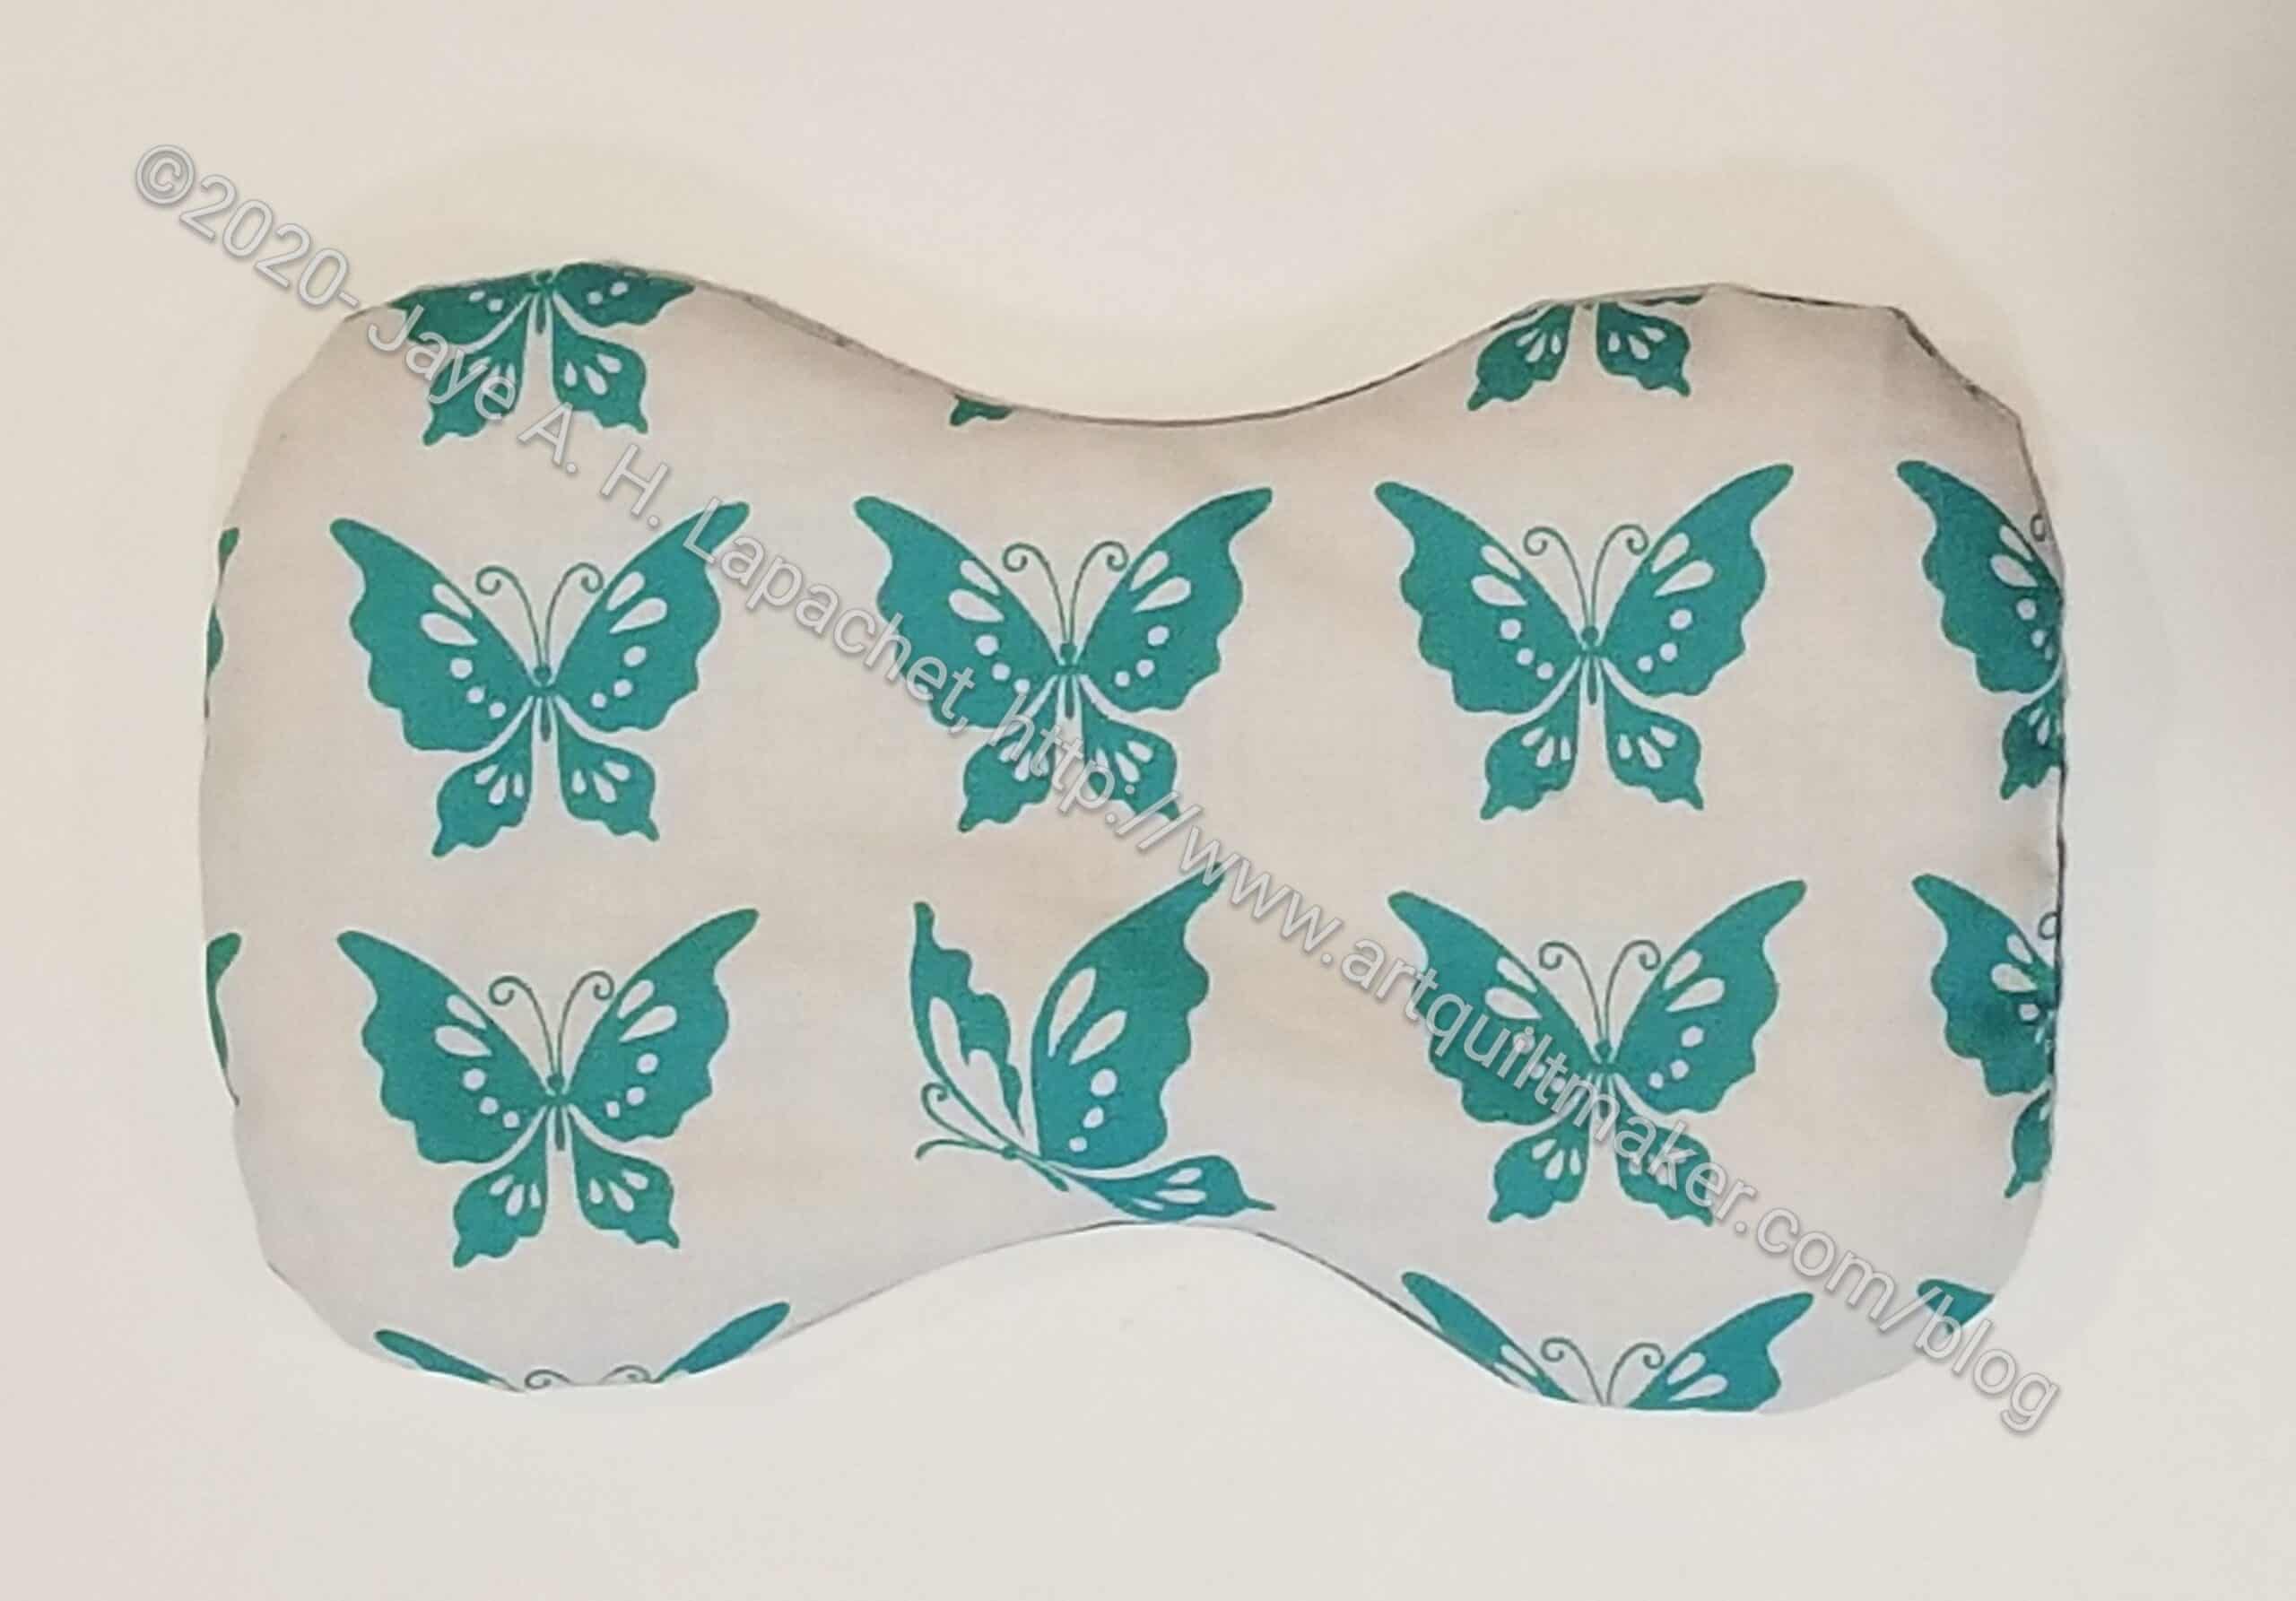
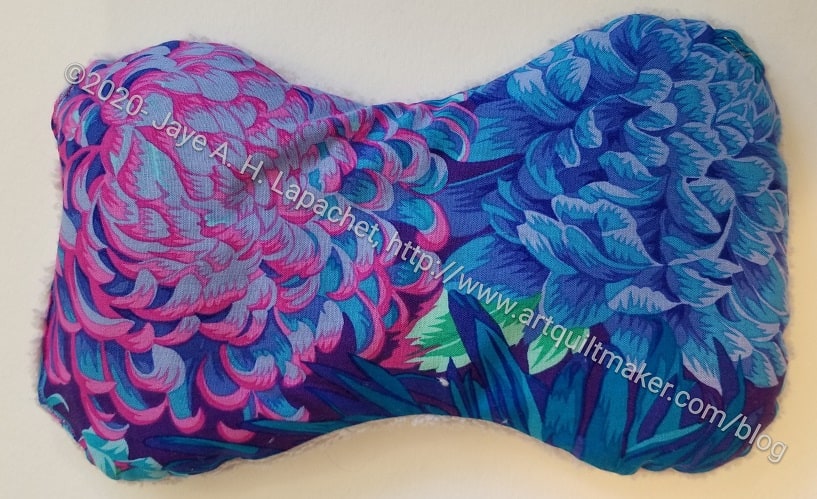
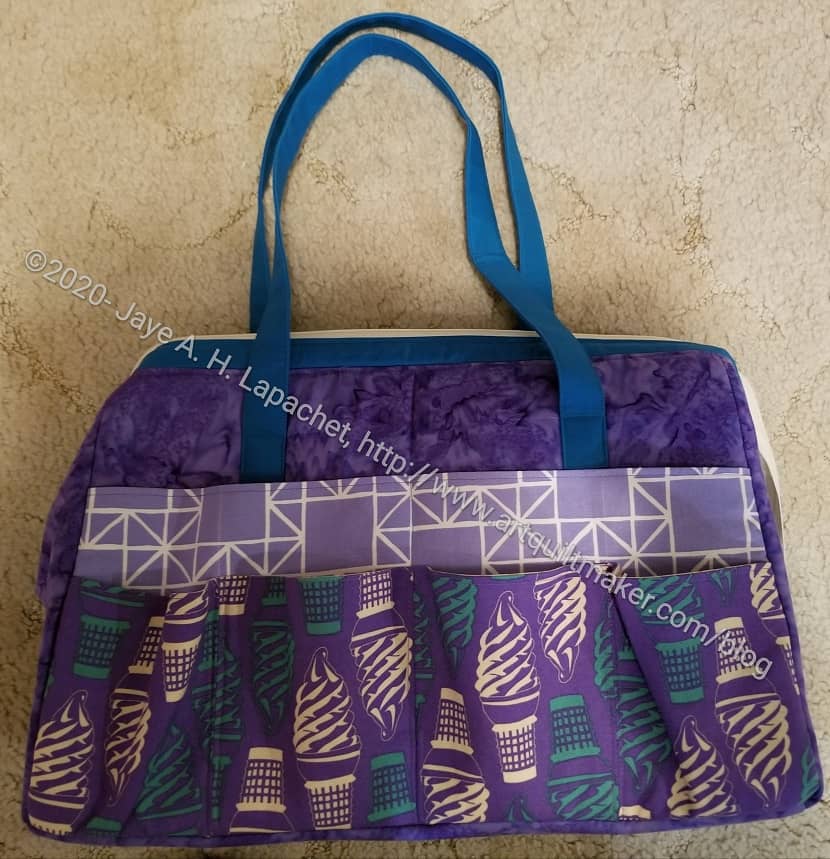
I wrote about the eye mask I made for myself in January. At the same time I made two others and this is the second one, which I delivered to Gerre for International Women’s Day. It went with the Purse Organizer.
These eye masks are simple and quick to make assuming you have some rice on hand. I want to try adding some lavender, but don’t have any so I haven’t done that yet.
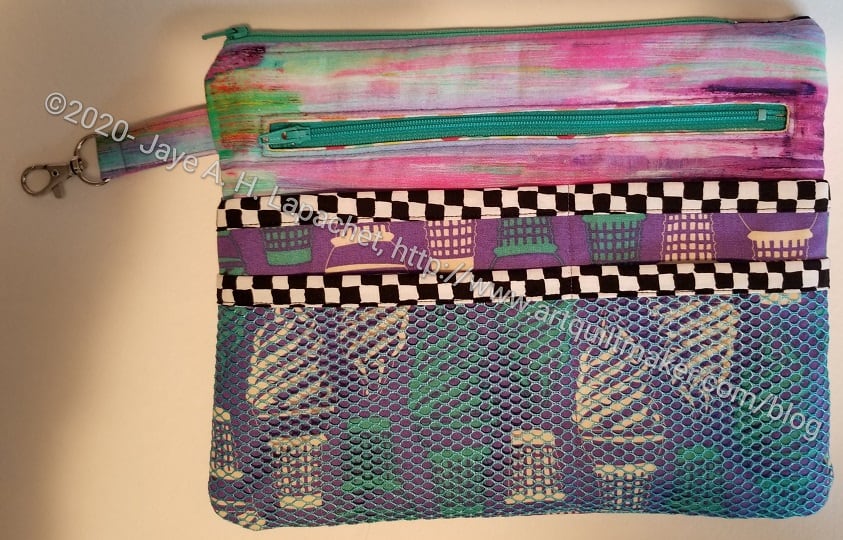
I showed this pouch briefly after I made it at New Year’s. The other day, I sent it off to Gerre to celebrate International Women’s Day (same day as her birthday, but she doesn’t celebrate her birthday anymore).
I want to make sure she knows she is remembered and valued so I try to whip something up at each holiday. This was the second of the Purse Organizers that I made, but the other one is for a gift in May. Look for the post then.
I struggled more with the construction of this pouch than I did on the first one, partially because I made some changes. One was to sew the two zipper slip pockets at the same time rather than with some other steps in between as the pattern says. That may have been a mistake as I had to do some ripping.
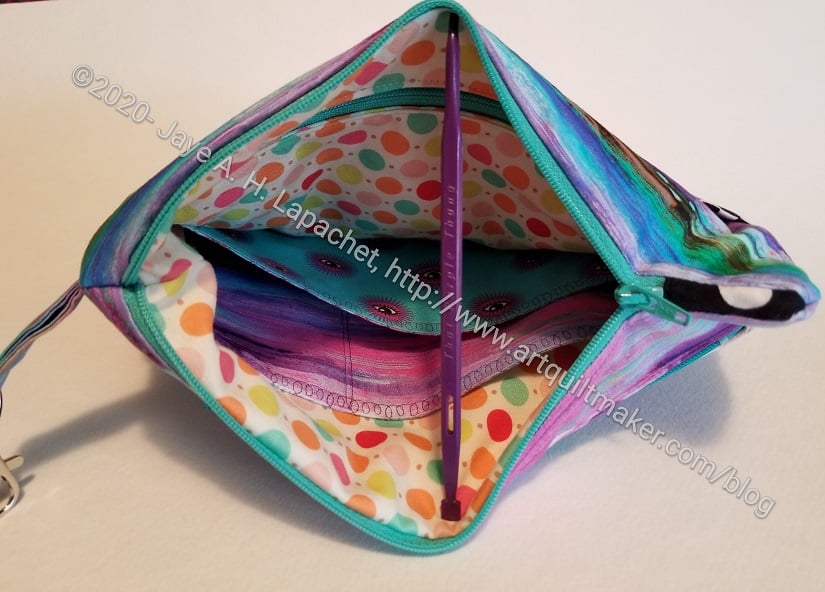
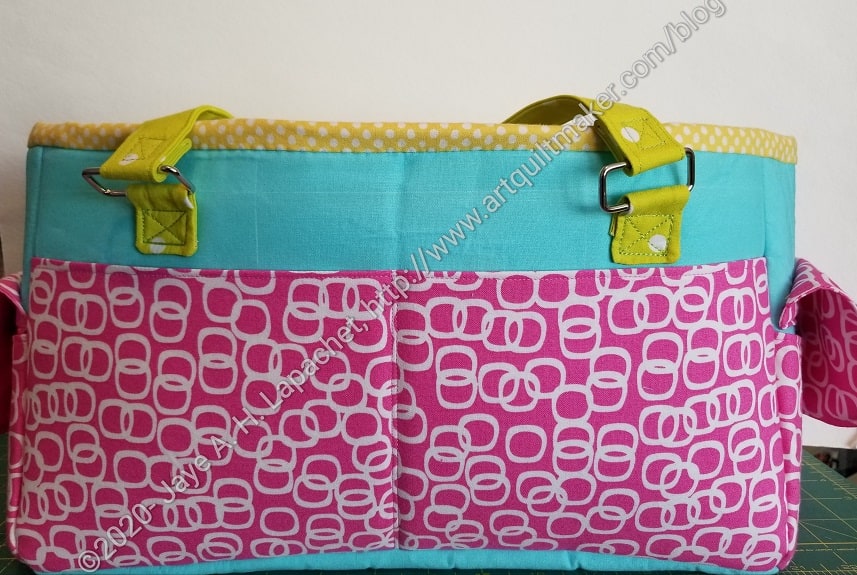
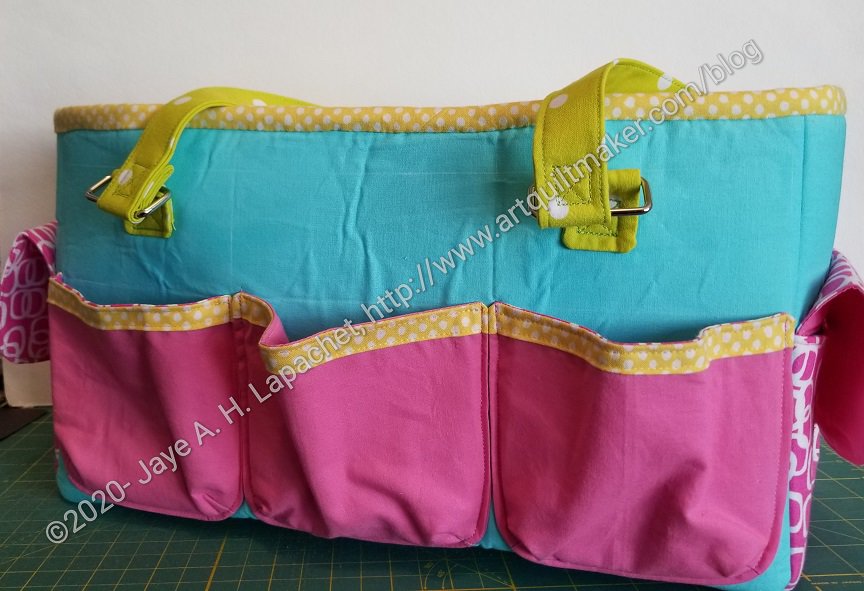
Gerre’s Purse Organizer (#2) – inside
I am not a huge fan of her method of constructing the inside [regular] slip pockets. They seem too thick to me and I may try and construct them using a different method next time.
The pattern also neglects to remind the maker to clip the corners. OR I didn’t see that instruction. Not clipping the seam allowances made poking out the bottom corners on the first Purse Organizer difficult and the corners didn’t look that great. For this pouch, I rounded the corners using a 2 inch circle template** and they came out a little better. I am not sure if that change impacts the usefulness of the pouch. For example, Svetlana’s picture shows the inside can hold a tablet. Since I don’t have a tablet this size, I don’t know if the rounded corners will change the size so the tablet will no longer fit.
I also added the leash so that it could be clipped to another bag. The leash is a useful feature if you are storing things in this pouch. Taking things in and out of a larger bag is better if you have them organized in pouch like thisand are concerned it will fall out.
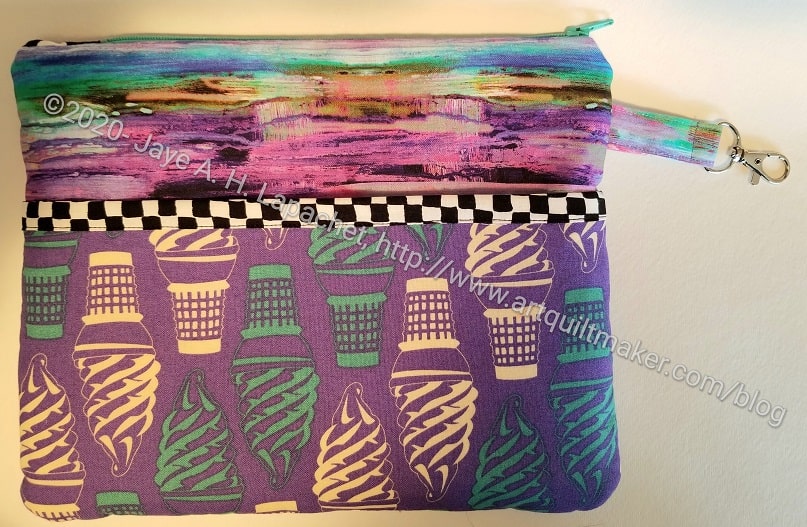
Gerre’s Purse Organizer (#2) – back
The good part of this pattern is that makers can adjust the sizes so the Organizers fits the stuff you need to carry around.
I didn’t choose to put the snap on the back pocket, but since I received a snap installation kit for Christmas, I plan to try that out. I thought that back pocket might be good for my journal**. It was a passing thought and I haven’t measured them yet.
I look forward to hearing how it works for her.
**I use affiliate links and may be paid for your purchase of an item when you click on an item link in my post. There is no additional cost to you for clicking or purchasing items I recommend. I appreciate your clicks and purchases as it helps support this blog.
Yes, I seem to be on an eye mask kick. I bought a large bag of rice and, with this mask, have used it up, so my eye mask efforts are finished for now. I like making a project a few times so I can get it right. This project will be a good quick gift going forward, assuming I buy more rice I want to use in eye masks and don’t want to eat.
Renee’s Eye Mask – back
Renee is the Grand President of the Native Daughters of the Golden West. NDGW is the female version of the Native Sons of the Golden West. There are more dresses and more pomp and circumstance as well as more efforts to assist with various California History related projects. They also have a vibrant effort to help kids in various ways through their Children’s Foundation. If you are interested in joining, check their website. It is definitely an organization trying to find its way with a new generation, but there is potential and they do a lot of good.
The Grand President will be having a Parlor visit in April. Apparently, people make gifts and the Grand President opens them at this event. I am not able to attend this year, but I feel a special rapport with Renee, so I made her a gift. I will drop it off with the District Deputy and it will be sent on to her. Her theme is butterflies, which guided my choice of fabric.
Some time ago, I though about making some eye masks as gifts.This came up when my eye doctor said to put a hot compress on my eyes every night to prevent something I can’t remember now. I was suffering from whatever it was (stys?) at the time and the doc was concerned. I had never had them before, but when I told my mom, she said she gets them all the time. Then another friend said the same thing and here I am.
I know the side I closed after filling the eye mask is oddly shaped. The others came out better.
I used the Chloe Mullaney pattern with some changes. I guess I basically only used the pattern piece. This isn’t a difficult project: cut out the pattern piece from fabric, sew right sides together, fill with rice and close up. Yes, I used rice, because I wasn’t sure how other fillings would act in the microwave.
I bought a hand towel at Tuesday Morning to use as the back, which was not part of the pattern. I thought a towel would be more comfortable and more absorbent than quilting cotton. I wanted something pretty for the front, but purely functional for the back. I was able to get 3 pieces out of the fluffy part of one hand towel. The Tuesday Morning towel was very good quality, but not expensive.
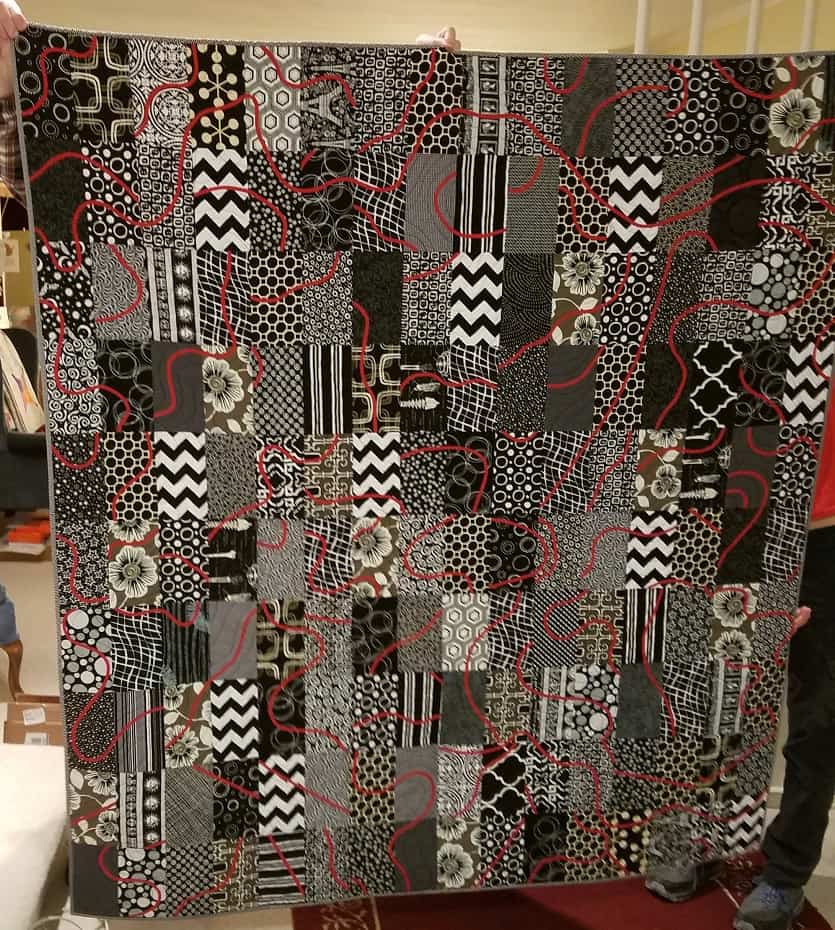
I finally finished Red Scribbles about two weeks ago. It is has been go-go-go here, so I didn’t post until now.
I only had to finish the binding, which shouldn’t have taken very long except that I am not getting a lot of handwork done since we are working on the giant puzzle. I also had some other handwork projects with firm deadlines.
This quilt took a long time to come together, but I am really pleased with how it came out. As a result, I am now teaching the bias tape technique as part of my basic quiltmaking class. I haven’t written up a tutorial, so you’ll just have to pay me to teach you!
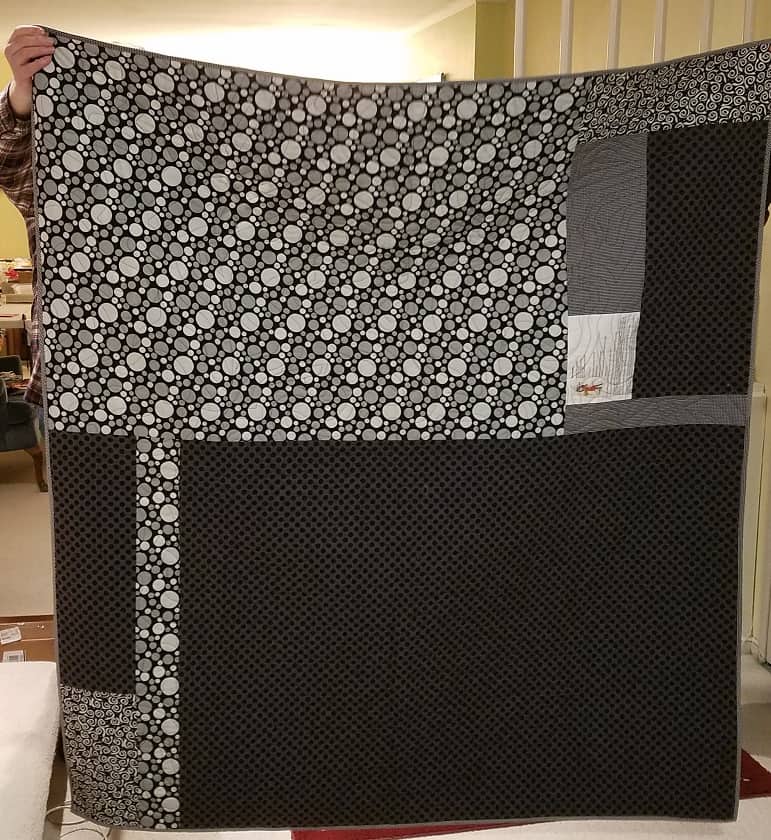
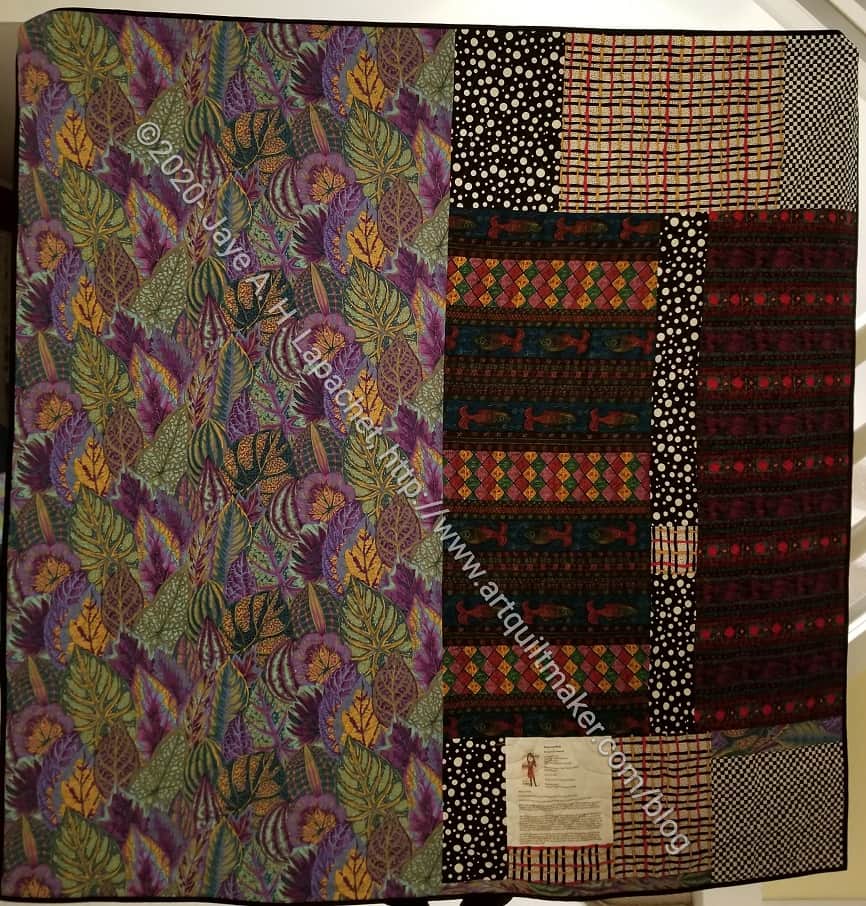
Red Scribbles Completed – back
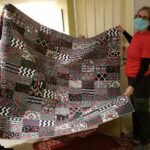
I think this might constitute the start of a series. I gave another quilt to my SIL when DH’s brother died and now I have given this quilt to my husband’s sister and her husband. Of course, my sister has received at least two quilts.
SIL and BIL came over to get it close to their anniversary. Too bad I was teaching when they eventually showed up, because I didn’t get to hear their comments. DH handled everything and got photos as well, so it was fine.
Red Scribbles recipients -1
Red Scribbles recipients -2
This quilt has encouraged me to get back to Who Am I? Instead of doing a lot of satin stitching for the words, I plan to use bias tape. I have to experiment with widths of bias tape.
So, the Journey 2 Nebula is finished. I finished all the projects which were part of the ‘Journey’ and the rulers have been returned to Amy. I am not making the Nebula quilt. If you like hexagons, you should try it. It is an interesting design. I am happy with the small projects I made during this Journey 2 Nebula and am moving on to other designs.
Gazebo Finished
Gazebo, as I mentioned, is the one project about which I was really excited. I did all the projects in order and waited patiently to get to this one.
This project, like all the others, was pretty easy. I was able to start and finish it in less than a day. This is an example of the excellent directions provided by the pattern.
**I use affiliate links and may be paid for your purchase of an item when you click on an item link in my post. There is no additional cost to you for clicking or purchasing items I recommend. I appreciate your clicks and purchases as it helps support this blog
Sometime ago I bought the frames for the Retreat pouch. The Retreat pouch is a free pattern from Emmaline Bags. The pattern, as I said, is free, but the frames are not.
Retreat Pouch closed
Over the New Year holiday, I decided I was going to make some bags, the supplies for which had been hanging around. The Retreat pouch was one of the bags I sewed.
I started out with the small size, which is about 8 inches x 4 inches. I didn’t think the small size was tiny. Once cut out, this is not a difficult bag to put together. I was able to finish it in a couple of hours while I catted with a friend.
Retreat Pouch open
I thought the installation of the frame was a little weird because the pattern says to remove stitches you have already sewed in order to install the frame. The pattern didn’t say whether to sew up the hole that I made, so I did.
I just used a frame for the Sheffield Tool Bag. That pattern uses a casing to house the frame. Since I haven’t used a lot of frames in bags, I don’t know what is normal. I prefer the casing.
I plan to use this pouch for my bag making tools. I might need to make the larger version for the tools as I have a lot of them, but I plan to make the larger one anyway.
I found a video that shows how to add handles and make some other changes to the bag while showing how to make the pouch. I have watched it, but I didn’t watch while making this pouch. I may add handles to my next one.
N.B. on Frames: I still don’t have a good handle on frames. I know how to install them in a bag or pouch in a couple of ways, but I don’t know if different frames can be interchanged in different bags. I haven’t made enough bags with frames to understand them very well.
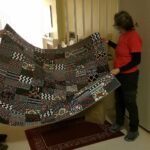
I finished the Black Windmill on Monday night. It is a Christmas gift, so I took it straight to the Post Office Tuesday morning and these are the only two photos I took. DH was kind enough to be my quilt holder.
In this version of the windmill quilt, the windmills are much more hidden some of them can be seen, but most the variation in colors hides the others. As mentioned, I kept sewing until I used up all of the pieces. I want to be done with this pattern, though it is possible that I will make another one at some point in the future. We’ll see. For now, I am done with the pattern.
I am finally posting about a finished FOTY 2018. I actually finished the binding a month or so ago, but somehow it never made it on to the blog 9as far as I can tell!). I finished the top in July and took it to Colleen shortly thereafter.
Once I got it back, I had to sew the binding and the sleeve. The piece is ready to hang and I can move on to getting FOTY 2019 quilted.
It is nice to finally have this done. I am kind of over the Journey2Nebula project. It is sad, because I was eagerly anticipating the Gazebo project.
I still plan to make the Gazebo table topper** soon. I want to complete the whole group of projects.
**I use affiliate links and may be paid for your purchase of an item when you click on an item link in my post. There is no additional cost to you for clicking or purchasing items I recommend. I appreciate your clicks and purchases as it helps support this blog.
I joined the most recent guild swap and made an Oslo Craft Bag for Cyndi. She said she wanted any kind of tote bag. I was on the fence about this bag as it doesn’t strike me as a straight tote bag.
A few years ago I wrote about this bag and have been wanting to make one ever since. This was a great opportunity. I put a note in the bag that I would make her a real tote if this wasn’t what she was expecting. I thought about making her a Multi-tasker tote as well, but lost steam and didn’t get to it. I kind of want to make her a Superbloom tote as well.
Oslo Craft Bag Swap Gift
This bag went together with no problems. I thought the pockets with the yellow binding were a little too fussy. However, I like it that they have dimension. I don’t know if I would make them the same way again, but I like to make the pattern as is the first time, as you know.
I saw another version in the Facebook group (a good use of FB, IMO) where the maker put two pockets like the top photo shows, but put a second mesh pocket over the first. I am thinking about making another one and I might do that. I like mesh for some reason, though I am not sure what it is good for in terms of storing sewing items.
Oslo Craft Bag Swap Gift – interior
I was disappointed in the interior. Not the design, but the saggy-bagginess of it. The seam allowance was 1/2 inch, which I thought meant that Sara had included enough to take up some of the lining so it wouldn’t sag. No such luck. The exterior was sewn with a 1/2 inch seam allowance as well. I tried a few things to make the lining fit better. Short of taking the whole thing apart, none of my efforts worked.
It is a nice rectangular bag and I think it would be useful for various tasks including bringing things to Sew Day. We’ll see what Cyndi thinks.
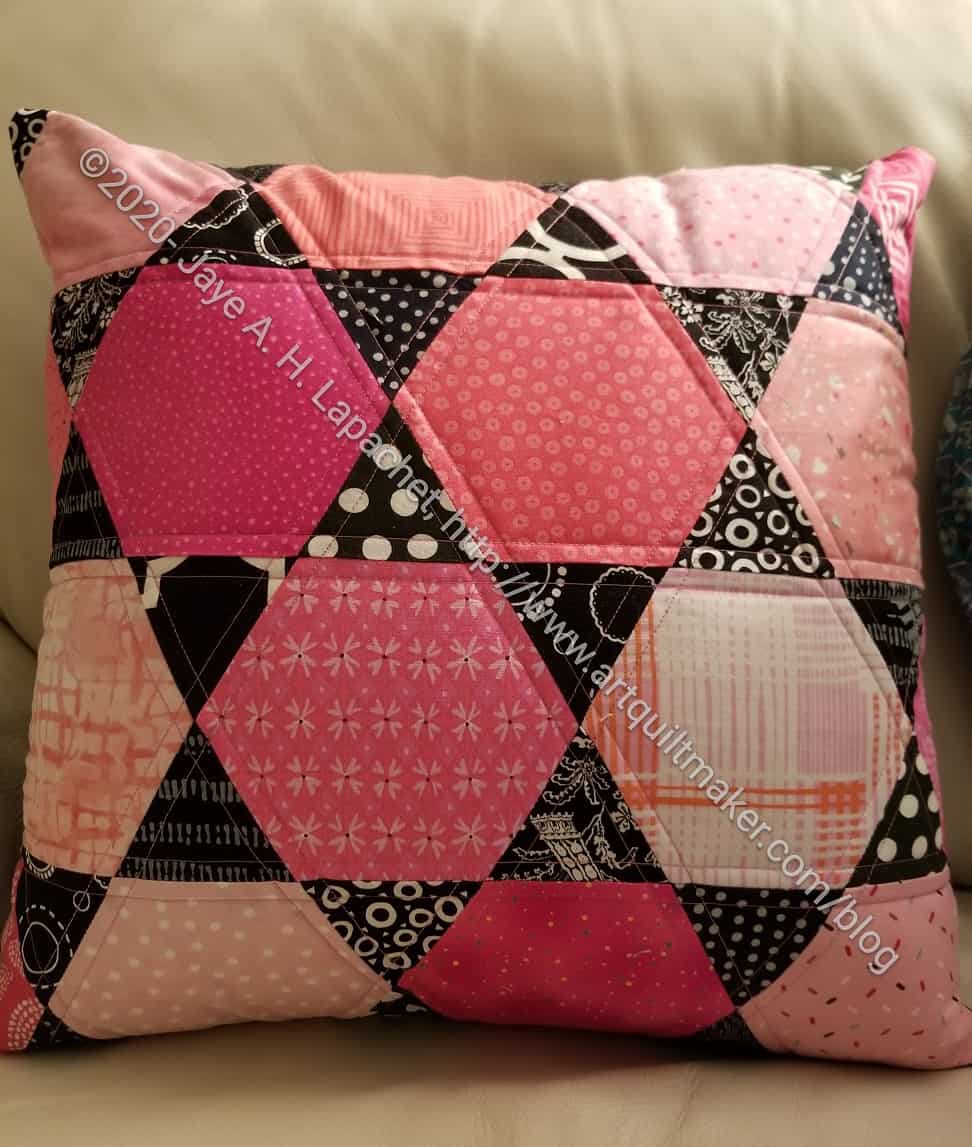
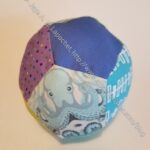
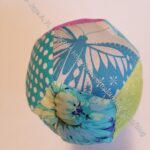
I finished my large-ish EPP ball and really like the way it came out.
I fussy cut some favorite fabrics and then spent several hours during Craft Night and some guild meetings basting the fabrics and, then, sewing the ball together.
I used the last bits of my bag of fiberfill to stuff it. Normally I would add some Beanie Baby pellets to the stuff to give the ball some weight. However, I plan to give this ball to a 1 year old and I don’t want her breaking a lamp or giving one of her parents a black eye when she throws it.
EPP-Pentagon Ball
EPP-Pentagon Ball
I think these balls would be fun for people of any age, though the fun could get out of hand at a family event.
**I use affiliate links and may be paid for your purchase of an item when you click on an item link in my post. There is no additional cost to you for clicking or purchasing items I recommend. I appreciate your clicks and purchases as it helps support this blog.
I finished Rock Candy over the weekend, but still needed to do the binding. That is always a good hand task to work on at Craft Night, so I finished the binding on Monday night. This has been a banner week for finishes: Rock Candy plus 3 donation tops and backs.
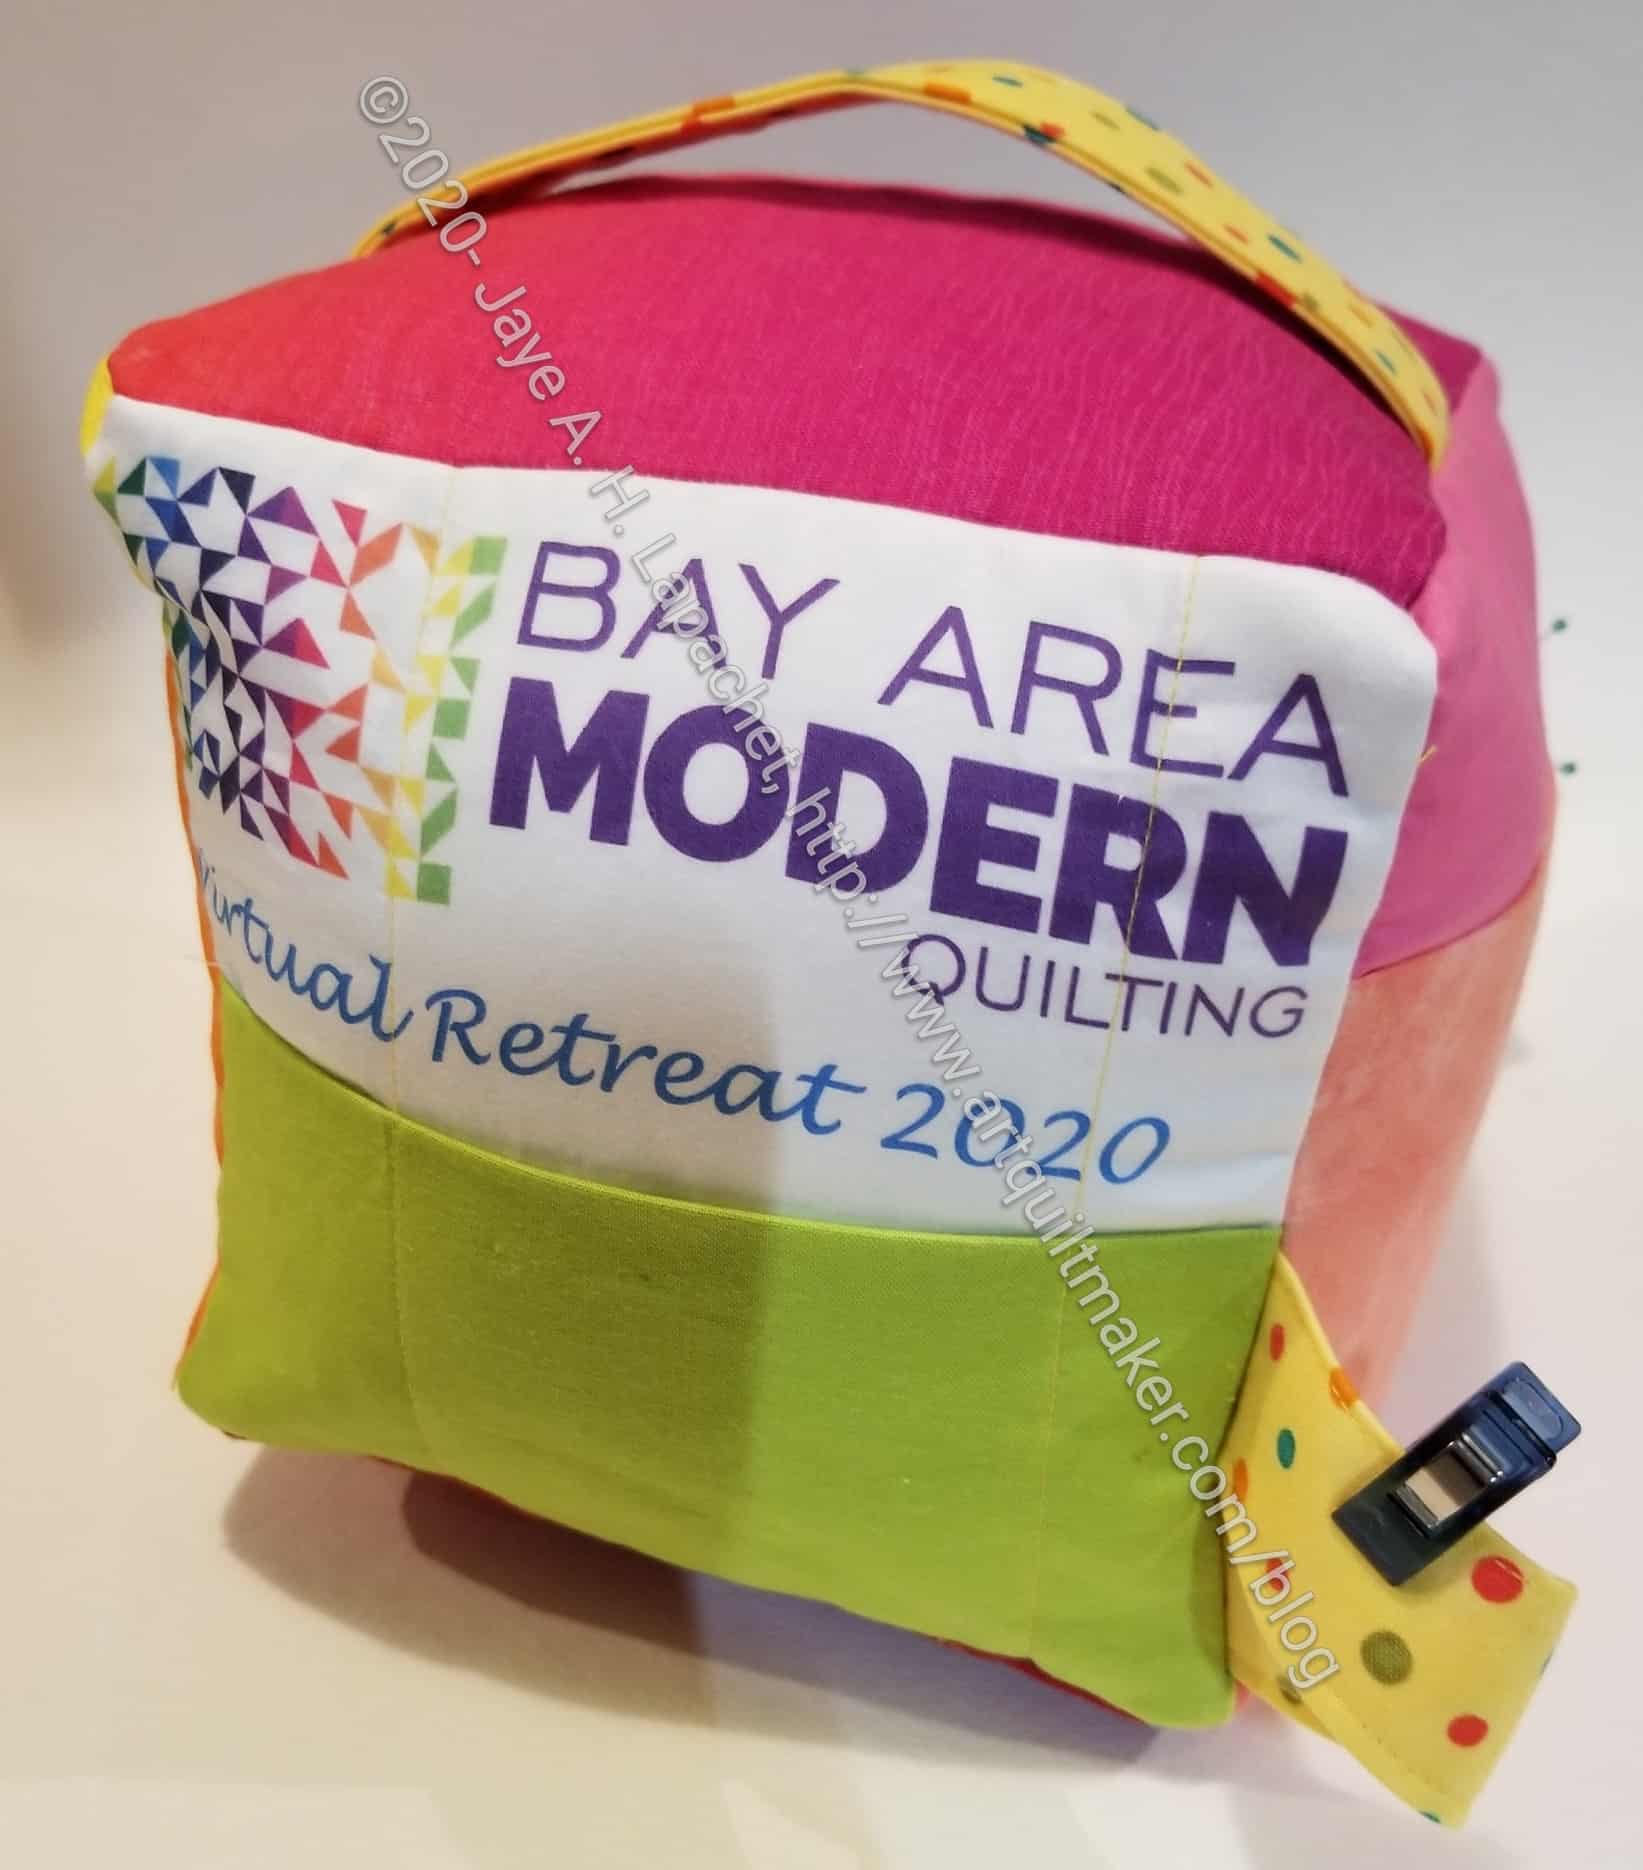
Despite a lot of ripping, I finished the Mega Pinnie on Sunday in the mid-evening. I thought it would be a quicker project than it turned out to be :(. Now I am going to have to scramble for some content this week.
I am pleased with the way it came out, however, and think someone at the retreat will enjoy it.
When I was printing my last label, I had some extra space, so I decided to print the BAM logo on some fabric and use it for part of the Mega Pinnie. It will also be a souvenir for the Retreat. I adjusted the size of the pocket on that side so the words wouldn’t be covered up.
BAM 2020 Retreat Mega Pinnie – finished
I made the handle a little smaller than the pattern called for this time, so I had an extra piece. I decided to sew it in as a way to attach the Mega Pinnie to another bag or a place for clips. I didn’t think about putting a lobster clip on this time. I completely forgot!
I did make a super cute Mini Pinnie! I really like the fabrics and the way the Mini Pinnie came out. I think it is a cheerful addition. I also made the needle safe a little different this time. I sewed it to fabric RST, then turned the piece and top stitched. It worked ok.
BAM 2020 Retreat Mega Pinnie – finished
I forgot to top stitch the pockets, but that isn’t critical; it just makes the piece look a little nicer.
This is kind of large, but I think I might try and make one using charm squares. It would be smaller and might not work for some tools, but might be more convenient to transport.