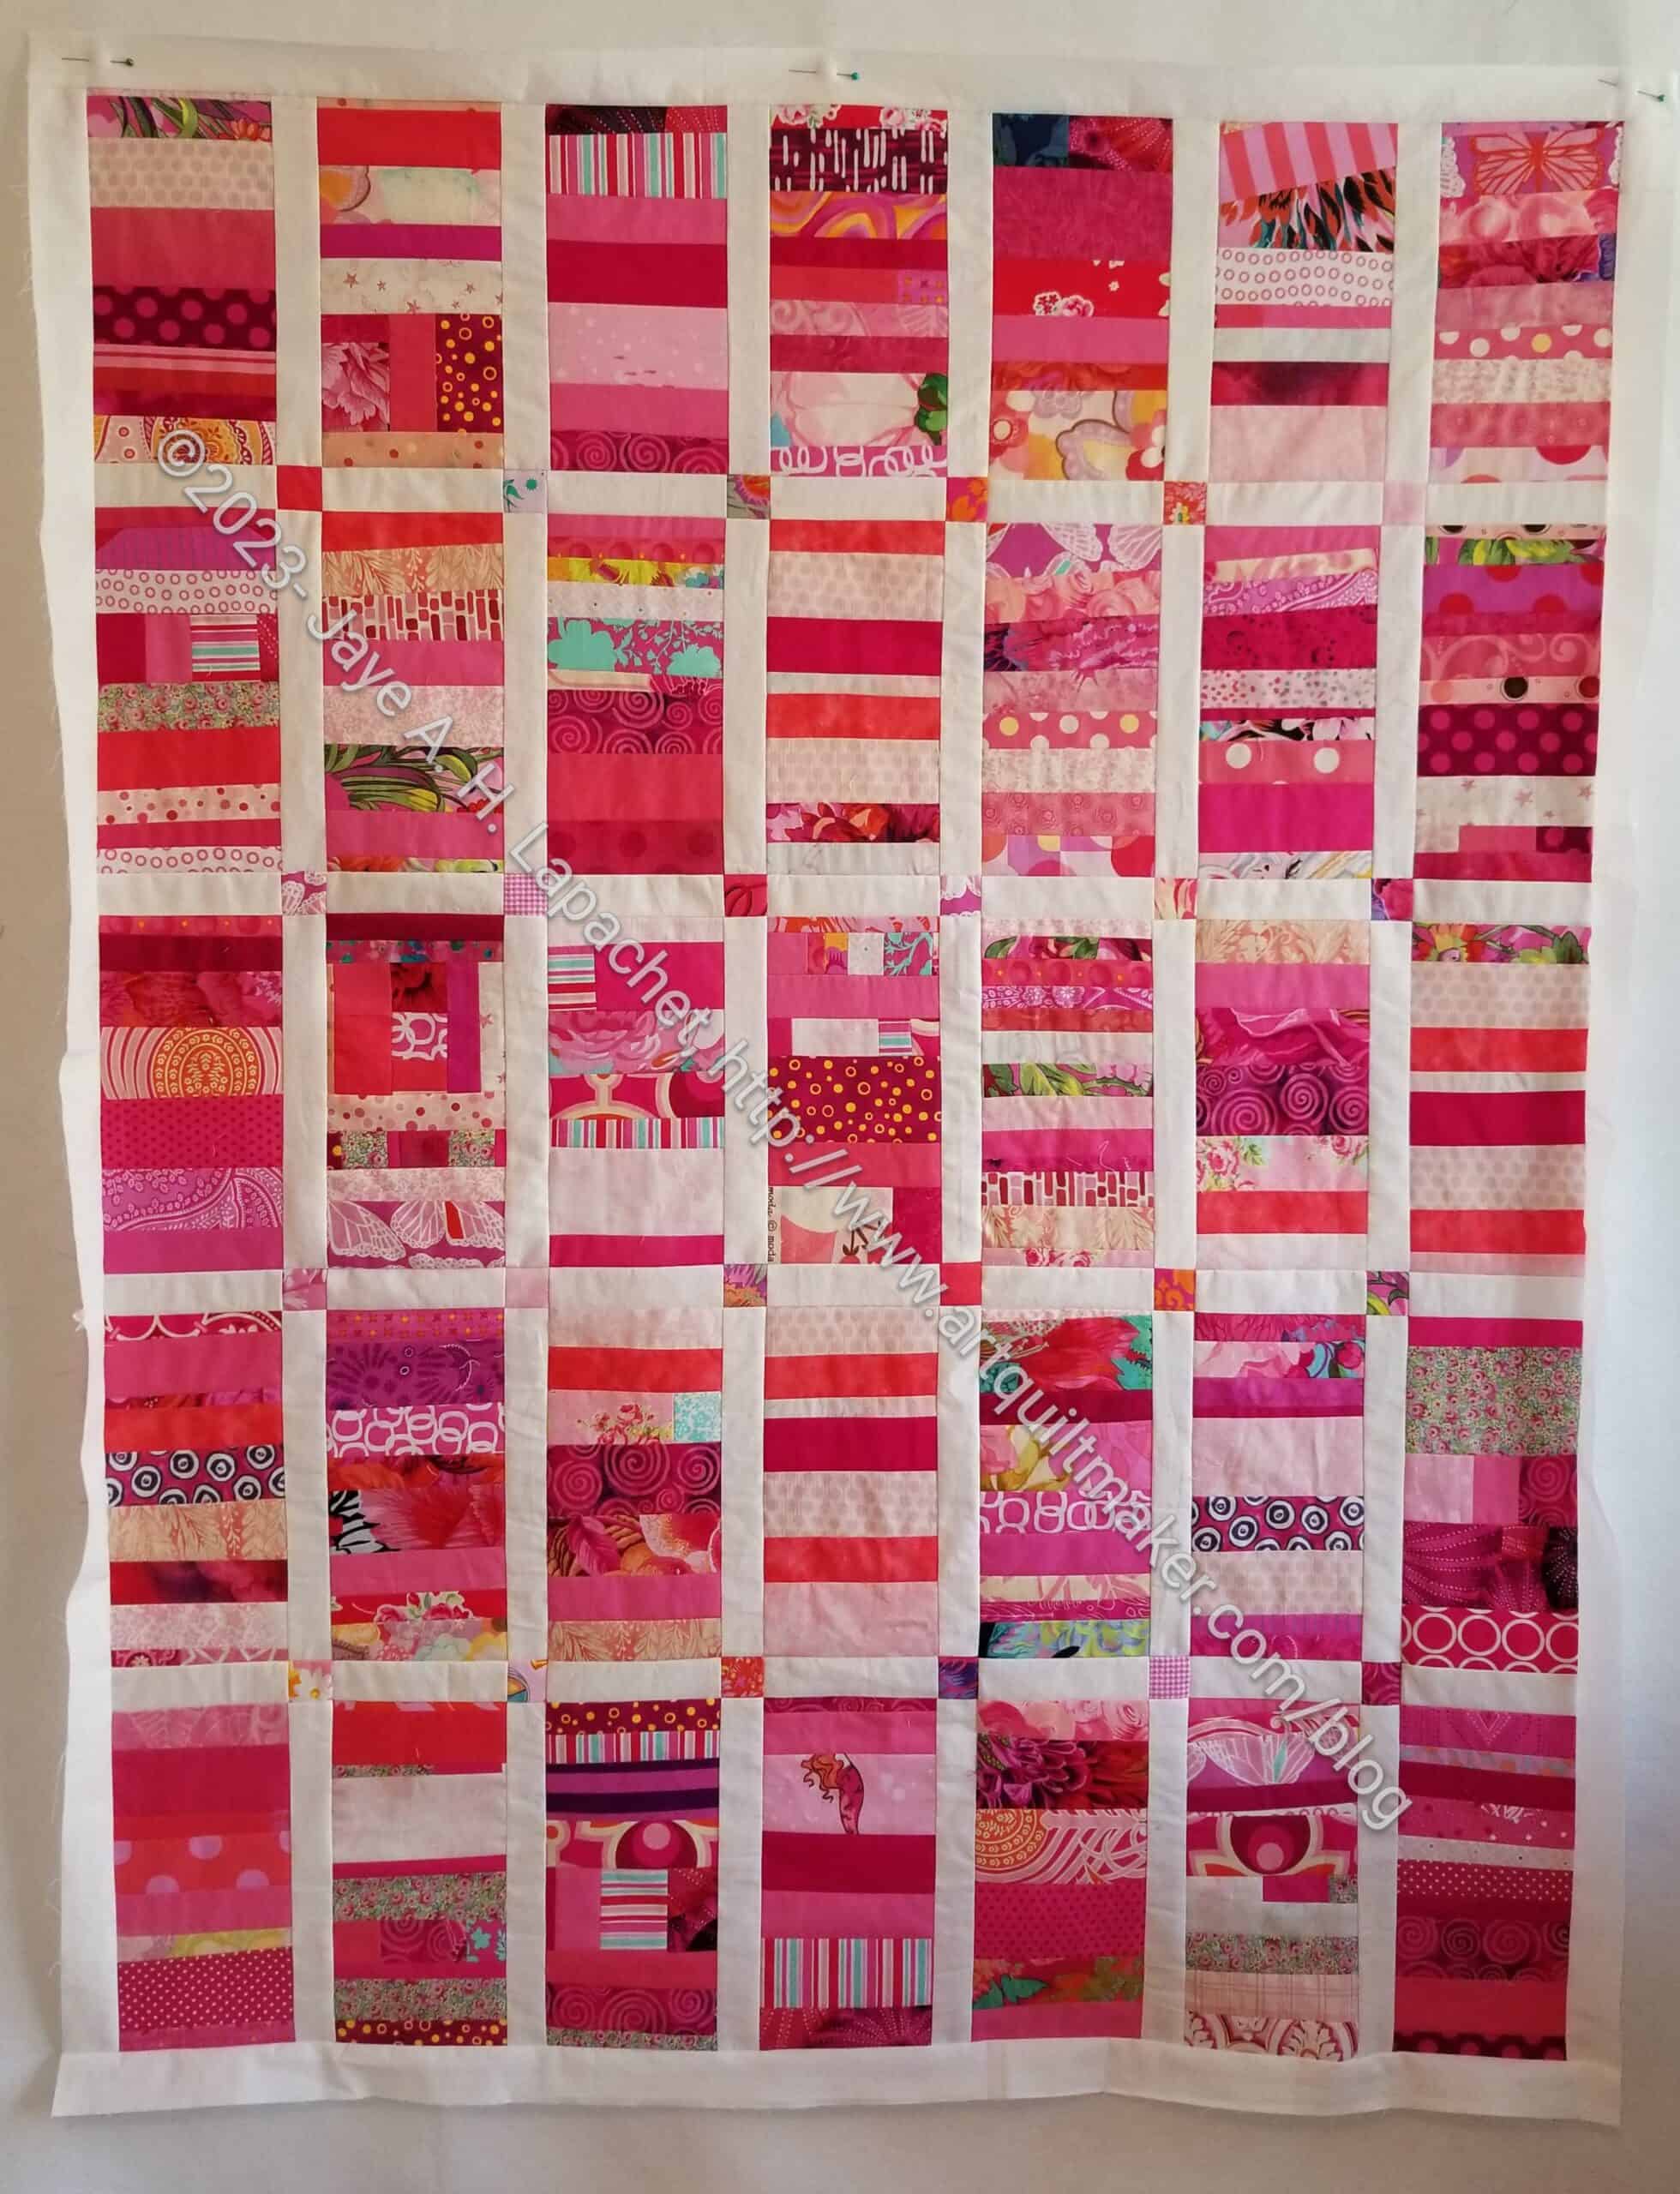
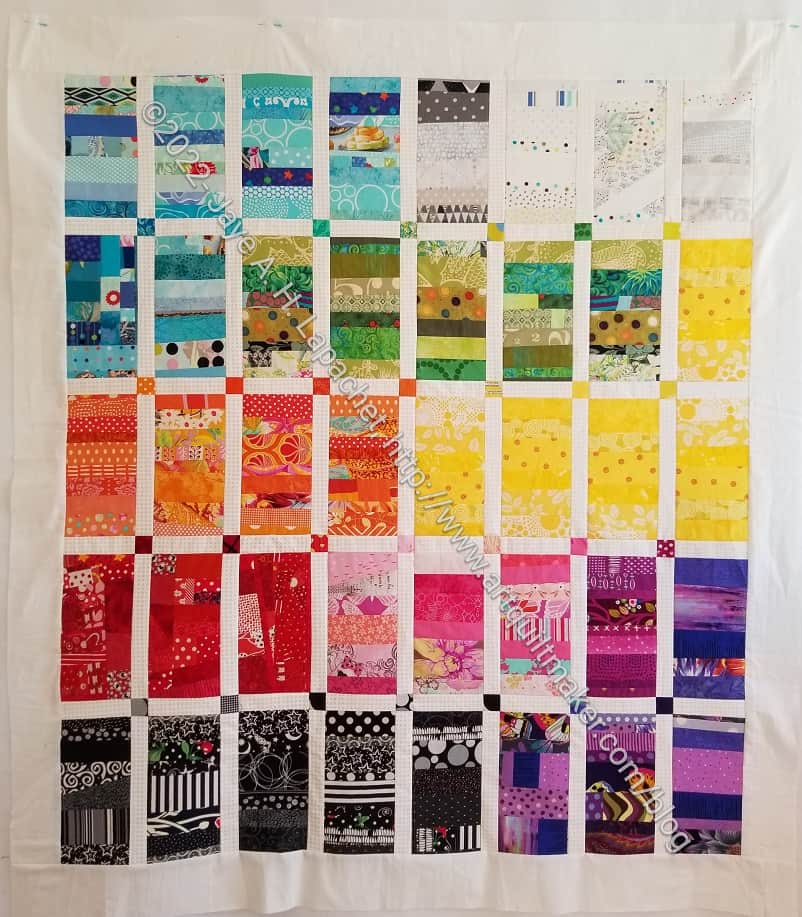
I moved all the blocks to my larger design wall after Who Am I? went into the ‘to be quilted’ bag. While I was little lazy about walking across the room to use the donation blocks for leaders and enders, I finally put the quilt top together and put the borders on.
I got inspiration from the Red Strip donation top I made a few years ago. I really liked the cornerstones and the way the white sashing separated the blocks so viewers could see each one distinctly.
This one is larger than the Red version. I did end up adding a column to the quilt, but I still think it is a weird shape. I didn’t do any of the ratio math I suggest my students do to make their quilts the right shape. I plan to put more borders on, so maybe I will make the vertical borders a little wider than the top and bottom borders.
So far so good and I am on track to bring it to Sew Day or the next meeting.
I finished another old project. As mentioned, I started this project in 2015, so it is only eight years old. Still, old enough to get on my nerves.
Someone compared my dislike of UFOs to someone I really don’t like who has no UFOs. That annoyed me, because I don’t think I am like her at all. I just don’t find that **my** projects improve by sitting around. I can’t imagine never having any UFOs, but I think they will be projects for which I have cut fabric, but not started sewing. Once I start sewing, it is pretty easy to continue.
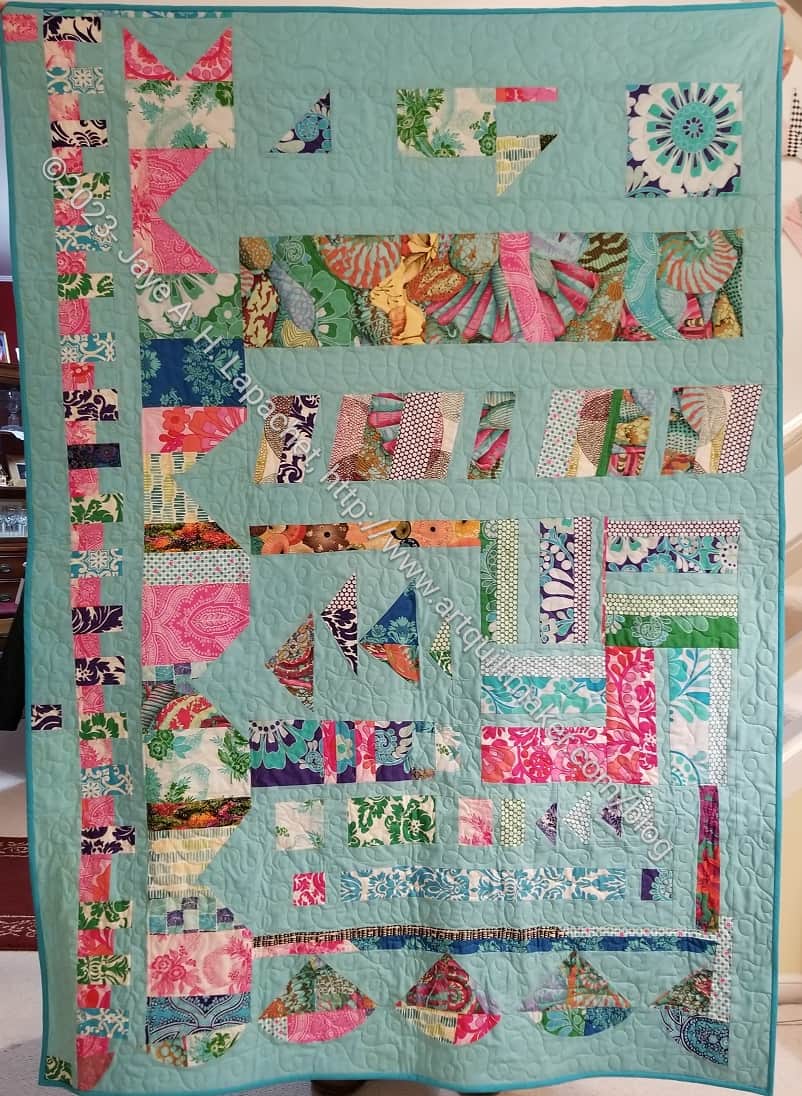
Finished: BAMQG IRR (back)
I zoomed through the binding on this quilt. Using good fabric really helps. I was pleased I remembered not to use a batik in the binding! I didn’t expect to finish it so quickly, but it went really fast.
This is another quilt that I had returned to me for finishing. This has been a long time in coming. The start of the project was in 2015! I know Rhonda, who was also in my group, was working on hers recently as well.
I probably won’t keep this one, but for the moment I don’t have a recipient. I’ll need to check my Niece-phews list and see if it would be appropriate for anyone on it. I have an idea, but would need to make another for a sibling.
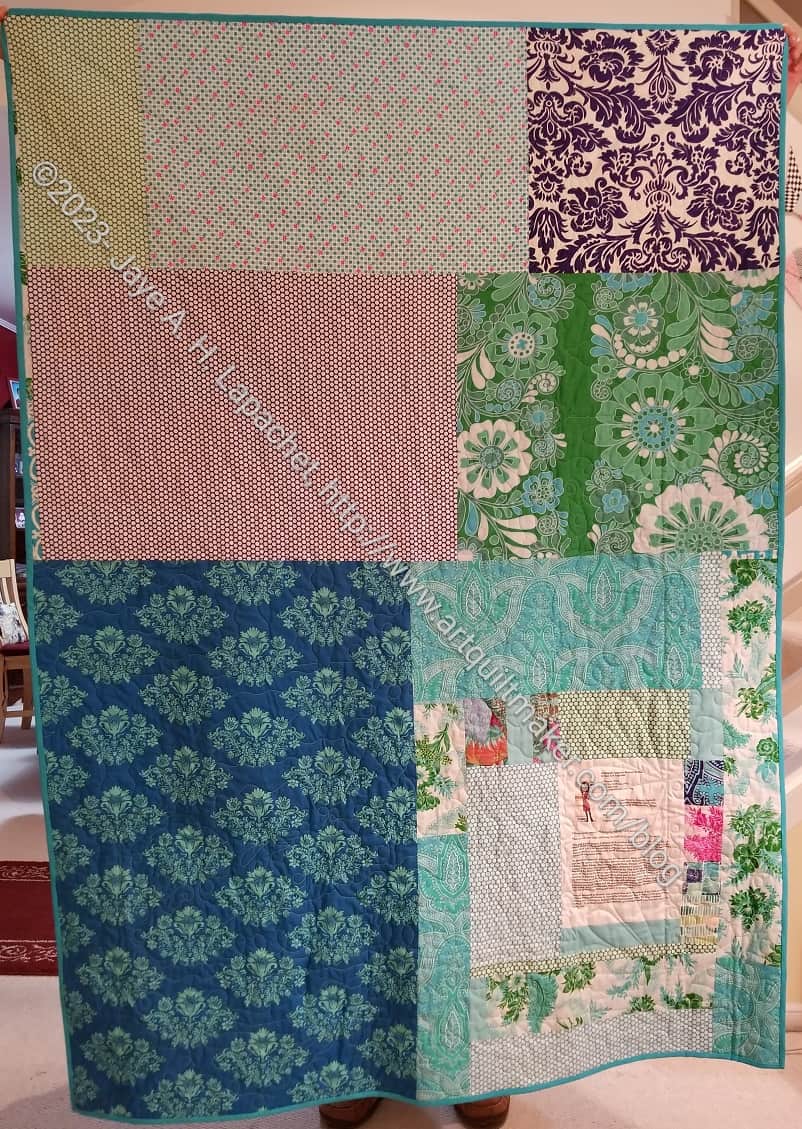
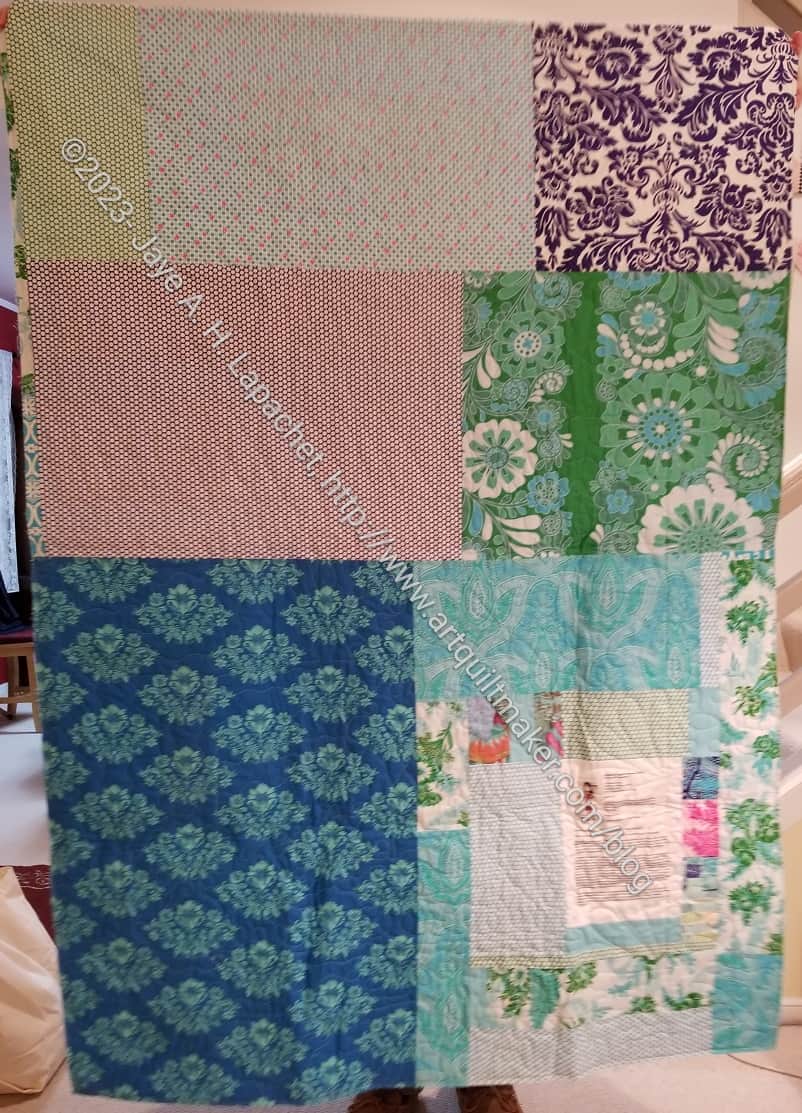
BAMQG IRR back
I remember my excitement at using the Queen Street fabric in this quilt. I think the solid turquoise dominates more that Queen Street, though the Philip Jacobs shell fabric is no slouch either.
Queen Street really shines on the back. You can see all the prints, but they aren’t highlighted by piecing.
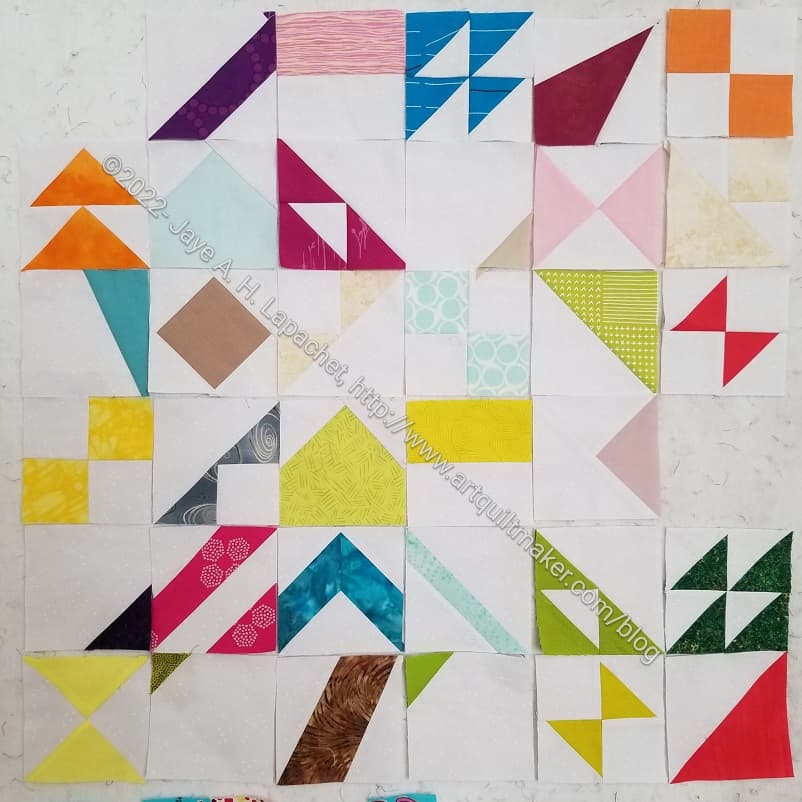
I received some more blocks from Julie a week or so ago.
These are the result of the postcards I sent to her. It is interesting to think about the choices I made and the result that I see in the blocks Julie made.
I can’t imagine how the blocks the blocks will come together as a whole but I am excited to see how they come together.
I have not made any other blocks since my last batch. I need to get one that.
Finishing a donation quilt first in the year has to be good karma, right?
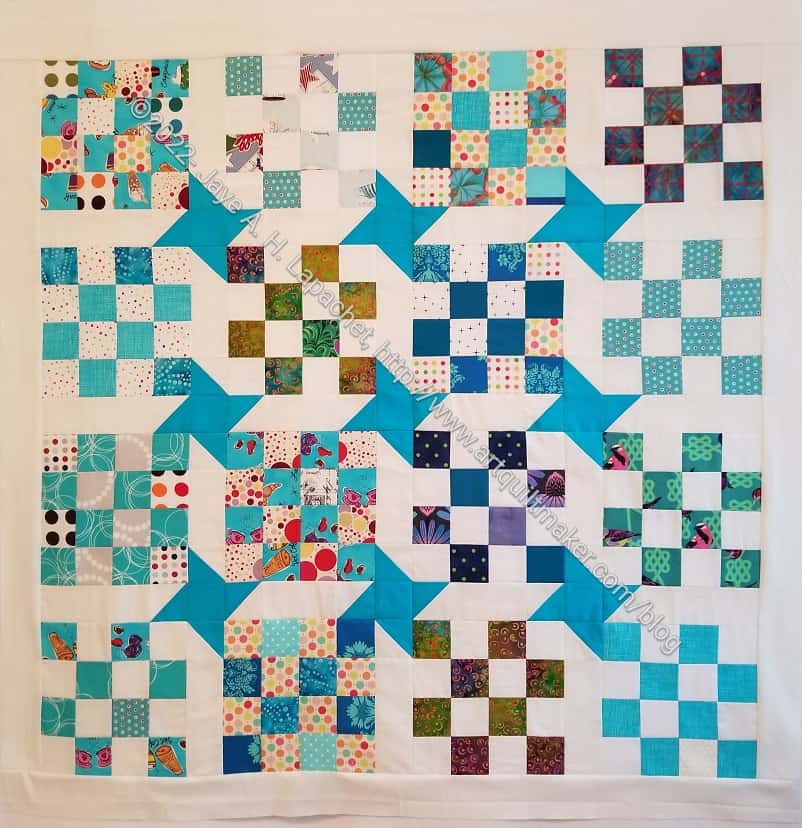
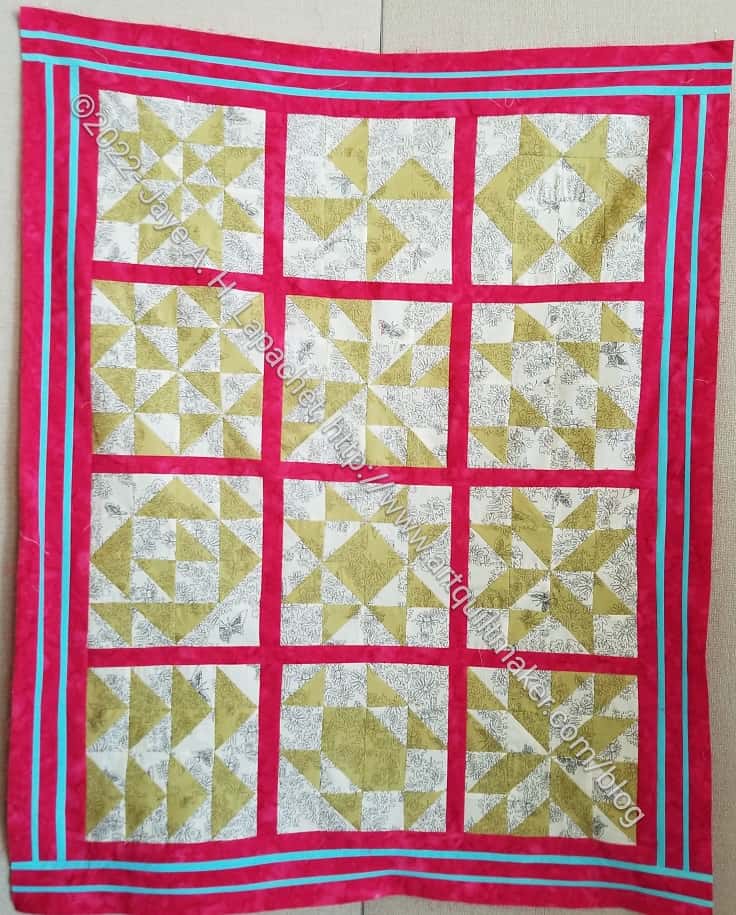
Friendship Star donation top
I had been saving some 16 patches to make a donation quilt and decided that New Year’s Day was the day. I combined the 16 patches with pieced sashing and cornerstones from an article in Today’s Quilter issue 91. The information was in the Essential Guides sections, which is great for tuning up your skills.
I wanted to try the technique out, so I took out those donation blocks and got to work. I, mostly, used up some Pure Elements Linen for the sashing background and used a solid for the cornerstones and the back.
It felt so good just to do some easy piecing and I am pleased to have a donation quilt to bring to Sew Day next week.
I received a nice package of blocks from Friend Julie the other day. It is so interesting to see these blocks. Julie mentioned that it looked like a real project now when she posted about the blocks I sent to her last week.
I can’t really see what they will end up looking like, but I can see that they will end up as something. I can see the possibilities now.
I have received more postcards and need to match them to fabric. I might be over the hump of fabric selection being a big barrier. We’ll see how it goes with the next group.
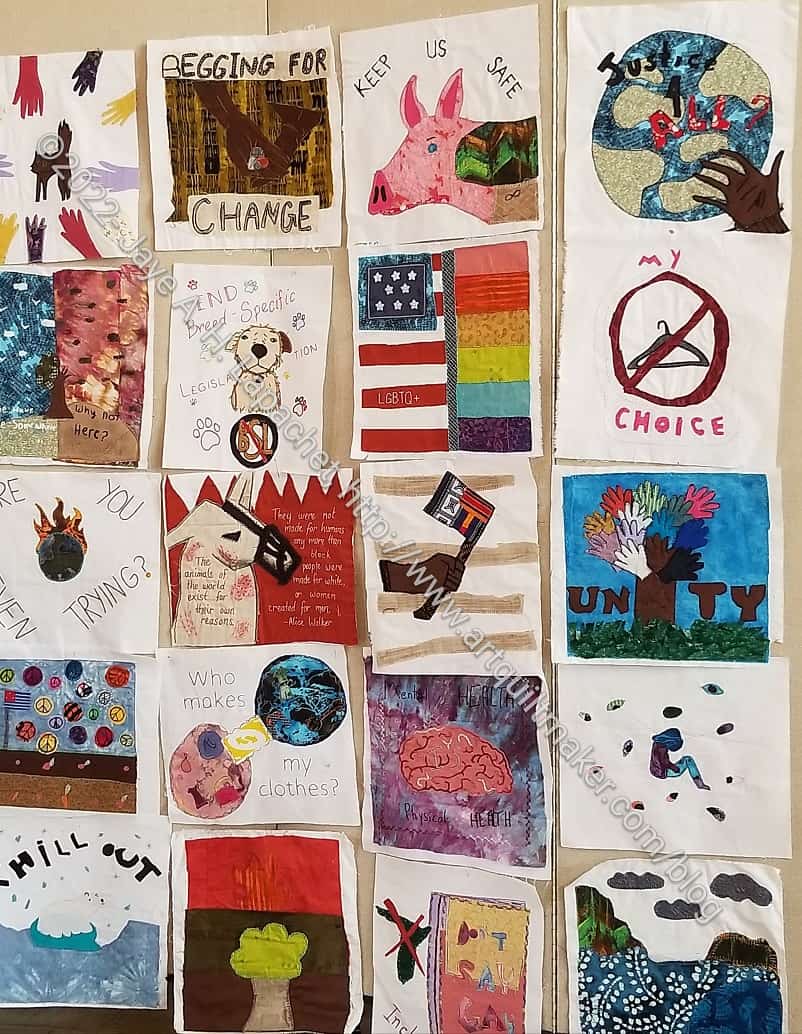
Cyndi invited a group from the Social Justice Sewing Academy to our Sew Day. Some of our group had finished blocks, so those were turned in. Sara, the organizer, brought a different group of blocks that were to be made into a quilt.
People worked together to put sashing on the blocks and sew them together.
I was tired and stayed in my corner working on the Half Hexies. I wasn’t up for a group project that day.
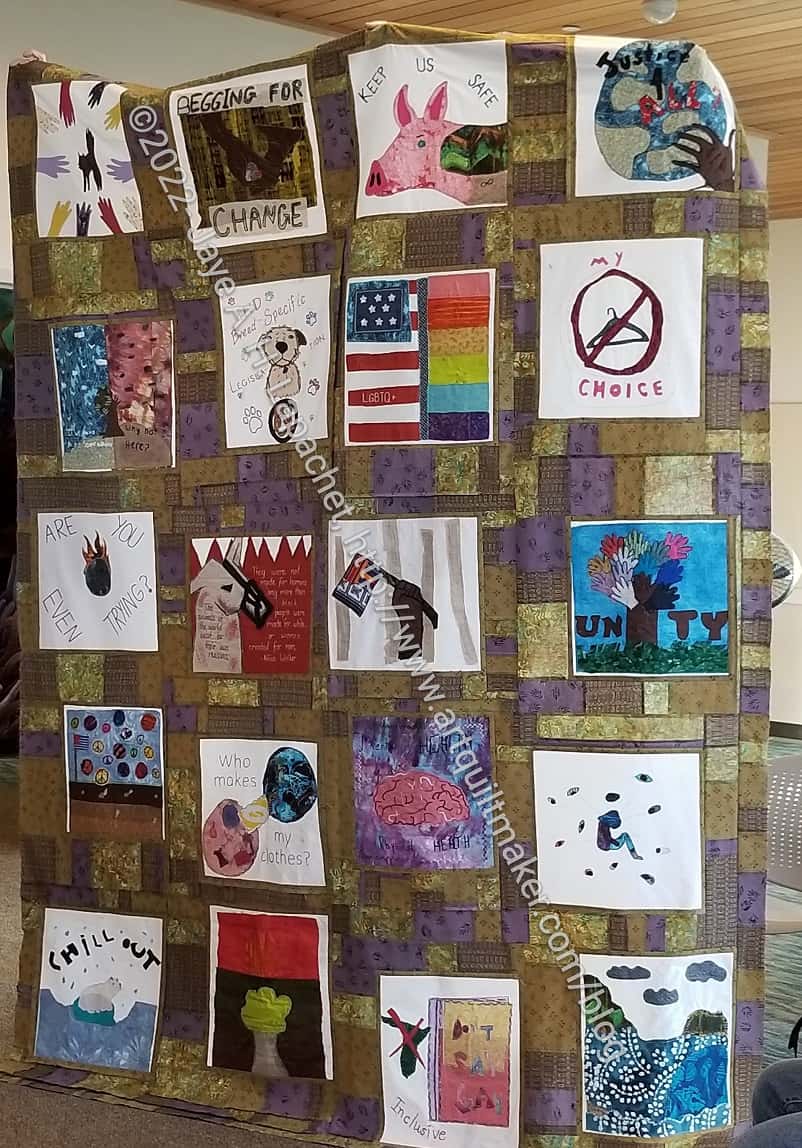
SJSA Sew Day blocks with sashing
The group achieved a lot. They put thin sashing around each block and then worked on larger pieced sashing (no photo). They decided to put the larger pieced sashing on backwards so the raw edges show. I am not sure the point, especially after quilting, but it was definitely a design choice.
The themes of the blocks varied. I might have put all environmental blocks together in one quilt and all animal blocks together in another quilt. I can see the appeal of varying the themes as it makes people really look at them to see what else is there.
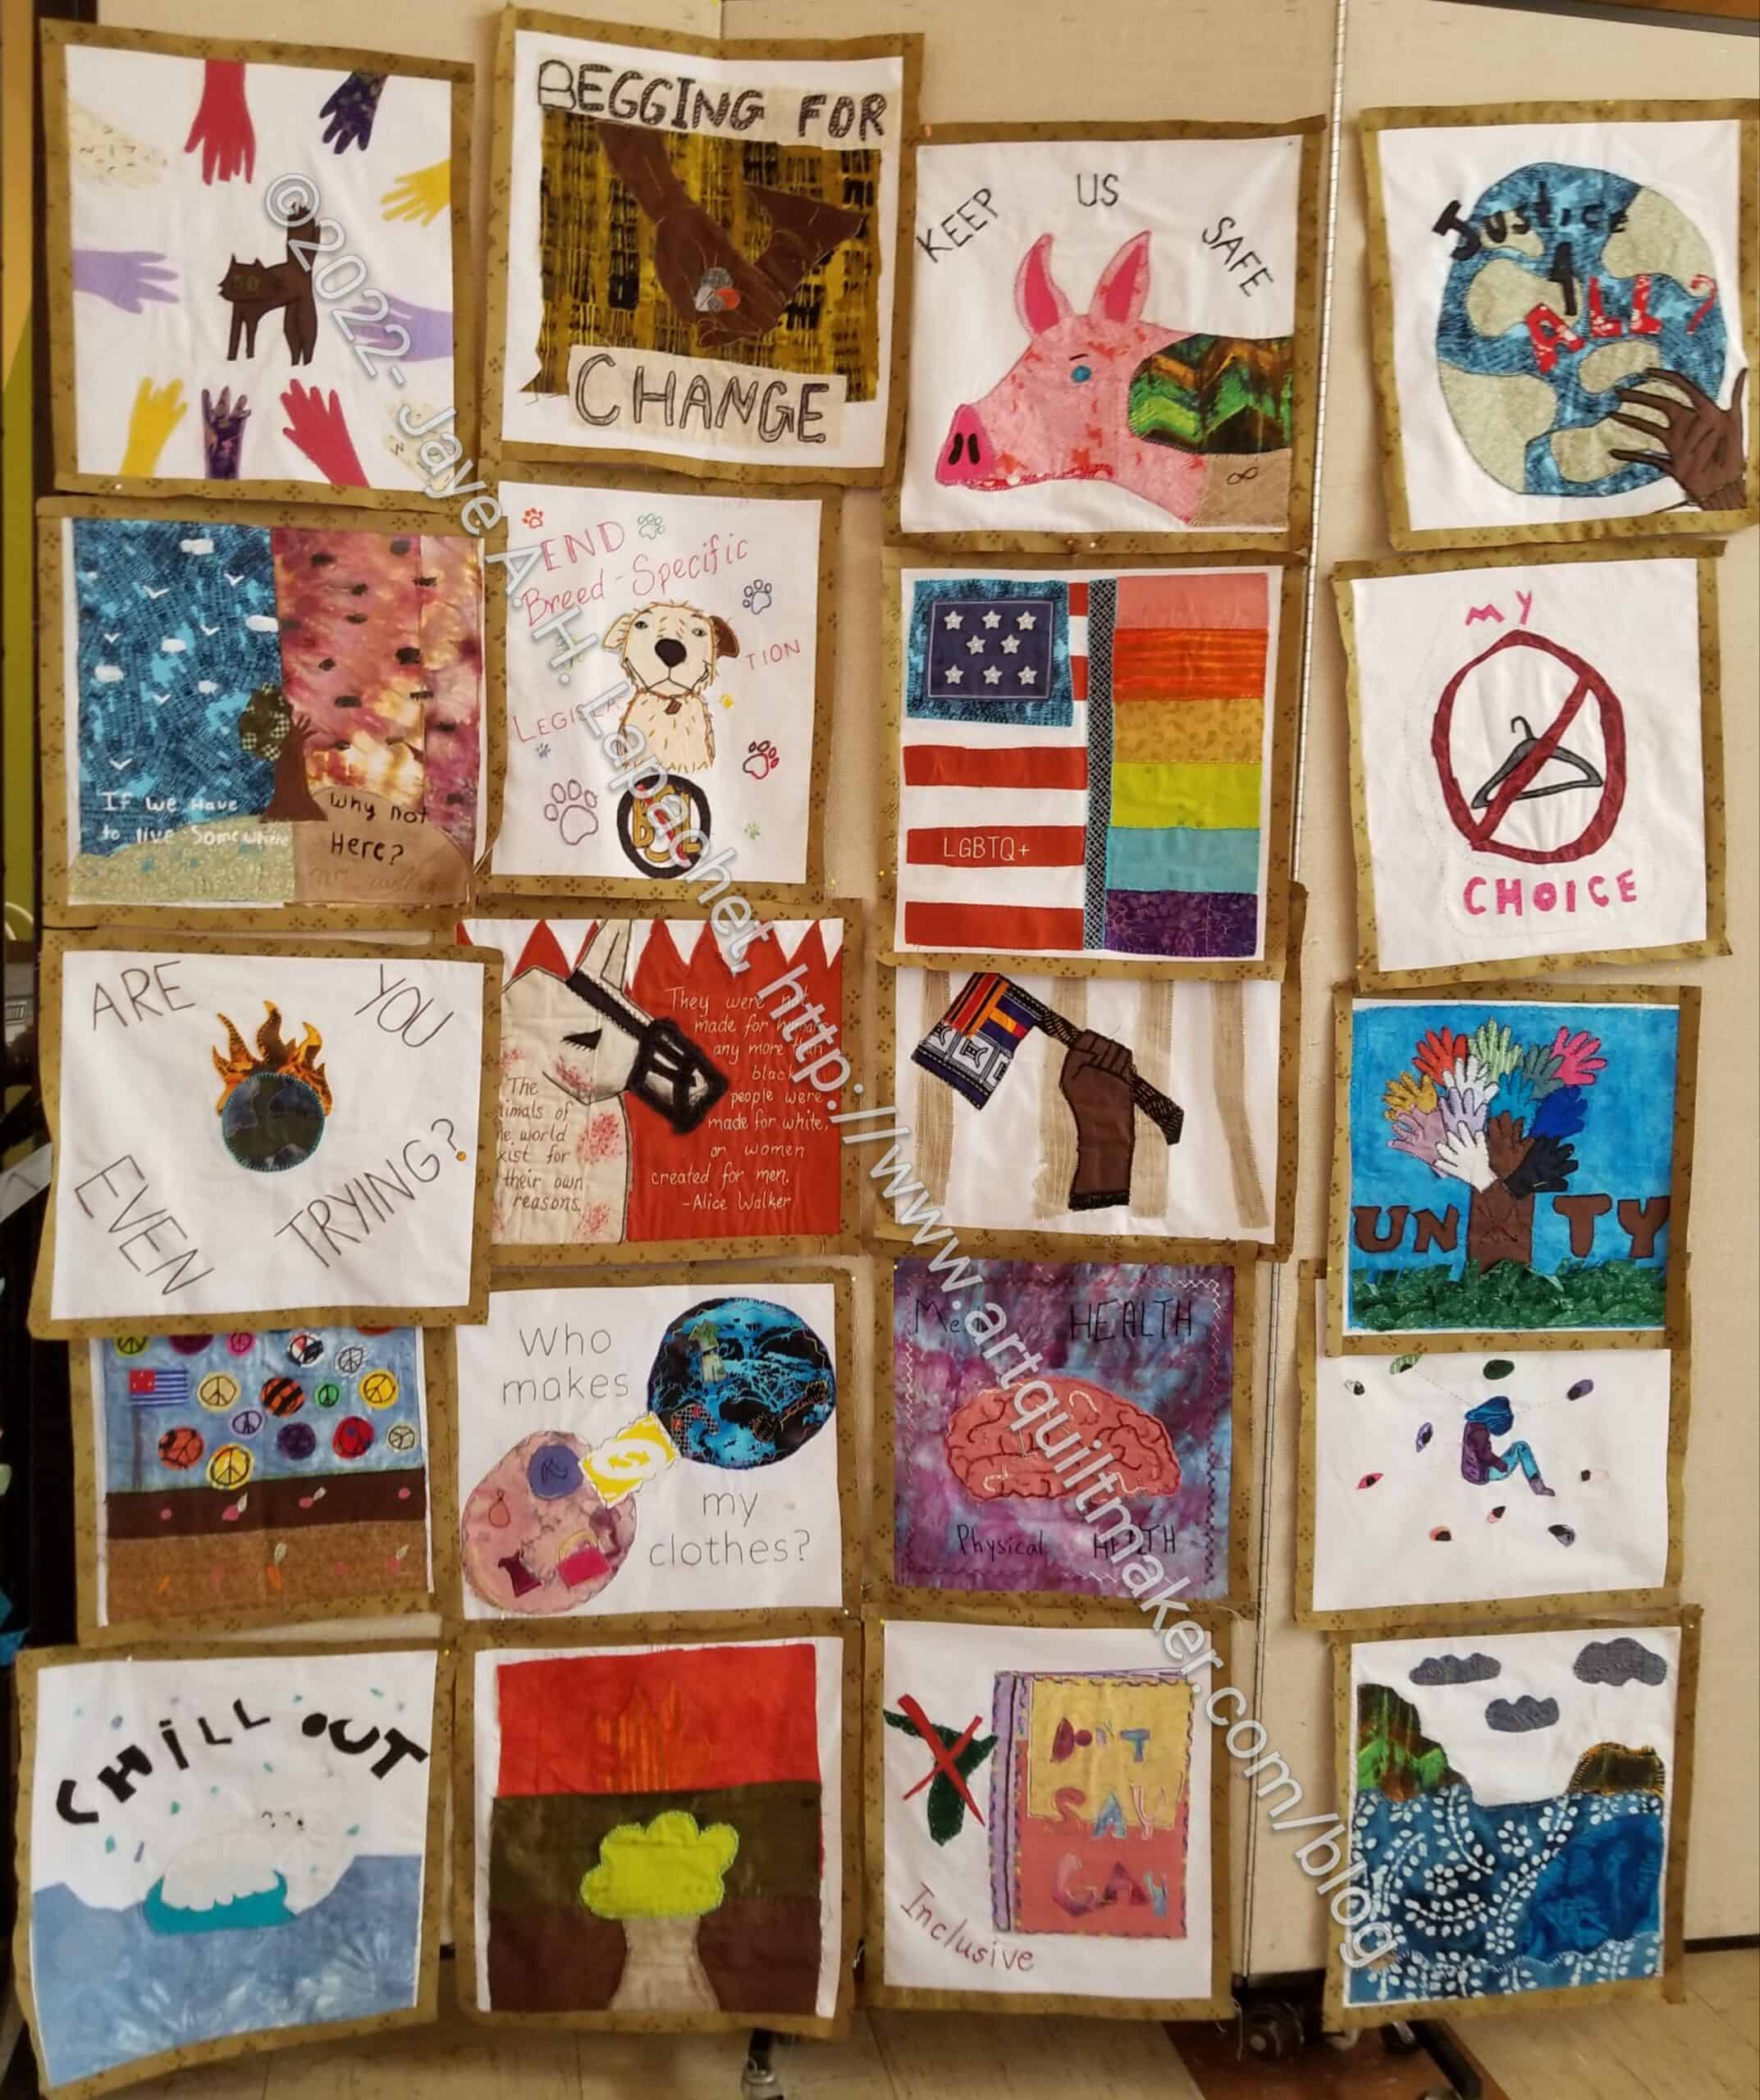
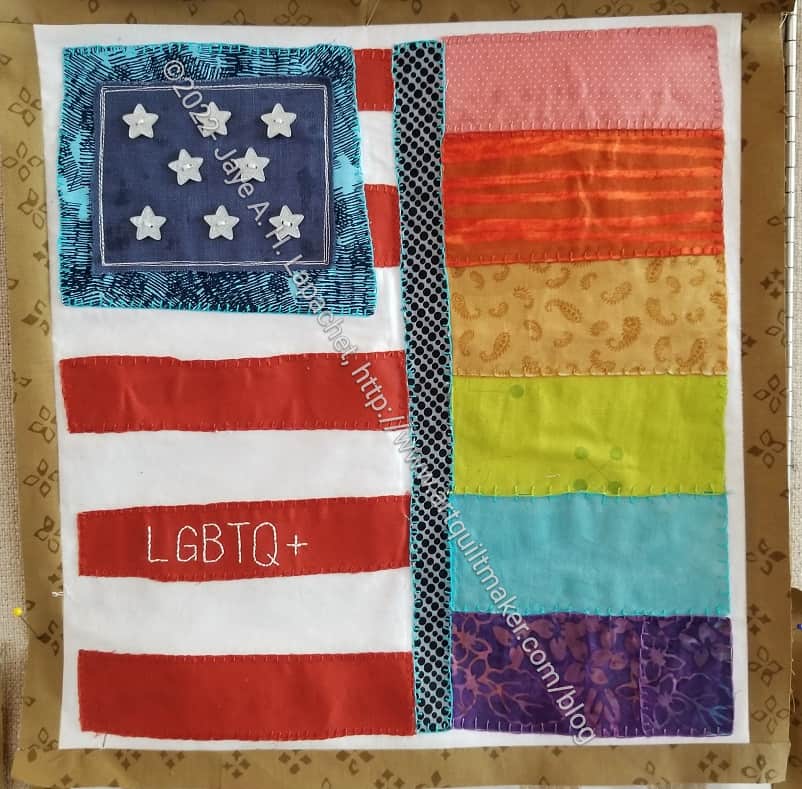
SJSA block
My favorite block has a fantastic design. The design is very simple and clear IMO. It also has a graphic quality and provides a lot of scope for discussion. Whoever designed this block should get an award. Great job.
It was fun to see the blocks up close and contemplate the messages. If you want to participate, check the SJSA website for more details
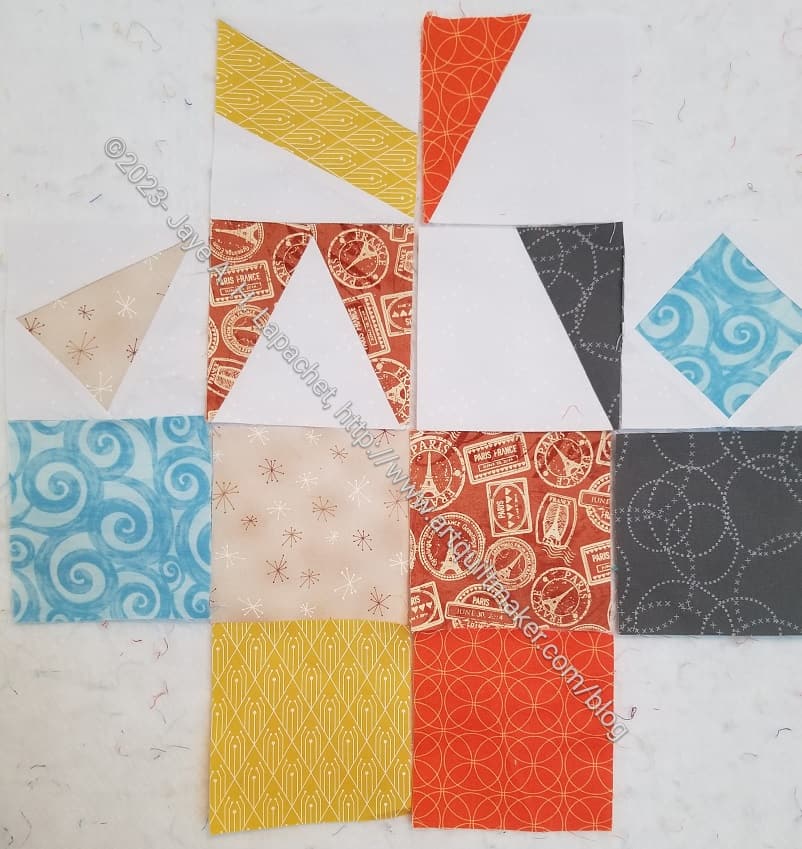
I finally (FINALLY!) made some Pantone Project blocks and handed them off to Julie when we were at PIQF.
I know there are a small number shown here, but along with the fabrics I have selected, I feel like I have made a good start. I am in the process of making the other blocks. Once I do that I will be caught up and should be able to make a couple of blocks per week. Fingers crossed.
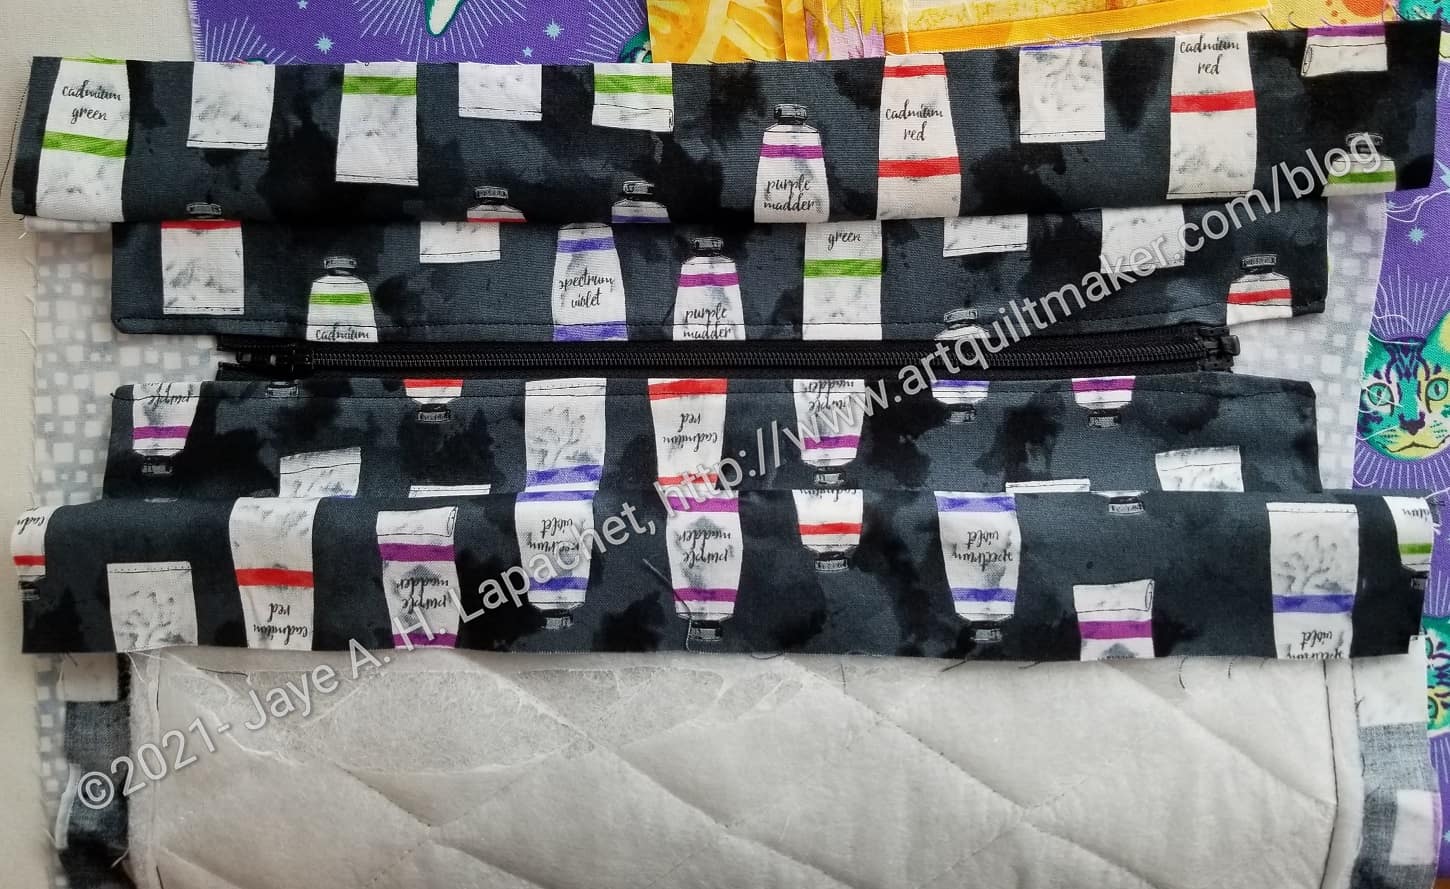
I was not able to find a 12″ separating zipper so I used a 10″ and it worked fine. you might be able to find one the right size at Wawak.
Use E8 pieces for this step. The zipper flanges (fabrics surrounding the zipper) should be exterior fabrics ifyou want them to match the outside of the bag.
Tutorial:
Use a 3/8″ seam allowance for this step.
You will be using the pattern starting on page 20. Use the exterior fabrics for the fabrics surrounding the zipper (E8-zipperr flanges). Match thread to those fabrics.
Take the zipper apart. Keep all the pieces oriented as if you are going to zip them back together.
Clip E8 to the zipper
Make a zipper sandwich
Lay 1 E8 piece right side up
Position the zipper tape along the center of E8 half an inch from the end (see photo above where clips are)
Clip fabric to zipper tape
Put another E8 piece face down to make the sandwich
Reposition the clips on the E8 pieces to encompass the entire zipper sandwich
Clip the top of the zipper (side where the stop will be when the bag is closed) so you can veer it and the top of the tape will be hidden. Sew Sweetness has a tutorial on veering a zipper.
Follow these directions for the second piece. You want to continuously check that the two pieces of the zipper are lined up so the zipper will work properly.
Look at the images on pg.20 of the pattern as they will help.
Install the zipper. Stitch to the end of the fabric.
Check the zipper
Stitch both short ends closed. You have, basically, sewn around the zipper lining/edges in a U shape so that the ends are closed and three sides are finished.
Make sure the end of the zipper is OUTSIDE of the seam allowance. You want to stitch as close as you can to the stop, then match the seam allowance on the second side of the zipper.
Turn the piece right sides out and press. Top stitch the U after you have finished the second side.
Throughout this step:
Remember that this zipper comes apart.
Make sure the two sides of the zipper are in the correct orientation and the ends are even the whole time.
Keep checking.
N.B.: Quiltessa Natalie calls these zipper tabs, but I have never heard of zipper tabs being applied to the sides of the zipper. I call them zipper flangesI have also never used a separating zipper, so who knows?)
Small Front Pocket Tutorial pt.2 – Clippy pockets (instead of badge holders)
Pocket information – post showing additional mesh pockets (not a tutorial)
**Obviously, you should shop at local fabric, knitting shops or quilt shops. However, if you can’t, please know that I use affiliate links. I may be paid for your purchase of an item when you click on an item’s link in my post. There is no additional cost to you for clicking or purchasing items I recommend. I do not recommend items I don’t like. I appreciate your clicks and purchases as it helps support this blog.
I finished the vertical orange donation blocks into a quilt. I did it on a day when I was really annoyed and needed some straight piecing – no pockets or zippers – that could soothed my jangled nerves.
These blocks were made from the strips I cut off of the Orange You Glad backgrounds. Waste not want not.
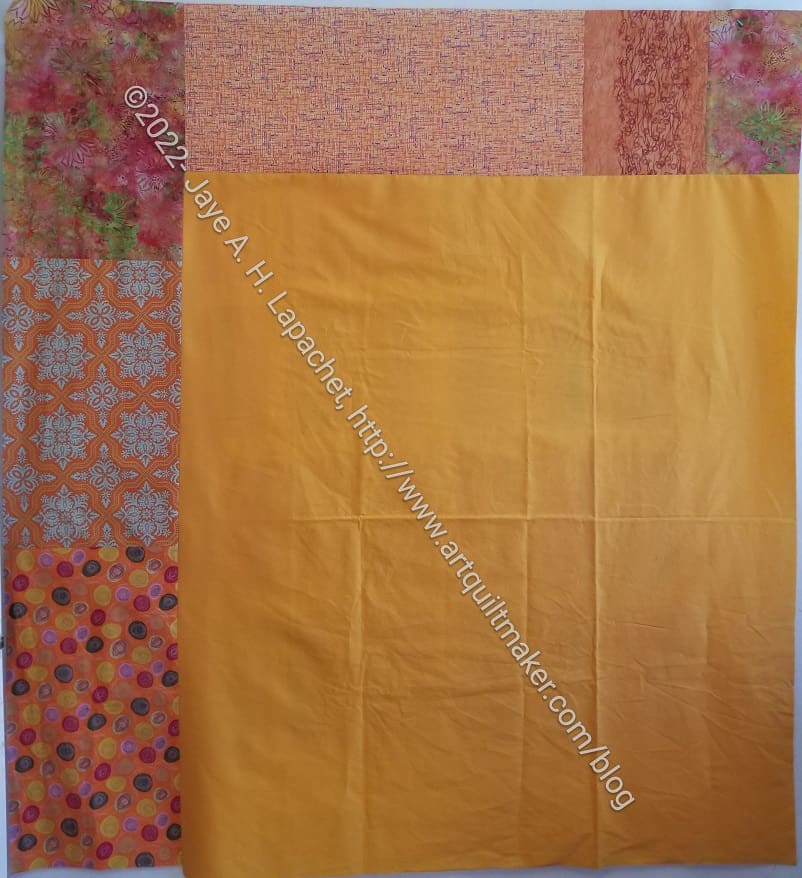
Creamsicle back
I am pleased with the way this top turned out and also glad it is done.
I put the back together quickly so I could give Peggy a whole package. Nothing special. There certainly has been a lot of orange in my life lately.
I am pretty pleased with the way it turned out and will be really glad to see it finished.
This piece seemed like it was on my design wall for years, but when I went back and looked, it wasn’t. I seemed to have started the layout in March 2022. In the grand scheme of things, it is only 5ish months ago. Why does it feel like this quilt took so long?
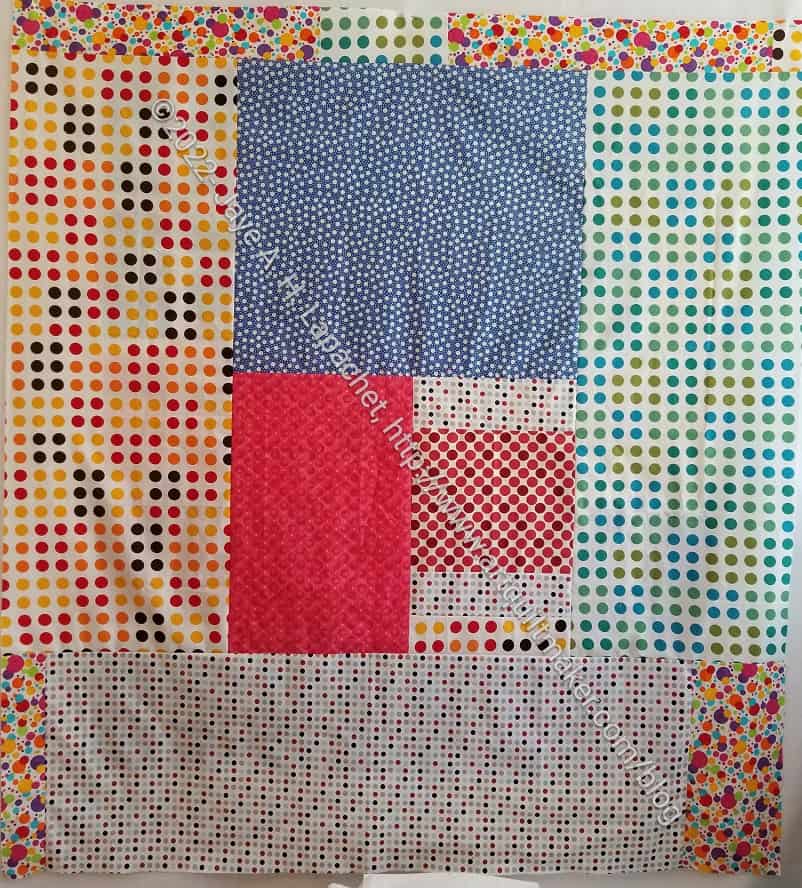
Finished: Rainbow Strip donation back
I dipped into my stash of dots for fabrics for the back. These are mostly dots I bought before I refined what I like in dots. I do like the prints, but probably wouldn’t use them in the foreground of a quilt and they are too large or too diffuse for the background. I think they make a really cheerful back.
I have more scraps, which is probably a super obvious staement. I have a lot of pink scraps, so that will probably be my next quilt in the series, after the orange vertical strip donation top.
The guild Sew Day for August was a Community Quilt Sew Day. Mary C and I collaborated again to make three tops. Normally, I would make a top, then make the back. We focused on tops this time.
Mom Blocks donation top
Mom gave me some orphan pieces and pieces that she didn’t want anymore. I had left them in the car so I didn’t even know what was in the bag. What I found in that bag was some ugly pieces. We also found some pretty nice looking blocks.
The blocks in the top on the left are the ones Mom made and handed over. Once we saw these, we decided we could just put them together quickly and move on to the day’s community quilt pattern.
I had some strips left over from the Libs Elliott class I took at QuiltCon in 2018. Fortunately, we had enough for sashing and borders. The turquoise and pink ones were already sewn together, which made things easier. The blocks weren’t all square, but we squared them up as much as we could.
Mary C sewed and I pressed and trimmed, which worked really well.
I am pleased with how this came out and how we were able to use some of the pieces that Mom sent along. I think someone will like this quilt.
Julie and I went out the other day to Golden State Sewing. We usually meet for lunch and visit the Granary, but I suggested we change it up. They have really good fabric at Golden State. More on the visit later.
One of the things I wanted to do was look for fabrics for The Pantone Project for the cards with which I was struggling. We also chatted about ‘good enough’, which is de rigeur for this project. We agreed that neither of us want to buy a lot of fabric.
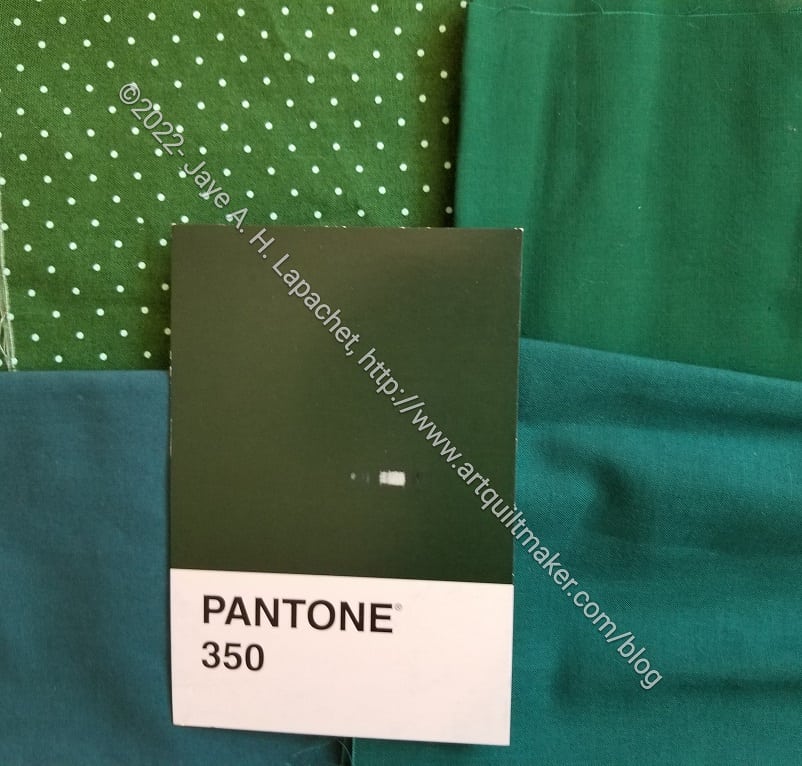
Pantone 350 choices (green)
I finally crawled up into the fabric closet and got down the cool solids bin and pulled out the greens I remembered. Neither were exactly right, but Julie and I decided that two of the three fabrics would work.
We think the Tula Pink Tiny Dots is the right color, but lighter. We think the top right solid is dark enough, but doesn’t have that black (or brown?) tinge to it. We agreed that either would work.
One strategy I haven’t tried is comparing the postcards to the color cards I have. As I said, though, I don’t want to buy a lot of fabric; I’d like to use what I have.
Friend Julie has already started selecting fabrics and making blocks. I have just started with the most recent postcard she sent (Pantone #350, a VERY dark, almost black, green). I am behind and I have no excuse except I am quilting the Tarts, I finished Pies & Points and the Diagonal 9 Patch and I am working on clearing my to do list.
I needed a break while I was quilting the Tarts, so I started looking at fabrics.
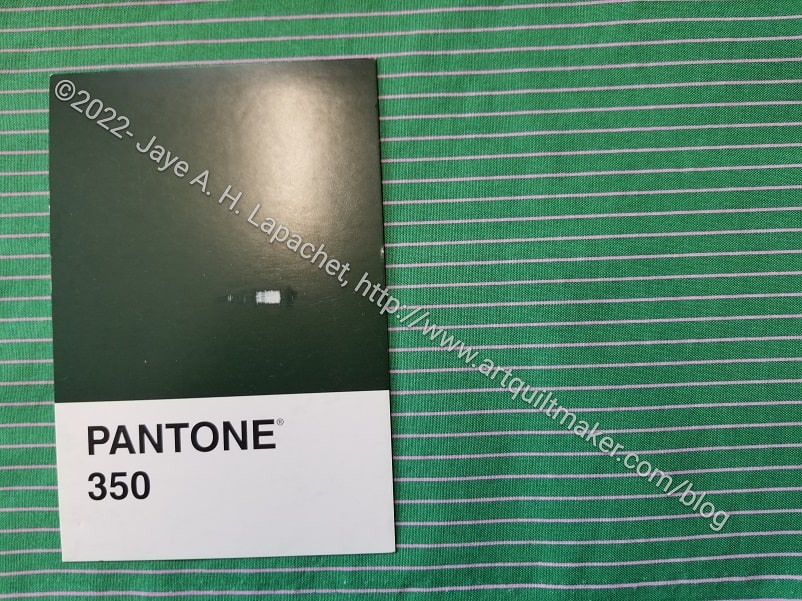
PP Comparison: Tula Tiny Stripes
When I receive the postcard, I sometimes get an idea of the fabric I want to use. For this VERY dark, almost black, green I thought immediately of the Tula Tiny Dots and Stripes. On a break I got the striped fabric out, confident I would have one selected and compared the postcard with the fabric.
Bleah! Not dark enough.
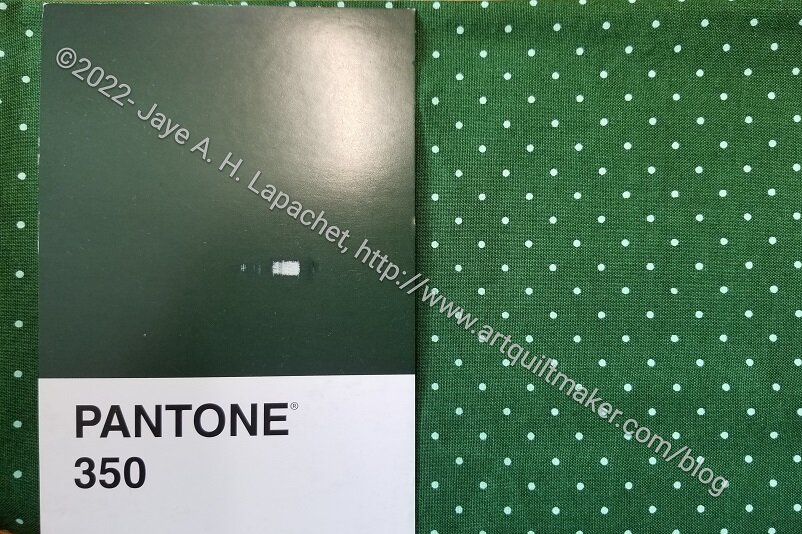
No problem, what about the dots?
PP Comparison: Tula Tiny Dots
Better. Maybe a good enough option, but still not dark enough.
This was depressing and I started thinking about the greens I have. If I have a green this dark, it will be buried in a project box or at the bottom of some “old fabric” box, because the last time I may have used such a fabric was when I took the Mary Mashuta class on pushed neutrals. I also have a Tula solid that might work.
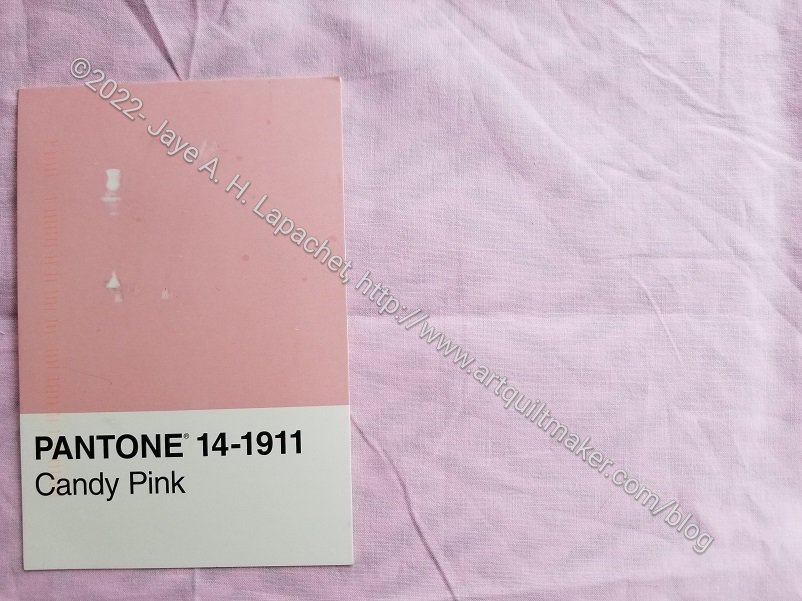
I put Pantone #350 aside for awhile. I had to file papers before I could climb up into the depths of my fabric closet to get at the old neutrals, so I took out the Pantone #14-1911, Candy Pink postcard. I knew there was a pink solid around that would be perfect.
PP: Candy Pink
Wrong again. This is a great example of making visual decisions visually. Again, the pink might be good enough, but if you look at Julie’s selections, they are perfect matches. Sigh. More climbing up into the closet. I really don’t want to buy fabric for this project if I can avoid it.