Book Review: Marcia Decoster Presents

Marcia DeCoster Presents Beaded Jewelry by 30 International ArtistsMarcia DeCoster Presents Beaded Jewelry by 30 International Artists by Marcia DeCoster

The table of contents of this book includes an introduction and then the names of bead artists. It is amazing. “The interviews…, along with brief biographies and photos that showcase each artist’s work, are the results of this effort.” The book includes a wide variety of beading styles “from Nancy Dale’s elaborate fringe to Heather Collin’s cubic right angle weave creations and Susan Blessinger’s multimedia masterpieces. The author states that this book was, in part, made possible by the wonder of the Internet, which gave her the means to admire beadwork from around the world.

The shapes and colors are enough to inspire ideas for quilts and other crafts for a few years. The artists are from many different countries and backgrounds. Miriam Shimon shows a piece that would make a fantastic applique’, Aurora (pg.11). The necklace has some curves that look like mustaches in beautiful greens and reds tempered by burgundy and gold. Miriams designs are elegant and large.

Beki Haley includes natural elements such as a dragonfly (pg.30 on Enchanted) and a shell that looks like an ammonite (pg.31, Ancient Seas) as well as charms and beads that further the nature idea. The work is calming and has interesting textures.

I liked Sian Nolan’s rich, vibrant colors and thought her piece, Siany Bird (pg.43) was really innovative. It is a flamingo beaded scarf-like piece with feathers. I would look fabulous with a black dress that had a mock turtle collar. Her work includes a needlework case, which is different.

Each section includes photos of the artists’ work, also some biographical information and answers to a series of questions. Many of the artists make jewelry, but also beaded bags, the “scarf” mentioned above and cuffs.

This book is about texture and shape as well as lushness. If you need some inspiration along those lines, this book is one to look at.

Take a look!

View all my reviews

Book Review: Simple Soldered Jewelry & Accessories

Simple Soldered Jewelry & Accessories: A Crafter's Guide to Fashioning Necklaces, Earrings, Bracelets & MoreSimple Soldered Jewelry & Accessories: A Crafter’s Guide to Fashioning Necklaces, Earrings, Bracelets & More by Lisa Bluhm

I received two more jewelry books to review last week. Again, Lark was so great about supporting the Boxing Day Sew-in that I just can’t say no to reviewing this book.

This book has a very appealing necklace on the cover. I like the charm bracelet look of it. This book has an introduction that explains the reason behind the book, and that is followed by a section on essential tools and materials. This includes a part on setting up her workspace. I haven’t seen a section like this before and I think it is a good idea, especially for an art like metal working. Both are well illustrated. The illustrations are both of tools and of the final result of the details of the book. I particularly like the layout chosen in this section. Every paragraph or so has a heading and describing each type of tool.

Chapter 2 discusses creating soldered glass pieces. It is includes cutting and scoring glass, followed by breaking the glass and tidying the edges. My first job was in a stained and leaded glass shop and the section reminds me of learning how to make leaded glass windows as the author discusses the various parts of the process of working with glass.

This book includes sections on basics. In the glass section there is a ‘basics’ page called “techniques for working with wire.”

Finally, Chapter 3 is all projects.I was expecting the regular projects, but was pleasantly surprised by the wide variety and I have to admit being tempted by some of the lovely shapes. There wasn’t just jewelry, but also a Letter Pendant (pg.39), which is jewelry, but could be a bookmark with a charm on it. There is also a Holiday Ornament (pg.41). The next section is called New Life for Found Objects, which starts off with a broach (pg.45). I like the project called Snazzy Storage Labels (pg.47). I also like the Beautiful Bobby Pins (pg.85), which use store bought bobby pins. I also like the Scrapbook Frames (pg.119), which I think is a very different and interesting project. It includes some variations, which I thought was an excellent idea for a book with a lot of projects. The Decorative Tin Box (pg.121) would also be a good gift or stocking stuffer.

There are a wide variety of designs, shapes and different jewelry and projects in the book. I like the wide variety of projects.

Check it out! Thanks to Lark for sending me this book to review!

View all my reviews

ATCs for CQFA

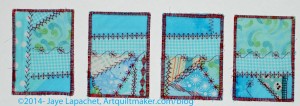
January ATCs
January ATCs

ATCs are small bits of art that can be traded.

ATCs are 2.5″x3.5″ – the size of baseball or other trading cards. They are made using discarded bits and are not limited to being made from fabric. Paper artists make them from paper and other materials are suitable as well.

As you read this, CQFA is meeting (or will be if you are reading this at 6am ._. ) and part of the meeting is trading ATCs. It is fun to see what other people have made and I love it when a lot of people participate. I am always sad when I can’t one of each example of the other members’ cards.

I had a mosaic pieced fabric in turquoise already made and decided that I would use it since it was a start. I stitched out some of the stitches on the loaner machine over the seams and called it good. The flower on the right hand card is my favorite of the few decorative stitches on this machine.

First Finish of 2014

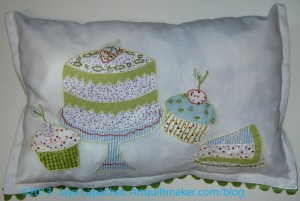
Tea towel pillow
Tea towel pillow

A few years ago, TFQ gave me a tea towel which I thought was too pretty to cover with kitchen yuck. i really liked the motifs, which echo,in shape, if not color, the Tarts Come to Tea. It hung over the door of the fabric closet for quite awhile. The door of the fabric closet is a hybrid inspiration wall and I-know-what-I-want-to-do-with-this-but-haven’t-gotten-to-it space. I wasn’t quite sure what I wanted to do with the tea towel, but one day it came to me that I could fold it over and make a pillow.

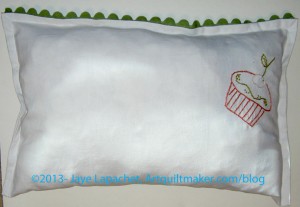
I sewed it as described except for a space to stuff it last week. It was a quick trip around the edge with white thread. Yesterday I stuffed it with a combination of shards and tiny scraps and leftover batting. Then, I sewed it together on the machine.Voila! back pillow.

I really like finishing something on New Year’s Day as I like to think it sets the tone for the year. We will see.

Tea towel pillow - back
Tea towel pillow – back

A Few Gift Bags

Gift Bags
Gift Bags

I had some fabric left over after making the pillowcases for the nephews and used it to make some gift bags.

These are on the small size, but I really like the cheerfulness of the fabric and didn’t want to waste it.

I don’t need many more gift bags as I have plenty, but I do like to make some new ones to use new fabric that I can’t resist.

You can find the directions for making the gift bags on the tutorials pages.

Gift Post #2-2013: Pillowcases

Pillowcases  Christmas 2013
Pillowcases Christmas 2013

I had some time and thought I would make some pillowcases for the littlest nephews. The ‘littlest’ nephews are now 2d and 4th graders so ‘little’ is relative.

Still, I thought it might be a fun to give them a pillowcase they could especially use during the holiday season. I won’t have much of a chance to do that as all the niece-phews are getting quite old.

They came out well, but I really had trouble with the directions this time. Once again, I used the Twiddletails tutorial, which has been great in the past, though it isn’t as straightforward as it could be — or it is not written in the way I think.  I have decided that what I need to do is measure a pillow case of my own, figure out the dimensions of each piece, take what is good from the Twiddletails tutorial and create my own tutorial. I haven’t posted a tutorial in awhile and it is about time.

Christmas Pillowcases - open 2013
Christmas Pillowcases – open 2013

I think the problem is the selvedge. I always get confused when I am reading the directions about the selvedge. I don’t know if it matters where the selvedge ends up. I have made notes on my printout and have determined that they are muddying the situation. It could be that I need to just print out a new version of the directions and make other notes. We will see once I measure my own pillowcase.


* This is the second version of this post. The first version disappeared in the move of my blog.

Holiday 2013 Gift Post #1

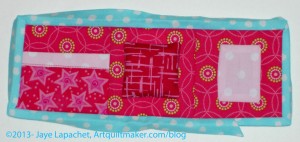
You already heard about the various needle cases I made. Here are the final photos of the one I made for my BAMQG Secret Santa. Presumably she received the gift yesterday, but I wasn’t able to attend the meeting as the Young Man had a concert.

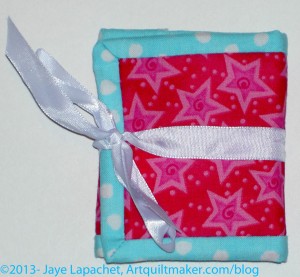
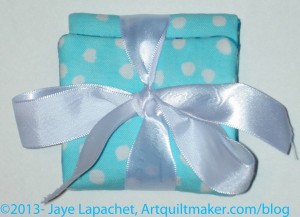
Gift Needle Case closed

I finally finished the first needle case and am able to post about it.

I am posting a picture of it open and closed. While closed, it needed a ribbon or something to close it. I am not thrilled with the ribbon. I think it looks really nice, but it isn’t really practical for a needle case. I thought about other options, but the supplies for the closure I really wanted weren’t readily available.

When I was a teenager, thin hair elastics were available. I have a very few left, but only large. For this project I need a small one and didn’t have one. I don’t think they are sold in stores anymore as I haven’t seen them at Walgreen’s and such stores. I haven’t tried places like Claire’s, but will, perhaps. I would have put a button on and then pulled the hair elastic taut around the button to close. I will look at, and think about some other closure options.

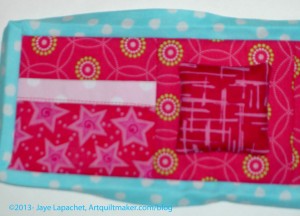
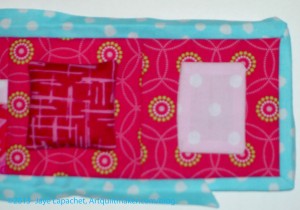
Needle case open
Needle case open

I forgot to fill up the needle case with pins and needles, etc. I hope the recipient knows what it is without those little touches.

Second Needle Case

Needle Case #2
Needle Case #2

Tomorrow is my only day at work before Thanksgiving until December 2. I am cooking for Thanksgiving and ‘need’ the prep time. I also need to go to the dentist and clean up the house and sew and laze around. The whole Grama thing has been really hard and even though I was off for a week at the end of October/beginning of November, I need more time off.

None of that is either here nor there, except that you should watch for the Pie Day photos that I will tweet out. I don’t know if you like it, but I always have fun tweeting Pie Day photos. I plan to make a pie for my mom’s priest who was awesome while my grandmother was sick. He was a great support to her and is a super nice guy.

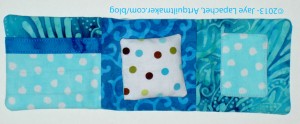
So, two paragraphs in and no discussion of sewing. Let’s get to it. I made a second needle case. I couldn’t help myself. I needed to get it right. It still isn’t exactly right, but is much better. I did it last Sunday and then worked on the hand stitching on Monday night.

The problem this time is that I put batting in and I think I just don’t like batting for small accessories like this. I think batting should be in quilts and something thinner (not sure what yet) should be in journal covers and needle cases.

The changes I made to the pattern are:

  • Put ShapeFlex on all the major pieces. This gave it more body, but not quite enough to forgo the batting.
  • Machine sewed the ribbon on to the main outside piece right after adding the ShapeFlex to the fabric and then pinned it carefully out of the way
  • No binding; sewed around and then turned the whole thing
  • Stitched the top and the bottom of the pocket accent (directions say bottom only)
Needle Case #2 Open
Needle Case #2 Open

This pattern really doesn’t take very long. I am going to Joann to see about some ShapeFlex sometime this week and may look for fusible flannel as well. I don’t know if there is such a thing, but I will look. Flannel might be sticky enough without the fusible.

Book Review: Metal Clay 101 for Beaders

Metal Clay 101 for Beaders: Create Custom Findings, Beads, Embellishments & CharmsMetal Clay 101 for Beaders: Create Custom Findings, Beads, Embellishments & Charms by Kristal Wick

The earrings at the beginning of the book have a design stamped, I assumed without reading any further, that could be a free motion quilting design. This book is about upcycling and eventhis purple earring projects sets that intention from the very beginning.

Again, Kristal Wick‘s book has an illustrated table of contents, which gives the reader an overview of what to expect. The thumbnails set out an ambitious and appealing agenda.

Ms. Wick has a 2 page introduction, which extolls the virtues of beads and metal clay. She gives a taste of what the book will include with a sense of competence and enthusiasm.

The ‘Basics’ section (pg.10-37), includes pictures of her favorite materials as well as a description of different things. Or so I thought. I leafed through the pages, looking for the end and found an unbelievably complete ‘Basics’ section. Kristal’s ‘Basic’ section includes the above as well as metal clay tools and materials, a Metal Clay Toolbox, metal clay fundamentals, firing the metal clay, how to create patinas, embellishments, jewelry components and tools, a section on bead strings and stitches and basic wire techniques.

After 30+ pages of detailed instructions, the projects start. I am pretty sure I wouldn’t wear most of these pieces, but I would pick them apart and put them on some of my art quilts! I really liked the textures and shapes of the different designs.

I have to say that an appealing part of these patterns is the variety of textures included int he same design. In the first project, the Birdhouse Necklace (pg.38), there is metal clay, charms, crystal and metal beads and everything works well as a cohesive whole.

Throughout the book, the author shows very clearly how to put the bits and beads together to make the various projects. Quiltmakers could easily apply components of these projects to a quilt project in the same manner and achieve a great look. This book can also be used as a good source of inspiration as it has detailed images of different textures used.

Each project has a good description of the supplies required along with the nice photos. Variations are mostly shown, though not always described. The reader can get a brief idea of what the project looks like in slightly different colors.

The end of the book has a gallery of projects, by different artists, as well as a short index.

Enjoy the colors and textures as inspiration from this book. Thanks to Lark Books for sending it to me.

View all my reviews

Needle Case – Secret Santa #2

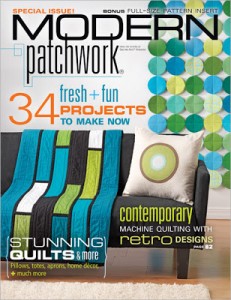
Modern Patchwork Spring 2013 cover

When I was down at Grama’s I had a stack of quilt magazines with me. I hadn’t brought a lot to do, because I was supposed to be at a conference and didn’t want to feel like it was a waste to have lugged a bunch of stuff down with me only to lug it straight back home.

As you know, I ended up at Grama’s, racing around like a crazy person before dropping into bed exhausted, looking at two pages of quilt magazines and falling asleep with the magazine on my face. Two pages, however, is progress. While looking through the magazines, I found a needle case pattern in Modern Patchwork. I decided to add it to the shopping bag for my BAMQG Secret Santa. As soon as I finished the machine part of the shopping bag (I still have a bit of hand stitching to do), I started in on the needlecase.

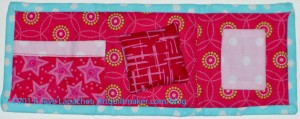
Needle Case #1 Open
Needle Case #1 Open

The pattern is by Rashida Coleman-Hale of the I Heart Linen blog and I, initially, had a hard time with the way the pattern was laid out in the magazine. Remember, I am much better at being shown how to make something than I am reading directions and following them. I began reading the directions and couldn’t figure out what to do first. The pattern started with “Create the Pocket.”

Huh? What pocket?

Needle Case #1 Open detail

Finally, I realized I needed to cut all the pieces out first, even though the pattern says nothing about that. Step 1 should be “Cut out pieces (see Sidebar)”, but it wasn’t. Also, the list of pieces of fabric that need to be cut is on the right hand side of the page and I was looking on the left (we read from left to right), which happened to be instruction #1 of the pattern.

My heart sank. I didn’t want to do a project that was so hard to understand that it wouldn’t come out well. The project is small enough to use scraps, so I decided to cut out the pattern pieces and try one more time. Miraculously, as soon as I cut the pieces, step #1 of the directions made complete sense.

I am skeptical of magazine instructions, but these were ok, after my initial confusion, for a not very complex project. I am not quite done with the project, but the one thing I would do differently is sew the cording (I am using a ribbon) on before I sew on the binding. I think it would look neater and be stronger. I might also figure out some other closure, but I haven’t thought that far ahead. Live and learn.

Needle Case #1 Open detail

I used fabric scraps from the shopping bag and also a few others. The the two Secret Santa pieces will match, but not be matchy-matchy. Cute, huh? I did not use the linen. I used regular quilting cotton.

If I made this project again, I would give the outside pieces some body by lining them with ShapeFlex (LOVE that stuff!).

I didn’t have any Fiberfill to fill the pincushion, but if I had been thinking I would have used the roving I bought for the other pin cushions I have been making on and off. I just wasn’t thinking so I cutting up some batting scraps to fill the pincushion. It is small, so I think the batting will be ok.

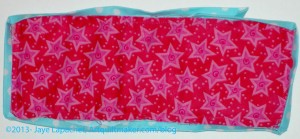
Needle Case #1 back
Needle Case #1 back

My Secret Santa likes pink, so I am going all out on the pink. I really hope she likes what I have made. This needle case really did not take me very long and I think I might make a few more for friends. We will see.

Secret Santa

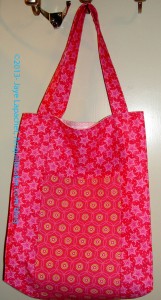
Jane Market Tote
Jane Market Tote

I went back and forth about whether or not I should post this on my blog before the BAMQG party, but I have so little to post these that I decided to go for it. I don’t know all of you as well as I would like, but I don’t think the recipient is a reader. Perhaps she will be after receiving the gift.

I agreed to make a Secret Santa gift for the BAMQG Holiday Exchange. It was hanging over my head, so I decided that Saturday would be the day to start. I actually cut out all of the pieces on Friday night and put most of the interfacing on as well, so the sewing went pretty easily.

I decided to make another Jane Market Tote for the gift. It is a good pattern – useful and nicely shaped. I am also familiar with it since I made over a dozen of them since I bought the pattern. The other bonus was that a shopping bag was on the giftee’s list.

Perfect.

As I said, I cut out the pieces on Friday night. I also decided to try adding some ShapeFlex stabilizer to see if that would give it some body.

As an aside: Have I said how much I like ShapeFlex? I love it. It is so easy to work with. It is not thick. Now, I am almost out again and am now thinking of buying a bolt. Crazy?

Anyway, I was able to put ShapeFlex over all the pieces except one, so I was really ready to sew on Saturday morning. So, Saturday morning, which was really about 11am since I slept so much, I sewed. The bag went together really well. I tried very hard to make it look nice. I used a star pattern on my machine to finish the top of the bag. I also put the handles inside rather than outside after the bag is finished, as the pattern suggests.

It is a nice bag, but I also decided to make a little needlecase and put that in the bag as well. I know it is not necessary, but I have some leftover scraps from the bag. I also found a pattern in Modern Patchwork for a needlecase that doesn’t look too difficult. Stay tuned for that.


Book Review: Bead Embroidery Jewelry Projects

Bead Embroidery Jewelry Projects: Design and Construction, Ideas and InspirationBead Embroidery Jewelry Projects: Design and Construction, Ideas and Inspiration by Jamie Cloud Eakin

One of the first things I noticed was the extraordinary drama of the first piece in the book. It is large, paired with the right clothes and the model is looking straight at the reader daring him/her to object, or, perhaps, say anything. This led me to the table of contents, which is illustrated with thumbnails of the various projects. Many of the pieces, including the Panel Collar necklace (pg.52), the Waterfall Necklace(pg.97), the Royal Vines Necklace(pg.101), and others are all quite large. The first piece and these supporting ‘actors’ tell the reader that this is a designer with whom to be reckoned.

My first impression is supported by the first line of the Introduction, which reads “One of the premises I live by is ‘Life is too short to wear ordinary jewelry.’ and I am sure many of you agree.” I have always wanted a mantra like that! These two things set the stage for the book. The pictures of all the pieces throughout the book are dramatic and make the pieces look large, though some idea of actual side is implied in the pattern instructions.

This book has 29 projects, but these projects are further expanded by, in some cases, several variations. The nice thing is that the variations are included right in the table of contents. While the reader may not want to go straight to the variation after opening the book, their inclusion in the table of contents gives the variations some stature, prominence. With the variations, the total project count is 45.

The ‘Basics’ section in this book is called Basics of Design and Construction, which includes design as an important element. The design piece has a few exercises to get you started. Design tools are, then, combined, somewhat, with construction. Prominent in this section (pg.12-13) is the use of neck forms and collar forms. The contents of a Standard Necklace Kit is briefly discussed and then the Basic sections goes to The One.

The One (pg.16- ) is described as the star of the show, a single focal point that is described as “a beautiful simplicity to a single focal embraced by bead embroidery.” In this section, the reader is back on to design with some definitive examples. This section is filled with tips such as “use your closet and the colors inside to help with your design choices.”

I was slightly alarmed when I found that the above section was immediately followed by projects without very thorough directions. First, there is an instructional section at the back of the book (pg.149-154) and all of the patterns have a variety of types of instructions.

Throughout the book, the author tips on different aspects of the projects, including how to execute certain stitches and hiding thread when beading around corners. Most of the patterns are 2-3 pages. The supplies are clearly enumerated. The focal beads look quite special in these pieces and I think the reader might have some concerns about matching the quality of the imagery. The focal beads and color are integral to the success of the project. I am sure that readers will have fun seeking out the special beads!

Picking my favorite project was difficult. I don’t wear these types of pieces. I found aspects of various pieces drew my attention. With some, I was attracted by the colors. Others had appealing shapes.
as I started to look through them.

The end of the book has a small gallery of projects, by different artists. There is also a comprehensive index, which also warms my librarian heart.

Use the colors and shapes from this book for inspiration and thanks to Lark Books for sending it to me.

View all my reviews

Book Review: Shaped Beadwork & Beyond: Dimensional Jewelry in Peyote Stitch

Shaped Beadwork & Beyond: Dimensional Jewelry in Peyote StitchShaped Beadwork & Beyond: Dimensional Jewelry in Peyote Stitch by Diane Fitzgerald

One of the first things I noticed was the feel of the book. It is a paperback, but it has a bit of a heft to the cover, making the book feel as if the cover wouldnt’ be damaged immediately.

Upon opening the book, I was enchanted by a photo of a group of bead starfish. they look like they are photographed on a piece of Styrofoam, but it isn’t obvious and it is the perfect background. I love these little starfish.

Both are, of course, irrelevant to the content. As with her previous books, Diane Fitzgerald makes a brief introduction and then gets on the with the projects. This book is STUFFED full of projects, 43 in all. If you want a peyote stitch project book, you won’t be disappointed.

Unlike Diane Fitzgerald’s Favorite Beading Projects Designs from Stringing to Beadweaving, which I reviewed before, there is a ‘Basics’ section, which includes the contents of a Basic Beadwork Kit, understanding the Peyote stitch, general techniques (including unpicking!), and recognizing patterns. Chapter 1 is brief, but seems to be fairly comprehensive.

After Chapter 1’s intructions, there is what I would call a practice/basic pattern. It is a basic triangle (as 60 degree triangle, if you want to translate the patterns to quiltmaking), which is a component of many of the projects in this book. I see immediately, in the Oh My Stars! necklace (pg.18), a pretty and delicate piece, that this triangle is used. It is clear from leafing through the book that mastering this first pattern will go a long way towards success with the other patterns.

Throughout the book, the author shows very clearly how to put the beads together into the larger units needs to make the various projects. In looking at these images, I am sure a clever quiltmaker could apply beads to a quilt project in the same manner and achieve a great, if flatter look. This book can also be used as a good source of inspiration as it has wonderful pictures of different beads used as well as different pieces.

The Temari Beads necklace (pg.23) gets the reader early into the dimensional aspect of the book

I was hard pressed to pick a favorite project as I started to look through them. I liked many of the projects as objects, but weren’t my style in terms of wearing. If forced, I would choose the Rivoli Bracelet (pg.104). I like the sparkle and flash and think it would go well with what I wear to black tie events. I also think the construction is interesting. The Navette Pendant (pg.132) is also something that I might wear. The construction makes it look like a very large gem and I can see people doing as double-take as they see from the middle distance. Aside from the eye bead, which I liked and was a bit repelling, the Eye of Providence (pg.142) is appealing. I can see wearing the Eye of Providence with Roses(pg.145) pendant.

Chapter 6 covers pointed ovals. While the shape can look a bit weird and eyelike, I did like the variety of options presented in the book, especially the Eye of Apollo necklace (pg.133). This shape and the projects shown really look like jewelry to me.

Each project has a good description of the supplies required along with the nice photos. Variations are mostly shown, though not always described. The reader can get a brief idea of what the project looks like in slightly different colors.

The end of the book has a gallery of projects, by different artists, but all, presumably made in the peyote stitch.

As I said, this book has a whopping 43 projects. At an MSRP of $27.95, that is about $.65 per pattern. If you want to try a lot of different techniques, this is a good buy.

Enjoy this inspirational book and thanks to Lark Books for sending it to me.

View all my reviews

Book Review: Contemporary Jewelry in Perspective

Contemporary Jewelry in PerspectiveContemporary Jewelry in Perspective by Art Jewelry Forum

Thanks to Lark for sending me this book to review.

This is more like a scholarly book than most of the books I have reviewed for Lark. This book sets out to distinguish why contemporary jewelry is not like the jewelry found in the local shopping mall (pg.7). It is clear that contemporary jewelry artists struggle with the same problem that art quiltmakers have: art v. craft. The book delves into detail about what craft is and how jewelry making fits into fine starts traditions.

This is a serious books that looks at contemporary jewelry from all angles. Discussion about the journals of contemporary jewelry have a place. Photography of contemporary jewelry is explored. the tools, spaces and materials are all discussed in a scholarly and serious way.

The book is lavishly illustrated with photographs, which are works of art on their own.Many, many contemporary pieces are shown throughout the book.

The title, Contemporary Jewelry in Perspective, really describes what this book is about. No stone related to contemporary jewelry goes unturned. If you want a thorough grounding in contemporary jewelery, this is your book.

View all my reviews

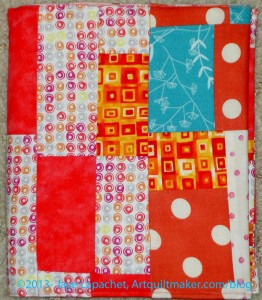
Swoon Journal Cover


Swoon Journal Cover
Swoon Journal Cover

I have been cutting a lot lately. I finished cutting out the bag that will be part of Purse Palooza blog hop. I am cutting out another Petrillo Bag and I cut a bunch of pieces I will talk about tomorrow. Regardless, I needed some finishes – or at least a finish.

This piece had been hanging around just needing a bit more work to get it finished. I really only spent an additional half hour on it to make it ready to use.

Ever since I had the idea to use the trimmings from quilts to make journal covers, I have been making different journal covers. At first, I was just sewing the pieces into the right sizes. Now I am trying to make the covers more interesting. I found that I didn’t like looking at them and that is not a good thing.

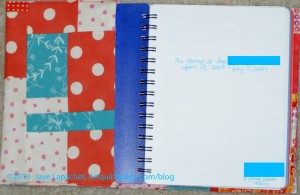
Swoon Journal Cover inside

The trimmings are long and thin so by just sewing trimmings together I was ending up with a lot of horizontal design elements. I wasn’t liking those, so on later journal covers I cross cut the pieces and re-sewed them. You can see the sort of checkerboard I have going. Yes, it is more work, but it is also more interesting.

I am still fumbling with the lining. The batting is too fluffy even though it works on some journals (think that has to do with lucky placement) I think I need to try flannel next, but that requires buying some flannel just to put in the center of the journals and I haven’t wanted to spend the money. Part of my idea is using supplies on hand for these covers. I might also try no filling again and see if I still think it needs improvement.

I still have some bits for other journal covers on my sewing table. I’d like to get them off the table, which means I need to make more journal covers.