I have a lot of needlework from my female ancestors. I am starting to have a hard time appreciating it, because It is taking up space in my cupboards and not all of it is my style. Yet I feel compelled to keep it. I know this is how the Young Man will feel when all the quilts I feel compelled to make are dumped on his living room floor when I am dead.
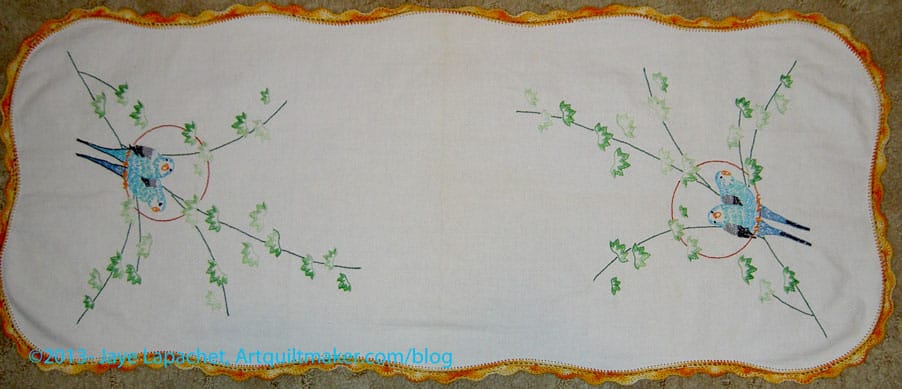
Parakeet Embroidery-detail
This dresser scarf is actually one of the pieces that I like and use. the birds look very cheerful in this piece.
We had parakeets when I was a kid and, though, they were messy, they also made a cheerful noise. We had a green (Bilbo) and a blue one (Gandalf). As an aside: My mom named them, I think, because I would have never named them after characters in the Lord of the Rings series.
I like the embroidery because the cheerful personality of the birds comes through.
Parakeet Embroidery-detail
I also like the way the stitching was done. It isn’t really dense, so the stitches seem to have some air to breathe.
I haven’t ever seen an embroidery with this pattern before and it makes me wonder if it is unusual.
I think this one must have been made by my maternal great grandmother, because of the tatting around the edge. I don’t remember my grandmother ever doing tatting.
I looked for an image of the pattern, so I could give some background for those of you history buffs, but didn’t come up with anything. ‘The’ Google’s precision is really lacking. I would love to be able to filter more, but they have dumbed their system down enough that it is nearly unusable for difficult searches.
While I was visiting my Grama a few weeks ago, my mom pulled a quilt out of the cedar chest (I know! wrong on so many levels).
Huh?
A quilt? Huh? I really was confused because my Grama is a not a quilt person. She enjoys the one I gave her, but she doesn’t want more. I have no idea why I have never seen this quilt before.
Apparently, my sister has known about this quilt for awhile and always uses it when she sleeps over at Grama’s.
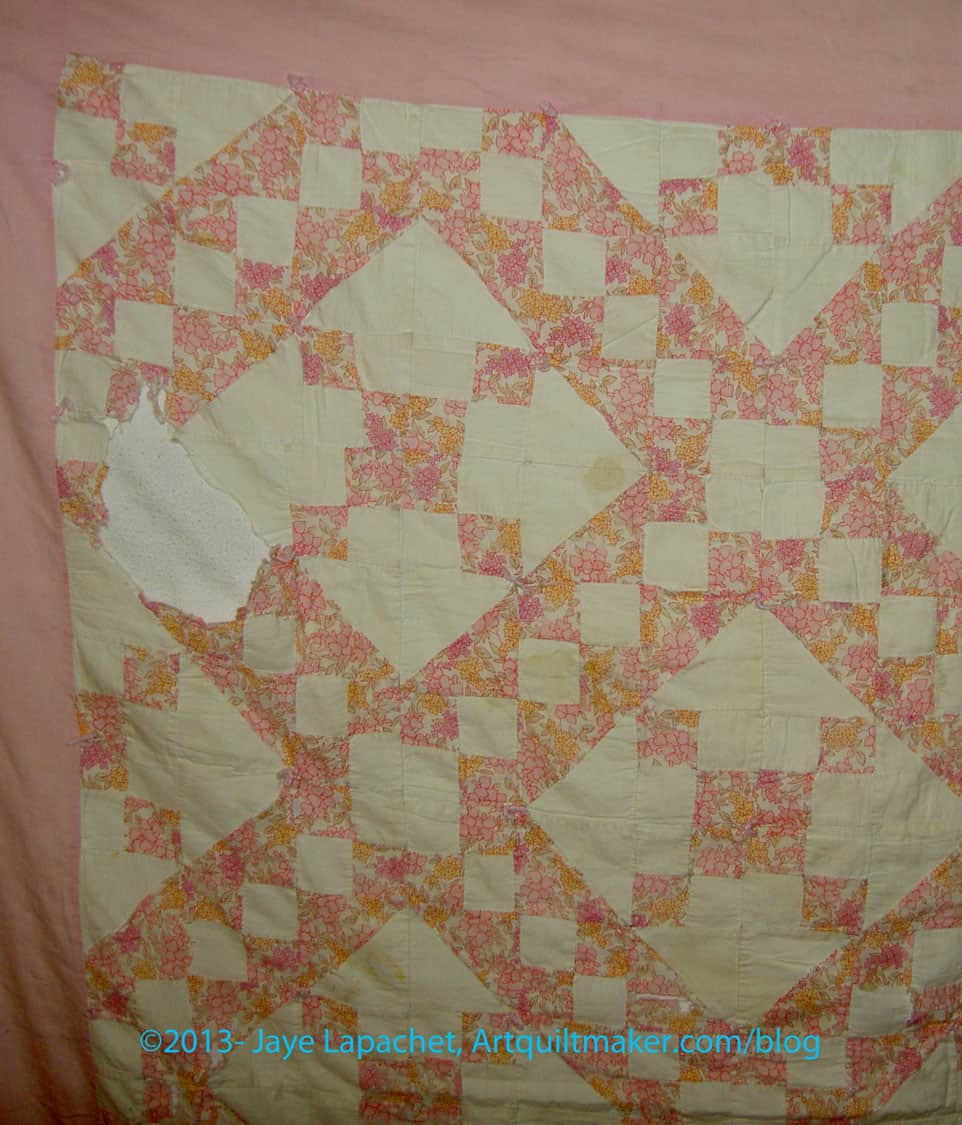
This quilt is referred to as Grandma Betty’s quilt. Grandma Betty was a woman who drove out to California from Chicago with my Grama, her brother (Uncle Gene), their father (Grandpa George, yes I knew him) and Grandma Betty’s daughter. I am not sure who drove, but Grandma Betty owned the car. I’ll have to ask Grama more about that trip.
Grandma Betty’s Quilt- detail
This is the first time I have heard this story and was amazed. The quilt is in terrible condition, but has a lovely soft look and feel to it.
If my quilts look like this in 70 years, I will be happy. It means they were loved.
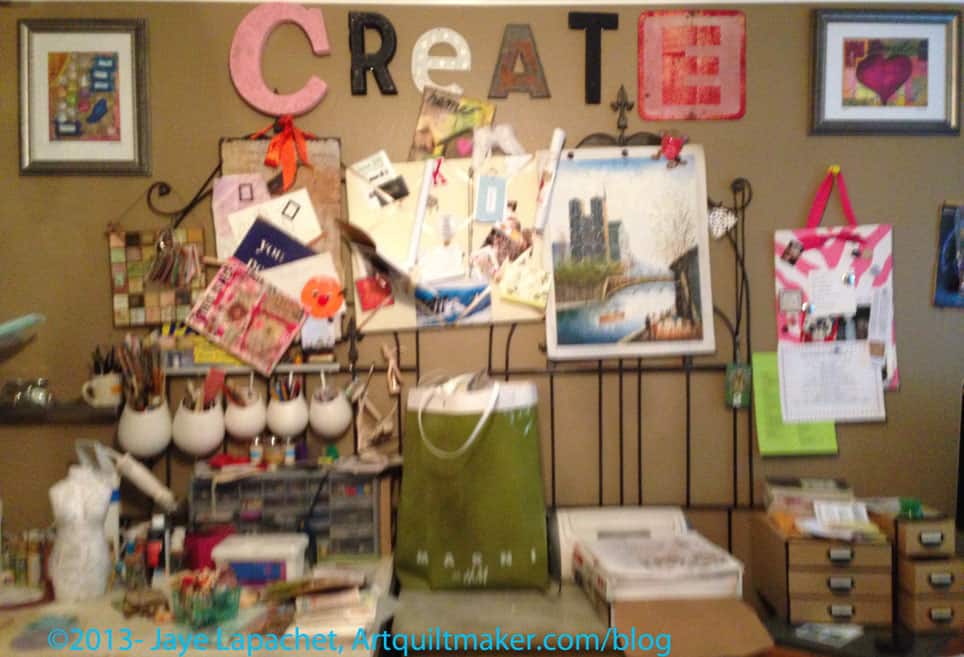
I stopped by my sister’s house last week on my way to visit my grandmother. I don’t get to see my sister that often and she is getting ready to move, so I wanted to stop by and see her studio. My sister and I are having an argument, but I decided to celebrate her creativity anyway.
The last time I saw my sister’s house, she was living in a place that I don’t remember having a lot of wall space and I don’t think I saw her studio, or perhaps it wasn’t set up? I don’t remember. Last week, she was coming home from work and we were going to meet her at her house for a quick pow-wow before we went down to Grama’s. My mom and I got there before my sister. The dogs had had a little party, so we cleaned up for her and, in the process, I couldn’t help looking around.
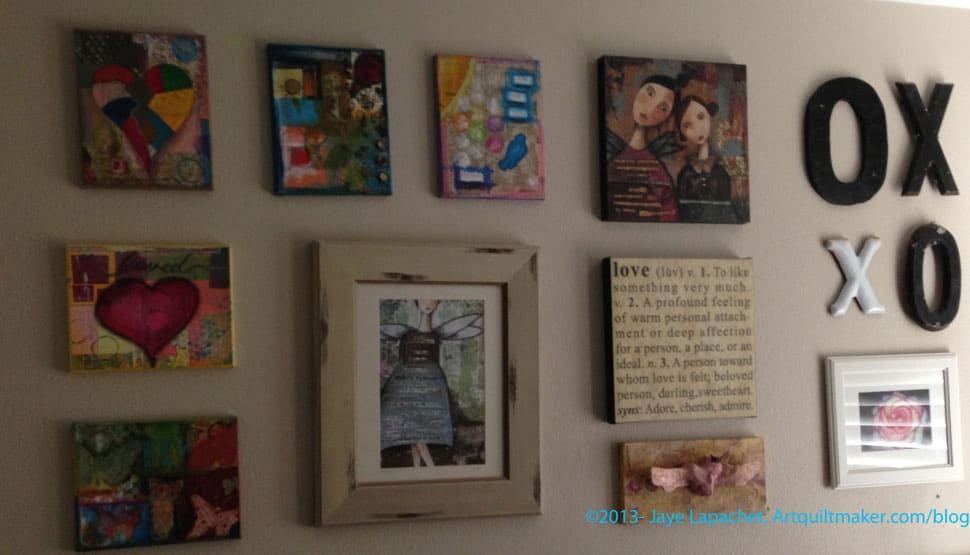
I was so blown away. My sister is unbelievably talented. She paints (By the way, you can get some of her stuff at her Cafe Press A Paper Addict store. Her paintings are really great, but her creativity doesn’t stop there.
Variety of works by Kim Hyer
Her creativity extends to decorating as well. Her whole space has the feeling of light and air. Some of the pieces that were in our childhood home are now in her house. They don’t look heavy and large in her house. They fit in really well.
This is the wall in her bedroom and I just loved the variety of canvases paired with the large sized letters.
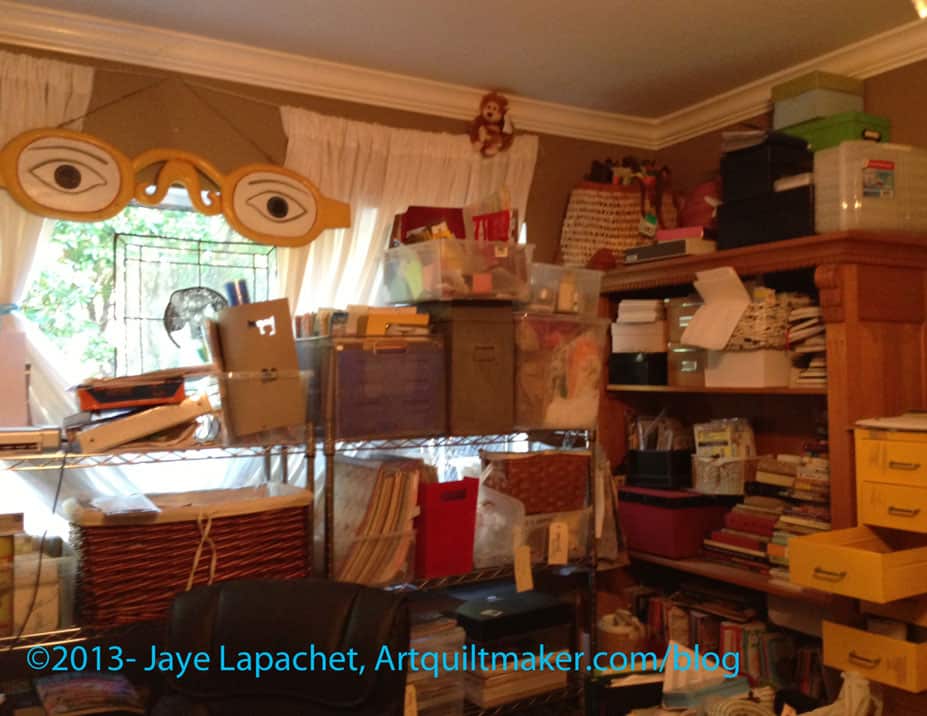
The best part was that she turned the Master bedroom and bath into her studio. What a genius!
Kim Hyer Studio Space
She really did a good job thinking outside of the box. The room was large and she put tables all around the room with her supplies on them.
Kim Hyer Studio Space
She also put decorations and things to inpire her on the walls. Don’t you love the giant glassses?
I really didn’t have much time to talk to her about her studio as we had other family business to discuss.
I really would like to have known more about the space and how she created the organization, but another time.
Wanda, over at the Exuberant Color blog, put up her March finishes at the end of March. One that I loved was her Japanese X quilt. As you remember, I have one quarter of one of those blocks in my A-B-C Challenge quilt. I saw a pillow that Kathleen made (talked more about this back in August 2012) and do want to make a larger piece with this pattern. Wanda’s version is GREAT. It truly has exuberant color.
Take a look at the results of the March-a-Long that Darla, the Scientific Quilter organized. Lots of people participated and I think a lot of people made progress on their projects. Thanks to Darla for spearheading this effort and for thinking up a clever name.
An excellent blog pointed me to this interesting video about Nancy Page, go here: http://vimeo.com/28386634. I promised to keep her secret blog secret, so I can’t tell you where I got the tip, but go look at the video, if you have any interest in 1930s quilts or just not making dinner, not bathing children or not going to the grocery store. You are busy watching a QUILT video for heaven’s sake! 😉
CraftyGardenMom talks about quilt shops in recent blog post and follows up with more information about more quilts in a future podcast (as of this writing).
Supplies, Fabric and Notions
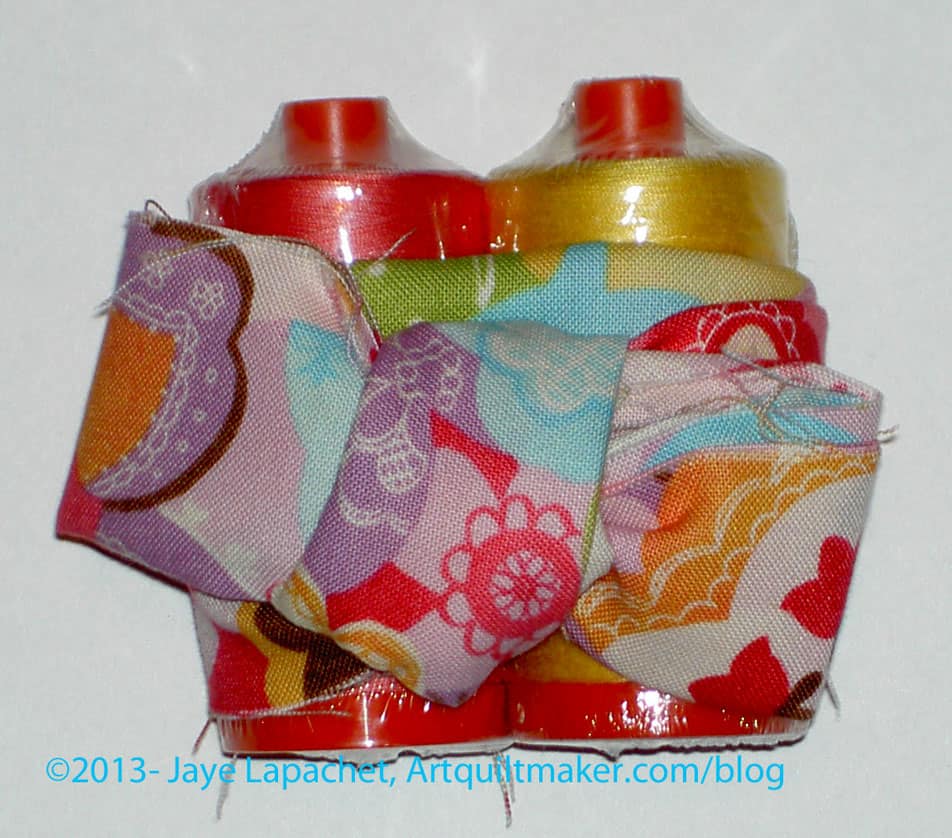
Quilt Bear April Club
The Quilt Bear Aurifil Club sent me this variegated coral and yellow spools this month. I have them both already, but still enjoyed the little treat. Aren’t they nicely tied?
Rhonda brought an iron caddy that she made with the Madrona Road fabrics to the last meeting. I really liked the shape and thought it would be a good purse shape, or purse pattern. I was too lazy to try and find as I probably won’t make it. Today I was noodling around the BAMQG forum and Amanda posted a link to the site where a person (AHEM) could buy the pattern. It is by Kaye Wood and you can see the shape. The examples are not as cute as Rhonda’s caddy.
As you know, I bought some Soft & Stable from ByAnnies.com to make the Petrillo Bag. I was tidying up my workroom the other day and looked at the brochure that came with the Soft & Stable. In it, the writer of the materials details the variety of zippers they company has. When I went to buy the zipper for the Petrillo Bag, I wanted pink to make the inside, but all they had was a boring baby pink, so I ended up with a boring cream color. This brochure shows fabulous colors like turquoise, eggplant and seagrass. Sadly, they didn’t have the right length, but at least I know I can get cool zippers if I need one in a 24″ length. Now I just need to find some cool 9″ zippers. Well, maybe one additional 9″ zipper.
If you read between the lines of my last post, I was a little ahead of those of you, because I had already gathered my supplies back in March and had started to cut. I did want to be a little ahead of you, so I could give you some tips and tricks if I found any.
Nota bene: Kay at Tantalizing Stitches sent the sew-in magnetic snaps out the day after I ordered them.
Fabric
The fun part was choosing fabric. You can see the colorways below, but the particulars about what I chose are:
For the exterior: Heather Bailey’s Pop Daisy from the Pop Garden line (Westminster Fibers #HB02). It is a few years old and had been slated for a back, but called to me when I looked in the Fabric Closet – green, yellow, red print
For the lining: Savon Bouquet by Verna Mosquera for FreeSpirit – pink polka dots
Straps and accents: City Weekend by Oliver & S for Moda (Pattern #11165, I think. It might be L1165)- yellow
I am not sure what possessed me to choose these colors and this combination of the three. It was grey and foggy at my house the day I chose the fabrics, so, perhaps, I was seeking cheerfulness. I also wanted to use some dots for something. I do like a light interior for bags. It is hard to see what is inside if the chosen fabric is too dark.
Organization
Petrillo cut pieces
Week 2 is all about cutting, so I did the cutting. It took me awhile to get the cutting done. I would say it took me about 3-4 hours. I was doing laundry, ate lunch and went to pick up the Young Man in between, so it is hard to say. It did take me a long time as I was trying to be really careful and not miscut. Don’t plan on doing it in a few minutes.
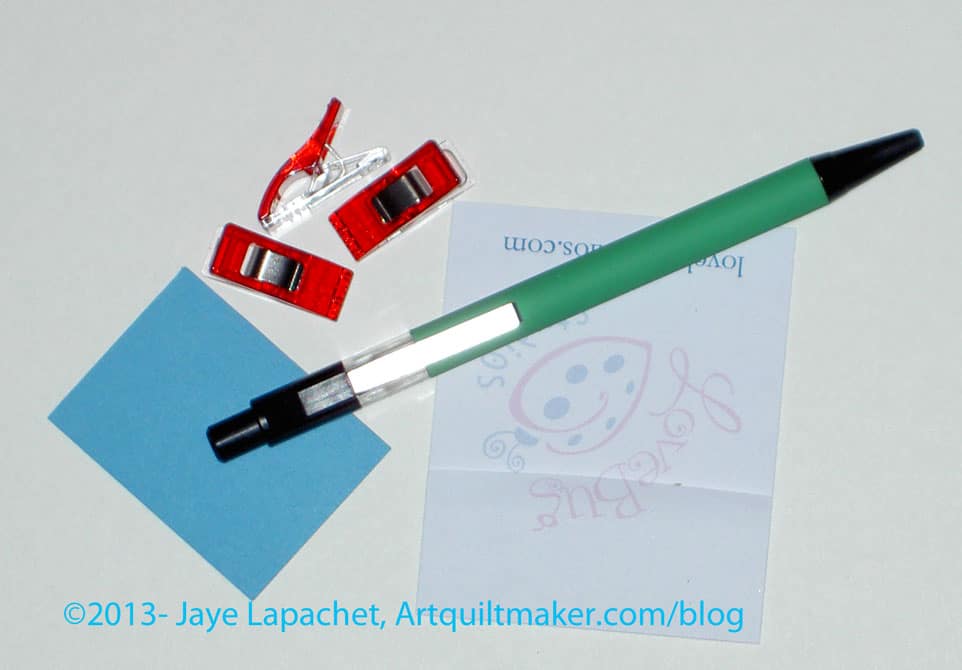
Additional supplies
There are a lot of pieces to cut for this bag, so take the time to be organized. I would add the following to the supply list:
sticky notes, though paper will do as well
Wonderclips
pen
I like to pin a piece of paper or sticky note to each cut pattern piece with the corresponding name from the pattern, e.g. Lining Flap, and the size. Even if it doesn’t help me truly be more organized, I feel more organized.
I also felt like I needed a spreadsheet to track everything that I needed to cut. I think it would look like a main column of what parts needed to be cut and a main row of the materials out of which the parts needed to be cut. I might also put dual columns for each put a tick mark in one noting I needed to cut a part from that materials and the second column for when I had done it. I could have just ticked off the lines on the pattern. I didn’t because I didn’t want to confuse myself for the future use of this pattern.
Cutting
Sara wants you to cut the fabrics in the order listed on the pattern. In some places, she has you cut a smaller piece before a larger piece. I like to cut all the larger pieces first, so I rearranged a few, but really tried to stick to her pattern directions. I would like to see a layout sketch for the pattern pieces on fabric in the directions.
There is enough fabric to cut all the pattern pieces. Sara did a great job estimating yardage.
I did cut one piece wrong early on and had to piece together enough of the lining fabric later for one of the bottom pieces. As I haven’t made this pattern before, I am hoping it will be ok. I am going to rummage through the fabric closet and see if I have another piece of the pink fabric (shown above) and cut a whole piece out of it. You could add an additional quarter of a yard, if you are worried about screwing up the cutting.
I just used my rotary cutter to cut the Soft & Stable where possible. I did notice, during cutting of the Soft & Stable, the sounds of paper being cut. I couldn’t feel any paper on it, especially something like paper covering a fusible. I am not sure what it is made of or if it was a good idea to use a rotary cutter, but I did want to speed the process along as much as I could.
This Petrillo bag by Tutinella is one of my favorites. I love the use of the map fabric, especially how she carefully placed the legend. I think Tutinella (great name, don’t you think? It is fun to say!) is a girl after my own heart. She writes “I’m a typical girl – no matter how many bags I have, I want more!” in her post about this bag. I also love how she calls her husband/significant other Mr. Right. I wish I had thought of that first! This is one of the great bags you can see in the Sew Sweetness Flickr Group, so go and take a look.
You might remember that I saw this bag a few weeks ago and extolled its virtues, most of which had to do with it being a vertical bag that was good sized, but not a Rotator Cuff Injury inducing size. I posted a ‘warning’ in a post on March 18 that we would be starting soon and Pam, of Hip to Be a Square fame, talked about the bag along in her episode 121 podcast. We have finally gotten our acts together, other projects in order and are ready to go. Pam already posted the notice of the ‘Along’ yesterday and I am following along in her footsteps to catch my readers as well.
Here is the schedule that Pam laid out:
Week 1 (week of 4/7/2013) – assemble pattern pieces, supplies, and get fabric cut out.
Week 2 (next week, starting on 4/14) – sew the bag.
I may have to modify it to:
Week 1 (week of 4/7/2013) – assemble pattern pieces, and supplies
Week 2 (week of 4/14/2013) – Cut out the fabric
Week 3 (starting on 4/21) – sew the bag
Week 4 (starting 4/28) – finish up
I know that we all have a different working pace and obligations. Pam works quickly, so don’t be intimidated by her pace. I have to be out of town a couple of times this month and I like to work slowly on bags. Pick (or make up) the schedule that works for you. Pam is in the middle of her Labyrinth quilt, so the only hope I have of finishing the Petrillo bag anywhere close to when Pam does is to get started immediately and sew like a demon. 😉 I would advise you to focus on having fun.
If you need to buy the pattern you can get it instantly (or nearly instantly) as it is a downloadable pattern. It is only $8.
There are some specialty supplies you need to probably get online. Sara suggests different places to get the supplies. I had seen Soft & Stable at the Road to California quilt show I attended last year. I was interested in trying it, but didn’t buy any as I didn’t have a suitable project at the time. Thus, for this project, I ended up buying the Soft and Stable from ByAnnie.com. I am not affilated with that site and don’t think it was the absolute cheapest site, but I was in a rush and wanted to make sure I got the right stuff. Amazon was out at the time. The package was sent out really quickly. I received the Soft & Stable in a few days.
I bought the snaps from AGraffSupplies on Etsy. I am not affiliated with that site. They had the snaps cheaper than Sara’s preferred vendor. I compared and I am pretty sure the snaps were the same. The confusing part about both Etsy shops was that it was hard to tell how many I was buying. I ended up with a big bag of magnetic snaps – many more than I needed. I’ll have to go on a bag making binge to use them all up. Nota bene: These turned out to the wrong ones. You need to buy SEW-IN magnetic snaps. I didn’t even realize such a thing existed.
I bought the Shape Flex, which seems to be muslin with fusible on the back from Beverly’s online.
Pam made the Aeroplane bag pattern and says “Sara’s patterns are awesomely written with clear instructions and lots of pictures”. Pam is making one change to the bag construction; rather than using the Soft & Stable, she will be using “a combination of Pellon Decor Bond (a home dec weight interfacing) along with Pellon Fusible Fleece.” If you want to make changes like that, then Pam is your girl. I wasn’t happy with the floopy results of changing out fusible fleece for two layers of regular batting and some interfacing when I made my last Chubby Charmer, so I am going to stick with the directions on supplies for the most part. It is also a good opportunity for me to try the Soft & Stable as well.
As Pam said, in addition to posting my progress here, I’ll be posting pictures to Sara’s usual Flickr group so she can see our work as well.
Go forth and make a Petrillo bag!
**Thanks to Sara at Sew Sweetness for allowing me to use her image.
Weeks writes “Aim high and ignore what other people are doing. Following the crowd will not teach you as much as figuring out how to combine you interests with your skill set. Where do you want your quilting to take you?”
One of the best things about quiltmaking is figuring out how to get something done. once I had to figure out how to put beads on a quilt — a lot of beads. I also had to figure out the best way *for me* to attach French ribbon to the quilt. I didn’t know of a class; I didn’t think to look on the Internet (though I think I started that quilt before blogs were prevalent. Not sure about that) and I was confident I could figure it out.
I want to make a kind of curved Pickle Dish, Double Wedding Ring looking quilt. I saw a picture of a little part of a quilt in a magazine. I cut it out and will try and make it someday. I won’t buy the the kit because I want to use my own fabric choices. I like making hard blocks and hard quilts. I don’t necessarily want to do it all the time, but I want to make things that others think are impossible.
Image Courtesy of The Modern Quilt Studio, Bill Kerr and Weeks Ringle; *No copyright claimed to Modern Quilt Studio’s chart of points.
Weeks Ringle issued some homework in her lecture at QuiltCon and then posted it to her blog for the rest of us. In a recent Various & Sundry post, I briefly mentioned the QuiltCon homework. I glanced at it first and thought I would pass it on, which I did in that post.
Then I went back and looked at it further and thought it would be a good exercise. I thought I would print and paste the homework into my journal and maybe write something about each section and make myself a better quiltmaker.
I decided that I would do it here for all of you to read. Won’t you join me?
Weeks Ringle’s Quilt Con Homework #1
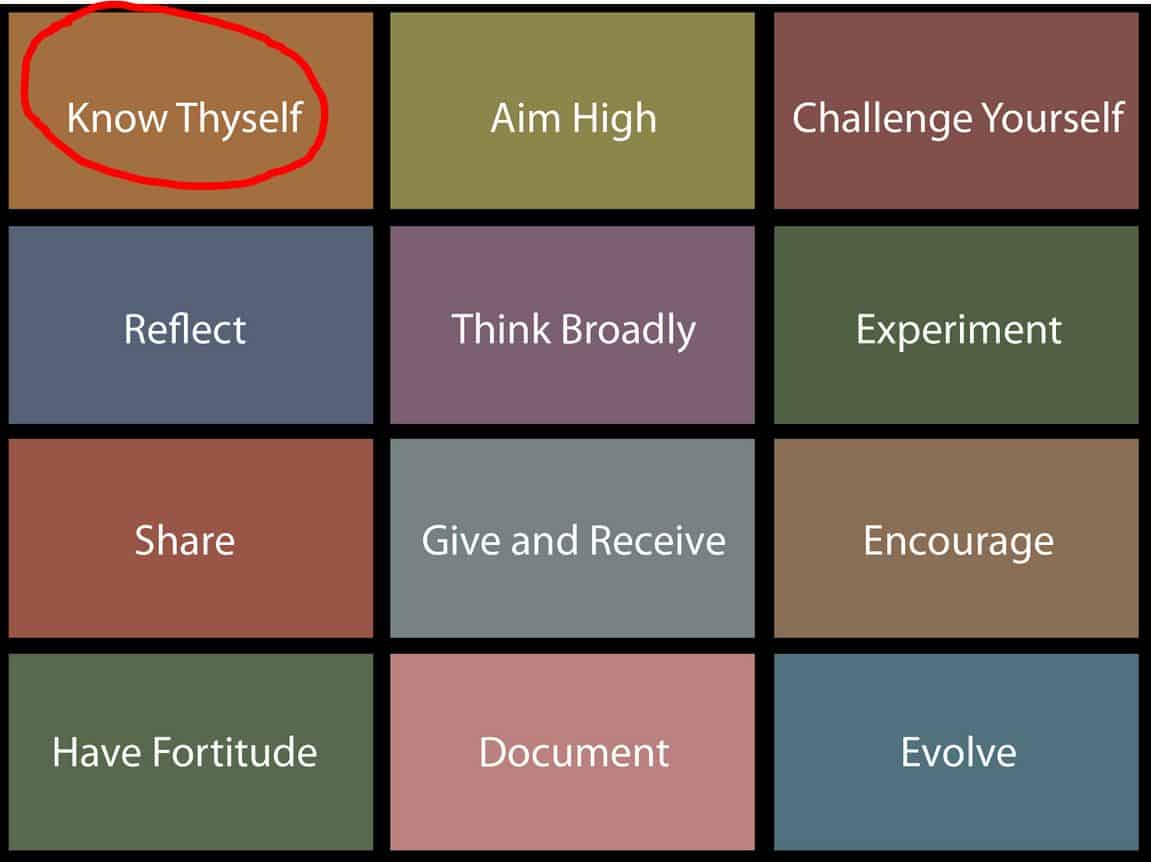
#1 is Know Thyself
Do you know yourself as a quiltmaker?
Weeks writes “Know thyself. Make a list of what you’re good at – use your strengths to develop your own techniques and your own pattern. Now make a list of things that you don’t know how to do – then figure out how to whittle away at this list to expand your skill set”
In order for me to make a list of what I am good at I first need to make a list of what I like and what is important to me about quiltmaking and relate it to myself.
I like bright colors, so I work in bright colors. It might be good for me to try out some beiges, but I don’t like beiges. I have bought some chocolate browns lately, so I am considering that to be expanding my horizons into the realm of depressing colors because there is no way I am making beige quilts.
I want to make cheerful quilts. I want to make quilts that make people sing in happiness. I want to make quilts that make people smile when they look at them. So what if they aren’t dignified?
I don’t believe in the adage “buy ugly fabric, because it makes your pretty fabric look prettier.” To me, ugly fabric is just ugly. I have been down that road and refuse to do it again. Fabric is getting to be too expensive to buy what I don’t like.
I like good technique, because *I* think bad technique can take away from the look of the piece. If that means making my half square triangles 1/8″ larger and trimming, so be it.
I like to make well made pieces, because I don’t want my pieces to fall apart. I take my time in finishing and I rip out seams a lot.
I don’t want to be categorized as making a certain kind of quilt. This is such a hard thing to explain. I want to make the quilts that I want to make in the style and fabrics I want to use. I don’t want to be a traditional quiltmaker, I don’t want to be labeled a modern quiltmaker or an art quiltmaker (ironic, huh?). I want to make the quilts the my mood dictates.
I like to work on projects that I like. This is my hobby/passion/vocation, but I don’t get money from it, so I want to make what I want to make.
I like to reshape ideas into my own. This might mean that I take a block from the 1930s and make it over in Martha Negley and Philip Jacobs prints.
I think knowing quilt history is important. Kind of like that old saying “knowing history prevents us from repeating the past.” I like to remind myself that women came before me and have done all this before. I appreciate different ways of doing things and different tools to get the job done, but I have no illusions that I am doing anything brand spanking new that nobody has done before. I have block books, so I can try and figure out who did it before and where I might find more information on how they did whatever the task is. To recognize those quiltmakers who came before me makes me feel like I am part of something.
I think it is important to step up. People before me shared tips and tricks. I have some knowledge and I might as well share it. The blog makes it easier. That is why I work with Sandy on her podcast, post tutorials, etc.
It is important to support the community. I don’t mind sharing my tutorials. I want everyone to make quilts, buy fabric. Perhaps some of that karma will come back to me someday.
I don’t like it when people steal from my blog. It hurts when I have spent a long time working on a project and taking the time to post.
I find it important to use part of my quiltmaking time for charity. If I can’t make a quilt, I’ll make a quilt top. If I can’t make a top, I’ll make some pillowcases. There is always someone who needs to know that someone else cares. I think charity/donation quilts should be pretty. While I am making them, I can learn something new or try out a new pattern I normally wouldn’t work on.
As a result of the above, here is my to do list. These are not resolutions; these are things I will work on over the next 50 years.
To Do:
Be more patient
Practice curves
Don’t let my fabric sit around.
Get back to that Pineapple quilt.
I am sure I will think of more, but this is a start.
*No copyright claimed to Weeks Ringle’s chart of points.
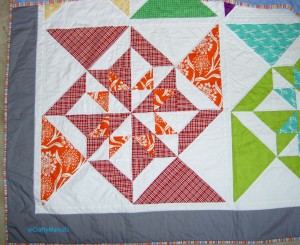
I was somewhat unclear, apparently, about what I was doing with the Star Sampler, the general idea of this piece and how it came about. Apparently, I just started babbling on and posting a zillion blocks. I thought you all just mind-melded with me and knew what was in my head! 😉
So sorry! Thanks to Mrs. K for pointing this out to me.
Really, what happened is life. I went about, in a leisurely manner choosing my fabrics and cooing about them, then all of a sudden it was time to start and things heated up at work and I had several weekends in a row out of town and WHAM! I needed to get myself in gear.
The idea for doing the Star Sampler started when TFQ and I talked about doing a project together. The idea of doing a project together came up, I think, when I saw the announcement for Easy Street, the recent mystery quilt by Bonnie Hunter. Both of us were a little leery of doing a project when we didn’t know what the end result would look like. We both kind of wanted to know what direction we were headed.
Due to the distance and our crazy schedules when we are together, we decided to leverage technology and work on the same project, but in our own spaces, using our own tools and fabrics. We have worked on quilts together in the same physical space and I expect we will again, but this time, we are using the same pattern and doing the work on our own.
We looked at books, Flickr and various blogs to try and find a project we both liked. We used a joint Pinterest board (great tool, BTW) to keep track of our ideas. We eventually chose the Oh My Stars Quilt-a-long. The rest of the universe did it in 2012, but we just found it and since the directions and information are still posted, we are able to do it. We chose it because we both like Sawtooth Stars, there was enough scope for both of us to stretch our creative wings, use fabrics we liked and a wide variety of blocks.
Sheila is the owner of Thought and Found blog and the creator of the Oh My Stars QAL. She seems to post regularly to her blog. I have been hanging out there a bit more, but mostly referring to the layout or the block information. She set up a Flickr group for the QAL and I have been posting photos there even though everyone else is finished. It is a great group for inspiration, even if you are just looking for color combos.
The quilt is made up of of 12″, 8″ and 4″ Sawtooth Stars. Sheila includes patterns and tutorials for each of the Sawtooth Stars needed to complete this quilt. Scroll down on the first page of the QAL information to see the blocks. We are using many of the stars she lists, but we also went through EQ and created a group of stars that we wanted to make so some of the group’s stars will not be in our quilts.
Star Sampler Layout (Thought & Found blog)
One of the attractions for me of this project is the layout of the blocks. This is not your typical straight set. This layout makes the viewer work for their view. It is interesting and the viewer is rewarded for their work in looking at the quilt for longer than the typical 30 seconds.
I am toying with the idea of sewing the 4′ blocks to the larger blocks before I have finished all the blocks. There are a couple of reasons. First, I don’t have enough space to store the thousand (ok, it isn’t a 1,000, but sometimes it feels like a thousand!) blocks I am making and they would be easier to store in larger chunks. Second, I might like to take a chance at some random color choices near each other. Third, I am not sure I can face a bunch of single blocks needing to be sewn together. I need to think about it some more before I decide.
We are keeping ourselves to a strict schedule so this project doesn’t take forever. I have already posted bunches of blocks and I will continue to do so. You can also see my Flickr set for these blocks. TFQ has a Flickr set also. She said I could link to it, so take a look and comment.
I hope this clears up the mystery of this project and I would encourage you to join in.
The last weekend was spent at the CQFA Retreat. We go to a small town on the coast about half an hour away. It is perfect, because I don’t have to drive very far and it is beautiful.
Rhonda and Angela came to the CQFA Retreat for the first time. It was great, because they were able to get to know the other members better. As I mentioned CQFA and the BAMQG were on the same day so it was hard to stay and socialize. It was also great, because we got to spend much more time with Angela and Rhonda.
Rhonda brought her A-B-C Challenge and was able to work on it a little bit. It really looks great and the CQFAers loved her travel concept. I really admire people who bring multiple projects to the Retreat and then work on them. I brought two projects for the first and was able to work on both. One of my issues is I can’t organize myself well enough to make sure that I have all of the parts necessary for multiple projects.
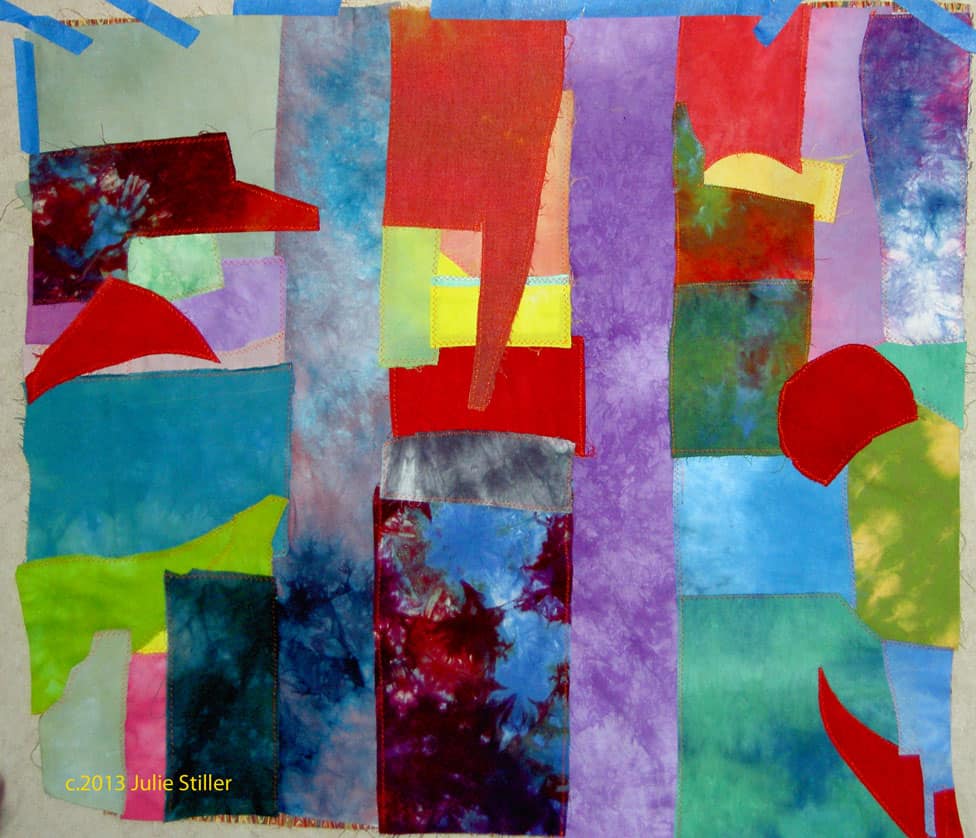
Julie, unlike me, has a wonderful spontaneity about her work. As a result, she worked on several different projects. The three parts of this piece are really a good aspect of this piece. Of course, she used her hand dyes.
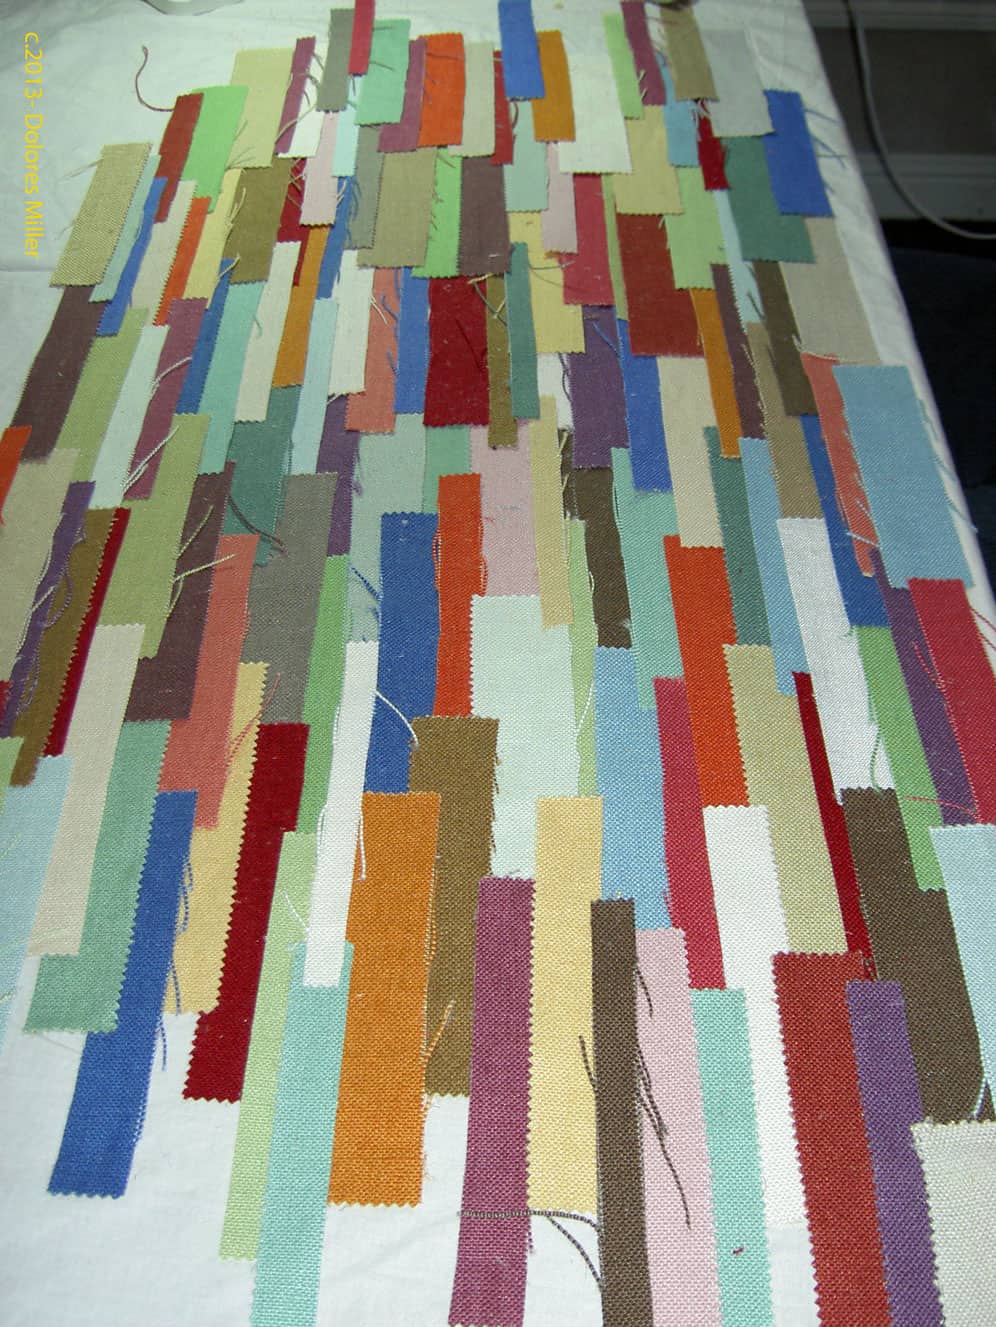
Dolores’ FabMo Piece
Dolores likes to plan her pieces and does gorgeous, thoughtful work. At this Retreat, however, Dolores was sitting next to Julie and, without Dolores realizing it, some of Julie’s spontaneity wore off (infected???) on Dolores. Dolores took a sample book of linen she got from FabMo and cut the pieces apart. She laid them out on a piece of muslin as a backing and glued them down temporarily.
Her intention was to sew them just enough to hold down the strips until she could embellish them.
The interesting thing about this piece is the texture of the fabric and the fraying of the edges. The colors are earthy with a bit of zing (see the purple?)
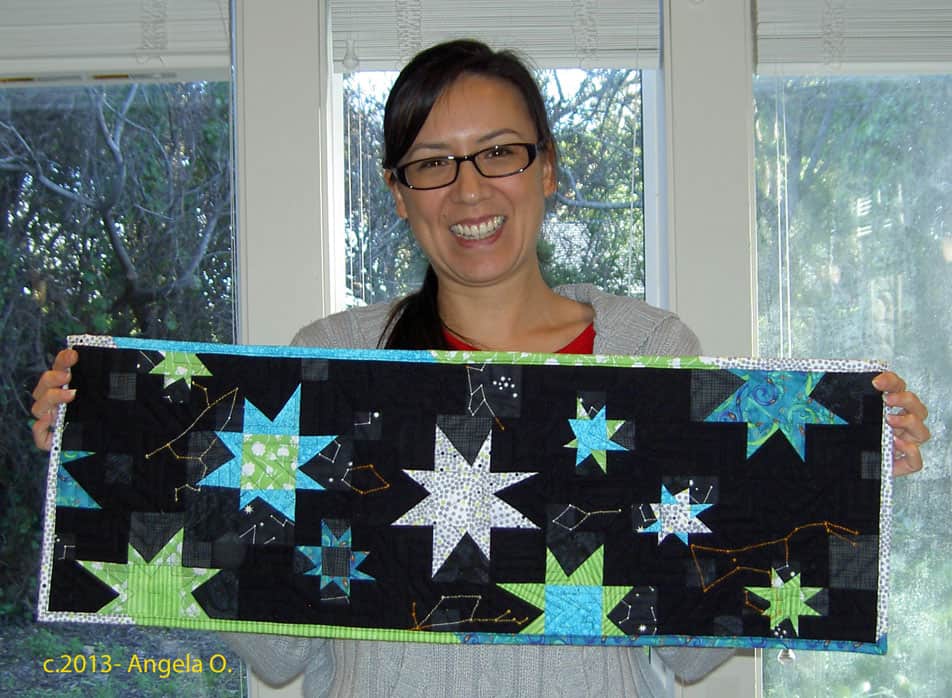
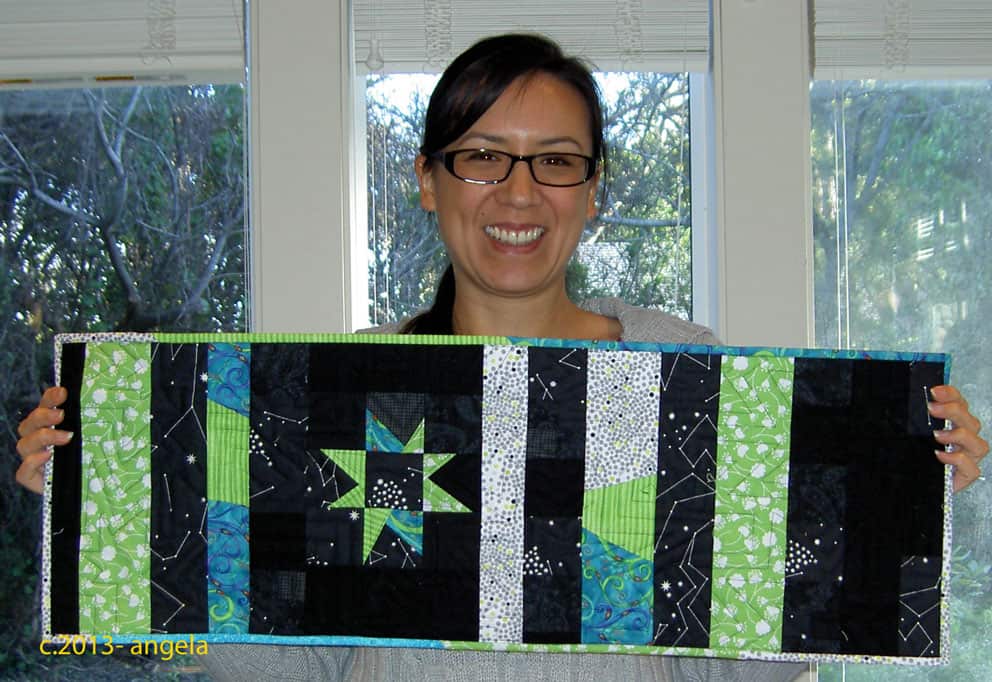
Angela’s Table Runner
Angela came with the SCVQA challenge project. They will be having a show in April and the theme is Oh My Stars!
Along with the show quilts, the organization will have a challenge exhibit and Angela brought her pieces along to work on. She brought fabric and thread and ended up with the piece on the left.
This is a miracle, because there were many, many rules to this challenge. I admire Angela for coming up with this gorgeous piece and still working within the rules of the challenge.
Angela’s Table Runner
She decided to use the Gwen Marston wonky stars technique. I love this piece. I love the colors (of course!!! Look at that turquoise). I love the embroidery of constellations she did as embellishments. I would love to see Angela make a similar piece but larger.
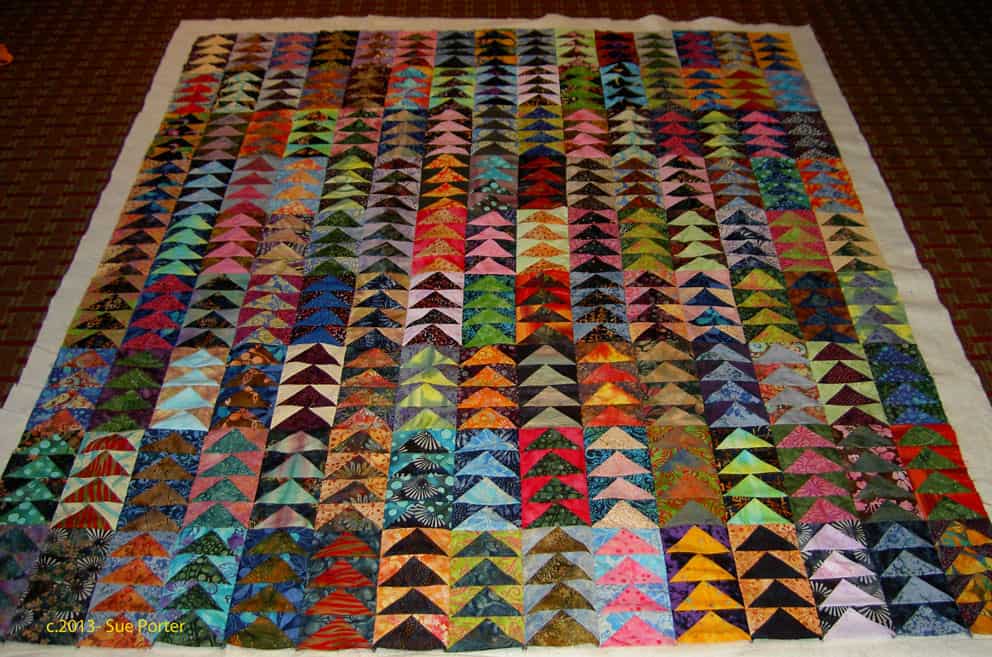
Sue’s Flying Geese
Sue worked, again, with batiks. Her piece from last year was just as gorgeous and when you look at them together, they look like a series.
I also like the juxtaposition of the classic Flying Geese with the contemporary look of the batiks. I know it is weird to say such a thing, but it looks so interesting to me and really stands out to me.
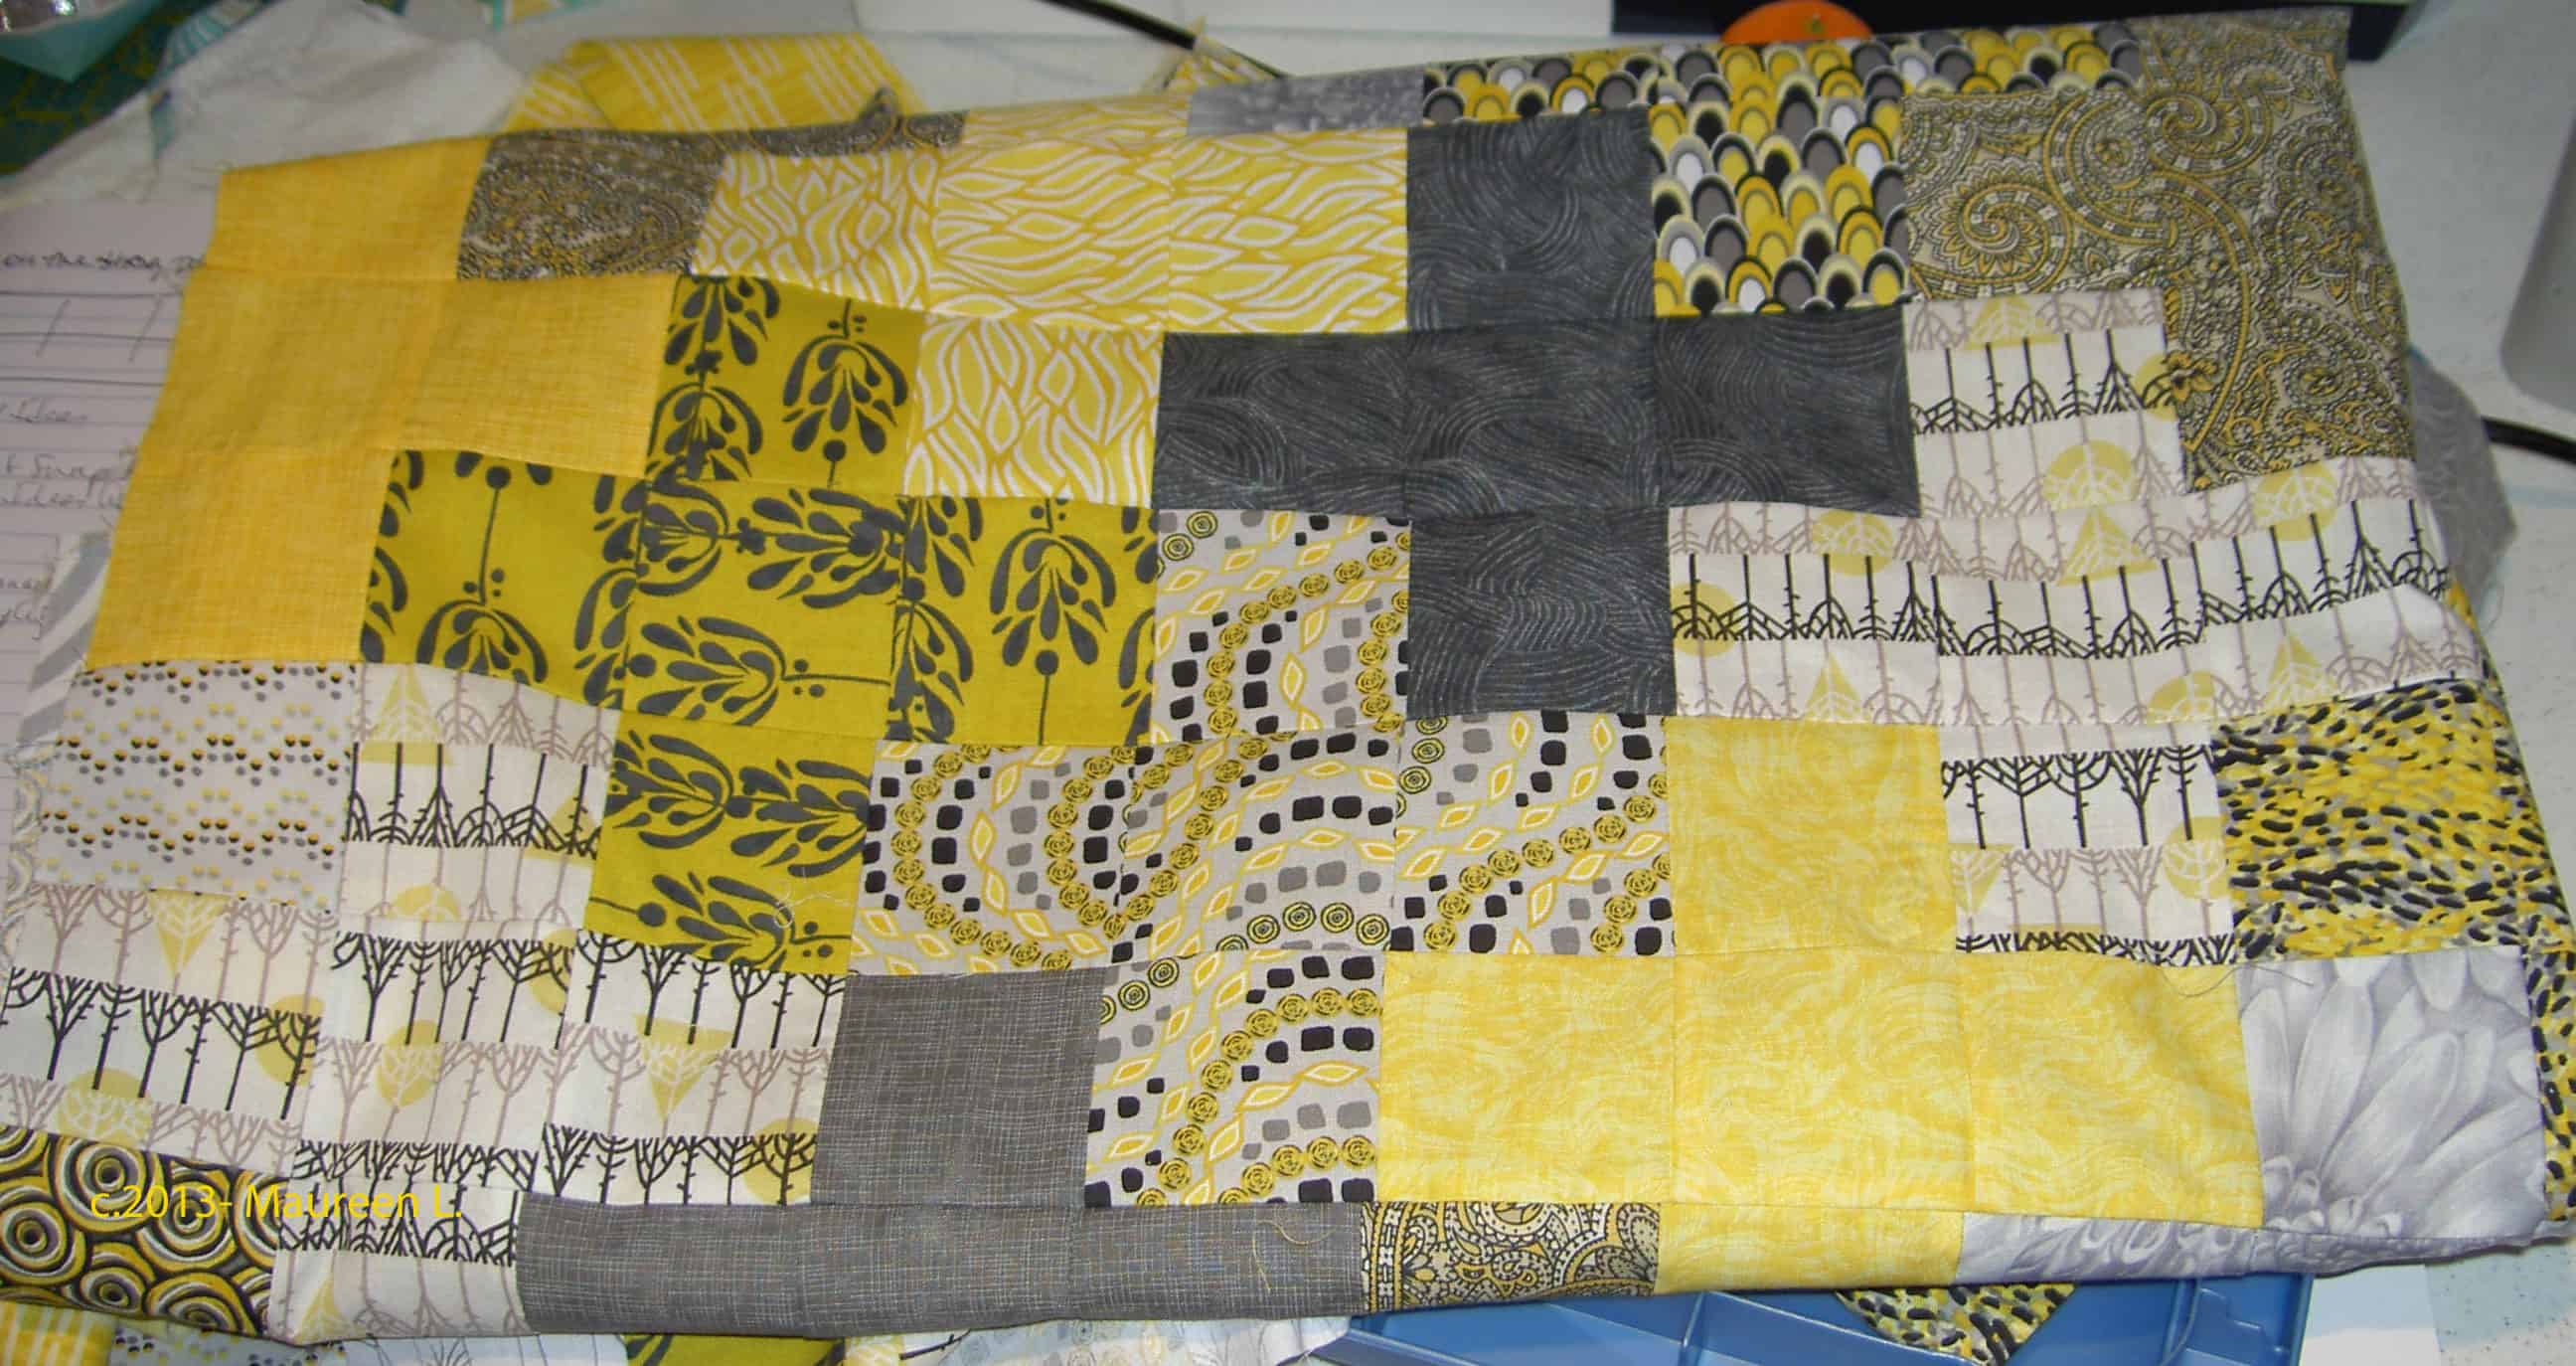
Maureen’s Plus Quilt
Maureen started out with this Plus type quilt.
I love the fabrics that she chose. Maureen had a Jelly Roll or strip set with these colors. Instead of using rectangles as some of the pieces Maureen used all squares. She told me that starting with this piece made for a very calming beginning to the quilt retreat.
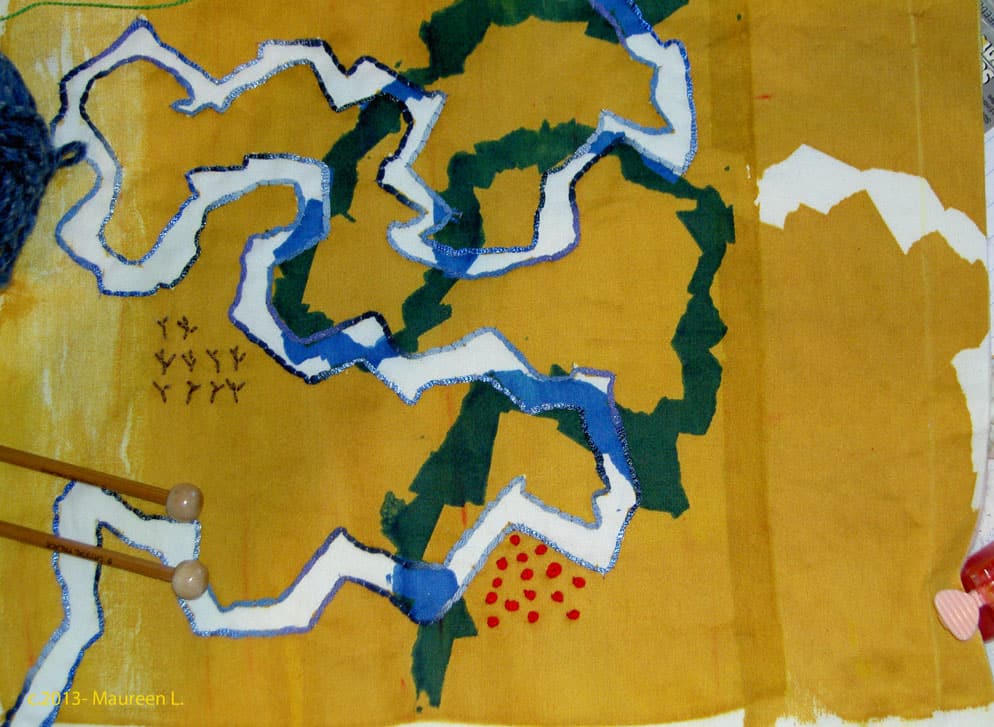
Maureen’s Fabric Map
Maureen started to have some trouble with her sewing machine so she switched to a hand project.
This piece looked like a map. Maureen did a lot of handwork on the piece and was thinking about others. She added French knots and a lot of couching around the edges of the white and blue areas..
DoloresCalm Basting
This is what Calm looks like during basting. Big Deal, right?
Rhonda’s Hand project
Rhonda took a class on different types of handwork. In the picture above we are helping Rhonda chose the colors for the next set of borders.
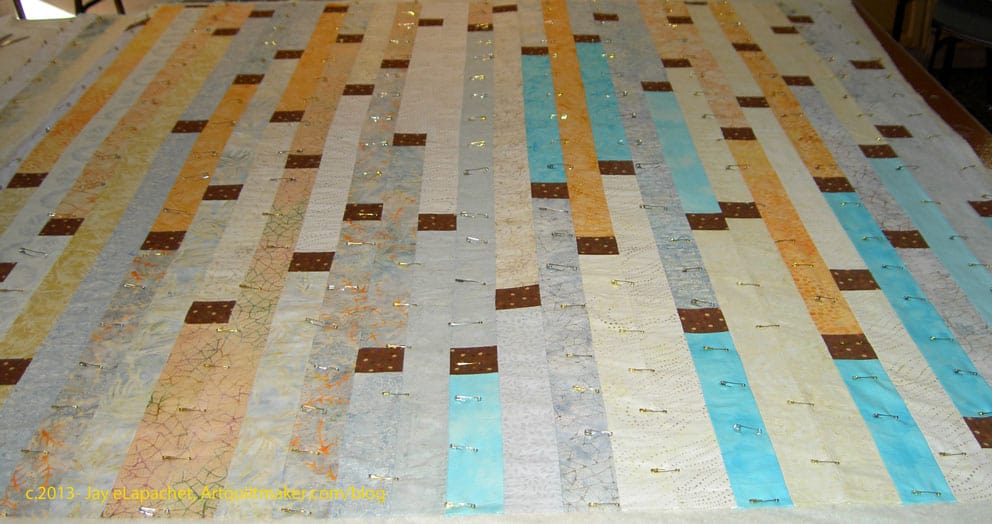
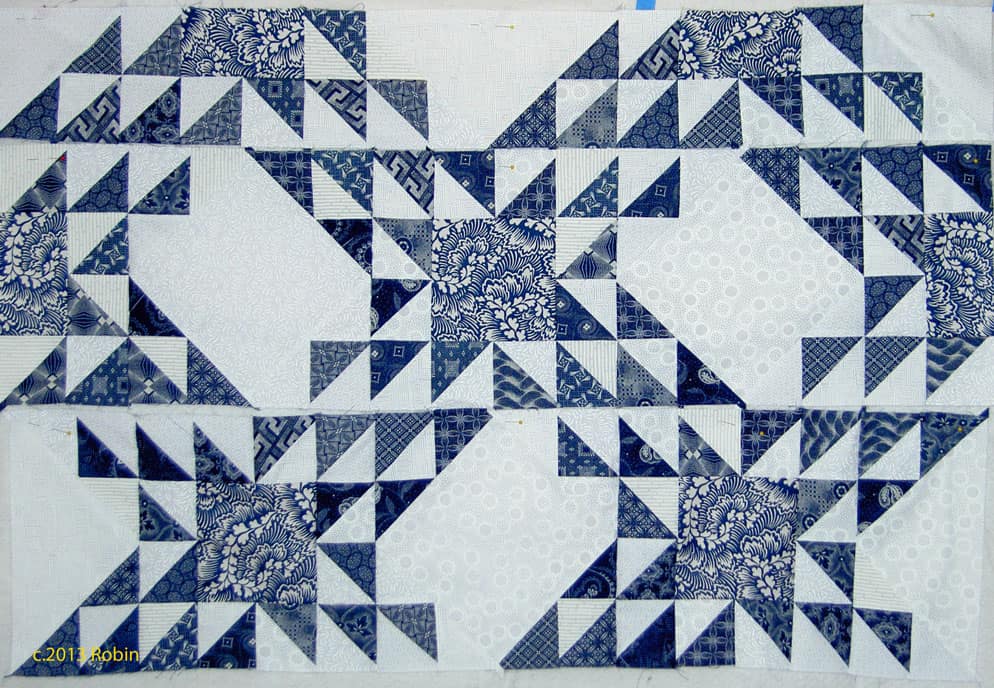
Robin’s Indigo Ocean Waves
Robin had some indigo fabrics from her mother. They were from South Africa. She found some great, and perfect, contemporary companion prints to use with the indigos.
The large squares are the contemporary prints. I also like the way these blocks are a bit off. It gives the piece movement.
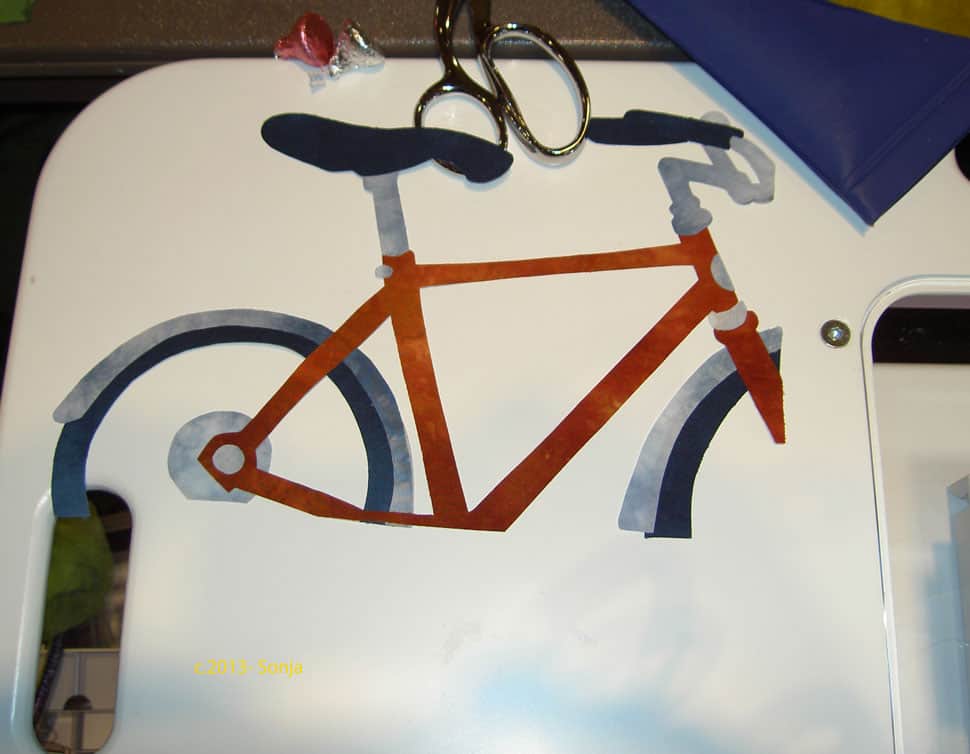
Sonja’s Bicycle
Sonja was working on several pieces as well. She was inspired by some of the activities she does with her family. In addition to the bicycle, she had a scooter as part of the series. It was such great work; I can’t wait to see it finished.
Artquiltmaker.com has a store, as I have mentioned. I updated the store recently with new products, especially products related to technology, such as iPad cases, and phone covers as well as tote bags, jackets, etc. I have used Flowering Snowball images and I hope you like them.**
Yes, shameless self promotion. Now we are done with that for the time being.
Patterns and Techniques
Have you seen Camille Roskelley’s new patterns? She gives us an overview of her 5 new patterns and a sneak peek at her new fabric line. I really like the Fireworks and Round & Round patterns. Fireworks reminds me of Swoon. It is very Swoon-like. She has moved away from the aqua/turquoise I adore into more of a dark blue. I probably won’t buy it, but I am sure it will be a great seller for Moda. She also introduces us to a new Pre-cut called Honeycomb, which is a hexagon charm pack. I will not be buying them. Don’t tempt me, don’t talk to me about them. I have enough hexagon projects. Thank you.
I have mentioned the Star Sampler that was still germinating. TFQ and I spent some time over the weekend of our birthdays (we have birthdays 2 days apart) hashing out the details. I have more fabrics to find, but we know the blocks we are working on first and we both should be well underway by now. One of the things we did over the day we spent together was flying geese. I am a big fan of the ‘squares method” of making Flying Geese. Very Lazy Daisy, who is actually quite the prolific quiltmaker, put up a tutorial for the Flying Geese part of Easy Street that explains this squares method. I am a big fan of Deb Tucker’s Wing Clipper ruler. In the directions that come with the ruler, she gives the measurements for different sizes of Flying Geese, which is helpful. The Wing Clipper is one specialty ruler that actually works works without too many machinations, headstands or special dances. 😉 You can use the squares method to make the Flying Geese without the Deb Tucker ruler. Any ruler will do. I sometimes use my 4.5″x8.5″ Creative Grids ruler (also a fave), if I am in a rush and my Wing Clipper is buried. There are also four methods of making flying geese that you can try out on the Martingale blog.
If you are scared of zippers or just want to learn a new way to put zippers into a small pouch, check out Lovebug Studios’ Fearless Zippered Pouch tutorial. These make great gifts and Pam, of Hip to Be a Square podcast fame mentioned that her guild is making them for the Wellspring House in her town. Her comment made me think they would be nice gifts for a domestic violence shelter.
Around and About the Web
I noticed a Skills builder Block of the Month and it is free. Do you need to build some skills? check out the list of block techniques that will be covered. Have fun, if nothing else.
If you haven’t banished the voice in your head that tells you are not good enough, smart enough, etc. It is time to do so. Read Robin’s take on the subject. Remember: you are good enough, you can make hard quilts, you are smart enough.
I get the City Quilter’s newsletter. I have no idea why as I have no intention of going to NYC anytime soon. Cathy, the author/owner, sent along a notice about a Wall Street Journal article on quiltmaking. “QUILT COLLECTOR FEATURED IN THE WALL ST JOURNAL In case you missed this recent Wall Street Journal article, you will enjoy reading about art quilt collector Jack Walsh, and his collection (almost 100!), many of which were commissions. We got to know Jack last September when he was honored at the European Patchwork event in Alsace. Here is a photo gallery drawn from his holdings”
I probably have blocks of the month on my mind, because Ruth was talking with me about the BAMQG BOM program she is designing. While perusing the City Quilter newsletter, I saw this new Amish BOM as well and love it. I can’t do it, because I have enough on my plate AND I don’t like the term/acronym BOM.
Completely switching gears, I just had to tell you that I LOVE the fabric the Pile of Fabric blog shows in her new sampler post. If you didn’t get me a birthday gift, yards of these would be fine. 😉
Jennifer Pagnatelli has a new line of fabric coming out in May. It is called Circa (looks nothing like Circa 1934 from Cosmo Cricket) and has a similar feel to the Flower Sugar line I am using for the hexagon quilt with a little of my Grama’s living room curtains thrown in.
I used to make ornaments every year for family gifts, but everyone has enough ornaments now and I am lazy. Lori has some wonderful photos of felt ornaments on her blog, which make me want to make some ornaments again. I really like the way she used the buttons, rick rack and ribbon to embellish. It might be a fun project to do with friends and then donate to a women’s shelter or some other worthy cause.
Jane Davila has a relatively new blog post up with some ideas for starting the year off right with your art AND a free printable calendar.
Doing Good
Quilter’s Corner asked for 600 pillowcases to provide pillowcases for the children at Sandy Hook. I wrote about it in a previous post. The shop received over 7,000 pillowcases! Isn’t that great? I am so pleased that the drive was successful.
Design Series
My most recent segment with Sandy was about Negative Space, which isn’t, if you listened to the episode, really a principle or element. I found a great quilt by a friend, Maureen that has some interesting negative space.
Kaffe Fassett – A Life in Colour will be an exhibition at the Fashion and Textile Museum and will run from 22 March to 29 June, 2013. You can find more information out on The Quilt Show Blog.
Publicity
Yes, I am getting some publicity, which is nice as long papparazzi don’t start following me around. I am not sure I would be very patient with them, which would lead to stories in Star Magazine and Gawker saying how mean I was. Somehow The Carolina Cotton Company found the Food Quilt on my blog and Lisa Ann Toney of Carolina Cotton Company left this comment: “You just made Carolina Cotton Company’s FAVORITE QUILT OF THE DAY! DElicious! Creative! Love the black/white/red accents! Perfect for movies/games/picnic! AND… “Supper” cool! We liked you on facebook as well, of course!
http://www.facebook.com/CarolinaCottonCompany”
I was shocked and thrilled to be notified that the Renewed Jelly Roll Race was one of the most loved projects of 2012 on Threadbias! I was so shocked, because I have put up about 3 projects there and almost no information. I just haven’t invested the time, especially after SeamedUp and Tomspoolery both imploded. If you are not a member, I guess I should say “sign up!” Thanks, Threadbias!
NQR
This article about ideas completely blows my mind. Two quotes to keep you up at night:
“…your use of the alphabet does not inhibit mine.”
“If I give you the tie off my shirt, now you have it and I don’t; but when I give you an idea, now we both have it, can expand upon it, test it, and make it more valuable. Ideas and knowledge are subject to increasing, rather than diminishing, returns.”
Go forth and make stuff!
**If you buy stuff, it helps get the word out that AQ is a cool place to be and adds to the Young Man’s college fund. Truly. I don’t use the money to buy more fabric. JL
You might remember that I made a pincushion for a Modern Quilt Guild swap (and sent me into an orgy of pincushion making), which was organized by the Kansas Modern Quilt Guild. You can see the pincushions that were sent in to swap on Flickr. Not all of them are up there yet, so go back and look later.
The photo, left, was posted to the BAMQG Ning site (members only) by Adrianne. I tried to find the original source, but couldn’t, so I may swap it out, if I find it later. My pincushion is in the upper left hand corner a tiny bit in from the exact left.
I love the creativity, but I have to say that I am pretty pleased with the way my pincushion turned out. It looks like a pincushion and is cute, but not cutesy, if you know what I mean.
I haven’t received a pincushion yet, but others in the guild have so I am waiting with bated breath.
I had the pleasure of being involved in a very sweet gesture recently.
You may know that the History Quilter lost her dad earlier this year. I am fortunate enough to still have my parents, so I can’t imagine her pain. Being a public figure like History Quilter generates a lot of empathy. That empathy generated a quilt for her from Melissa of Sew Bittersweet Designs, Shanna of Fiber of All Sorts and Jenna of Sew Happy Geek. Susan met all of these wonderful women via Twitter and her podcast.
Lower Left CornerUpper RightNavy Star VariationLower Right
In the strange quirks of the Internet world meeting the Real World, I met Melissa at a BAMQG meeting. She had the quilt and I offered to send it to Susan for her. Susan received it and loved it. How could she not?
It is such a sweet gesture and I am pleased to be a part of it.
I finished the borders for this Original Bullseye over last weekend (12/1). I thought for sure I would be able to finish the back as well, but the headache hangover kept me sewing at a snail’s pace. Also, I had to clear off the cutting table before I could sew.
For some reason, finishing this particular top makes me really feel like I have made true progress on the 26 Projects list.
This top has been hanging around so long (12 years!) that I know I am acting like I finished the whole quilt. I wonder how I will feel then!
Original Bullseye back
I got a bug in my ear to clear out some projects on Friday and made the back for this piece. I am pleased with it and think it matches. It isn’t really very special, but is interesting. As an added bonus my white on black bin has some space in it!
I have to say that I am resolved not to let projects languish for years. In the recent past, I think I have been plowing through projects once they get past the hunting and gathering stage and I hope to continue that practice.
Fortunately, I have friends with better memories than me. Julie wrote a nice overview of our Bullseye project and reminded me that I started this quilt in 2001. Last post on this subject.
TFQ and I decided we wanted to work on a project together. We will each do our own quilts, but we will do the same pattern.
We thought about Bonnie Hunter’s mystery challenge Easy Street, but decided to do our own project. We will be working on a star sampler along the lines of Oh My Stars. The whole idea is to be able to chat about some project together.
One fun thing we found is that boards on Pinterest can be shared! Who knew? That was fun. I probably could have done that forever, but TFQ moved me along.
Star Sampler Fabrics -first batch
At the moment, we are both gathering fabrics. I think TFQ is farther ahead than I am on that front, but I am excited about the fabrics I have picked so far.
Of course, I have a Philip Jacobs fabric. This fabric pulled my color scheme together, sort of. I saw the non-PJ fabrics laying on top of the PJ fabrics and thought they would work together. The solids are from the Chicopee line and the dots are just….dots.
I need more fabrics; I want the piece to be scrappy, but a controlled kind of scrappy. I just haven’t taken the time to look yet. I think I need another purple or violet as well. I know I want a lot more fabrics.
One big problem, for me, is the background. We need about 4.5 yards for the background and I don’t have that much of any fabric. I am not sure what look I want for the background. I thought about one of the dots that I have with a white background. Some of the fabrics I have may be a possibility, but I have to look–I have to make visual decisions visually.


")