Quilt Class: Cathedral Window Block

Finished Cathedral Window block

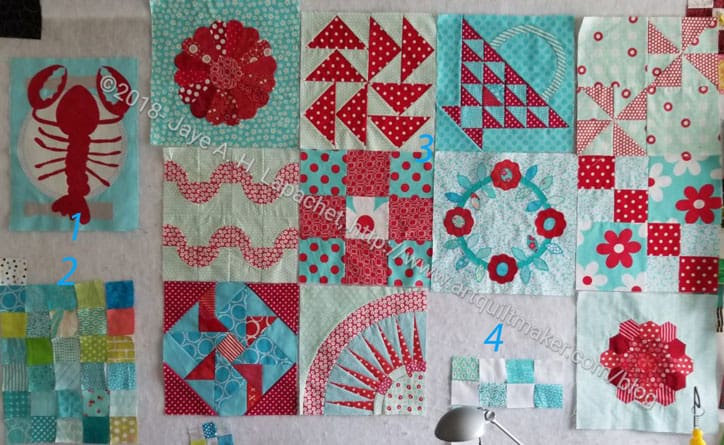
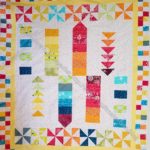
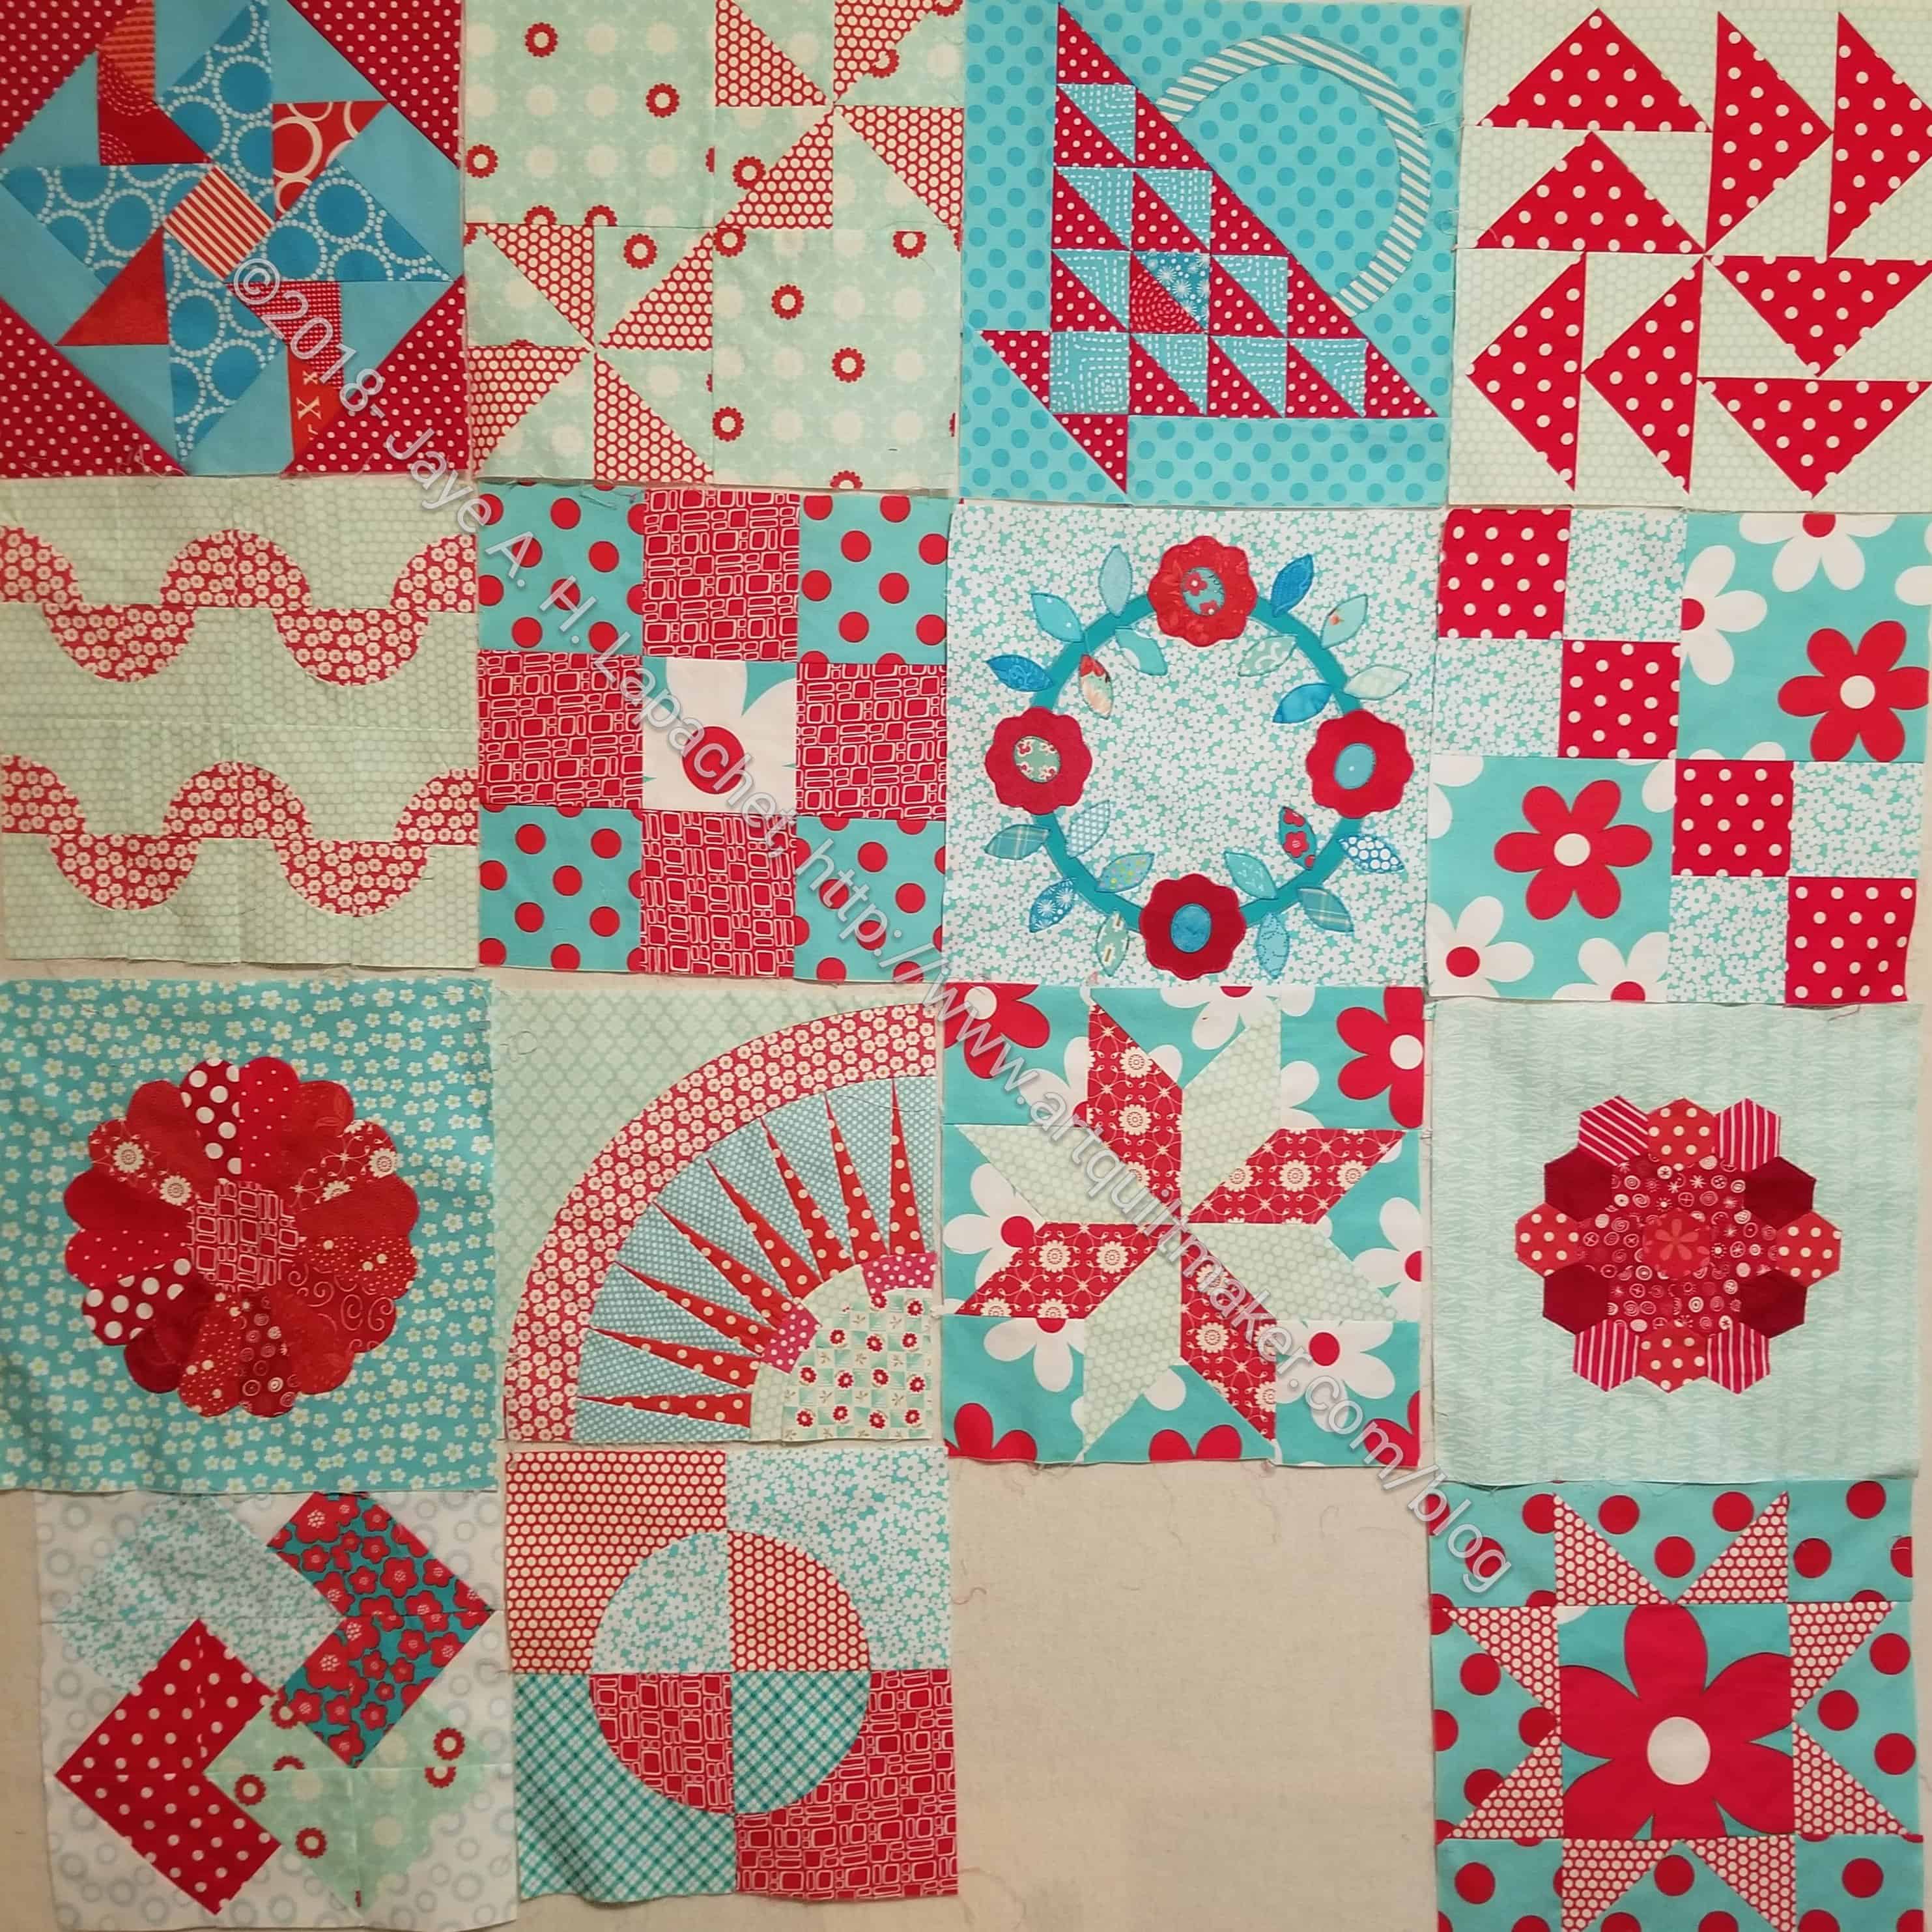
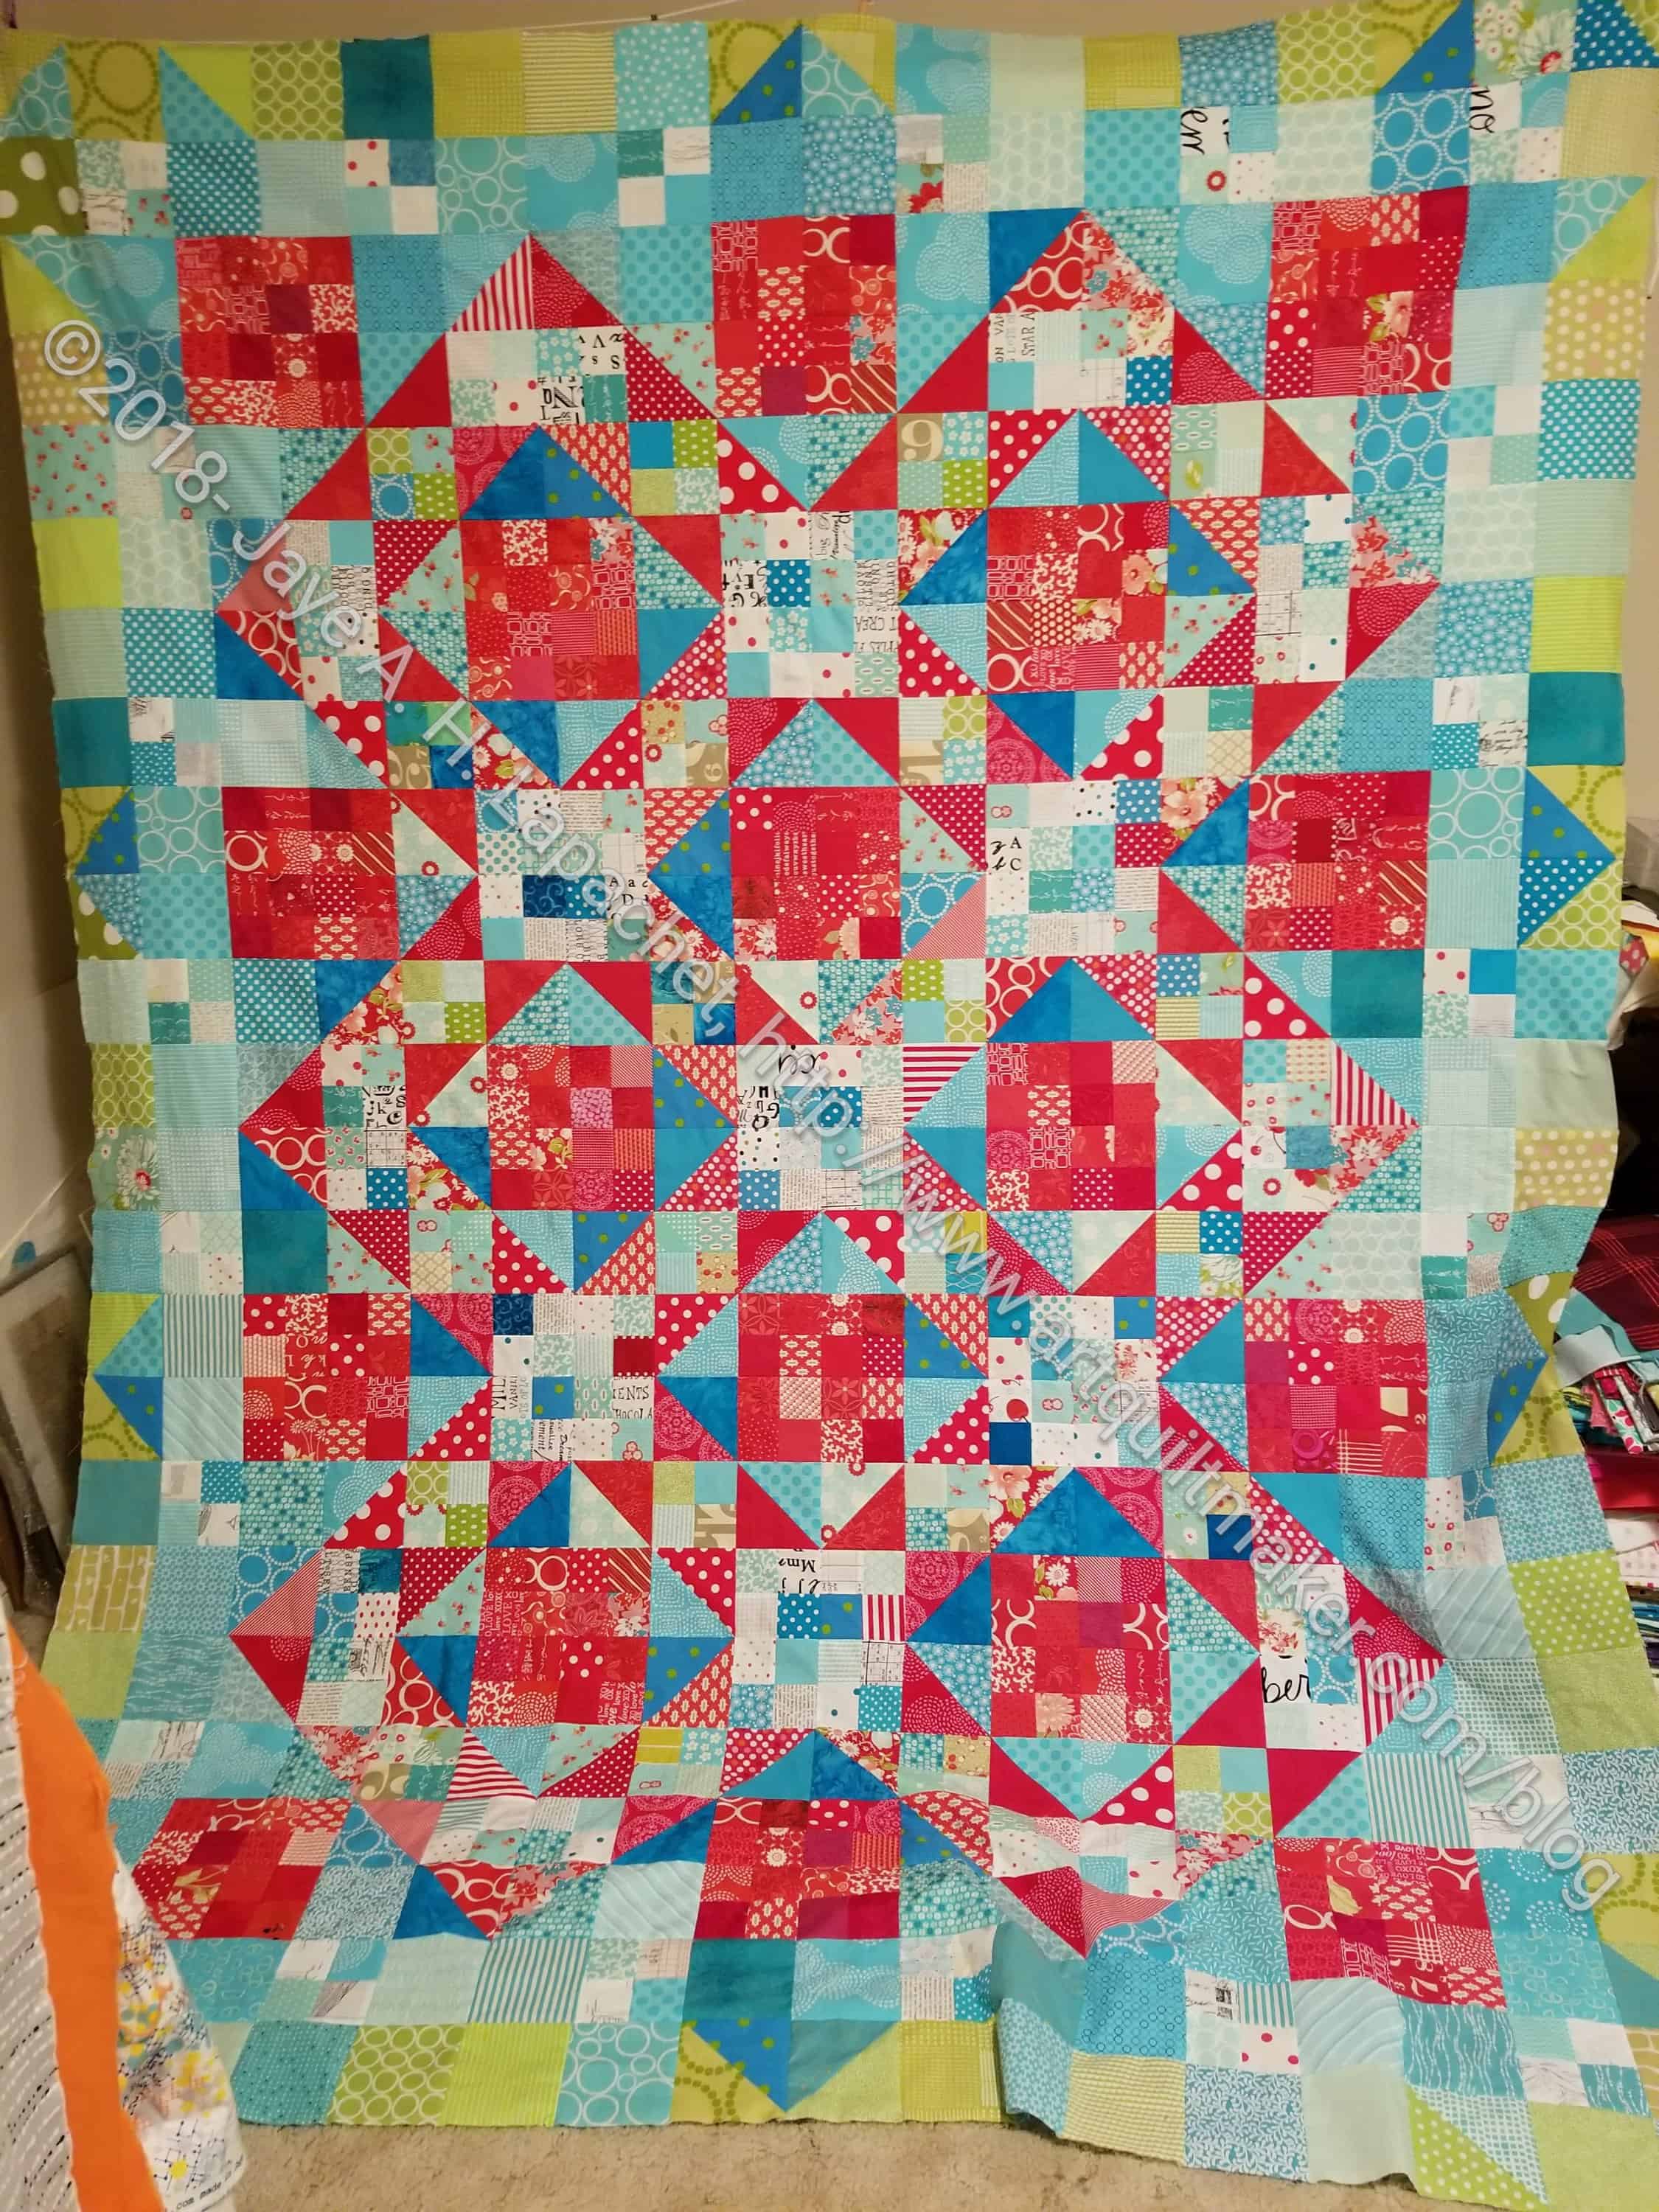
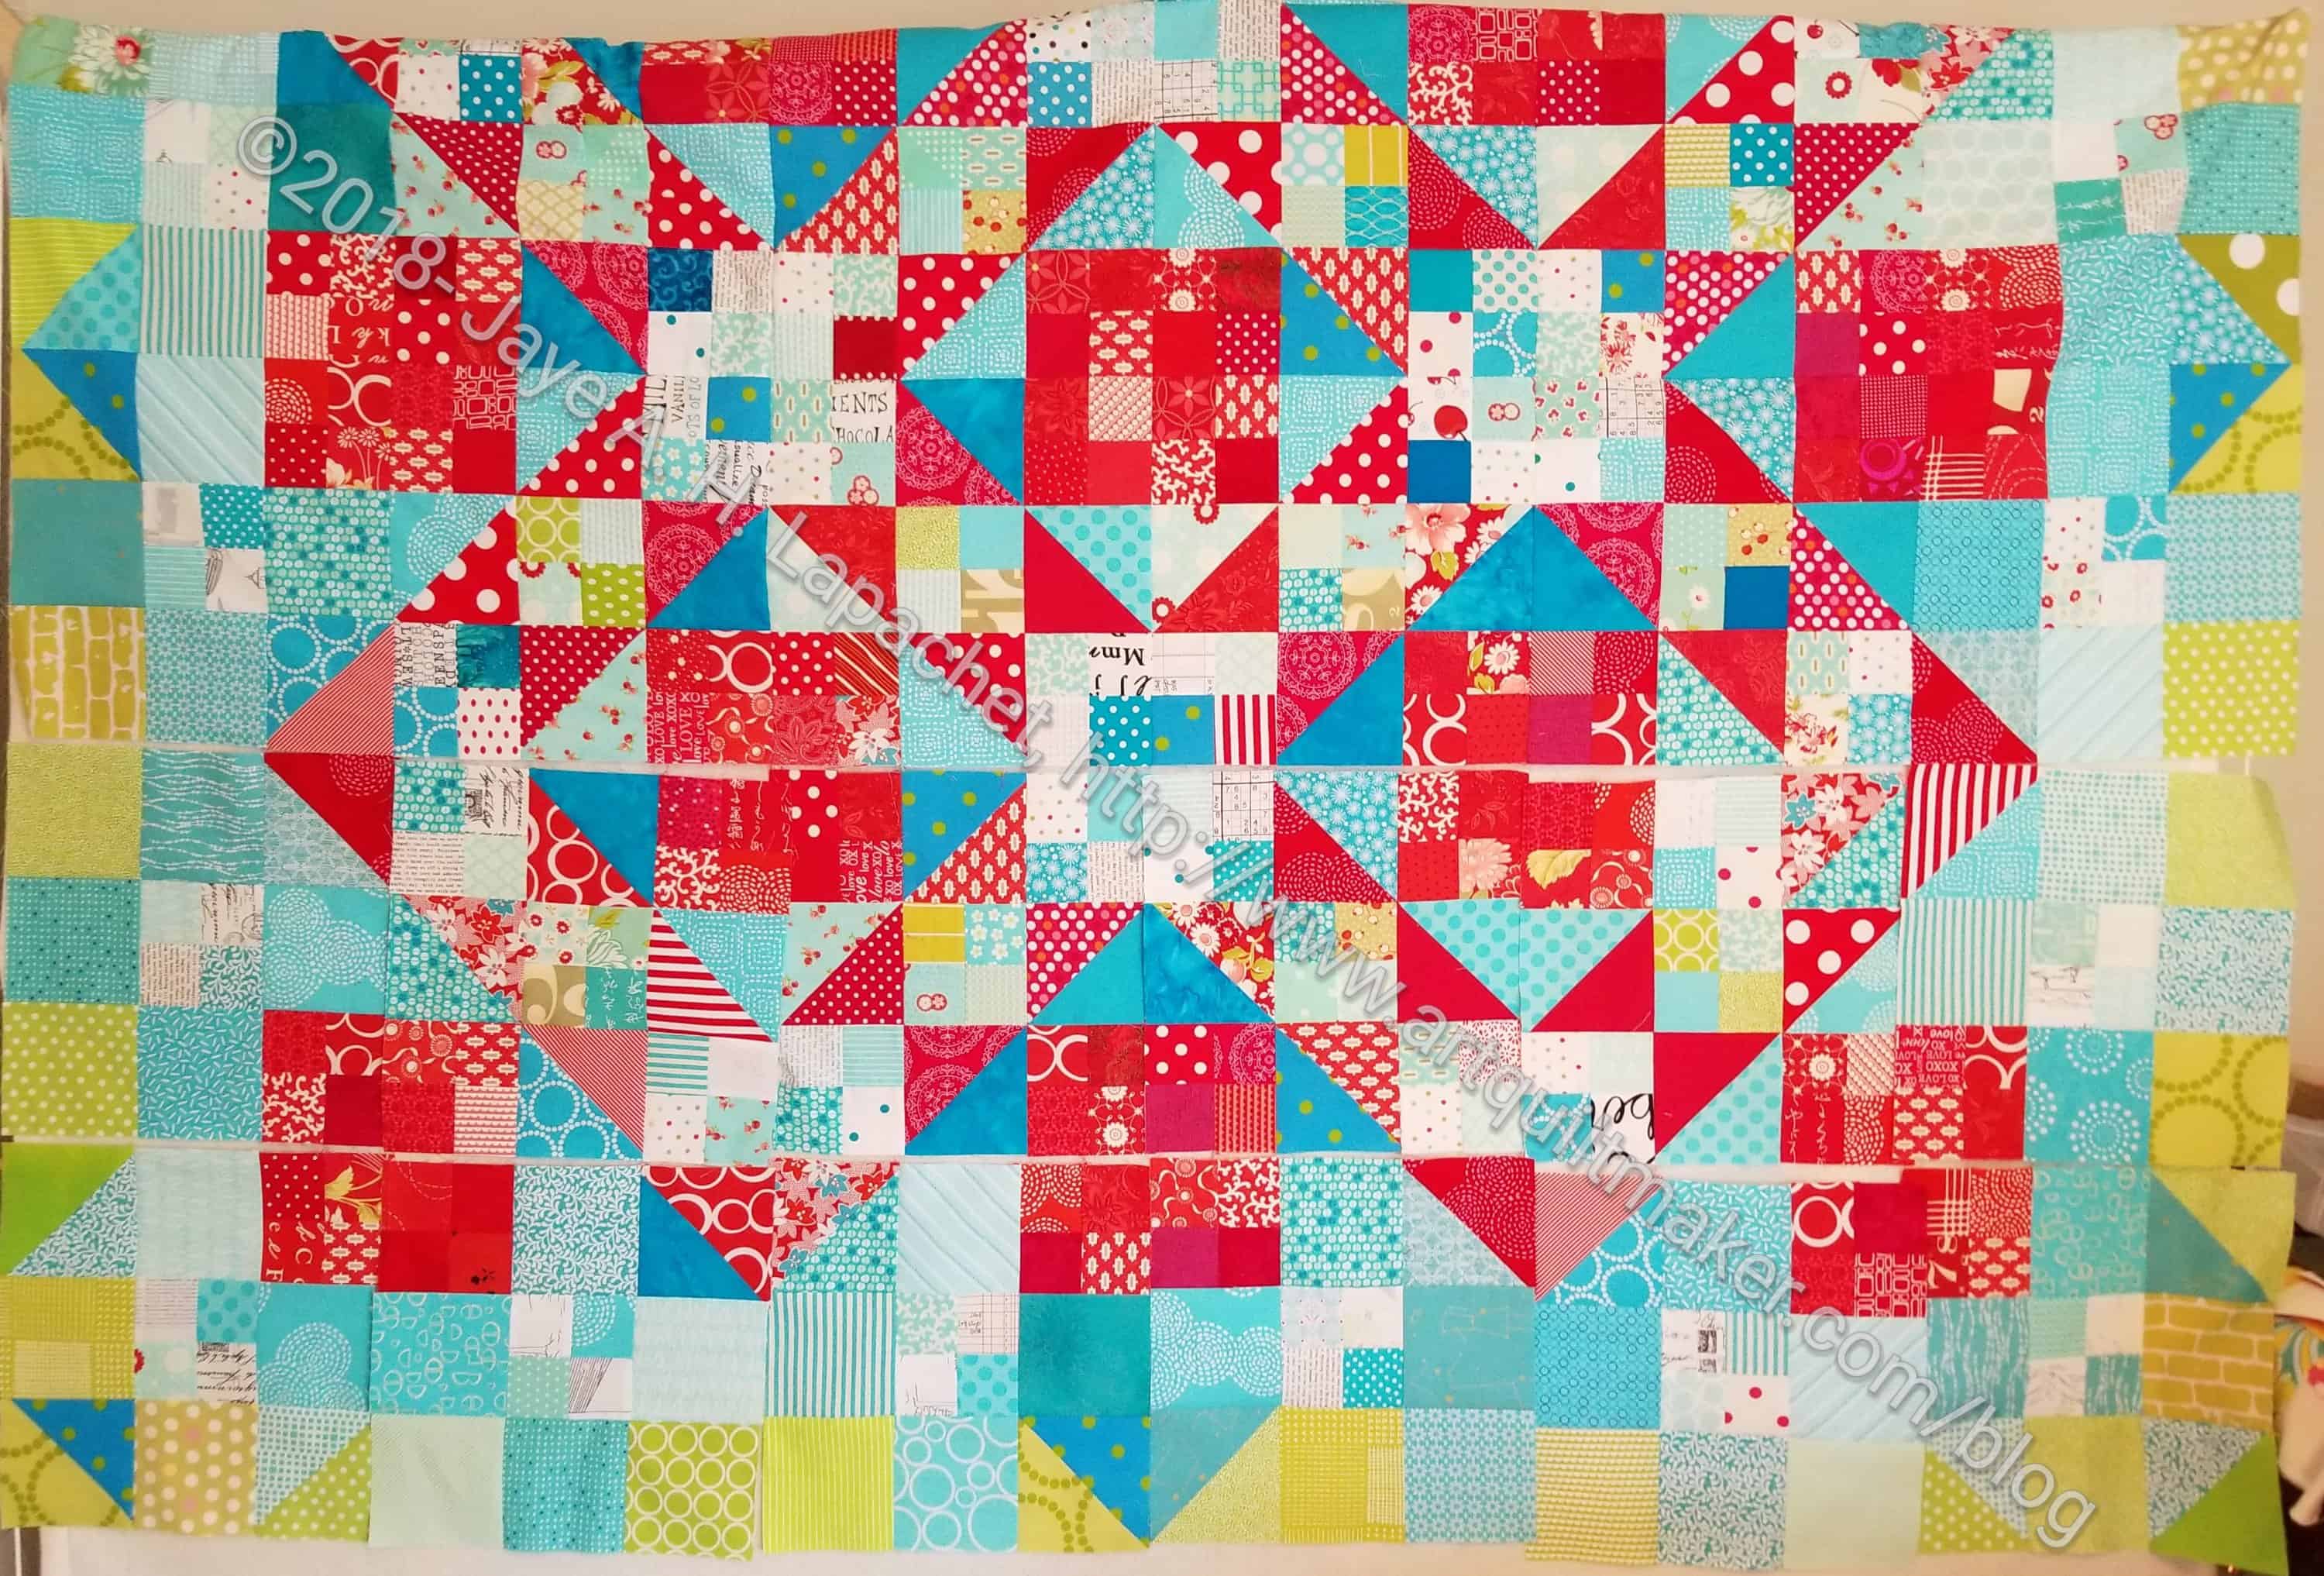
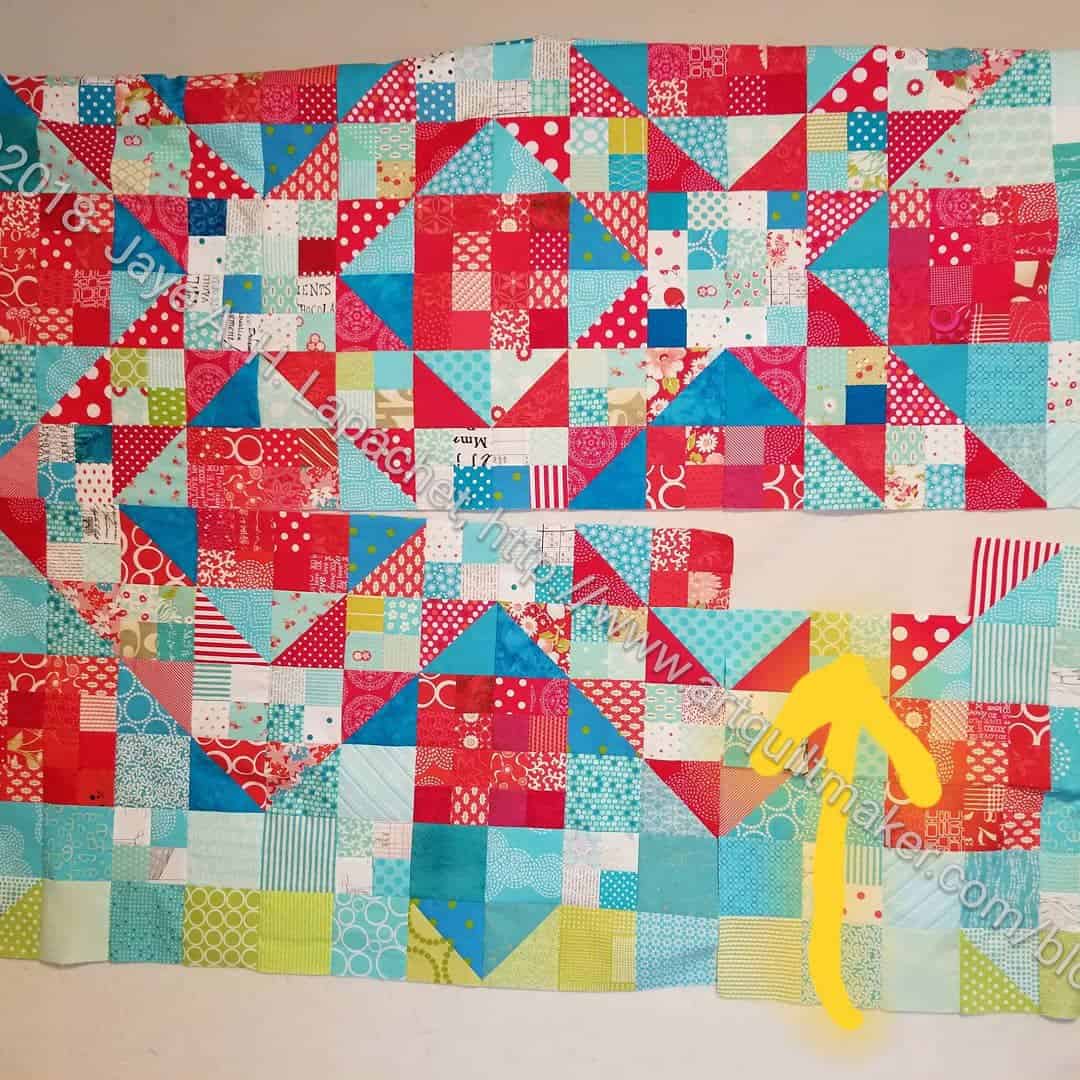
I decided to make this block after finding I needed one more block to complete my Aqua-Red Sampler. I have never made one of these, so I thought “what the heck?”. I had seen some directions for it and it caught my attention. As mentioned, I had to cobble together instructions from at least three different tutorials to be able to make the block. Below is my version. The tutorials I referenced are noted below.

Finished Block Size: 12 inches (12.5 unfinished)

Supplies

  • Fabric
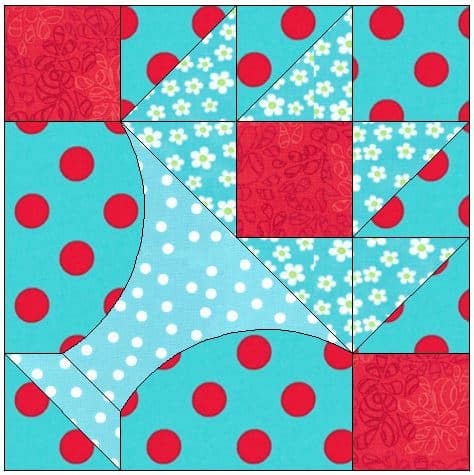
    • In this tutorial, the background is turquoise and the foreground is red.
  • Thread – you might want to use your regular piecing thread for the first part of the directions, then switch to a thread that matches the background fabric for sewing the curves shut
  • Seam ripper (I use a Clover ergonomic seam ripper)
  • Sewing machine
  • 1/4 inch foot
  • applique’ foot (foot with a center mark)
  • square ruler at least 12.5 inches square
  • long ruler at least 12 inches long (I use a 3.5 x 12.5 Creative Grids)
  • snips or scissors
  • Pins
  • Iron
  • Ironing surface
  • Tool to poke out corners
  • A pen or pencil you can use to draw on fabric (I like Sewline pencils)
  • Stiletto or dental pick type instrument (something thin and pointy)
  • hand sewing needle

Instructions for making a 12″ (finished) Cathedral Windows block

1. Cut 4 squares of background fabric 12.5 inches by 12.5 inches

4- 4 x 4 inch foreground squares

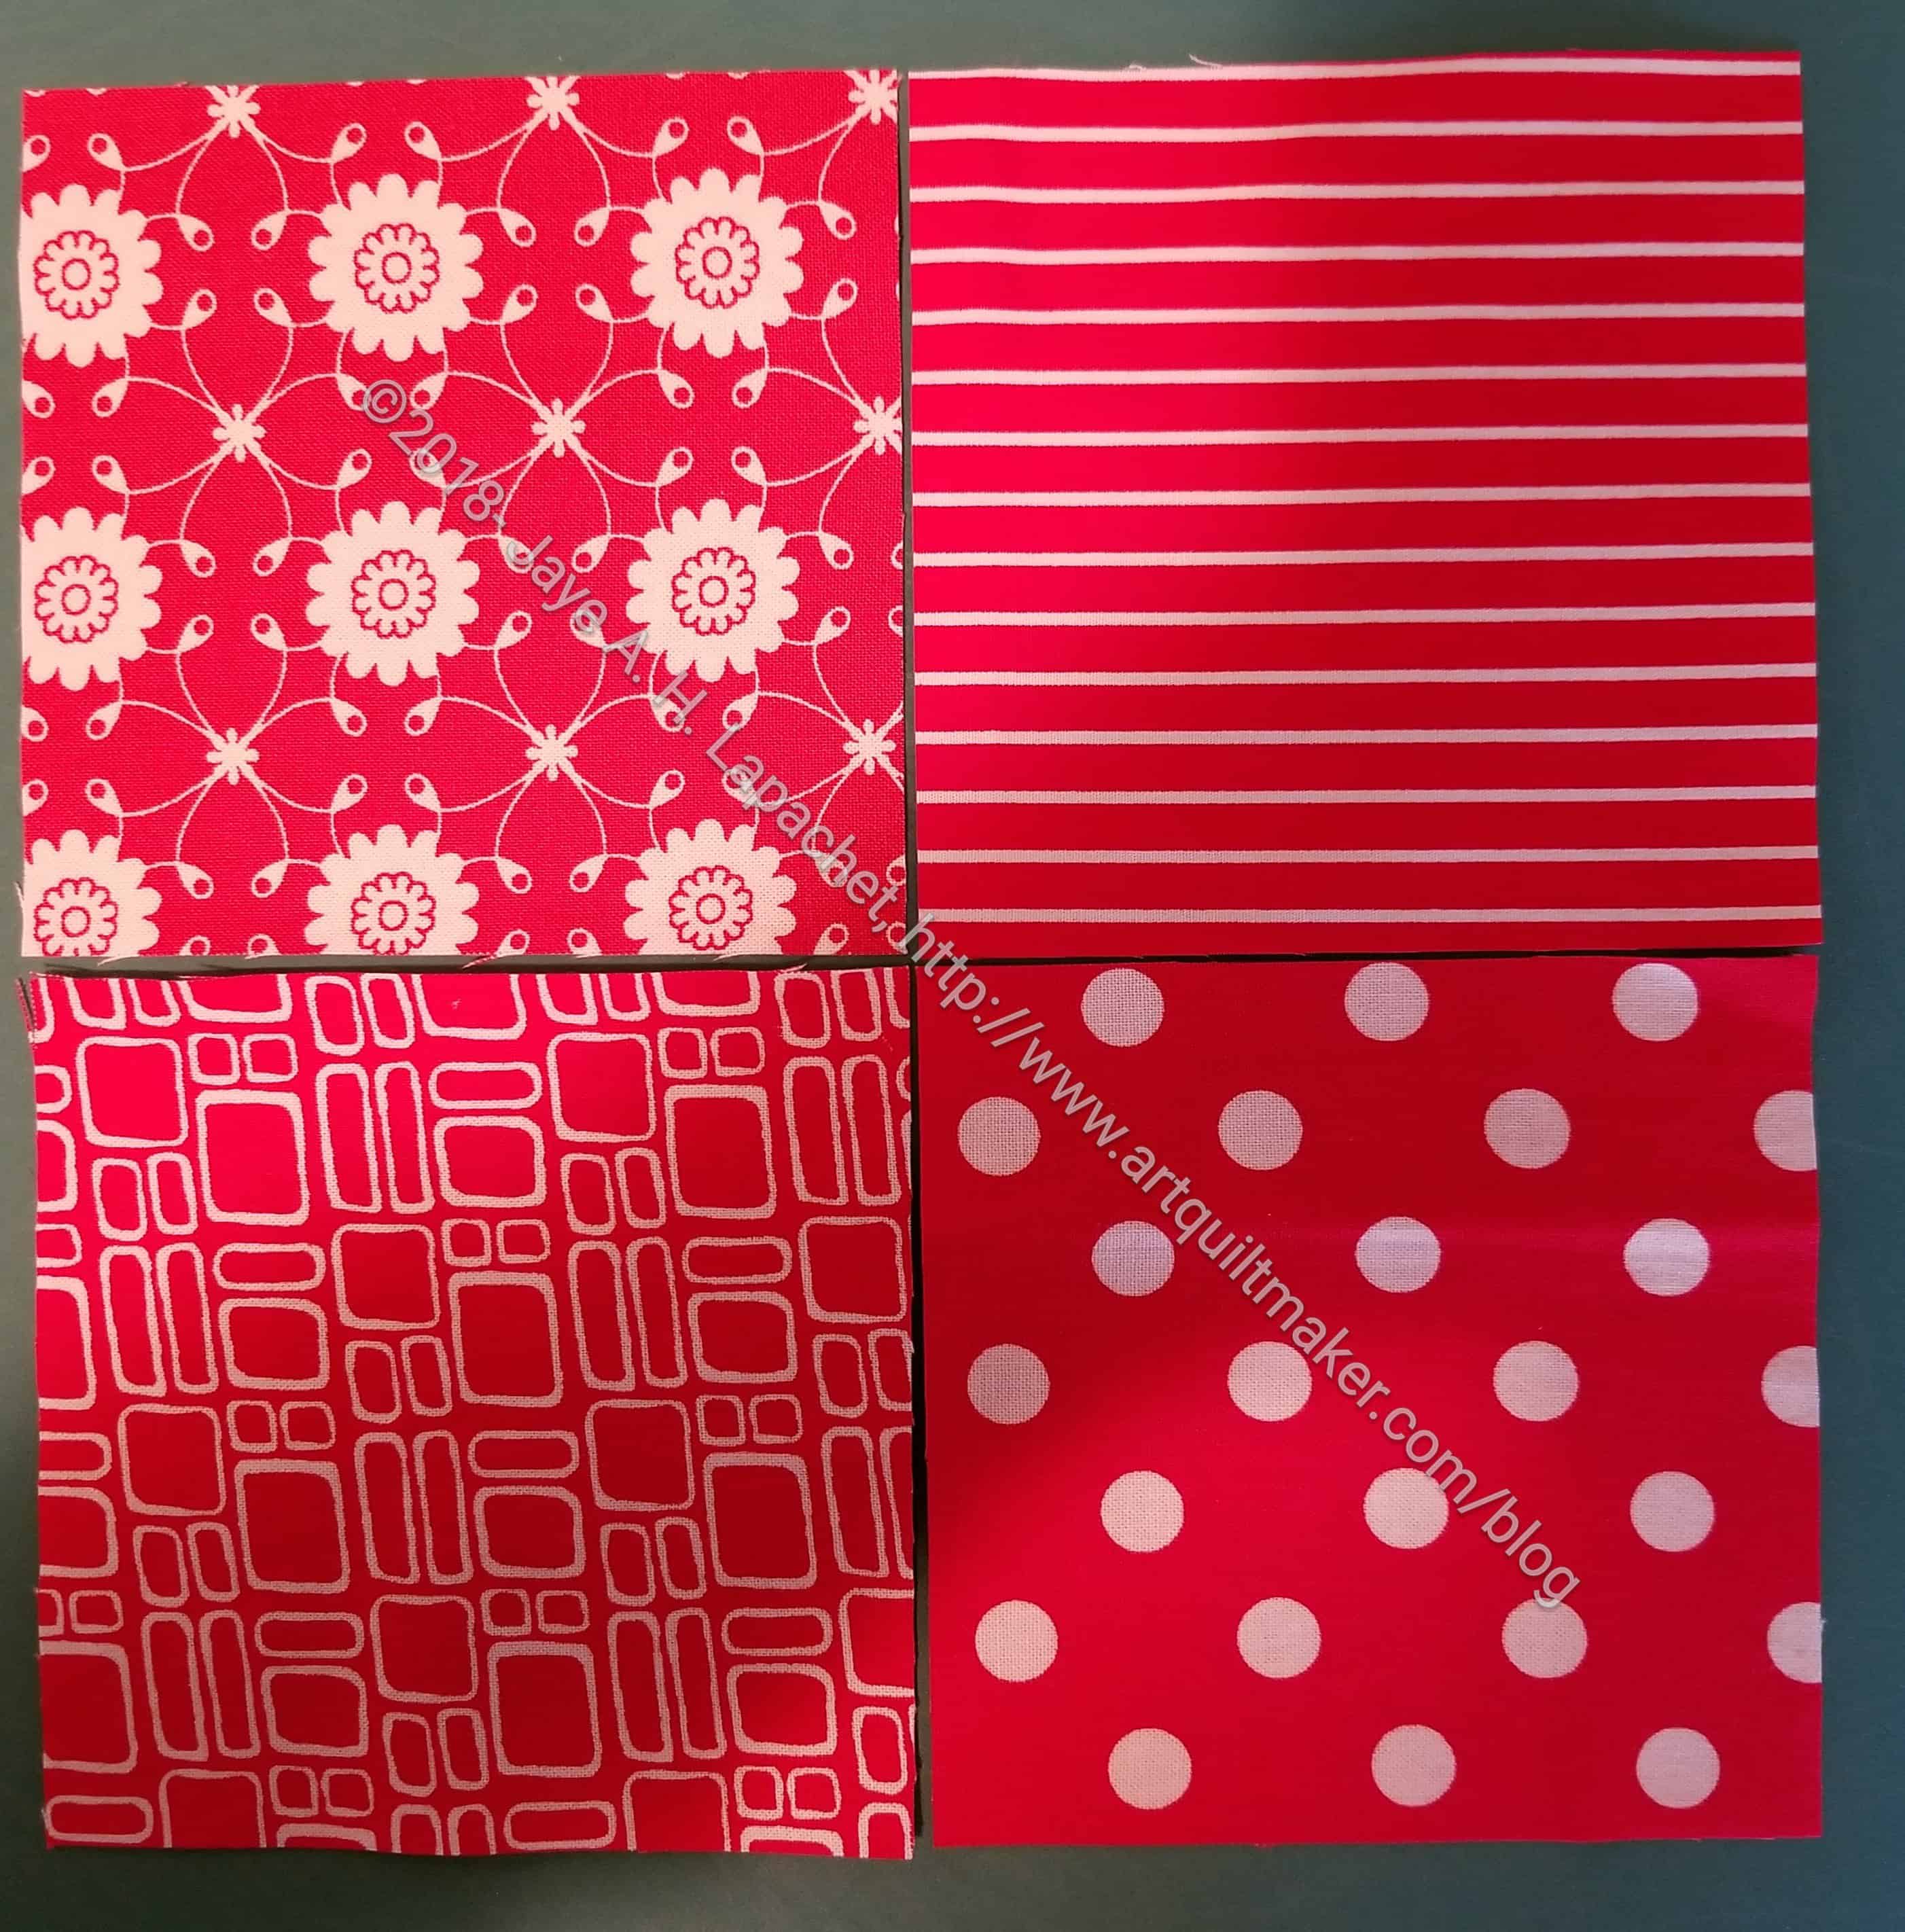
2. Cut 4 squares for inset pieces 4 inches by 4 inches.

Fold 12.5x12.5 inch squares in half
Fold 12.5×12.5 inch squares in half

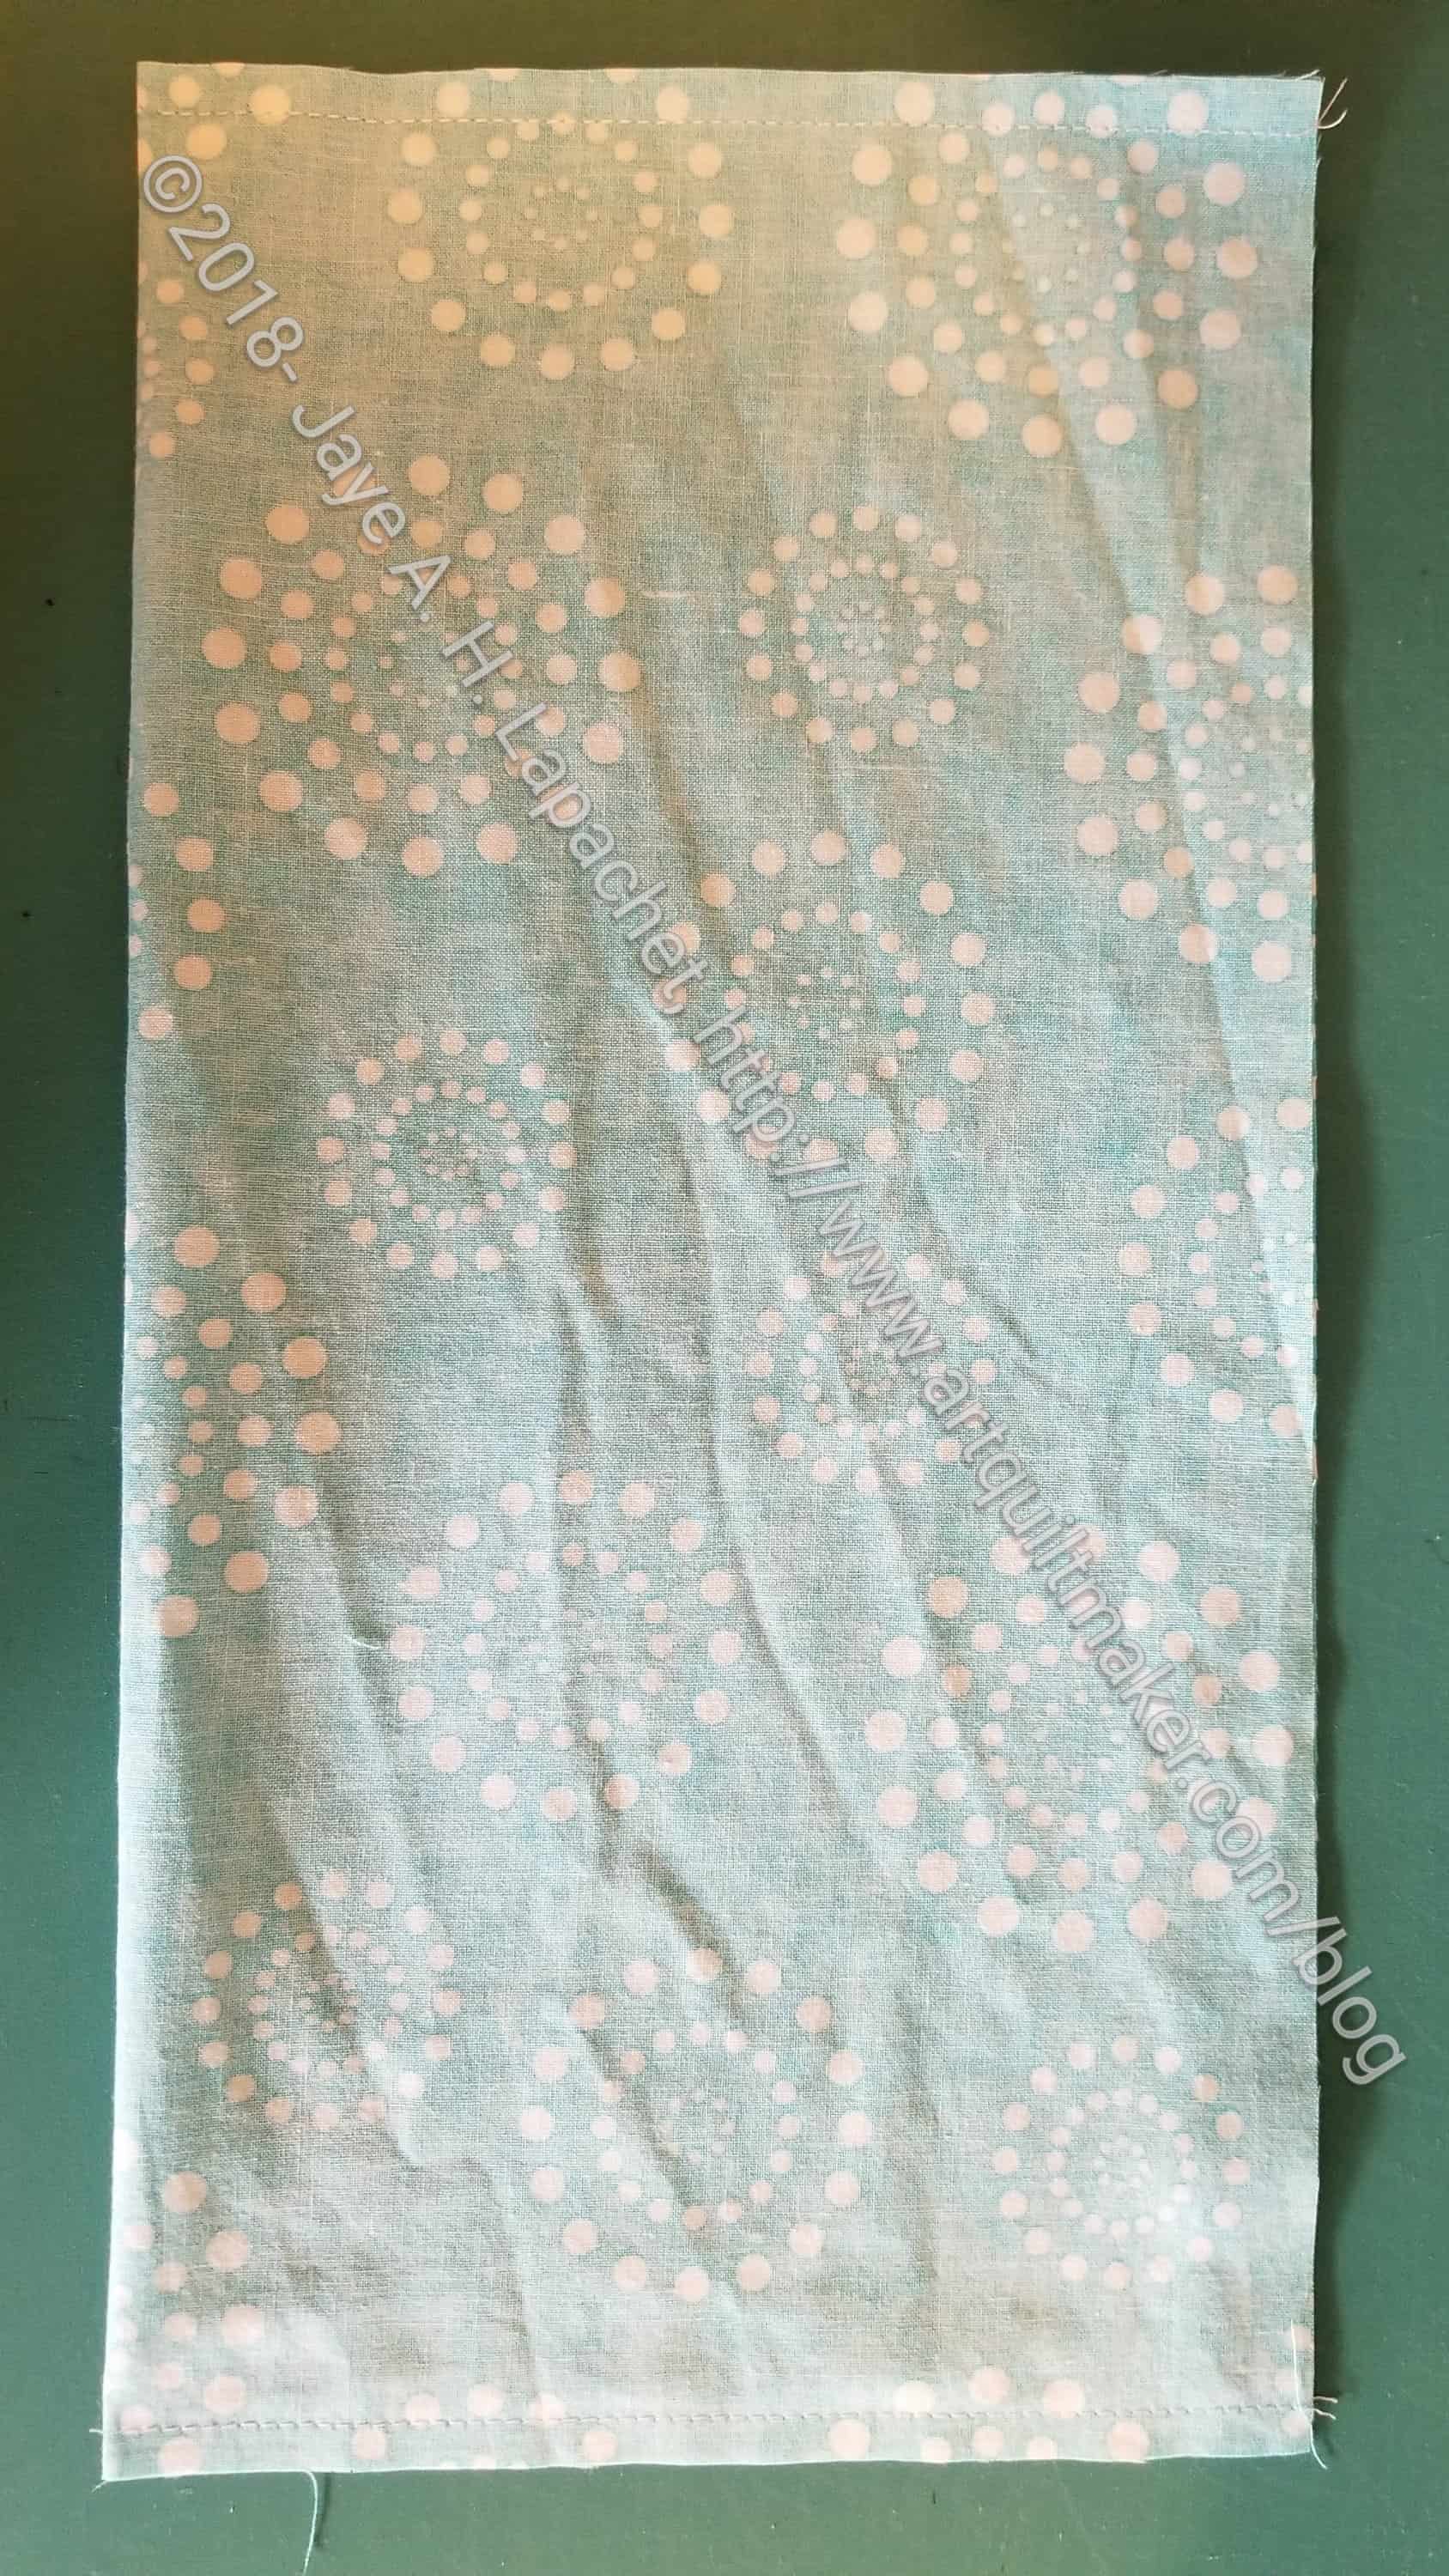
3. Fold each of the 4 background squares in half. This will make your 12.5 x 12.5 inch squares into rectangles (e.g. do not fold NOT along the diagonal).

  • Hint: I sew all four one after another, but you can sew one at a time, if you prefer.

3A. Sew along the short side, backstitching at the beginning and the end.

Open up rectangles & match edges

4. Open your rectangles and match up the raw edges.

Match edges and nest seams
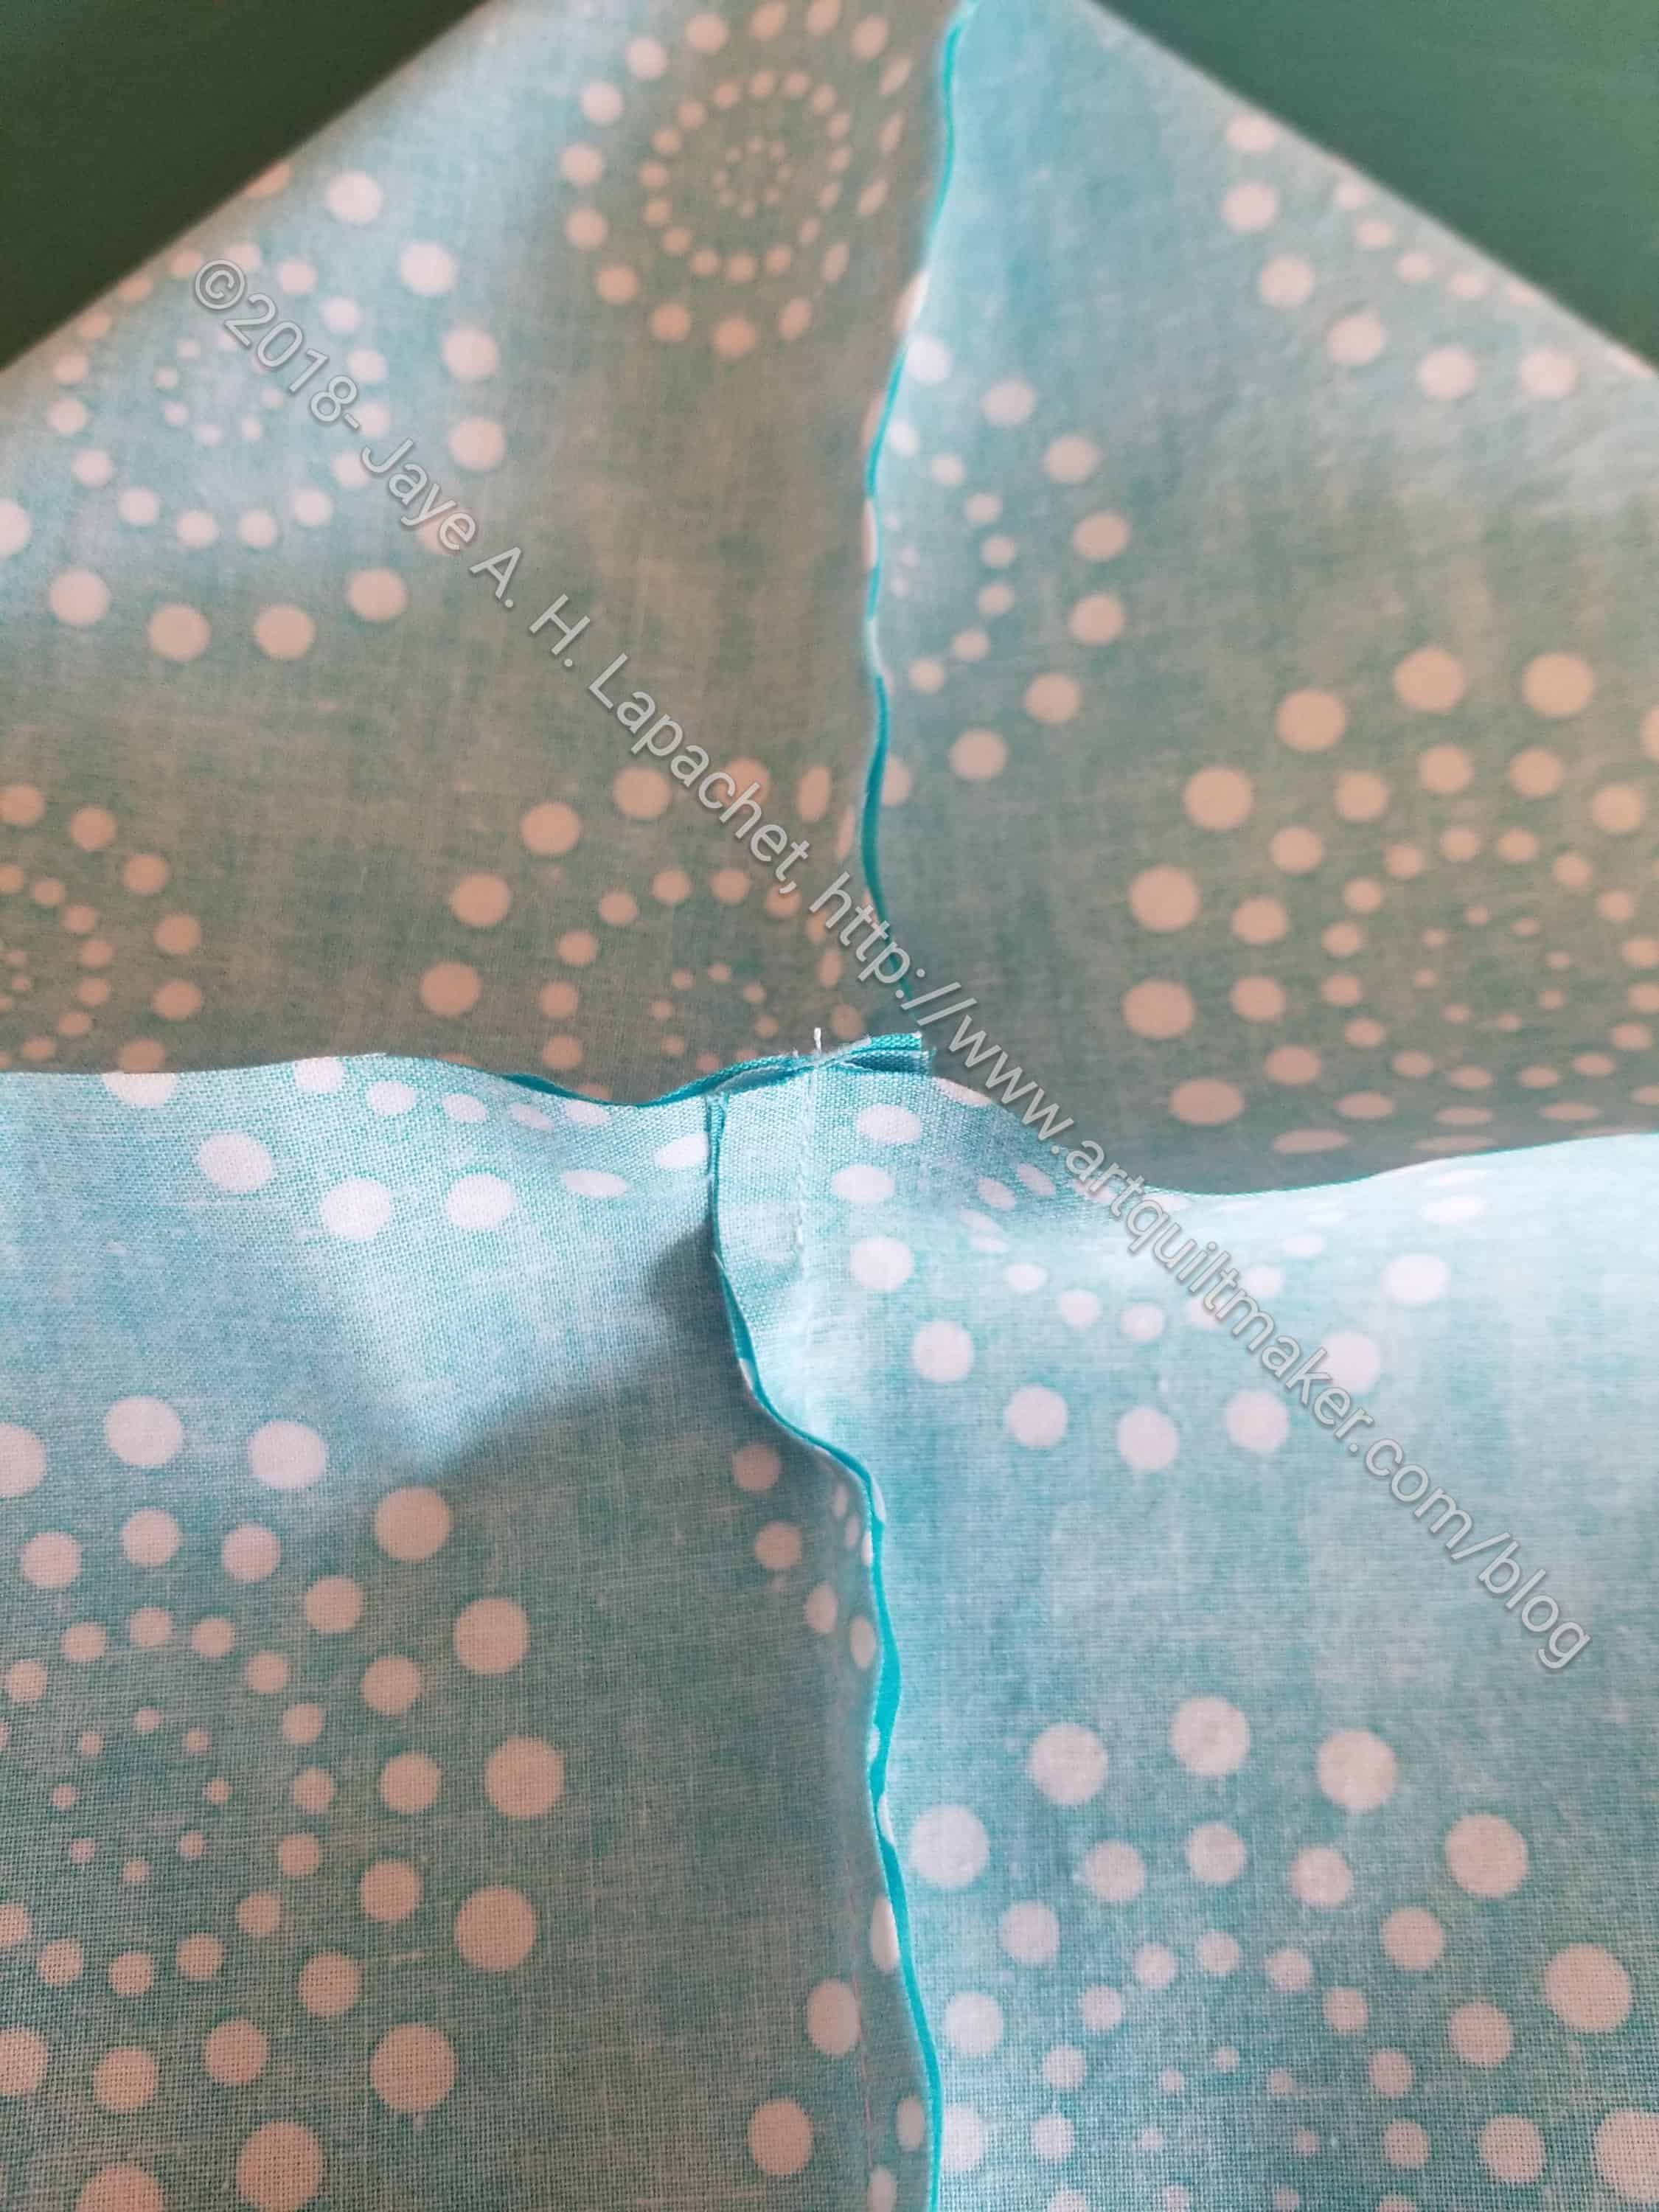
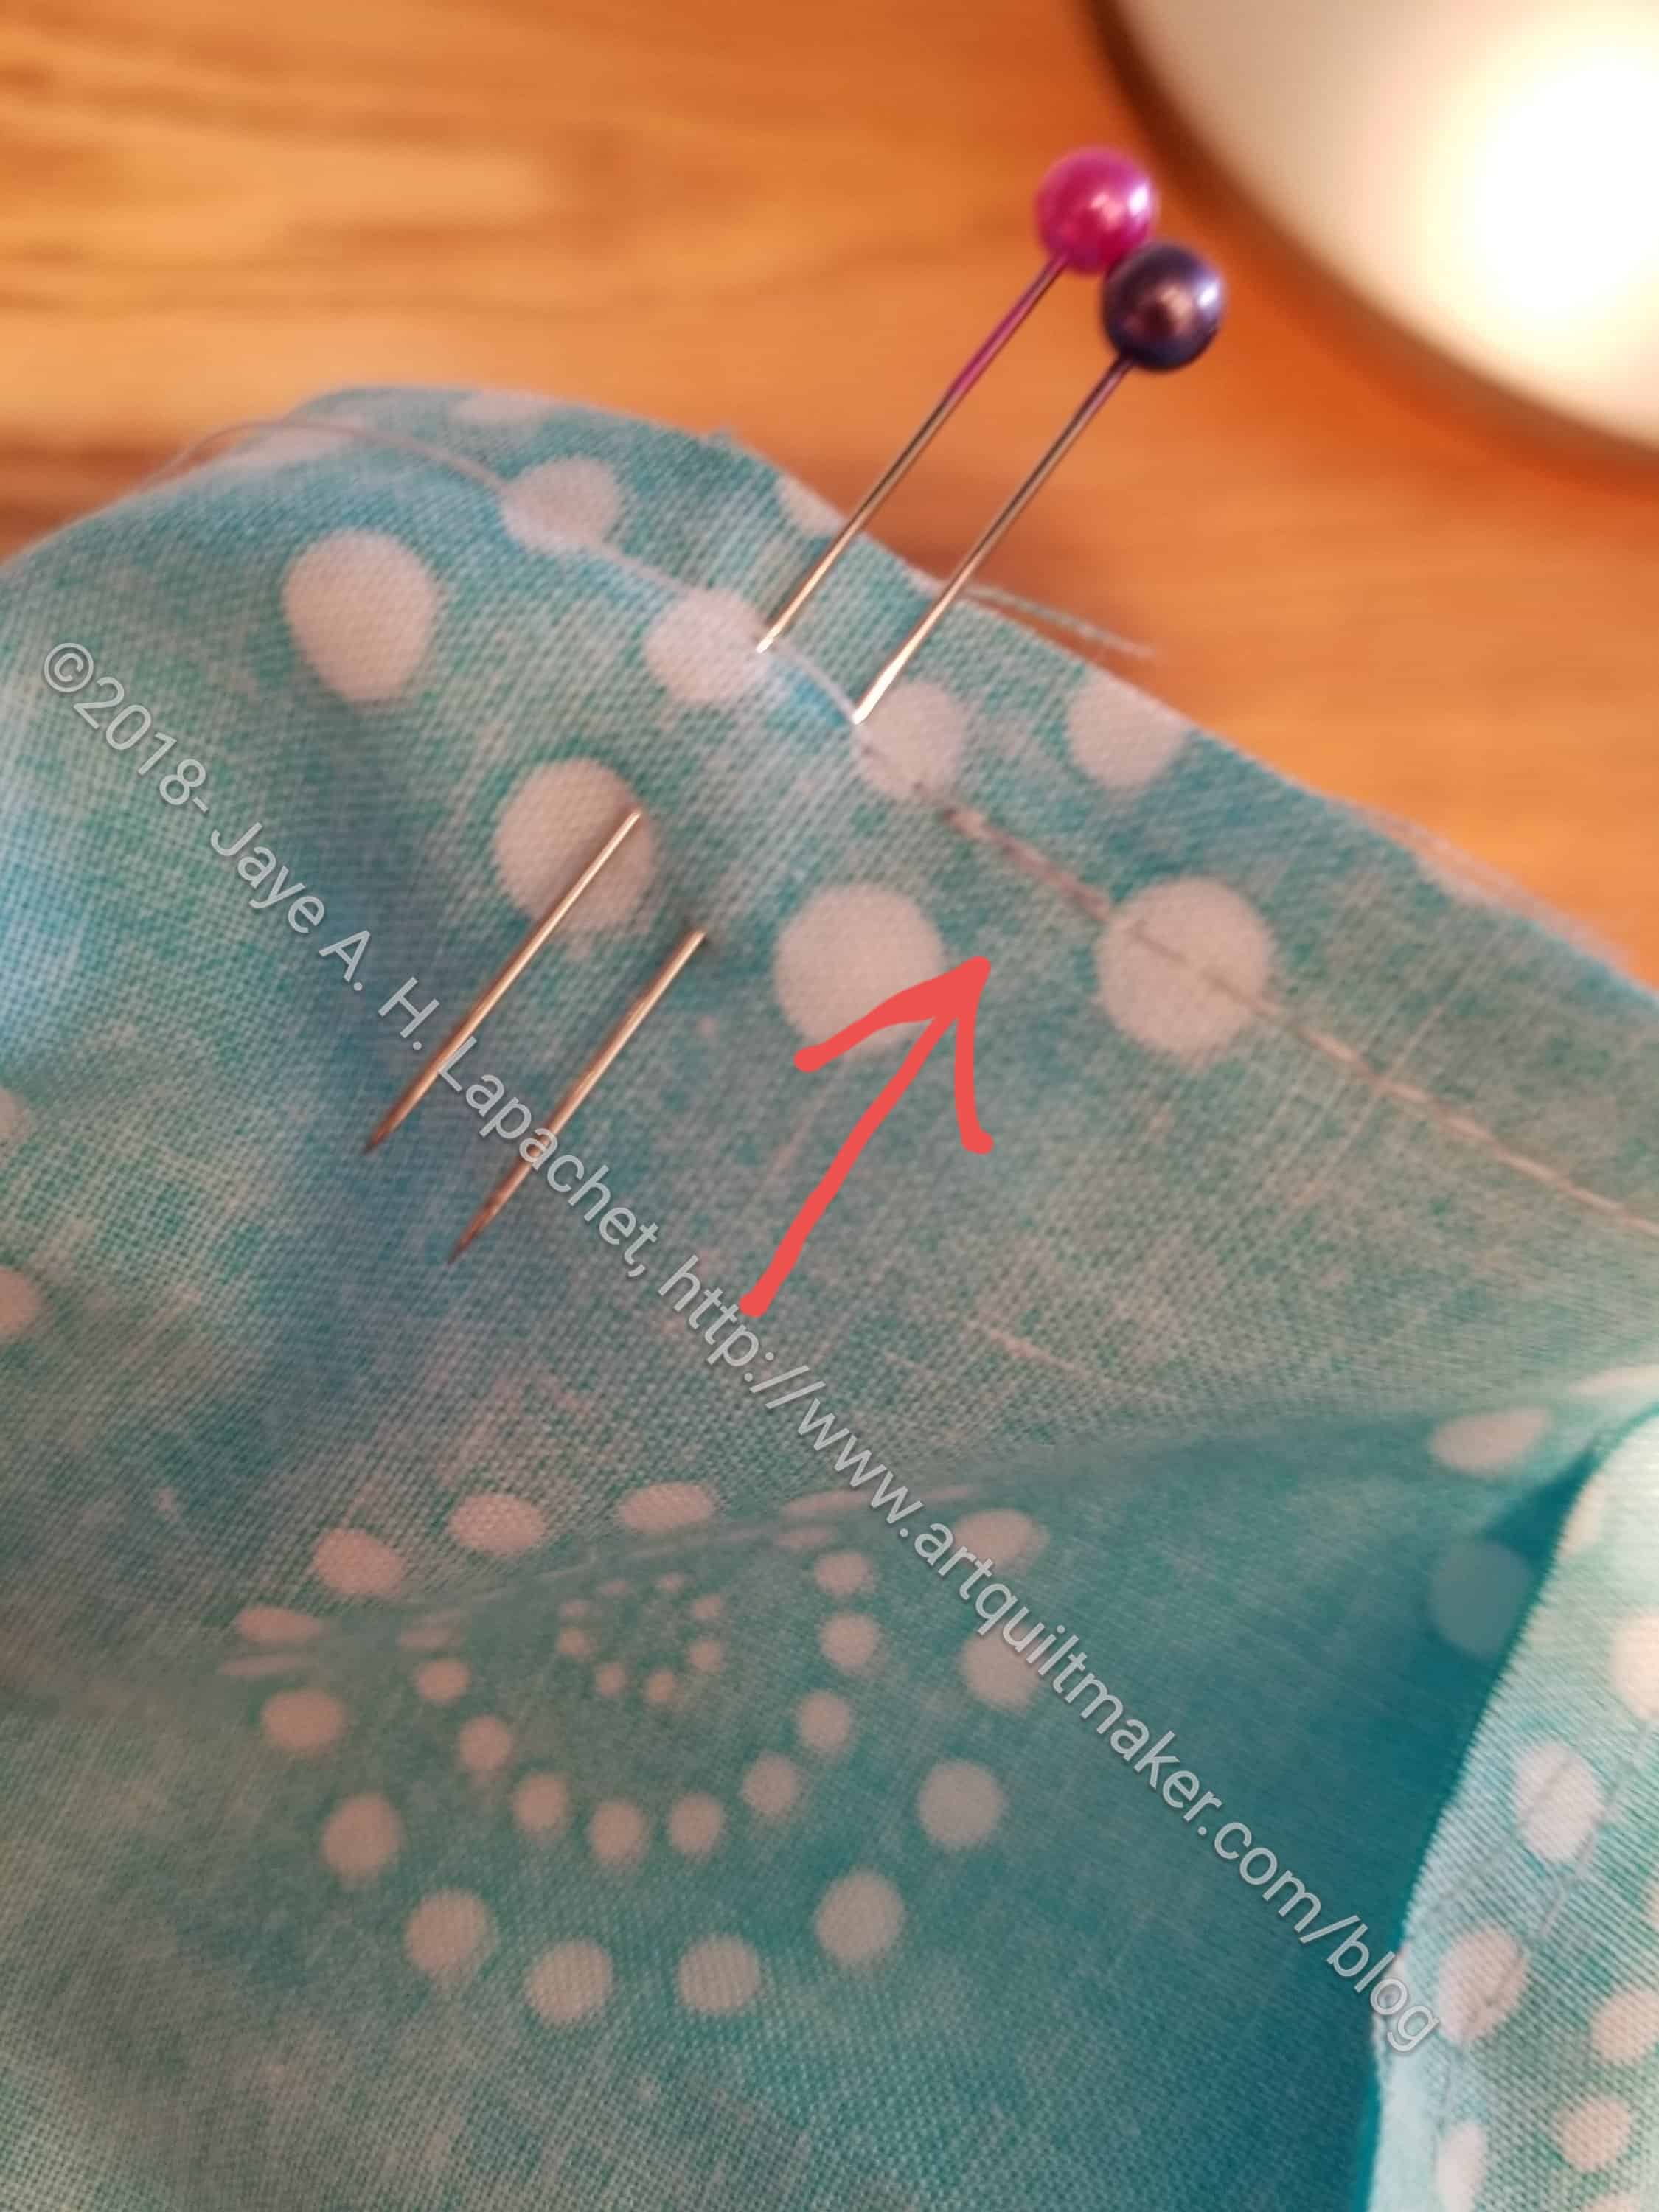
  • Hint: I nest the center seams and pin, starting in the middle
Leave opening
Leave opening
Pin edges closed, leaving an opening for turning
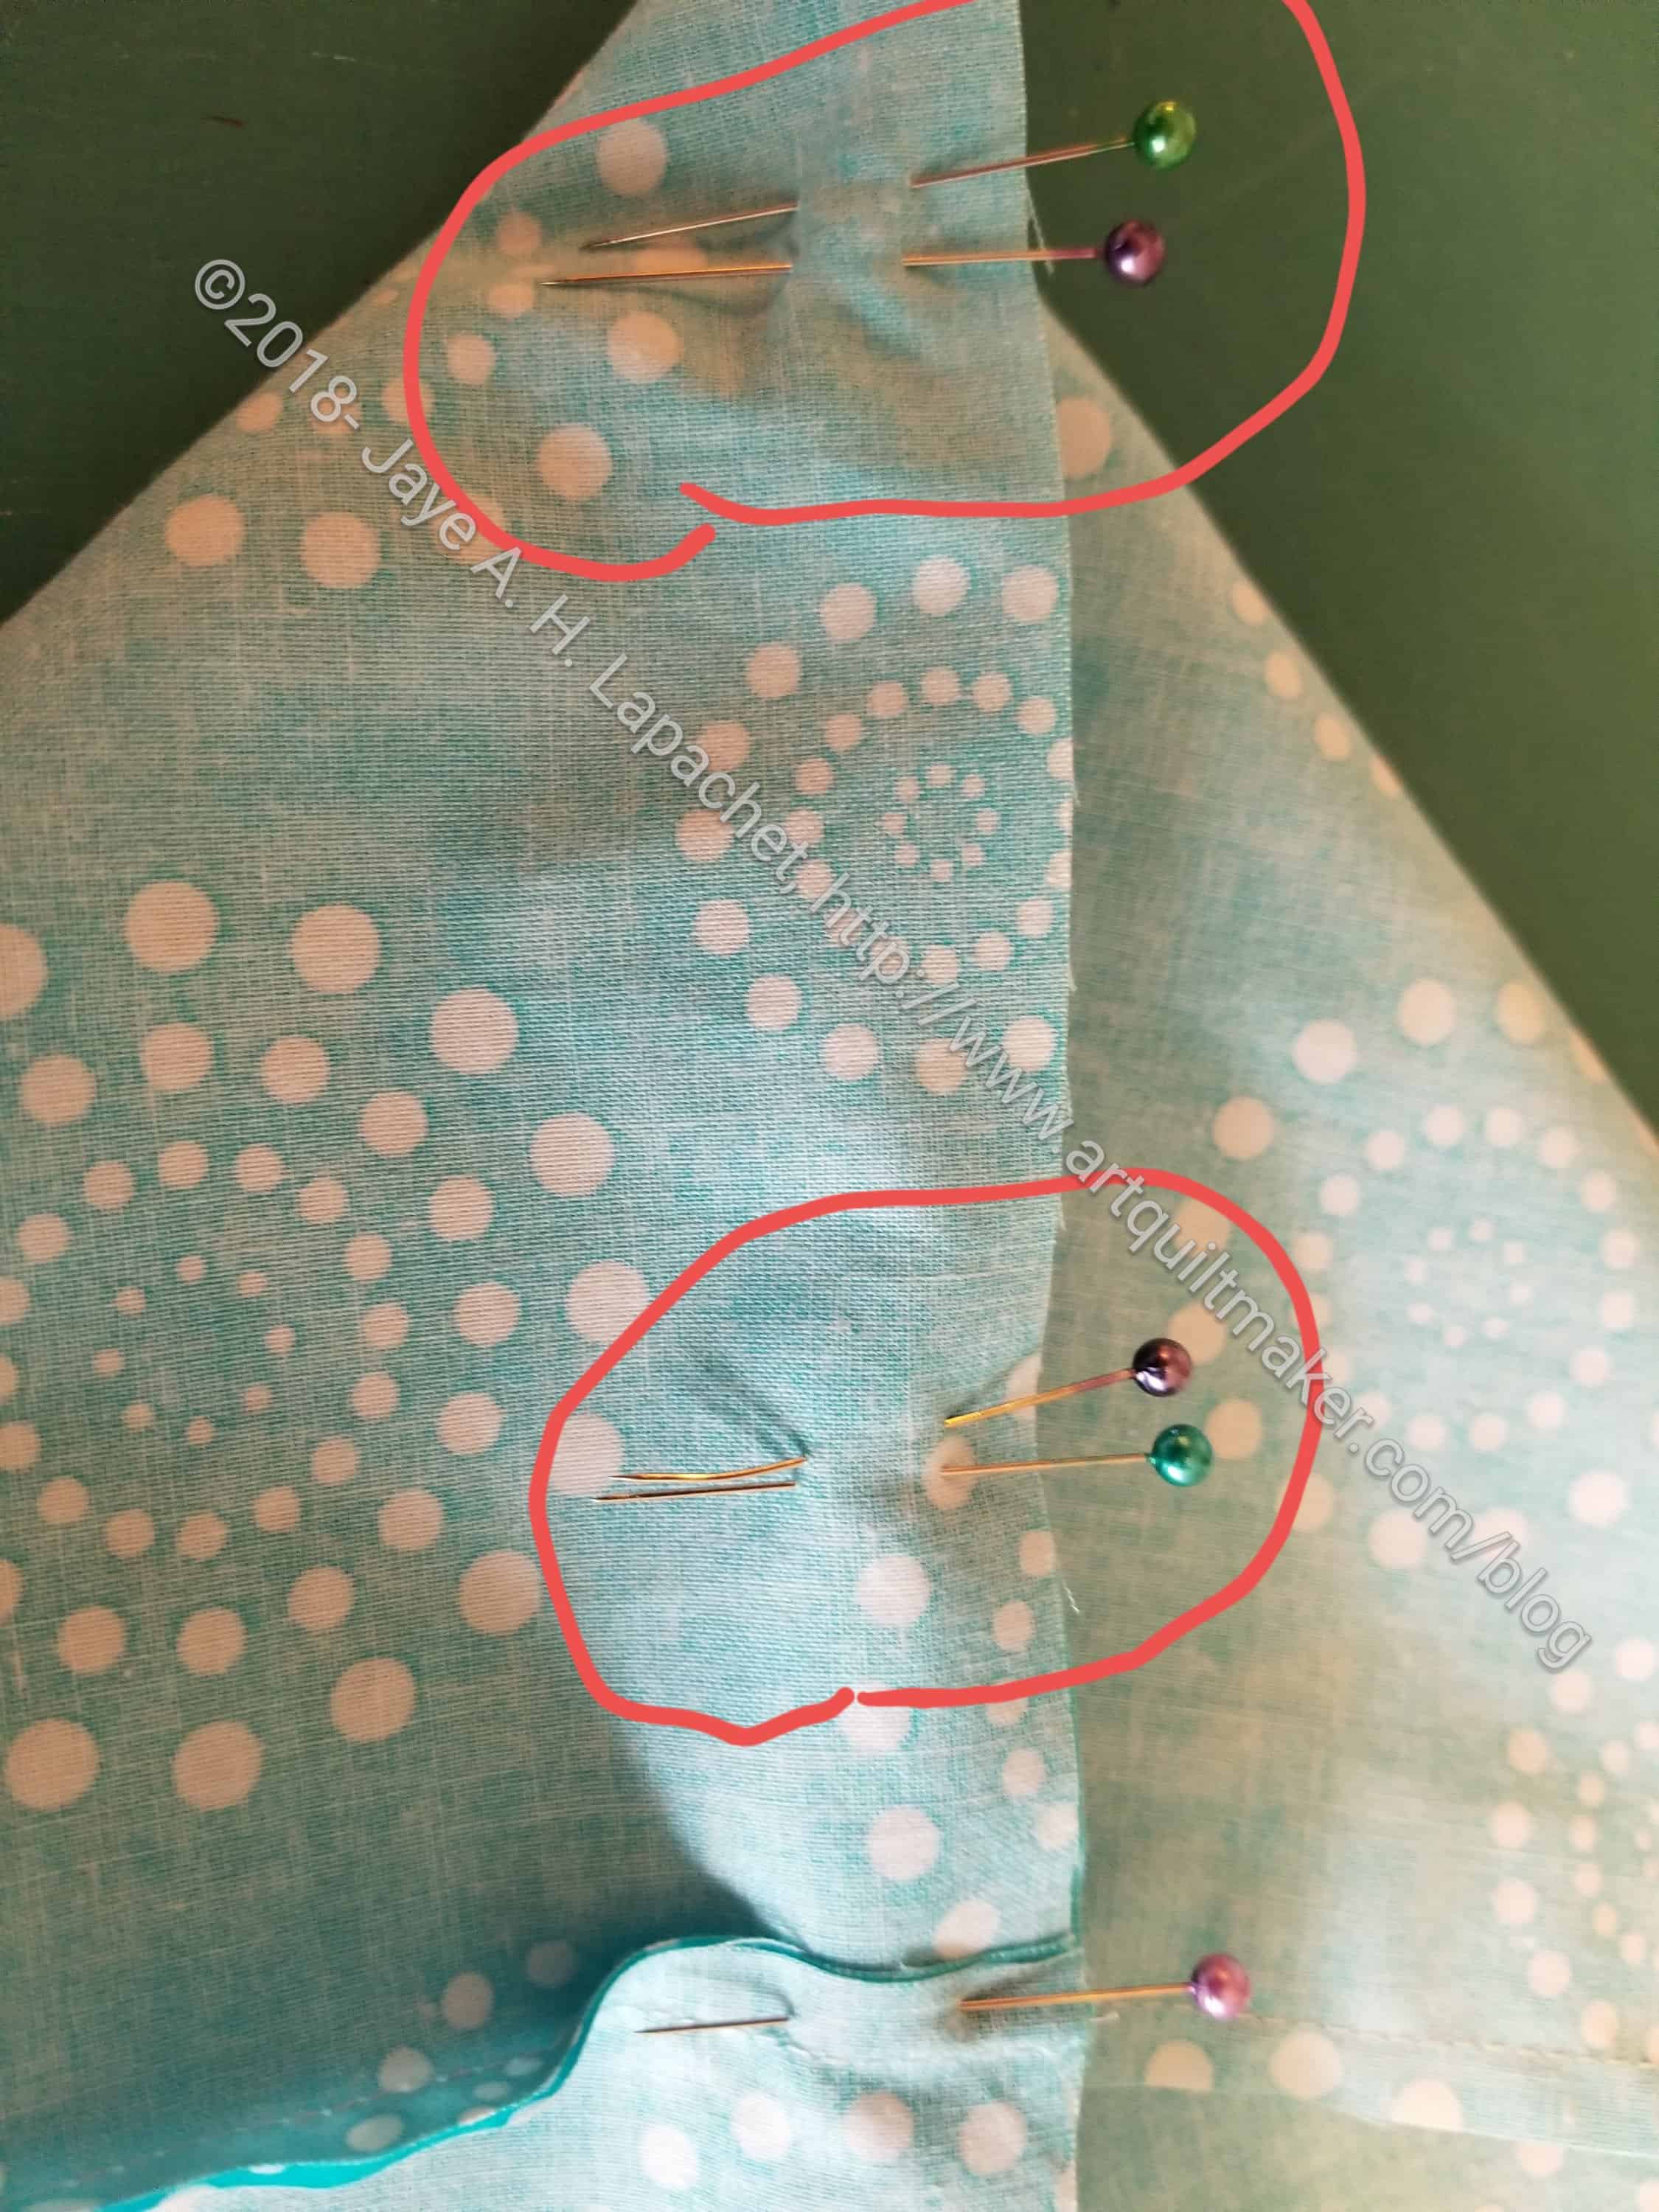
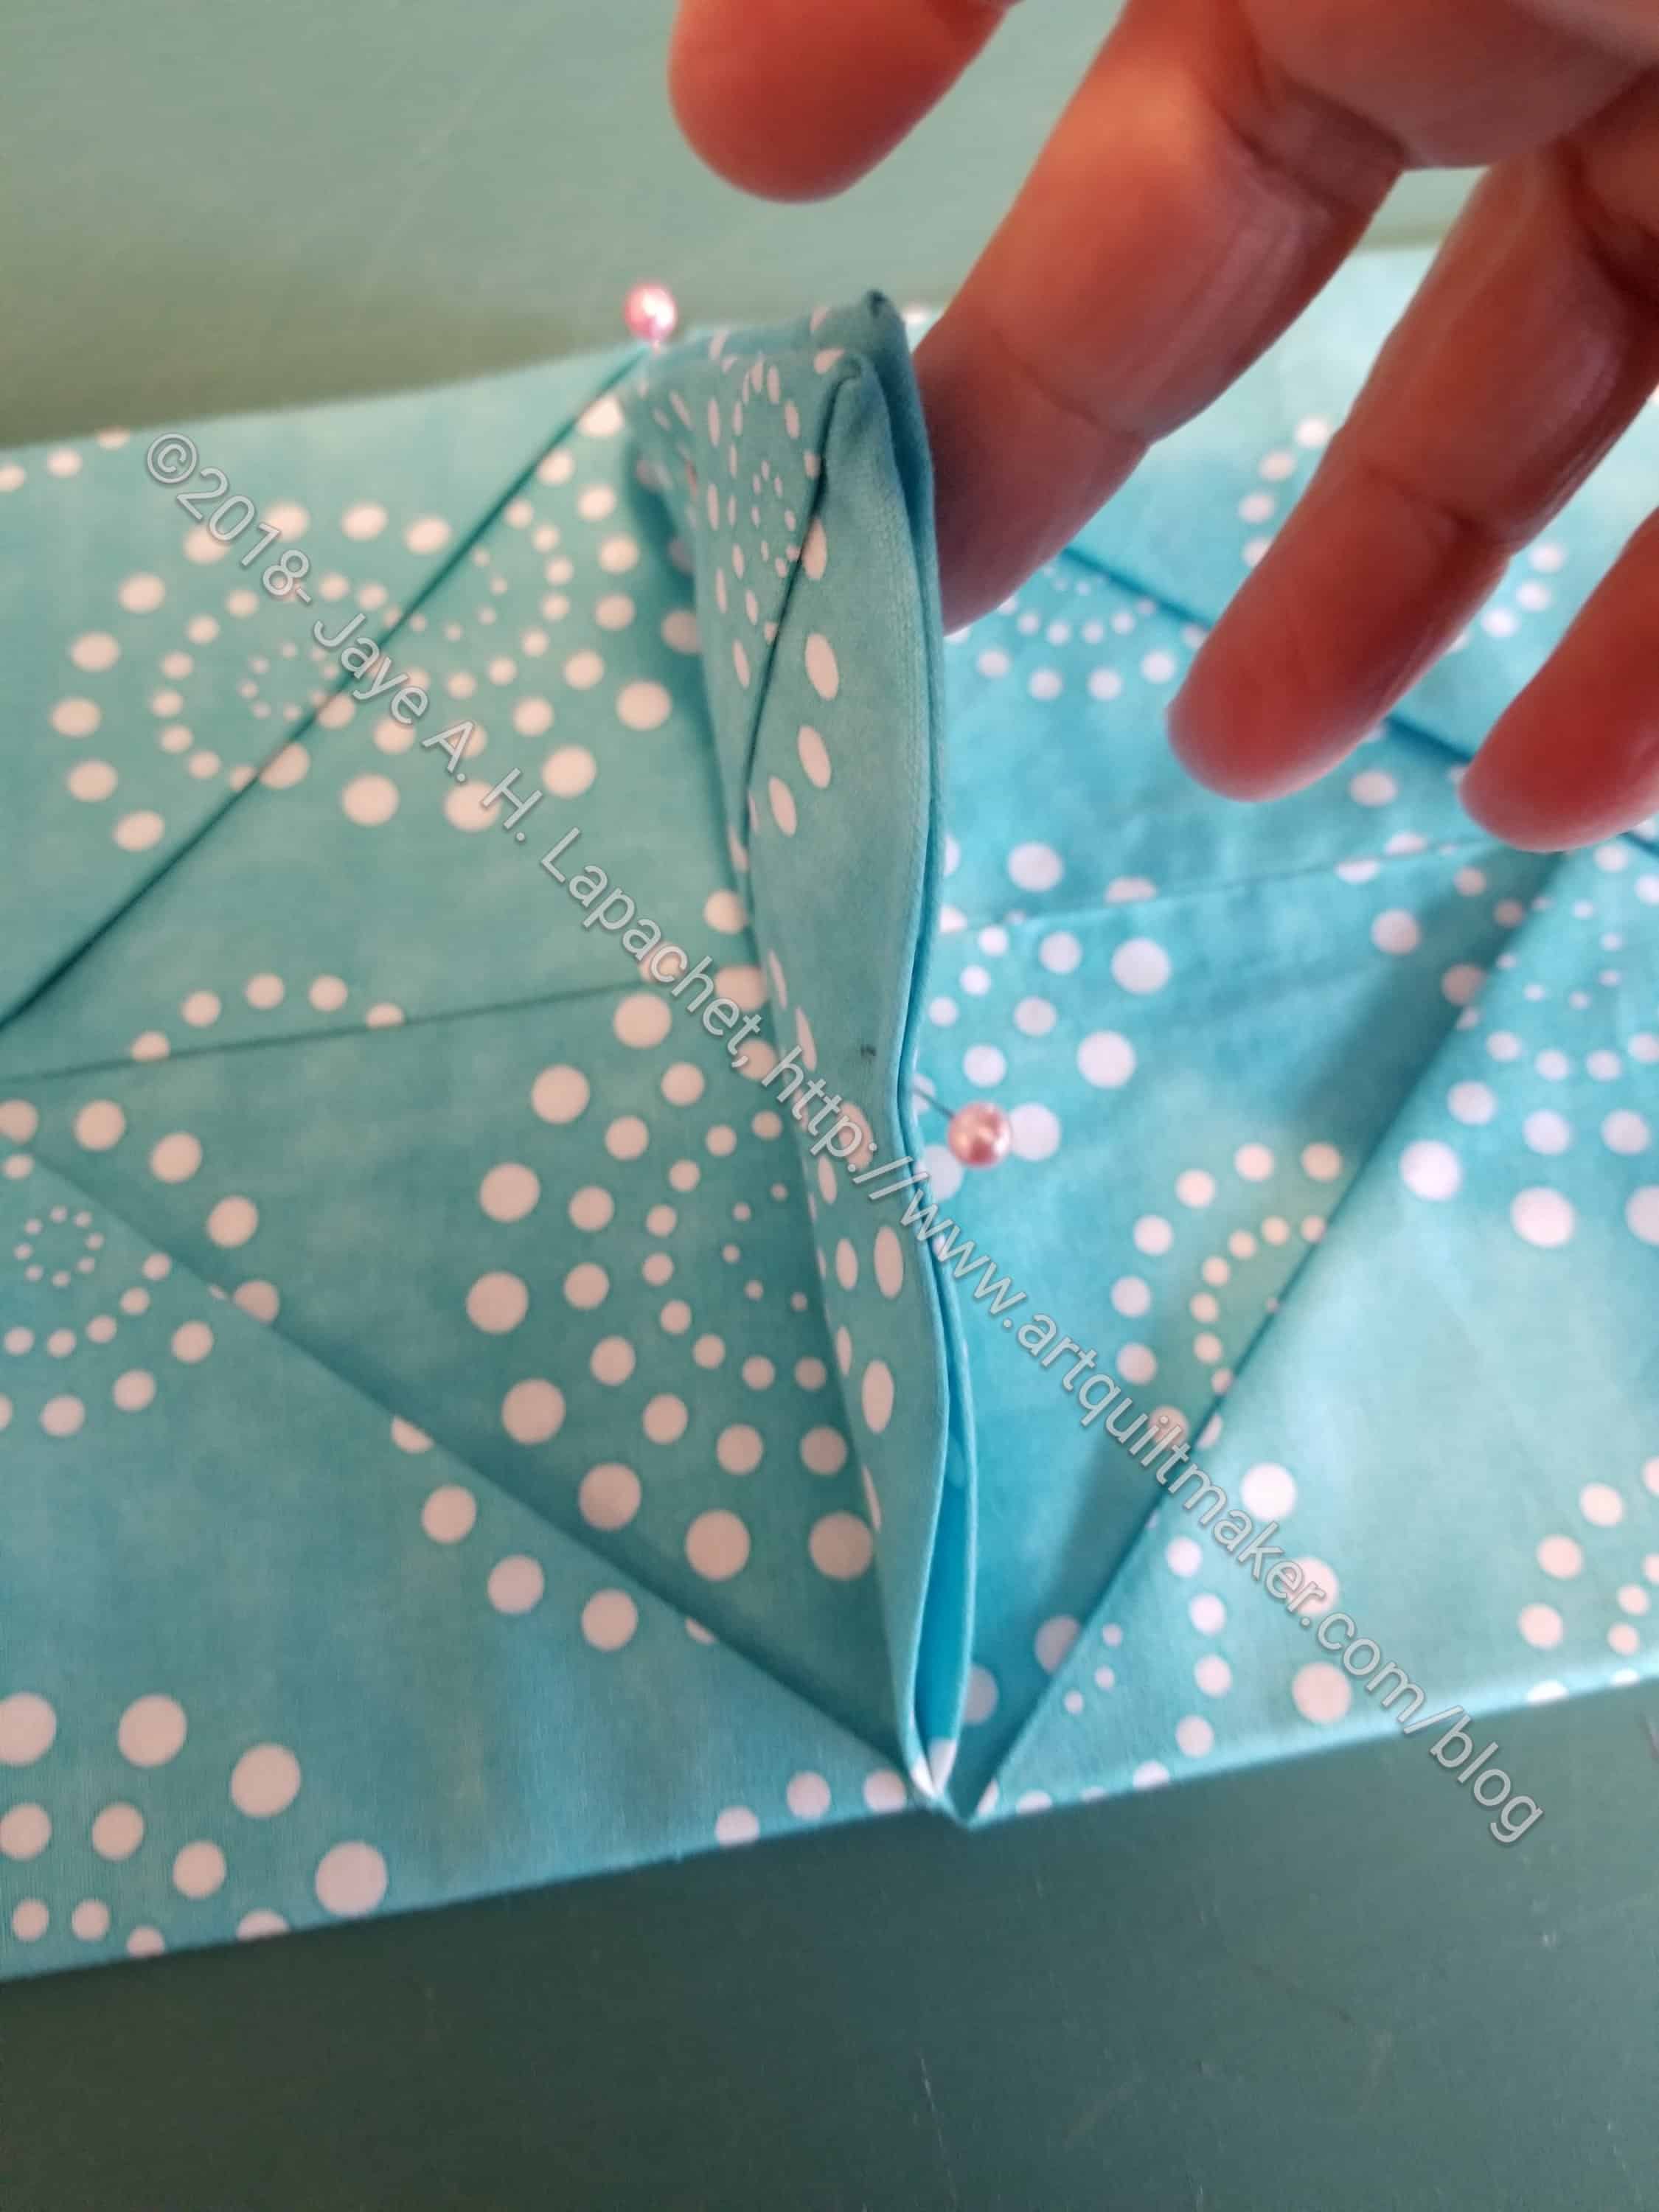
  • Hint: leave an opening 2-3 fingers wide for later turning.  I mark this with two pins right next to each other.
Sew seam shut
Sew seam shut

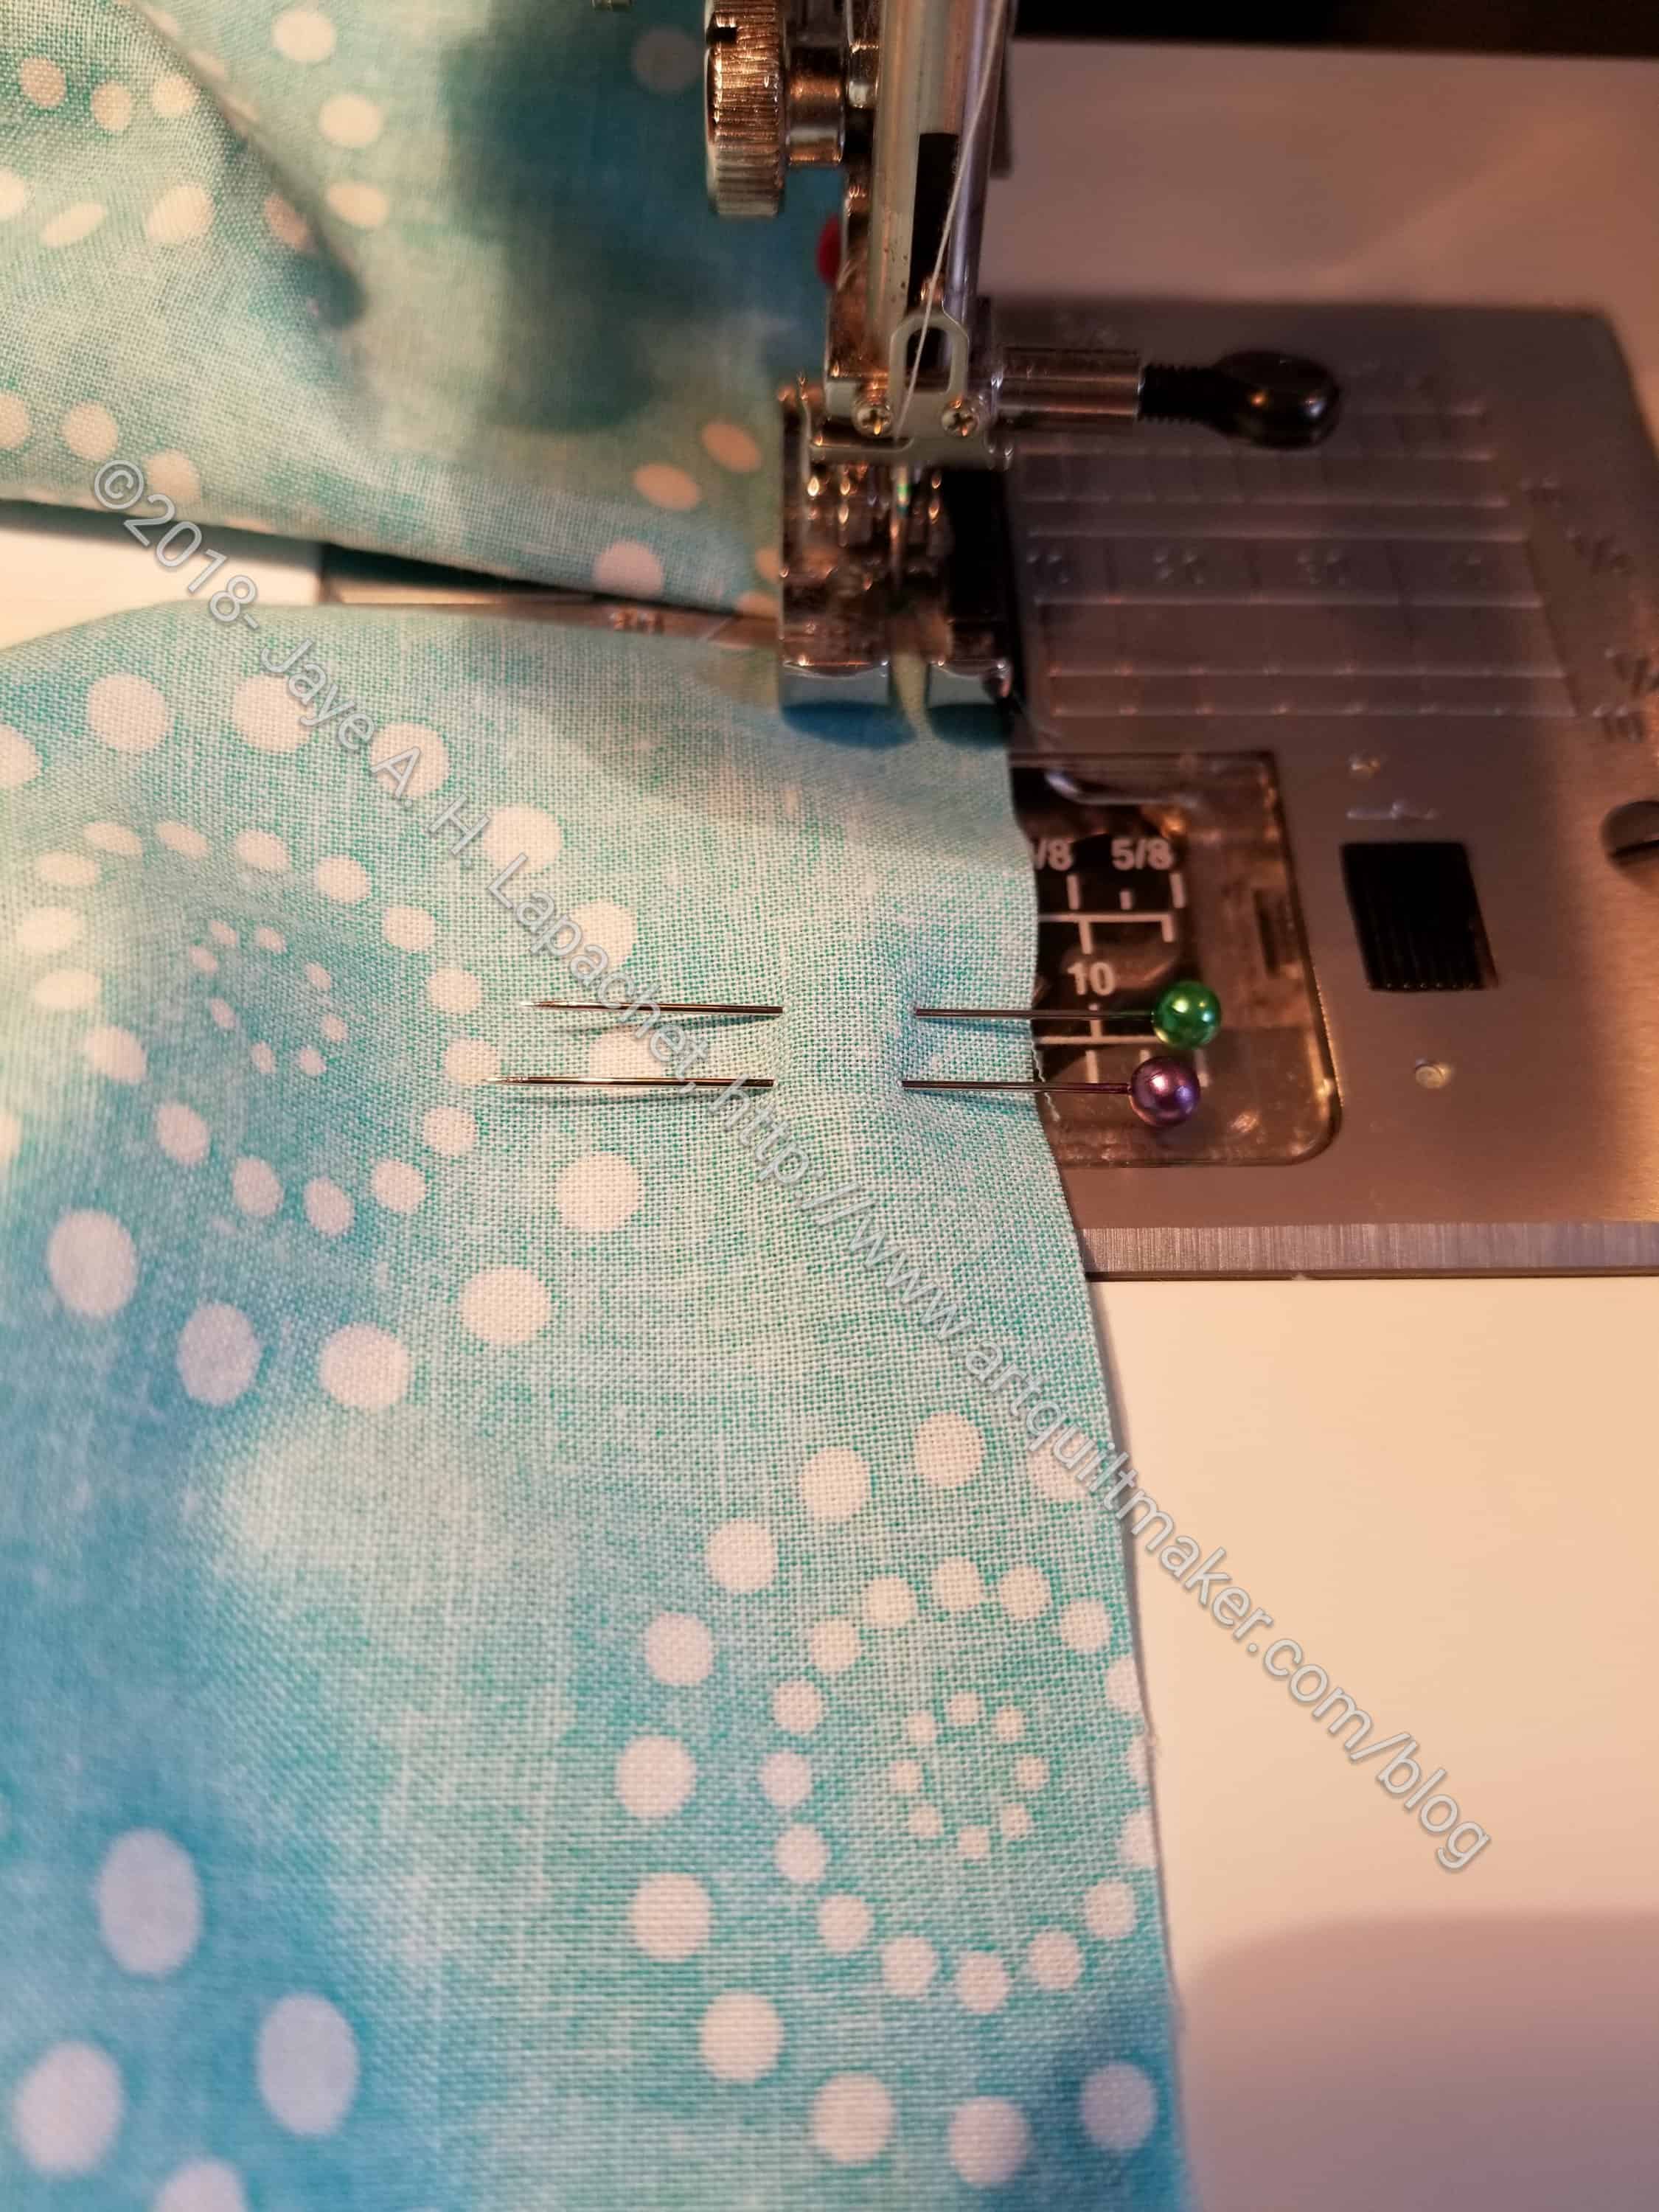
5. Sew your pinned seam shut except for the opening you have left.

Backstitch at beginning and end
  • Hint: I backstitch at the beginning and end of the seams including next to the opening. Yes, it is a hassle to start and stop, but I don’t want the edges of the seams to come apart when I turn.
Smooth out blocks
Smooth out blocks

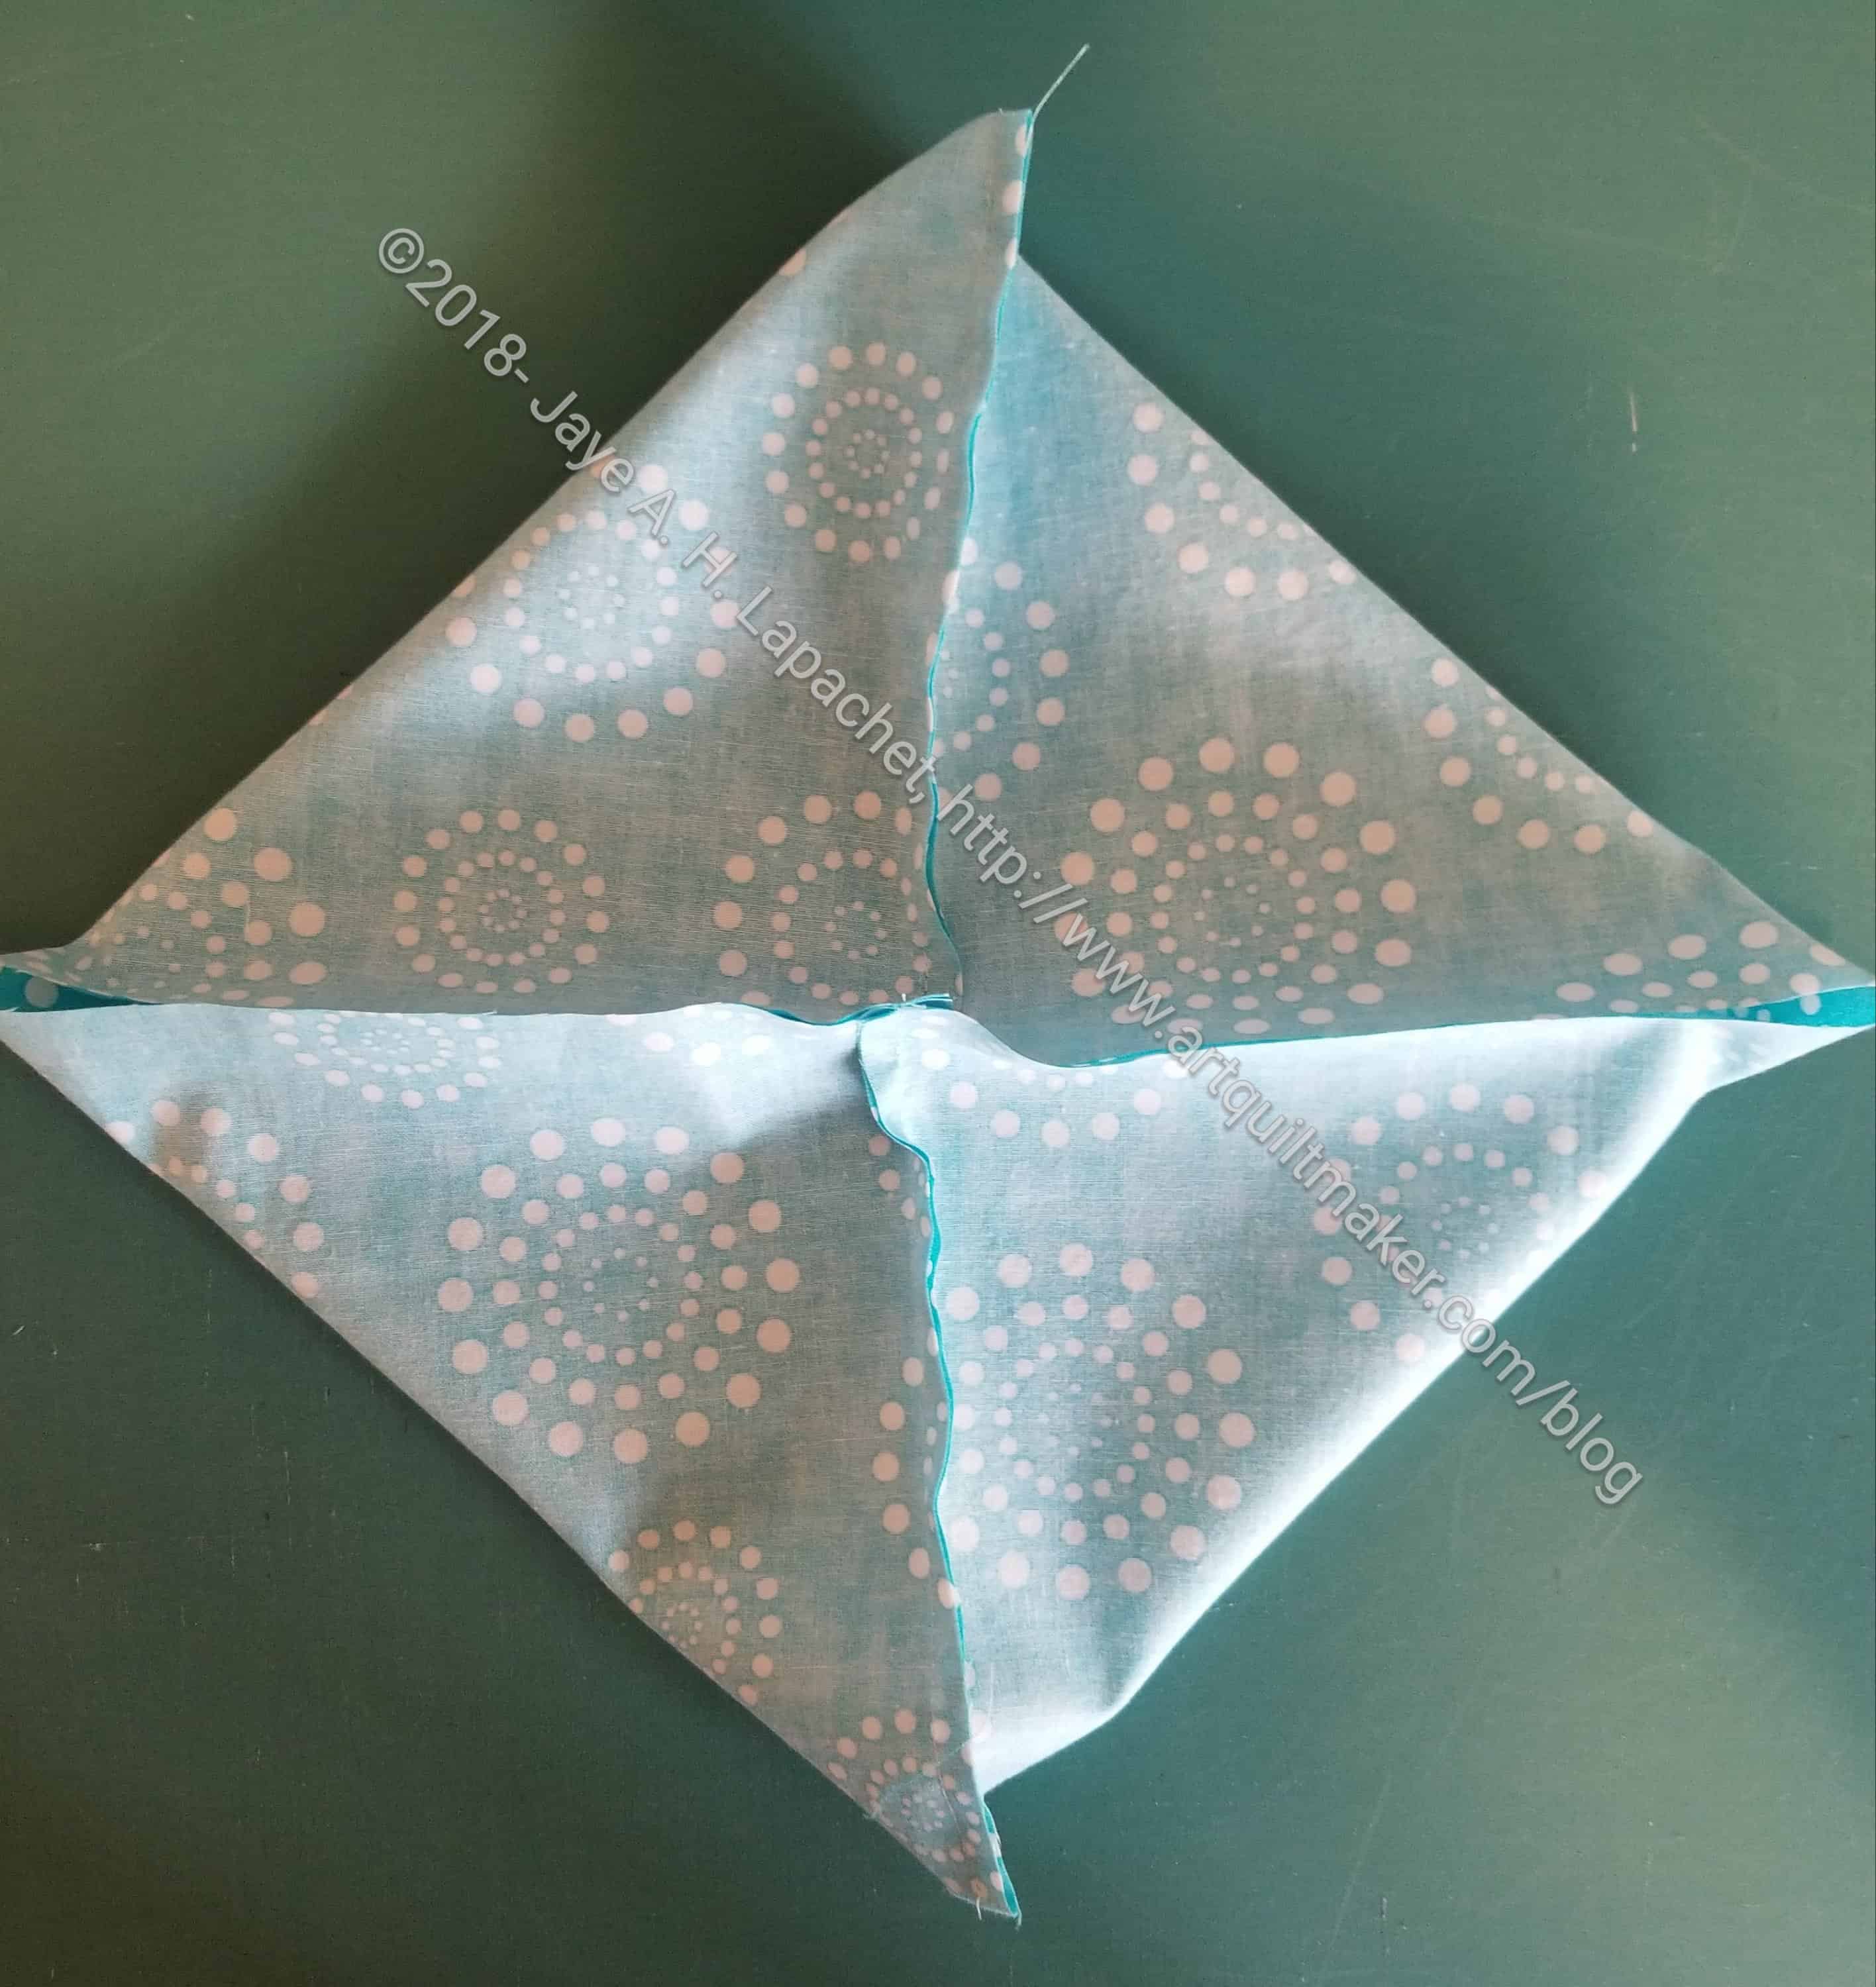
6. Place recently sewn squares on the ironing board and smooth out wrong side out (above). They should make nice squares.

7. Press nested seams in opposite directions from the center out.

Press seam open to minimize bulk

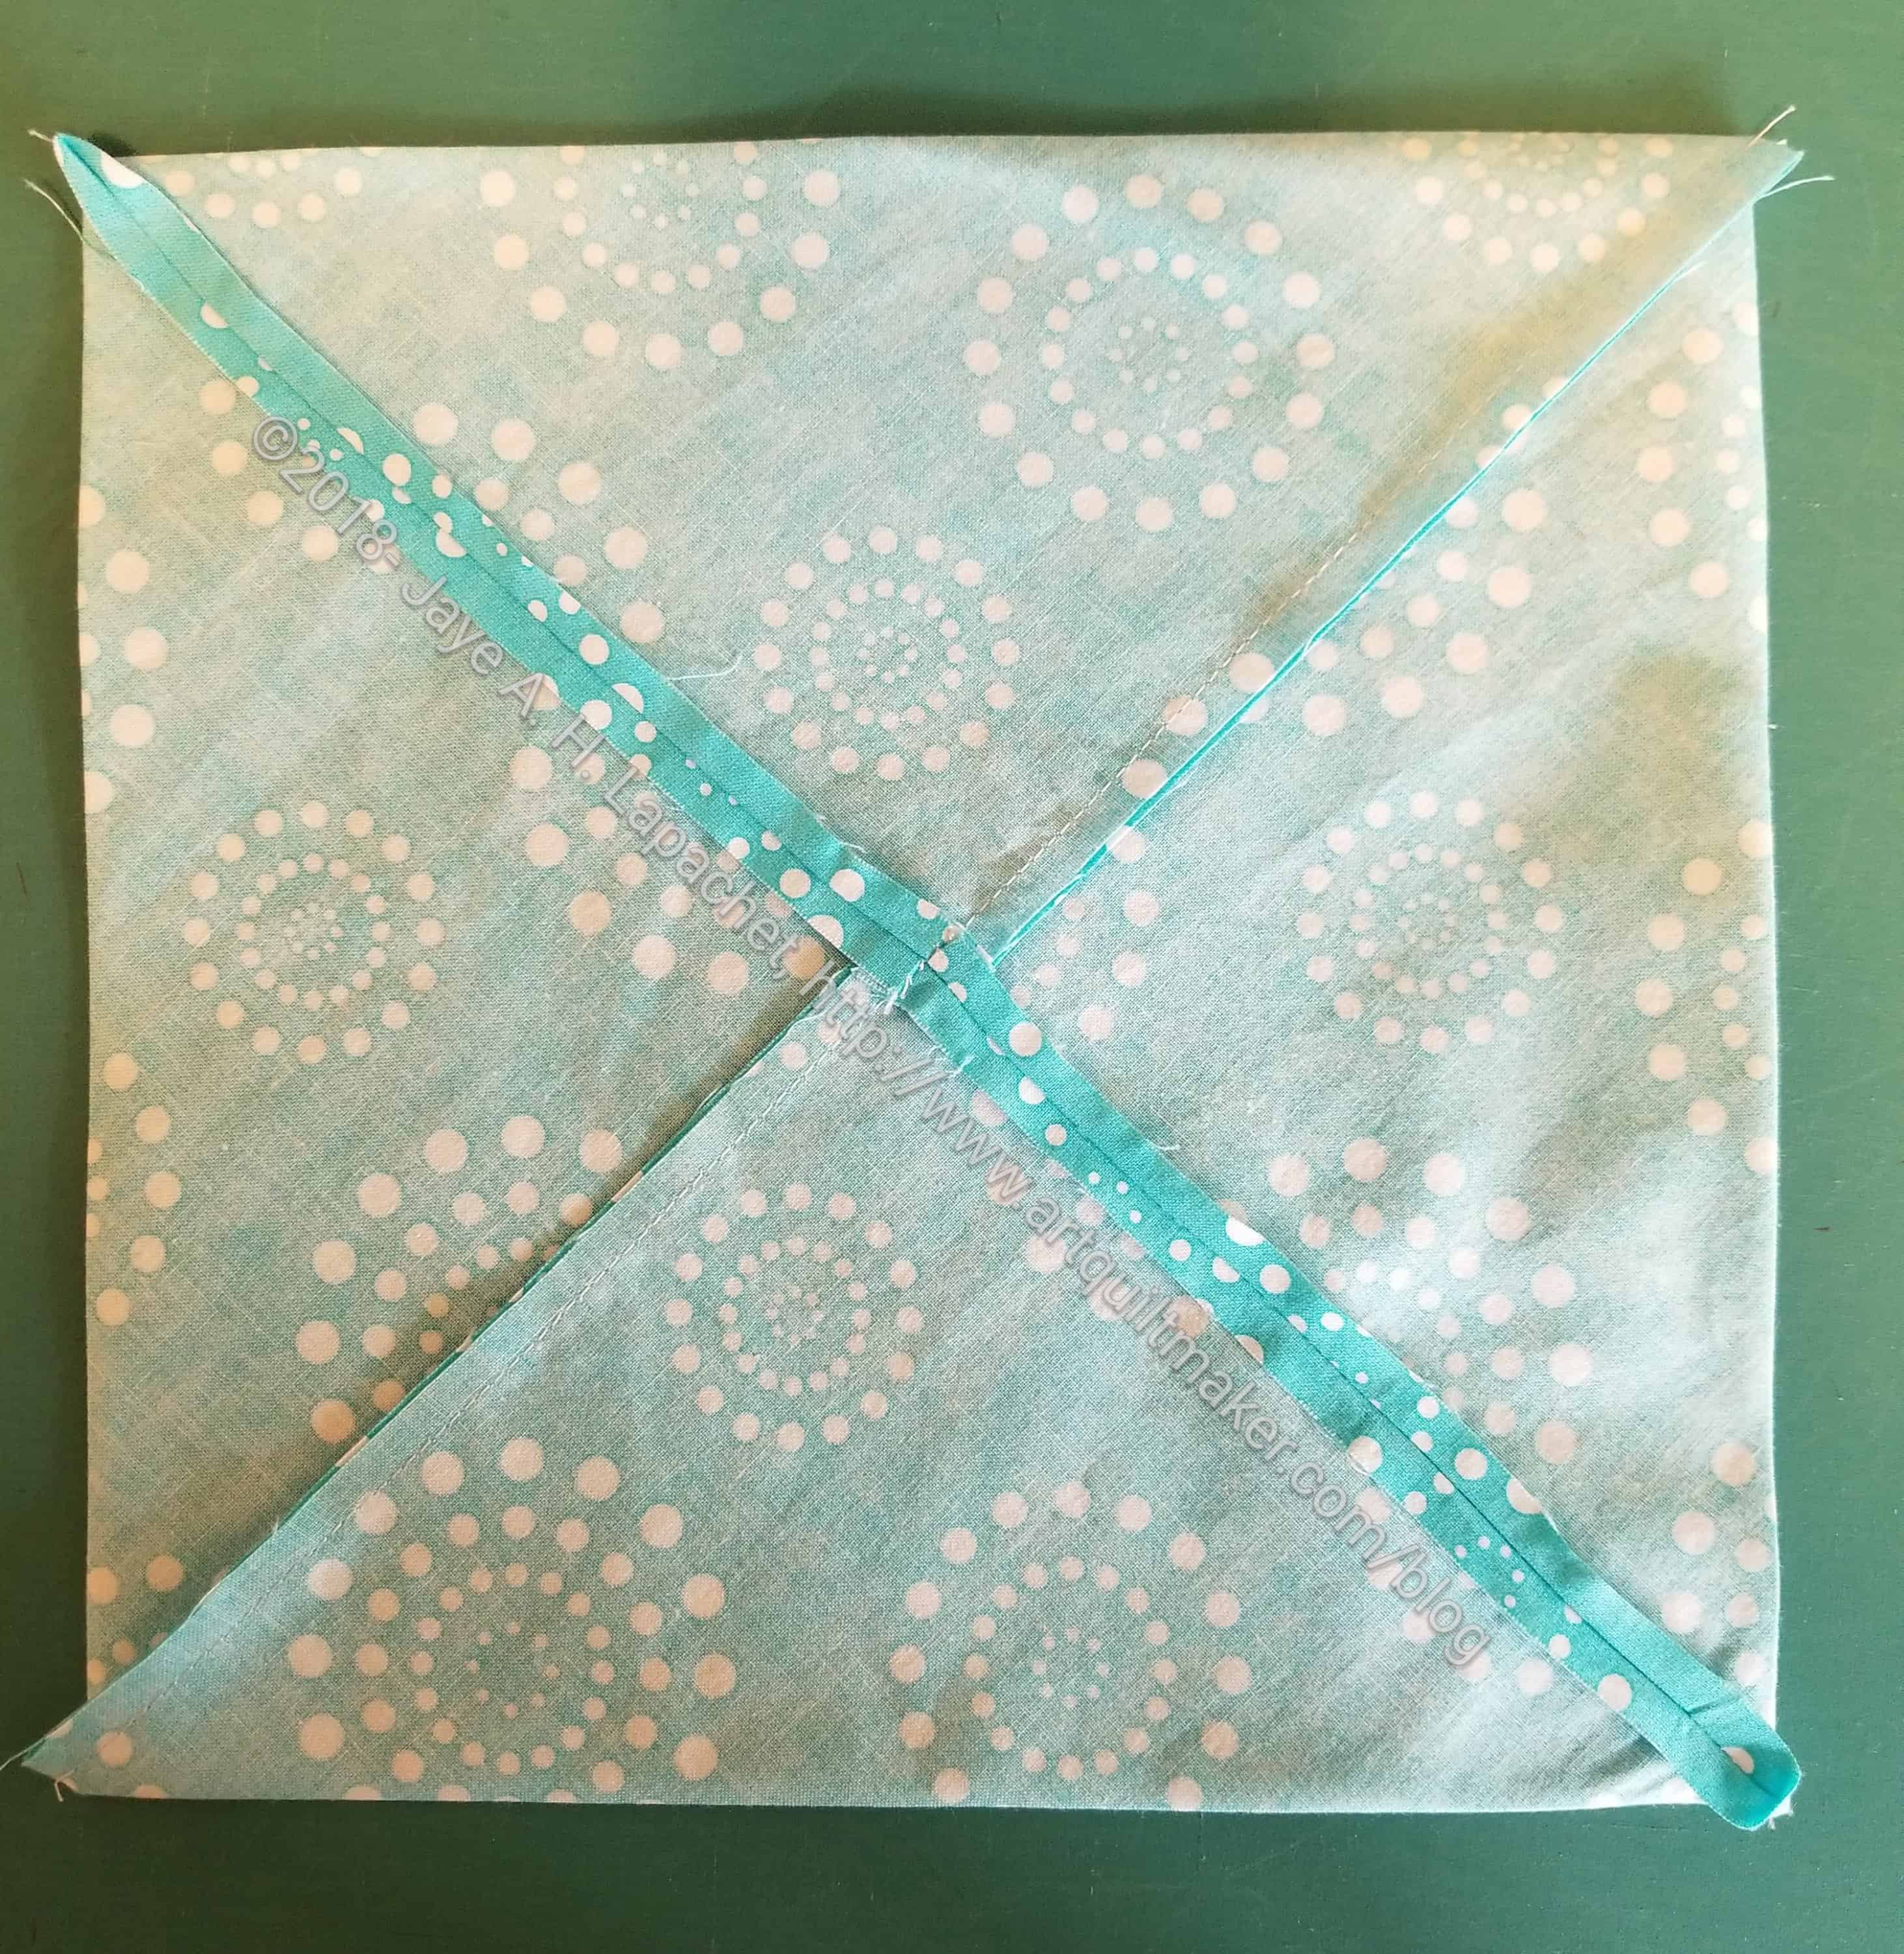
8. Press long seams in one direction, being careful to line up edge of opening as best you can.  You can press this seam open if you want.

You should now have 4 nice flat squares with wrong sides out.

9. Turn squares right sides out.

10 Poke out corners carefully. I use a knitting needle whose mate broke.

Your squares are now on the bias, so be careful when you handle them.

Press right side
Press right side

10A. Press

Press
Press


Corners folded in
Corners folded in

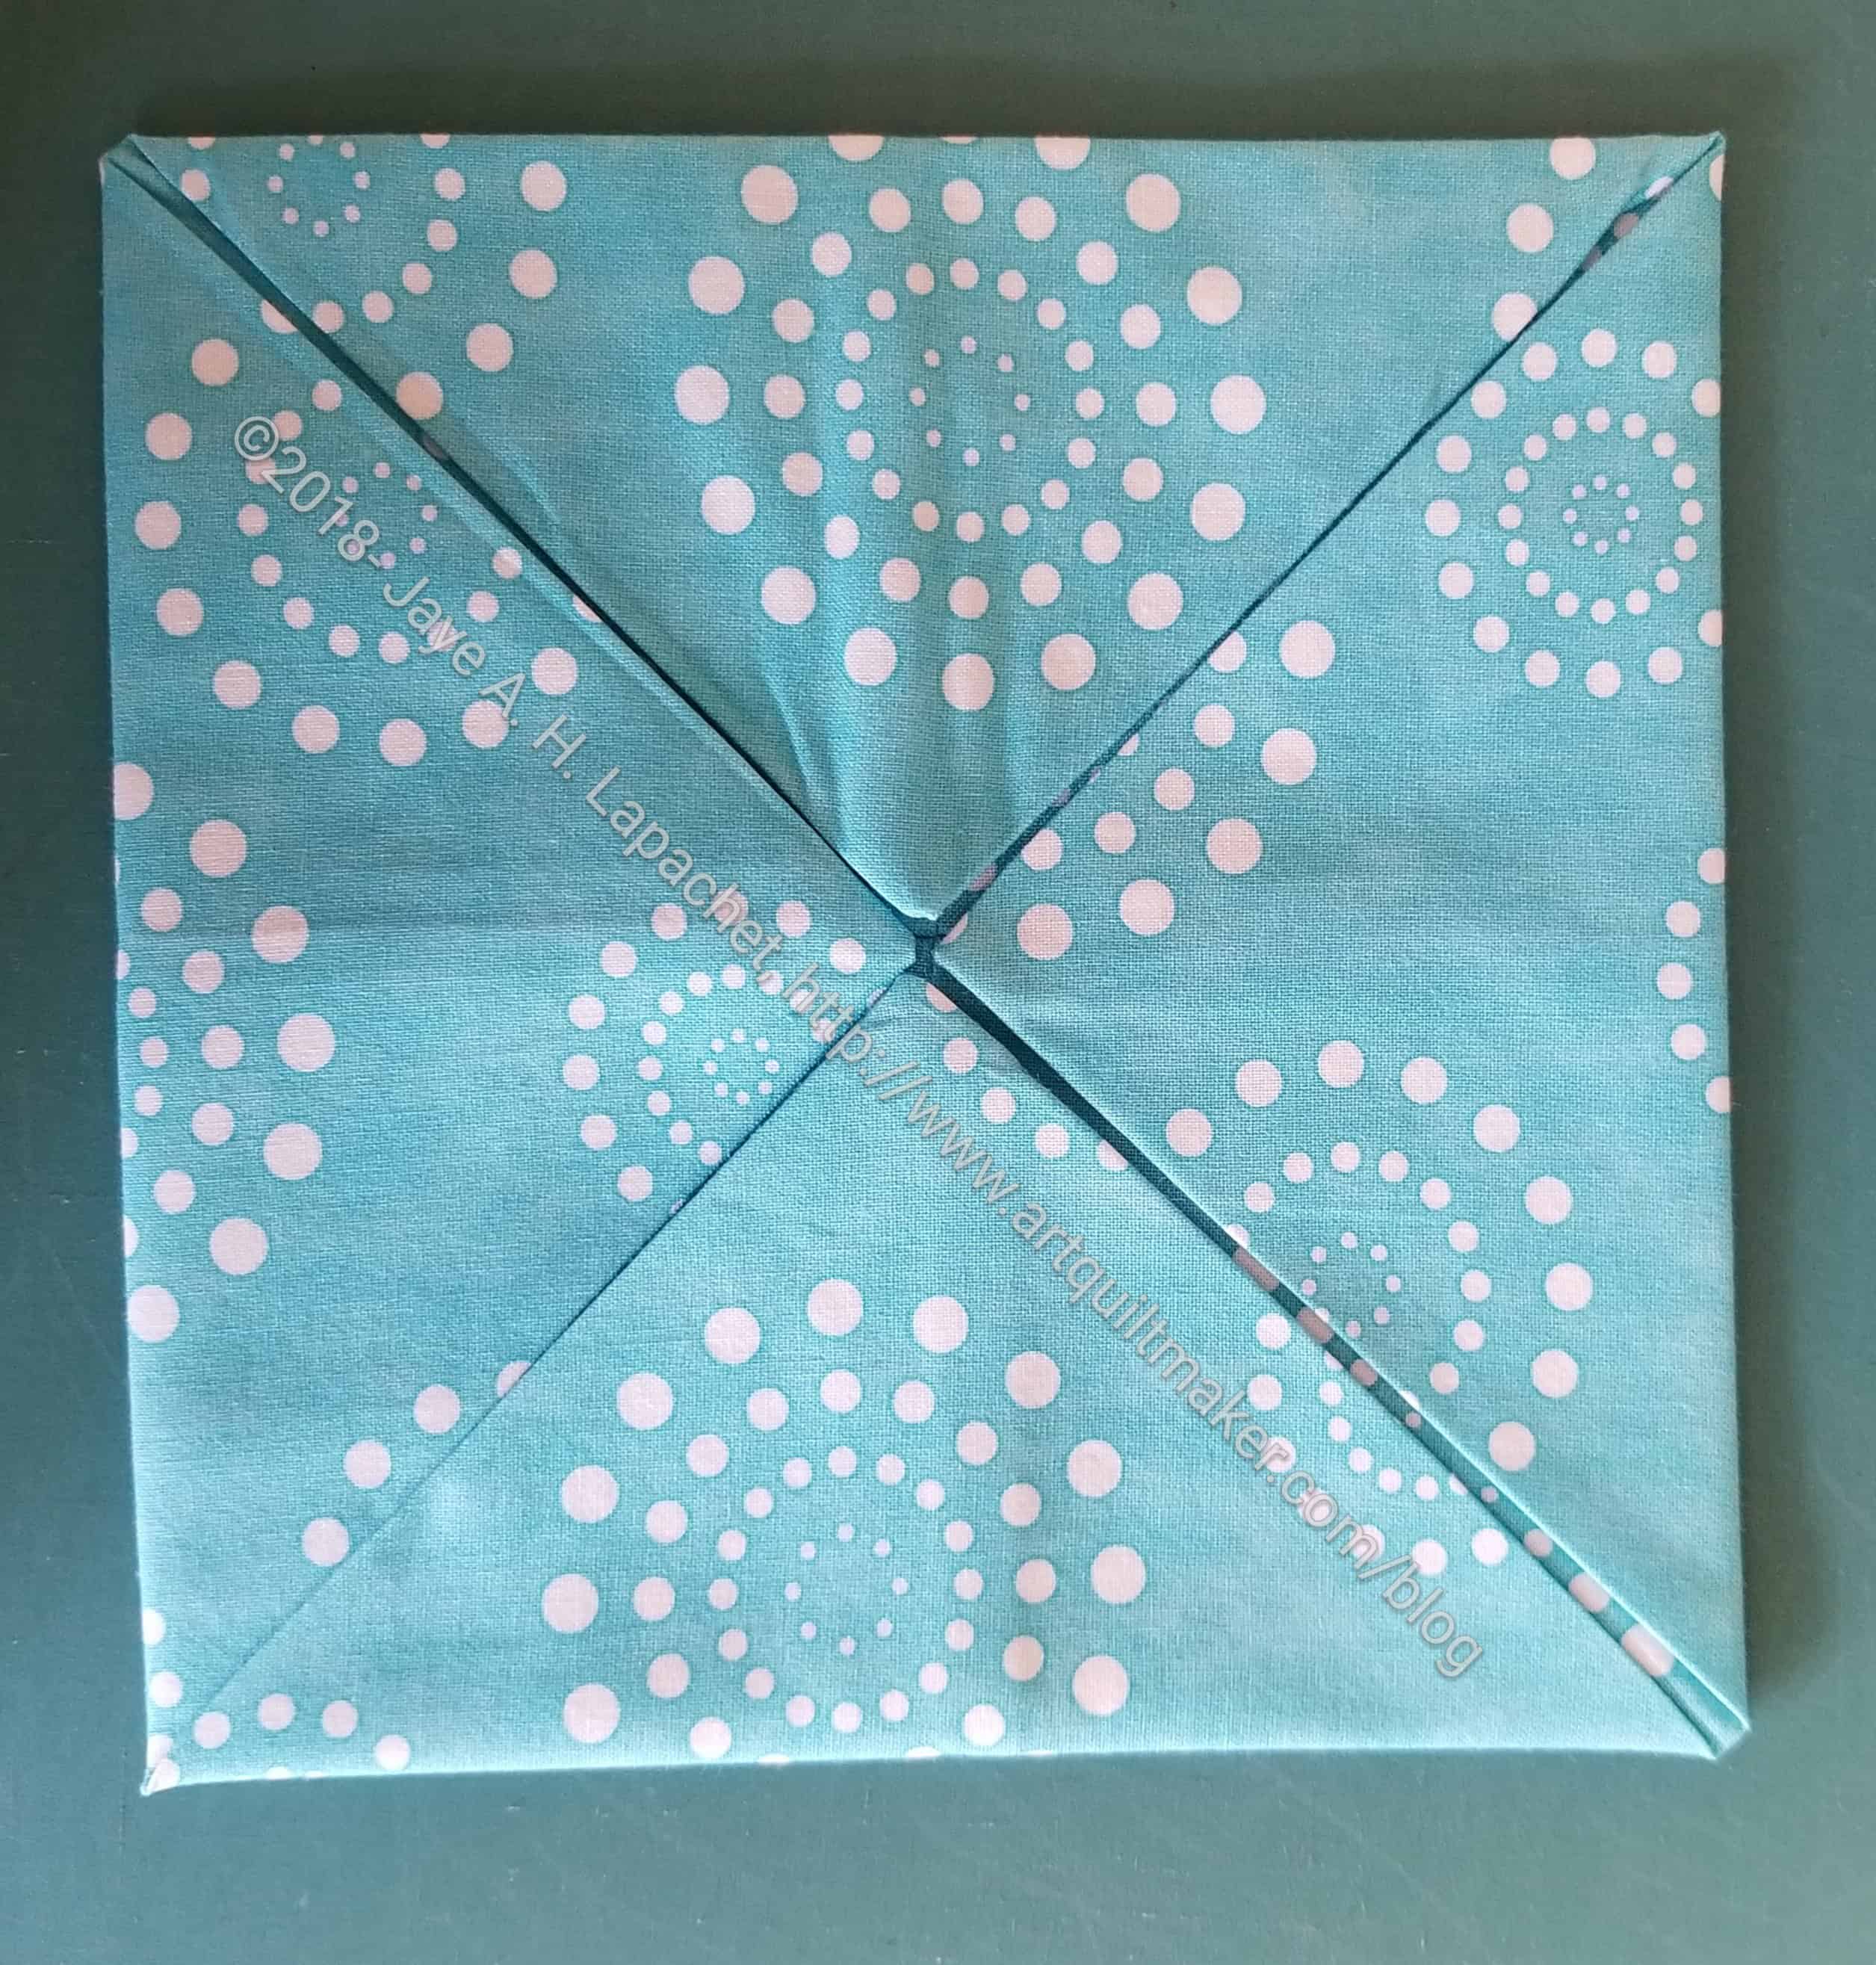
11. Fold corners into the center. Do this with all four corners and make a new square. The square should be 6 inches.

4 blocks laid out in a 2x2 grid
4 blocks laid out in a 2×2 grid

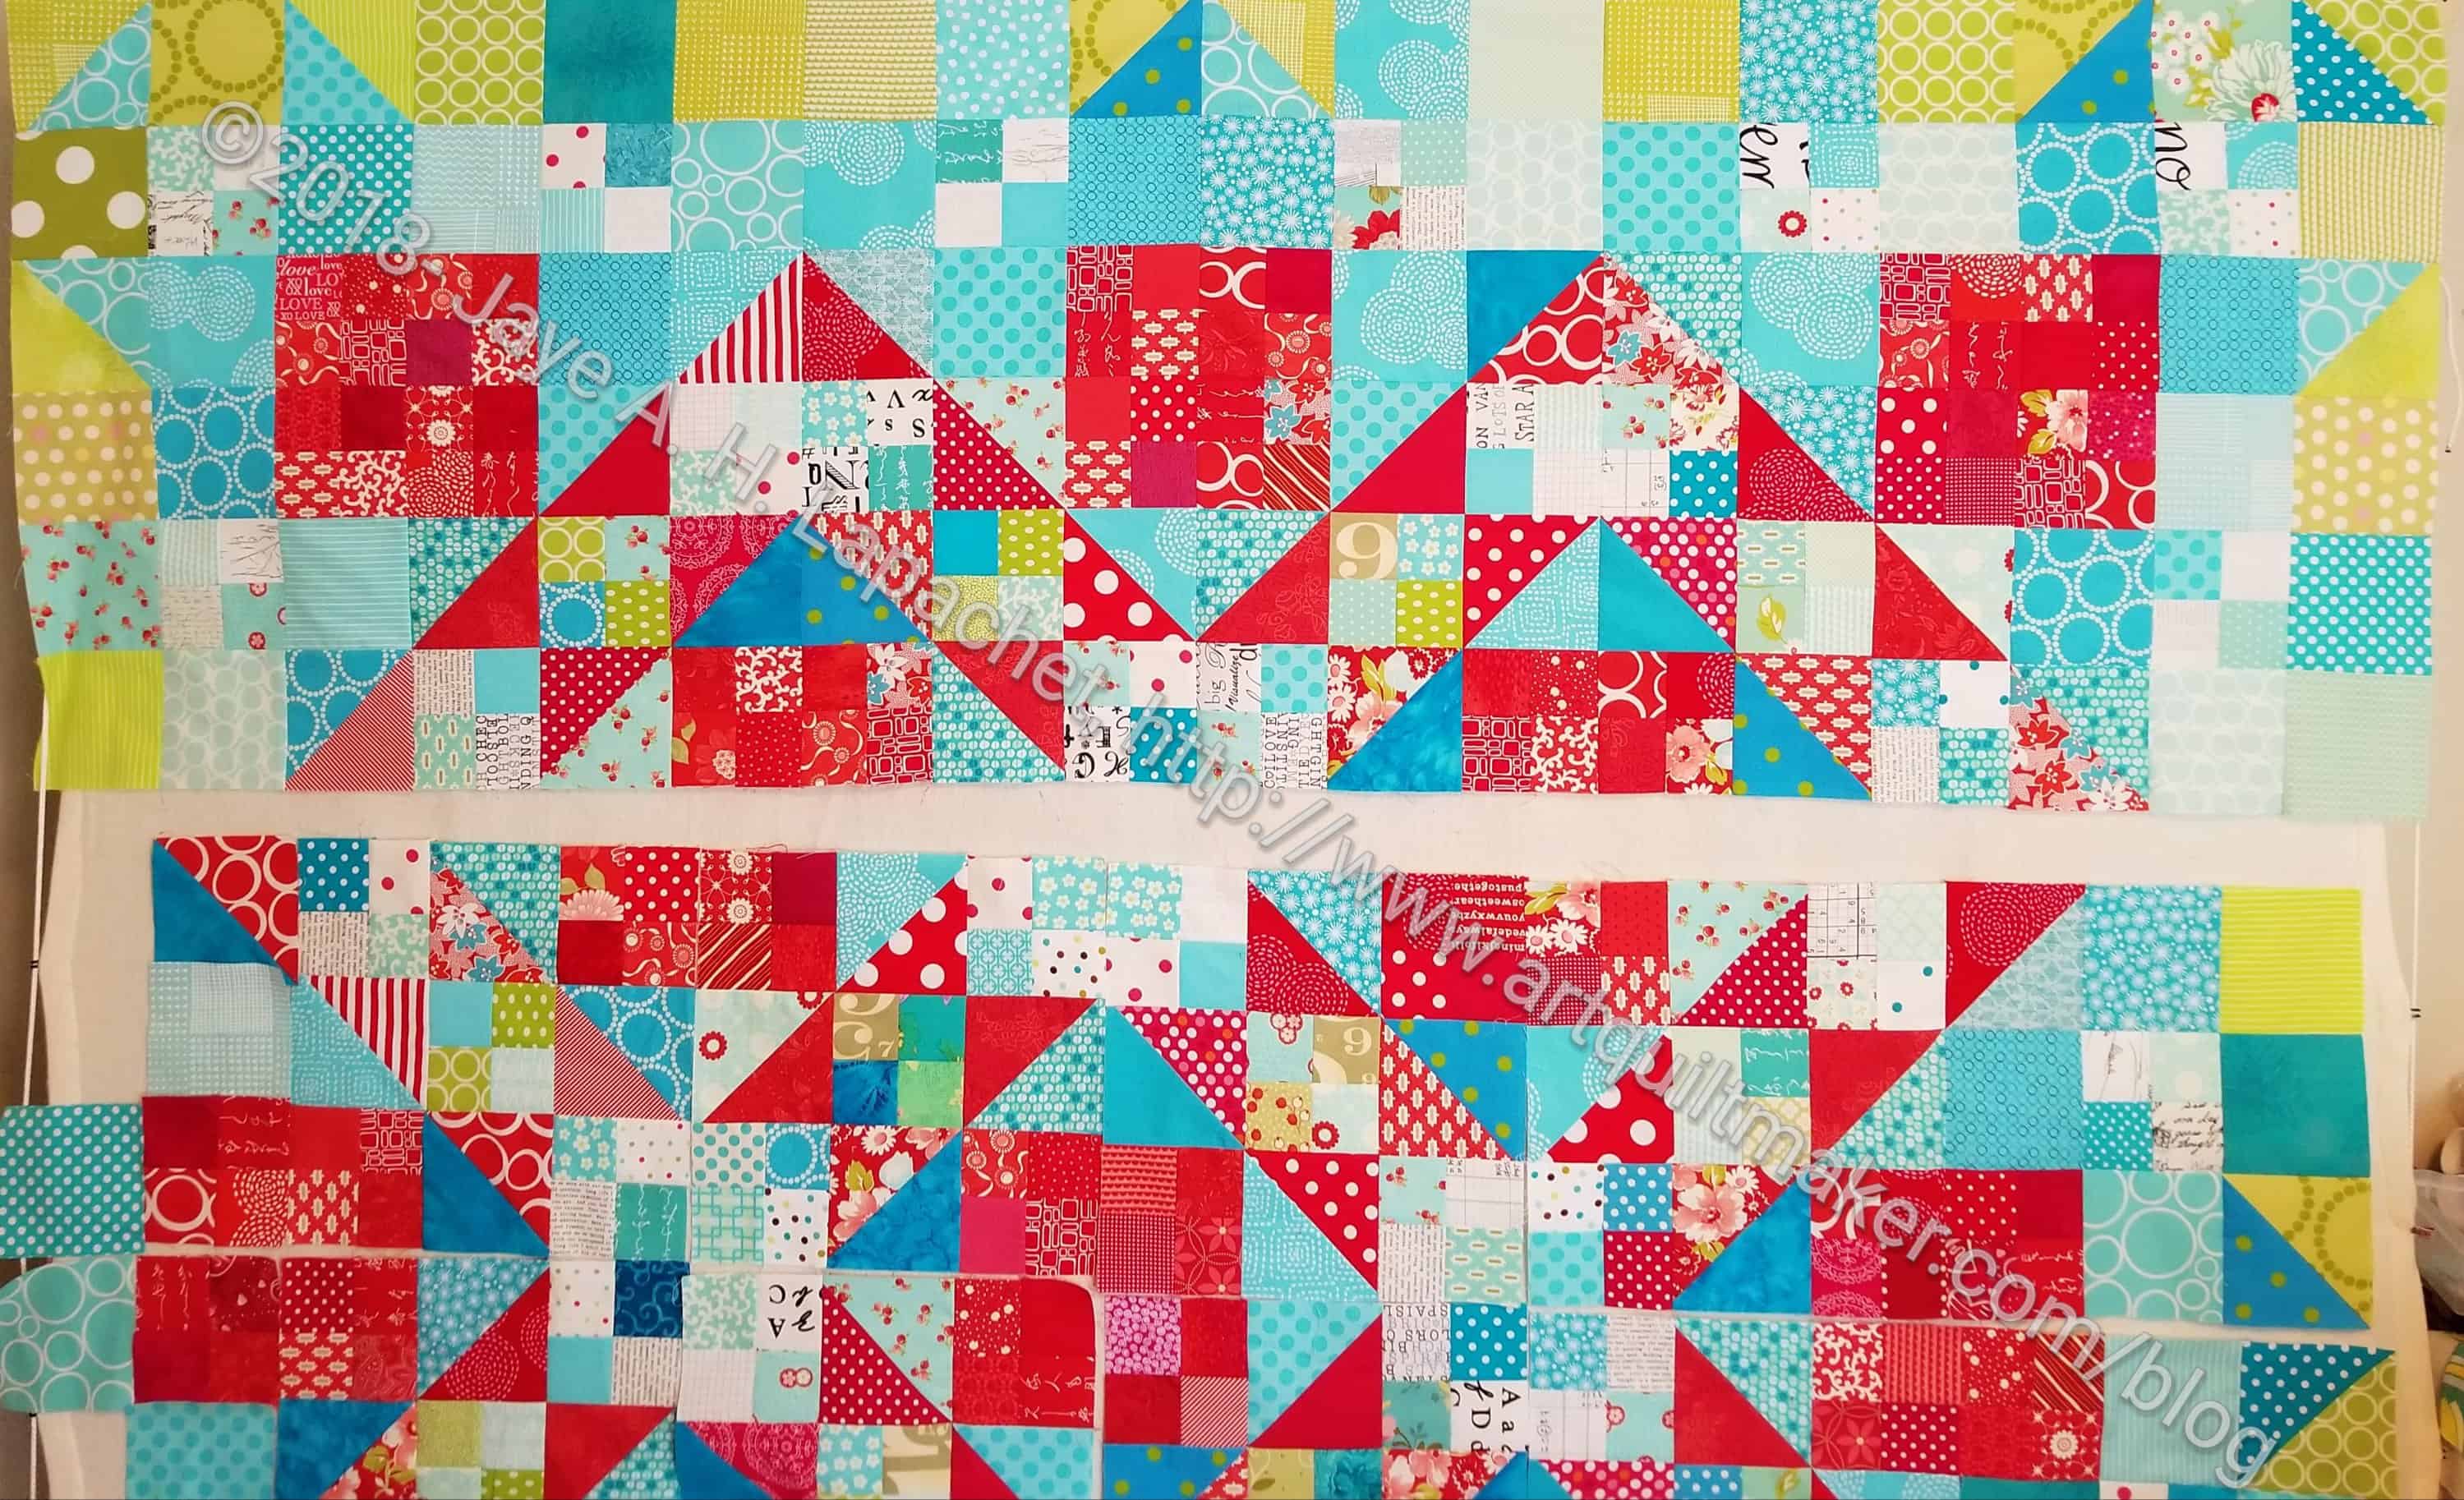
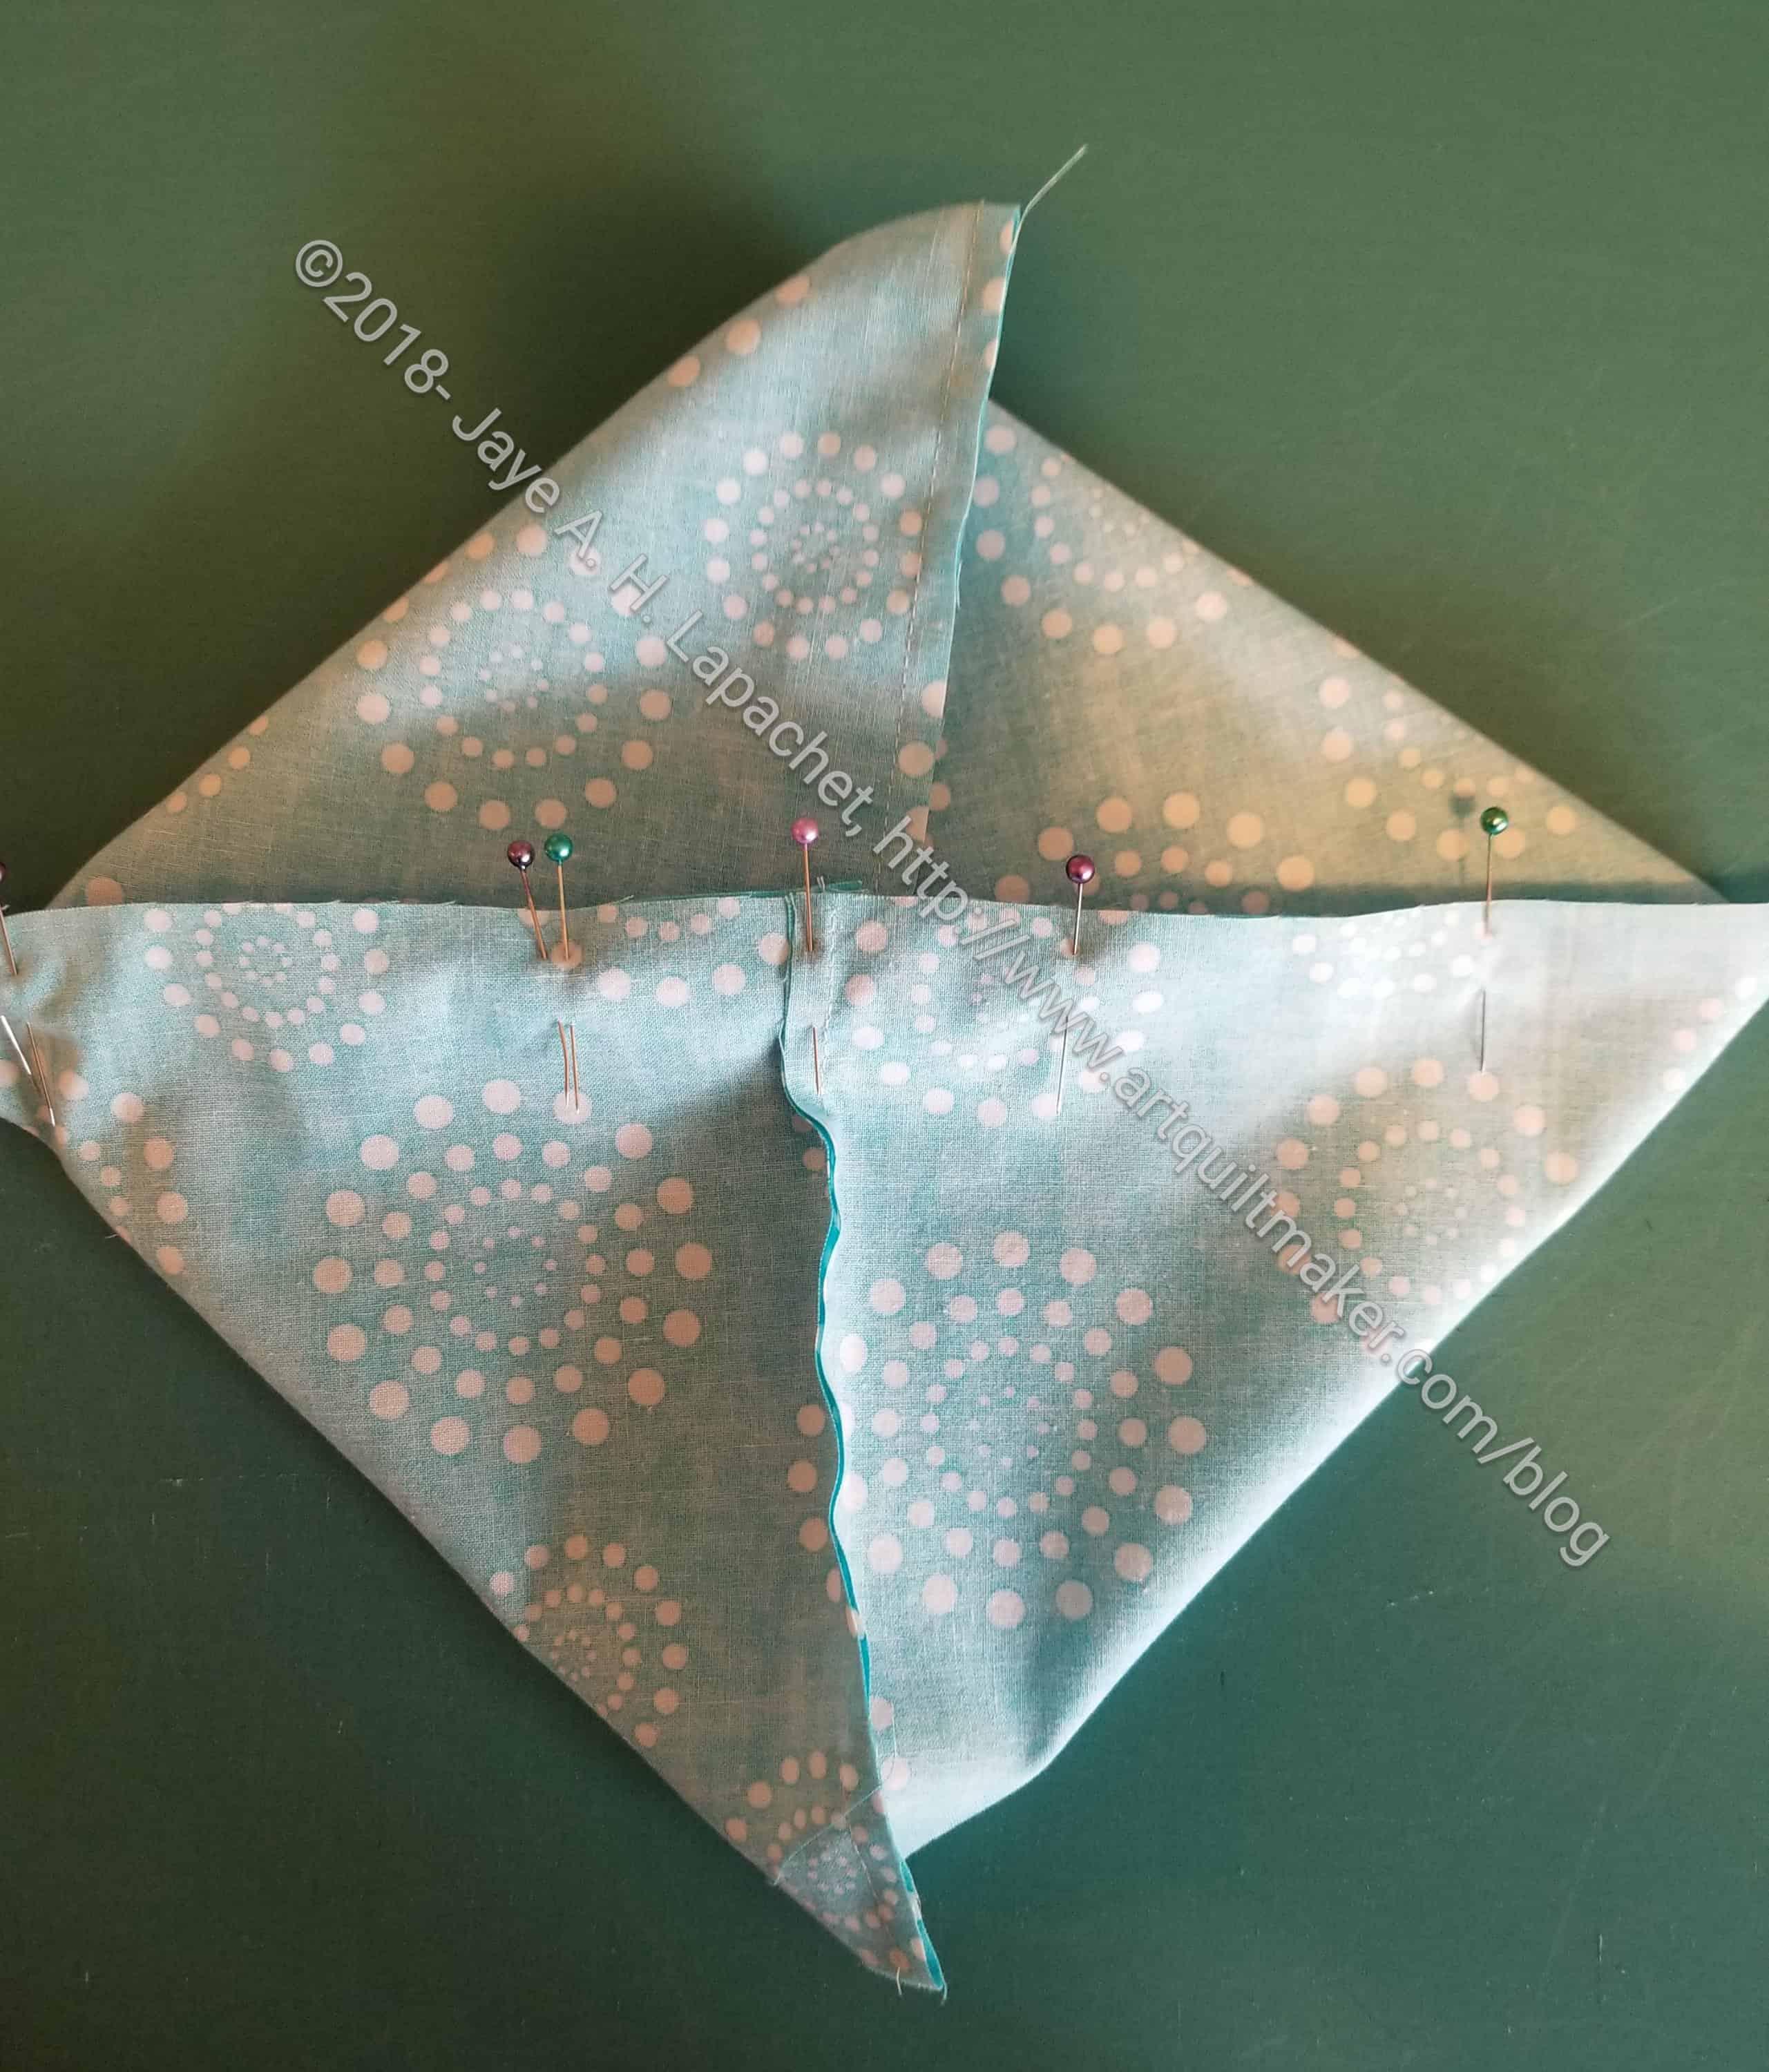
12. Lay out the blocks in a 2 x 2 grid, so you can see what you have

Pin triangles together

13. Pin the center triangles of the two top triangles together. Do the same for the bottom triangles. Now your 2×2 grid will be pinned together in two rectangular sections

Draw a line in the crease

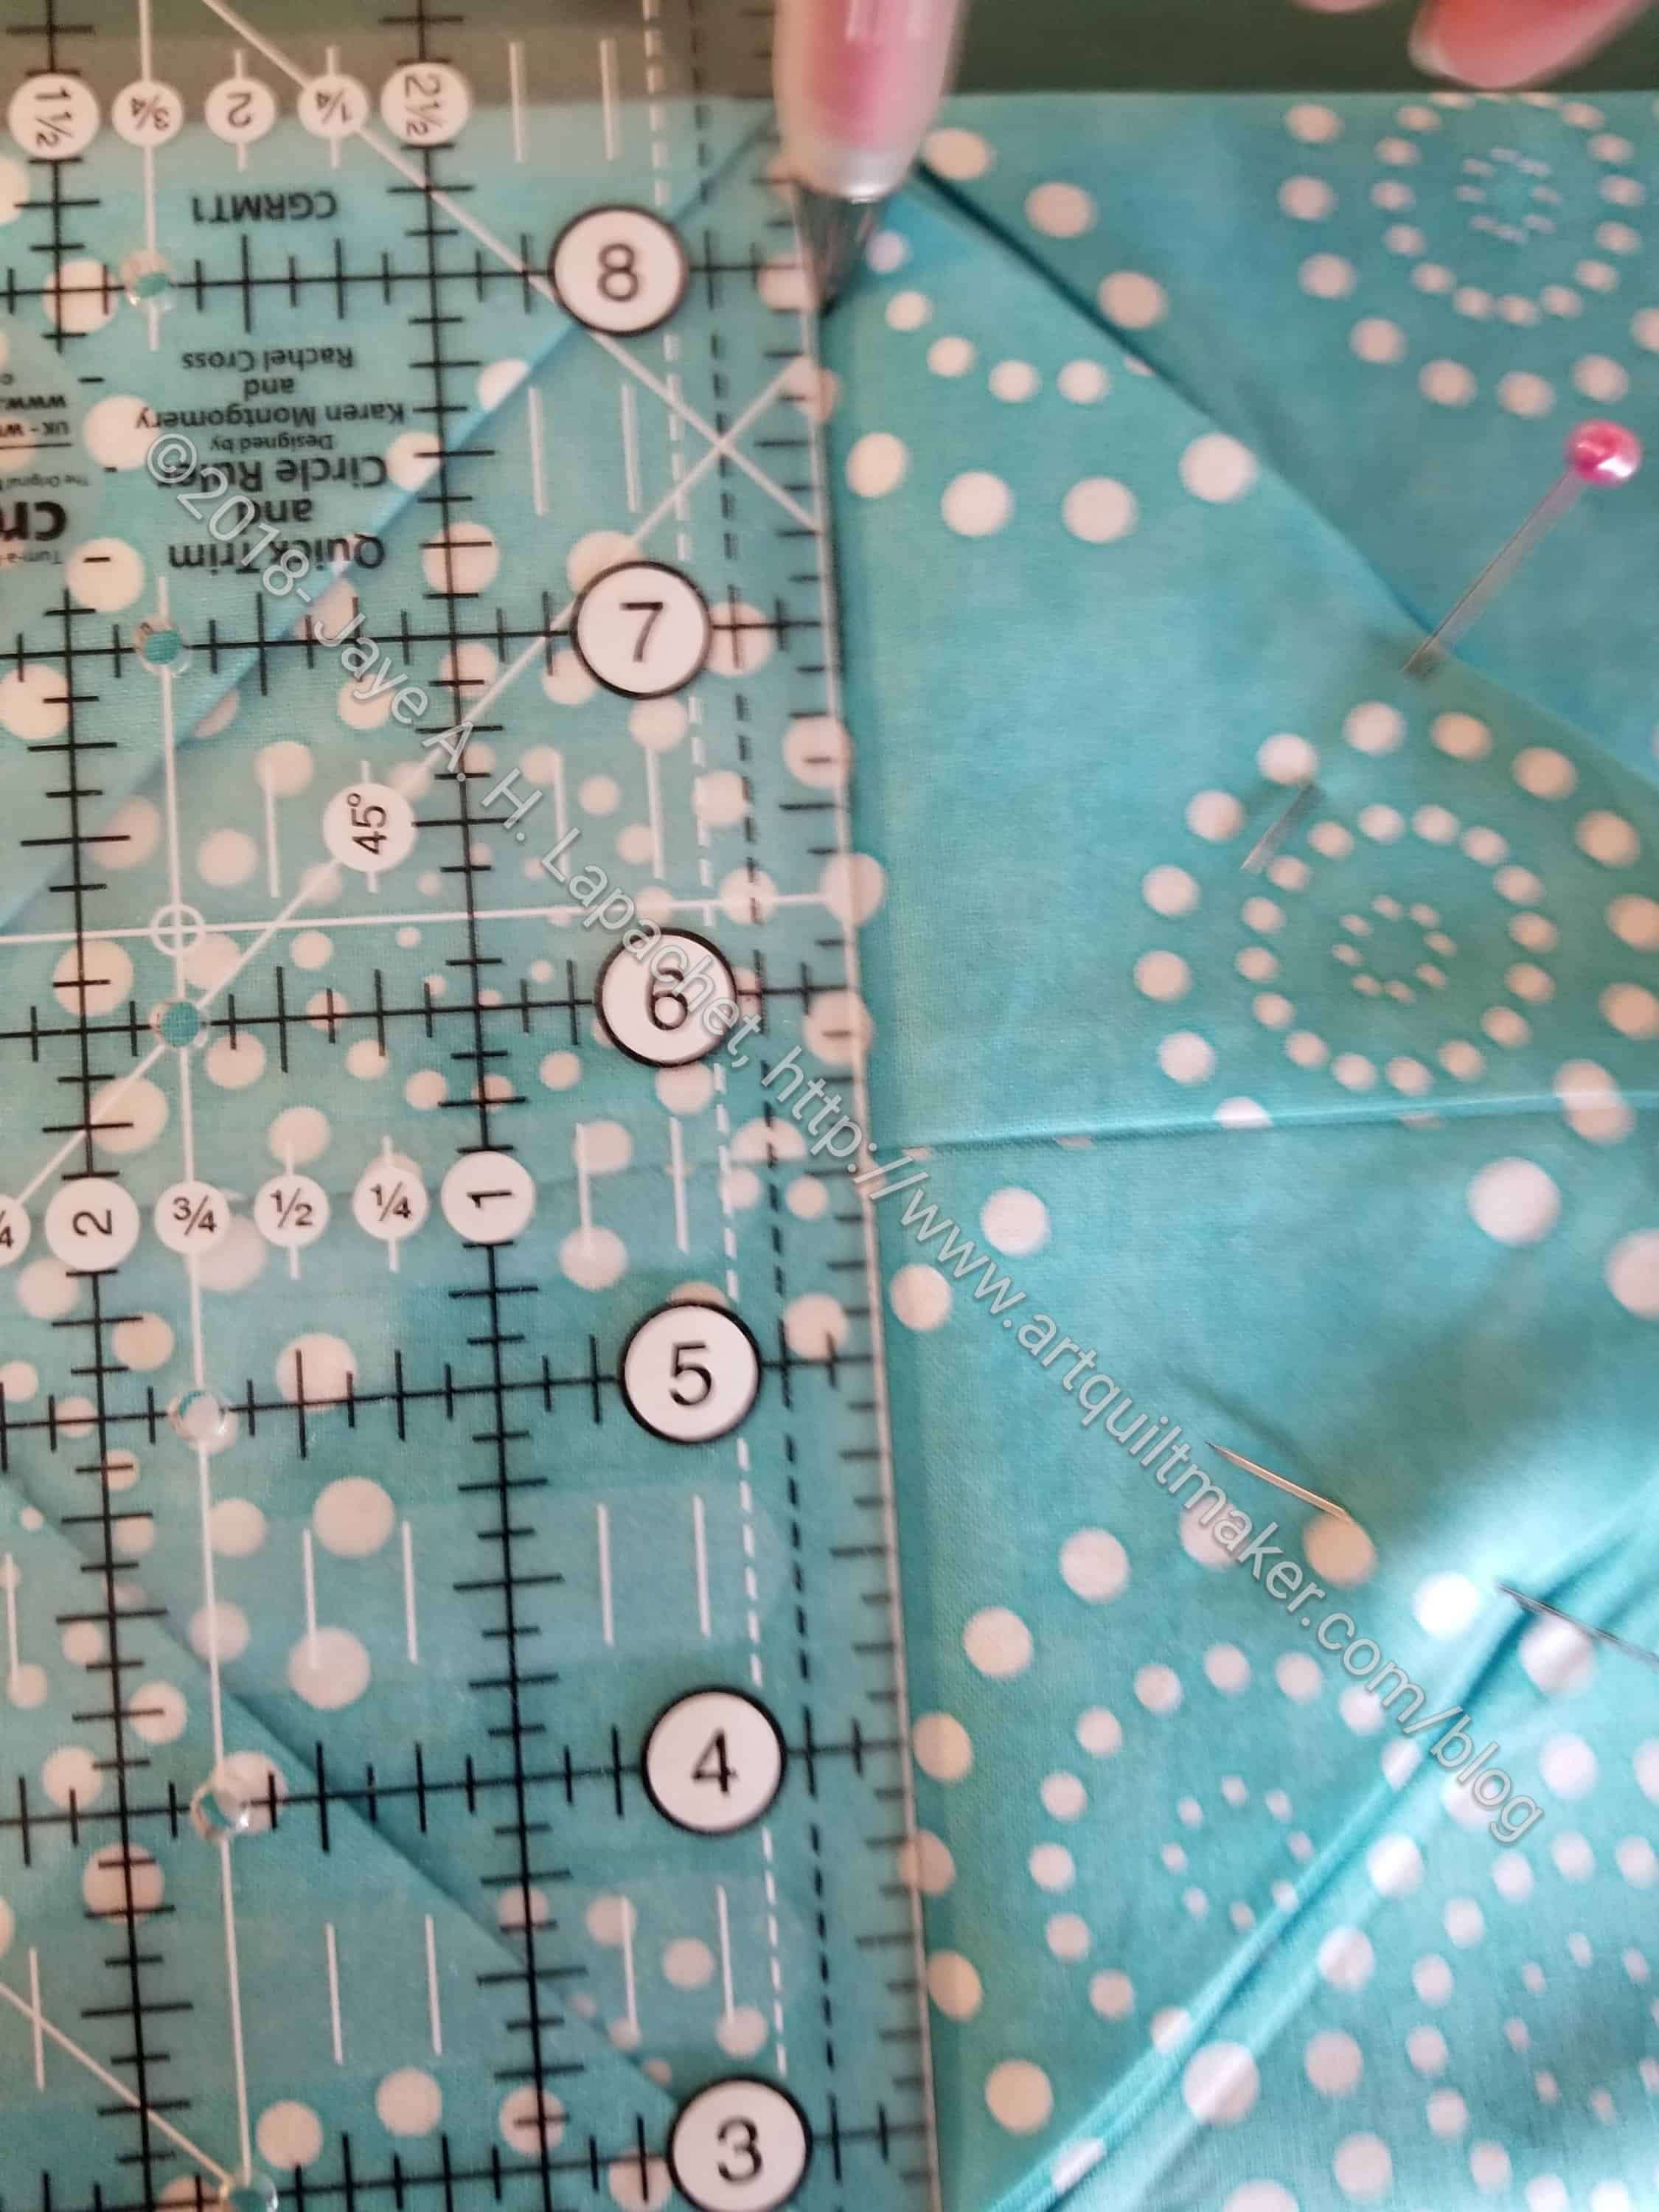
14. Using a ruler (I use a 3.5 x 12.5 Creative Grids), and your marking implement (I like Sewline pencils), draw a line in the crease under the triangles you are about to pin

Line up squares
Line up squares

15. Line up squares with backs together and triangles pointing to the right.

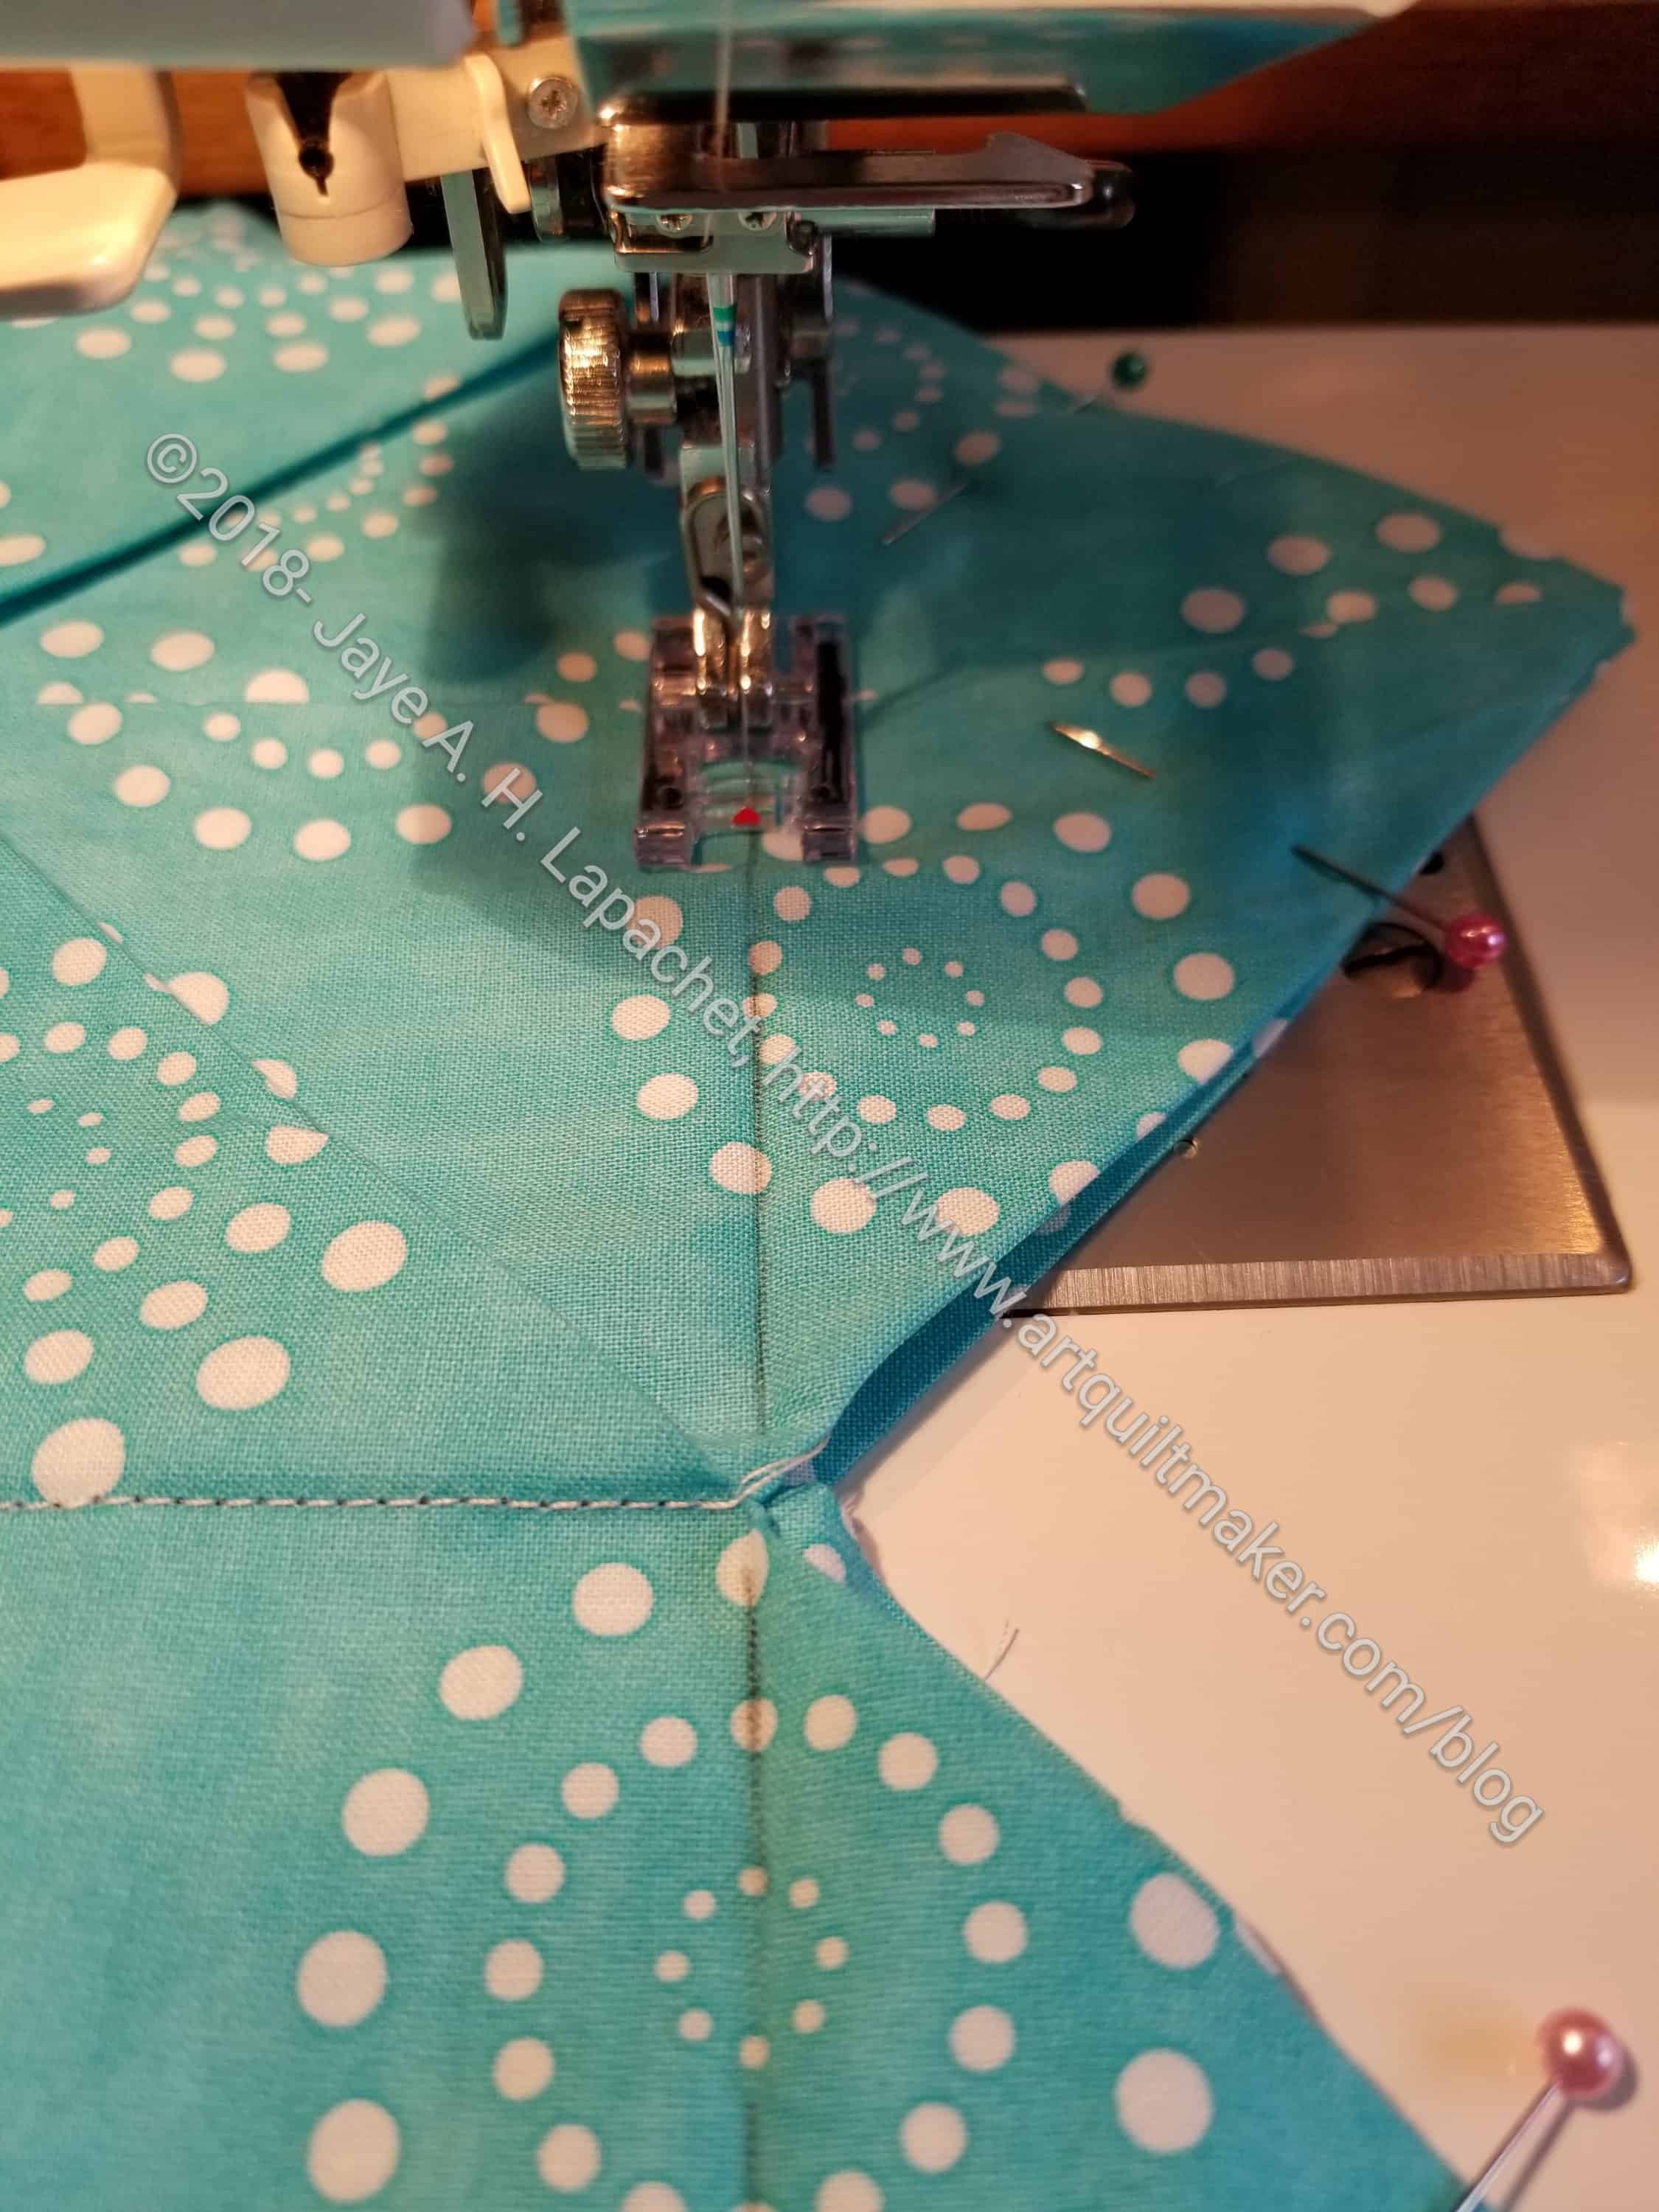
16. Put your applique’ foot on your sewing machine.

17. Sew along the crease on both sets.

18. Lay out the 2×2 grid again. Now you will have two ‘rows’. You are going to sew the rows together.

Pin them together
Pin them together

19. Fold up the top triangles from the bottom row and the bottom triangle from the top row.

Draw another line between the two 'rows' in the crease
Draw another line between the two ‘rows’ in the crease

20. Draw a line along the crease at the bottom of the two triangles.


21. Sew along the line. After, you will have your 2×2 grid of squares sewn together and the triangles will be flapping around.

Start laying out your foreground squares
Foreground squares laid out

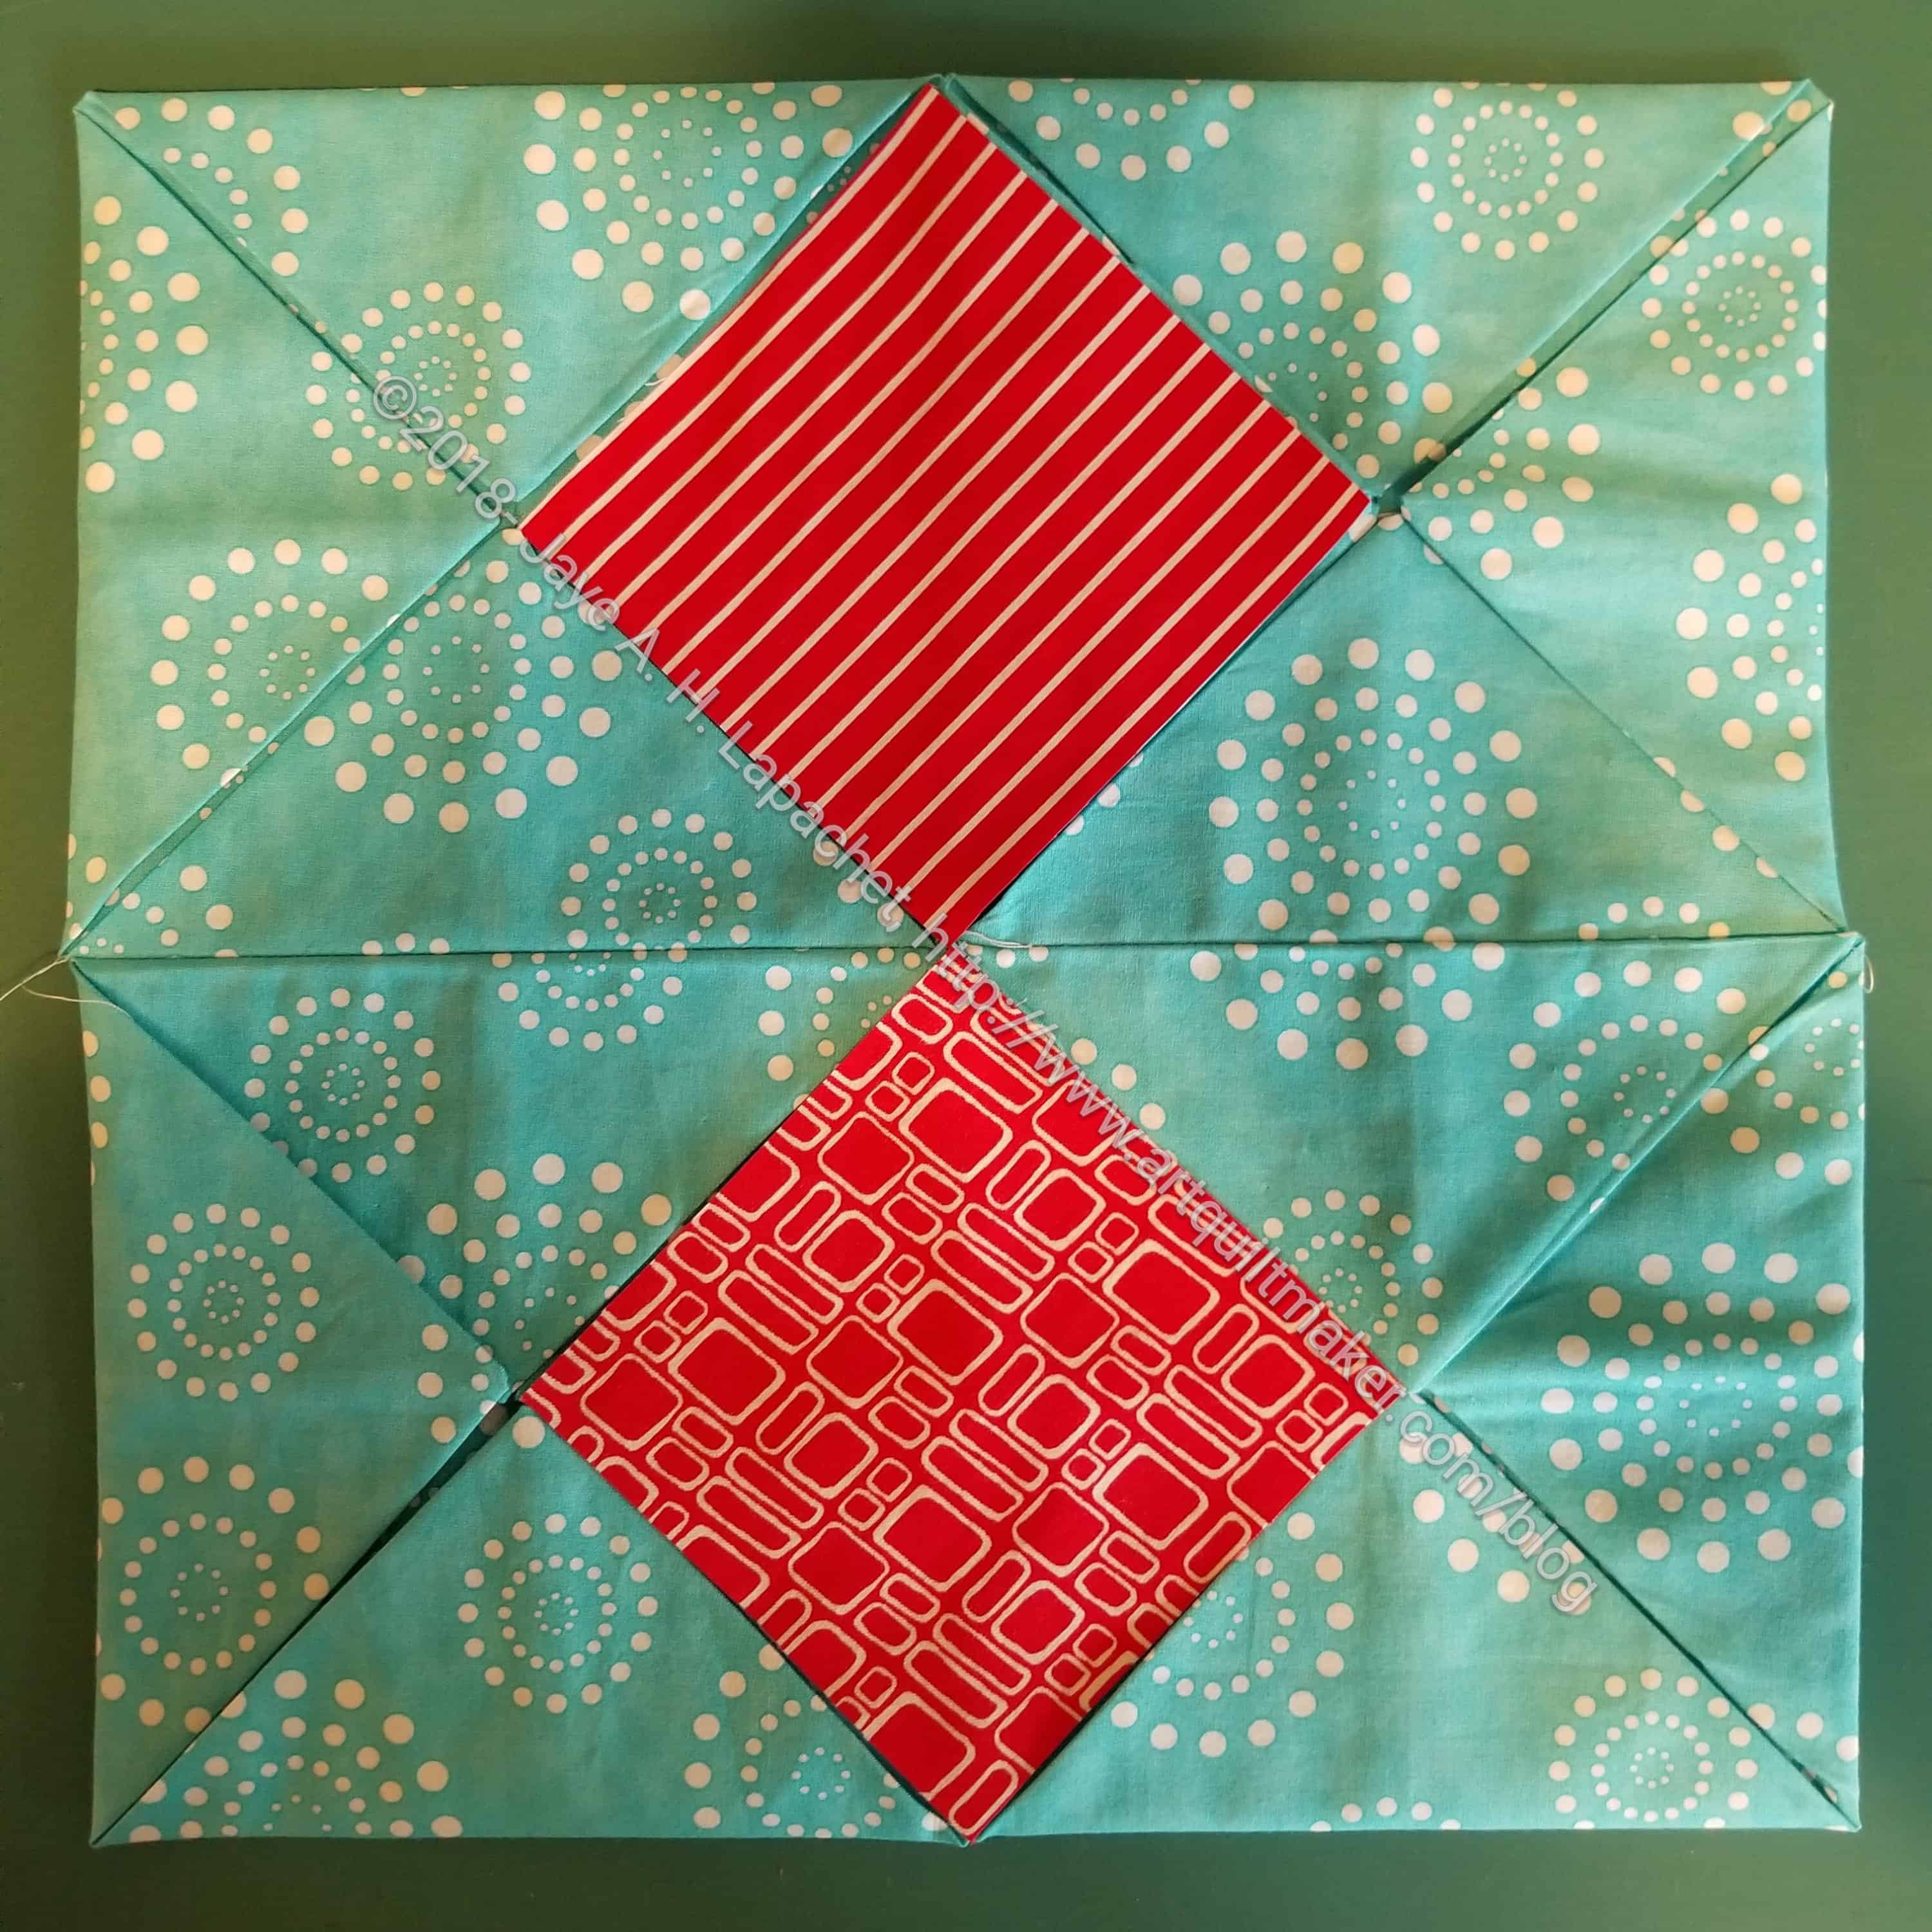
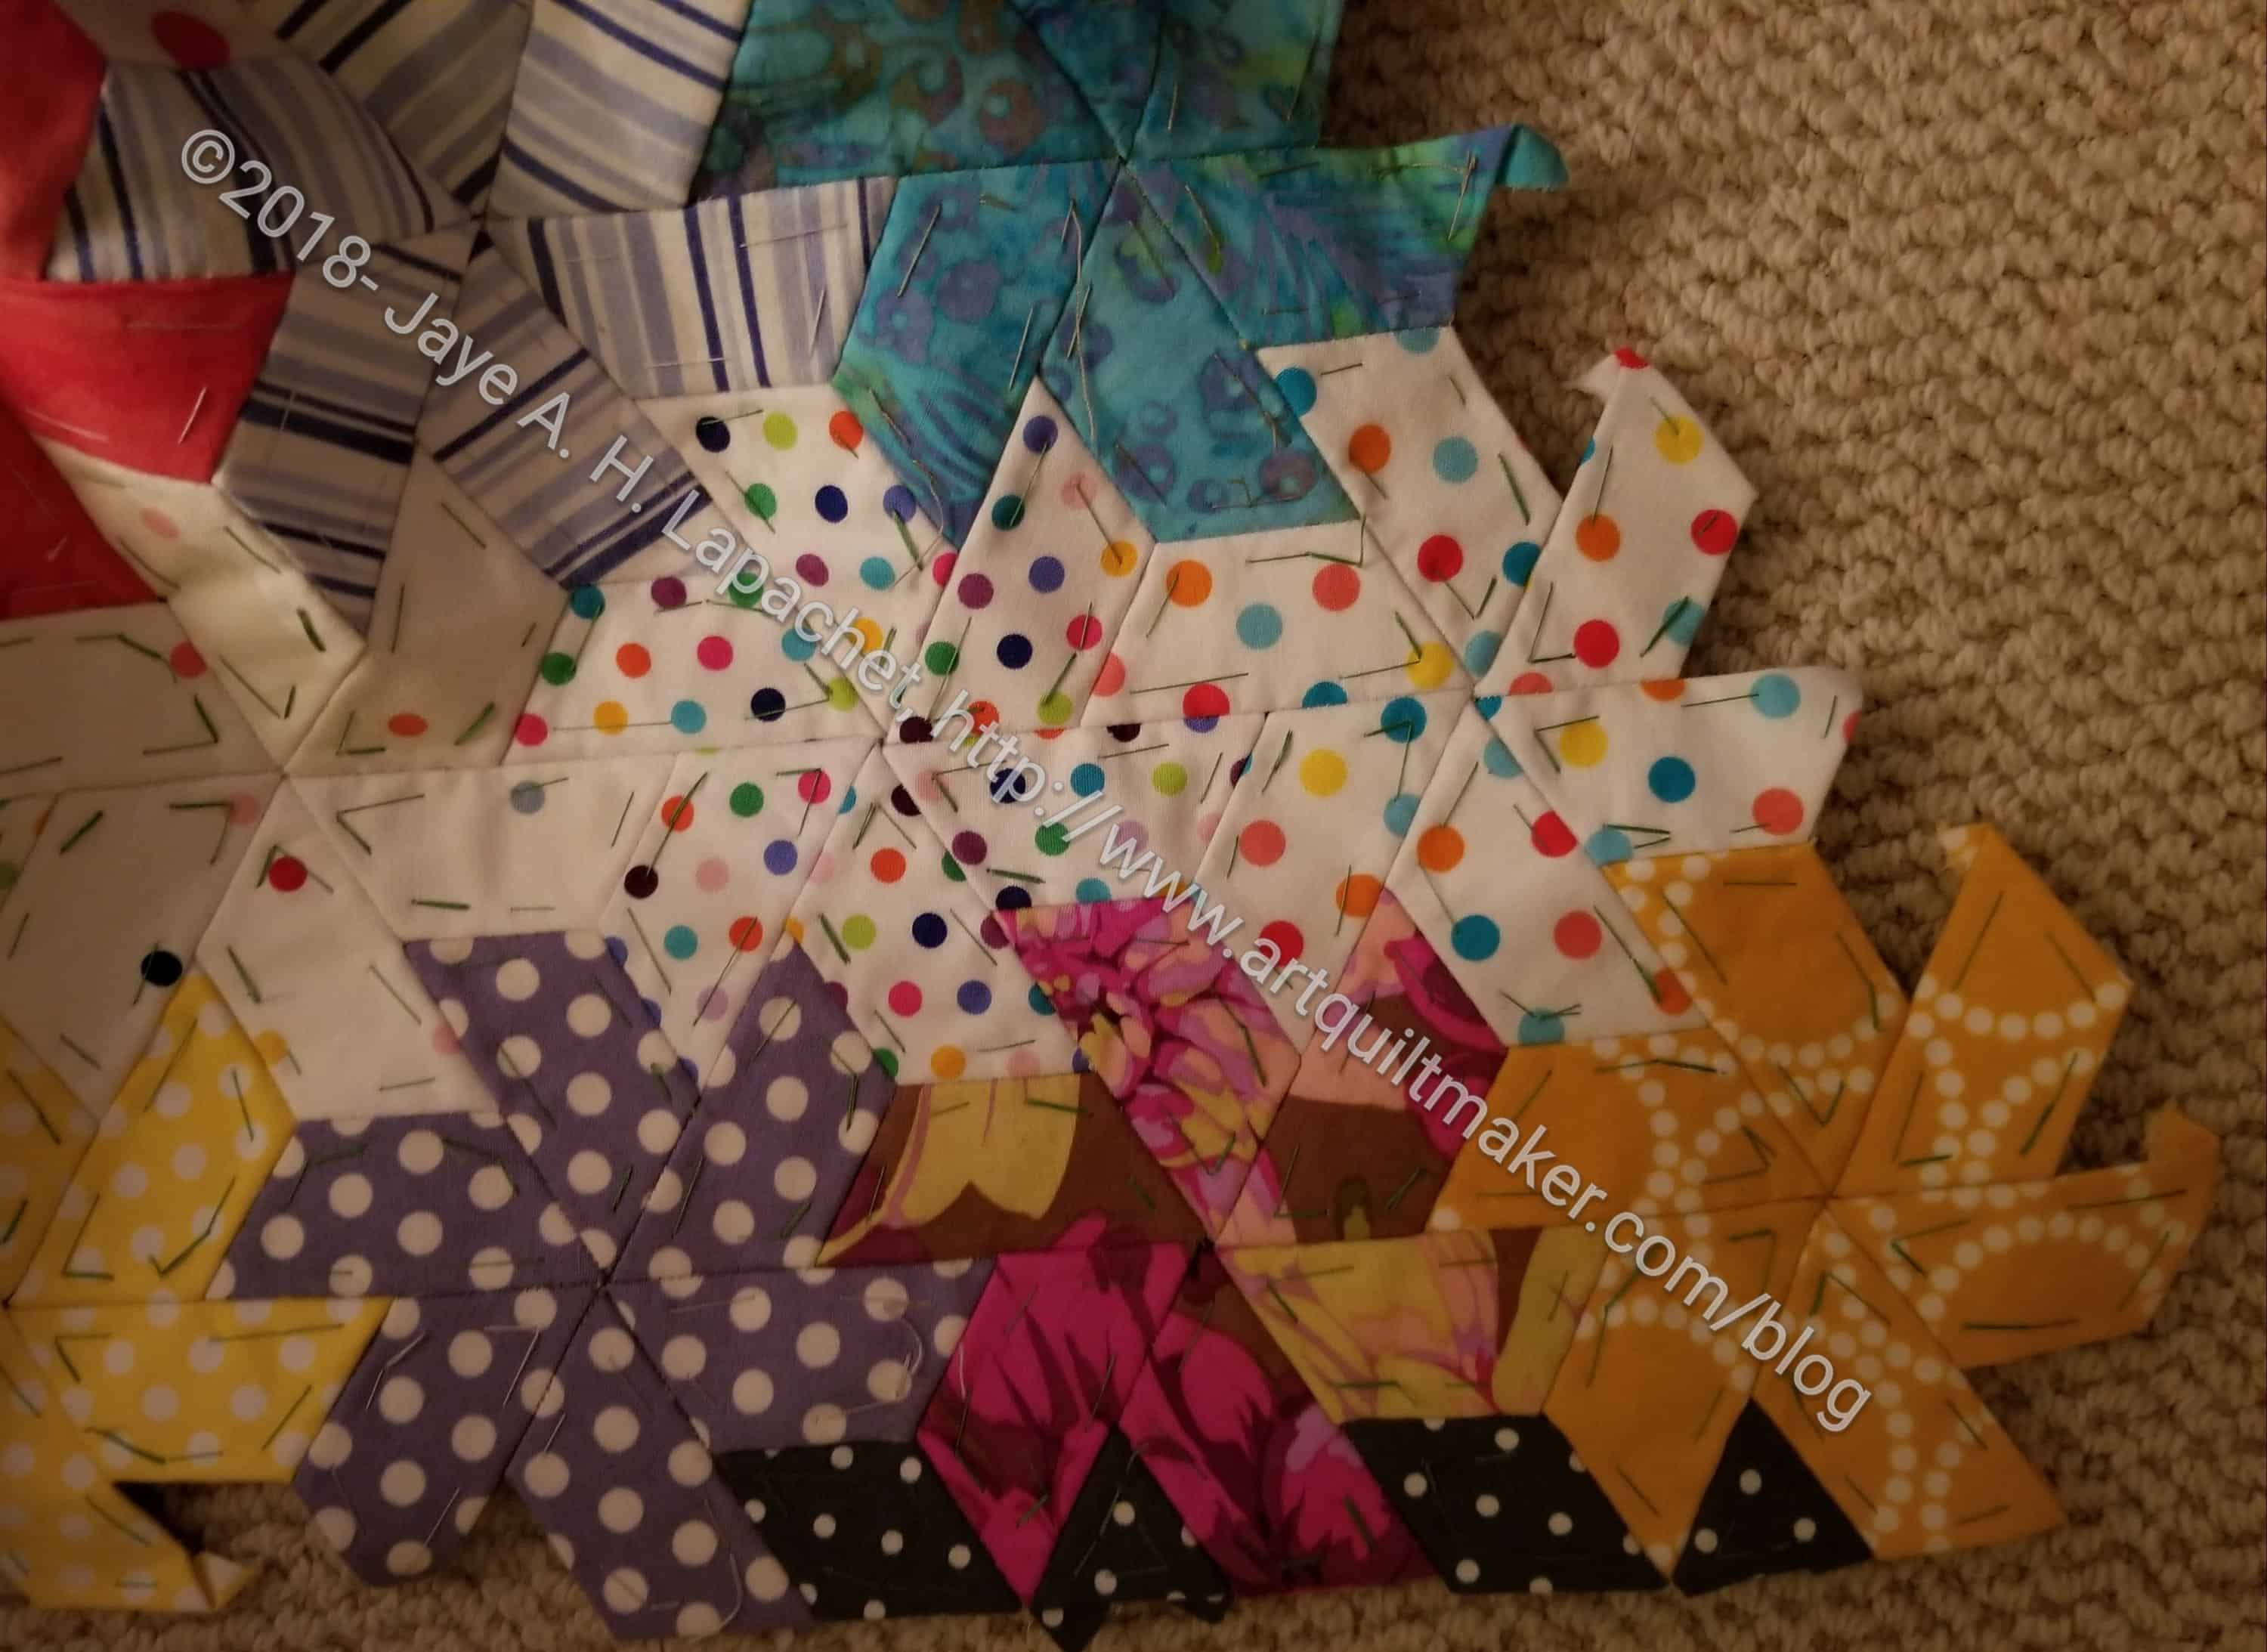
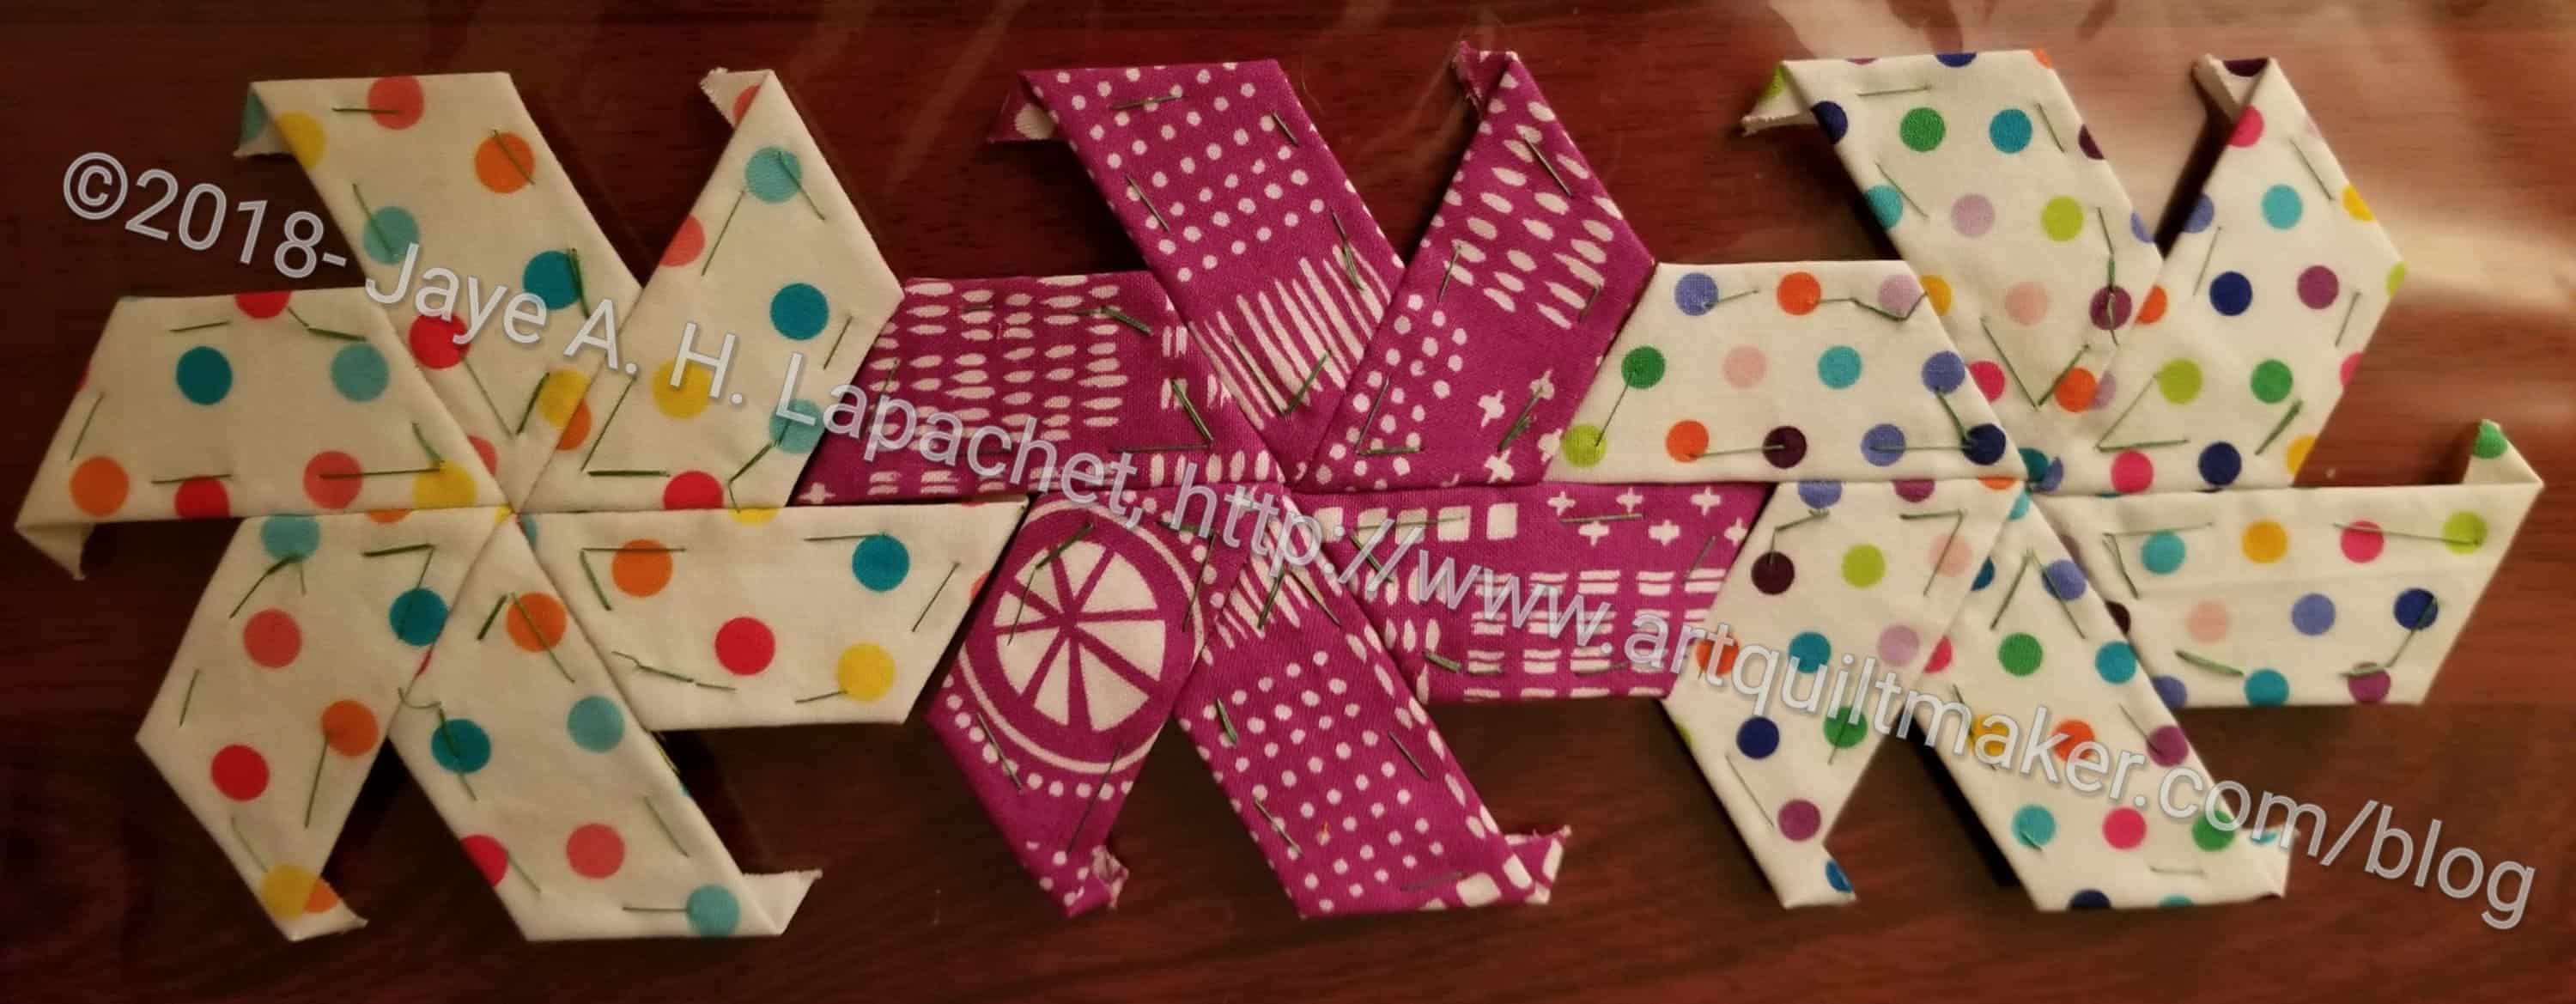
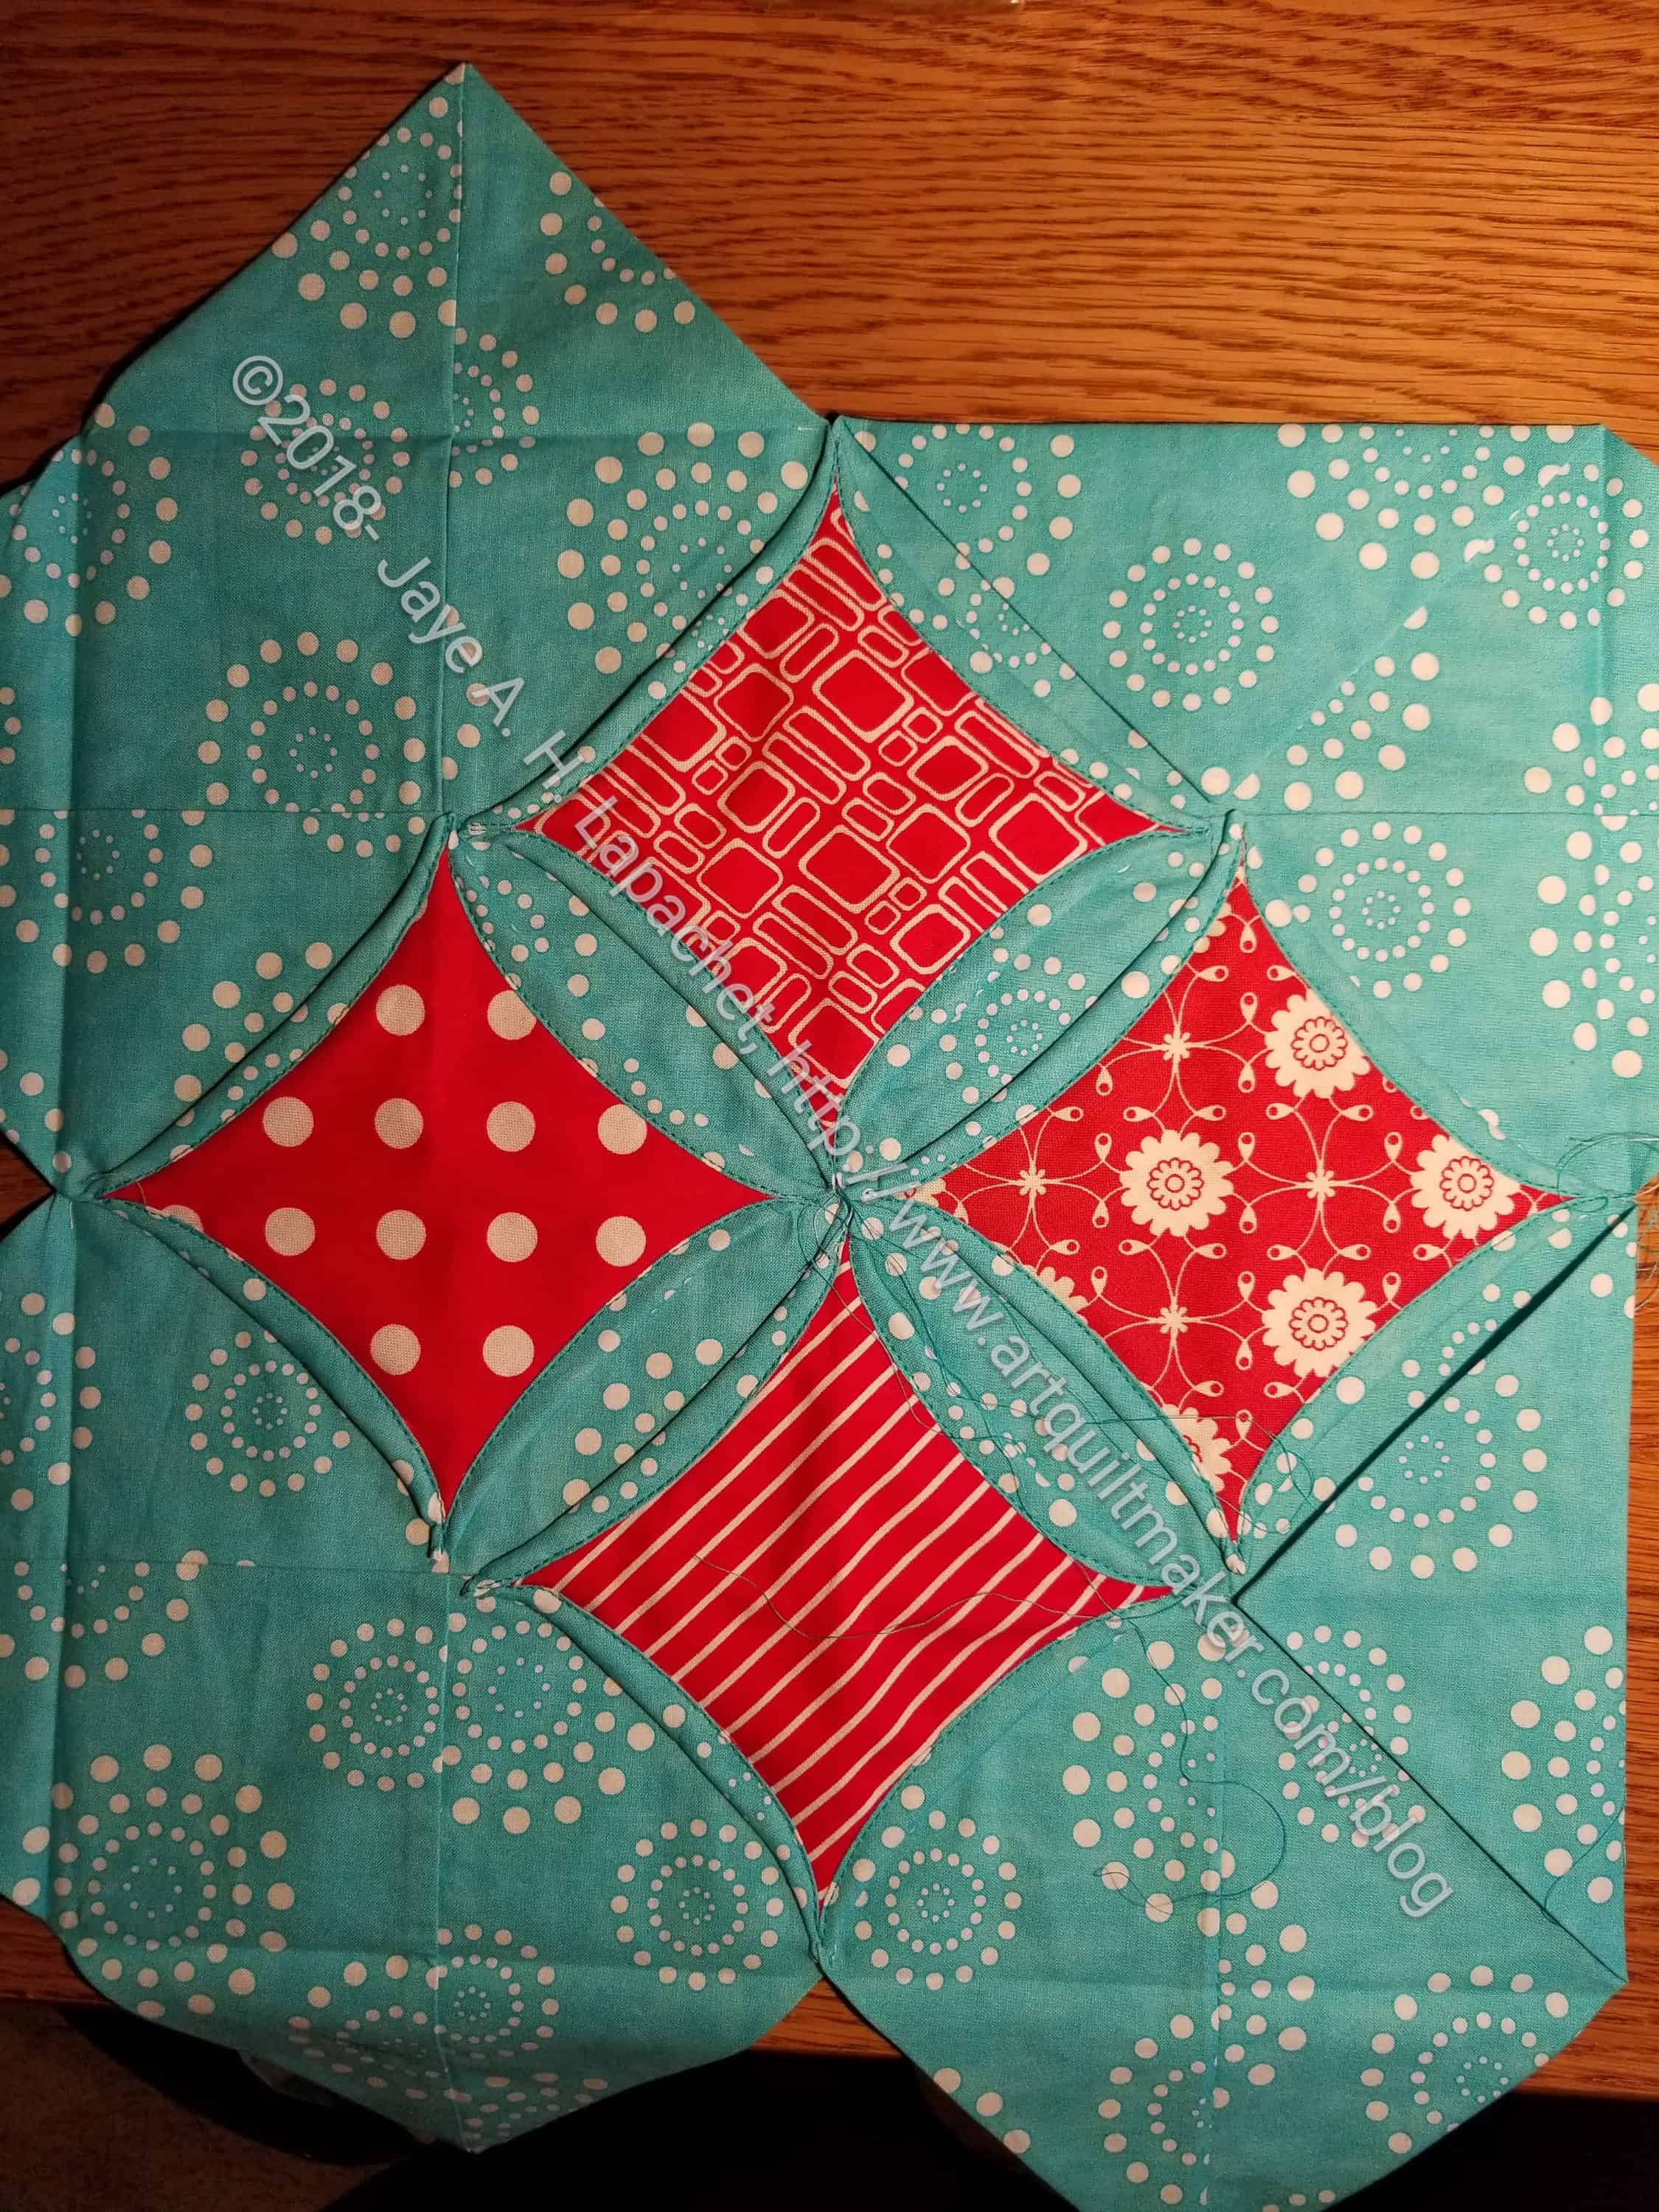
22. Take your foreground triangles and lay them on top of your background

Tuck flaps over foreground

23. Tuck the flaps in towards the center and pin in place. Watch out that the edges of your foreground squares don’t show. Make the edges curve slightly

  • Note: this was confusing to figure out and it turned out that I did not have all the sewn triangles in the right place. After you sew the triangles together, make sure you flatten them back in their original places, e.g. one layer of background on top
You may need to use a stiletto
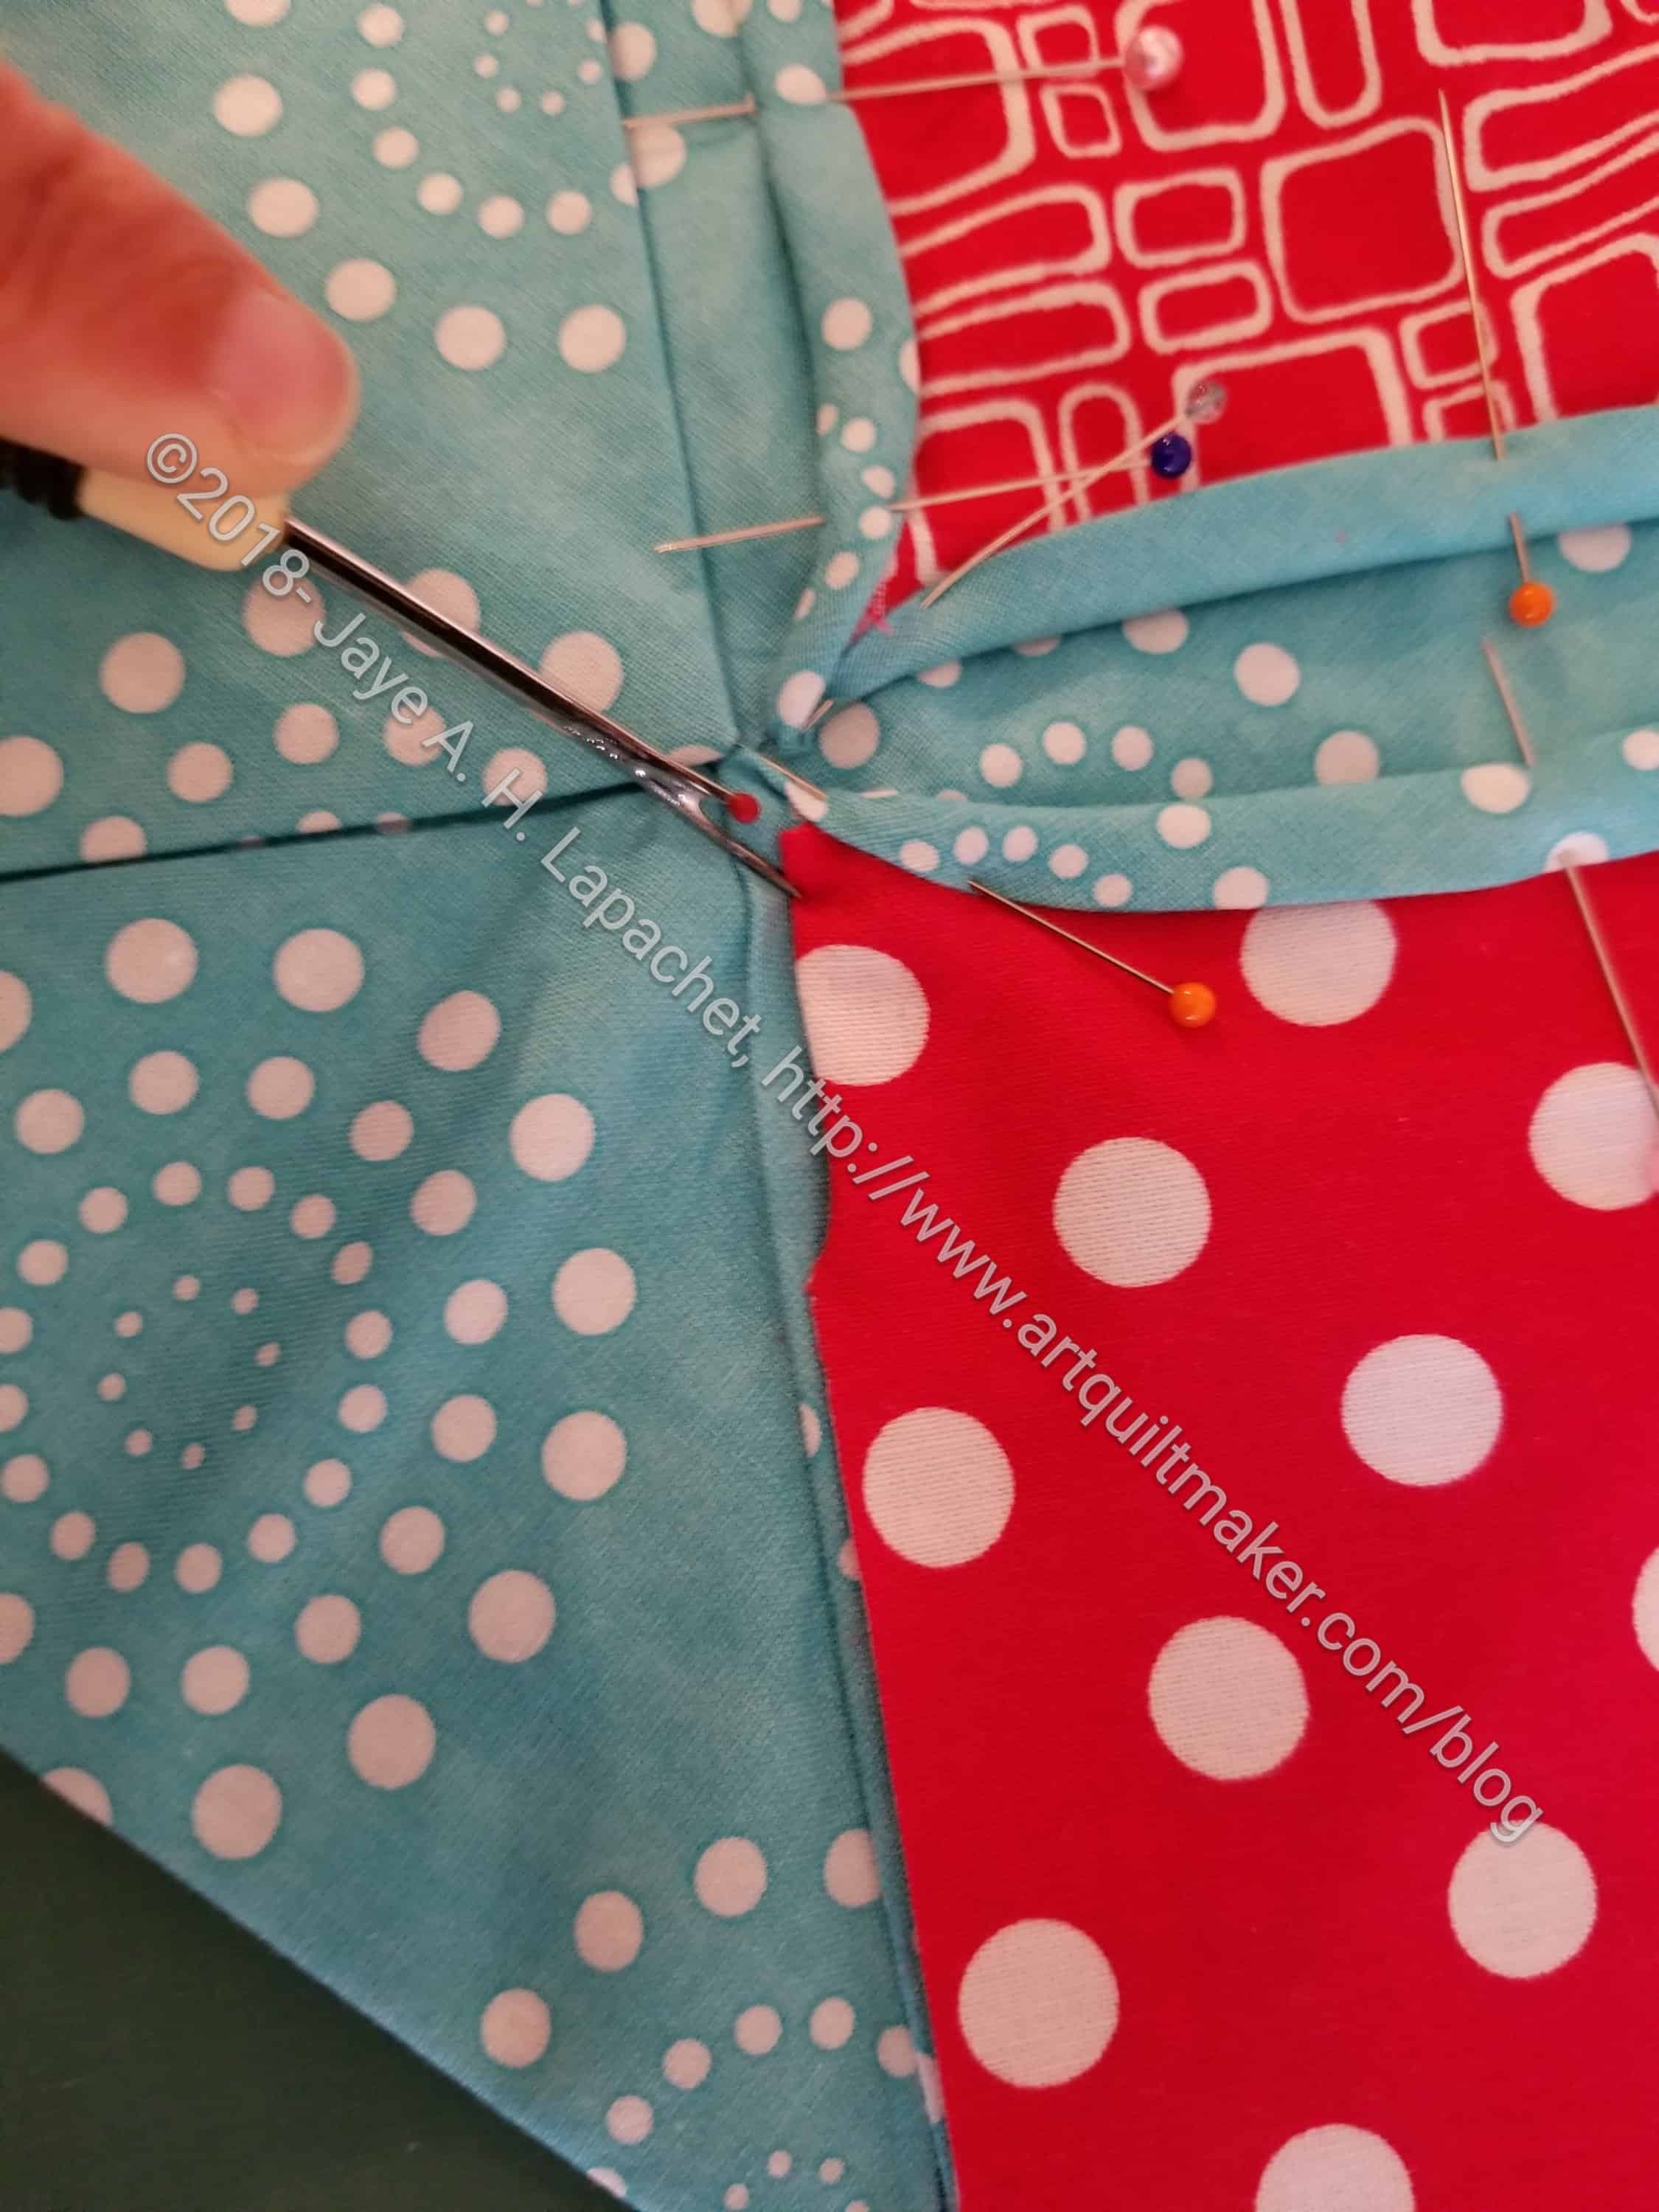
  • Note: I had to use a thin sharp tool, like a stiletto or dental instrument to tuck in some of the foreground edges. I sometimes use a seam ripper, which is a very bad habit, because if you aren’t careful, you can rip your fabric. You can definitely trim the foreground fabric, but trim a little at a time very, very carefully
Pinned and ready for sewing

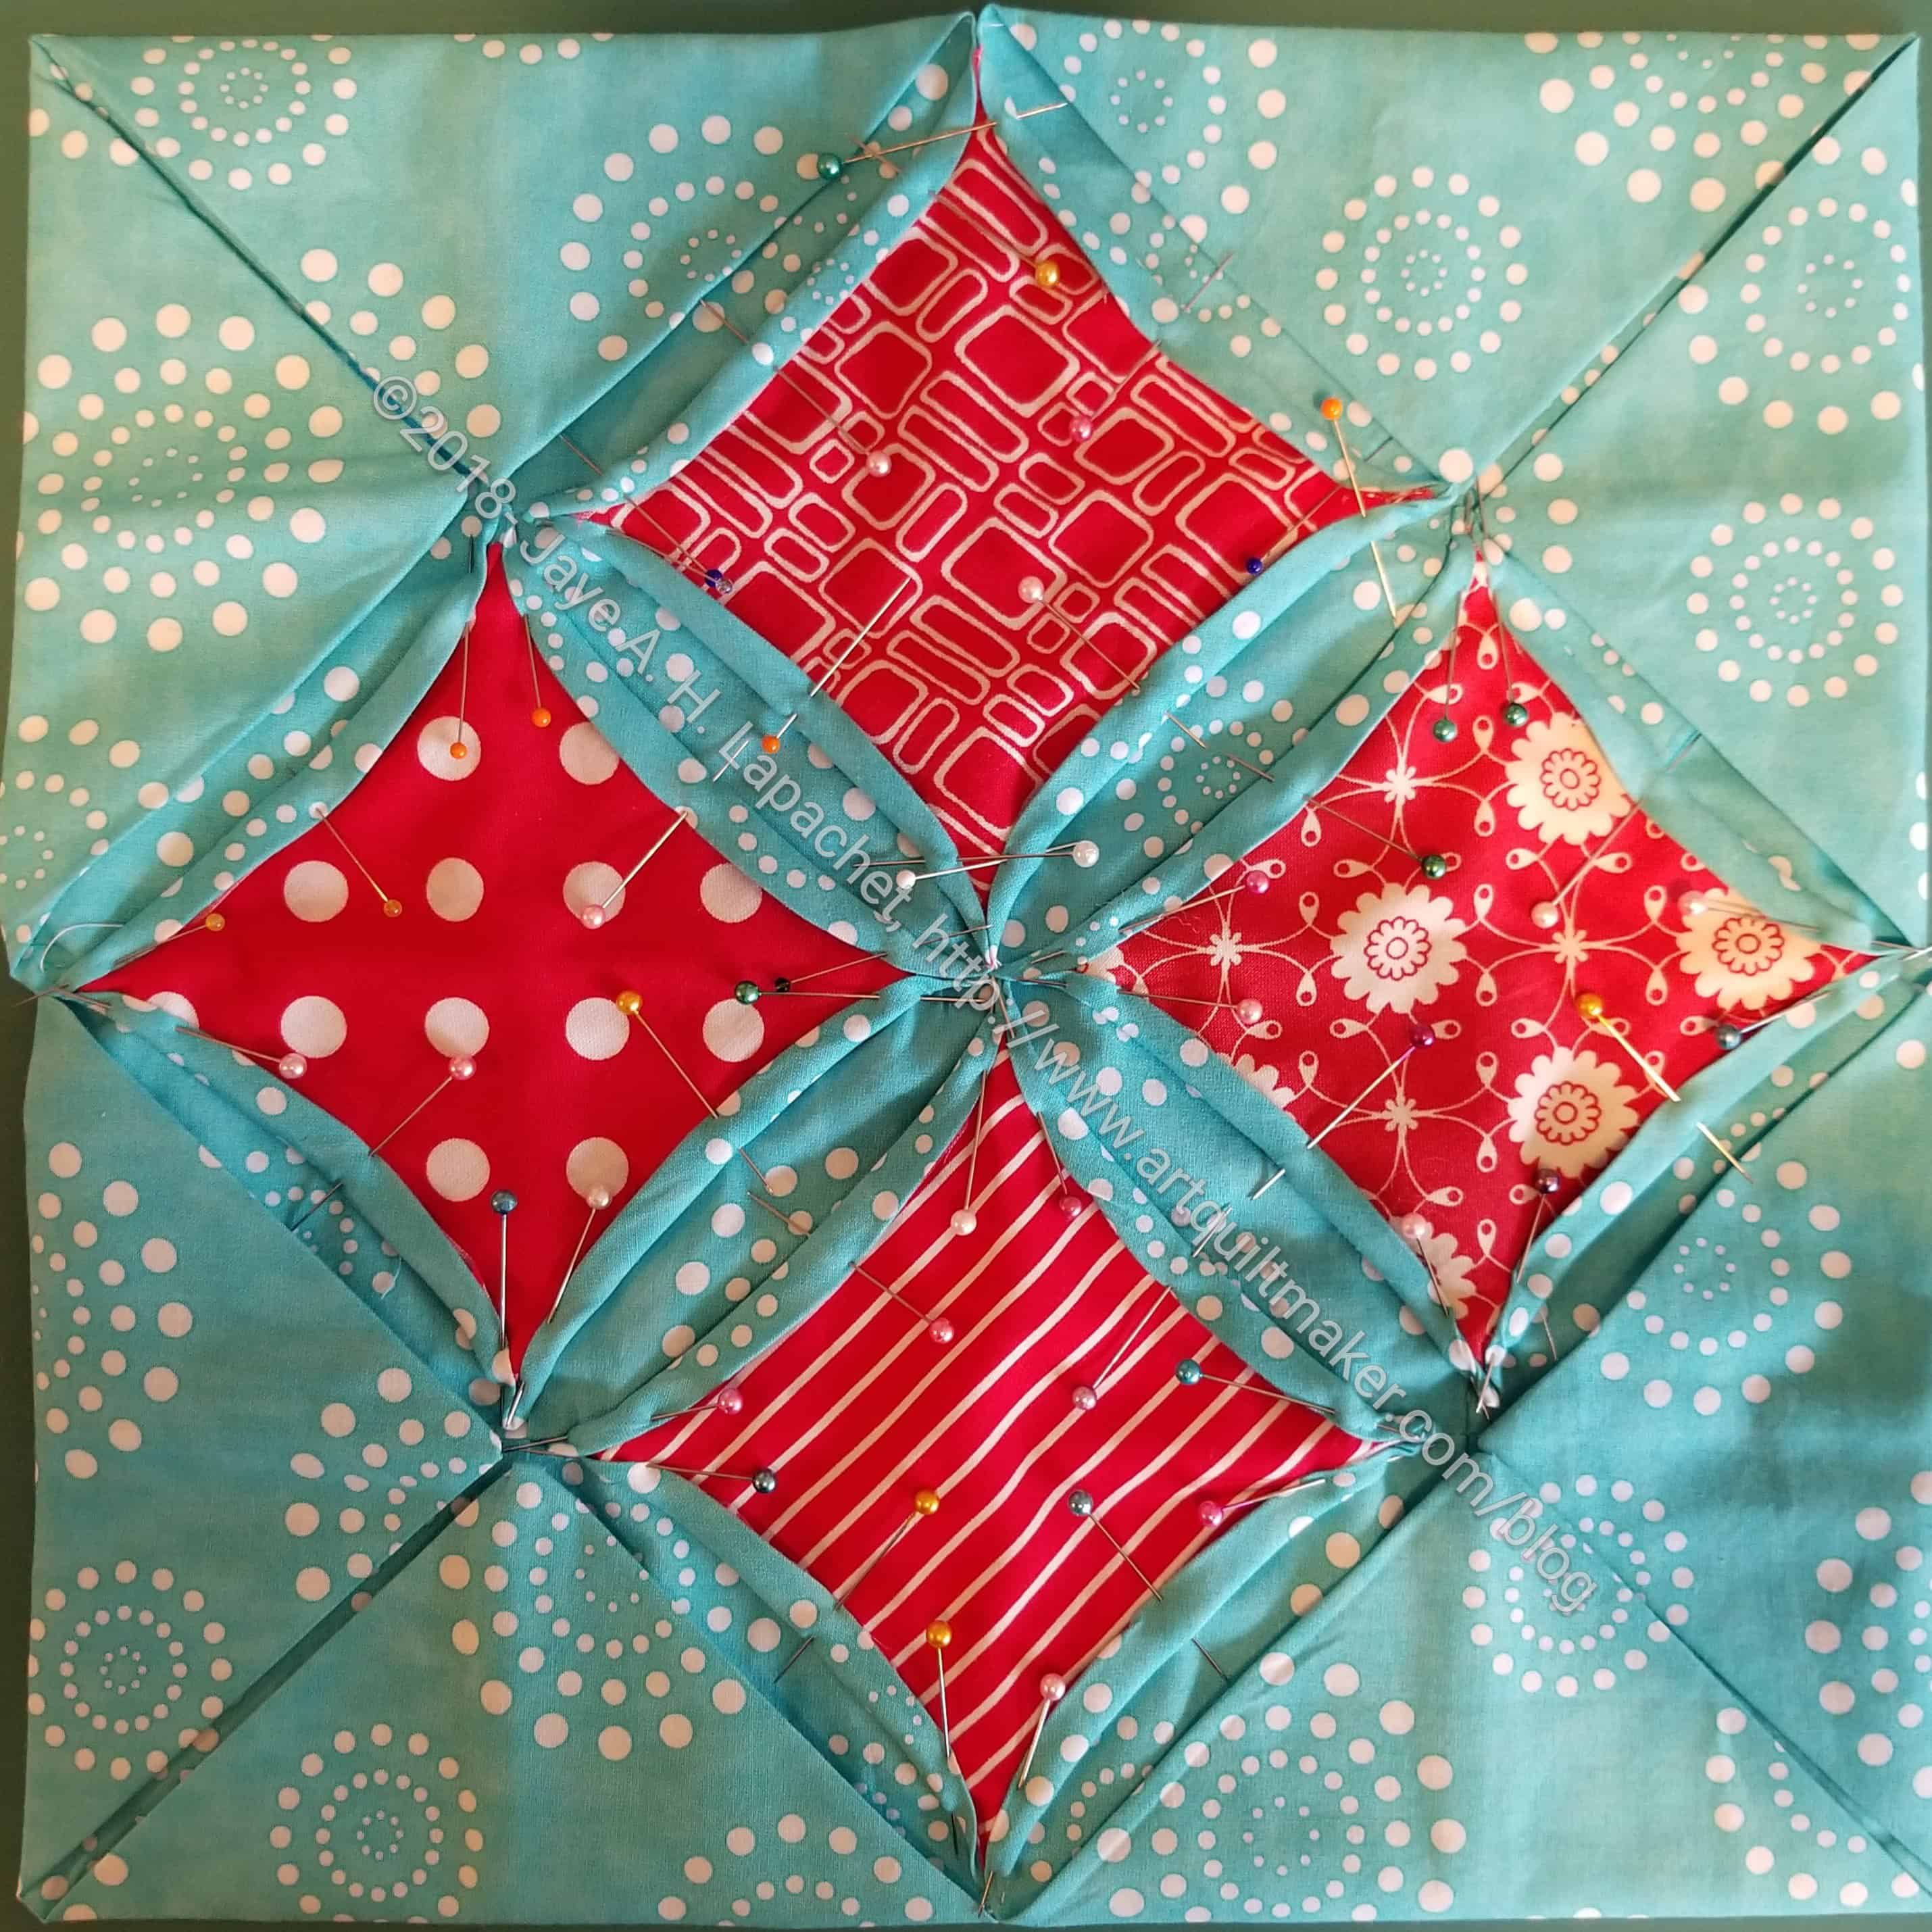
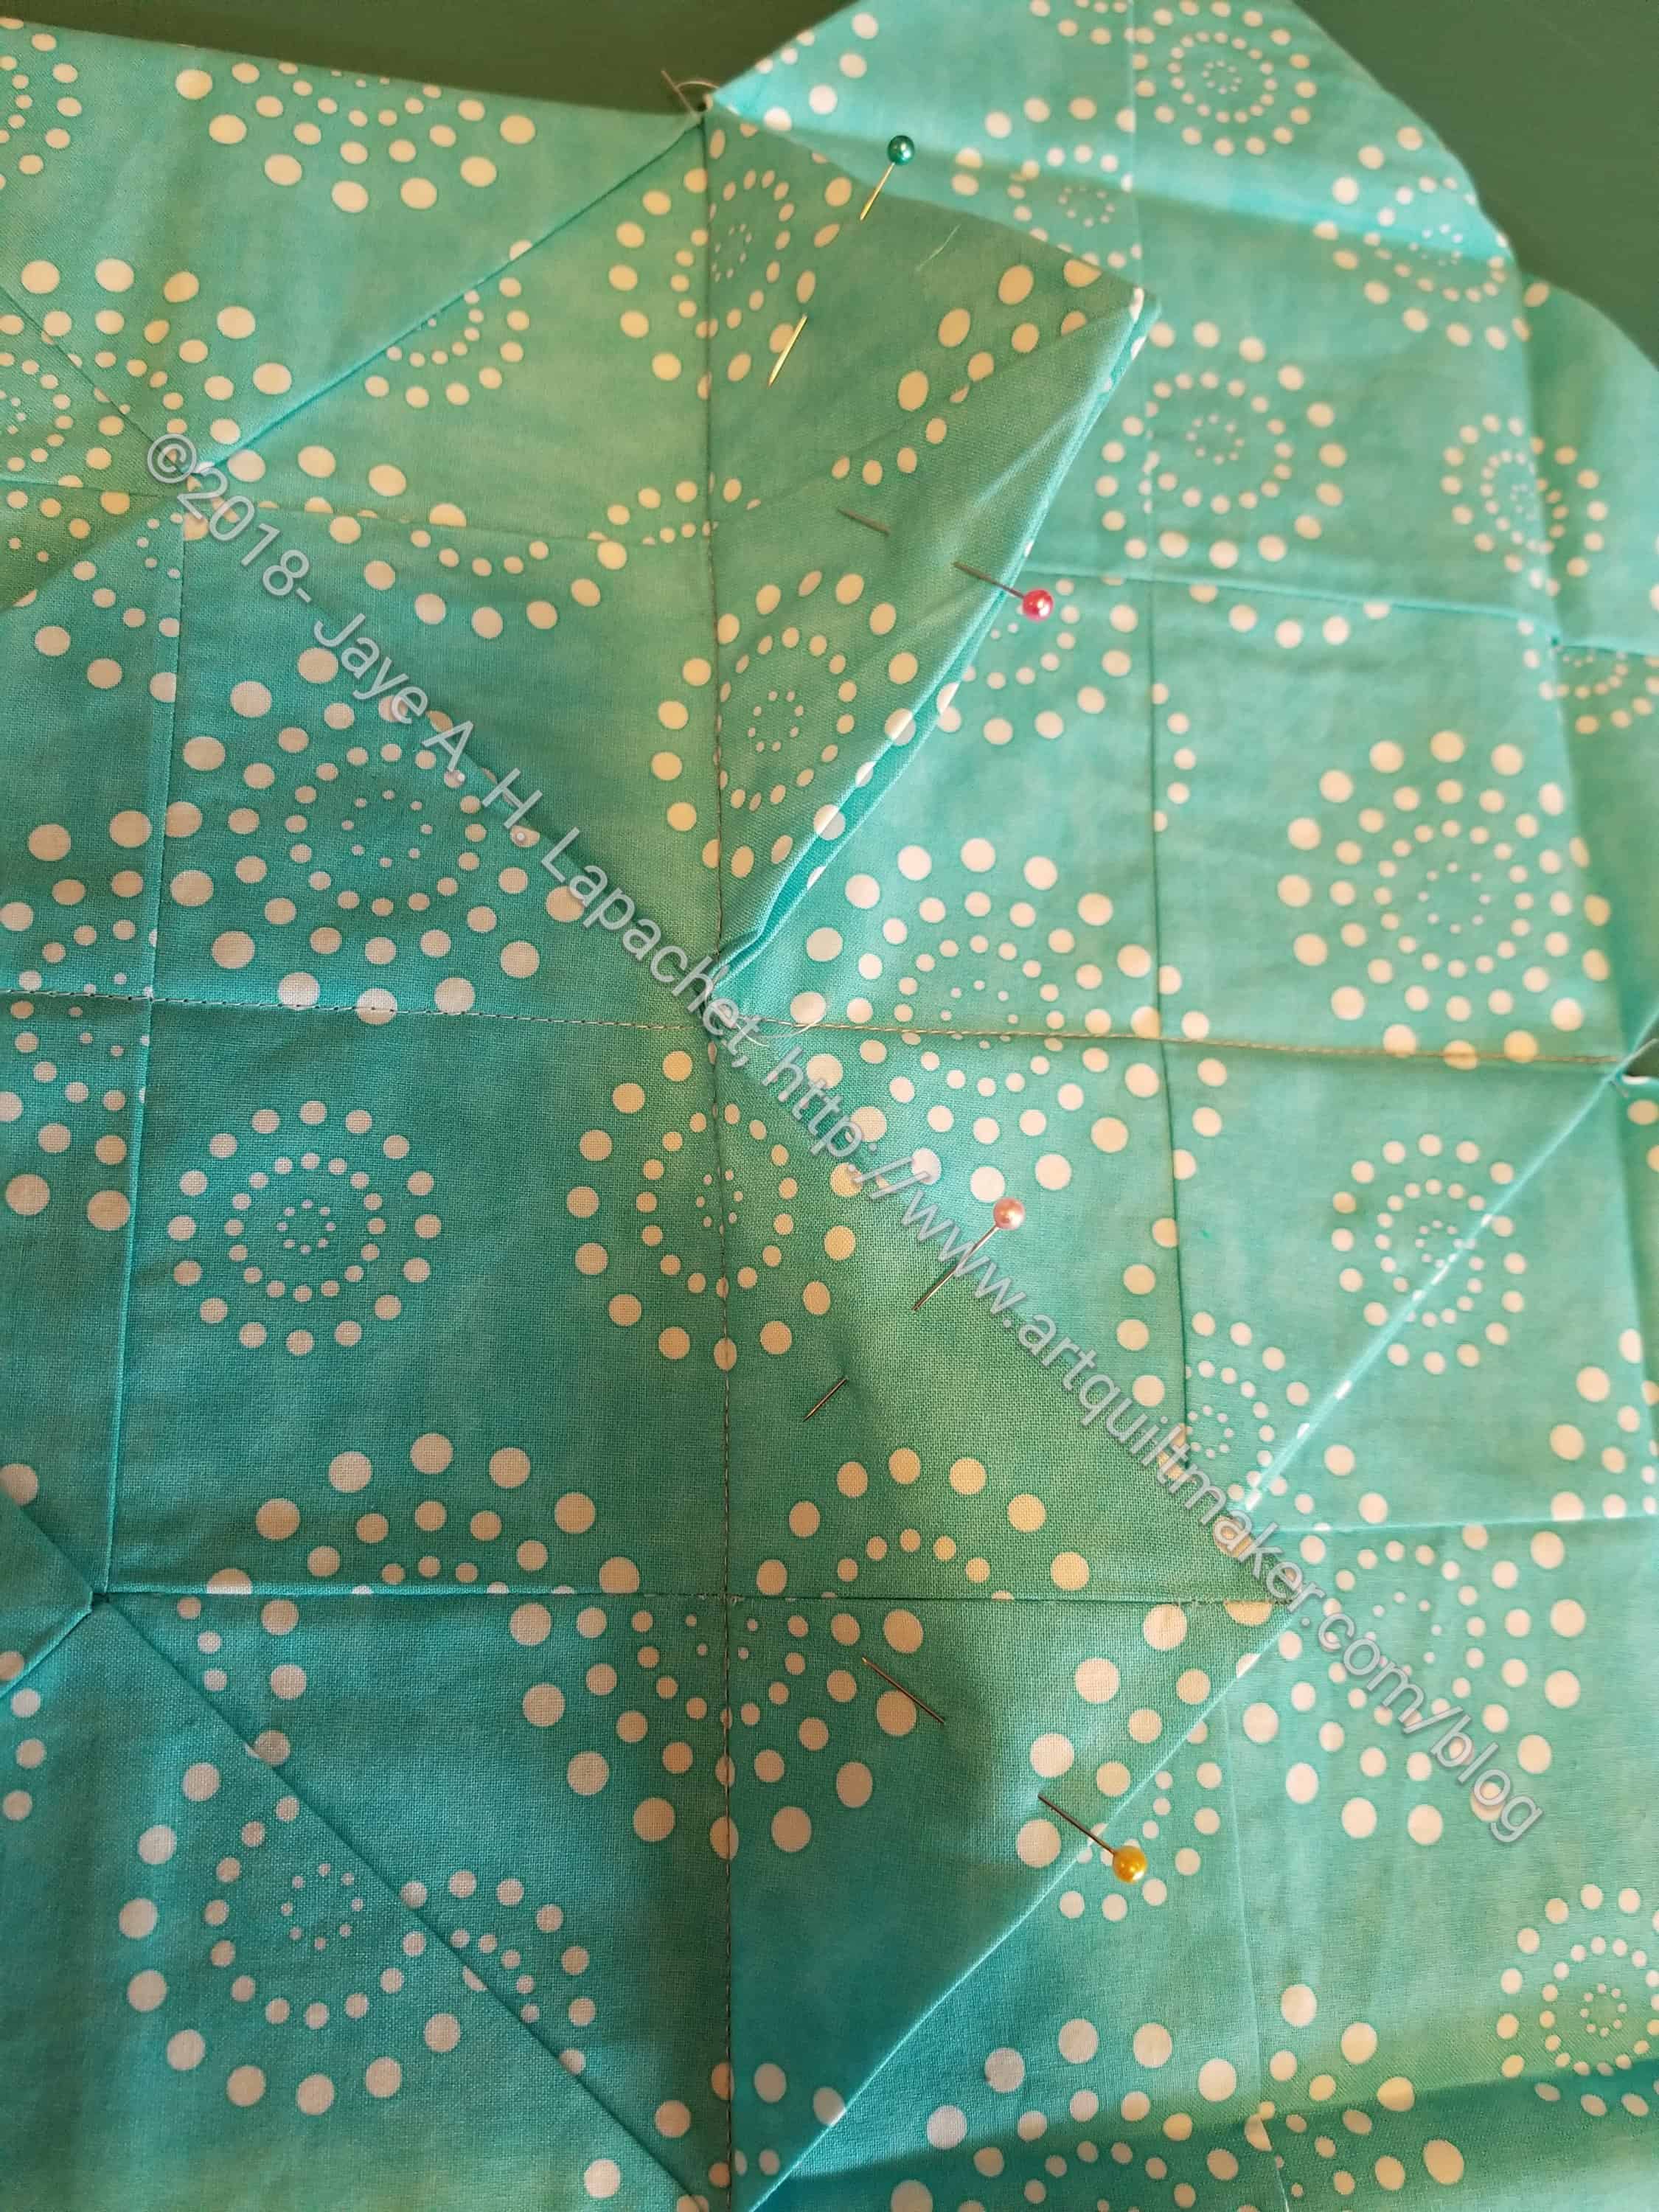
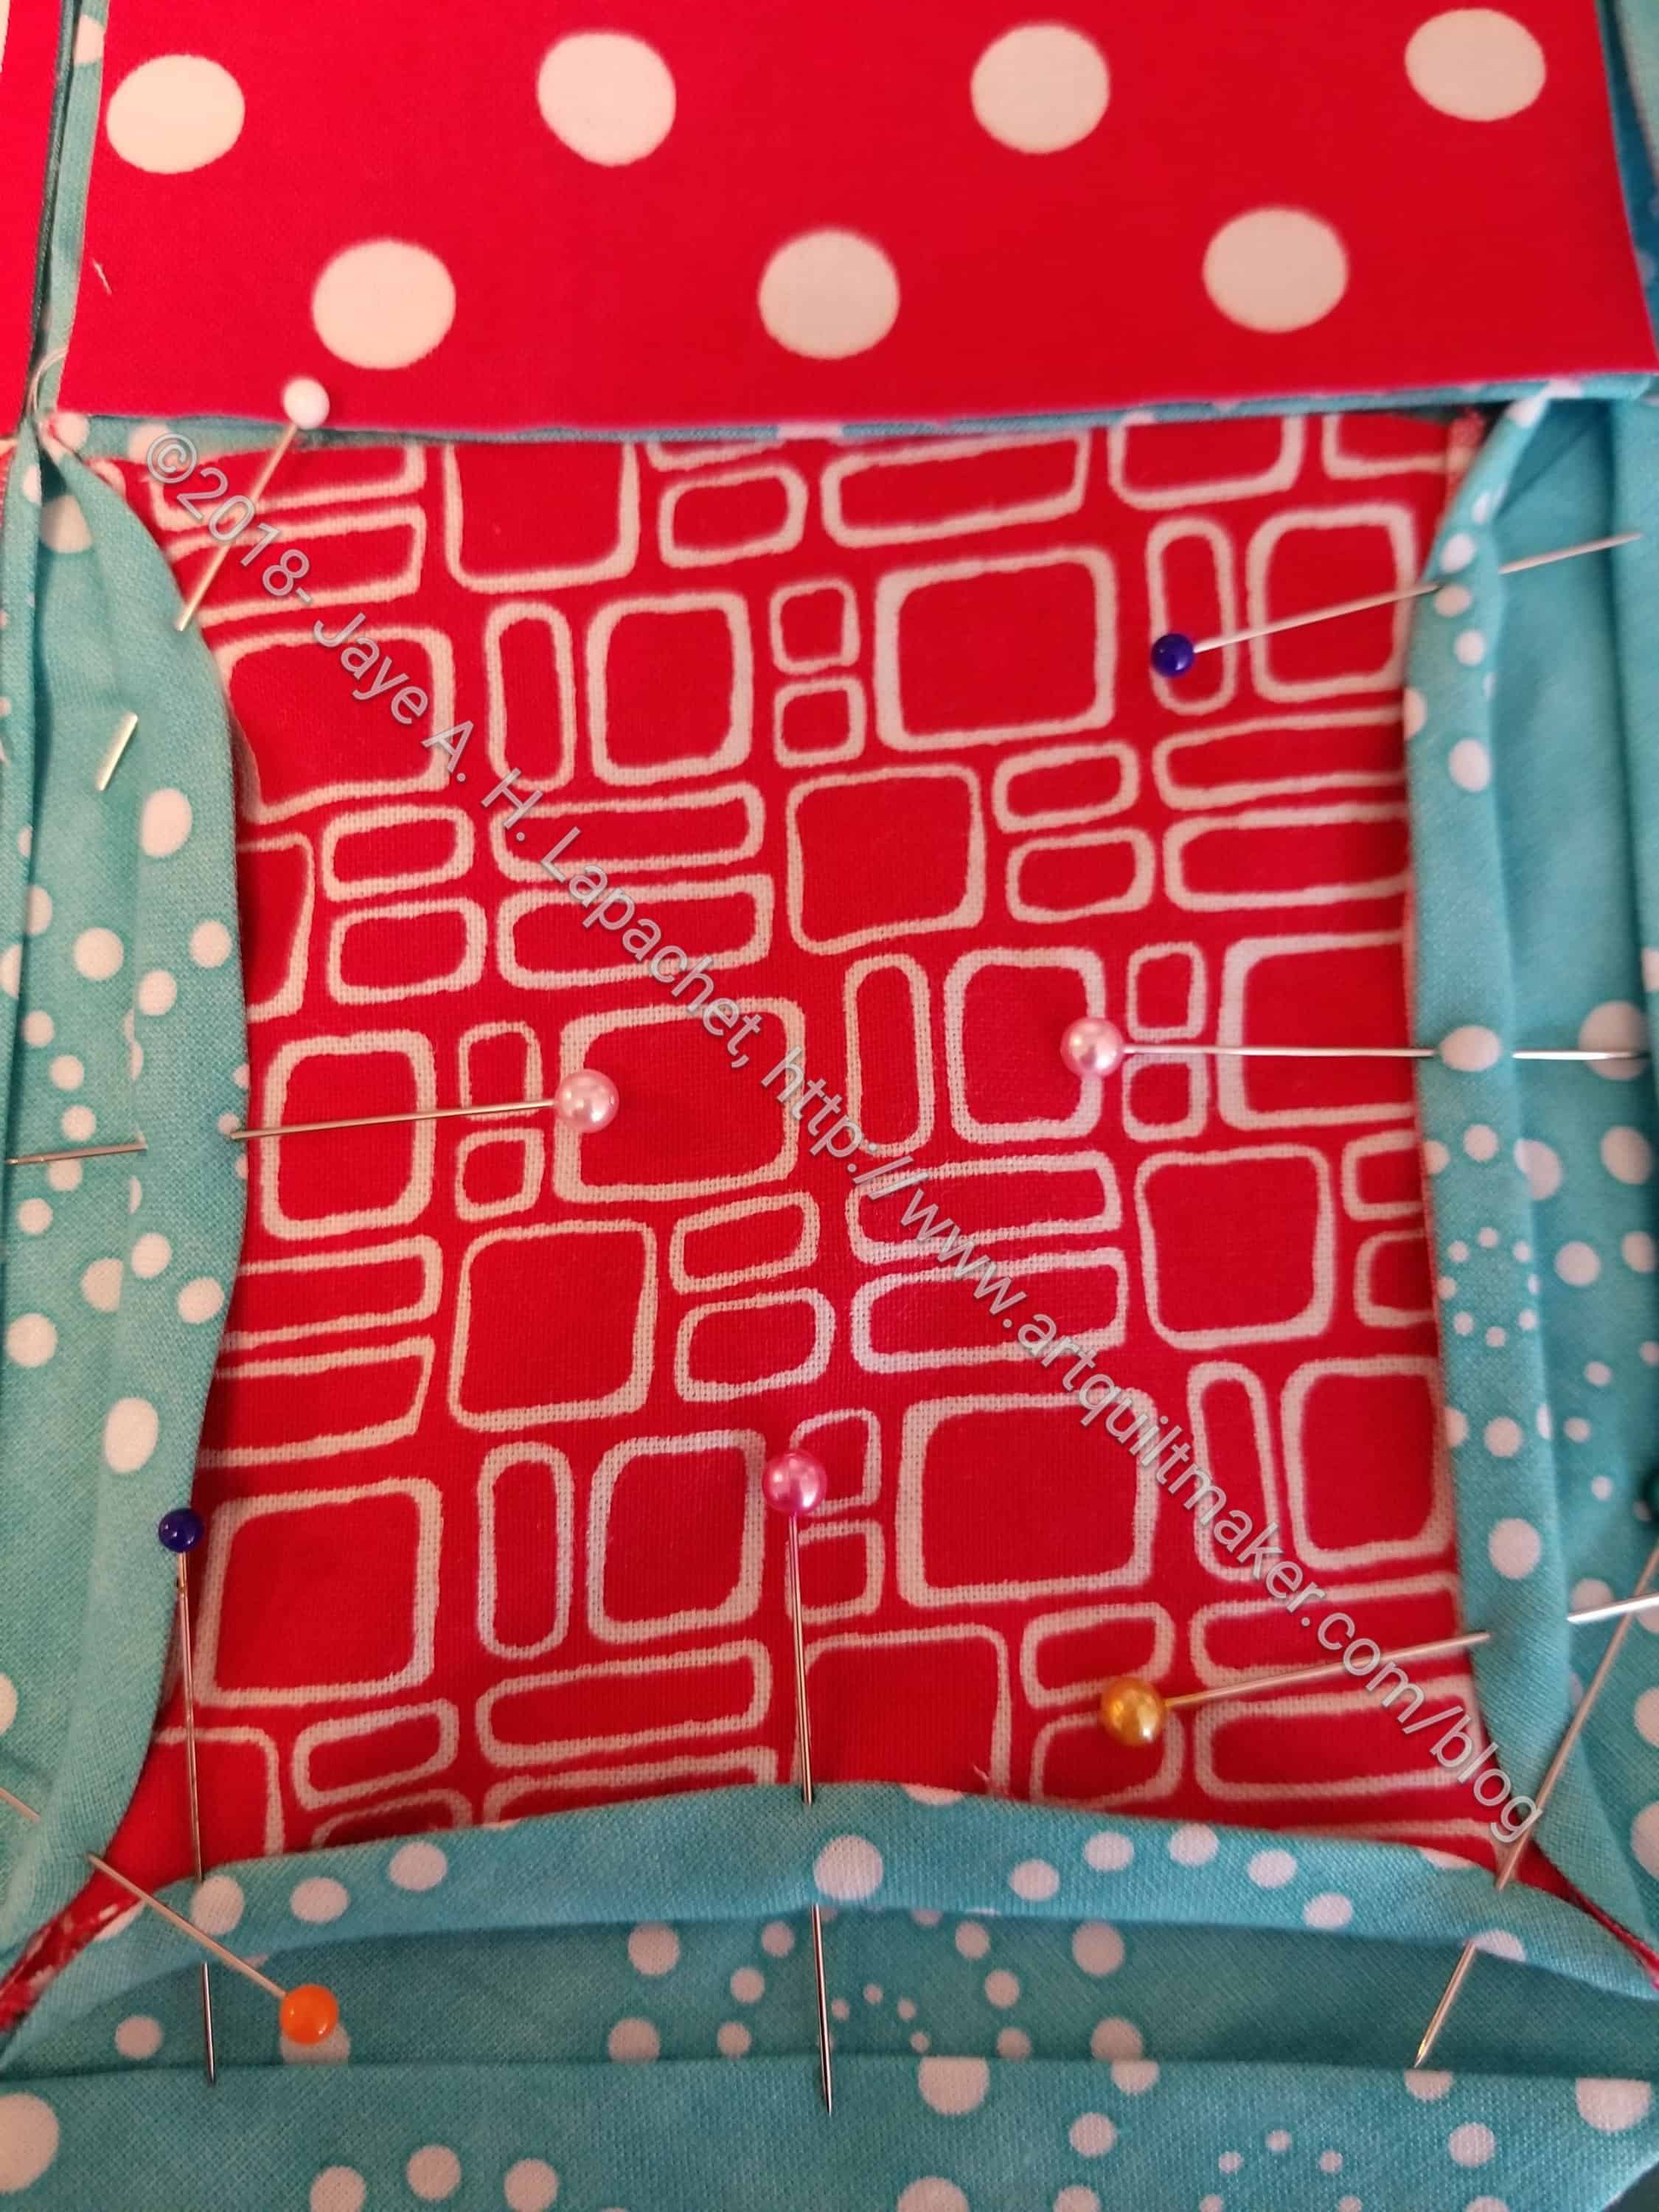
24. Pin each edge in three places with the heads of the pins facing the center of the foreground fabric. This is not micro management; this technique will allow you to sew as long as possible with the pins in place

Sew close to the edge of the background fabric

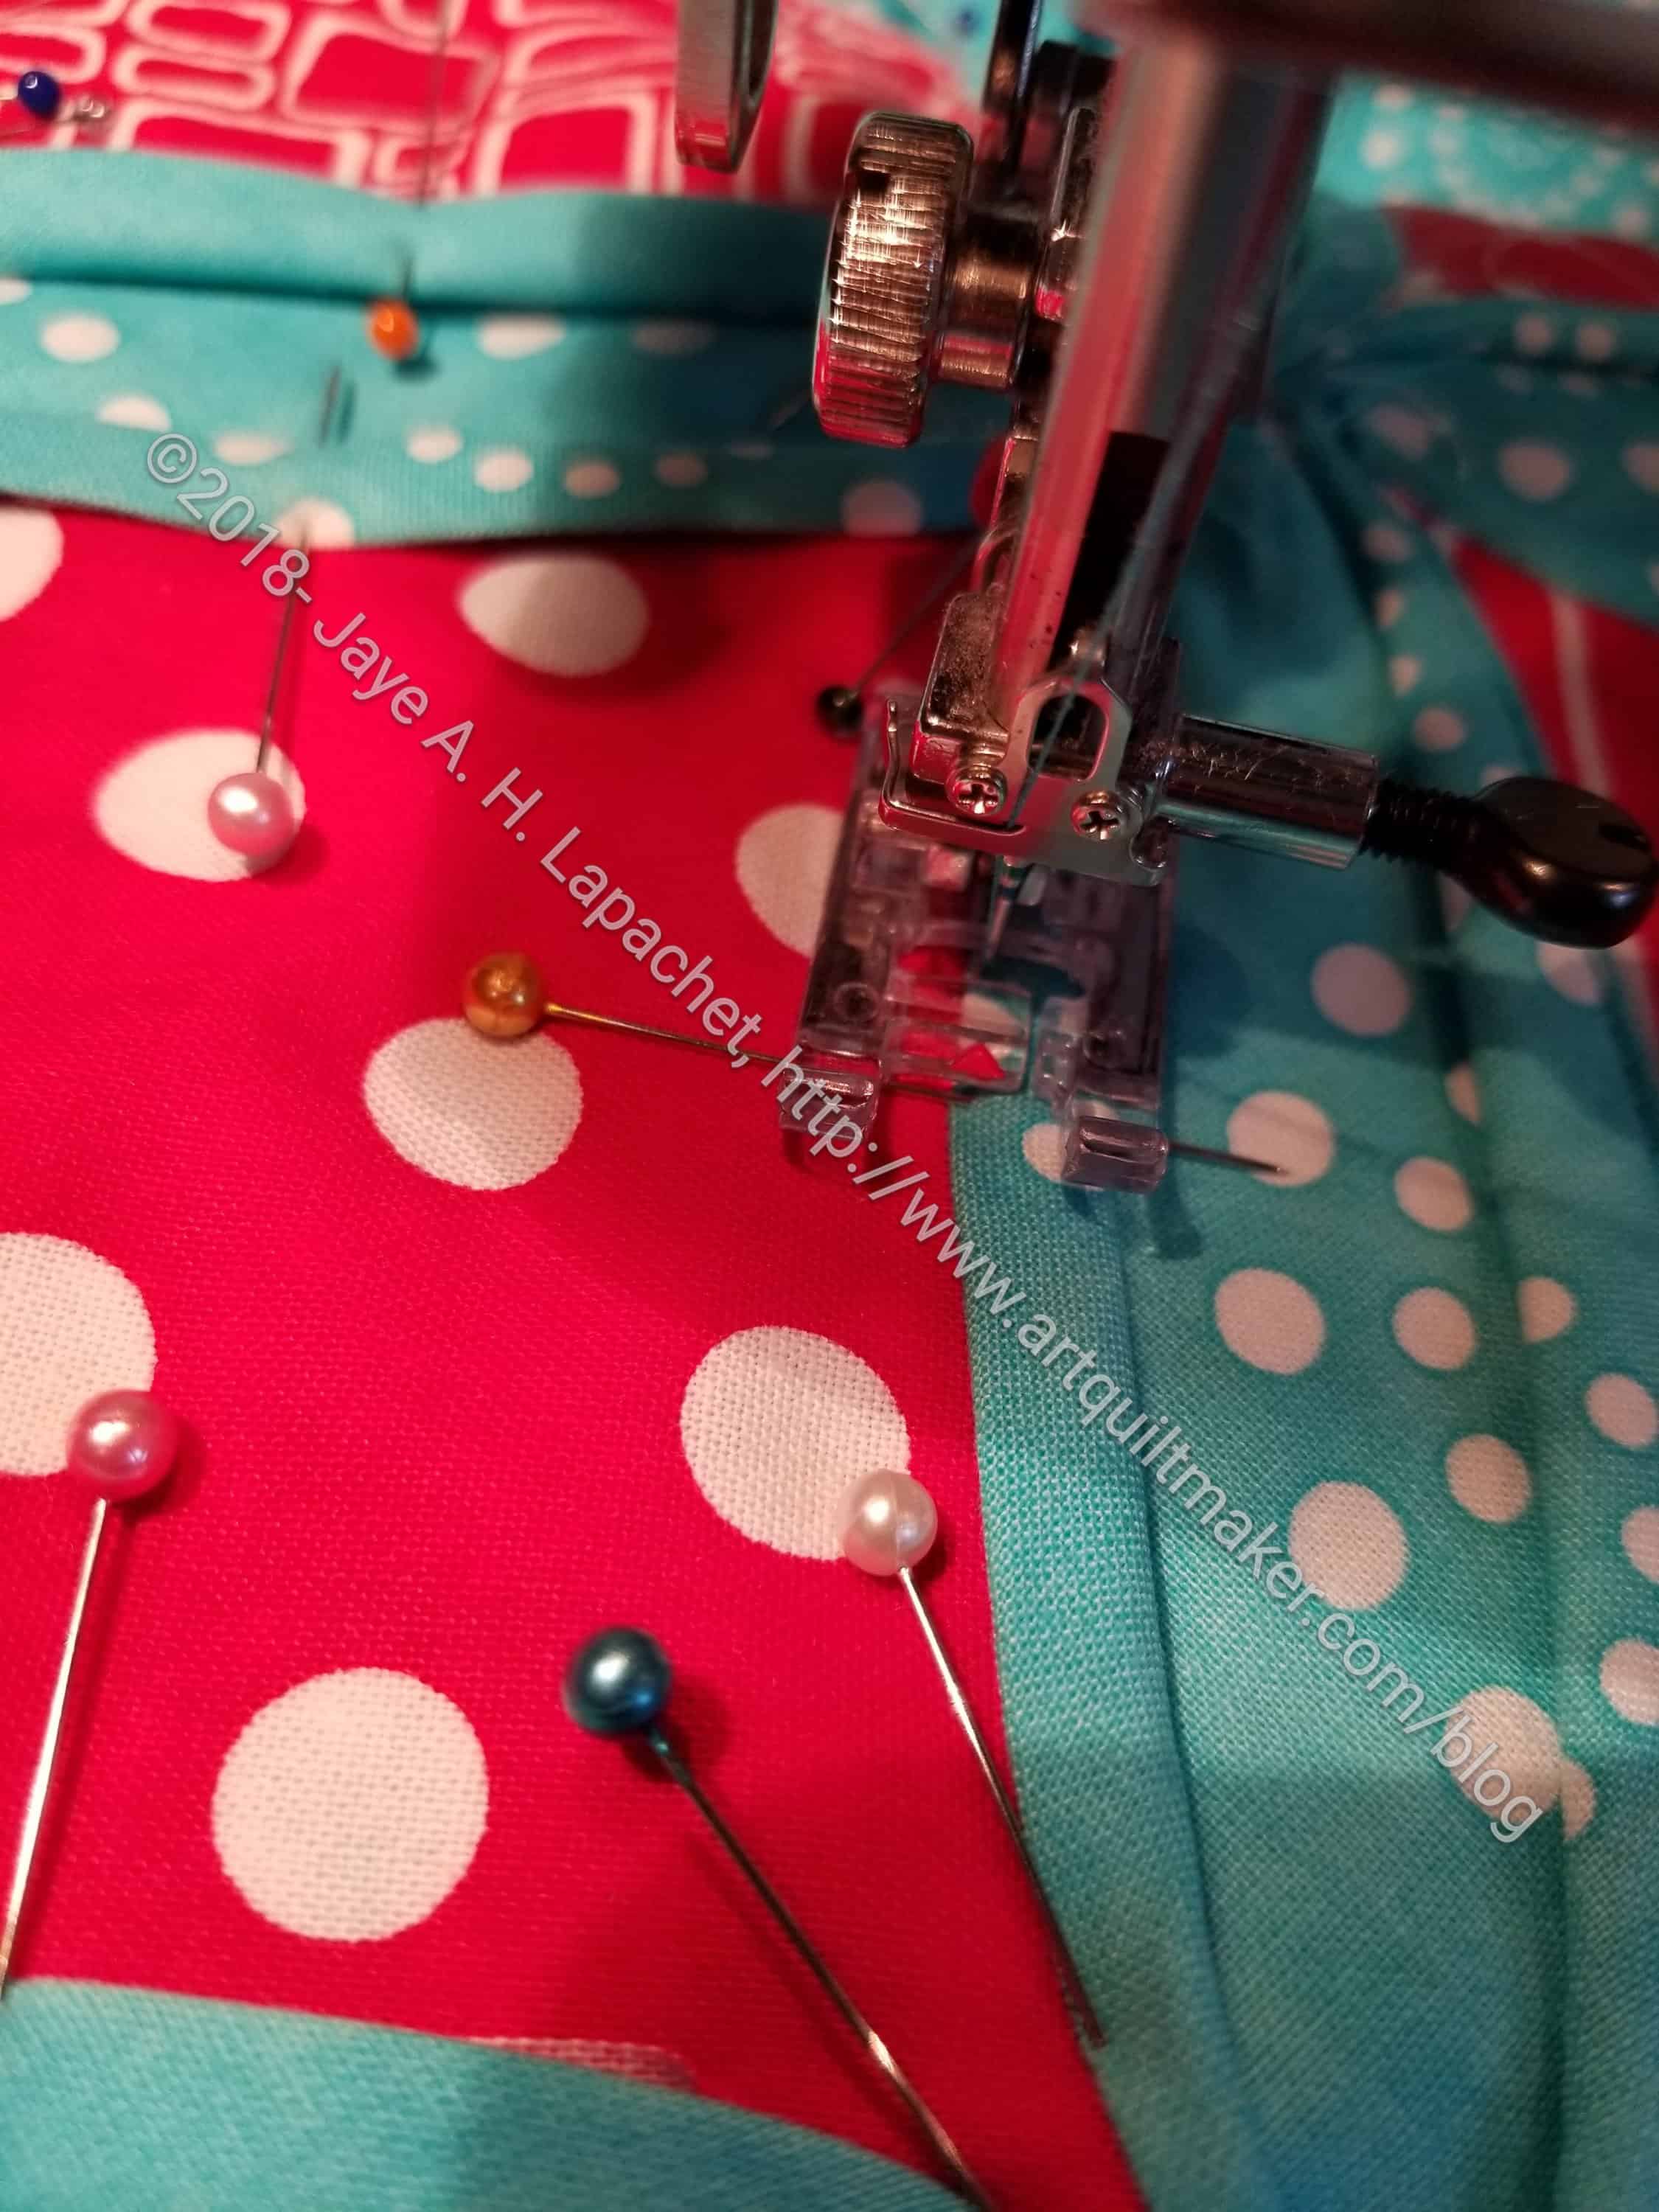
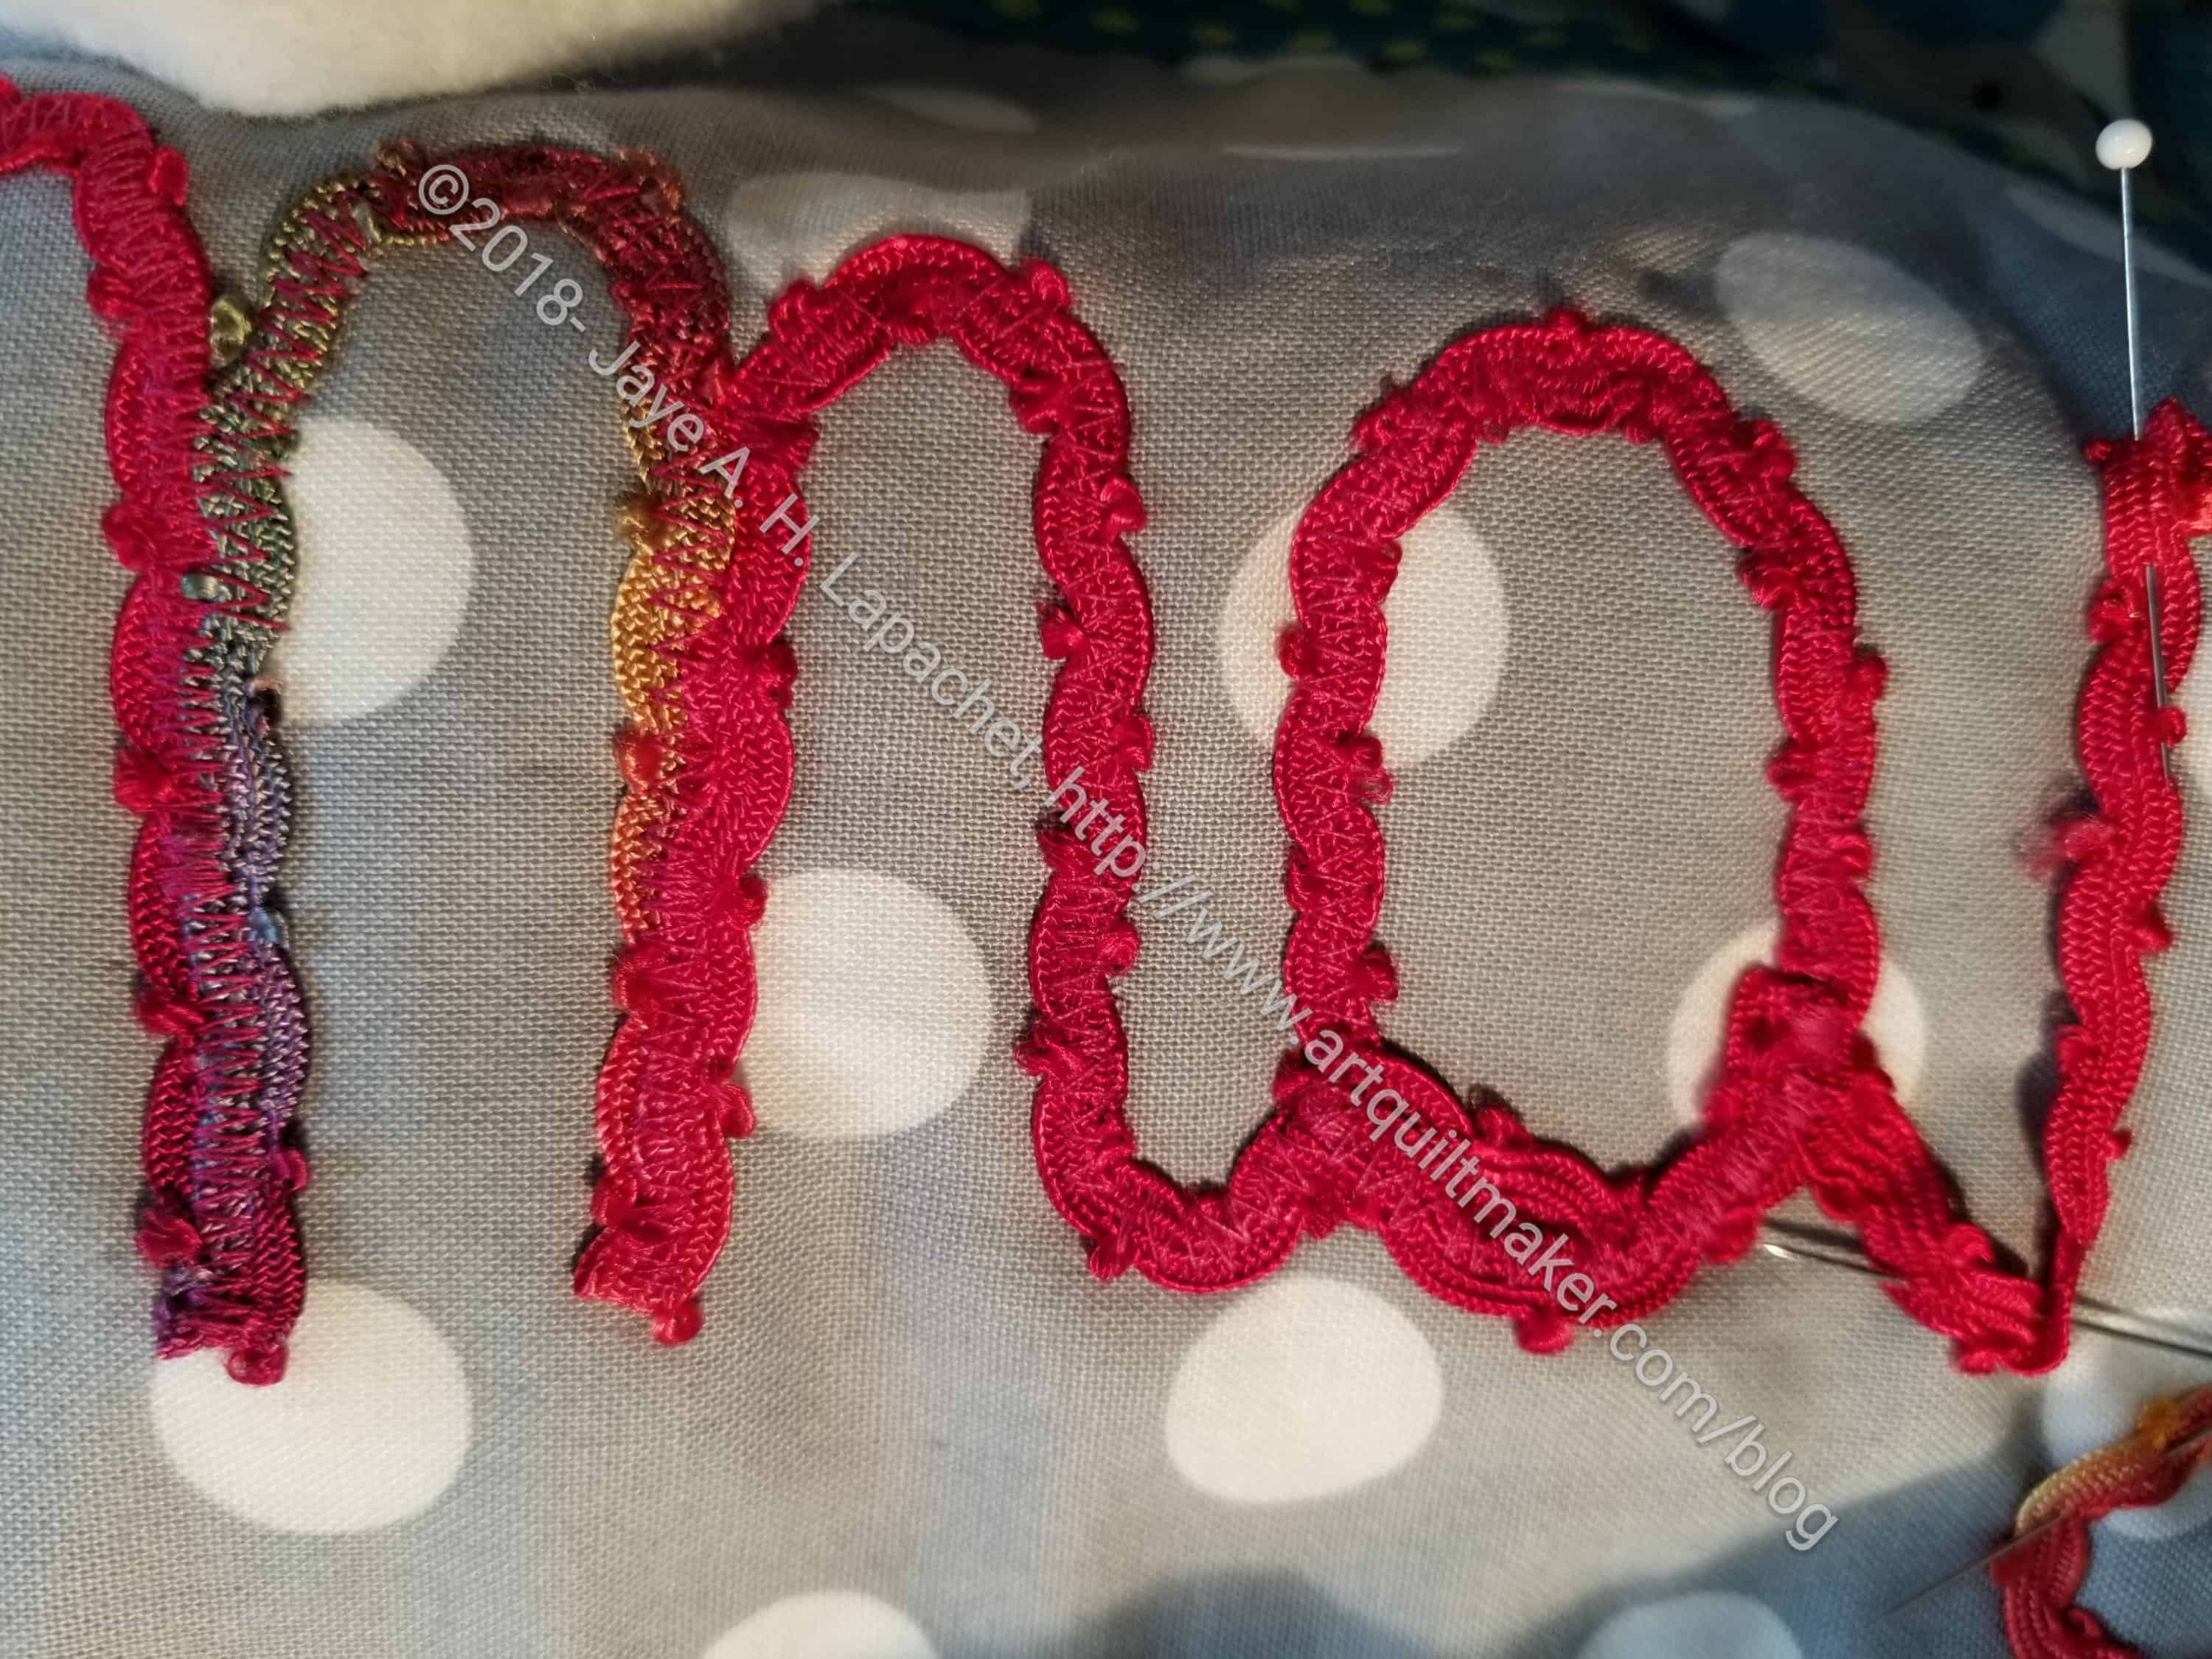
25. Sew very close to the edge of the background. I sewed slowly and carefully. I used the above mentioned sharp tools when I needed a little help. Leave LONG tails so you can knot off and hide the threads

26. Handstitch the other triangle flaps closed with a few stitches. The other tutorials said to use the machine, but 2 stitches is a pain and an irritant on the machine, so I hand sewed the flaps closed when I was sinking threads.

Cathedral Window Block in process

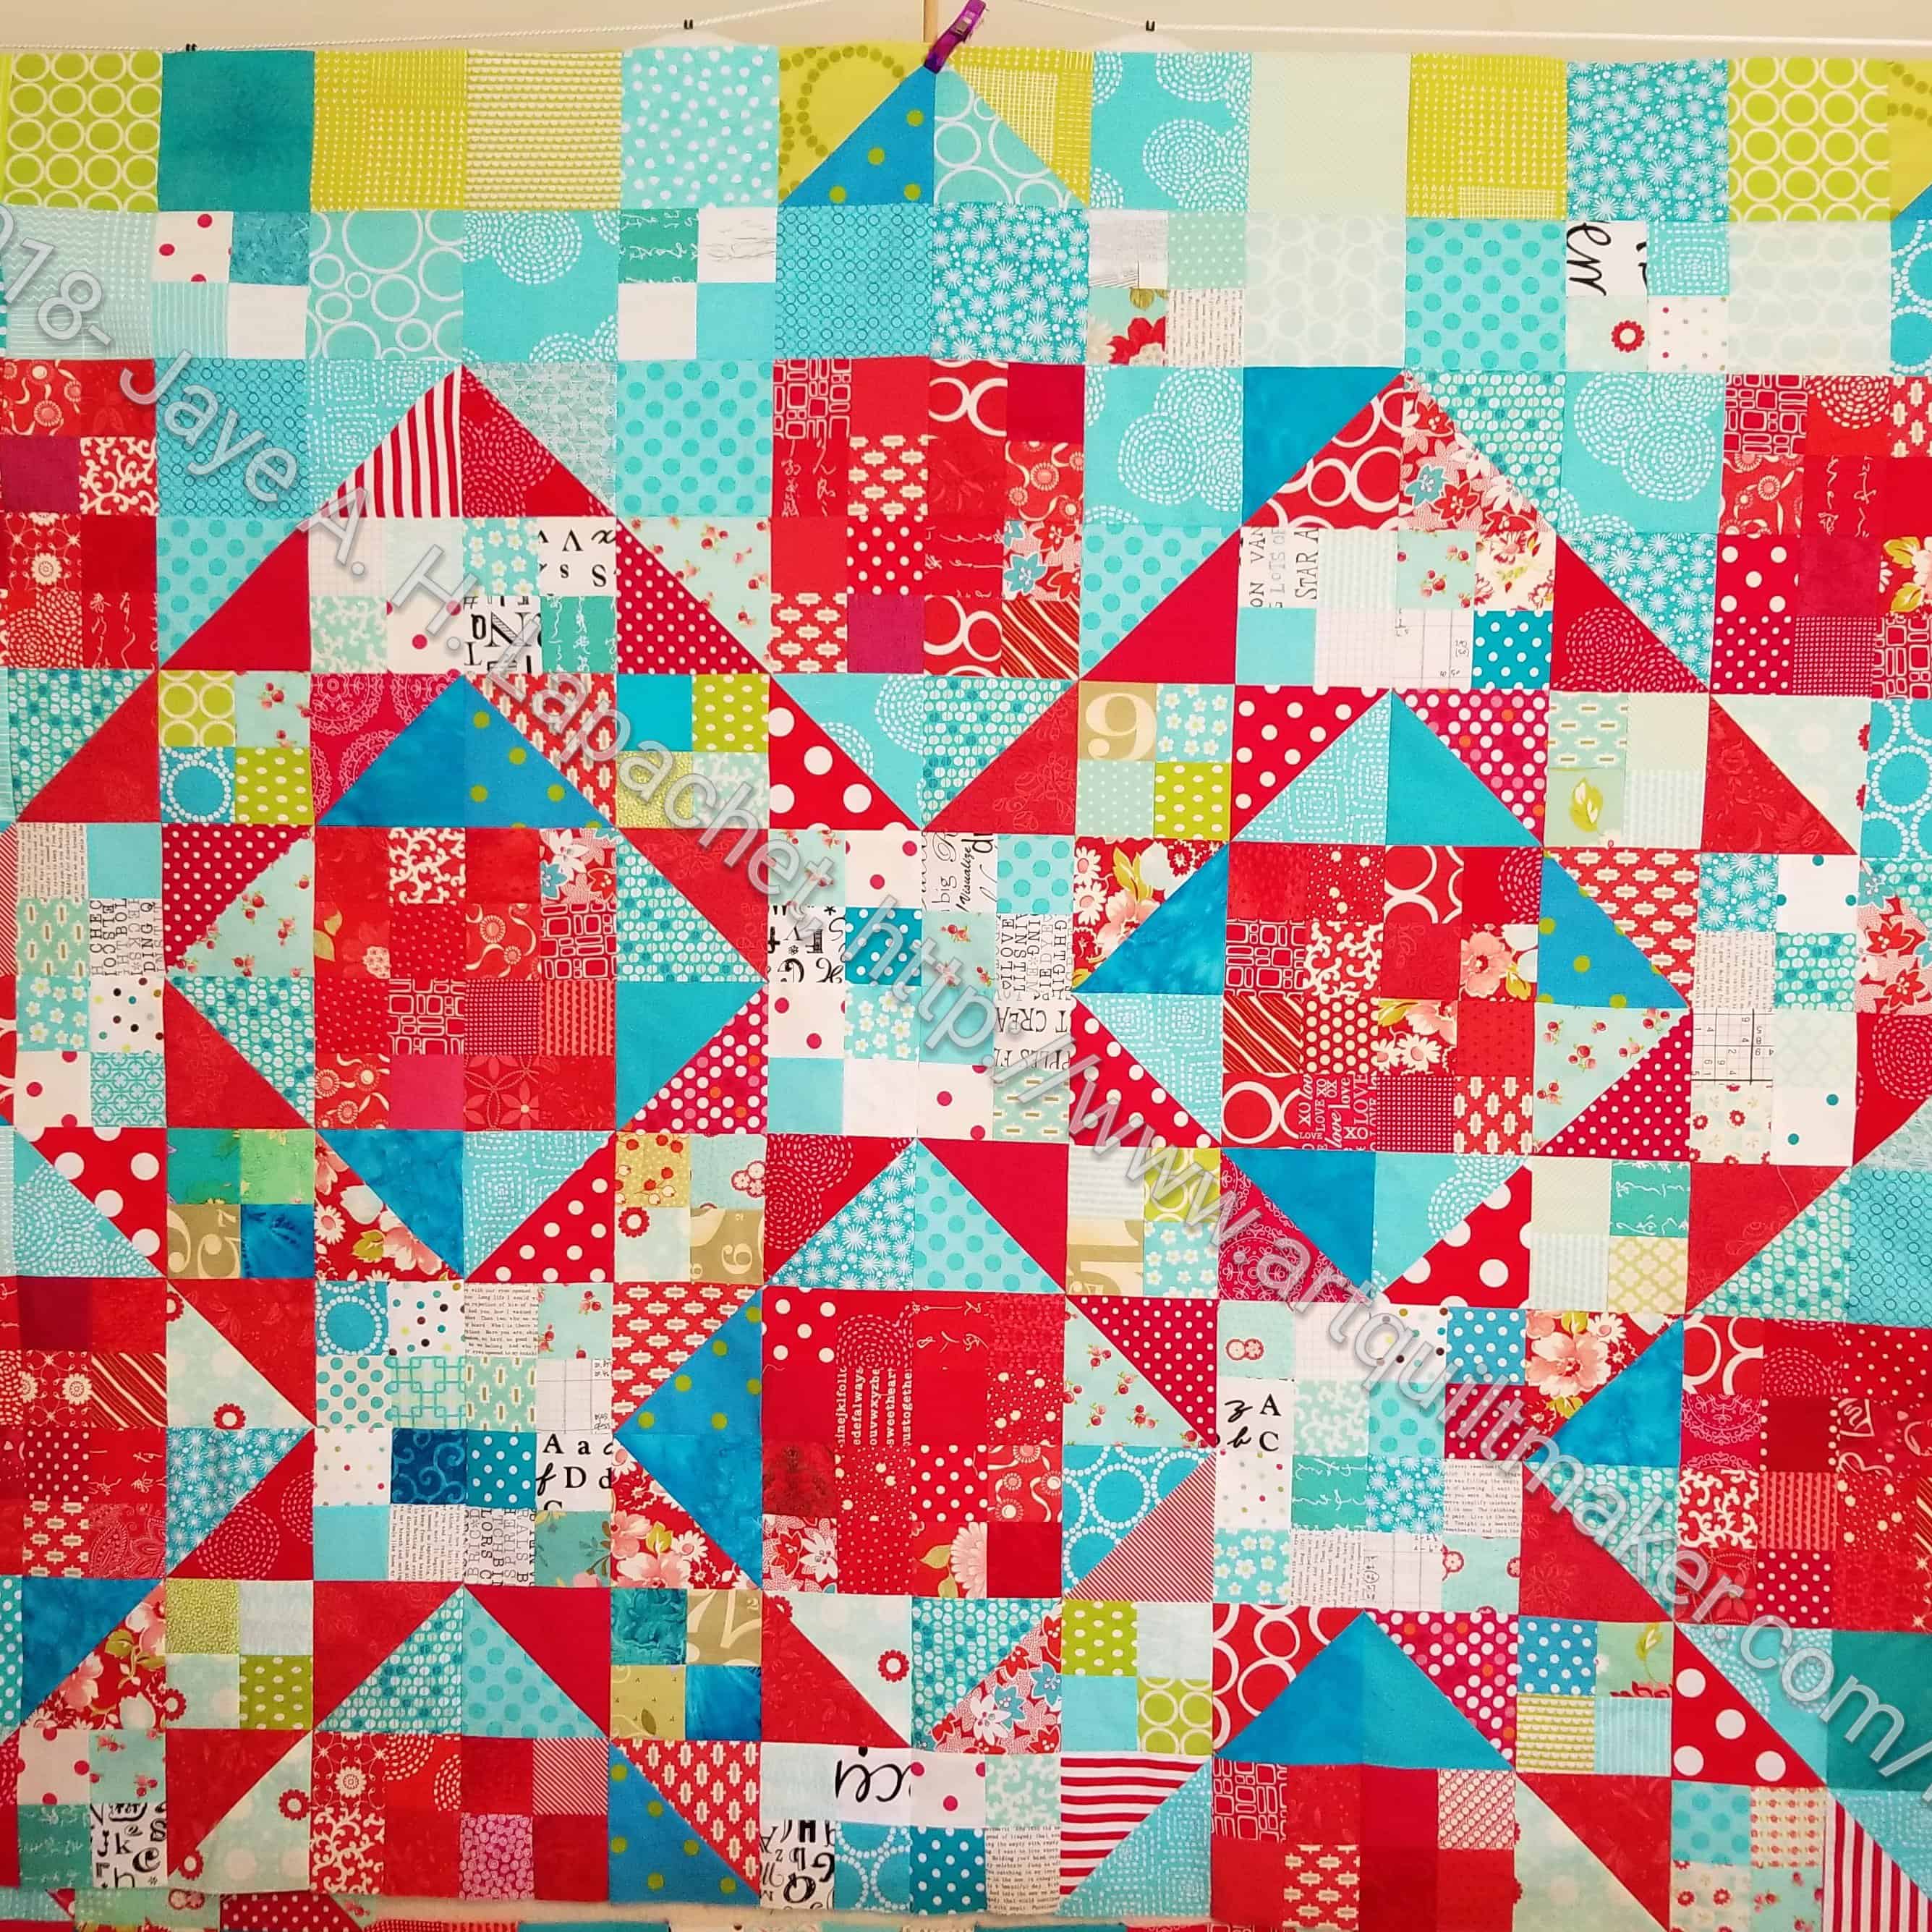
I never thought of making it before, but this block did kind of take my fancy. This is kind of a strange block, partially because of all of the layers. It is lumpier than I expected. Warn your longarmer about it.


Resources:

  • Fons & Porter Cathedral Window block– I originally found the instructions in one of their magazines as part of their ‘learning to quilt* series’. I had to go looking for other instructions when I found the directions had no sizes or actual cutting instructions. Directions are brief.
  • Lovely Little Handmades Cathedral Window block – uses a printed background, so you can see how that works. Most people use white, so it was a little confusing for me when I wanted to use the blue.
  • Sometimes Crafter Cathedral Window block – some missing detail, but has the instructions for cutting the right sized patches. I also don’t like it that the viewer cannot enlarge the photos to see the details.


*Nota bene: not sure if this is the correct name, but it describes the basic idea of the series.

Under the Sea Progress

Under the Sea, August 2018

After analysis of the divisions and categories with the least number of entries at the Fair, we decided embellishment was one to target. Craft Night was Monday and I decided I needed to work on this piece.

Under the Sea has been underway for awhile (uh, 2009!) I decided that I will make a pillow out of the piece and enter it. That means getting it done. I took it out and got reoriented as I don’t know the last time I worked on this piece. I had a bit of thread left so I finished a section with that thread (see purple arrow below) and then did a few more lines of stitching in the center.

I feel like it might need a few beads in various places, but we’ll have to see. I have to lay some out and look at it, otherwise I am going with done.

Progress on RD Piece

I carved out about 6 hours yesterday where I just sewed. I finished a donation block and started another. I started and finished a Color My Quilt shard. The biggest deal was that I worked on the Rosalie Dace piece I started in Sisters. I haven’t really worked on it since the trip, but my mind has been working on it. I finally cleared off the big design wall enough to get it up there.

Who Am I? - early August 2018
Who Am I? – early August 2018

I thought I would keep adding letters, but the number of pins in the piece (a problem at Sew Day I can talk about later) and unfused bits flailing around demanded a different course. The quilt really wanted me to sew down and fuse down letters so I did.

The two sets of ribbon/trim letters are sewn down using a zig zag stitch in varying widths. It really took forever because I sewed very slowly, but I am pretty pleased with the way it came out.

Mary's Daughter - early August 2018
Mary’s Daughter – early August 2018

For the ‘mary’s daughter’ piece, I used an Aurifil violet-ish color on the top and the bottom.

For ‘William’s Mom’, I used clear Auriful in the top and an an orange 50 wt in the bobbin. I started out with orange in the top, too, but it obscured the circles that are part of the design of the ribbon.

I feel good about the work. I am so pleased to be making progress.

Design Wall Monday

Design Wall, July 23 2018

My design wall looks crazily turquoise and red this week. I didn’t realize how much I am in a turquoise and red mood lately. The Stepping Stones n.2 is part of that as well.

Despite the color theme, not much is happening on the design wall. For the moment it is acting as storage.

Design Wall July 2018 annotated
  1. The Lobster. I still have to finish the stitching
  2. New FOTY 2018 squares
  3. Aqua-Red Sampler blocks, most not all
  4. Half of a new donation block

I moved the Aqua-Red Sampler off the larger design wall. My goal is to put the Who Am I? piece up there an finish it. Yes, the Sampler needs to wait awhile longer. Poor baby getting supplanted again.

I’m linking up with Small Quilts and Doll Quilts, the relatively new hosting site of Design Wall Monday.

Three Quilts to Quilt

The Octagon 9 Patch, the Stepping Stones n.2 and the BAMaQG Color Round Robin are all at the quilter. I took them on my way to Sisters. It was kind of a ridiculous stop, but I had to take the time when I had it. We did the speediest dropoff ever and then got on the road to Sisters.

Interesting Half Hexie Progress

I’d love to say this piece was in the finishing process, but it is so far from the finishing process that lying wouldn’t even cover what I was doing. I am, however, working on this piece. It is slow going, which is fine when I don’t have other handwork that I must do.

Half Hexie First Borders

Recently, I bought papers to fill in the border of the half hexie piece. I needed some triangles and some diamonds. I want to create a full stop at least on one side, so I picked out a dark grey (charcoal) with small white dots and basted some pieces. The fabric is not a pin dot.

It is a little bit of a shift to insert these extra shapes, but I got into it. It is kind of funny to see the edge done. I wonder if the grey is too dark considering the overall cheerful look of the piece.

I plan to put another straight border on the sides, once I get all the diamonds and triangles attached.

More 26 Projects

I am making progress. It’s slow, but I am making progress.

Finished 2018 Quilt Projects

The list is finally getting to the point where I feel like it matches what I am feeling. Five quilts is not shabby for 5 months.

Finished 2018 Non-Quilt Projects

Doing Good

In Process
The ‘In Process’ is used to denote projects on which I am actively working or pretending to stitch. I try not to put away projects, because that will ensure I never work on them

  • Aqua-Red Sampler –This is on the design wall and I am contemplating the last block.
  • Pies and Points from 2016 Victoria Findlay Wolfe class. Julie and I had a playdate towards the beginning of April. I brought this piece with me so I could cut more elements (Julie has a Sizzix). I am more excited about this piece now. I thought I had done more, but I couldn’t find more than 2.5 sewn together pieces.
  • English Paper Piecing Project– half hexies – I have added about five stars. I also found some grey (did I buy it for this project or on spec?) that will be perfect for the border. Remember last time when I said I couldn’t find the diamond papers? I gave up and bought more. I haven’t actuallly made a border yet, but I have all of the supplies. I bought a template to go with the diamond papers. Joann at Paper Pieces was very helpful.
  • Tool Tote – In process!

Still WIPs
I still have WIPs. Who doesn’t, after all? A project in the ‘UFO’ category means I am stalled. A nicer way of saying UFO is a WIP. The list is a lot shorter and the projects are newer, for the most part.

  1. City Samplerblocks all made. The long term goal is to sash the blocks and put the top together. In the meantime, due to some seam allowance issues, some of the blocks are smaller than others, so I will have to adjust them in some way – either ripping and resewing, adding a piece or two to the block, or with sashing. This is my sticking point. I need to finish measuring all of the blocks before I can move on that is just a tedious task. Once I know what I am facing for each block, I can probably move forward. I am not looking forward to it, thus no new progress.
  2. FOTY 2017 – pieces cut. Need to layout and start piecing. No new progress.
  3. Handbag Sampler – this is a project about which I had forgotten. The blocks were teaching samples when I taught a sampler class the time before I started writing the quilt class sampler tutorials. I found one block recently, but otherwise I actually don’t know exactly where the blocks are hiding. I have an idea and will crawl up in the far reaches of my fabric closet soon and see if I can find them. I haven’t even found a picture of all the blocks.
  4. Lobster – I still have more stitching to do and then I need to quilt it.
  5. Pointillist Palette #4: Fourth is a series of 6 quilts; needs tiny square patches sewn together. No progress.
  6. Self Portrait: started in 2006 at a class at Quilting Adventures in Richmond, Virginia. I am still stalled on this again. As my oldest (I am pretty sure) UFO, I put it on my blog and out into the Twitterverse and Diane suggested that I not consider this as a self portrait. I think that strategy is a great idea. I am now trying to think of a new persona for her.
  7. Serendipity Lady Quilt: no new progress.
  8. Under the Sea: class project; like the design and am happier with the colors. I have a new idea for it, which is to make a pillow and gift it to a friend.
  9. Black and Red quilt – This came about because of two other projects. I made a whole bunch of bias tape as part of my failed attempt at doing the Mighty Lucky Club a few years ago. Another part of the inspiration came from my class with Tina of Little Blue Cottage fame. This was going to be for a nephew, but I think it will be for one of my SILs and BILs. I have rectangles cut and some bias tape ready. My next step is to sew the bias tape to the rectangles like pickup sticks. I don’t have any photos of this, so you’ll have to trust me.

Small Projects in Process

Most of my progress involves thinking or just cutting.

  • All Rolled Up Tote – part of Crafty Gemini Organizer Club, so on my list, but I haven’t actually started
  • White on black dots cell phone wallet
  • Solid black cell phone wallet
  • Chubby Charmer with Good Fortune charm pack – gift
  • 4-Zip Organizer – part of Crafty Gemini Organizer Club, so on my list, but I haven’t actually started
  • Ultimate Project Organizer – another project from the Crafty Gemini Organizer Club, also on my list, but not yet started

Ready for Quilting

  • BAMaQG Color Round Robin– I didn’t think I would do anything with this project soon. I am on a mission to clear off this UFO list. One weekend, I just blew through the back and binding. This will go to Colleen soon.
  • Octagon 9 Patch: I finished the top on May 5, the back and binding on May 6. This piece is finally ready to be quilted.
  • Stepping Stones #2 – This is ready to be quilted and I am happy. Finally!

In Quilting Process

  • BAMaQG IRR –The sandwich has been basted. I machine quilted a couple of lines to stabilize it. I am making slow progress on hand quilting it using Big Stitch. I
  • Thanksgiving tablemat – I have the correct feet and just need to get busy.
  • Theoretically, the Tarts Come to Tea is in the quilting process, though I haven’t worked on it in a while. See above.

Binding

  • nothing at the moment

Hunting and Gathering

  • 30 Something: I continue to cutting 1.5 inch squares. I am pretty sure I have the 800 I need, but I am not ready to sew them together yet, so whenever I have a chance to cut more I cut more. It will give me choice when the time comes. I’ll have to think up a new name for this quilt, too. My next step is to figure out if I need to cut other sizes of squares and switch from cutting 1.5 inch squares to cutting the new size.
  • Blue Gradation Quilt: cutting 2.5 inch x 4.5 inch blue rectangles. It has to end sometime. I wasn’t sure I was ready to put this together, but I think I am. I might do a couple of gradation quilts in a row just to get the practice.
  • Blue Lemonade: cutting blue, green, purple 2 inch squares. I used a lot of these squares for En Provence, so I am slowly cutting more.
  • FOTY 2018: I have started cutting 2.5 inch squares for the 2018 version.
  • Pink Gradation Quilt: cutting 2.5 inch x 4.5 inch pink rectangles
  • Spin Wheel: really not started, but supplies gathered. I might have to cut some more background fabrics. I probably have enough fabrics and just need to decide to start.
  • Windmill quilt: Still hunting and gathering. I am supposed to be cutting a variety of greys for the background, which required the purchase of a new template. I should be able to get going again

Other

  • Stepping Stones #3 using the Macaron pre-cuts from Hoffman. I have all the fabric in pre-cuts and am just waiting for space (and desire) in my schedule.

I bought some fabric, so I am down on net usage. Still gross usage is just over 113 yards. My net calculation isn’t working, though I think I must be at 50 yards net now. I am pleased, but I want to confirm my guess. If I could make it to 100 yards NET used by the end of the year, I would be ecstatic. It is good to have goals!

What’s on your list?

Tool Tote Finally

I have been thinking about the Tool Tote a lot lately. Since I finished the Stepping Stones n.2 last week, I thought it was time to work on a bag. I have a lot of bags on my project list and never enough time.

As you may recall, I bought the pattern at QuiltCon from Elk Horn Quilts (great shop, BTW). I took some time several months ago to cut a few pieces at a Sew Day, but hadn’t made any other progress since. It was time to move, so I took out all the pieces and started cutting.

Quilts Illustrated Tool Tote chits

OMG! The Quilts Illustrated pattern was fantastic. You have probably seen the post-it notes I attach to the pieces I cut for bags. This Quilts Illustrated pattern had a sheet of bits of pattern chits included. they were already made!!

These made life so much easier. I took the sheet, cut off the chits as I cut the pieces and when there were no more chits there was no more cutting. I didn’t feel frustrated and exhausted. It was awesome.

Thoughts on Aqua-Red Sampler

Aqua-Red Sampler
Aqua-Red Sampler

As I mentioned a couple of days ago, I have the Aqua-Red Sampler on my design wall and I am trying to figure out what block to make as my last block.

Tea Basket block
Tea Basket block

I was thinking of the Nosegay. I have a great version for the Handbag Sampler, so it isn’t pressing that I make another one. Still, it’s a good block. Then I remembered the Tea Basket block. It isn’t very popular. In fact I don’t know if I have ever seen a quilt that included that block. It is in Jinny Beyer’s The Quilter’s Album of Patchwork Patterns, so I was able to find it. I also found it in BlockBase and made some adjustments so the BlockBase version looked more like Jinny Beyer’s version. I also added some color to get an idea of how it would look. Looking at it now, I think it is more of a contender than I thought.

Finished: Stepping Stones n.2 Top

Stepping Stones Top
Stepping Stones Top

Yes, I worked really hard over the weekend and finished the top!

I also finished the back and binding, so the piece is ready to go to Colleen. Yay!

I started playing around with colors in 2012, so this quilt has been hanging around for longer than I thought. Those first tests were a lot different than what this quilt turned out to be. I am pretty pleased with the colors, though the darker turquoises do stand out. At least they are evenly spaced.

I have another group of fabrics destined for this pattern. Regardless of whether I actually use those fabrics for n.3 remains to be seen, but I don’t think I am quite done with this pattern yet. I’ll need a different border. This one is fine, but not for a second quilt.

As You Sew, So Shall You Rip

I realized that I don’t talk much about ripping out stitching. I do it all the time and this week was no exception.

Stepping Stones n.2 - 1 seam left
Stepping Stones n.2 – 1 seam left

I have been eager to finish the Stepping Stones n.2 top as it has been on my design wall for too long. In my rush, I put a block together wrong and then put it in the quilt. With one seam to go to finish the top, I had to rip out a bunch of seams. Yes, I had to. I looked at the quilt for a long time time, trying to decide if I could live with the mistake. I didn’t want to rip when I was so close to finishing, but I just couldn’t live with the problem.

Stepping Stones n.2 - 1 seam left + error
Stepping Stones n.2 – 1 seam left + error

The look is almost right, but if the viewer looks hard, there is a disruption in the pattern. Also, all of a sudden two like fabrics were placed together, which I really worked hard to avoid all through the piecing process.

I am sure you can’t avoid the big circle, but refer back to the photo above to see the problem. Look down and to the left one row to the see the duplicate fabrics (not circled.

Stepping Stones n.2 - lower right hand corner - ripped
Stepping Stones n.2 – lower right hand corner – ripped

Yep. I ripped. I thought I would just take out one row from one block and sew it back in. I ended up taking part a good portion of the lower right hand corner. The photo with the arrow is before I ripped out some other pieces.

I am in the process of sewing the bottom back together and finishing the top.

Stepping Stones n.2 Painfully Slow Progress

Christa Watson has a new pattern out called Stepping Stones. It looks like a reimagined Rail Fence to me, but who am I to say? I had to stop contemplating the names of blocks, however and get back to sewing.

Stepping Stones Border Block - Left Side
Stepping Stones Border Block – Left Side

I try to make a CrockPot meal for Mondays so that we can come home, eat and I can go to Craft Night in a timely manner. Craft Night was at my house on Monday and the meal was over and done before I even needed to prepare the tea and all. I had about half an hour of time, so I raced up to my workroom and sewed! I didn’t have a lot of time over the weekend to sew, so this was a good way to scratch that itch for sewing.

Stepping Stones Border Block - Right Side
Stepping Stones Border Block- Right Side

I wasn’t able to finish a lot, but every little bit helps. I had cut some fabric, so I could work on a couple of border blocks, which I did. These blocks will allow me to put together another row of the top.

The green and blue HSTs indicate the middle of the quilt and prove I am halfway finished with the top. I know you believe me, but sometimes I need to prove to myself I am making progress as slow as that progress might be.

Aside from cutting more pieces, which I have mentioned, I have to make a few more HSTs. I can’t actually see one corner of the quilt, because there is some stuff piled in front of it ( 🙁 , I know). Once I sew the latest row to the top, I’ll be able to pull the quilt up and really work on the bottom.

Progress might be painfully slow, but I am making progress. It would be really great to finish this top before July 7, but we will see.

Stepping Stones n.2 Half

Stepping Stones n.2 - top half
Stepping Stones n.2 – top half

I made really good progress over the weekend. I had only a few seams to sew in order to finish half of the quilt. The quilt is starting to look like something!

You might remember that I finished the first quarter not that long ago and kind of got on a roll.

I have had to cut a lot of blues and greens for the border, so that is taking time, but at least I can do a few at a time in between everything else.

Looking at this half makes me think that I might have to work on another one of these. I would like to see the framework of the red diamonds more filled in. On the other hand, if I used more red, would the Sawtooth Stars (check the middle, right under the red square) show up? Perhaps fabric with less contrast? Red and pink or orange and yellow? I’ll have to play around.

I also need to work on the border of a new version. This border is ok, but not great. Not sure why, but it isn’t doing much for me.

A Few More Hexie Stars

Half Hexies - May 2018
Half Hexies – May 2018

I have been working on the half hexie stars a tiny amount. They take a long time, as I have said.

I finally was able to cut some more backgrounds, so I have been focusing on making background stars. I’ll have to see when I can add more stars to the larger piece. Making the individual stars is fairly easy, though not completely mindless. I do have to really pay attention when I am adding stars to the larger piece.

Stepping Stones n.2 – Top Quarter

Stepping Stones n.2 - top quarter
Stepping Stones n.2 – top quarter

I wouldn’t normally put a quilt together like this (you know I like chunking!), but it is too long to fit completely on my large design wall. I put the top quarter (ish??) together and and then flung it over the top so only the bottom couple of rows are showing. That allowed me to move everything up and work more on the middle. I hope also, to work on the bottom, but I will probably have to move it up again.

I am always amazed at how good quilt tops look sewing together. I really like the top part of this quilt and it took me so long to get to this point. Yes, I have a lot more cutting and a lot more sewing, but I am thrilled, finally, to be making some progress!