What Works for Me

Various podcasters have gotten together on a service called Big Tent and created a Quiltcast Supergroup. I don’t know the ins and outs of Big Tent, but it is basically a way for all the podcast listeners to get together and talk. I am assuming that this is like LISTSERVs back in the day or Yahoogroups used today. The nice thing about Big Tent is you can have one giant group with a bunch of subgroups and that is how they have organized it.

One of the podcasts I have started to follow is Stash Resolution. You can find it on iTunes. There is also a blog, of course. In the Big Tent Stash Resolution Group a week or so ago, some asked what people were afraid of. Someone said the Storm at Sea block. Another person said Mariner’s Compass. Someone else mentioned that she did not have much time to sew and wanted to guarantee success every time she had time. I thought this last comment was the most interesting. It made me think of whether I need success every time.

I wrote that I thought it would be hard to guarantee success every time. I think one has more success when one is more confident in their own technical skills and can assess quickly when the project is going well or not.

It occurred to me that I use some strategies to  maximize my sewing time and also to have more success. Here is what I wrote to the group:

1. take notes from the time the project is an idea until it is finished. This helps me get it organized, keep track of where I am and remember what I did after I finish the project, which is helpful if I want to do it or something like it again. Everything flat (e.g. paper, some fabric) gets organized in folders.
2. Take lots of photos and put them in computer files by the project name and printed out in the folder.
3. Remind myself there is always more fabric. This is so that if something is going badly, I don’t feel like I have just used the last piece of good fabric.
4. I focus on quiltmaking. The only other crafts I do is knitting and some paper crafts. I only knit when I cannot quilt and I do not keep a stash. I do the paper crafts at a local shop and try to keep the stash to a minimum.
5. I plan well for days when I am free, so that I am ready to go. I also do little bits, if I can, during the week. Cutting straps and interfacing, making patterns, cutting templates are all things that can be done in a little bit of time.
6. I warm up as I start. I use easy blocks (like 4 patch) that I piece from scraps to get me in the groove.
7. When I cannot be at my sewing machine, I read, listen and think about quiltmaking.
8. I have to play and realize that I will make mistakes and things will come out badly. It is just the way it is. I was a lot more successful when I acknowledged that and worked with it. Mistakes can be repurposed.
9. I make the same project over and over again, especially for smaller projects(tote bags, pencil rolls and journal covers are the biggies). Doing things over and over helps you get to know the pattern, your machine, your skills. This is much easier with sewn accessories like bags as opposed to quilts. You can make the same block over and over.
10. Always use good fabric, because you might not ever make the project again.
11. If one way of doing something doesn’t work, try a different way. I suggest making pillows to try different ways of machine applique’.
12. Take classes and learn.
13. Try it again next year.

I am not sure if these are my ‘rules’ for quiltmaking, but it is a pretty good list to think about.
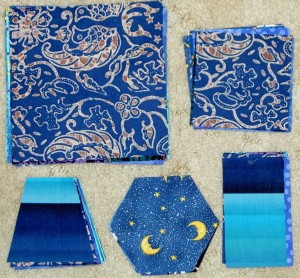
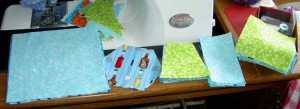
Patches I Cut

2010 Patches
2010 Patches

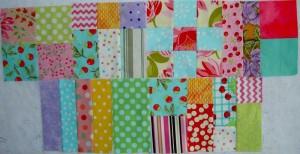
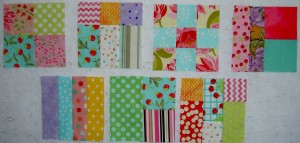
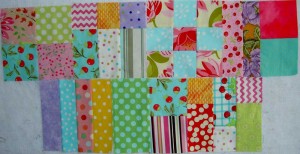
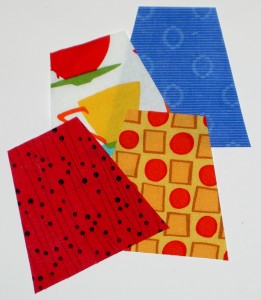
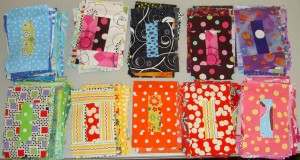
You all know that I cut a patch from each piece of fabric I buy in a given year. You also know that I do this in order to decide if I like the fabric so I can buy more before it goes out of style. These are my Fabric of the Year (FOTY) patches and this year I am cutting diamonds. In addition to my FOTY patches, there are other patches I cut from other pieces of fabric. Lately I have been cutting from both new and old, but it depends on the project.

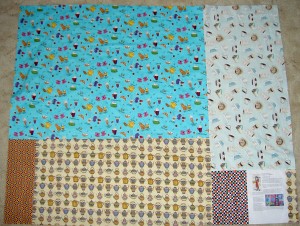
First, in the upper left hand corner are the 6.5″ blue squares. Some blue green snuck in as well. These are for a quilt I am making for someone who reads this blog, so I can’t tell you any more until I get it done.

Next, upper right, are the 4×4″ squares. These are for TFQ, because she cheerfully cuts many, many patches of almost any size and shape I ask. I am cutting these from any fabric that I get out of my fabric closet and all new ones.

Third, lower left corner, are the Tumblers for Julie. Her quilt is king-sized, so until I see her put the thing together and get it quilted, I keep cutting. Mostly these are from new fabrics, but I hauled out a bunch of blues lately, so this stack happens to be blue.

Fourth, in the lower middle, are Eye Spy hexagons for my SIL’s Eye Spy project. I buy very few conversationals, so I don’t cut many of them yet. I don’t know if she has started cutting from her own stash yet. These are fun to fussy cut. The exercise makes me look at my fabrics differently.

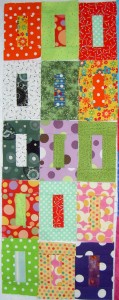
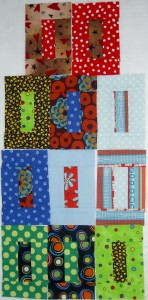
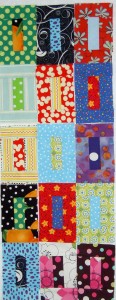
Last are the blue rectangles (2.5″x4.5″). I am in deep love with that rectangle shape I used for FOTY 2008. I look at the quilt every day at work and adore it, so I decided I wanted to make another out of blues. It takes a lot of cutting, so it will be here for awhile. After starting to sew the Blue Quilt together I am thinking that a blue rectangle quilt might not have been such a great idea.

Not pictured are the food fabric squares, 6.5″, I am cutting for my mom. She is making a replacement quilt for her step grandson, whose quilt was burned up in a fire. I will probably help her with it. We are seriously considering the Corner Store pattern from Pretty Little Mini Quilts, which is like M Dugan’s version on Flickr. I may try this quilt out myself, too. Back to my mom, though. I hope we do get to work on it together. I think it would be fun.

I also cut 2×2″ squares and make four patches as warm-ups.

Multitasking
Multitasking

I often press and cut fabric while I am on the phone. I am not much of a phone person, so there are only a few people to whom I speak on the phone for extended periods of time. On a recent conversation with TFQ, I was amazed to see how much I cut. I am not a fast presser or cutter, so I was pleased.

I hope this preparation doesn’t seem terribly schizophrenic. Sometimes it does feel that way, but I am so glad when I have enough of one patch and can just start sewing. I don’t like to do all my cutting at once and this is a good way for me to do it incrementally.

Sandy talked about scraps and what she cuts for scrap quilts on a recent podcast, so I don’t feel quite as crazy. It was interesting to hear what she said about the pieces she cut.

Basting & Quilting

I am trying to force myself to sew, so last Friday, I planned a day to baste the Tarts Come to Tea. I am not in the groove since I was sick and that is a weird thing.

It has been a long time since I basted a quilt. The last time I remember doing it was on our kitchen floor before we remodeled the kitchen 3 years ago. I think it was a long time before the remodel, too.

I wasn’t sure how long it would take me, so I planned to spend the whole day. First, we had to set up the tables, which we planned to do the night before.There was NO way I was crawling around on the floor and the tables are large enough so this configuration was the perfect size. When we went to set them up, one was missing. SIL and BIL kindly offered to come over and bring our table back (it gets shared around the family) that evening. Once it was found and delivered, DH and I set two of them up downstairs. It was a tight squeeze downstairs, but worked fine in the end.

Piecing Batting
Piecing Batting

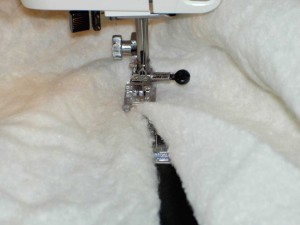
First, however, I needed batting and I didn’t remember that critical piece of information until I was at class at 7am on Friday morning. I did remember the night before and vaguely thought about looking to see if I had a piece, but didn’t get to it. The gang was over watching the Lakers vs. Celtics game. I looked when I got home from class and found nothing big enough. I did find two leftovers I could piece together. I have pieced batting before and think I learned the technique from one of Harriet Hargrave‘s books. I just use a big zigzag and butt the two pieces of batting together but not overlapping. Once quilted, there is no problem with shifting or anything. I try to use the biggest pieces possible and not have too many seams. This a good use of leftover batting.

Pieced Batting
Pieced Batting
Placement of Pieced Batting in Quilt

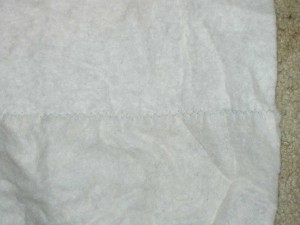
If you look carefully in the photo above, you can see the zigzagged seam. I thought about turning the piece over and going over it again, but decided that would be overkill. I did pay attention to where the seam ended up in the quilt (lower photo). I want to keep track of where it is as I quilt so I can see if there is any difference in how that section looks. Obviously, I won’t highlight it. I just want to see how it comes out.
Back Face Down
Back Face Down

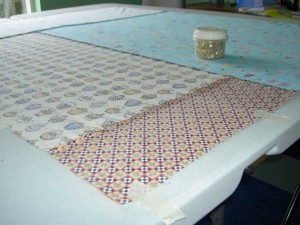
For the first time ever, I basted on a table. One of the things that was preventing me from quilting my own quilts (and there are many) was basting on the floor.

The two tables made a HUGE, GIGANTIC difference on how my body felt afterwards. I am no longer the limber gymnast I was at 15 and crawling around on the floor just isn’t an option! This basting experience was awesome! I sat or stood around the table and listened to some podcasts while I pinned. It really put me a good mood to move forward on the rest of the process.

Quilting Border Comes in Handy

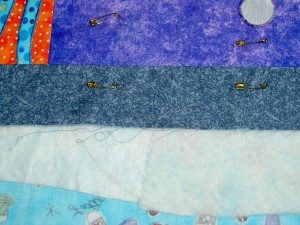
One of the things about a quilting border is that it protects the end seams. Sometimes seams on the edge of the quilt come apart as I work with the quilt. The quilting border, which I like to add (though don’t always remember), help keep those seams tidy. I talked a bit about the quilting border in a previous post.

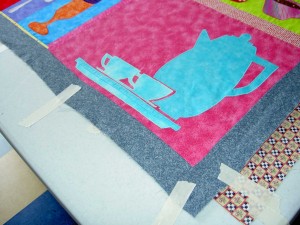
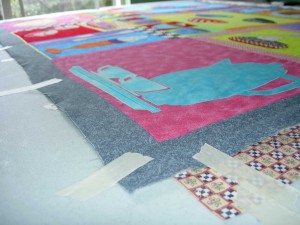
All Taped
All Taped

I tried very hard not to stretch the quilt top or back while I was taping regardless of how tempting it was to make the piece tight as a drum. It was taut, but not tight.

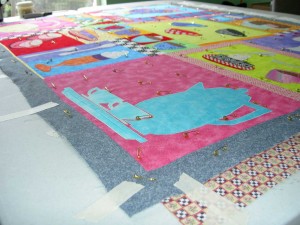
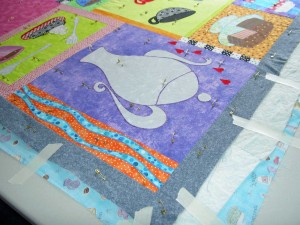
Pins In
Pins In

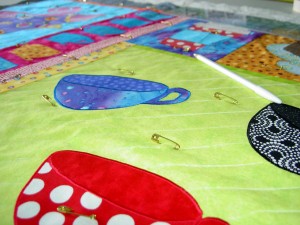
I tried not to put pins in the actual motifs, thought I had to do so on occasion. I find that the combination of the fusible and the safety pins creates a hole. If I get a hole, I rub it with my fingernail, but sometimes it stays even with that treatment.

Pins In - Top View
Pins In - Top View

You can see above that I broke my self imposed rule. The curvy teapot was just too large a space to go without pins. I am scared that there will be a giant ugly hole. We’ll see.

3 Cups Marked
3 Cups Marked

In my first quilting class, I learned to use a white pencil to mark quilts. They are difficult to use, but are not permanent. The thing I like about them is that they are white and not permanent.

I don’t like that I can’t sharpen them to a really find point. I also don’t like it that I have to go over and over the line. I found as I was quilting, that the light in my workroom (and the foggy grey weather) made it hard to see the white lines as well.

Deirdre sent me some .9mm chalk ‘lead’ that can be inserted into a mechanical pencil. I am sure these will work better, but haven’t had the chance to go to a stationery store and get a new pencil.

Despite these problems, I am not prepared to try a water soluble marker. I may leave my quilts marked and unquilted for years and I know that won’t work with a water soluble marker. Nadine Ruggles has a great podcast episode giving instructions on using a water soluble marker. I feel more confident with her instructions supporting me, but still don’t want my first effort to be on this quilt.

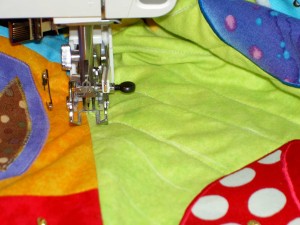
Open Toe Walking Foot Quilting

After the above photo of the curvy teapot and my brilliant success at basting, I was ready to quilt. Mentally, I was ready to quilt.

I know that I quilted Beach Town last year. Beach Town, however is small and does not need quilt wrestling. I don’t remember the last time I quilt wrestled. It had to be more than 10 years ago. Aside from the quilt wrestling aspect of quilting a large quilt, I was reminded that I am not a fan of the actual designing of quilt motifs. I have to look at my Flickr set. I don’t know if any motifs will be appropriate, but I will, at least, look.

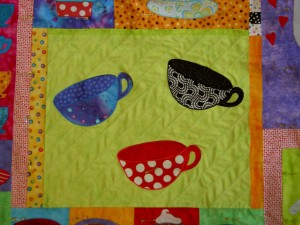
I did some basic quilting on the 3 Cups block. It isn’t enough. I should have remembered that I like my quilts to be densely quilted. Now I don’t know whether I should quilt within the lines I created using a free motion foot or whether I should leave it and move on. I don’t like the puffiness. If I go back and quilt more, will I get folds or tucks?

3 Cups Half Quilted
3 Cups Half Quilted

Let me know your thoughts on how this block looks. I went around each cup (in the green) with green thread, but didn’t do any quilting within the cups. I think I need some. Again, I have to think about giant holes through the fusible.

More Sorbet

Sorbet Blocks
Sorbet Blocks

I showed these blocks last week. I have a lot of finishing work to do, so they are still on my design wall, which means I keep looking at them.

My original thought was that they should but up against each other and kind of blend together. The more I looked at them, the more I thought the blending together idea wasn’t really working.

Sorbet with Space
Sorbet with Space

Since rearranging is free, I moved them a little apart and started looking at them. It is better having them farther apart, but I am going to reserve judgement until I make more blocks. I definitely need more fabrics to add interest, so I am glad that TFQ helped me pick additional colors and designs.

This quilt is not the mind sorbet project I thought it would be. I know I mentioned this in my last post on this quilt.

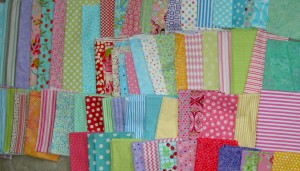
Sorbet Fabric

Sorbet Blocks
Sorbet Blocks

I know I haven’t shown Sorbet in awhile. I had a number of different issues and it wasn’t working out as the mind sorbet that I needed. I think what I determined is that quilts are not mind sorbet if I have to amke a lot of decisions. Bags and pencil rolls are mind sorbet.

At some point I got some creativity energy behind the project and decided to make some blocks. My laptop, with EQ6, where all of my design ideas were) crashed and died. I had the basic measurements, so I thought I could plunge on, but then the finished blocks went missing. That sealed it for this project for the time being.

Time went by and I found the blocks! I put this project on my list of TFQ to dos. One of the many good qualities that TFQ has is that she is more than happy to paw through the fabric in my fabric closet. What we did was look at all of the fabric I had set aside and then all the fabric in the pastel/Easter/sorbetish colors that might work. We also figured out that we needed a few more stripes and some graphic designs.

Sorbet Fabric Palette

The fabrics above are all put aside to possibly use for the project. Nice, eh?

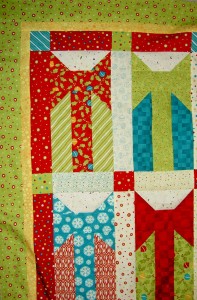
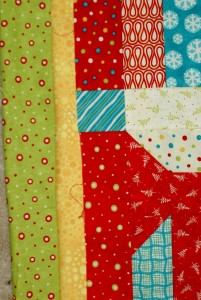
Merry & Bright Wrap Progress

Merry & Bright Border

TFQ came to stay last weekend. She and I wedged a visit in even though we had a family event in the middle of her visit. One of the things *I* like to do when she is here is get her opinion about my various projects. Often I get stuck and need to move forward but seem to be unable to make any decisions. I can ask any quiltmaker I know, but TFQ knows me well enough not to suggest something completely stupid. She also often prevents me from doing something stupid because I am just tired of the project.

One of the things we worked on was the border of the It’s a Merry & Bright Wrap. I didn’t really work very hard at finding a border by myself, to be honest. I was glad, because what was in my head was not what I ultimately went with.

Possible color combo
Possible color combo #2

We auditioned a couple of color combos, including my idea, which included a white dotted inner border (no photo, sorry). I had a lot of that fabric and wanted to use it, but it was too stark as white often can be.

TFQ suggested yellow. We looked through a number of yellow fabrics until we found one that fit well with the yellow from the Merry & Bright Jelly Roll. I found the blues and yellows in this group to be off the beaten path. Interesting, but different than what I have in the fabric closet. The yellow we went with is an older commercial print and not part of that group.

I was pretty interested in using a blue/teal/turquoise color. I found the tone-on-tone in my fabric closet (left photo), but we both felt the quilt needed a bit more pattern. I liked the idea of bringing out the blues, but, since I didn’t have any large pieces of blue from the group and nothing I had was the right tone and I didn’t like the idea of having to buy and wash new fabric I used the green. I happened to see some half yards at Rainbow Resource at the EBHQ show, so I had enough.

Truthfully, we didn’t agonize too much over the colors. We did the Lorraine Torrence thing of making visual decisions visually, we picked and then I sewed them on the next night.

I used the new walking foot to sew the borders on and they are flat and I had not problems. The quilt is now ready for a back and to be quilted. My finishing seems to come in clusters!

I will probably use red for the back, since I have plenty. I don’t know if I will longarm this quilt or send it out. We’ll see.
Eye Spy & Tumbler

Tumblers, cut
Tumblers, cut

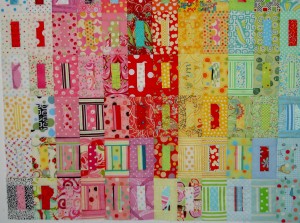
I have been cutting patches for Julie‘s Tumbler quilt for awhile. It seems only fair since she cut a boatload of hexagons for my Eye Spy quilt. Periodically, I get a bunch together and give them to her when I see her. They fit very nicely into a Recchiuti caramel box, so she gets a nice smell of chocolate along with her Tumblers. It occurred to me that I should surprise her sometime and give her a box of the actual chocolates!
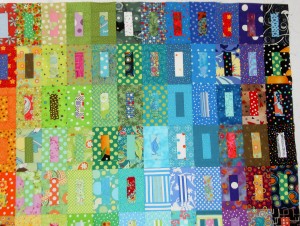
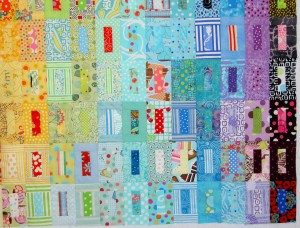
I kind of like having a list of patches to cut as I work through new fabric or fabric I am using. There is something nice about collecting a bunch of blocks and then putting them all together at the end of the year or the end of some other timeframe.

The other day, Julie wrote about getting close to the end in a recent post. She is struggling with the same issue I had and that is the edge. When I was finishing up the Eye Spy, I didn’t want to slice off several hexagons to make a straight edge. That is the suggestion that many resources had for the edge of an Eye Spy.

Eye Spy, Full
Eye Spy, Full

I also didn’t really want to sew a binding around all of those weird angles. I did that once and once was enough. The one weird angle in the Chocolate Box was enough for me. As you may remember, I did some triangle gymnastics on the Eye Spy to finish the edge in order to end up with a straight edge.

I think this is a case of thinking about what design would be best for the quilt. Chopping off hexagons that were fussy cut to include an image would be jarring, I think. If I had thought ahead, I might have made the edge hexagons a solid or tone-on-tone fabric and not worried about chopping them off. Solid fabrics might have provided a kind of border effect.

I am happy with my solution. It wasn’t the easiest solution, but I think it looks good. I am sure Julie will come up with a good solution as well.

Brain Dead Projects

It's a Merry & Bright Wrap!

I have had some time to reflect on this project. I realized that “brain dead projects” have a place in my quiltmaking process.

“Brain dead project” sounds fairly derogatory and I don’t mean the concept to be.  To me, a brain dead project is a project that I can work on that has very few decisions involved. I have put off writing this post while I tried to think of a better term.  I haven’t succeeded yet. I am sure one of my brilliant readers will come up with one.

Quiltmaking is, in a way, an intellectual process for me. My normal way of working is that something intrigues me – a block, a fabric, a tool – and I start playing with it. The circles are a good example. I saw a quilt, began thinking about how to make it and what I wanted to convey and ended up in a class. The process with the circle quilt is not over by a long shot. It is still in the percolating process.

Sometimes, my normal process takes too much thinking. The It’s a Merry & Bright Wrap quilt was the perfect project when I needed just to sew. I didn’t have to choose the colors (except for a couple of background additions) and I didn’t have to figure out the piecing. I bought the pattern, which was a choice, but after that, it was basic sewing and pressing. I only had to focus on the more technical details of putting the quilt together.

I need this kind of project sometimes. It keeps my hands busy and allows my mind to wander. When I made this top (which still needs borders) I was having a hard time and the fewer decisions the better.

I am happy with the way the quilt turned out (so far) and that I got to learn to use a Jelly Roll. Yes, my quilt looks like everyone else’s. Sometimes that is ok.

More Tarts

I finally buckled down this past weekend and got some of my ‘rote’ sewing out of the way. Rote sewing is stuff like making backs, putting on bindings, etc. I usually consider it to be stuff that I have to do at the machine, but isn’t very creative. I often have a hard time getting started on it. The good thing about rote sewing is that it usually goes fast once I buckle down and I can often cross a lot of tasks off my list after a rote sewing weekend.

Fluttering Hearts Test

This time I worked on backs and tossed the Fluttering Hearts into the mix. Above you can me trying out the Fluttering Hearts. I have had 3 on the piece on my design wall since November or December. I really wanted some at the top and decided that Saturday would be  good day to try it out.

Fluttering Hearts Appliqued

I spent a lot of time sewing carefully around the hearts with the satin stitch. I am out of the thin Maderia embroidery thread so I used a spool of Robison-Anton that seemed relatively new. I love the sheen of that thread. It is also thick like quilting thread, so the satin stitch looks pretty full on the hearts.

Tarts with Fluttering Hearts

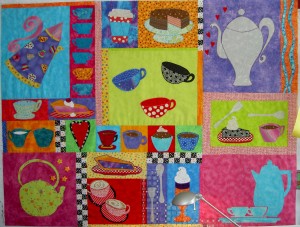
Above is the Tarts with the Fluttering Hearts appliqued. I thought I would be done, but I am thinking that I need to applique’ something to the tea kettle (lower left), some steam or stars to the Chocolate Pot, like I showed in this post.

I think I might be getting too mired in the layering thing that is going on in my head. I have to remember that I put the label on the back and it says I finished this quilt in 2010, so I have to finish it!

Tarts Back
Tarts Back

Here is the Tarts back, another bit of rote sewing from the past weekend. It went together really fast! I was shocked. I guess I really do need to finish this quilt!

Give me your opinions about more bits of applique’ of it you think I should just wait to embellish with buttons and beads and embroidery.

CQFA Retreat 2010

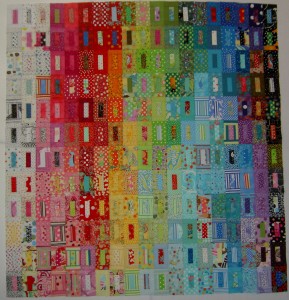
FOTY Top Complete
FOTY Top Complete

This past weekend was our annual CQFA retreat by the beach. I spent the weekend working on the FOTY 2009. I also relaxed a little even though I spent a lot of time hard at hard sewing. My body is rebelling a bit from sitting so much and standing so much.

Last few FOTY blocks

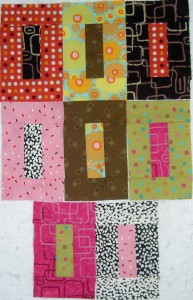
First, I found the last few FOTY blocks on my design wall before I left and I wanted to post a picture of them. I didn’t think I would use the one with the earthy brown (middle row, middle block) on the front, but I ended up using it.

FOTY 2009 in progress

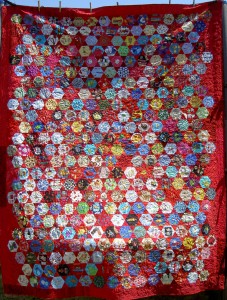
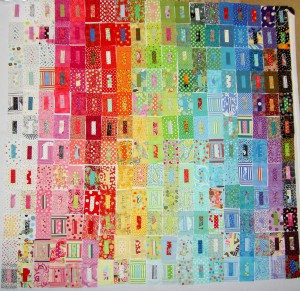
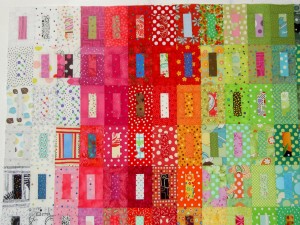
I really worked hard on the piece. As with last year’s piece, there is a lot of sewing and pressing. The process, after I figured out the size and laid the blocks out was to sew two Zanzibar blocks together, press, put back on the design wall, sew two Zanzibar blocks together, press, put back on the design wall and then repeat that process 133 times. Once I sewed sets of blocks together, then I sewed two sets of two blocks together to make a set of four. I did that approximately 67 times. Since I wasn’t in my own workroom I had to walk around my table, past another table and into the corner to get to the iron. The distance was inconvenient, but also good, because it forced me to stretch my body. Putting the top together was a lot of rote sewing, but it was the perfect project for the retreat.

I did a few things differently this year. One was to count up the blocks and try to make a plan as to how I would lay them out before I arrived at the retreat location and was standing in front of my design wall.  I knew I had 225 blocks, so I thought I would lay them out in a 15×15 format. What I didn’t take into the consideration was the size of the portable design wall. If I placed 15 blocks down, 3 of them were on the floor. I didn’t want to work with blocks on the floor even though I could have. It is hard to photograph the in progress piece. It is easy to forget some of the blocks, etc. I reconfigured the layout and ended up with, I believe, 12 down and 19 across. I prefer a rectangular layout anyway so it worked out. I needed another block, however, so the earthy brown one ended up on the front. In the grand scheme, it doesn’t scream brown out of the quilt.

Color Sorting
Color Sorting

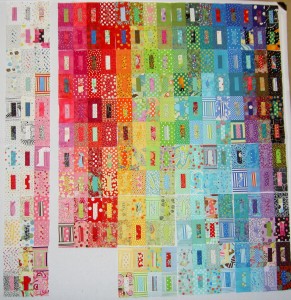
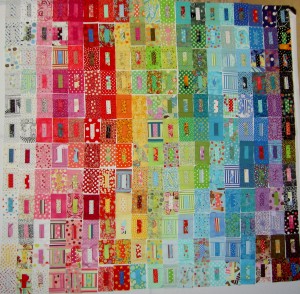
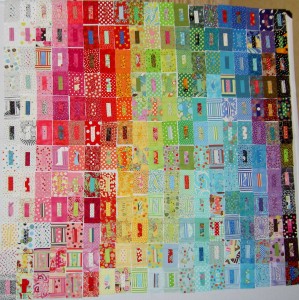
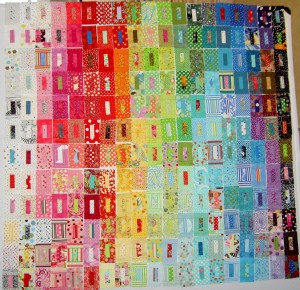
I also sorted the blocks. Last year, I think I just put them up in general areas on the design wall and then I had to move them around a lot. This time I sorted the fabrics on the table, put them in Roy G. Biv + white and black order and then put them up on the design wall. This strategy was a lot easier. I didn’t have move such large groups of blocks over and over. I had to move some groups, but the whole process was much easier. Below is a progression of how the piece evolved as I worked on the color:

#1 Blocks on the design wall
#2 Blocks on the design wall
#3 Blocks on the design wall
#4 Blocks on the design wall

Another thing I did differently this year was ask some of the other retreaters if any blocks stood out to them in an “I am out of place in this quilt” kind of way. Many of the CQFAers are really skilled designers, others are skilled colorists. All of them have something wonderful to offer if I remember to ask and listen.

I was looking at FOTY 2008 last week and found that there were some rectangles I really should have moved. It is by no means a horrible quilt, but I should have played with the layout a bit more. Asking for help was a great strategy, because people mostly liked the color work I did and I got lots of kudos, but some of the blocks jumped out at them. Funnily enough the blocks they noticed, for the most part, did not jump out at me. Almost exclusively, these were blocks that were hard to place – multi-color fabrics, conversationals, light backgrounds almost completely covered by various colors, etc. The CQFA group is great, because they helped me place the problematic blocks to their best advantage. In this way, I also learned.

FOTY 2009 Upper left corner
FOTY 2009 Lower left corner
FOTY 2009 Upper right corner
FOTY 2009 Lower right corner

I spent a good portion of the retreat sewing the quilt top together. Open house at school was today, so I had to leave the retreat early and only got some straps for my next Anna Maria Horner Multi-tasker tote done. I really wanted to stay, but am glad I was able to have a chat with various teachers at school as well. There is always so much to do!

Last of the FOTY?

I spent Sunday, and a few minutes on Saturday night, finishing up the FOTY blocks so I can take them to the CQFA Retreat. When I return from sewing bliss, I hope to have the quilt top ready to show you.

FOTY January pt.2 #1

I really like the warm colors in this group. Some of the darker colors, especially the greens were given to me by my sis for my 2009 birthday.

FOTY January pt.2 #2

Getting down to the bottom of the pile made matching up fabrics difficult. I tend to pull out the ones I really like and press and use those first. Some (not all!) of these were my lesser favorites.

In a way the FOTY exercise helps me train my eye and mind to choose fabrics I really love and want to use right away. At the same time, it trains my eye to avoid fabrics that are not my colors. Yes, I did find fabrics that I bought that made me wonder why I bought them. Before I buy, I think I will have to not just look at the fabric next to lovely coordinating bolts. I think I need to take the potential bolt off the shelf and unroll it a little to see more of the fabric. That will make me shop slower, which can’t be a bad thing.

I pressed, cut and sewed the last fabrics on Saturday. Sunday I counted all of the blocks and consulted with DH about the layout. Not the layout in terms of color, but the layout in terms of numbers of blocks across and down. He told me I had to have an even square root number (or something). I ended up needing 14.83 blocks across the top and down the side. I don’t know what a .83 block looks like, but I knew it wasn’t going to fit evenly into my quilt.

I immediately grabbed the fabrics I received for Christmas and shoved them in the washer. Then I went to work on a pencil roll, which you can read about later in the week. When the fabrics were done, I had figured out that I needed to make 7 more blocks to come out with an even 225 (15 across by 15 down). I pick out some pairs of fabrics and sewed them together. Now I am ready to arrange the quilt and sew it together.

FOTY January pt.2 #3

I do have one extra, which I will stick on the back.

Some of the fabrics I bought at the very end of 2009 will end up in the 2010 quilt. As the Quilt Mavs say “my quilt, my rules.”

Unrelated notes:

* I have no Internet at home at this time, so if I am a little slow responding to comments, I apologize! It makes it a challenge to get blog posts up as well!

* Remember to leave a comment in the One World One Heart post for a chance to win!

Various and Sundry Saturday

I have to admit that this week has been a challenge and I am pretty exhausted. I felt this way on Wednesday and just had to power through the rest of the week. It was tough! Boys are gone and I am supposed to go to a party. I am tempted to blow it off, but I have gotten a lot of emails asking me if I will be there. I also really like the people who are giving it. We’ll see.

I’d like to get some sewing done as my brain is starting to wonder what that is. I feel like it has been an eternity since I have been at the machine.

I went to the Timberlake Quilters Guild Blog, which is called Fiber Whimsy and saw some lovely photos from their string piecing workshop. One of the photos was a Spiderweb! They seem to be popping up all over. I guess this is message to get back to mine. I think it is one of the projects I want to work on in 2010. Stay tuned to see. Love the red background on the one pictured in the photo.

Tagging this Blog

As a librarian, you’d think I would have all the answers about tagging, but I don’t. I have been thinking about whether or not I should add a tag for the name of each project so you (and I!) can click on the name of a project and see all the posts about that project. I am not sure I could back and tag all the old posts unless I was laid up in bed for a period of time, but I could do it going forward. Let me know if you think that would help you. I would also like to k now what you do in your blog, if you have one.

I helped my mom download iTunes and subscribe to some podcasts. We listened to a little of the Cast-on podcast and she loved it. I can’t wait to hear whether the whole premise works for her or not. She has really gotten into Cat Bordhi, a knitter, lately so I downloaded some interviews to which she could listen as well.

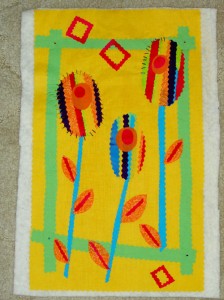
Laura Wasilowski class "Flower Garden"

Laura Wasilowski left a comment encouraging me to finish the piece that I started in her class. I took a look at it again and realized that the handstitching makes the piece look really spiky and unfriendly. I think I need to add some petals to the flowers and see if that makes it look more friendly.

You can see a watercolor painting that usually hangs in my dining room. I love this painting. It makes me feel calm. I just generally love beach and water scenes. That thought makes me wonder if that is why I like turquoise so much? After the painting project, the art is not back up yet. We may rearrange the art. However, as I seem to never be home, we haven’t discussed it yet.

Elizabeth of Oh, Fransson! blog has a laptop sleeve tutorial on Sew, Mama Sew! While I am not fond of beige, I do like the swirly motifs on the fabric. This would make a nice gift. Yes, I am thinking ahead! I would probably add a strap or a handle, however. I have to admit that I find it hard to navigate that site, but sometimes the effort pays off and here is a list of a year’s worth of Elizabeth’s projects just for you.

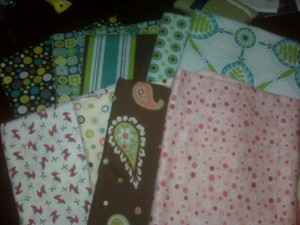
Oregon Fabric
Oregon Fabric

My sister received Lakers v. Trailblazer tickets for Christmas from her boyfriend. Our dad lives near Portland, so I think they went together. While she was there she took the opportunity to raid and scan our childhood photos. In the course of that project she went to a craft warehouse to get supplies. While she was there, she found some fabric that she said was for me. YAY! I haven’t received it yet, but presume I will soon.

She has sent me some scans of my 5 year old self, which are not new, but still entertaining.

I saw a post on Twitter to a Detroit artist who is doing interesting things with blue. Steven Magsig has a blog called Postcards from Detroit where he posts paintings of little areas of the city and buildings in the city

I seem to remember mentioning that I spent an hour and half last Saturday talking to the CQFAers about developing a creative habit. I got lots of good feedback. Here are some tips from my talk:

  • Use what you have at hand
  • Use materials you feel comfortable using
  • Tools (KISS)
    • paper
    • pen
  • Start small
  • Acknowledge your distractions
  • Be process oriented not goal oriented. The goal will be achieved if you engage in the process
  • Develop a daily practice that works for you
  • Surround yourself with inspiration

I am thinking about something bigger with more detail on this subject, so am just giving you an overview.

Have an inspirational and creative weekend!!!!

Using Oilcloth

Most of you have probably heard about oilcloth recently.  Anna Maria Horner has some as does Michael Miller and many other designers. While on my week away, I bought some dotted oilcloth designed/produced by Michael Miller from the Quilting Loft.

I don’t have a very strong garment sewing background and part of my tote bag adventure is learning to construct 3D objects. As a result, I have never used anything like oilcloth before, except for the tablecloth vinyl. Some issues I ran into were:

  1. What scissors to use: if used my good sewing scissors, would the oilcloth dull the blades?
  2. What foot do I use? Will I need the roller foot?
  3. The directions I found said press on low heat. What is low heat? Testing required, I suppose.
  4. What thread should I use?
  5. Will the oilcloth play nicely with the regular cotton?

_______________________________________________________________

As I may have mentioned I have wanted to try the oilcloth after carrying the Julie Bag around in the rain and trying to keep my stuff from getting soaked. The bag is complete, as you can see and here is what I found.

I used my medium scissors – not my good Ginghers, but not paper scissors either. They still seem sharp.

Using a regular foot was fine. The machine had no problems feeding the oilcloth.

Pressing the oilcloth was not an option. I used the very lowest setting on my iron and the oilcloth just curled up. After I found that out, I just finger pressed. Not as good as a nice crisp seam, but it worked. When I put the floor into the bag, I pressed from the lining side.

I used regular Aurifil thread and had no issues

The cotton and the oilcloth were nice to each other. The oilcloth was not too slippery. I think I sewed mostly with the flannel-ish side against the bed of the machine, which probably helped.

Tarts Again

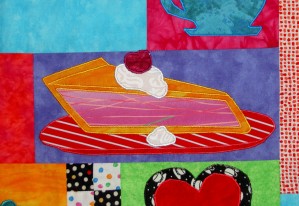
The Big Drip
The Big Drip

Yes, I am obsessing. This is the last time I will force you to read my obsessive, compulsive rantings on, what I am now calling, The Big Drip. The reason? The Big Drip is done. It is glued and appliqued down for eternity. Or at least until the glue from the fusible rots away and the fabric underneath is no longer viable.

I am pretty pleased with how it came out and will be even more pleased when I am at the point where I can embroider a stem on the cherry. Stay tuned for that drama! 😉

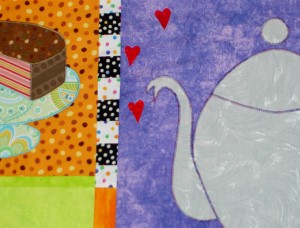
Fluttering Hearts
Fluttering Hearts

After successfully appliqueing The Big Drip to the piece, I had the idea that, perhaps, I should add some other little, appliqued embellishments to some of the other blocks.

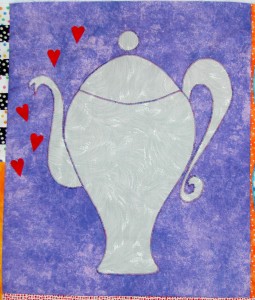
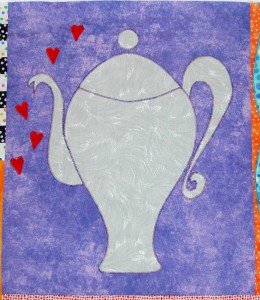
I have to admit that the big grey teapot needs some spicing up. I cut out, and am trying, these little hearts. They do add a bit of a spark and draw the eye up towards that corner of the quilt, which is good. I don’t want the piece to look like I copied Mary Engelbreit. I also want it to be fun and not cutesy. Let me know what you think.

Mind Sorbet & In Between Projects

I latched on to the idea of Mind Sorbet or Quilt Sorbet) after I heard about it in Judy Martin’s newsletter in February of 2008. I mentioned it in a post around that time. Today, I got a new view of finishing, process, starting and resting as I listened to an old CraftyPod podcast.

I am a bit obsessive about thinking about process. I can get stuck in a mindset, though, as I think I did with mind/quilt sorbet. Fortunately, I can also be easily influenced by a reasonable argument. It is probably a good thing that I leave politics mostly to Julie! 😉

Sister Diane interviewed (CraftyPod episode #66) Kirsty Hall, a UK artist who, in 2007, did one drawing every day and mailed it to herself in a project she called the Diary Project. This interview was done towards the end of 2007 as the project was winding down and Kirsty was anticipating ceasing her daily envelopes drawing practice. As I listened I thought “how can she just give up something that has been a habit?”, but I listened further and found what she said to make sense. Personally, it also defined and named something I didn’t even know I was experiencing.

I started the Quilt Sorbet project soon after finishing (mostly!) the Tarts top. I was excited to do something, uncomplicated, easy and fun in different colors. Then the 9K went back to the shop and I have wandered around not working on that project for a number of weeks.

As Ms. Hall talked about her Diary Project and the ending, she talked about resting after a big project. She made a good point in saying that we makers love to dive in and start something new. She subtly suggested, and included herself in this suggestion, that we should consider refraining from diving into a new, big project right away. Her words and thoughts resonated with me, because diving into any quilt project is a big commitment. No matter how enjoyable a project is, quilts take a lot of time and energy. Other people may be able to make a quilt in a day. That isn’t me; I spend a lot of time thinking and looking and trying. Looking at the time I have spent on Beach Town is a good illustration. I spent at least 10 hours quilting that thing and it is a small quilt! A quilt is a big project.

Listening to this podcast suggested to me that I might need to think about the project that I undertake after finishing a large project, especially a large quilt project. Ms. Hall mentioned resting after a project and I think it is a good idea. Perhaps making tote bags or pencil rolls or journal covers would be better than starting a new project. Perhaps sewing scraps together to make new fabric for fuure projects would work better than starting a quilt. I am wondering if even sewing on sleeves and bindings or facings would be good mindless resting projects?

I have had to expand my idea of finishing since I started doing the UFO reports at the end of each year. I was getting down looking at my massive quantities of UFOs. I had to start thinking about completing steps/sections as accomplishments. Really finished does mean the piece is ready to hang or put on a bed. Quilts, however, are big projects and there are multiple steps in the process. I have found that completing one of the steps, like the top can be a good place to stop in order to work on another piece for awhile. Completing a group of blocks, then sewing a tote bag together can be a kind of finishing. Working on different projects one after another can give me some breathing space to mull over a project subconsciously.

I have to say that there is a definitely a limit to the number of projects that be happening at the same time, especially if one of them takes a lot of design wall space. I may have reached that limit at various points this year.

What I have taken away from this podcast is to rest between projects. I don’t think that means stop making. I think it means making something smaller and easier.