PIQF Baskets

One of the good things about going to quilts shows, aside from buying fabrics, is the opportunity to get inspired. Due to the large number of cheerful quilts, I am really inspired and anxious to sew.

TFQ and I started a basket quilt based on a block in a quilt we saw at PIQF 2007. We saw another quilt with the same block at APNQ 2008. When we got to my house after the show, we worked on it again.

Above are the original blocks and the colors/fabrics (left) that we are auditioning for the next groups of blocks. We decided to make 9 more blocks and, thus, needed more of everything. TFQ had a plan, so we had searched out and bought all of the butter yellow fabric at the show. The right butter yellow is not the *it* yellow fabric this year and we had a hard time finding it.

One aside about fabric is that it seems like fabric is only available for a short time. I understand that fabric manufacturers need to sell new fabric all the time. However, I buy fabric on spec and it is usually a few years down the road before I get around to using it (remember the whole drama with that Denyse Schmidt fabric???) and knowing whether I like it. I understand that, like book publishers, they can’t keep all fabrics in print all the time. Still, I think it would be a service to either keep track of fabrics people are missing OR every few years reprint some of the popular fabrics from a line. In fairness, the FOTY project is an effort to use a bit of the fabrics I buy right away, so I can see whether I really like them and buy more in a timely manner. I have to remember to keep that in mind while I am cutting and sewing the FOTY pieces.

This is the whole piece minus some of the setting triangles on my design wall now. I have a whole dissertation on those d*mn setting triangles that I hope to spare you. I am really pleased with how it looks. I stared at it for about 45 minutes this morning and could only find a few minor pieces to move around. I am anxious to get busy and sew it together. Of course, I still need to cut most of the setting triangles.

Above is a detail. The block in the upper left hand corner is one of the new ones that we pieced this year. One of the things TFQ did is pay more attention to which triangles were going together in each block. She gave me little sets of all the pieces already sorted so all I had to do was sew them together. I really enjoy sewing with her as we divide up the tasks and can accomplish a lot more. I am really pleased with how cheerful the whole quilt is looking.

Now to the setting triangles problem. Figuring out the size is the problem. If I were truly organized, the whole quilt would have been laid out and measured and figured out before I started sewing. That is just not how I work. Where is the fun in knowing exactly how things come out? That is not to say that I don’t have any idea in my mind, but I do leave the sashing (yes or no) and layout (on point or straight) decisions until after I have made blocks. I want to see what they need.

OK, you are not going to be spared the dissertation. Sorry! Skip the next paragraph if you can’t deal with my setting triangles drama.

I bought a cool new ruler to easily cut setting triangles. BAH! It is impossible to figure out how it works so we couldn’t use it. TFQ, who is GREAT at figuring out directions, gave it a go. No joy there either. What a waste of money. We resorted to looking through a number of books to try and find the directions. I know now why I don’t do on point sets that often, because the directions in a variety of books are atrocious. The best chart we found was in the Joy of Quilting and it gave no direction for blocks with sashing. I guess people don’t make quilts that are designed for an on point setting and have sashing. We ended up guessing. I haven’t cut all of the setting triangles yet, because I want to sew a couple of blocks together with the sashing to see what size they end up and they fit with the guesstimate of the setting triangles size.

Stay Tuned!

Joy of Quilting 
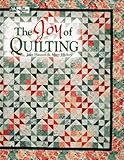
Joy of Quilting by Joan Hanson


My review

 
rating: 3 of 5 stars
This is a book that I mostly use as reference. One good thing about it is that it has chart of the sizes to cut setting triangles for an on point quilt. This chart only works for blocks with no sashing.

View all my reviews.

Chocolate Box Again

The Chocolate Box is truly finished now. Except for the quilting, binding and sleeve. 😉

I like the the way it came out, but I wish I had made more of an effort to keep some of the non-chocolate edges larger. Live and learn.

After finishing the back for the Purple Bullseye, I realized that I needed a bit more of an edge to accommodate the jagged edge (photo above, bottom right). Since I was in back making mode anyway, it seemed like a good time.


You can’t see the bit I added, because the back is really large and I really couldn’t get it all in. Now Colleen will be able to get it on the quilting machine with no problem.

Progress on Bullseyes- YES!!

Last week I noted that I wanted to get moving on the Bullseye, because I wanted to get it off the design wall and to the quilter. Yesterday, I got busy and began sewing blocks together. This is a project, because I need – well, want – to keep the patches in the order I have laid them out. As TFQ pointed out, in the future nobody will notice and I won’t remember, but there is no sense in laying them out and not, at least, trying to keep them in order.

I spent several hours yesterday sewing blocks together, trimming applique and squaring up the blocks. I decided that it would be a lot easier to square the blocks as I went along rather than waiting. It did take longer, but I am happy that I am trimming and squaring now since it will be a lot easier to put the blocks together later.

The sewing part is a little tricky, because, while I was sewing blocks, the blocks I was sewing together have nothing to do with the design on the quilt. Groups of blocks make up the design.

You can see from the photo, above, how much the piece will shrink once all of the sewing is completed. Right now there is about a 2″ gap between the sewn block (left) and the unsewn blocks (right). It never ceases to amaze me how much fabric seam allowances take up. There will be more once I start sewing blocks together.

Towards Final Bullseye Arrangement

After magnificiently struggling with the layout for the Bullseye, I believe I have settled on a shape I can live with and one that is successful. The difference between this and the others I have done is that the ‘knots’ I have created are self contained. I keep thinking of them as Lovers’ Knots, but I know that term may confuse people who know the actual Lovers’ Knot quilt pattern.

I have more patches on the wall and am finalizing fabric placement now. I hope to get to sewing today as I would like to have this piece ready to take to the quilter with the Chocolate Box. I am itching to get back to the Pineapple (amazing, but true). I need to move a couple of projects forward first.

Out of the Mouths of Babes

Here is the latest update to the Flowering Snowball (Cross Blocks).

As I have mentioned, I am nearing the end of the project. I am not sure what the end actually is, but am thinking that it is 10 more of the middle blocks and then a round of border blocks. I haven’t designed the border blocks, but will design them to complete the colored areas with the rest being white. I was also thinking of a black border. I need to play around with what I am thinking because it is much easier to show a photo/image than explain.
Here is a detail.

The Child came in and joined me while I was looking at the blocks. He said that it looks too chaotic and I need to put some solids in it. HUH???

I do think he is right. I don’t know if I will use tone-on-tones or something like low contrast batiks, but I think I need to add some resting spots for the viewers eyes. I will try it out and see what I come up with.

Bullseye Progress?

I can’t really decide if I am making progress on this project. It has been on my wall for awhile and all the ways I have tried to arrange the pieces have not been successful or satisfactory. I want to finish it and get it off my wall, because it is a dark quilt and doesn’t make me feel happy when I look at it. I like the quilt, it is just the wrong time of year to have a dark quilt on the wall.

Until yesterday, the above photo shows the most recent design. It had been on the wall for awhile and I knew it wasn’t working, but was considering sewing it together just to be done with it.

Sadly, this layout looks like two separate quilts, which is not good. I suppose I could put one on the front and one on the back. Not happening. I want a cohesive/unified design. I seriously like the snaky bit highlighted with the warm colored (red and pink) fabrics, but I couldn’t figure out how to include it and all the other patches. I like the half block wedges (see photo below) that end up, often, in the corners, s, in this iteration, I tried to replicate those on the left side of this layout. It doesn’t solve the problem of two quilts in one and the wedges don’t show up very well in the overall piece.

Wedge detail.
Detail showing my attempt at the wedge design.

I saw a quilt of Kerr/Ringle’s called XO in the Modern Quilt Workshop book. The blocks had patches the same shape as my bullseye wedges, but Bill and Weeks had added a thin strip of fabric in between. Above shows my attempt at using their idea. I considered trying a purple/violet fabric, but ultimately didn’t choose this option, because I was too lazy to find the right fabric and think I came up with a better idea.


Yesterday morning, I had a brainwave and the above layout is it. Is isn’t finished and there are still a couple of problems to work out, but so far I like this layout the best of all. The red/pink snake is gone, but so is the two quilts in one problem. Some of the problems I have to work out are:

  • fabric placement
  • how to work with the many more pieces I have than are shown with a small design wall.
  • getting the whole piece to be cohesive while using all (or most of the blocks)
  • Making the piece fit in a square or rectangular format without adding blank pieces of fabric. I added blank pieces in Feelin’ Blue and don’t want to do that again.

None of these are as insurmountable as the layout. I think I have a good one here and will move forward with until such time as it is finished or I decide it was a bad idea.

Bullseye Arrangement

I have a sinking feeling I already posted this picture, but I can’t find it in the blog, so either I am losing my mind or imagining things. Either one could be positive. 😉

This is the first arrangement. It will work, areas I want to stand out stand out. With a few more blocks the self bordering will work as well.

I know I rearranged the pieces after I took this photo, but, once again, my camera is upstairs, so it will have to be a post for tomorrow.

Friday Sewing Session

I almost never sew during the week anymore. I used to sew almost every night, especially back in the dark ages (especially bW) when I had to wait for a port to open to connect to the UNIX based Internet, but then life happened and work grew more demanding and I seemed to not be able to find the time. Yesterday, I found myself, unexpectedly with a free afternoon. After making sure my most arduous work tasks were done, I raced with glee up to the workroom and got down to it. My spine actually tingled with the thrill as I started to touch the fabric!!! I know that sounds like a stupid sentiment, but there you have it.

Frankly, I wasn’t sure what to do when I got up there, but, with a limited amount of time, I quickly told myself to stop wasting time and start work.
Julie’s Bullseye pieces had arrived so the, as yet unsewed, FOTY* pieces had to go. Before I took them down, I took a picture of what was happening, because I particularly liked the interaction of the turquoise blue and the pink. For FOTY, I like to fussy cut motifs from conversational fabrics. The fish is from the fabric I made Dad’s pillow covers from.

Here are all of the Bullseye pieces I have received so far. My pieces as well as Julie’s are shown. My pieces are mostly on the right and Julie’s are mostly on the left. I played around with them after I took the above picture and realized that I am glad I didn’t receive all of the pieces at once. It has allowed me to contemplate the arrangement of the pieces without being overwelmed.


This will, hopefully, be the focal point of the piece. If not THE focal point, perhaps it will be one of the focal points. Receiving Julie’s pieces allowed me to make this area stand out more because of the way some of the colors were placed. When I receive AJA’s pieces, I may be able to use some of her pieces to make it even stand out more.

This is primarily the section where I placed Julie’s pieces initially. They will get moved around as I swap sections out.

As I moved pieces around this morning, I found that some of the pieces stood out more than others. With putting the “red” pieces in one section (detail above), I realized that some of the pieces stood out more than others. Some were more subtle than others. This got me thinking about where to put the subtle pieces and whether I should put all the subtle pieces together or mix them up. I don’t know yet.


I also worked on was the Chocolate Box (above). I needed to straighten up the borders, which were quite wonky, so I proceeded to put borders on. The photo above looks weird, I know, because it wasn’t taken straight on (I was standing on a stool on, what is now, the left side of the photo) and then I rotated the photo. It is pretty straight except for the little jog in the left, bottom corner.

When I started this quilt, it was mind sorbet for me. I want it to continue to be this way and so I didn’t think very much about what type of borders to add. I just began sewing. I hope it will be successful and I think it is so far, but I don’t want it to be a serious project. As a result, I don’t want this quilt hanging around; I want to finish it. I don’t mean to make it sound like I don’t like it or that it is somehow a stepchild project. It is an experimental project and I want it to stay that way.

I put on all the borders and pronounced it done. However, when I looked at it this morning, I decided that I needed to do something about the jog. Although it is at the bottom, I think it will cause me problems later- with quilting, hanging, etc.

I may work on the back before I go back to the bottom border. I am interested in what you think, though, so let me know.

*Fabric of the Year project pieces

Cross Block Back From Vacation


While driving around Virginia checking out quilt shops, I worked on some Flowering Snowball blocks in the car. I was amazed at how much I was able to get done. I know two blocks doesn’t seem like a lot, but since these are handpieced, this represents quite a bit of work.

I also began thinking about the border blocks. Nothing definite yet, but I think I am nearing the end of this project. Stay tuned.

FOTY Progress

I sat down today and sewed together all of the FOTY pieces I had cut. I had two batches from a number of sources. The one belowwas from my Memorial Day Weekend travels. The rest of the fabric was from a rip or wo to new Pieces, the fabric I bought while TFQ was here for EBHQ in April and miscellaneous online orders.

The above batch is much more cheerful than the group below.
Now I am only behind on the fabric I bought in Seattle over the weekend. At least it is washed.

PS I don’t know what is going on with the size of my photos. Ever since I got the new version of Photoshop Elements, I can’t adjust the size like I used to be able to in Photoshop Elements 3.0. I may have to breakdown and buy the book THEN go through it. I’ll work through. Thanks for your understanding.

Projects Calling

I couldn’t stay away from my workroom on yesterday. I found a playmate for the child and left them to their own devices (except for an occasional admonishment to go outside away from the screens) while I sat and sewed. I sent Aja’s Bullseyes off to her, as I may have mentioned, last week. She received them Thurs or Fri, so I only had my blocks to work on.

This calling business was a bit disconcerting, because it seemed like my mind had a mind of its own. Normally, I will sew a bit, do the laundry a bit, sew a bit more, make my weekly phone calls, sew a bit, change the laundry and do the dishes and sew a bit more. Yesterday my body and mind were united and they were having none of it. I went to the workroom and basically stayed there. No dishes, no laundry and the dinner didn’t get started until almost 7pm. IT WAS FABULOUS!!!
This is one of the blocks and I really liked it. I fussy cut the last circle and was sad to slice it up, because the flower is so perfectly displayed.

These are my blocks after I have added the last circle. The blocks in the upper right hand corner are blocks that weren’t in the photo I posted the other day. My design wall isn’t big enough to accommodate all of the blocks.

These are details of the blocks from the upper right hand corner.

Now my Bullseye blocks are nearly complete. I have sewed the last circles on and trimmed all the blocks down to 9.5″.
This is how the back of a block looks after I have sewn the last circle and before I have cut the back of the second circle out. You can see that Julie and Aja have cut out the backs of the background and the first circle.

Here is how the above block looks after I have cut out the back of the second circle. This reduces bulk and provides lots of lovely circles for another project.

I finished the process of cutting out the backs of the second circles, and I have sliced the blocks into quarters. I am preparing them to be sent off to Julie and Aja.

Here is how I set up the blocks to slice them. I love the Creative Grid rulers, because they have a lot of different markings that allow you to line up the ruler so the block is sliced very precisely.

I keep two quarters of the block and send one quarter each to Julie and Aja.

Here are my slices. I just slapped them up on the wall, but I like the internal maze surrounded by a larger maze and may go with that type of design for the final design. I think I will have to put some of the stronger colors, perhaps red, in that internal maze so that it stands out. I will also want the self bordering technique to give the piece a finished look You can see it in Seeing Red.

Bullseyes – Another Round

Friend Julie sent me a second package of Bullseyes sometime last week and I decided I needed to get my act together and sew them up.

Adrienne’s blocks detail.
The rest of Adrienne’s blocks after I put the circles on.
Adrienne’s blocks after Julie put the first circle and I sewed the second circle.
The rest of Adrienne’s blocks after Julie put the first circle and I sewed the second circle.


The rest of my blocks. I was surprised at how much non-purple the other girls used, but then I remembered that that is the fun. DUH! I have cut all the squares for the last round and hope to sew them on this weekend. I recut a lot of them so that most, if not all are purple. I want to cut them up and send them off before I start off on my travels.

I Didn’t Realize I Did Do Something!

Normally, I like to give my posts their day in the sun – the one time in their life when you will see them and only them first.

Today isn’t one of those kind of days.

A few days ago, I was lamenting the fact that I hadn’t been doing anything sewing related lately except thinking. When I realized that I had been working on the Cross Blocks (Flowering Snowballs) on and off, but pretty regularly for about three weeks or so, I was thrilled and had to show you. I have some work done! Hooray!

Some time ago, I spent a couple of hours cutting a bunch of patches to have handy when I had time to make blocks. The above five blocks are the result of that exercise as well as the actual sewing that I have done during the past few weeks. It pays to plan ahead, I think.

Some of the fabrics I wouldn’t use again, because they are too dark or too blah, but I think they will mix in well in the end.

Since 5 blocks is an odd shape, I took a close up of these four so you could see the circle (of which I am very proud). I also wanted you to have the opportunity to enjoy some of the fun and fabulous fabrics: the kitchen fabric in the middle (upper right block, yellow) as well as the lamp fabric (upper right block, blue). Normally, I don’t use these in the types of quilts I make, but this project is perfect for some of those conversationals that I like and never use.

I have a total of 33 blocks. I could stop at 36 and make a 6 block by 6 block quilt. I would like to have this piecing see me through my summer travels.

I also want to do the self bordering technique on this project so that the quilt looks finished. I will have to make a round of blocks for the outside. That idea worked so well with the Pineapples, I will have to really think about how I can do it successfully. If I make the center too big, the border will be too daunting.

Cross Blocks Chugging Along

Here is the latest installation of the Flowering Snowballs project. I think that the green (upper left) is a feedsack fabric. I have only a small piece of it and the weave doesn’t seem to be a modern weave. Not that I know anything about feedsacks or the weave of fabric and whether it can be tied to an era!