Star Sampler Fabrics

Fabrics January 2013

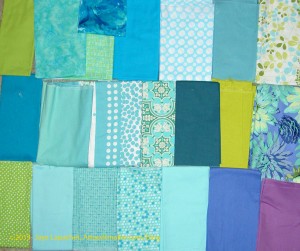
I have been working on getting the fabrics for the Star Sampler together.

I washed a bunch of new fabrics over the weekend  and have added some of them to this group. I have a few more to iron, but will probably add them as well.

It occurs to me that the ones with a lot of white won’t work with the background I have chosen. I want the stars to be crisp and I don’t want the colors of the fabric in the stars to bleed into the background. That might mean taking out that nice graphic dot in the top row.
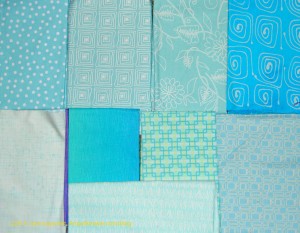
Additional Star Sampler Fabrics - January 2013
Additional Star Sampler Fabrics – January 2013

After I started writing this post, I was doing my Qi Gong practice and looking at the FOTY 2012 top, which was in process on my design wall. I saw some other fabrics, which I thought needed to be added.

I do notice that the group is getting very blue heavy, so I need to use a lot of the non-blue fabrics OR find some more of the purples and greens.

It has taken me some time to get the right fabrics and I think I still have more to add and some to take away. This group has more fabric than the group I posted in December.

Now I need to get off my duff and make some blocks. Enough playing with fabrics!
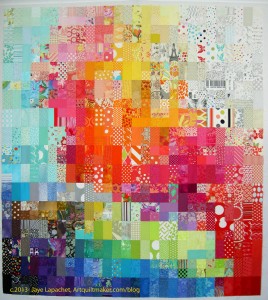
FOTY 2012: Top Finished

Fabric of  the Year 2012 Finished Top
Fabric of the Year 2012 Finished Top

One of the things I love about this quilt is that I get to visit with my fabrics again as I sew the top together. I get to say hello and they get to tell me not to forget them and how they can be used.

I also love the anticipation of finishing this piece and hanging it on my wall and looking at it more often, walking by it every day and remembering the fabrics.

I finished the top yesterday and am very pleased with it.

I probably could have finished the back as well, but finishing this top is some kind of miracle, because of how slow I was moving. Working on it, I think it helped to keep my joints a bit more limber. It could just be a perception, though.

You can see the whole series on the FOTY Gallery Page.

Quilt Class: Curves Part 2

Tutorial on sewing curves

I started a series of tutorials on sewing curves during my last Sampler Class, but I never finished the last two parts. The first part is about fabric and arrangement of pieces.

Curves-The Dove
Curves-The Dove

Supplies:

  • The Dove pattern
  • paper scissors
  • template plastic
  • glue stick
  • fabric (at least 2 different)
  • pen ( I like the Pigma Micron & the Pilot Ultra Fine Point)
  • Fabric scissors
  • pins
  • Sewing machine
  • quarter inch foot or other marking system
  • thread
  • Iron and ironing board

We will be using a quarter inch seam allowance. You will need to adjust the pattern if you are using a different seam allowance.

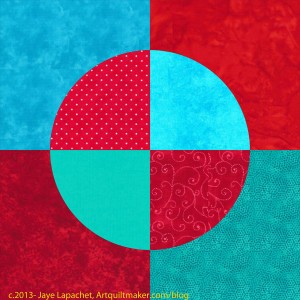
The Dove pattern is a baby version of the Drunkard’s Path. If you make this piece, the next logical curved piece would be a Drunkard’s path block.

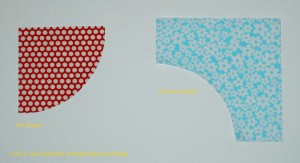
Key to Pieces
Key to Pieces

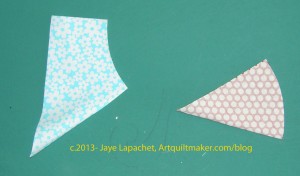
This block, as well as the Drunkard’s Path block is made from two types of pieces: a concave ‘L’ and a pie shape. The pie shape forms the circle in the center and the concave ‘L’ can be considered the background. In this block, the pieces are somewhat larger than in the 12″ Drunkard’s Path I used in my previous class. This design also has a very strong focal point.

  1. Take the The Dove pattern and rough cut the templates.
  2. Use the glue stick to stick the paper templates to the template plastic. You won’t need heat resistant template plastic as we won’t be ironing over the templates. It is fine to use, though, if that is the only kind you have.
  3. Rough cut out the templates you have glued to the plastic.
  4. Carefully cut out the template on the seam allowance line, cutting off the rough cut paper and plastic.
  5. Place your fabric wrong side up on a hard surface.
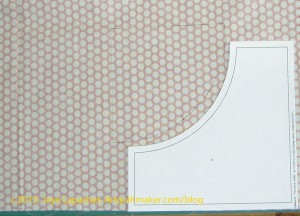
  6. Draw Around Templates
    Draw Around Templates

    Place the templates wrong side up on your chosen fabric. Nota bene: If you are using symmetrical templates, then it doesn’t matter whether they are right side or wrong side up, but it is good to get in the habit of doing it the right way in case you use non-symmetrical templates in a future project.

  7. Draw around the template with your marking implement of choice. You will need to hold your template firmly so it doesn’t shift. You can also rough cut out the fabric pieces if trying to cut precisely or carefully with a long length of fabric draped over the cutting table is too difficult.
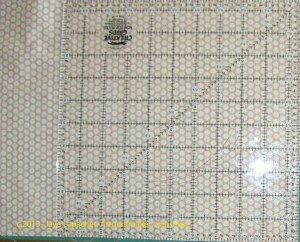
  8. Rotary Cut 90 degree angles
    Rotary Cut 90 degree angles

    Cut the fabric out carefully using your fabric scissors, especially the curves. Cut the drawn line off the fabric. I used a rotary cutter for the 90 degree angles.

  9. Check to make sure that the fabric you just cut out is the same size and shape as your templates. You can lay the template over your fabric to check.
  10. Fold Pieces in Half
    Fold Pieces in Half

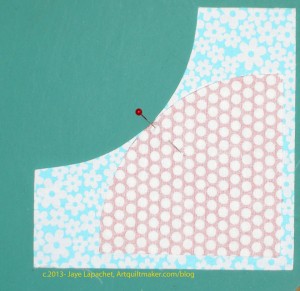
    Take a pie shape and a concave shape and fold them in half. Line up the edges carefully. The halfway point that you create will be used to make sure the pieces are sewn together evenly. You will want to make the marks so the patches nest. That means you fold the concave piece in half with right sides together and the pie shaped piece in half with the wrong sides together. Mark the halfway point with a pin or through finger pressing.

  11. Nestle the pieces right sides together.
  12. Pin in Middle
    Pin in Middle

    To do this, line up the middle mark where you have finger pressed to align the blocks accurately.

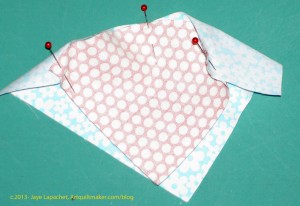
  13. Pinned 3 times
    Pinned 3 times

    Line up the outside edges and place a pin close to the two outside edges.

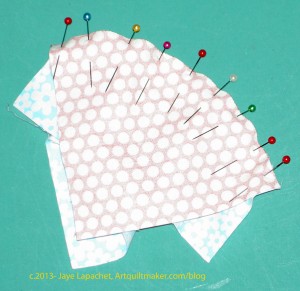
  14. Fill in the area between the middle pin and each outside pin with pins. Ease the area between the outside and middle pins into smoothness with your fingers, lining up the edges of the fabric as you do so. Place as many pins as you need between the middle pin and the outside pin. Make sure the fabric is flat and there are no pooches. You may have to ease a bit, but do it very gently so as not to stretch the pieces. If you have to stretch and tug and pull, there is something wrong and you should check to see if your templates match your fabric pieces.
  15. Completed Pinning
    Completed Pinning

    Do the same with the second section between the middle and the other outside edge until you have used a lot of pins.

  16. Sew Pie to Concave Piece
    Sew Pie to Concave Piece

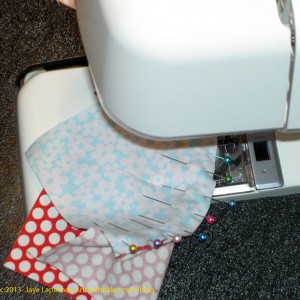
    Sew Pie to Concave piece, removing pins before you sew over them. You may want to use the point of a pin to keep the edges of the fabric lined up until you sew over the area where the pin was. I also use a seam ripper as a stiletto to keep the two pieces in place after I remove the pins.

  17. Dove Block in Process
    Dove Block in Process

    Press carefully.

  18. Repeat for all of the quarter blocks.
  19. Dove Block in Process
    Dove Block in Process

    Sew 2 quarter blocks together to make a half, then sew the other 2 quarter blocks together so you have two halves.

  20. Press so that the center seams nest
  21. Pin the two halves together, paying careful attention to the center.
  22. Sew the two halves together.
  23. Press carefully.


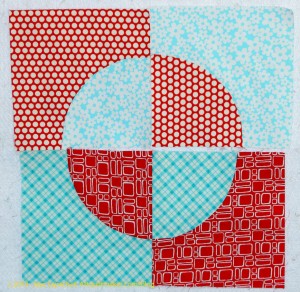
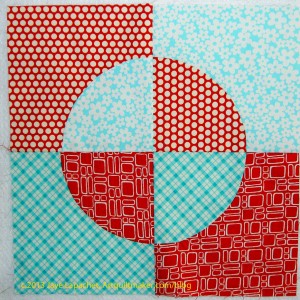
Finished Dove Block
Finished Dove Block

Creative Prompt #193: Fresco

Louise Ottilie Fresco (born 11 February 1952 in Meppel) is a Dutch scientist, director and writer.

al fresco

Buon fresco technique consists of painting in pigment mixed with water on a thin layer of wet, fresh (hence the name) lime mortar or plaster, for which the Italian word for plaster, intonaco, is used. (Wikipedia)

Fresco Chocolate is an artisan bean-to-bar chocolate maker producing award winning single origine chocolate.

Definition: Fresco (plural frescos or frescoes) is a technique of mural painting executed upon freshly laid lime plaster. Water is used as the vehicle for the pigment and, with the setting of the plaster, the painting becomes an integral part of the wall. The word fresco (Italian: affresco) is derived from the Italian adjective fresco meaning “fresh”. Fresco may thus be contrasted with secco mural painting techniques, on plasters of lime, earth, or gypsum, or applied to supplement painting in fresco. The fresco technique has been employed since antiquity and is closely associated with Italian Renaissance painting.[1][2]

Take 5 minutes to do any kind of artistic response: poem, doodle, quilt, pastel, pencil. ANYTHING counts. Don’t judge yourself or second guess yourself. There are no rules; just do it!

Post the direct URL (link) where your drawing, doodle, artwork is posted (e.g. your blog, Flickr) in the comments area of this post. I would really like to keep all the artwork together and provide a way for others to see your work and/or your blog.

The Creative Prompt Project, also, has a Flickr group, which you can join to  post your responses. I created this spot so those of you without blogs and websites would have a place to post your responses.

Fresco Stainless Steel Coffee Percolator

Fresco Towels are produced by a family of artisans with many years of experience in the field of textile production.

A mobile kitchen serving Southern Oregon

Jacque Fresco (born March 13, 1916), is an American self-educated structural designer, architectural designer, concept artist, educator, and futurist.