Supplies:
- 1 Layer Cake (or the equivalent amount of fabric)
- background fabric – enough for 1 10″ square for each layer cake square.
- 12.5″ square ruler
- Long 18.5″x3.5″ ruler
- rotary cutter
- Sewing machine
- iron
- ironing board
- thread
- Starch or Mary Ellen’s Best Press
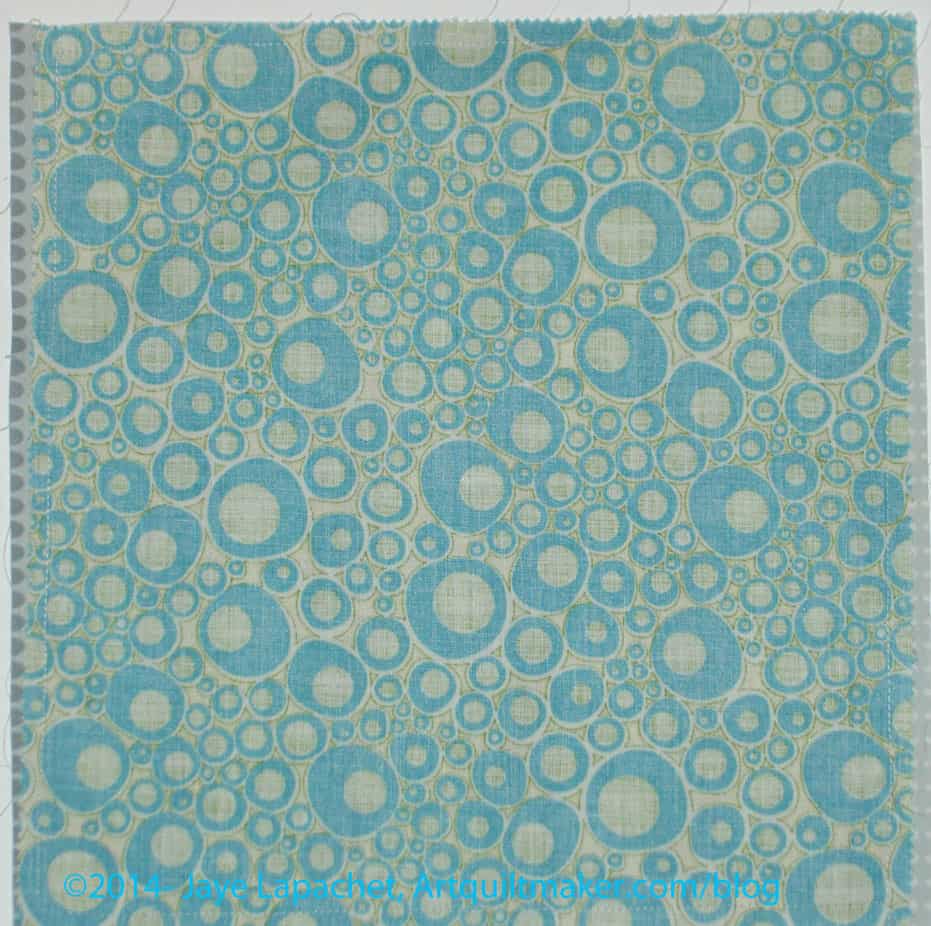
1. Select a layer cake or cut 10″ squares of foreground fabric.
2. Cut 10″ squares of background fabric. Make sure it is a good contrast to your foreground fabric, unless you want a blendy-low volume look.
3. Place 1 foreground square and one background square right sides together.
4. Sew around the outside 1/4″ from the edge. No openings are needed.
5. Starch two squares heavily. I use Mary Ellen’s Best Press. Once I have sprayed the starch, I change the setting on my iron to dry.
Nota bene: the project takes a lot of MEBP to keep the bias edges under control, so have some refills on hand.
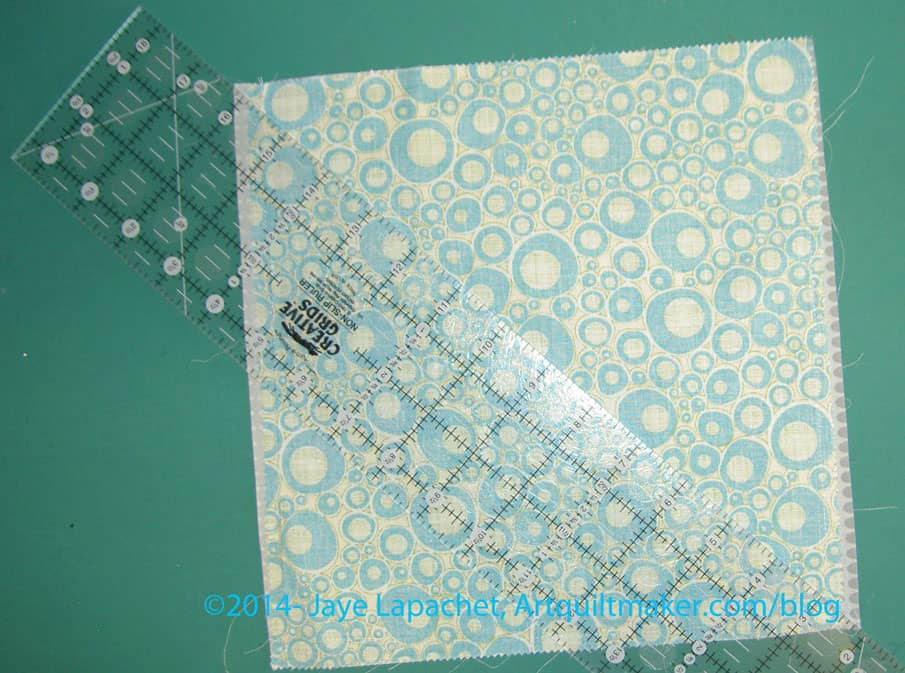
You will not always be able to cut exactly corner to corner. I found that when I starched, the layer cake fabric shrank. Trimming later helps square things up, so just cut to the corners of the background if you can, or line the ruler up with the sewn corners.

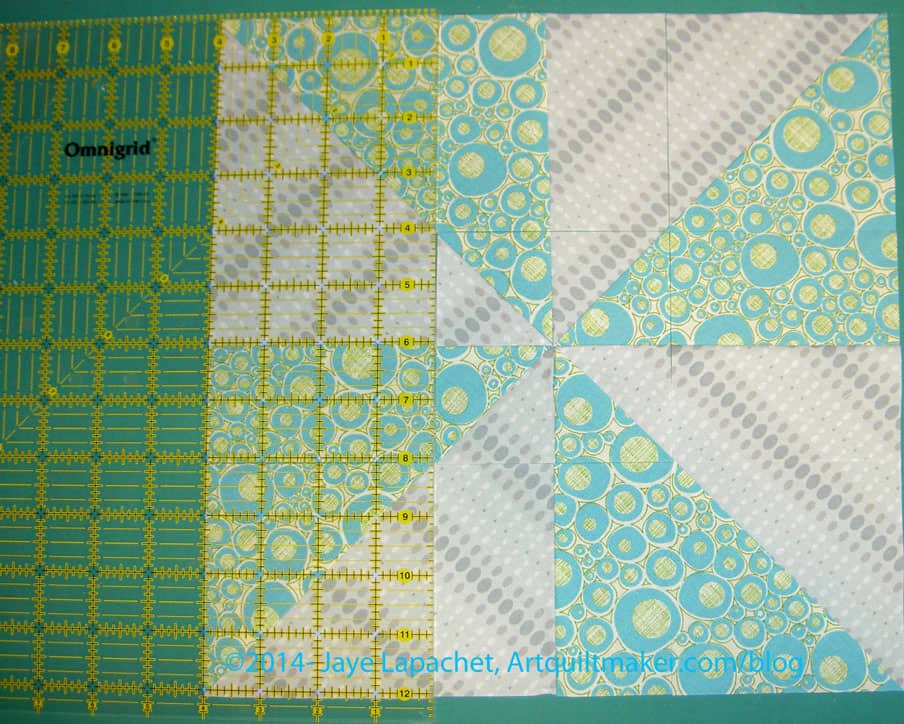
6. Cut sewn 10″ squares on the diagonal.
Nota bene: pay no attention to the different fabric in the photo above. The steps are the same.
You will end up with some Half Square Triangles (Triangle Squares)
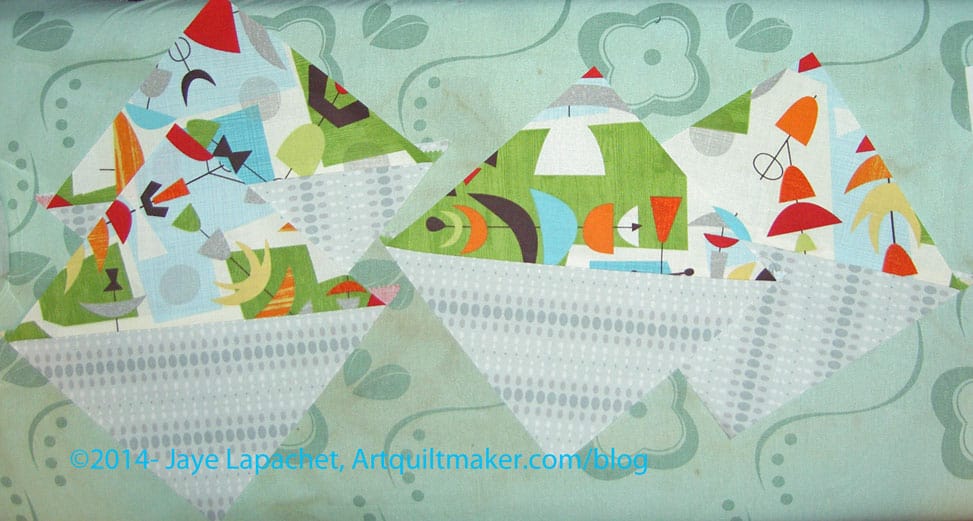
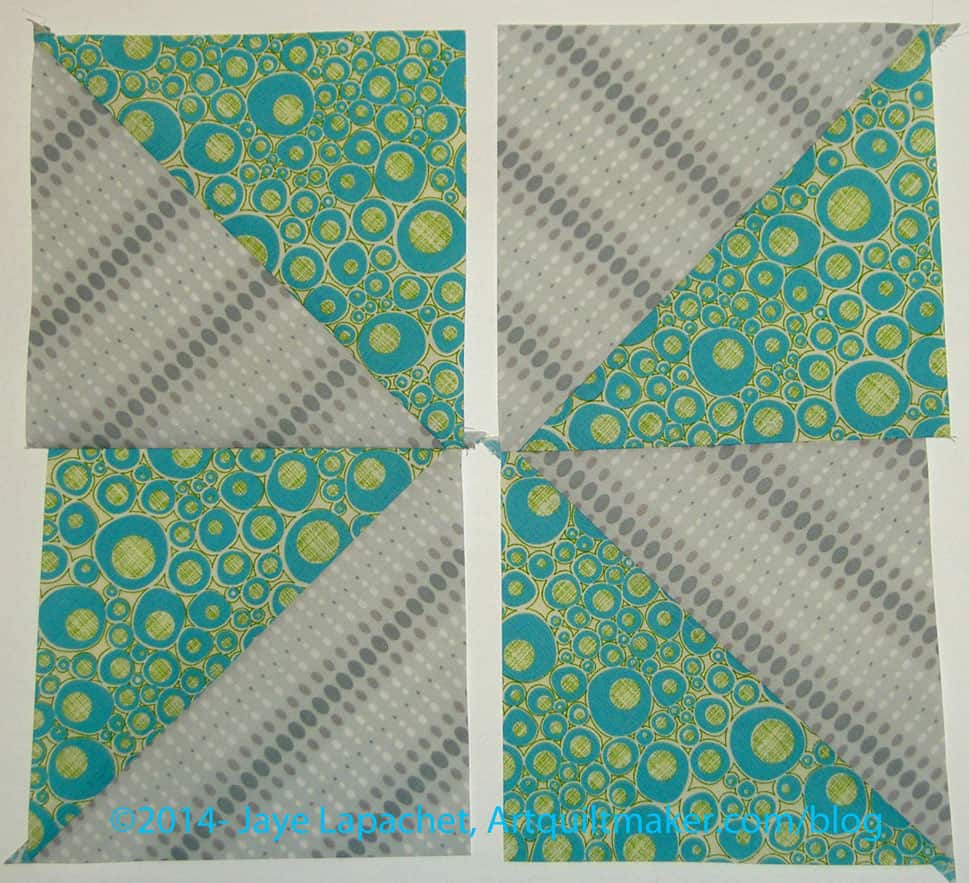
7. Lay the HSTs out so they form a pinwheel.

8. Put half square triangles together to make the top and bottom half of a pinwheel block. Pin the side you will sew as a reminder.
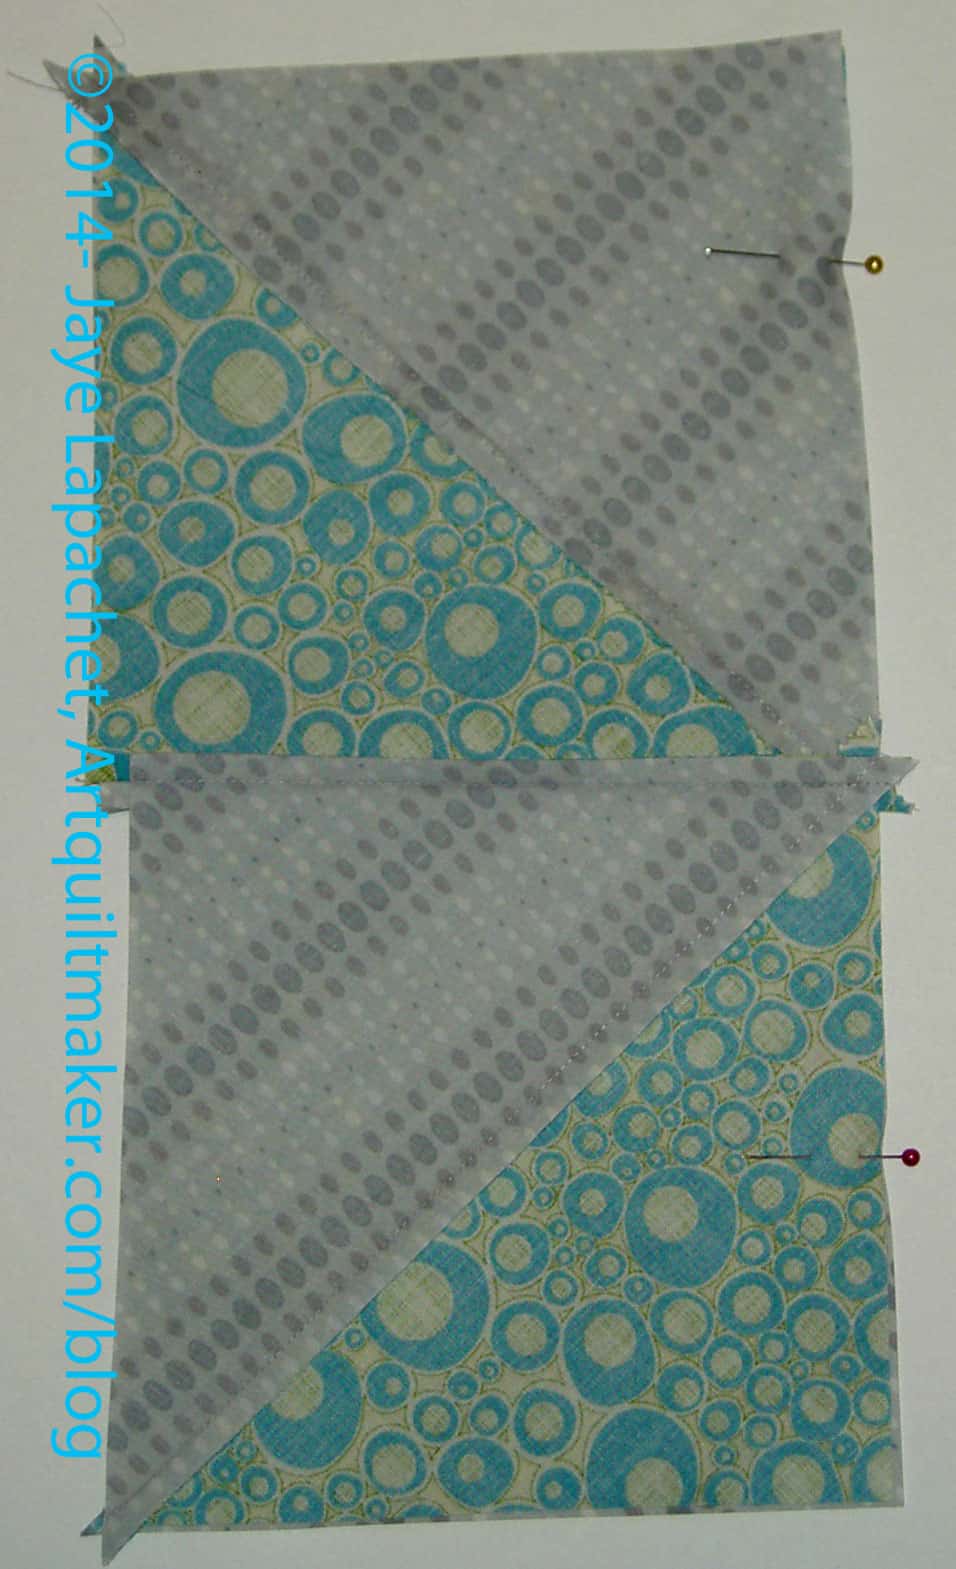
You can see from the photo above that my HSTs were not lining up with each other. I did worry about that, but finally decided that trimming later would solve a lot of sins. I nested the middle seams together to help make the point in the center of the final pinwheel.
9. Sew the HSTs together to make two halves of the pinwheel block.
10. Lay the piece down so the foreground fabric is on top.
10a. Press. I press from the front towards the foreground fabric. It doesn’t matter as long as you are consistent.
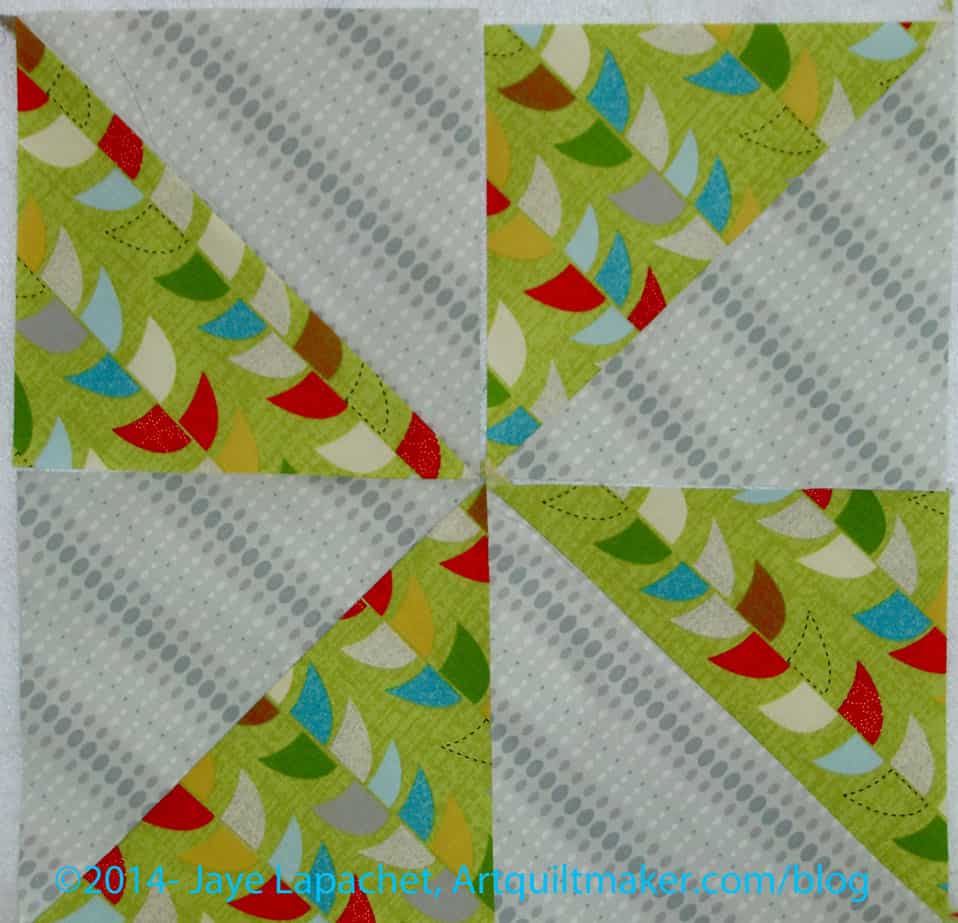
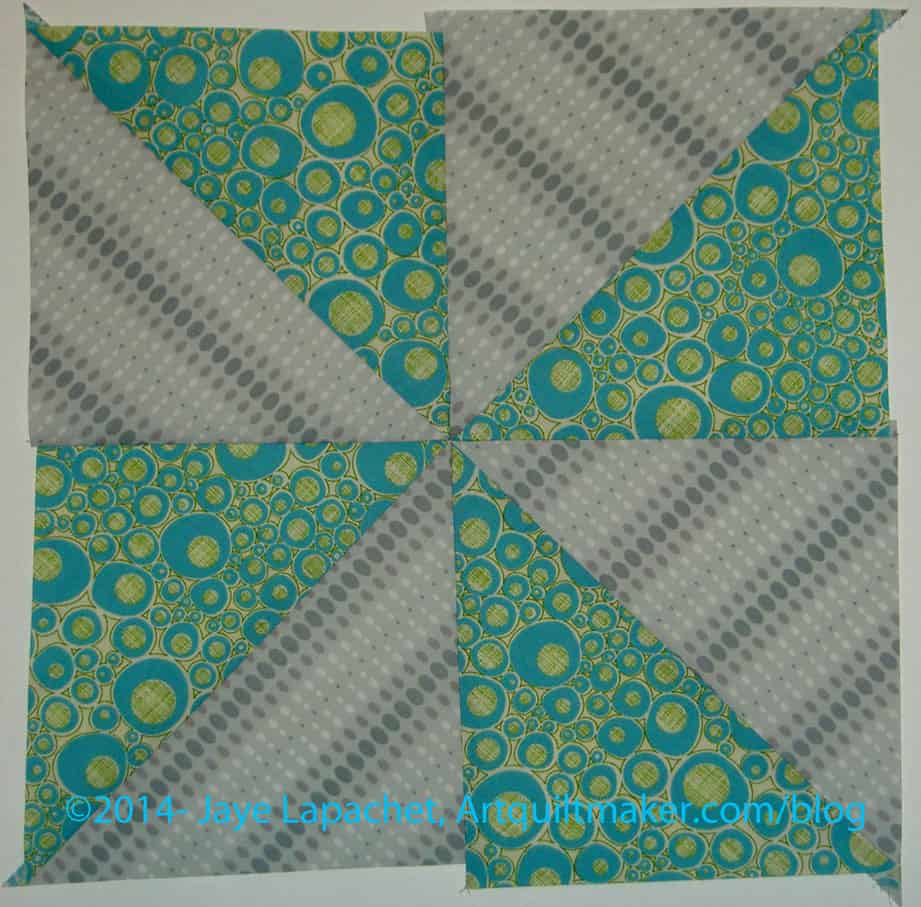
11. Put squares together, once again, in a pinwheel configuration. Pay special attention to getting the center to line up.
12. Pin so that center nests together nicely.
13. Sew all the pieces together so you end up with a block in the Pinwheel configuration.
14. Press.
14A. (Optional) Add more starch (I use Mary Ellen’s Best Press), if desired. I like my pieces and parts to feel a bit like cardstock. I get assurance from that feeling that the bias edges will be under control.
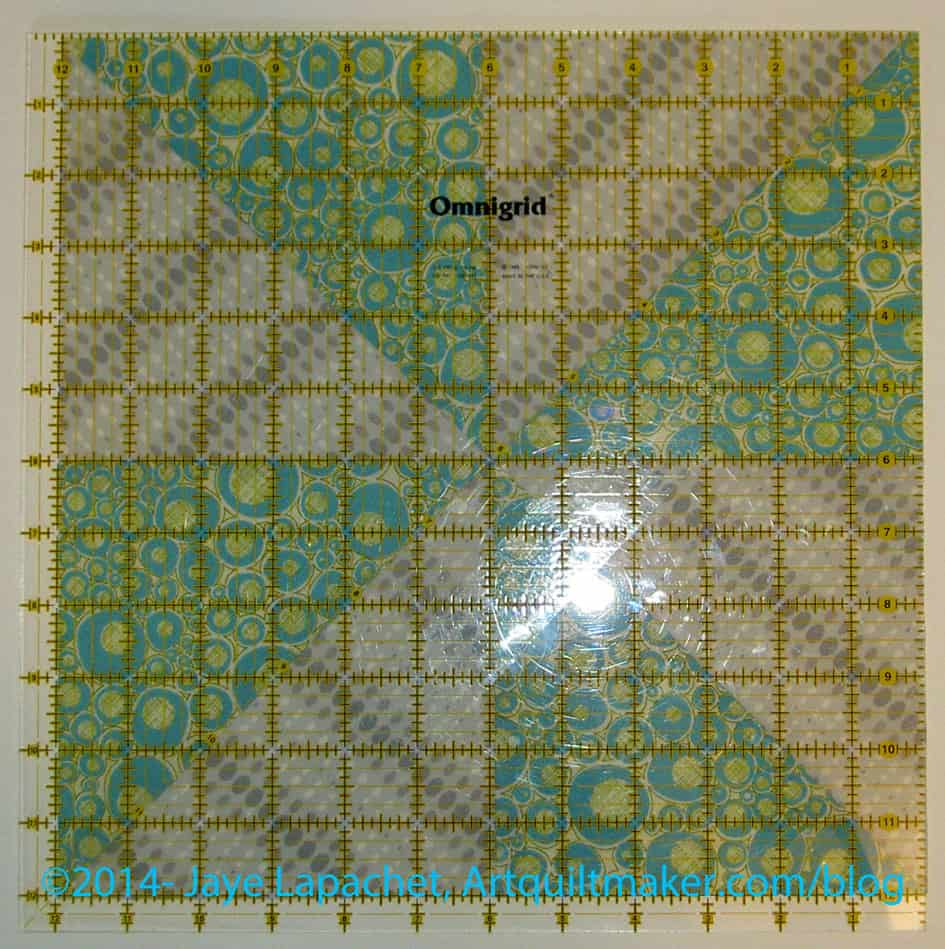
15. Trim to 12″. This will get rid of the uneven edges seen in the previous photo. I don’t know if others do this, but I decided to do it to keep my pieces square.
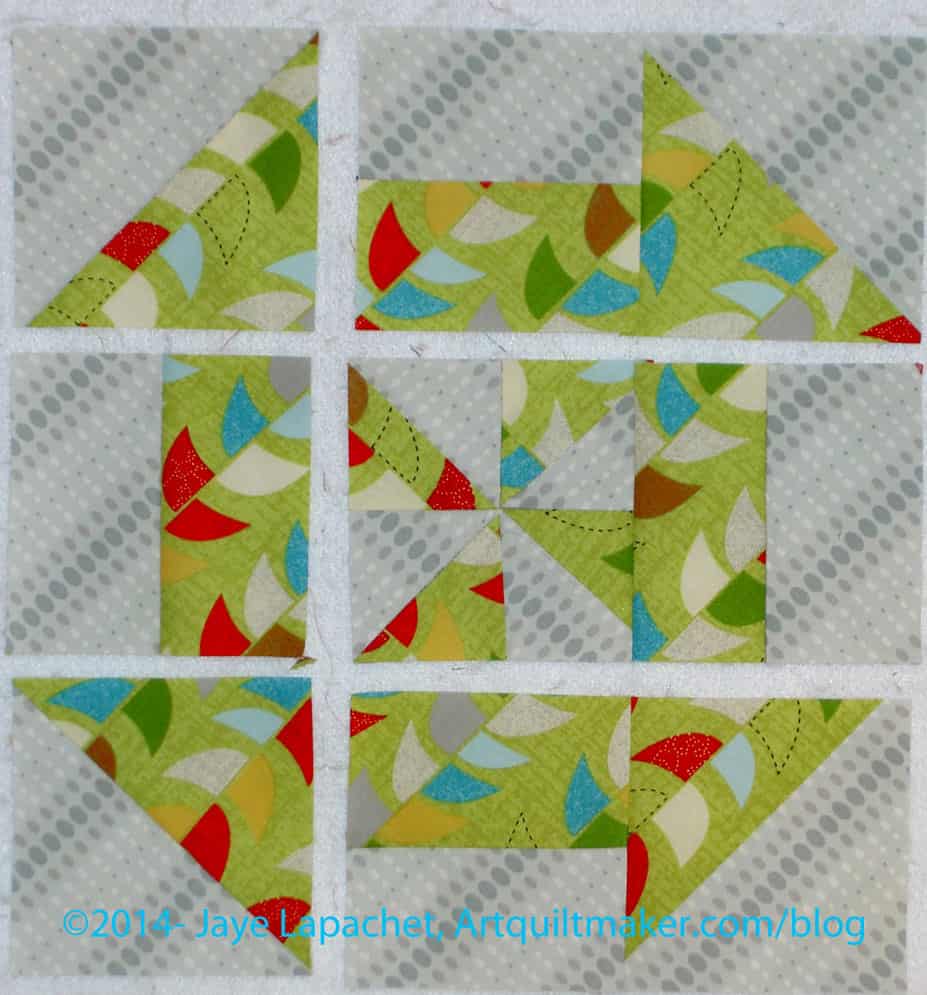
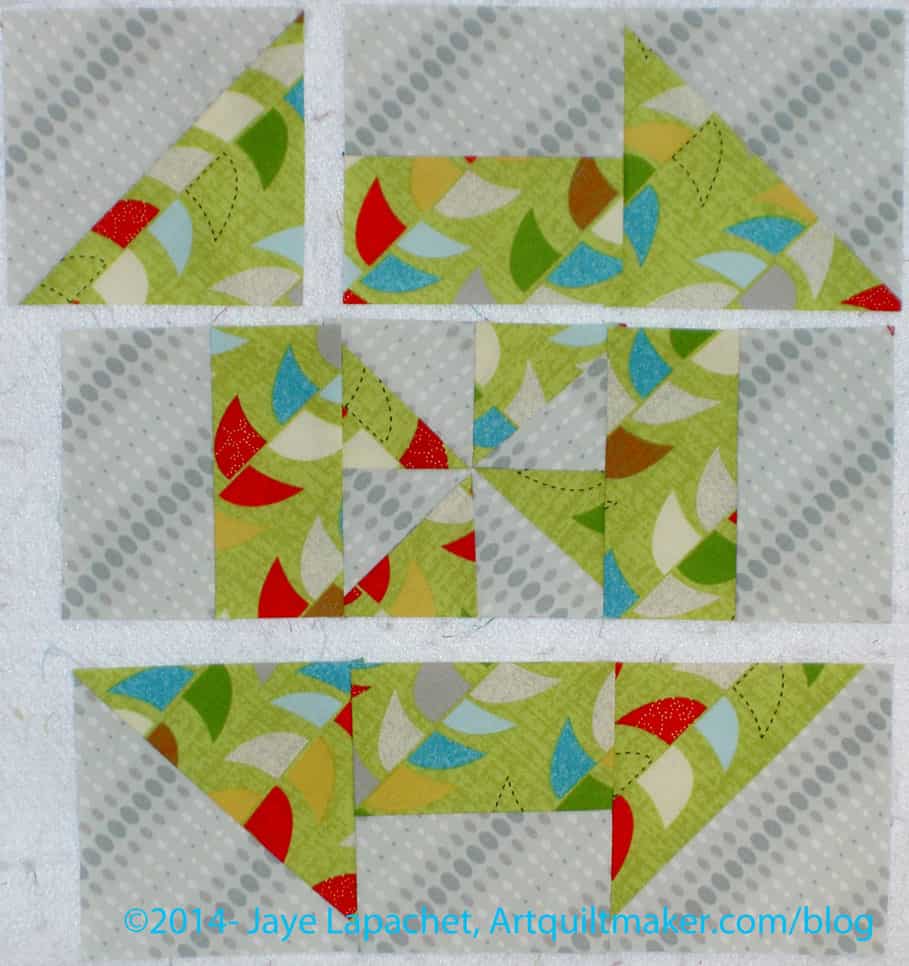
16. Since I trimmed my blocks to 12″, I used the 4″ line on my ruler to cut the block into 9 pieces. I started from the left and cut the vertical lines first.then moved my body around my cutting cutting table to finish this step by cutting the horizontal lines.
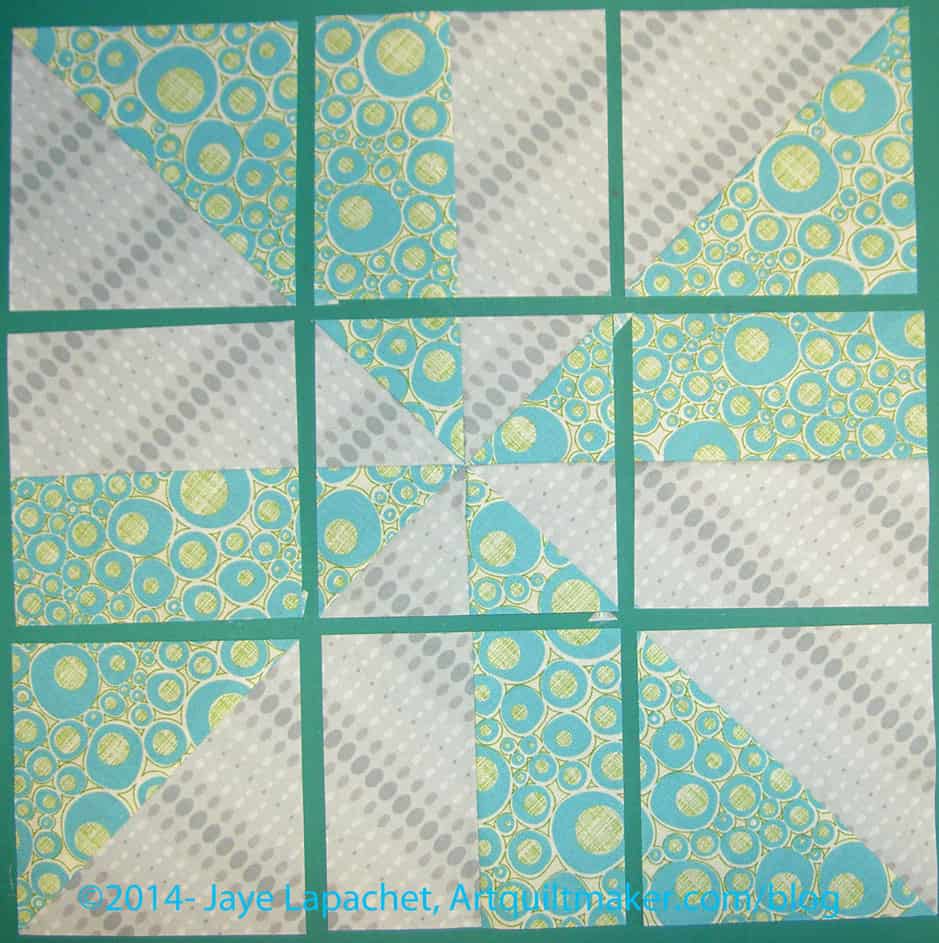
Photo above shows the pinwheel cut into 3 equal parts – 4″ each, but not yet rearranged.

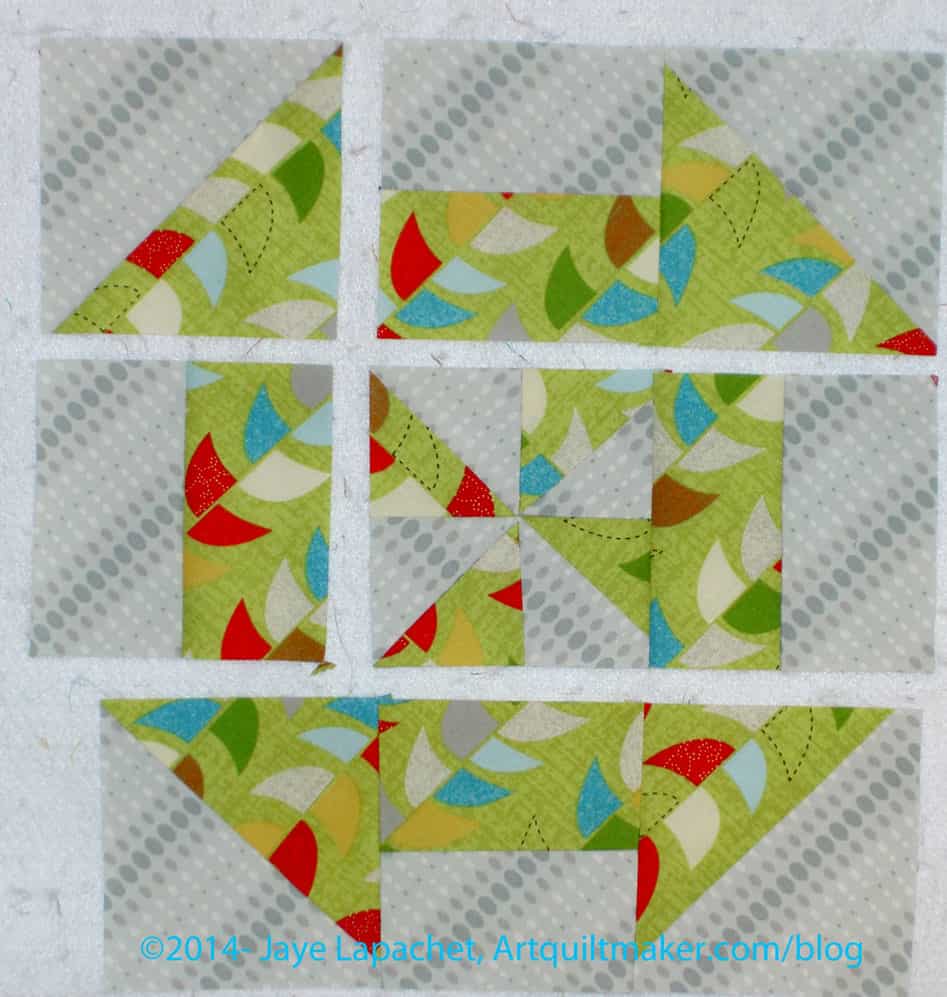
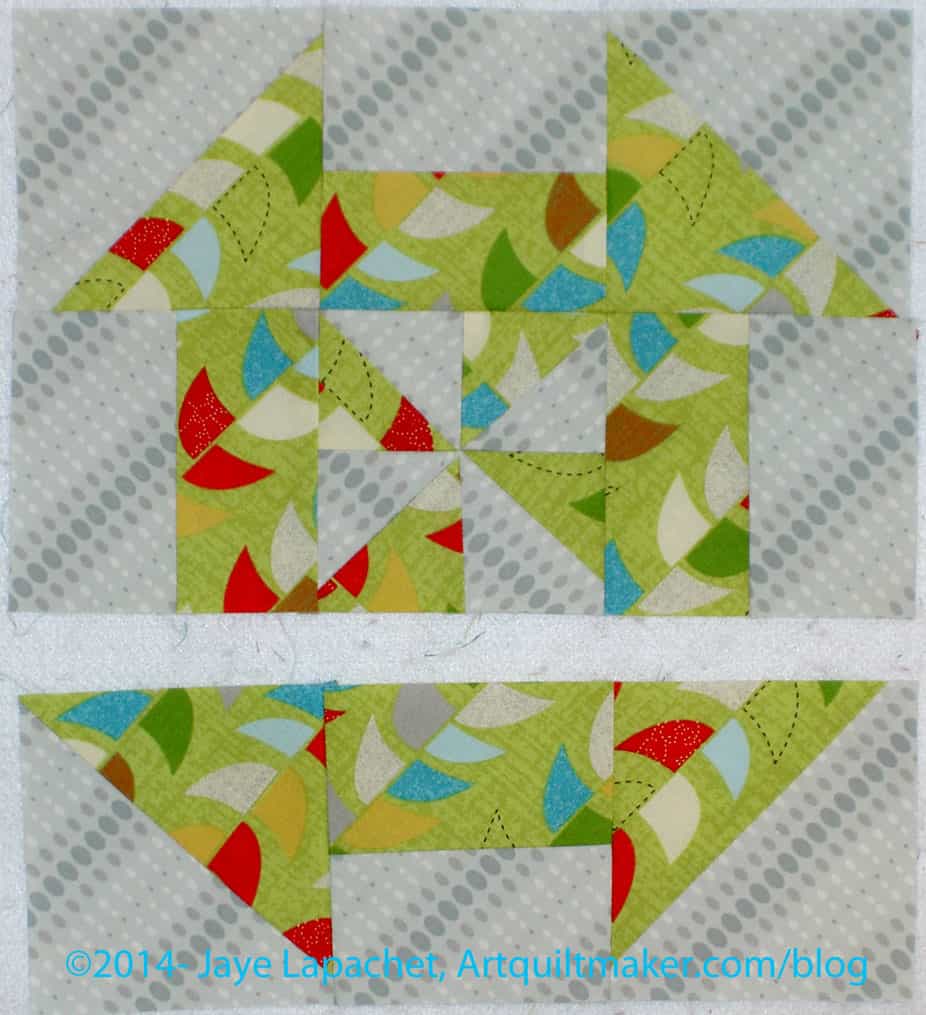
17. Rearrange the 9 parts to suit your aesthetic. You can create a look of the Churn Dash block configuration above or you can switch the corners and the centers in the opposite direction (foreground on the outside) for more of a flower/circle arrangement.
18. This block is now a 9 Patch and you can sew it together like you would a 9 patch. If you do not know how to make a 9 patch, see my tutorial.
Fold part #3 onto part# 2, from chart above, on top of each other and sew inside seam. do this for the rest of the parts, like you would a 9 patch, to create the rows.

19. Finish the rows by sewing the final part to the two parts already sewn together. You will have 3 rows of 3 parts each.
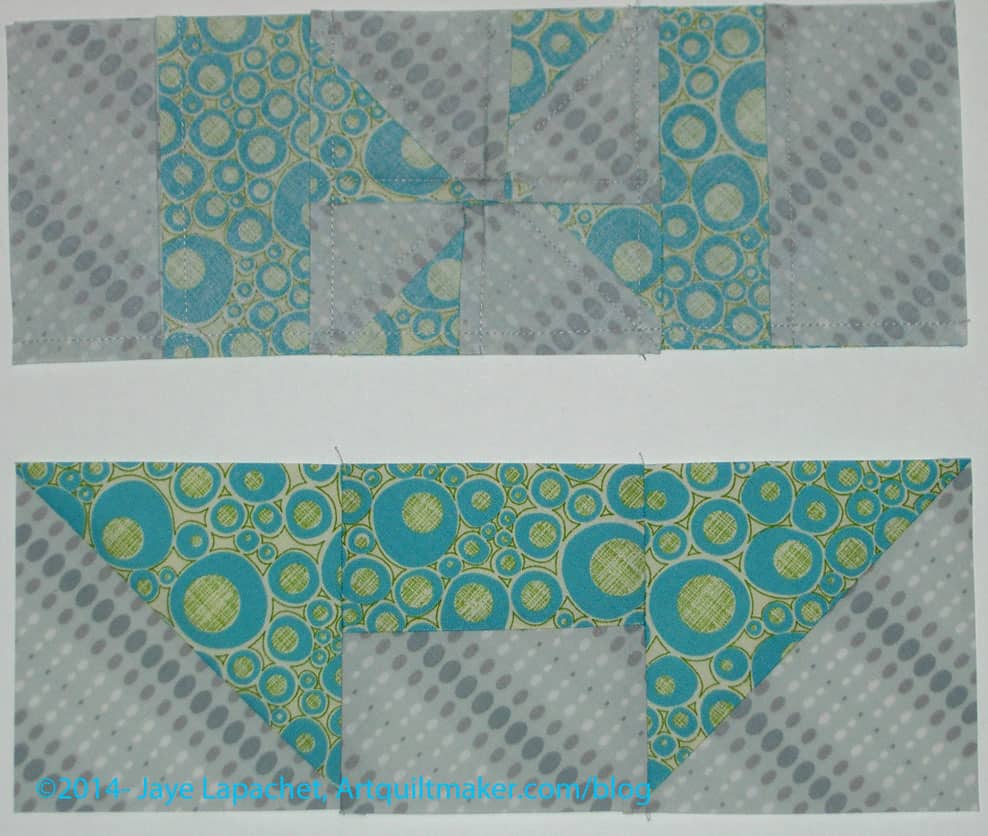
20. Sew three rows together like you would a Nine Patch.
In the above photo, the bottom row is not involved. Place the center row right side down on top of the top row (right sides together) and pin at the intersections, along the seam closest to the bottom row in the picture.
21. Press to the “bars.”
22. Once the two top halves are sewn,place the bottom row on top of the middle row. Pin as needed and sew to the center row.
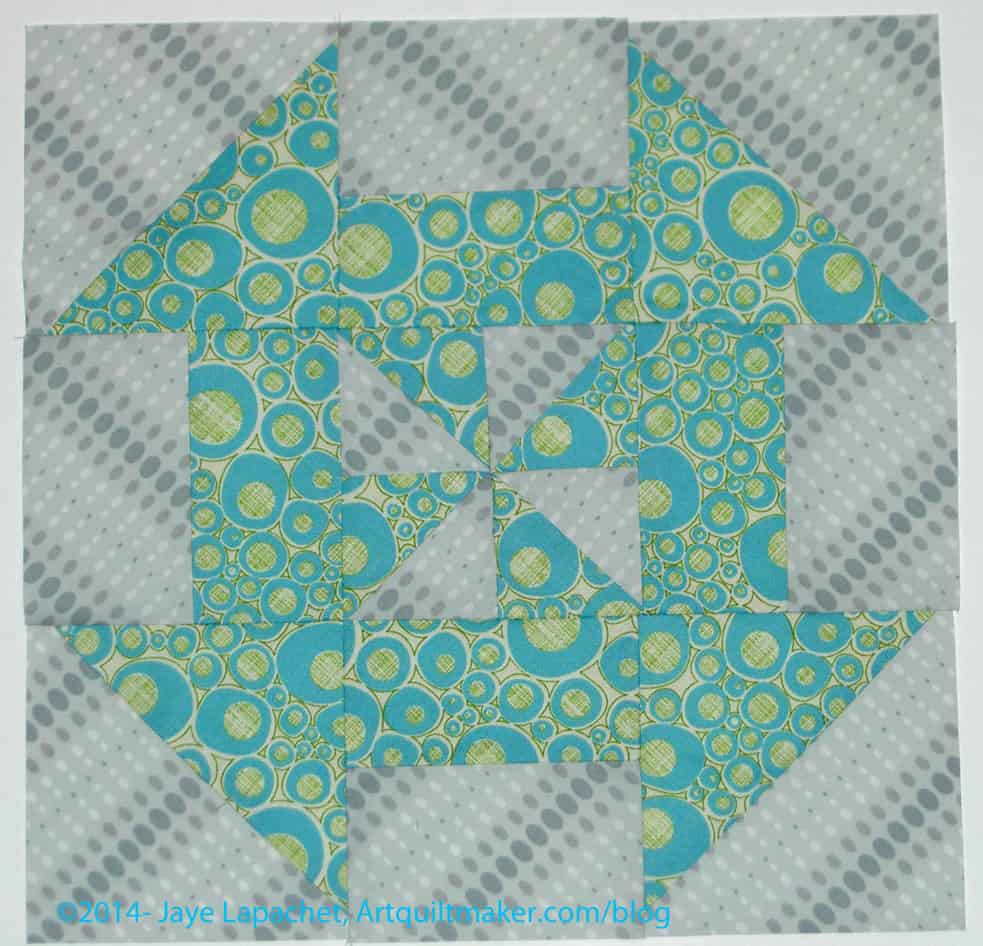
23. Voila! Good job!
I didn’t make this block up. I first saw it in a video put out by the Missouri Star Quilt Company. The tutorial above is how *I* make the block.
Other Resources
You might want to take a look at the post I wrote a few weeks ago. Included in that post is a link to a video that shows how to make a Disappearing Pinwheel by the Missouri Star Quilt Company
Nota bene: I may update this tutorial or make clarifications, changes as necessary