Recently, I posted the tutorial for the second Large Pocket. That is one of the pockets needed to complete the Ultimate Carry All Bag by Natalie Patton. Next we are going to work on the first part of the small, interior front pocket
In order to sew along, you will need to:
- Purchase the pattern
- Gather your supplies
- Cut your fabric
- Print the tags
You can find more information at the following links:
- Tour of the bag -Instagram
- Bag-a-Long project post – 9/27/2019
- Thoughts behind the bag – 8/7/2019
- Sotak Handmade’s video on making a neat and tidy zipper end
- Find all posts about this bag, including posts on my progress,
- by using the hashtag, Ultimate Carry All Bag
Additional Supplies**
- Blue painter’s tape**
- Clover Chalkoliner**
- Corner poker (wooden knitting needle, skewer, etc)
- Creative Grids 4.5″ x 8.5″ ruler**
- Double-fold elastic (or twill tape)
- Hump Jumper (helps deal with thick layers)
- Sewline pencil**
- Large WonderClips**
- SF101 – add this to whatever section you think needs it. I added it to P4 to add some stability to the Clippy Pocket
- Post-it Notes** (really, you can use any post-it notes. I just like the shape and color of these. Another good product is Semikolon’s Sticky Tab Markers in a Booklet-no affiliation)
- WonderClips**
The directions for the small interior, front pocket start the bottom of pg. 12 in the pattern.
N. B.: My version of this Small Front Pocket eliminates the vinyl/badge holder pockets and includes a second type of Clippy pocket that I developed from a pincushion pattern.
N.B.2: put a Post-it note on pg.9 to remind you where her zipper instructions can be found. She refers back to them in a non-specific way and marking them is helpful for quick access.
N.B.3: I am using a couple of different versions of the front pocket for this tutorial. Ignore the differences in fabric and pay attention to the location of the parts as well as the piece numbers.
Tutorial:
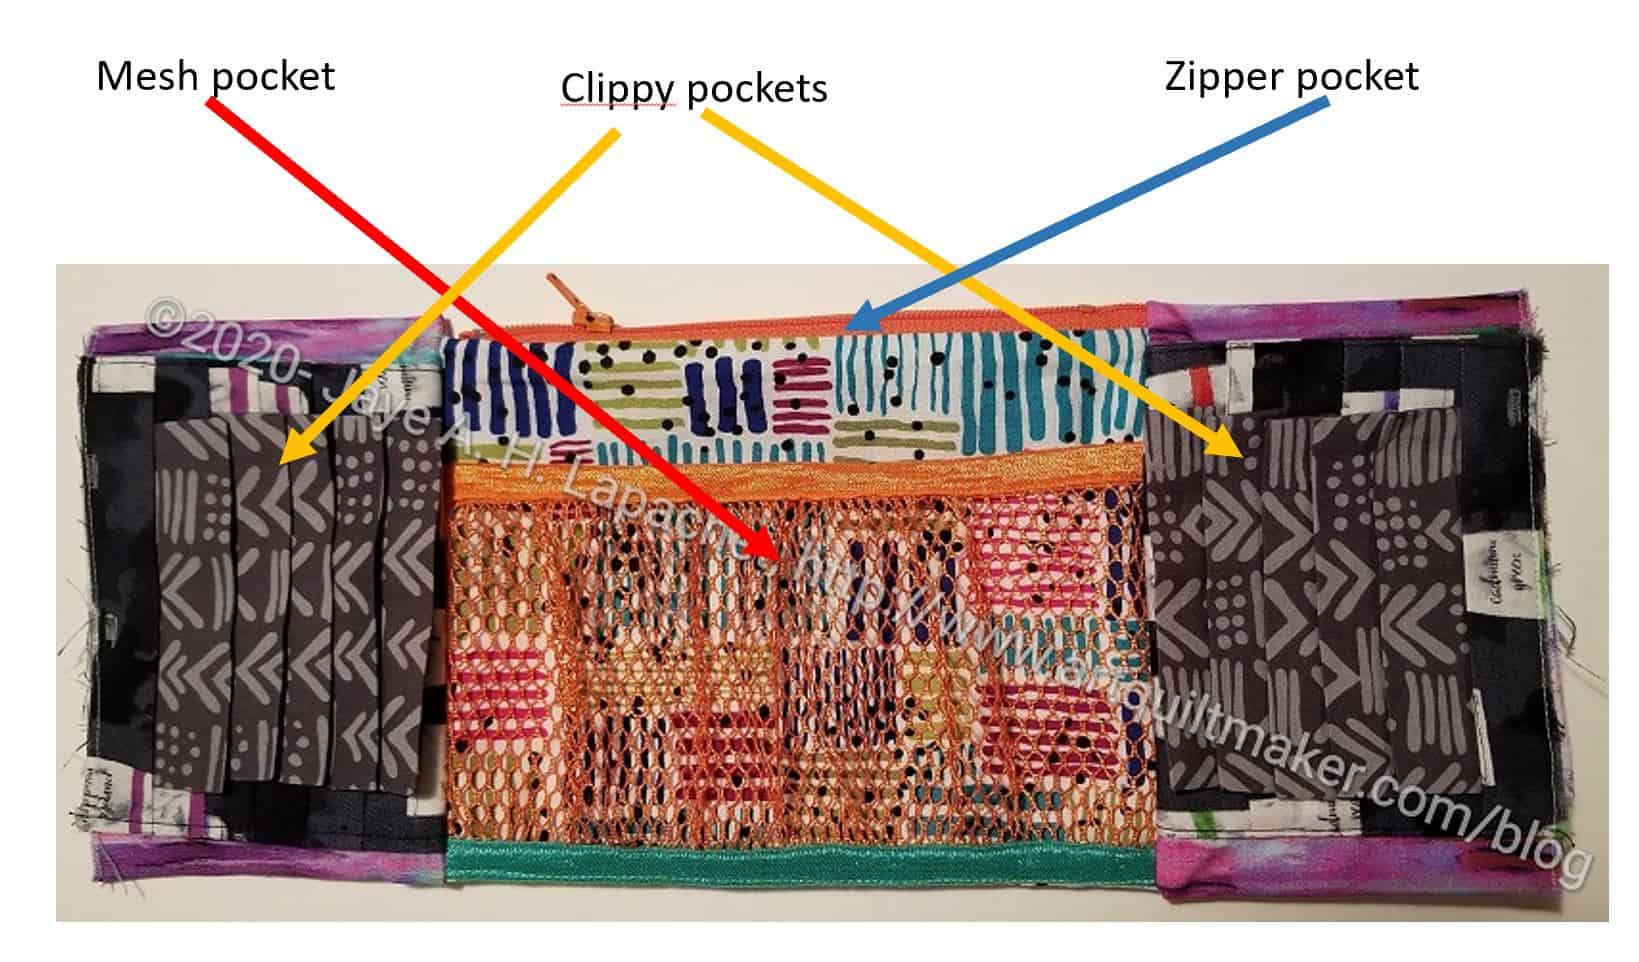
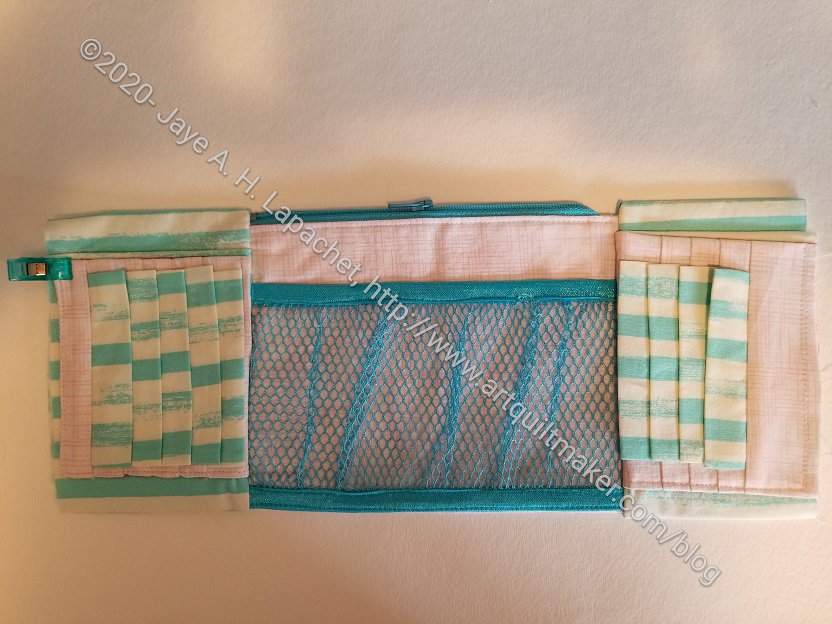
This pocket is made in 3 parts.
Center Zipper Pocket
First, we will make the center zipper pocket. If you haven’t already done so, fuse SF101 (or similar) to the pieces that make up the zipper pocket.
We need to add a zipper to the center part of the pocket. Full directions for adding a zipper start on pg.9. We also talked about this in the Large Pocket Tutorial.
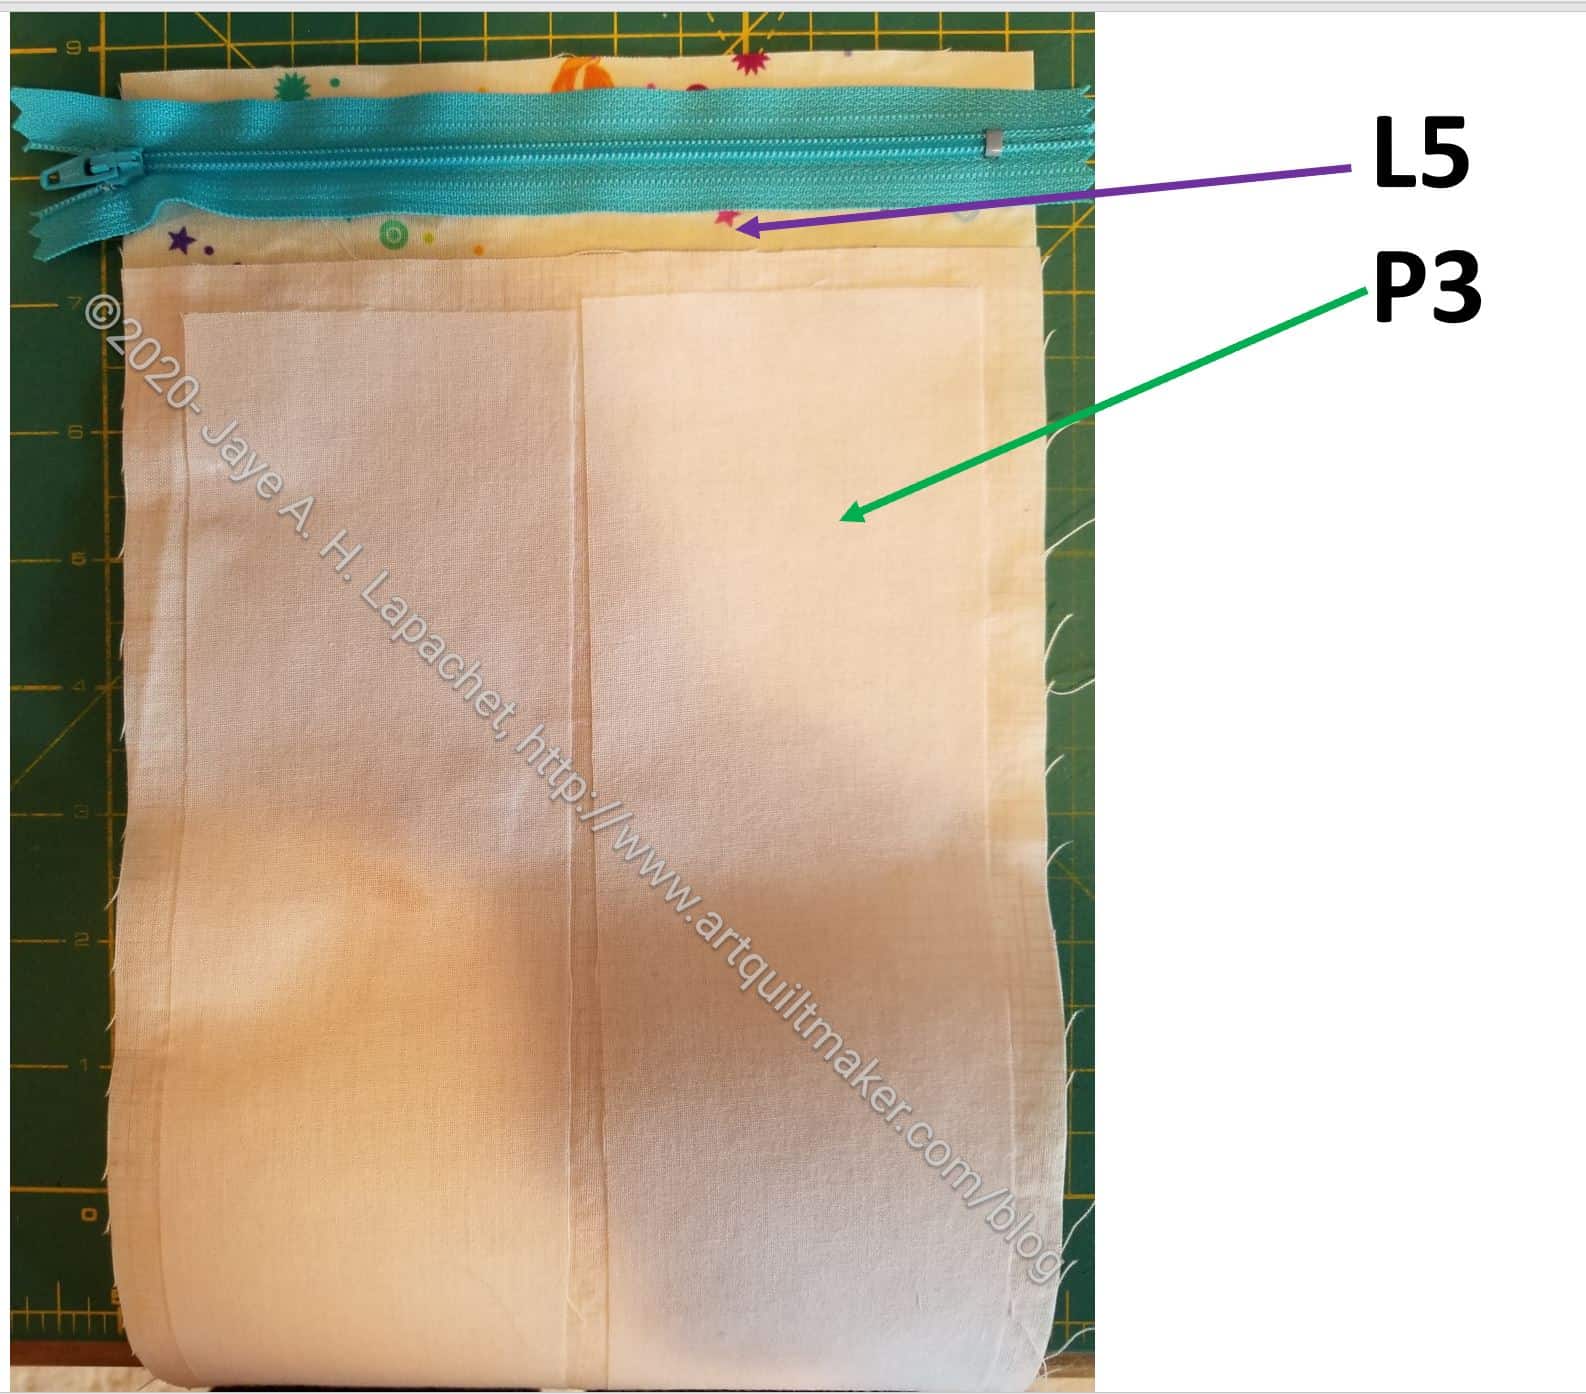
First, lay L5 down face up/right side up.
Lay zipper on top of L5 with zipper pull facing up.
On top of L5 and the zipper, lay P5 on top of zipper face down/right side down. The layers should be L5 and P3 RST with the zipper in between.

As I said before, Natalie Patton does something really clever with her zipper. She folds the zipper tape at a 45 degree angle and pins it. This makes it look really neat and tidy. Do this, as shown in detail in the Large Pocket Tutorial. Sew the layers including the zipper, being careful to move the zipper pull out of the way as needed. The last photo above shows how to sew (green line) and reminder to stop half way (red line) in order to readjust the zipper pull.
Turn over and press. Top stitch next to the zipper.
Wait to sew second side of zipper until later.
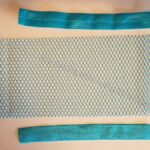
The center pocket has mesh, so cut the mesh and the double-fold elastic. The pattern doesn’t say, but you need to cover both long edges of the mesh with double-fold elastic or twill tape. I prefer the double-fold elastic.
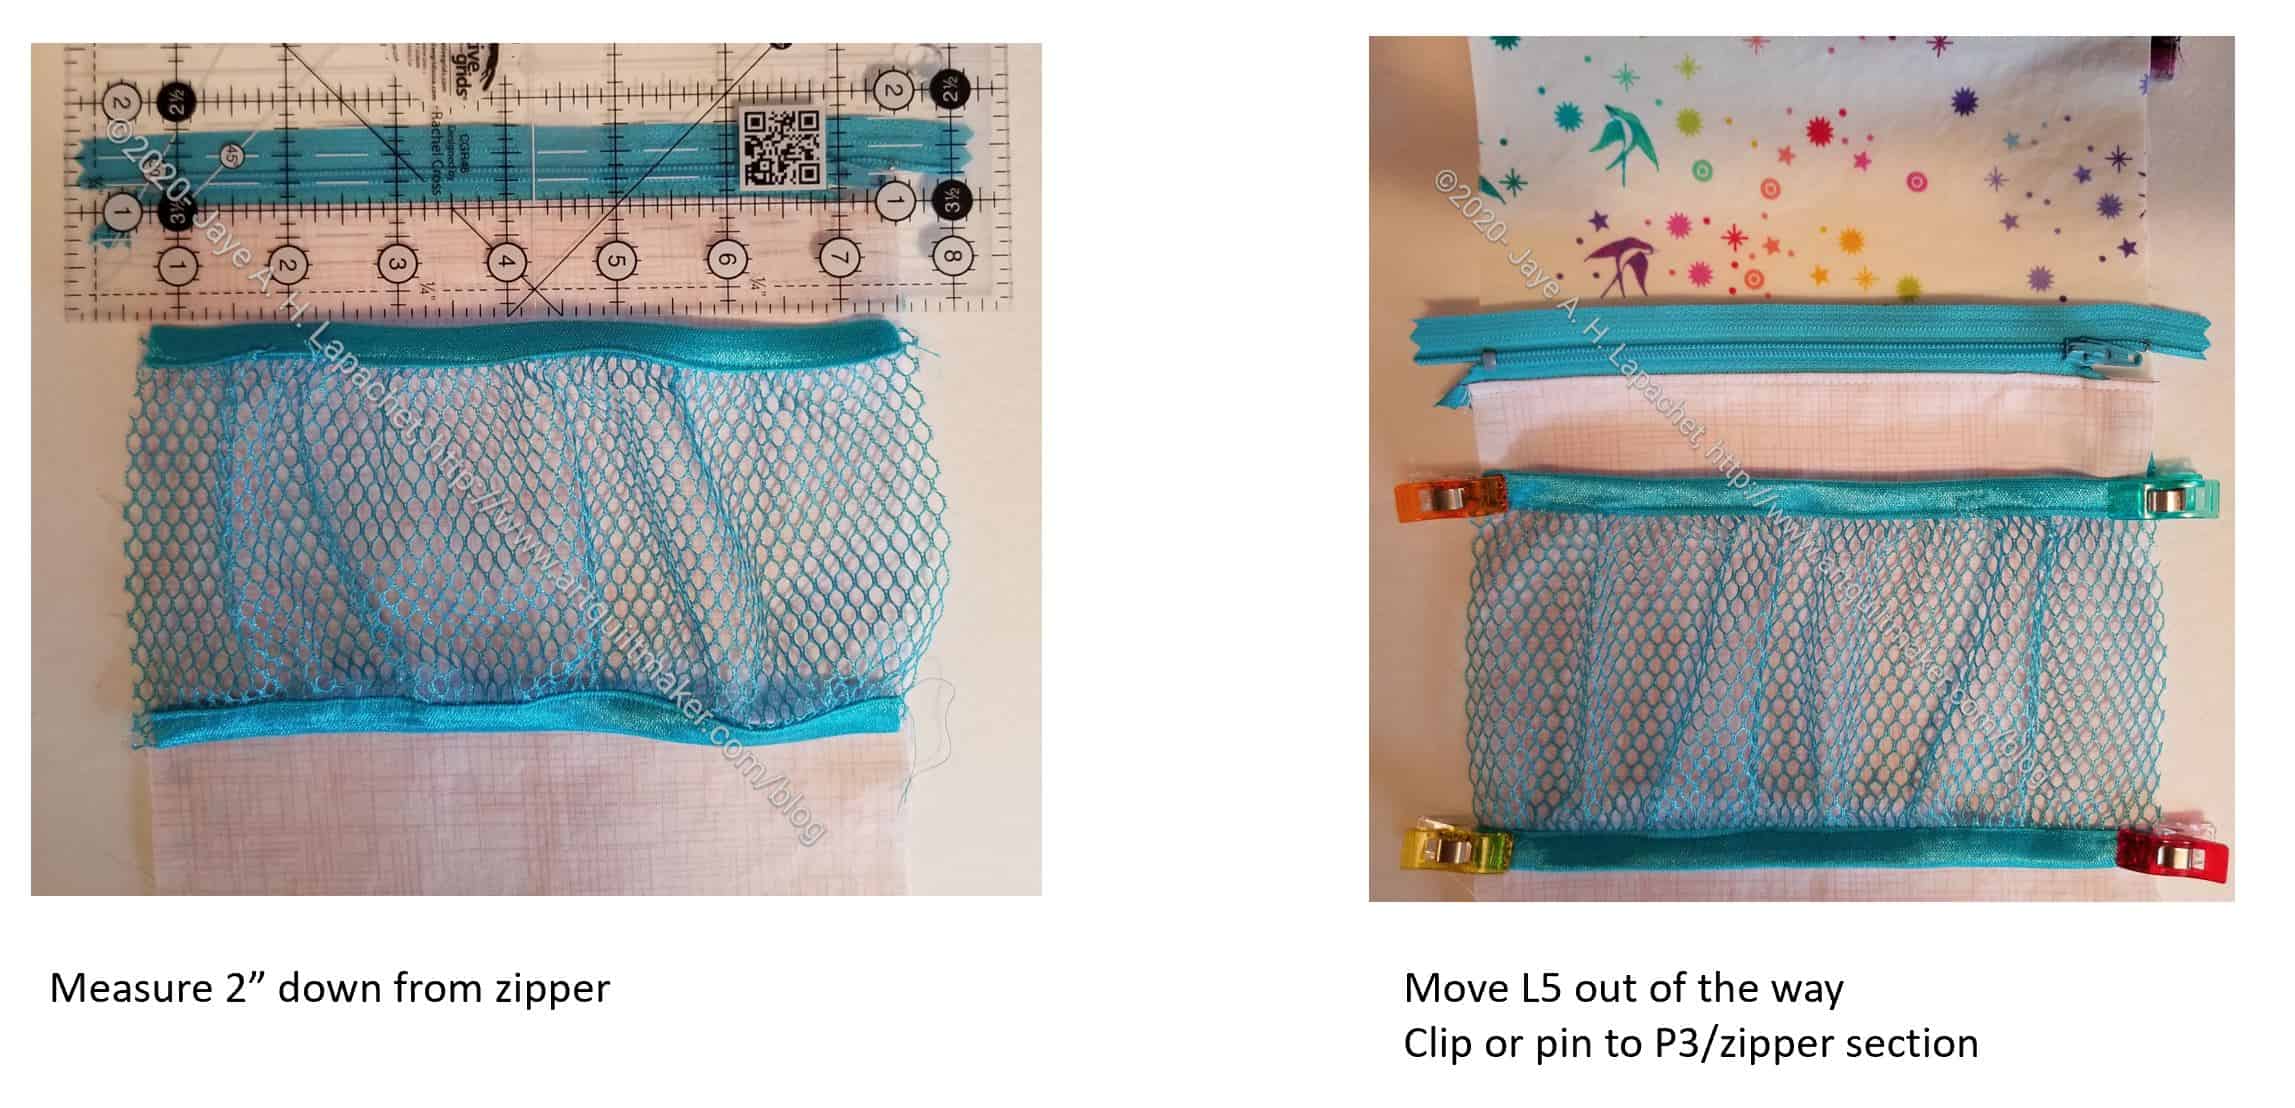
In order to attach the mesh pocket to the center zipper pocket, first mesh 2″ down from the zipper.
Move L5 out of the way (right photo above).
Clip the mesh pocket to P3/partly sewn zipper section.
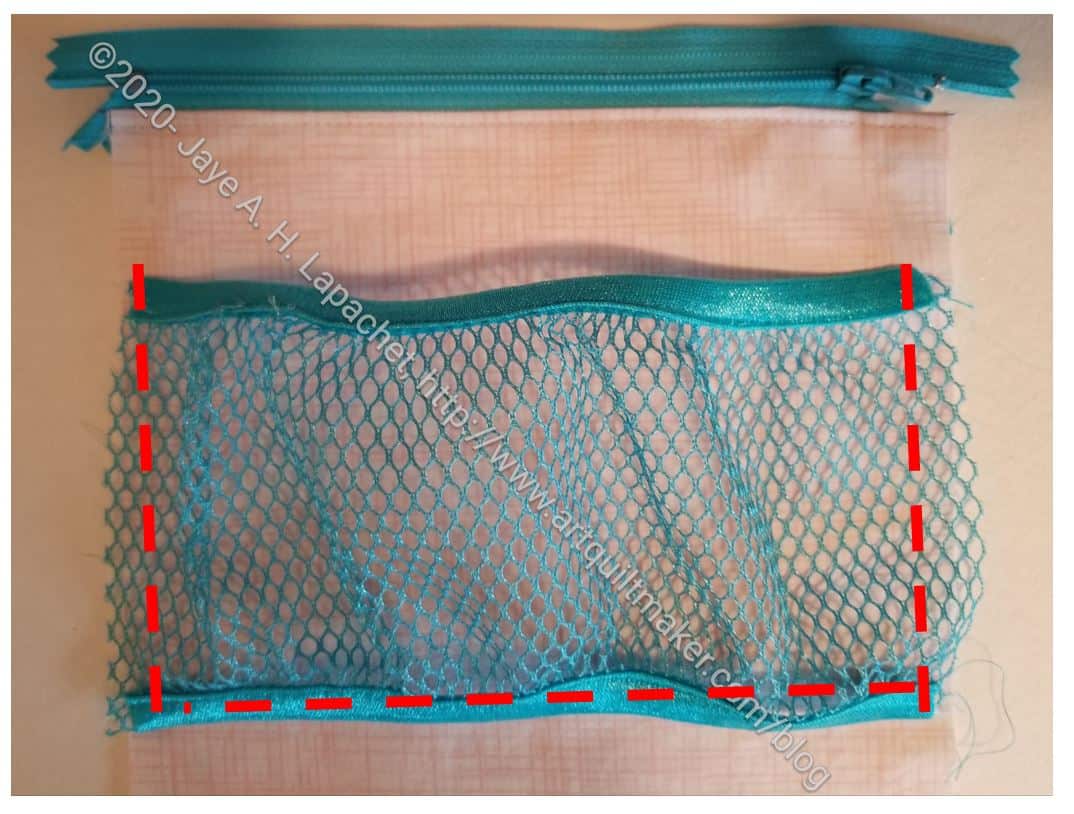
Leaving the top open (opening/top is closest to the zipper), sew around 3 sides of the mesh pocket. If you want to divide the pocket, mark as many divisions as you want with painter’s tape and sew very close to the painter’s tape without sewing through it.
After you finish sewing the mesh pocket, finish the center section by layering the other sides of P3 and L5 with the zipper the way you did before and sew. You will be sewing more of a roll this time.
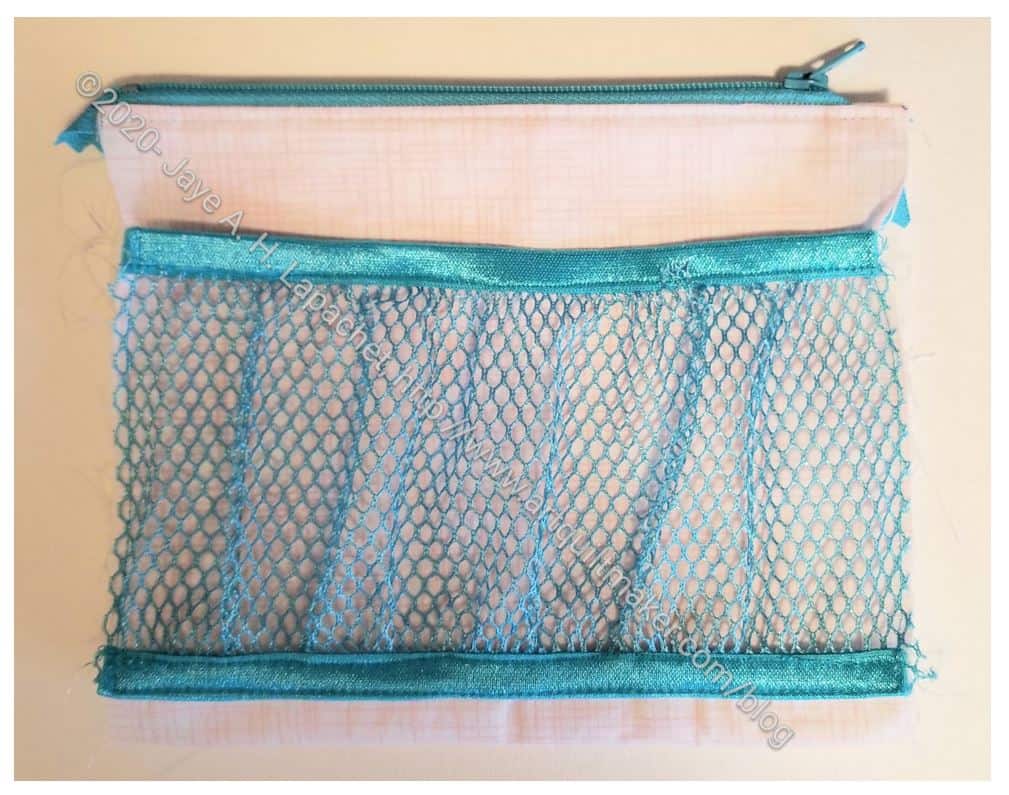
Your finished center pocket will look like the above photo. You still need to make the pleat so you can add 3D items to the pocket.
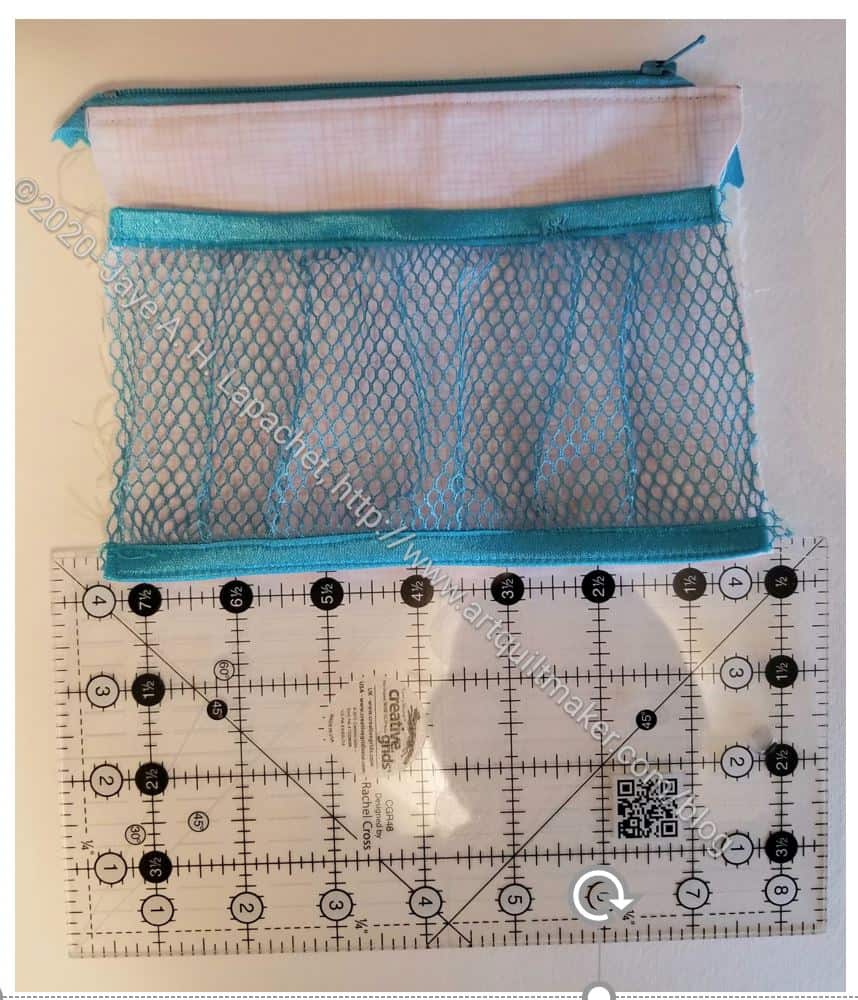
Stick your ruler 1/2in into the bottom of the mesh/zipper pocket to create the right sized pleat.
Use Wonder Clips on the sides and the bottom to keep everything in place, especially on the top double-fold elastic. I didn’t take a photo, but you do want to put clips on the top double-fold elastic, because it tends to curl in from the mesh pocket wanting to curl.
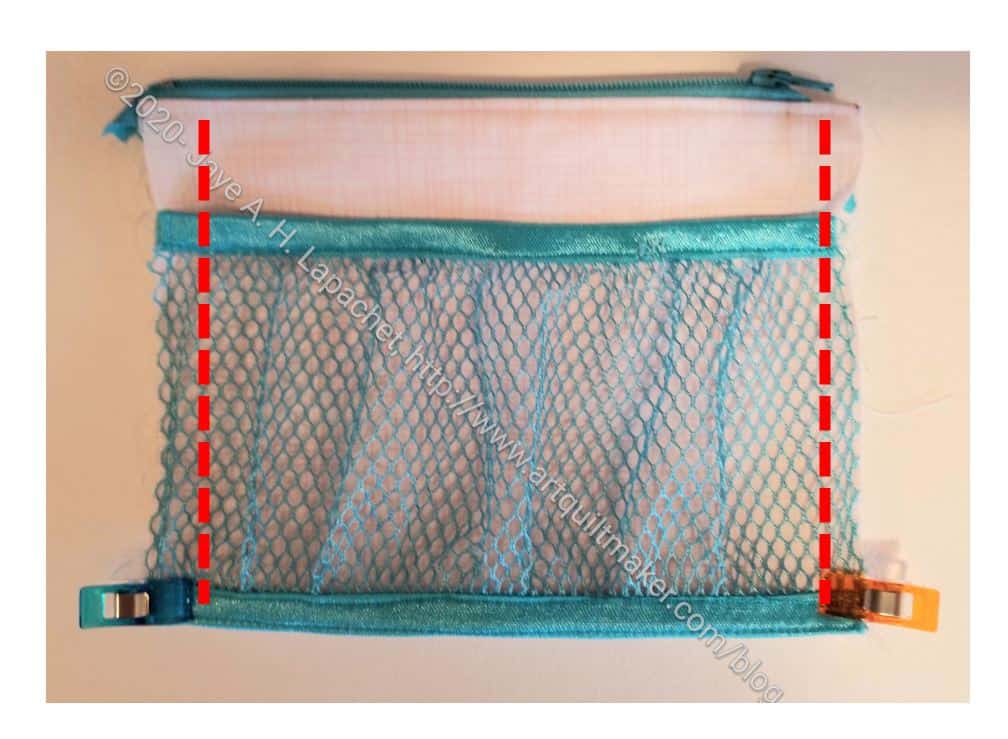
Sew up the sides. These seams will be sewn again later, so you just need to sew enough to hold them in place until final assembly.
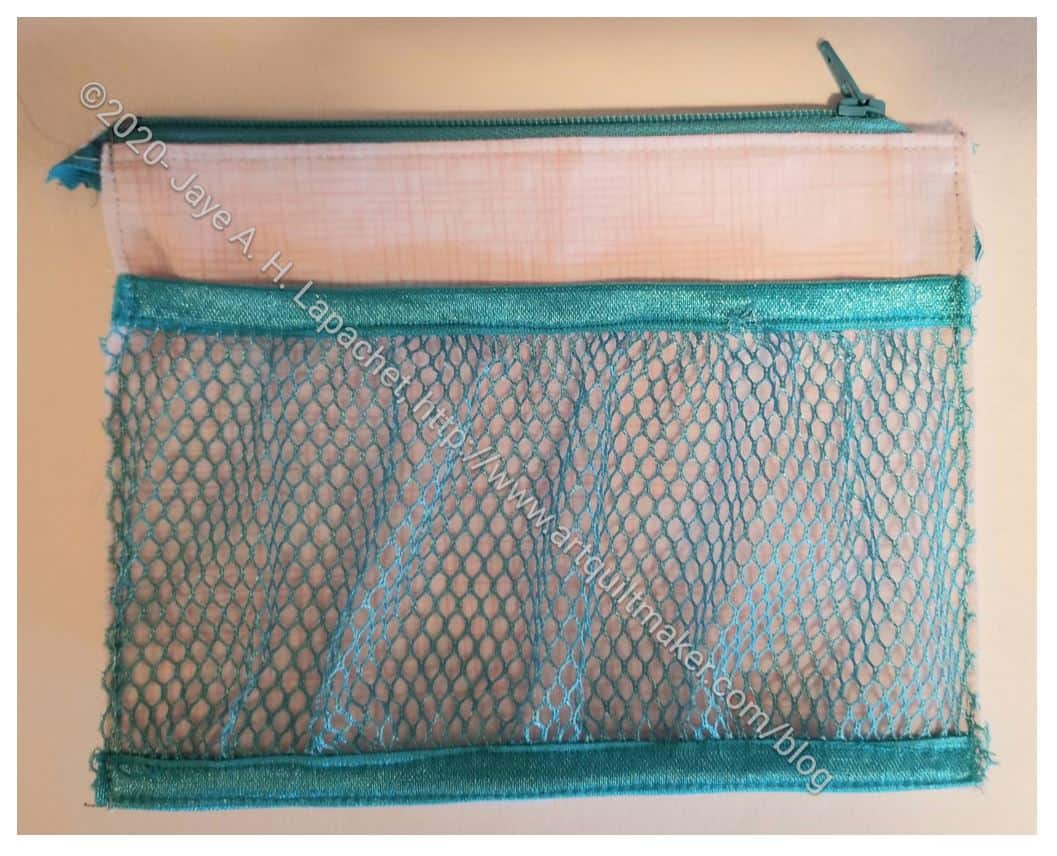
Your center section is finished.
Next time we will work on the side Clippy pockets.
Previous Tutorials:
- Large Pocket #1 pt.1 tutorial
- Large Pocket #1 pt.2 tutorial
- Large Pocket #2 Clippy Pocket tutorial (type 2)
- Large Pocket #2 tutorial pt.2
- Front Pocket information
- Pocket information
- Clippy Pocket Hack (type 1) – prelude to a tutorial
- Clippy Pocket Hack (type 1) pt.1
- More on Clippy Pocket Hack (type 1)
**I use affiliate links and may be paid for your purchase of an item when you click on an item link in my post. There is no additional cost to you for clicking or purchasing items I recommend. I appreciate your clicks and purchases as it helps support this blog.