After a two year hiatus, I entered the County Fair. I entered 3 items and hope I get free tickets.
My three items are:
Friesan pouch side 2
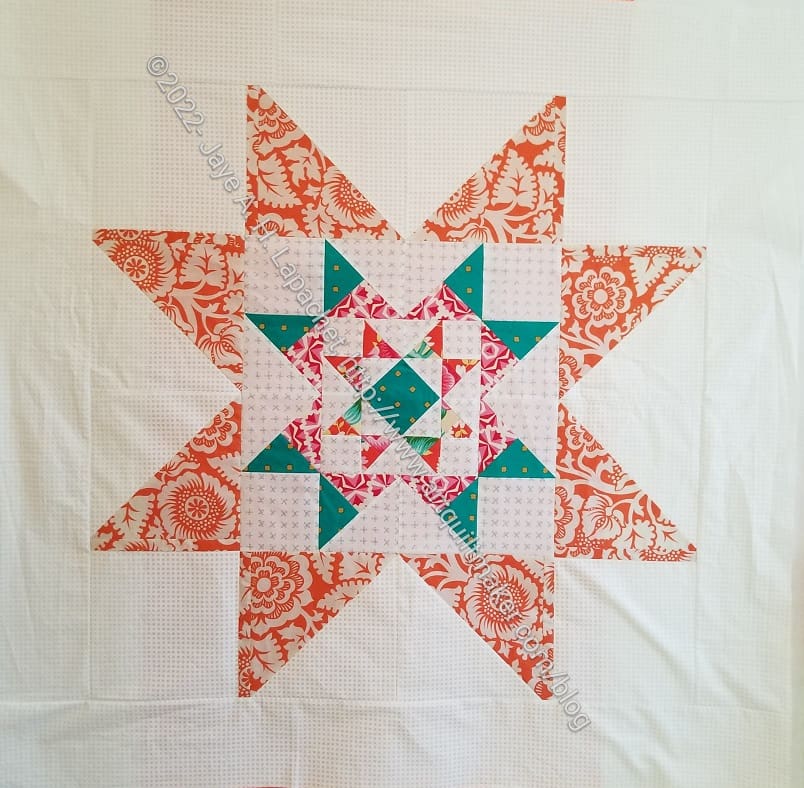
Frolic! Finished
Fabric of the Year 2019 Finished
I kind of wanted to enter more things, but wasn’t sure what else to enter or I don’t have the thing anymore. Also, I am busy, I don’t have time to figure out all the divisions, etc, especially now that they are only giving prize money for first place. Phooey on that! I really wanted to enter Flying Around, which has had no outing at all. It was, however, finished in 2019 and that seems like a long time ago in Fair years.
One of the good things about writing my 26 Projects posts is that I sometimes find projects I forgot to write about. This is one of those times.
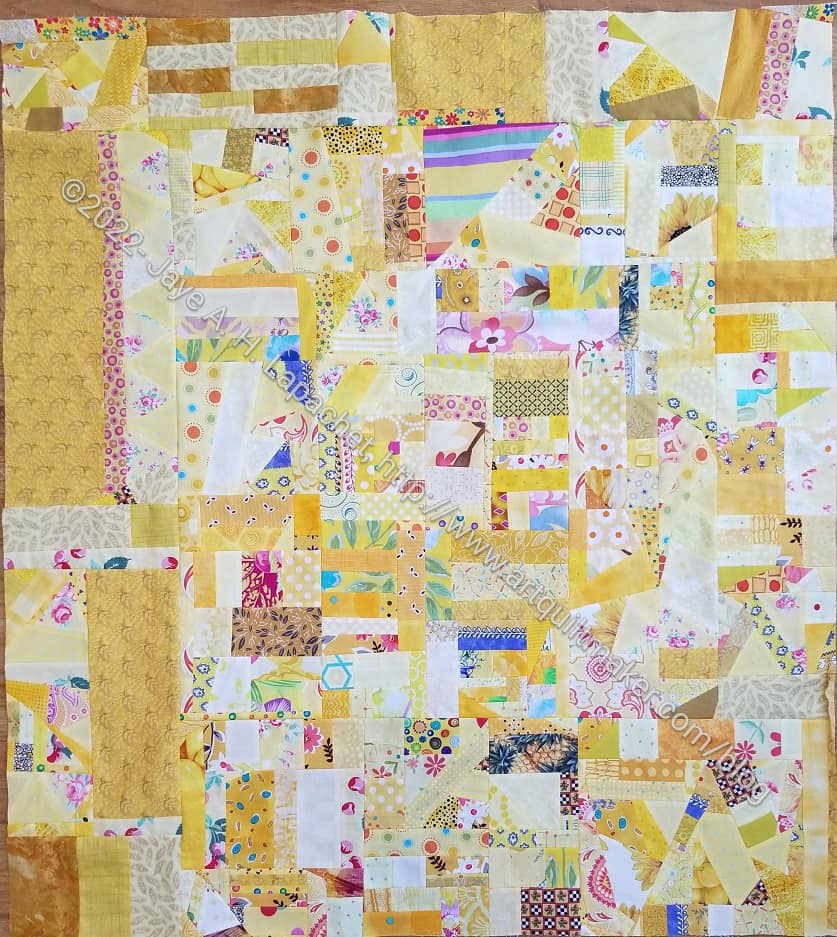
Yellow Improv Donation Top
I can’t believe I forgot to tell you about the Yellow Improv donation quilt. Yes! I finished it. I was super happy to do so. Peggy already has it and I think someone already decided to quilt it.
I am not fond of those big chunks on the left, but I used every yellow scrap I had so I had to get some yardage out to use.
The piece turned out ok. I am not a huge fan of yellow. Still, I am glad I did it.
The Easter fabric I bought at Just For Fun in Vancouver, Washington (haven’t written about it yet, but have photos) was intended for masks. I bought all the other fabric at Pioneer Quilts. I decided to make napkins instead, because most places want us to wear N95 masks.
I don’t like making napkins, but I made it a little easier on myself by 1) adjusting my attitude and 2) rounding the corners. Rounding the corners meant that I didn’t have to pivot while using a fancy stitch, which made the whole process go faster.
I used the 2.5 inch circle from the Creative Grids Circle Set** to trim the corners of a fat quarter to a round shape. I would have done well to also use a rotating mat** while I cut using the circle, but I didn’t have mine handy. Acrobatics were required.
I found the 2.5 inch circle to work really well. It looks pretty good in terms of shape and size and, as I said, made sewing pretty much a breeze. I don’t know why I didn’t do it sooner.
I used different fabrics on the back, so we can tell them apart. We use cloth napkins all the time, but only change them out about once a week unless something happens.
**Obviously, you should shop at local quilt shops. However, I use affiliate links and may be paid for your purchase of an item when you click on an item’s link in my post. There is no additional cost to you for clicking or purchasing items I recommend. I appreciate your clicks and purchases as it helps support this blog.
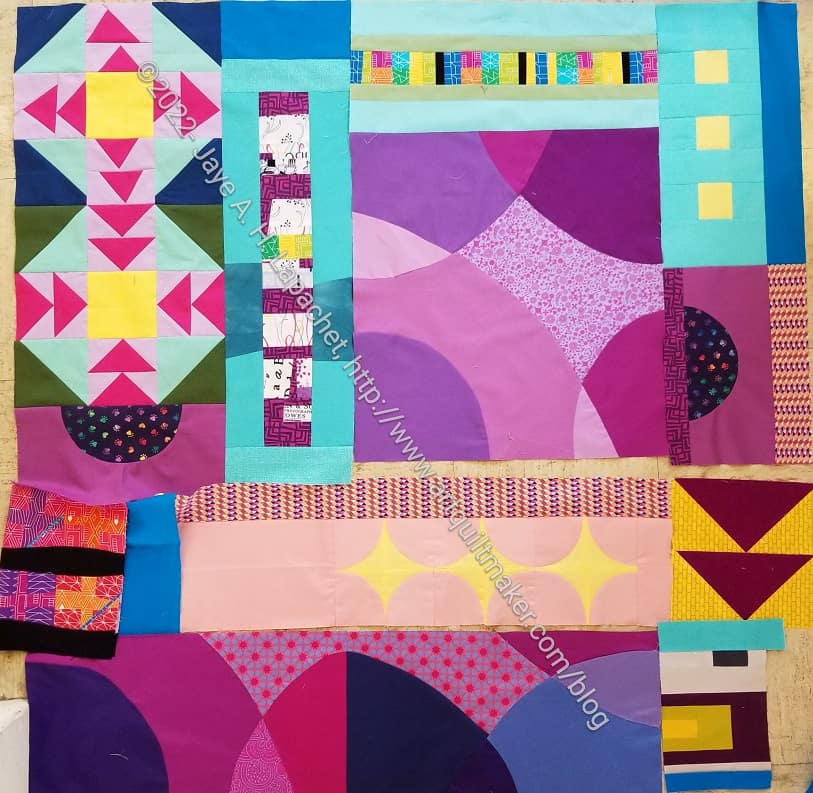
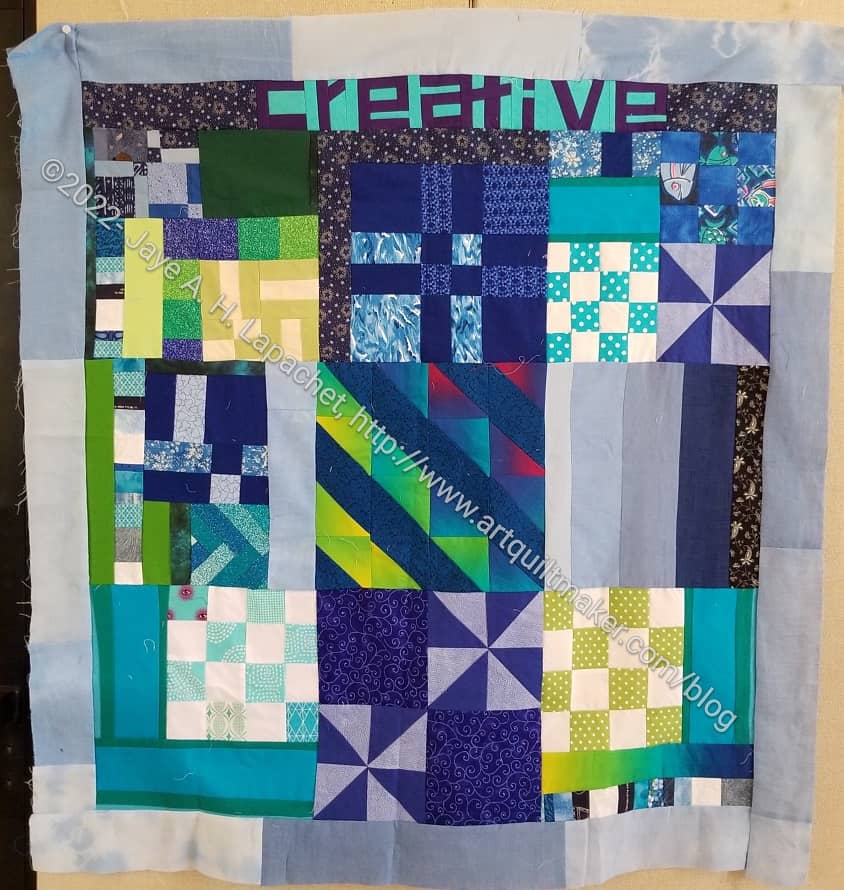
Mary and I did finish the top at Sew Day. I brought it home to make a back and will be handing it in today at the meeting.
I am pleased with how this came out. The ugly bits we started with turned into a really great quilt. It isn’t made from the colors I would normally use, but I am pleased with the result.
I am also pleased with how many of the orphan blocks and chunks we were able to use up overall during Sew Day. Sadly, none of the shards I brought were used. There is always next time.
Mary wants to do another with me next time, which I think will be great fun.
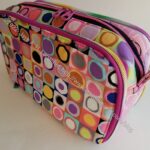
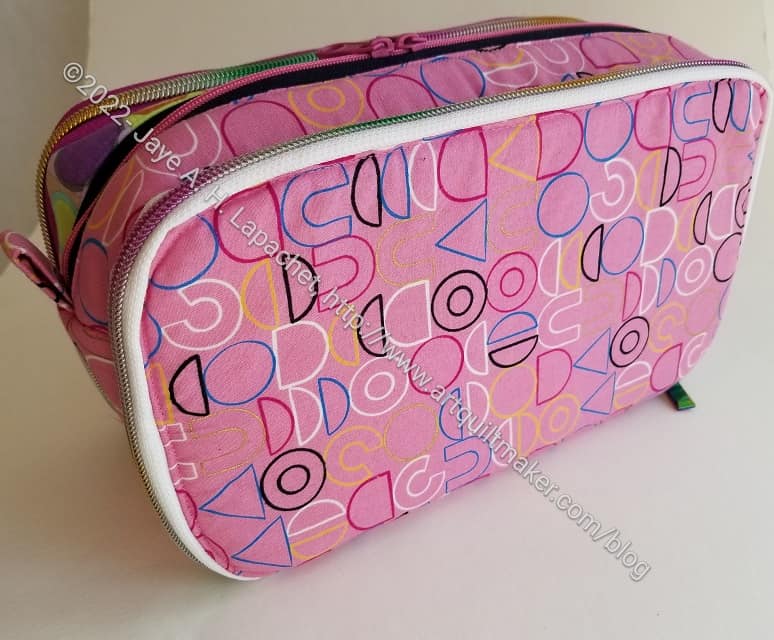
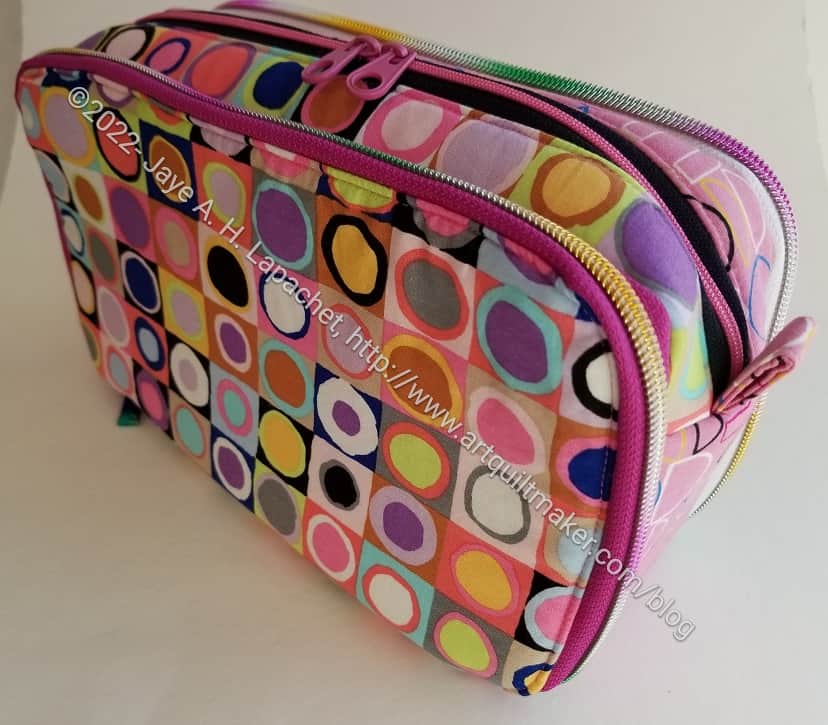
This was a great pouch. I can’t say I didn’t rip, but it still went together really well.
In a number of the FB groups in which I share my pouches and drool over others’ pouches and bags, people tend to point out the flaws. I always tell them their work is great and not to point to the flaws. Now I know how hard that is. All I want to do is point out the flaws in my work. What is that about people? Is that a way to add to the life’s drama?
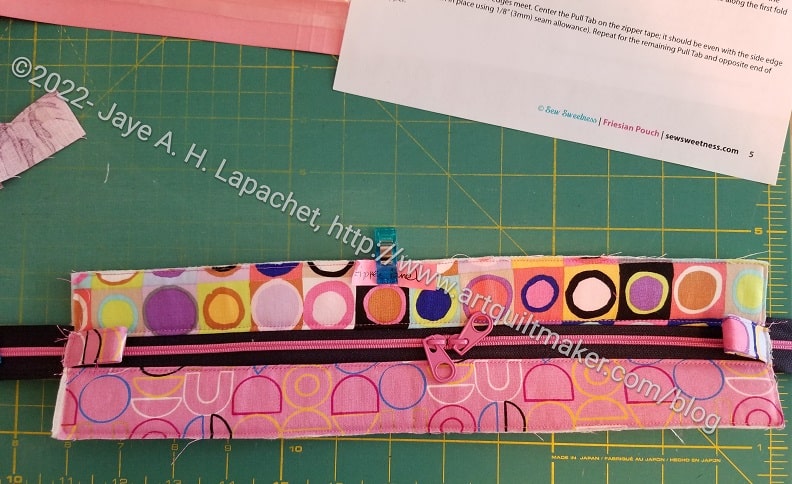
As I said before, one reason I made this particular pouch was to use the zippers Julie got me for my birthday. There are three different colors of zippers and two different kinds of zipper heads, so I tried to make the most of them.
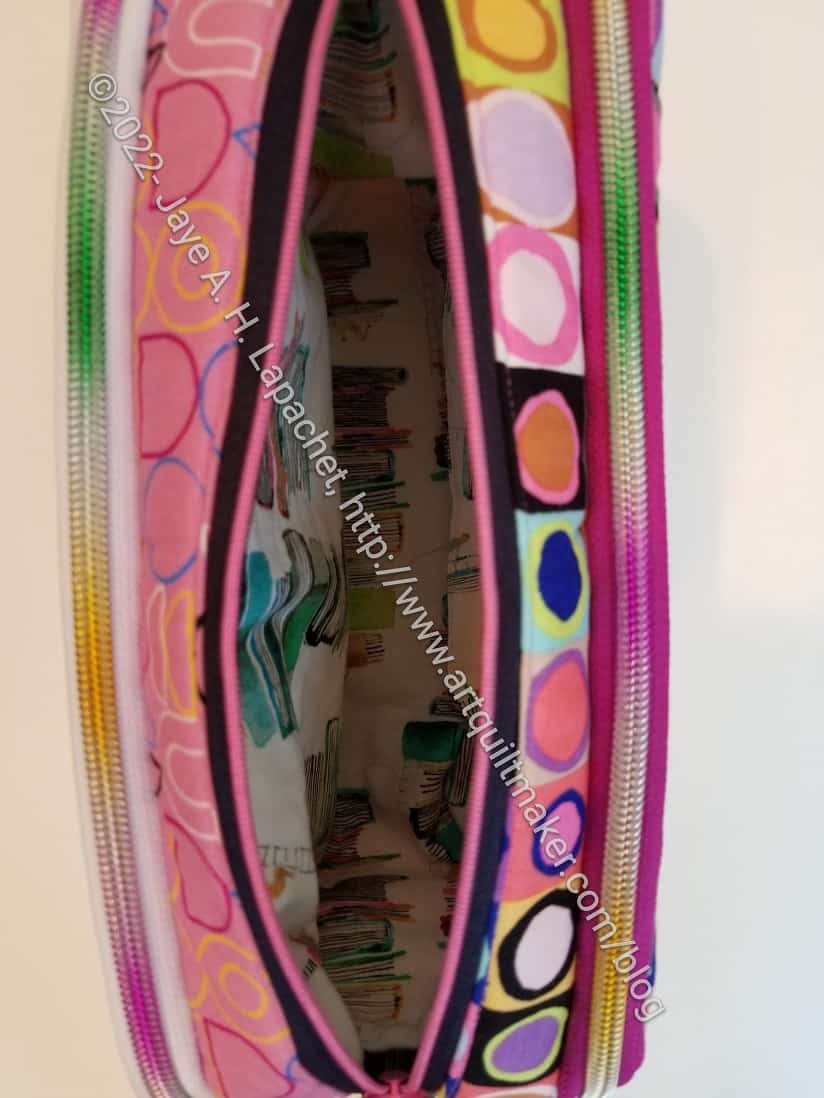
Friesan Pouch center / inside
A lot of the fabric (maybe all) was purchased on my trip to Portland. I used two different fabrics for the outside to give myself a visual cue as to where something was. I also wanted to use my new fabrics right away.
I used book fabric (from Windham) for the lining as an homage to my librarian roots. It is hard to see, but I can see it when I use the pouch. The book fabric makes me happy.
I like the stiffness of the bag. The center has foam to help it stand up while the sides have foam** and Decovil**. The bag stands up really well. I want to try something with more Decovil**, but I haven’t found the right pattern yet.
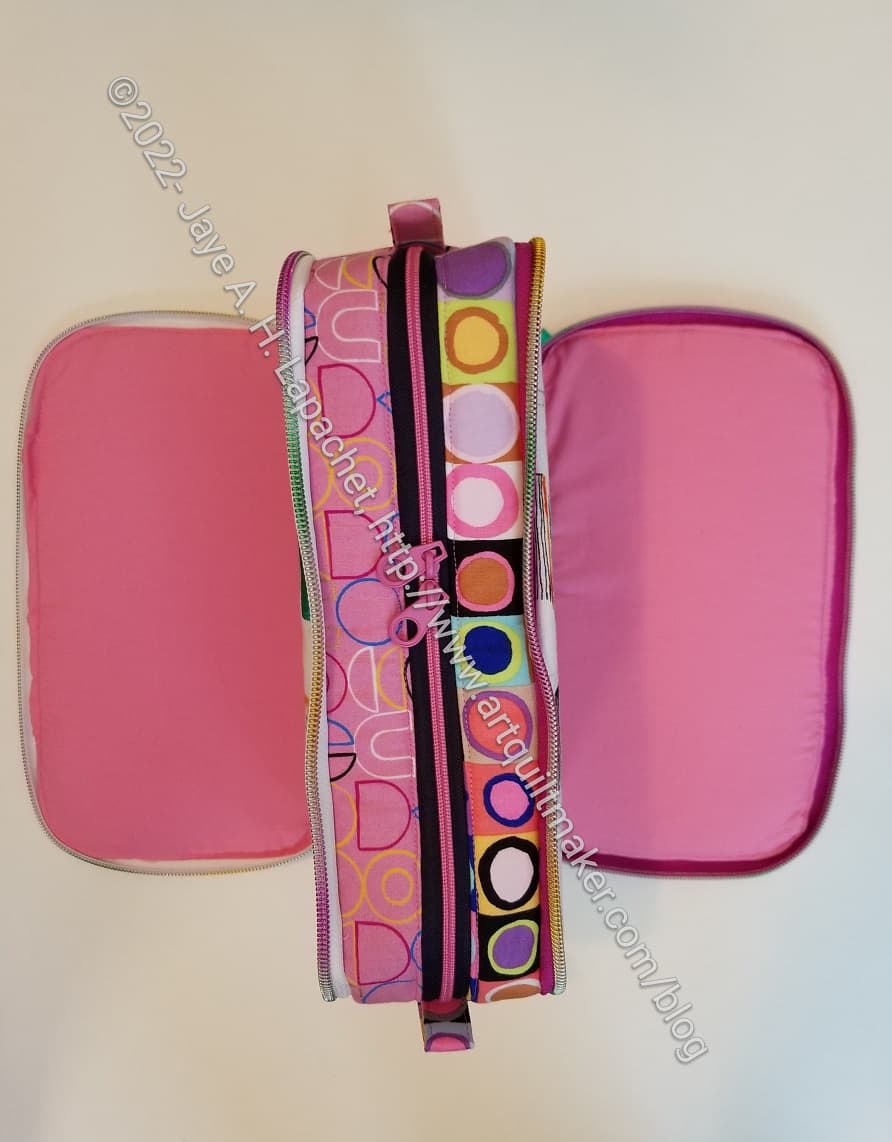
Friesan Pouch – sides down
One thing that makes this an interesting pouch, is that the sides fold down. I was inspired to use the AGF solid pink after using it to good effect in Gerre’s Retreat pouch. I wouldn’t use a solid again on the inside pocket. It just looks too stark even though I like that fabric. A print would give the viewer something to look at.
Also, I would probably put something to hold pens – elastic or mesh – to make those folding down sides more useful. It is hard for me to see what might be better for me in the design when I make a pattern the first time. As I have said before, I like to make things a few times before I get the true hang of them.
Overall I feel like this pouch came out really well. I am pleased. I made it for me. I am not sure how I will use it, but I will find some way to use it, I am sure.
**Obviously, you should shop at local quilt shops. However, I use affiliate links and may be paid for your purchase of an item when you click on an item’s link in my post. There is no additional cost to you for clicking or purchasing items I recommend. I appreciate your clicks and purchases as it helps support this blog.
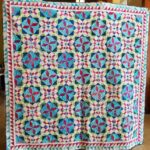
Cathy went straight to work almost as soon as we arrived. She brought some of her Pointillist Palette chunks to work with.
I keep looking at this one and seeing different things.
It is great to see other people’s work in the quilts. Two of my donation blocks were included. Cathy also used Joelle’s word chunk from a previous swap.
What I wanted to do at Sew Day, since all of my La Pass month 9 pieces were basted, was cut out a bag. I had been thinking about the Friesan Pouch for awhile and I chose to cut the pieces for that pouch out.
As I have said, cutting out large-ish projects at Sew Day is great. The larger cutting table and space to spread out are very helpful.
I prepared everything I could at Sew Day, so I was ready to sew when I had time on Sunday.
I basted all the pieces like Sara says to do instead of being lazy and wanting to get to the finished product. It took forever to get through the basting and making the zipper panel, but I had everything ready so it went very smoothly.
Friesan Pouch zipper panel
I used the zippers Julie got me for my birthday. I was able to put the zipper heads on (using my zipper head tutorial) with the zipper heads that Julie included in my gift and I think they look really good. I am ridiculously pleased with how the zipper panel came out.
I used two different fabrics (from my trip to Portland), one for each side of the zipper, because I used on fabric for each side of the pouch. I hope it comes out like I imagine it.
I am in the process of installing the zippers on the outside pockets.
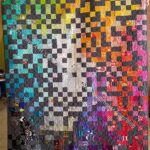
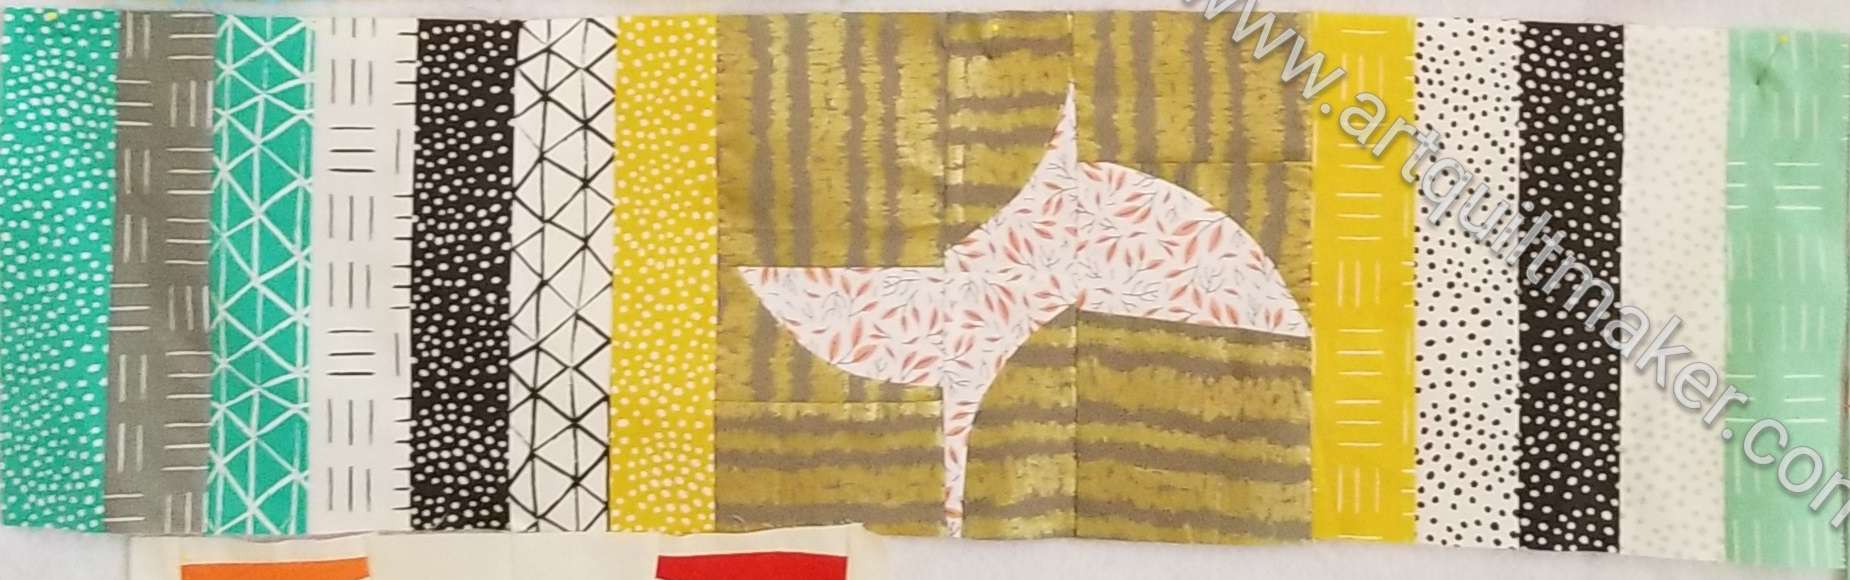
I finished cutting out the Friesan pouch at Sew Day and had an hour until it was over. I could have left, but instead Mary C and I decided to work together to make another donation quilt top in an hour. It was a charity Sew Day after all and both of us had been working on our own projects.
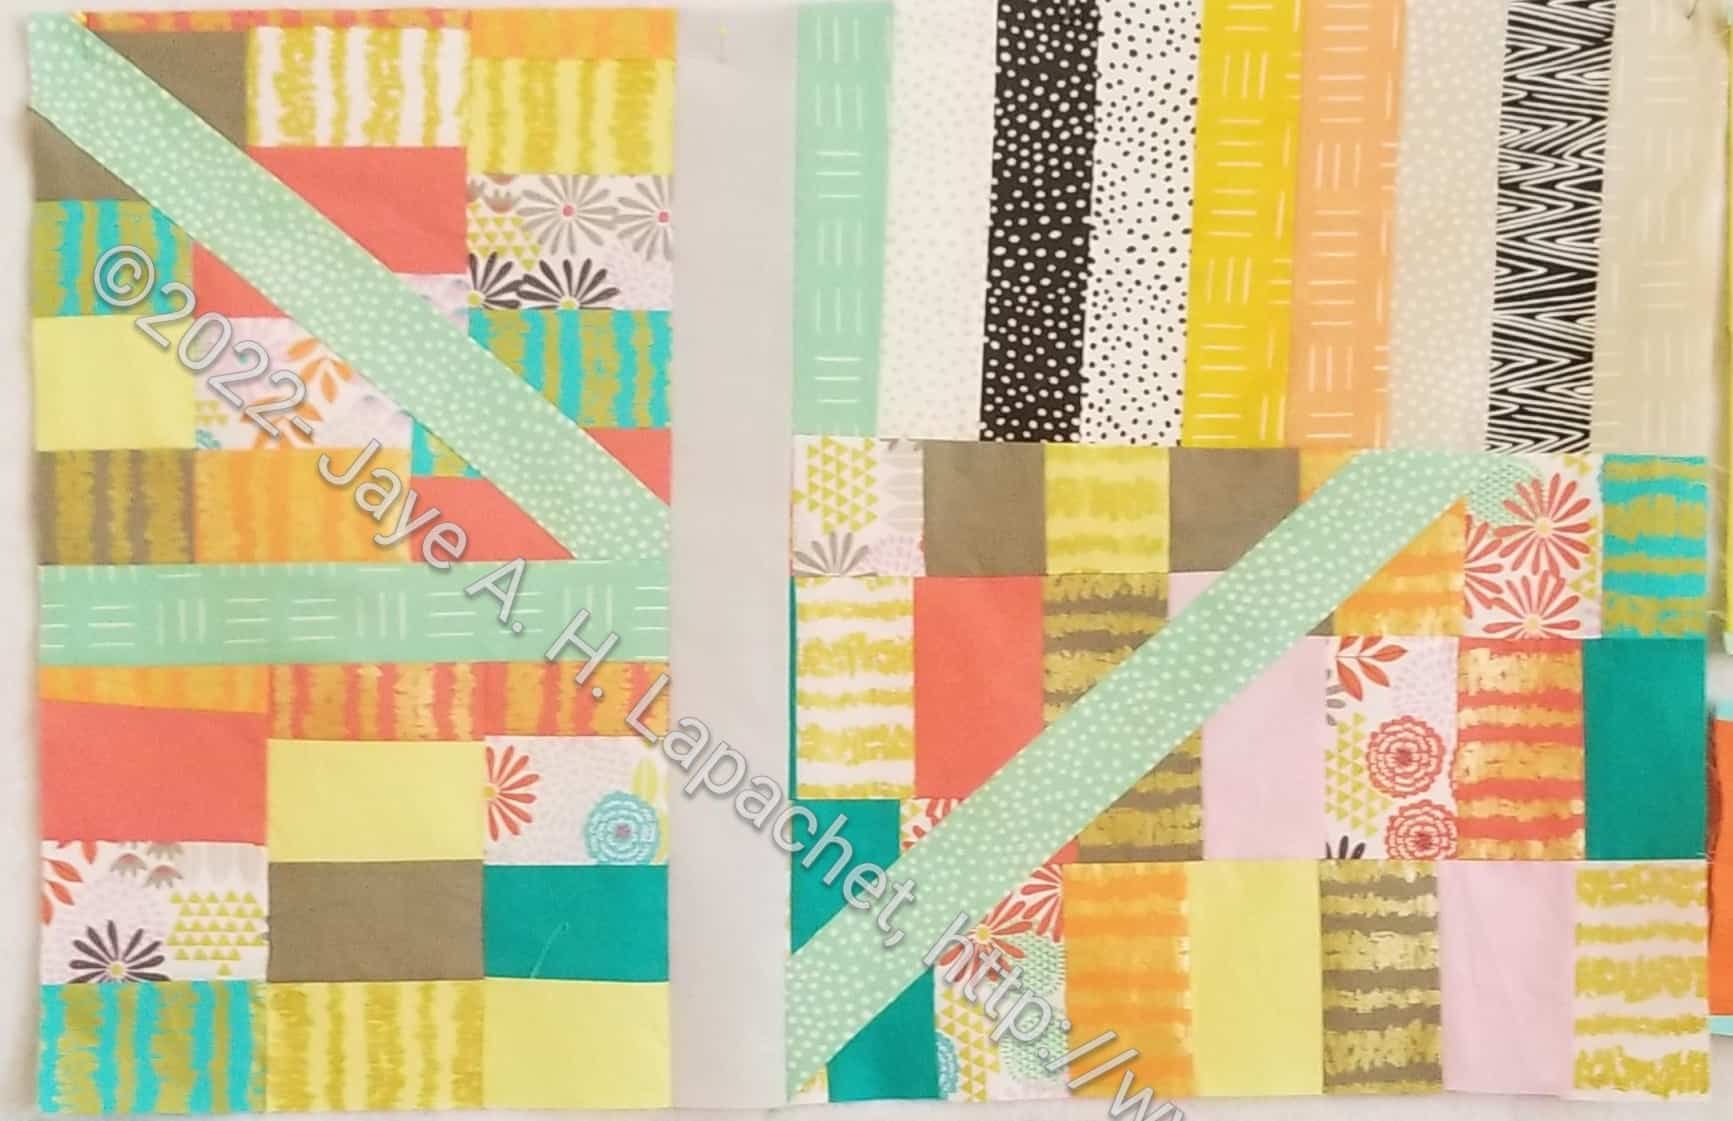
Sew Day Donation Top start
We used some fabric from one of the first retreats that had been sewn together into a block of rectangles. It was not very attractive.
The first thing we did was to cut it in half and they cut the halves on the diagonal so we could insert some strips and break up the parts that were unattractive.
Sew Day Donation top 1st steps
Mary C had some strips and strips sets leftover from a quilt she had just finished that we ransacked to make the improvements.
I selected some grey from the abundance of solids that Peggy has and we used that color to fill in other places.
Adding the seafoam green strips REALLY helped that rectangle go from unattractive to attractive. The addition also lightened up the piece.
To make the two halves large enough, we added the strip set and sewed the pieces together.
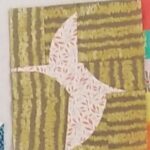
Green ‘bird’ block
Brown ‘bird’ block
We decided we wanted to use the ‘bird’ blocks as well. They were mostly made from the same fabrics, so they fit in well. I had to build up the green block, which was not nearly square.
Brown ‘bird’ chunk
Mary sewed the brown bird into a large-ish chunk with the intention of putting on the bottom of the piece. I thought it came out well.
Green bird block built-up
While she did that, I built up the green bird block into a shape we could use. The green strip along the bottom allows that darker green and orange section to float a bit which was a happy accident.
Sew Day Donation Top in process
Eventually we ended up with several large chunks. We wanted to add those half circle pieces, which took a bit of time to work out.
In this endeavor, Mary did the sewing and some ironing while I trimmed, pressed, matched fabrics, cut strips and brought her stuff to sew. We had to make little bits to allow us to fit the chunks together. There is a freedom in this kind of improv quilt. I happily hacked off pieces of the blocks and chunks to make them fit.
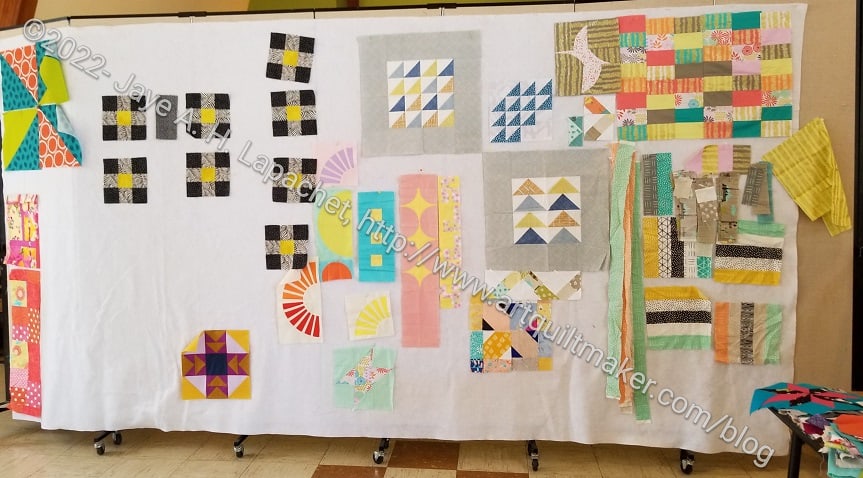
We had a charity Sew Day on 4/2. Often Peggy will provide a pattern, but this time the activity centered around orphan blocks and chunks.
April 2022 Sew Day Design Wall
Maria had been collecting orphan blocks and chunks for awhile. The first thing she did when she arrived was start pinning them to the design wall.
Maria put up a random assortment of blocks and chunks and people took what they wanted and worked on donation tops.
As mentioned, I didn’t really want to do the activity, but others got right into it. Since I made the Missouri Star donation top and brought it, I didn’t feel guilty about it. Nobody said anything to me either.
Sew Day Donation Top in process
After I finished cutting out the Friesan Pouch, I ended up working on a quilt with Mary C and found that it was a fun activity. I prefer to do these types of quilts with someone else.
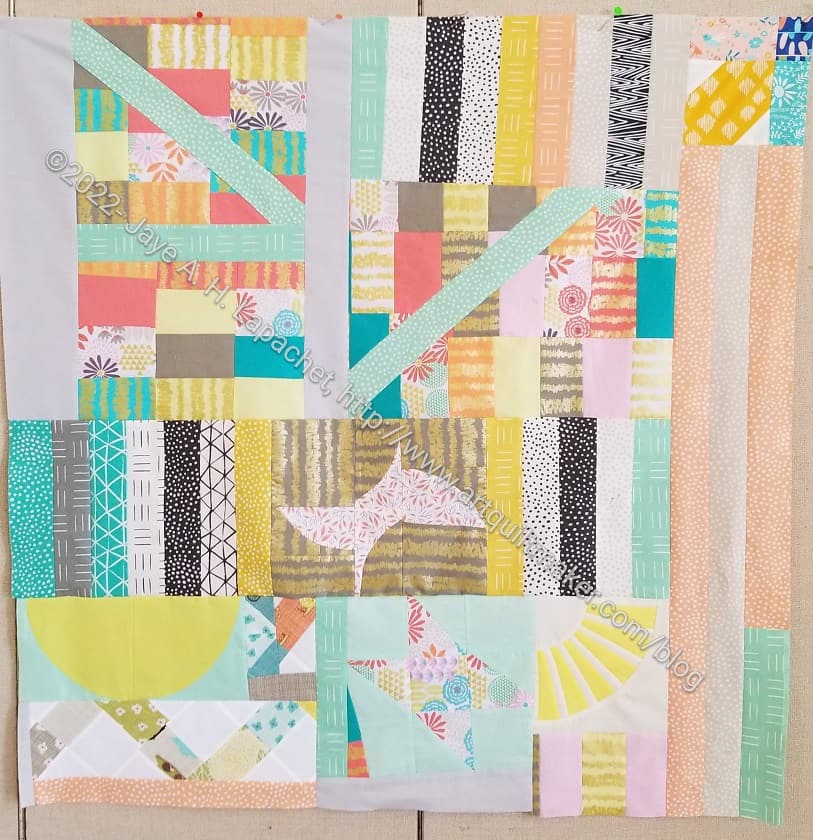
Month 9 is very light, so I was able to mostly baste it at Craft Night last week and finish during a work meeting.
I am now stitching the pieces together and I think I will finish soon. It is nice to have a light month, but I don’t know what I will do when I finish. More half hexies, I guess.
I finished the Missouri Star donation top and back on Friday night before Sew Day last week. I wanted to make sure I could give it to Peggy and I just didn’t have time to work on it during the week, even though I thought I would.
Adding the top and back to my Fabric Usage Report put me slightly back into the black, which makes me happy.
Missouri Star donation quilt back
I am pretty pleased with how it came out. Making a top like this was a good use of that block.
The fabrics I used for the back have been around for a long time. The middle piece is a Moda and I never cut into it. I was thinking that I would use it for something, but since I hadn’t up until now, I went ahead and used it for the back. There’s always more fabric, right?
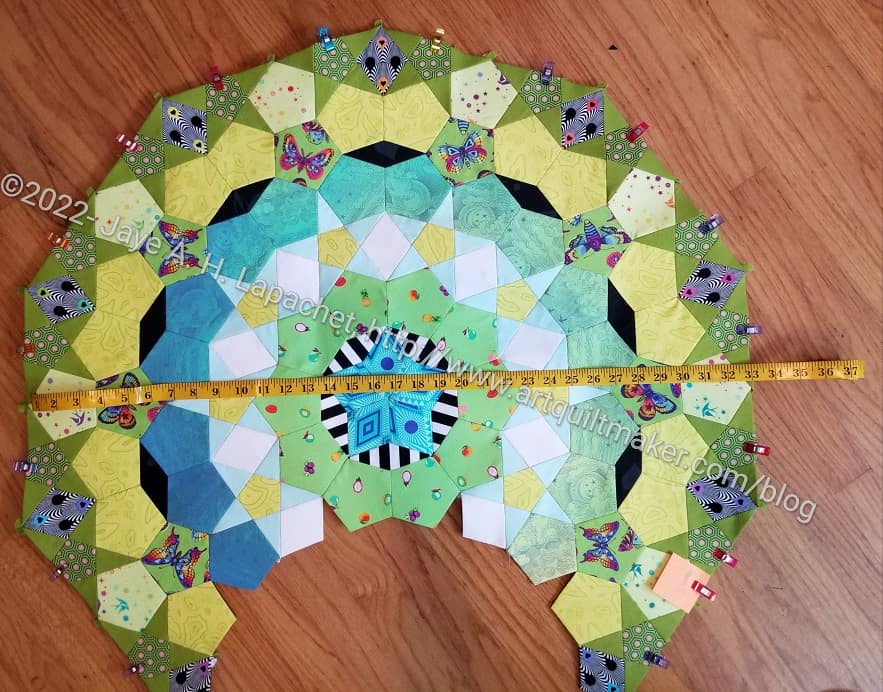
In a comment, Mrs. K asked how big my M8 rosette ended up. I know the paper pieces are larger than the original, but I didn’t know how big the rosette was, so I measured it.
I know the photo is small, but the tape measure says 40 inches! WOW! I am glad there are only a few of these in the quilt. They are pretty hard to maneuver when they are this large. I know I will be challenged when I put the whole thing together.