On my most recent trip to Portland, I bought this painting from the artist with whom we stay. Leah Kohlenberg is a working artist who also teaches. I fell in love with this painting and just decided to buy it. I have never done that before and it was a novel experience.
The Grab & Go Sleeve is a project from Minikins Season 1. Honestly, it is one I never thought I would make. I have at least two laptop bags, so I really don’t need anything else. Also, there is nowhere in the bag for the mouse or the cord.
However, it is a good bag for other things like files and notepads. My mom has a portfolio she is using to take notes during a series of appointments she has. She is using the project bag I made her to carry around her portfolio. It doesn’t really fit very well.
This project immediately occurred to me once I saw what was happening. I am not sure why as I really never thought about this bag before.
This project serves a second purpose as well. I want to make the Heartlands Backpack. It is a ‘choose your own adventure’ bag. The Grab & Go Sleeve is a lighter version of a ‘choose your own adventure’ bag. It has only a few pieces and not many options. I wanted to try an easy ‘choose your own adventure’ bag before I started the Heartlands.
Grab & Go Sleeve- lining with pockets
I decided to add some mesh pockets to the inside to provide a bit of organization.
I also added a D-ring (but rectangular) so she can clips things to the bag if she needs to do so.
Cyndi gave me a few yards of white from an estate sale trove of fabric she got, thus I decided to use white on this quilt.
I know white for a donation top is a bad idea as it will get dirty, but a design wants what a design wants.
I have one more section to sew before I decide if it needs to be larger. Without the left hand section sewn, the top is about 40 in. x 40 in. at the moment. I might not want a white strip on the end. We will see.
As you know from the Sampler Quilt class tutorials, I am very fond of people learning all the quiltmaking techniques. It is a way to be free from the tyranny of always having to use a pattern.
NOTE: I am not against quilt patterns and I feel we should all support quilt designers.
Y Seams demo sample
However, at some point quiltmakers will want to make a quilt design they have thought up themselves. To do this, we need to know all the techniques. Thus, I couldn’t say no when SueS asked me to do a Y Seams demo for the guild. As usual, I had to overachieve. I posted a handout to the guild members only site*. Most of the information is in the Y Seams tutorial.
I made a whole bunch of step outs and notes to tell people. I won’t be actually sewing. That didn’t work out well when I tried to show a demo of leaders and enders, thus the step outs.
*N.B. If you are in the Bay Area and want to join, click the join button on the guild site. We also have a Zoom option, though the demos and Bag Club are not always available via Zoom.
I was very pleased to learn a new zipper tab technique after working on the Stella Pouch. I actually emailed Sara Lawson from Sew Sweetness about it. She said it was new to her. I really like the technique, because it makes zipper tabs really easy and you don’t have bits sticking out as you do when you fold them.
Note this is not a tutorial. I am just showing a technique you can try. It is well explained in the Stella Pouch pattern. You can probably figure out how to sew zipper tabs using this method from the photos below.
CSQ Zipper Tab Technique step 1
First you cut two pieces of fabric and place them over the zipper. You don’t put the fabric quite to the end.
CSQ Zipper Tab Technique step 2
Next sew a big U starting away from the end of the zipper. Do not catch the zipper tape in the stitching. It is pretty easy to see the zipper tape through the fabric.
CSQ Zipper Tab Technique step 3
After the tabs are sewn, turn the zipper tabs out to cover the raw edge of the zipper. You might want to trim the corner where the vertical stitching meets the horizontal stitching to reduce bulk.
CSQ Zipper Tab Technique – turned tab detail
Now you can sew your zipper into a bag or pouch.
CSQ Zipper Tab Technique – info
However, one thing I didn’t like was that I couldn’t poke the turning point corner out to be crisp. I even tried my awesome Modern American Vintage turning tool. It was a little large for the job. I wonder if they have a smaller version? I didn’t trim around the corner, but I would try that next time (see above).
Zipper tabs sewn in
Fortunately that particular area is sewn into the seam allowance when you sew the zipper into the bag or pouch. It makes the technique really crisp and clean. Of course, if the zipper is sticking out like in the Cotton Candy pouch or the Boxy Clear pouch, then a different technique needs to be used.
After my recent post, I thought more about this quilt and decided that the Jacob’s Ladder pattern wasn’t going to work at all. I tried different ideas, different colors, but it just isn’t the right idea for my friend.
First, I really shouldn’t call it the Sad Quilt. Not a great start. I can’t help how sad I am, though.
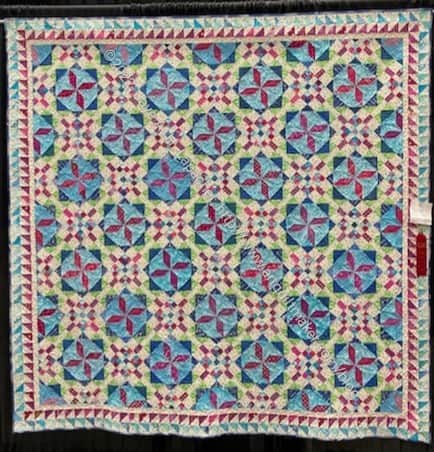
Frolic!
Second, as an interim solution, I sent off Frolic! to her. I am glad I have some quilts around I can just send off to people in need.
I love this quilt and had a good time making it, so there is a lot of good karma/energy associated with it. My friend lives in Hawaii, so it wasn’t cheap to send. It was totally worth it since I can’t be there to hug her in person.
In the meantime I am still working on a design made specifically in memory of my friend’s daughter. I am thinking that I will repurpose the Tilde fabrics I bought on vacation into this quilt.
Country Revival QCR pattern
A pattern occurred to me that I bought awhile ago, but haven’t yet tried, Country Revival. I don’t know why it is called Country Revival, because it doesn’t look ‘country’ at all to me.
The QCR (etc) patterns I have made, Metro Twist and Metroscape, have come out well, so I think the end result would be successful. At least is has a chance of being successful.
Tilde Fabrics
Obviously the Tilde fabrics would give it a different look than the quilt on the cover. I think I need to find a common fabric I could use in the center to bring the whole quilt together. I think pink would work, even different pinks. I also have that weird blue, which might work.
Also, the example quilt is small. I would want to make it larger, maybe 9 blocks. Still work to do to bring it together, but I feel I am on the right track now.
We are thanking Laura, a longarmer in Half Moon Bay who has been longarming donation quilts for us for a year or more. Carrie is gathering gifts to make a nice basket for her.
Stella Pouch for Laura
After seeing the Center Street Quilts video on IG showing the making of a half vinyl pouch, I decided to try and make one. I actually made two. One will be for a guild swap. I thought I could probably make the pouch after watching the video, but decided to buy the pattern, the Stella Pouch from Center Street Quilts just to make the process a bit easier.
Stella Pouch for Laura – vinyl side
I looked for more specific directions on the Flying Geese and the vinyl, but didn’t find any. Even with the pattern, I still had plenty of figuring out to do. I knew I could do it. That is one reason I enjoy making bags. There is always something to figure out.
I think I forgot to trim the height, so the pouch is taller than the pattern states. Still, I think it will be useful. Small project bag?
One of the good things about using vinyl for this bag is I was able to use a very pretty lining fabric. Having a good fabric show through the vinyl is an added bonus.
I think I might have a few more of these pouches in my future.
**N. B. : Obviously, you should shop at local quilt shops and support small businesses. However, if you are too busy or can’t find what you need there, I use Amazon affiliate links and may be paid for your purchase of an item when you click on an item’s link in my post. There is no additional cost to you for clicking or purchasing items I recommend. I appreciate your clicks and purchases as it helps support this blog.
As I work through some sewjo challenges, I decided to make another Ends donation top. I have already handed in two donation tops this month, but an empty design wall doesn’t work for me.
I had various ends laying around the workroom and slapped a few up on the wall to see if I could make anything.
Ends n.18 was finished in September, so it is time for another one. I want to use a background fabric with the pieces shown, but I haven’t decided what color yet.
I received an email from DH’s cousin last week saying “i was canvassing for kamala in both reno and racine WI for 5 and 7 days in october, respectfully, just home this wednesday…..i needed a shoulder bag that would hold the door hangers we were distributing….i looked in my closet and found the bag you had made for me one christmas….it worked perfectly through many days of heat and rain!!!…just wanted to let you know you came along with me!!!”
This bag is from 2011! I am so thrilled to see it again. I didn’t remember giving it to DH’s cousin, however I am really glad it was useful.
My friend’s daughter died in a car accident. She was 17.
I have known my friend since 1981 or 1982. We were teens together for a very important year. We are not in contact every day, but she is a sister of my heart. Immediately, I thought I wanted to make her a quilt. Of course.
For a long time I have wanted to make a Jacob’s Ladder quilt – or a Jacob’s Ladder variation. The original idea for the Stepping Stones quilts came from the Pam & Nicky Lintott book, Layer Cake, Jelly Roll and Charm Quilts. Of course, I made some variations.
I went to the Stepping Stones posts and looked at the EQ project file, but decided that it wasn’t quite right. I want to make another version of this quilt sometime, but today is not that day
Jacobs Ladder for Kathy
I looked at blocks in EQ and designed a Jacob’s Ladder type quilt.
This was my first attempt at color, using the Sweet & Plenty charm pack I bought at Ocean Waves in Eureka as a base. I went through a lot of iterations of color, placement of groups of color, etc.
This design wasn’t working for me. It didn’t feel right for the purpose. I thought about forcing myself to make it. I have a date with Colleen in a couple of weeks and would like to get a quilt to her to speed the process along.
I decided I needed to make the right quilt. I am going to keep trying.
I will look through the quilts I have made and see if there is one that will stand in for a fit for purpose quilt.
I finished the Running with Scissors tote the weekend after I returned from Portland in October.
Running with Scissors tote – front
The time I spent in Portland working on the Running with Scissors tote was well worth the time. I am pleased with how it came out.
I used the foam that Colleen quilted for me and that made the whole project go a lot quicker.
The pattern calls for a border on the front, but I like the large flowers of this Philip Jacobs print so much that I didn’t put it on. Both the front and the back look similar, but I don’t mind.
Running with Scissors tote – inside
The inside looks really great IMO. I forgot to cut all of the zipper and pocket bindings. Fortunately, I had the turquoise stripe with me and it went well with the zippers and the general overall look of the bag.
I customized some of the pockets for my tools. For the mesh pocket, I divided it into a very large section and a small section. The large section will be used for a rotary cutter and the small section will be for Sewline pencil refills.
Running with Scissors tote – outside
I thought the webbing I used for the handle would hurt my hand, but I think the bag won’t get heavy enough to be a problem. I do like the glitter of the webbing. Perhaps having a little sparkle in my life is a good thing.
I was surprised at how small this bag is. I think of it as being much larger. I wonder if I could enlarge the pattern. The pattern is so complicated that I think it would be difficult.
Take a Stand & Running with Scissors
This bag is designed to be used with the Take a Stand bag**. I made a Take a Stand bag for myself awhile ago. As soon as I was finished with this RwS tote, I tried it with the Take a Stand bag and I was so pleased with how it looked.
Now I need to fill this bag up and take it to Sew Day.
**N. B. : Obviously, you should shop at local quilt shops and support small businesses. However, if you are too busy or can’t find what you need there, I use Amazon affiliate links and may be paid for your purchase of an item when you click on an item’s link in my post. There is no additional cost to you for clicking or purchasing items I recommend. I appreciate your clicks and purchases as it helps support this blog.
My brown and beige bin was out so I used a beige dotty sort of fabric that has been hanging around for a long time. The sashing uses various cream fabrics, so I thought it would coordinate. The backing was another plain brownish and white fabric. Nothing special, but a large enough piece so I only had to piece one seam. My stash of large fabrics is getting low, so borders and backs are becoming more work.
I said I would make a few additional Ribbon Friendship Stars to make up where someone bailed out. I was supposed to make another 5, but only had the fabric for another four. I hope that is good enough, though I can whip up one on the special Sew Day next week if we need an extra.
I made good progress on my Rectangle quilt, though it does seem to be taking forever.
I am not sure why I am sewing so slowly, but I am. I plan to put a border on this one. I haven’t decided what kind of border or what color yet.
I like the idea of using larger scraps for this type of quilt. I might start collecting such shapes again as I come across larger scraps. It’s a good way to use them up.
In my job there is a concept called ‘MVP’. It means minimum viable product, which is part of an iteration process that promotes getting something out and eschewing perfection. In the quilt world, I like to say ‘there is always more fabric’.
I finished my Sun Hat. It is a MVP.
Sun Hat (Heather Handmade) – side view
I thought I had done everything properly. I was unsure about my progress, so I had Mary C help me at a recent Sew Day. I redid the brim piece after leaving the seams out meant the brim was too big for the crown. Still, there was so much adjusting and redoing that the hat just doesn’t look right. The side parts of the crown fold in too much on the top and I had to ease in the size when I sewed the pieces together.
It didn’t come out as well as I had hoped, but it isn’t terrible and someone will wear it and like it. I want to try again. I bought the Sew Hungry Hippie Bardot hat pattern. I haven’t started it yet, but may try to get it done soon.