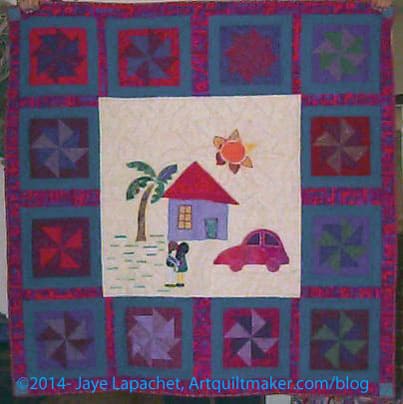
This is the first quilt I made on my Janome 9000 in about 1995.
I moved up to the 9k from a Singer 201 that I bought at a White Elephant sale for about $30 including the table. The Singer 201 got me started in quiltmaking, but I outgrew it after about 3 years. The one thing I really wanted to do was machine applique’. The Singer 201 did not have a zigzag stitch.
I was so excited to do machine applique’. I drew out a picture that became the center and stitched it out. I didn’t know anything about stitch density. I used Mettler quilting thread for the stitches. and the satin stitch was really thick.
I was really pleased with the center block when I made it. I can do much better now, but it really showed that a much better machine helped me take a huge leap forward in my quiltmaking. The new machine allowed me to spread my creative wings.
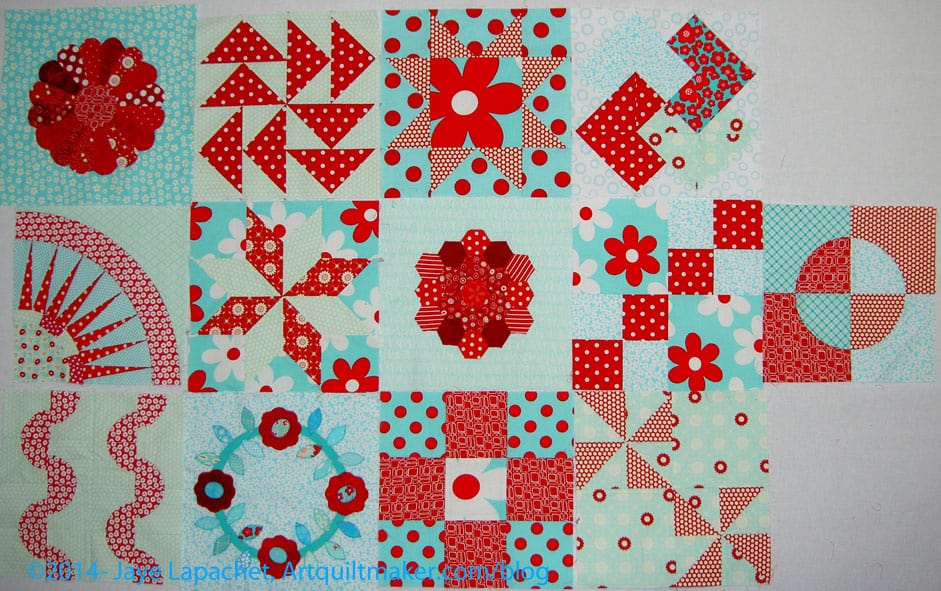
Last week, I got a bug in my ear to look at all of my Sampler blocks. I hadn’t done it in awhile and, frankly, I had forgotten where we were with the class.
As soon as I finished the top and back of the Super Secret #4 project, I got it off the design wall and put up the blocks.
Aqua/Red Sampler Blocks
I had totally forgotten the Double 4 Patch, the Card Trick and the Dutchman’s Puzzle. I had also forgotten what a good job I did using the large Patty Young flowers in these blocks.
I also noticed how some of the backgrounds are very bold and others are more subtle. I think the piece hangs together well despite the differences. I am not sure what block to do next, but I need at least 2 more and could work with more.
The basket block is clearly missing. That block teaches combining piecing and applique’. If I did a different one, such as the Tea Basket block that would be an interesting addition that I haven’t done AND be challenging.
Other than a basket block I can’t think of what skills I haven’t worked on with Frances. I don’t think an art quilt block would work with this piece and I am not sure what something like the Spiderweb would buy. I could do a block with some weird shapes like trapezoids.
DH is firmly ensconced in his position on the Executive Board of the Native Sons of the Golden West, so I was off the hook last year in terms of making pillows. The last time I made them was in 2012. They are extremely popular and I got a lot of questions last year about whether I had made any. It is kind empowering having control of an item that people really want. It is also shocking that others don’t make pillows for this event. People really like them.
DH’s Grand Presidential year is approaching and he needs a Marshall. The Marshall is an Executive Board position in which the guy makes sure he has the names of all the “dignitaries” correct, knows whether the dignitaries have a wife, girlfriend or daughter along as companion and that the AV equipment works at any given function. He passes all the relevant information to the Grand President. This position votes in Board votes and has a say in discussions as well. As I understand it, of course. DH asked his brother, which means there will be a Hospitality Suite this year with all the trappings of a political campaign: portable bar, raffles and lots of hand shaking.
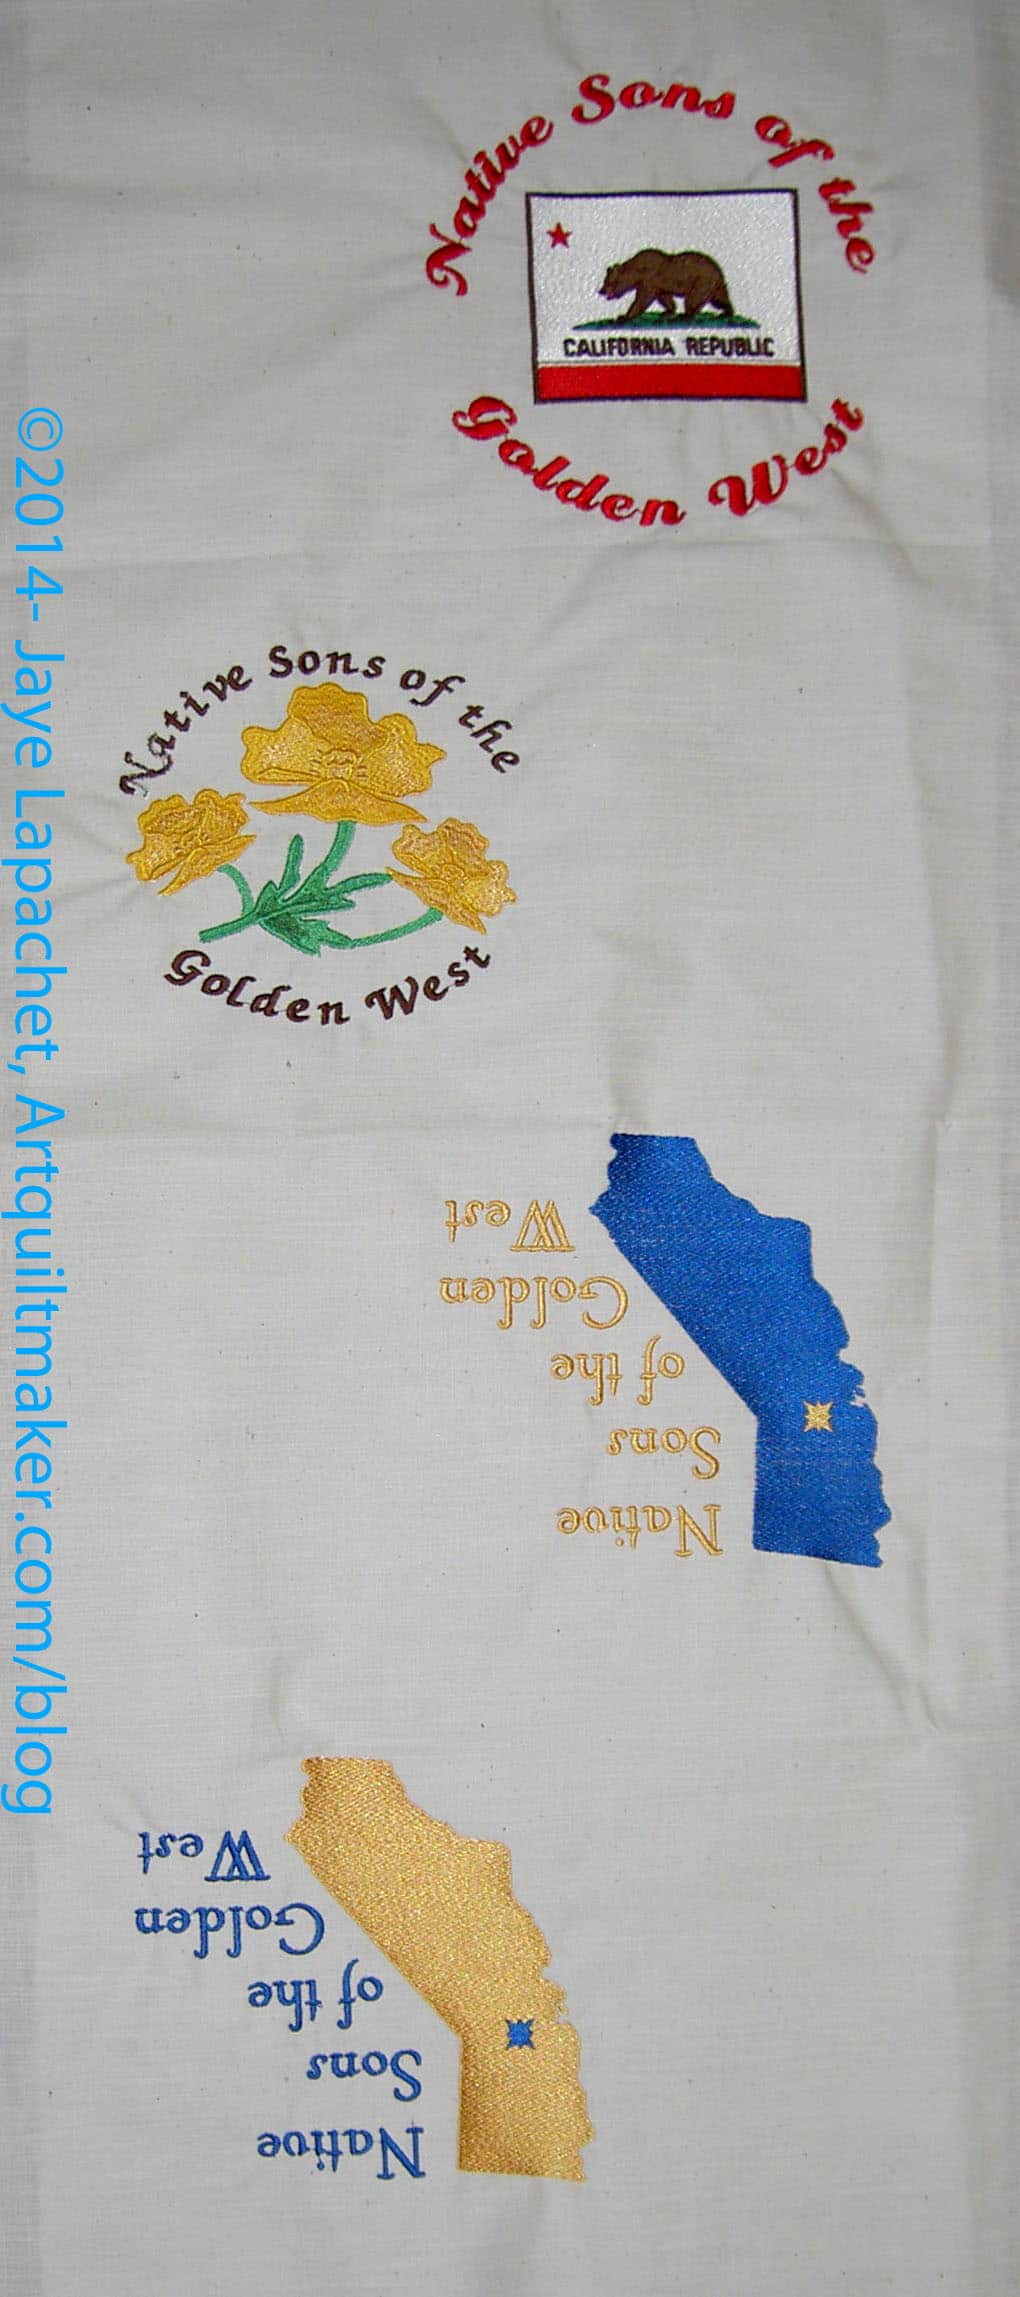
NSGW Pillow Embroidery
I was, apparently, first on his list for the raffle requests. His mom and a neighbor always make gift baskets. He asked me at least a month and a half ago to make pillows and he wanted four. No problem, right? Pillows don’t take that long to make, but I always seem to have problems making them. They are also very popular and bring in a lot of money for Cleft Palate. I also like having my work ‘out there’ for the Muggles (as Frances says) to see. The more people we have admiring handmade work, the better.
I immediately emailed my SIL with examples from previous years and she agreed to do the embroideries. She couldn’t do them until May 6 as she was heading off to graduation for our niece in Michigan. No problem.
NSGW Pillow Embroidery
We don’t, yet, have a .blf file (I think???) of the logo of the Native Sons, so SIL uses various embroidery motifs to come up with suitable designs for the embroidered panels. The software that works for her machine is so much more sophisticated than the embroidery module on my 9000. I never did get the software for it, but I am glad I didn’t spend the money as embroidery software has gotten so much easier to use, more workable with a computer and, generally, so much more sophisticated.
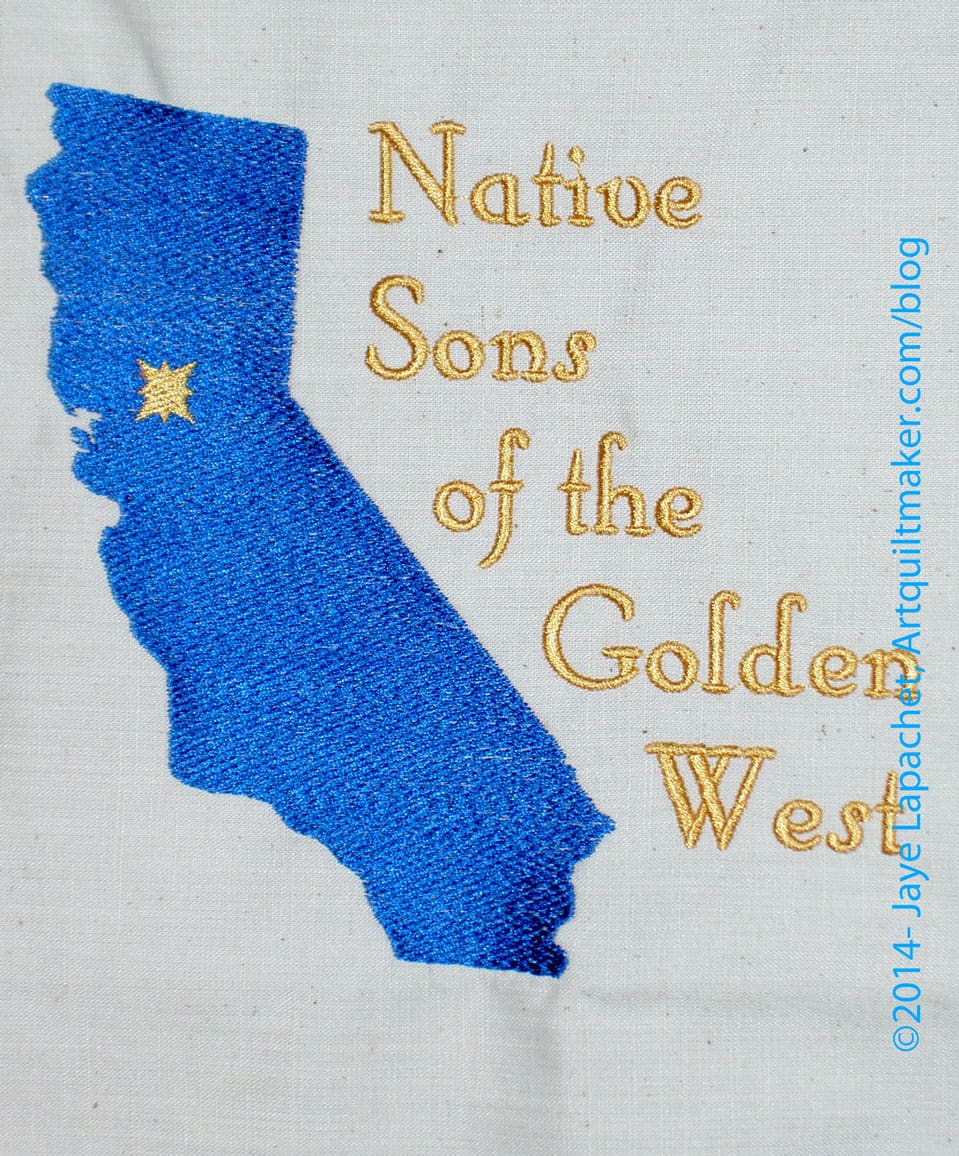
The bear, the California flag and the outline of the state work well and are popular. Even though we don’t have the official logo, once we add the name, people seem to like these designs.
NSGW Pillow Embroidery
While I can take very little credit for the designs, SIL and I worked together on some designs when I was in DC in 2011. The pictures I emailed her were from that trip, I believe, though they could have been from the 2012 pillows. The designs are similar.
I got SIL’s work on the 7th or 8th of May. The first thing was to cut the embroidered panels apart into squares.
Then piece the panels to the right size, then put the back on.
Done.
NSGW Pillow Embroidery
Go to the conference and have people fling money at the raffle box.
I finally got a chance to listen to the Slightly Mad Quilt Lady podcast and I really like it. I like the descriptions of her process and what she is working on. Charlotte, the hostess, also has a very calm voice. If you haven’t listened to her episode #2, it is really great.
NPR had a recent story on improving memory and they mentioned quiltmaking! They also mentioned exercise and Photoshop, all things we quiltmakers discuss endlessly.
One of my wonderful quilt friends and fabulous teacher, Pamela Allen, has a piece, finally, in Quilt National. This has been a long time goal of hers. She is featured in an article about her journey. In the piece she talks about arrogance and ignorance and quiltmaking. Read it. You will be inspired.
I am not sure if over-dyeing antique quilts is a sad comment on not valuing our past or helping the quilts live another day. I know I am incensed by the prices. Read the brief article and decide. Thanks to Charlotte of the Slightly Mad Quilt Lady podcast for the link.
So many different kinds of media! Have you seen Alex Veronelli’s paper.li? Check out the links to machine binding your quilt. I might have to try that.
Want to take a peek at the eInsider? It is a magazine of the quilt industry.
Reddit has a quilting board that I have never quite gotten the hang of. Katie, from Katie’s Quilting Corner podcast, post a link to a heartwarming story about the perfection of quilts. Good food for thought.
Projects
People are starting to finish their Disappearing Pinwheel projects. Not me, but Sandy finished hers. Her layout looks really nice. It looks like a flower bed to me.
People are also finishing their Scrapitude projects. Not me, yet, but Jackie posted a picture of hers. I think she quilted it herself! It is so great to see how different they look. It looks like Jackie used slightly darker fabrics for the foreground and a creamy light for the background.
Products, Tools & Supplies
Sewing Machine Printer
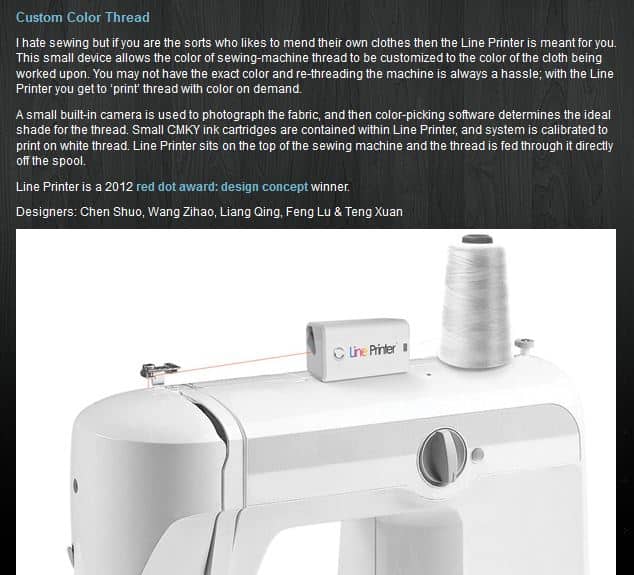
Alex Veronelli, the Aurifil King, recent wondered if sewing machines with print cartridges to color the thread would put him out of business. I was shocked when I saw the photo of the sewing machine/thread printer from Yanko Designs. There is so much wrong with this ad, but the concept also brings up a lot of questions for me. Why would people who hate sewing create this sewing machine? How many print cartridges would I have to buy? What kind of thread does it use and who makes it? Is the color colorfast? How fast will it fade? Will the designers be at Quilt Market? Let me know if you see them? I am sticking to Aurifil, Superior and Presencia even if it makes me a an old fuddy duddy.
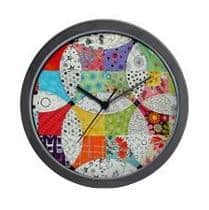
I sold another clock on my Cafe Press store! Clearly I have started a trend, so get yours now while the getting is good! 😉 When I updated my store recently, I forgot to change the image for this clock, which is still a detail image of the Flowering Snowball quilt, and now I am glad. I have sold a total of 3, which isn’t 50,000, but kind of amazes me. What do you think of a clock as a quilt novelty?
I have also been making an effort to click on my own Amazon link when I buy stuff on Amazon, so that I can get credit for it that way, too.
Other Artists
The buzz around Quilt Market grew in the week leading up to that event, which is on now. Blogs, Twitter and other social media all blew up with the hashtag # QuiltMarket. Did you follow along? A I have been starting to listen to the QuiltCast, a podcast that started late last year. Amy, of Amy’s Creative Side, and April, of Prairie Grass Designs, are the hostesses and they have both also just come out with new fabric lines with Moda.
I was inspired by this word at the recent CQFA meeting. While there is some standard imagery, there is also the metaphors that go with the word.
What is your crossroads? Are you at a crossroads in your life? Do you remember a crossroad in your life? What happened when you took the path? Did you go back and take the other path? Do you with you had?
At the crossroads
Crossroads, the first green-certified building on Cal’s campus and the nation’s first organic certified kitchen on a college campus.
Crossroads is a world champion. a capella quartet rooted in—but certainly not limited to—the Barbershop genre.
The work of Crossroads is to dismantle systemic racism and build anti-racist multicultural diversity within institutions and communities.
Crossroads.js is a routing library inspired by URL Route/Dispatch utilities present on frameworks like Rails, Pyramid, Django, CakePHP, CodeIgniter, etc.
Britney Spears and Tamra Davis in Crossroads (2002)
Definition: a place where two or more roads cross; a road that crosses a main road or that runs across land between main roads
“The Crossroads”, an intersection of U.S. Route 61 and U.S. Route 49 in Clarksdale, Mississippi, where Robert Johnson supposedly sold his soul to the Devil
Post the direct URL (link) where your drawing, doodle, artwork is posted (e.g. your blog, Flickr) in the comments area of this post. I would really like to keep all the artwork together and provide a way for others to see your work and/or your blog.
We are also talking about this on Twitter. Use the hashtag #CPP
The Creative Prompt Project, also, has a Flickr group, which you can join to post your responses. I created this spot so those of you without blogs and websites would have a place to post your responses.
I received a weird email message early last week and, since I was busy, I ignored it. I didn’t open it, thinking that it was spam I could investigate or delete later.
A little while later, I received an email from the BAMQG Retreat Coordinator saying that I should have received my first ‘clue’. Hhmm. I went back to the ‘spam’ message and it still made no sense, but I figured it was the Mystery quilt project, so I downloaded the instructions.
BAMQG is doing a mystery quilt on the retreat. I decided to play along.
BAMQG Mystery Color Story
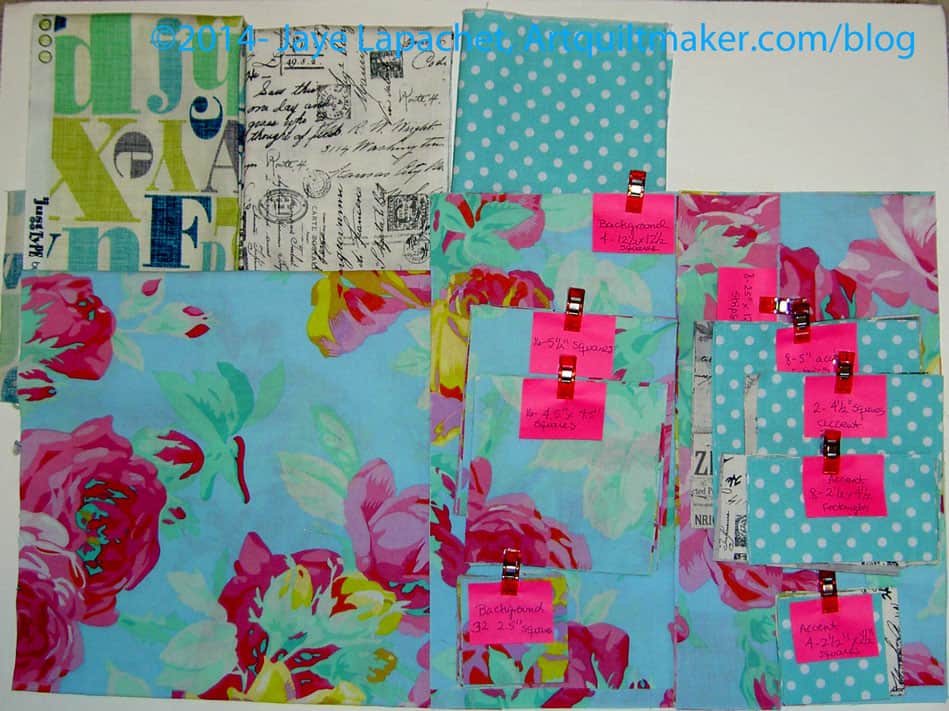
I recently read an article about color that included a suggestion about using a large scale print as a background. One reason I decided to do the mystery quilt was because I couldn’t get this idea out of my head. If I was going to do a project that I wasn’t sure about, I didn’t just want to do the same old thing. I picked a wild selection of fabrics. I am not sure they go together and will tend towards ‘pushed neutrals’ or a ‘low volume’ color story.
First, I went rummaging through my Phillip Jacobs and Martha Negley prints. I have been using those mostly for backs so the opportunity to use one on the front made me giddy. I picked English Rose.
I had the dot on my cutting table. It is very close to the green in the English Rose, but it will be fine (famous last words, right?). The text prints are really different. I don’t think I have used many before and they have been on my mind. In they went.
I may add the charcoal circle stitch fabric by Michael Miller as well. We’ll see.
Still, the quilt will be interesting and will be a nice donation quilt, if worse comes to worse.
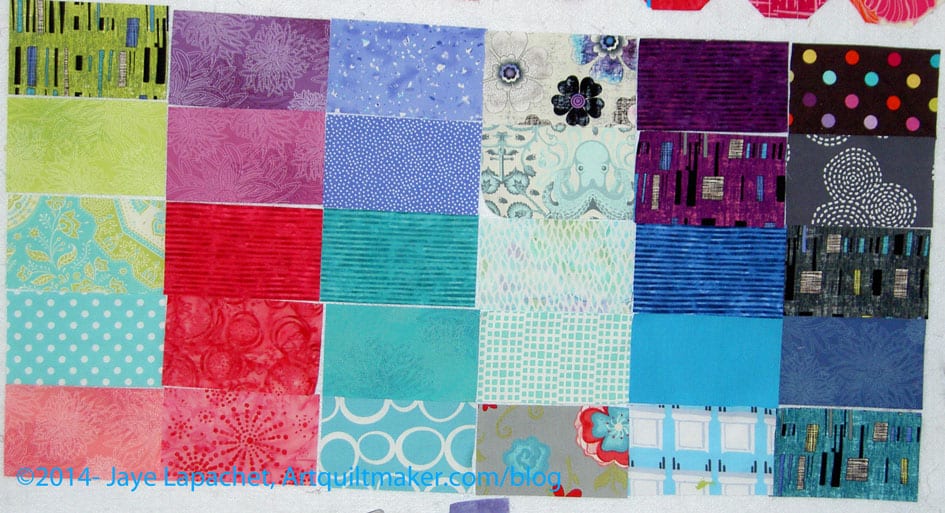
This group of fabric is a lot of what I got on my road trip. Not all, but a lot.
Someone suggested setting the rectangles like subway tiles, so I thought I would post them like that here so you could see what you think.
I really like the charcoal grey circle stitch fabric (last row, 2d from the top on the right). I am very tempted to buy a bunch of it and use if for a background for something. I don’t know what, though. I don’t know whether I am following a trend with all this grey or whether I am shying from other light colored backgrounds.
Do you like the crazy dip to the right? I can’t believe I didn’t see that until after I took the photo. Hopefully I won’t piece them like that.
This is more of a guide than a true tutorial. It is also as much for myself as it is for you.
The approximate size of the finished pillowcase discussed in this tutorial is 29 inches x 20 inches. This is the approximate size of a standard pillowcase. Because I am human and not a machine, my pillowcase sizes tend to vary a bit
Supplies
Fabric (3 different if you want trim, two different if you will not use trim)
Main body: 3/4-1 yard
Cuff: 1/3 yard
Trim (accent fabric): 1/8 yard (will be way too much, but you can find a strip wide enough in your fabric collection, if you don’t want to buy fabric for this part. This is optional. You can make fabulous pillowcases without trim.
Trim: 1.5″x width of fabric (WOF) strip (optional)
Cuff: 12″x WOF strip
Main body: 27″x WOF
In the example below the following fabrics are used:
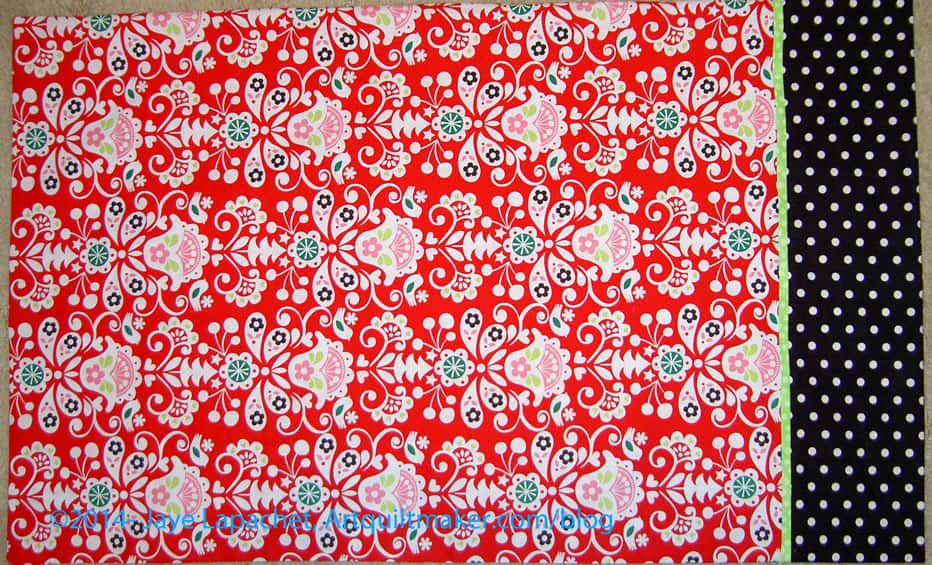
Trim: lime green
Cuff: black with white dots
Main body: red with white motifs
Prepare
Press your trim in half the long way, so you end up with a piece that is 3/4″ wide and WOF long.
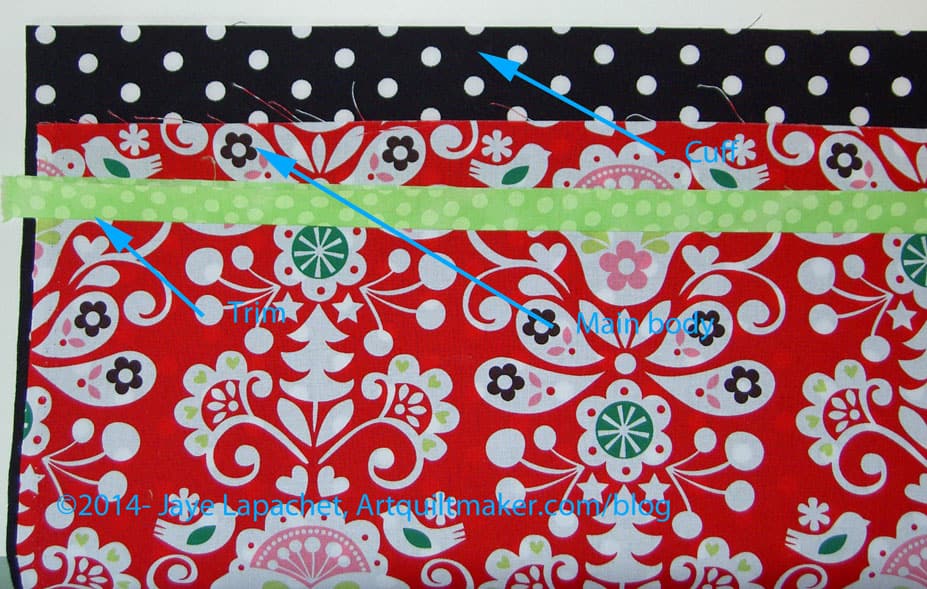
Lay cuff fabric right side up on your worktable (or ironing board).
Lay your main body fabric right side up on top of the cuff fabric. Cut edge is up, selvedges are hanging down.
3 Layers Ready to Roll
Lay trim fabric on top.
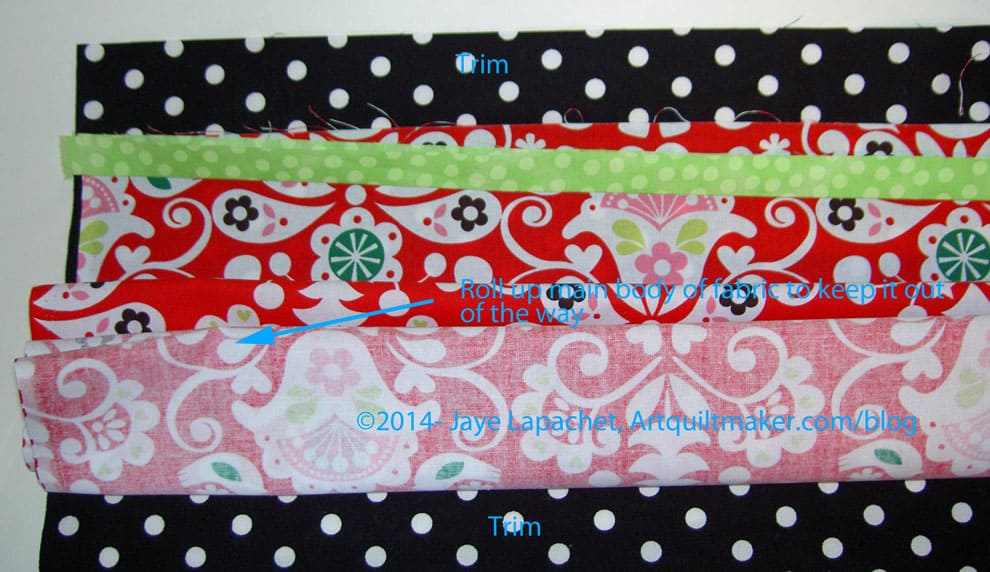
Roll up Main Body Fabric
Fold main body fabric up towards trim, keeping it well away from where you will be sewing.
Bring cuff fabric up and around main body fabric.
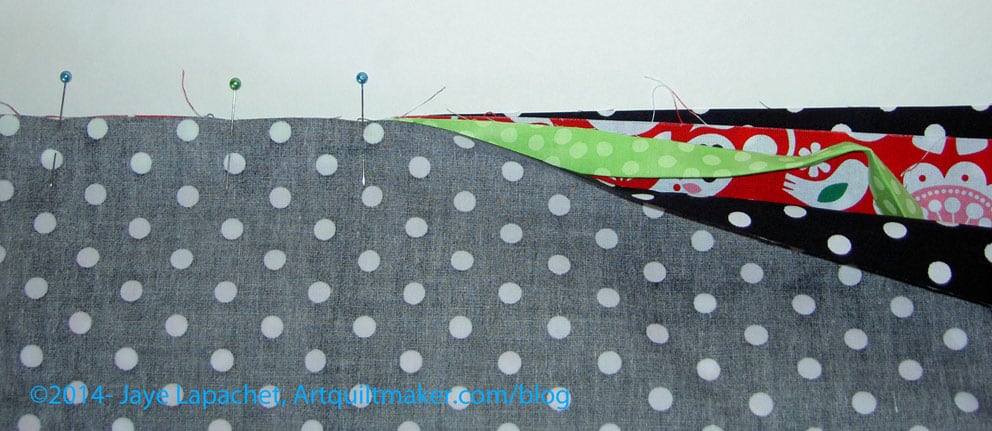
Line up all parts and pin
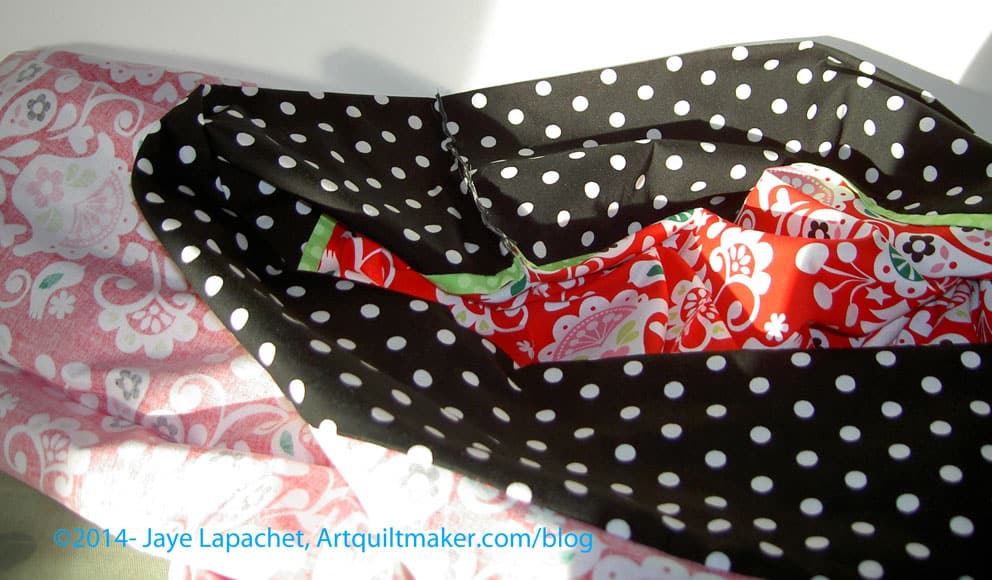
As you lay the cuff fabric on top of the trim, line up the edges of all the pieces you have layered and pin them all together. You will end up with a tube filled with fabric. The tube will look like a burrito with the cuff fabric forming the flour tortilla. All of the other fabric will be wrapped inside it.
Burrito completely pinned
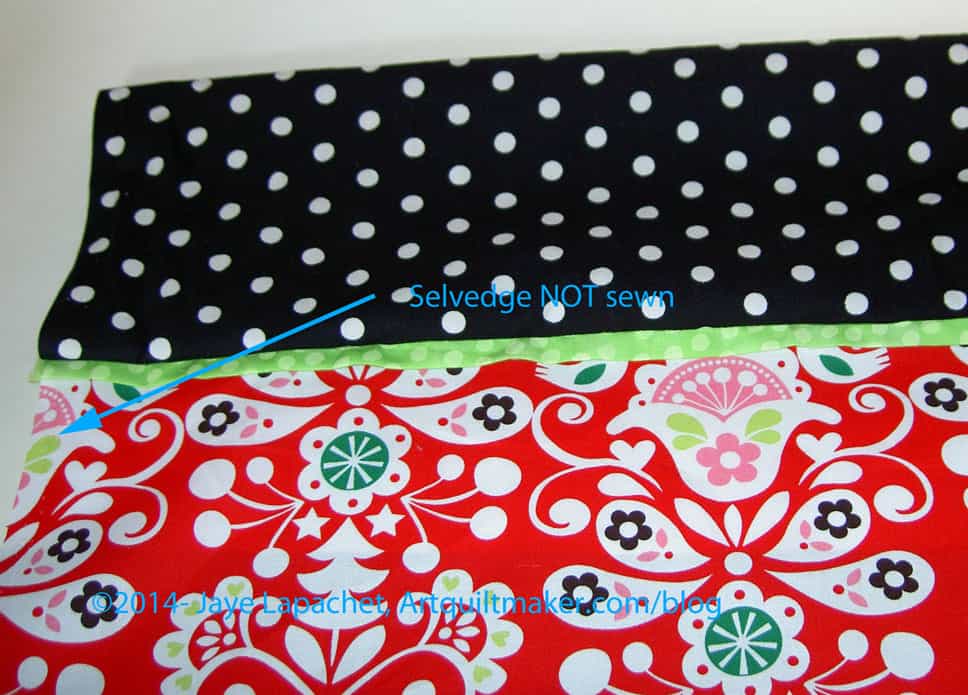
Nota Bene: the selvedges are NOT pinned
Sew
Sew ‘burrito’
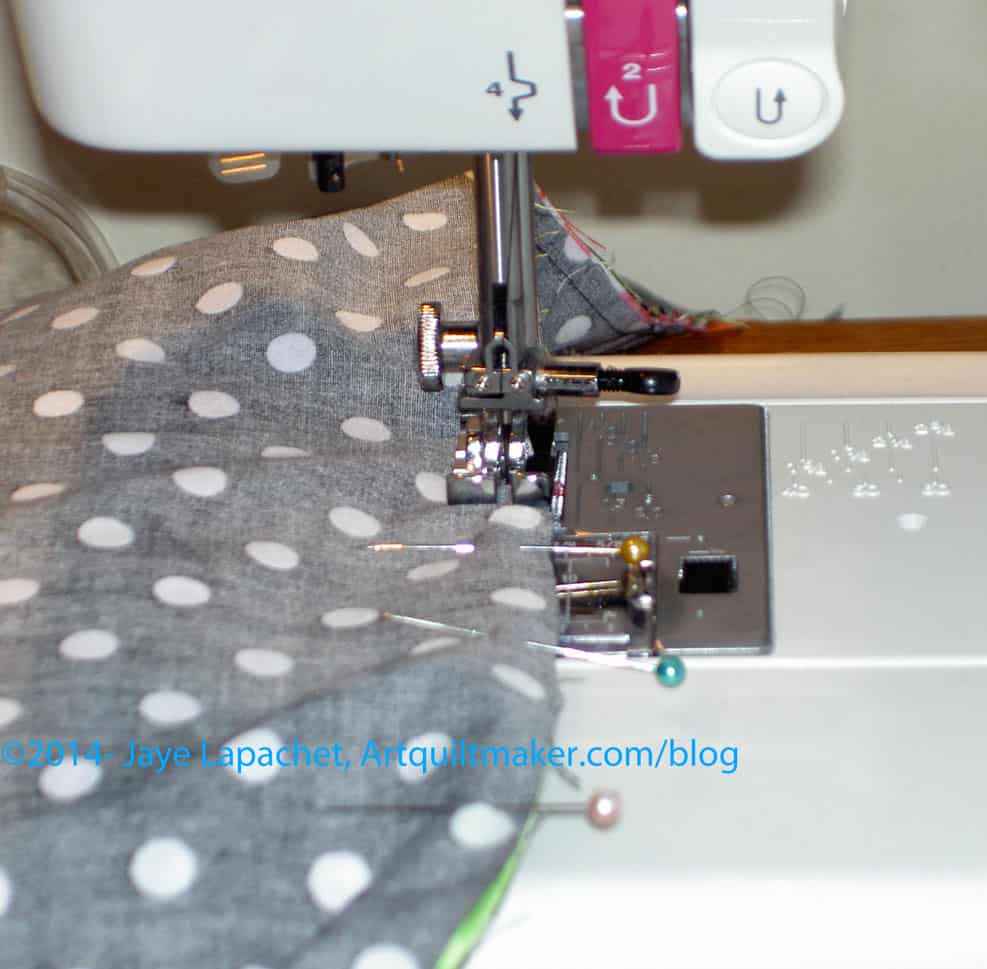
Take your burrito to the sewing machine and position it so that the pinned edge is underneath the presser foot.
Starting sewing, stopping after a few stitches and backstitching, then continuing on until the entire seam is complete.
Pull out pins as you sew
Backstitch at the end to secure the seam.
Burrito Sewn
Prepare #2
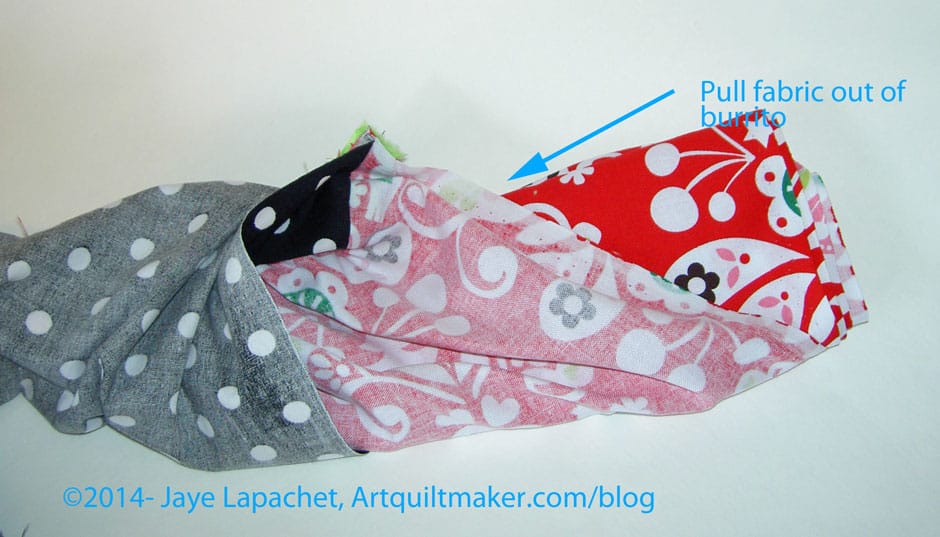
Pull Filling Out of Burrito
Carefully pull all the ‘filling’ out of the burrito so that you have a piece where the cuff, trim and main body are all sewed together.
First seam sewn; case on ironing board
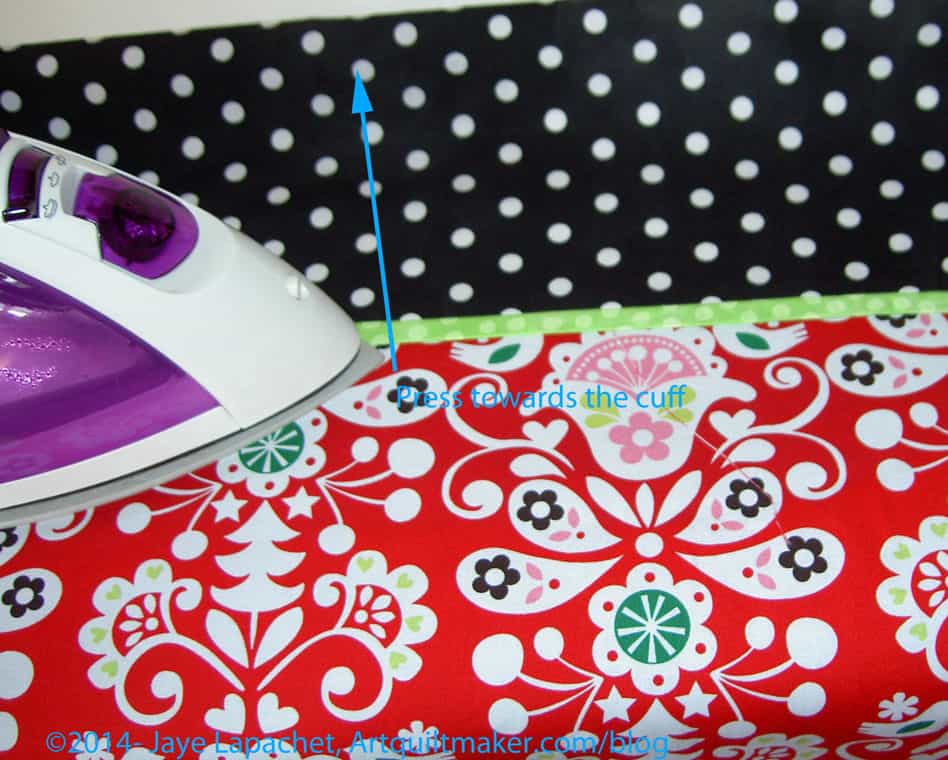
Lay the piece flat on the ironing board with the cuff fully on the ironing board and the main body hanging down the front.
Press Towards the Cuff
Press, carefully smoothing the fold of the cuff away from the trim and the main body, so it is neat and tidy.
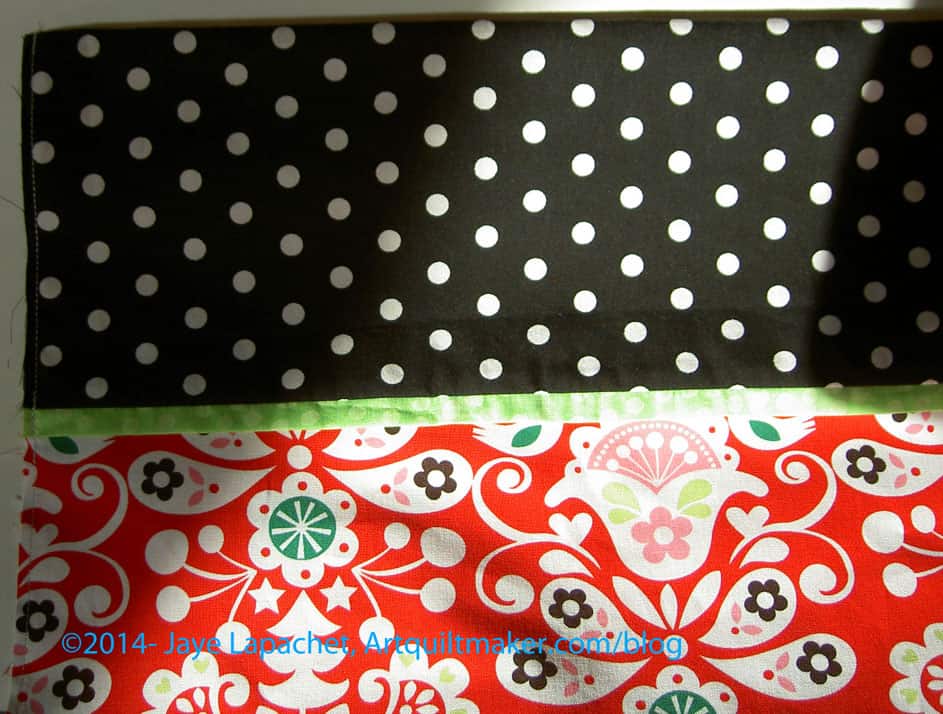
Fold the piece in half with WRONG sides together. The RIGHT side will be facing towards you (you will be able to see the right side)
The selvedges will now be touching each other.
Trim the main body after measuring 28″. That is the measurement of the main body fabric and does not include the cuff or trim. If you were to open the piece, your main body would be WOF x 28″. You can adjust the 28″ to fit the size of your pillows.
Pin at strategic points
Sew #2
This step will start the process of making a French seam (completely encloses the seam with no raw edges).
Using a 1/8″ seam allowance (or smaller), start sewing at the top of the cuff, down the side. I sew it this way to have the best chance at matching up the trim.
After a few stitches, stop and backstitch the top. This is important because the top seam will get a lot of wear from stuffing the pillow in and out.
N.B. You can also use a locking stitch, if the locking stitch doesn’t make a mess on the back of your work.
Remove pins as you get close to them.
Stop at the corner and backstitch, then turn and sew the bottom of the pillowcase closed.
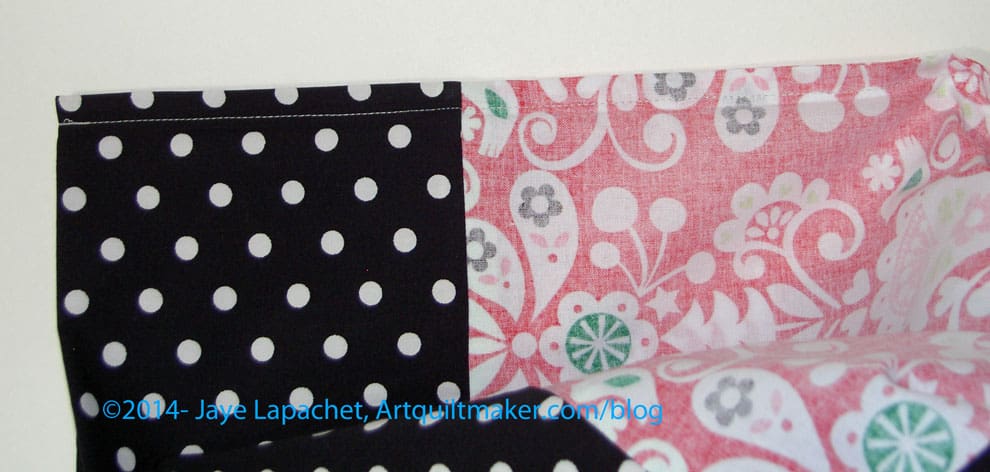
First Step French Seam
Prepare #3
Press the seam from the right side.
Sew from wrong side
Turn the pillowcase inside out so the wrong side of the fabric is showing.
Place the full bottom of the pillowcase on the ironing board
Smooth the fullness of the pillowcase towards the seam.
Press the seam so it is neat and tidy.
Repeat with the side.
Sew #3
This is the section where you create a French Seam, which means that you will encase the raw edge of the previous seam.
Starting at the cuff again, sew with a 1/4″ or larger seam along the side. You want to use a seam allowance large enough so that the entire raw edge that you sewed in the previous step is encased.
After a few stitches, stop and backstitch the top. This will further reinforce the top seam, so it can withstand the wear and tear from stuffing the pillow in and pulling it out.
Sew down the side neatly as this seam will be seen
Remove pins as you get close to them.
Stop at the corner and turn and sew the bottom of the pillowcase closed.
Backstitch neatly at the edge of the bottom.
Sewn French Seam
Finish
Press the seam from the wrong side.
Turn the pillowcase right side out.
Place the bottom of the pillowcase on the ironing board with the seam away from you
Smooth the fullness of the pillowcase towards the bottom seam.
Press the seam so it is neat and tidy. I often press starting on the main body of the pillowcase and moving the iron towards the seam.
Repeat with the side.
Shake out your pillowcase and show it off!
Finished Pillowcase
Good job!
Notes
Width of fabric means from selvedge to selvedge. Example: If you cut a strip 1.5″ wide for the trim, there will be a piece of the selvedge on each end of the strip.
Main body: I straighten a 1 yard piece of fabric and cut it to size AFTER I sew on the trim and the cuff. This leaves me with a strip about 6″ wide, but it keeps me from getting confused about which side is up. Sometimes I need to straighten one side of fabric if it is very uneven so I can sew the cuff to the main body.
Main body: the selvedges will be on the sides. Do not sew the trim and cuff to the selvedge.
Main body: I trim the selvedges from the sides after I sew the cuff and trim on.
I have used trim sizes from piping to a 1″ cut. You can make the trim whatever size gets you the look you want. Rickrack also makes a nice trim, though my irritate the sleeper’s cheek.
Resources
Twiddletails tutorial – I like the burrito method. Print out these directions and use them as a guide. Most of the way I make my pillowcases are from this tutorial
My last effort with a pillowcase was frustrating. Amy left a comment that really helped me make this one. Except for messing up the French Seam and having to rip it out, this pillowcase went together really well.
Amy said that the selvedges go on the side of the pillowcase. What I did was leave the selvedges on until I had sewn the first seam and used the numbers and other directions from the Twiddletails tutorial. Sometimes a comment as simple as that can really help (which is why your comments really matter!!!).
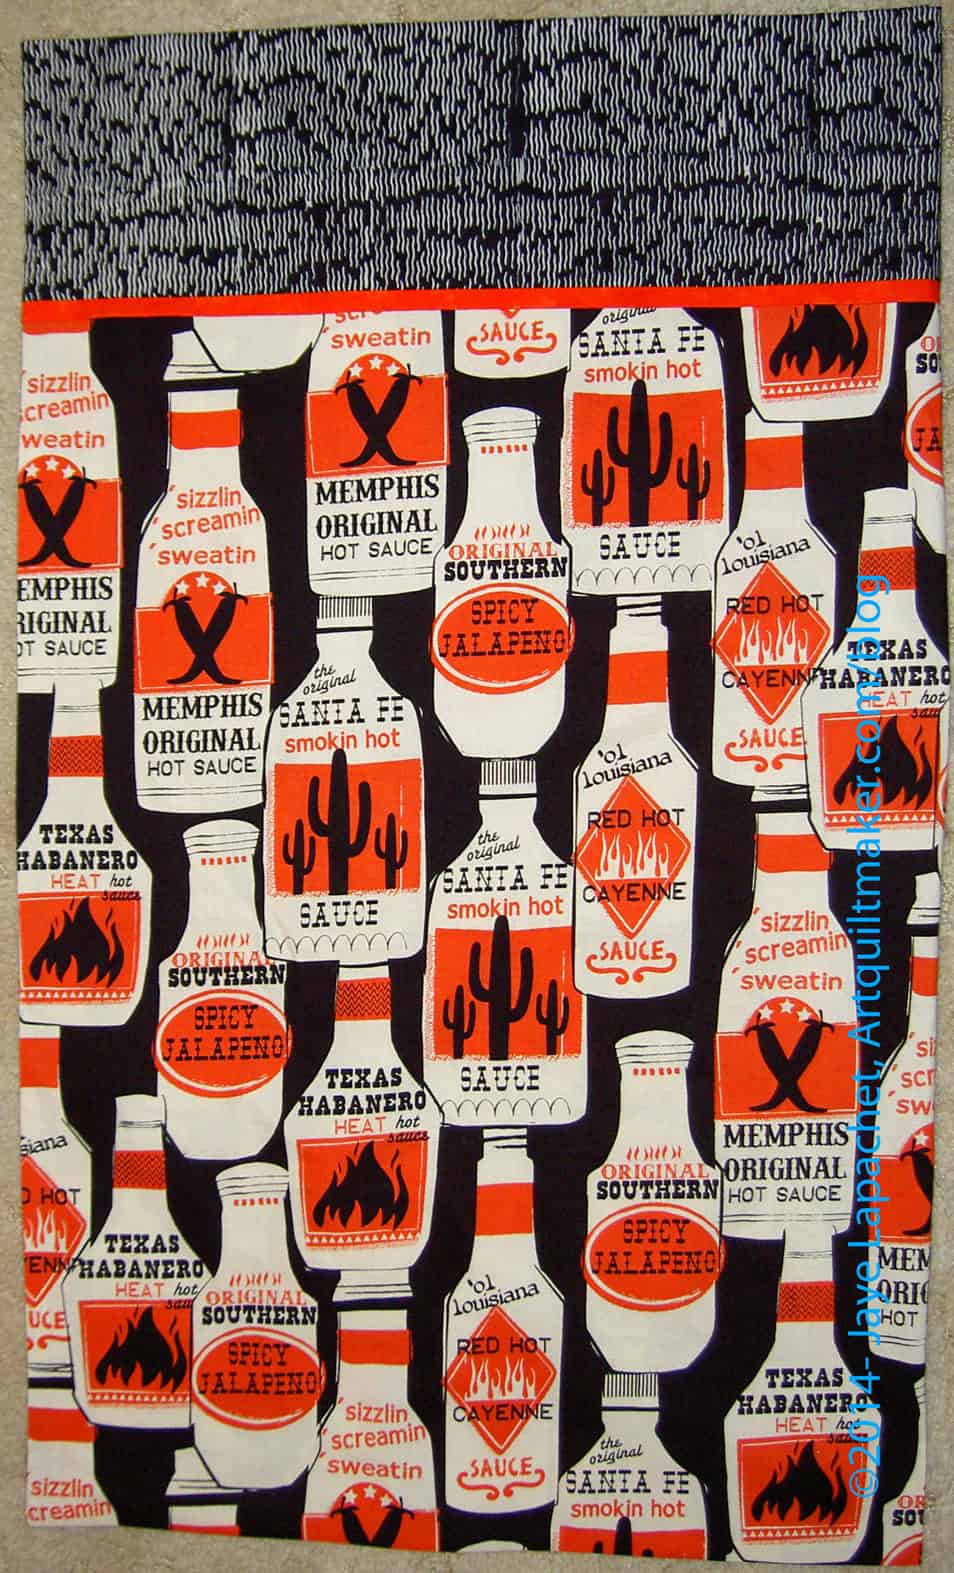
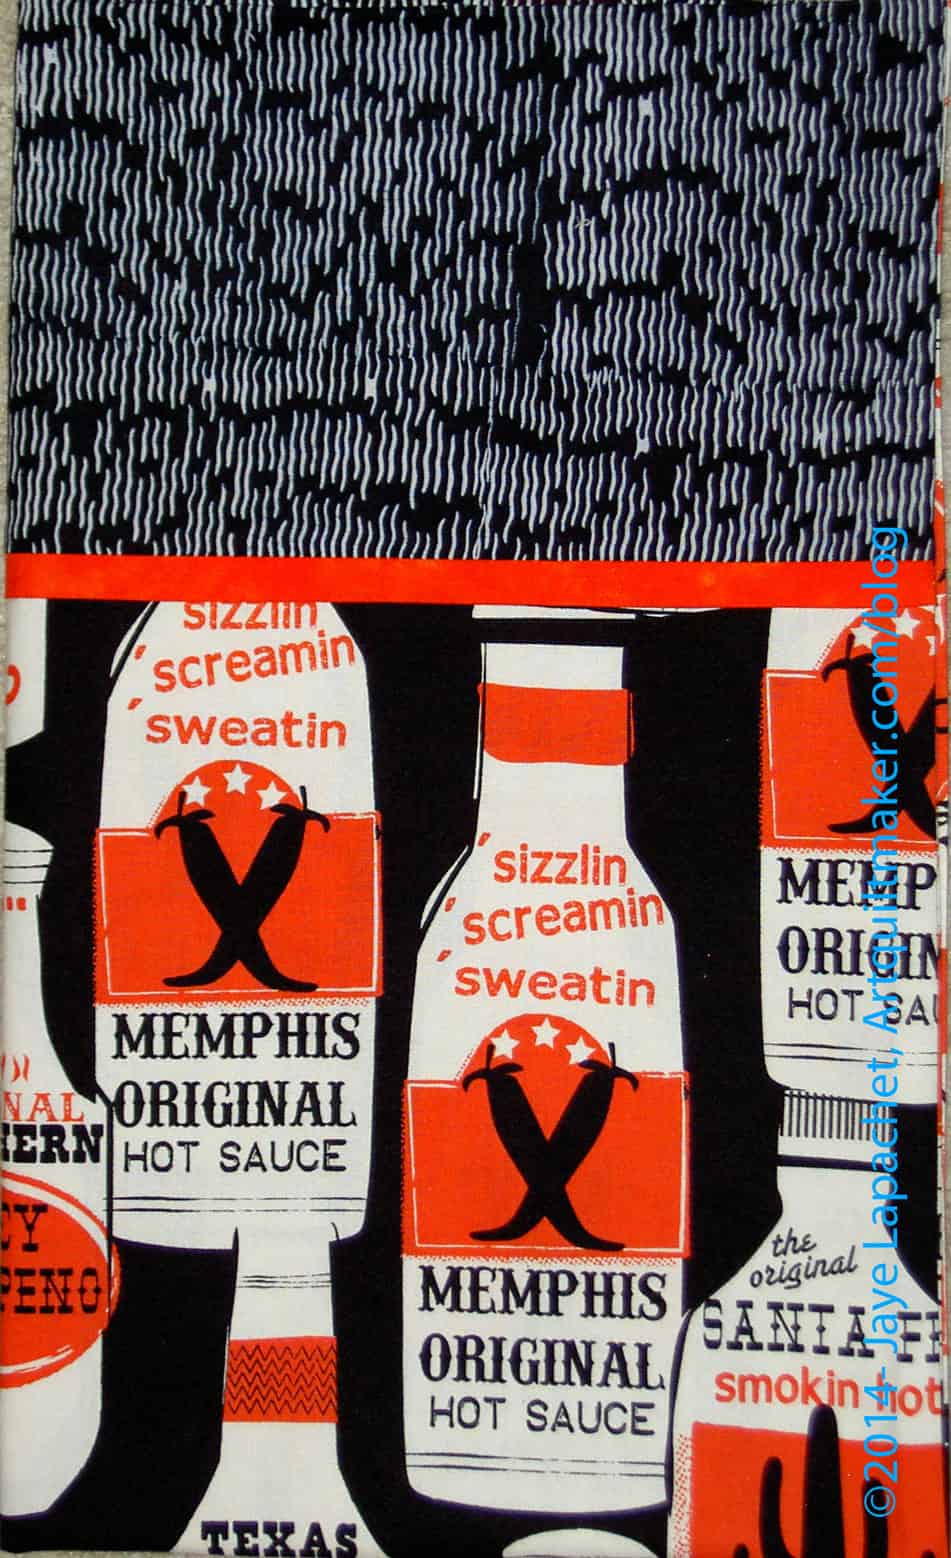
I am not sure I bought this fabric for a pillowcase or for a pillowcase for my nephew who is off at college, but I washed this fabric and decided that I was neglecting the poor soul.I like to make things and send them to my nieces and nephews who are off at college. You have seen a quilt or two that have gone off to colleges around the country. I have also made pillowcases and have a few other items on my list to make as gifts. Yes, pillowcases, I am sure get strange looks from their recipients, but I don’t care. They are good vehicles for fun fabrics. Where else could you use hot sauce fabric?
Smokin’ Hot Pillowcase – folded
After I finished the top and back for Super Secret Project #4, I decided to tackle the pillowcase. I am really glad it went together easily, because I don’t think I could have taken another frustrating pillowcase experience.
It would have been a shame, too, because I probably would have given up on pillowcases and I really can’t think of another way to use fun fabrics like this.
I really am completely thrilled at how this one came out. It came together really easily and even the trim is matched up pretty well. No, I didn’t match the pattern of the fabric. That is a fight for another day.
I hope this pillowcase doesn’t look too Halloween-y
After a string of curses, not directed at you, “Yes,” I say.
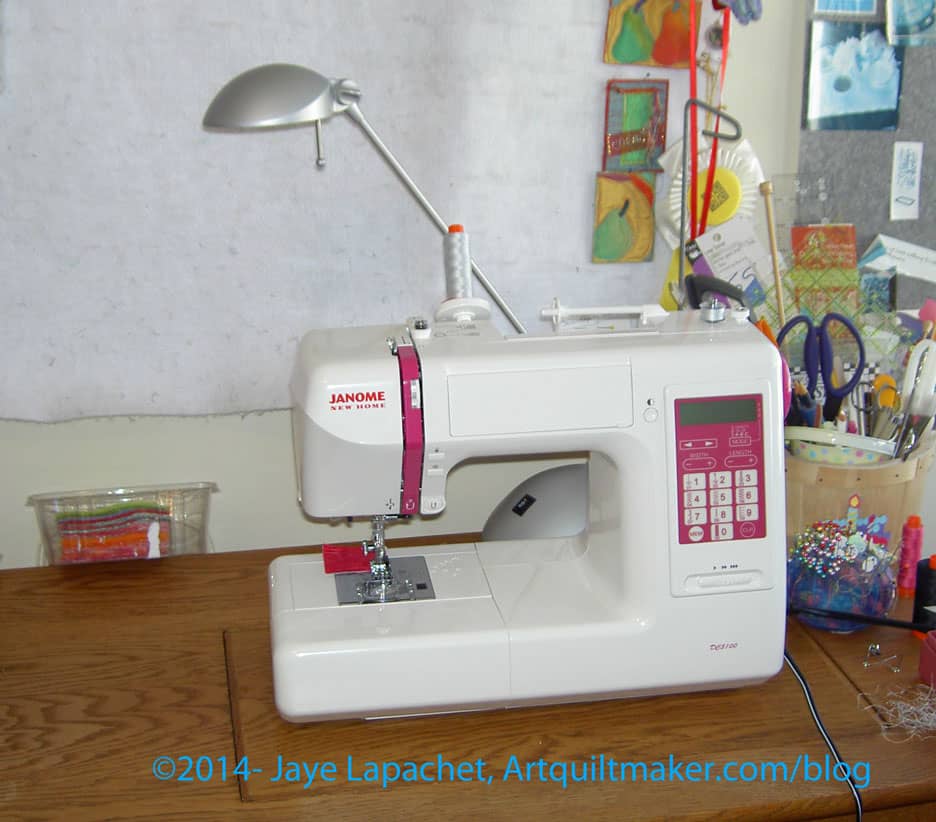
What is the problem? I don’t know. I just stopped zigzagging in the middle of my ATCs a week ago. Since something was stuck under the feed dogs last time I had in the shop, I took off the sole plate and cleaned out everything that looked linty and like it didn’t belong. I didn’t see anything scary looking. I put it all back together and it sewed again.
Hooray, I thought, it was just a recommended stoppage to avoid permanent damage. I was happy.
For about 5 minutes, then it stopped again. I took off the sole plate again and nothing was in there. Well, the area I could see was clean.
I was done.
Backup Machine on top of cabinet
I got out the backup machine and put the 9K on the floor in timeout. Saturday I went and picked up the insert. Perfect timing, because I am thinking of quilting the Wonky Nine Patch.
Also, I have been waking up in the morning with tingly fingers and wrists (old injury that flares when I am naughty), which I know is from not having my machine flush with the table. I see a lot of people sewing without their machine flush and I envy them, because it makes for so much more versatility when they sew. They can go anywhere and sew. I can sew for a very limited time without the machine being flush with the table or I suffer.
Why have I been sewing like this, you ask? Denial? No, I MUST sew. I must get the creativity out of my body or I will probably explode.
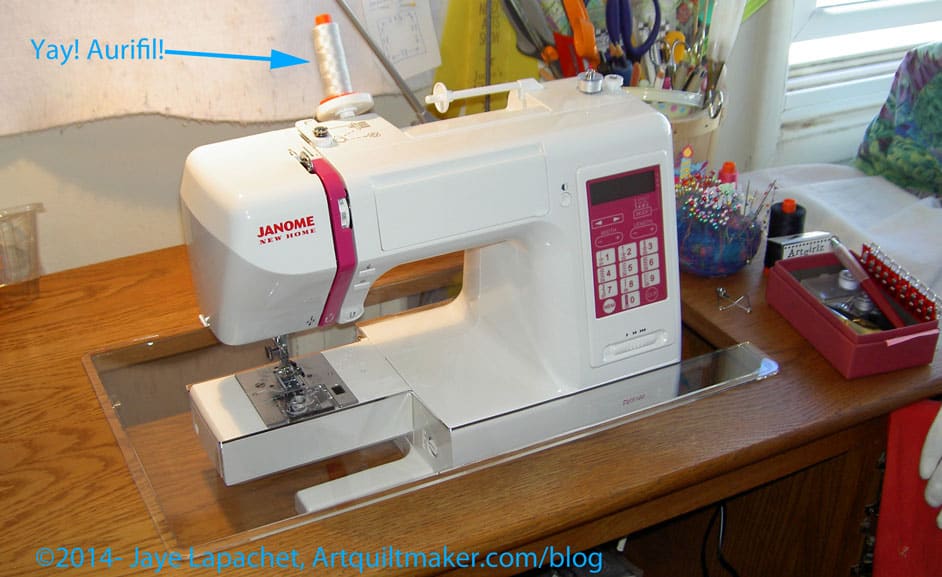
Backup machine flush in cabinet
My backup machine is ok. It is a good machine and it is working, which is a bonus, but it doesn’t have a knee lift. I don’t know it as well, so I always have to go hunting for various stitches and feet. It isn’t my 9K, which I do love.
The insert is nice, though it is a little strange to be able to see down under the machine. As of this writing, I haven’t sewn with it yet and I don’t know how that will be.
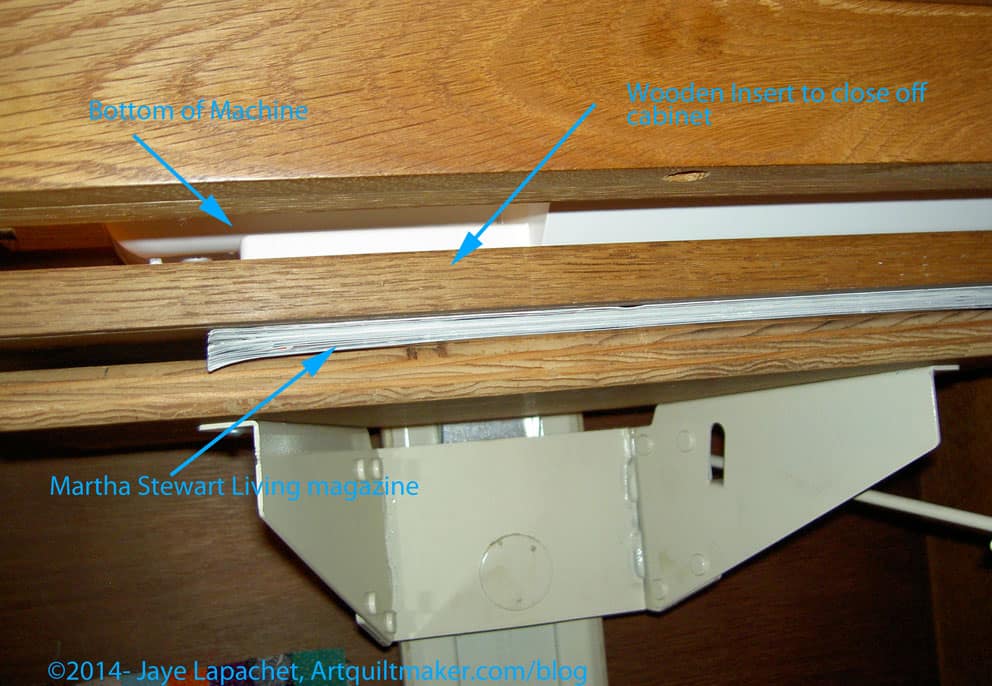
Raising the backup machine
The bed of the the backup machine isn’t as tall as the 9K, so I had to boost it up to make it flush with the acrylic insert/table. I used the wooden closing insert (see picture above) and a magazine to get it to the right height. I might add some clamps to the whole assemblage if the slickness of the magazine makes the machine move around.
I took the 9K to Serge-a-Lot, my new best friend sewing store, after Sherri invited me to do so. She assured me that her man, Brad, could work on my machine. She came through with the insert and if Brad can’t fix the machine, then I am no worse off. She did see that the feed dogs weren’t advancing when she turned the fly wheel, so I didn’t come across like a complete lunatic. Of course, when we put thread in it in the store, the machine sewed fine. WTF? I told her to service it if she thought it needed it.
I am thinking that a new machine is in my future sooner than I had hoped. I hope Serge-a-Lot can get it running and that it can give me a few more years of service. I don’t know, though. I better start saving my pennies.
The CQFA meeting was last Saturday (May 3) and was quite lively.
Workshop Work
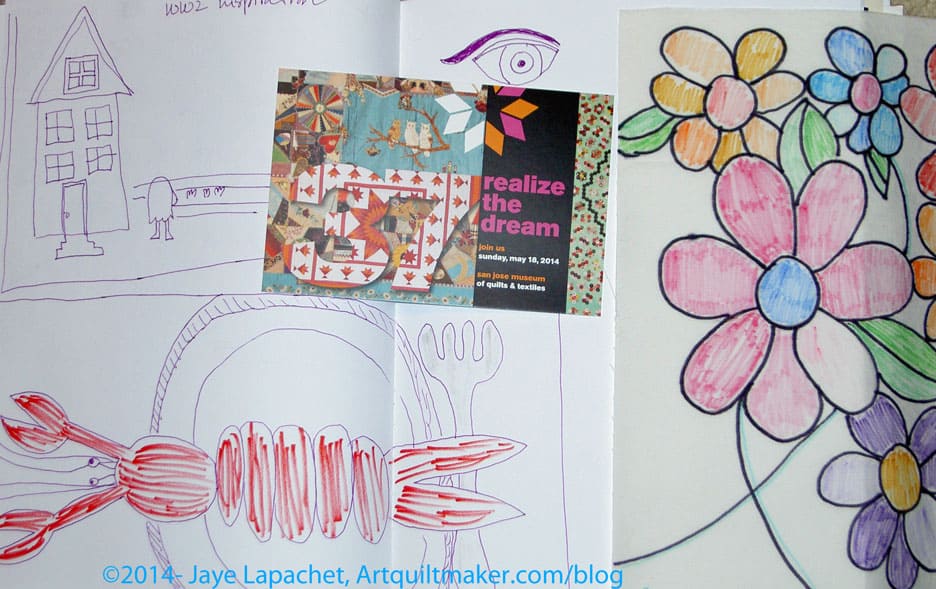
Jennifer is a graphic facilitator/graphic recorder and she led a workshop about “from drawing to art quilt.” I did a graphic recording course with hopes of moving into that profession, but I didn’t pursue it and wish I had the opportunity to do so. Still, my skills came in handy in this class because I can draw basic shapes relatively quickly. I am not sure I got what was intended out of the class, but I did get some inspiration. I have been thinking of the ongoing placemat challenge and I drew out a design that has been in my head for it.
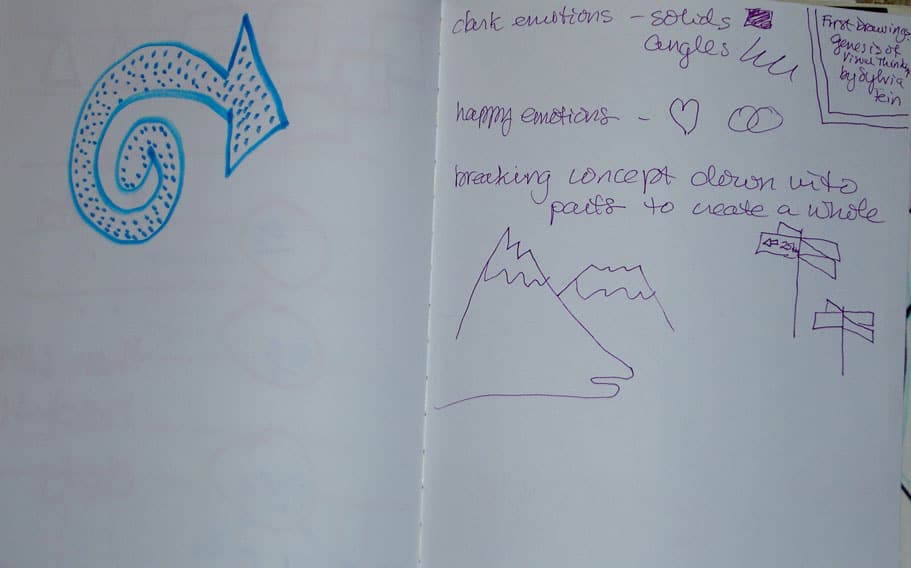
Art Journal Workshop Notes & Sketches
We did some work in our art journals/sketchbooks as part of the workshop and that was fun. I got some ideas down that have been in my head. They are not perfect or fabric ready, but they are down and I can see them with my eyes and not just my mind’s eye. I have a start and can see a little way down the path. Also, I just found it fun to work in my journal. I don’t do it enough.
Art Journal Workshop Notes & Sketches
Jen gave out some handouts and one of them had a quick sketch of mountains, which I found interesting.
She suggested working with fat markers (e.g. see the round arrow) and I found that hard, so I switched to the pens with which I normally write (see purple drawings on the right). She had a point about the fat markers, which was you couldn’t put in a lot of detail and you filled the page faster. Both are true. I still like my thin pen better. I wonder how I would feel with a fat pen if the tip was different?
Of course, we had the ATC exchange, which I talked about.
Marie told us about some upcoming events at the San Jose Museum of Quilts & Textiles:
May 18 – Quilt National Opening
May 24 – Royal School of Textiles speaker on dyeing, but not the how-to. She will speak on the societal, social and the geo-political effects on dyeing, how colors came about etc.
June 14 – beading lecture by a pre-eminent beadist (is that a word?).
Marie reported that these events are a way to engage more with members. Some of the CQFA members said that, while they couldn’t always attend the lectures and events, they went to the website more and read more of the emails, which is a good thing. Check the website for more details.
The Library show planning is in process. I have been out of the loop for a few months due to some personal issues and am not quite sure what is going on. I may withdraw my piece. We will see.
Diane Carver Place Mat Challenge
Show and tell was great. Maureen is using a gelli plate to print on fabric and some of her prints were gorgeous. Diane did the placemat challenge and I like the way the pieces stand up from the background.
Virginia is working on her piece for the show and the piecing is amazing. It is large, too.
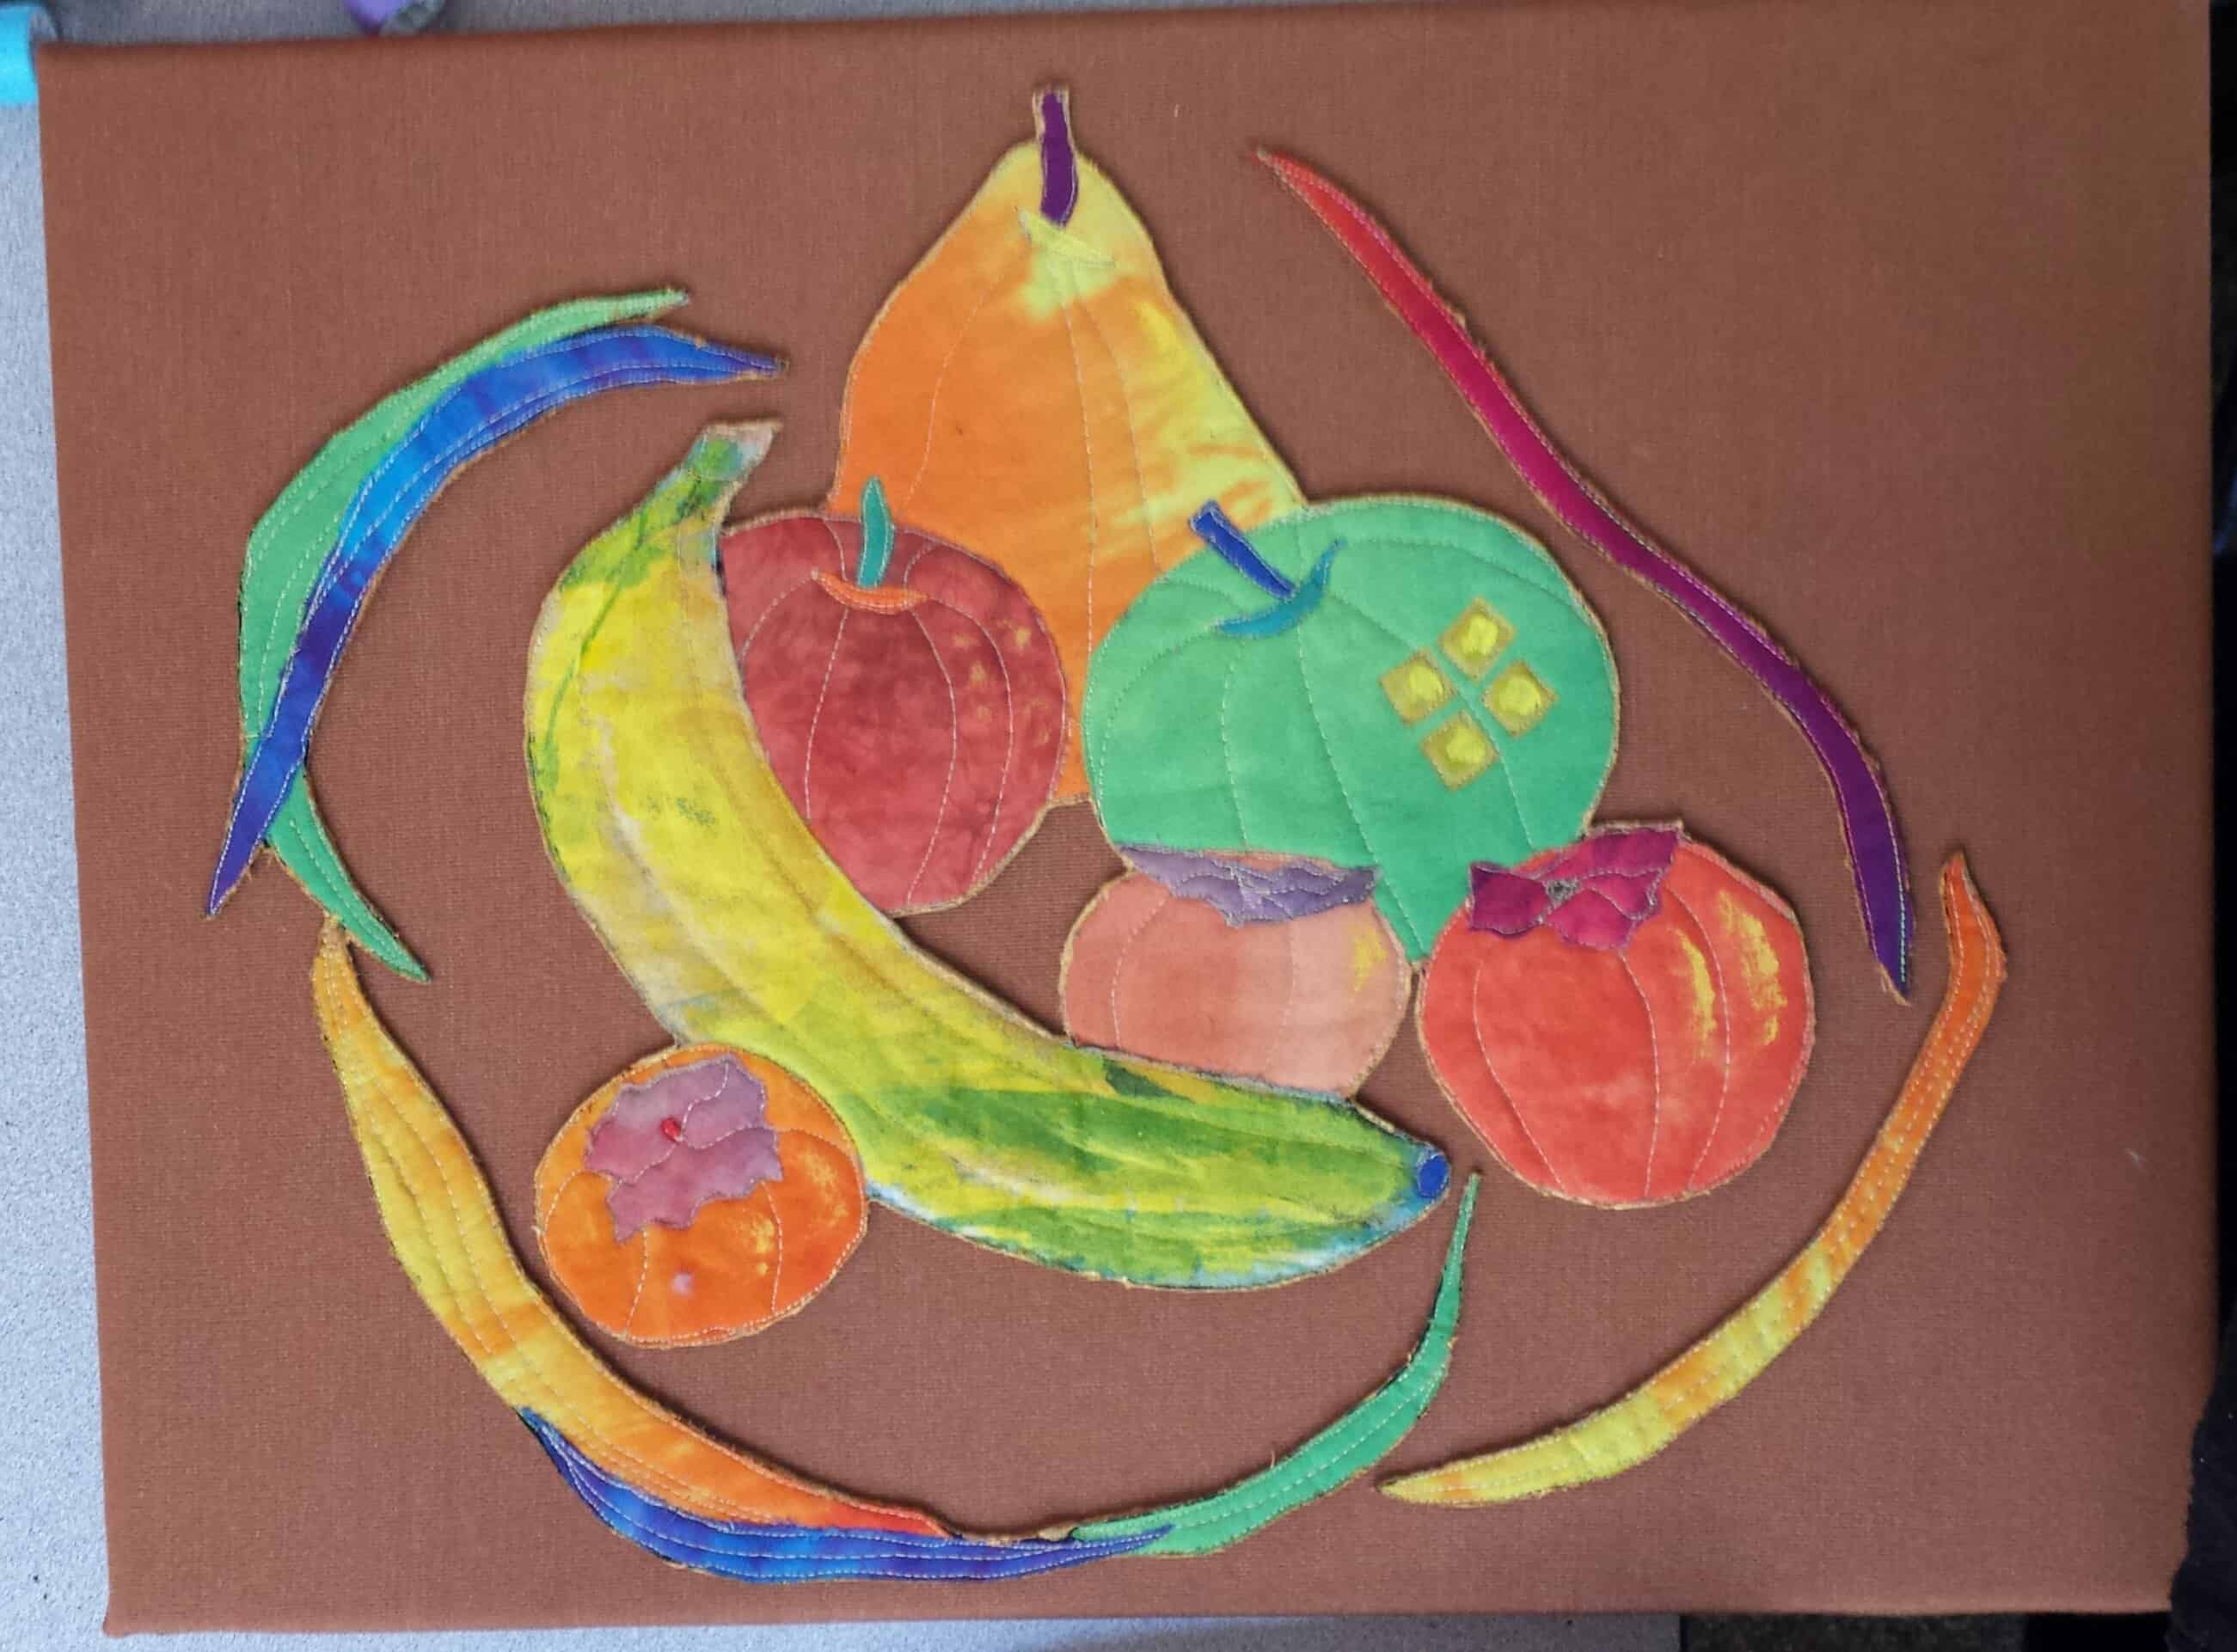
I showed Fresh Fruit and Fabric of the Year 2012. I worked on FOTY 2012 at the retreat last year and people gave me some nice compliments. Someone suggested that I have a show of all the FOTY quilts when I get a few more under my belt. I would really like to do that. I’ll have to work on it once I get a larger stock of quilts.
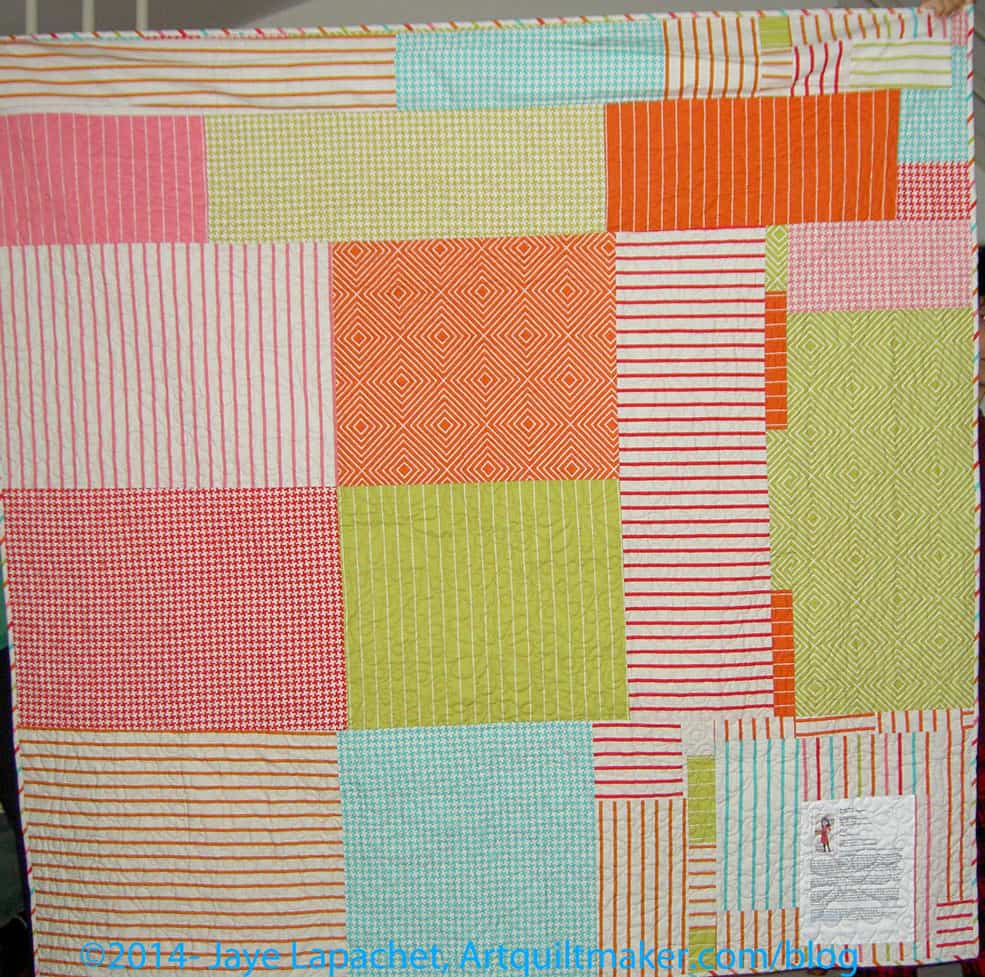
As I mentioned, I got two quilts back from Colleen at the same time. I just finished the sleeve on the second, which means the whole quilt is finished. Yes, I finished Fresh Fruit. 😉
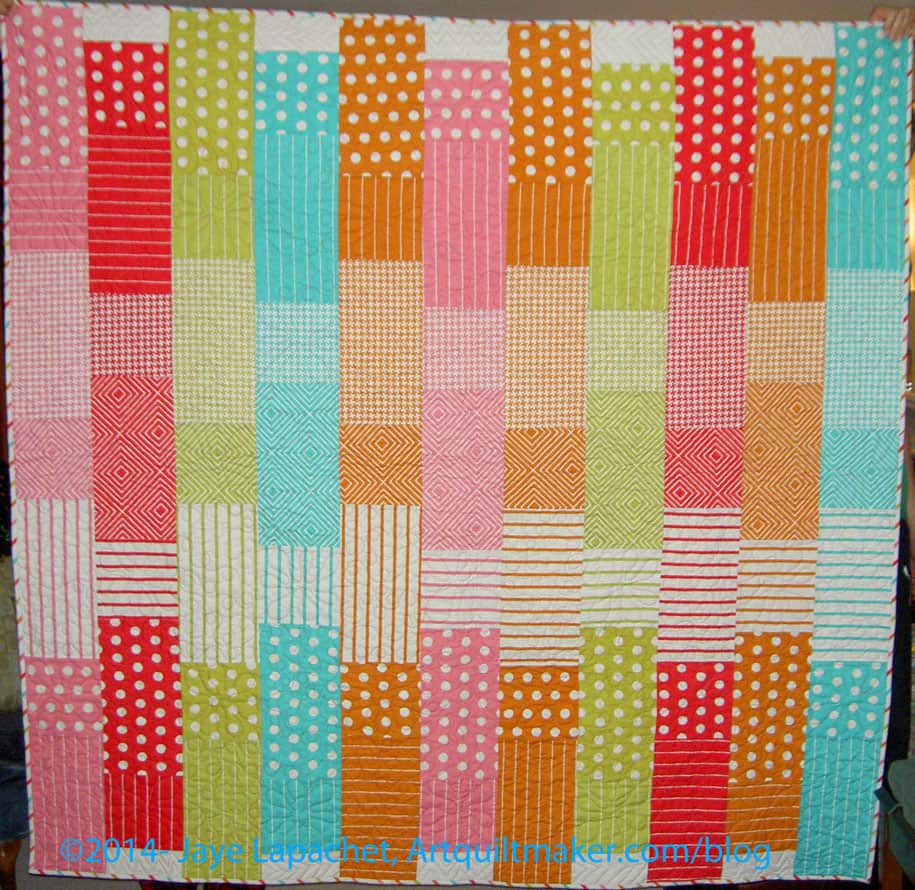
I like this quilt and think it is very pretty. Do you see how there is continuity across the quilt with fabrics in different colorways? I think that the design could be used very effectively with other fabrics, even if they were not different colorways of the same line. Of course, I am thinking about Philip Jacobs fabrics and dots.
Fresh Fruit front
The sad part of this quilt is that I barely remember making it. I should have called this quilt Cinderella, as it is beautiful, but shoved to the side, in a way, like fairy tale step children. The design was from a pattern and I used same fabric as the pattern. I did the whole thing as leaders and enders, I didn’t quilt it. The most time I spent on it was on the back, the sleeve and the binding. It feels weird, but it is true.
I had help from inexperienced quilt holders in taking the photo. They were tired after the front, so the back isn’t straight.
I started this blog in 2005 – 9 years ago, if you are counting. I have written over 2900 posts, some good, some bad. I have 4,600+ images in my Media Library. I write about a lot of stuff including:
Idea Cloud
I have 74 items marked as being about a completed project.
Thanks for reading all this time and for commenting on my projects and posts. Without you, why should I bother?
Check out the creative prompt, which was posted yesterday for those of you keeping track.
The prompt is being posted early this week, because there will be a special post tomorrow.
Radiant Orchid: Pantone 2014 Color of the Year
Phalaenopsis orchid
Fairmont Orchid, Hawai’i
San Francisco Orchid Society
Orchids at Palm Court is a superior fine dining restaurant that offers gourmet, fancy meals inside the Hilton Cincinnati Netherland Plaza.
The Orchid was the name given to a DHARMA Initiativestation dedicated to exotic matter research, namely time travel, under the guise of being a botanical research station. The true station was located in an underground chamber beneath a greenhouse, and drew energy for its experiments from the same anomalous energy source as the frozen wheel. The Orchid was located several hours north or northwest of the survivors’ camp, and was found fairly close to the remnants of the statue of Taweret. (Lostpedia)
Post the direct URL (link) where your drawing, doodle, artwork is posted (e.g. your blog, Flickr) in the comments area of this post. I would really like to keep all the artwork together and provide a way for others to see your work and/or your blog.
We are also talking about this on Twitter. Use the hashtag #CPP
The Creative Prompt Project, also, has a Flickr group, which you can join to post your responses. I created this spot so those of you without blogs and websites would have a place to post your responses.
Definition: “Orchidaceae is a diverse and widespread family of flowering plants with blooms that are often colourful and often fragrant, commonly known as the orchid family. Along with the Asteraceae, they are one of the two largest families of flowering plants, with between 21,950 and 26,049 currently accepted species, found in 880 genera.[2][3] Selecting which of the two families is larger is still under debate, as concrete numbers on such enormous families are constantly in flux. Regardless, the number of orchid species nearly equals the number of bony fishes and more than twice the number of bird species, and about four times the number of mammal species. The family also encompasses about 6–11% of all seed plants.[4] The largest genera are Bulbophyllum (2,000 species), Epidendrum (1,500 species), Dendrobium (1,400 species) and Pleurothallis (1,000 species).
The family also includes Vanilla (the genus of the vanilla plant), Orchis (type genus), and many commonly cultivated plants such as Phalaenopsis and Cattleya. Moreover, since the introduction of tropical species into cultivation in the 19th century, horticulturists have produced more than 100,000 hybrids and cultivars.”
Vanilla is a kind of orchid!
Orchid Cellmark is one of the world’s largest and most experienced AABB accredited DNA Paternity testing laboratories
My ATC work this month didn’t go as smoothly as I would have liked, but I am disavowing responsibility, because my Janome 9K is acting up again. I was able to finish them on the backup machine, but there are some differences so they don’t look as professional as I would like. I might do a special whine post later abut the &^%$* machine, but now I just don’t want to get into it.
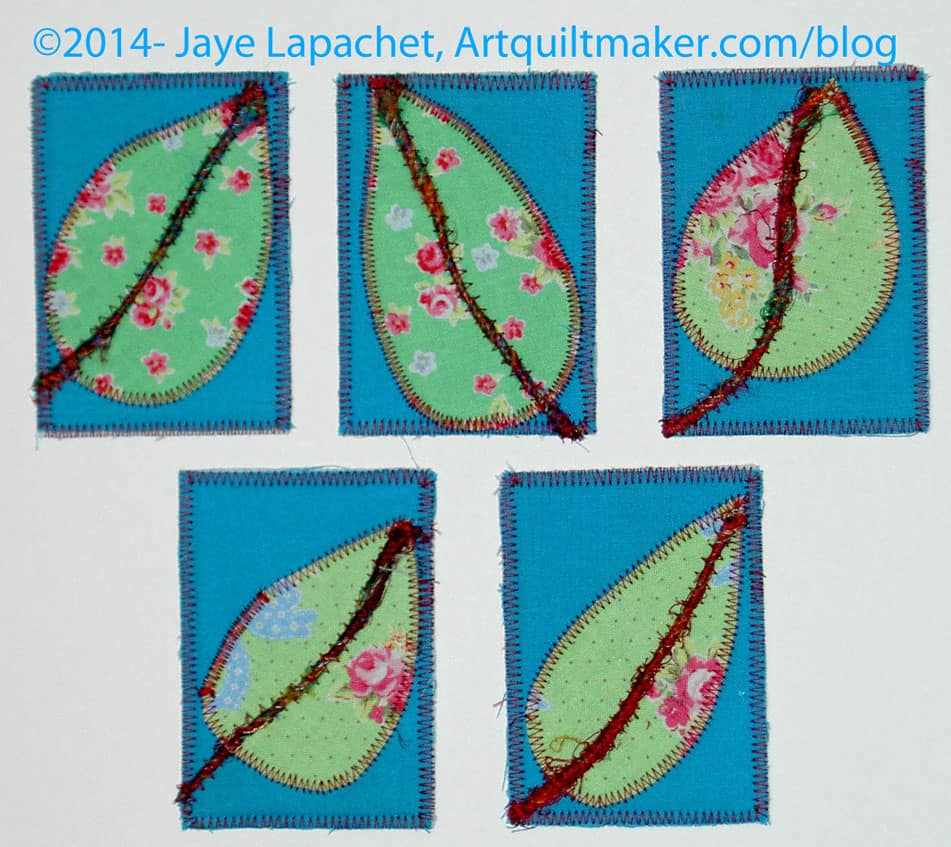
May 2014 ATCs
I decided to do some more leaves, similar to last meeting’s ATCs, so I could donate one to the ATC collection for the guild show. I had enough time and enough interfacing cut, so I went for broke. There are some similarities to last month’s leaves, but some differences as well.
I used my last of a piece of thickish thread for the stems. Someone told me it was from saris, but I don’t remember where I got it and don’t know. I had to couch it on the cards.
I am really pleased that I had enough time. I didn’t start until Friday at midday. Friday is kind of last minute and I don’t know why I wait that long, but I felt like I wasn’t racing the clock. I just worked along and the cards came together well. I didn’t do any embellishment, but I also didn’t feel like the pieces needed it this time.
All May ATCs
There were a lot of participants in the ATC challenge this month and I got a nice group of cards to keep.
The most unusual award goes to Sue who is experimenting with cookie decorating (lower right). The cookie decorating description doesn’t even begin to do justice those these mini-works of art. I didn’t take any because I would have just been tempted to eat them.
Angela is doing some interesting things with mixed media. Her work (cards directly to the left of my leaves) is on fabric, but she is painting or dyeing and stamping.
Bron did some renditions of the Golden Gate Bridge.
I love Maureen’s spirals as well (far right).
Everybody did a great job.
All in all it was a really great exchange and I look forward to the next one.
ATCs are 2.5″ x 3.5″. You don’t have to make them out of fabric. Some of the cards the CQFA people trade are partially paper. I like mine stiff, thus all of the interfacing.