Jelly Roll Race Background

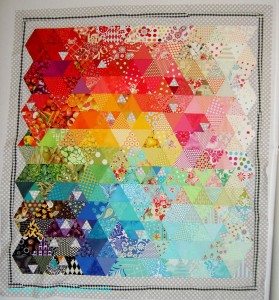
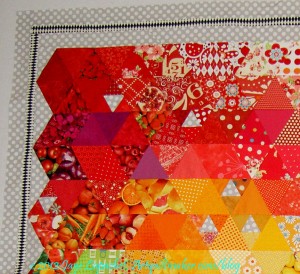
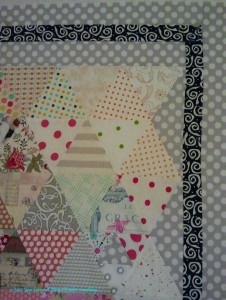
Jelly Roll Diamonds on Ta Dot Grey

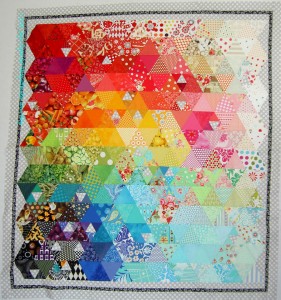
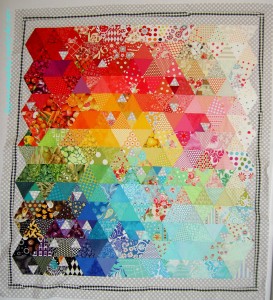
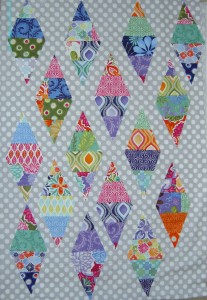
I have been hard at work figuring out what to do with the Jelly Roll Race background. I tried the Ta Dot Grey as someone suggested.

I love that fabric, but think it fights with the fabrics in the actual diamonds. Not a good fit.

I don’t have enough of any one pale grey solid to make the sashing and I don’t want to go out and buy more fabric. (really, I just don’t want to go out) Also, grey is very hip and chic right now and I don’t want this quilt to be easily identifiable as being made in 2012. Kind of like 1980s hair. I want to avoid that look.

SherriD's backgrounds

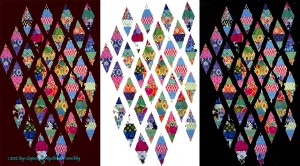
SherriD, the ever helpful did some Photoshop magic to show the contrast between chocolate, black and white backgrounds. This is a good example of another way to “make visual decisions visually.” The darker colors do make the diamonds glow a bit. When I saw this rendition, I thought about the black. I pulled out some black from Pat Bravo’s Art Gallery/Pure Elements solids and laid out some diamonds on that to get a better view.

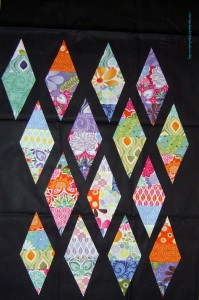
Diamonds on black
Diamonds on black

I wasn’t that excited when I saw the effect.It isn’t horrible or anything, but not the look I am going for.

I decided on white. I am using the Pat Bravo Pure Elements Linen. If you haven’t tried Pat Bravo’s solids, they have a gorgeous hand to them. They feel very silky, but with the stability of cotton. Lovely fabrics.

I cut some 1.5″ strips and worked a bit on sewing them together on Friday. Check back for more details on that process.

Donation Blocks

February Donation Blocks

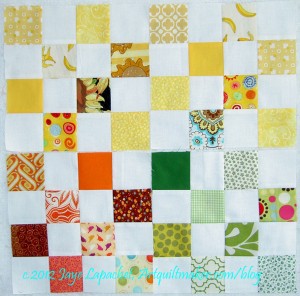
These are the latest blocks I made from the BAMQG kits the Charity Co-Coordinators put together. I wasn’t able to get kits of all the same colors, but I think these look nice.

Donation Blocks - My Scraps

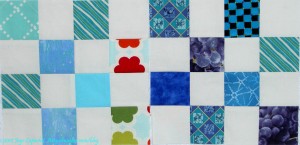
I also cut some 2.5″ squares from scraps of my own as I worked on some other projects. I am trying to cut 2.5″ squares from scraps and fabrics I am working with, so that I can contribute more to the donation effort at BAMQG.

I was able to make 2 blocks from my own scraps. I like the blue.

Creative Prompt #145: Fly

Restaurant in San Francisco

Dixie Chicks album: Fly

Flying nun

The Fly (movie)

A bibliophile of little means is likely to suffer often. Books don’t slip from his hands but fly past him through the air, high as birds, high as prices.
William Lyon Phelps (Read more: http://www.brainyquote.com/quotes/keywords/fly.html#ixzz1nGXxFEeg)

Must fly!

Fly Lady

Definition #1: True flies are insects of the order Diptera (from the Greek di = two, and ptera = wings). They possess a pair of wings on the mesothorax and a pair of halteres, derived from the hind wings, on the metathorax. Apart from secondarily flightless insects (including some flies), the only other order of insects with any form of halteres are the Strepsiptera, and theirs are on the mesothorax, with the flight wings on the metathorax.

tent fly

horse fly

Aerodynamically, the bumble bee shouldn’t be able to fly, but the bumble bee doesn’t know it so it goes on flying anyway.
Mary Kay Ash (Read more: http://www.brainyquote.com/quotes/keywords/fly.html#ixzz1nGYT26cW)

your fly is open

strength training exercise

a pattern run by a receiver in American football

Please post the direct URL (link) where your drawing, doodle, artwork is posted (e.g. your blog, Flickr) in the comments area of this post. I would really like to keep all the artwork together and provide a way for others to see your work and/or your blog, and how your work relates to the other responses.

The Creative Prompt Project, also, has a Flickr group, which you can join to post your responses. Are you already a member? I created that spot so those of you without blogs and websites would have a place to post your responses. Please join and look at all of the great artwork that people have posted.

Fly River

HMS Fly

fly ball

how birds move from place to place

on the fly

house fly

aviation

The brand of universal youth fashion culture

fly.twitter.com


high fly ball

Definition #2: (intransitive) To travel through the air, another gas or a vacuum, without being in contact with a grounded surface.

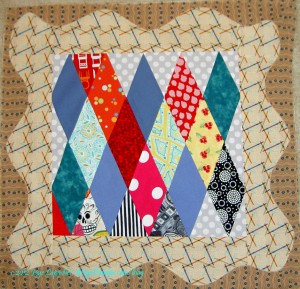
Test Piece

Test Piece
Test Piece

The center of this piece has been on my design wall for a long time. I made it to try and get my head around sewing diamonds together for FOTY 2010. I didn’t feel like I could toss it even though it isn’t my best work.

Eventually, I decided to use it to test my idea for the border on the Original Bullseye. After some thought, I decided not to use my idea for the Original Bullseye, but I decided to try the border on the Test Piece anyway.

I used some fabric that I didn’t really care about for the border. I modified the directions from an old QNM article (hand applique’ was not going to happen on this piece) and went to work. I got surprising results. The surprising part was that I finally became with one mitered corners. I finally understand the ins and outs of creating a mitered corner. I have known, in a theoretical way, how to do it, but this was the first time the process and theory really made sense to my brain and hands together.

This is no masterpiece, but it does prove that quiltmakers can learn something from every piece. I find it somewhat freeing to not care about the overall piece. I have cared about each specific element or technique or process, but not the whole piece. The point of this piece is learning.

And, in that, this piece has value.

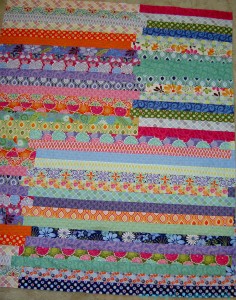
Renewed Jelly Roll Race

Jelly Roll Race
Jelly Roll Race

This is the piece that I started with. As you might remember, I wasn’t very happy with it. It doesn’t have enough interest to continue with it as a quilt. Still, I suffered through all of those long seams, so I didn’t want to discard it. And the fabric is nice.

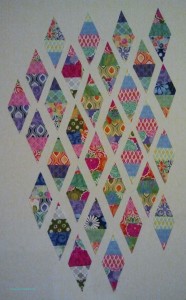
Jelly Roll Diamonds
Jelly Roll Diamonds

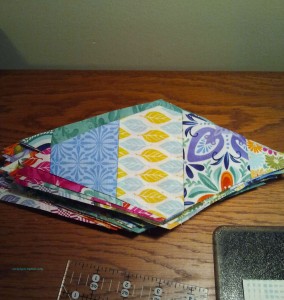
Not sure why, but I decided to cut the piece into diamonds. I worked on that over the weekend. I now have about 158 diamonds, which I intend to sash with something and then resew together.

I also was able to use my diamond ruler again. I got good use out of it for FOTY 2010, but since then it has been languishing.

Now that all of the diamonds are cut, my next task is to figure out a sashing color. I want something that will be different enough so that the diamonds don’t bleed into the sashing.  I want them to be distinct.

I won’t be able to achieve that goal completely, but I was thinking white and the portable design wall does a good job showing how that will look. I did a FB poll on my page and on the Artquiltmaker.com FB page(are you a member??) and on Twitter. So far, people like the white, but chocolate and black have also been suggested. Not sure I have enough of a chocolate fabric to sew the whole piece together, but I definitely have enough for a test. I also have a nice piece of black from the Pure Elements line that I can try.

Stack of Jelly Roll Diamonds

Fabric of the Year 2011 – Update

FOTY 2011 top
FOTY 2011 top

The Fabric of the Year 2011 top, back and binding are finished and ready to be sent to the quilter.

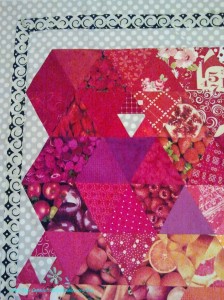
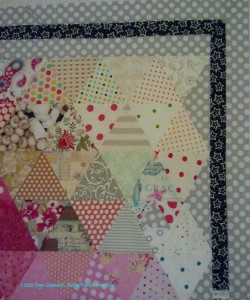
As you may know from my previous post, I ripped out the first inner border (which meant ripping out all of the outer borders as well) and replaced it with a different fabric. The ‘different’ fabric, is a 2002 star fabric from kp kids. I used it a few years ago on Women’s Work #1. The stars suggest the same form as the triangles and the color is the right amount of black to frame the piece.

I also trimmed a bit of the grey Ta Dot from the top and bottom borders. The top and bottom borders didn’t need that much space.

FOTY 2011 before removing diamond border

You might think I am crazy for doing all that ripping. I really think I need to make visual decisions visually, but sometimes I can’t see the piece as a whole until I get pretty far along the sewing path. I really want to do my best work and in order to do my best work I needed to get rid of that diamond border. I couldn’t get the joins in the strips I was using for the border to match up to my satisfaction. TFQ pointed out that the diamond fabric was printed off grain so the parts of the pattern printed on the fabric was not the same each section of the strip I used. She is right and I didn’t notice it until she articulated it. All I could tell is that I didn’t like the border and I needed to rip it out. So, I ripped it out.

FOTY 2011 back
FOTY 2011 back

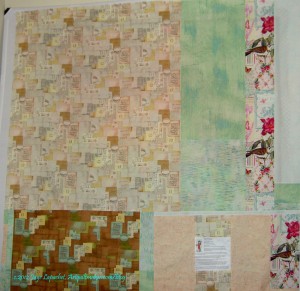
I used large pieces to make the back, for once. The two fabrics on the left are Basic Grey and I thought using the large pieces would show off the labels and the portions of letters, which are part of the pattern of the fabric. I was also pleased that I was able to use the last bit of the Belle Fleur fabric. I like that fabric and I am glad I have a piece that I can keep for awhile.

Backs are arduous and I am really glad I was able to focus on using large pieces and getting the back finished.

Lincoln

A-B-C Challenge: Lincoln

As I mentioned, there is no BAMQG meeting for March. We still have blocks to make. I made K, which you know, and L in now done. M and N are April blocks and I will get going on those soon.

In looking at all of the A-B-C challenge blocks on my design wall, I also decided that I needed another block with the same on point symmetry as the Basement Window block.

I don’t know why this block is called Lincoln, but I chose it for my L block, because of the on point symmetry. I, now, only have two of these kinds of blocks and need at least three, so I’ll have to find another one.

I chose the colors, because in looking at the whole group of blocks, I thought that I needed to use more of that light green-y yellow.

There are 33 pieces in this block, in case you were wondering.

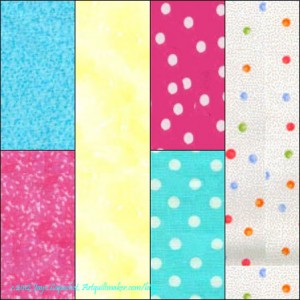
Block-a-Long #44: 2 Columns-2 Split Columns

2 Columns 2 Split Columns #44

I know people were having fits with last week’s block. I heard about it. Did you make it?

I am cutting you some slack this week. 2 Columns-2 Split Columns is another easy block. It would be really effective in a quilt if you made a bunch of them and turned some vertically and some horizontally, Rail Fence fashion. I am really loving rectangles right now, so look for more.

You probably really only need the sizes to cut to make this block, but I am posting the 2 Columns 2 Split Columns directions anyway.

If you have made blocks or a quilt from these patterns, please post a link in the comments section of the relevant block or on the AQ Block-a-Long Flickr group. I would love to see what you have made.

King’s Crown

King's Crown
King's Crown

There is no BAMQG meeting for March. We still have blocks to make. K and L are March blocks and M and N are April blocks. I have the K block made and am working on L.

I have all the blocks for the A-B-C challenge on the wall and in looking at them, I decided that I needed a block with another strong diagonal line. I want an uneven number (3 is good) for various elements in the blocks – colors, fabrics, different block elements.

I chose King’s Crown for my K block, because of the strong diagonal line. I am pretty pleased with the colors.

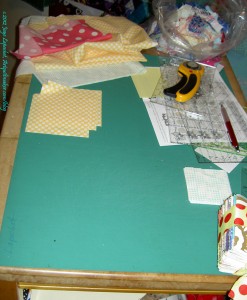
New/Old Cutting Table

Cutting Table
Cutting Table

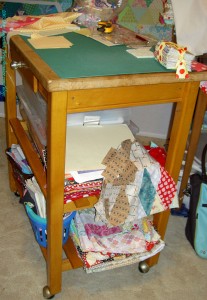
I recently got a cutting table. “Got” isn’t exactly the right word. Commandeered is more like it. 😉

It isn’t new; I re-purposed a microwave cart we have had for years and turned it into a cutting table. I re-purposed it, because DH made it and I can’t bear to give it away. Besides, it is the perfect height for me to cut. Also, my 18″ mat fits very well on it.

It had just been sitting around downstairs gathering odds and ends that don’t otherwise have a home.

Cutting Table 2
Cutting Table 2

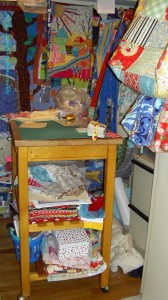
One of the things that works for me about this cutting table is that it fits really well into the fabric closet. Sadly we don’t have a large house, so there are times when my workroom becomes a guest room and people sleep there. A cutting table in the middle of the room doesn’t work well in that scenario. I roll the cart into the closet and the guest room is reborn. Vacuuming is easier, too.

I used the opportunity of setting up the cutting table to clear out the fabric closet. The bottom shelves of the cutting table look like a bit of a mess, but it is relatively organized compared to what it was and that stuff is not on the floor of the closet anymore.

I put all the patterns in a box I wasn’t using for anything else and there is another box full of orphan blocks, tests and partially pieced things that are “simmering.”

Cutting Table top
Cutting Table top

The top is almost twice again as large as my former cutting table. TFQ and I were cutting together on the same surface so it is quite large enough. At the moment, it is covered with the accoutrement of various things I have going on.

I have to figure out some way to attach the bag in which I toss schnibbles to the side of the cutting table. It will come.

Having this cutting table means that my space isn’t so open, but I love having a much bigger space to cut, and some more shelves for storage.


Creative Prompt #144: East

East meets West

The Far East

East Coast

Back East

East Bay

Definition: East s a noun, adjective, or adverb indicating direction or geography. East is one of the four cardinal directions or compass points. It is the opposite of west and is perpendicular to north and south.

East side of town

Eastern seaboard

East Asia

East of the moon

California State University, East Bay

Middle East

East Bay Regional Parks

East Orange

The Ballad of East and West by Rudyard Kipling

Please post the direct URL (link) where your drawing, doodle, artwork is posted (e.g. your blog, Flickr) in the comments area of this post. I would really like to keep all the artwork together and provide a way for others to see your work and/or your blog, and how your work relates to the other responses.

The Creative Prompt Project, also, has a Flickr group, which you can join to post your responses. Are you already a member? I created that spot so those of you without blogs and websites would have a place to post your responses. Please join and look at all of the great artwork that people have posted.

Book Review: Liberated Quiltmaking 2

Liberated Quiltmaking IILiberated Quiltmaking II by Gwen Marston

I knew I liked this book when I read “Life is short. Do your own work, have a good time, and be nice to everybody…including yourself” (pg.10). I also liked this book, because she talks about the wheres and whys of the quiltmaking process. Gwen Marston assumes that quiltmakers are intelligent. She says “We can solve our own problems” (pg.11) and “contrary to popular belief, you don’t have to suffer to make a good quilt” (pg.10). I like Gwen Marston’s writing style, the clear directions and the information she packs into this book.

This book is about design; designing your own quilts as in not using a pattern. This book is about what kind of quilts that can provide inspiration, how to use that inspiration to make your own quilts and the steps to get there. This book is about having fun, using good fabric and enjoying yourself.

This is also a technique book which straddles the line between liberated construction and good technique. She says “…that working in the Liberated style doesn’t mean you have to throw the baby out with the bathwater” (pg.12), a sentiment with which I wholeheartedly agree. Liberated Quiltmaking is a “process rather than a pattern (pg.8)” and not an excuse for poor design or bad technique.

Most of the books talks about process and the vehicle she uses are, for the most part, traditional blocks such as log cabins, baskets and square within a square. Marston shows us some quilts, usually antiques, talks about the liberated fundamentals of that block and then give step-by-step instructions for the liberated version of the block.

Each section that shows how to make the various blocks, and block parts, are well illustrated. Both written and visual steps are shown. In working with these designs and techniques the reader gets the distinct impression that s/he should follow the directions, but adjust as needed to make the piece her/his own. In the star making section, she writes “the cuts are not made exactly from corner to corner” (pg.31). The end result is complex looking, but not difficult.

One block in the process section is from a quilt by a student (Kathy’s Block, pg.39-45) and other sections discuss borders, triangles, recut blocks and medallions. Kathy’s block is a good lesson in making lemonade out of lemons. If you are afraid of sawtooth borders or joining a border round robin, then this book will help you get more comfortable with the concepts. The topics are covered thoroughly and in a way that gives the reader confidence to do what she is teaching. The Medallion with Wild Geese and Squares on Point (pg. 102) in this section is particularly cheerful.

Keeping the above in mind, Gwen writes “As I am writing about a process rather than describing how to make a specific project, it is not my intention to give you the exact measurement to duplicate my quilt. Rather, I am showing you how to figure out how to make your own blocks any size you want (pg.81).” I hope, after reading this book, that my readers will go away with those skills firmly embedded in their head and fear left outside the workroom door.

It may as well be said right up front that a lot of the blocks and units are on the bias. They are on the bias because of the way they are cut or pieced. Sewing slowly and using Mary Ellen’s Best Press will allow you to work with the bias with no trouble.

If you can only buy one quilt book, I would buy this one. The scope for imagination, as Anne of Green Gables would say, is limitless. A quiltmaker could easily spend her life making variations of liberated quilts from this book.

View all my reviews
FOTY 2011 Update

FOTY 2011 before ripping

I was going to say “HOORAY!!! I finished the FOTY 2011 top!”, jump up and down and encourage us all to dance together.

But.

No dice. I starting ripping out the border on Monday, because it screamed at me. The diamond black and white didn’t work. Two people that I asked didn’t even notice, but I can’t even look at the top without my eyes going straight to that black and white border. And that means I have to rip.

Still, I spent all day Sunday sewing and that is a bonus. It was such a pleasure to spend time with my sewing machine listening to audiobooks (yes, I finished one book and started another). Still, the pleasure did not create a great border.

If fabric were wider than 42"

If fabric were wider than 42″the quilt top would have looked like the photo right. In this photo, you can’t see the way the fabric was printed off grain or the way my joins did not line up properly when I tried to make the borders longer. The border didn’t work for *me* and the sooner I faced that reality the sooner I could really get to finishing the top.

I got to this place, because I couldn’t find the fabric I originally wanted to use and I was too lazy to shift stacks of fabric around to find it.


New Border Option
New Border Option
New Border #2
New Border #2
New Border Option #3

Laziness is my downfall and I deserve what I get. In fairness, I did move some fabric AND I may have used all of the fabric I was considering, but I did not look all of the blacks to make sure.

I retrieved some other fabrics and found the stars. Right now it is my favorite. I’ll see how I feel and how the joins look later in the week. I am so glad to have some time this week to  work on this project in little bits.

26 Projects Update

I got a bug in my ear to update this list. I don’t think I have made much progress, but I wanted you to know that it is still on my mind.

Here is the list, again, still in no particular order. This time I have some annotations and I am crossing things off that are well in hand:

  1. Stars for San Bruno #2: Finished! YAY!
  2. Stars for San Bruno #3: Ready to be taken to the quilter. I am thinking of trying another quilter. Needs quilting, backing and binding.
  3. Pavers. Finished! YAY!
  4. Food Quilt: needs quilting, backing and binding.
  5. Jelly Roll Race: I decided I would cut this up into diamonds, put a border around each diamond and sew the diamonds back together again. I don’t know what the ultimate purpose will be, but I am pleased with that idea.
  6. Original Bullseye: needs border, backing, quilting and binding. Went rummaging through my fabric closet to find this top, because I was fired up to put the border on. I couldn’t find it. It is lost. I know it is in there somewhere. I am also working on my border idea and have definitely decided not to put that particular border on this quilt, if I ever find it, but I am glad I am doing the test.
  7. Corner Store: foundations cut; blocks not made
  8. Spin Wheel: really not started, but supplies gathered.
  9. Infinity blocks: I know where they are.
  10. A-B-C (A-Z) BAMQG Challenge – I am actually not sure if this should be considered a WIP, because I don’t really have enough blocks with which to make anything yet. I am making good progress. This month I need to make K and L blocks.
  11. Aqua-Red Sampler – steady progress has stopped and the class more than the quilt is really weighing on my mind. As far as I know Frances has still not finished her Dresden Plate. I really don’t know what am I going to do with her? The next class was going to be fusible machine applique’, but I haven’t gotten past cutting out the templates. Perhaps I should skip to machine piecing curves?
  12. The Tarts Come to Tea: I haven’t quilted on this since April 2011. I need to work on the quilting. I was making good progress and then got sidetracked.
  13. Kissy Fish: Finished! Yay!
  14. FOTY 2011: piecing nearly complete.
  15. Flowering Snowballs: I decided not to abandon this project, partially because I am so far along and partially because I need a hand project. I made the templates I need for the border blocks and am ready to start cutting fabric for the borders.
  16. Garden
  17. Flower Garden
  18. Moon and Stars: need to finish handquilting. This quilt is not interesting.
  19. Pointillist Palette #4
  20. See: needs satin stitching.
  21. Self Portrait
  22. Spiderweb
  23. Under the Sea: class project; like the design, but not the colors much.
  24. Pineapple: Abandoned; will remake blocks at a later time with more care.
  25. Flower Sugar Hexagon: sewed more hexagons together. Sewing Y seams is a bit of a chore, so I get tired of doing it after awhile.
  26. Young Man’s t-shirt quilt: have cut up the t-shirts and am in the process of applying fusible.

Here is new categorization:

Well in Hand or Complete:

  • Stars for San Bruno #2: Finished! YAY!
  • Stars for San Bruno #3: Ready to be taken to the quilter. Needs quilting, backing and binding.
  • Pavers. Finished! YAY!
  • Food Quilt: needs quilting, backing and binding.
  • Kissy Fish: Finished! Yay!
  • Pineapple: Abandoned; will remake blocks at a later time with more care.

Have a Plan:

  • Flower Sugar Hexagon
  • Young Man’s t-shirt quilt: have cut up the t-shirts and am in the process of applying fusible.
  • Pointillist Palette #4
  • See: needs satin stitching.
  • Original Bullseye: needs border, backing, quilting and binding
  • FOTY 2011: piecing nearly complete.
  • Pointillist Palette #4

Hunting & Gathering Stage:

  • Corner Store: foundations cut; blocks not made
  • Spin Wheel: really not started, but supplies gathered.

Steady Progress:

Not a Clue or I Have Lost Momentum:

  • The Tarts Come to Tea: I haven’t quilted on this since April. I need to work on the quilting. I was making good progress and then got sidetracked. I think I do have a clue; am just not inspired.
  • Garden
  • Flower Garden
  • Moon and Stars: need to finish handquilting. This quilt is not interesting.
  • Self Portrait
  • Spiderweb – I know I want to put a self bordering border on this quilt, but just can’t seem to get it done. I think I may need to make two quilts, because I have way more blocks than I need for a bed sized quilt.
  • Under the Sea: class project; like the design, but not the colors much.

Abandoned:

  • Pineapple

I am going to remove the finished items from the list for the next update. I will still call it 26 projects, but I want to see the list shrink and that seems like a good way to do it.

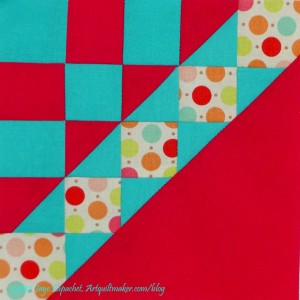
Block-a-Long #43: Diagonal Split 9 Patch

Diagonal 9 Patch #43

I warned you this one would be hard and I wasn’t kidding you. You won’t rip your hair out because of this block. You can do it. I know you can. Think how cool it would be to have said you made this block.

Diagonal Split Nine Patch #43 directions are posted.

If you have made blocks or a quilt from these patterns, please post a link in the comments section of the relevant block or on the AQ Block-a-Long Flickr group. I would love to see what you have made.