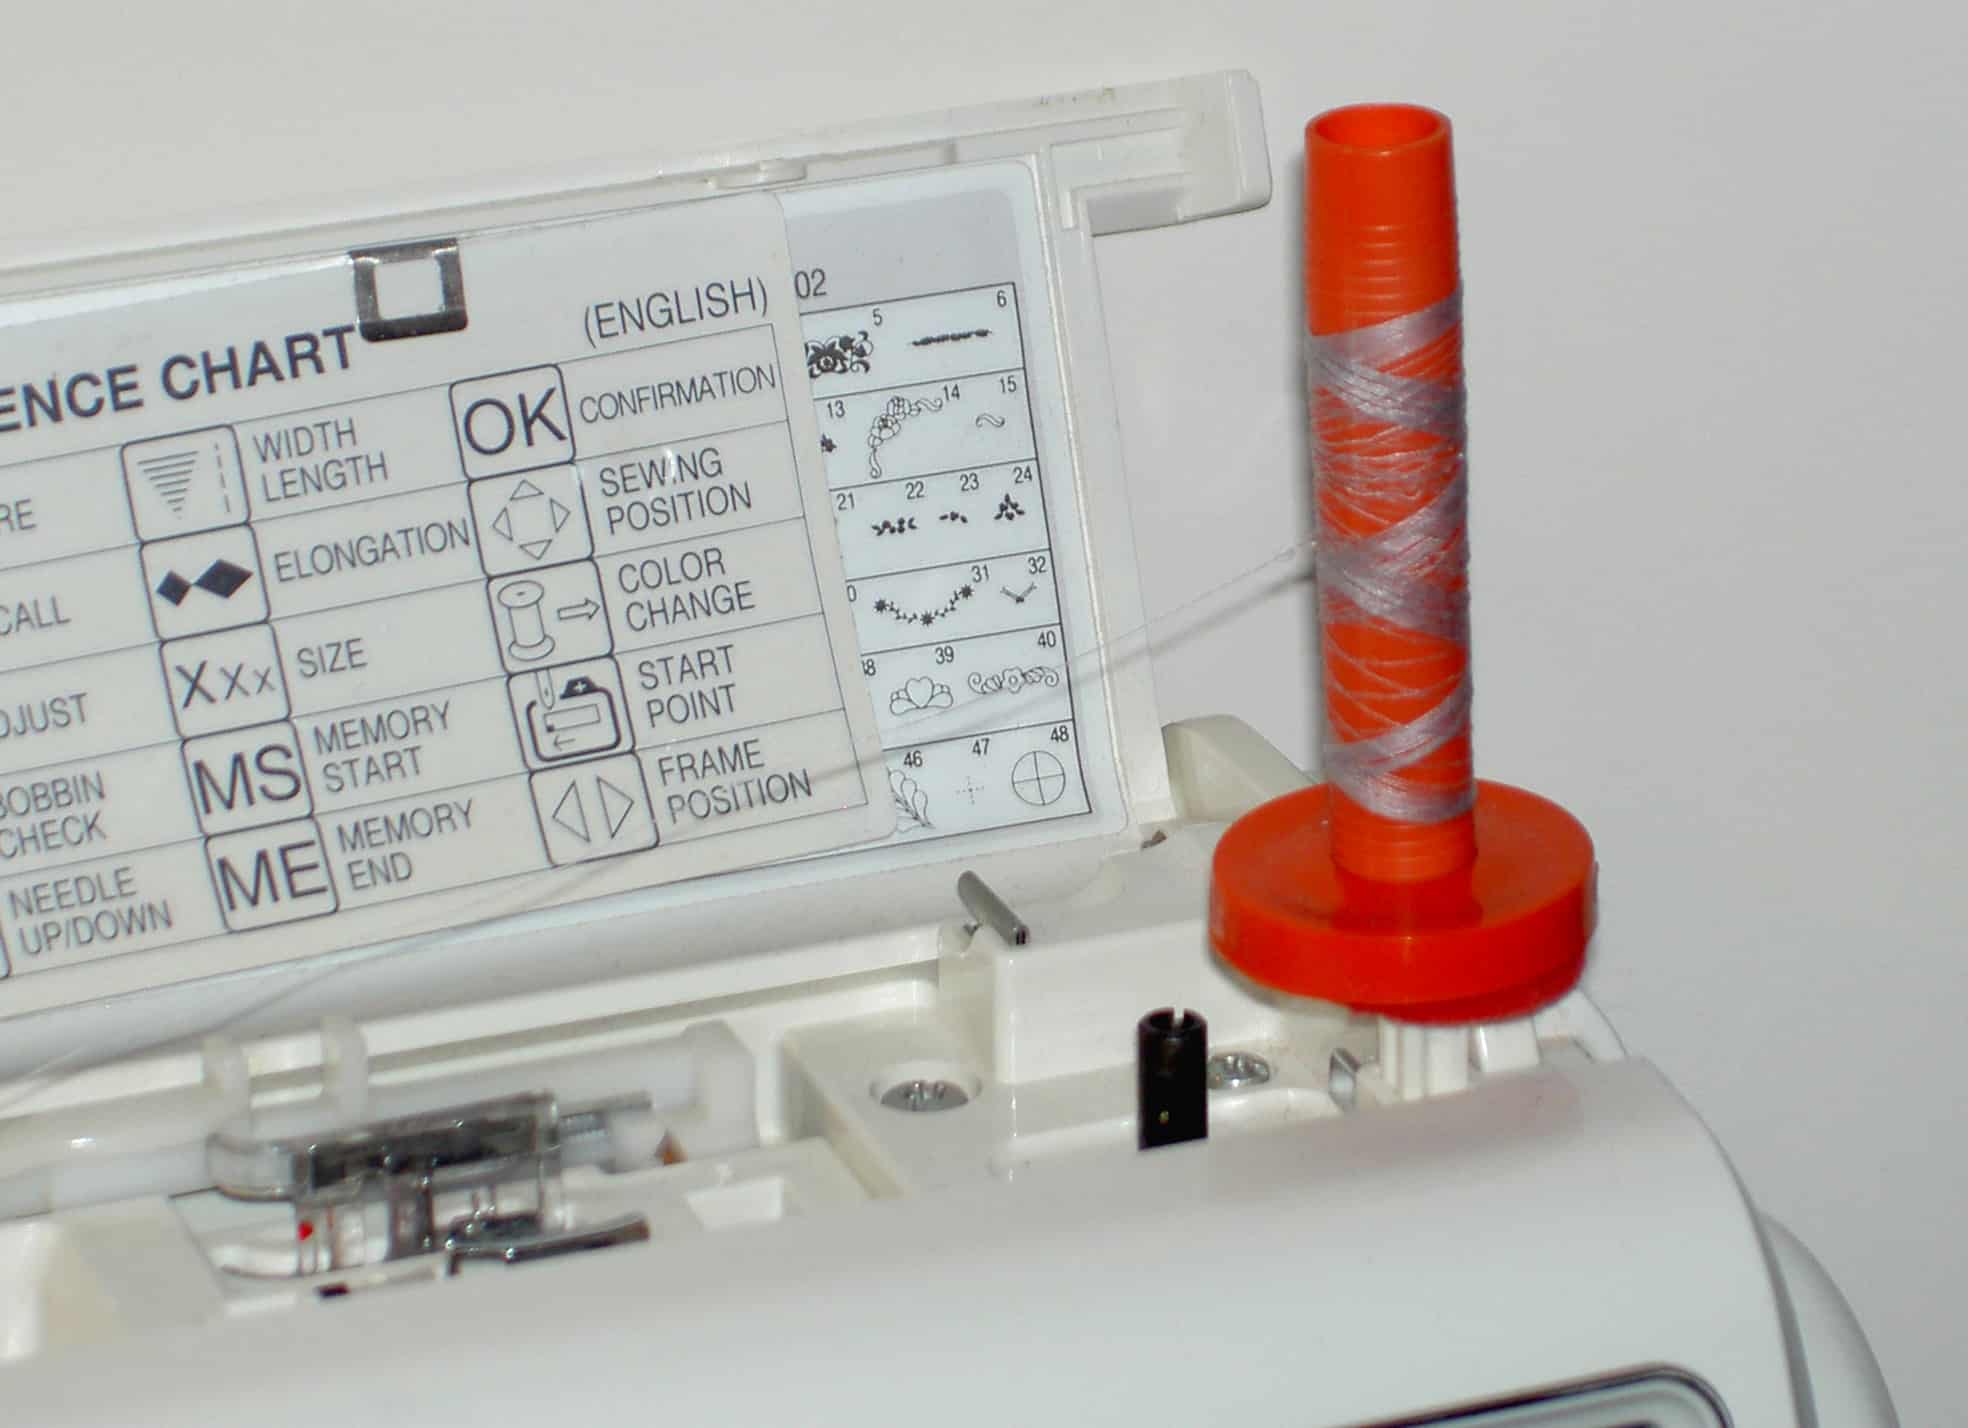
As you know, the machine is in the shop. It is still in the shop. While I have the Jem on which to sew, it isn’t the same.
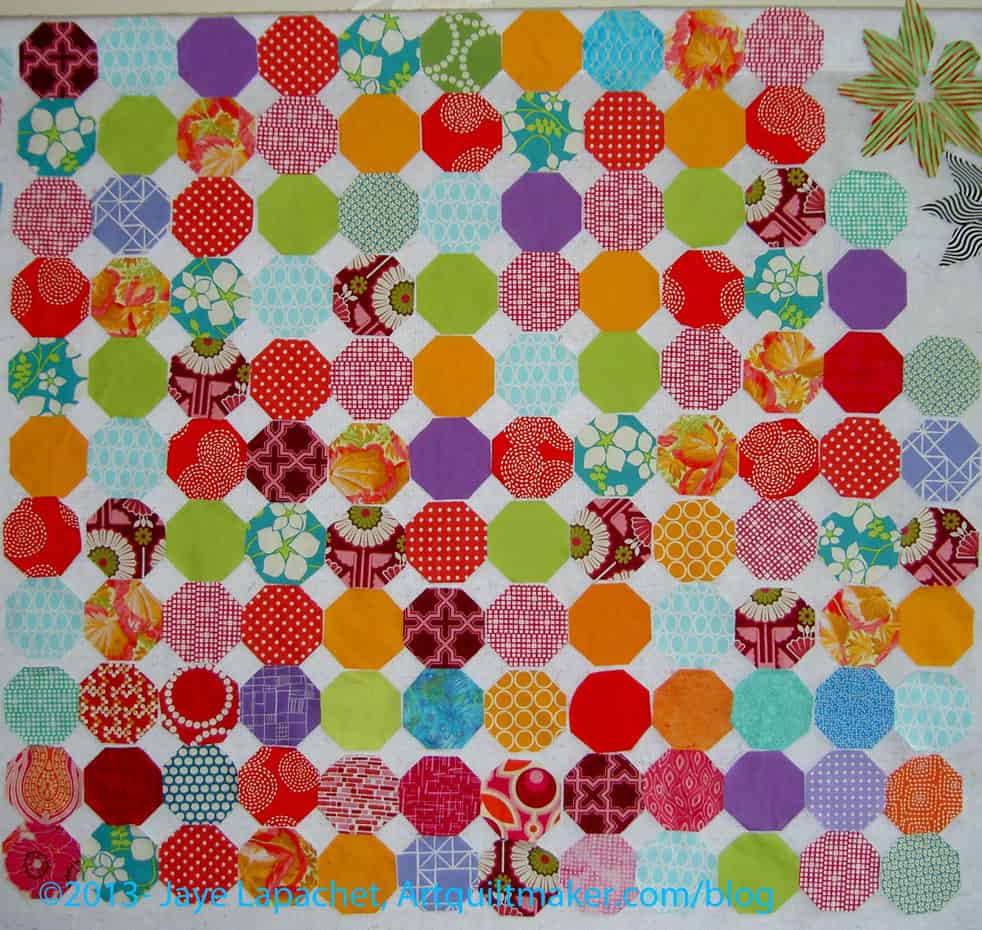
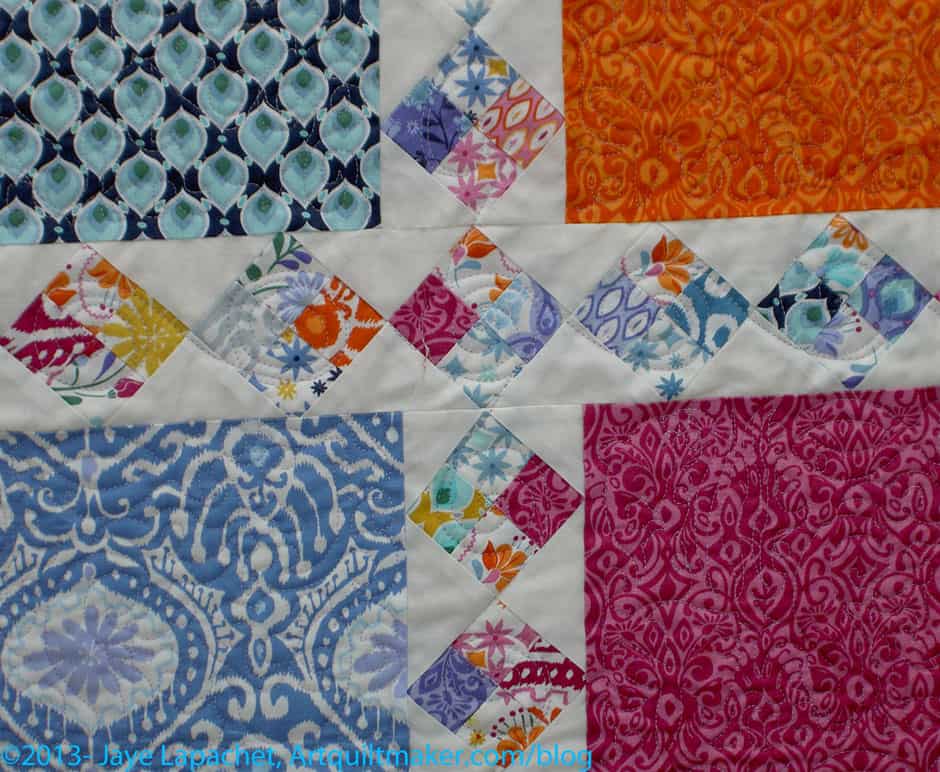
I have been looking at the Russian Rubix pieces A LOT. I finally decided that some of the Joel Dewberry fabrics might be wrong. I really wanted to keep them in , because they were nice darks. Sadly, they just seemed wrong. Also, I couldn’t get a comment about the large stylized flowers looking like eyes out of my mind. I think that this quilt needs some darks. These weren’t them, though, so I thought they had to go.
One fabric removed
I decided that I would take them out in stages and try to make, at least, some of these dark fabrics work.
I took out the one Notting Hill fabric that had the stylized flowers. I left in the fabric with the same colors (upper left hand corner). I am on the fence about it. I think that the piece, as I said, needs some darks.
One of the things I don’t like about the Moda Jelly Rolls is that the collections of fabrics often do not have enough darks or lights. Remember how I said I was trying to make my own Jelly Roll? I am understanding how hard it is to make a Jelly Roll with the right mix of lights, darks and mediums.
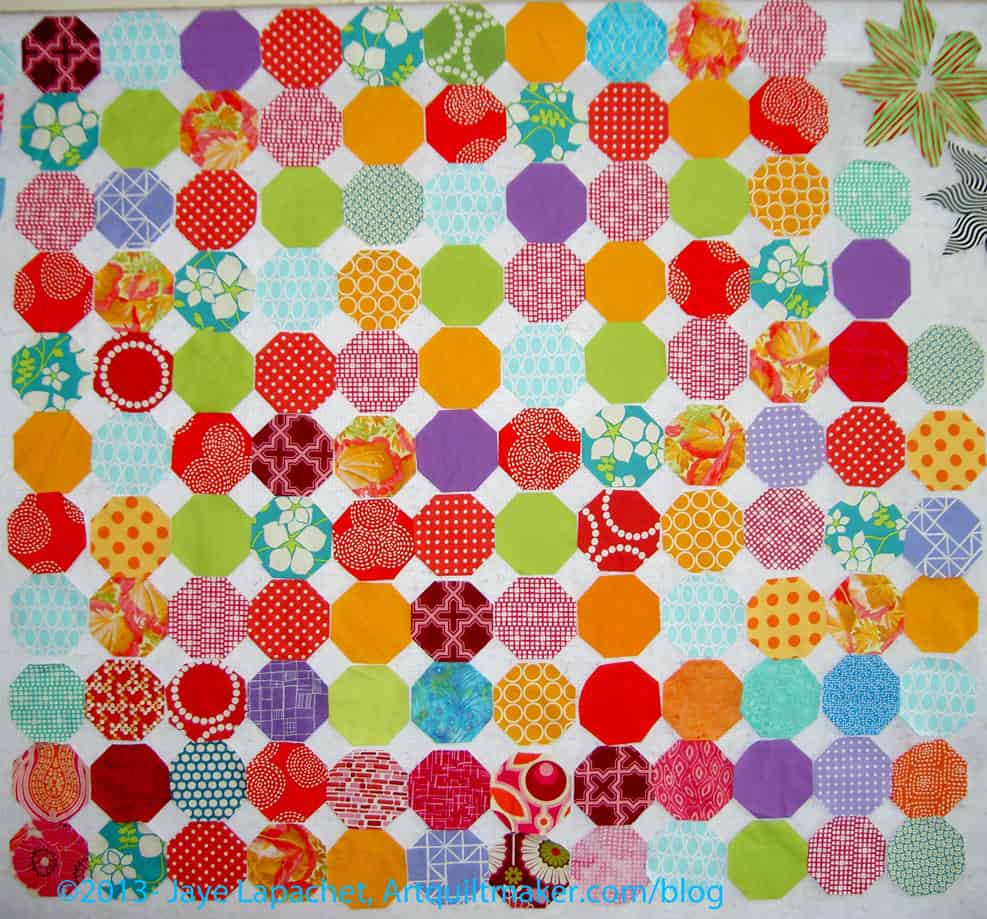
All dark Joel Dewberry removed
With the two dark Joel Dewberrys removed, it was clear I had too many warm colors
OR
I needed more cool colors.
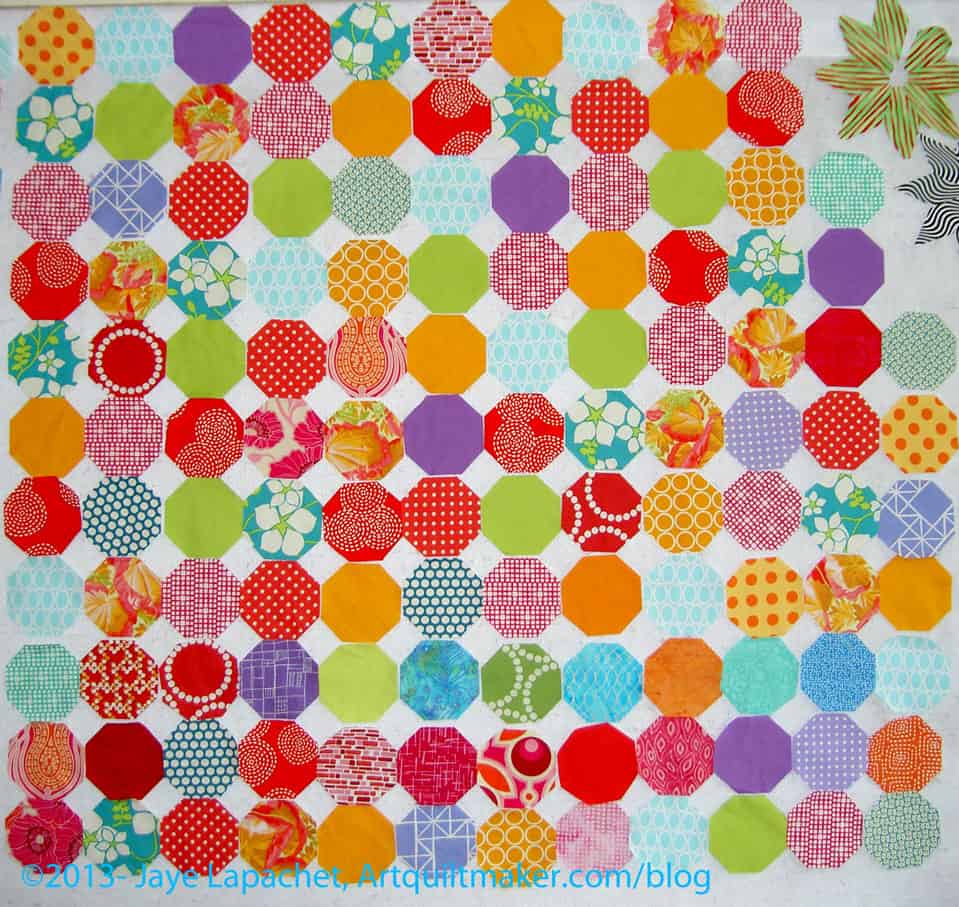
The piece stayed like this for a week or two until today when it occurred to me that I might be able to add some DARKS and that might make the piece.
As I see it, at the moment, there are two reds that are the only darks. Perhaps I will some dark purple Pearl Bracelets. I have to look at it with the dark purple.
The BAMQG Meeting was yesterday. I turned in some cat beds to Amanda and was very happy I did. Amanda was having a bad week, so I was glad I made the effort.
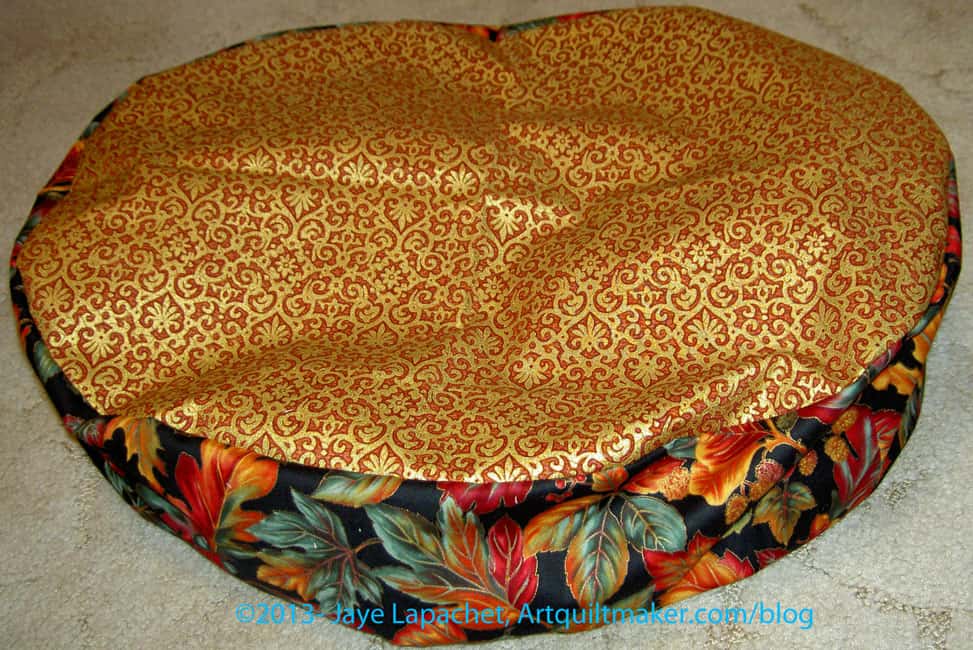
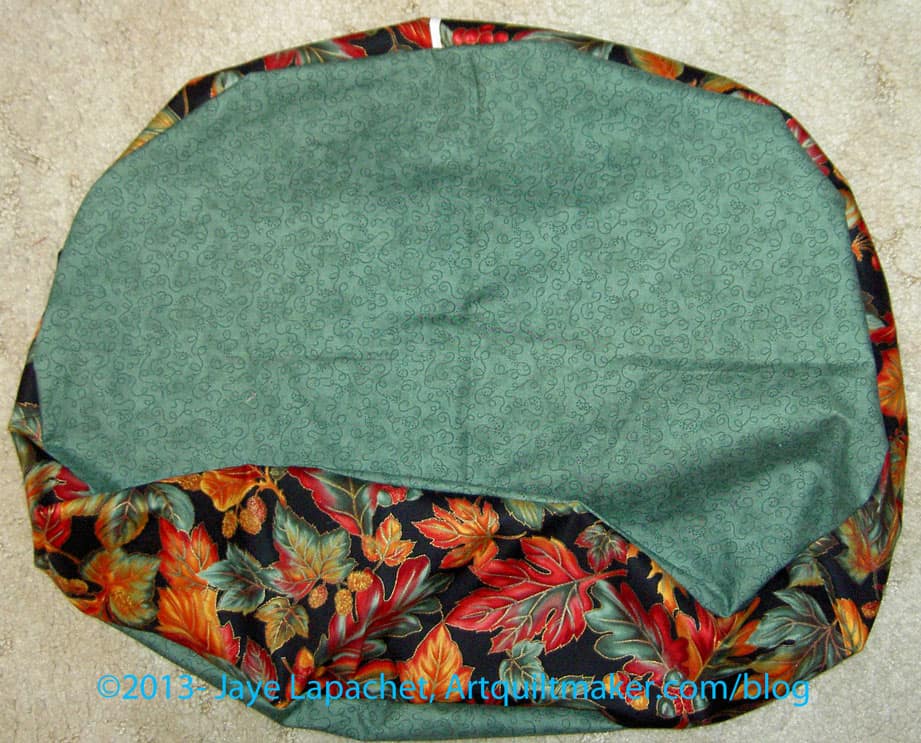
These two cat beds were different, because they were both made of cotton rather than Polartec/Polarfleece. I like working with the Polartec/Polarfleece, but it is a little more difficult to work with than cotton. It was a relief to work with the cotton. I made the cotton cat beds pretty fast compared to the Polartec, but I still don’t mind working with the Polartec.
Cotton Cat Bed
These were interesting fabrics with which to work. They are fabrics which remind me of fabrics that were very popular when I started making quilts.
I wasn’t the one who brought the most cat beds. Someone brought a whole shopping full of really cute cat beds. Someone had made about 30 and appliqued (using blanket stitch) one adorable heart on each cat bed.
All of these cat beds made Amanda really happy. It was great to see her smiling again.
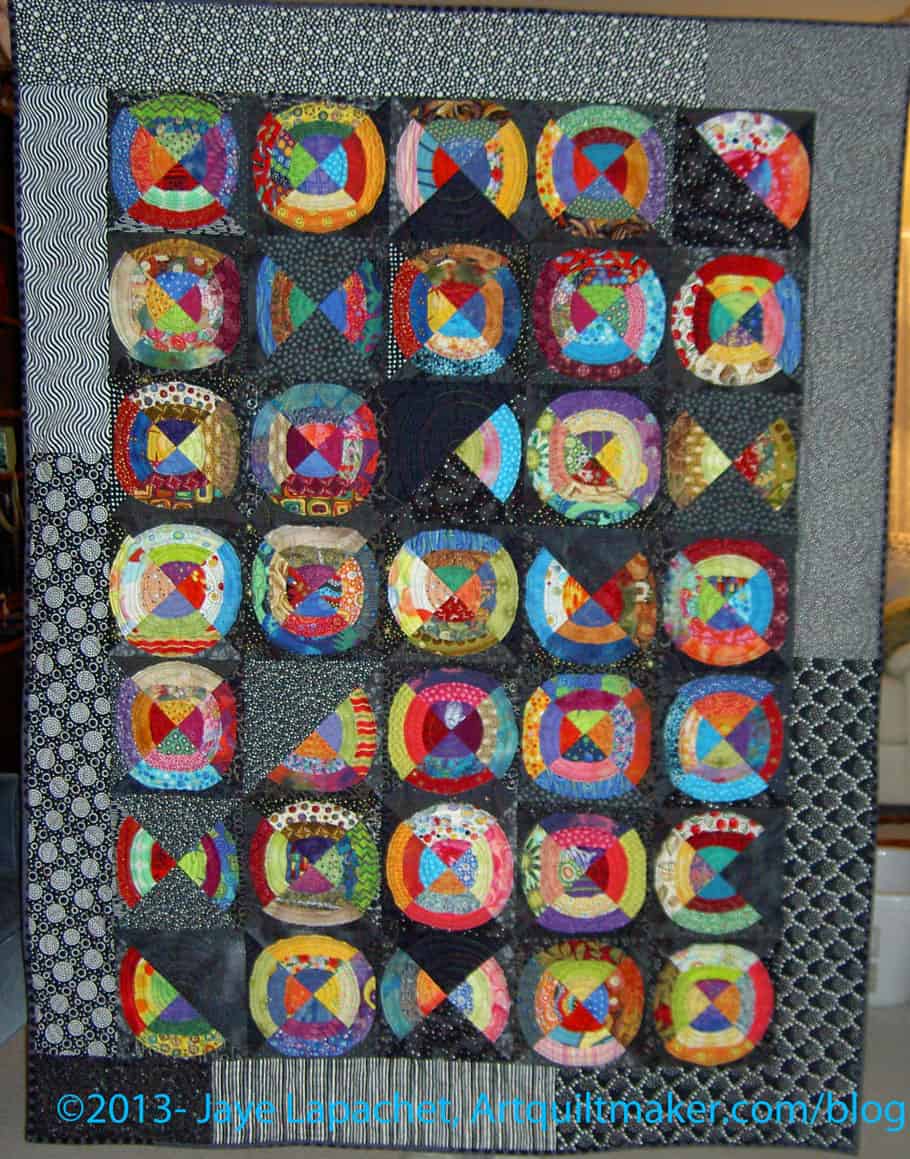
After about a gazillion years of not working on this project, it is finally done. OK a gazillion is a little bit of an overstatement, but when I work on a project for many years, it can feel like a gazillion.
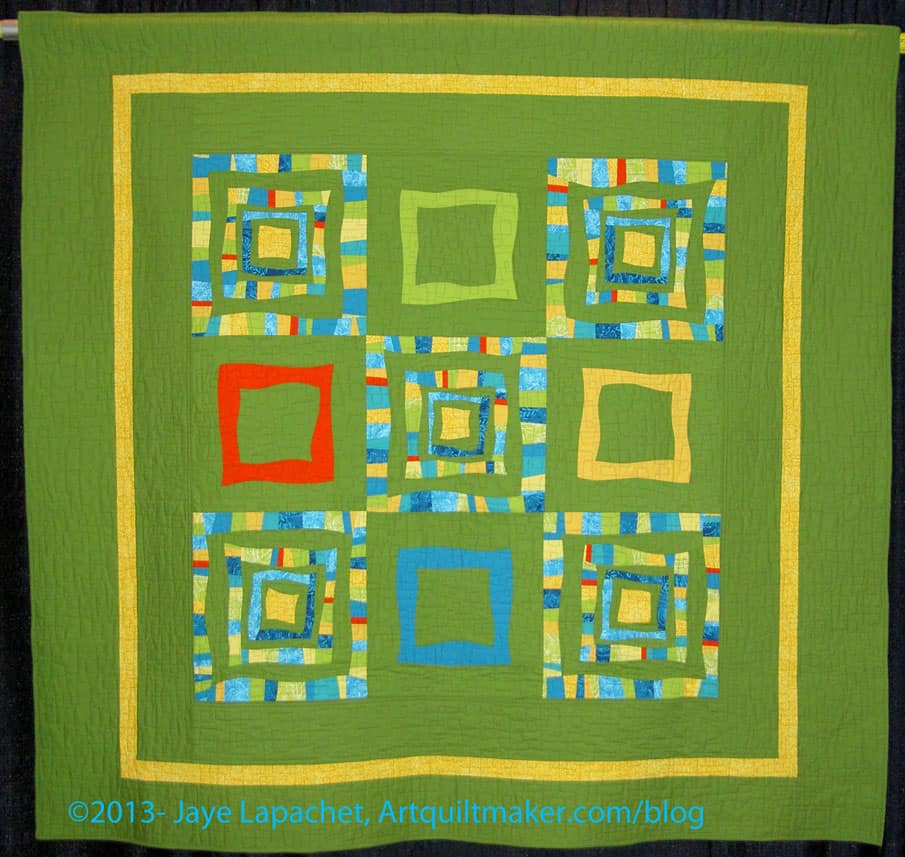
I finally finished the Original Bullseye. It was started in 2001. I think that I started it soon after I joined the Quilt Mavericks. I finished it this year, so the duration was 12 years.
I am pleased with the way it came out. Colleen did a great job quilting it.
The other thing that I realized is that this is a great size. It easy for my quilt holders to hold it up and for me to photograph it.
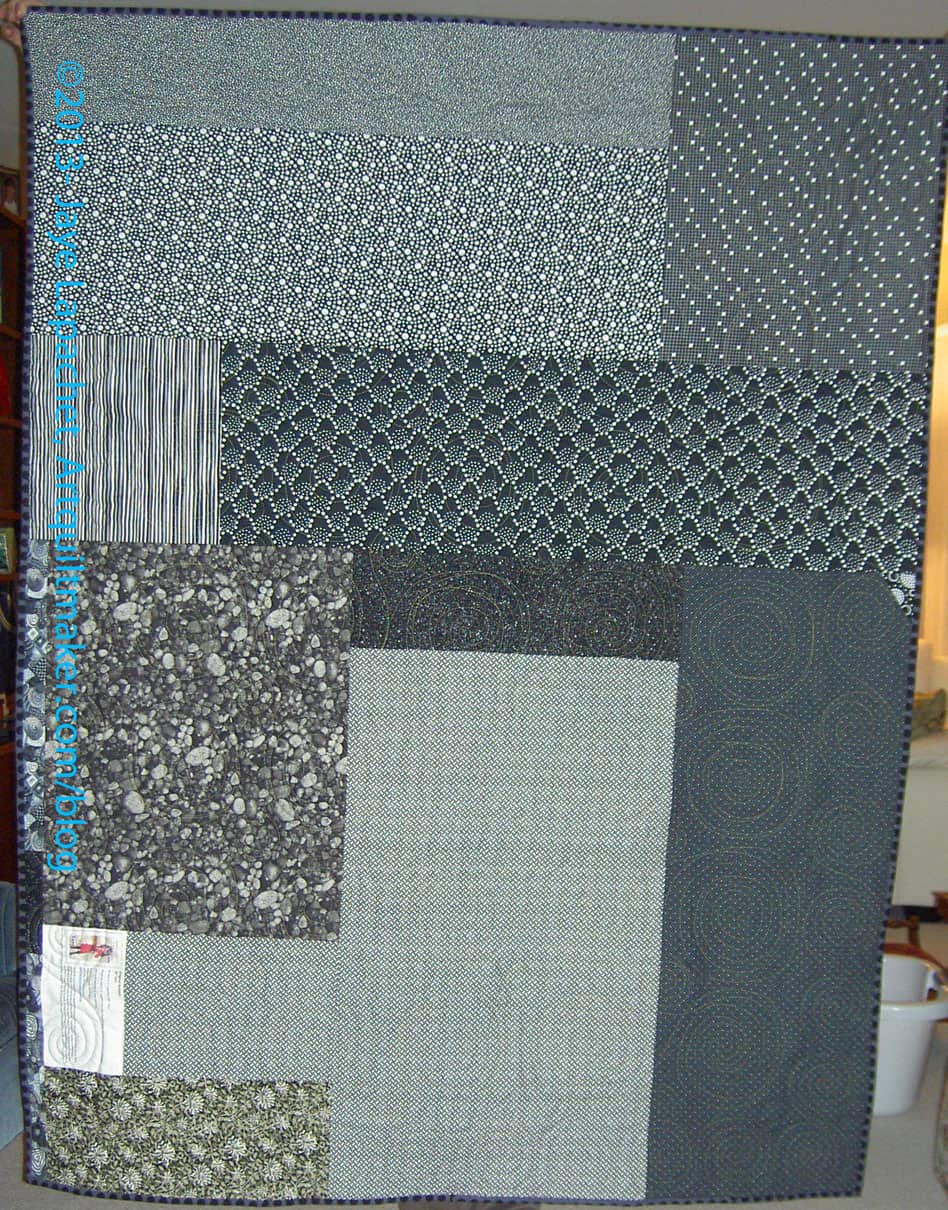
Some of the fabric is pretty old and I noticed that one of them is pretty see through. If I had realized that would happen, I wouldn’t have used it. Live and learn.
Definition: “Cream is a dairy product that is composed of the higher-butterfat layer skimmed from the top of milk before homogenization. In un-homogenized milk, the fat, which is less dense, will eventually rise to the top. In the industrial production of cream, this process is accelerated by using centrifuges called “separators”. In many countries, cream is sold in several grades depending on the total butterfat content. Cream can be dried to a powder for shipment to distant markets.
Cream skimmed from milk may be called “sweet cream” to distinguish it from whey cream skimmed from whey, a by-product of cheese-making. Whey cream has a lower fat content and tastes more salty, tangy and “cheesy”.[1] They are also used in variety of food products.
Cream produced by cattle (particularly Jersey cattle) grazing on natural pasture often contains some natural carotenoid pigments derived from the plants they eat; this gives the cream a slight yellow tone, hence the name of the yellowish-white color, cream. Cream from goat’s milk, or from cows fed indoors on grain or grain-based pellets, is white.” (Wikipedia)
Ice cream
Center for Research and Analysis of Migration
ice cream sandwich
Cream pie
Cream of the West, Inc – offering 100% whole grain cereals and other naturally healthy foods from the heartland of Montana, along with heart-heathy recipes.
Strobe Cream from M*A*C* cosmetics
hand cream
sour cream
clotted cream
Crème fraîche (28% milk fat) is slightly soured with bacterial culture, but not as sour or as thick as sour cream. Mexican crema (or cream espesa) is similar to crème fraîche.
Fenton’s Creamery
cream cheese
buttercream frosting
heavy whipping cream
whipped cream
Post the direct URL (link) where your drawing, doodle, artwork is posted (e.g. your blog, Flickr) in the comments area of this post. I would really like to keep all the artwork together and provide a way for others to see your work and/or your blog.
We are also talking about this on Twitter. Use the hashtag #CPP
The Creative Prompt Project, also, has a Flickr group, which you can join to post your responses. I created this spot so those of you without blogs and websites would have a place to post your responses.
I still have 7 projects on my WIPs list, but only 3 (4?) of them are really old. Two projects, from the “In the Quilting” stage, are ready for binding. I am still kind of in awe at how much progress I have made since I counted up my UFOs for the first time and decided to do something about it. It was 2 years ago that I started. All of the really old UFOs are mostly taken care of.
Again I need to keep in mind that I need to be thinking about whether or not to focus my efforts on not filling up the list again. I don’t mind having a few projects going at once, but I continue to feel that I don’t want stalled projects hanging around for years. I really don’t. That is the key: I have to work on them.
The machine is still in the shop, so I haven’t been doing a lot of sewing, even with the loaner (finally gave up). I pulled out the Jem and have done a bit of sewing. I have been doing a lot of cutting – still for Scrapitude, but also for one of the Super Secret Projects and a little for the Russian Rubix. Cutting so much means new projects. 😉
Aqua-Red Sampler – Frances and I are stalled. She has a lot going on, but I hope we will get back to it. I should be able to do the next tutorial regardless.
The Tarts Come to Tea: I still haven’t worked on this since April 2011, though, periodically, I think about working on it.
Pointillist Palette #4: Fourth is a series of 6 quilts; needs tiny square patches sewn together. I still haven’t worked on this, though, every once in a while I think about using some of the squares as leaders and enders.
See: needs satin stitching. Small, also a possibility for finishing before the end of the year, though with all the cutting I have done recently, perhaps not so much.
Self Portrait: started in 2006 at a class at Quilting Adventures in Richmond, Virginia. I like the piece, but don’t know where to go from where I am. Mouth? Hair? The attitude I need to have is that I can’t ruin it; there is always more fabric. Possibility for abandonment.
Under the Sea: class project; like the design, but not the colors much. Possibility for abandonment. I have to face reality.
Flower Sugar Hexagon: This piece is up on the design wall and I have sewed a few more hexagons together, but haven’t made significant progress despite looking at it all the time.
Ready for Quilting
Again, I don’t have anything ready to take to my quilter. The machine being in the shop has put a cramp in my style this month. Sigh.
New:* Wonky 9 Patch: needs quilting and binding. I am still thinking about quilting this myself and I am thinking about it more and more. I am wondering how far apart I can quilt it so that it has some drape. Not on original list
Infinity blocks: blocks sewn together into a quilt top, borders on. Back and binding made; at the quilter.
Spiderweb: Top is together, binding is made. This is at the quilter.
New:* FOTY 2012: top, finished. Back and binding are complete; at the quilter.
New:*Star Sampler: Top finished, back and binding finished; at the quilter. (not on original list)
New:*Fresh Fruit: Top finished, back and binding finished; at the quilter.(not on original list)
Please note that even if you combine the two lists above, I do not have 26 projects on this list even though I keep starting new things. I am so thrilled I have made progress!!!
In Process
I decided that I had better put in an ‘In Process’ category. The difference, at least in my mind, between ‘In Process’ and ‘UFO’ is that I am actively working on something In Process.
Spin Wheel: really not started, but supplies gathered. I probably have enough fabrics and just need to decide to start.
Windmill quilt: Still hunting and gathering. Need to find a background, because if we use the cut fabrics, the pattern will be lost. The pieces are too oddly shaped to lose the pattern in a mass of scraps.
Stepping Stones #2 using Bonnie & Camille fabrics Bliss, Ruby, Vintage Modern: made two test blocks, but still in the thinking stage while I decide on the background colors. I want the contrast to be good.
Super Secret Project #3: working on color choices.
Abandoned
Nothing so far for 2013
Last update for the 26 Projects List. Read it. There’s some interesting stuff there.
I thought you might want to take a look at the first list I made, the one with the 26 Projects. I started the list in October 2011. I have made progress. I plan to stop this post when I have no more projects from the original list to write about. I wonder when that will be?
*New – Project started after I started working on the 26 Projects list
I spent the day at PIQF with Julie. I had a nice time. I looked at quilts. I looked at vendors. I examined stitching and patterns. I, generally, had a good time.
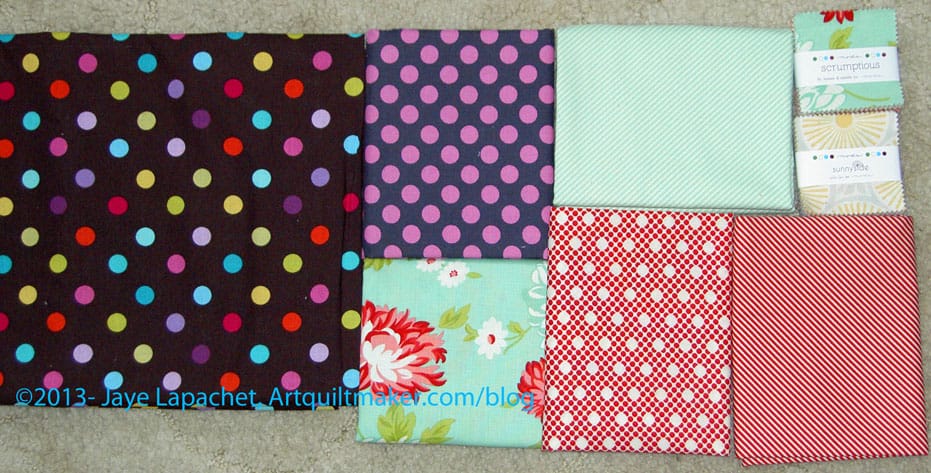
I found more Scrumptious mini-charms, another Sunnyside mini-charm, a few pieces of fabric, and some Cosmo embroidery floss. I did not buy the Splash Bali Pops or a Sew Steady Table for my Jem. As I said yesterday, there was a story behind the mini charms. After driving home Wednesday, it occurred to me that I could use the mini-charms to make a Midi bag. I knew had the pattern, but wasn’t sure where it was or if I could find it before I went back to the show. So I asked Katie on Twitter and she knew. 108, which meant that I needed to buy some more mini charms. Of course, I went back to the booth to buy more and they were out. I was sad, but it wasn’t the end of the world and I did find some more Sunnyside mini-charms and will probably make a Midi bag out of those as well. I was sad, but undaunted and was pleased to find more of the Scrumptious mini-charms at the Prairie Queens Quilt Shop booth! that is a relatively local shop but one with which I am not familiar. I’ll have to check it out.
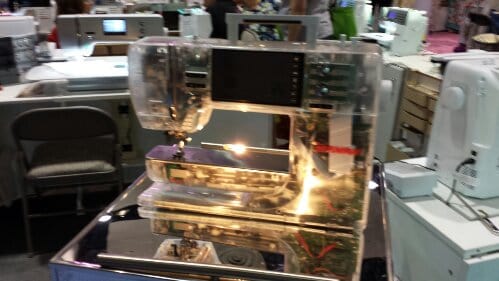
See through Bernina
6 hours is not enough time to see everything. I feel good about the number of quilts I saw. I am sad that I didn’t see all the vendors, though I know my wallet is happy. I thought the vendors stepped up their game a bit this year. It was nice to see some of the new products out for sale. The vendors were friendlier and their booths were very appealing.
I really liked the quilts. I saw so many that had fabulous design or details. Let’s Go Party! (above)has wonderful lines and those circles amaze me in the way they are made with tiny strips of fabric. The lines of the design are wonderful.
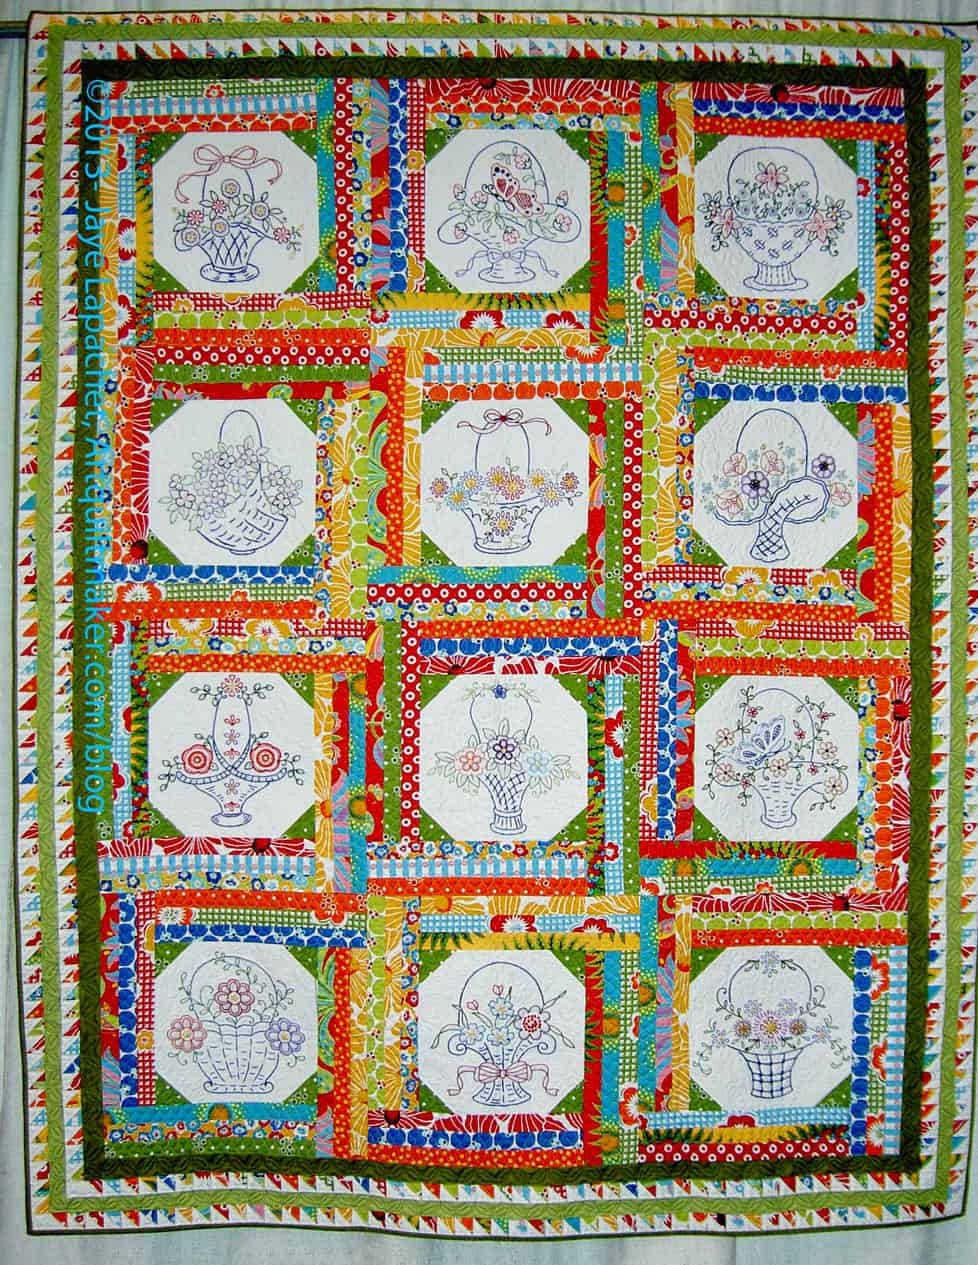
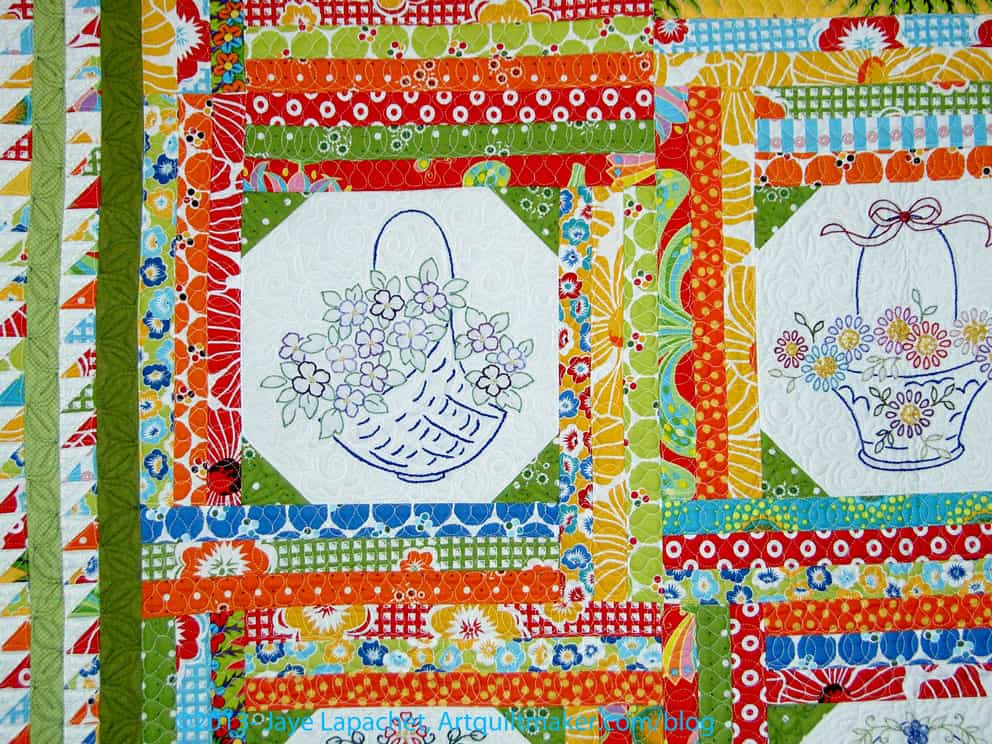
Baskets by Diana Roberts
I also really liked the combination of hand embroidery and bright sashing. The combination is unexpected and pleasing. I always like hand embroidery, but I have thought that it needed to be freshened up a bit, in general. This piece has taken hand embroidery and incorporated into a really fresh quilt. It takes hand embroidery and gives it new life.
Baskets by Diana Roberts
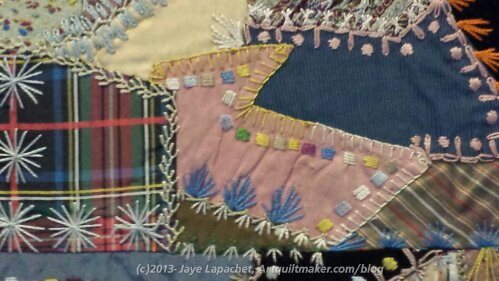
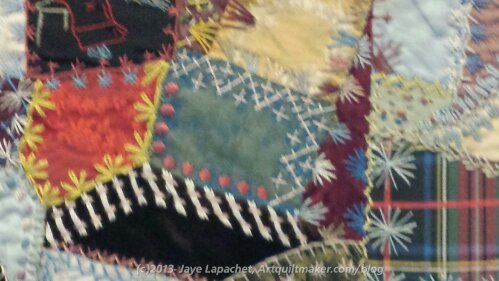
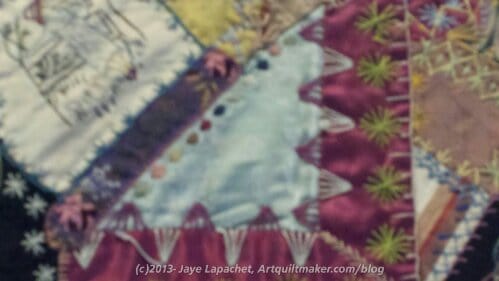
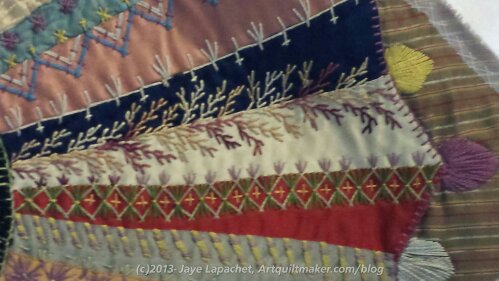
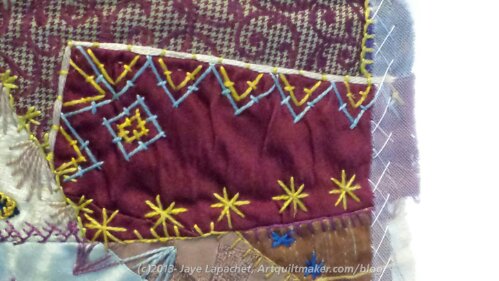
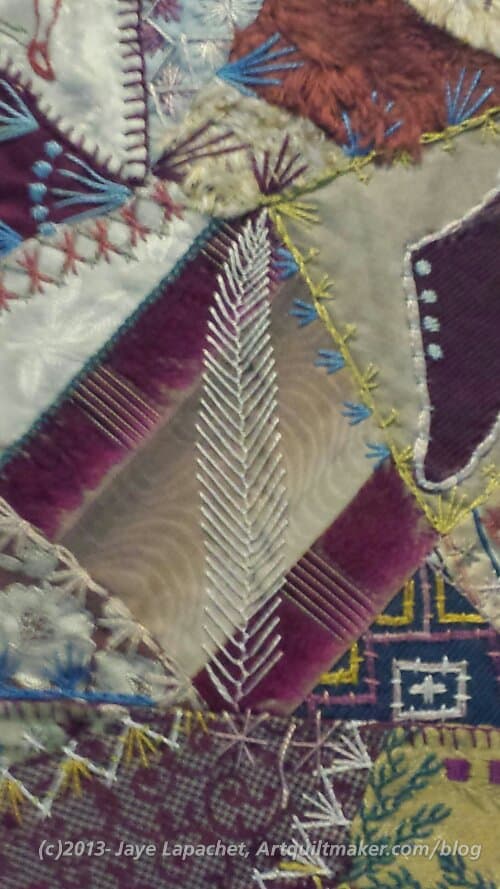
SJMQT Crazy Quilt Example (detail)
The San Jose Quilt Museum was there with a display of crazy quilts. I didn’t take photos of the entire quilts. A lot of crazy quilts don’t photograph (by me) well. They are full of detail. I did take photos of the stitches I was interested in.
I took photos of the stitches that I thought were different than the ones in normal stitch dictionaries.
SJMQT Crazy Quilt Example (detail)
SJMQT Crazy Quilt Example (detail)
SJMQT Crazy Quilt Example (detail)
SJMQT Crazy Quilt Example (detail)
SJMQT Crazy Quilt Example (detail)
There was a bag called a Pasadena bag that I thought was interesting, but didn’t end up buying. I reminded myself that I have plenty of bag patterns as yet unmade. This thought inspired me to dig through my pattern box and look at the bag patterns I have bought with good intentions.
The Mancusos have a preview night before the Pacific International Quilt Festival officially opens. It is held on Wednesday. I went this year, as I have for the past several years, but this time I drove down right after work. The drive down was ok. I didn’t encounter much traffic on the way down – just a bit as I got closer to Santa Clara. I consumed an odd dinner – GF cheese crackers, a bottle of water and a NuGo bar – and listened to an audiobook as I drove. Healthy, I know.
I arrived at 7pm, which gave me plenty of time to park, get the lay of the land and sit for awhile reading my [other] book before the doors opened. I like having plenty of time. Rushing around makes me forget things. People were already waiting in line when I got there, eager to be first. I always wonder what they want to be first for. I don’t wait in that line. I sit and wait for 2 extra minutes past the opening time, then stroll in without waiting. 😉
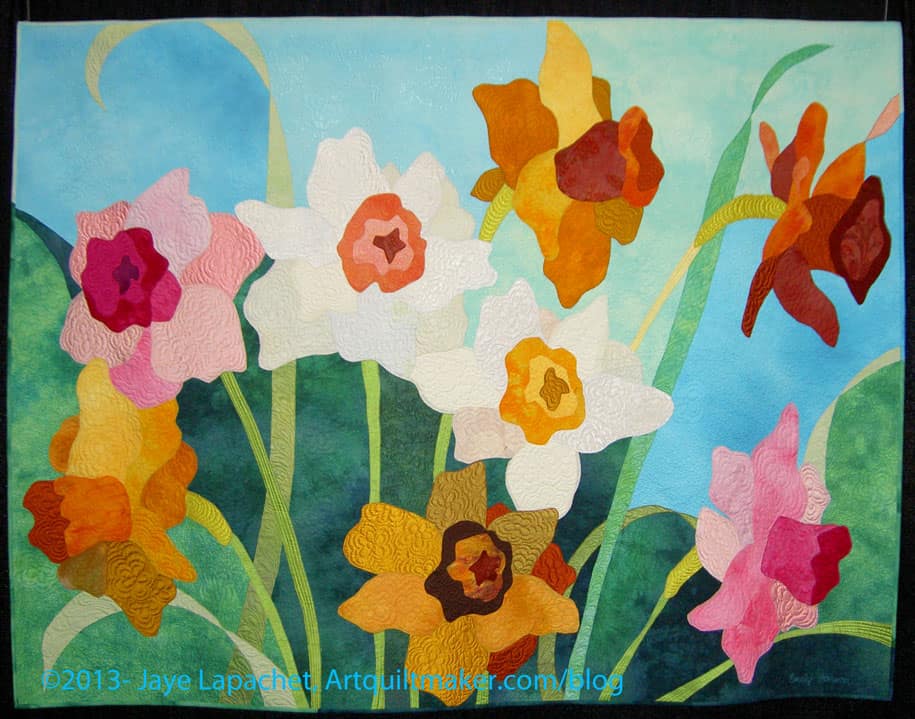
Flower Field by Emily Parson
TFQ usually comes, though her company’s budget process has been so screwed up (my words, not hers!!!) the past couple of years that we have had to change our plans last minute. This year she couldn’t make it at all. It is ok as we are looking at other shows. The PIQF format is getting a little tired for me. They need to add a display of bags and small accessories. They should change the hanging drapes to white to brighten up the hall and they should look at local talent for some special exhibits and to make the show different from all the others they host. Still, it is a large show in the area and I couldn’t miss it. I definitely need to report back to TFQ on the quilts.
My intent was to wander relatively quickly through the entire hall and get an idea of what quilts and vendors were available. I didn’t want to try to look at all the quilts or take photos of everything in the hour and a half of the Preview. I just wanted to get a sense of the show. I planned to go back Saturday and a drive-by would help me plan that day.
My first impression of the quilts was light and air. Often, the quilts on the black drapes create a dark, oppressive feeling. This year there was more light. The quilts were lighter in color and feeling, which gave the space a lighter feeling. Some vendors were moved slightly – up a booth or two, to a corner where previously they had been in the middle of the aisle. Many of the vendor booths had lighter colored quilts hanging also, though there were plenty of the repro booths filled with beiges, browns, burgundies and black.
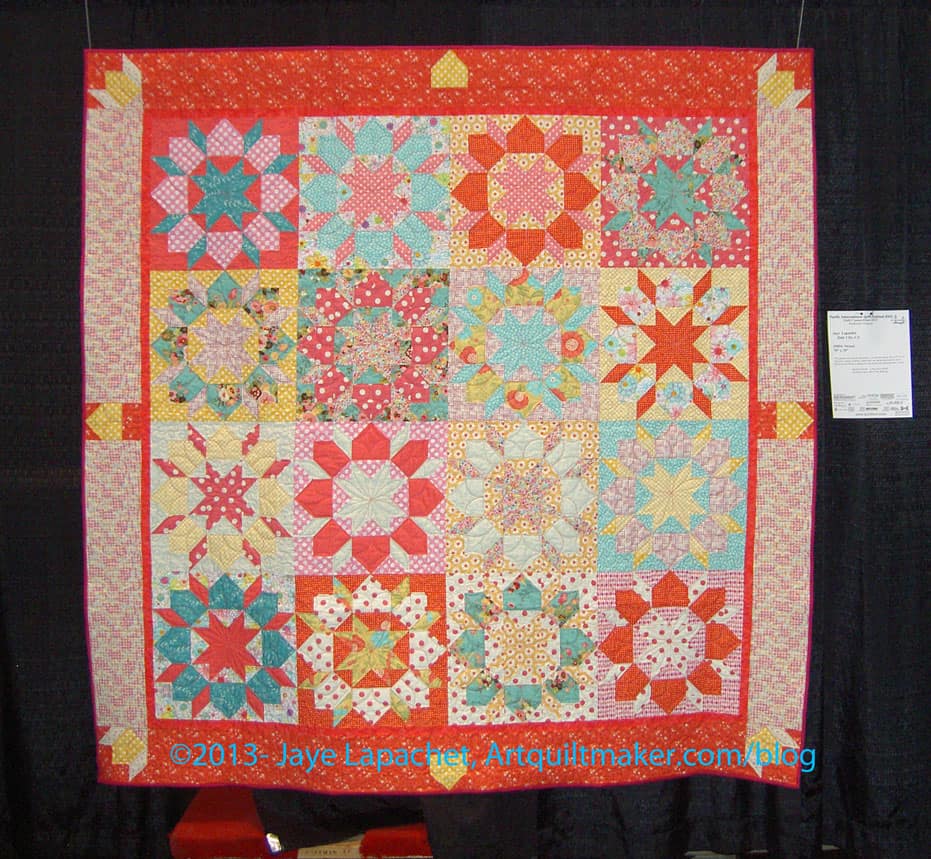
Swoon at PIQF 2013
I went to find Swoon pretty soon after I arrived. I did, after awhile, find it near the PENWAG booth and the Wearables. It is actually in quite a prime location except for the tools and supplies pushed behind it and poking out underneath the curtain. Hmpf.
As I said, I only intended to look at the quilts quickly and not take photos. I couldn’t help myself, though, and took a few. I plan to write some posts about the ones I liked later.
I also went and talked to Colleen for awhile. Her booth was filled with fun and cheerful fabrics. She also has a new technique that she will be launching tomorrow at Quilt Market. If you are reading this from Quilt Market, make sure you visit her Schoolhouse. I’d love to see a Modern Quiltmaker make an Instant Quilt from Tula Pink’s octopus fabric from the Saltwater line.
Sylvia Gregorian (PIQF)
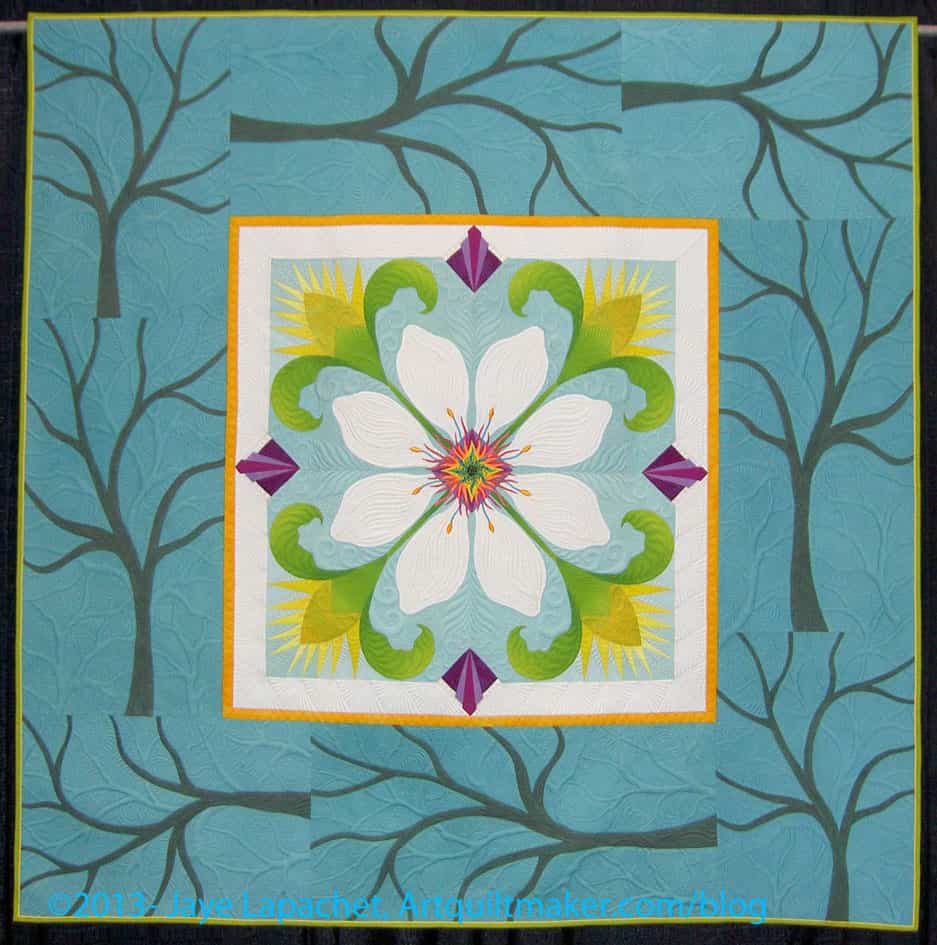
I was pleased to see that Sylvia Gregorian won one of the big prizes for her quilt. Sylvia used to be a member of CQFA and I have watched her work through what she has entered and the quilt that won definitely deserved to win.
I loved the border. I have been looking at tree quilts, especially for the width and shape of the trunk in relation to the branches.
The quilting in the border echoes the shape of the tree. The quilting is amazing all over the quilt. It looks like anyone could do it with enough patience. This quilt really inspired me. I have enjoyed watching Sylvia enter and enter every year, gradually winning bigger and better prizes. Congrats!
Saki by Yoshiko Katagiri
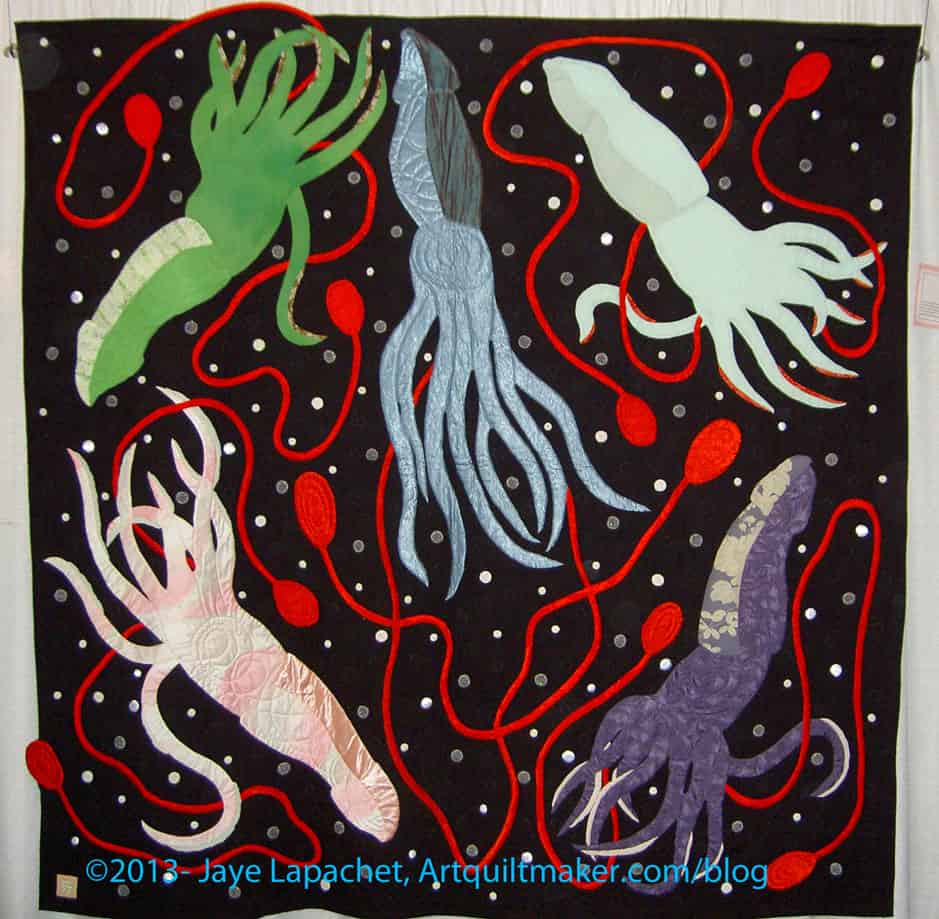
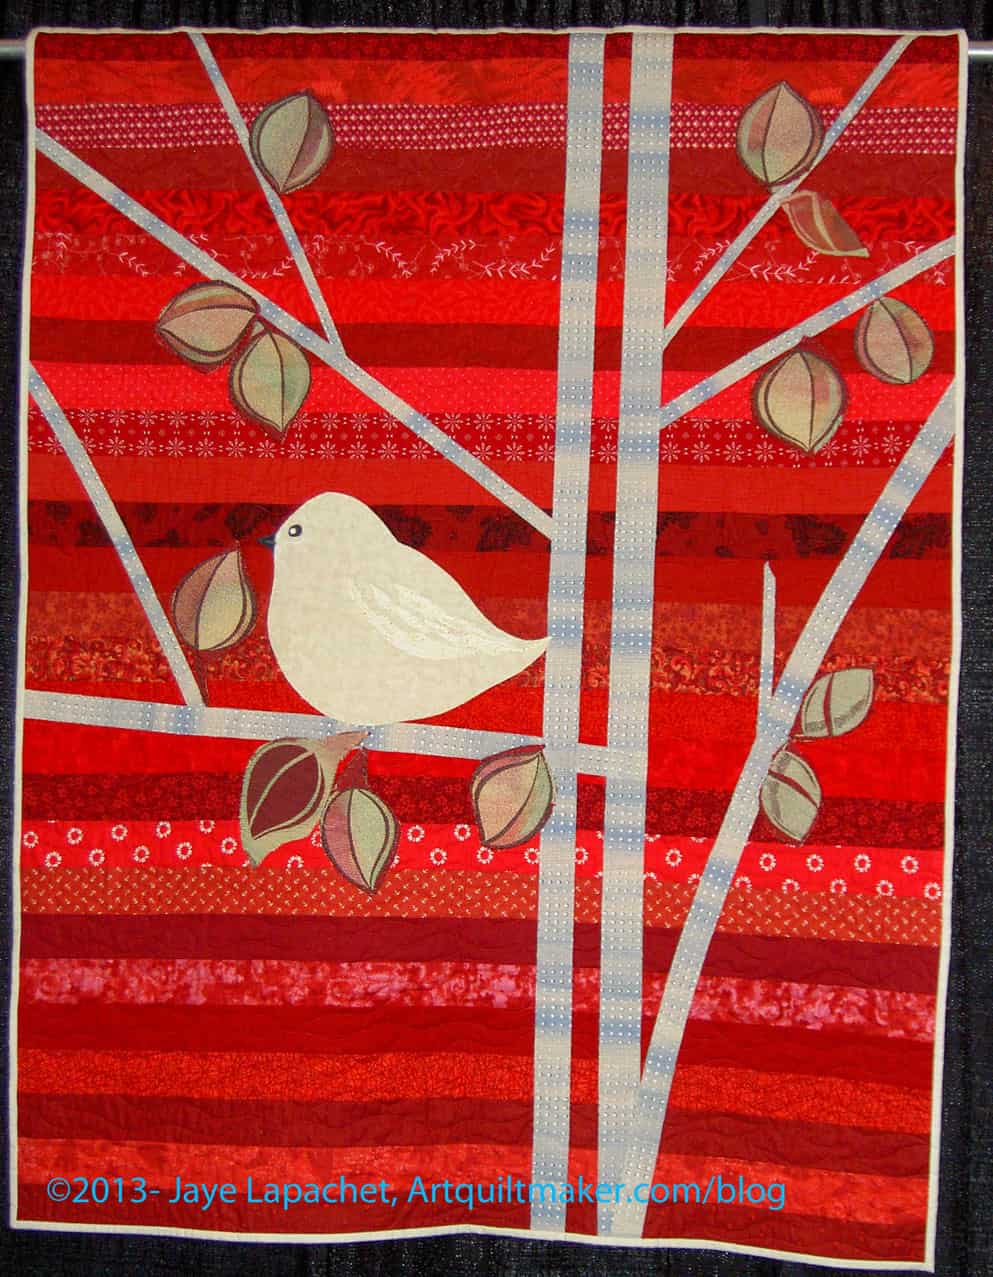
My overall impression was of much lighter quilts. My overall impression of a trend among the quilts was birds and squids. No joke.
Bird in a Tree by Joyce Marty
Yes, I visited some of the vendors. Quiltin’ Cousins was there. they have a great booth and great fabric. I also saw some Scrumptious mini charms and bought them on spec. Later, it occurred to me that they would be perfect for the Midi bag, so I got more when I went back, but that is a whole story of its own. Stay tuned.
I hope that, later this week, you will see another finish.
I went and got two quilts from Colleen last weekend while we were out car shopping in her neighborhood and both are ready for binding. I decided to sew the binding on the Original Bullseye first since that project has hung around much longer than the T-Shirt quilt. Also, I am planning to give the T-Shirt Quilt to the Young Man for Christmas. He hasn’t noticed it has returned, which means he isn’t clamoring for it, which means it will be a great gift.
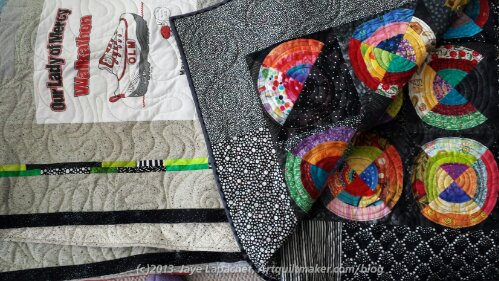
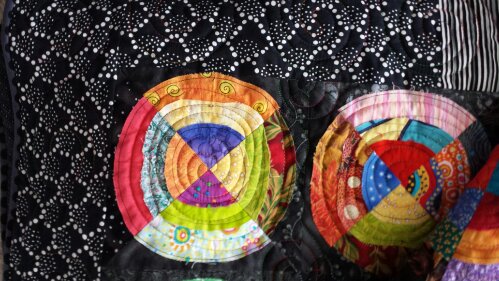
Original Bullseye detail
Colleen did a really nice job on the quilting of this piece. It is flat as a pancake despite all of the bias edges of the circles.
T-shirt Quilt detail
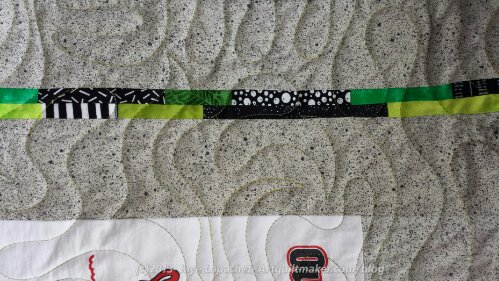
Colleen sees a lot of quilts so I was very pleased when she, and her Mom, Elaine, complimented me on the border. That is a border that is a pain to make, but very effective. I discussed the making of it in a previous post.
I wanted to show the detail, because of the quilting. I told her to do something basically all over, but not to ignore the difference between the t-shirt ‘blocks’ and the sashing. I am pleased with what she did.
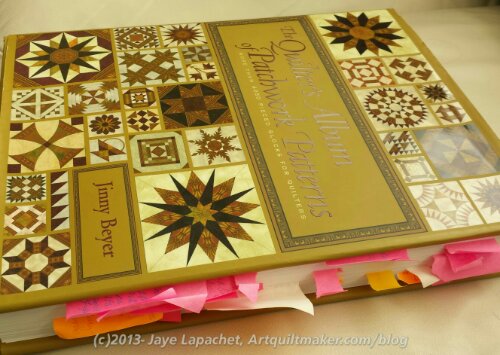
After I started the book, which I did read from cover to cover, I knew I wanted to spend time on this review, which is why it took me so long to get it up. I didn’t want to rush, because I want you love this book as much as I do. The short version is that if you have even the slightest bit of interest in blocks, drafting blocks or quilt history, you need this book. It is a fabulous reference, full of inspiration, well written and well organized. Go buy it right now.
This is a follow-up to her 1980 book, The Quilter’s Album of Blocks & Borders. If you see the 1980 book for a decent price, it is useful as well. Make sure it has the plastic grid insert.
The Quilter’s Album of Patchwork Patterns is not a sequel necessarily, but Jinny Beyer built on the original idea to come up with this larger and more comprehensive book. The basic idea that I got out of the original book was that if you understand the structure of the block, you can make any quilt. I understand that all quilts aren’t made from blocks, but having a good foundation makes analyzing the structure of all types of quilts easier.
This book lists the all the names by which a block is known. The primary name is listed first and comes from the oldest source she could find. This means that you will see blocks you know by one name entered in the book by another. Have no fear! All the published block names are listed under the primary name and the comprehensive index makes finding your favorite blocks by almost any names easy. She has limited herself, primarily to blocks created before 1970. As she says “This book would be at least four times its size if I had attempted to catalog all designs that have been created since the 1970s. I purposefully limited myself to traditional quilt blocks created for the most part before 1970…”. The exception are blocks Ms. Beyer has designed. You may not find more modern variations or names listed here. I hope she or someone else will do follow-up or a volume two adding truly new blocks to this resource.
The beginning of the book is extensive and includes not only the Table of Contents, Acknowledgements and an Introduction, but also A Primer on Pieced Blocks. The last section includes some history of the block sources, a description of the way the blocks are organized and how to draft a variety of blocks, even the oddly shaped blocks.
I was amazed to see how many catalog offering there were prior to World War 2. People could buy pre-made blocks, quilt pieces and even quilts made up. Some may lament the advent of quilt kits now, but shop owners are following in the footsteps of the “good old days” of quiltmaking.
The blocks come next and are organized by shape: squares, hexagons, continuous pattern blocks, one-patch blocks and miscellaneous patterns. It was amazing to me how the bulk of patterns are based on a square grid.
Beyer talks about the grid and this is the piece that is important to understand that will allow you to analyze blocks in a quilt at a show, draw it and go home and make it. Read this section carefully and make sure you understand before you move on.
The drafting section is very useful. It explains geometry related to quiltmaking, so those of us who tried hard to stay awake in that 9th grade class have a reason to stay awake now. My favorite part was the magic that is drafting the perfect square. Beyer gives, at least, two methods. I also liked her method of making a perfect grid. As a bonus, understanding these drafting instructions really help when you are working with a program like EQ7. Understanding the grid and how a block is drafted makes using that program much more intuitive.
The section on blocks takes up the bulk of the book. Each group of blocks is broken down by the type of grid it uses. For example, the first section is called 2×2 Base Grid Category. The blocks in this category are what we would normally call four patches. Each block is shown in Jinny Beyer fabrics and colors and also as a line drawing. Included on the page is the block name and reference.
Another bonus is that Ms. Beyer has gathered like blocks together into a section called Quick Reference: (theme). This is a good and easy way to find all the blocks with a certain theme to use in a quilt. One Quick Reference is called Boats. There were also Quick Reference pages for leaves, baskets, Red Cross blocks and Feathered Stars. All the blocks on a Quick Reference page have the name of each block and where to find it in the book.
As I moved through the book I marked blocks I liked as well. Most were my standard favorite categories like Baskets all with a twist. In a way I was creating my own quick reference pages, which I, sometimes, found were redundant with Jinny’s quick reference pages. Still, I enjoy seeing my own notes and references.
One of the things that I loved was the names of the blocks. i always knew that quilt blocks had interesting and funny names. This book gathers all of those names. Crow’s Nest, Scroll Work, Night and Day, Open Sesame, and California Sunset are all wonderfully evocative and spur on the imagination, but have nothing to do with the piecing. Like modern paint color names, I guess.
Like the previous book, this one comes with Transparency Grid Sheets as well. These tools allow you to lay the transparency grid on top of the blocks to see why they are categorized as the grid indicated.
There is a comprehensive table of contents, a bibliography, a variety of cross references, footnotes, tables and a fabulous index. All of this warms my librarian heart. This is a well done book and well worth the money.
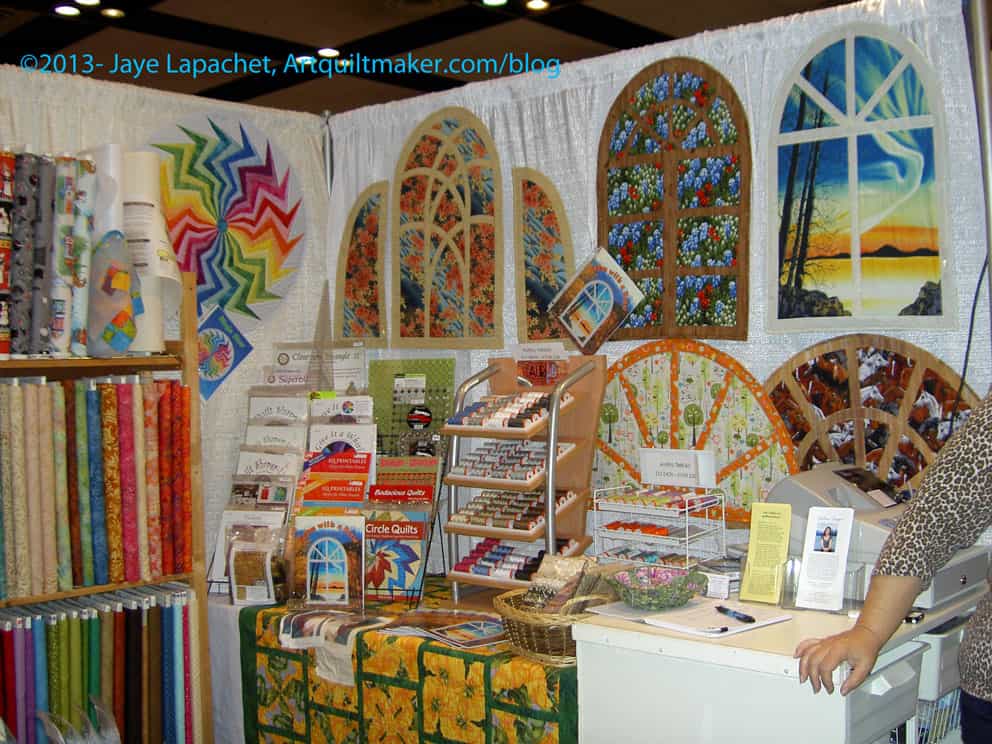
I went to pick up two quilts the other week from my longarmer. While there she showed me what she was working on for Quilt Market: Instant Quilts. When I hear ‘easy’ and ‘simple’ related to quilts, I can roll my eyes like the best of a teenager. “Instant” stopped me for a second, but as I was about to roll my eyes, Colleen put up her hand and showed me what she meant.
The quilts look like windows and I love the possibility of windows. These quilts are the ‘Big Block of Special Fabric’ type quilts. These quilts do use special fabrics, but the window type design makes it appear that you are looking into a fabric landscape. I saw some of that Octopus fabric from the Salt Water Collection by Tula Pink that would look fabulous in this design. Modern fabrics are made for these designs. I can also imagine hand dyes being used to wonderful effect. Admit it, you hand dyers (ahem, Sandy), sometimes the fabric is just too delicious to cut up into tiny pieces. 😉
I also think some of the Asian fabrics that are popular would look great in this style. My mind was whirling after we talked and I kept thinking of how many different types of fabric would work using this format.
This will be rolled out at Quilt Market, where Colleen is also presenting a game. She has self published a book about the concept, which should be available on her website Monday or Tuesday for those of you who are unable to visit her booth at PIQF. I have to say that I really like the concept.
Children’s cup is a humanitarian and spiritual aid organization. It has feeding programs, medical treatments, and orphanages for hurting people around the world.
Cup o’Noodles
Stacking cups (toy)
Ryder Cup
Quidditch World Cup
Coffee cup
Definition #1: “The cup is a customary unit of measurement for volume, used in cooking to measure liquids (fluid measurement) and bulk foods such as granulated sugar (dry measurement). Actual cups used in a household in any country may differ from the cup size used for recipes; standard measuring cups, often calibrated in fluid measure and weights of usual dry ingredients as well as in cups, are available.
As a result of the fact that the imperial cup is actually out of use and the other definitions differ hardly (±3%), the U.S. measuring cups and metric measuring cups may be used as equal in practice.
No matter what size cup is used, the ingredients of a recipe measured with the same size cup will have their volumes in the same proportion to one another. The relative amounts to ingredients measured differently (by weight, or by different measures of volume such as teaspoons, etc.) may be affected by the definitions used.” (Wikipedia)
Definition #2: “A cup is any of a variety of drinkware used to consume food or beverage.” (Wikipedia)
Post the direct URL (link) where your drawing, doodle, artwork is posted (e.g. your blog, Flickr) in the comments area of this post. I would really like to keep all the artwork together and provide a way for others to see your work and/or your blog.
We are also talking about this on Twitter. Use the hashtag #CPP
The Creative Prompt Project, also, has a Flickr group, which you can join to post your responses. I created this spot so those of you without blogs and websites would have a place to post your responses.
In cooking:
Measuring cup, a measuring instrument for liquids and powders, used primarily in cooking
Cup (unit), a customary unit of volume and measure
I hope you don’t think that I made you suffer through all the other posts to get to the part in which you were really interested? I loved everything about the show and thought there was so much to post. It finally occurred to me to post some more quilts. Hmmm…
Concrete Jungle by Becky Parry
There were a lot of great quilts at the show. I was very impressed with the quality of the quilts selected. The workmanship on many of them was outstanding. I have to admit, though, that the little devil voice in my head reminds me that I couldn’t stick my nose up to the quilts since they were hanging in trees. I am going to move through the voice and tell you that it doesn’t matter.
I don’t know anything about the judging or selection process for the quilts, but I thought, in general, from what I could see, the quilts were well selected, interesting and diverse.
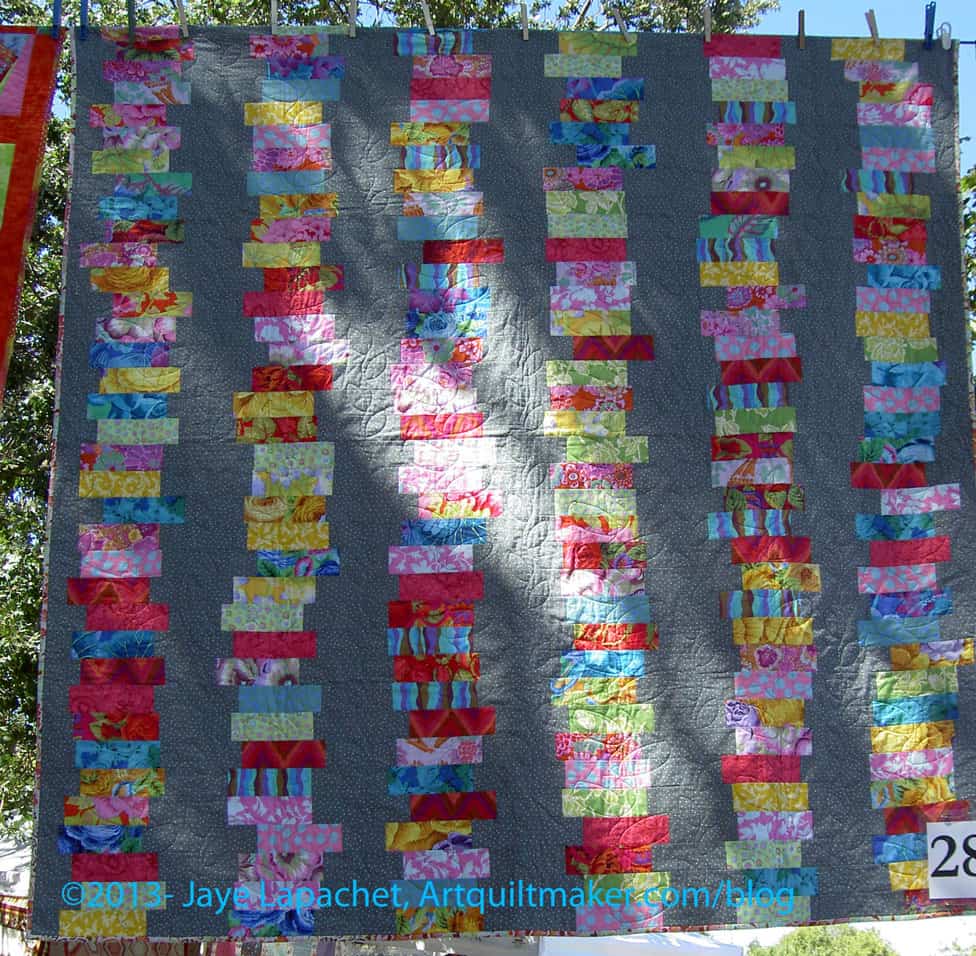
Becky Parry’s Concrete Jungle is one of my favorites. I love the design, which I consider to be a modified Chinese Coins pattern. It might have another name or be a new, modern pattern. I also love the fabric. This pattern would work very well with the Philip Jacobs prints I own. Of course, I would add in others. Mrs. K and I put our cameras on super telephoto, because we wanted to see how it was made. I will study the construction a little more before I pass judgment. I love how much interest and movement there is in this piece.
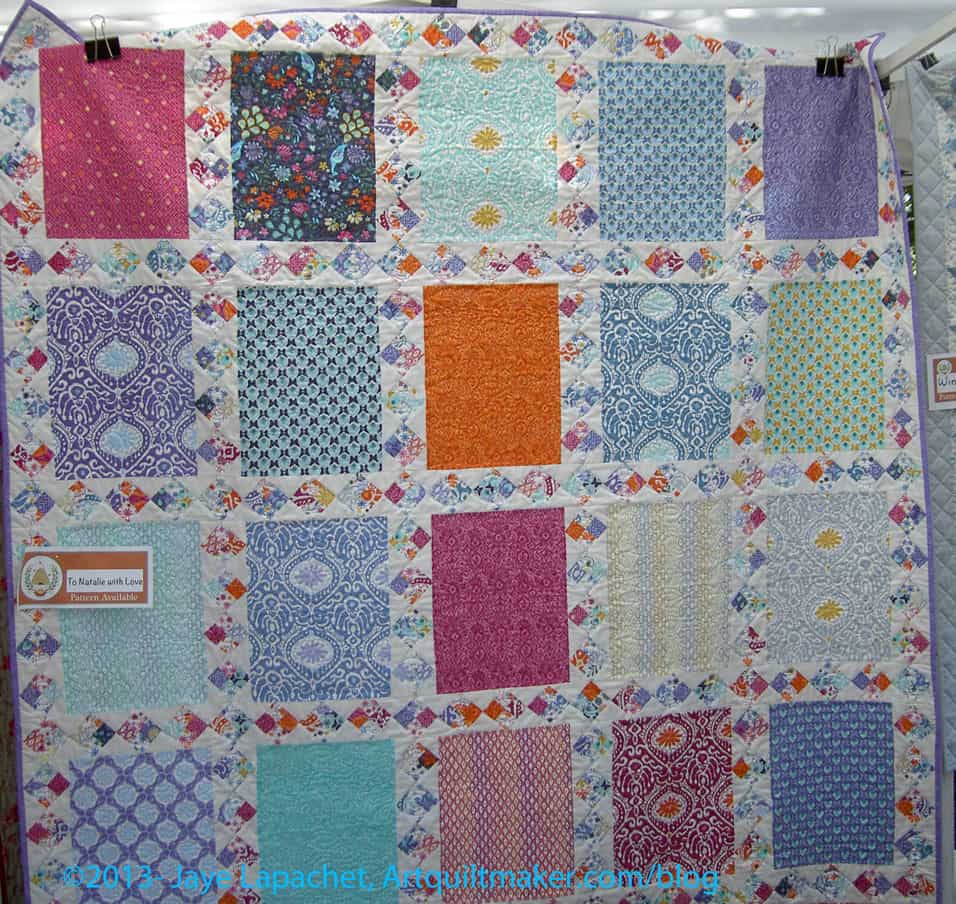
To Natalie with Love from Quilt Bug Patterns
I am also always, as you know, looking for interesting uses for large scale print fabrics. This is a pattern called To Natalie with Love from Quilt Bug Patterns. I wasn’t able to easily find a link to buy the pattern, but the quilt was hanging outside the In Between Stitches booth and you might contact them to find it, if you nee a pattern to make it.
What I think makes the quilt interesting is the sashing. Yes, the fabrics are, of course, interesting. No matter how interesting the fabrics are, the quilt is boring to me if it is just a bunch of big squares (or rectangles) of fabric. This quilt would be a great leaders and enders project, because you could sew the four patches using the leaders and enders method. Chunking the sashing to the blocks would also help keep the piece straight. Again, I wonder how this would look with Philip Jacobs fabric?
To Natalie with Love by Quilt Bug Patterns (detail)
This sample is well pieced. The corners aren’t cut off and I like that. I mentioned chunking above, because I think sewing smaller pieces of the sashing to the ‘blocks’ would facilitate that high level of piecing. My only concern would be that chunking might add extra, possibly unattractive, seam lines. Choice of background could hide such a ‘problem.’
I notice that the fabrics chosen for the four patches do not help to distinguish the pieces as four patches. I think that is fine, as long as it was a conscious decision. Some of the darker fabrics help move the eyes around the quilt, which is great and was, perhaps, planned.
I didn’t, yet, do all the cutting as instructed in the first clue, partially because I wanted to see if I could find a better way, more preferred way to cut. I also didn’t want to delve into my stash completely yet. I still wanted to try and use as many scraps from my scrap bin as possible. Some of the drawers are getting pretty full.
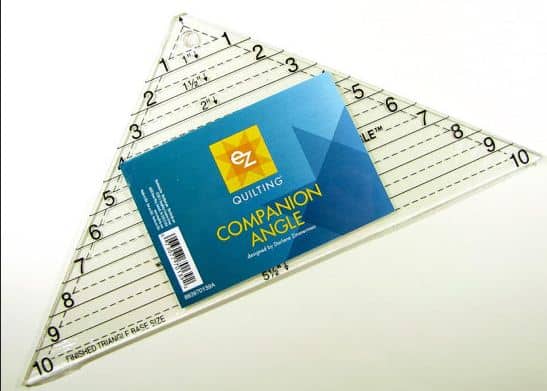
EZ Companion Angle Ruler
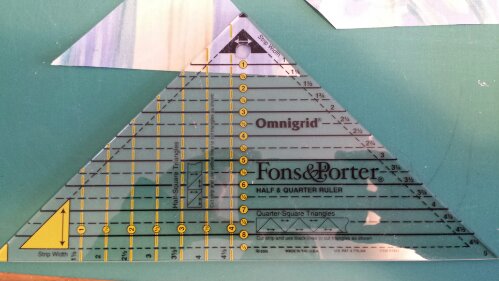
In order to cut from my scrap bin, I had to be able to cut from smaller scraps. I don’t have a lot of 5.25″ scraps laying around. It occurred to me, as I was thinking through this process, that I had a ruler that would make cutting the quarter square triangles a bit easier. I found the EZ Triangle Companion Ruler (I think I bought this for the Easy Street Mystery quilt) and the Fons & Porter Half & Quarter Triangle Rulers. Neither had been opened (ooops!), so I examined them and, for no particular reason, chose the Fons & Porter to try first.
I cut one 5.25″ square the way Charlotte suggested so I had a sample. I used that to determine the size I needed to to cut using the HST/QST ruler. The directions on the Fons & Porter ruler tell you to cut a strip size of 2.5″ to get the size QSTs I needed. This cut off the tip of the triangle at the top (see that tiny black triangle at the tip of the ruler in the photo below?). I wasn’t sure why I would want to cut off the tip since it didn’t create the bunny ears. This made me wonder if that ruler would work. I didn’t want a hole at the point where those triangles intersected with other piecing. Nobody was around to answer on Twitter, so I cut the strips 2.75″ and used that dimension as a guide for cutting additional triangles.
“Strips” is a bit of an exaggeration as I was using scraps. I tried to find scraps that were at least 2.75″ wide.
Fons & Porter Half/Quarter Square Triangle Ruler
Using this ruler took a lot longer than cutting already cut 5.25″ squares into quarters would, but I was able to use a nice variety of fabrics and I was able to clear out my scrap bin a little more.
I found that I had to have a nice straight cut line on which to line the correct cutting line.
One confusing thing, which I have found with other rulers, is where to put the fabric under the ruler. Some of the lines, including the one I needed to use, were quite thick. Do I line the ruler on top of the fabric with the bottom of the thick line even with the cut line? Or something else?
I just decided to be consistent. I can always trim.
If you haven’t done the triangle step of Scrapitude, I hope you’ll try using one of these rulers to vary your fabric selection.
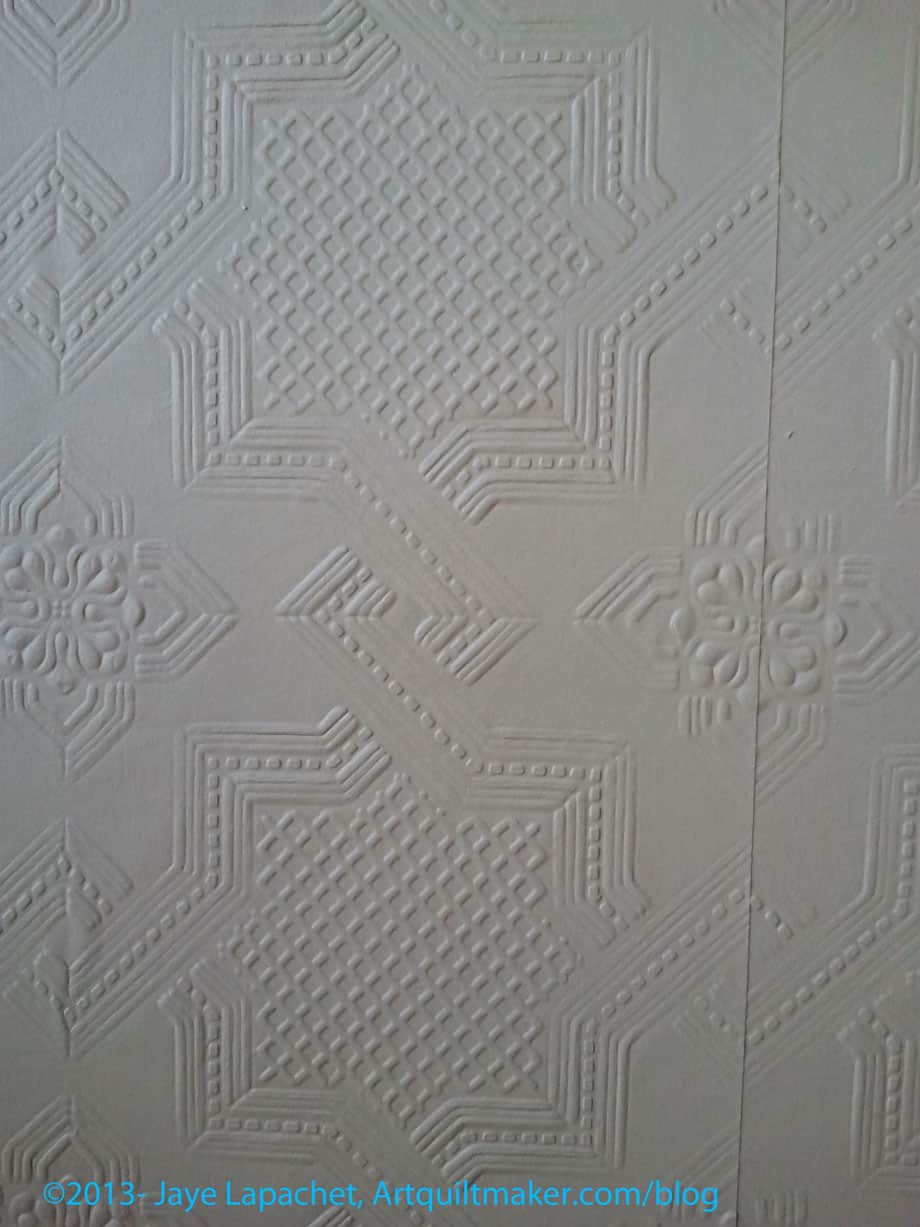
I saw this design at the Alden Lane Quilt Show somewhere. I have always liked the tin ceilings and faux tin wall treatment seen in many Victorians in San Francisco. I thought this example would make a particularly nice quilting pattern. Perhaps modifications would be required for machine quilting, but hand quilters could use the designs as is.