The Back of Rosette #1

Back of Rosette #1 with M2 in process

I have been asked several times to see the back of Rosette #1. I thought this was a very odd request, but after about the third time, I am guessing it is simple curiosity.

I have been thinking about this piece and realized that this is a very different piece from most English Paper Piecing.

I think most people are familiar with sewing hexies. This is more complex and very different looking than hexies. Even though 500+ people are working on the Pink Door BOM, that is a small number compared to the number of quiltmakers out int he world. I think my guild is fortunate to have 2 members working on this project. That is  A LOT for one small guild.

I have always thought that EPP was a great way to do complex designs and after reading All Points Patchwork, I wasn’t scared of any complexity. Perhaps I should have been a little scared of this project as it is not easy.

As you can see, and as I have shown before, there are a lot of different shapes. The shapes don’t really matter (bias doesn’t really matter) as all of the fabric is stabilized with papers. You can see the white in the photo above. Those are the papers. I could take them out from the pieces that are completely surrounded, as I have a little in the Half Hexie Star project. I want to keep them in as long as possible. I am not sure why. Some are starting to pop out, but I keep shoving them back in.

Back of Rosette #1 with M2 in process - detail
Back of Rosette #1 with M2 in process – detail

I am using SewTites**, mostly, to keep the pieces together until I can sew them. Fortunately, I have collected a lot of SewTites, because at one point I was using them all.

I try to keep the back neat. This is one of the large rosettes (I think there are 4 large rosettes) and it is a challenge to handle as I sew.

I have gained some skills and developed some strategies, which have helped. I lay the piece on my cutting table and use the table to hold the weight of the piece while I am sewing M2  pieces to Rosette #1.

I also have started sewing joins together before I sew a whole seam. This keeps things in line.


I still have not started M3 and I know the next shipping date is soon. EEEKKK!


**I use affiliate links and may be paid for your purchase of an item when you click on an item link in my post. There is no additional cost to you for clicking or purchasing items I recommend. I appreciate your clicks and purchases as it helps support this blog.

Book Review: Quilts from the House of Tula Pink

Quilts from the House of Tula Pink: 20 Fabric Projects to Make, Use and LoveQuilts from the House of Tula Pink: 20 Fabric Projects to Make, Use and Love by Tula Pink

I had to read this in my browser to write this review as I kept falling asleep as I read it at night. I didn’t fall asleep because it was boring; I fell asleep because I was tired. I think I have to be sitting upright to write reviews. 🙂

As I have worked on La Pass, I have gotten more interested in Tula Pink. I have watched most of her Tula Talk Tuesday videos and have gained a lot of respect for her work ethic, design ideas, her ability to have fun along the way and to connect with her customers. I was somewhat disappointed in this book. I wanted to learn more about Tula Pink the person. Instead I was handed more patterns for projects. The projects were fun and whimsical and some of the projects are interesting, but I have enough projects. I want to learn about inspiration, what inspires Tula and more about where she came from. I know it is too much to ask, because everyone needs their privacy, but I still want to know. Despite this disappointment, there are some interesting things about this book.

As I said, I borrowed this on Kindle. The Library’s hours are much reduced and I can’t take time from work to drive over to the library to pick up the print book. It is much easier for me to write reviews when I have the print book. I can flip back and forth and refer to page numbers for you. This will be a much more basic, not as detailed review.

One weird thing was that on the title page, Tula’s name was spelled ‘Tule’. The librarian (cataloger) in me always studies the title page. Not sure if it is just this copy or if she used to spell it that way. Strange. Also, where was the copy editor???

The first few pages after the title page and before the contents page has the beautiful photos we come to expect from Tula. I like how some of the quilting extends beyond the photo onto the page.

The first section of the book is called Techniques and Designs. It includes techniques that Tula uses in her quilts such as Easy Corner Triangles, Half Square Triangles, Tula’s Totally Tubular Tube Technique, Fussy Cutting Method, Scrappy Fusing Technique, Squaring up Strips, Nesting Seams method, and her binding method. Tula also talks about sketching out your design, selecting fabric and thinking about quilting designs.

After the Techniques section comes the projects section. The first project section is her storytelling quilt pattern section and the other one is Color Block quilts and projects. She also has Haiku quilts and projects.

If you have the Simple Folded Corners ruler I talked about you don’t need the Easy Corner Triangles method. However, it is an interesting method, especially where she talks about the measurements.

Tula’s Half Square Triangles method isn’t rocket science. I do like her attitude, however. She writes “Piecing is often discussed in terms of easy and hard. The reality is that there are only so many ways to sew a couple of pieces of fabric together, and none of it takes a college degree to accomplish.” I think this is true, straightforward and well said. She goes on to talk about thinking of piecing in terms of the time it takes.

Tula’s Totally Tubular Tube Technique is a method for creating offset strips. I might be able to use this.

I am pleased to say that Tula shows how to nest seams . Yay! I am not the only one who still does that. I wonder what would happen if other modern quiltmakers knew she nested her seams?

Tula talks about color. Her methods are no different than the methods I teach, but she has better names for them: The Starlet, The Chorus Line, and the Centerpiece Theory. She also talks about creating color stories and I like the way she illustrates this by giving examples of things to think about that represent the colors in the story. For example, for a warm color story Tula suggests you think about “sunsets, fire and gerbera daisies”. These items represent warm colors exactly. She goes through cool, monochromatic, analogous, and complementary. Thinking about items in a certain color family is a great way think about colors. It trains your eye to think about visual images in terms of where colors fall on the color wheel. The examples she uses are all from her own lines of fabric and are very interesting.

The author has a few pages on quilting and discusses home vs. professional quilting. Tula gives the pros and cons of both, disparaging neither.

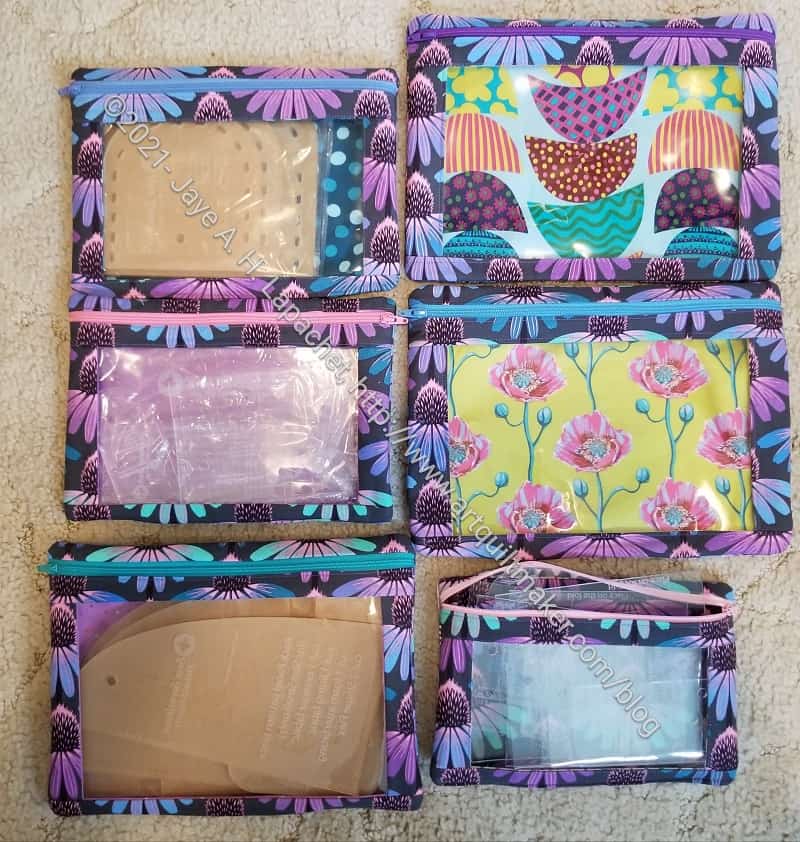
There are 20 projects in the book. Each pattern has about 7 pages. Tula weaves a small story around each quilt, which I find entertaining and endearing. The quilts are mostly made from squares and rectangles, so not very difficult. I noticed that there were a few triangles in one quilt. Not all of the projects are quilts. She also shows you how to make a framed silhouette, a shower curtain, a clock, pillows, a lampshade, a sleeping mask, and a sketchbook cover. Some of these have buttons, hand embroidery and others use different interfacings.

Throughout the book are hand drawn images of project steps, finished projects (in addition to the photos) and details. The images look like they were colored in with colored pencils. The end of the book has all of the templates. Finally, there is also an index, which makes my librarian heart sing.

None of the projects are very difficult. They all have some humor associated with them. This book is worth a look if you want any of those things or you just like Tula Pink.

View all my reviews

Maria’s Potholders

My guild had their first in person meeting over the weekend. Maria organized a swap as a fun thing to welcome everyone back. I joined and was assigned Maria who wanted potholders.

Maria's potholders
Maria’s potholders

Potholders are almost the last thing I would consider making. When I use potholders I want them to protect my hands from the heat and I have not found that homemade potholders do that. Still, Maria wanted potholders, so I made potholders.

I had some Insulbright on hand, so I used that in addition to two layers of batting. The sandwich was super fat. I didn’t want to do very much thread sinking, so I didn’t quilt it as much as I could have, but they turned out pretty thin in the end. I hope all the layers will protect Maria’s hands.

She also wanted lime green. Since I made her a pillow before, I decided to stick with that theme and use the same block. I had to redraw the block in EQ8, because I couldn’t find my block from the swap. The proportions came out a little different in this piece, but I think they still look good.

I didn’t think about a hanging loop until it was too late to put one on. Oh well.

I added in pink because I like pink and it made the potholders look cheerful and celebratory. The theme of the swap is Celebration! so the colors fit. I made a gift bag in the same fabric as the binding. The gift is ready to go.

Digital Printing or …?

I am using some Windham digitally printed fabric for the exterior of my UCAB. I am finding it to be kind of delicate.

I bought pieces at two different stores, so I am pretty sure the problem lies with the printing process and not the storage at or the transportation of the fabric to the stores.

Holes left after ripping out

First, I found that the holes were very noticeable after I ripped out some stitching. Sometimes this happens, but they were still visible even after I rubbed the fabric down.

As usual, I did wash the fabric in hot water with Retayne before I used it.

Runs in the fabric
Runs in the fabric

I also noticed that this fabric gets runs – not color runs, but like runs in stockings – if I am not careful. This happens when fabric is ripped. In this case I don’t know (and don’t remember) how the fabric was separated from the bolt.

Windham Digitally printed fabric

I needed some more of the fabric and when I got the second half yard I noticed some flaws.

I don’t know that much about the process of printing on fabric. I only have a few experiences with my printer and with buying from Spoonflower.

I don’t know if the experiences I am having are because it is digitally printed or because of this particular fabric or for some other reason.

I like the fabric and hope this was an anomaly.

Working UCAB

Mom's UCAB to go
Mom’s UCAB to go

While this is Mom’s UCAB, I tested it on my travel sewing machine bag to see if it would work for me. The key is to adjust the back sleeve to fit over your rolly bag handle. I have no idea if there are standard sizes for those, so make sure you check before you sew everything to the exterior.

I plan to put my smaller items in the UCAB. I am not sure how I am going to reconcile this bag with the Tupperware box.

The picture below shows the bag empty, but trust me when I say I filled it up. It isn’t completely filled.

Sewing machine cart - front pocket
Sewing machine cart – front pocket

I need mine to contain all my to go items – notions and rulers, etc. I put them in the various pockets of the sewing machine bag, which has a lot of pockets, but it makes some of the zippers hard to open.

More La Pass Month 2

La Pass M2 WIP
La Pass M2 WIP

Month two’s work is getting done.  Not as fast as I would like, especially since I already received Month 3. I have to keep reminding myself it is not a race. As I have said before I just don’t want to fall behind. And I am making progress. I posted about my M2 work the other day and you can see that I have made progress since then.

Everything outside the black circle is Month 2. In this picture you can see the various chunks laid out next to the Rosette #1 with only some (mostly on the left) sewn down.

Full Shelves

Shelf replacing old brown shelf

I spent time filling my shelves and emptying boxes. The boxes went out with the recycling (except for some DH hid from me) and my shelves are now filled with my quilt books.

I am really happy that my books are more accessible. Before, some of them were on the floor in big stacks, which was not conducive to browsing.

Last week after I had done some of the work, I spent time leafing through some of the books that were more accessible to me. I also leafed through some while on work calls, though I have to be careful, because I tend to tune out work and focus on quiltmaking, which is not what they pay me for. 🙂

Shelf replacing old desk

Before this whole workroom redo I had collected books, run out of space which meant all the books on one topic were scattered. As I was putting books in boxes, I made an effort to arrange them so that like books were together.  All quilt history in a group of boxes, all art quilt books in other boxes. This made it easier to shelve them all together when I unboxed everything.

The very top shelves are less useful *to me* because I can’t reach them without a stool. I wanted them (the top shelves are add-ons to the Billy bookcases not part of the shelves) for two reasons. First, stuff will get crammed up there anyway, so I might as well have a shelf. Second, dust. I prefer cabinets and bookcases to go to the ceiling because that open space just becomes a dust collector. With these shelves, I put books and stuff up there that I don’t access often. For the books housed there, they may be candidates for weeding in the future. We’ll see.

My shelves are not 100% crammed full, which is great. I am glad to have some growth space. I do feel like there are a few books missing, so there may be another box somewhere.

Next project is to put up the design walls. I want to work on some quilts again soon, not that I am short of bag and other projects, so I can mark some fabric off my ‘fabric used’ list. DH is busy with clearing out his parents’ house (still) so I have to fit this in or get the handyman in.

Finished: UCAB #1

Art Themed Ultimate Carry All Bag

I can’t tell you how excited I am to be saying that I finished the UCAB for my mom and gave it to her for her birthday! This bag goes with the set of items I am making from the Paint Tube fabric.

I am so excited because I spent a lot of time on this bag and got everyone excited about it, then the pandemic hit and all the excitement died.

I finished the bag on September 12, 2021 after spending September 11 ripping out a lot of what I had sewn the prior week. I spent the Sunday morning of the 12th thinking about construction and how I could avoid putting the bag together the way Natalie does. I know she has had success putting together a million of these bags, but the construction did not work for me. I can’t believe how flat she gets her binding.

Ultimate Carry All Bag - binding applied
Ultimate Carry All Bag – binding applied

What I ended up doing is putting the binding on before I constructed the whole bag. I know the binding is supposed to cover the edges of the sides. This made no sense since the sides were finished.

After thinking about how I could construct the bag without killing myself, I decided that I would put the binding on the exterior, then sew the side section to the exterior. The sides were already finished and the process worked very well. I lined up the bottom of the sides right next to the binding and clipped the living daylights out of it, then sewed that section to the exterior. It looked a lot better than my previous effort, which was a big mess. My effort is not as neat as Natalie’s, but I am happy with what I did. I am not embarrassed to give this bag as a gift.

Ultimate Carry All Bag - interior
Ultimate Carry All Bag – interior

The other thing I thought about is not finishing the bottom of the side panels. This would mean that only two layers of fabric along with the thickness of the exterior would need to be under the binding. I might try it that way on the other version of the bag.

Chunks of EPP

There is a lot of discussion in the Pink Door La Pass FB group when each new month arrives. One of the discussions has to do with how to put the sections together before adding them a main piece.

The goal, overall, is to have as many straight lines as possible . One of the members is great at figuring out what pieces to put together to make sections of straight lines.She figured out the Hearts and Cones method I talked about.

La Pass M2 chunk
La Pass M2 chunk

For  month 2 I didn’t pay attention to her work. I just figured out what worked for me. I felt like these chunks worked for me. Adding any piece to a larger rosette, like Rosette #1, is a hassle, but with this chunk, I get a lot of bang for effort.

I decided as the chunks floated around my workroom that I would sew them partially to Rosette #1 so that they wouldn’t get lost, then go back and sew the rest later. Stay tuned for more on whether that worked or not.

More Workroom Shelves

Second Shelf
Second Shelf

DH came home from the football game Saturday night and put together the second shelf. My room has that new paint or furniture smell again and is a complete wreck.

I really like the clean, white look of the bookcase next to my desk. It is beautiful. It is also a lot better than a pile of cardboard boxes.

Big mess in the workroom

Cardboard boxes don’t just magically unpack themselves, though I wish they did. The rest of the room is a wreck. I have a lot of work to do reshelving books and arranging stuff on the shelves.

DH has to get some anchors, so I am not allowed to stand in front of the bookshelves during an earthquake for the moment.

See that computer set up in the picture (above right)? That is where I spend my days. That particular computer is my personal computer. I swap it out for my work laptop at about 8am every morning. One reason I need to clean this area up is that I have to get that blue chair out from the boxes, so I can “go to work” on Monday. Currently, it is stuck behind some of the boxes because we quickly moved the boxes out of the corner of the room so DH could install the second bookshelf.

More progress! Yay!

La Pass Rosette #1, M2

La Pass, Month 2 progress

I spent some time at Sew Day working on La Pass, M2. Actually, I spent the whole Sew Day working on La Pass. I got some more done, but, as usual, not as much as I expected.

I might be using Sew Day for the foreseeable future for La Pass since I have so little other time to work on it. I was working on it during meetings where I didn’t have to present, but those meetings are less forthcoming that before.

Many of the pieces you see around the right edge are not sewn to Rosette #1, though some of the smaller chunks on the left edge are attached. I am working on putting chunks together before I sew them to the rosette. 

The chunks are strange shapes. I didn’t follow the guidelines shown in the Pink Door La Pass BOM group. I know I can sew them to Rosette #1 and I just didn’t feel like doing it their way.

Some progress, which is good. Not enough, but better than nothing.


*M2 = month 2

Workroom Shelves

Bookshelf #1
Bookshelf #1

Some progress is being made on my workroom. I retrieved the purchased bookshelves about two weeks ago. It seems like an eternity.

I asked DH if I should get the handyman to put these shelves together. (I am sure they are relatively straightforward to assemble, but my shoulder can’t handle such work.) He said that he would put them together. Time went on, we went to San Bernardino ? for an event (it was a good event, but an icky town) and still he insisted he would put them together.

When DH told me he had to go work at his mom’s house over the weekend, I asked him when he was going to put my shelves together. While I was gone at Sew Day, he put the first one together. Then he came home from the football game later  the same day and banged around putting the second one together. He is a really great husband.

October Sew Day

Sew Day Workroom
Sew Day Workroom

We had another in person Sew Day the other day. We all wore masks and did quite a bit of physical distancing. We each had our own 6 foot table, which was nice not only for safety, but also because we could spread out.

In addition we had, as usual, cutting tables, ironing boards and a free table. The usual, overflowing snack table was strangely empty. I did not have a chance to make coffee cake, so I wasn’t surprised that other were in the same boat.

As usual, it was great to see people. Mary and I tested the 5 ironing boards the guild has and decided two of them were substandard – one was too wobbly and one tilted in an odd direction. We have been wanting to do that for awhile, so it was good to get it done.

The Sew Day was actually a Super Sew Day in that people came on Friday and Saturday. I put together two door prize bags, which were won by Amy and Joelle. I wish I could have attended on Friday, but work and taking off the Friday before prevented me from attending.

Someone from the church donated her mother’s fabrics. The mother had died and there were 12 garbage bags full of fabric. Some guild members sorted the fabric. People chose pieces they wanted. Most of the fabric was Joann quality. I didn’t take any, but some went to make pet beds. I think some will go to the community quilt project as well. The rest of the fabric will go to FabMo for others to pick through.

Sew Day Workspace
Sew Day Workspace

My workspace was good. Having a 6 foot table to myself allowed me to leave Rosette #1 flat on the table while I worked with the smaller chunks.

It also allow people to see the big part of the piece and not disturb my progress. As I said before, people are very interested in the progress of my piece. They were less interested this time in English Paper Piecing in general. The La Pass rosettes are very impressive and my Rosette #1 is no exception.

Month 3 arrived and I was able to press the fabric as well.

People were working on really nice projects. Rhonda sat across from me and shared a design wall with Melinda. Rhonda’s piece (right) was fantastic! She is working on a round robin with Cheryl, Kelly, Ruth and some others. It is one of the best round robins I have ever seen. She told me that Ruth did a lot of the design work. I love everything about it.

Melinda’s piece was also really great. The colors aren’t exactly my colors, but I did like the combination. It is really different. I also like the variety of plus (cross) blocks. I received some of these fabrics in one of the Modern Handmade modern boxes I got last year before they stopped the subscriptions.

Alice's block
Alice’s block

Other people were working on interesting projects as well. Bonnie was working on a quilt top that looks woven. Nancy was quilting a community quilt. Alice finished a great block that I think was paper pieced.

Amy found a project that has generated interest throughout the guild. She found a pattern for a zipper organizer. She made one for Mary C as a gift and Mary started to use it to organize pieces for a quilt she is working on. It looks like it works really well! I think I might need to make some as gifts.

Mary clipped the various pieces for her Aftershock quilt in groups and then hung them on the zipper organizer, which is now a project organizer. I can see using it for bag parts and other projects.

Mary's Aftershock quilt
Mary’s Aftershock quilt

The other thing I noticed was the quilt on which Mary was working. As mentioned it is called Aftershock and is from Wren Collective. Mary picked her colors and then didn’t have enough of the background. Also, the quilt store was out of it. The quilt store, Bay Quilts, was very helpful in that they pulled Mary’s foreground colors and suggested several different background colors. Mary picked the maroon-ish you see above. She admitted that it wasn’t one she would normally pick, but that it worked really well. I have to agree. It isn’t a color I would pick, but it looks great with her foreground colors.

All in all it was a really good day!

Finished Tools Bucket

Tools Bucket - 3rd pass
Tools Bucket – 3rd pass

I worked on covering up the previous blue with some magazine pictures.

It didn’t like the way it looked. If I had had more cakes and dots, it probably would have been fine, but I didn’t. I thought it looked bad, so I went back to fabric. The good part was that the magazine paper covered up the blue pretty well. After this 3rd layer dried, it made a good base for more fabric.

Finished: Tools Bucket

I finished decoupaging my Tools Bucket in a way that I can live with a few days later.

As you can see, it is in use next to my sewing machine. I don’t notice any difference from before I decorated it. I think it looks better, though.

More progress! Creeping along, but workroom progress.

My Favorites

After posted the most recent 26 Projects post, one kind reader asked me what my favorite was. S/he kind of took me off guard. I like keep tracking of my finishes, but I don’t think about them much after I finish them. On reflection, that is kind of a weird response.

Pink Kaffe Quilt finished

While I like all of my projects (or most of them) I didn’t have much trouble picking a favorite quilt.

I really like this Pink Kaffe quilt. I like the solids that I used (mostly AGF). I also like the flowers that I fussy cut. I didn’t follow the pattern exactly. I cut flowers that I like, including some that were non- Philip Jacobs, though very few.

I find that to be really strange because 1) it was a pattern rather than an original design; 2) none of the rooms in my house are pink; 3) I don’t really have a place to display it where the colors would fit in. This quilt really shows how I make quilts to please myself.

All the I Spy Pouches

I find myself really liking bags lately. My workroom is still without its design walls, which makes it hard *for me* to work on quilts. As a result, I have been working on bags that are cut. You have seen my work on the Ultimate Carry All Bag recently. That is just one of a few that I am working on. I have to say, though that I really like the I Spy pouches I have made as well as the Retreat Pouches.

I haven’t made the large version yet, but I have the frames, so I can do it any time.

I’d love to hear what you think of my favorites.