I should be less tired, but I’m not. DH was out of town, which should be a good time for me to rest, but I did an extraordinary amount of driving to be with him to attend some events.
Work has been stressful. I am working on getting a new contract, which will be in a different department. This means that I have to prepare my work to hand over to the next person. I know you are thinking “really? again?”. It is the nature of contract work. I am constantly having to get my contracts renewed or find new ones. It isn’t ideal, but I have a lot of flexibility, which I like.
Still it is all tiring and people in the department are whispering about my contract ending, which is just annoying. I am looking forward to some time off.
I haven’t done much sewing except for my work on La Passacaglia. I have had an hour here and there to do some hand stitching. I love that project. I think I will go work on it now.
Mostly I grabbed handy fabrics and cut squares out of them, then folded and pressed them. I didn’t spend a ton of time deciding on whether a certain fabric would fit in with the orange. I did eliminate fabrics as I was choosing, if they were too close to orange and wouldn’t show up or were obviously not suited to the project. I also eliminated all browns, blacks, predominantly white fabrics and fabrics with too much white in them.
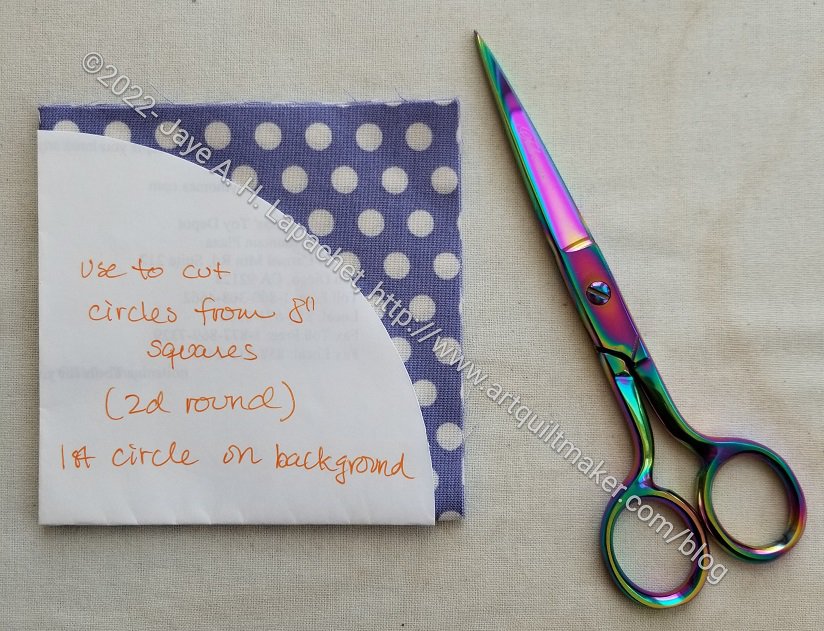
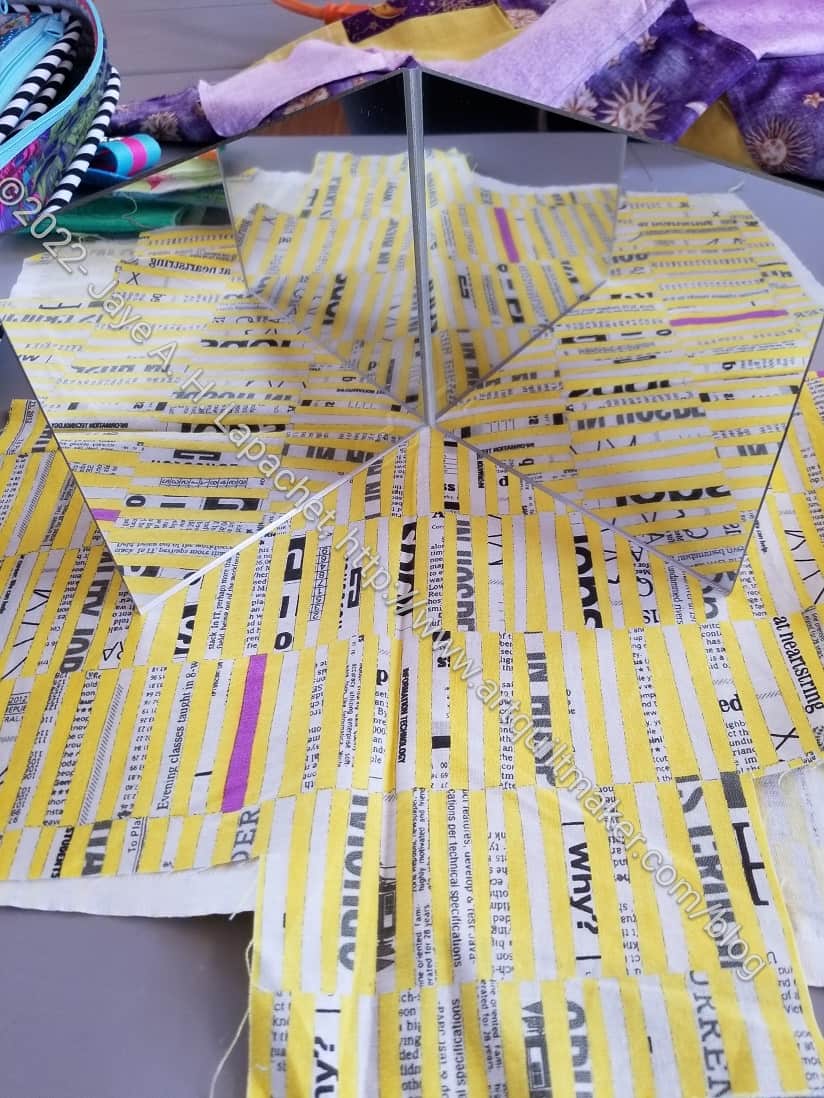
The paper template is a circle I made the right size by using a compass or a plate. I don’t remember as I had to use both for different sizes of circles we agreed upon for this project. The circle template is folded into quarters.
The scissors have to be sharp. I want a smooth cut the first time. I hold the paper in place with my left thumb and fingers, but you can also use WonderClips or pin the template in place.
Friend Julie has some great photos of making the templates, using the templates and holding them in place in her blog post today.
I am speeding along in sewing the Month 10 rosette together. I will probably have to find another project on which work for the rest of the month. I am making good progress.
I changed out a number of fabrics this month. I added the coneflowers. I wanted a little space for the roses to shine. I wasn’t sure if the coneflower fabric would provide space, but I think it does. It also continues a mini theme from Month 2 (Rosette #1).I have a couple of other coneflower fabrics in different colors and hope to be able to add them in as well. I’d like to add at least one more coneflower fabric to balance out the two I already have.
I also used a Carrie Bloomston fabric for the center, replacing the Curiouser and Curiouser cat fabric. The rainbows don’t show up as well, but I still prefer the newsprint fabric to the cat fabric.
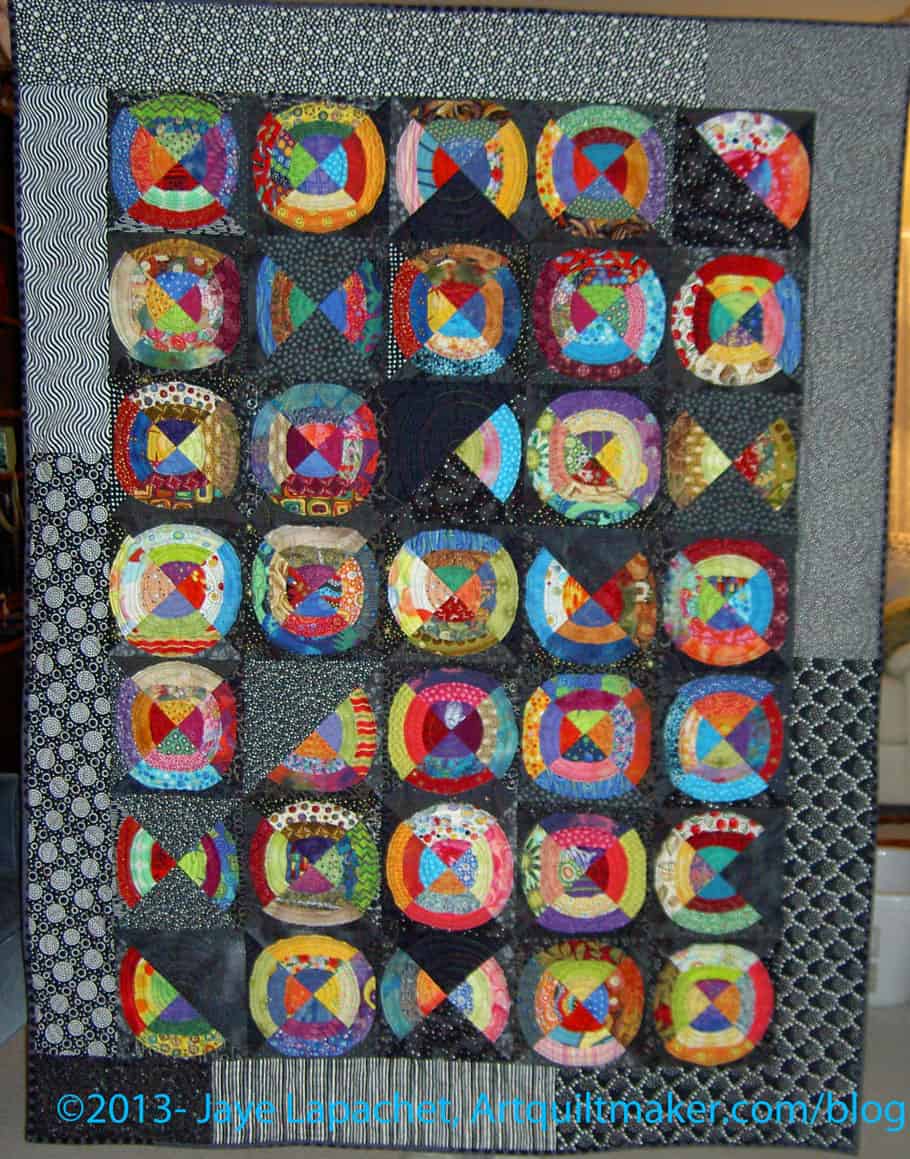
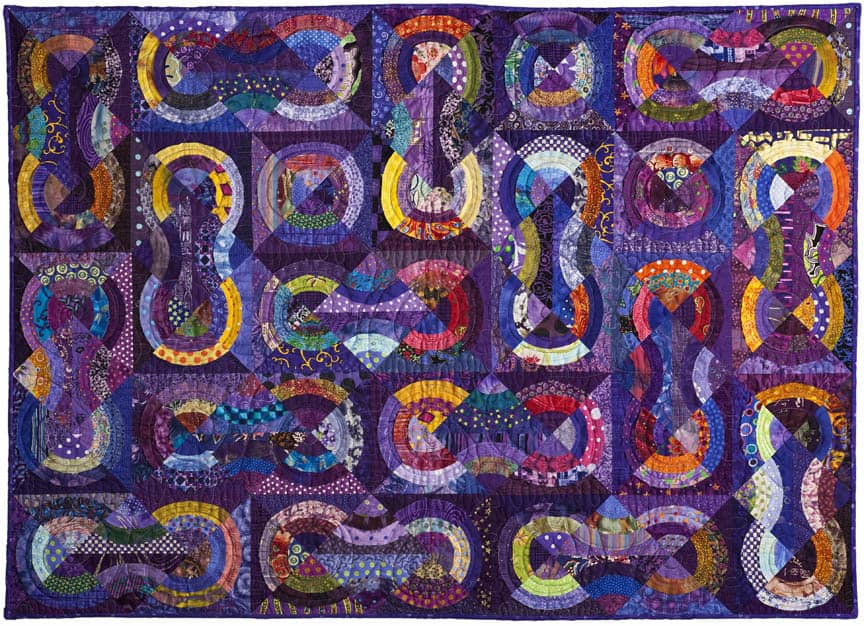
I have a spot in my gallery for the Bullseyes, but it is unsatisfactory and I need to rewrite the page. This needed, yet still undone, update spurred me on to show all of the bullseye quilts here.
I realized in looking at them that they are another color project like the Fabric of the Year quilts.
Finished: Original Bullseye
Original Bullseye: The black background provided a way for the other colors to shine out from the black.I like having each circle separate. I remember thinking how clever I was to include partial circles as well.
Seeing Red
Seeing Red: The red background is bright and cheerful and I do like the way the loops are continuous.
Feelin’ Blue
Feelin’ Blue: we decided that trying different shapes would be a good idea. I had to add background pieces to prevent jagged edges or partial squares. While I like this quilt, I prefer the circular versions.
Finished: Passionate Purple
Passionate Purple: this one might be my favorite, though all of the different quilts bring something special. I like the way the loops are finite and that they are different sizes. I hesitate to duplicate the idea for the recent orange version, but I am sorely tempted.
I really want to make quilts in this style from all the colors with my friends. I don’t want to do them by myself. The element of surprise when others add the rounds is part of the fun.
I made a Sheffield Tote for Gerre as a gift in 2020. I make gifts because I want people to know I am thinking about them. I do know that what I think is great may not be great for someone else, but I don’t have hard feelings when someone doesn’t use a gift I made for them.
Alternatively, I am super thrilled when I see a gift being used. This ‘t the first time I have seen Gerre bring it. She says she uses it all the time. Whenever we sit near each other I see it packed with supplies. It makes me so happy that it is a useful tote.
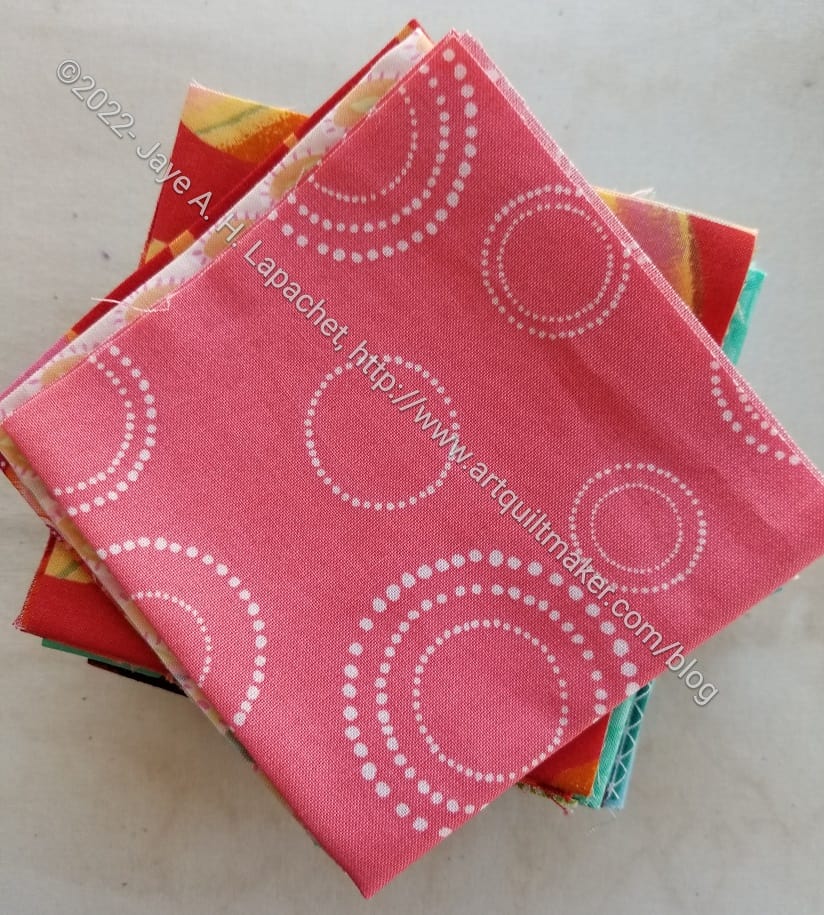
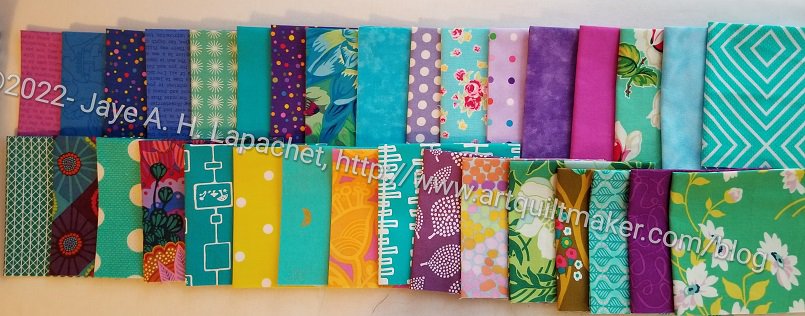
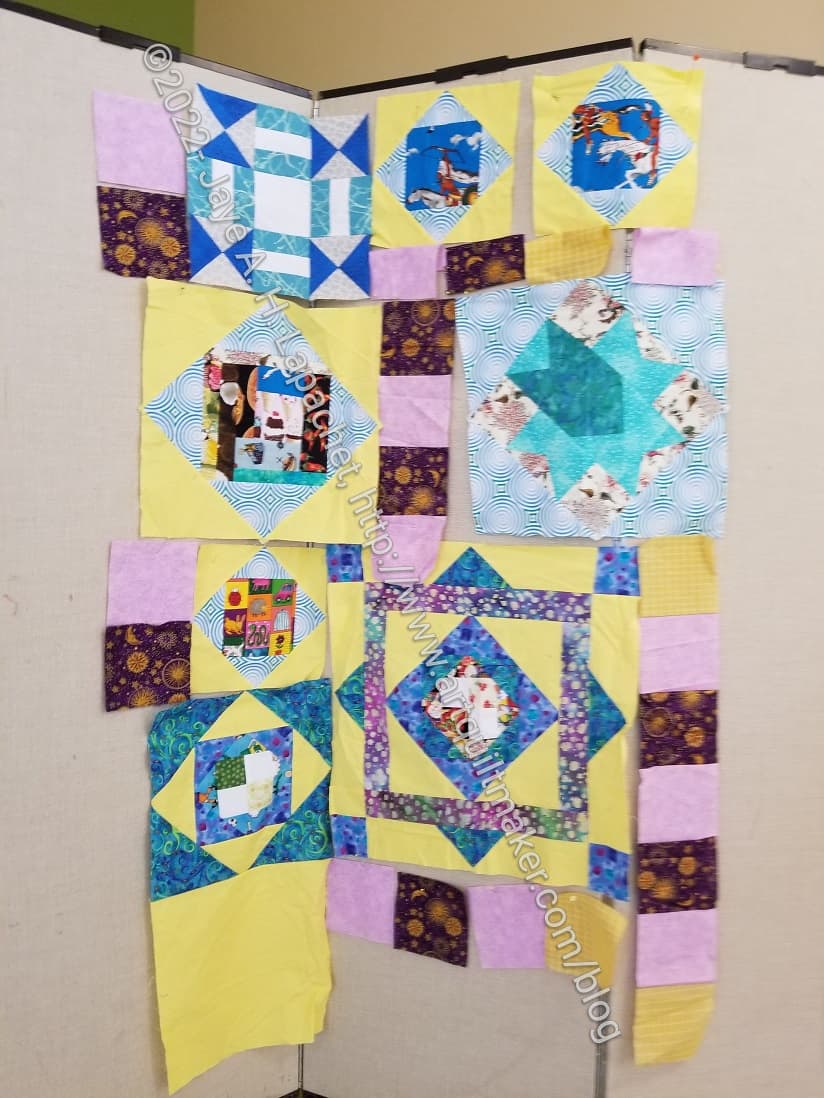
I received Julie’s orange squares last week and have been diligently cutting the fabrics that I will applique’ to the top. I had many of them cut, but not all.
First round circle fabrics
The background squares are 10″ and, during this round, we are supposed to applique’ an 8 inch circle to the top. I do this by first cutting 8.5 inch squares, then cutting a circle from the square.
I am using mostly cool colored fabrics, as you can see. I selected these from the stacks in my fabric closet, but may switch some out if I don’t like the way they look.
Looking at the fabrics I chose alongside Julie’s backgrounds has got my mind working on which to pair. I feel excited!
Friend Julie and Adrienne are, presumably, doing the same to my squares and Adrienne’s squares.
We have a month to applique’ the circles to the backgrounds. This is a fun project.
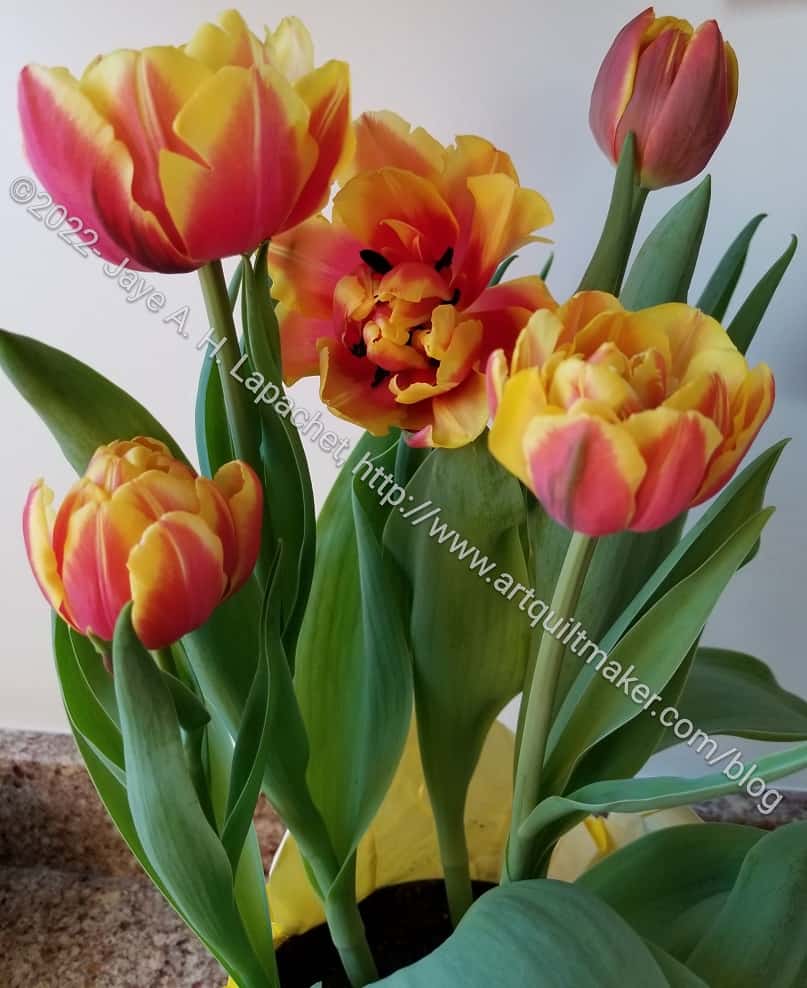
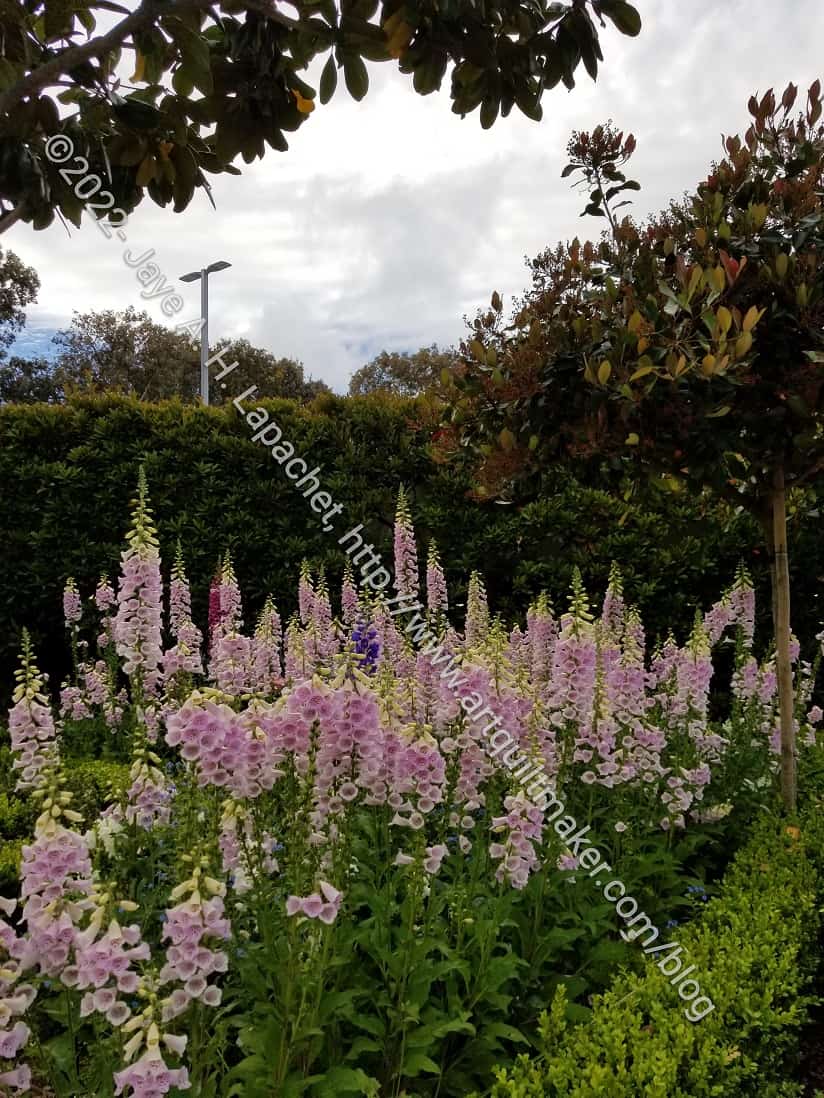
I had just read Friend Julie’s Late Spring Flower Friday post when I went off to a work event and saw this bed of foxgloves.
The nice, but odd thing is that this is right next to a parking garage. I didn’t really have to crop the photo much to keep the concrete out of the photo. This bed was quite large and even included a few small trees. It was really nice to see some nature near a shopping mall.
In the course of looking at the other pieces, we decided that we (meaning me) would put a border on this one and call it done. The pieced rows that are not joined to the larger piece will not be used for this quilt. There is something wonky about the piecing and we will repurpose them in the yellow and blue piece I talked about yesterday.
The hardest part will be deciding which fabric I should use for the border.
At the last Sew Day Mary and I decided we would make another donation quilt in an hour. Neither of us brought a sewing machine, so we just played around with some blocks and shards that Mom donated.
Mom is clearing out stuff she doesn’t want and quilt projects she won’t finished.
Mom’s donation blocks-2
These are not really my style and they are all odd sizes, but we can make them fit together in some way.
We started out by just putting them on the design wall and looking at them. Tim stopped by Sew Day and helped us play around with them. Three brains are definitely better than one.
We got rid of one block that was the same pattern, but just much busier than the others (bottom center block). It didn’t really go. The butterfly was not sewn by my Mom and that one was out, too. I really wanted to put all the blocks in so there were none left, but that isn’t always possible.
Mom’s donation blocks-3
We tried spreading out the blocks and imagining other fabrics or blocks in between.
I think it is harder to imagine what could between blocks when you don’t have any extra fabric with which to work. When we did the Improve charity tops, Maria and Cyndi both brought big bins of solids we could use.
Still, we thought we had a good selection of blocks and some possibilities.
Mom’s donation blocks-4
We automatically put the largest block in the center, but started talking about not having it in the center. What could we do if we put it somewhere else in the top?
Moving the largest block down and the Ying/Yang blocks (those with the crazy circle fabric prominently placed) to the center made the piece a weird shape, but we liked the location of the blocks better. We will probably cut off the yellow square on the bottom and use the yellow in some other location. We finally started to feel like we were getting somewhere.
Part of the issue is that none of use these types of fabrics. My Mom has a unique fabric selection style that people love and is hard to imitate.
Mom’s donation blocks-6
We finally ended up adding some of the leftover purple and lilac squares from the Celestial Squares quilt to bring out the purples in the batik. Those fabrics are unconventional choices, but I think they work.
We have plans to sew it together next time, but we will see.
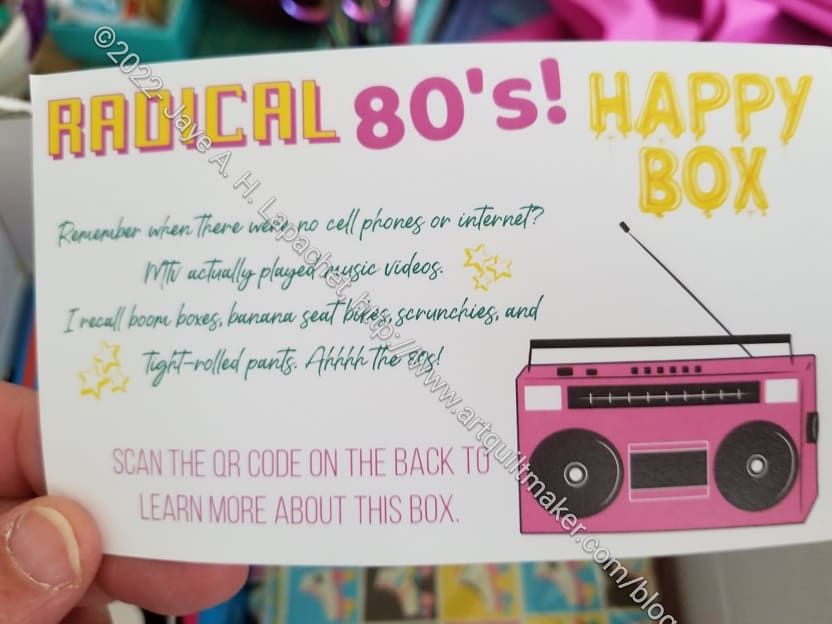
I have received three of the Sew Hungry Hippie Happy Boxes. You saw the Rainbow Pincushion I made from the first box. I really enjoy these boxes, partially because they are not 100% sewing supplies and partially because they are fun.
Happy Box Radical 80s
There is always a theme. This month’s theme is ‘Radical 80s’. Did people say ‘radical‘ in the 80s? I seem to recall they did. This month has some fun smelly erasers, which I remember my sister having in the 1980s.
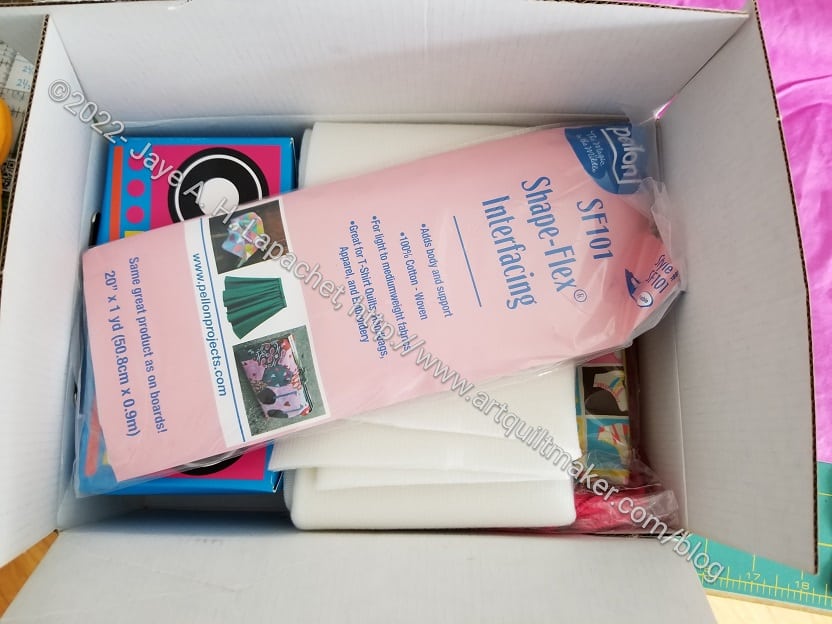
Happy Box project
The box also contains a boom box project. Boom boxes were big in the 80s. The nice thing about the projects in these Happy Boxes is that everything is there: fabric, interfacing, pattern, hardware, everything. You don’t have to think; you just have to sew. The project has some of the Ruby Star Society novelty prints with roller skates and boom boxes.
Happy Box candy, patch & miscellanea
There is candy, too. From the other boxes, I noticed that it was candy with which I was not familiar, but always fun. This time it is Hubba Bubba chewing gum. I am not really a gum chewer, but Hubba Bubba and Bubblicious are the most fun gums to chew, because a person can blow HUGE bubbles.
The box also always includes a good card with a profound saying.
I won’t get these forever, but for now it is fun. I am two projects behind now that I have gotten the latest box, so I need to get sewing.
I noticed on Saturday that there were two left, so check out the Happy Box subscription and consider getting one of your own. There is also a Happy Box Mixer, which gives you the opportunity to get a box one time and see what is inside. No affiliation!
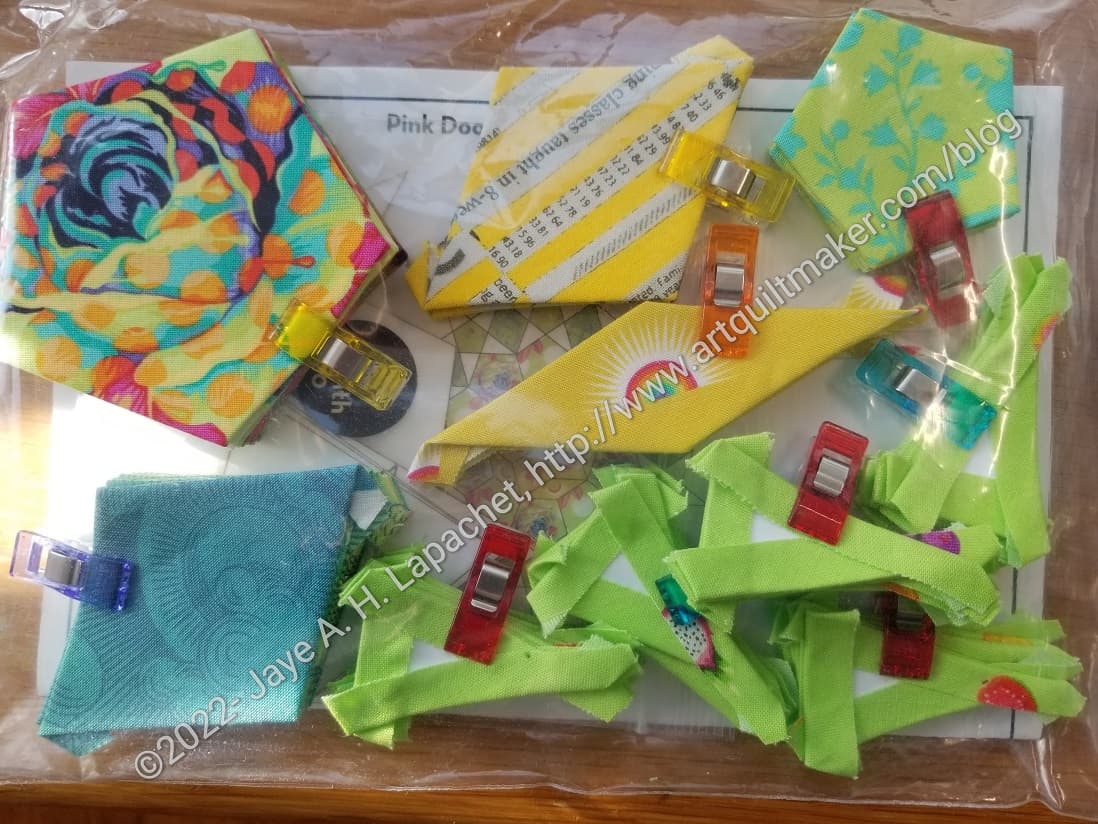
I spent Sew Day on Saturday cutting and basting my La Pass Month 10 pieces. There are under 100 pieces, fortunately, and they are now basted and ready for stitching. I am relieved as I thought I might not have enough time to baste all the pieces.
Auditioning centers
First, I had to decide on a new center fabric. I am not using the Curiouser and Curiouser cats. They are too scary looking. Tula might like them, but I don’t.
The Carrie Bloomston text fabric is the one I chose for the diamond pieces in the center. It is not the same gold color as the cats, but will work just fine.
I actually changed quite a few fabrics in this month. I hope it works with the rest of the quilt.
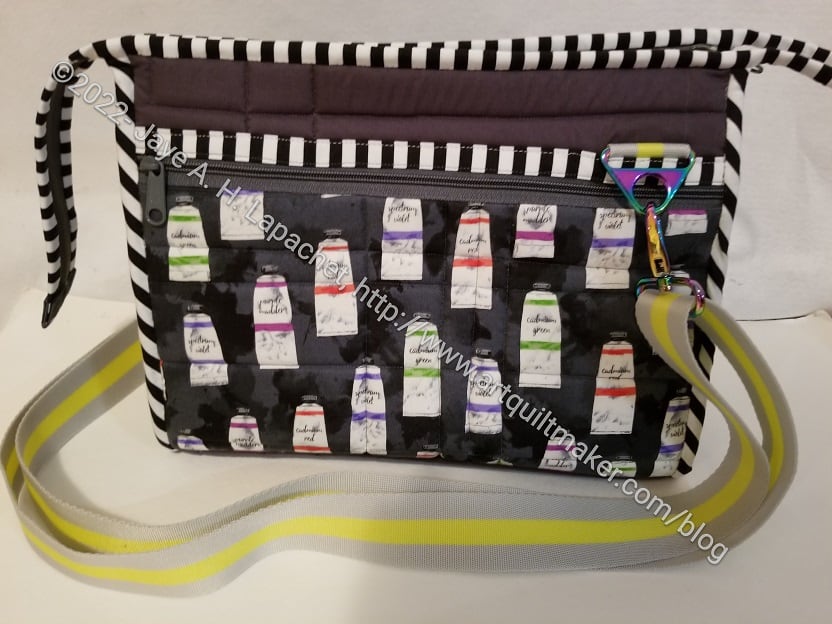
The Take a Stand** bag (which for some reason I keep wanting to call the “Without a Trace” bag) bag is done and I am on my way to give it to my Mom for Mother’s Day.
This is the first time I have made this bag and it has the usual things that annoy me about a ByAnnie pattern: quilting all the pieces and lots of binding. It is also a great size and shape. It might be a good replacement for my Travel / Go-to-Sew-Day Bag. Or at least a partial replacement.
Yes, I used the Tula Pink webbing for the shoulder strap. It isn’t the perfect color, but works ok and Mom can unhook it and use it for other things. Using webbing means that I don’t have to make straps. I seem to remember making straps with webbing as the inside a la ByAnnie, but I can’t remember (or find) what project they were used on. It wasn’t a completely smooth process, but the strap went together pretty quickly and I am happy with them.
I adore the rainbow hardware!
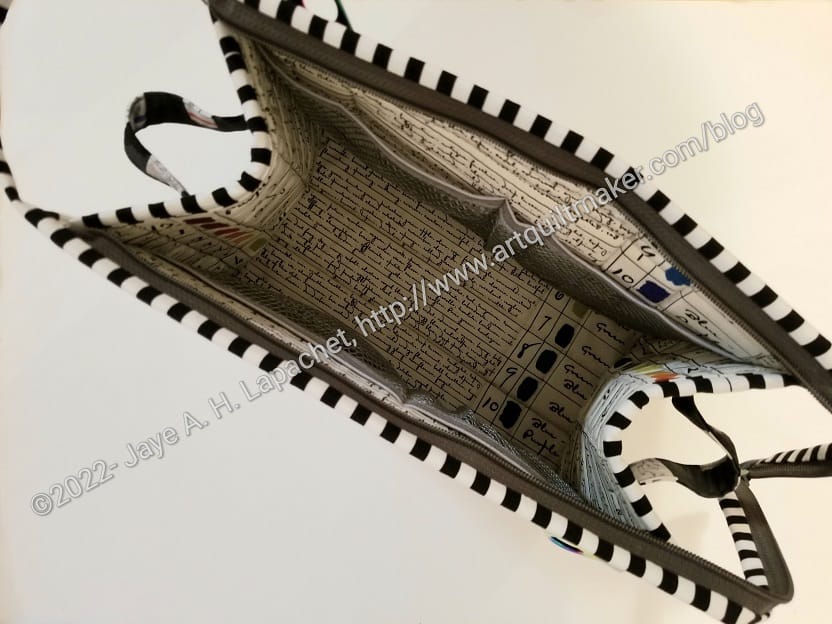
Take a Stand Bag for Mom lining/inside
I am pretty proud of the inside/lining. It is hard to see in the photo, but easier if you make the photo larger. I used a text print with color wheel type paint blobs on it. It is perfect for my mom and came out really well in terms of placement in the bag.
I have two more in the works, meaning that I have two more cut and quilted (such a chore), so you’ll see at least one of those soon. I decided that I want to make the larger size as well, but will have to cut and quilt that one before I can decide if it will be a good replacement for my Travel / Go-to-Sew-Day Bag.
I hope Mom likes this bag. She is getting quite the collection.
**Obviously, you should shop at local quilt shops. However, I use affiliate links and may be paid for your purchase of an item when you click on an item’s link in my post. There is no additional cost to you for clicking or purchasing items I recommend. I appreciate your clicks and purchases as it helps support this blog.
I finished Frolic! a long time ago, or what seems like a long time ago. Then, I entered it in the Fair. THEN I realized it didn’t have a sleeve! YIKES! I needed to make one fast in order to have enough time to sew the sleeve on. I often fight with sleeve making despite the great instructions in Free Expression** by Robbi Joy Eklow.
Frolic! Sleeve
I was able to make and sew the sleeve on in, what felt like, record time. It may only need a sleeve one time. I am happy that it is ready to go.
**Obviously, you should shop at local quilt shops. However, I use affiliate links and may be paid for your purchase of an item when you click on an item’s link in my post. There is no additional cost to you for clicking or purchasing items I recommend. I appreciate your clicks and purchases as it helps support this blog.
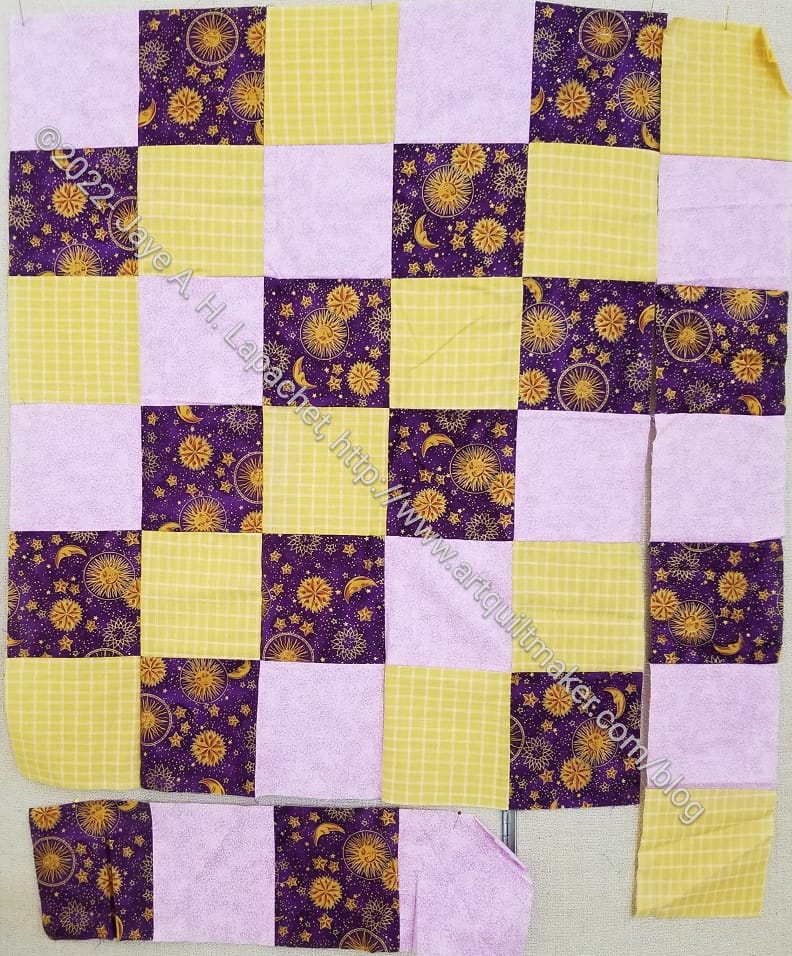
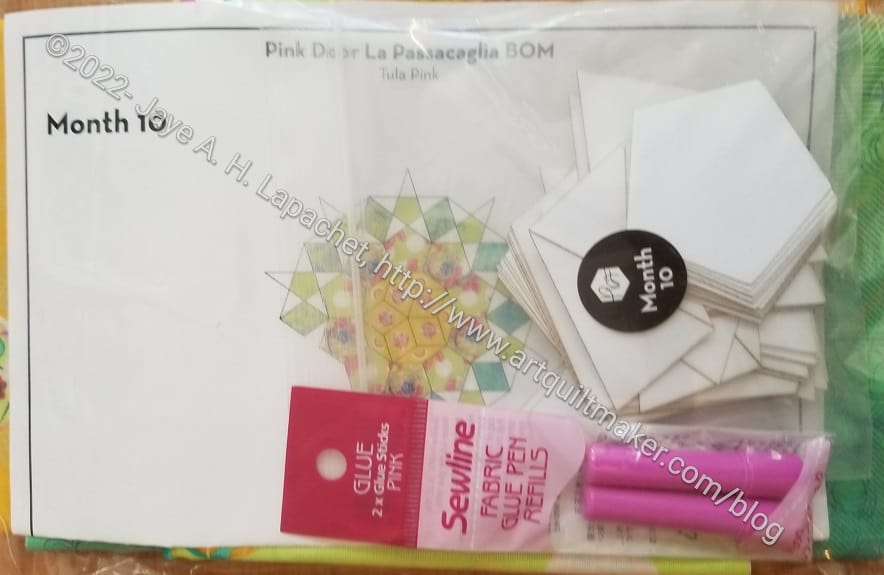
La Pass Month 10 arrived FINALLY. It seems like it took forever to get here after I sped through Month 9. Really, it has only been about two weeks and I had a lot of other hand work to do that I really needed to get done.
La Pass Month 10 fabrics
It’s more green again, but also tending towards yellow. I know they wanted to include more yellow, but the Tiny Beasts fabric was delayed. I am not using the cats and may use the same fabric I used for the Month 7 small rosette center for the Month 10 center. I pulled out some other yellows, but they were brighter than the cats and I wanted to stay in the color range.
I thought I would have time to start basting during a 4 hour meeting yesterday, but i really had to pay attention and take notes, so no basting. 🙁
This is a shop we visited when we went to Portland in March. For some reason, I never got around to writing about it.
When we had to leave the AirBnB, but before we could check into the hotel, we had some time to wander around the Portland Metro area. We happened to wander into Washington and visited Just for Fun in Vancouver.
Just for Fun: front of the shop
In case you don’t know, Vancouver is not too far from Portland. I liked this shop. The people were super friendly – verging on too friendly, but just shying away from it.
They had an excellent selection of fabric, samples and a great notions area.
Just for Fun: Kimberbell area
The shop wasn’t large and the first thing I did was look at the Kimberbell items. Do I have an embroidery machine? No. I don’t know why I look at the patterns and supplies all the time, but I do. The lady in that area was super friendly and very chatty. I had to work hard to get away from her.
Just for Fun: fabric shelves
The shop isn’t large, but they had an appealing selection. They did have the fabrics on those slanted shelves, which I don’t usually like. I did feel like I could see the fabrics pretty well, angled as they were.
I think they all the Kona solids, though i didn’t count.
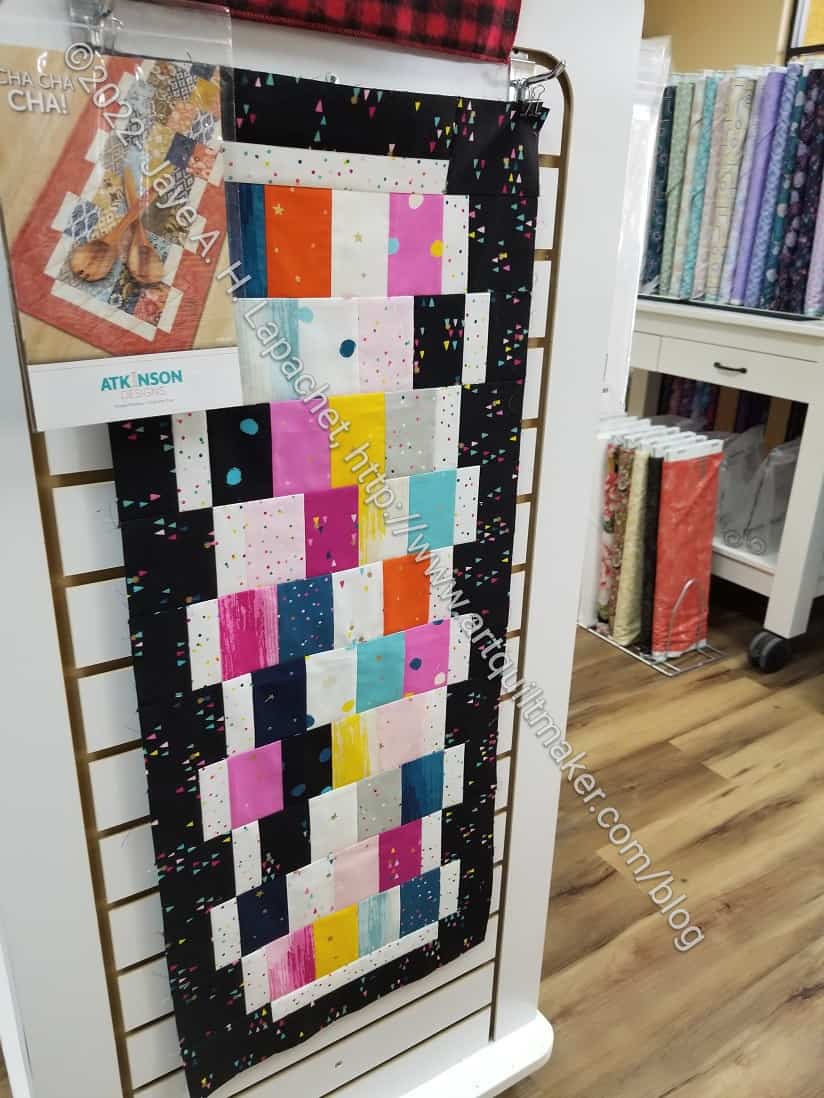
Cha Cha Cha in Just for Fun
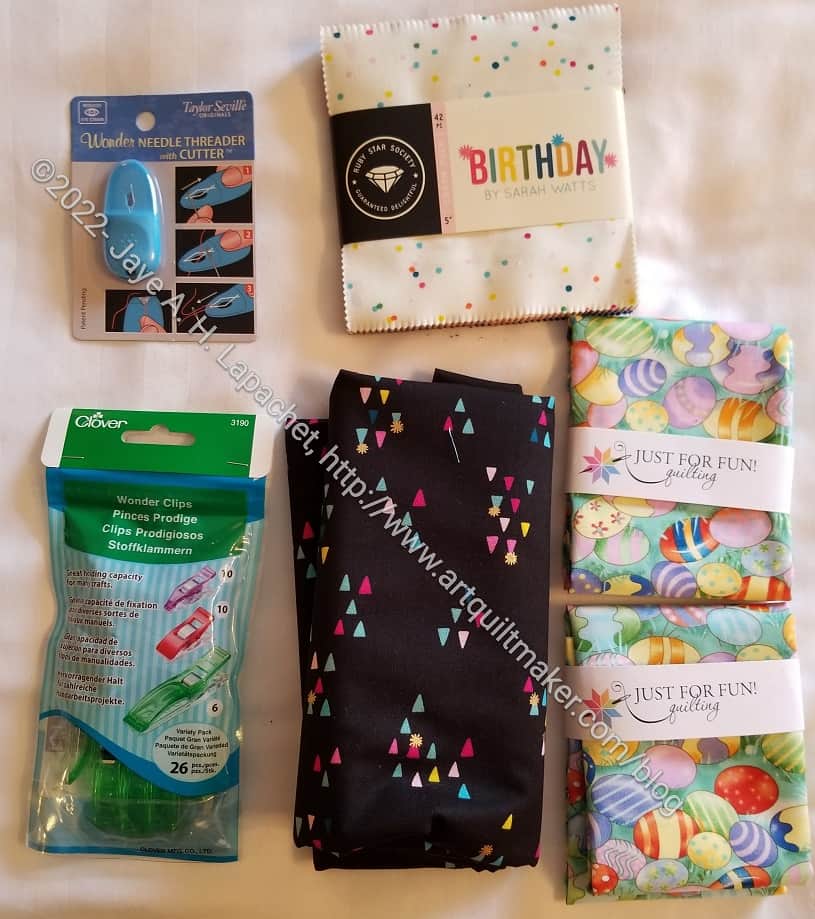
This is where I saw the Birthday fabric from Sarah Watts of Ruby Star Society used in the Cha Cha Cha table runner. I didn’t do anything special except buy the charm pack and the pattern. Mine came out a little differently, but I still like it.
There were a number of good sample projects around.
I also found the Easter fabric at Just for Fun. As mentioned, I thought I would make masks for Easter, but then decided to make napkins.
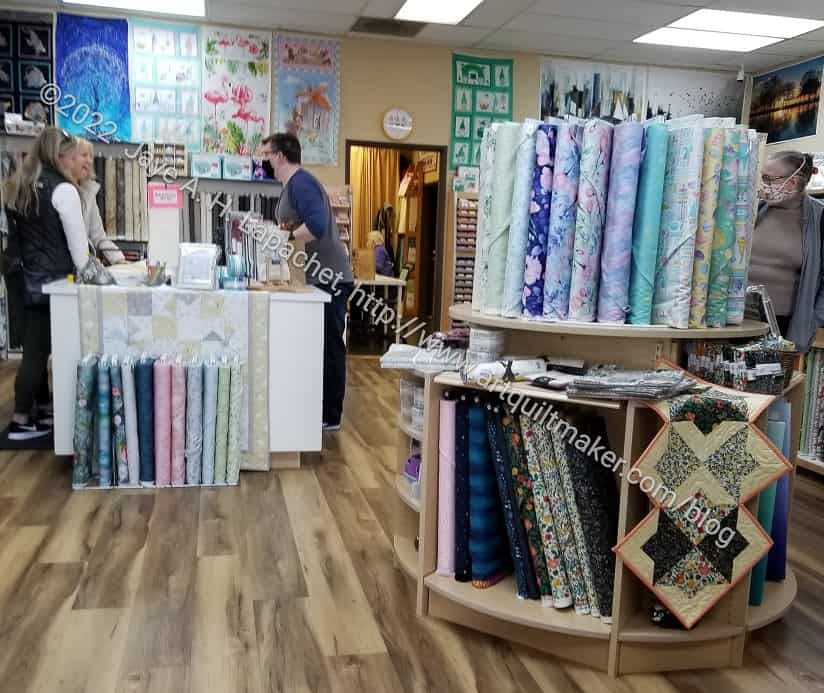
Just for Fun: center of the shop
I noticed the shop had a kind of pastel-ly vibe. That is probably not true, but that was the impression I got. Perhaps there was a larger selection of light fabrics? Or there were just Easter fabrics in profusion, which are typically pastels.
Above where the people are standing (photo left) you can see some panels. They had a nice selection of panels. Mom bought one or two for future baby quilts.
Remember when I talked about Golden State’s new space and the longarm machines? I have no problem with any shop dedicating space to longarming, but the noise breaks my concentration. Just for Fun had two or three machines as well. Those machines were in a corner of the space and blocked with doors from the retail space. Customers could look into the space and see the longarms running, but not hear them. It was GREAT (no photo, sorry).
Just for Fun: purchases
Just for Fun Address: 1503 NE 78th St, Unit 12, Vancouver, WA 98665, United States Phone: +1 360 882 9101 Website: https://www.justforfunquilting.com/