I have made a lot of progress on my English Paper Piecing project. I worked on it a bit during my recent trip to the North Coast.
I am now out of papers and basting thread, though I have more to use. I just didn’t have it with me. The papers are a bigger problem as I need to buy more or unbaste some from that big piece and reuse them. I will work on that.
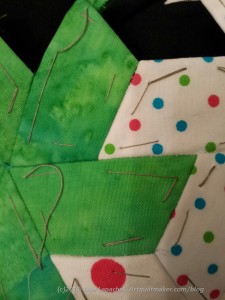
Invisible Stitches from the front
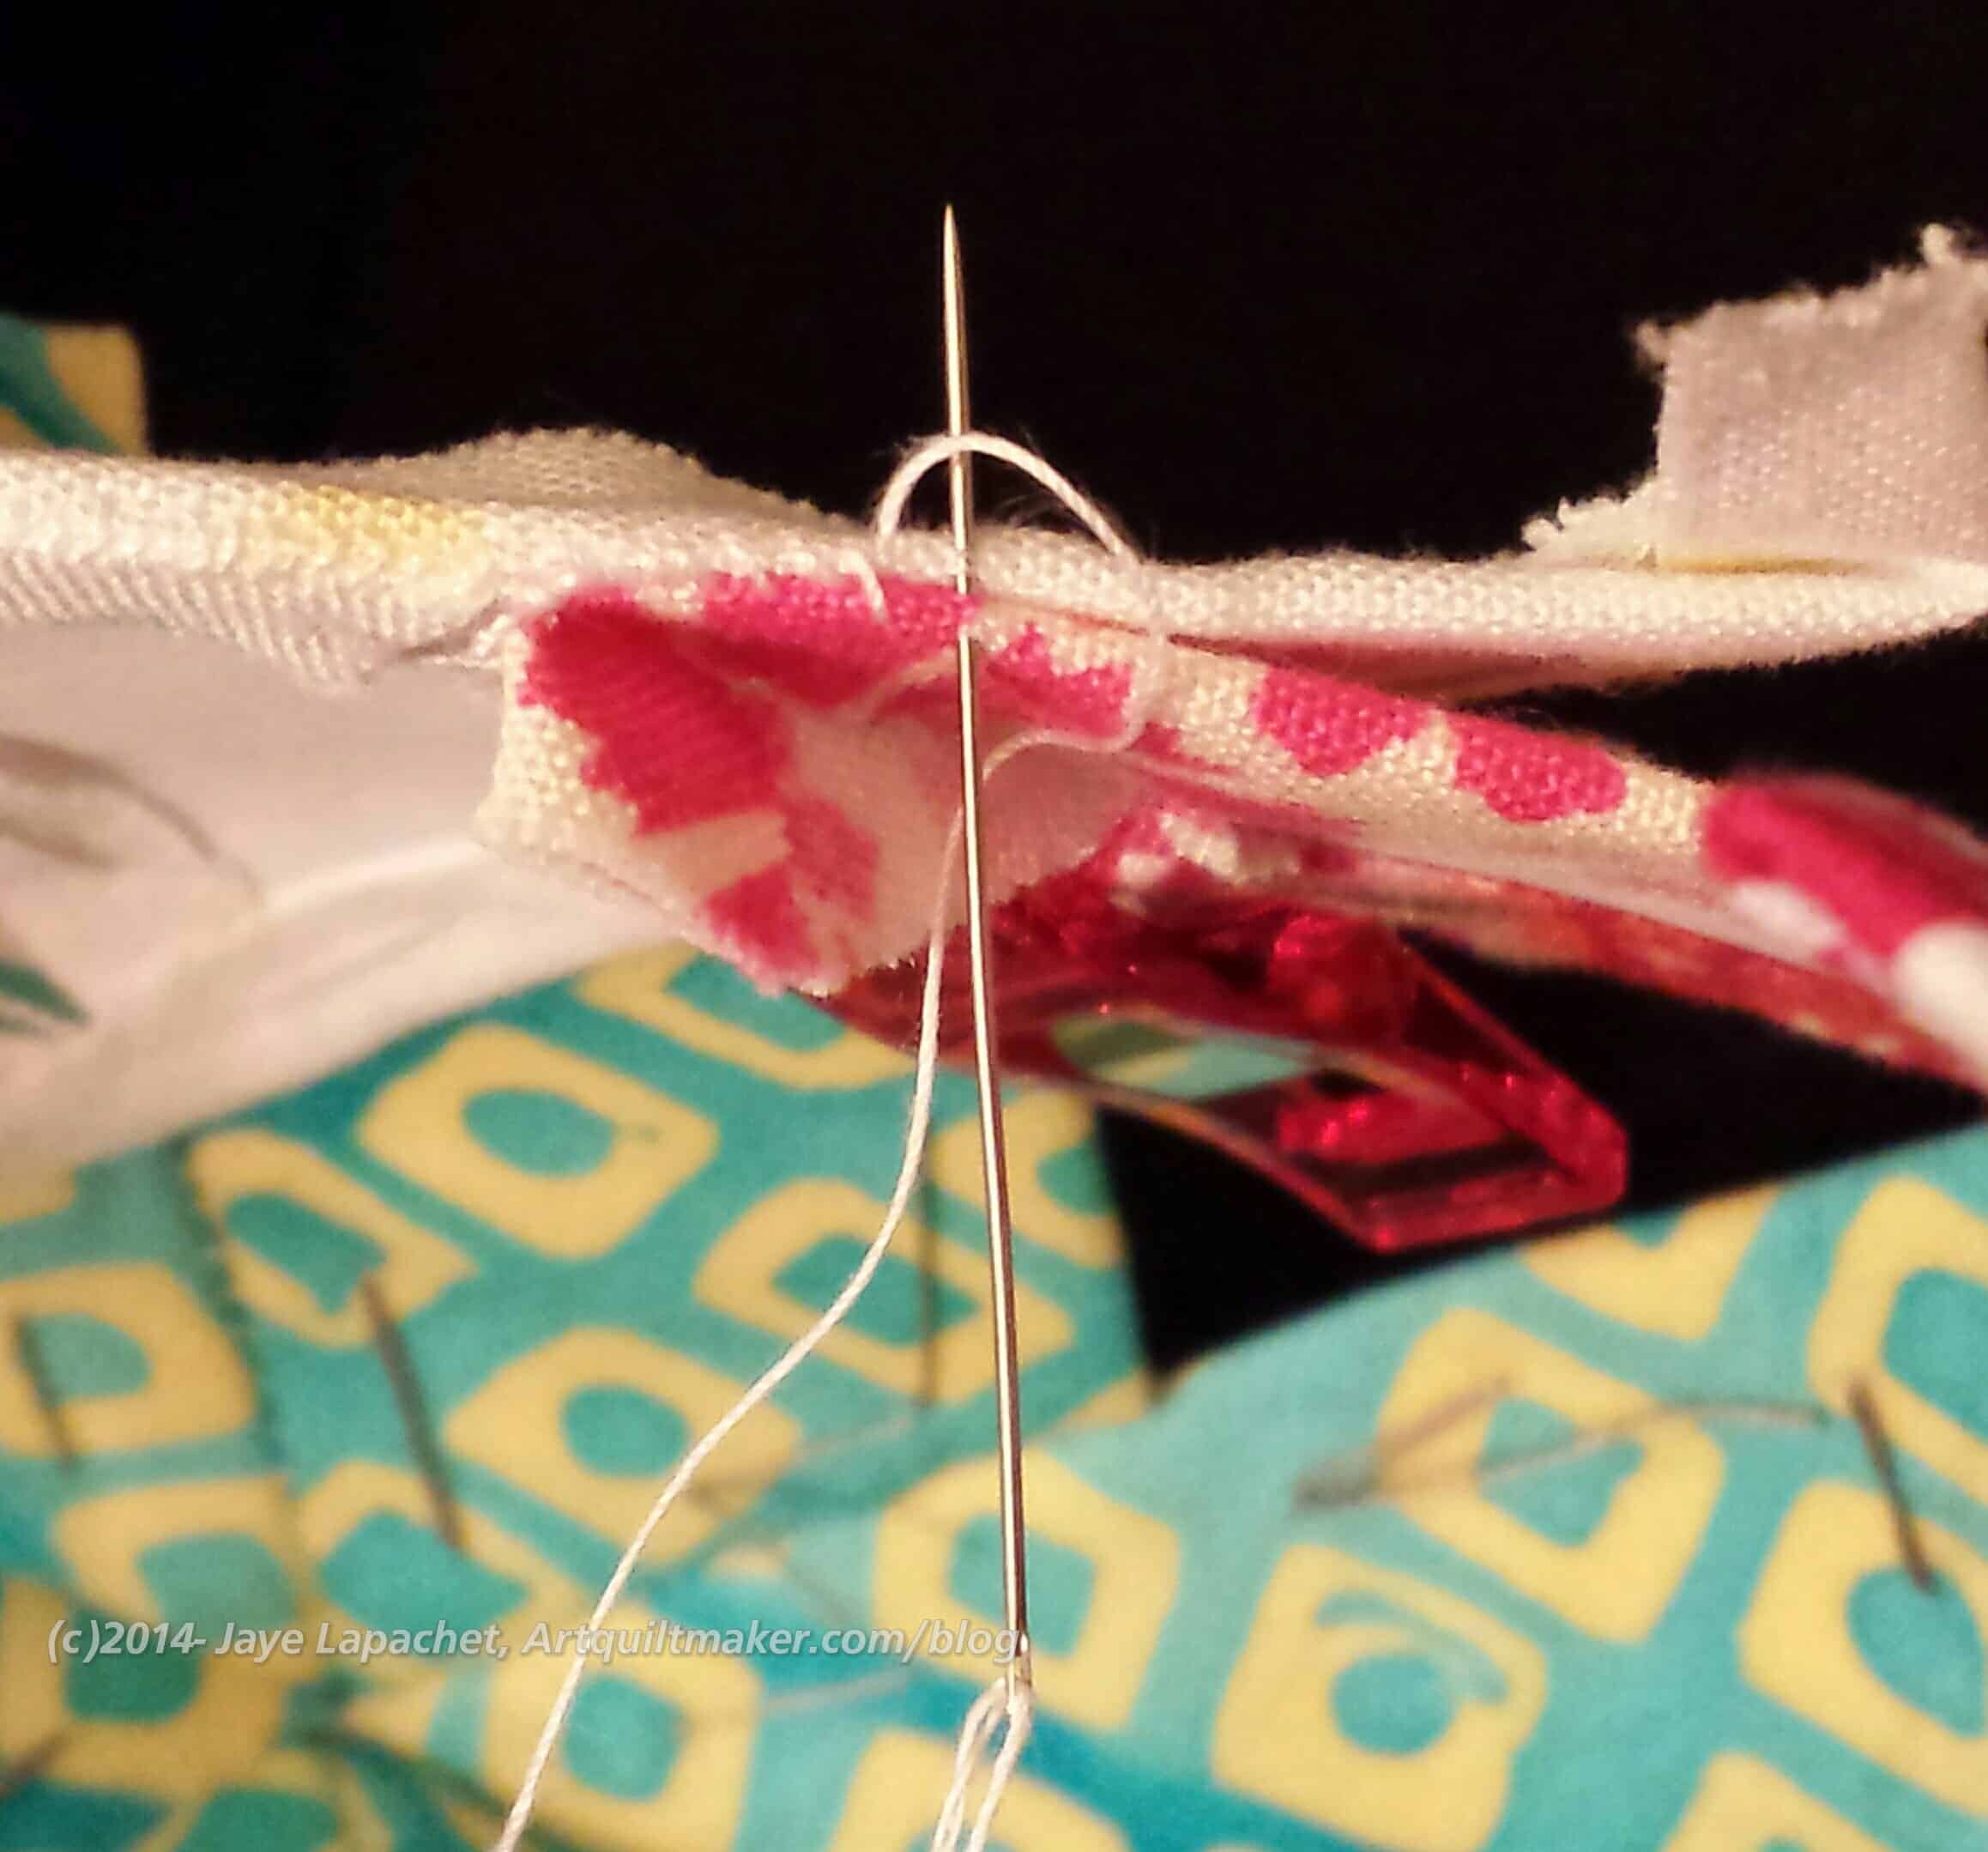
I also tried a different way of stitching the sections together. I used an, supposedly, invisible stitch and I am pretty pleased with the results. The picture with the green star is one of the first tries at this invisible stitch and I can’t see the stitches. I am using Aurifil 50wt in the #2600 color, so I have thinness and a blendy color on my side. It is a bit of a pain to sew the pieces together, because you line them up side by side as they will look when finished. This makes it hard to hold them together while sewing. I can’t use WonderClips to pinch them together. I have resorted to a few stitches at critical points to hold the pieces in place and that seems to be working. I am pleased with the progress.
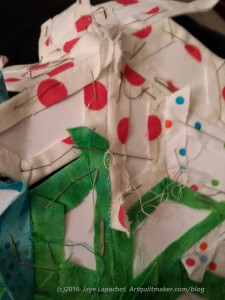
Back of invisible stitches
The back doesn’t look quite as nice. Fortunately, very few people will see the back.
In the photo, you can see my needle (towards the center of the picture by the green rabbit ear). That is how the sections, or stars, get sewn together. For the moment, I have been sticking to this method with big sections only.
I have found that using this method means that I trim more of the excess fabric, frayed threads, etc off the back.
So progress. Next on the list is to lay this on the bed and see how much more I have to make.
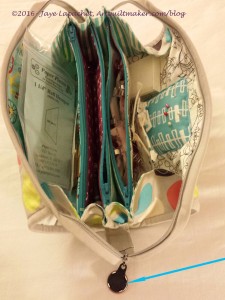
Finally! I made a Sew Together Bag for myself. I haven’t filled it up with my English Paper Piecing materials as of this writing, but I will have done by the time you read this.
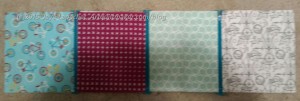
I am not sure why I chose the paint can fabric for the outside. It was waiting to be ironed and it kept beckoning me. I couldn’t resist and it was perfect. It feels like a good outside for a working bag. I also think I won’t wonder why I chose it.
I didn’t mean to match the top, but I did a pretty good unintentional job, don’t you think?
Jaye’s Sew Together Bag -some fabric choices
I chose the inside fabrics very carefully. I wanted fabrics that I loved. A lot of these are new or new-ish fabrics, but have the feel of old favorites. All the choices has to be light for the inside so I can see the tools that fall to the very bottom. I did choose one dark violet/magenta Karen Lewis fabric. It isn’t light, but I think it will be fine.
As I mentioned the other day, I made this one at the same time I made TFQ’s. After I cut all the pieces I sewed the steps for one and then the next until the end when I had to get TFQ’s done because she was coming to visit and I needed to gift it. I finished mine in a few quiet half hours over the weekend after the fun and games with TFQ.
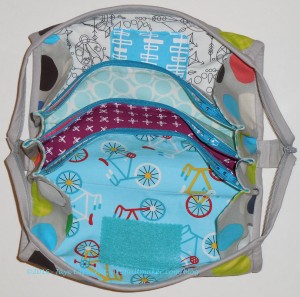
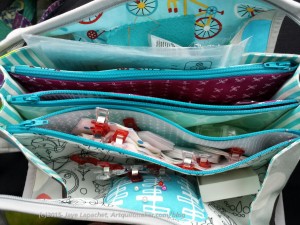
My Sew Together Bag – open
I added a couple of pinks for the inside of the pockets, but they are hard to see unless you have the bag with you.
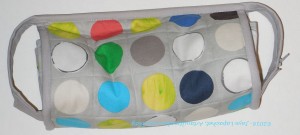
Jaye’s Sew Together Bag – closed, side view
I tried one thing on mine to try and cover up the stitching of the side panels to the lining. (If you look at the photo above, the area I am talking about is a vertical line of binding on the ends just in from the curvy handle). At the end of the process, when I was putting on the binding strips, I sewed the binding to the bottom first then wrapped it around to the top. I still had to deal with the thickness, but I was able to see where I had stitched and could make an attempt to cover it.
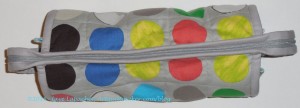
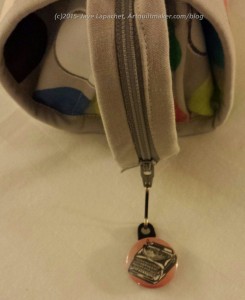
Sew Together Bag with zipper pull
I received a zipper pull for Christmas and decided to put it on the bag. Why not? I had it. It would make the long zipper easier to pull and it would look cool. Also, I wouldn’t have a random zipper pull floating around the house.
It fits perfectly and looks cool (at least to me!). One problem is that the zipper pull is one sided. When I open the long zipper to access my EPP materials, the zipper pull ends up on the other side of the bag upside down. I know this is silly. It would be better to get a two-sided zipper pull. Since I already had this, I am going to continue to use it but I would advise you to get a two sided zipper pull if you are out buying one.
I have an idea of making one using beads for the next STB, but we will see.
Upside down zipper pull
I filled the bag on Friday. I took my regular handwork bag and put some items from that bag into my new Sew Together Bag. I took all of the stuff I might need for English Paper Piecing. I may have mentioned that I intended all along to use this for my English paper piecing project. Two problems I had in the filling: would I get a second pair of Gingher snips to put in my regular handwork bag? I also forgot thread. I meant to go upstairs and get another spool and I just forgot, or got distracted. That forced me to go to quilt shops over the weekend. 😉
Sew Together Bag in my lap
In using the bag in the car, I found the best part to be the ‘tray’ that the bag formed in my lap. With my old handwork bag, it didn’t open as far as this one so my lap was my tray. Also, everything was sorted into pockets. As I got used to where my tools and supplies were located, I found I could work relatively quickly. I finished on two EPP stars in the car, placing the bag with the pincushion towards me. I found it to be very useful and convenient.
Some Observations
I think the strips for the long zipper would lay better if they were on the bias.
The bag needs some feature to which Wonder Clips can be clipped.
I tried a few different things and cannot get the top stitching to look good where there are many, many layers.
WonderClips are a godsend for making this project. I used about 12. They are not listed on the supply list, but I think they are essential for this bag.
Make the pincushion (mine is a little too large on this one) and the exterior at the beginning of the bag making process. It is such a hassle to stop and do the fiddly bits when you are so close to finishing.
Use a two sided zipper pull
I have an idea for one more that I want to make, but it isn’t a requirement and I think I will let the feeling lie for awhile.
After making this bag 4 times, I am tempted to try the Bionic Bag just to see the differences. I am trying to restrain myself. I need another bag pattern like I need a hole in my head.
I have been working on the EPP project while watching TV instead of sewing the sleeve on to FOTY 2014.
A week or so ago, I was in desperate need of some dots on white, so I spent quite a bit of time cutting fabrics to make some stars for the alternate rows. I can’t reap the rewards without papers.
Mostly I have been making stars, but I needed to free up some of the EPP papers so I sewed a section together and will sew it to the main piece next. Once I sew the section shown to the main piece, I can pull out some of the papers. yes, I could buy more, but it seems ridiculous to do so until the papers I have fall apart. I could make more papers from the subscription cards in magazines, but I am too lazy.
I don’t like doing this. I wanted to make all the stars and then sew them all together. I know there were some times where I just couldn’t help myself and sewing sections together is sensible, but still.
I have made my half hexie star project larger. I like making the stars and, as I have said in the past, they are great for a traveling project. However, I seem to be obsessed with making the ‘top’ piece larger. I don’t know why, but when I sit on the couch to watch TV with DH, I add a star or a row of stars to the larger piece. It wasn’t in my plan to do that, but I can’t seem to help myself. Even the sleeve from the Russian Rubix is languishing, because of this new obsession.
I really need to keep this project going through 2017, so that I have something on which to work when I travel with DH on his rounds to the various parlors. I can’t just zoom through it.
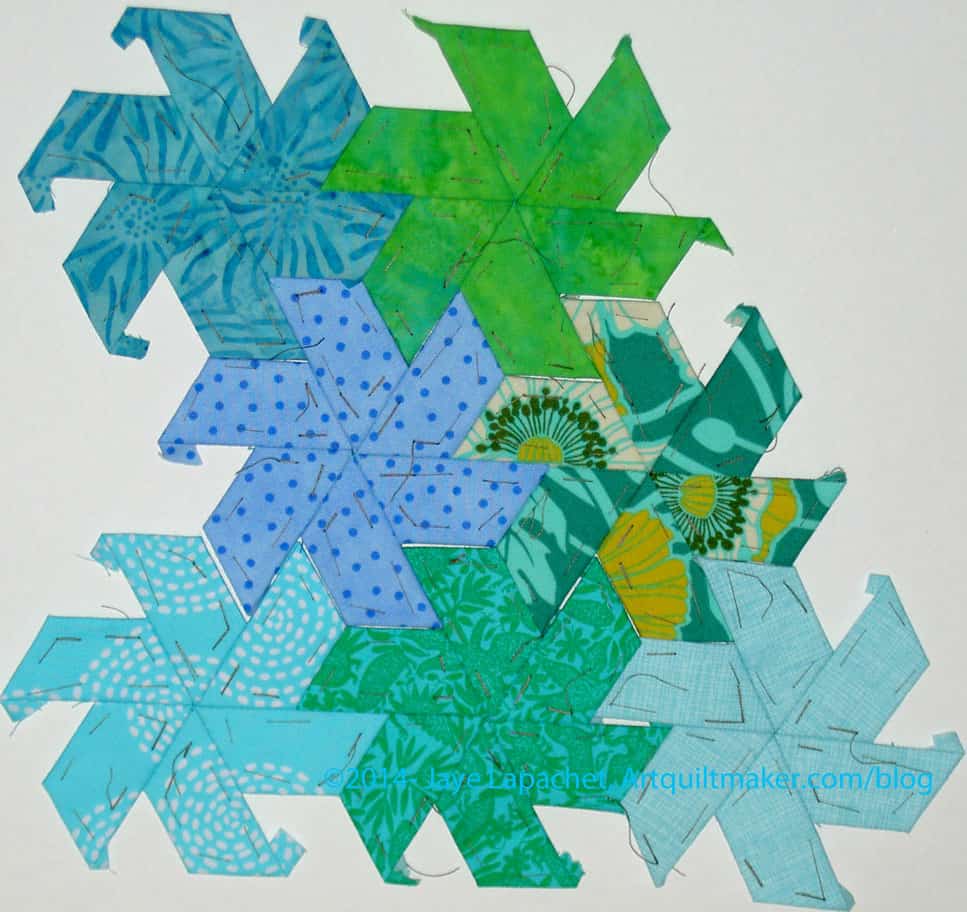
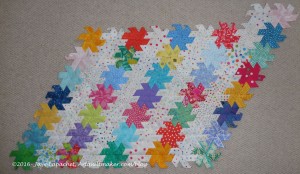
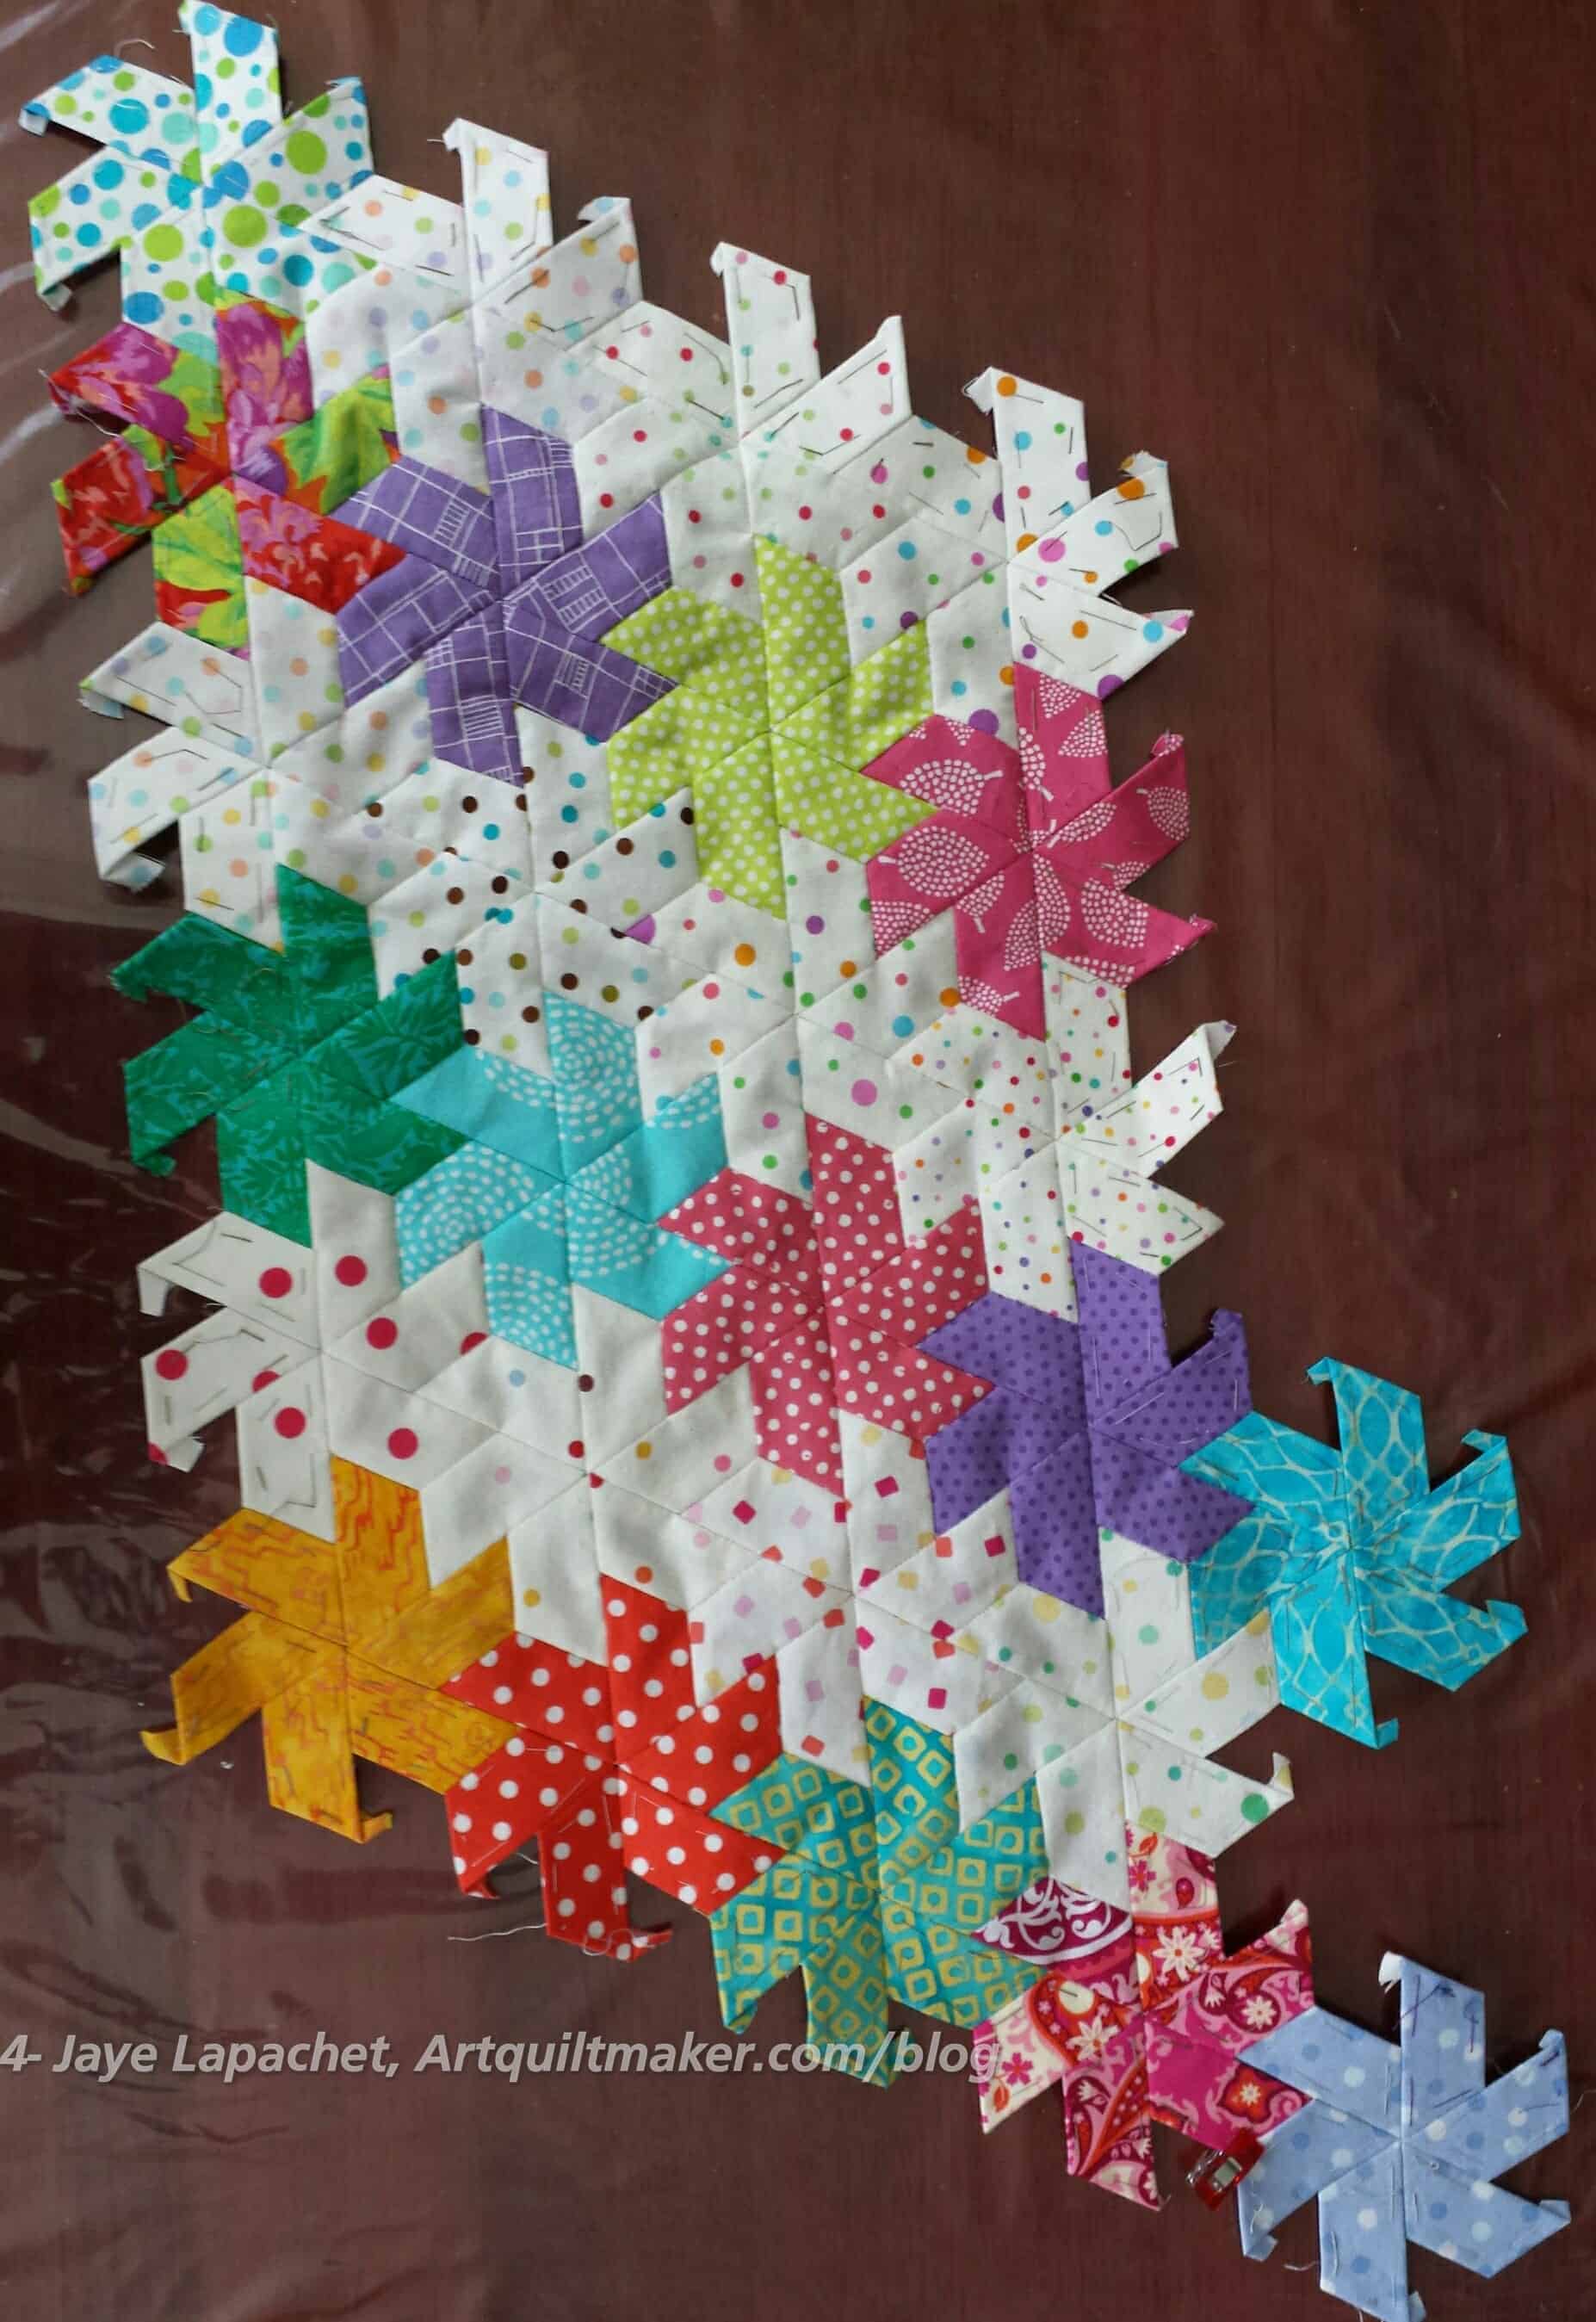
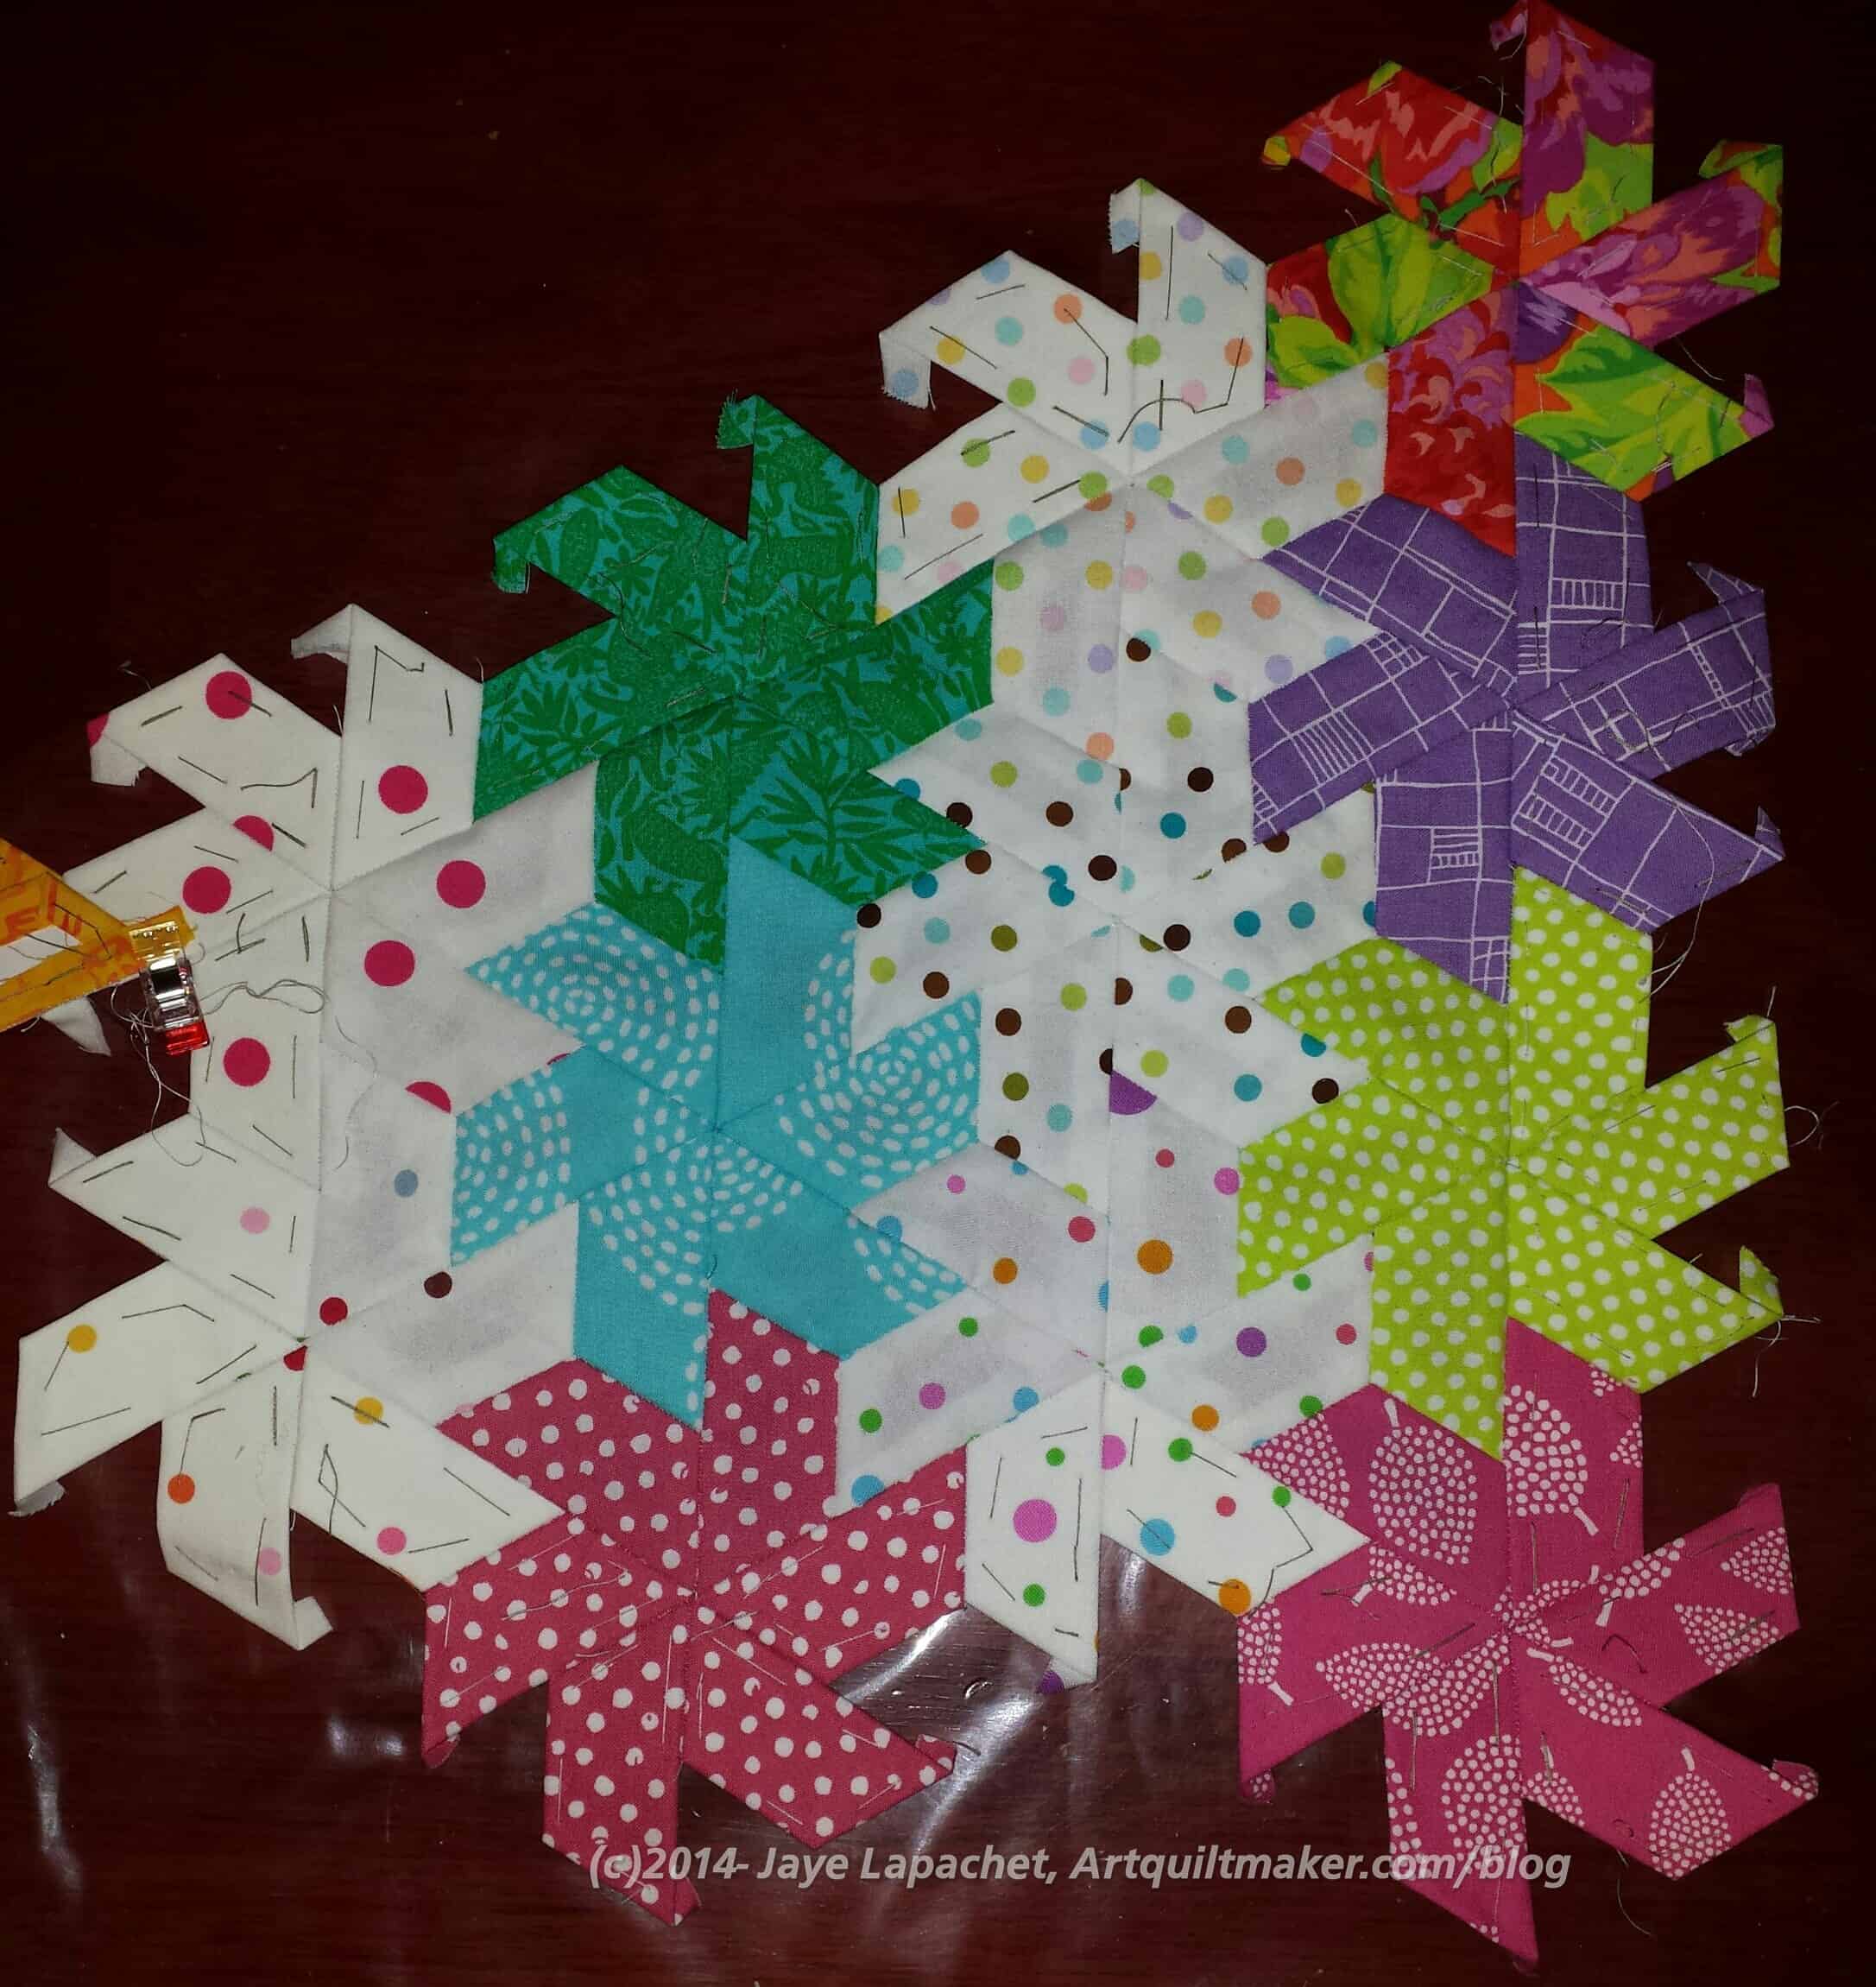
The other night I sewed a row of dot-stars (I decided to make the piece have a stripey effect with stars made from dots on white alternating with the other scrappy stars) together and then added them on to whole piece (see top of picture). Yesterday, I laid the piece on the bed to see how big it needs to be. I estimate that it needs to be 2.5 -3 times as wide as it is now to be a bed quilt with a bit of drape over the sides.
Friday night I pulled out a lot of the center papers, because I was running out, so now there is just a row of papers left around the outside. I got a little over enthusiastic with that process and pulled out half of one on the edge. I didn’t want the stitching to come out, so I sewed the blue batik star to the purple star to keep the purple seam from being lost. That is why you see the blue batik star sticking up, seemingly at random, on mid-bottom right. I didn’t really mean to add another row to the top.
The lavender dot in the lower right hand corner is just clipped to the piece so I remember to place that star in that location. I need to sew it to a white dot star before I sew it to the whole piece. It isn’t hard to inset the stars, but it is less work to sew two together and then add them at once.
EPP Stitching
What I really wanted to talk about was thread. I have a hand sewing kit I use when I sew on the couch that has random bits of thread and everything I need to do almost any kind of hand sewing. I don’t always have the exact color, but usually I can find one in there that will work for whatever my project is.
At some point I ran out of Aurifil #2600 and never replaced it. I could just walk upstairs, wind a bobbin and voila. Sadly once I have parked myself on the couch there will be very few steps added to my FitBit. As a result I haven’t replaced that thread.
I am using an Oliver Twist thread that came with a pack of those threads when I bought them several years ago. It is quilting thread, I think, so fairly thick. I don’t think it is ideal, but it doesn’t fray like some others, though it is hard to thread.
I feel like adding only two stars to the larger piece is major progress. I like the symmetry of the [kind of] rectangle. Somehow this looks like I am making something.
My plan is to make the piece big enough to cover a bed. I will slowly make the stars as I travel with the Grand President (HA! DH) then add them to the piece when I am at home.
I know it seems like I should be able to take this piece with me. It is, however, 1.5′ x ~1 foot and I want to keep it as flat as possible because of the cardboard EPP templates still inside. Making one at a time is better for travel.
I have a bin of stars that I have been making. I pulled out my bin of stars and picked some to add to the piece later. I made the stars and stored them in the bin thinking that I would just make the stars and put them together eventually. I couldn’t wait, thus I started putting the piece together into what you see above.
I finally took a little time to finish the larger piece.
I had sewn two sides of the yellow and red star segment onto the larger piece, but I hadn’t finished sewing the rest of the sides of the two piece segment onto the larger piece.
The folded over bits waiting to be sewn finally started to bug me. I took some time on Friday night to stitch the last remaining sides.
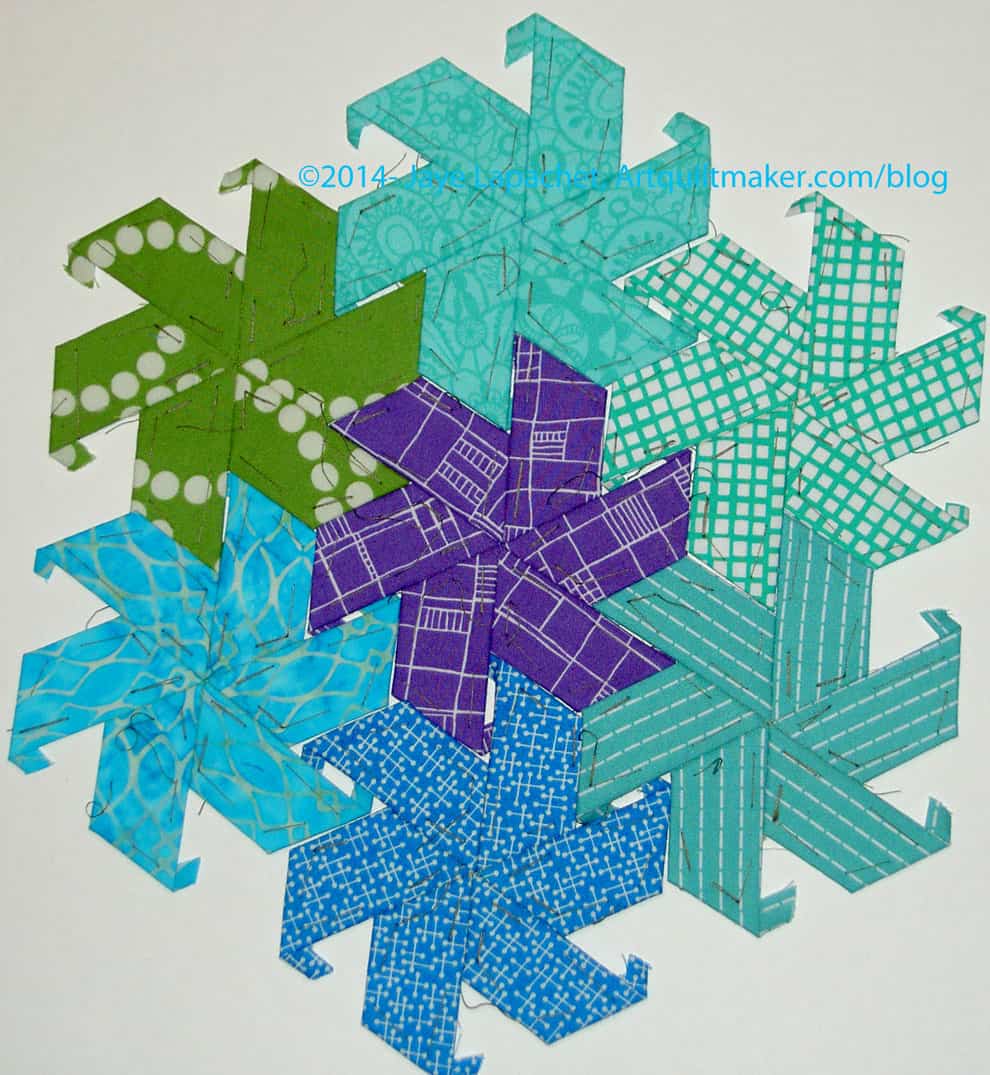
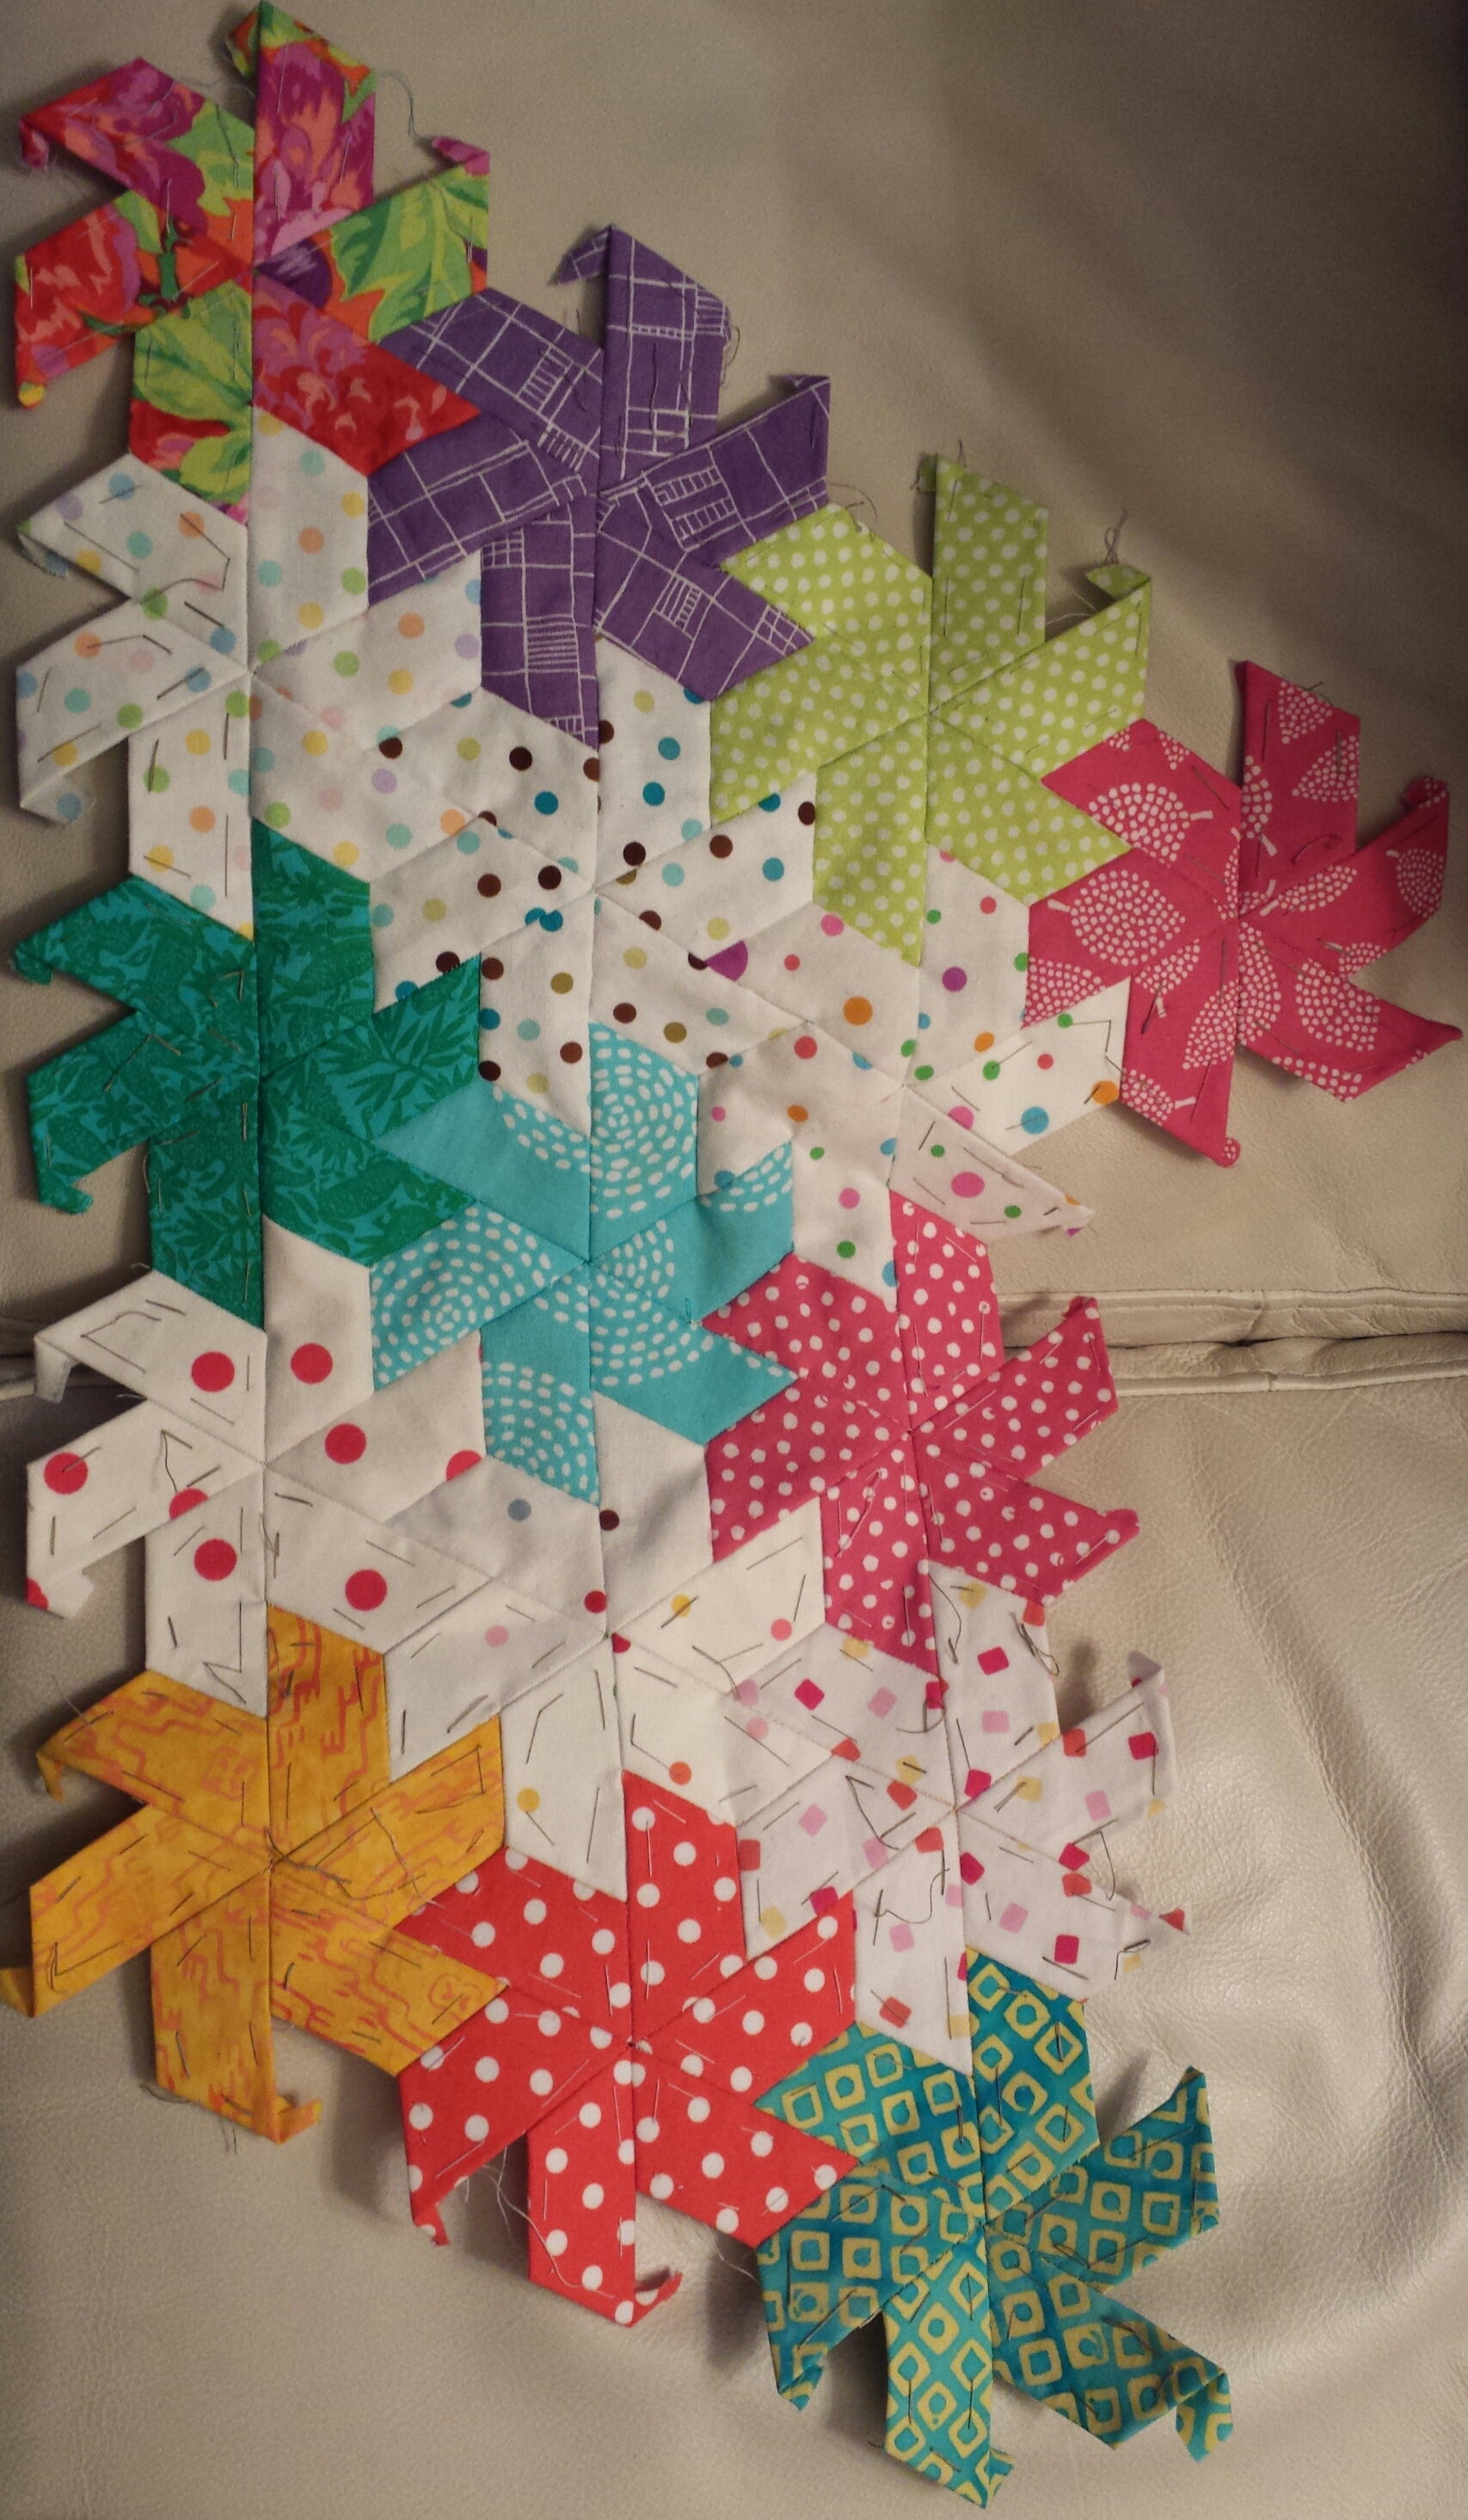
My English Paper Piecing half hexie stars are growing into a giant cluster.
I forgot to rotate the photo. What I think of as the bottom is the line of stars with the dark green and Philip Jacobs flower print on the diagonal on the left.
I have some diamonds that will make the border straight. I don’t know what color I will make them, but I would like to decide and make a few to get the feel of how the piece will look. There will be no black stars, so, perhaps, black? I hoping for a look like those 1930s quilts which just have a spark of black. I’ll have to try it out and see how it will look.
I recently finished adding a whole big section, or what I thought was a whole big section and it really turned out to be about four blocks. I thought it was a larger section when I was doing it, because of the twisting of the stars that needs to take place to get them together. I think I will add one star at a time from now on.
My biggest problem is the background stars. I need to make more and keep forgetting to cut the bright white dot fabrics until I am sitting and doing it.
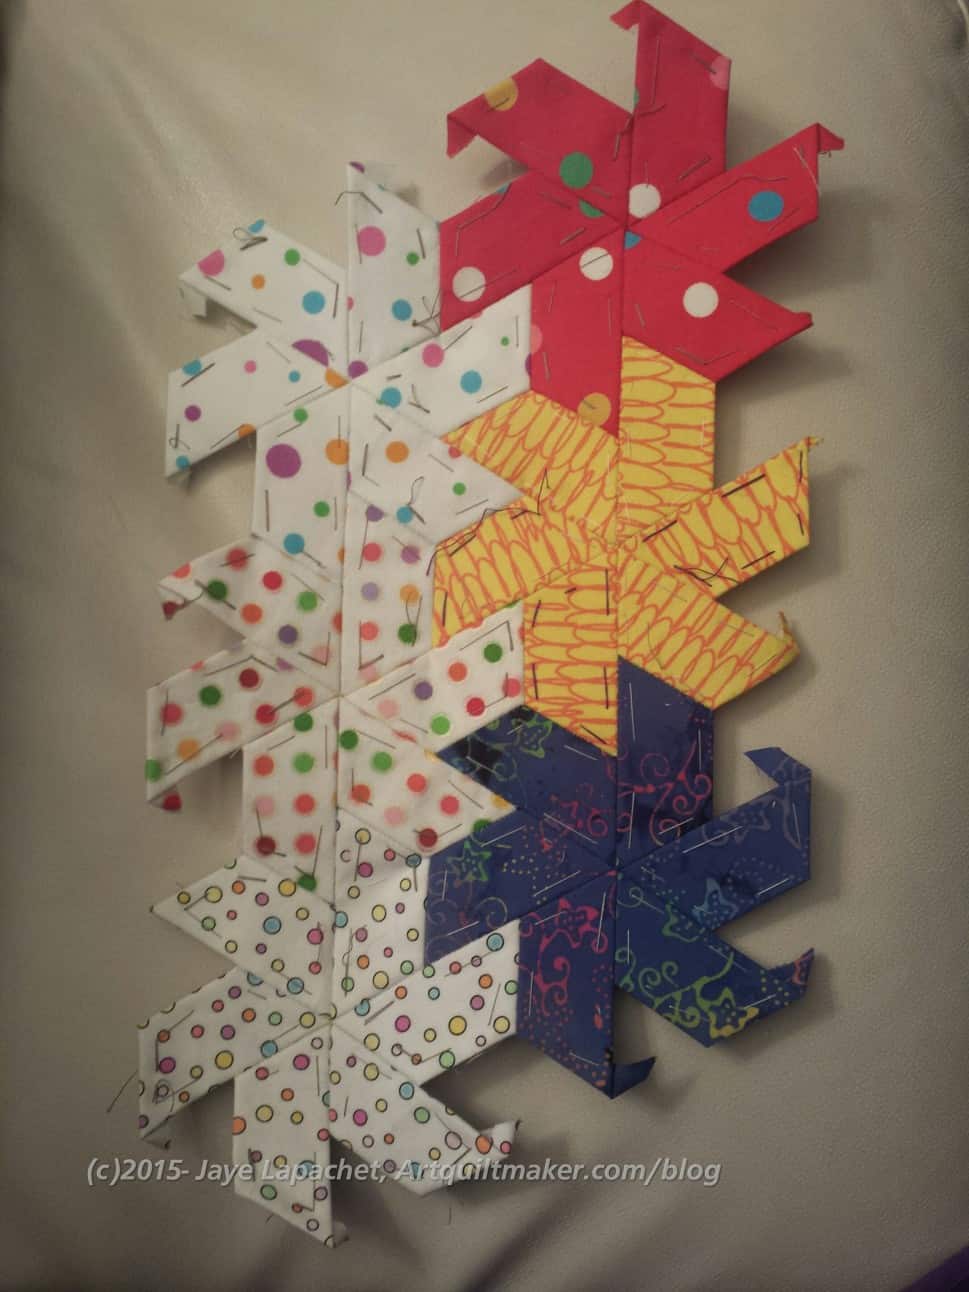
I have been working on my Half Hexie English Paper Pieced Stars since August of 2012. I really wanted to see if I could actually take out the paper templates and use them again. I sewed four stars together and went from there.
I would have felt a lot better if TFQ were sitting with me supporting me (egging me on). She wasn’t and I needed a stiff upper lip.
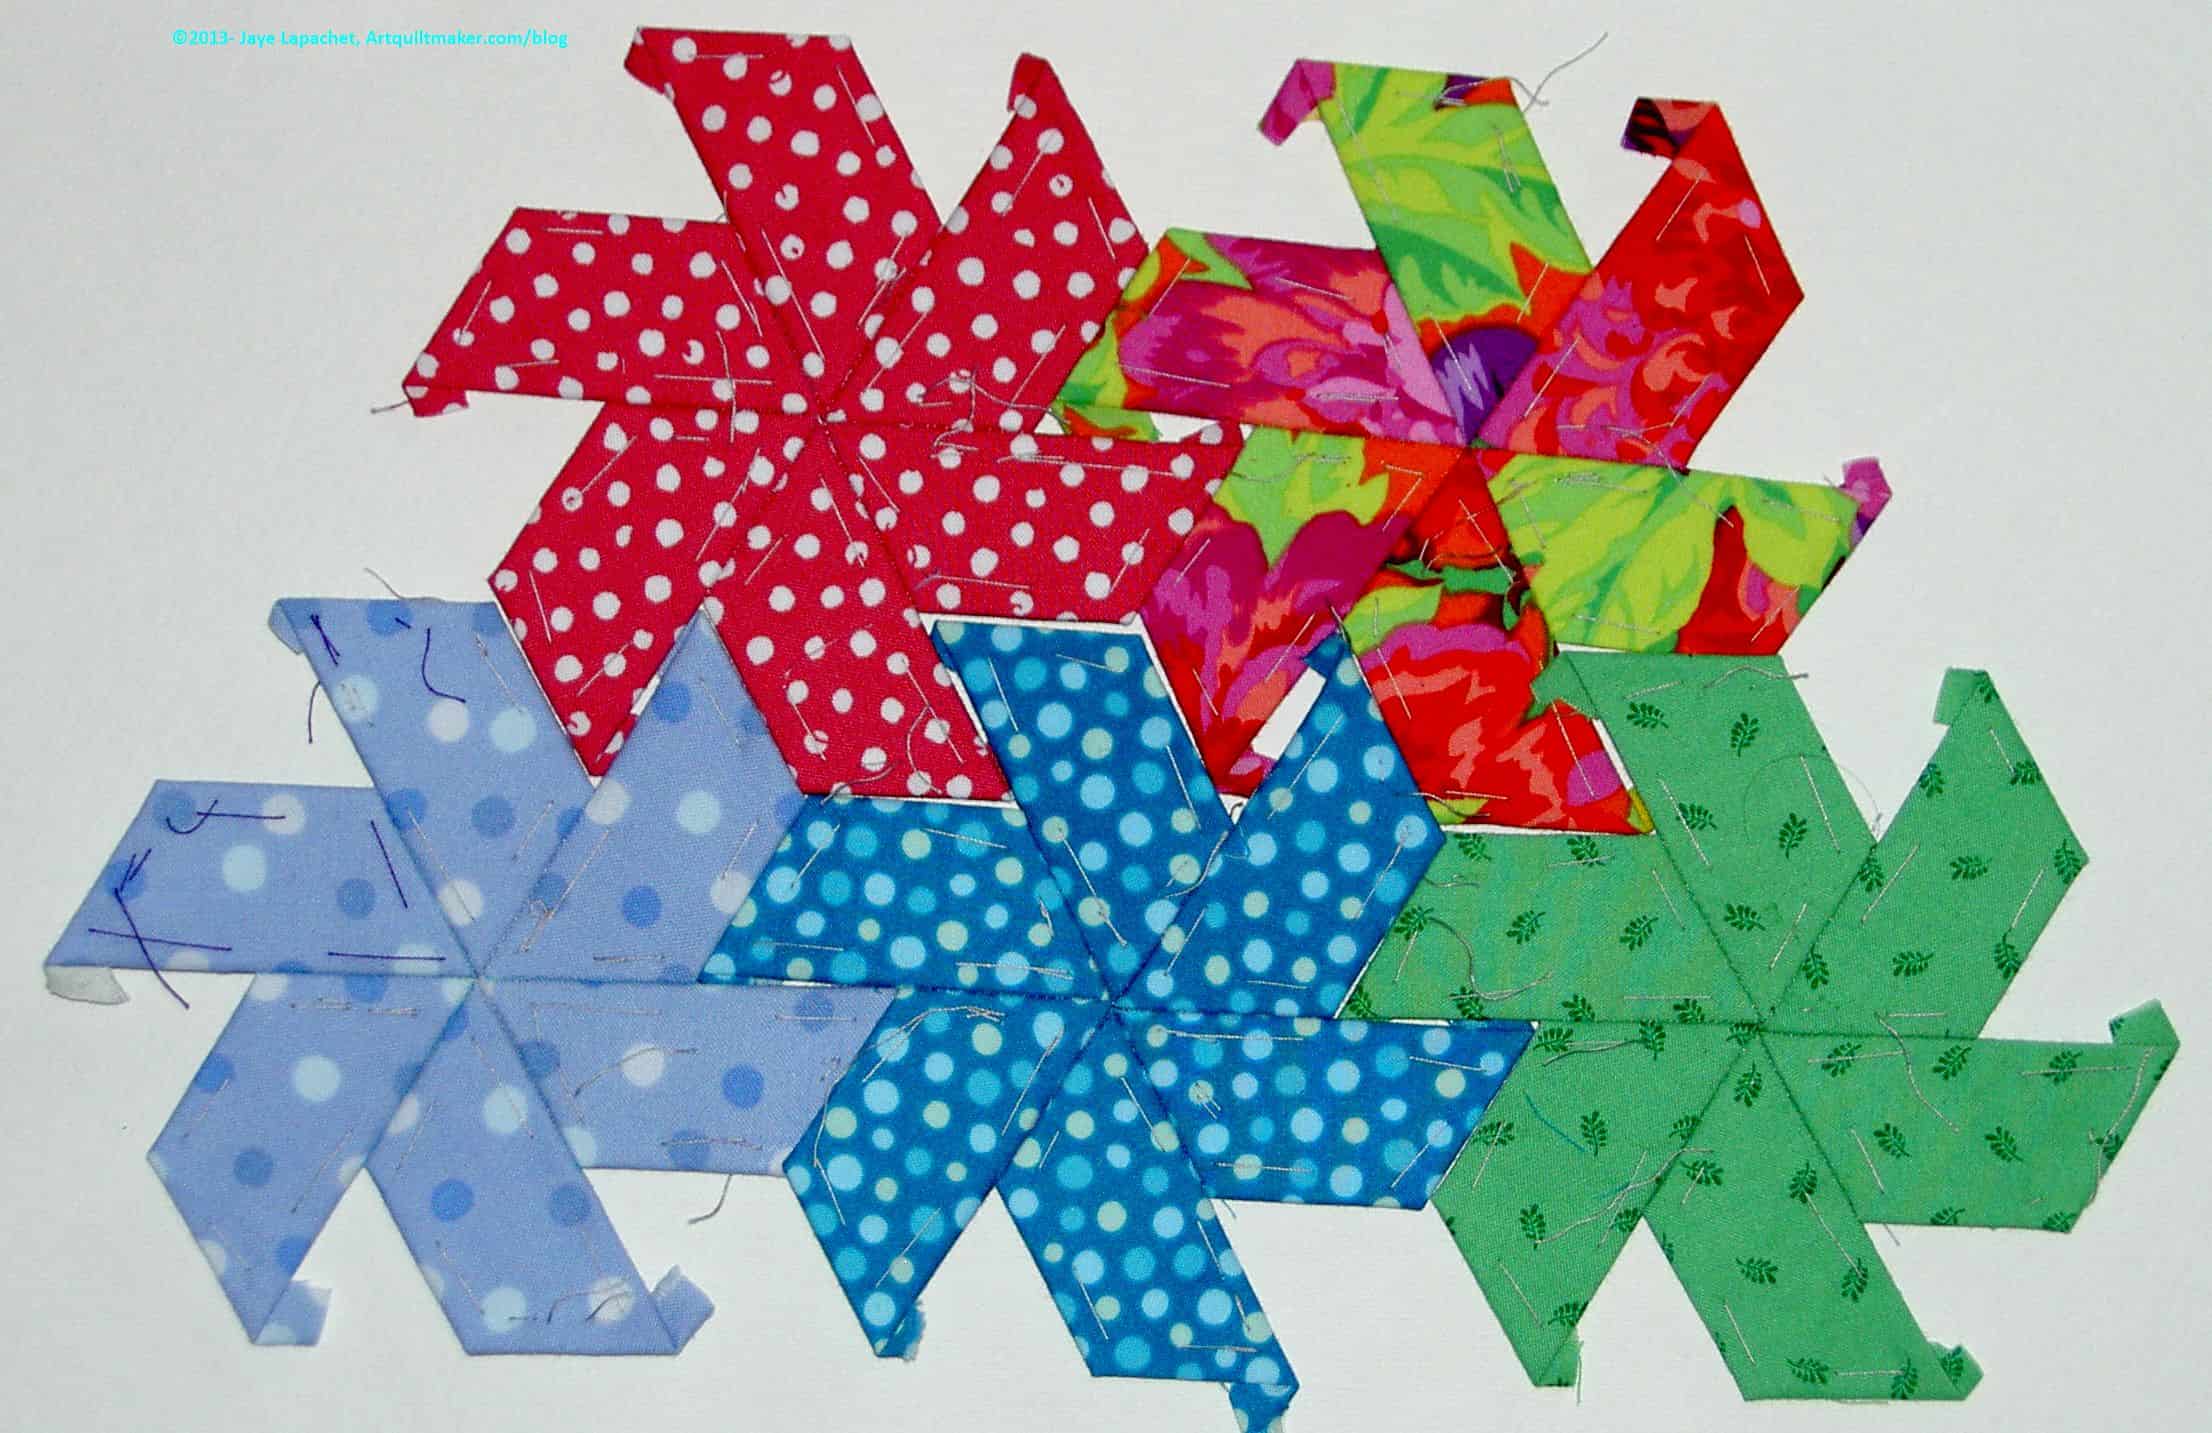
EPP Stars with Papers
I did it. I took out the papers and the piece is fine. I was kind of shocked at how easy it was and how well it worked. It is tempting to take them all out, but I know I can only take out those that are surrounded on all sides by another piece.
I should have been, but I was a little surprised by how well the ‘free’ pieces kept their shape.
I don’t know how many stars I have completed, but I may pull out the box in which I keep them and start sewing them together. I would at least get an idea of how many more I need. I could also start putting a border on, once I decide what fabric to use for a border.
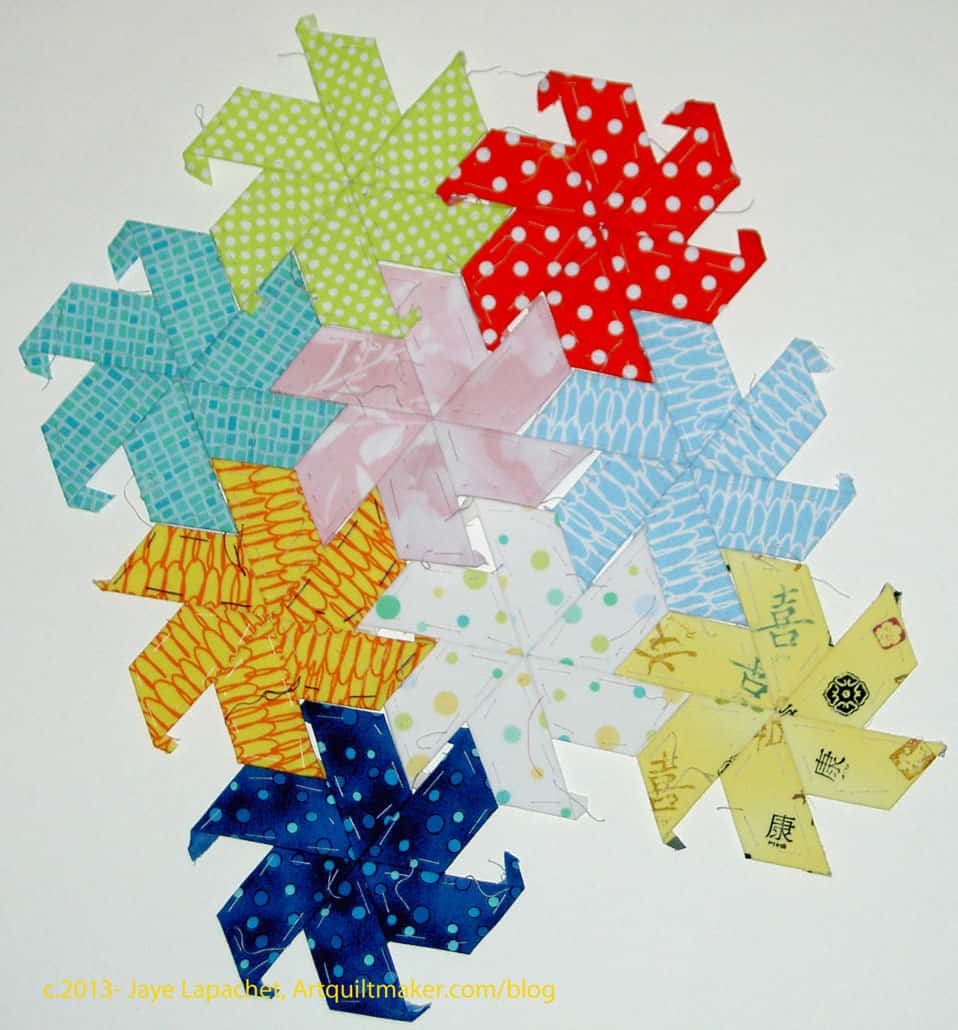
I got all of these stars finished over the weekend. I spent several hours in the car on the way to and from Fortuna/Ferndale.
As an aside, if you haven’t visited Ferndale, it has a lovely Victorian main street (I posted some photos a few years ago) with lots of nice shops. Fortuna is more modern, but there are some great shops and a wonderful Mexican restaurant called La Costa where they make their own tortillas.
Both directions are about a 5 hour drive and DH drove on this trip. It rained and I am not a very good passenger. Having my focus on something else is a good thing.
One thing I did differently was I sewed a couple of the stars together to start a line of them. I want to start putting the piece together. I also have to put some of the stars together, so I can start to take the papers out. I may need to buy another pack of papers.
I don’t have the background nailed down, though I am still thinking of dots on white. I am pretty sure I will use dots on white since they worked so well on Scrapitude. I loved the look. I just need to cut some pieces.
The last time I posted about these stars was September 9, 2013. I can’t believe how time has flown. I have worked on them, but a couple of bindings and the Christmas stockings as well as the Christmas and Birthday thank you notes got in the way.
I’ll need some more of these to work on in the car during an upcoming car trip, so I will need to cut some more fabric. I like the way Scrapitude is coming out and think I will use dots on white background for the alternating rows of this project.
I am surprised at how many of these stars are in the blue range and am wondering if I decided to concentrate on these colors and have forgotten?
In between bindings and hemming pants, I made some more English Paper Pieced Stars. I still haven’t decided on a layout, but I am running out of papers, so I will need to do so soon, so I can reuse the papers.
Thursday, as you may know, was the Fourth of July in the US. We celebrate our independence by barbequing, watching fireworks, etc. We went over to my BIL’s house for a BBQ. It was last minute and very small. We picked up MIL, a friend from the Natives came and an old friend of BIL’s came. That was it. The Young Man was disappointed that his cousins didn’t attend. Since BIL got sick, he is not up for a large event. He said he misses the larger BBQ, especially seeing friends, they used to host, but it just wasn’t possible.
EPP Stars May & June
Since the event was small, I had a bit of space to spread out. I finished one EPP star and started and finished another. I was pleased to be able to do a little sewing even though I was away from the machine. It was nice, because I could participate in the conversation. I also made a bit of a sensation. People were really interested in my project. The Natives friend, Dave, brought his girlfriend, Teri. She asked a lot of questions about the process and what I did with the quilts, etc. I encouraged her to look into a class. I doubt she will do it, but I always try and encourage people to learn to quilt.
This group of stars also makes me wonder if I should continue with my plan to have alternate rows be dots on white or if I should make alternate rows warm and cool colors.
You can see the last stars I worked on in a May post.
I guess I am on kind of a star kick. I am showing you MORE stars, after all.
Aren’t the colors pretty? I think they go together well.
This is the miniscule amount of English Paper Piecing I was able to do while we were out with the Natives. I was only able to piece in the car and it was just a 4 hour drive each way.
I thought I would have scads of time sitting by the pool to work on this project, but nope. I was too busy smiling, shaking hands with DH’s constituents to bring this project out. I think I will have a goal of getting it done by the time he ends his term as Grand President in 2017. It will be my political project. Perhaps I’ll have enough for a table runner?
I spent the weekend up on the North Coast with my handsome DH. In the car, I like to work on something. The English Paper Piecing project I started in August is perfect and I was able to finish 4 stars. A few of the stars were done during TV watching sessions.
I forgot how much I liked this project.
I organized the half hexagons in the hotel room on Saturday, so they were ready to put together in the car. It worked out great.
I make about one of these stars per night depending on whether I have basted the half hexagons beforehand or not.
Faye did hers with rows of light and dark stars, as I mentioned, but my plan is to use dots on white as the alternate rows. This is a long term project. It is so I have something to do in front of the television when I am out of bindings to stitch down. I don’t know if I will ever finish this quilt, but I might get sick of it and just decide to finish it once I have made thousands of the stars.
I am still kind of working out how large to cut pieces and what pieces to cut. I have decided to leave out blacks and also dark greys, though I do have a medium grey that I will leave in for the time being.

")