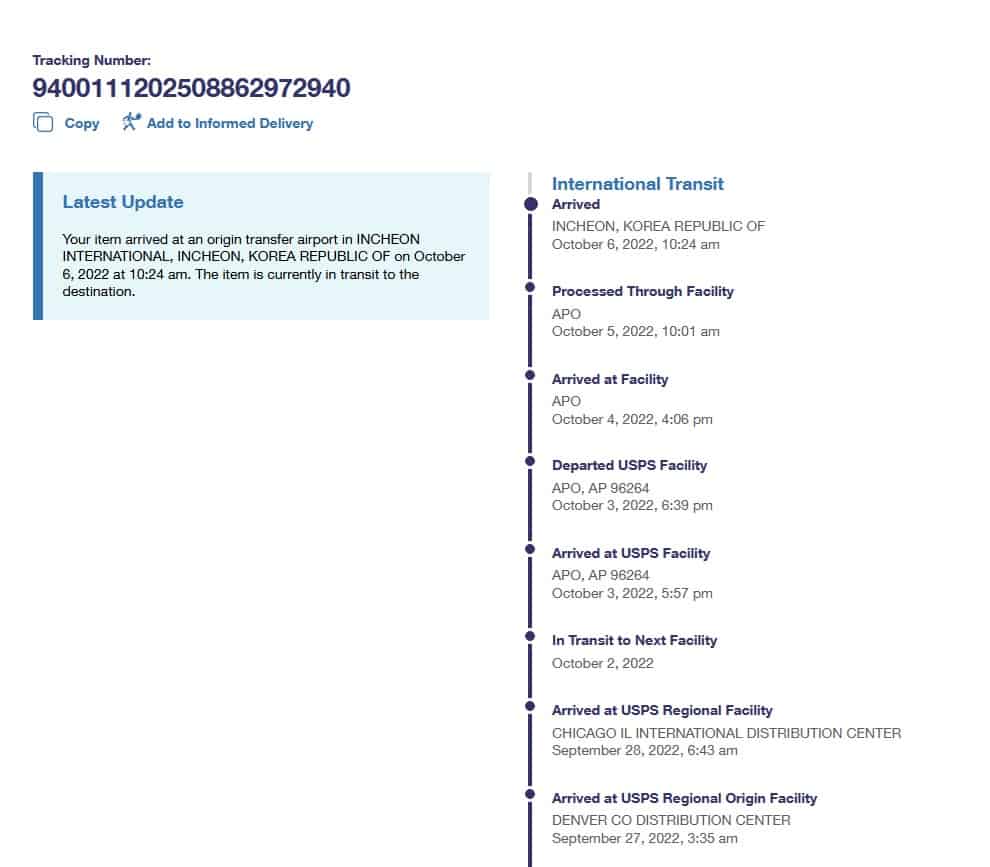
My La Pass package, which caused me so much drama for Sew Day is in Inchen Korea heading towards a military base.
Why?
Who knows. Pink Door has sent me a second package after a couple of inquiries. They also told me to go to the Post Office and ask them to help me. My local post office knows me and knows I am not a lunatic, usually. The helper, however, wasn’t very helpful and I got the boss. He said that they can’t do anything, because they don’t own the package. He suggested I tell Pink Door to issue an ‘intercept’ on the website and get the package sent back to them.
I told Pink Door, but haven’t heard back, so for now I am still waiting. I think I will start sewing the rosettes to each other. I have to do something and I am sick of knitting.
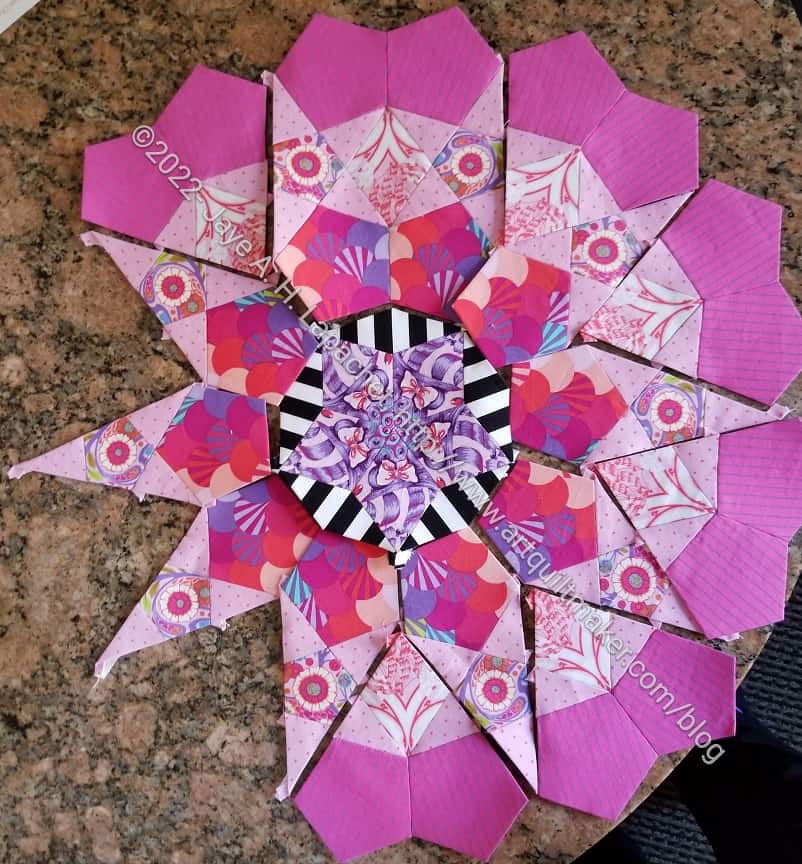
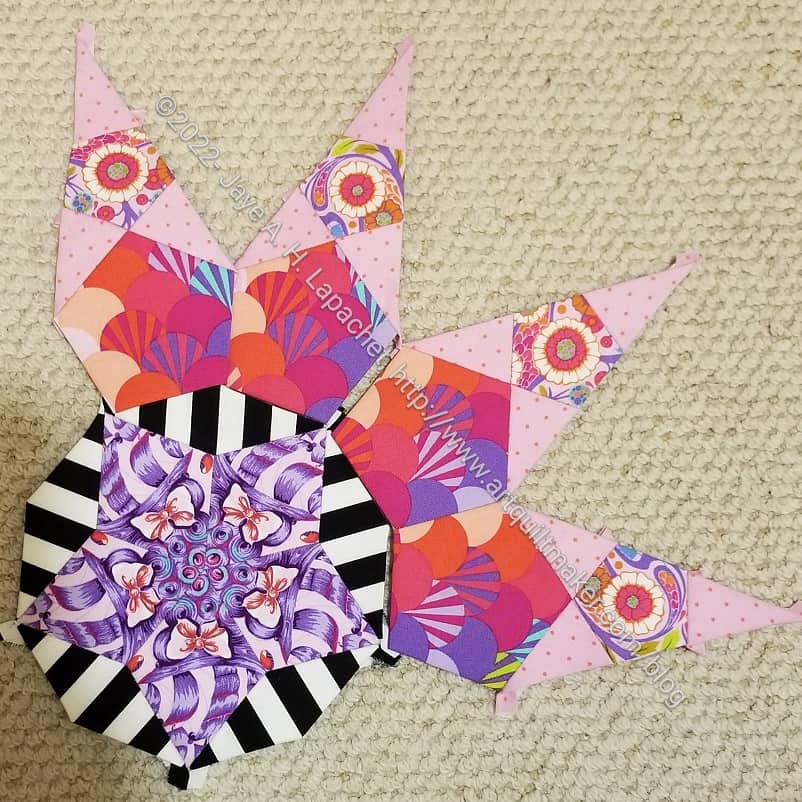
I finally finished the combined Month 13 and 14. This is a large Rosette, like Month 1/2. I did not finish Month 13 before Month 14 arrived, but since they ended up as one rosette, it was ok.
I started out putting Month 13 together using the Hearts & Cones method, as mentioned, that I learned early on in the process. I wasn’t able to sustain that technique with the Month 14 pieces, but having any straight lines is a good thing.
La Pass: Rosette M13/14 center detailParisville Deja Vu Cameo detail
I really like the center, which is cut from the main Parisville Deja Vu print. I did not use the faces as Pink Door suggested. I used the bows, because I love that motif. I wanted the bows to be the stars. The curls and some of the ship hairdo came along for the ride, creating a really pleasing, fussy cut center.
I have a few days before Month 15 arrives, so I am catching up on some binding and may be able to finish the foot part of my sock.
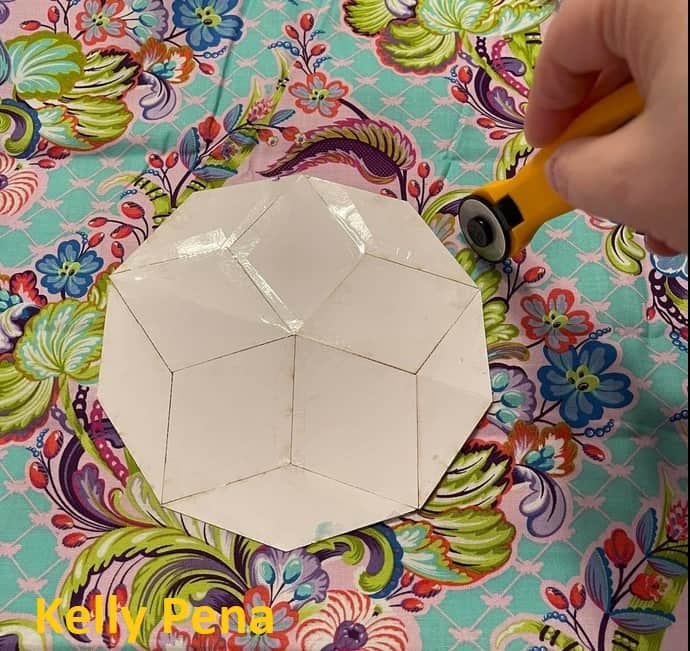
Kelly Pena, a quiltmaker/sewist also working on La Pass and in the private La Pass FB group, creating a basic and an easy to understand tutorial for making center medallions. She has kindly allowed me to use her photos for this English Paper Piecing technique. This question has come up a few times in our La Pass group. I consulted with Kelly and said that I would write a blog post using her photos so there would be a permanent link to the information. I have added a little bit of additional explanation to Kelly’s already excellent tutorial.
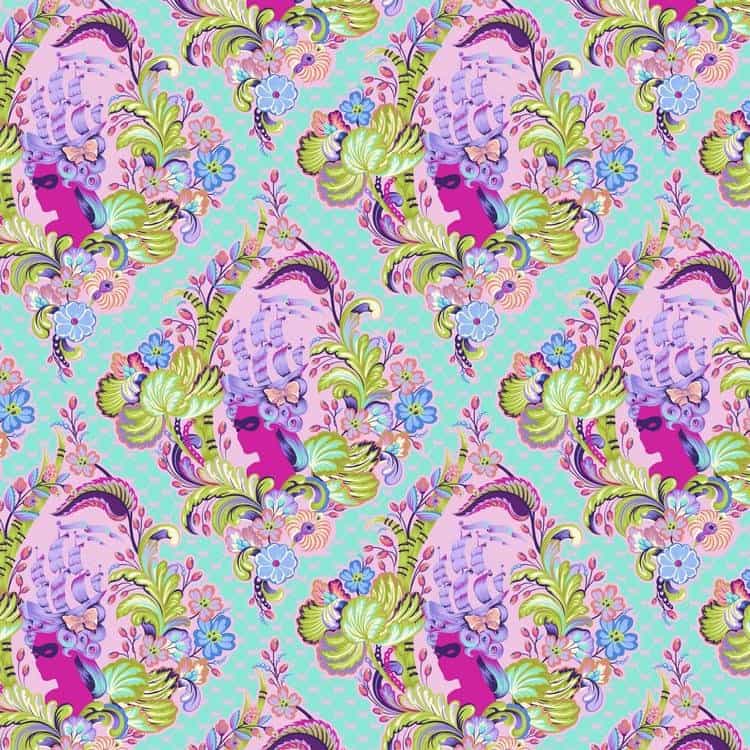
Tula Pink’s Parisville Cameo
Our La Pass rosettes require certain sized fabric pieces that correspond to the paper we are using to create various rosettes. We fussy cut the fabrics and make cool designs. Sometimes people want to use a larger motif, such as Tula Pink’s Marie Antoinette from Parisville Deja Vu. This motif would be difficult to put together using the various shapes and pieces. Not impossible, but very difficult.
In order to use up, in this case, the entire cameo and not make ourselves completely crazy, we need more ‘paper space’.
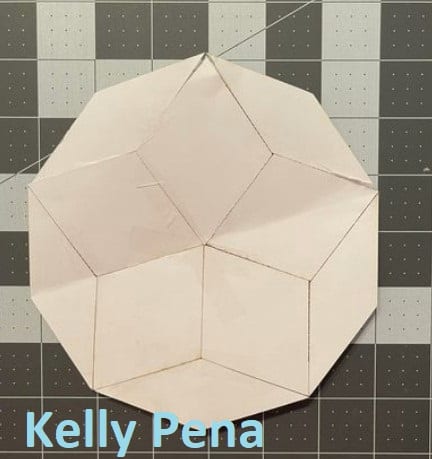
Combine papers
1. Find all of the paper pieces you need (want to use) to make the center medallion. Tape the paper pieces together for the final shape. This can vary depending on the shapes making up the rosette and you can adjust the shape by adding or deleting papers until you are satisfied. You can create quite a large shape.
As far as I know, there is no size limit as the paper will be removed at some point anyway. My gut tells me that you may have some issues with the bias if the pieces are too large. As a result, and, as usual, be careful with the bias.
You can configure the papers into any shape that will work for the fabric you have. I tried this technique on one of the Month 4 rosettes and found it moderately successful. In looking at Kelly’s example above, I should have added the long, thin diamonds to my center in my attempt. I think it would have made the process easier. The concave edges around the center diamonds are difficult and the long, thin diamonds make the edge easier to deal with.
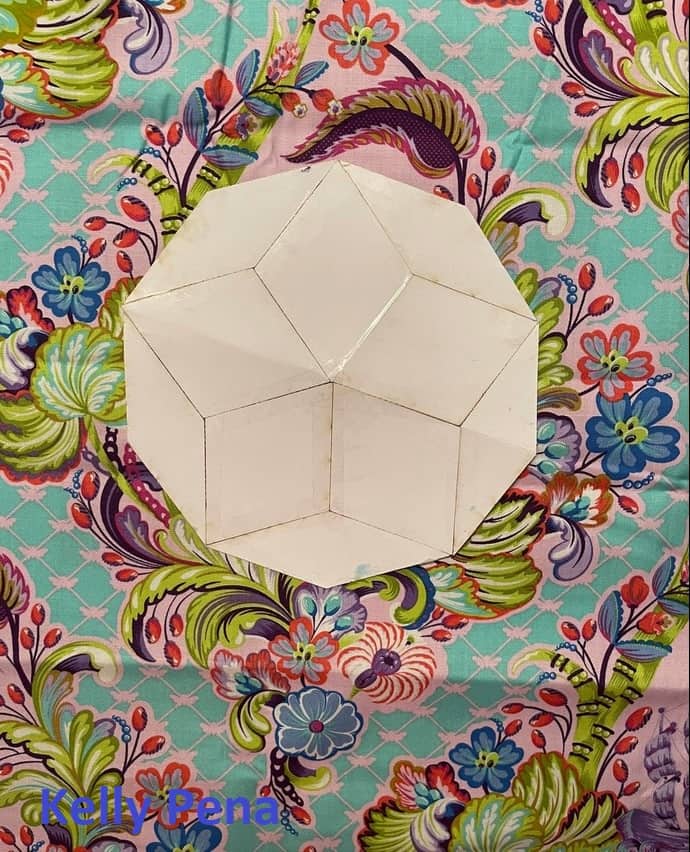
Lay combined papers on fabric
2. Lay the combined and taped papers on the fabric. Adjust the placement until you have the fabric motif you want centered on your papers.
Remember to take seam allowance into account.
You can use a light board or light box** here for more accuracy.
Cut around paper leaving seam allowance
3. Cut around the template allowing for seam allowance.
N.B.: In the image (left), Kelly is cutting freehand. If you are not confident, you can also use a small rotary cutting ruler**. If you use a ruler, you will need to keep moving it around the piece. In this case, a rotating cutting mat** might be helpful.
Cameo/Center Medallion basted
4. Baste as usual. Kelly and I are both using glue for La Pass. I am using thread basting for my Half Hexie Star project. Either method will work with this center medallion technique.
You may find it helpful for circular shapes to cut notches into the seam allowance when basting.
5. Stitch up your new larger piece. The paper shapes used will allow you to sew as if you were stitching all the shapes separately.
Thanks, again, to Kelly for allowing me to use her words and photos.
**Obviously, you should shop at local quilt shops, knitting shops or art stores. However, I use Amazon affiliate links. I may be paid for your purchase of an item when you click on that item’s link in my post. There is no additional cost to you for clicking or purchasing items I recommend. I only link to items I like. I appreciate your clicks and purchases as it helps support the costs related to maintaining this blog.
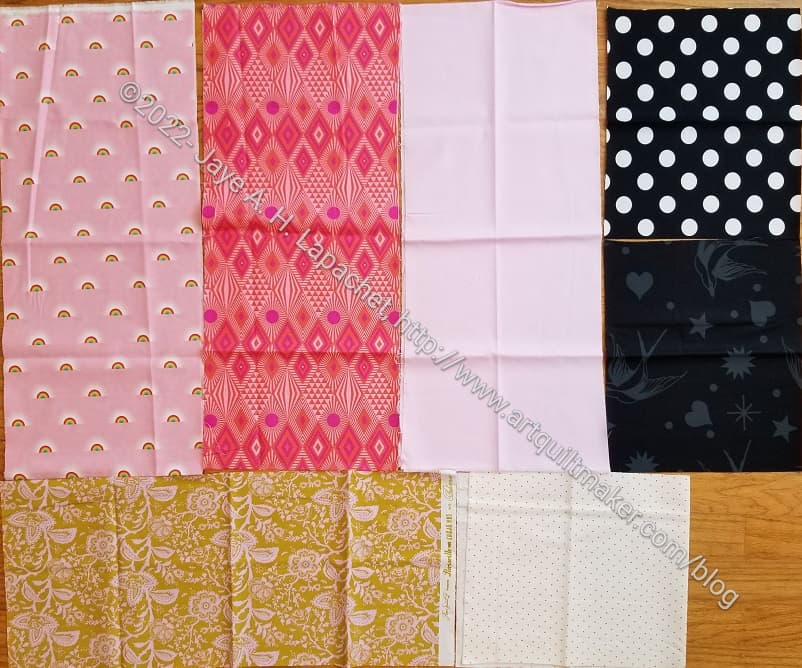
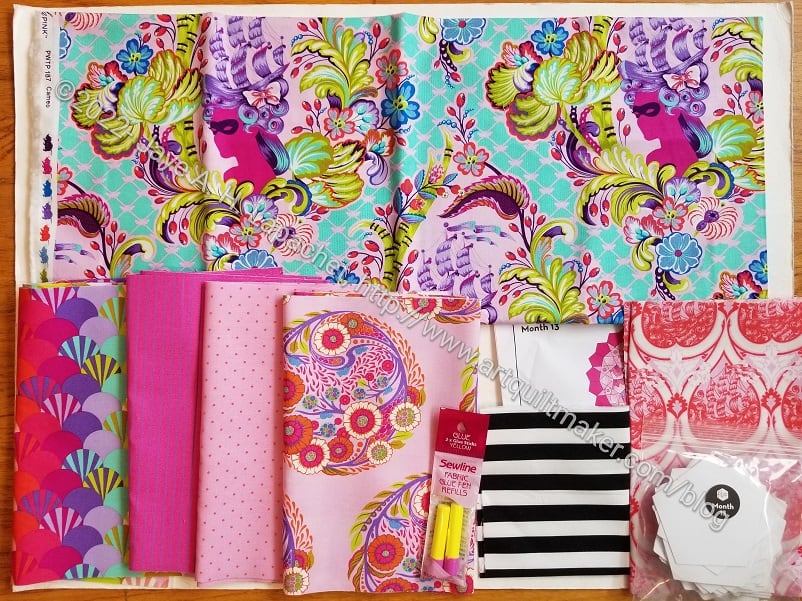
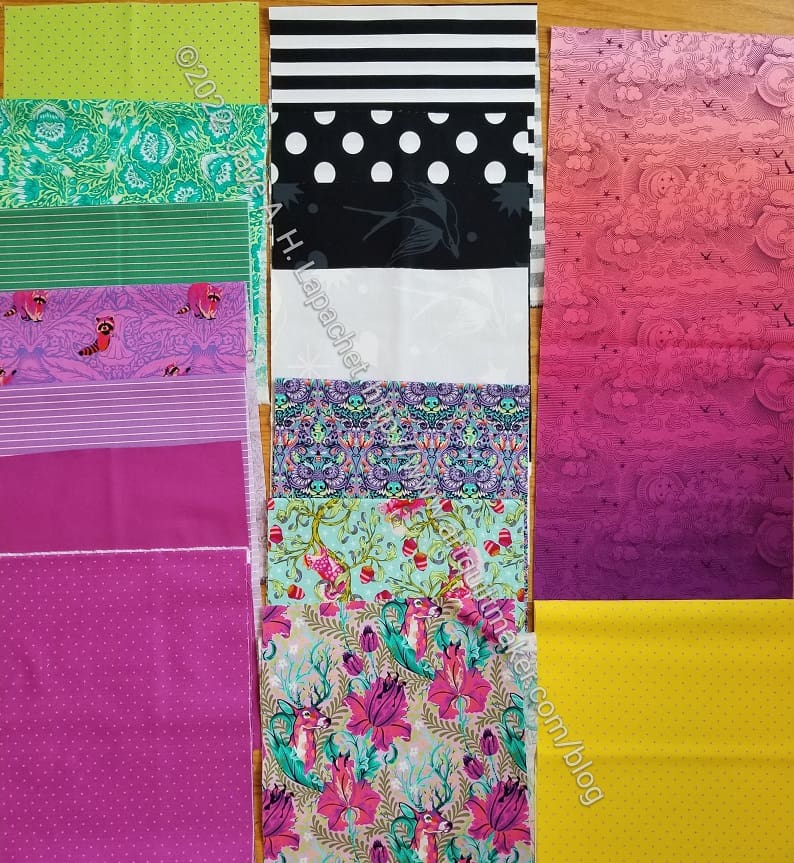
I know I already talked about basting La Pass Month 14, but I forgot to show the fabrics.
These are all pretty good except I am not using that green in the lower left hand corner. I decided I have enough green in the quilt and decided to pick something else.
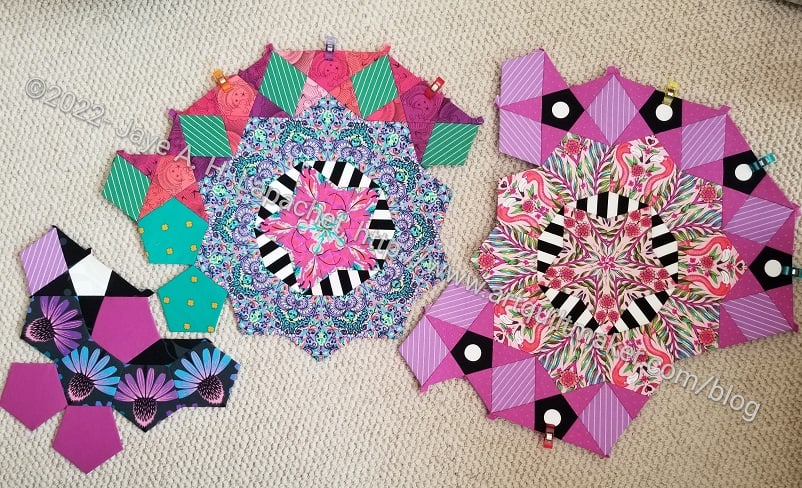
Progress on Month 13 continues. Aside from continually having to go back and cut more pieces, this month seems easy.
I think using the Hearts & Cones method makes the process seem easier.
I keep having to go back and cut more pieces because of the shift in the BOM shipping schedule for Month 13. Because this month included Parisville, Pink Door could not ship as normal. My practice is to wash all the fabric, then cut and baste at Sew Day (first Saturday of the month). I couldn’t do that this time, so I cut and basted some pieces so I could be ready to sew in the evening while hanging out with DH, then I would go back and cut more for the next night. I got off track and, apparently forgot to cut the rest of the star points.
Recently, we took a long weekend and visited Lake Tahoe. Our nephew was getting married. We tacked on a few extra days to make it a long-ish weekend. The YM flew in to see his cousin get married. That means we got to spend a few days with him as well. It was really great to have more than a day to catch up and get more of a sense of how our YM is doing.
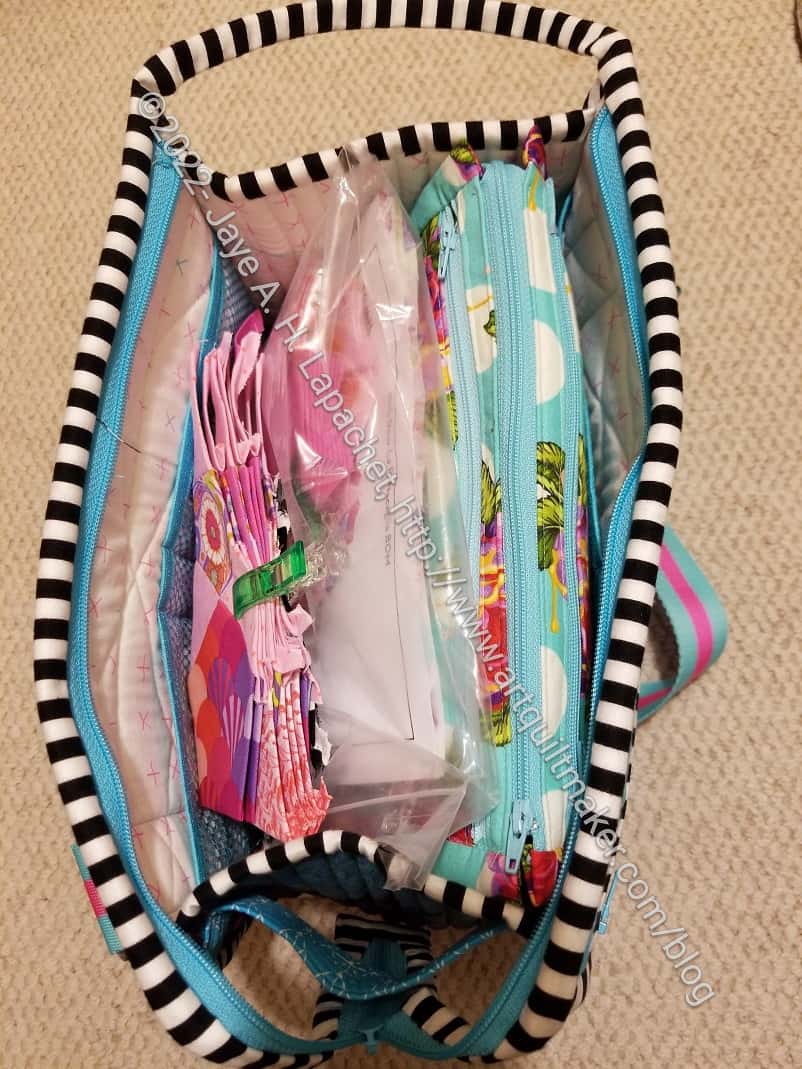
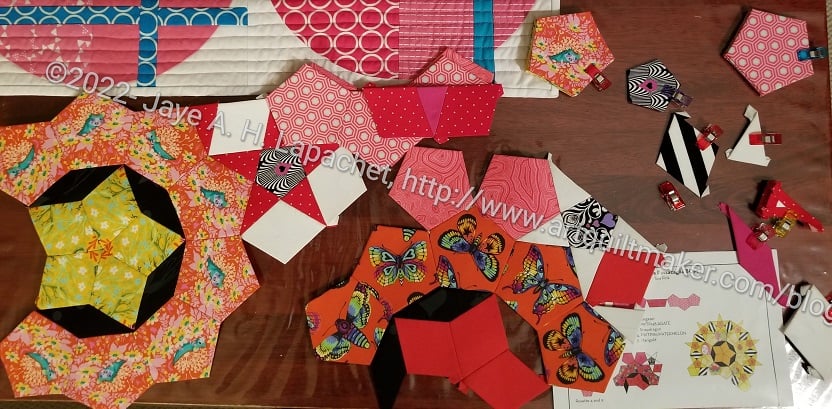
Without a Trace/Take a Stand tote filled with La Pass
I wanted to take La Pass with me on the trip so I could work on getting Month 13 finished. Month 14 had been shipped and I needed to get back on schedule. As shown, my pieces were in hearts and cones, so I needed a bag that would keep them flat during the drive and general chaos of travel. I also needed space for my Sew Together Bag and my Inside Outside Pouch, which contain various tools and supplies for La Pass. Eventually, I landed on the Without a Trace/Take a Stand Tote. Since I fixed the zipper and sewed the zipper tab closed, I have been looking for a use for it.
Unlike my trip to Portland earlier this year, travel was much easier with the rosette not yet sewn together. I keep working on combining the smaller pieces into larger sections. Once each rosette is fully complete, it is a bit of a hassle to transport until I remove the papers.
It was a bit of a tight squeeze, but worked. I am really pleased!
We had a social meeting day this month. Most of the Board was out of town and it was assumed that a lot of members were as well. I invited the people from the Pink Door La Passacaglia (with permission from the Board) for two reasons. One to give them a chance to meet up and also to introduce some new members to the guild. Only one lady, Courtney, showed up. She lives in San Jose and is actually not a quiltmaker. She is only doing La Pass, which I think is really interesting.
The meeting turned out to be the same day as my knitting class so I rushed over from knitting for the end of the social. It was hair raising, a bit.
La Pass – M1-M12 laid out (August 2022)
Courtney is on Month 4 and firmly with Team Turtle. She helped me lay out my La Pass, which was fun. It was fun to see it laid out and see how it is coming together.
We identified a couple of minor problems, which I noted and will fix when I have time.
I was glad Courtney came and I hope to see her again.
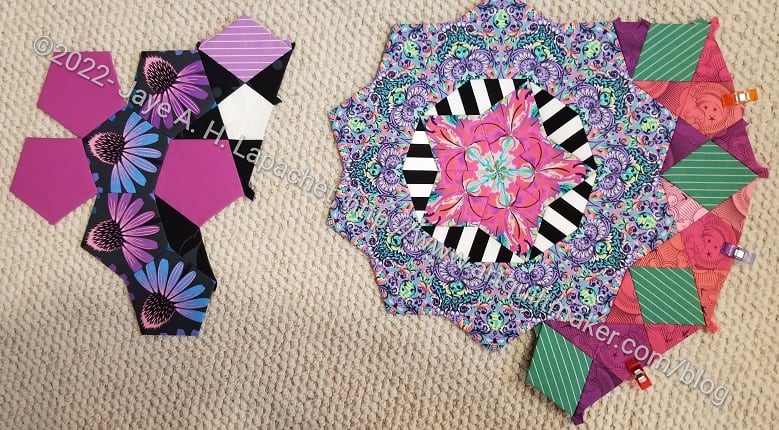
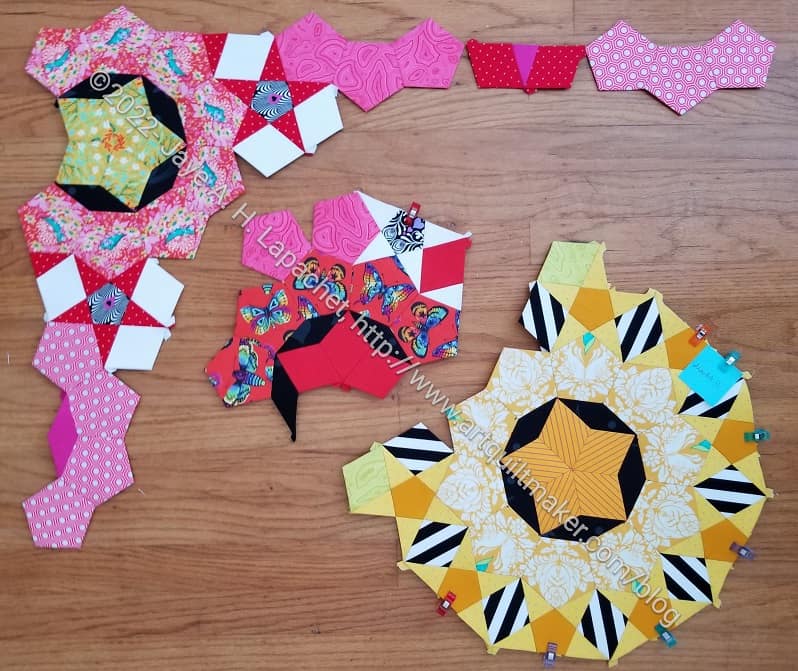
I am making good progress on La Pass Month 13 using the Cones and Hearts method.
I am pretty much using the fabrics provided so far. I did contemplate using different pinks for the outside pentagons (not shown), but decided just to go with what they sent.
I cut the large cameo print differently as, like the animals, I don’t want people faces looking out of my quilt. Also, I really like those pink bows.
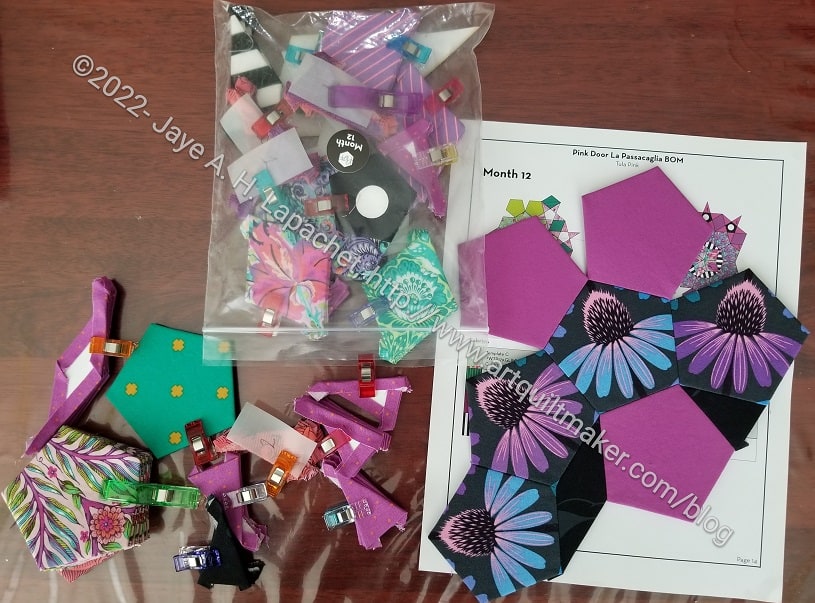
Month 13 arrived the other day. I am so excited to finally be able to get going.
Pink Door sent an entire yard of the cameo print! Lindsay and I were speculating on how many bolts of that print they had to buy to send everyone a yard of the fabric. Many bolts!
I snapped the photo and dumped the fabric in the washer. I did forget to wash the small piece of striped fabric, but I have some that is already washed so I’ll still be able to cut and baste the fabrics while I collect more fabrics for washing.
I finally finished Month 12. I redid so many parts that it seemed to take forever.
I am not a huge fan of these rosettes and may redo them.
Now I am waiting for Month 13. I plan to sew some of the rosettes together while I wait, but I have to lay them out and haven’t done that yet.
Pink Door can’t send out Month 13 at the time they normally do, because they are using Parisville, Tula’s new line. They aren’t allowed to send out the new fabrics before a certain date. I understand, but it is frustrating, because it puts me off my basting schedule.
I can’t believe it has been so long since I talked about La Pass. It has been at least three weeks since I basted and started.
La Pass M12-Rosette #2
This month should have been a favorite month, but I have struggled the whole time. There is finally quite a bit of pink, but also a lot of the weird animal prints. I switched out lot of the fabrics despite my resolve. Frankly, I switched out some of the fabrics a couple of times. I have also put some pieces in the wrong places necessitating ripping out and redoing or going with the flow.
Also, this month seems to be taking me forever. I don’t know why except for all the ripping and switching.
For now, I am going with what I have. I am not 100% commiting to what I have for M12, but I’ll wait to see how I feel when I have more together. La Pass M12-Rosette #1 & 3 are done and I am working hard on La Pass M12-Rosette #2. M13 will be delayed so I have a tiny bit a breathing room, but I need to be ready for it.
Month 12 arrived and I did a bit of cutting, but thought I could do the rest when I went to Sew Day. I was almost able to finish, but not quite. I spent some time that same day to finish after I got home, but before dinner. That was exciting because that meant I could start working on M12 right after dinner. ( yes, I lead a simple life. Partying for me is an evening with John Barnaby and my DH. 🙂 )
It was a bit of a trial to cut and baste. I didn’t want to use the Squirrel or Raccoon fabric. Because I am determined to use the fabric, I tried really hard to fussy cut around the squirrels and raccoons. I couldn’t find an appealing angle that would give me enough of the shapes I needed. It didn’t help that that shape I needed was the largest pentagon.
I switched the fabrics out when I got home. I used the coneflowers instead of the raccoons and the Daydreamer flamingo fabric instead of the squirrels. I alternated the flamingos with another part of the fabric that included more blue and green to help with the transition between rosettes. Apparently, birds are not animals in my crazy mind and I don’t mind them looking at me through eternity.
Anyway, I am super excited to be working on this project again.
Month 12 arrived and that means 6 months to go after this.
La Passacaglia Month 12 fabrics
At first glance I was not that excited about the fabrics this time. Lots of Tiny Beasts and, as I have said, I do not want animals looking at me for eternity. Also, I have had enough green. I want more turquoise. I need to balance those feelings with “I already bought the fabric and need to use it.” I took a good look to see what I wanted to change out with the fabrics.
As I looked closer, I found that there were some possibilities with most of the fabrics, though there are a couple I will change out.
Stag fabric in fussy cut mirror
First I got out the fussy cut mirror** to look at different aspects of the stag fabric. This required me to take a good look at the fabric. I found that there were two kinds of orchid type flowers I could use instead of the stag’s head. The first one was ok, but the second was very appealing. I particularly like the middle.
I am still cutting, so I haven’t done it with all the ‘suspect’ fabrics, but will.
I also decided I would use the ombre little fluffy clouds/sunset (PWTp 177-Dragonfruit from the Daydreamer line) fabric for the middle of the stars. Pink Door had white for those centers. I want the whole star to be one color.
The racoon fabric from Tiny Beasts will probably go as it is basically a tone-on-tone if I eliminate the racoon motif. Same with the squirrels, though there are some interesting vine patterns that may work for fussy cutting. However, they are green.
**Obviously, you should shop at local quilt shops. However, if you are too busy or can’t find what you need at quilt shops, I use affiliate links and may be paid for your purchase of an item when you click on an item’s link in my post. There is no additional cost to you for clicking or purchasing items I recommend. I appreciate your clicks and purchases as it helps support this blog.
Another month under my belt! Good thing, because I received the notice that Month 12 is about to ship.
La PassacagliaL Month 11 finished
This was a pretty easy month, though I did cut and re-cut fabric for some of the pieces a couple of times. I couldn’t decide what fabric to use to replace the Alice faces. I don’t want animal faces looking at me and I certainly don’t want Tula’s little sister as Alice looking at me for eternity!
Pink Door’s Sandra sent a new layout that shows all the rosettes we have made. I think Month 12 will use a lot of blue. Hooray!! I plan to add (substitute?) turquoise if there isn’t enough for me.
On a separate Life note. I know today is bad for women. Power has temporarily won. While we regroup:
I am making progress on the rosettes and edge pieces that comprise Month 11.
I showed you the first rosette from Month 11 the other day. I have continued to work on the month and this is what my workspace in the living room looks like while I am sewing in the evenings.
The particular sections I show above are not quite as satisfying as some of the other months. It is so fun to see them grow, however, and I am so thrilled with how the project is progressing.