Another Great CQFA Meeting

I had a great time at the meeting yesterday and it really didn’t have anything to do with the actual meeting.
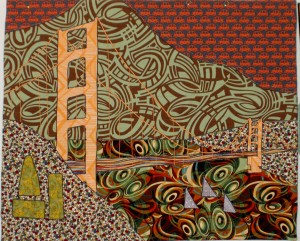
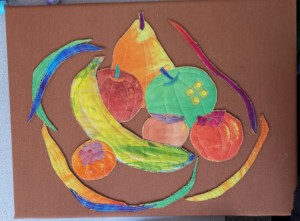
Gerre's Collage
Gerre’s Collage

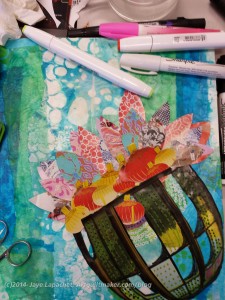
After the business and show and tell, we sat down to work on the picture I posted earlier this week as our workshop picture. We split up and added more tables so people had more space to work and I sat with Gerre and Rhonda. Gerre was doing work in her collage book (a giant board book she bought at a thrift store and then gessoed over. Great idea!!!) in colors vaguely related to the picture I posted. I would have taken the picture, but since it was in a book with beautiful collages, I thought it might be rude.;-)

I really didn’t know that Gerre was so talented with collage. I adore this piece and think it would make a great card.

Rhonda was doing her very precise improv piecing in the colors of the posted photo, tending towards the abstract. I was preparing a piece of white fabric for later painting with Tsukineko inks.

I finished my work pretty quickly. It really didn’t go as I intended and I didn’t want to work on it anymore, so I offered to press Rhonda’s strips. She sat and sewed her improv strips and I walked back and forth pressing them and getting more.
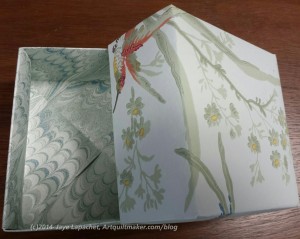
Bird Box for Rhonda
Bird Box for Rhonda

After some time I heard Bron talking about folded boxes. Rhonda said she needed some for her niece and nephew for Easter, so Bron and I sat down to make them, with Bron doing the teaching. It is amazing how they go together and I can see many of my wrapping problems evaporating.

Rhonda picked out the bird paper. We made two of the same and this box is about 3″ square.
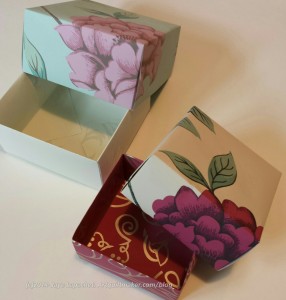
Folded Gift Boxes
Folded Gift Boxes

I decided it would be great to make my MIL a box and put a small gift in it for Easter, so we grabbed some sheets of wallpaper and I made a larger box from a 15″ sheet while Bron made a slightly smaller box, perhaps from an 11″ sheet. I ended up taking both home and will give one to someone else soon. I stopped and got some nice soaps to include in them.

Nota bene: We meet at FabMo and we have, pretty much, the run of the materials they have available. We still put donations in their box; we just don’t have to wait until selection day. In addition to fabric, they had books of wallpaper from which we took the larger sheets for the gift boxes. They are nice, because the sheets coordinate, though they are not always large. Some are half sheets or 3/4s sheets, which is why Bron made her box smaller. I thought some wallpaper with stripes would look great, but we didn’t see any in the quick look.

I enjoyed pressing for Rhonda and making the boxes. It interested me more than my Workshop piece.

The meeting went well. We talked about dues. We will be kicking people off the list soon, so people need to pay up. The Retreat is on and full, which si great. I can’t wait to check in and get sewing. I am going to work on the Field Day Zipper (I know! Blast from the past, right?) and the next Food Quilt. I suspect you can believe I won’t be working on FOTY 2014, but it works better for me to take more time and that requires working at home. I really want to get these two quilts done and 36 hours of sewing may be just what the doctored ordered.

The Field Day Zipper will be a gift. The fabrics and partially sewn pieces are clogging up my cutting table and I would like to get it done. I like the colors, but they are not demanding my time or attention. Too muddy. You knew that right?

The Food Quilt 2 will be a gift as well. It will be for a friend of Y.M.’s. We are friends with his parents and every kid should have a quilt. I keep looking at the Y.M.’s Food Quilt and trying to decide if I have cut enough fabric for the blocks I have slated to be made. The pattern is a Disappearing 9 Patch and I have decided that I will make 16 blocks. That means I need 64 food fabric patches (have already cut them), 64 black and white print fabric patches (almost none cut) and 16 purple patches, almost all of which are cut.

If I finish both of these projects, I also have the Box Full of Letters quilt on which to work. That will take come kind of miracle.

Anyway, the Retreat will be fun and I will have a lot to tell you about when I return.

The SFPL show is almost over. I’ll write more about that later. Be sure and go see it.

Rhonda will lead a workshop in June concerned with embellishment and hand embroidery. I can’t wait for that. I used some Aurifil embroidery thread for my ATCs and loved it! I will definitely buy more of that stuff.

Marie chimed in that there is a Stitchery show up at the San Jose Museum of Quilts & Textiles right at the moment. Fitting, don’t you think?

Show and tell was fabulous. Everyone does such interesting work and they all said kind things to me about the two pieces I brought: FOTY 2013 and the Hawaiian Donation Quilt. I know I haven’t written about them yet. Stay tuned for upcoming posts on those finishes.
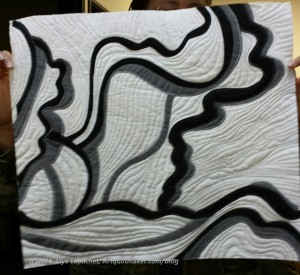
Sonja's Flower
Sonja’s Flower

Dolores and Sonja are taking an online class with Elizabeth Barton. They are regularly bringing their pieces to show us and it is interesting to see the process through which they are working.

Sonja’s piece was a follow-up to a flower she finished a few years ago that took forever. This newest piece was finished within the month.

I love the curves and the lines. The color palette emphasizes the design and there is no distraction from color.
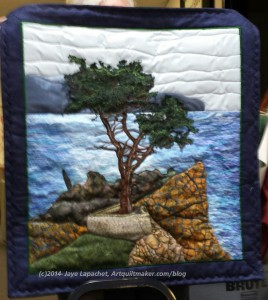
Caroline's Cypress
Caroline’s Cypress

Caroline does amazing landscapes and she is nearly finished with another one in her series of Lone Cypresses (Monterey Coast).

She threadpainted the greenery, but a new member showed some cheesecloth she had dyed, which sparked a discussion on the merits of making the greenery with cheesecloth instead of all of that threadpainting. Definitely doable, though different looks would be emphasized, I think. It was an interesting discussion.

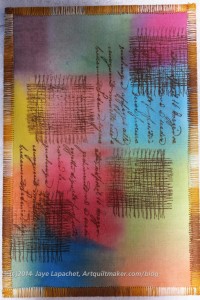
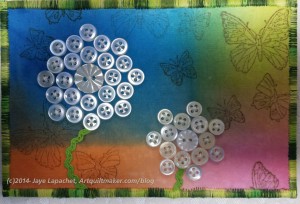
Valerie, one of the visitors does amazing work. I didn’t get to talk with her much, but she brought her dyed cheesecloth and embroidery floss as well as a bag she made from hand dyed fabric. I seriously thought about trying to slips some of her embroidery thread into my bag. I restrained myself and decided to make friends with her if she comes back. 😉 She also brought large covered buttons with beading work using seed beads, some fabric postcards and a fantastic name tag.
wpid-wp-1428193345594.jpeg

Valerie's Postcard
Valerie’s Postcard

As I said, it was a great meeting. I learned something, got to see my friends and got something to write about for you. The perfect day. 😉
CQFA Meeting – Feb 2015

I finally made it back to a CQFA meeting! September was the last meeting I attended and it feels like an eternity.

We changed locations and the months in which we will meet. The crowd was quite large – about 25 people. Dues were collected. Retreat monies were collected (if you are not a member and would like to attend, the cost is $107 and there are a few spaces left. Leave a comment and I will hook you up). Lots of announcements were made.

I am in charge of the workshop next time. The title is “Same Design, Make it Mine”. I have to post a photo of the image to our private group before the meeting, then everyone will bring their supplies and ideas and work on their pieces during the meeting. We probably won’t finish, but it will be a good way to work together on our own thing. I had an image all picked out and then I got an different idea during the meeting. We’ll see what I choose.

Workshop

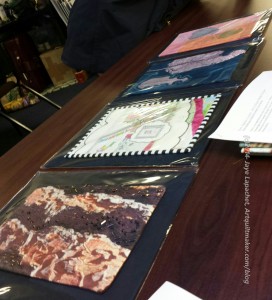
Our Critique Pieces
Our Critique Pieces

The first activity we did was to view the SAQA Trunk Show through the lens of a formal critique in order to learn about critiquing art. Maureen secured the SAQA Trunk show and Dolores made up a handout, then presented it, on how to critique a piece of art.

I have never done critiquing and I learned a lot, mostly because there are fact based tasks to perform in a critique before you get to the part where you say whether you like the piece or not.

The moniker we used to remember the steps in critiquing is:

DESCRIBE
E
M

ANALYZE
P
P
L
E
S

INTERPRET
S

JUDGE
U
I
C
Y

The first 3 aspects are essentially fact based: what do you see, what principles and elements of design do you see, what is the work about? The last one starts to get into opinion, but then the last aspect, Judge, is when you get to say whether you like the work and why.

I liked this way of  critiquing, because it forces the viewer to stick to facts until nearly the end. By doing that, I found that my emotions about the piece were less important, because I was spending energy is really looking at the piece. There some things that I noticed:

  • Make an artwork that is appropriate to the size. Some of the pieces had too much going on for the format size (around 8.5″x11″). That is a small piece and you need to focus on using that space well instead of trying to get a complicated message across. We found that the ones that were most successful were the ones that fit the format. There was was one that was interesting, but got lost because of the size. It would have been great in a much larger format.
  • Knowing the basics of design was really helpful. The most successful pieces adhered to some of those principles and elements. Making a piece – the actual technique – is really fun, but in order for a viewer to get something out of a piece, having some structure is helpful.

Dolores did such a great job on the handout. She really should think about teaching art.

Challenges

Rhonda introduced a new challenge, which was inspired by the book Brave New Quilts by Kathreen Ricketson. We are to make a piece of art inspired by a particular art movement or artist. We will be having a challenge review at our December meeting so we are encouraged to bring past challenges as well as this one to that meeting. I am not really inspired, but I have a book called the Daily Book of Art which I will look at before I completely bail.

Some of the challenges we have had in the past are:

  • 2 shapes
  • placemats
  • under the sea
  • fusible flowers
  • monochromatic

I have ideas and/or fabric for some of these. I really have a great idea for the placemat challenge and really want to do it. I just need to start designing the shapes, then cutting.

Show and Tell

Show and Tell is, of course, my favorite. I only brought the Pink T Quilt. I’ll post about the finished piece in a day or two. I brought it with the binding half on to the BAMQG Meeting, but Gerre wasn’t there so she got to see it at CQFA, which was great. It isn’t very arty, but people seemed to like it. They asked about the organizations to which BAMQG donates quilts. I didn’t have a great answer, but Rhonda helped out.

I also talked a little bit about the Tsukineko Inks class I took and showed the class samples. I really want to get back to that and do something. I just don’t know what.

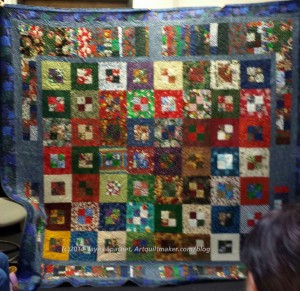
Julie's Christmas Quilt
Julie’s Christmas Quilt

Julie brought her Christmas quilt, the one we picked up the other day from Colleen (post about that soon as well!). Her Christmas quilt uses a lot of different Christmas fabrics. I have to admire her for having the courage to put them all together. If I look at the fabrics separately, I wouldn’t think they would work, but somehow they do. Of course, the Four Patches are wonderful as well.

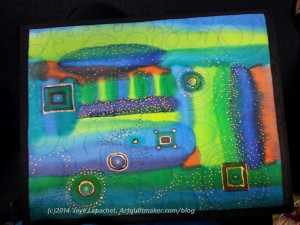
Diane's Silk Piece
Diane’s Silk Piece

I love Diane’s silk pieces and she is always prolific, so she brings, what seems like, dozens. It is amazing how much work she does. I often think she has to have an assistant. My favorites are Diane’s aerial city images. She doesn’t call them that, but that is what I think they look like.

I love this one, because of the swirly quilting. There is also a kind of submarine shape, though I know it is not a submarine 😉 and for the little flecks of gold.

Of course, I also like the blues and greens.

Ann Brook's workshop piece
Ann Brook’s workshop piece

Ann Brook brought a finished piece that she started in a Sherri Lynn Wood class.

There were was lots of great work and people were talking about interesting things. So much more that my head is spinning. You should come sometime.


BAMQG Meeting – Holiday Extravaganza!

I am really scraping the bottom of the barrel for posts and I don’t know why. Too many demands on my time, perhaps? I suspect not enough sewing, but this means you get the BAMQG report ASAP! Aren’t you excited?

Claire told us that the 501(c)(3) paperwork has been put in. That is a ton of work and GREAT news.

Quilty Happenings

  • Amish Exhibit at San Jose Museum Quilts & Textiles. Reception is on 12/7/2014 from 2-4, though SJMQT members and the artists are welcome to a walk through starting at 1pm.
  • BAMQG members have a show up at the Los Altos Public Library through December 31, 2014. It is open during library hours
  • CQFA Members have a show at the Main Branch of the San Francisco Public Library in the Wallace Stegner Environmental Center. I have 3 quilts there! Through April.
  • Santa Clara Valley Quilt Association show will be in March or April and the BAMQG will have a big presence, both in quilts and helping out.

Meetings

  • The meetings in 2015 are all scheduled to be at the Redwood City Public Library Community Room. The one that might change is the December Holiday Extravaganza because of the Redwood City parade that usually coincides with our meeting. Stay tuned on the BAMQG blog for updates.
  • Sew Day: January 3, 2015 at Los Altos Public Library
  • Charity Sew Day: February 2015 at Los Altos Public Library. Probably the first Saturday. Stay tuned on the BAMQG blog for updates.

Events

  • There will be three speakers next year, Stacy Lynn Wood, the lady from Peppermint Pinwheel and another, as yet to be named, national speaker. Buy or renew your membership to join that fun.

There was a prize drawing for the UFO Challenge and I won a spool of Aurifil thread! Yay! I can totally use that. There is a super prize in January and I can’t wait to see what that is. I hope I don’t have to be present to win as I can’t make that meeting.

BAMQG 2014 Swap Items

The Holiday Swap was awesome. I didn’t participate beyond admiring all the gifties.

I didn’t take a picture of the food, but the committee did an awesome job. There are now five of us who eat a GF diet, so there were plenty of GF goodies of which to partake. I had some yummy chocolate thing that Claire made. Yay for chocolate!

After that I just chatted with people. I found out that Michelle S has a blog. I had never spent time talking with her, but we were sitting next to each other and just got to talking. She does a lot of handquilting and doesn’t have many UFOs, which is quite envious, I have to say. She is also using the Hoffman Challenge fabric to make her City Sampler/Tula Pink blocks. I have to say that Michelle’s blocks made mine look terrible. 🙁

I also had the chance to discuss bindings with Annemarie. She has a large hexie made from Kaffe Fassett (and friends) fabric. She was thinking of cutting off the outer hexies and I encouraged her to either fill in the edges with triangles to make them square a la the Eye Spy or to bind them around the outer hexies,  leaving them in tact like I did, sort of, with Flower Sugar. I really wish these designers would stop telling people to cut off their hexies.

September BAMQG Meeting

Every time I turn around, I am kind of shocked that it is September. Even in my journal, I keep starting to write June when I write the date. I don’t know why. I did that all through last year as well and had no good reason then either.

Anyway. Lots of BAMQG this week.

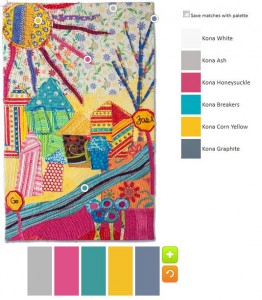
Play-Crafts Palette Builder

The meeting was awesome, as usual. The best part was the talk by Anne Sullivan of Play-Crafts.com. She gave us all a lecture on Color Theory. I know a couple of things about color theory, but I learned quite a few things. There are things called color models, which I have heard of before. One of the models is called Hue, Saturation & Value (HSV). It is a color model created to be more intuitive and show color relationships.

Anne also talked about the basics of color theory, contrast, and color schemes. Anne has the passion of someone who loves color. She has clearly done the research of a person dedicated to something she loves. I looked at her website and found nothing on color until I went to the patterns and tutorials section and there were some tutorials on color there.

We had some business as well.

  • Elections are next month.there will be a couple of new positions available: liaison with MQG and the Opportunity quilt coordinator
  • Charity will host a Sew Day on October 4. We will work in teams to create charity tops.
  • Amanda still has no reliable source for Cat Bed donations. She had a few that were already made, but not stuffed, so people took those. I gave in the neon orange bed. It got a few laughs. [BTW, I forgot to take a photo of that cat bed, but it was just neon orange, so nothing interesting. Also, I was able to cut a top and bottom, but not a gusset from the remaining Polartec. I hoped that Amanda would have a bit more fabric, not in neon orange from which to make the gusset]
  • The quilt display at the Los Altos Library will happen Dec 1-31 and Peggy has forms to fill out.
  • There were a few more packs of fabric for the 2014 Opportunity Quilt. The blocks are due at the October meeting.
  • PIQF is during the next meeting. 🙁 Poor planning on the Mancuso’s part IMO.
  • Retreat dates are still in process.
  • Amish exhibit – quilts are due. I didn’t do one, but people have to arrange for a dropoff with Kelly. People showed their quilts during show and tell, but no photos were taken as people were concerned that others wouldn’t attend the show if they had already seen the quilts.
  • I don’t know if the small groups met, because I was busy and missed mine.

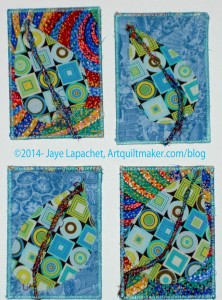
My ATCs for September

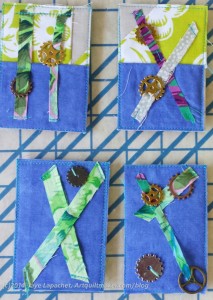
September ATCs
September ATCs

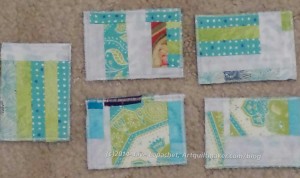
It has taken me awhile to get these posted, but here they are.

I made them the morning before the meeting after procrastinating for weeks, then realizing I no longer had Friday to scrape something together.

I had the gears from a pack I bought at Beverly’s and scraps and that is what I used. I think I need to get some more of those gears and try another iteration, perhaps with Perl Cotton instead of schnibbles? Braided Perl Cotton?

I have two of the gears left, because I didn’t have time to stitch them down by hand.

As I said in the CQFA Meeting report, I want to do them earlier for January (won’t be at the October meeting) and need to start on the backs.  Yes, I said that a week ago and haven’t done anything. First step: make the backs. If I have a lot of backs using a neutral fabric, I can concentrate on making the front awesome. Right?

CQFA September Meeting

As I mentioned, the CQFA Meeting was last Saturday. It was followed closely by the BAMQG Sew Day, which meant I didn’t get home until after 6 and dinner wasn’t on the table until 7:30. I thought a lot, afterwards, if I should have spent all day out of the house after working all week. I decided that, though I missed the Young Man, it was really good for me to see my quilt pals. Also, I got a lot done.

We have been having workshops first, but on that day the business meeting was held first as we had to wait for the sun to come out. It was pretty cloudy until after 10am or even 10:30.

During the business meeting, there was a lot of talk about the upcoming show. We are getting to crunch time as the opening day draws nearer. People when off to the other room at FabMo and got help recording their audio clips. The quilts for publicity have been selected (mine was not one of them). I recorded my audio files at home last weekend, so I didn’t have to do it during the meeting. I thought some readers might be interested in hearing what I said about the quilts so I will see about posting them to quilt page for each relevant quilt. I still have to make QR Codes for my quilts.

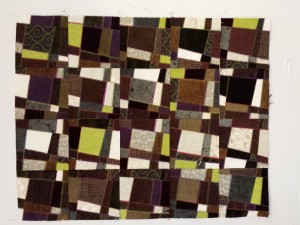
We had show and tell and there was so much great work. I love show and tell. Everyone was very complimentary about the Wonky 9 Patch. Angela, Ann B and Sonja took at SCVQA class on wonky piecing and two of them showed their quilts. Caroline did a landscape all in black and white and talked quite a bit about framing the piece.

Of course, we had the ATC swap. I got up at about 6:30 and made mine! I got an idea and even though I wasn’t going to, I realized that I would be really sad if I didn’t get to swap ATCs, so I made mine quickly. This is the shortest timeframe in which I have ever made ATCs. I hope not to go up against the deadline like this again.

My ATCs
My ATCs

They aren’t the best art ever, but people snapped them up, which made me really happy. I did use the charms I bought at Beverly’s when I was there with Maureen. I think the charms added interest. I definitely will try adding charms again. I also think that I will put together a bunch of backs, so I don’t have to do that when I am in crunch mode. Perhaps I can make 24 backs in advance and just have to worry about the fronts each month. I won’t be at the next meeting, so I have until January to make the backs and new ATCs. I will try and do them earlier!

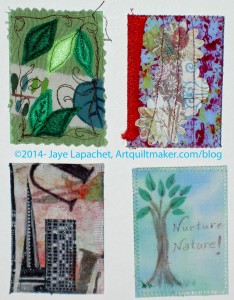
The ATCs I selected are shown to the right. (From top left to bottom right, they are by Maureen, Sue, Angela and Nancy). Angela’s were on paper and she got the idea from a painting class she took recently. I thought about getting some paper blanks to use as a base, but haven’t done it yet.  Sue used a technique that our former member Debbie did a lot of. It was a blast from the past seeing that chenille technique again.

Angela Demonstrating Sunprinting

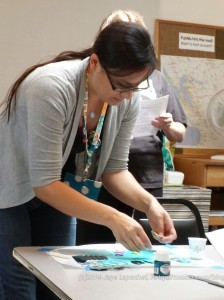
When the sun finally showed its face, Rhonda and Angela taught us sunprinting. I didn’t participate; I sat and worked on the binding of the Wonky Nine Patch, watched and listened.  I enjoyed watching everyone and talking to people while they worked. I also took a lot of photos for the CQFA Flickr group and Facebook page.

After the meeting I drove over the BAMQG Sew Day with Gerre. She is a new CQFA member, but I know her from BAMQG. She let me use her machine off and on at the last Sew Day where I forgot my machine’s foot pedal. We talked about art quilts and one thing I realized about CQFA is that people talk about their process. People are working through a process and they show the different quilts or surface design or bits and pieces of things on which they are working and they talk about it. The group is very process oriented, which I never realized until today and which I really appreciate.

CQFA -July 2014

Maureen's Show Piece
Maureen’s Show Piece

Last Saturday was the day of reckoning for Primal Green 2 (remember the first Primal Green show?), the show the group has coming up in the Fall at the San Francisco Public Library.

We all had to show the pieces (in progress ok) we were planning on entering. The work was amazing. Some of it came from the various challenges the guild has had and some is new. It was all very interesting and wonderful.

What a fantastic meeting, if for no other reason than the work alone.

ATCs

July 2014 ATCs
July 2014 ATCs

Angela wasn’t at the meeting, so Maureen led us in trading. A few more extras were collected for the show. I thought mine were pretty cool until I saw everyone else’s. I need to up my game. More embellishing, more stamping, more beading. More interesting.

Show and Tell

I showed the most quilts, all of which you have seen:

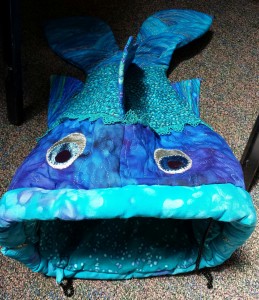
Fish Purse by Carolyn

Everyone showed such great stuff. Jennifer is really having a lot of success sending materials to magazines. Maureen continues to try new dyeing techniques. Carolyn showed the most hilarious, but fantastic fish pillow. People encouraged her to enter it into the show. It would be a great piece for one of the tabletop cabinets.

After Sewing

I stayed again to work a little bit with friends like I did last week and got part of the second apron cut out as well as the Soft & Stable for another Petrillo Bag. I still didn’t tackle the notepad covers or the Day in the Park bag. I guess I need to rethink those projects and why I am not working on them.

Jan Scardina
Jan Scardina

Jan and Maureen stayed, too. Maureen took a beading class from Thom Atkins and worked on her sampler project while Jan sewed like a demon to finish her quilt for the show.

I think of this quilt as part of Jan’s “Flying over the Country” series, though I am not sure she agrees. She flies to the Midwest to visit her parents and I think she gets inspired by what she sees during the flights. She started a piece at a retreat a few years go with circles, but similar in construction to the piece above. I love that previous piece and egged her on a bit about finishing it. 😉 I was really glad to see her and see her sewing.
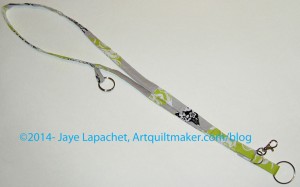
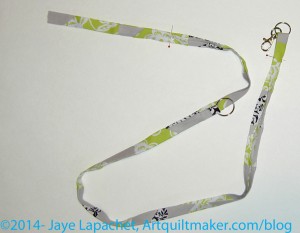
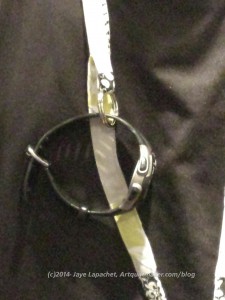
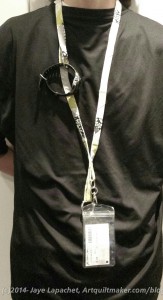
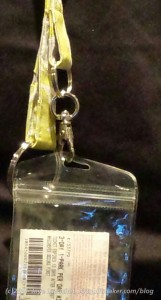
Orphan Block Lanyard

Orphan Block Lanyard

Back in December, I put a post up on the Bay Area Modern blog about making lanyards, which was a personal challenge that the president put out to the guild. I wanted to do it, but I haven’t done it for myself yet. It is on the list.

It took me some time to get around to making any kind of lanyard, but I finally did in response to the Orphan Block Challenge also put out by BAMQG. This one will be given in to a pool of small gifts and then I will get something back. I kind of like this lanyard, but am ok giving it away, too.The best part is that now I have a better idea about how to do it.

Supplies

  • 2 orphan blocks, at least 10″x10″
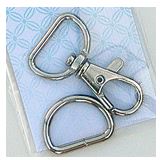
  • Atkinson Designs Swivel Hook & D Ring Set
    Atkinson Designs Swivel Hook & D Ring Set

    1 swivel hook and d ring set (See Atkinson Designs sample) OR a swivel hook and a ring. You can use any size that you have on hand as long as it is larger than 5/8″

  • 1 ring (yes, another one)
  • Sewing machine
  • thread
  • Rotary cutter, mat and ruler
  • pins or WonderClips

First I took a look at the Two Peas in a Pod tutorial. There are several tutorials listed. I picked this one, because it was the first one I looked at and I could follow it easily. Frankly, I already had an idea of how I was going to make the lanyard, but I needed to see how someone else did a few of the parts.

Then, I squared up the blocks a little bit to make sure the blocks to make them easier to cut into strips.

Since this was an orphan block challenge, next, I cut the blocks into 2.5″ strips. The blocks were 9″ or 10″ blocks (I don’t know -I didn’t measure) and I got about 3 strips from each one with skinnier bits leftover. It doesn’t matter what size they are as you can use regular fabric or a Jelly Roll strip and discard the leftovers.

After cutting, I sewed the strips together until I had a piece that was long enough to go from my belly button, around my neck to right below my collarbone (about an inch below or so).

Sew another strip that is long enough to go from your collarbone to your belly button.

Take both strips, fold them in half and press. Open them up and fold the raw edges to the center and press.

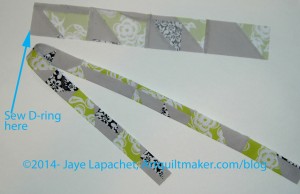
Sew D Ring Here
Sew D Ring Here

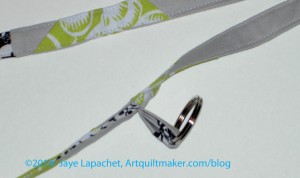
Then I wanted to add a loop at the shoulder so my nametag would be at eye level or I could use it to keep track of my glasses. Cut this piece about 4″.

I took one of the leftover skinny strips (from the block above), folded it in quarters, top stitched both sides, slid the fabric piece through a ring and sewed that piece to the right side of a strip that had not yet been sewed. Once you slide the strip of fabric through the ring, you will have a U if you hold both of the raw edges, one in each hand. The ring will be dangling from the bottom of the U.

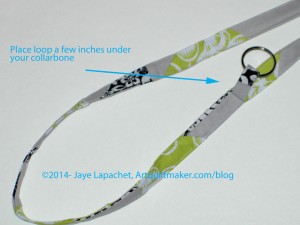
Collarbone Loop
Collarbone Loop

Nota bene: In the picture, the strip to which you have to sew is upside down. Make sure you sew the the loop with the ring in the bottom to the right side of the strip. Nota bene due: In a subsequent step, you will fold the whole piece in quarters and top stitch. You may want to measure and sew this loop to avoid the folds that will take place later.

Collarbone Loop
Collarbone Loop

After you have your extra loop added, you should sew the strip to the other strips and keep adding strips until the piece is long enough. You will need a bit of extra length to fold up to accommodate the Swivel hook and other loop, so don’t cut it off too short.

Now you have a long strip about 37″ long. This measurement is from the Two Peas in a Pod tutorial. I cut mine a little shorter to accommodate my height and torso length.

Fold your long strip in half and press. Yes, the glasses loop will be a pain. I haven’t figured out how not to make it a pain. If you know of a way to make it easier, let me know.

Open your piece and fold the raw edges towards the crease in the center. Once you have completed this the raw edges will be encased in the center.

Top stitch very close to the edges on both sides. If you want to be fancy, you can do a double line of stitching or a decorative stitch. Depending on the size of the ring holder, you may have to skip the area where the ring holder is, or go around it.

Now hang the strip around your neck. Trim the ends if you think they are too long.

Take the loop and thread one end of your strip through it. Pin in place. WonderClips work well, too.

Thread Strip End Through

Take the other end of the strip and thread the swivel hook through it. Pin in place or use WonderClips.

Now you are ready to finish off the ends. The different tutorials tell you to do it in different ways. I went with the the way the Two Peas in a Pod tutorial suggested. I hadn’t really thought about dual hardware on the bottom, but it works.

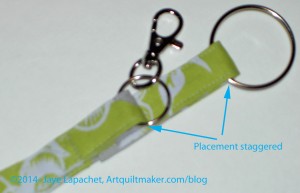
Staggered
Staggered

I staggered the placement of my loop and swivel hook so they wouldn’t clank together as I (or the user) walked around. This means that I had to adjust the placement of the two pieces. It took a little bit of trial and error, but, ultimately, I am happy with the placement. As an added bonus, I had fewer layers to sew over as I finished the lanyard. That step is optional.

Think about what you might hook on to your loop and swivel hook before you decide on placement.

Place the lanyard carefully around your neck. Make sure to smooth out the twists, if any, so the lanyard lays flat around the back of your neck and on your chest.

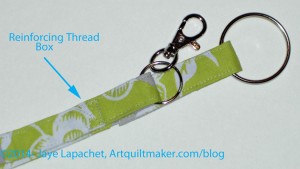
Reinforcing Thread Box

Once you are sure everything is smooth, pin (or WonderClip) the two ends together and sew. I made “thread boxes” (the same technique you use to reinforce areas of stress when making a bag) out of my sewing line in order to keep the lanyard together and looking nice.

Change your needle so you are using a new and very sharp needle. Sew two reinforcing boxes, the top one going through all layers. Move the swivel hook out of the way to sew the bottom box to finish the lanyard.

Collarbone ring in use

Pain and Suffering

There are a couple of places that will be difficult. Using orphan blocks or mosaic piecing means that there will be extra seam allowances. With these comes the possibility of really thick seams [See above where I refer to the glasses loop]. To mostly avoid these thick seams, use 3 unpieced lengths of fabric for the neck and loop pieces. 1 Jelly Roll strip (2.5″ wide strip) will work.

Lanyard in use
Lanyard in use
Swivel hook in use
Swivel hook in use


Le Challenge

I am linking up to the Le Challenge #14-Small on the Le Challenge blog


ATCs for July CQFA Meeting

July 2014 ATC Start
July 2014 ATC Start

I thought ahead for once and made these last weekend, except for the finishing. I didn’t really have an idea, so I grabbed some scraps from the City Sampler blocks and started sewing them together. I sewed until it was long enough to cover a piece I had cut for the backs.

I stopped partway through to actually make the backs. I added stabilizer for stiffener. Once the pieced scrap piece was big enough, I sewed it to the backing and stabilizer, cut the piece in 2.5″x3.5″ rectangles and zigzagged around the outside.

Boring.

I like them. They are mostly soothing colors, but they aren’t very arty or edgy. I planned to embellish them with beads, but really wasn’t excited about it, because I often do beading and just wasn’t in the mood. I also didn’t really have the time. It seemed like too much work in an already full week.

As I was tidying the workroom, I saw my alphabet stamps. PERFECT!!! I decided to stamp words on them. YAY! That I was excited about. I ended up not using the alphabet stamps this time, but using some Chinese character stamps I picked up somewhere.

July ATCs, Finished
July ATCs, Finished

Mine didn’t end up being that popular this time around, but the others were fantastic. Mine are calm (which I seem to be seeking lately), but the stamp wasn’t large enough to stand out and show the detail. I need to step up my game. I am not done with the stamps yet, now that I have found them again.

I am not depressed, because I know not everything can be fantastic and these small pieces are for play.

Stay tuned for more.

May 2014 BAMQG Meeting

I had a great time at the meeting Saturday. People showed some really great work and everyone seems to be looking forward to the Retreat.

The next Sew Day is June 7, 10am -11pm. Once again, I can’t make it as I will be in Vancouver for work. My trip will be fun, but I’ll miss Sew Day.

I will also have to miss the next general guild meeting, which is on June 21, as I just made plans to go to Disneyland. Shhhh! Don’t tell.

Angela's Quilt
Angela’s Quilt

Show and Tell is my absolute favorite part of the meeting and I wish that people would bring more stuff to share. Angela showed a great quilt from a workshop with Joe Cunningham and I just love it! It isn’t gradated, but it really gives the impression of being gradated. She was finishing up the binding so she could give it to her mom for Mother’s Day. She said that her mom loves it.

I showed Fresh Fruit and Fabric of the Year 2012. that was an exciting experience as people wanted me to tell the story of doing a quilt every year again for newcomers. I was a little embarrassed. Allison asked if I would bring all of the FOTY quilts sometime. As I said, I would love to have an exhibit of all of them, but, perhaps, showing them off to an appreciative audience would be the next best thing?

San Mateo County Fair: Lynnette kindly offered to take our quilt entries to the San Mateo County Fair intake day. She left with a  pack of quilts. We will arrange pick up at a later time. I had a crazy morning when I realized that the Whole Cloth Quilt, which I entered without looking at it, didn’t have a sleeve!!!! I quickly made the sleeve using Robbi Joy Eklow’s directions in her Free Expression book (a book which you should have if you don’t already!)

I am really slow at putting on sleeves and the two recent quilts, Fresh Fruit and FOTY 2012 took me forever. I didn’t have confidence that I would have the sleeve done by the end of the meeting, but I worked towards that goal. The sleeve was pinned on to the quilt when I left the house and I started sewing as soon as I sat down. I did get it done! I sewed on the entire sleeve, gave the quilt to Lynette and home I will see it at the county Fair.

The group will be participating with other Bay Area Modern guilds in an Amish Exhibit: November 2014 at SJMQT. Joe Cunningham will do jurying. Entries are due October 1, but I don’t think I will apply. I am not inspired.  Kelly decided to organize a small group to encourage people to work on their projects and get them ready for the exhibit. I don’t know how she will split herself between the Tula Pink City Sampler group and the Amish Exhibit group.

Jackie Gehring Workshops: July 26, 27 – there are still spaces available, so if you want one for a friend or haven’t signed up yet. I am surprised that these are not full.

Charity Block
Charity Block

Charity: I have been kind of a charity slacker lately. I haven’t worked much on the black and grey donation quilt, though I have also not abandoned it. I don’t know why as I got a lot accomplished last year and was busier.

It could be that all the other projects have been overwhelming me. Michelle, one of the Charity Girls has designed a new block for this quarter – the fish block. There are actually 3 fish blocks (Block ABlock B and BBlock C), which are the same parts in different configurations and sizes. Directions and handouts have been posted to the BAMQG blog. Take a look, because the blocks would make up cute baby quilts as well.

Enough about me and my excuses. Despite my slackness, 60 finished charity quilts will be taken to the NICU at Stanford this week. Peggy finished a number of them since the last meeting, using some time on the last charity sew day.

  • From the Cat Bed department: Amanda couldn’t make the meeting, which was a shame, because I couldn’t get any cat beds to sew together. Next time.

Small Groups:

  • Hand quilting and hand piecing – the group has been expanded to include other kinds of handwork. Angela worked on a binding while Rhonda stitched hexagons together using the English Paper Piecing method. She bought a Tula Pink kit to get started. Perhaps I will try to remember my half hexies to bring a long and work on.
  • Jaye brought blocks for the Tula Pink City Sampler small group, but the rest of the members were curiously absent.
  • We saw Nicki’s finished Round Robin and Cheryl’s almost finished Round Robin in Show and Tell, but no groups met.
  • Nobody in the Color groups  met.

I did not do the Personal challenge for this month, which was to make a tote bag using Kelly’s directions (or others as desired) out of the piece I free motion quilted last month. Next month we are supposed to bring a hand quilted or hand pieced project to the next meeting. I am thought of bringing the Sampler, but I won’t be there.

BAMQG and the St. Louis Modern Quilt Guild are participating in the Swap Challenge Swap Extravaganza. I decided to do it, even though I didn’t know anything about it until I showed up at the meeting with an orphan block. People who brought orphan blocks could sign up to make something that will be exchanged with someone at the St. Louis Guild. All orphan blocks were turned in. They will be doled out by Angela to anyone who signed up. People will not get their own block back, but will receive and need to make something out of someone else’s orphan block. Then the projects will be turned in and sent to St. Louis and the SLMQG will send us a package back and those items will be doled out. We can make anything and Angela solicited ideas, some of which are:

  • placemats
  • coasters
  • tote bag
  • zipper pouch
  • lanyard
  • wall hanging
  • etc

May 2014 CQFA Meeting

The CQFA meeting was last Saturday (May 3) and was quite lively.

Workshop Work
Workshop Work

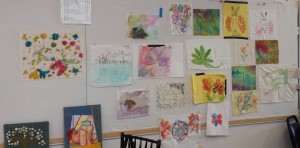
Jennifer is a graphic facilitator/graphic recorder and she led a workshop about “from drawing to art quilt.” I did a graphic recording course with hopes of moving into that profession, but I didn’t pursue it and wish I had the opportunity to do so. Still, my skills came in handy in this class because I can draw basic shapes relatively quickly. I am not sure I got what was intended out of the class, but I did get some inspiration. I have been thinking of the ongoing placemat challenge and I drew out a design that has been in my head for it.

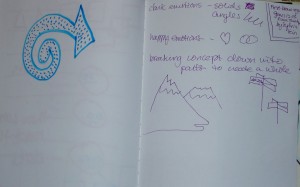
Art Journal Workshop Notes & Sketches

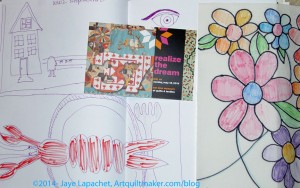
We did some work in our art journals/sketchbooks as part of the workshop and that was fun. I got some ideas down that have been in my head. They are not perfect or fabric ready, but they are down and I can see them with my eyes and not just my mind’s eye. I have a start and can see a little way down the path. Also, I just found it fun to work in my journal. I don’t do it enough.

Art Journal Workshop Notes & Sketches

Jen gave out some handouts and one of them had a quick sketch of mountains, which I found interesting.

She suggested working with fat markers (e.g. see the round arrow) and I found that hard, so I switched to the pens with which I normally write (see purple drawings on the right). She had a point about the fat markers, which was you couldn’t put in a lot of detail and you filled the page faster. Both are true. I still like my thin pen better. I wonder how I would feel with a fat pen if the tip was different?

Of course, we had the ATC exchange, which I talked about.

Marie told us about some upcoming events at the San Jose Museum of Quilts & Textiles:

May 18 – Quilt National Opening

May 24 – Royal School of Textiles speaker on dyeing, but not the how-to. She will speak on the societal, social and the geo-political effects on dyeing, how colors came about etc.

June 14 – beading lecture by a pre-eminent beadist (is that a word?).

Marie reported that these events are a way to engage more with members. Some of the CQFA members said that, while they couldn’t always attend the lectures and events, they went to the website more and read more of the emails, which is a good thing. Check the website for more details.

The Library show planning is in process. I have been out of the loop for a few months due to some personal issues and am not quite sure what is going on. I may withdraw my piece. We will see.

Diane Carver Place Mat Challenge

Show and tell was great. Maureen is using a gelli plate to print on fabric and some of her prints were gorgeous. Diane did the placemat challenge and I like the way the pieces stand up from the background.

Virginia is working on her piece for the show and the piecing is amazing. It is large, too.


I showed Fresh Fruit and Fabric of the Year 2012. I worked on FOTY 2012 at the retreat last year and people gave me some nice compliments. Someone suggested that I have a show of all the FOTY quilts when I get a few more under my belt. I would really like to do that. I’ll have to work on it once I get a larger stock of quilts.

May ATCs for CQFA

My ATC work this month didn’t go as smoothly as I would have liked, but I am disavowing responsibility, because my Janome 9K is acting up again. I was able to finish them on the backup machine, but there are some differences so they don’t look as professional as I would like. I might do a special whine post later abut the &^%$* machine, but now I just don’t want to get into it.

May 2014 ATCs
May 2014 ATCs

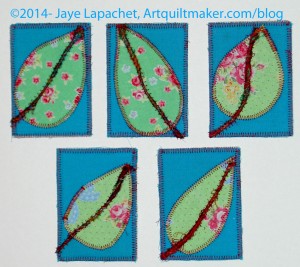
I decided to do some more leaves, similar to last meeting’s ATCs, so I could donate one to the ATC collection for the guild show. I had enough time and enough interfacing cut, so I went for broke. There are some similarities to last month’s leaves, but some differences as well.

I used my last of a piece of thickish thread for the stems. Someone told me it was from saris, but I don’t remember where I got it and don’t know. I had to couch it on the cards.

I am really pleased that I had enough time. I didn’t start until Friday at midday. Friday is kind of last minute and I don’t know why I wait that long, but I felt like I wasn’t racing the clock. I just worked along and the cards came together well. I didn’t do any embellishment, but I also didn’t feel like the pieces needed it this time.

All May ATCs
All May ATCs

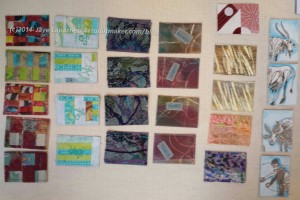
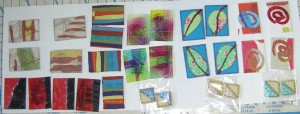
There were a lot of participants in the ATC challenge this month and I got a nice group of cards to keep.

The most unusual award goes to Sue who is experimenting with cookie decorating (lower right). The cookie decorating description doesn’t even begin to do justice those these mini-works of art. I didn’t take any because I would have just been tempted to eat them.

Angela is doing some interesting things with mixed media. Her work (cards directly to the left of my leaves) is on fabric, but she is painting or dyeing and stamping.

Bron did some renditions of the Golden Gate Bridge.

I love Maureen’s spirals as well (far right).

Everybody did a great job.

All in all it was a really great exchange and I look forward to the next one.

ATCs are 2.5″ x 3.5″. You don’t have to make them out of fabric. Some of the cards the CQFA people trade are partially paper. I like mine stiff, thus all of the interfacing.

March CQFA ATCs

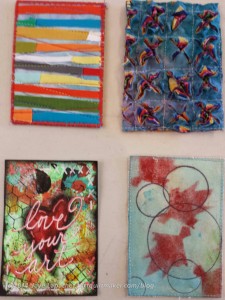
March 2014 CQFA ATCs

It has taken me awhile to post these, because I thought I lost one and was trying to figure out what to do. It has also been kind of a crazy month and organization hasn’t been my strong suit. It turns out that it was very flat and stuck to the back of one of the others. What a relief.

I am thrilled with these. I love the creativity and the combinations of materials. The upper right hand corner ATC with the flowers (by Maureen) has paper flowers.

The lower left hand corner piece (by Nancy) has text, which adds an interesting element.

These are fun to make and I am thinking about my next group for the May meeting. You can see mine in a previous post.

CQFA ATCs

March 2014 ATCs
March 2014 ATCs

I made some ATCs for the CQFA meeting, leaving it, again, until the last minute. I worked on them on Friday in between starting the process of renewing the Young Man’s passport and some other chores. I really didn’t have an idea, but then I hit on the idea of a leaf and the design went from there. I ended up with something with which I was very happy.

The step is a piece of thick thread or yarn. I only had about a yard of it and now I have, perhaps half a yard. Maureen thought the thread was sari thread. I hadn’t heard of that before and she explained that threads from saris are wound together to make the thread. It is colorful.

I couldn’t find my couching foot, so I used a zig zag to keep the thread on the ATC. It worked pretty well, but I need to practice more.

The background is from the Infinity quilt. It is leftover from the quilter cutting off the sides of the backing. I am sure you will see a journal cover or two along the way as well. 😉
ATC guts
ATC guts

Inside the ATC, I use 2 layers of tearaway stabilizer on both sides. This allows for no wrinkling when I zig zag.

First I make the backs and put the labels on. I do this first, because it doesn’t really matter what the back looks like. It gets me in the mood and gets everything cut. In this case, I used the same fabric – or group of fabric – for the back, front and leaves. You might be thinking that you see different fabrics ont he finished ATCs and you would be right. When I say ‘fabric’ I mean that which has been cut off the sides of the backing of my quilt. Even though there are different fabric designs, technically, it is one piece of fabric to me. I used what was on the end of the leftover backing fabric.

ATC fronts in progress

I tried, really hard, this time to make the corners of the stitching around the labels look really nice. I had to slow down.

They are a little easier to work with when I make them in a group and then cut them apart. I had to take care when lining up the motifs for the front and the back.

ATCs are 2.5″ x 3.5″. You don’t have to make them out of fabric. Some of the ones the CQFA people trade are partially paper. I like mine stiff, thus all of the interfacing.

ATCs for CQFA

January ATCs
January ATCs

ATCs are small bits of art that can be traded.

ATCs are 2.5″x3.5″ – the size of baseball or other trading cards. They are made using discarded bits and are not limited to being made from fabric. Paper artists make them from paper and other materials are suitable as well.

As you read this, CQFA is meeting (or will be if you are reading this at 6am ._. ) and part of the meeting is trading ATCs. It is fun to see what other people have made and I love it when a lot of people participate. I am always sad when I can’t one of each example of the other members’ cards.

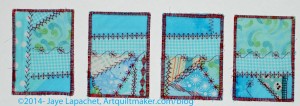
I had a mosaic pieced fabric in turquoise already made and decided that I would use it since it was a start. I stitched out some of the stitches on the loaner machine over the seams and called it good. The flower on the right hand card is my favorite of the few decorative stitches on this machine.