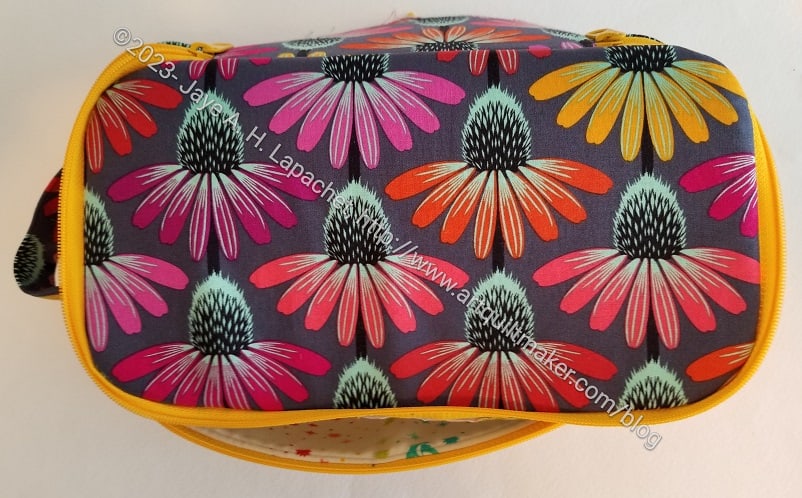
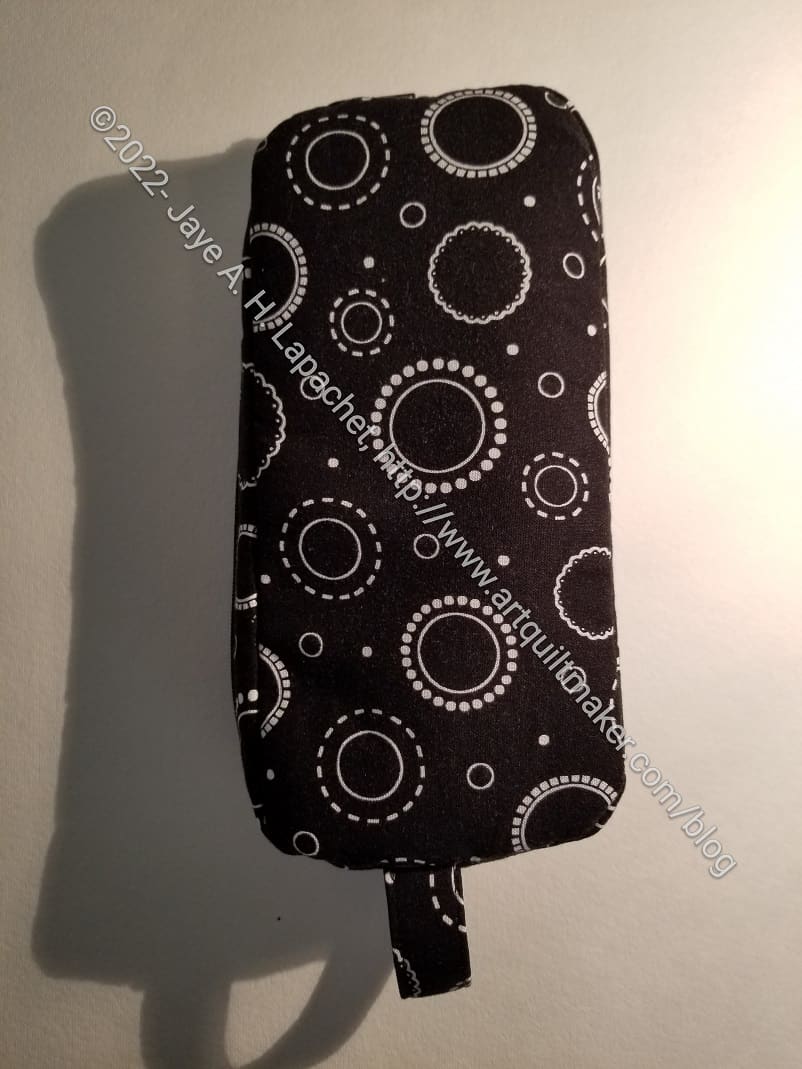
As soon as I finished the two Color Wheel Hackneys, I started another. I have decided to make a number of these as gifts. I have to say that this one went a lot quicker than the others. It is a clear indication that practice does make perfect.
I am pretty pleased with how the coneflowers look. I picked the zipper color to go with the yellow coneflower, but also because I wasn’t sure when I would use a yellow handbag zipper otherwise. I think it looks good so far.
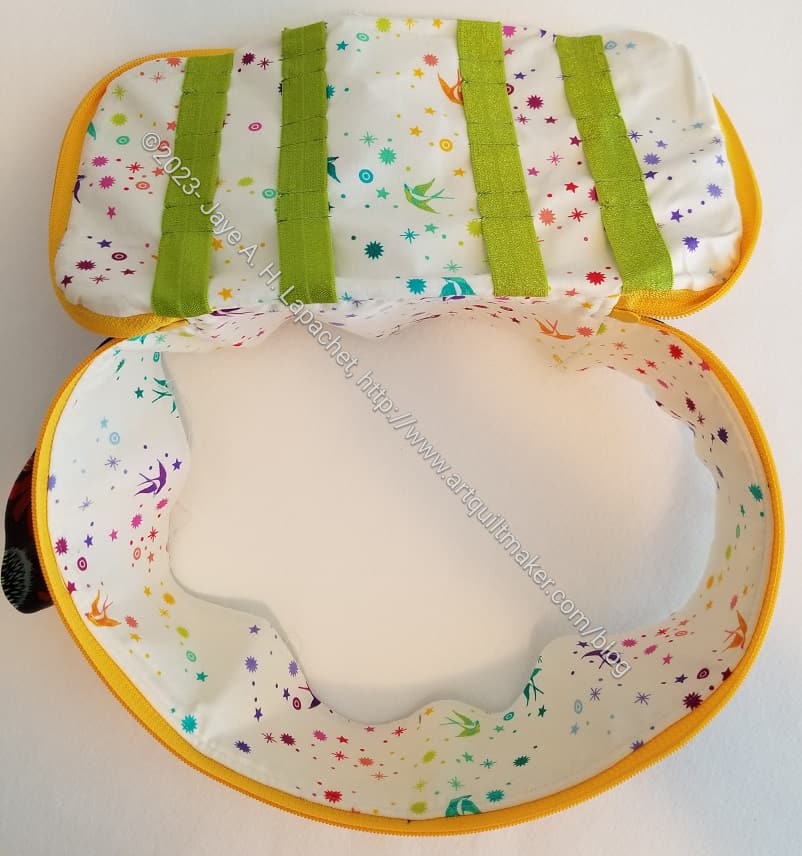
Coneflower Hackney interior- in process
I talked about the Hackney lining hack a bit ago. It is for this one. The lining is a little saggy so far, which I have to figure out. Otherwise, I think the piece is looking good.
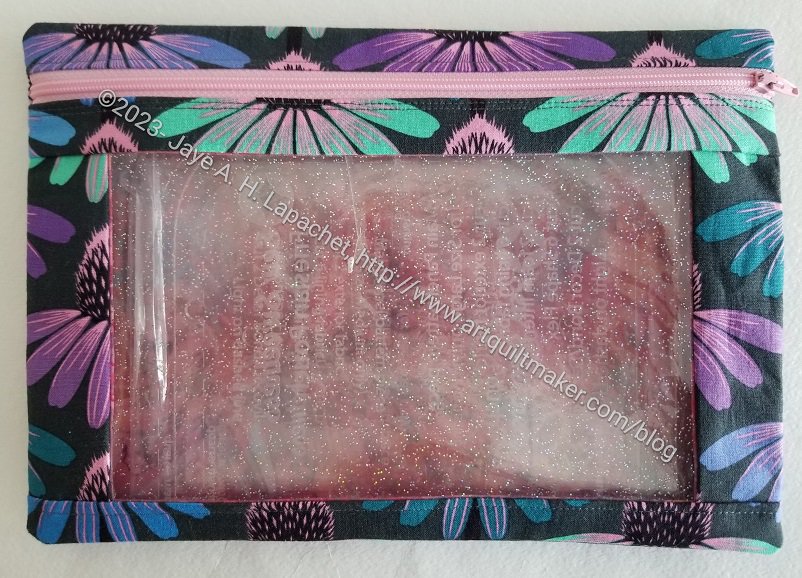
After writing the last I Spy post, I decided to take a look at the I Spy pouches I had made. I didn’t pull all of them as some are in project boxes with the supplies for projects I want to make.
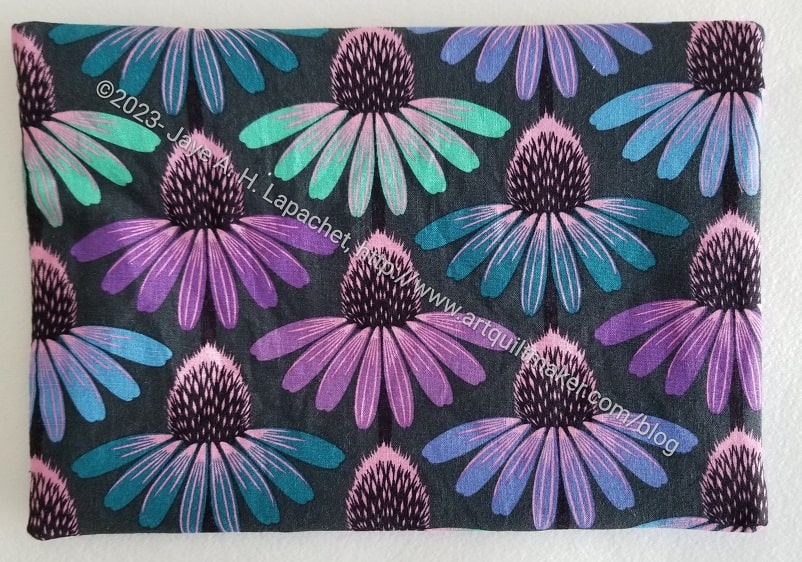
I was surprised to find that most of them were made with the same coneflower colorway. I have other colorways. I thought I had used multiple colorways to make these, but I have stuck mostly to the one. Interesting.
Yes, I am making another Hackney pouch. I like the shape of this pouch/bag. It is fun and a bit unusual. The process of assembly is also providing me with a challenge even after making several of them.
Yes, it is another gift. I might make one for myself. We’ll see.
This time I am working on perfecting a version that is most useful and that I like. As I might have mentioned, I don’t like the mesh pocket, because I don’t like the way it comes out. Mostly, I don’t like the zipper tabs and how thick they are. They are hard to sew and thus the seams look wobbly.
I tried a vinyl pocket, which was ok. I haven’t heard how useful it is, but will ask next time I see the recipient.
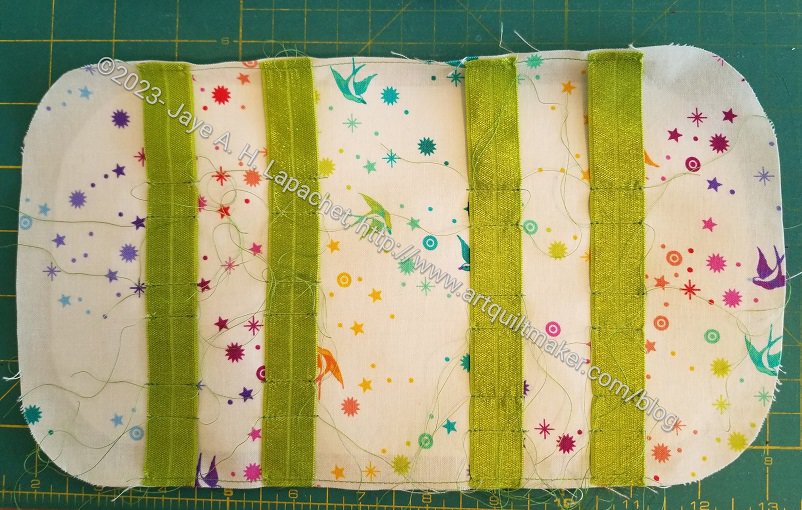
Hackney lining tool holder
This time I used doublefold elastic to make a tool holder.
I cut the doublefold elastic the same width as the lining, then basted it to the top lining piece.
I marked the places where I wanted the recipient to be able to slide tools in. I used a half inch size for each pencil or pen or whatever. I put an inch between each set of marks. These had to be mirrored on the second strip of elastic. I also made the marks on the second set of elastic off from the first set so the tools (or pens or whatever) wouldn’t interfere with each other.
I quickly cut more pieces for another I Spy and finished it over the weekend. I think I have a sewing routine for this pattern down pat now.
One of the reasons I made this one is that I liked a piece of fabric I pulled for the Pink Strip donation quilt back. I decided to use it for the lining, which shows up nicely through the window. It is a good way to be able to see a fabric I enjoy.
I Spy with Pink Batik
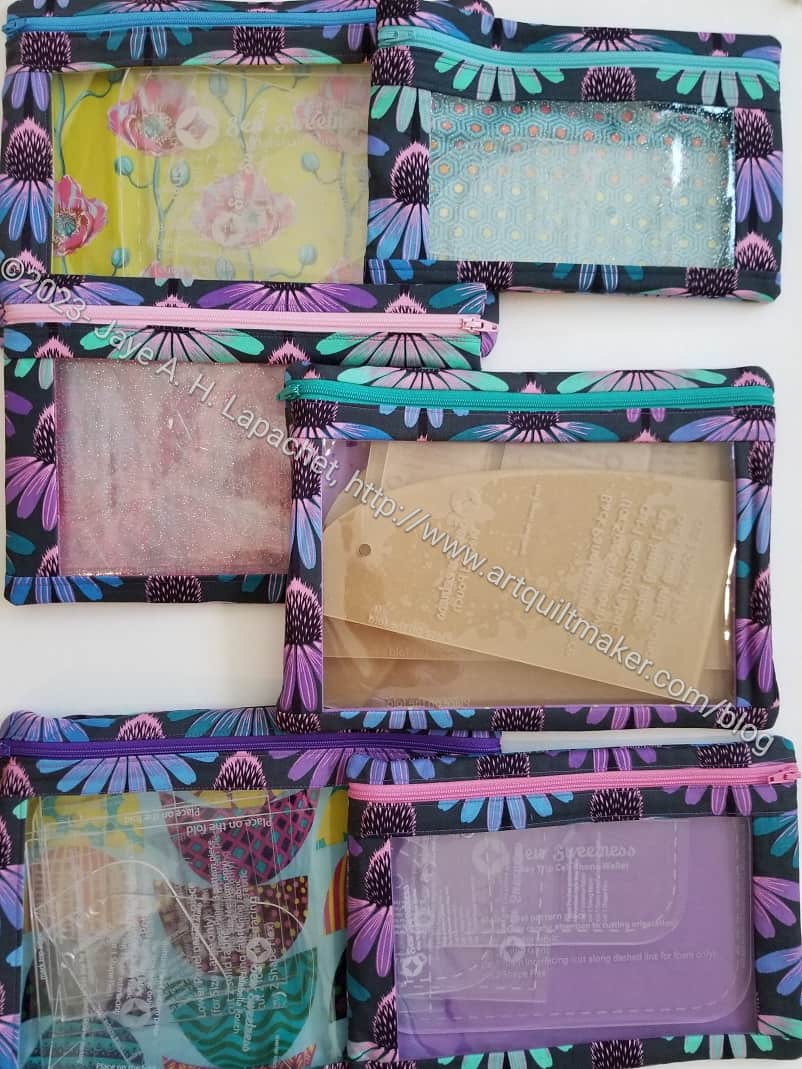
This one will replace the one I gave as a gift. It will hold the Friesan Pouch acrylic templates. I’ll save the Grey Cross I Spy for something else. I kind of like having all of my acrylic templates in pouches that match.
I was pleased to see that I lined up the top strips around the zipper very well.
I Spy with Pink Batik back
I just love making these pouches, as I have said a million times.
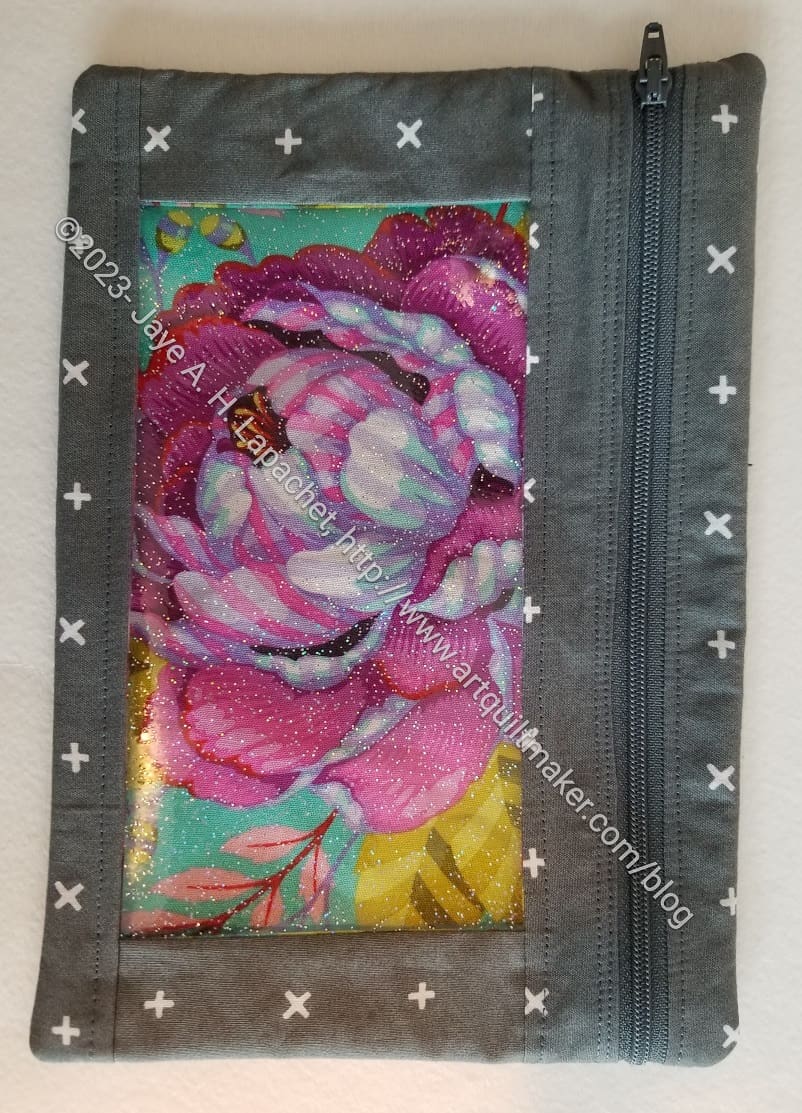
Yes, I made another I Spy pouch. I don’t like this one as much. It doesn’t feel as substantial as the last one and I am not sure why. It has to be the fabric. It is an Art Gallery fabric, which I really like, but I don’t think it is right for this project. Since I am storing acrylic templates in them, then need a little heft.
This doesn’t mean it is terrible or anything and I do like highlighting the lining fabric through the window. It is like a fun prize. I’ll probably use this as a gift.
This is the small size. I also use the glitter vinyl. I like that glitter vinyl. Not only is it easier to cut, but it is fun. It does make the peony look a little blurry in the photo. It doesn’t look like that in person.
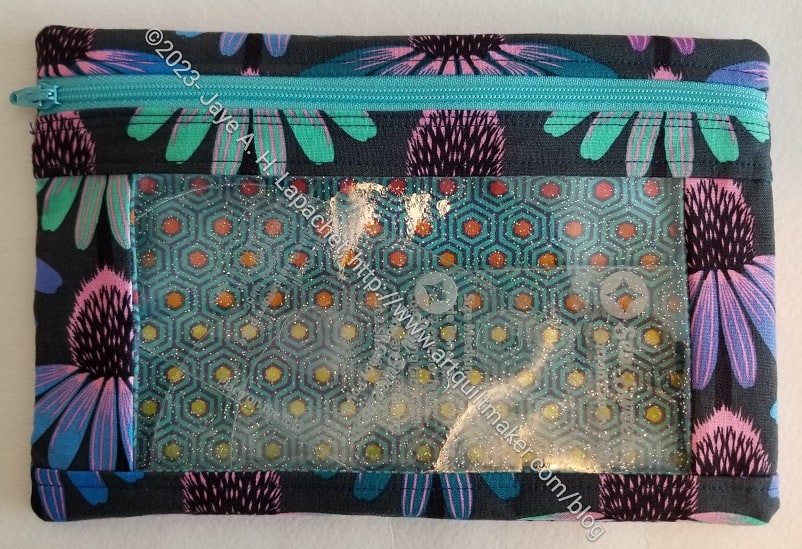
Remember I said that these pouches were like making candy? I gave one of my I Spy pouches to someone on my team, so I just made another one for my Cotton Candy pouch acrylic templates.
This one follows the theme of the others. I used the Anna Maria Coneflower fabric again along with some of the hexagon Tula Pink fabric for the inside.
It was fun just to sit down and start and finish something relatively easy. I feel ridiculously pleased with this pouch. Actually, every time I make one I feel ridiculously pleased.
This one is an International Women’s Day gift for Gerre.
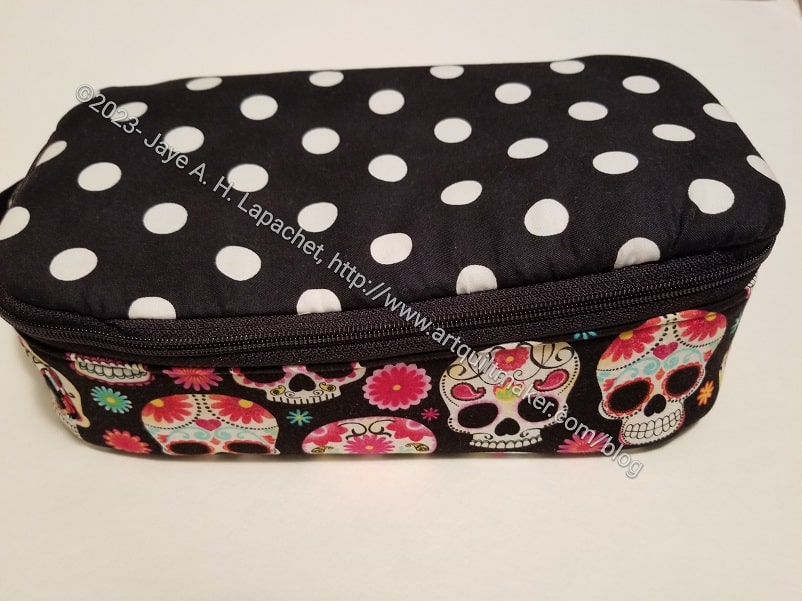
This is the fourth one I have made and I plan to make a few more. I have made them all in the large size. I could make the smaller sizes; I just haven’t yet. For some reason I like making these as gifts.
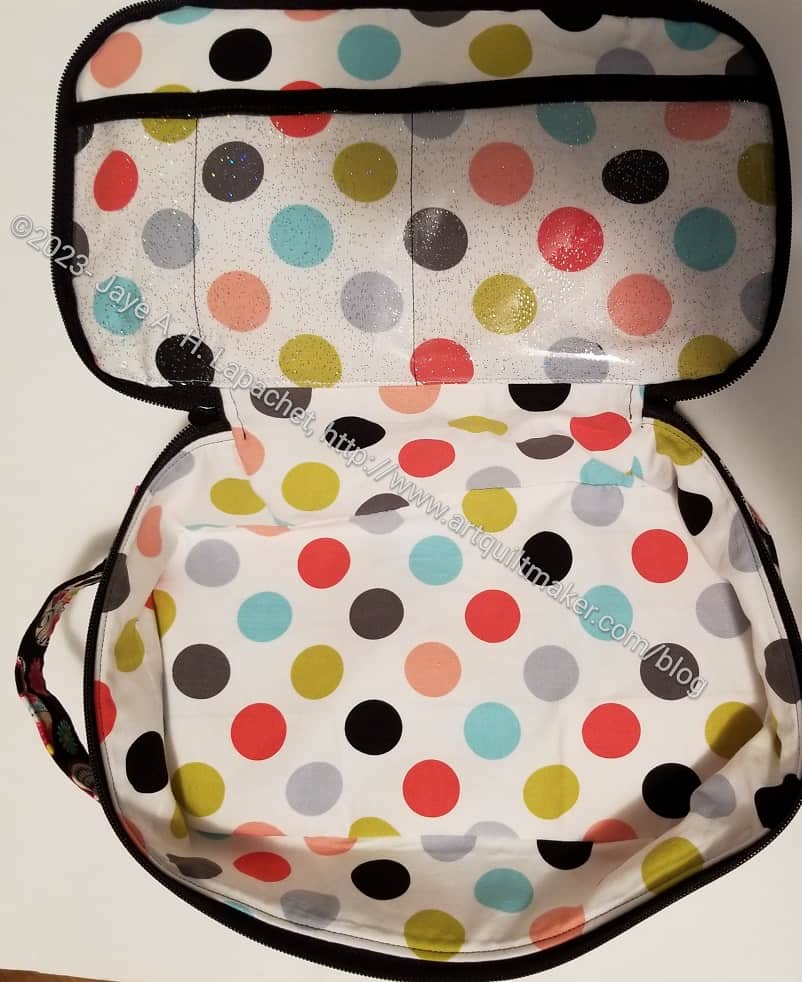
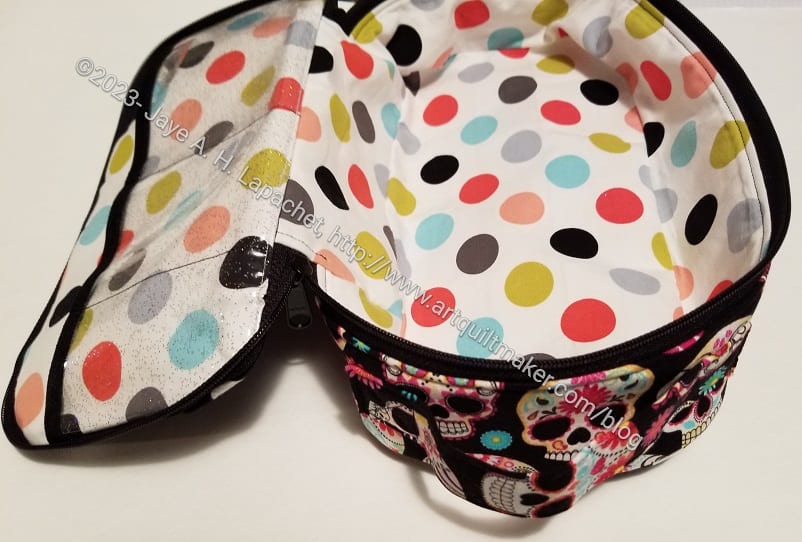
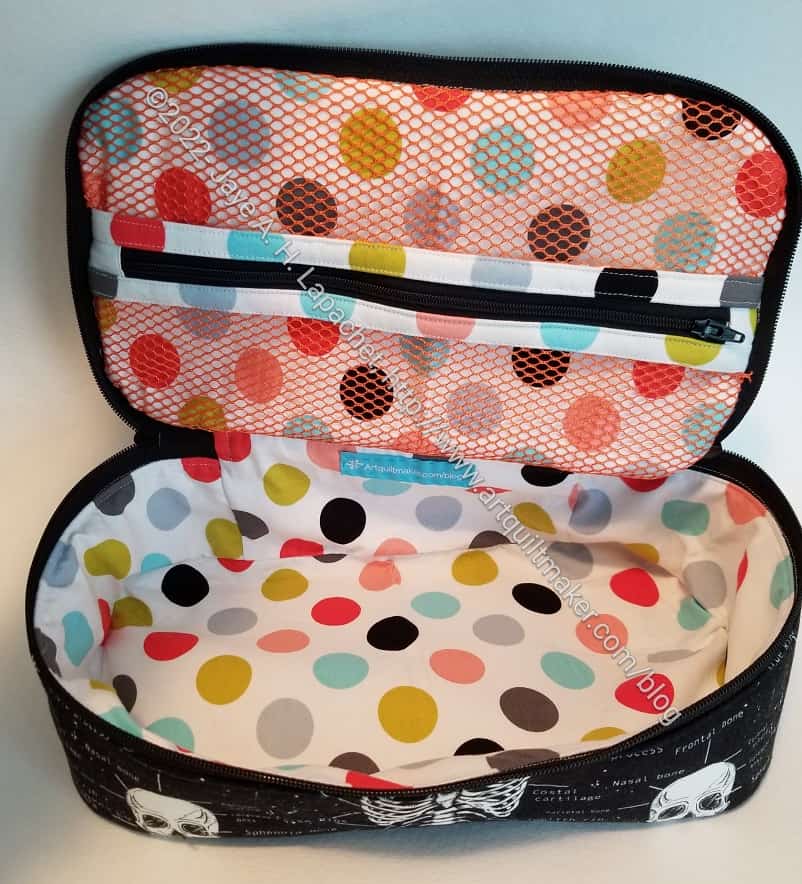
Sugar Skull Hackney interior
I used the same lining fabric as I used for the Skeleton Hackney. It is a good lining fabric. I haven’t used it as a background as it is pretty dynamic and doesn’t fade into the background like other fabrics.
I did the pocket a little differently, too. I made a vinyl pocket using the Glitter vinyl from Sew Hungry Hippie. There was a little bit of a problem sewing the turning opening closed, but not much. Some of that could have been from forgetting to use a 3/8 inch seam allowance on the top.
Sugar Skull Hackney handle
I also added a handle to this one and remembered not to sew through the lining! It was much easier to put the whole thing together.
I put a few small gifts and a card inside. I hope she likes it.
I try to make sets of things using the same fabric, but I have very little of the Sugar Skull fabric left. I thought the dots coordinated well.
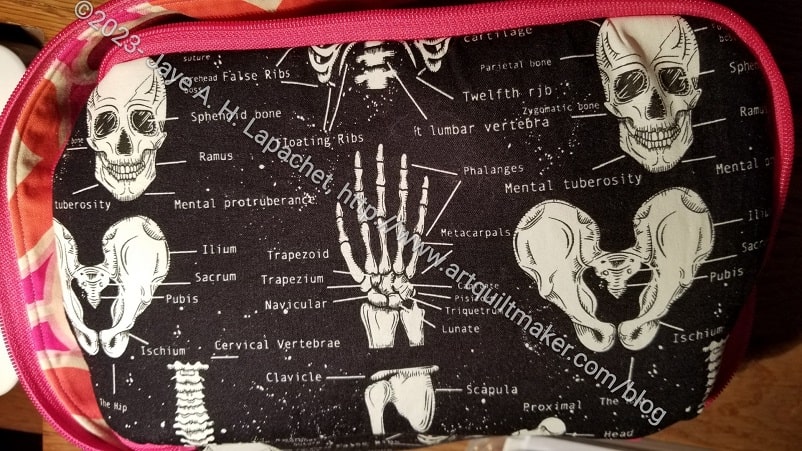
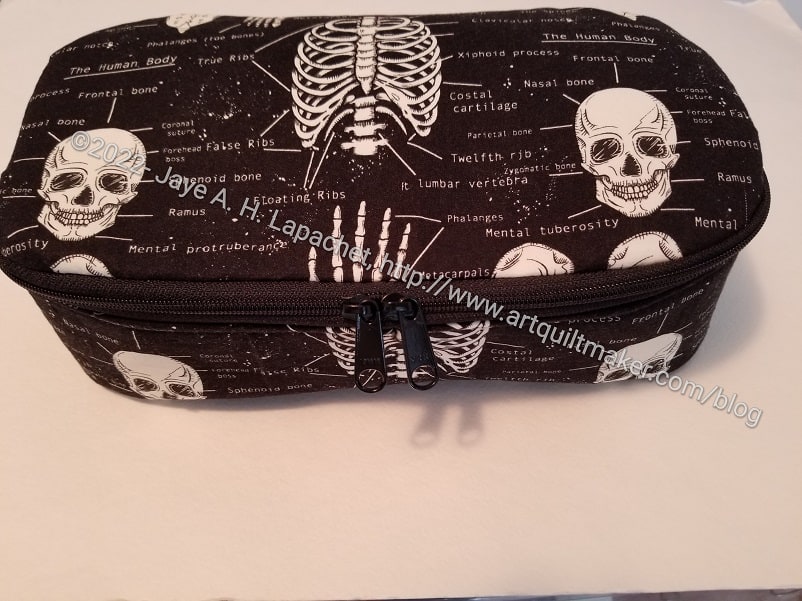
I made another Hackney. It is a gift for a friend. As you can, no doubt, see this one also uses the Timeless Treasures fabric that I used for the Skeleton Hackney.
Hand Bone Hackney bottom
I talked about this one in another post. I am really liking the pink zipper, of which you just get a slight glimpse. It is a fun addition to the somber skeleton fabric.
Every time I make one of these, I feel like getting a Switch and seeing if it would really fit in here. Stupid waste of money since I probably wouldn’t play with a Switch. Still, I am curious.
Hand Bone Hackney -interior
I used an older Joel Dewberry fabric for the inside and it is cheerful. I am making another one as a gift and I am going to change the mesh pocket for something different. Maybe a vinyl pocket?
I think the mesh pocket looks ok and I did a good job. There is something about having the zipper where it is that bugs me.
Hand Bone Hackney – handle
I added a handle, because I think it makes the bag more useful. I haven’t quite figured out the placement and I think this one is a little too tight. It was a little hard to get my hand around it. I also sewed through the lining as well and that caused some challenges for later steps in the process. Since the handle isn’t part of the pattern and I have to add it before the whole thing is put together, I think I am doing ok. I’ll do better next time.
I can’t remember when I finished this pouch, but I did finish it. I remembered to check to see if I showed it to you after I mailed it. Since I haven’t had time to sew lately, I am running out of projects to show you, so I am glad to show you this one.
The zipper, from this angle, looks a little strange, but it works fine. I am not sure why it looks like that, but I will try again harder next time.
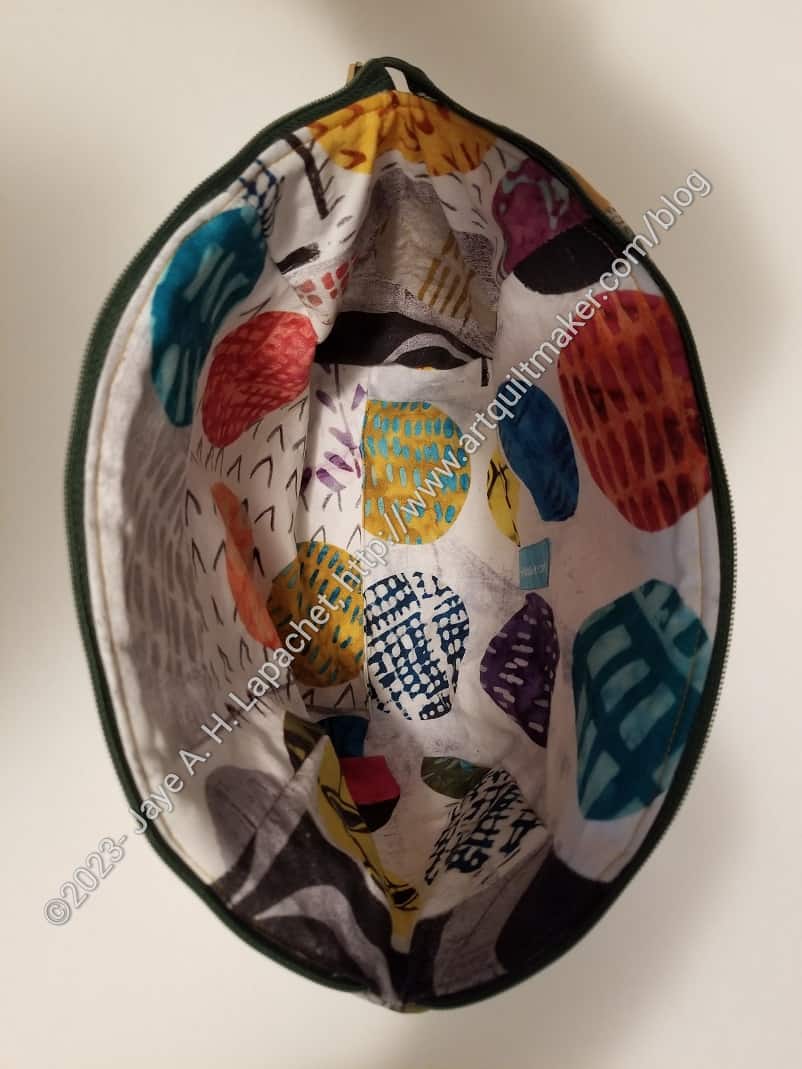
Venetia’s Cotton Candy Pouch -interior
The inside is also a Marcia Derse fabric and is really fun. This is the large size. It is big so you can fit a lot in it. I know Venetia brings a large bag to work, so perhaps she can use it for cords or something like that.
I am still thinking about the Odicoat and how to incorporate that substance into more of my bagmaking. From what I know, this pattern doesn’t lend itself to Odicoat application. I’ll have to try it some time. I’d like to try it after I put a pouch together. I will have to try it on a test pouch in case it gets ruined.
Venetia’s Cotton Candy Pouch -interior label
I used another Wunderlabel for this pouch and am pleased to see it not clash with the fabric.
I showed a friend the Skeleton Hackney I made before Christmas. She really liked it so I offered to make her one. I am in the process of making about 6-8 Hackneys and one more will be easy.
The inside is a pink from a line that has been hanging around my workroom for a long time. It is one of those fabrics I love and am reluctant to use because a better project might come along for which I need it. I am trying to get over that feeling and use the good fabrics. There is always more fabric, right?
Hand Bone Hackney
I have the lid on, but not the bottom, which you can see above.
I decided to center the hand bones rather than the skull this time. That means I ended up with two skulls on the top.
Hand Bone Hackney Handle
I have the handle on, but I am not sure I have that step in the right place. Remember the pattern does not include a handle, so I had to hack it.
My friend saw it in process and was thrilled. I just need to find some time to finish it. I don’t have much more to go, so it shouldn’t take very long.
I started the Cotton Candy Pouch I have been wanting to make for awhile. So far so good. I have to say that cutting isn’t annoying me as much as it has in the past. I am cutting up a storm. Maybe having the supplies and fabric organized* helps?
This is for a work colleague who arranged my second contract at the company where I work and then moved to a different department. We are still getting together occasionally for lunch and to share info, but we don’t work together anymore.
She did a lot of work to get me this contract. Since it is a cross-border department there was extra aggravation. I wanted to make her something as a thank you and this is it.
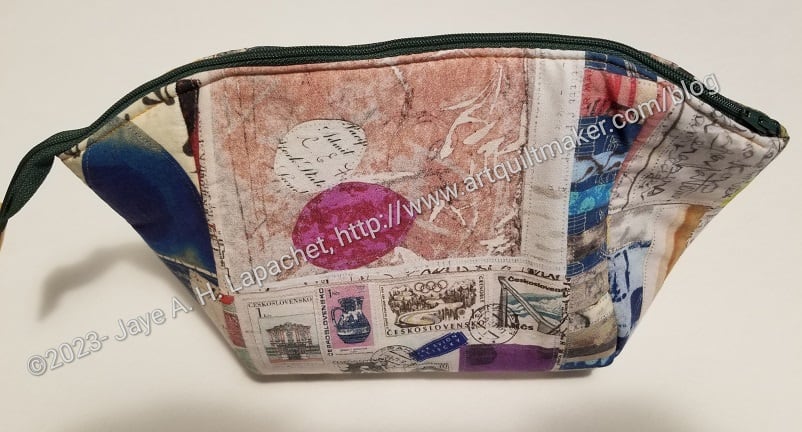
Cotton Candy: sewing the body together
I fussy cut the main panels out of some Marsha Derse fabric . I hope they will look ok. They look a little somber to me.
Still, this is such a great pattern. I can’t wait to finish it and see how it looks.
*I don’t think I told you about the day I spent pulling fabrics and organizing supplies for bags, did I? The short version of the story is that I looked at my list of bags I wanted to make and spent a day finding all the supplies I need and putting them together in a project box.
In addition to the Pink Moto pouch I made, I also made a black one.
I have said I like to make more than one of the same pattern so I can get the process in my head or smooth out the challenges I had with a pattern. These two pouches were no exception.
As mentioned, I struggled a bit with the drop-in lining on the pink version. I don’t sew patterns with drop-in linings very often, but I would be smart to make more to cement the techniques for making them look good in my mind.
Black Moto open- with lining
I used the same lining as the Skeleton Hackney, because it was handy, I think, and looks good with the black.
It is somewhat cheerful. The background fabric used for Who Am I? is the same print, but in a different colorway.
I am pretty happy with the way the lining came out. It isn’t too saggy-baggy. Since the lining is sewn separately and then inserted, it is pretty easy to sew it with a smaller seam allowance.
As you can see I added in a Wunderlabel at the last minute. That’s why it ended up in such a weird place. I am trying to be better about sewing them on intentionally.
Moto side view
I can’t remember what size Moto Pouches I made. I think these might be medium. They were fiddly enough without going to the small. I really admire the testers for Sara’s patterns. They have to make all the sizes whether they want to or not.
I think this a useful size. Not sure what I would use it for, but I would probably make it again as a gift. It might be good for the nephews.
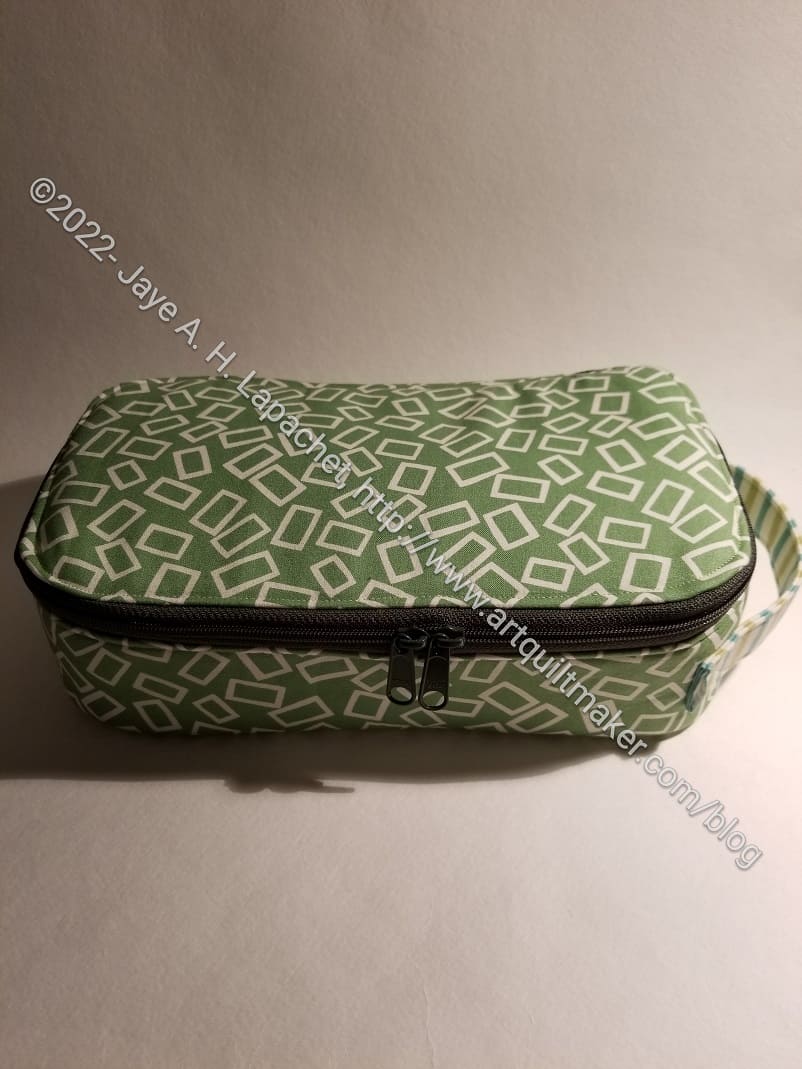
I finished the second Hackney in record time. Now, as I mentioned, have plans to make a few more. The second one always goes a lot faster than the first and I am enamored with the shape.
Cutting wasn’t even terrible for this pouch. Something must be getting into me, though it’s probably the templates. I have a set of acrylic templates for this pouch and cutting with templates is a million times easier than when I have to use a paper pattern. It might be even easier if I used a rotating mat.
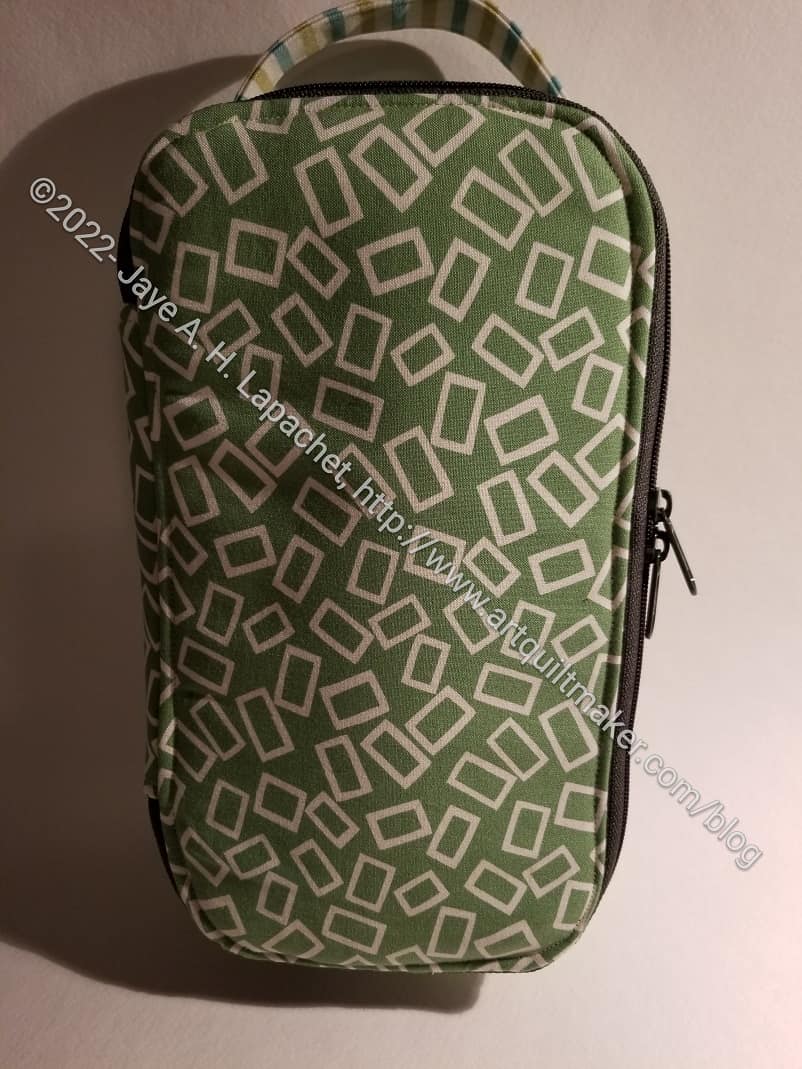
Green Hackney upright
The one problem with this pattern, as written, is the lack of a handle. I am not sure of the original intention of the bag, but having a handle I think is important. I asked a few questions of the designer and her team about when to add the handle. I got enough information and ended up adding after step 13. I think it worked out pretty well.
I love the pouch even more set upright like the picture (right). I think it looks so cool. It makes me want one, though I have no idea how I would use it. Some people sew elastic bands on the bottom in such a way that pens and such can be anchored to the bottom. It’s an idea I will have to consider. I have also seen this made as mini first aid kit. Lots of good ideas.
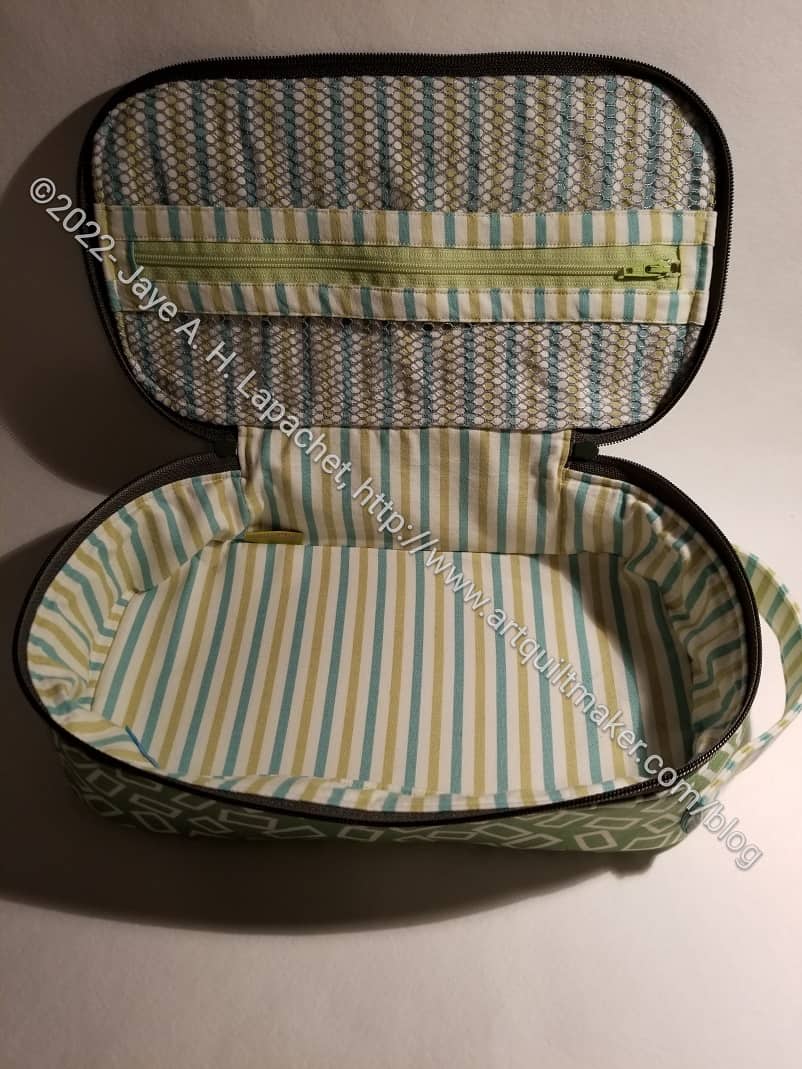
Green Hackney open
The same fabric that I used for the handle was also used for the lining. I am really pleased with how the stripes came out. Also, I think the inside zipper matches, without matching, very well.
The inside pocket is mesh and I think the center zipper looks a little weird, so I think I will try moving the zipper up a little, though I know that might interfere with the operation of the zipper. I might be able to move it up to where the curve starts with no ill effects. The other idea I have is to put a vinyl pocket on top and no zipper. Stay tuned for further iterations.
Sew Sweetness has a hashtag for the Hackney on her FB group (you have to be a member) and I scrolled through a lot of versions of them to get ideas. It was great.
I went on another organizing rampage this morning. I decided to gather all the fabrics and supplies for several bag projects I have planned. This task has been on my list for awhile, so I decided today was the day. In the course of this effort, I tidied up some project bins that were stuffed full of fabric, patterns, etc.
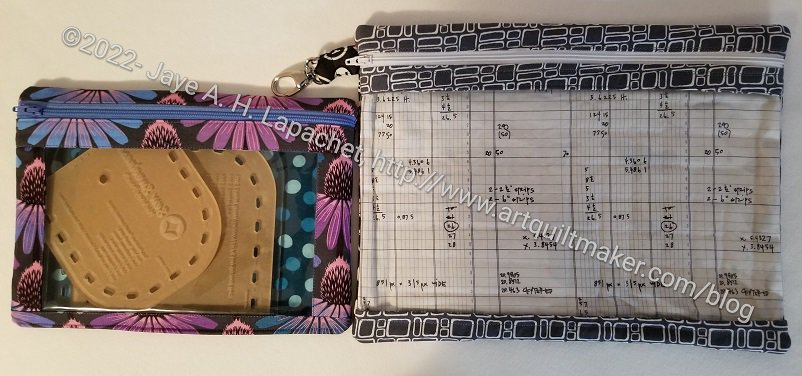
I-Spy / Roadtrip pouches
In one of the project bins I found two of the smaller, completed Crafty Gemini Organizer Club projects. I know I left them there so I could put them together with the last two projects. The last two projects, the Retreat in a Bag and the Ultimate Project Bag have not yet been made, but are on the list. Thus, they were two of the projects for which I gathered supplies and materials.
One of the projects I found, which will be clipped into the Ultimate Project Bag was the Roadtrip bag (right, photo above). Seeing this project again made me think of the templates for which I made a number of pouches.
The Roadtrip bag (pouch) was not used for the templates, but it could be. It looks very similar to the I-Spy pouch by Sew Sweetness (left, photo above), which I did use for the templates. Not counting the size differences, the main difference is the side strip on the Sew Sweetness bag. I made several of the I-Spy pouches for acrylic templates.
The reason I am talking about these is that I thought I would make a larger one, adjusting the size, to suit two sets of templates which don’t fit in the sizes given in the pattern.
The Sew Sweetness I-Spy pouch comes in 3 sizes. The largest size is 10.5 in x 8.5 in high, which is great except that it will not fit the larger templates that need a home. I want to make a pouch for the Chickadee Backpack templates I bought last year when the pattern came out. The templates need a pouch that is about 8 in by 19 in.
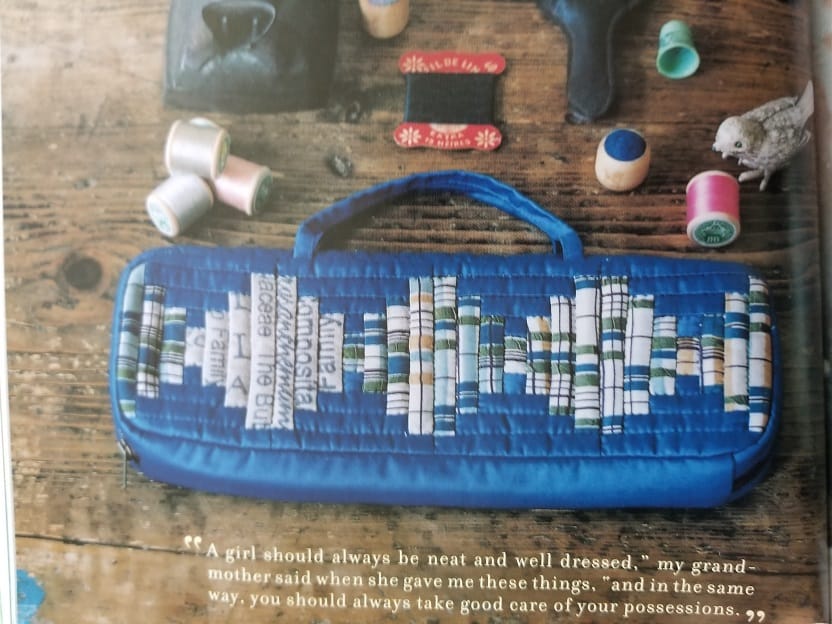
Yoko Saito’s Natural Patchwork bag
I know I talked about the bag from Natural Patchwork**, which I still want to make, but I don’t think today is that day. I do like the idea of handles (makes me think of the Grab & Go pattern, also from the Minikins patterns) and I may use foam instead of batting since the templates are quite large and I don’t want them to break.
What did I gain by today’s organizing effort? 1. I have everything ready when I decide to cut new projects out; 2. I have zippers on order, which weren’t already in my bin of zippers; 3. I have more of an idea for securing some templates; 4. Bins with less junk in them.
**Obviously, you should shop at local quilt shops. However, if you are too busy or can’t find what you need at quilt shops, I use affiliate links and may be paid for your purchase of an item when you click on an item’s link in my post. There is no additional cost to you for clicking or purchasing items I recommend. I appreciate your clicks and purchases as it helps support this blog.
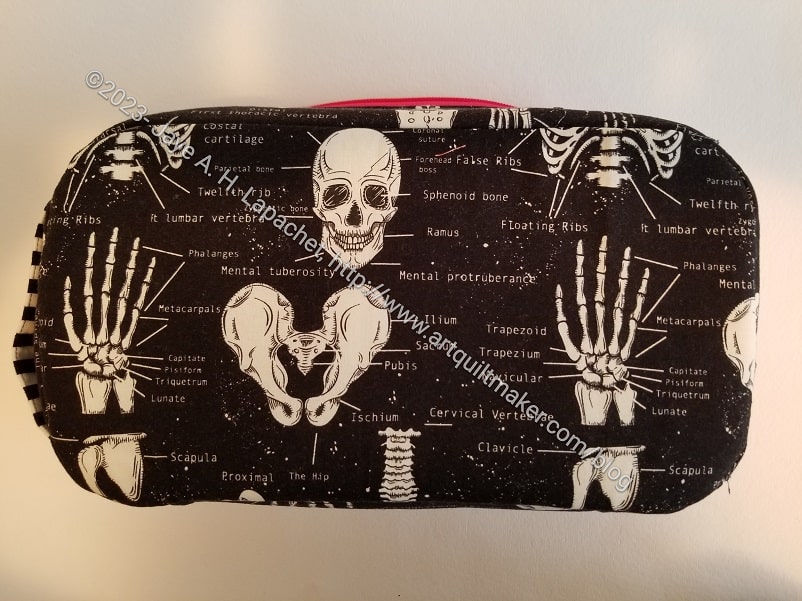
As briefly mentioned when I posted about the Minikins Season Three patterns from Sew Sweetness, I made a Hackney pouch as gift for the YM’s girlfriend/partner. She works as part of a forensics team and loves skeletons. This Timeless Treasures fabric is perfect for gifts for her and I still have quite a bit.
I made her a Sidewinder pouch a couple of years ago, but that had no skeleton fabric. I used a bit of skeleton fabric for the pincushion in the Leaf Sew Together Bag I made for her last year.
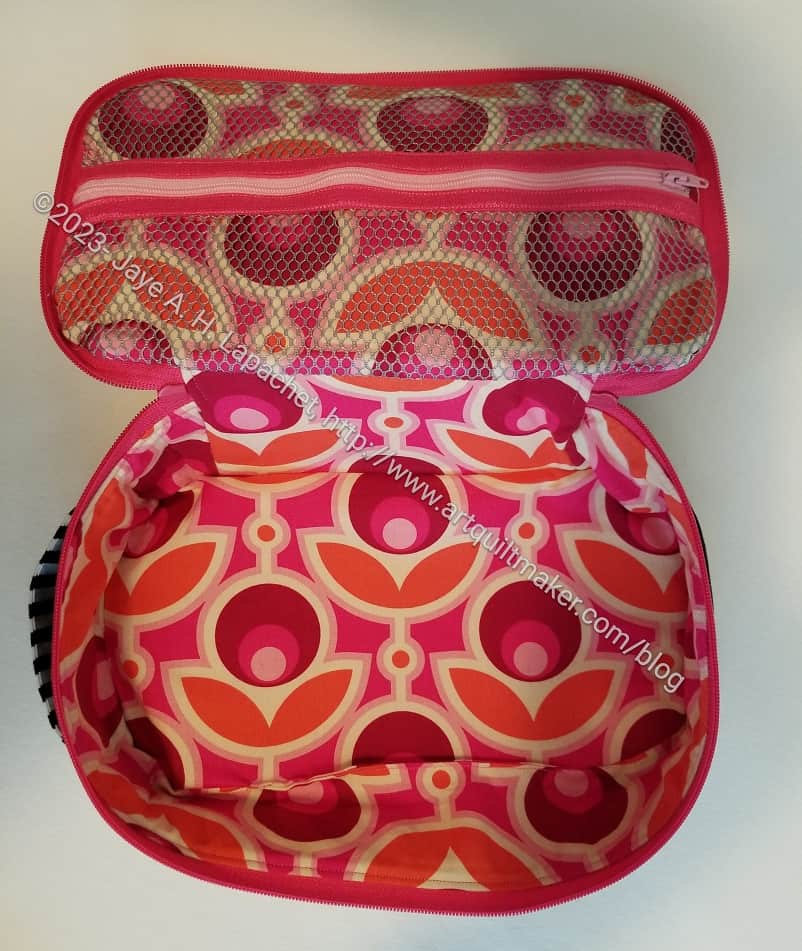
Skeleton Hackney open
This turned out to be all skeletons all the time, though not the lining. I can’t get away from light colored linings.
I think the center looks super cheerful and people using it can see their stuff.
This was my first try at the Hackney pattern, but I like it as a bag. These are quite large (I made the large size), so not really a pouch, but a small bag. I really want to know if it fits a Switch**. I’d like to see a photo of the large Hackney with a Switch inside it.
I plan to make a few more for more gifts, but also one for myself. I need to think of what to put inside before I make one and have it hanging around.
**Obviously, you should shop at local quilt shops. However, if you are too busy or can’t find what you need at quilt shops, I use affiliate links and may be paid for your purchase of an item when you click on an item’s link in my post. There is no additional cost to you for clicking or purchasing items I recommend. I appreciate your clicks and purchases as it helps support this blog.