I haven’t fully committed to this quilt by not really sewing on it very regulary. Part of my ambivalence was that I hadn’t looked at it on the design wall, because I wasn’t really able to find a spare spot on the design wall for it. The other thing I have to admit to is not liking the colors very much. I don’t hate them and they look much better all together than one at a time. I have to admit that I succumbed to a whim and the result was some fabrics whose colors I don’t like much. I am not saying I don’t plan on NOT committing; I just haven’t done it yet.
As part of the process, I put it up on the design wall once I took the Russian Rubix off . I had a nice blank space to put something on, so I split it between the Zipper and the Teenaged Boy Black & Grey Donation Quilt. I had some space leftover so I put up the Zipper to see what I had.Clearly this piece needs some room to breath, so I will do it as a kind of Chinese Coins layout and make sure I put something in between. Perhaps the Goldenrod (gold/sunshiney yellow) I bought with the Sangria.
The other thing that worries me is that I sewed a bunch of pieces and now I don’t know where they are. They could be included in the pieces I have in the photo, but it seems like so much more I’ll have to look around.
I was making a trip to see my quilter yesterday so all week I made a huge effort to get the piece done. I had to put on the last border, make a binding, and make the back. I slowly made may way through all the steps a few seams at a time and was able to get the quilt to a place where it was ready to quilt.
Final Corner, Final Border
The first thing I accomplished was the final border. I am pretty proud of these borders. I did have put a spacer in on two sides to make two sides fit, but I really feel like, as April Rosenthal said, I have mad math skills. Really, I don’t but it was nice of her to say and it is a nice thought to consider since nobody who knows me would say math is a strong point for me. 😉
In the process of the last border, I did have to make more blocks. I forgot to make the last two corner blocks when I was making the last border blocks last weekend (I think??). I think I was distracted by the Black Friday Sew-in Google Hangout. I was trying to do something rather rote so I could pay attention to what the others were doing, but apparently I can’t count, sew and Hang Out all at once.
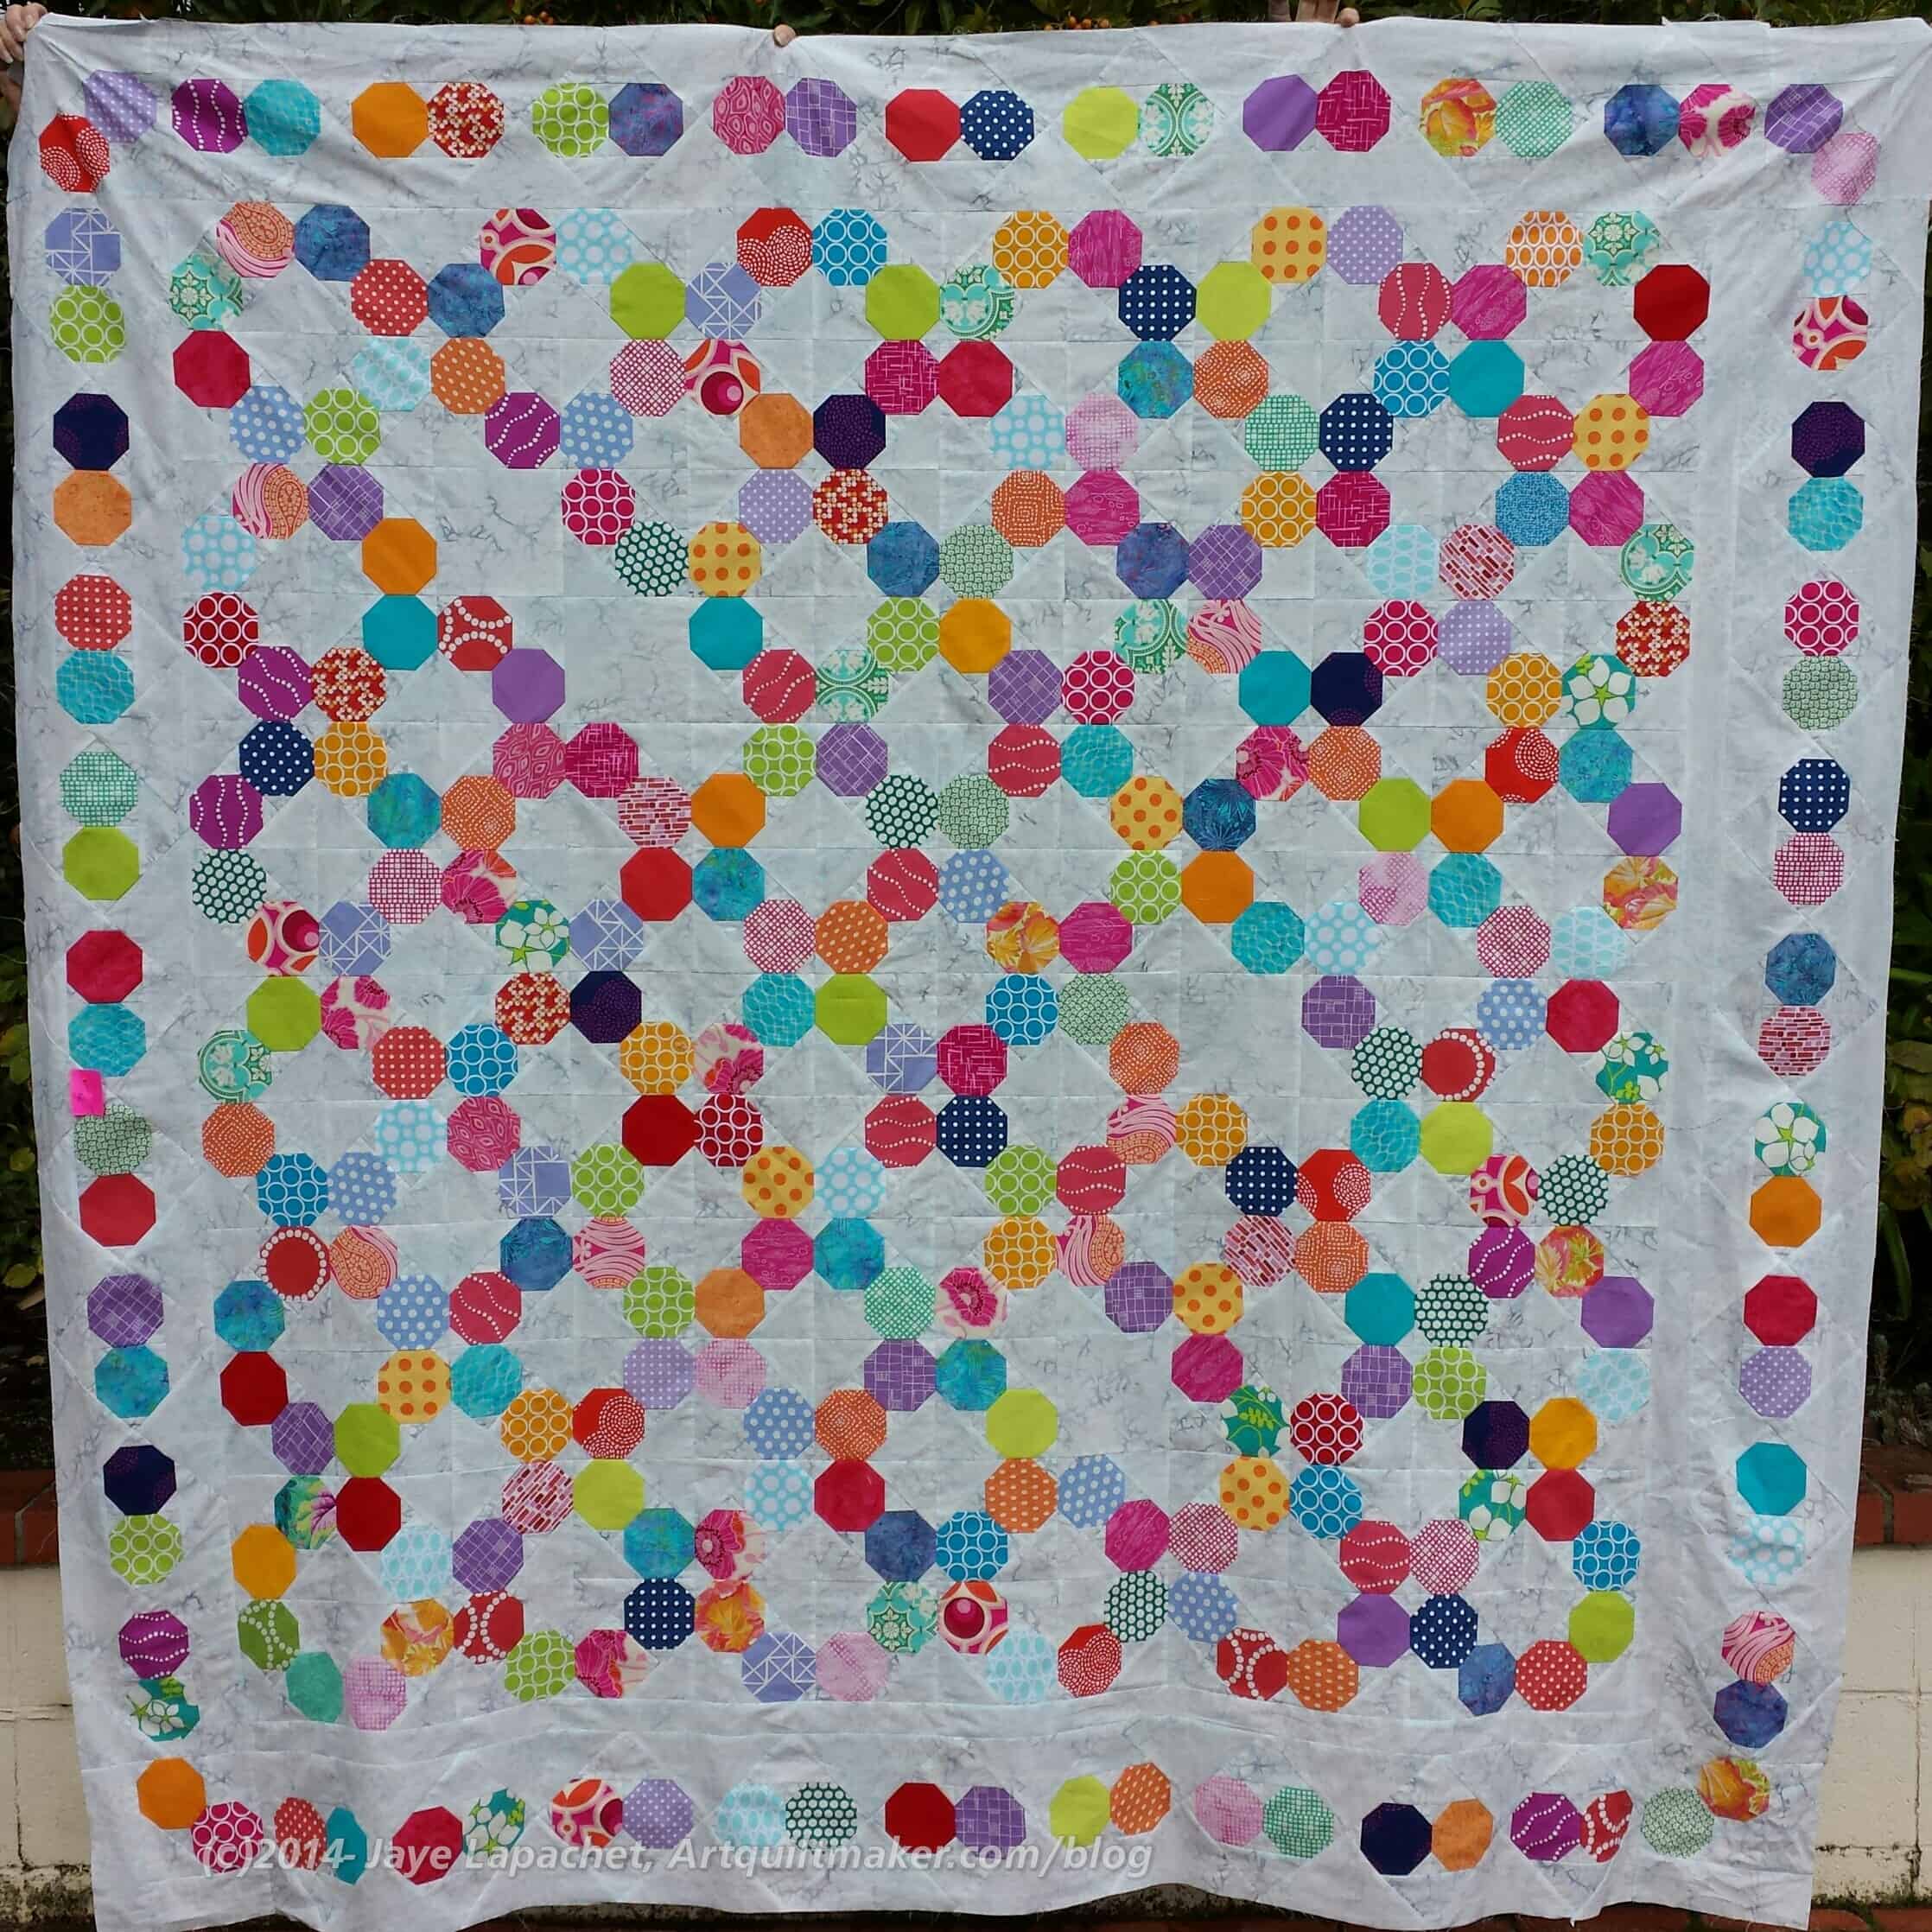
Russian Rubix Top Finished
The back and top are too large for me to photograph on my design wall, so Friend Julie and Colleen were kind enough to hold both up when we brought it over to Colleen’s to be quilted.
I was really pleased with the photo (despite being taken on my phone), but also with the way the quilt came out. The spacers don’t really show up much and I think the top looks really great.
We talked a lot about the quilting. It will be quilted in Signature Thread in the Cotton Candy colorway, which is a variegated that gets used on my quilts a lot, because it blends with my fabric color palette pretty well. I also chose bamboo batting this time, because Colleen said regardless of the density of the quilting, the quilt will still be drapable. This might be a bed quilt, so drapability is good. Also, I have been wanting to try bamboo.
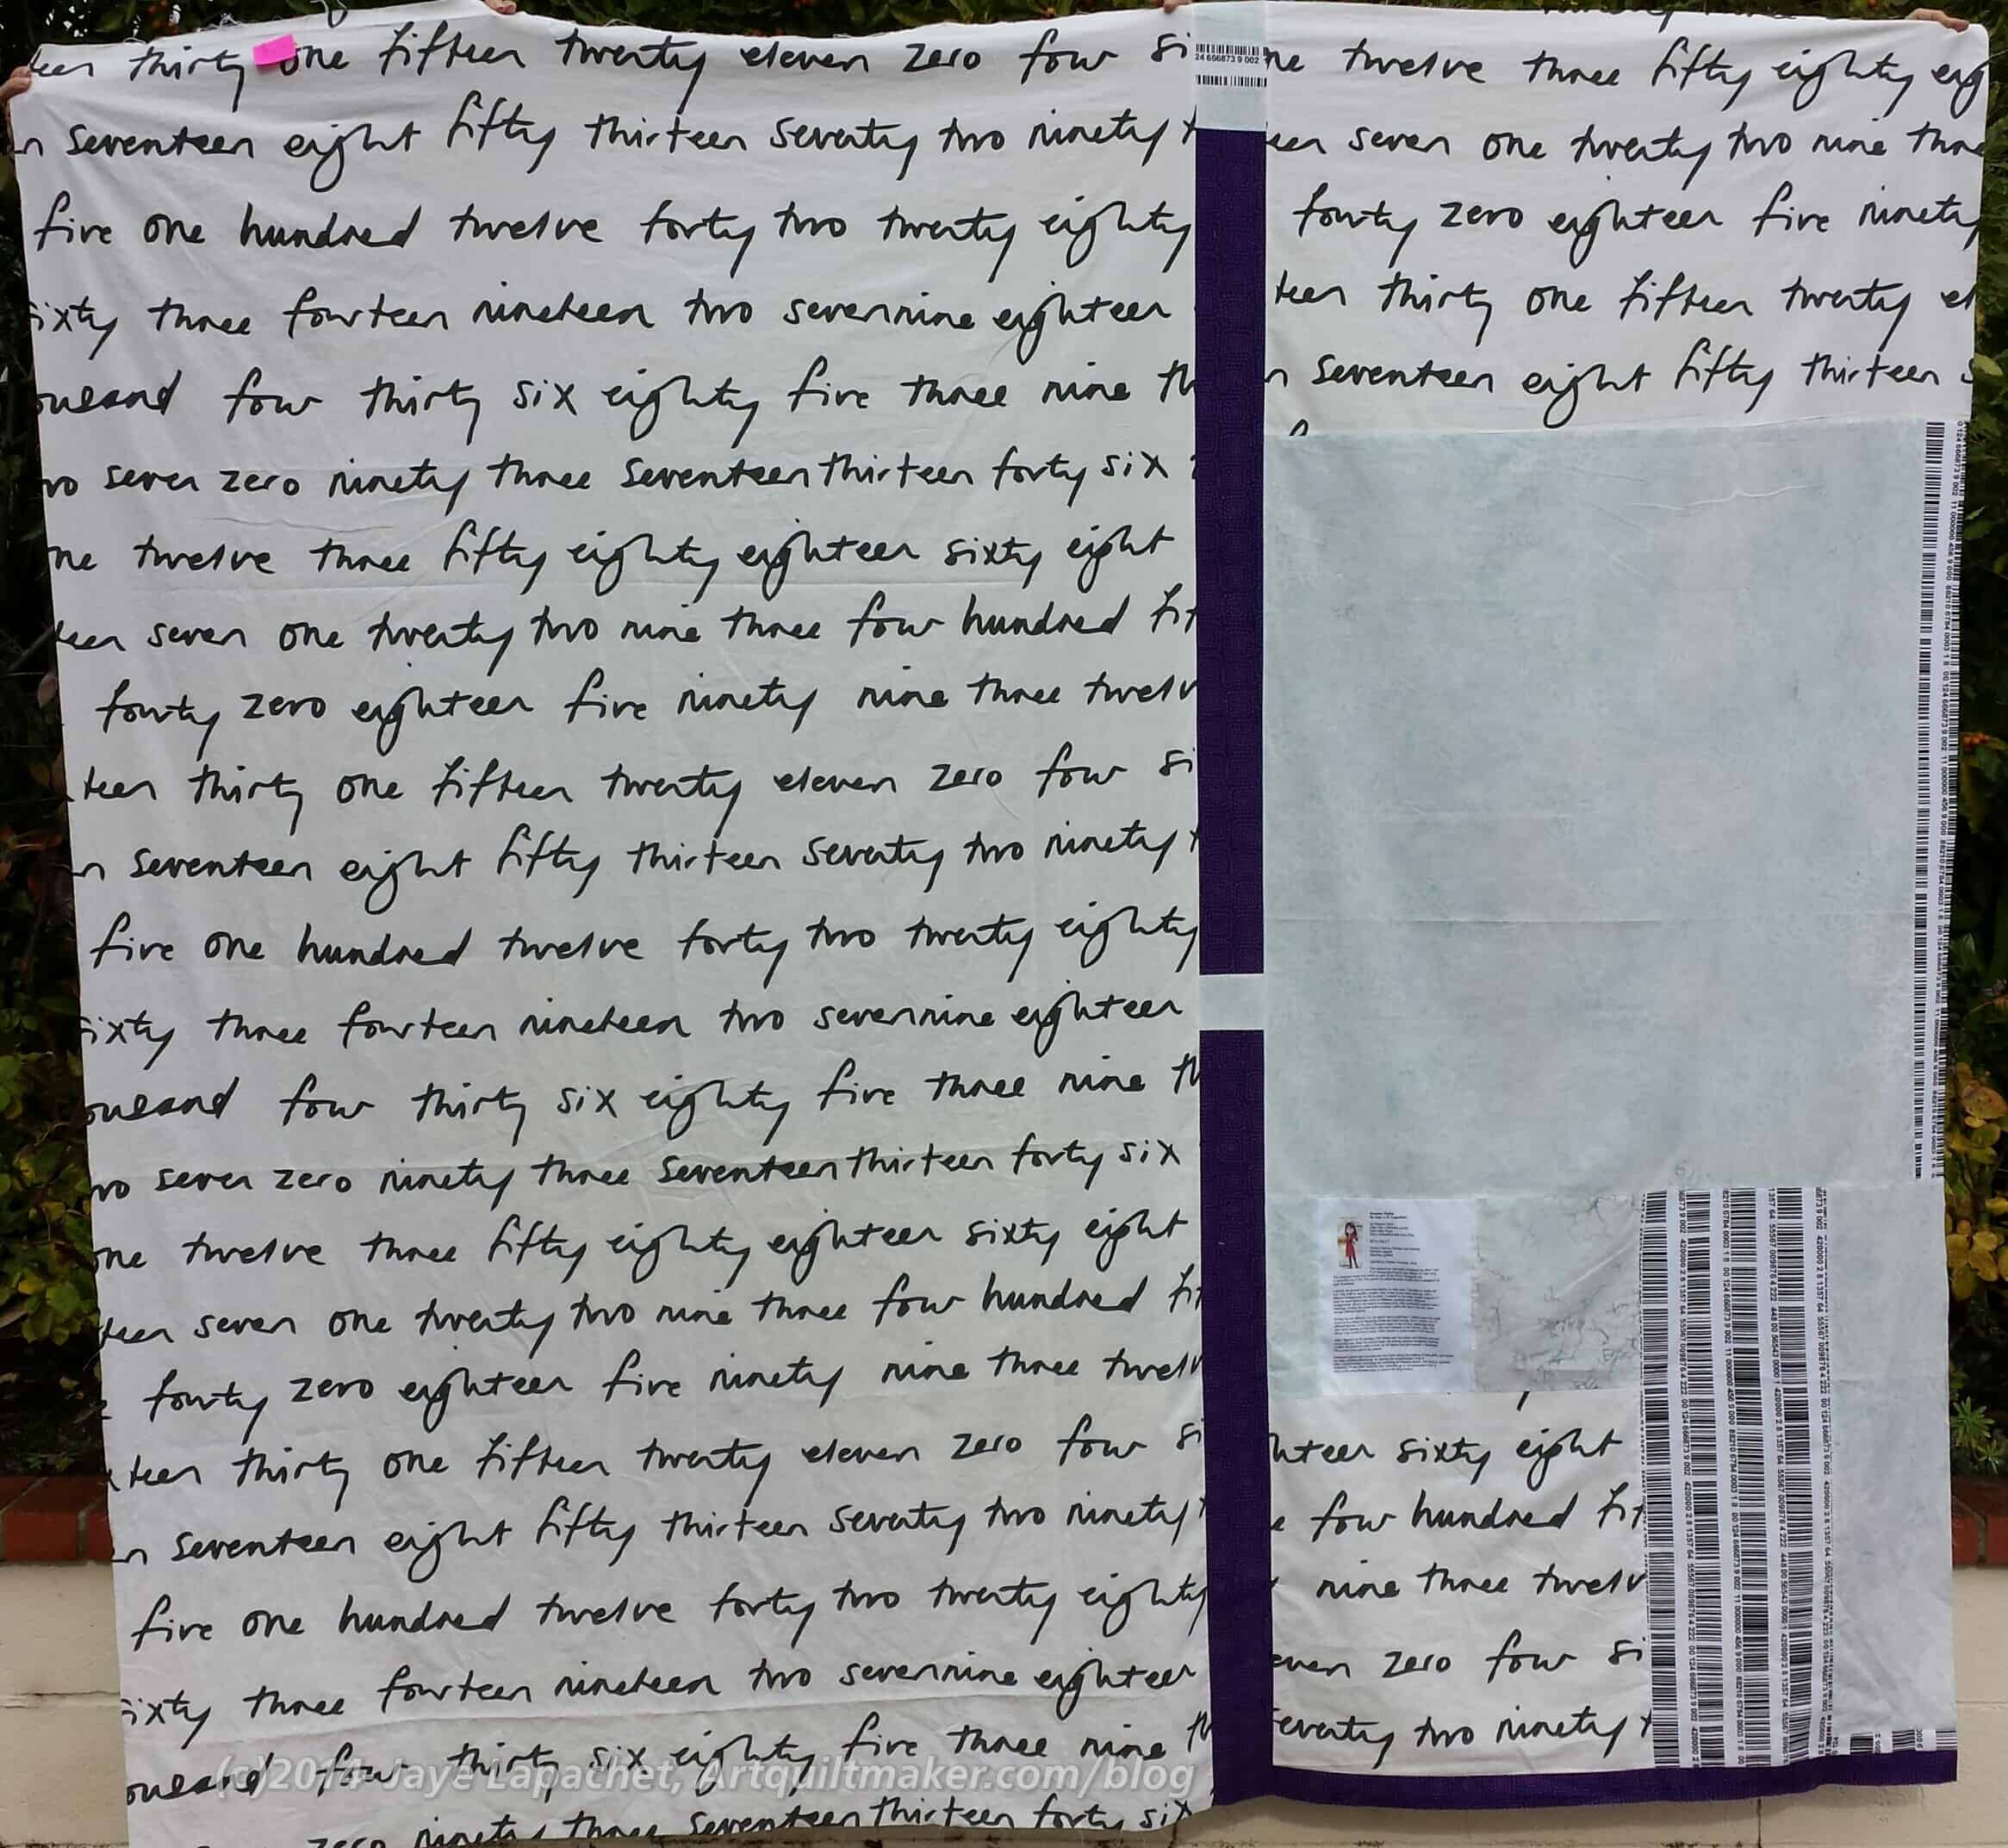
Russian Rubix Back Finished
The back went really well. I used a big piece of IKEA fabric that Kelly got for me. I thought I had 6 yards, but think I ended up with three, thus the piecing of the other part of the back. I used up the background fabric and most of a half yard of the barcode fabric, plus the stitch purple to add a little width and provide some distinction between the two halves of the quilt.
The stitch purple is a bit of a precious fabric and I was reluctant to use it lest I need it for a ‘better’ project, but I decided I didn’t want to use ‘bad’ or ‘ugly’ fabrics for the back because I still have to look at the back and I want the back to be nice, too. And, of course, there is always more fabric.
This is a big project and it is finally finished. WHEW!
Friday was the Black Friday Sew-in. I didn’t do anything in terms of giveaways or prizes. No time this year and no prizes. I don’t seem to be a reviewer for Lark any more since they closed their NC office and my contact was laid off. C’est la vie.
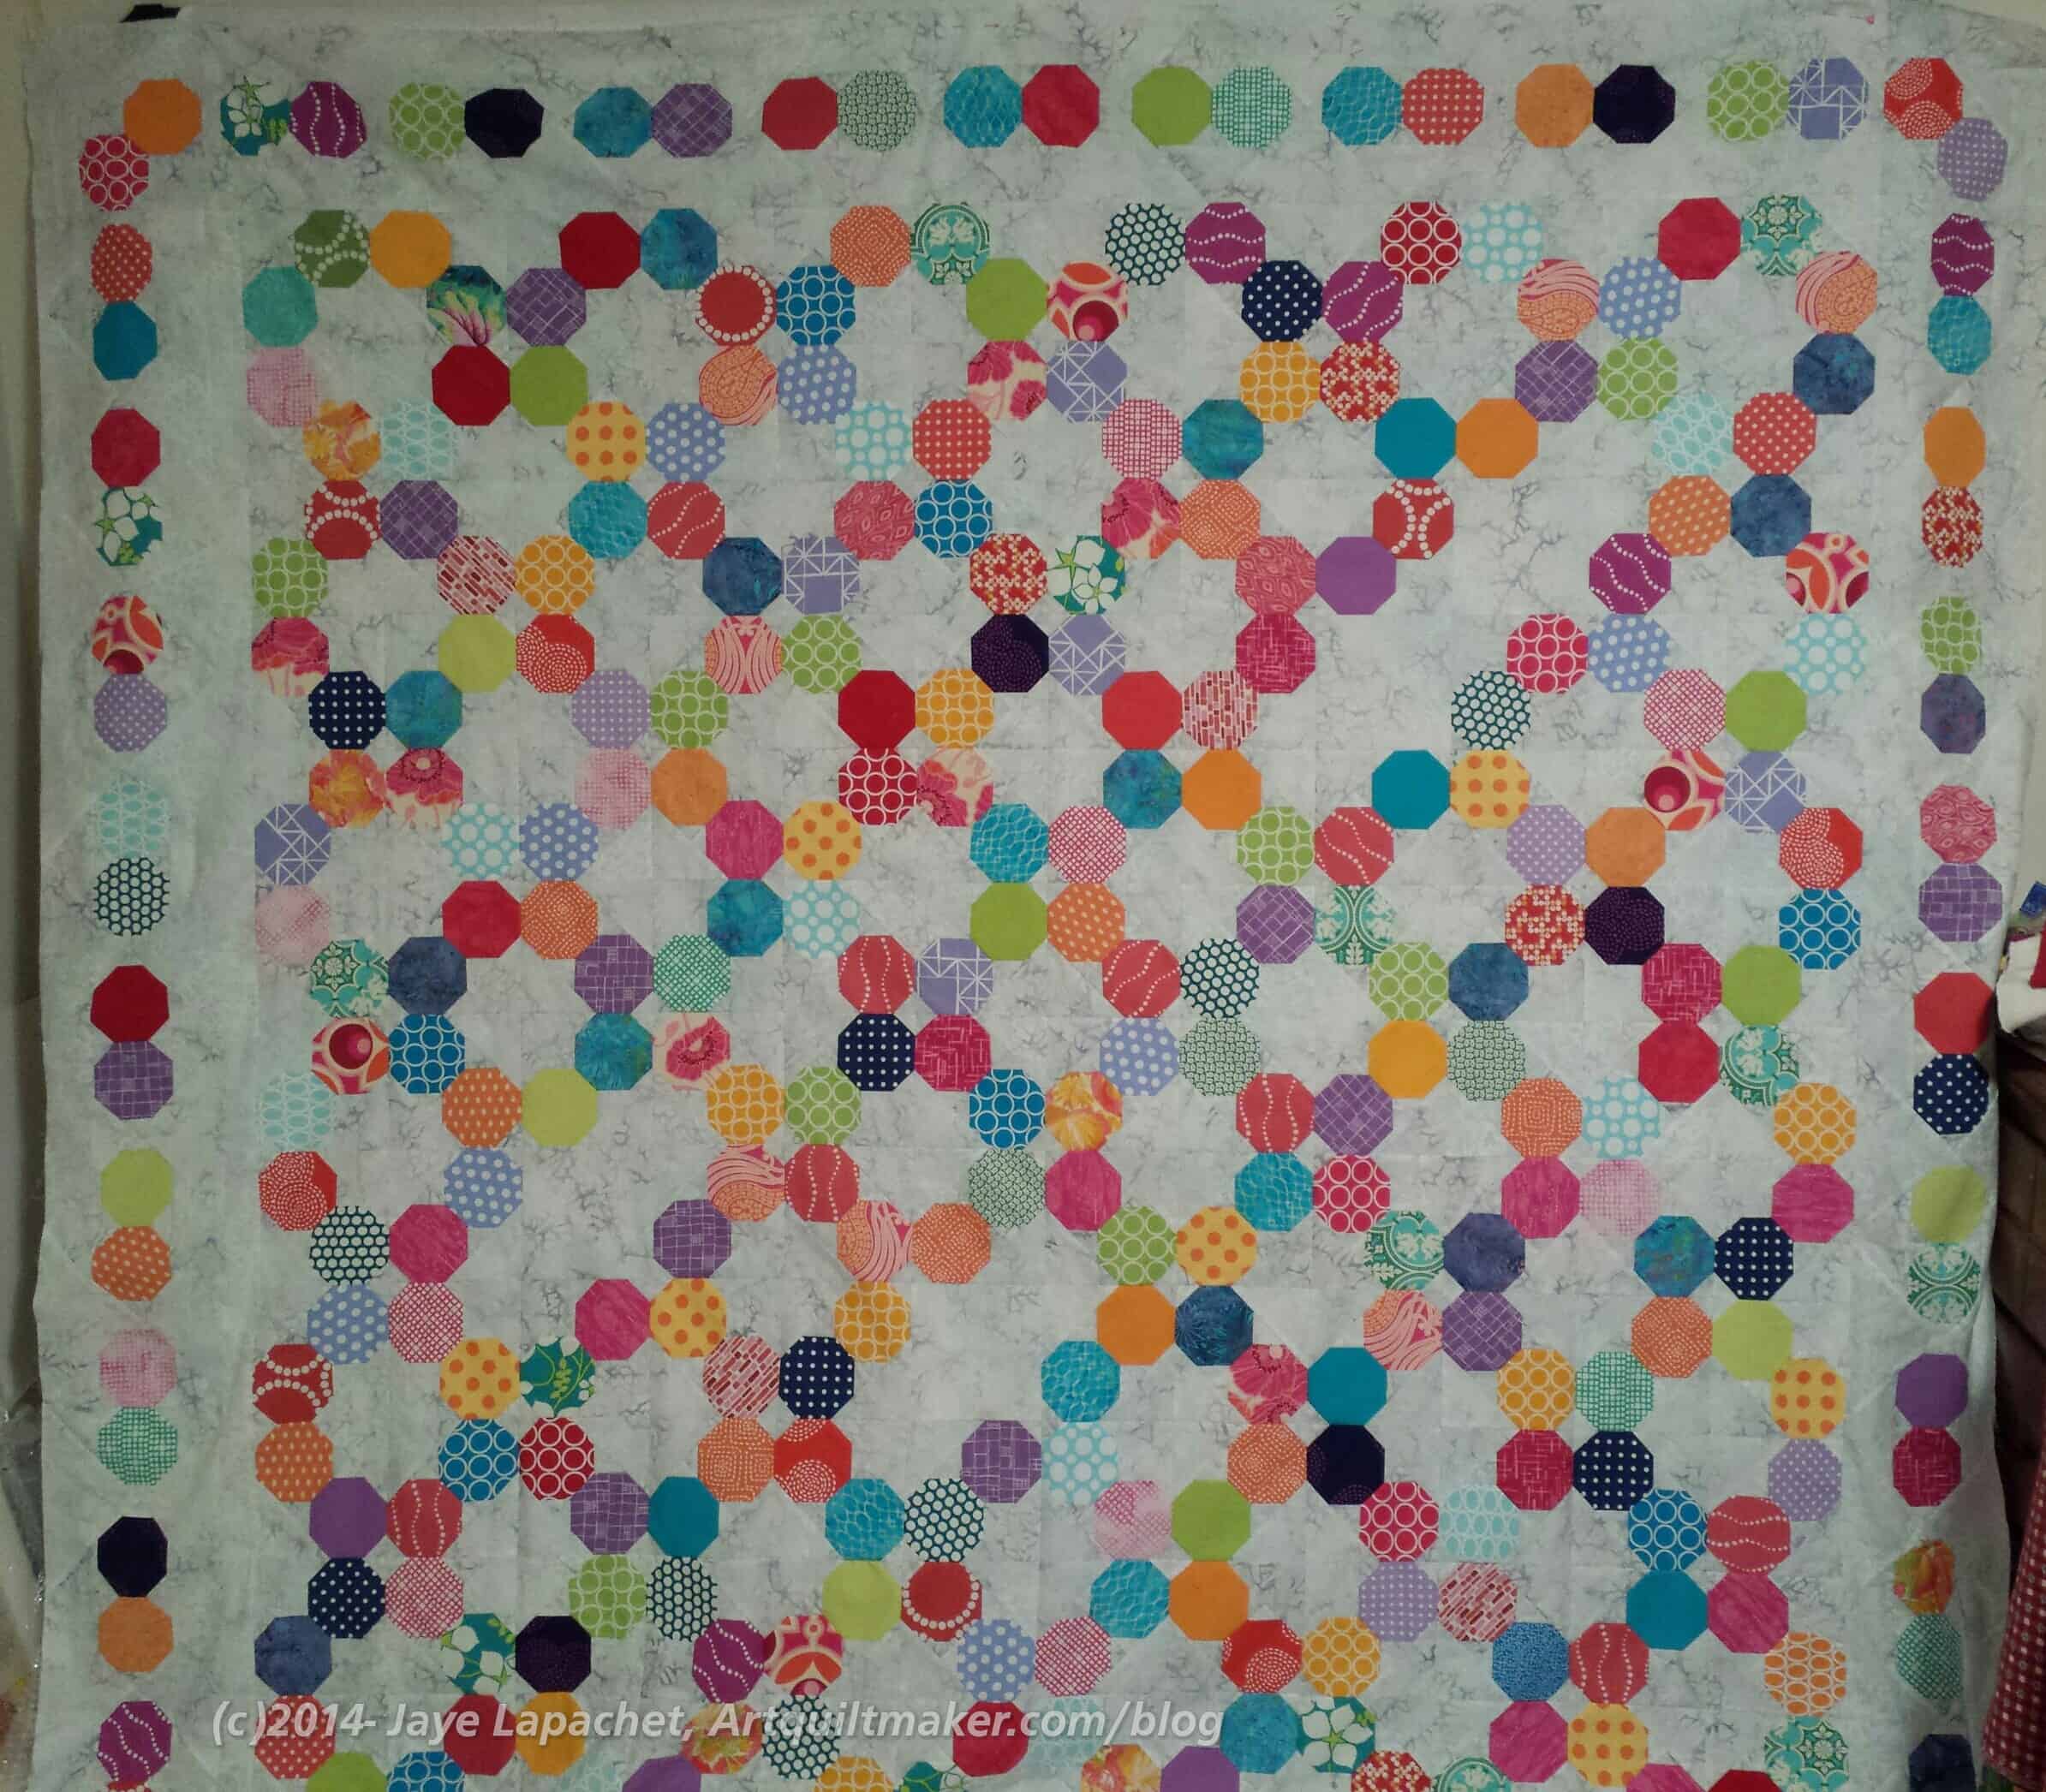
Russian Rubix with 3 Borders
I worked on the Russian Rubix for the amount of time I had to sew. I wasn’t able to sew all day on Friday, but I am pleased with the progress I made. My progress:
I finished all but two blocks for the borders. I thought I made all the blocks I needed, but realized, after putting the last border together, that I had forgotten about the corners.
I sewed another border on. Before I actually sewed the border and kept it there, I sewed it on, ripped it off and sewed it on again, but there are now three borders on the RR quilt.
As you can see from above, the top is starting to look like something other than a floppy mess. I am thinking of using Kelly’s letter fabric as the back. I have fabric I may as well use it. I have a nice large chunk and that might make the back easier than piecing a back. Right now I need some easy.
Did you read the UFO post? I was really thinking about this project when I wrote it. This project is becoming painful. However, I refuse to let it beat me. After talking with Friend Julie a week or so ago, I was ready to dive back in. It is often easier to move on with a project after getting someone’s perspective.
Corner Detail
I made the top border including the corners, which fit over the side borders. This was not helpful, as they had nothing on which to rest since I hadn’t made the side borders yet. Thus, I decided I needed to make the side borders as I thought it would be easier to put on the top and bottom borders which had the corners if there was enough fabric on the sides to accommodate the corners.
I decided I want this design for the border on this quilt. This decision means that I have to be ok with the idea that two of the borders may have to have a spacer to make them fit. I am not 100% sure the sizing won’t work, but it looks like it won’t. We’ll see as I make more parts of the border, sew bits together, trim other bits and the seam allowances are taken up.
Russian Rubix with borders in process
I had a few hours on Sunday and spent the time making a side border. It was really nice to just be sewing. I feel like I haven’t had much time to sew lately, so that was part of the reason I enjoyed it so much.
I have a bit left to do, but essentially I finished the side border.
P.S. The piece, as usual, is too large for my design wall, so I had to use tape to keep the border up on the wall. that is the first time I have done that, but I doubt it will be the last because of the size of the pieces I seem to make.
TFQ said the nicest thing to me on Sunday. It went something like “you should sew. I will press for you” And we did. I worked on the Russian Rubix border and finished the Church Ladies Apron that was making me crazy. More on that later.
Russian Rubix Top Border
I tried to get the whole top border pieced, but couldn’t quite make it. I made good progress and am pleased.
I was worried that the math wouldn’t work out, but I think it will. I wish I had made the sides first so I could sew one on and make sure that it worked. Instead I have to wait until I make both sides and sew them on. Oh well. I’ll plan better next time.
No, I probably won’t. 😉
Corner detail
Regardless, I think that it will work and it will take some time for me to get the border made. In the meantime, it looks nice and I am pleased.
I made some progress over the weekend and it felt good. The whole top is sewn together and I have started work on the border. I didn’t have enough time to do as much I as I would have liked, but I have to be happy with what I was able to do. I really wanted to keep working on the border and will again this weekend or next.
Upper Right Hand Corner, Russian Rubix
I am not the sort of person who measures out every little piece, so I can just hope that the border works out. I will know when I get to the end of the top row. I know all you math people are screaming about how crazy that would make you, but that is the way I work. It could be that I am making trouble for myself to allow myself the opportunity to fix it. I don’t think so, but you never know.
I did some sewing on the Russian Rubix, but not enough to call the top finished yet. I don’t have dates for finishing the top planned. It will get done when it get done.
I moved around some of the blocks with the blanks, because there were too many blank blocks next to each other. I am making progress. I have 16 blocks together and am sewing two to three together as I have a moment.
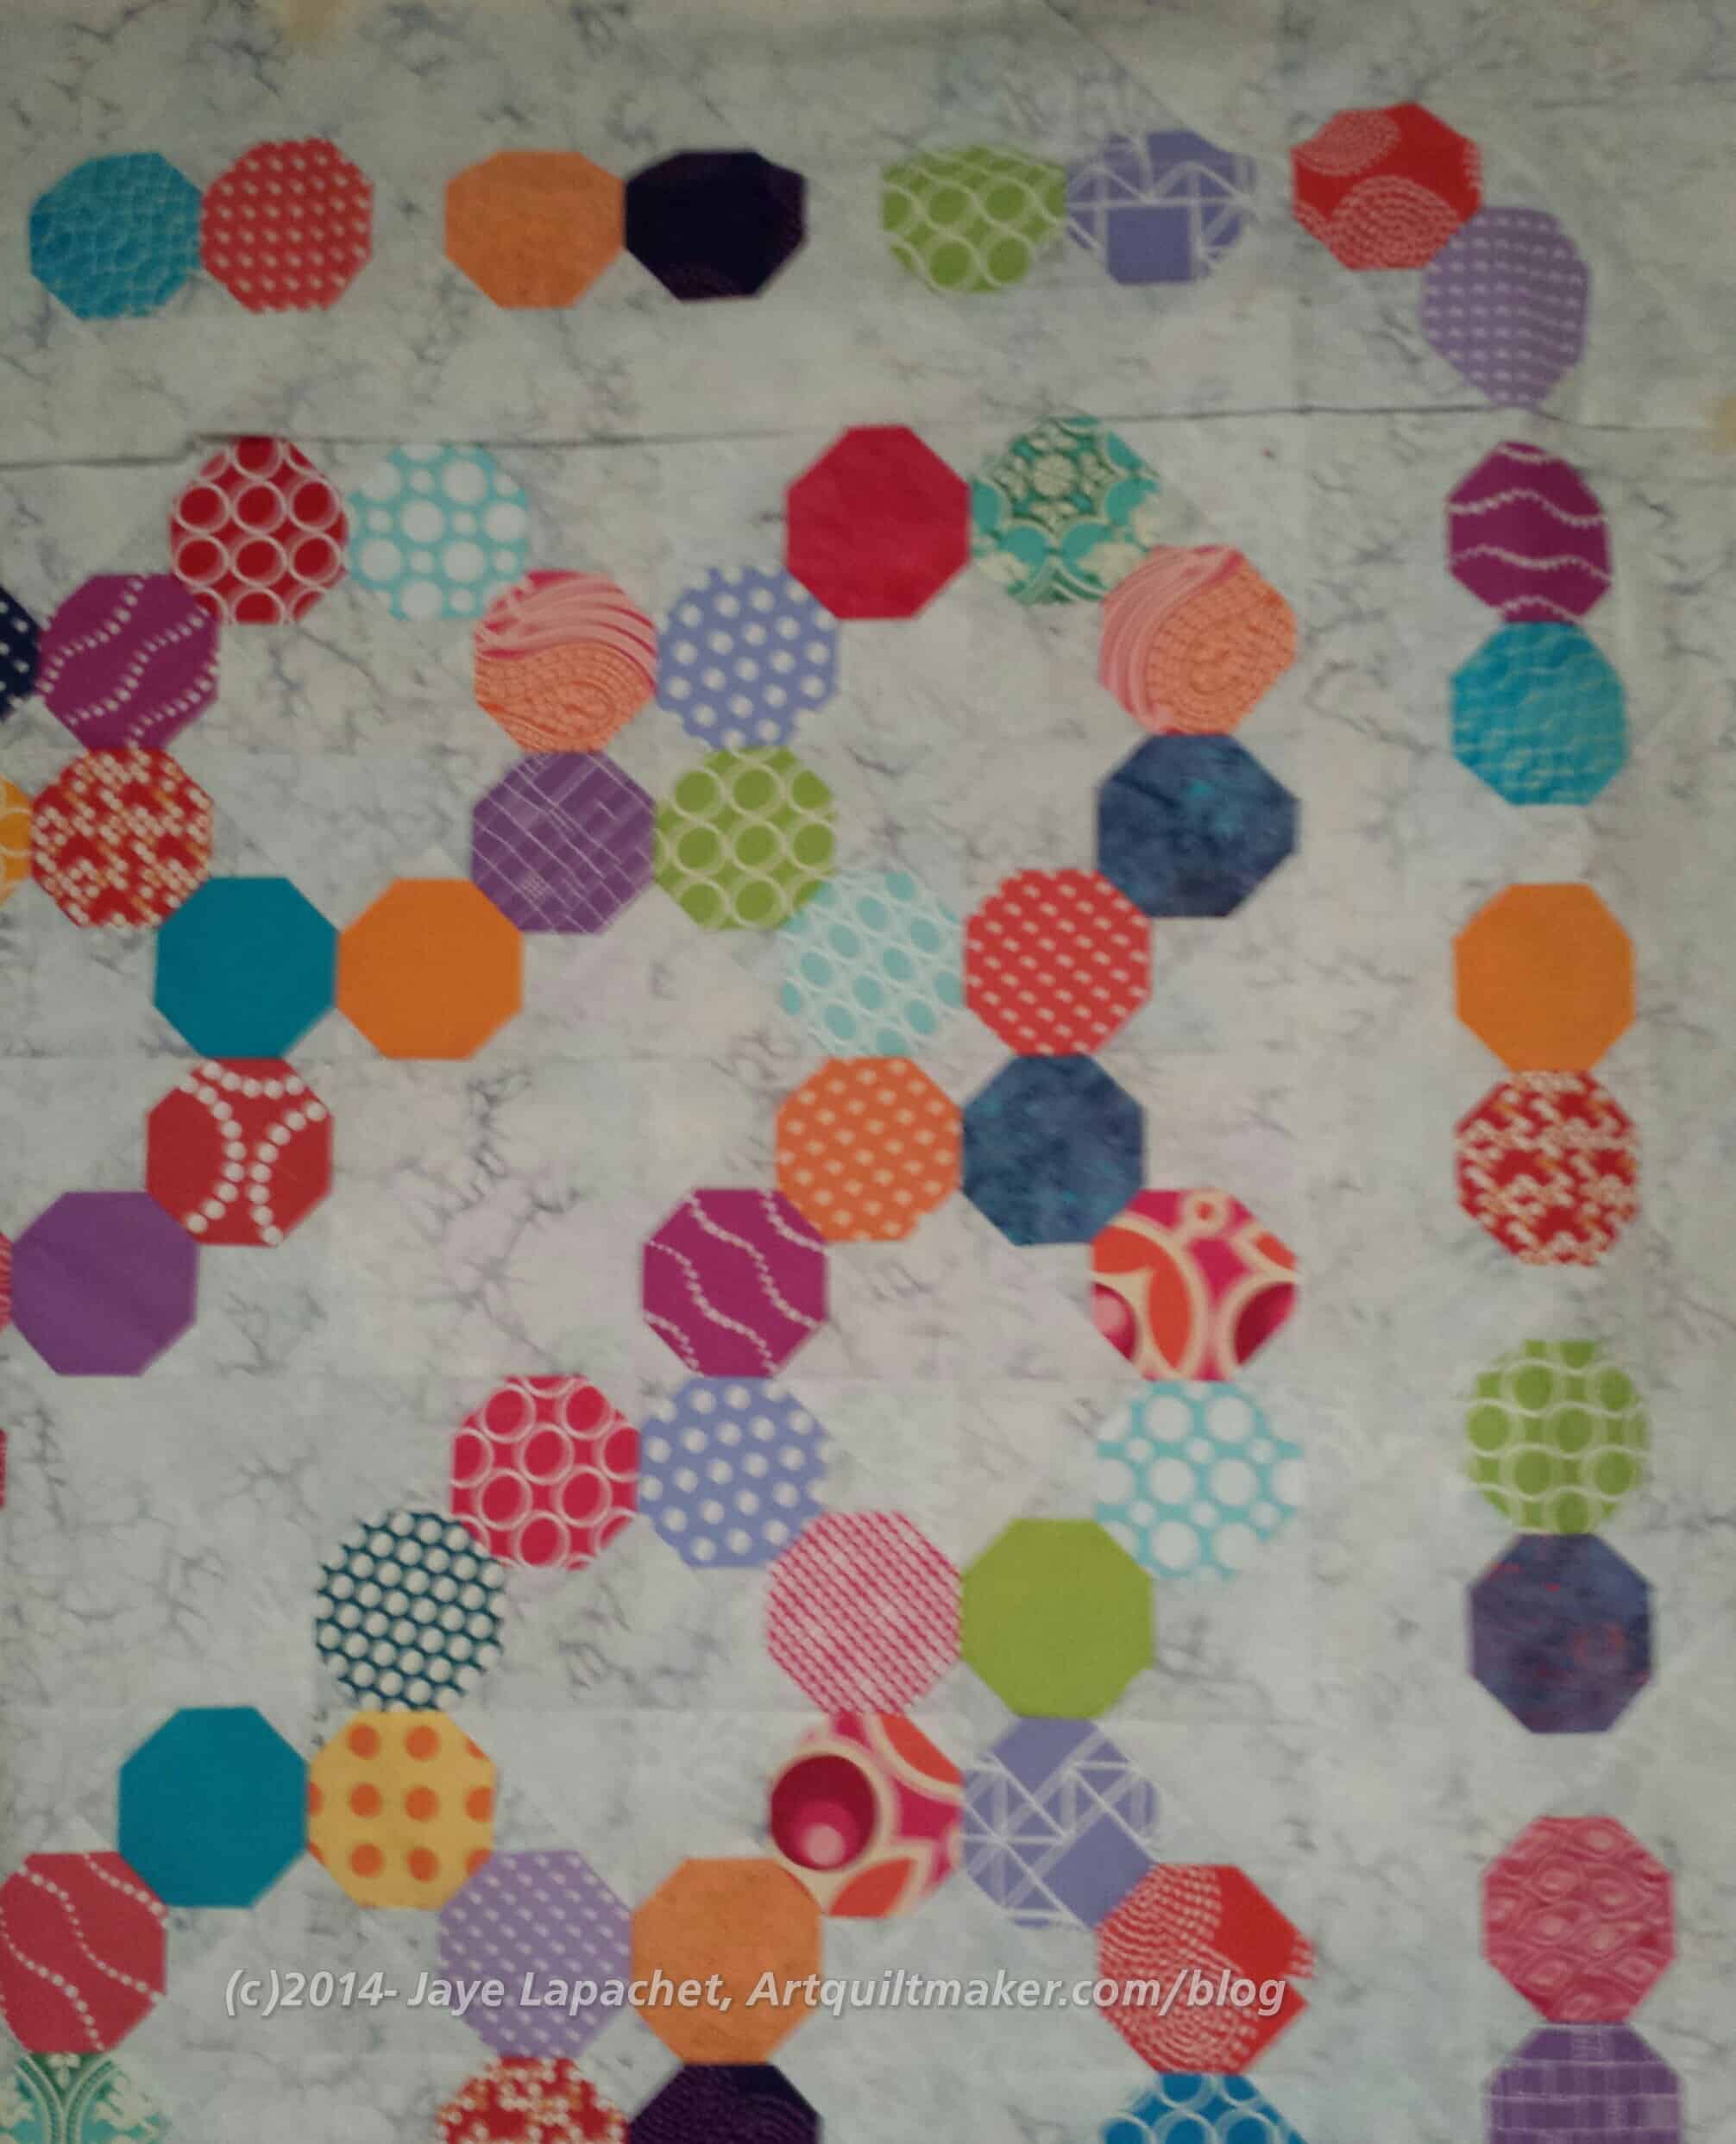
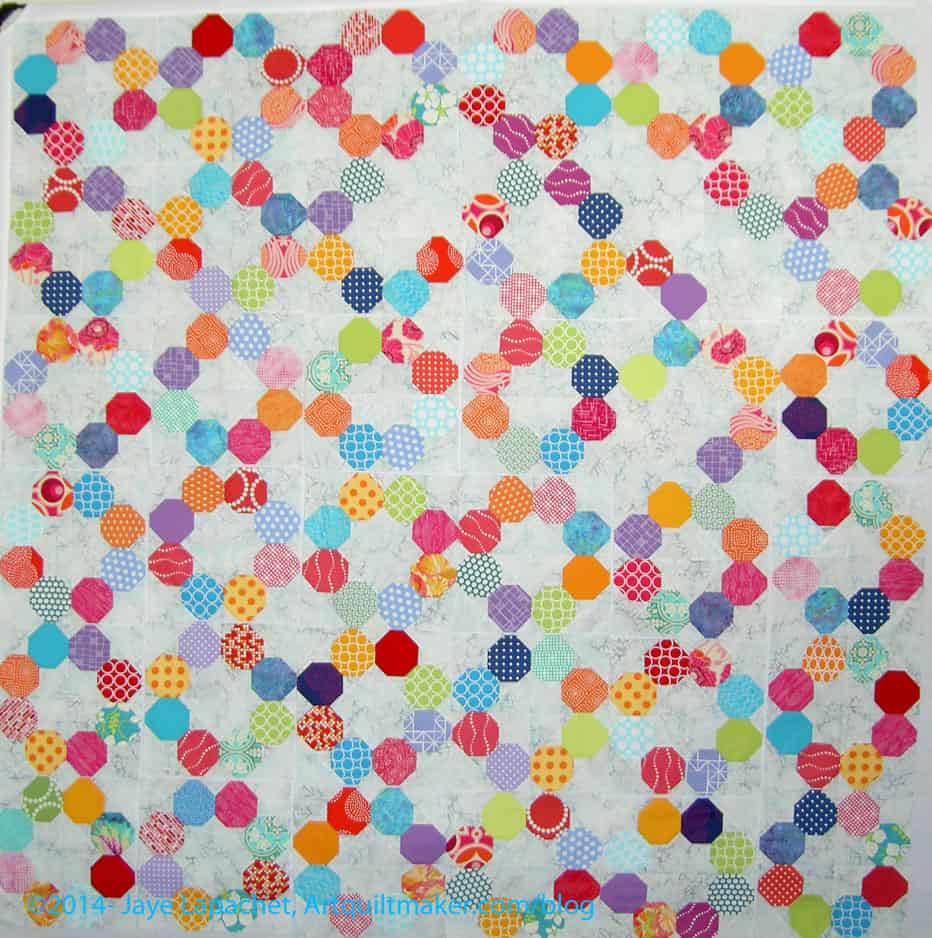
Lots of stuff is about process with me lately. That includes the Russian Rubix. I worked on it, finally, over the weekend and came up with, what I think, is a good idea: Dropping out.
By dropping out, I mean that I replaced some of the quarter squares with blank pieces of the background fabric and allowed the pieces to float. There wasn’t much else I could do with this very distinctive pattern and it seemed like the best solution after not really liking the idea I floated last time.
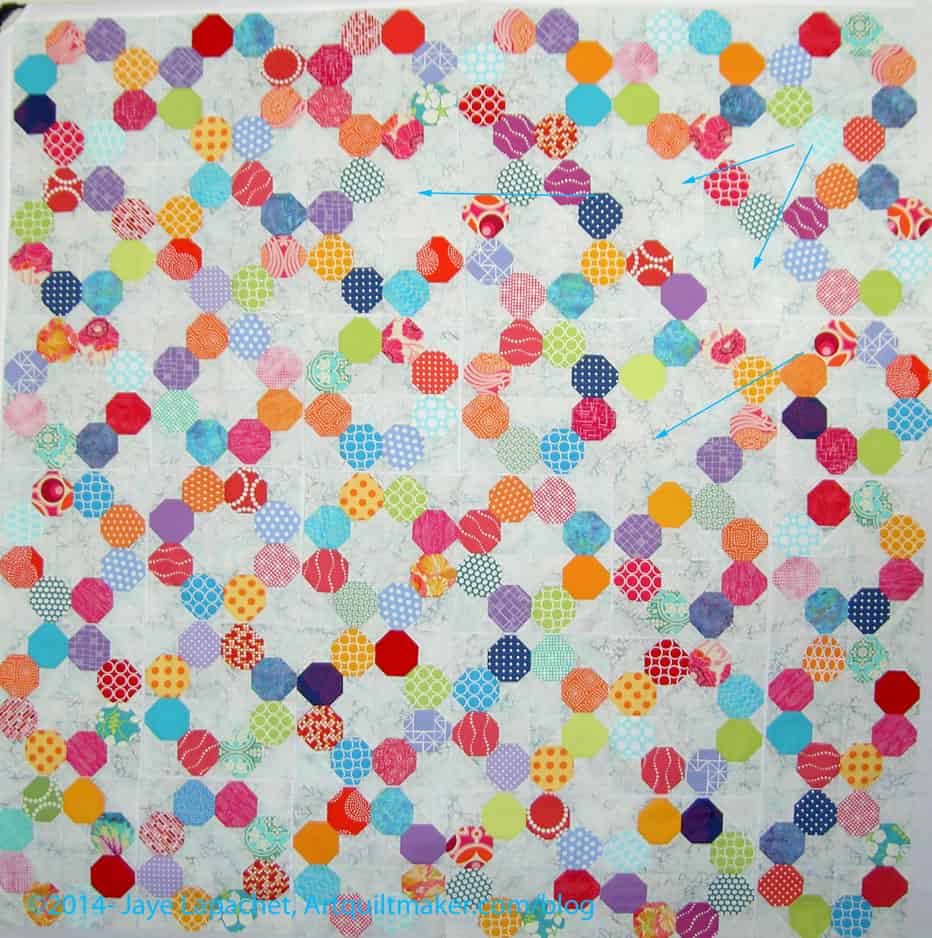
Dropping out chart
I made a chart of where the blank areas were when I took the last photos. I have moved things around a bit again, though.
After I took FOTY 2013 off the wall and before I put the Russian Rubix up on the wall, I put the very few Field Day blocks up to see what I had.
Well, it isn’t looking exactly as I expected or anticipated, though there are also not very many pieces yet.
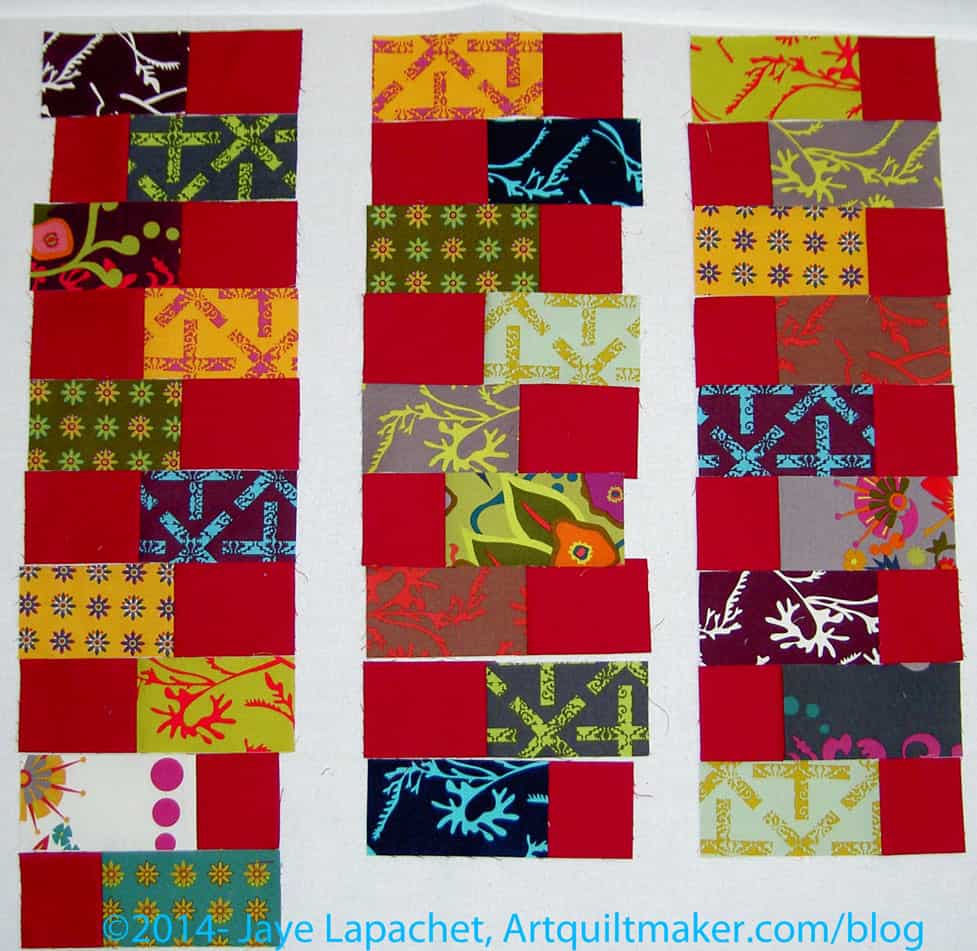
The pattern calls for 5″x2.5″ strips sewn to 2.5″ squares. The top center (2d column) piece is that shape and the correct size. I thought I would make the piece more interesting and vary the sizes of the non-Sangria background and the Field Day fabric. The top left hand piece in the first column is what I came up with.
Hhmm. Clearly I had trouble with the math, even though I measured everything, took the seam allowance into consideration, etc. I am going to use those pieces, but I am not going to make any more of them. I am going to stick with the boring 5″x2.5″ strips sewn to 2.5″ squares.
I also think I will put the Goldenrod in between the columns. I think that would add interest.
This is definitely a dark piece and I wasn’t anticipating that. I’ll have to get it done soon, so that it isn’t on the design wall in the winter when it is dark and cold.
You might think that I did a lot of amazing work between Monday and now, but really I made the blocks I showed Monday over the Labor Day weekend and the most recent work, which I will tell you about in this post, was done this past Sunday. It just so happens that I have a lot to say on the blog and haven’t been able to keep up. I could double up topics on posts, but it makes everything so messy in terms of tagging and categorizing and finding posts later. Some of my earlier posts include multiple topics and I don’t like linking to them as I don’t know if you, dear reader, will feel like wading through a long post to find a specific topic I meant you to find. It’s all about you, you know. 😉
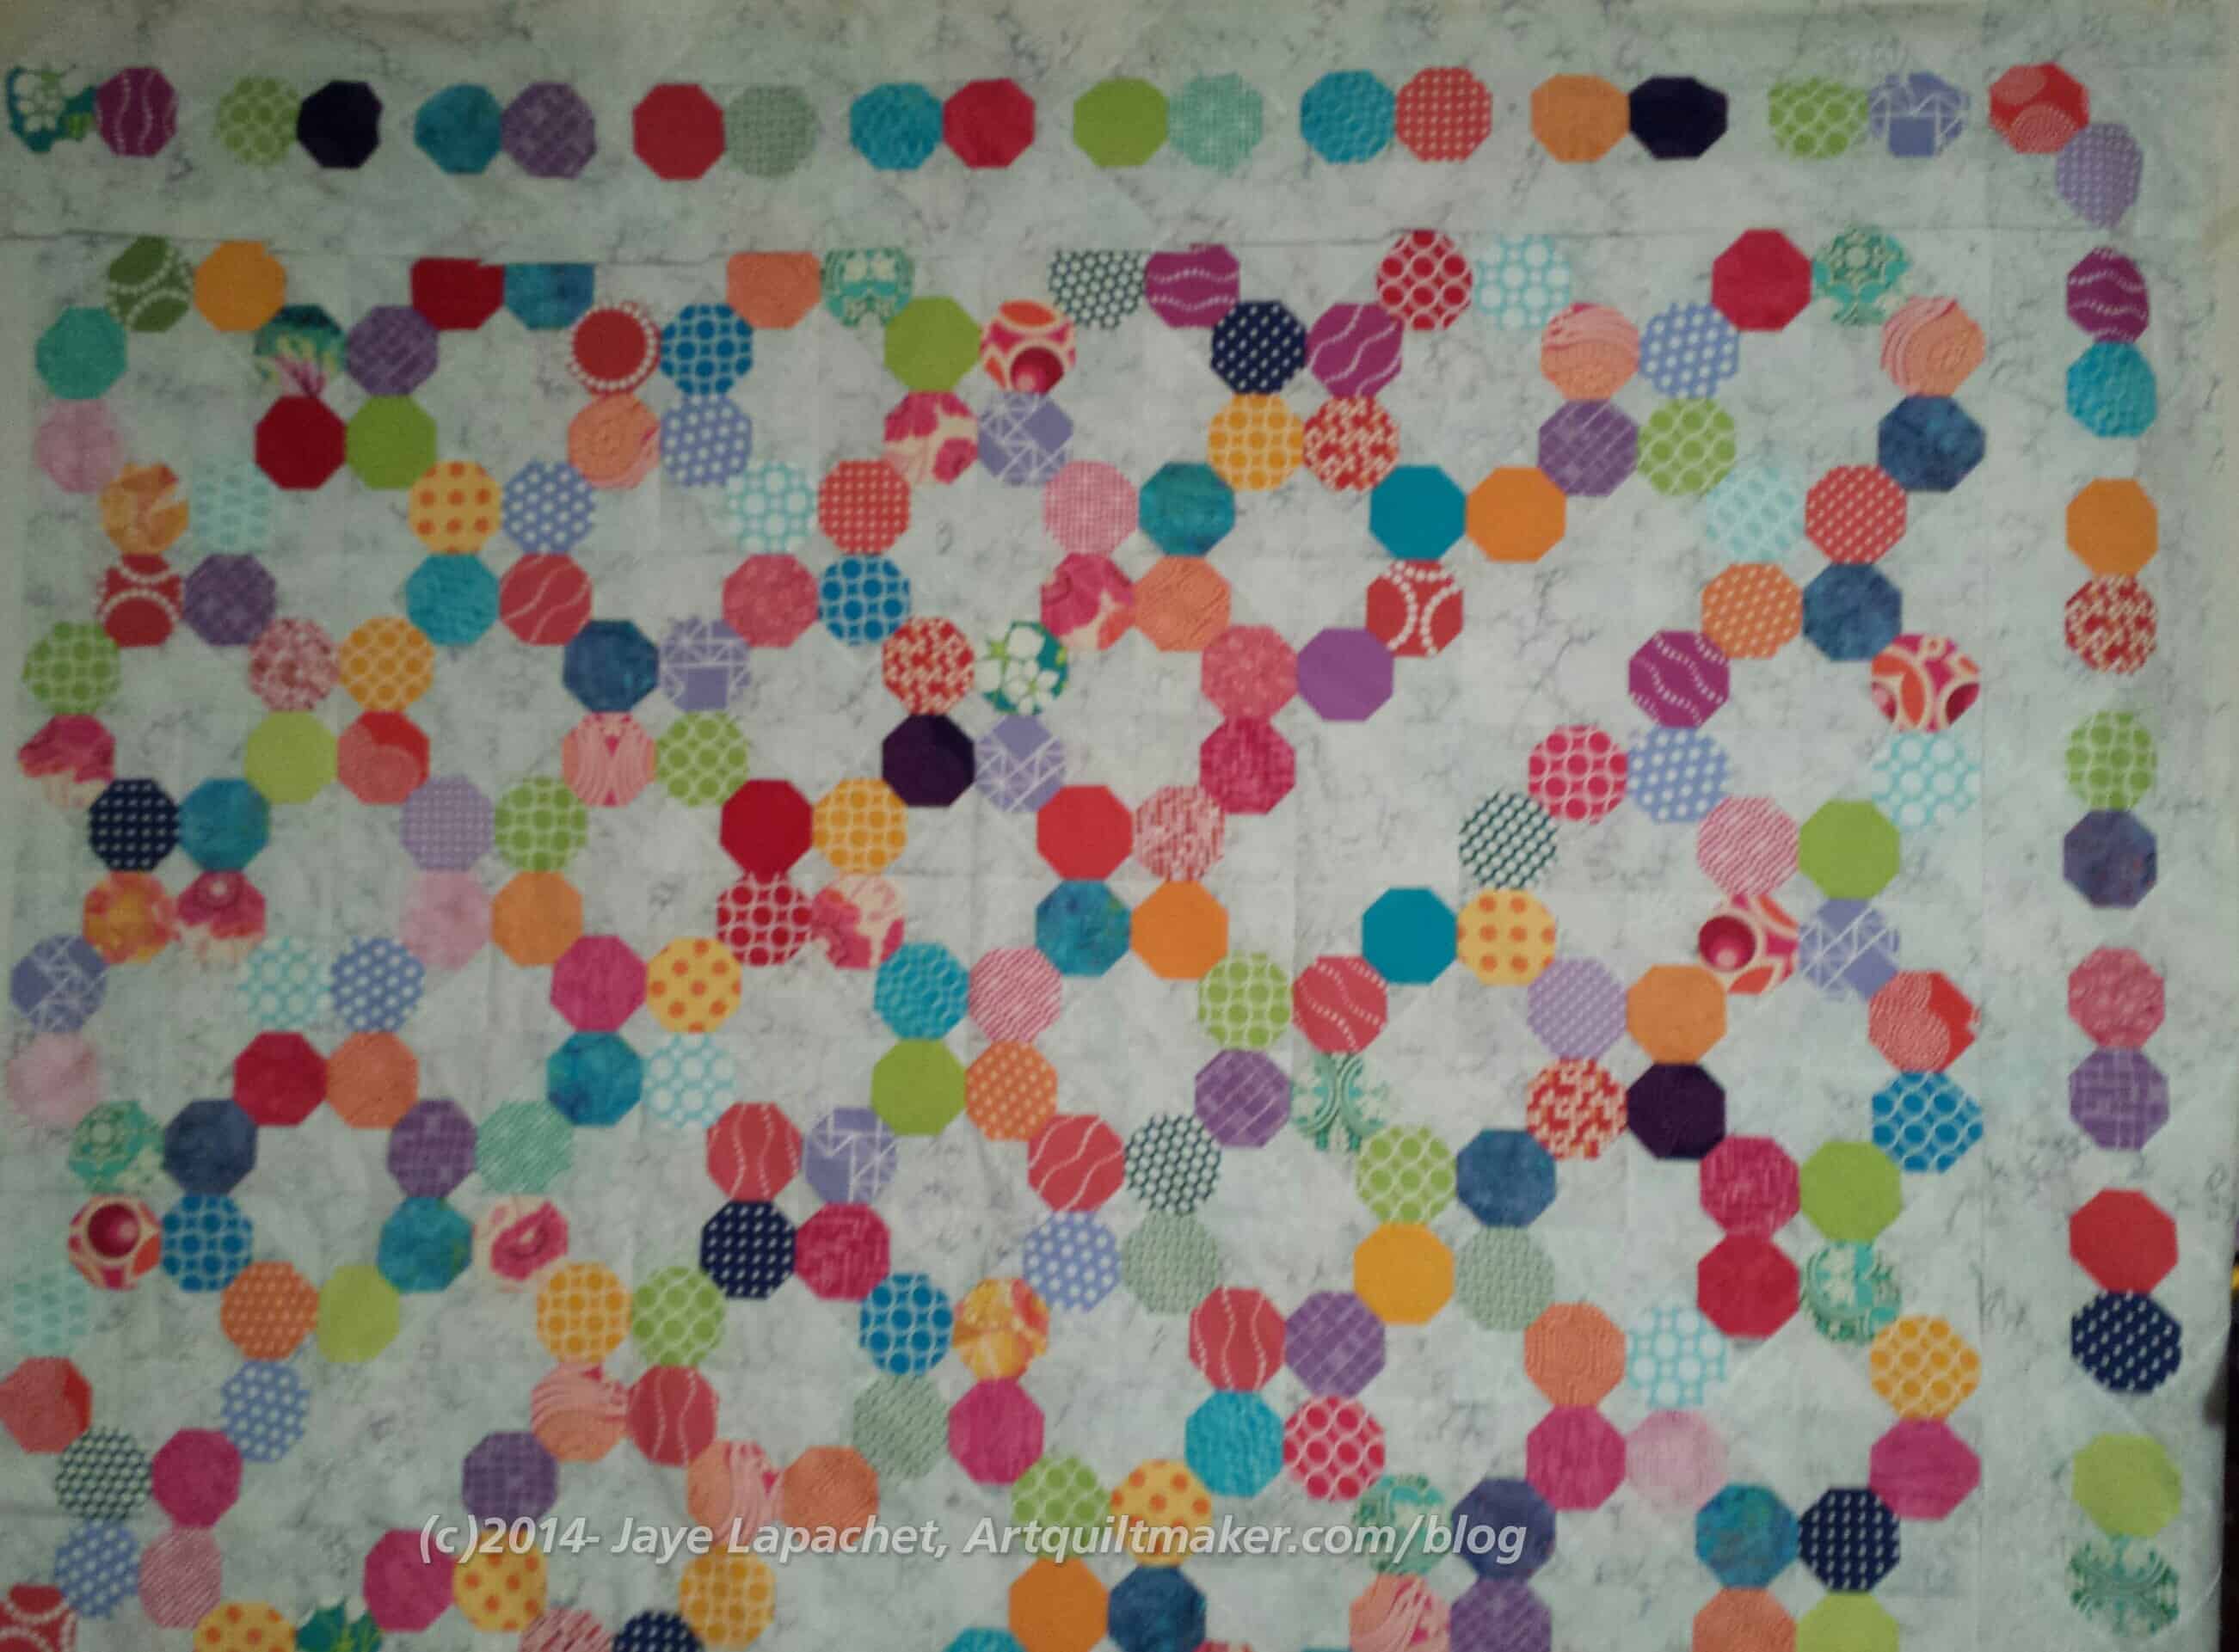
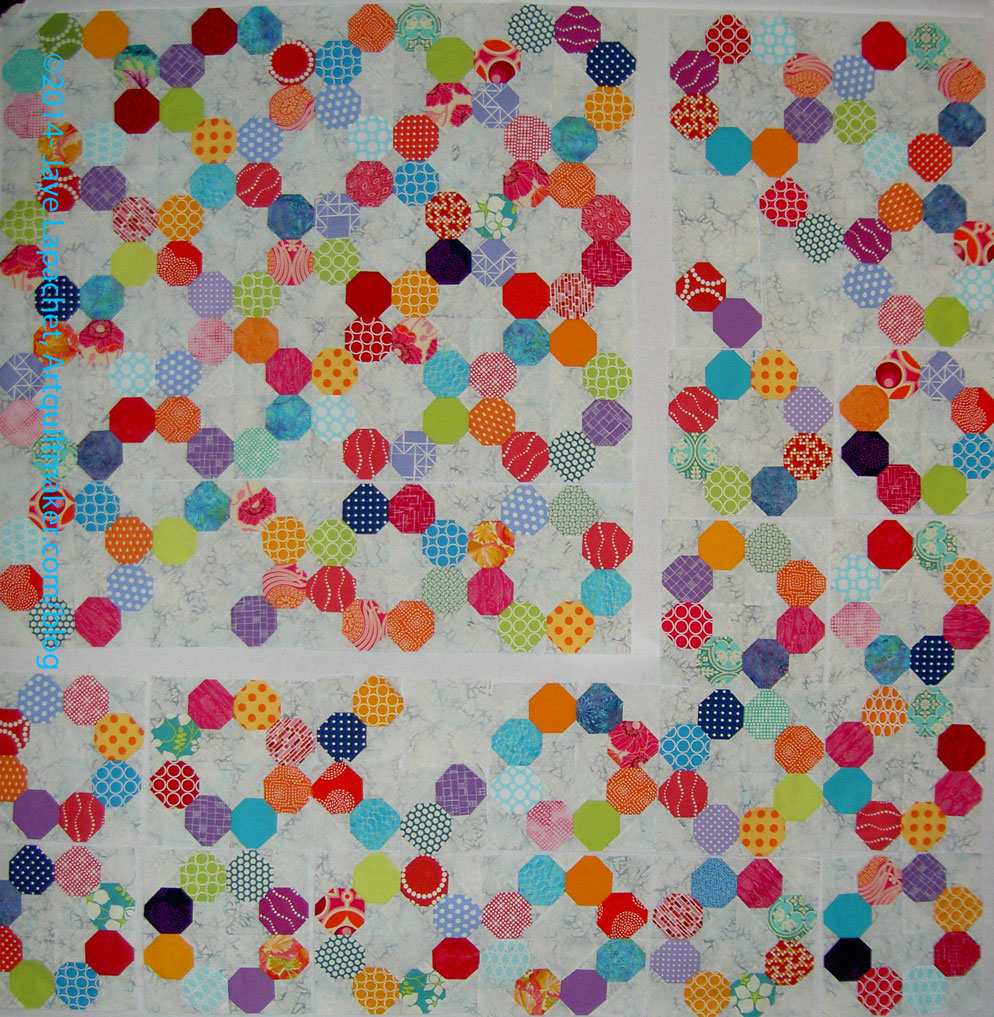
Russian Rubix Test Layout
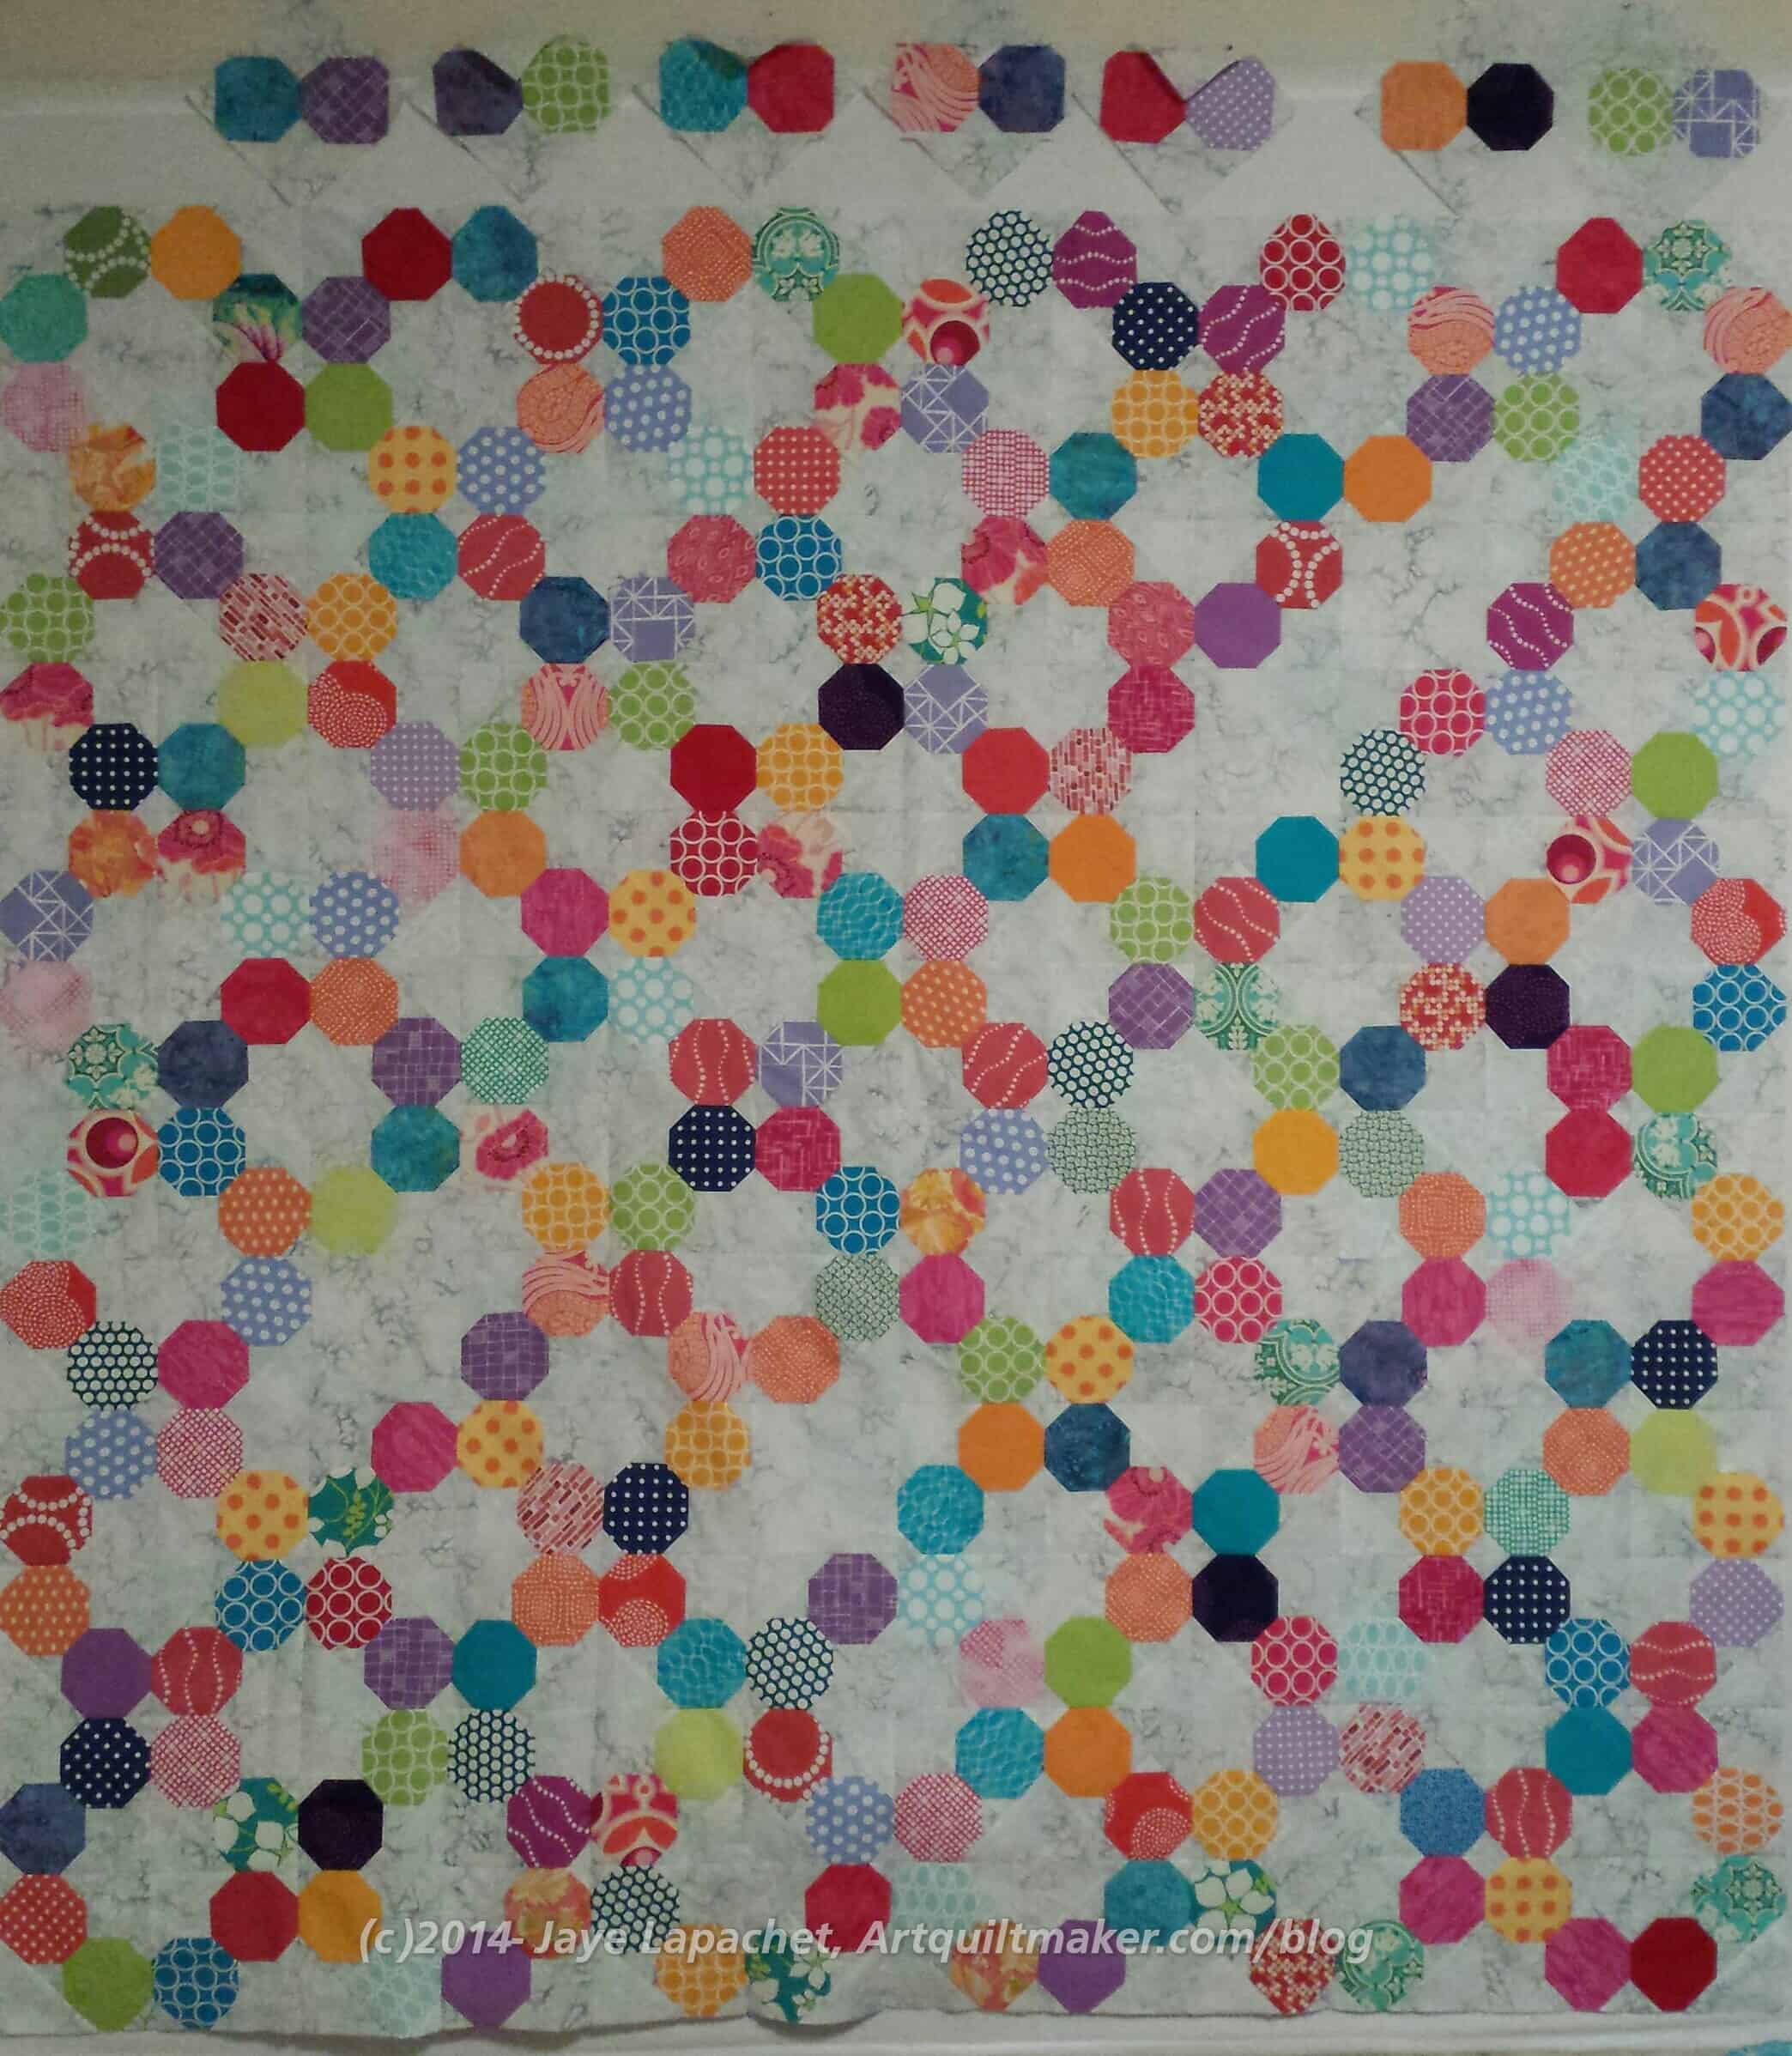
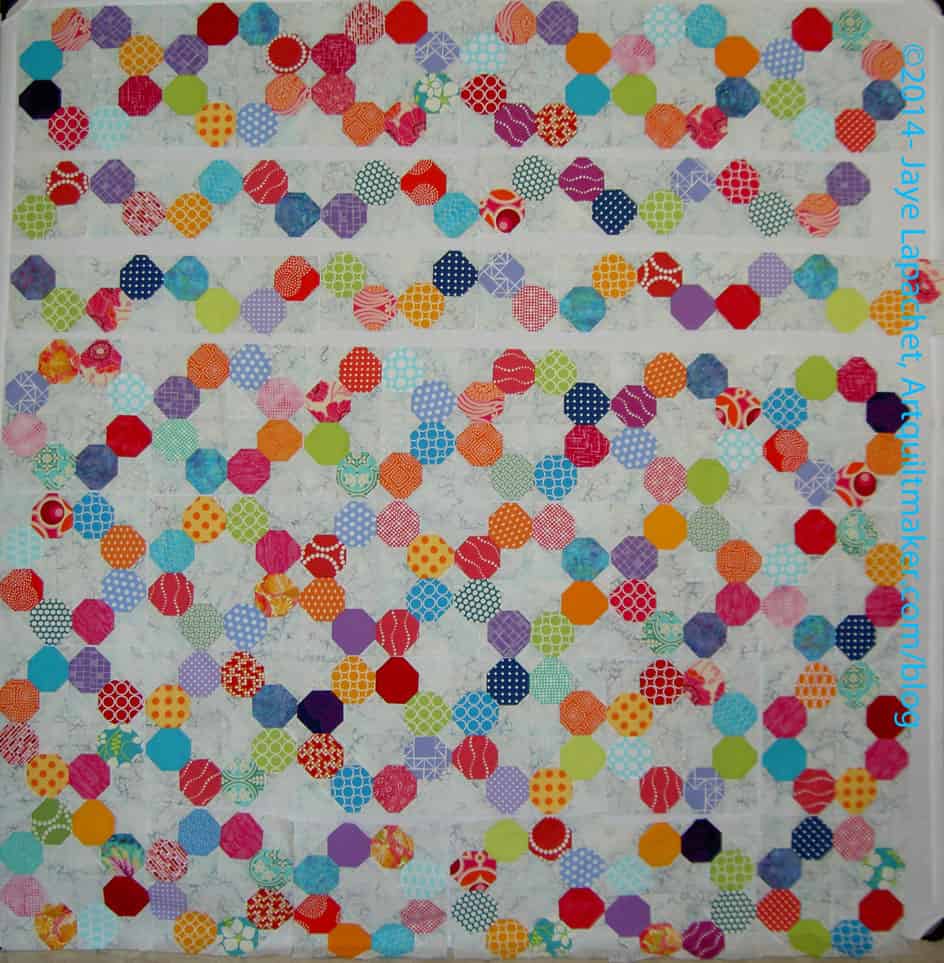
So, I got an idea in my mind and as soon as I did the Hell Binding for the FOTY 2013, I put the Russian Rubix blocks up on the design wall to see what my idea would look like.
The idea is to break up one row of blocks and make them look a bit off from the other blocks so the quilt is not as boring. I would put some of the grey in between the full ring rows in order to highlight the difference.
I put the separated blocks off center from the full blocks. I don’t think there is much differentiation and the parts still look like blocks and the blocks still look like rings.
Seeing it all up on the wall like this makes me think that I should just put the whole thing together and be done with it. I have already done a lot of work on this project and I don’t want to ruin it. I am also ready to be done with it.
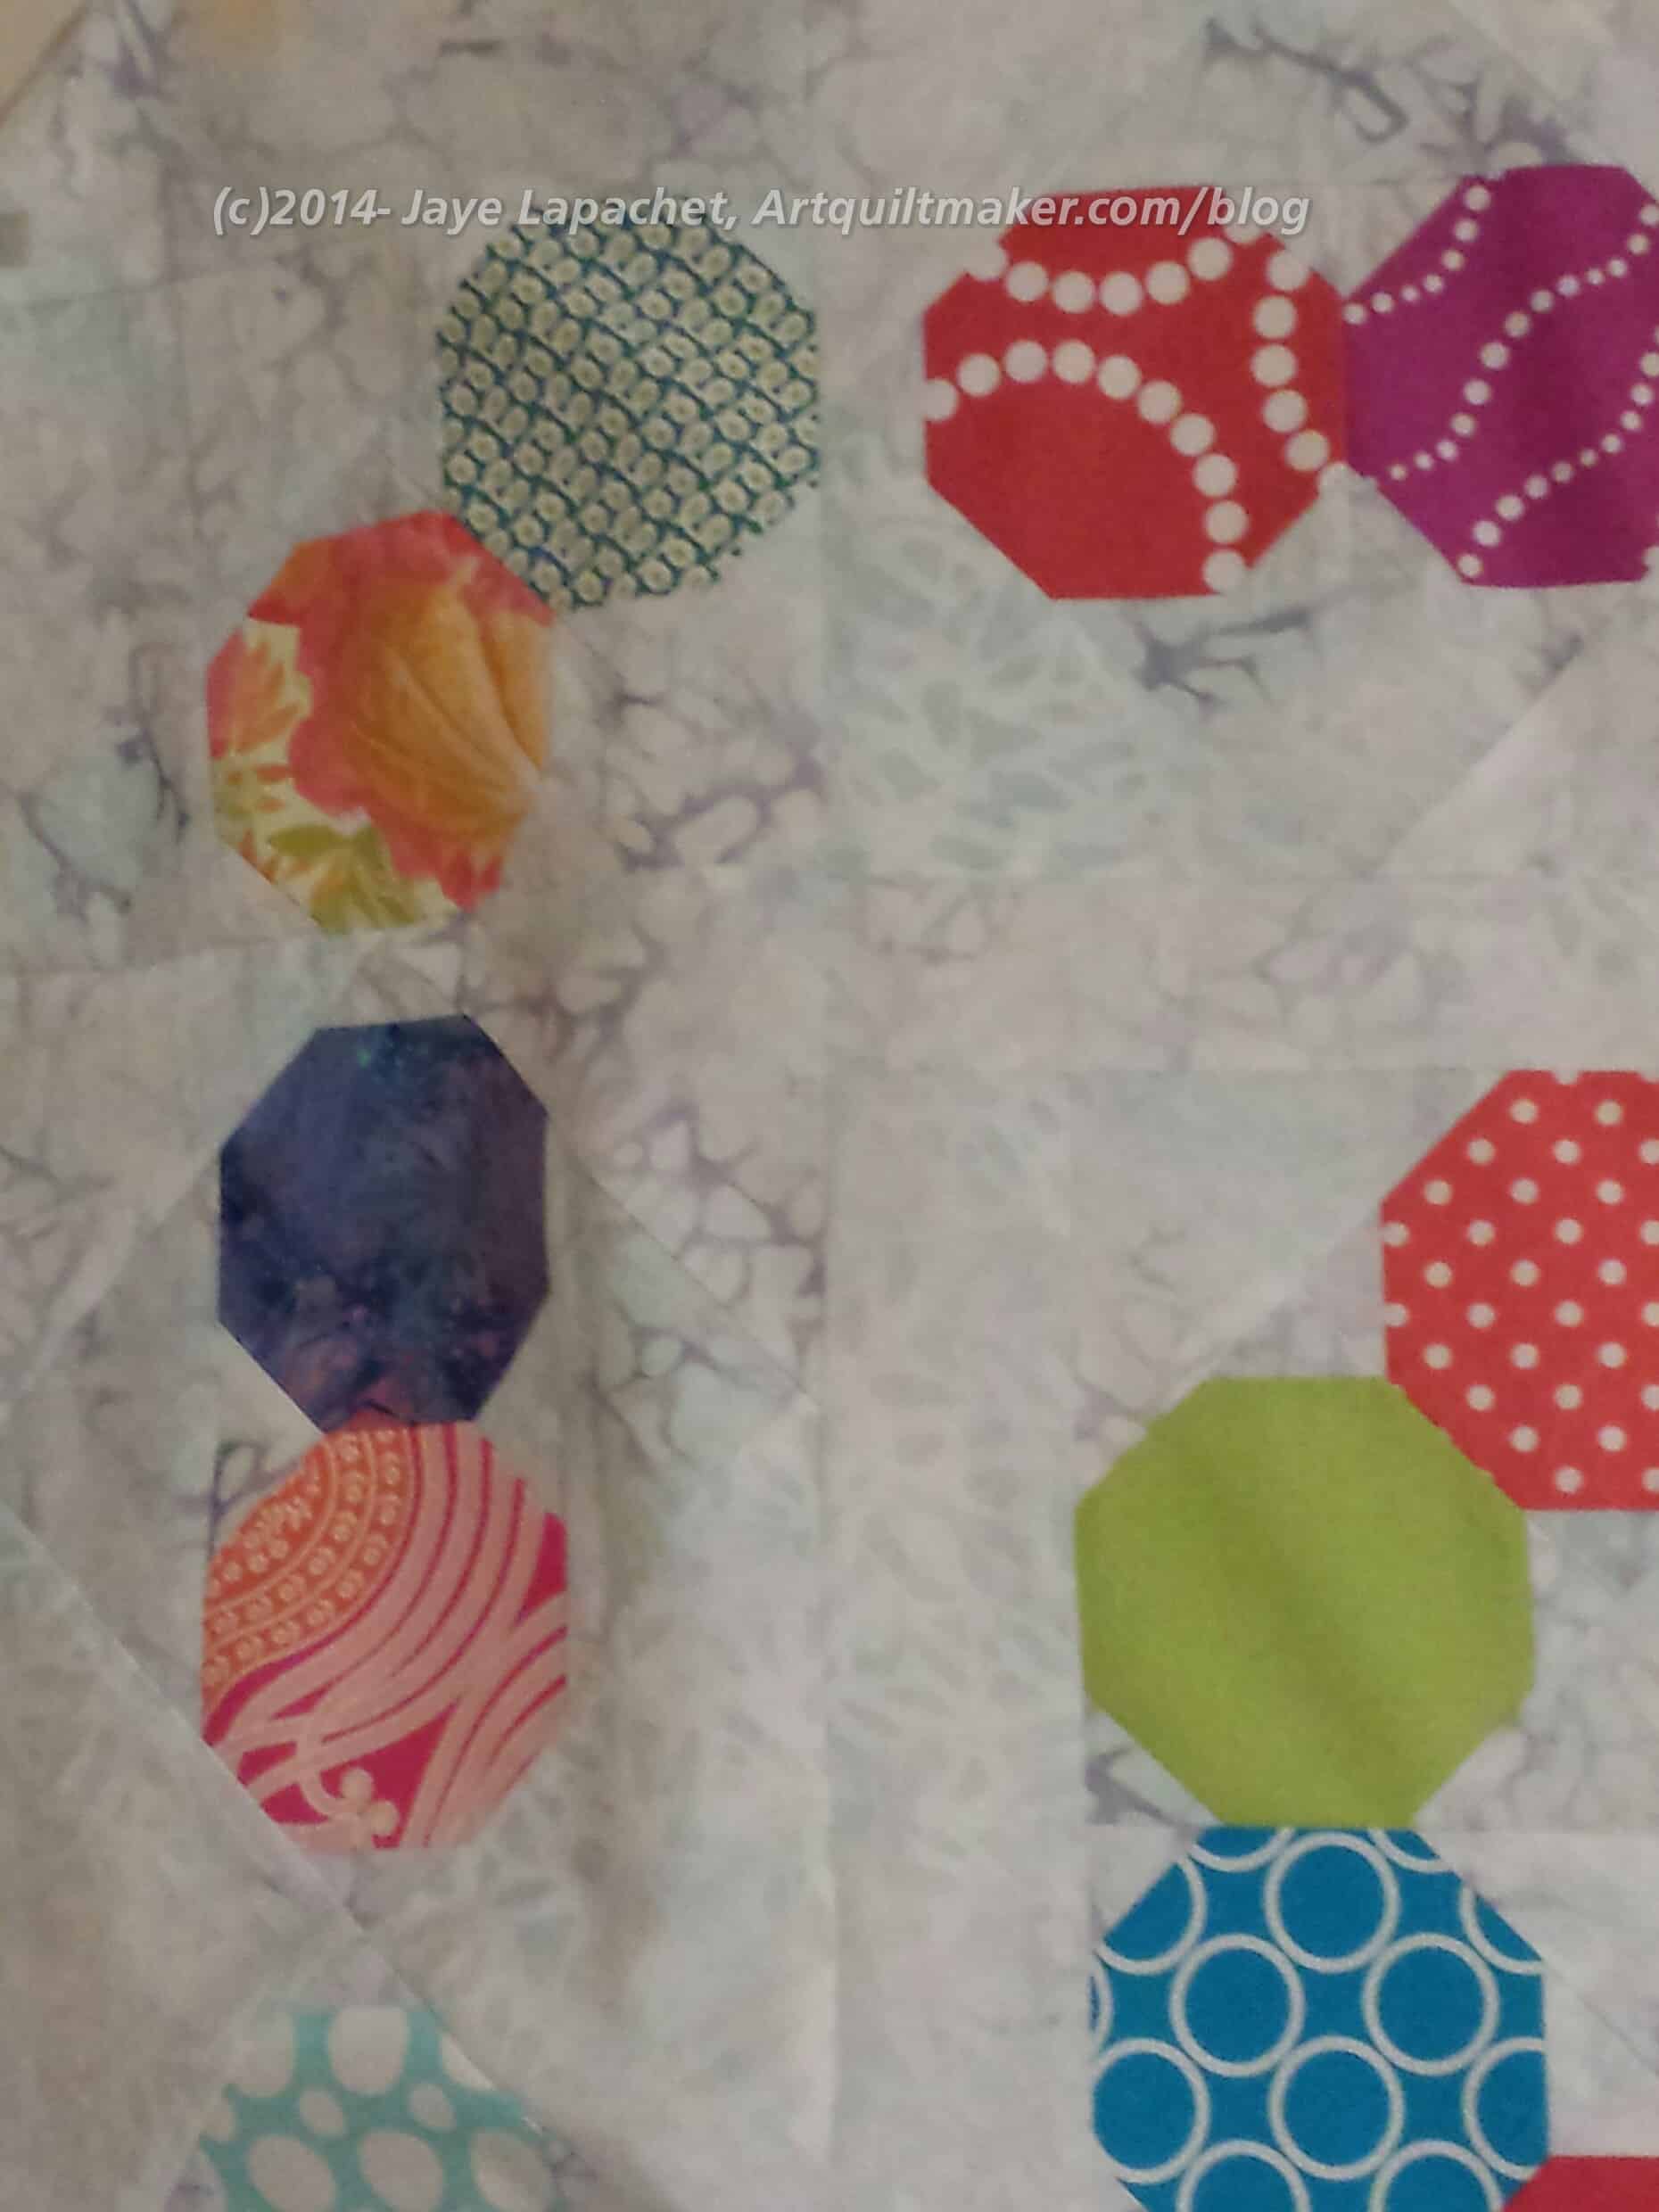
Russian Rubix Pieces & Parts
Alas, I have a ton of pieces and parts that which have not yet been made into blocks. What would I do? Make a second one? Cut squares out of all those octagons? Donate to charity?
Nota bene: I was kind of shocked that there was a dearth of posts at hte beginning of August. I feel like I have been working on this project all the time. I realized that I had been making parts with leaders and enders and not really making discernible progress until I put a bunch of blocks together.
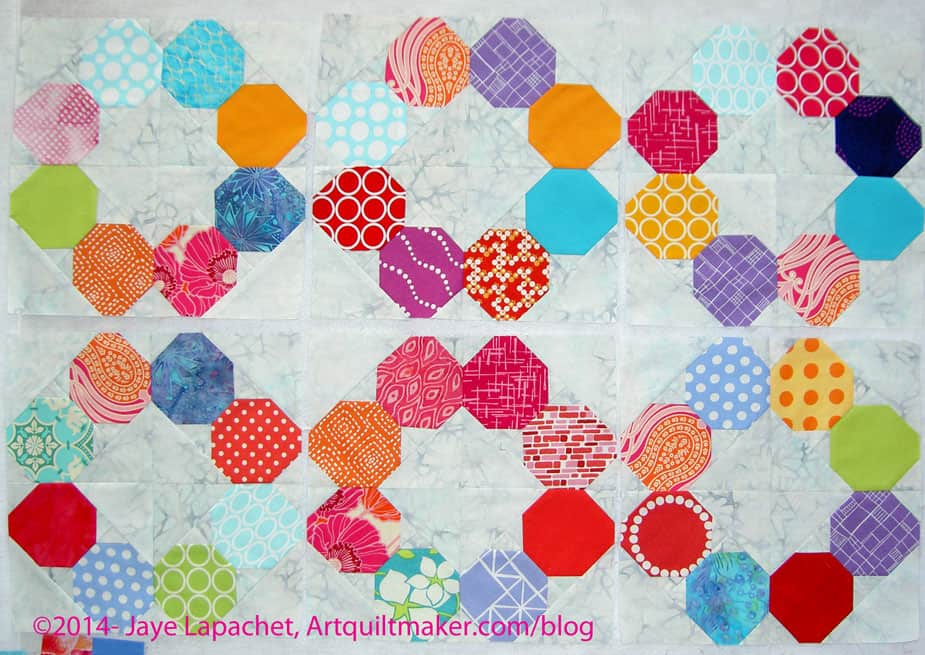
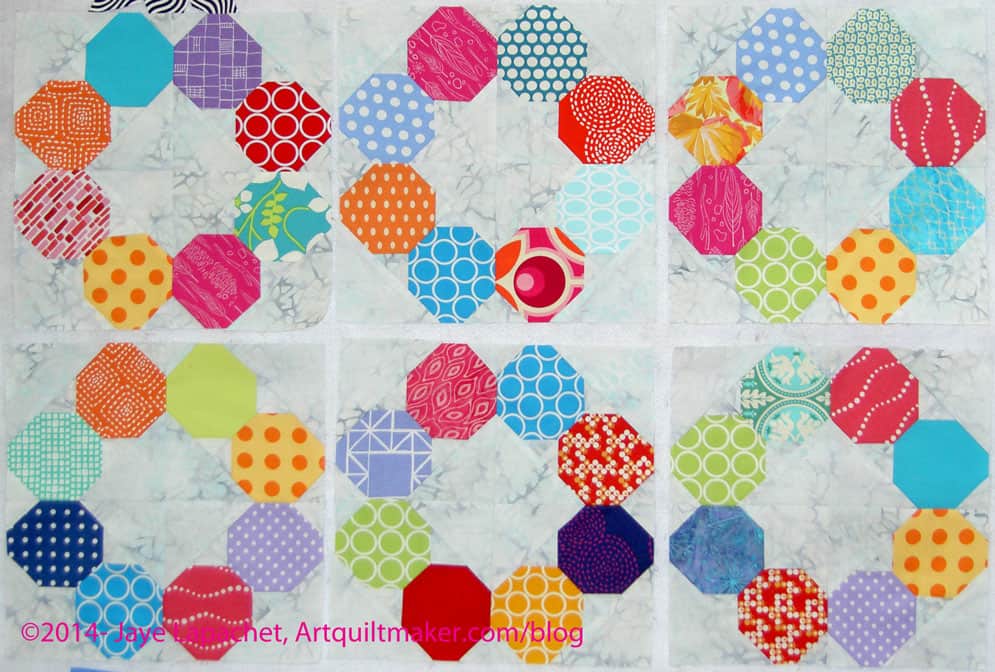
Another project I advanced was the Russian Rubix project. I made the six blocks you see on the left, but I also made parts for other blocks.
In the course of making the parts, I got an idea to make the quilt more than just a bunch of blocks. As soon as I get the FOTY 2013 top off the wall, I will try it out and take a photo.
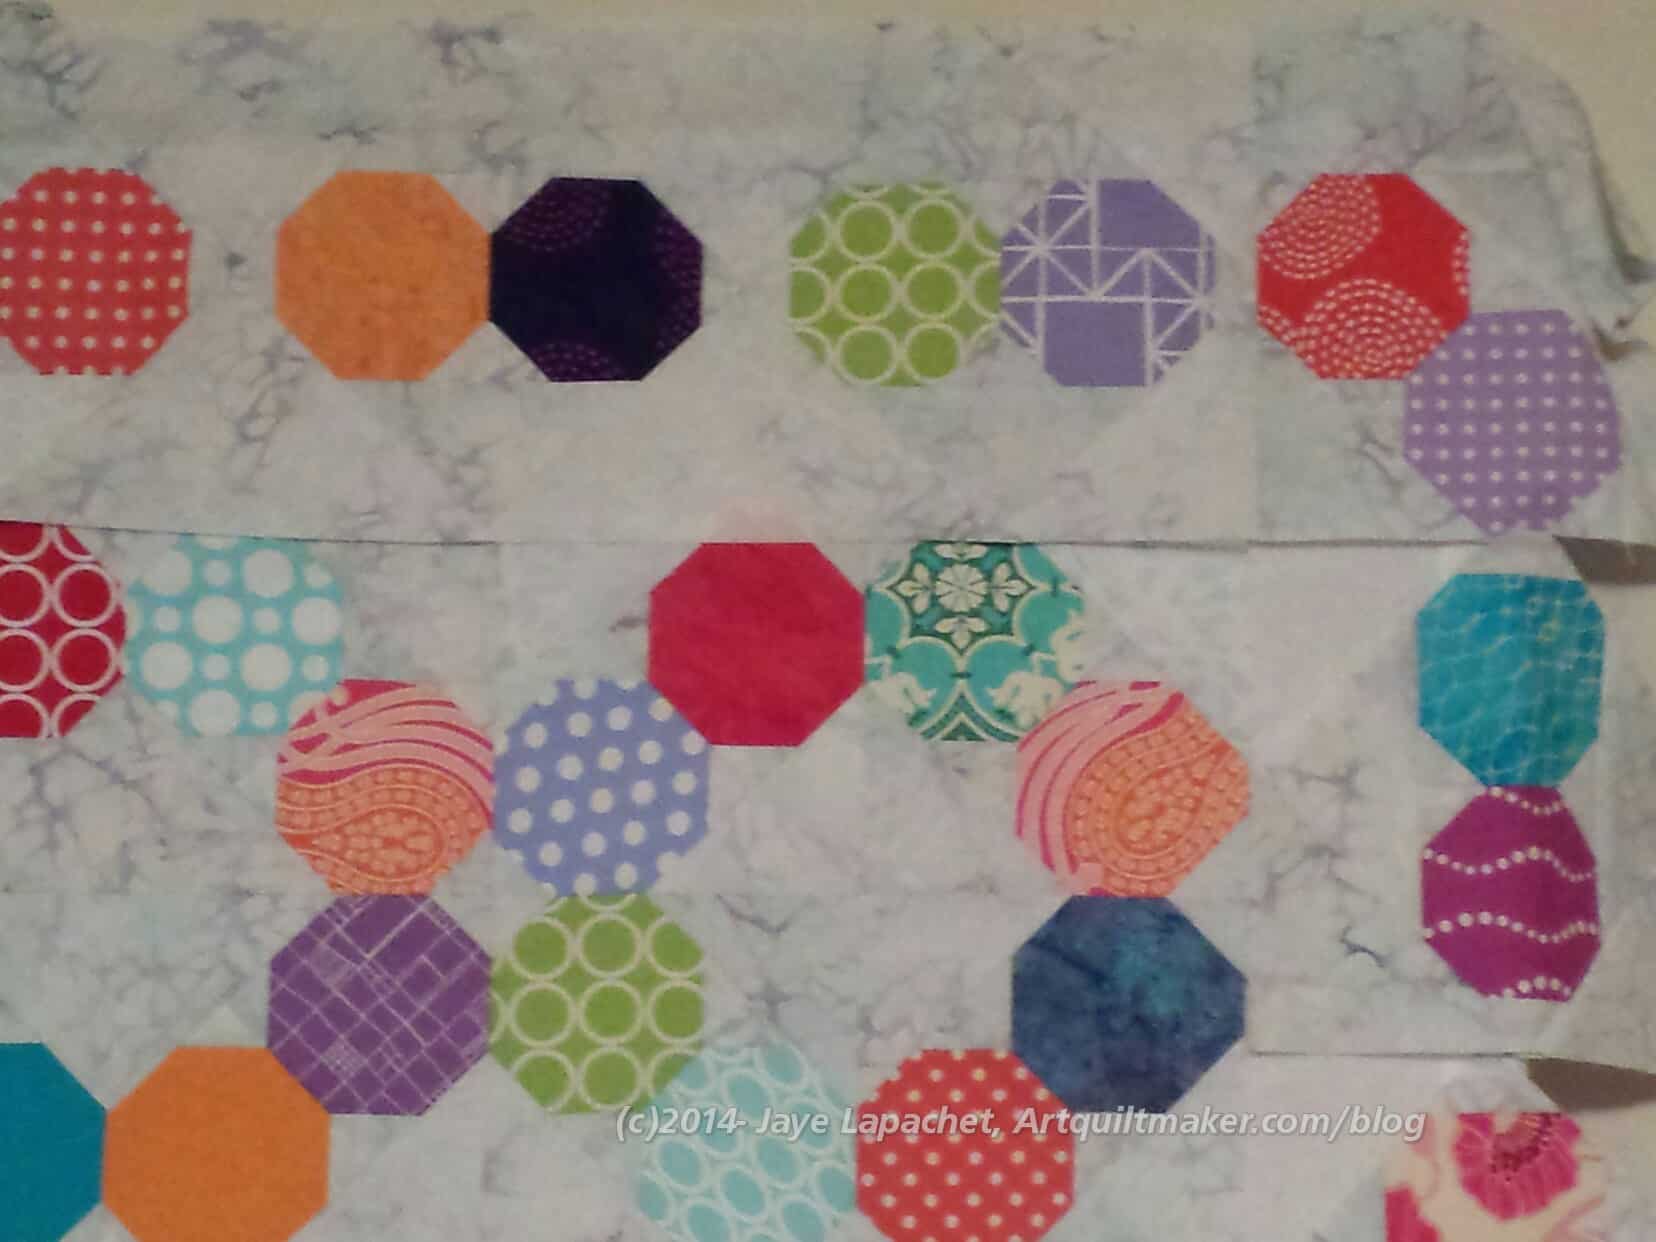
Possible Border?
The above is just a Photoshopped version of what I am talking about, but I think that adding in a couple of rows like the above, perhaps spaced with a thin piece of background in the middle of the blocks will make the quilt a lot more interesting. We’ll have to see.
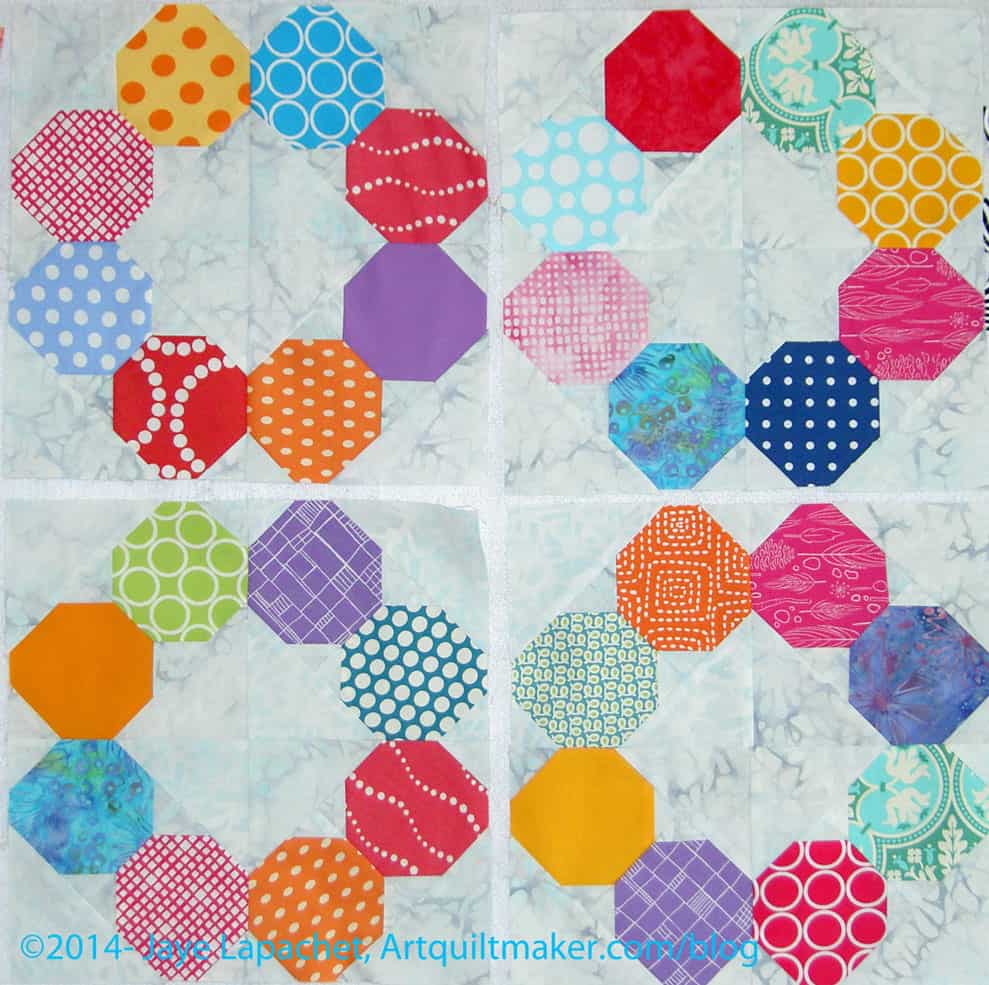
These blocks had been sewing into quarters and placed on my design wall, where they stayed like that for weeks. I think I had some sort of grand illusions of adding in different colors or something. Last weekend, I just sewed them together, photographed them and put them in the pile with the other blocks.
There will be other opportunities for messing with color on this project and I was sick of looking at these blocks. I also wanted to make progress on shuffling around the stuff on my design wall.
Weekend RR Blocks
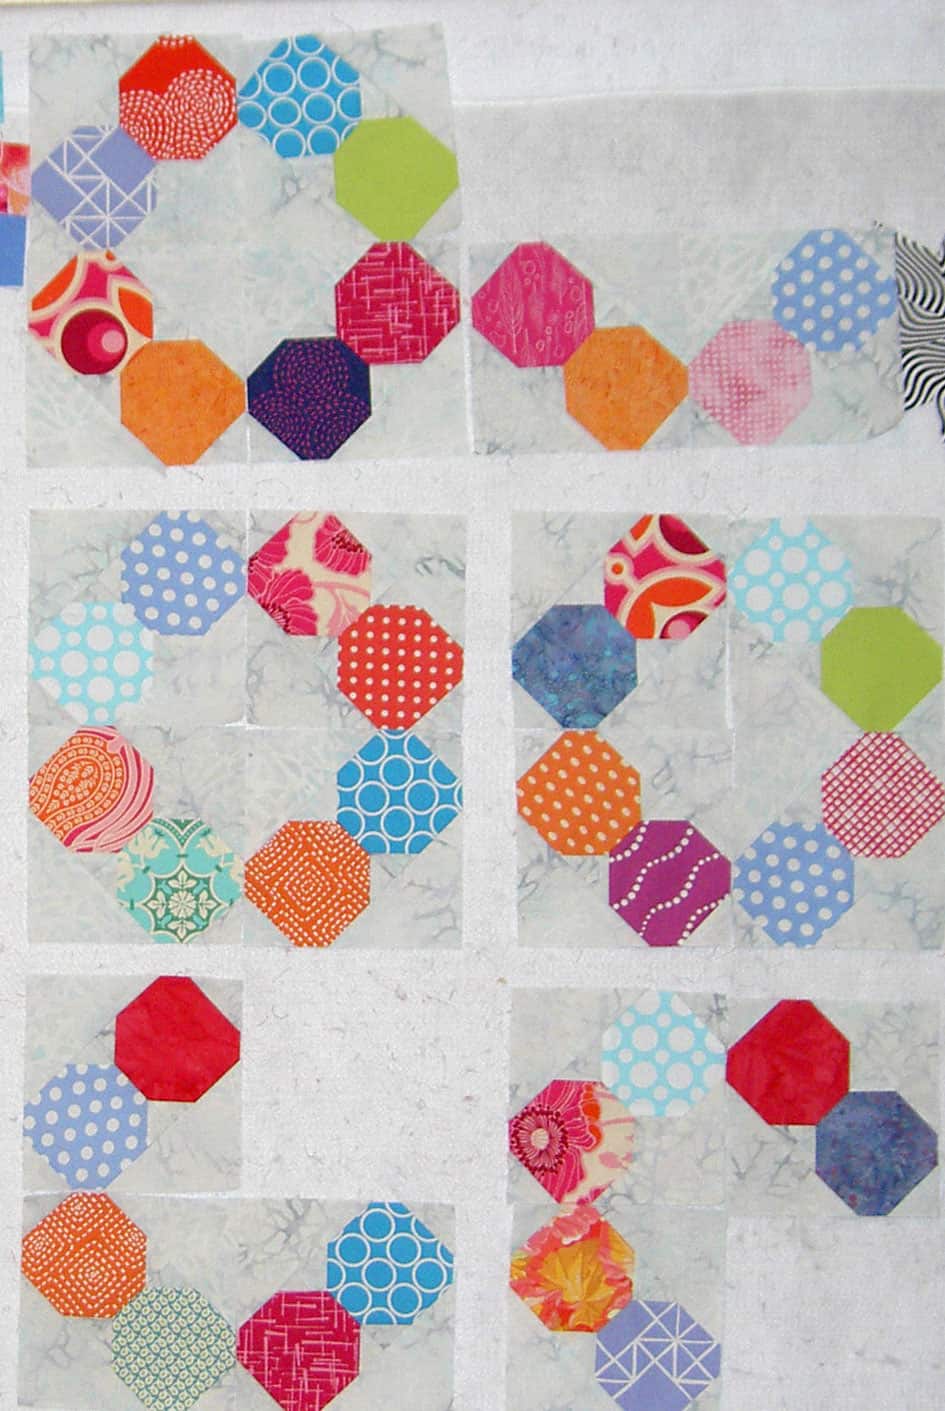
I sewed a lot of triangles to octagons, but many of them are not finished. For the ones that were finished, I started to put them together into quarter blocks and hang them on the design wall. I thought I might be able to sew a few more blocks, but the quarters were just about all I could manage.
As you could see from my Design Wall post last week, I worked a lot with cool colors, which meant that the quarters had a lot of cool colors. I tried to keep the cool colors in each block to a minimum, but still have some arranging to do.
I am still wondering about the ratios of colors in blocks. I have a lot more warm colors to work with. Intuitively that seems to mean that I should put more warm fabrics in each block. Practically, I don’t know.
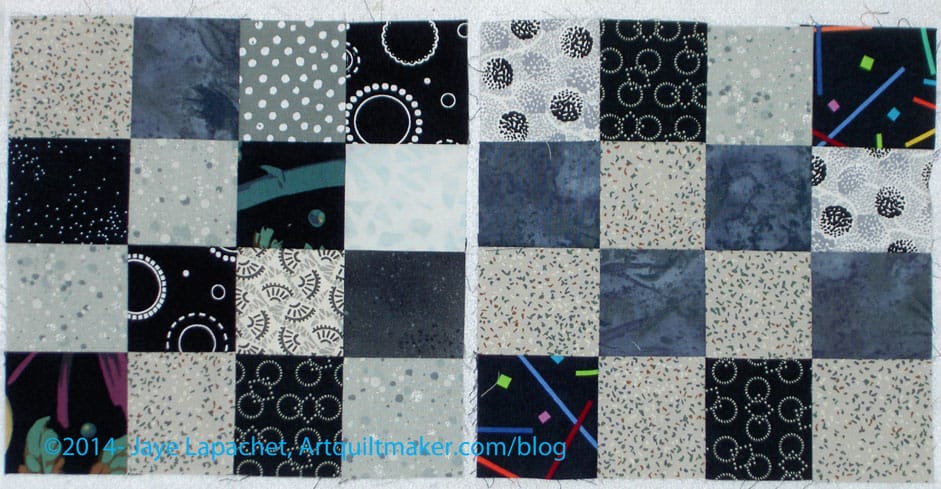
I think I am back in the saddle with the Black & Grey donation blocks. I haven’t really worked on the piece since February 8 of this year. I feel bad about that, but I can only do what I can do. I figure that doing something slowly is better than doing nothing.
I have about 15 blocks now and am still thinking of making a teenaged boy donation quilt. It feels dauntingly large, though and I don’t know if I can make all of those blocks. Again, I have run out of a lot of choices of different fabrics, which I know won’t matter in 6 months, but now feels constraining.
I’ll just keep plugging away as best I can and see how it comes out. Kelly offered to help and I am hoping she has made some blocks to add to mine to spice up what I have made.
I am not ready to piece yet, but I am so much farther along than I was when I last checked in.
I know a number of you liked the falling water/color gradation effect, but process wins and it wasn’t working for me.
This is so much better. I couldn’t have done it without the work I did on the first version. I did extensive sorting of the colors, as you may have noticed if you enlarged the photos and looked carefully. I expect that most of you didn’t have time and will just take my word for it.
The extensive sorting that I did really helped me leap frog over the preliminary shuffling that I have done in the past. I’ll have to keep that in mind for the future.
I still have a lot of work to do, but I am feeling better about the piece.
As I mentioned, I was avoiding the Petrillo bag on Saturday and ended up working on this project.
One of the annoying things about this project is that it takes 36 seams to make a block. This means that I sew and sew and sew before I make any progress.
On the good side I sew and sew and sew and then, all of a sudden, I have 6 blocks done. It is nice to see the blocks once they are done.
I have been trying to work through each color and then attach it to a different color to avoid duplication when making the 2-octagon subunits. It doesn’t always work and will look better once I have all the blocks done. The problem is that, in a picture like the one above, it looks like I have used the same fabrics in all the blocks.
To a certain extent I have and it bugs me, but then I remember that I am not going to, necessarily, put the blocks above next to each other in the quilt.
I also get bored with the same fabrics, so I try and move through the stack of colors so I have more from which to choose. As a result, I have some quarter block units to put together still and octagons waiting to be paired with other octagons.
The progress continues, though I only have 10 blocks at the moment. I will keep sewing and make more.