I don’t consider FQ size pieces of fabric to be scraps. My scraps are small. I have had some larger pieces of fabric that get lost in my fabric bins, so I have cut them up into as many of my normal sized pieces as I could. With additional large-ish pieces, I have also, now, cut some rectangles.
Rectangle pieces for donation top
These rectangle pieces have been hanging around for awhile. I finally had enough to make a donation quilt.
So far, they are just on the design wall. I need to cut white or background pieces, hopefully from scraps also, to put the top together.
I know it seems like this bag is taking forever. It is sort of, but I have been diligently working on it a little at a time in between working and managing the house. This is turning out to be quite the complicated bag. In addition to all the pieces I had to cut there is a lot of other prep before I am able to start sewing the actual bag itself together. Oddly, I am not in rush to finish. Usually, I am, but for some reason I am ok with how long this project is taking.
I am sure it will be worth it.
Hildegarde interior detail
After all the cutting and interfacing, I had to make the dividers. These dividers were a little complicated and I wonder if they were unnecessarily complicated? I guess I’ll see once the whole bag is together.
I am pleased with the front section elastic. I thought the way Sara told makers to put this together was really clever. I am a bit confused about the top part – the ‘slots’ are larger – but I am sure it will work out. I have to wait and see.
This is a Sew Sweetness pattern. It is part of Minikins Season 4 bundle. You can see the various projects I have made from the Minikins patterns on the Minikins page.
I finished all the blocks for the Ombre Weave and think I will change the layout to highlight more of the Os that show up in the design. The red I added looks good. The piece overall isn’t as depressing as it was before.
I was able to look at all the Ombre Weave blocks on the design wall.
I was somewhat surprised at how much brown and beige there was in the roll I bought. I never really cataloged the colors, but I always thought it was all the colors. Now I realize there are some significant hues missing such as RED.
This is totally my fault for not noticing years ago when I bought the roll. Still, it is not fatal. I got a small piece of red (cherry? cranberry?) and will add it in to the mix.
I have some other blocks I need to trim and then I will add those as well.
You can see that the small design wall is filled. I still like the improv pieces; I just haven’t gotten back to them, though I have a few more scraps to add to each one.
The Ombre Weave blocks are there to remind me where I am going. I have 40 of those blocks sewn already. I might need to get more fabric as the blocks are small and I don’t want to make a miniscule quilt for a teenager.
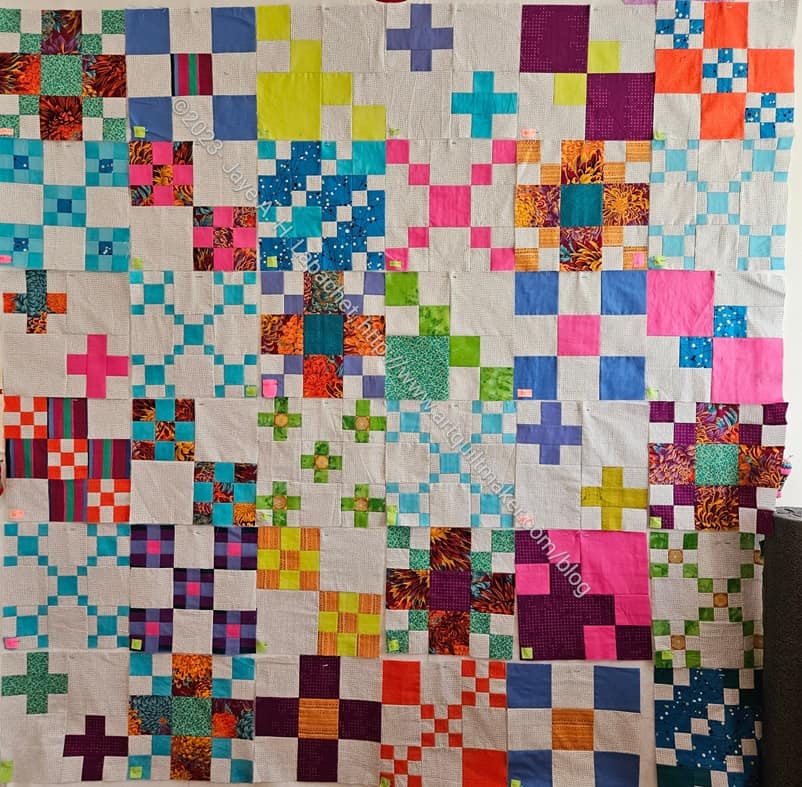
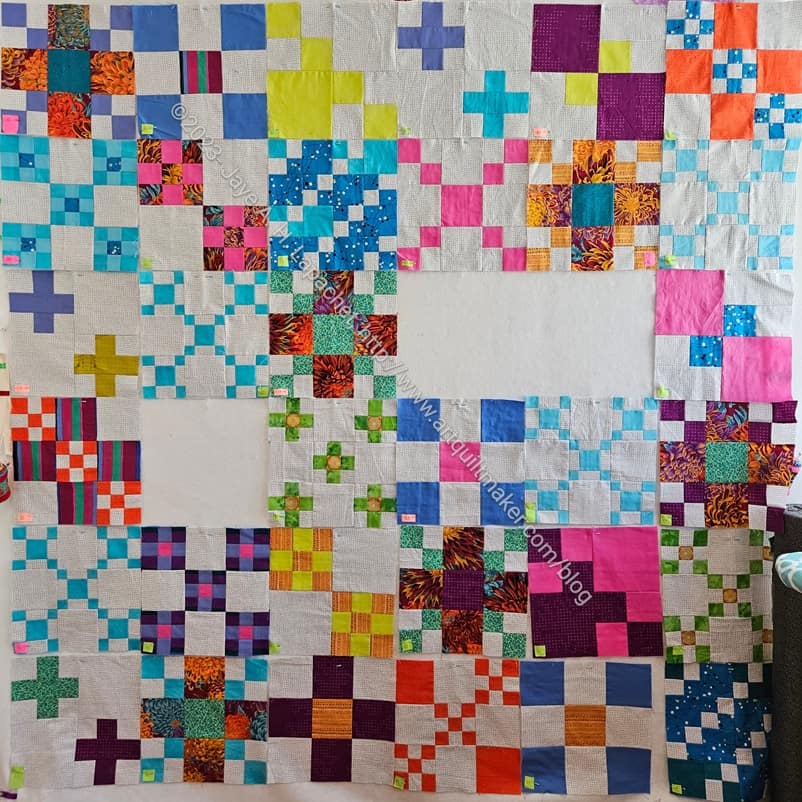
Pantone Project – almost layout
On the large design wall is the Pantone Project. I haven’t made any more progress since my last post, but progress is coming. It is too long and thin, so that is one challenge that needs to be resolved.
This all means there is no space to lay anything else out. I guess I should work on these projects.
I was thinking about what to piece next after making some pillowcases. I was thinking of starting the Ombre Weave** pattern, which I bought at Stitch in Ferndale. If I started that new project, I would have to take all the pieces of the Pantone Project off the design wall. I thought that was a bad idea since I didn’t want it to become a permanent WIP. Been there done that.
I decided to work on it a little at least and then see what happened.
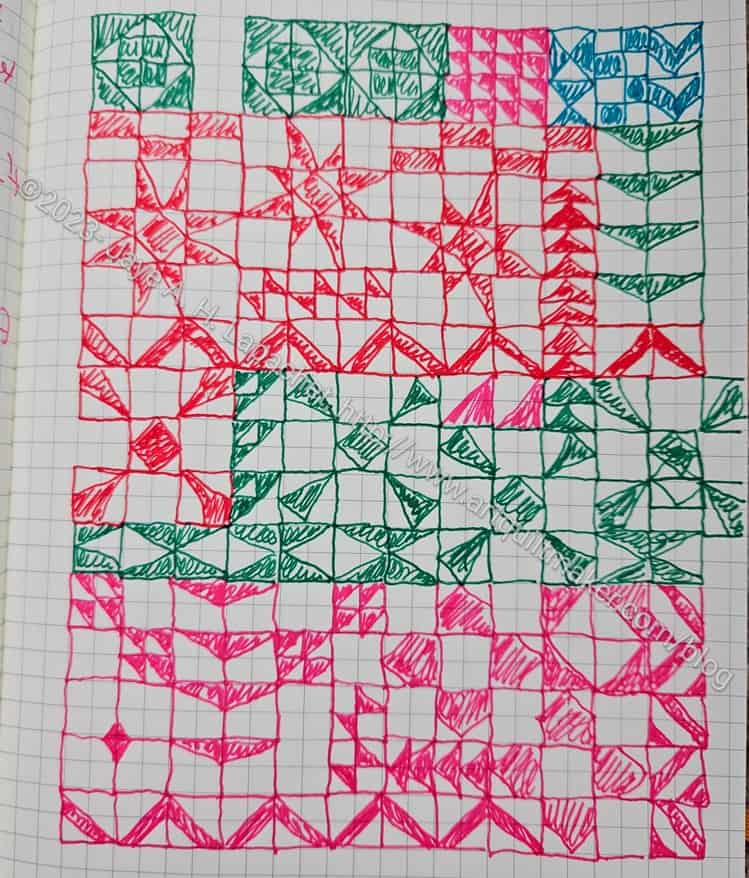
I wasn’t that happy with my previous layout ideas, Design #1 or Design #2, for the Pantone blocks. I took all the blocks down and started over with the design I drew in my journal. I liked it on paper so I thought it would be a good place to start.
Pantone Project – almost layout
It really is a good starting place. I am pretty pleased with the design as it is shown in the photo, left. I tried to duplicate what I had drawn with blocks and I am ok with the way the fabrics look. I couldn’t do everything as I don’t have enough of some of the parts, but I made due.
It isn’t perfect yet. The top right hand corner, for example is a little heavy while the left upper corner is a little light. Still for an hour of work, it looks like I can almost start piecing.
I might still start the Ombre Weave quilt and do both at the same time.
**Obviously, you should shop at local fabric, knitting shops or quilt shops. However, if you can’t, please know that I use affiliate links. I may be paid for your purchase of an item when you click on an item’s link in my post. There is no additional cost to you for clicking or purchasing items I recommend. I do not recommend items I don’t like. I appreciate your clicks and purchases as it helps support this blog.
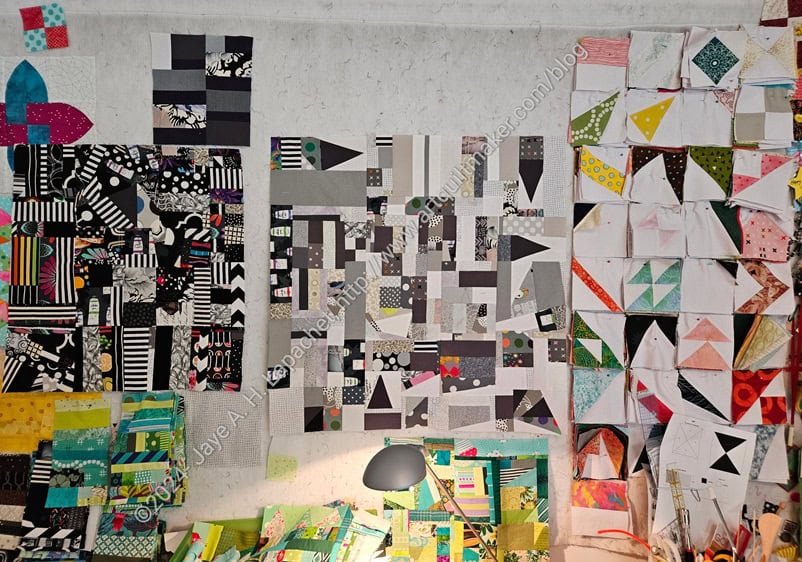
There are three big projects on my design wall, but a slew of littler bits and pieces as well.
It looks really messy, but there is a method to the chaos. I am still looking forward to getting some of those projects off the design wall, so the projects that are left have a little breathing space.
Small design wall – June 2024 – numbered
1. That is a lone turquoise and red 4 patch. I really like it and keep trying to think of how to use it or whether I should make a bunch more. I don’t currently cut 2×2 inch squares, so that would be an addition to my cutting chart.
2. That Rock Star block from Sew Kind of Wonderful is made with the Wonder Curve Ruler. Unfortunately, I was not able to find a link on their website to the sampler. I guess they never made it into a pattern. Too bad. I am planning to make a ruler sampler to fulfill part of the BAM President’s Challenge.
3. That is the black improv piece that will be a donation quilt, but I haven’t gotten back to it. It has grown since I last mentioned it in April, but it isn’t finished. I think I will clear out the green bin, then see if I have enough black to get back to this quilt and finish it. I made one small piece that will be added. I actually made it for the grey improv piece (#4), but decided it was too dark and will add it to the black piece.
4. That is the grey improv piece that will eventually be a donation quilt. I haven’t gotten back to it. It has grown since I last mentioned it in April, but it still isn’t finished. I plan to clear out the green bin, then see if I have enough grey to get back to this quilt top and finish it. I made one small piece that was too dark to be added. I like the lightness of the grey piece. It won’t go to waste. I will add it to the black improv piece.
5. Pantone Project blocks. All the blocks are now done and I am about to start putting them on the design to arrange them to make a quilt. I drew some ideas, which I thought were pretty exciting. I can’t wait to see how they translate to a quilt, or IF they translate to a quilt.
6. These are the rest of the green strip blocks that are not currently on the large design wall. I have enough to make another quilt of green strips blocks and then will have 1-2 leftover for the next Rainbow strip donation quilt.
7. Random piece of grey fabric from the Scrappy Celebration quilt. I LOVE this background and wish they still made it. I think this is my last piece.
8. This is the start of some green 16 patch donation blocks. I got sidetracked by the green strip donation blocks. Scraps win over 2.5 inch squares every day.
9. The start of the green improv donation top. It is emerging as I run out of strips and just have small scrap pieces of fabric.
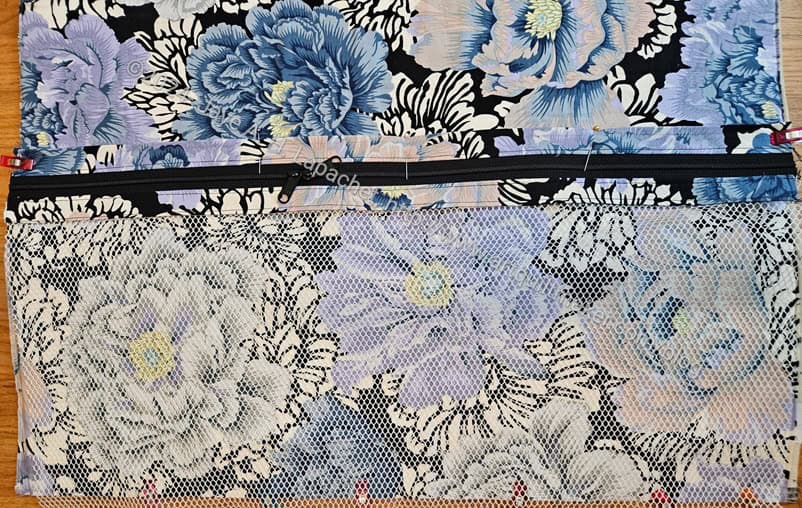
I made some progress on the Retreat Bag over the last few days. This is the mesh pocket shown where it will go on the bag. You can see where it is if you compare the Brocade Peony fabric on the top and the bottom.
I used white mesh, so the colors in the bottom of the photo are a little duller.
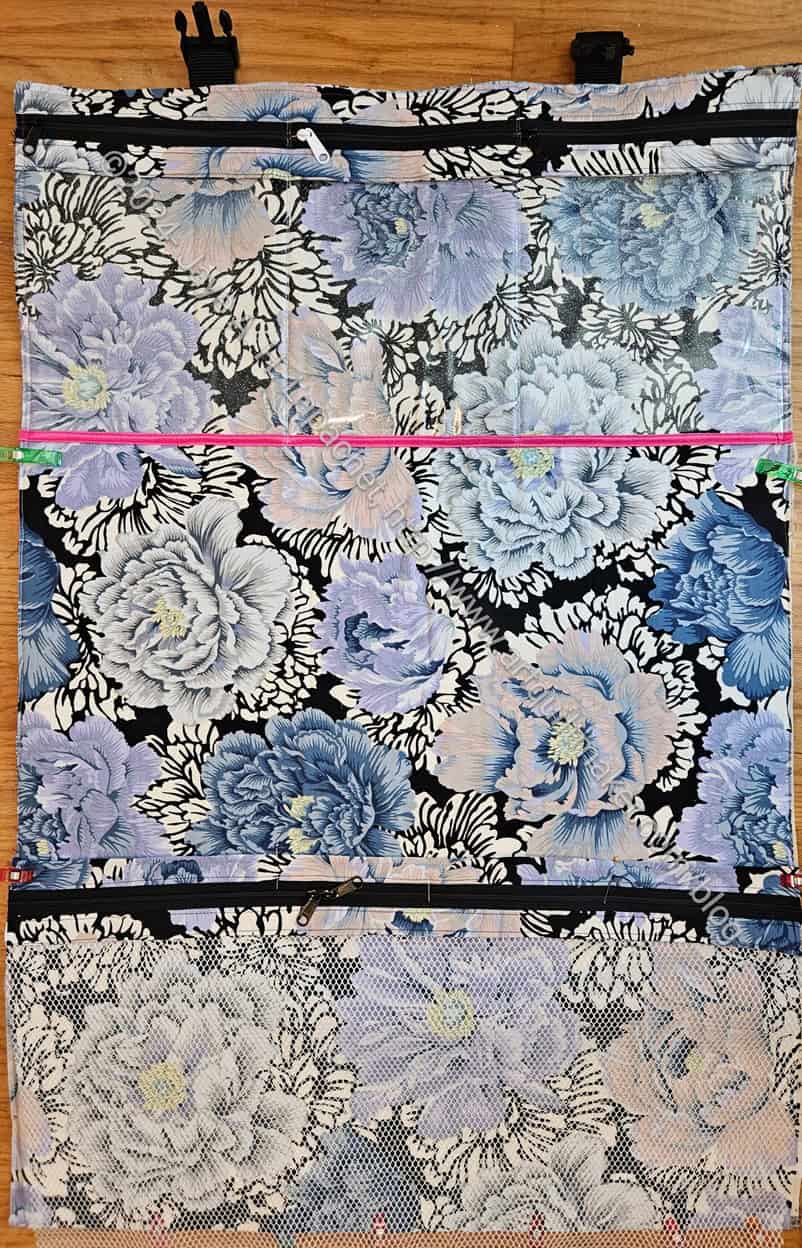
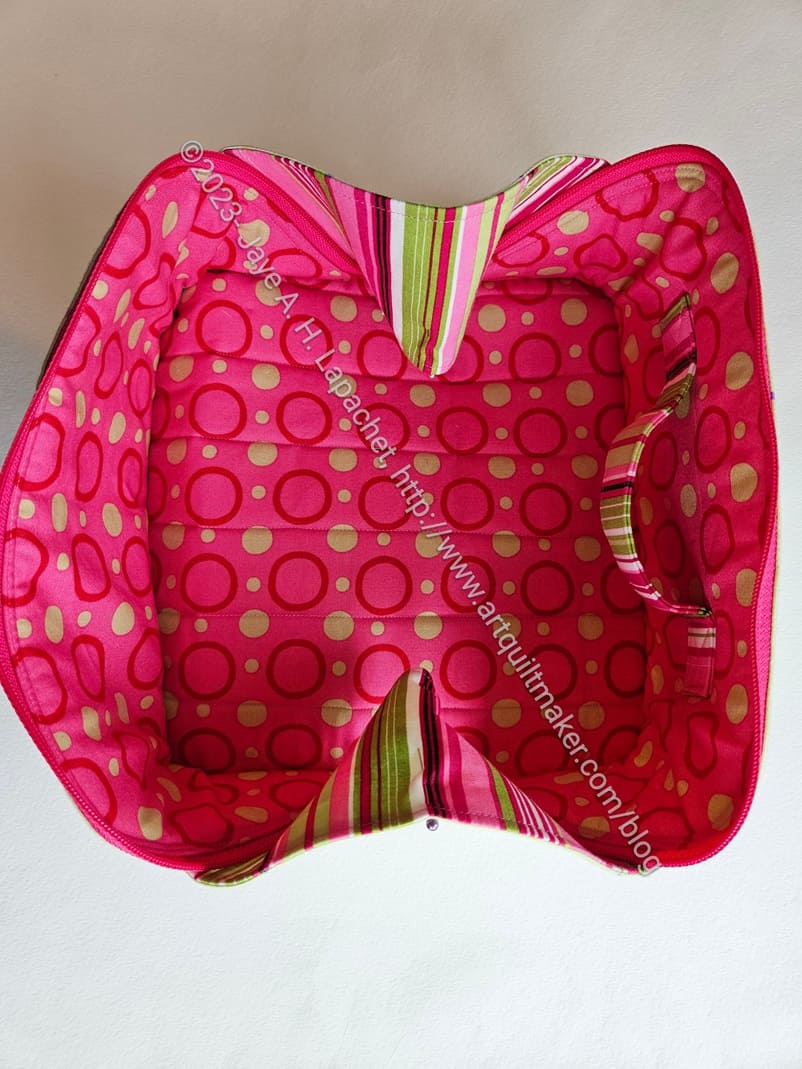
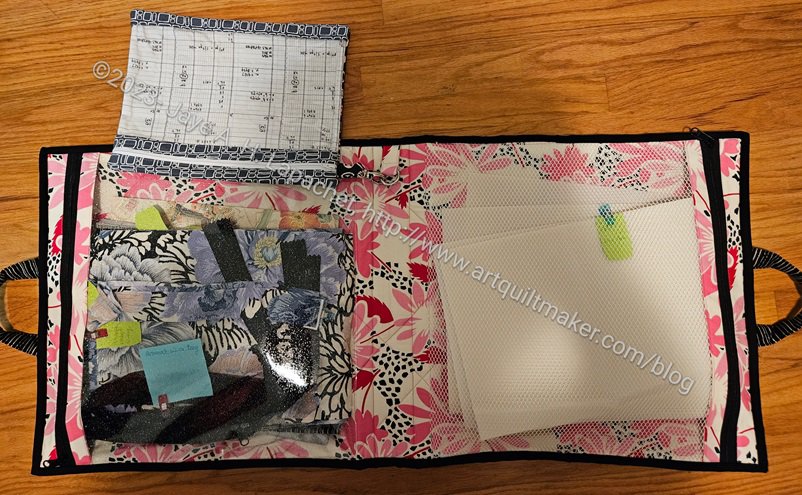
Retreat Bag interior
I actually sewed this on to the main part of the Retreat Bag, but I sewed it upside down, so I had to rip it out and now it is just clipped where I want to sew it.
I thought about not ripping it out and opening the bag like a book, but decided it would be handy to be able to hang the bag up and not have the zippers on the bottom.
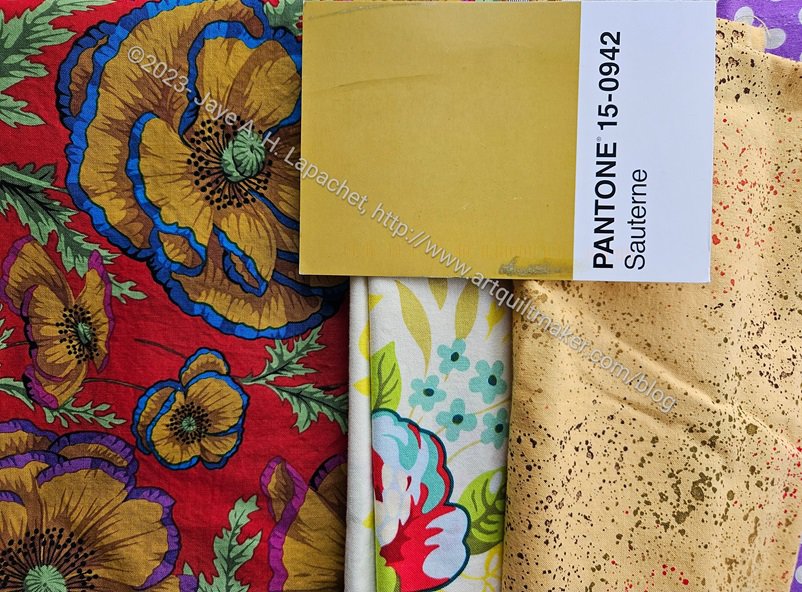
I received Sauterne with a heavy heart. Not for the message, which I always anticipate, but for the color. Another color I almost never use and never buy. Amazingly, I found a Philip Jacobs print with that color used for some flowers. It was almost perfect.
This print was the third one I found. The speckle gold is a good type to use for this project, but definitely the wrong color.
In the middle is a Heather Bailey print. Again, those tiny leaves right under the postcard are the perfect color, but so small. I didn’t think it was right.
Pantone: Sauterne in Half Night & Noon
Finally, I found a 10×10 square (I wonder where that came from?) of an Alison Glass print that actually was the perfect color and also the perfect type of print – a tone-on-tone.
I received another postcard today, so back to the fabric closet for more hunting and gathering.
I worked hard on the Enigma Bag over the weekend, but, frankly, projects get easier the more often I make them. This project went very smoothly until the end, when I didn’t quite catch the lining bottom with the sides and had to do a lot of ripping. I think this goes back to the quilting when the fabric shrunk up and left some foam showing.
I wrote myself a note to quilt then cut the piece the correct size. Sara gives specific instructions about that, but my quilting isn’t up to par, so this is my new strategy as I expect I will make another one.
The last time I talked about this quilt was in September! Since then I have been moving the blocks around my workroom in a desultory manner. I last had them all on the design wall in August and they don’t look great. I decided I needed to finish it and my deadline is on Friday. I have a date with Colleen and knowing my work schedule, will be unable to make another any time soon. So, I needed to get it finished.
Scrappy Celebration -what I had
I actually didn’t start from a bad place. I just needed to figure out where I was and where I needed to go.
The photo on the left is what I had when I put all the blocks up on the design wall. I ignored the block labels I had put on based on where the blocks were in the pattern. I rearranged blocks so they looked more appealing and, then, decided what I additional blocks I needed to make.
I worked on it last weekend and made good progress. I am now ready to sew the piece together.
We planned to make the Enigma Bag (Sew Sweetness, Minikins Season 4) together back in November, but life happened, so we didn’t get to it until last week.
I have to admit that the Enigma Bag might be my new Hackney Bag – that is a bag I make for gifts for various people. I like it a lot. I especially like the diagonal zipper and how it opens flat. I haven’t given them to enough people to have feedback.
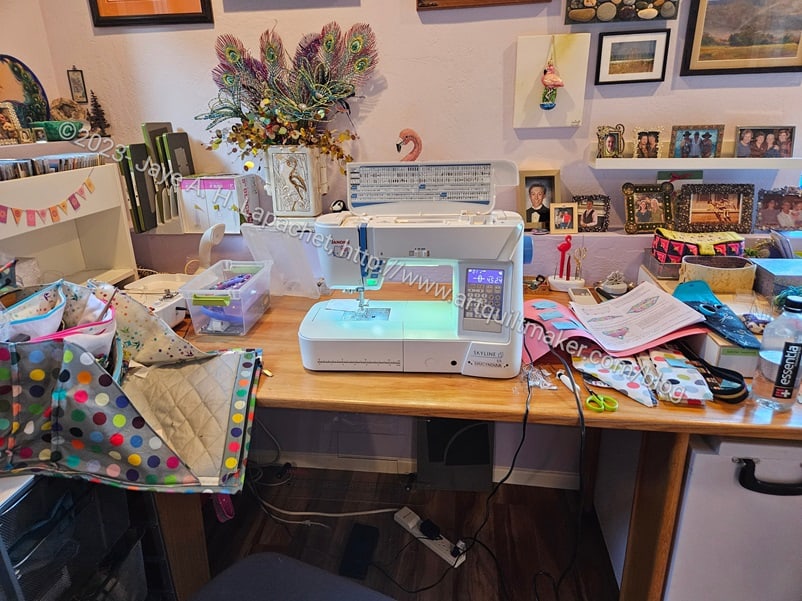
Sewing with Cyndi
I didn’t feel like lugging my machine along, so Cyndi kindly let me use her machine. She has a Janome Skyline and I have to say that it was really nice to use for sewing. The bobbin loading was amazing. I might need to look into getting a new machine. That’s a story for another day.
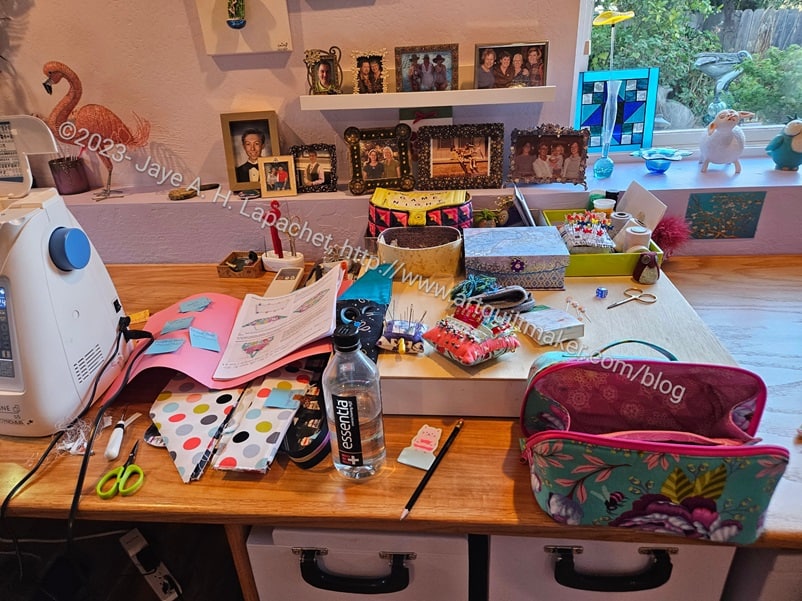
As you can see, I moved in quite completely. My pattern and pieces are on the right and my go bag is on the left.
Sewing with Cyndi – spread to the right
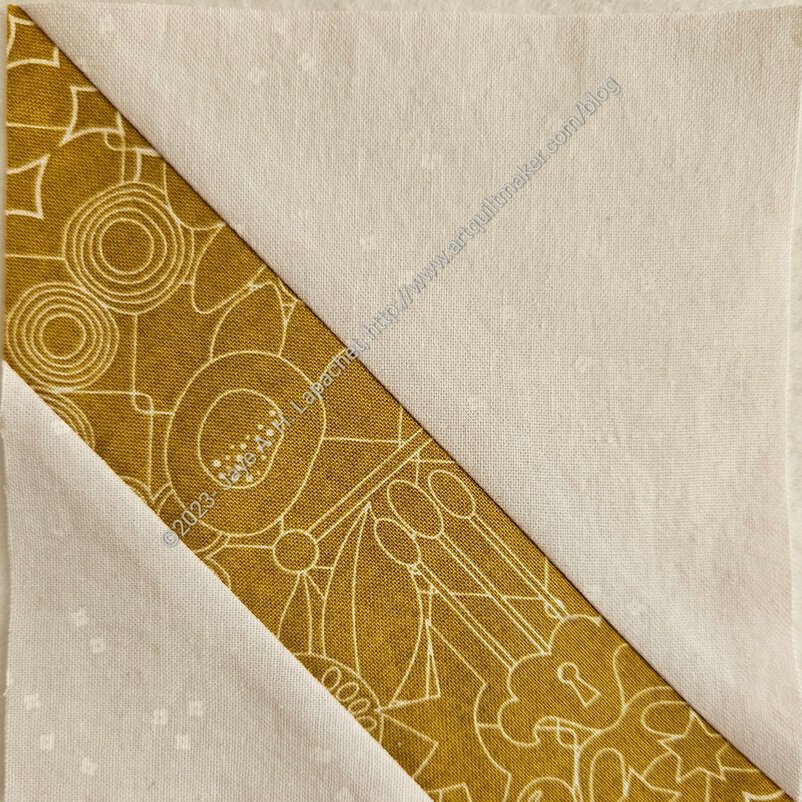
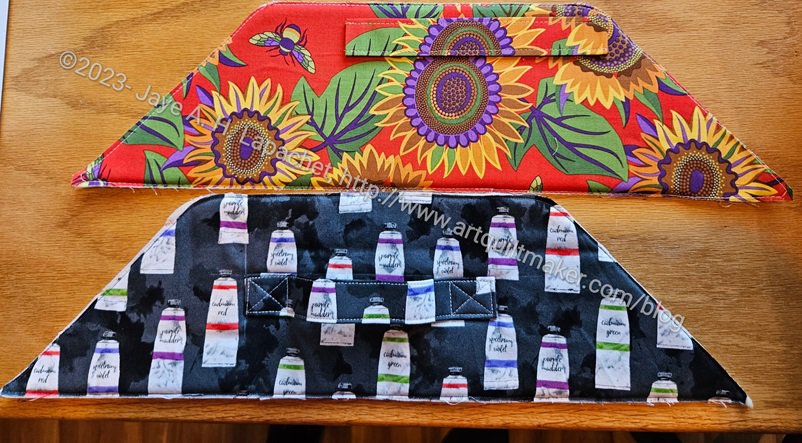
I had done all the cutting and prep for my bag, so I worked on cutting out the Goldenrod book cover, which I decided to make at the last minute, while Cyndi finished her prep. I started a bit before and was able to get to the point in the pattern where I installed the main zipper. I wasn’t happy with it, though and stopped, because I needed to contemplate the zipper in the overall scheme of making the bag.
It was a great day and I enjoyed sewing with someone else very much.
I am still not happy with the Road Trip pouch, but haven’t done anything to fix the position of the clip. At the time I took the photo above, I wasn’t using the pouch for anything. I am not sure where the hardware is for this project, but have another box with all of the 2018 Organizer Club bits and pieces in it, so will look there later.
As mentioned, I am making another Kit Supply Tote. For some reason, I am thinking a lot about this bag. Sometimes, making the pattern a second time gives me new insights.
Over the weekend, I worked on the zippers in addition to the pockets.
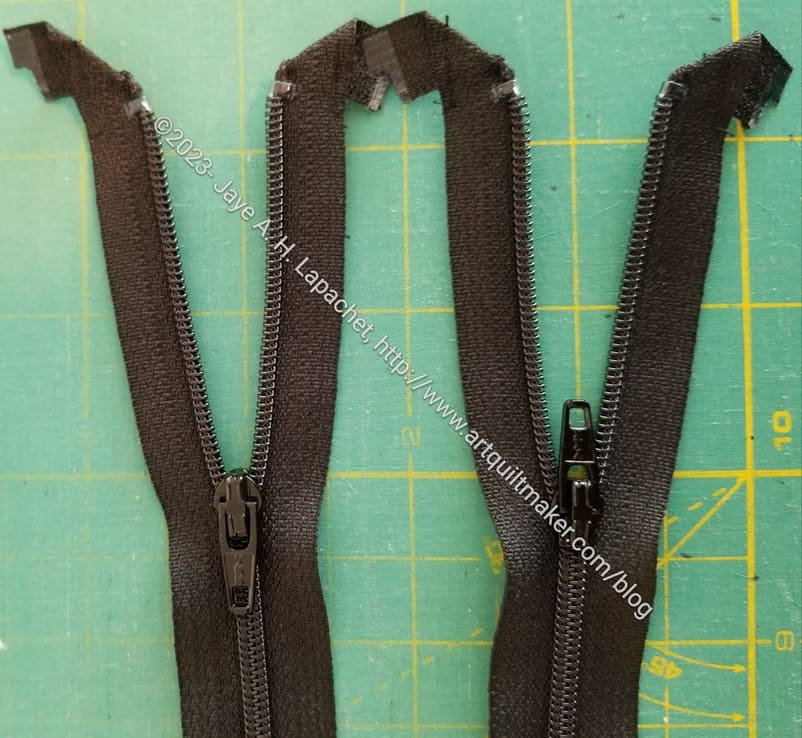
The bag requires one separating zipper. I am getting more experience with them after the UCAB and my own Kit Supply Tote.
Zipper tape at 90 degrees
Some designers have makers fold back the zipper tape at a 90 degree angle. I have always found this problematic. Over the weekend, looking at the pattern, I realized that I didn’t have to totally secure the piece so it would never come out. I only had to secure it enough to keep it in place until I sewed the zipper in. I sewed a few stitches just where the open edge of the 90 degree folded piece. I had no problems with the zipper tape sticking under the presser foot and developing a thread blob.
I am working on another Kit Supply Tote. As an aside, having a model to look at as I make the pattern again makes the second one much easier.
In this case, I worked on the pockets on Saturday night. I modified the pockets in the pattern, because I thought I could add more pockets. I prepared the modified pockets some time ago, but just started to sew them over the weekend.
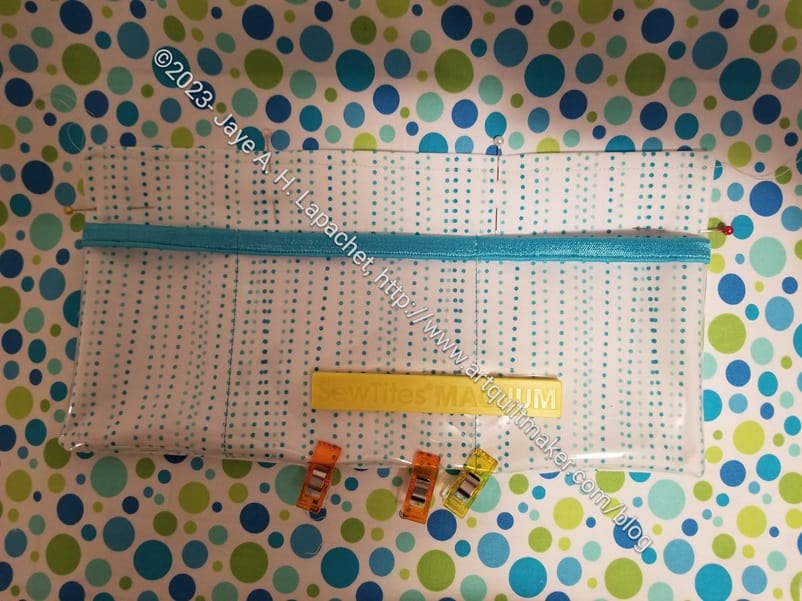
Kit Supply Tote pocket modification
My pockets have the pockets from the pattern on the bottom (white fabric with blue lines of dots) and another vinyl pocket (top of vinyl has blue double fold elastic) layered on top. I thought this was a great idea until I started to sew it. I had to fold the vinyl under to make a seam, which makes the whole piece really thick. It worked, but it wasn’t ideal. I had to rip out one section at the bottom, because I didn’t quite catch the vinyl. After that I was very careful about catching the vinyl.
I could always add an internal zipper pocket, but I think these slip pockets are more useful. I think this idea has potential; I just have to work on it a little more.
N. B. In the photo, I am using Sew Tites**, pins** and WonderClips** to hold the pocket in place. The pins cannot be used on vinyl. I know I have mentioned this before, but it is always useful to hear it again. Vinyl doesn’t self heal, so WonderClips and Sew Tites are a must when you work with vinyl. That Sew Tite Magnum** was great! I use the pins linked above because they work better for me with bags. The super thin pins that some quiltmakers love bend when used with the layers required for bagmaking.
**N. B. : Obviously, you should shop at local quilt shops and small businesses. However, if you are too busy or can’t find what you need there, I use Amazon affiliate links and may be paid for your purchase of an item when you click on an item’s link in my post. There is no additional cost to you for clicking or purchasing items I recommend. I appreciate your clicks and purchases as it helps support this blog.