A Binding Away From Finished

Fortunately, today was just the kind of weather I enjoy. It was cool tending towards cold, but clear with some big fluffy clouds around. The light was really gorgeous and it helped me get into a calm mood before I got to the machine.

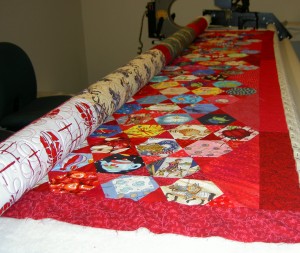
I spent my day quilting the Eye Spy on the longarm machine. In my February 8 post, I old you that my next longarm session would be on March 2. Instead I went today. My assistant for Monday bailed and Friday works much better for me, so I changed the date. As I sit here, the Eye Spy is completely quilted. YAY!

I woke up with one of those “who stuck a knife in my temple/forehead” kind of headaches. They happen periodically especially during times of stress, but I wasn’t happy about it. I drank a whole bunch of water and caffeine and ate more protein than should be legal so I could go on about my day. Amazingly, longarming is a good antidote to a headache!

Eye Spy on the longarm

I was more familiar with most parts of the process this time and the session went a lot better. I completed a larger quilt in a slightly shorter amount of time. I didn’t have to stand as long and it was slightly less expensive.

I used an easier pattern which contributed to completing the larger quilt faster. I tried really hard to manage a consistent speed and to make the designs larger. As the day went on I did tend make smaller motifs, which I will have to work on.
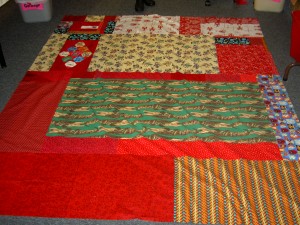
Eye Spy back before quiltingThe crazy part about the whole process was the back. I spent last weekend, when I wasn’t shopping for headstones and wasting time,  making sure the top, which has a lot of bias, was stable. I only started the back and figured I could do it this coming weekend. Then I changed the date of the longarm session and totally forgot I hadn’t made the back. Huh?? I don’t know what I was thinking. Fortunately, I remembered on my way home. I spent the evening, in between life stuff, making the back. They never go together as quickly as I think they should, but it all worked out.

During my last session, I felt like I had a really steep learning curve. This time, I had more of an idea of what was happening and knew, basically, what to do when prompted. By the end of the day I was starting the rows myself without assistance. I really in absorption mode – trying to absorb the process. I didn’t take as many notes. I still needed a lot of help and reminders, but I have made a lot of progress and was much more confident. I do want to go over my notes tonight and see how they jive with what I remember now that I have two sessions under my belt.
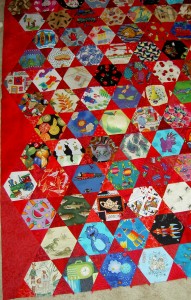
Eye Spy Lurching Towards the Finish Line

I don’t know where this month has gone. Frankly, I am glad February is coming to a close, but I still wonder what happened to the days.

My next longarm day is March 2 and the Eye Spy is in line to be quilted. As a result, I needed to make a back and get the Eye Spy in shape for finishing. I put the diamonds in to fill in the diamond shaped space, so that I wouldn’t have to hack through any of the hexagons (which is what most patterns recommend). I didn’t want a zig zaggy border, so I started out by cutting off the excess from the diamonds.  I had intended just to leave the edges straight after cutting – no borders.

Eye Spy corner before border

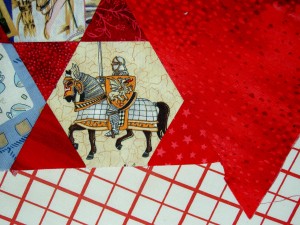
While cutting the diamonds in half, I realized that the middle of those diamonds was one big bias edge. This brand spanking new bias in addition to 3 sides of each hexagon being on the bias was asking for trouble during the quilting process. The top  needed some stabilization, so I added some borders and corners to the odd shaped corners of the top.

Corner detail
Corner detail

The little star printed piece is the patch I had to insert into the corner to make the corner a 90 degree angle. You can see it really well above.

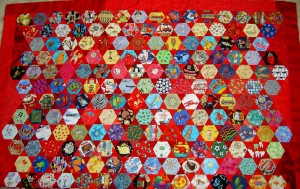
Finished top with borders

Above is a picture of half of the top. The quilt top is another monster and I gave up on moving furniture to fit the whole thing into one picture. I am going to have to think up a way to photograph whole quilts, especially these huge things I seem to be making.

I used a new (to me) method of measuring for borders.  I measured width-wise (across) and lengthwise (down) in three places on the quilt and cut the borders to the average size. I did have to ease, but the top is flat and I am happy about that. I found one little tuck that I will need to fix before the longarming. All in all it worked pretty well.

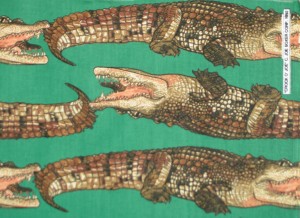
Scary backing fabric

I acquired the crocodile fabric a long time ago, perhaps in the early 1990s from a woman named Joan who was getting rid of everything. It is a Joe Boxer fabric and I never saw anything like it. I also never heard of Joe Boxer selling fabric, but they totally should, because their fabrics have such a sense of humor.

At one point, I thought I would cut out the alligators (crocodiles??) and applique’ them on something, but the inspiration never struck. Also, I only have about a half yard, which limited what project I could complete using the fabric. I came across the fabric over the weekend and proposed it as a backing fabric. The Child took a liking to it, so I will use it as part of the backing. Shopping in my fabric closet can be fun!

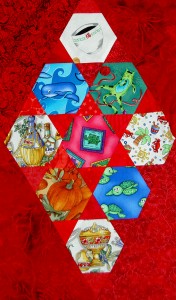
hexagons on the back

I had some leftover hexagons, so I put some straight edges on them and will also use this piece for the back. I need to find a nice way of making this bit play nicely with the crocs.

Avoidance Issues

I was on my blog and directing traffic and tweaking a lot during the past three or four days. The blog move has been somewhat time consuming, but is mostly done, and worth the effort so far. One of the things I did was scroll through recent posts about four hundred times. In doing that it dawned on me that I was in avoidance mode because nothing I posted was quilt-related.

Origami Train Dude

Sketches

More Sketches

None of that is quilting and since the blog is about quilting, I needed to get back to it before all of you got fed up and went and read some other blog. I needed to take stock and figure out what was going on.

It turns out, after a little investigating it is all about The Tarts Come to Tea. I faced up to reality that I am really in avoidance mode over that project. Some of the issues I discussed about change of focus in a previous post are so true with this project. I am not enthused with machine applique right at the moment and I want/need to redo several of the blocks, because they don’t fit my current interest or style. It just seems depressing. The sad part is that every time someone enters my workroom they gush over it and say how wonderful it is, which enhances the guilt factor. Bleah.

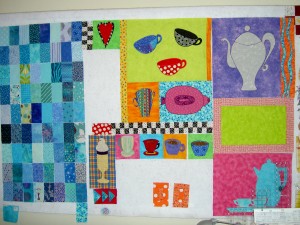
Design Wall 2/22/2009

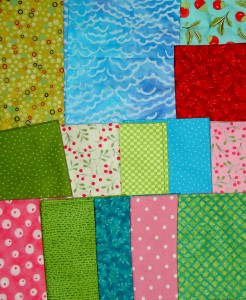
I was able to avoid a bit more this weekend, because I realized that my longarm day is next Monday and I haven’t done the back for the Eye Spy project, so the back had to go to the front burner.  My quiltmaker SIL was also in town so I spent some time at Always Quilting with her. Fabrics 2/20/2009I  bought the fabrics above. The smaller pieces were all in a pack that I had been coveting for awhile. I got home to find buyers remorse waiting for me, though, because when I unwrapped them, some of the fabrics are a bit off the colors I thought they were. I was thinking of doing something like the Yellow Brick Road (from Terri Atkinson) quilt with them. I still am, but will have to go shopping in my stash to replace some of the greens.  More piecing, you notice and not machine applique’.

I was able to continue to avoid the Tarts on Saturday because of family obligations, which isn’t to say I haven’t been working on them at all.

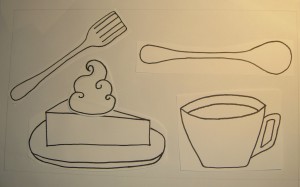
Tarts block layout drawing 2/19/2009 (middle right)

This is the layout/design drawing for the block in the middle on the right of the photo of my design wall above. It has a green background. What I decided was that I would make one block and see how I felt about the project afterwards. I need to find my notes on machine applique’ – or ask someone – because I can’t remember what method I used or any method, frankly.

I feel a strong need to make some kind of effort, but this piece is definitely teetering on the verge of abandonment.

I have learned something about myself since I dragged The Tarts out. Leaving quilts laying around with the top half finished doesn’t always work for me. I need to think about bring them to a logical stopping point (e.g. the top and back are done and are waiting on quilting).

Blues are Back


Remember the Hop, Skip and Jump pattern I tried in December?

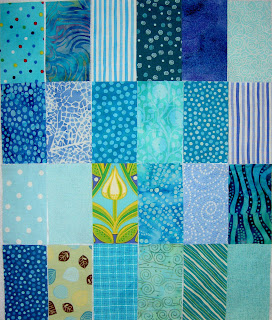
I thought I was, but I am, apparently, not done with the blues. And there is that rectangle shape again (2.5’x4.5, FYI). While the Tarts Come to Tea has been on the design wall, these blue rectangles have been up there, too. They are actually taking too much space (both physically and mentally), so they are coming off the wall and will go back up later.

Last weekend I had a little time and wasn’t organized enough to work on an actual project, so I cut blue rectangles. I have to be honest, though. I was trying to prevent a fabric avalanche and decided to fill in some space in the fabric bins. It is much easier and more accessible to stack fabric up on the sides of the closet. Sadly, four foot stacks eventually end up in fabric avalanches. Appropriate for this time of the year, though…

A fabric avalanche was definitely imminent and by moving fabric around and pulling out the blues, I felt like I was actually working on a project rather than organizing.

Some of the fabrics I cut from the scraps that appeared after I made the back for the Crazy Test . It was interesting to see some of those older fabrics mixed in with the newer turquoises.

Newest Cross Block (Flowering Snowball)


I sat and watched Wall-E the other night, which provided a good opportunity to spend some time finishing this block. I am only a few away from needing to start the border.

It is one of the blocks influenced by The Child’s comment that the blocks were pretty chaotic. I think the tone-on-tones look good with the prints. I will lay them out and take a photo soon.

Fabric of the Year 2008 Project

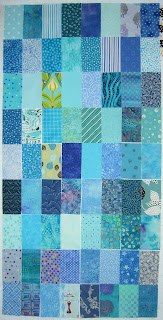
I have mentioned dozens of times that I have been working on and off on the FOTY project all year. That is sort of the idea of FOTY (Fabric of the Year). You work on it all year, especially cutting fabric. In my case I also sewed some of the patches together. Now the top is finished and I will soon be moving on to FOTY 2009.

Basics of the project:
2.5″x4.5″ rectangles
Cut one patch from each piece of fabric purchased in 2008.

I did find one fabric that was missing and that was the purple vegetable fabric I used to make the eggplant/lemon tote. I have a little piece of the veggie fabric that I will put on the back, but I would like to make another tote with that fabric as the one I made didn’t quite come out the way I wanted. Sadly, I don’t have a large enough piece. Gladly I will be able to admire it on the back of the FOTY 2008 quilt!

This project was a joy to work on during the retreat weekend, as I may have mentioned. I didn’t realize how much fun it would be. Partially, it was one project to work on so I could focus that alone. Partially, people made really wonderful comments on how cheerful it was and what a good job I was doing, which boosted by ego a bit.

One of the huge things I decided not long before leaving for the retreat was to change the direction of the project. I started out with the idea that the patches would be oriented in a rail-fence type setting, like I show in a post from August 18, 2008.


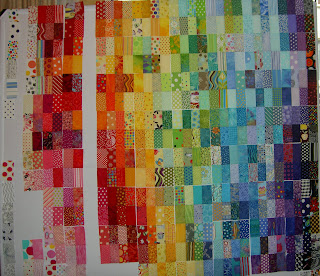
After playing around with that stack of blues over the holidays, I was really inspired by the different blues next to each other. I played around with the unsewn patches I had madly cut in January. Trying the layout of the patches out the new portable design wall sealed the deal. I decided to work on more of a blended / color wheel type look to the quilt. That is what necessitated all that ripping. Three days worth, to be exact, though to be honest, it was all day, every day.

That brought to mind the challenge of the FOTY projects. The fabrics purchased during the year may not necessarily go together and there has to be some way to make a cohesive project. At least for me, as I didn’t want to make a project with no design cohesion. TFQ solves this design challenge by adding in other fabrics for the background.
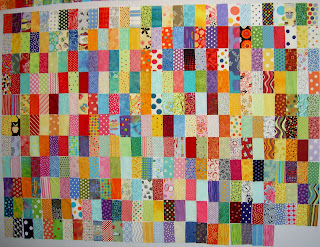
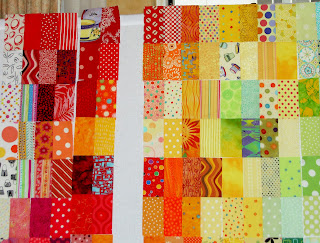
Above are all the pieces that were not sewed together. I put them all up on the portable design wall to look at them. It looks like a jumbled mess here, but that is part of the design process. 😉

The above is an in process photo. I don’t, wherever possible, like to sew tops together in rows. The seams never seem to line up and that frustrates me. Good technique and well sewed quilts are important to me. It really depends on the piece as to how I end up sewing it together. Generally, I go for chunks, as TFQ calls it. She suggested the technique to me and I have embraced it. On this piece, I started in the upper right hand corner and sewed two rectangles together and did that all the way across the quilt. One thing that always fascinates me is the way the top shrinks as I sew. I know it is the seam allowance, but to see the big space appear as the piece goes together just amazes me for some reason.

Above I was working my way across the quilt sewing 2 sets of 2 rectangles together to make a chunk of 4 rectangles.

In the above photo, you can see that I have made larger chunks. Eight pieces are sewn together by now.The process was:

2 rectangles sewed together

2 sets of 2 rectangles sewn together = 4 rectangles

2 sets of 4 rectangles sewn together = 8 rectangles (like the above photo)

So, the top is complete. I am feeling like I can plow through some backs this weekend, so making labels is on my list. I am thinking that this might be a quilt that I can machine quilt on the longarm. I’ll let you know after Friday’s session.

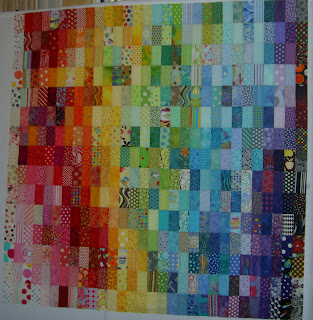
Finished Top!

I finished this top, the Fabric of the Year 2008 top, at the quilt retreat this past weekend. It was a great project for the retreat, because it was enough work to consume almost all of my sewing time there.

The FOTY concept was created by TFQ, who decided that it would be a good idea to try and use a piece of fabric shortly after buying it for a couple of reasons:

  1. If she liked the fabric, she would find out while the fabric was still available.
  2. It would be a good exercise to confirm what fabrics she commonly used so she could buy similar ones later.
  3. She would still like the fabrics

I really like this top. I think it glows. It is very cheerful.

I will have more about this later, but I had to post this for your viewing enjoyment.

Nosegay: Finally, Completely, Really Finished

The Nosegay is finally finished.


The binding is on. The piecing is finished. The sleeve has been handstitched on to the back. It is a large quilt, so I will have to post it again after I get a professional photo taken.

I finished sewing the sleeve on to the back while watching The Queen last Saturday night while the boys were gone. I had to watch some of the bonus features (sadly, no deleted scenes) in order to get the last bit done.

So many “hands” have touched this work. By that I mean I have received so much help with this project: TFQ, quiltmakers from CQFA, Doreen Speckman, the teacher of the class in which I started the project, Colleen.

I am thrilled to have a finished project – a quilt project.

Re-introducing The Tarts

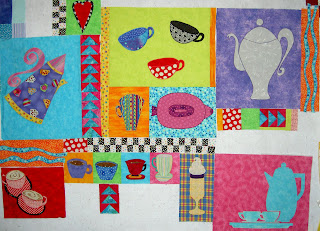
Please meet The Tarts Come to Tea.

I started this project sometime in the past. TFQ and I made some tops using a technique that we called Improvisational piecing. Mostly we did this type of piecing at her house. When I came home after one trip, I decided to take an idea for a hot drink quilt and work on it on my own using the technique. After doing quite a bit of work, I put it away.

I was spurred on to take this piece up again after writing the UFO report for 2008. I want he UFO list to be shorter on 12/31/2009. Either some of these projects have to be completed or they have to be abandoned. It isn’t about just getting things done, though, it is about deciding whether I want to devote mental energy to projects that no longer make my heart sing.

I have put it on my design wall as the first step in getting it off the “to do” list. I decided that I wanted to look at it for awhile before I decided how to proceed. There are elements that I really like about it, but others that I want to redo. My plan is to work on a few other projects (like cutting FOTY patches!) while I look at The Tarts and figure out what needs to be done. I already have a small list of parts that will change.

1. The plaid has to go.
2. The cup in the middle with the striped print will morph into a cup with a sleeve on it, like a Starbuck’s or Peet’s cup.
3. I need to add some more of the red/white dot print that is currently in only two of the cappuccino cups.
4. The random piecing under the grey tea pot with the purple background has to go.

TFQ and I worked on a list of elements to change and add, but I can’t find the piece of paper anywhere, so I have started to recreate it.

When I first took the pieces out of the box, I thought I would just abandon the whole project, but I see possibilities now. I will work on it a bit and see if I can generate some enthusiasm. Looking at this project has made me realize how I have evolved as a quiltmaker: different types of fabrics, different colors, more piecing. Some of what I talked about in the Word of the Day: Time post applies here.

Flower Tote Bag

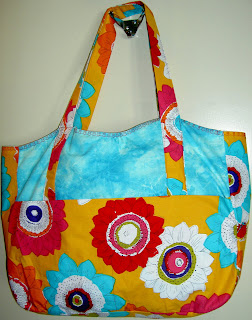
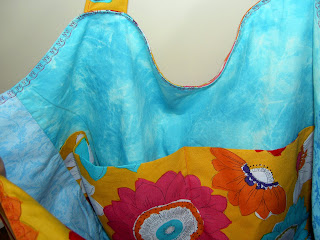
I loved this fabric, which I bought back in November. As I mentioned last week, I finally got to making a tote bag out of it.

I am pretty pleased with how it came out. I love the bright cheerfulness of these splashy flowers. I think it is a good way to use those big prints.


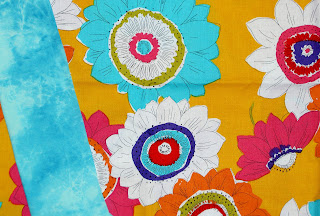
On one of the last bags, I didn’t like the way I couldn’t see the pocket and the straps, so this time I used a blue for one side of the outside of the bag so that the pocket was highlighted. It means that the bag sides were different fabrics, but who cares? I am pleased with the way the flower fabric stands out.

I used a tulip stitch for the top stitching on the edge around the top. It is ok. There were parts where I had to sew over a lot of layers and the spacing got a bit wrecked. I am going to keep this bag for myself, because it is cheerful and I didn’t put any interfacing in it.

Using Fabric

I am really in a philosophical frame of mind right now. Not sure why, but I seem to be thinking more about things rather than just trying to get through the day. All that vacation freed up brain space, I guess!


I started a new tote bag last night (forgoing all computer time for fabric time!). As you can see, the fabric is a large flower print. I needed another fabric to go with it. As I was pawing through my blues (oh no! are they back??), I found myself thinking about using fabric.

I am very grateful for all of the fabric that I have. It makes me feel like I could sew to eternity and not worry. It seems that when I am looking for a specific color or shade, however, that I don’t have enough fabric. What I was doing last night was looking through fabrics to go with this wild flower print. It was a lot easier because I didn’t have a certain value or tone in mind. Does the amount of fabric expand or contract depending on what I am looking for?

Done with Blue


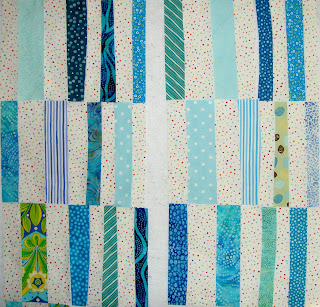
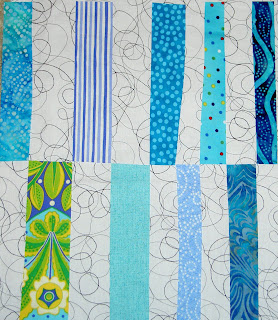
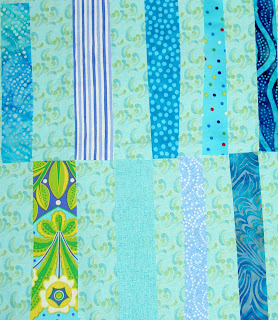
These are the fabrics that I started with. As I was cutting the FOTY pieces, They fell together and, as I said, I wanted to do something calm and quick-ish with them. I still like the fabrics together.

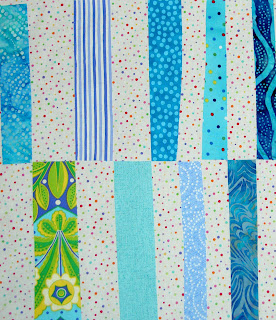
Here are all the pieces cut out and ready to sew. The contrast between the two photos (first photo above and the photo directly above) is striking. The photo of the cut pieces does not convey the look I was seeking at all. I think the dots was the right background choice from among the three I pulled, but I think the background strips should have been thinner.

Above is one pieced block.

Above are 6 completed blocks. I decided that these blocks are the sum of the Hop Skip and Jump blocks I will make. I am not getting the look that I want with this pattern. The blocks are pretty small and I would have to make at least 24 more to get a lap quilt. This is more of utilitarian quilt pattern and I am not interested in making it as a wall hanging. I enjoyed the sewing, but when it was time to cut more pieces I couldn’t face the work and decided to cut my losses. Perhaps I will make someone some small placemats since I didn’t sew the blocks together.

Tomorrow I am making a tote bag!

Hop, Skip & Jump by Denyse Schmidt Project

I decided to work on the Hop Skip and Jump pattern by Denyse Schmidt (Denyse Schmidt Quilts book) as my next project right now. I rarely sew from patterns, but this one seemed like a good one to use with the blues that I had weeded out from my new fabrics. I had thought of modifying the pattern so that there were no curved pieces, but I didn’t. I am not afraid of curved piecing (note Flowering Snowballs/Cross Blocks), but each of the 16 pieces required for each block must be cut out separately. It is an arduous task, but I am into it now and will just continue on.

One problem I already had was with the copy place. The pattern directs the maker to enlarge the pattern by 400%. I have terrible problems with office equipment, copiers in particular, so I went to an office shop and they offered to do it for me. The girl couldn’t get the entire pattern on an 11″x17″ sheet of paper. She asked me at one point if it would be a problem to have the top of the pieces cut off. Finally, I told her she could reduce the size slightly and that seemed to work. It doesn’t bother me to have slightly smaller blocks. I can make a few more with no problem.

For once I have cut all the blue pieces for 6 blocks before I have sewed any of them together. I haven’t decided on the background yet, so I haven’t cut background pieces. I thought I had just bought a white on white that I would use, but I can’t find it so either it was my imagination, it is hiding from me or it isn’t washed yet.

This is my favorite. The background is a very cheerful dot print where the dots are irregular and a variety of different colors. I am all about cheerful, you know. 😉

The above is my second favorite. I don’t have enough of this particular black on white print, so I would have to use a variety of different black on white prints with the same weight/ratio of black to white. I wouldn’t want it to be too overly black.

I really wanted a very calm looking quilt, thus all the blues. This background is one of the P&B New Basics from 2000. I recently bought a yard of it and have at least a fat quarter somewhere else. The problem is that it is very close to some of the value of the other fabrics so the pieces blend together. I think they blend together a little too much.

There are a couple of factors for the background: one is that it has to have the look that I want. Another is that I have to have enough of the chosen fabric to use as a background. The bottom line is that I want this to be a quick quilt. I don’t want to spend weeks on picking the background. I also, however, don’t want to hate it when I am halfway through the sewing. I am happy to hear what you think.

Hexagon Edges

I am also still working on the hexagons. I am in a spot where there is a lot of sewing triangles to hexagons and then pressing. It is the part where it looks like not much progress is being made.

However, I did take some time to figure out the bottom of the quilt. I am at the point where I need to shift everything up.


Since my design wall isn’t big enough to handle a twin sized quilt, I need to shift the top off the design wall, leave a few pieces so I know how to hook the top and bottom together and then slap up the hexagons destined to be on the bottom of the quilt.

So far, it isn’t working. I haven’t gotten the right steps in my head enough to move forward so I am sewing equilateral triangles to hexagons (check!), pressing (half check!) and sewing together four hexagon units to make diamonds.

I am also still thinking about the side borders. My decision was to have an uneven border. That decision is still not settling completely well with me. I am thinking of making a big diamond template and sewing a plain red piece (or use different fabrics) onto the edges.

The Snowballs are Flowering

I am still working on the Flowering Snowballs (Cross Blocks). As you can see, I have taken the Child’s advice and added in some visual resting places for the last 10 blocks.

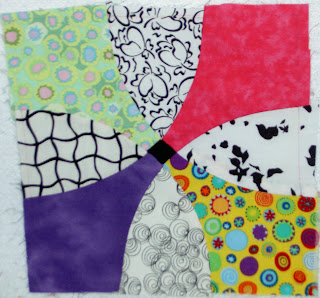
As I have mentioned on numerous occasions, these are hand pieced. I intend to sew them together by machine. However, in the cutting process, they do not all turn out to have uniform edges. I have been wondering if they would come apart if I trimmed them with a square ruler and then sewed them all together?

The knots I have made to hold the pieces securely would be trimmed off. Would it matter how quickly I sewed after trimming? The machine piecing would definitely hold all of the blocks together. More pondering….