You have probably noticed that I make a lot of bags. Mostly I give them away. There are only a few (Springy bag, Jane Market totes) that I actually carry around. Part of that is that I am one person and one person only needs so many bags. Still, I do like to make them.
As I have said in the past, I carry a bunch of stuff with me to work in a bag on public transport. The bags have to be sturdy, have lots of pockets, be on the large side and relatively stain resistant. The bags I carry to work have been Timbuktu bags for the past several years. They work but they aren’t perfect. They are large enough, have enough pockets, but they look like everyone else’s bag. Also, I am kind of over the backpack thing with my work clothes.
When I made the Petrillo Bag, I did so because I liked the shape, mostly.
In the case of making the bag, I don’t have control over the finish, but I can choose the colors and pattern. I probably have an equal, if different, amount of control over color the as I do if I bought a bag in the store.
Using the ShapeFlex plus layers of fabric plus interfacing. That is a lot of layers to go through and my backup machine wasn’t happy. I could make a better, sturdier bag if I had a tougher machine, perhaps an industrial machine or pseudo industrial machine. There is no way I am even going to consider buying an industrial machine, but I still want to make bags. I may never do it, but there is a place where you can go and rent table saws and welding things…Tech something. They have industrial machines there. Perhaps I will go and see if I can use theirs.
I worry most about setting the bag in something and not being able to get the stain out or having the stain leak through the bag. I like my bags nice and when you take public transport, it is hard to keep things nice. This is why Sheldon has ‘bus pants.’ I tried using the fusible laminating stuff on the Scrap Lab Backpack and that worked OK. It isn’t like using regular oilcloth. I suppose I could just make a new bag if the old one got stained or boring…
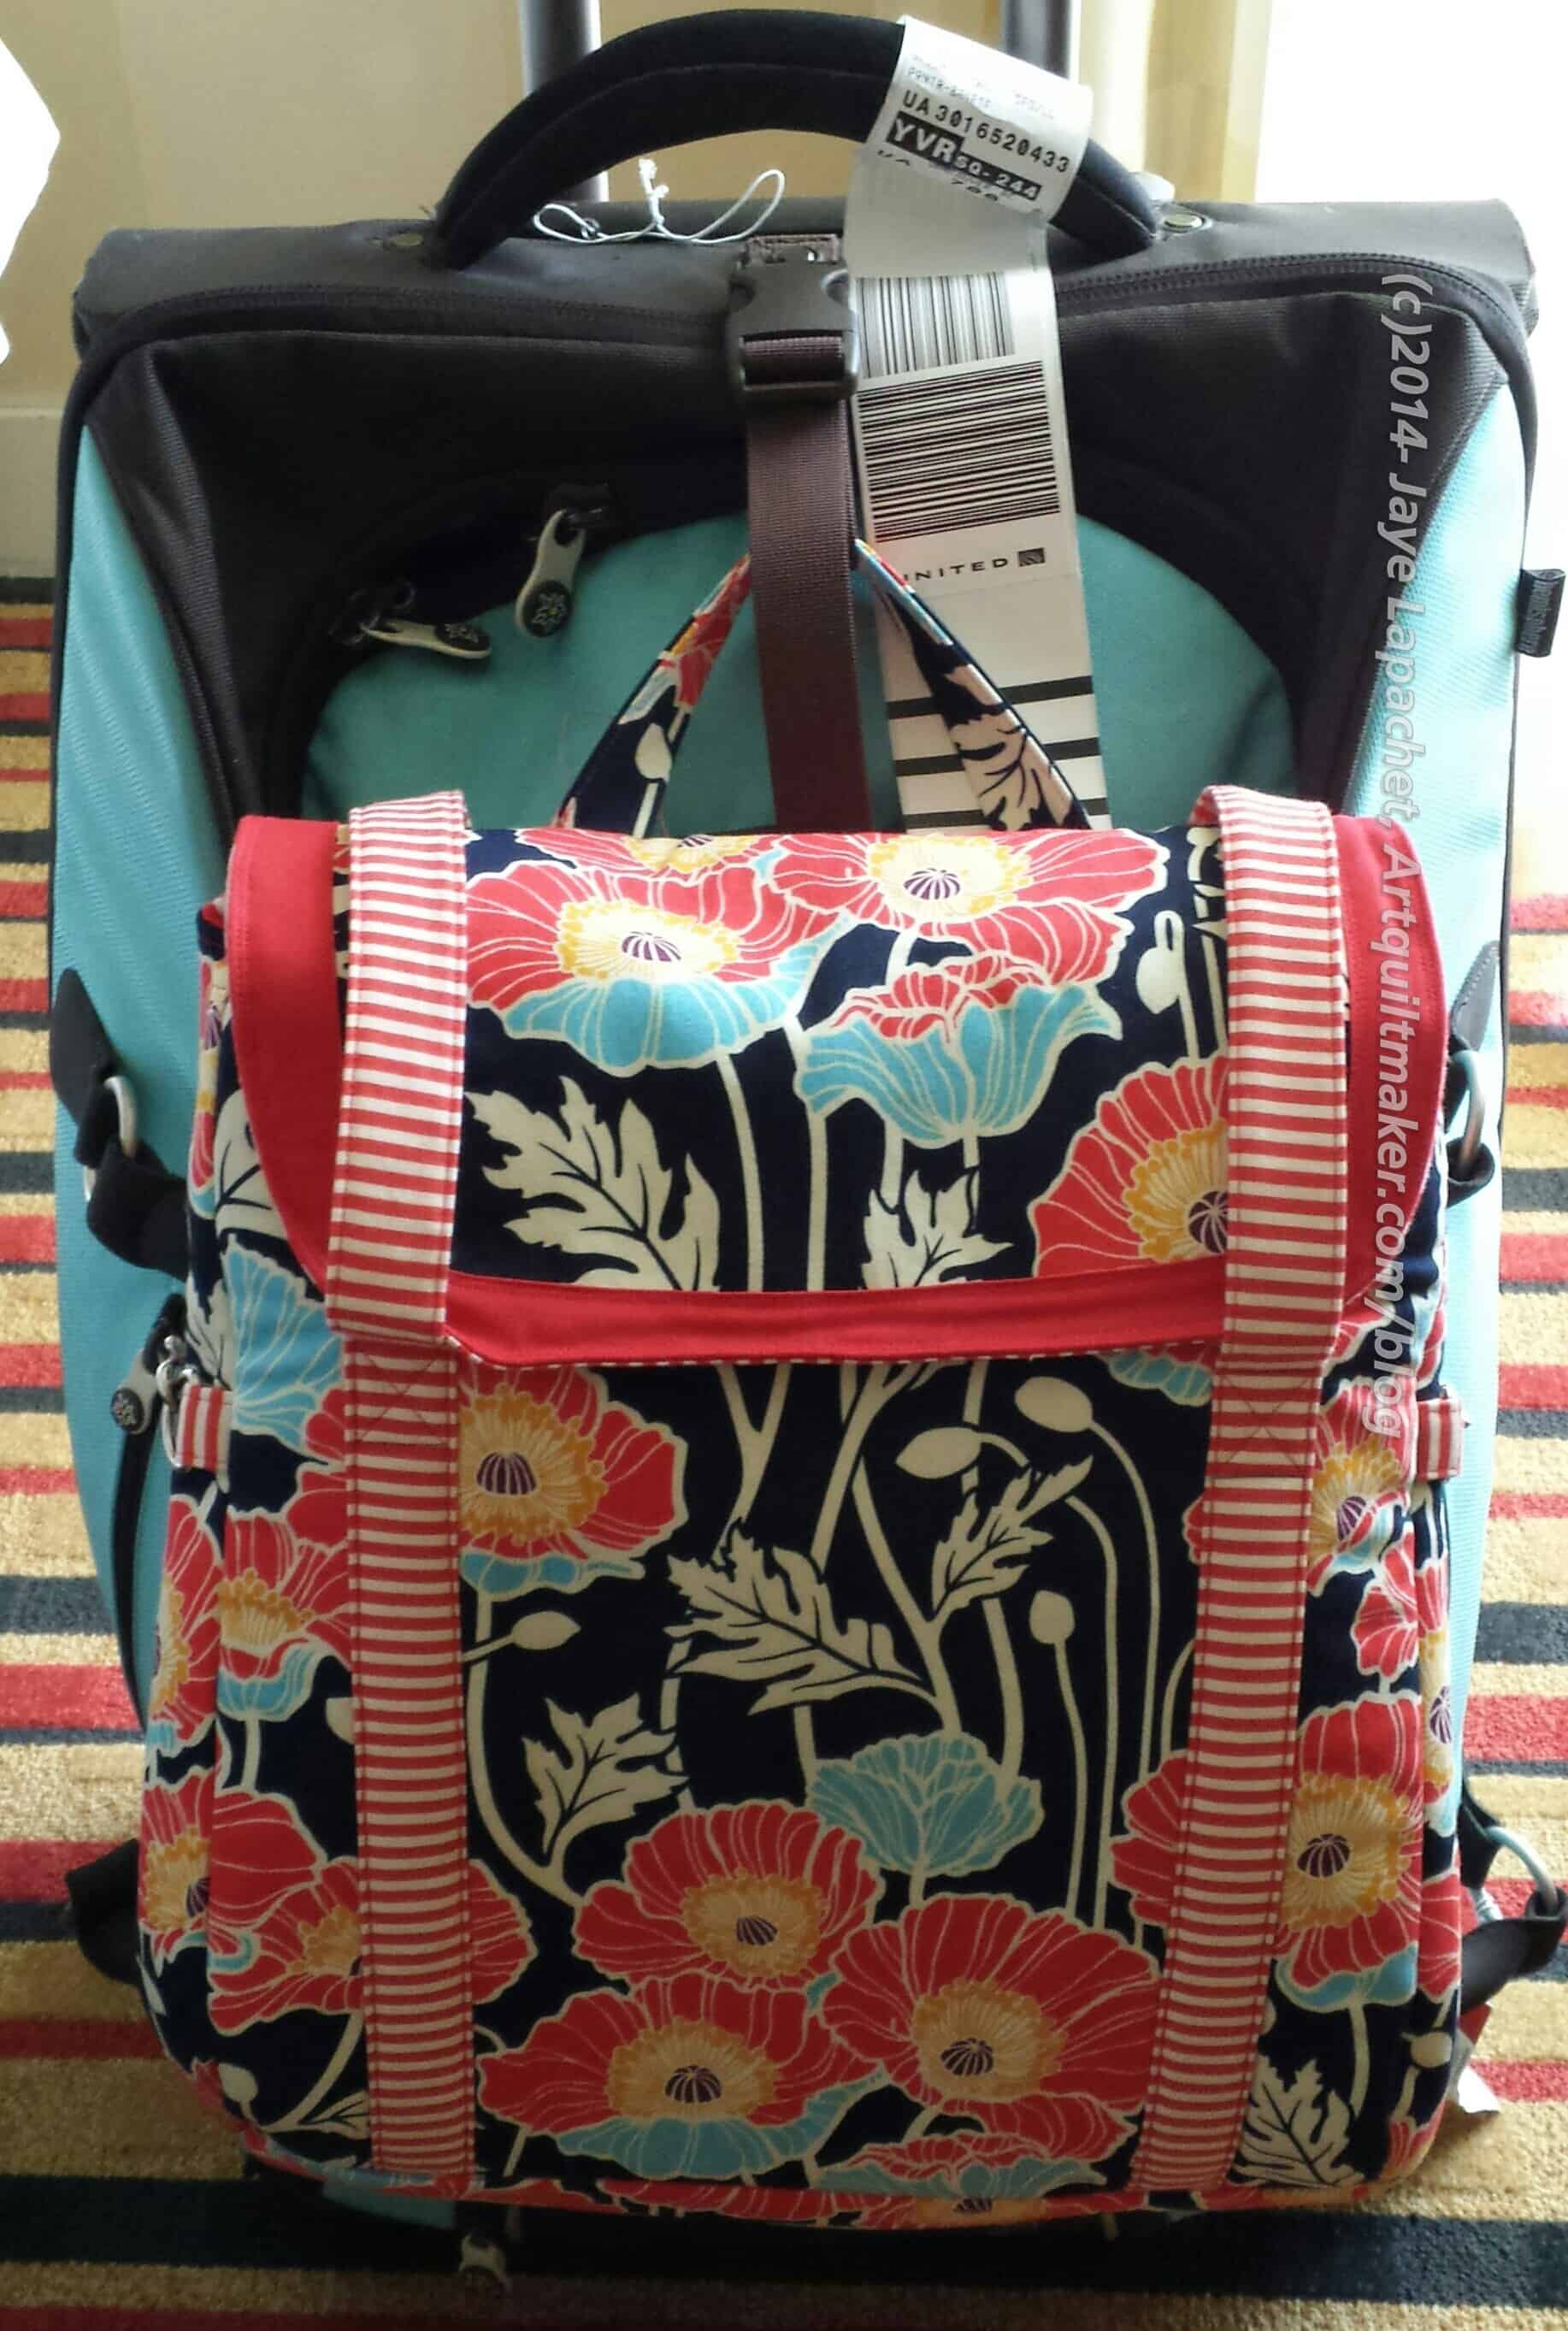
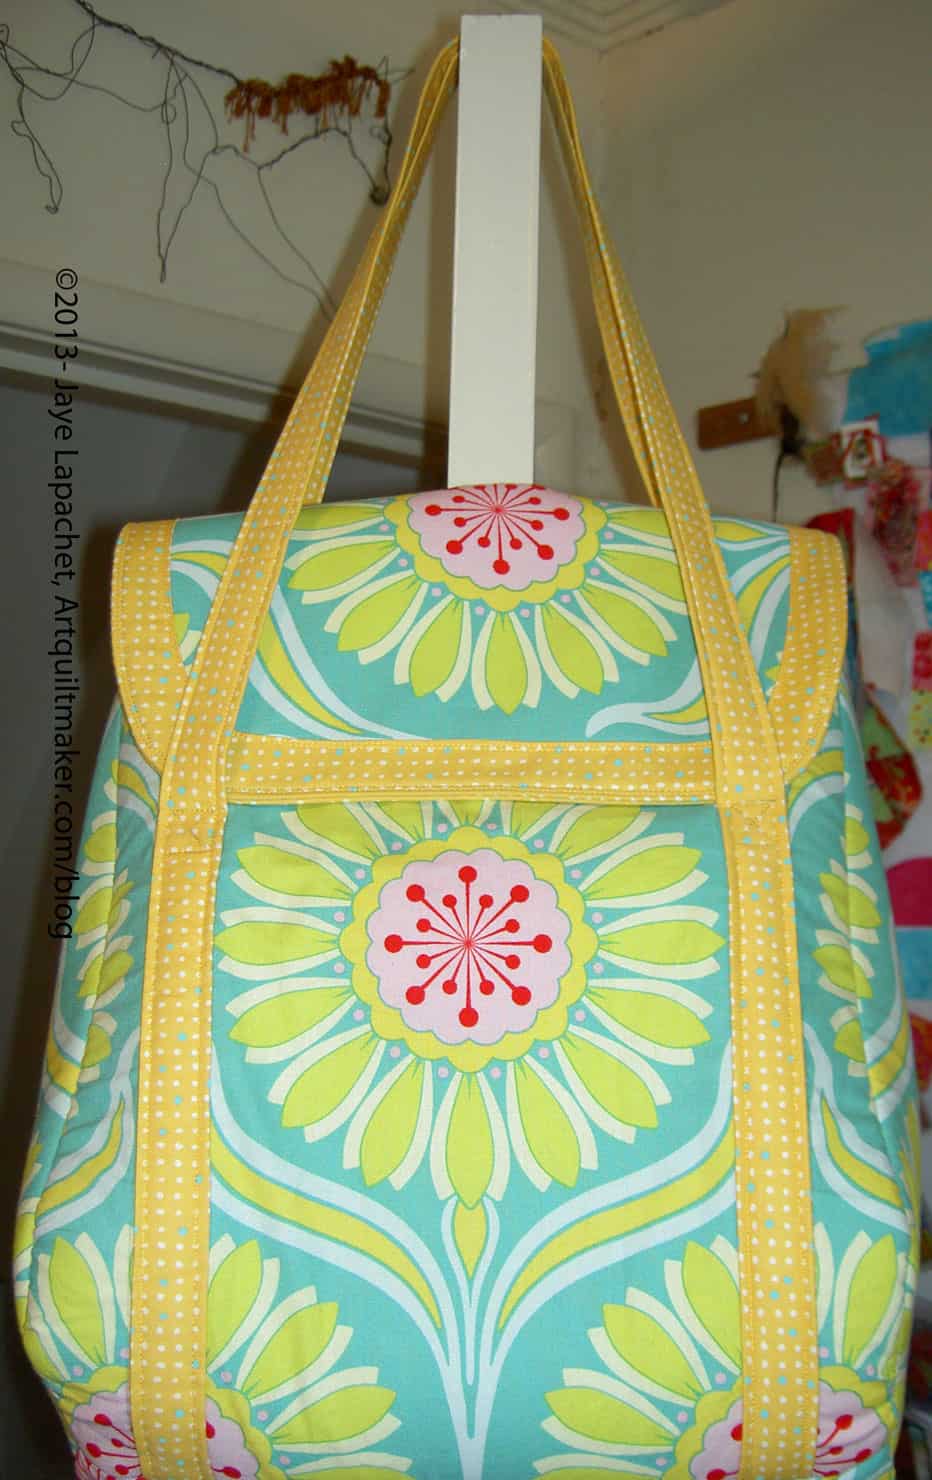
I finished the Poppy Petrillo Bag on June 6, 2014, then immediately left town with it for a conference. I had about a gazillion things to do that day, but managed a few minutes to finish the bag. I wanted to take it with me, because my Sherpani carry-on is too heavy and the straps are not that comfortable. It helps if I don’t bring everything I own, but let’s set that aside for a moment.
As I told you the other day, I made some changes to the bag to make it better to actually use. I liked using this bag, especially with the changes. I liked the straps, the size and the weight. It still isn’t the perfect bag, but it was really a good bag. It is lightweight and it fit well under the airplane seat, it was comfortable to carry and held the right amount of stuff. I also really like the shape.
I think there are other things the bag needs. More pockets for one and at least one outside pocket for a water bottle (or soda, if you drink soda) and the conference program. Given Sara’s excellent and stylish design of the bag, I am not sure it is possible to make all the changes I require.
Detail of Gusset I added to make the bag bigger, if necessary
The BAMQG retreat was over Memorial Day Weekend. I wasn’t able to attend on Friday, but I had been cajoled for a couple of years and decided to join as a commuter this year. I really had a good time and will post some more of the fun in a different post. Short bit of advice: if you have the opportunity to go on retreat, GO! You get a lot done and really get an opportunity to get to know your guild-mates much better.
After working on the mystery quilt, I switched to working on the Petrillo Bag. This a Sew Sweetness (Sara Lawson) pattern. Pam and I worked on a Petrillo Bag-along last year. Since then, I had wanted to make another with some changes.
Since I commute to work by train and do not have a car at work to store stuff, I have to carry my stuff or leave it at work. Thus, I have developed very specific ideas about what I like in my bags.
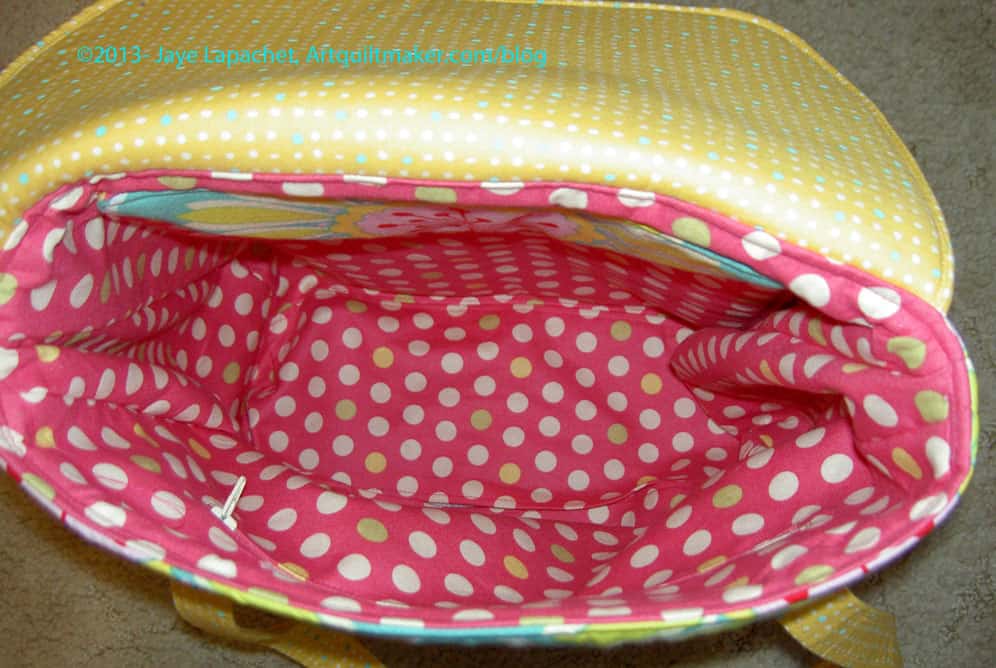
Part of what I like in a bag is security. I don’t want people reaching into my bag and grabbing stuff out. Thus, the bag has to have some kind of flap and closure. I also like lots of pockets and a light colored interior so I can see all the stuff inside. Easy, quick access is also a must.
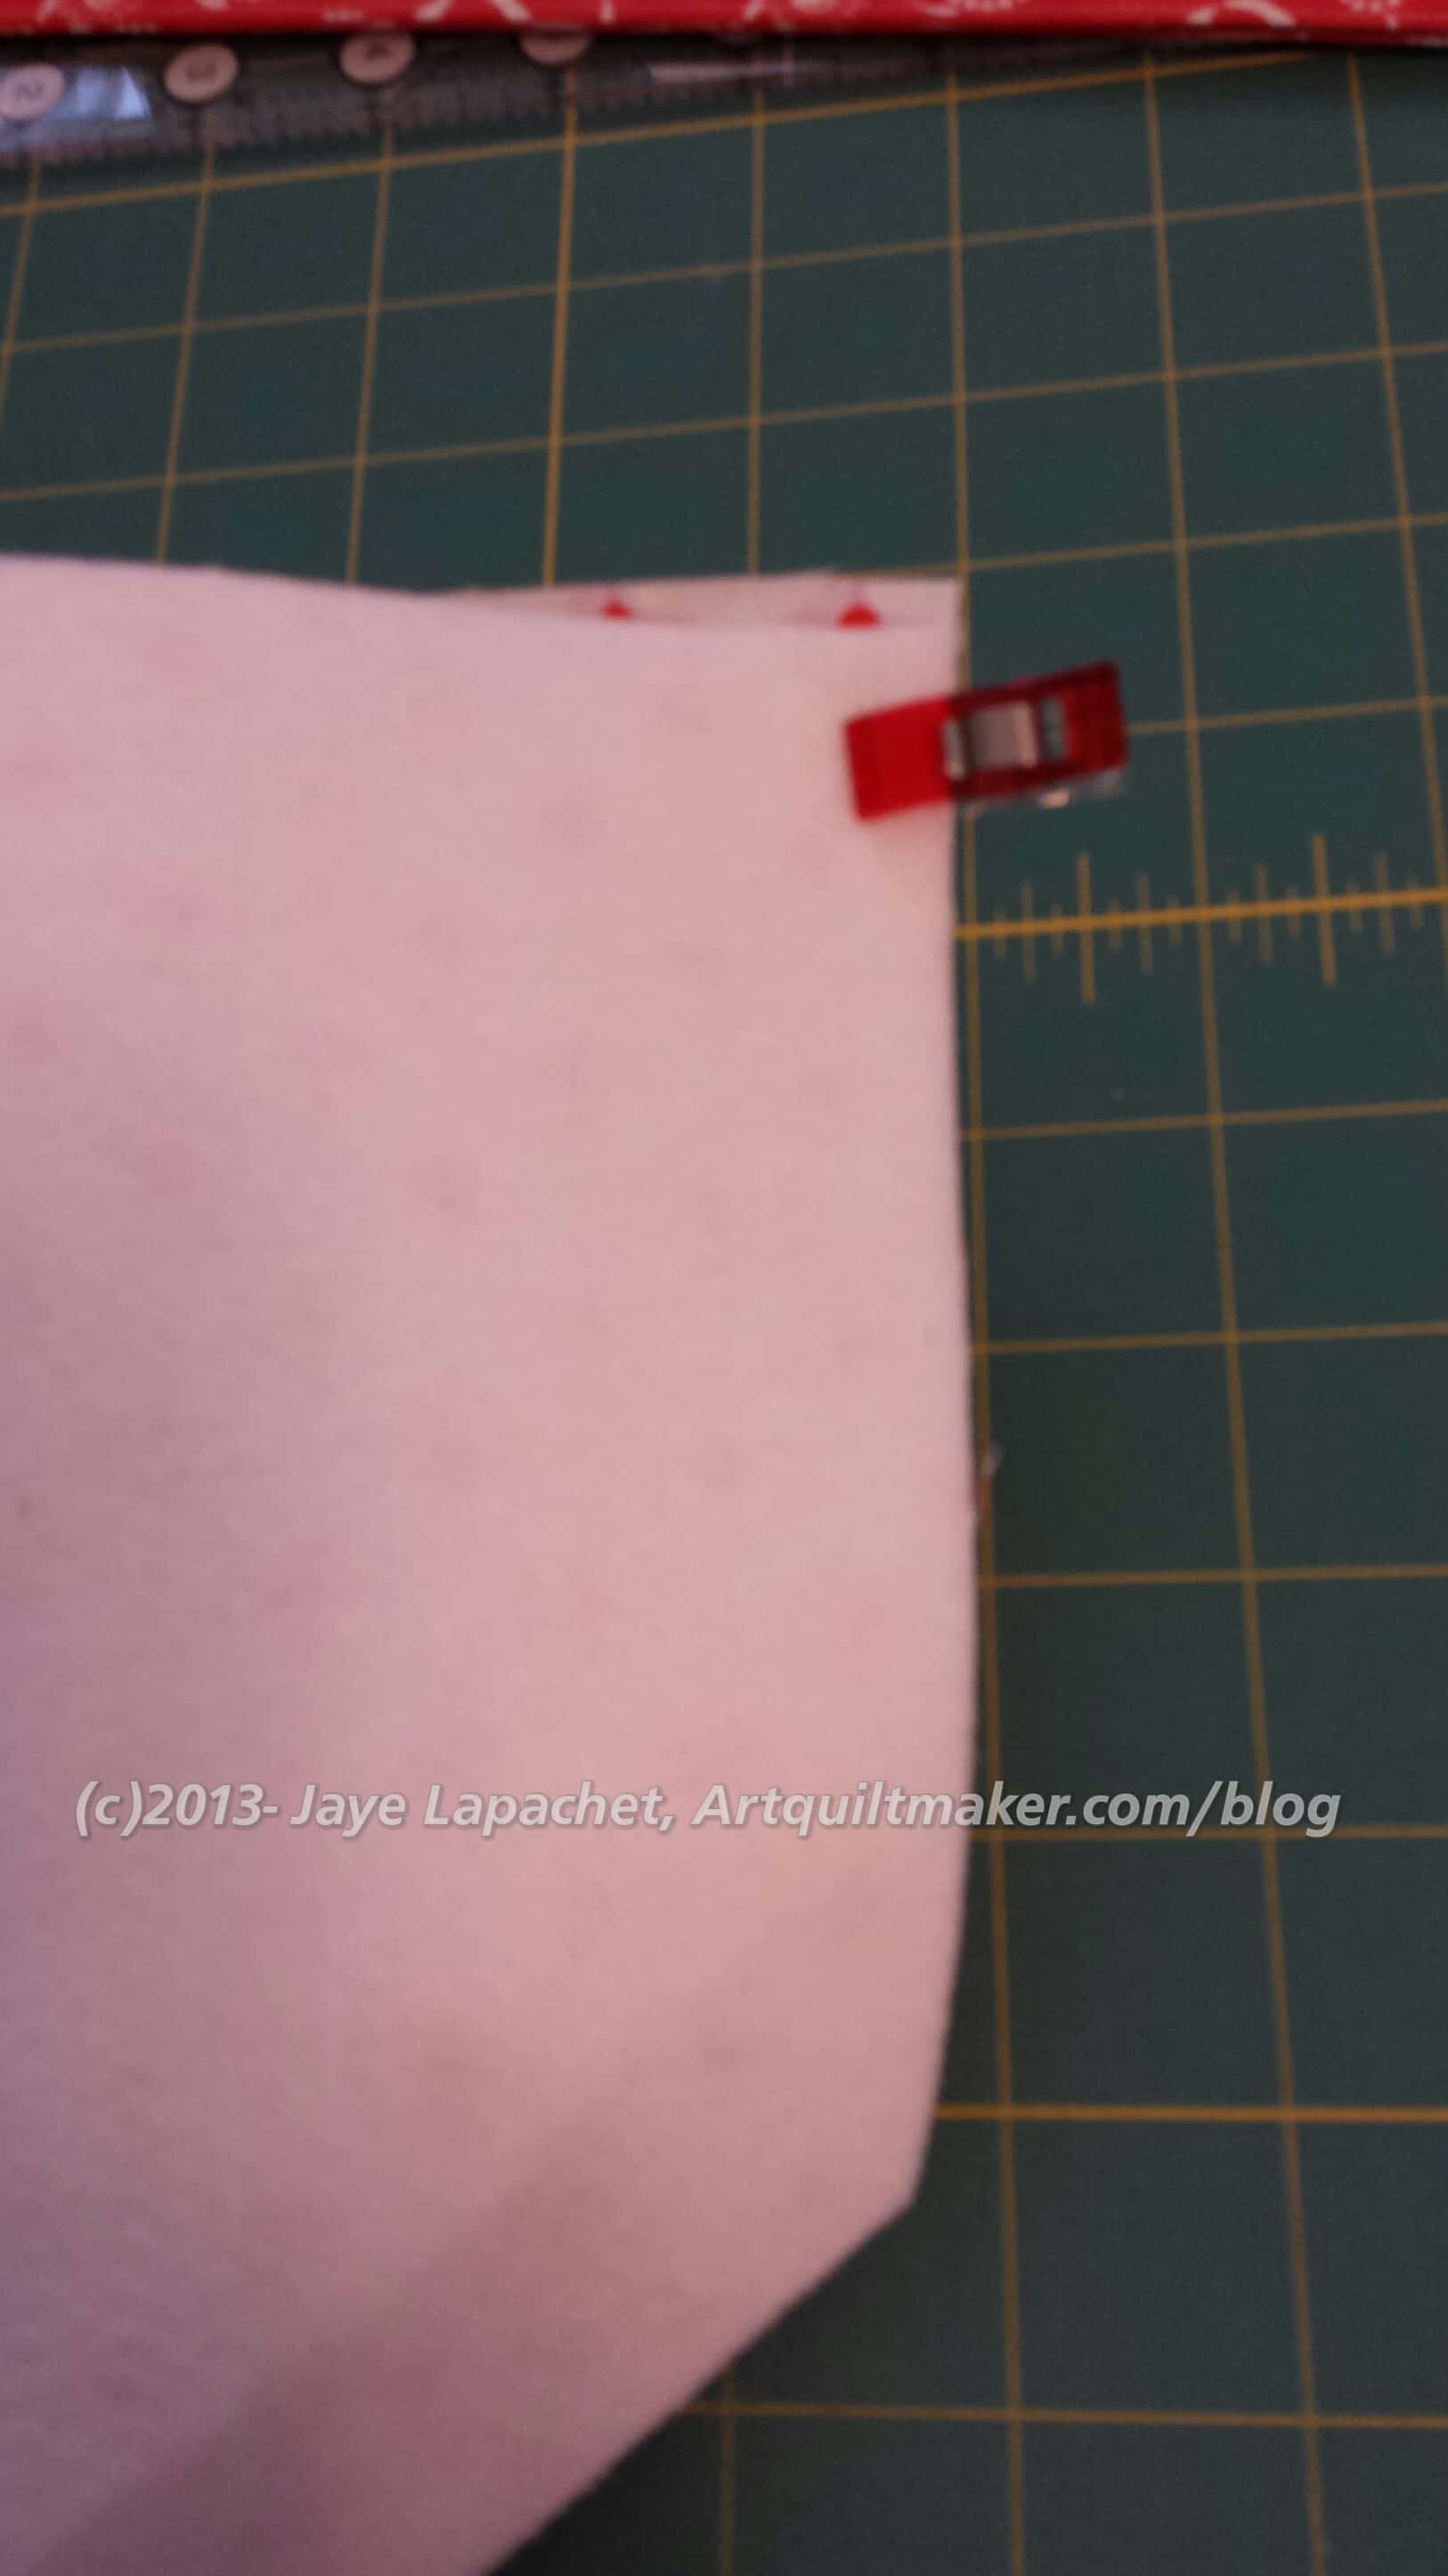
One of the things I didn’t like about the Petrillo Bag, as written in the pattern, was the skinny top. I liked the look a lot, but the functionality needed to be improved for my use. The side panels are shaped like ice cream cones. After you insert them the top access is very thin. This does help with security, but it makes it hard to stick stuff in and pull it out.
I had been thinking about changes to the pattern in my mind for awhile and had started cutting out pieces several months ago. As you know this bag has been on my to do list for awhile.
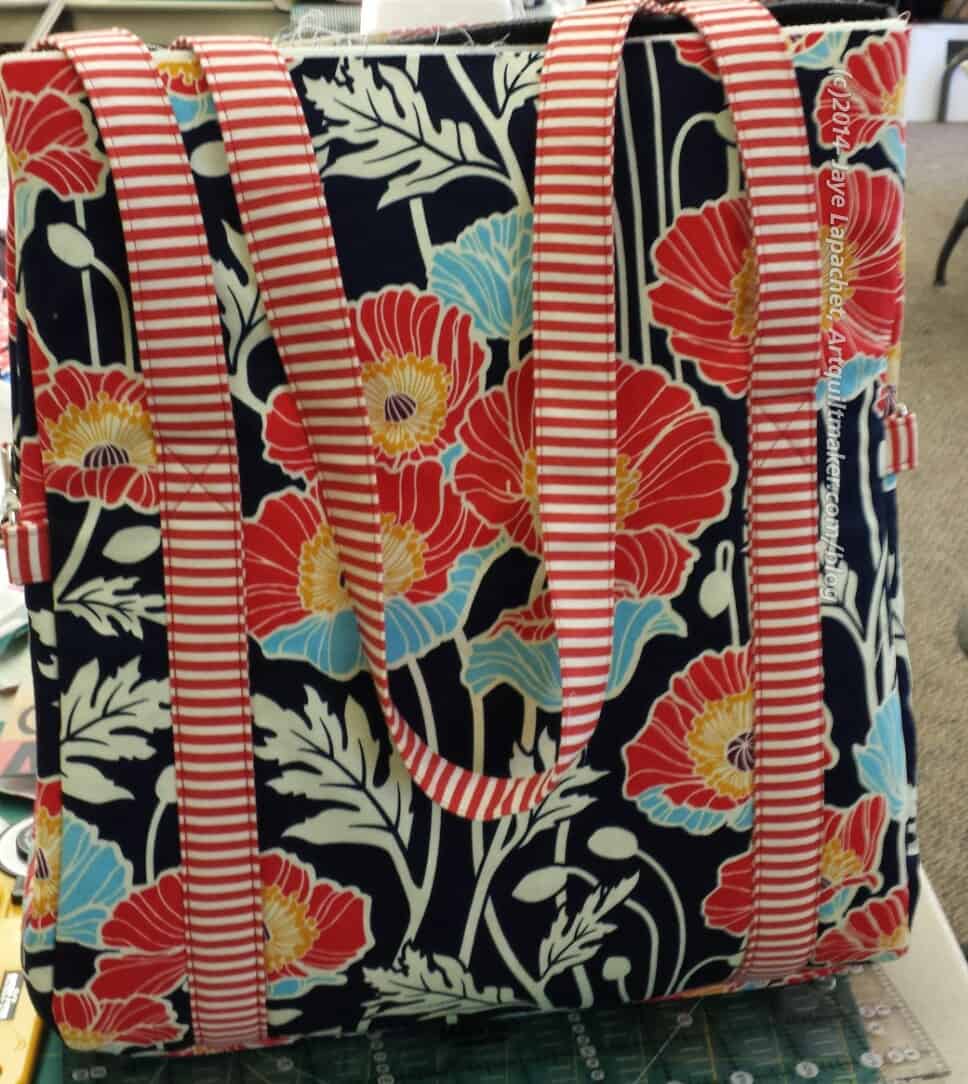
Petrillo Bag back
After being frustrated with another project, I started working on this bag and was able to get most of the outside done on Sunday, late, and Monday at the retreat. It is a good thing I was commuting, because I switched lining fabric midstream and was able to get some Michael Miller red with white Dumb Dots from home and start recutting lining pieces. I’ll use the previous lining choice for another bag.
I got to the point Sunday night that I was ready to construct the gussets and on the drive home, I turned over the process in my head, so I really felt ready to tackle it on Monday when I returned to my sewing machine at the Retreat.
A number of people at the Retreat had never heard of Soft & Stable, so we had a little talk about that. Many are not bag makers and since I never heard of it before the Petrillo Bag pattern, I wasn’t surprised.
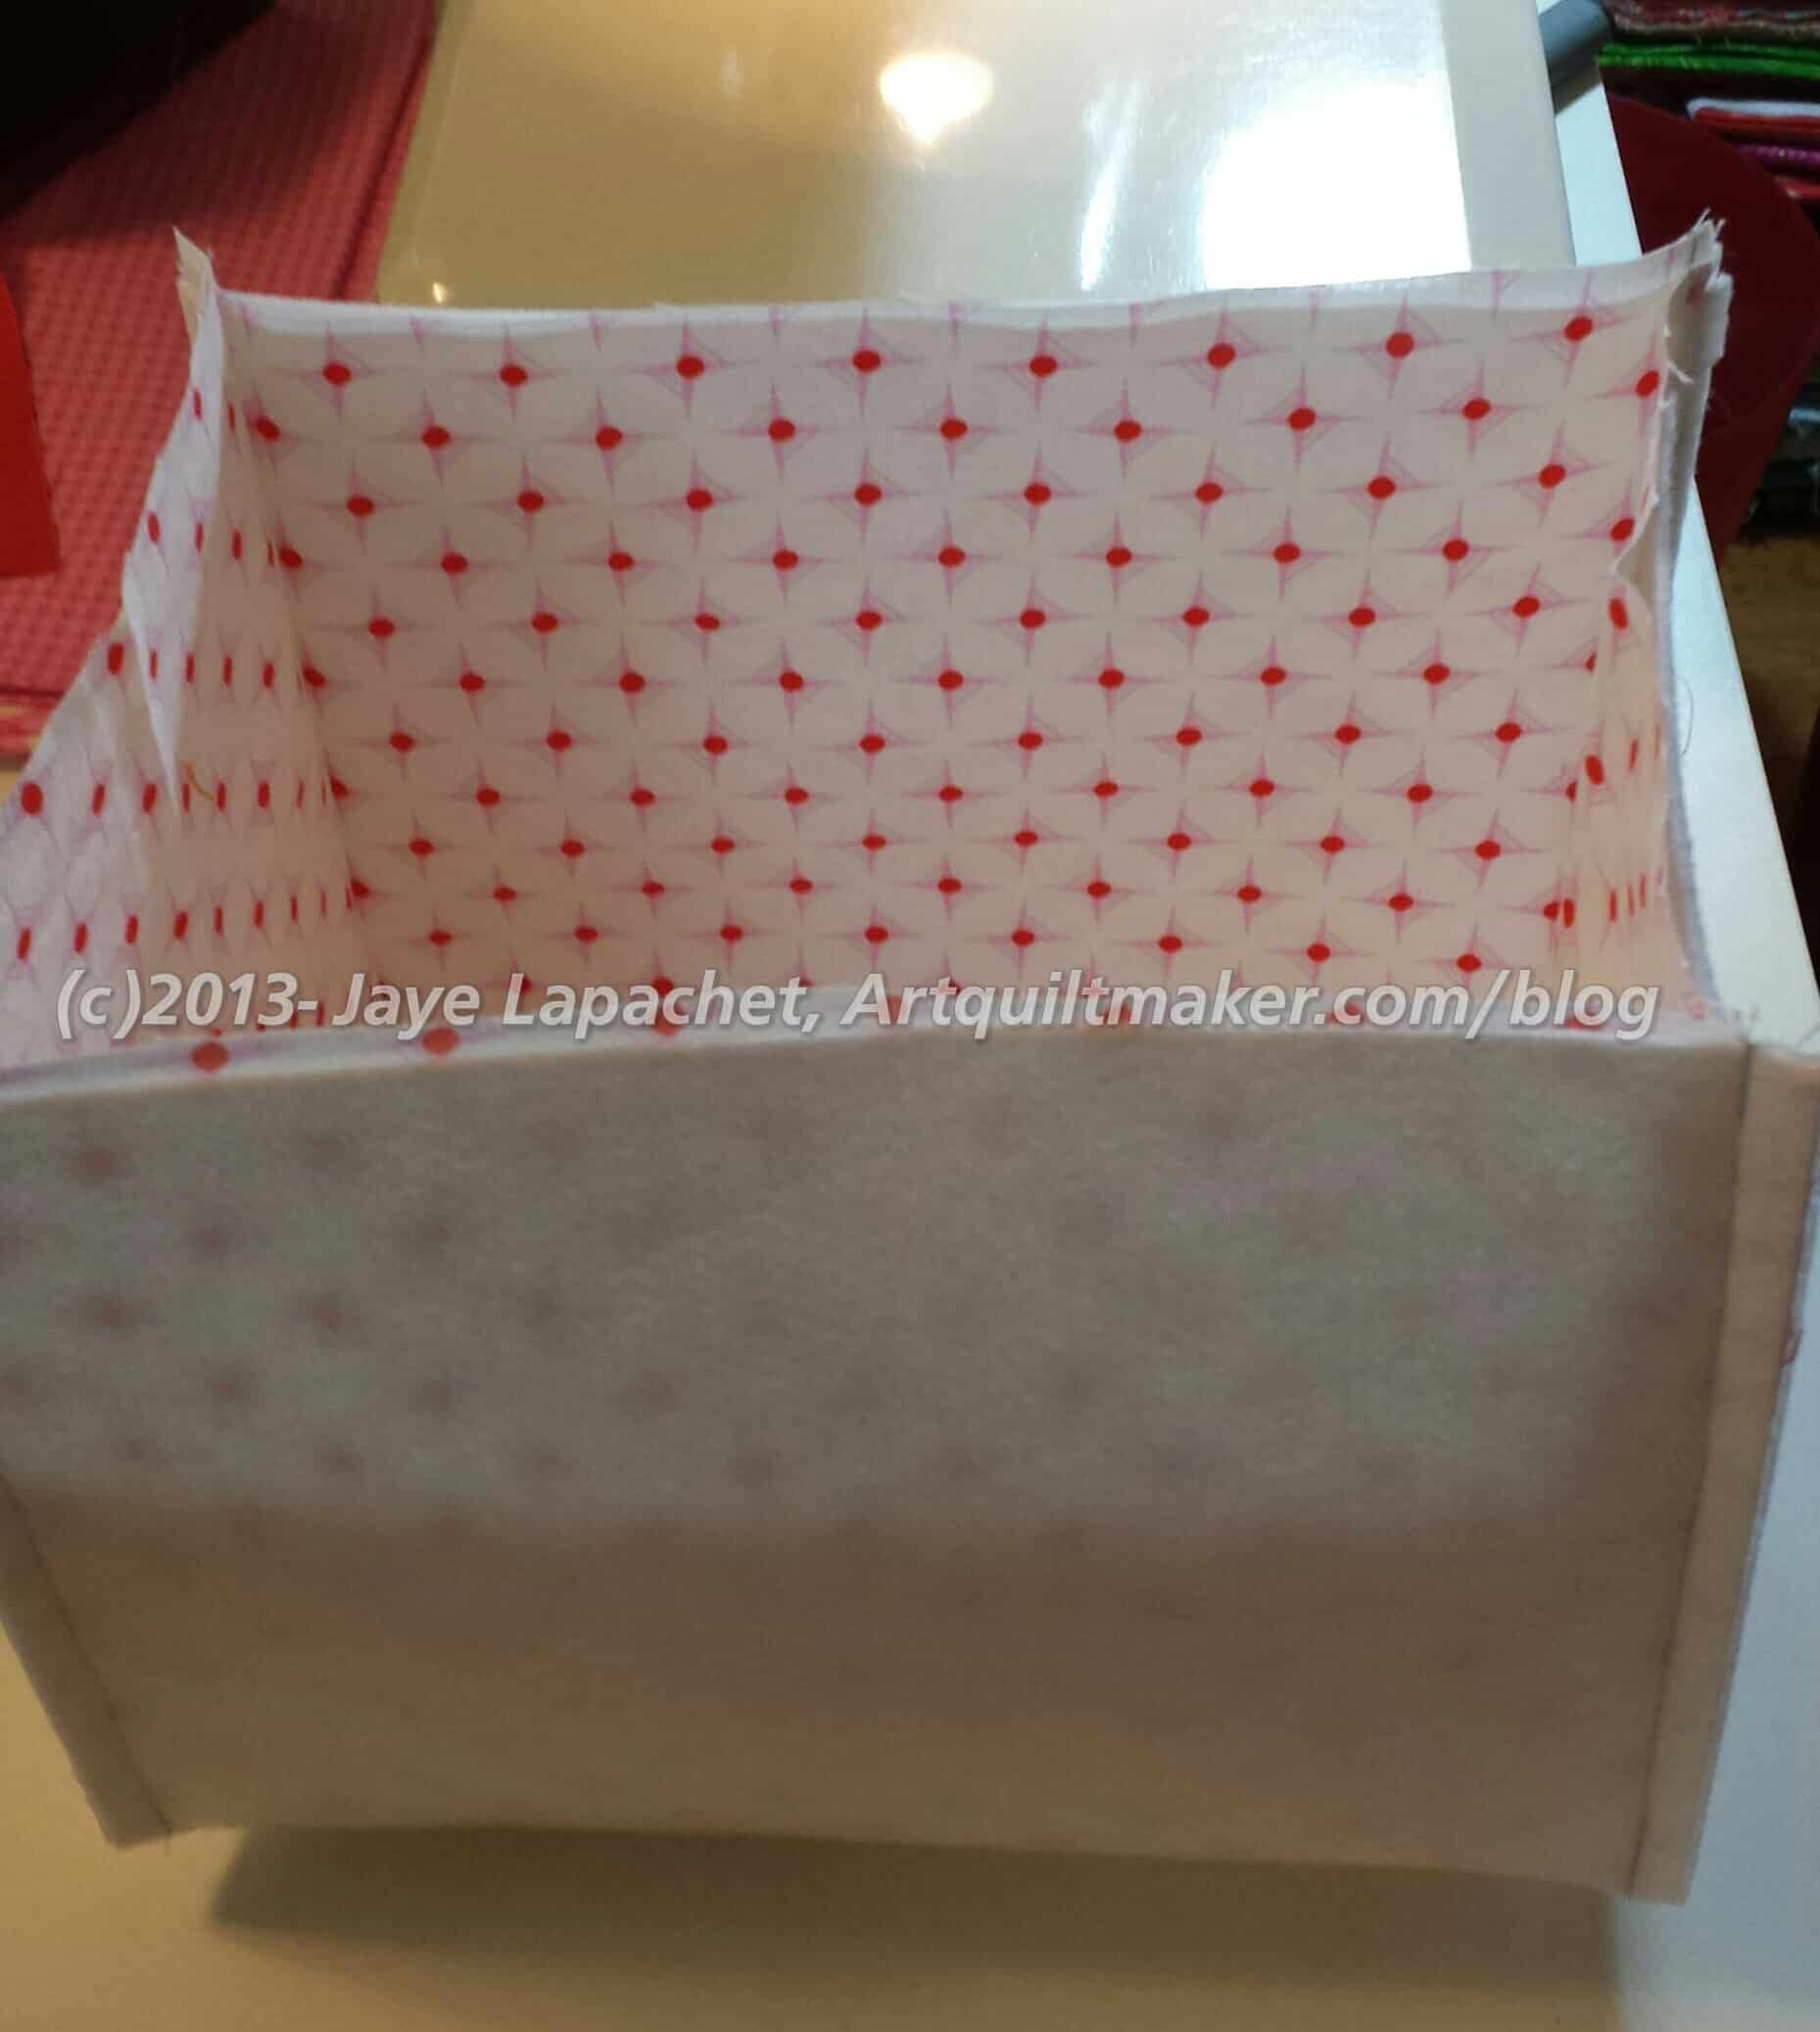
When I got home I worked on the lining and, as of this writing, I am ready to start putting the lining together. I am not sure what I will do about the side panels of the lining. I don’t want to put another set of clips on the inside. Elastic, maybe?
I don’t know if this will be the perfect bag as I have just realized that I forgot to put on side pockets for a water bottle or my cell phone, but I will try it out and see if I like it enough to use it or if I will give it as a gift.
I am glad this thing is completed. It was a pain from start to finish, but it will be cute for my young friend.
I think it will be perfect for a beach bag or some such for a teenager. I do think a teen would like it better.
I think I am not liking it that much because of all the problems I had with hardware. The last part was the*&^%$ grommets. Dritz grommets, I think, are not that good in terms of quality. DH helped me and we had problems putting them in. He had to pound like a crazy man and we ruined 2 of them in the process.
Still, the adjustments I made to the sizes worked out and I did a nice job finishing, so I think it looks ok. One friend told me my standards are too high. I’ll keep that under advisement. 😉
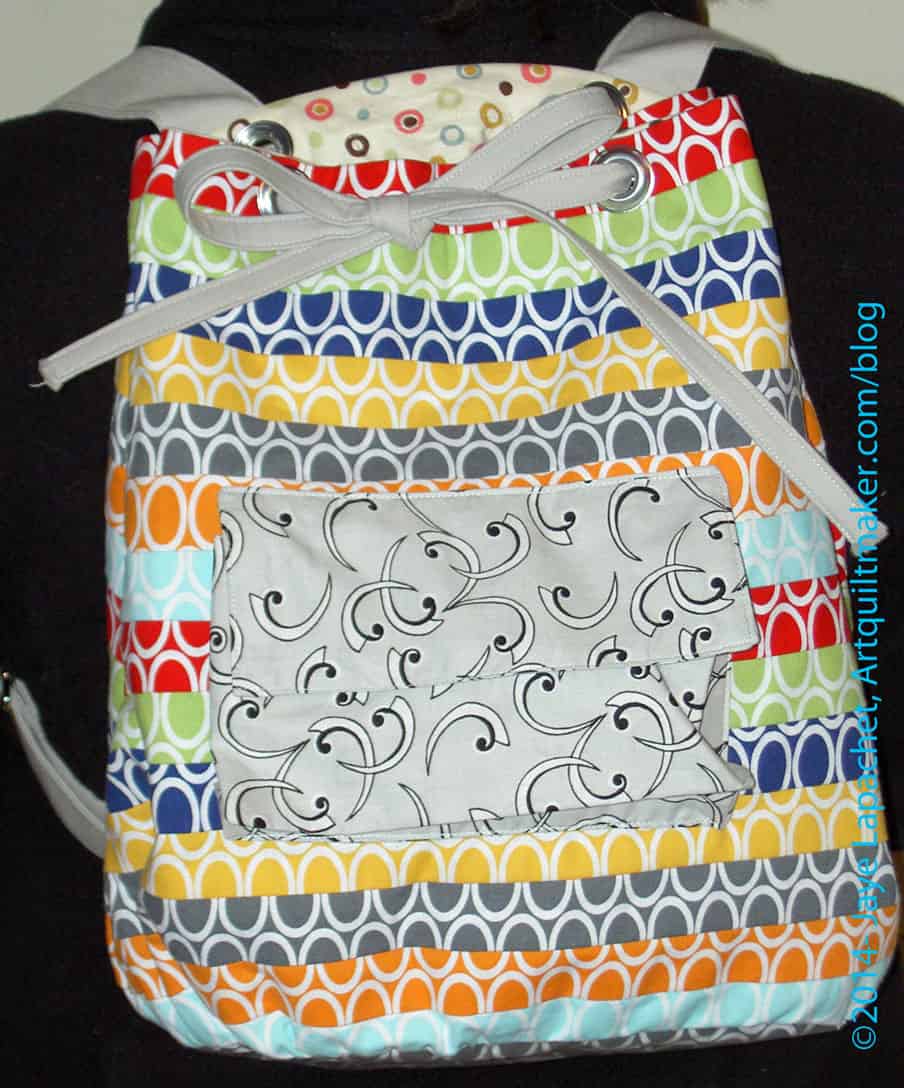
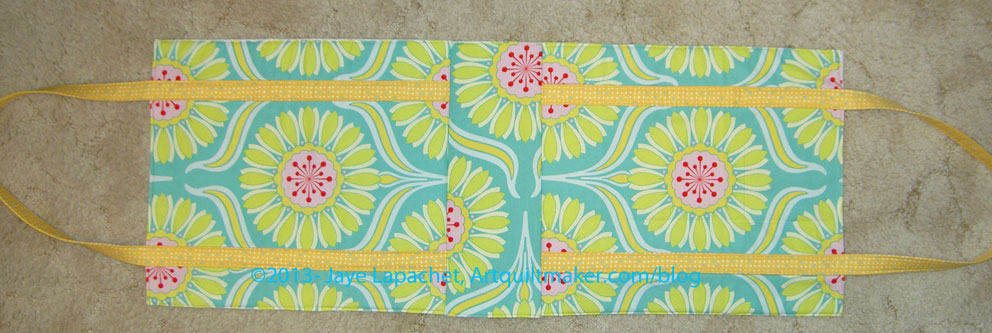
Some weeks ago, I saw a backpack in the Scrap Lab article in an issue of Quilts & More. The pattern is also on the web on Allpeoplequilt.com. It captured my attention in a “hhmmmm interesting” kind of way. After meeting a young friend at one of DH’s events, I decided to sew it for her. I wanted to make it, but I didn’t want to keep it, so this was a great solution. The Fat Quarter Shop, at that time, had a fabric kit (no hardware), which I bought.
Scrap Lab Backpack Bag Body
Last weekend I started on the project. It has a lot of steps and the directions were not always completely clear *to me*. I know magazines have limited space.
The pattern calls for fat quarters to create the bag body. That is what came in the kit. The pattern also said that I should cut 2″x21″ strips from the FQs. The problem turned out to be that the FQs were not 21″ wide even before I squared them up. It made no sense to me since that is what I understood the whole point of the Scrap Lab is – to use a small amount of fabric. I worked at adjusting all the measurements to accommodate this problem.
Sewing Strips
The backpack requires two panels, like the one made from strips (shown above). In order to keep the strips in order, I laid them out on my design wall and sewed them in order. I found that, in order to keep them in the same order, I had to sew them in the same order, but upside down. For example, I always placed the strip I wanted to end up lower on the panel on top to sew it.
I was further disappointed when I also found that the half yard of background was not enough for all the pieces that needed to be cut. I am not sure if I cut wrong. I didn’t see a cutting layout (like they have in garment sewing), so I cut the largest pieces first, but still did not have enough. Shifting gears deftly, as I did not what a ‘lack’ of fabric to derail the project completely, I chose a different fabric for the pocket, which will look nice and will solve that problem. All in all these fabric problems were unexpected and, as I said, disappointing.
I worked on it on Sunday this past weekend. It has a 1/2″ seam allowance, so I couldn’t really make progress on my various leaders and enders projects without the 1/4″ foot on the machine. That was a little frustrating.
I did make good progress on the backpack, though. I have the straps and drawstring done. I have the bag outside and the lining done. I wasn’t able to finish it, because I didn’t have a slider buckle/triglides. I also didn’t really understand what they were even after searching out a photo on the web.
The slider buckle/triglides turned out to be pretty hard to find. I found some nice ones in the UK and Australia. Amazon has packs of 50. My local Joann and Beverly’s had none. ERGH! Monday, after work, I went to Britex and they had them there. They usually have weird stuff like this. With bags being so popular, I was surprised that these were so hard to find.
It was good that I went to Britex, though, as the people there actually know something about what they sell. We looked at our own bags and the pieces I was thinking of buying and kind of talked through where the parts went on the bag. It was a good experience.
I think I have said before that I prefer to make all the fiddly pieces first – straps, pockets, etc. This pattern is not written that way, so it was a little hard to backtrack and make the straps and drawstring when I was on a roll with getting the larger pieces of the bag done.
There were some directions on the pattern that were confusing or poorly explained. I was able to figure out making the pocket, even though I wasn’t familiar with the type of pocket. Once I figured out that it was a 3D pocket, I thought the method was clever. The pattern leaves the inside edges raw. The method could have been improved somewhat by finishing the inside edges, which I did even though the directions didn’t say to do it. The location of a 3D pocket is a little odd, I thought, as whatever you put in it will pull the whole bag down from the shoulders.
I had some trouble applying the pocket to the bag. The directions just say to topstitch the pocket on to the body of the bag. They do not take into account the corners which are multiple layers thick. Since the pocket is 3D, I could have used some more detailed directions and additional photos on going around the corner.
I also thought the pattern on the web did not use the web to maximum effect. I would have had the PDF, as they do, since it is easy to print. I would have also linked out to videos showing how to apply the pocket, how to add the grommets and other handy hints. These videos could be used over and over for many different patterns and would drive traffic to their site.
It could be that this pattern was perfectly written and the problems were all user error. I am a visual person and learn better with lots of pictures and when people show me how to do something.
I went back and forth about whether or not I should post this on my blog before the BAMQG party, but I have so little to post these that I decided to go for it. I don’t know all of you as well as I would like, but I don’t think the recipient is a reader. Perhaps she will be after receiving the gift.
I agreed to make a Secret Santa gift for the BAMQG Holiday Exchange. It was hanging over my head, so I decided that Saturday would be the day to start. I actually cut out all of the pieces on Friday night and put most of the interfacing on as well, so the sewing went pretty easily.
I decided to make another Jane Market Tote for the gift. It is a good pattern – useful and nicely shaped. I am also familiar with it since I made over a dozen of them since I bought the pattern. The other bonus was that a shopping bag was on the giftee’s list.
Perfect.
As I said, I cut out the pieces on Friday night. I also decided to try adding some ShapeFlex stabilizer to see if that would give it some body.
As an aside: Have I said how much I like ShapeFlex? I love it. It is so easy to work with. It is not thick. Now, I am almost out again and am now thinking of buying a bolt. Crazy?
Anyway, I was able to put ShapeFlex over all the pieces except one, so I was really ready to sew on Saturday morning. So, Saturday morning, which was really about 11am since I slept so much, I sewed. The bag went together really well. I tried very hard to make it look nice. I used a star pattern on my machine to finish the top of the bag. I also put the handles inside rather than outside after the bag is finished, as the pattern suggests.
It is a nice bag, but I also decided to make a little needlecase and put that in the bag as well. I know it is not necessary, but I have some leftover scraps from the bag. I also found a pattern in Modern Patchwork for a needlecase that doesn’t look too difficult. Stay tuned for that.
Sara of Sew Sweetness kindly asked me to participate in her Purse Palooza, as I have mentioned. Today is my day. Find my review on the Sew Sweetness blog TODAY! Go leave a comment so Sara knows how popular I am. 😉
A Day in the Park Backpack
I decided to, finally, make and review A Day in the Park Backpack Tote by Liesl Gibson. It is a few years old and I was relieved to see the pattern is still available at the Oliver+S website. I was pretty excited when I bought the pattern and I didn’t want you to get excited and then not be able to buy it. Also, it is about time I made it.
One of the reasons I bought the pattern in the first place is that I liked the verticality of this bag. Vertical bags are good for commuting as they don’t hit people when you walk up the stairs from the train. The size ended up being good-not so large that I would hurt my shoulder, but a nice size for commuting with a snack, a book, and a few odds and ends. Lunch wouldn’t fit unless it was bills in your wallet. 😉
First off, the look of this pattern reminded me of the Vogue and McCall’s patterns we buy to make clothes. I am not surprised as Liesl Gibson designs children’s clothes. I don’t think she has created many bags or small accessories.
The pattern is in a paper envelope with newsprint instructions. The pattern pieces are printed on tissue-type paper. I am always a little scared of the tissue paper patterns as I am afraid they will rip and be useless. I find it interesting how pattern expectations (plastic envelope with folded 8.5″ sheets inside) have changed since I bought this pattern.
Sara suggested a couple of ideas to get the review started. I don’t have any problem finding things to say, but I thought these were good ideas, so I will include them. Sara asked:
What fabric/supplies were needed to make the bag?
What did you think of the illustrations and instructions?
Did you make any modifications to the pattern?
What Difficulty Level did you think this pattern was at?
Fabric and Supplies
There is a complete fabric and supply list that includes 11 items. You will use all of them if you make the bag as directed. I didn’t find this to be a bag you can decide to make at 11pm on Saturday night and finish to take to brunch with friends on Sunday morning. There are some specialty hardware items that I don’t keep around. I made a special trip to Britex to purchase most of them and Britex is not open at 11pm on Saturday night. 😉 I am sure they are also available online.
I found it difficult to find the O rings required for the pattern. I ended up buying two key rings that were on sale at Joann just in case. After visiting 3 stores and multiple online sites, I ended up using them. They were a little small so make sure you buy O rings on the large end of the spectrum described on the package instructions.
O Ring Option
I found this package in the beading aisle at Michael’s, which was another option. I didn’t really want to buy 20 O rings, though. I don’t plan on making 10 of these bags.
In the finishing process, DH was helping me with the rivets. I told him about the O ring problem and he suggested a hardware store. He said Home Depot and Lowe’s are more home improvement and don’t have much hardware, but a real old fashioned type hardware store where you can buy individual pieces of metal thingy-ma-bobs might be a good source. I’ll have to check it out. I have heard of other quiltmakers finding supplies at hardware stores, but I never think of it.
Additional Supplies I Used
Aurifil 2250, a red, for the top stitching.
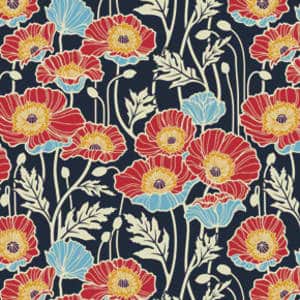
Free Spirit/Joel Dewberry Notting Hill Midnight Poppies (this is home dec weight)
Soft & Stable (instead of the canvas for the interfacing)
Good Morning by Me and My Sister for Moda (same fabric I used in the Star Sampler) for the lining
Pellon #100R Vinyl Fuse for the base
Shape Flex fusible interfacing
Saral paper to transfer markings from pattern to fabric. You might need two colors if you use a light and a dark. I wrote a post about Saral Paper that gives more information.
Directions
My first thought about the directions were that they were long and confusing. I always think that, though, because it is hard for me to read through the directions of something and understand what they mean until I start working through the steps. I am much better at figuring things out or being shown techniques BUT the former strategy doesn’t work for bags and the latter wasn’t available.
In the end, I thought there were a few things that could have been improved on the directions, but, in general, the directions were good.
There is a nice little chart that tells what to cut out of which fabric. In the chart, they list Primary Fabric, Contrast Fabric, Lining, Canvas. One immediate problem was that I didn’t know what pieces of the bag were going to be made out of which fabric. The section titled “Materials Needed” cleared that up a bit, but I was still unsure how the canvas (used for stabilizer) would be used until I read much further down the directions. I would have liked more of an explanation of the whys and wherefores of the fabric/supplies choices as well as a list of possible substitutes. For example, I would have liked to have known why the designer chose canvas rather than another kind of stabilizer. Look and feel? Weight? Availability? Cost?
It occurred to me that the pattern might not have been appropriate places for the whys I needed, so I went to Flickr and searched for “A Day in the Park” backpack. I found a Flickr group of these bags. You can get a good idea of the placement from the random photos and the photos in the group. I got a better idea of what pieces belonged in which fabrics. Hooray for Flickr! Nota bene: Please note that I said a better ideanot that I knew exactly. There was some variation in the way pieces and fabrics were referenced, or, at least, in the way I understood them to be referenced. I would like to see the different supplies referred to in the same way on all of the pieces, the chart, the supply list and the instructions.
I didn’t find much on the Oliver+S blog through web searches, but there was a post about why she created the pattern (sewing class). I did see that shops who are teaching classes could, at the time (don’t know about now), purchase packs of the hardware along with the pattern. While that would not have worked for me, I could have called to see if the packs were available for purchase by non-wholesale customers.
I also saw one forum post, which had some helpful information about making the straps. I didn’t explore to see if there were more posts.
Joel Dewberry Notting Hill Pristine Poppy (midnight)
Once I decided which fabric to use (Joel Dewberry Notting Hill Midnight Poppies, home dec weight), and after I washed it, I got started on the cutting. The cutting was a bit daunting, like the Petrillo Bag, simply because there are a lot of pieces involved. [Nota bene: when I cut out the second one, I cut the main fabric, then the lining and stabilizer fabrics that went with that main fabric piece and the cutting seemed less daunting.] I persevered and found the chart of how much of each fabric, etc. to cut to be very helpful. I was able to use it as a check to ensure I had enough of everything cut properly.
Making the Petrillo Bag was still fresh in my mind, so I decided use some of the supplies from that project. Since I didn’t have the canvas and don’t like floopy bags, I decided to use Soft & Stable instead of the canvas. I knew I was taking a risk. I usually like to make things as per the instructions the first time through, then start making changes if I make the bag again. I have enough bag making experience and I wasn’t doing anything completely crazy, so I decided it wouldn’t be completely crazy to use Soft & Stable.
The other thing I did was use iron-on vinyl for the base. I have been wanting to do it for the bottom of bags for awhile and this was a good opportunity. Pam did it first and gave me courage. The Base pieces on the A Day in the Park Backpack tote were small, so it was a good test. They came out pretty well, but, mid-process, the vinyl was stickier than I expected. I used Pellon #100R Vinyl Fuse. I used an applique pressing sheet on my ironing board and the vinyl release paper on the top. If I had been able to find my second applique’ pressing sheet, I would have used that on top. Nothing came off on my iron. Remember to cut the Base piece a little large, apply the vinyl, then trim the fabric with vinyl to the size of the pattern. This will avoid any issues with shrinkage.
I lined all of my lining pieces with Shape Flex fusible interfacing,to help prevent floop. Floop is bad on the lining also, because it means that the inside pockets aren’t strong enough to hold your stuff, and pens, etc can flip out of your bag. I felt that having iron-on interfacing would work fine and give the pieces some added body. It also saved me time and used a product I already had on hand.
I also didn’t want to baste all of the pieces I needed to cut. I used the WonderClips to help prevent the need to baste. They are too thick to sew over, but keep all the layers together with no problem.
I don’t think the main fabric really needed interfacing since I was using home dec weight fabric, but I put it on anyway. I haven’t used a lot of home dec fabric, so I was not 100% confident. As I said, there is very little out on the web about this pattern so I didn’t have a lot of information and experience to choose from when looking at what other people did. FreeSpirit and Joel Dewberry both replied to my question about washing the home dec fabric, which was GREAT!
Instructions
I thought the instructions were detailed enough. The way the pattern is written makes it clear that there is a certain level of knowledge expected. I would make several bags, including something as complicated as the Petrillo Bag before tackling this bag. In the blog post I referenced above, this pattern is designated as an advanced beginner pattern. I think that is optimistic. Not to discourage beginners, but there are a lot of steps, a lot of supplies, including a zipper, and sewing through many, many layers. I’ll defer to Liesl Gibson, but would categorize this pattern as Intermediate.
The instructions were a little hard to follow. I think they needed a bit more testing by random makers with a variety of intermediate to advanced experience. The more I got done, the easier it was to navigate through the pattern, but the designer should revise it for consistency with terminology and add some additional explanation, especially at the beginning.
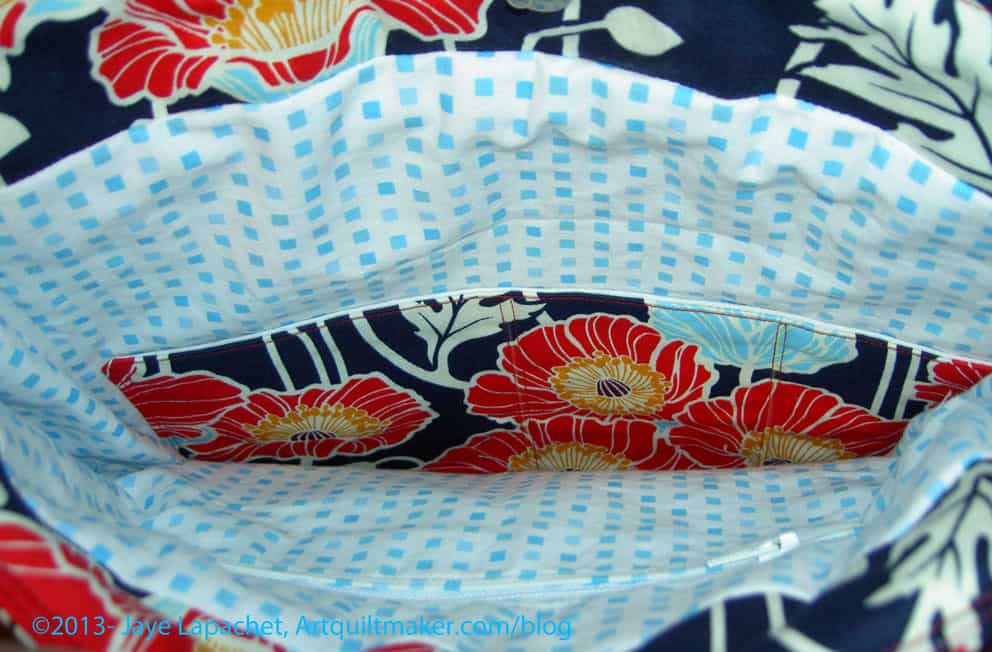
Inside A Day in the Park Backpack Tote
The instructions didn’t say how to put in a zipper (I don’t necessarily think they should), so make sure you know how to do that before starting the bag. Instead of making a zipper pocket, you could make two of the lining panels with the appliqued pocket. I do think that the directions for the appliqued pocket don’t tell the maker how to apply it in a nice way. The finishing isn’t very nice looking and I went around the pocket twice to make sure that it stayed on, if I put something heavy in it.
The fabric I used for the interior wouldn’t necessarily be my first choice again. I like it, but it frays. Definitely use a light colored fabric for the inside of your bags when making your own. A light colored lining makes it much easier to find things in the bottom of your bag. I am using a black on white for the second version.
Finished A Day in the Park Backpack Tote
I am pleased with how the bag came out.
Things I Liked
No errors in the pattern
Shape of bag
The directions on how to make the zipper pocket. It came out really well
If I Made this Bag Again
I would try it with the canvas as the stabilizer
I would eliminate the facing and magnetic closure at the top and add a flap instead
I would add a larger pocket, such as a file folder pocket on the back
I would add a messenger bag type strap and not make the backpack straps
I would use a slightly larger seam allowance on the lining as cutting it per the instructions make it a bit large for the size of the outside of the bag. Alternatively, I could cut the pieces a little bit smaller
Leave a larger opening in the lining to turn the bag, especially if I used the Soft & Stable again. The Soft & Stable takes up more space and was kind of a problem to turn using the opening size indicated in the pattern
The lining bottom is made of two pieces sewed in the middle. I would try to cut one entire piece rather than two pieces. It is the lining, so who really cares, but I think it would look better and be one less step
Modifications to Materials
Iron-on interfacing (Shape Flex) instead of basting on interfacing
Soft & Stable instead of canvas
WonderClips instead of basting
I have already started a new version of this bag with the modifications described above. I am not very far along, so stay tuned.
Thanks to Sara for inviting me to join Purse Palooza. I really appreciated the opportunity to make a bag that had been on my list for awhile and write about it. Check out the other bags that will be shown in the next two weeks.
I am happy to be participating in Purse Palooza this year with a special bag sewing pattern review! Here’s how the event works:
1. Every weekday from September 30th – October 25th, there are at least 2 amazing guest bloggers on the Sew Sweetness site scheduled to share with you a purse sewing pattern review. None of the purses reviewed from the event last year are being reviewed again, so these will be fresh sewing pattern reviews! Each review will contain detailed information about what the reviewer thought about the sewing pattern, modifications made, what kind of interfacing used, and more! There are a few technique and product review posts sprinkled in as well.
This is a great way to get inspired to make the bag you have always wanted to make. Having a buddy really helps. Remember when Pam and I did the Petrillo Bag-Aong?
Aeroplane Bags
2. Even more exciting…THERE WILL BE A GIVEAWAY EVERY WEEKDAY DURING THE EVENT! That’s right, 20 GIVEAWAYS!
3. At the end of the event, you will get a chance to show me your purse in order to win some amazing prizes! Of course, international entries are welcome too!
1. Check out all the purse pattern reviews throughout the month and get inspired to sew up a purse of your own!
2. Link up your completed purse on the Purse Palooza 2013 pageBETWEEN SEPTEMBER 30th AND NOVEMBER 11th. Your purse must be created and photographed between those dates; purses made prior to September 30, 2013 will be disqualified. The purse may be of your own design, or made from a sewing pattern. You can link from Flickr, your blog post, or wherever else you host your photos.
3. There is no limit to how many purses you may enter, as long as they were made between September 30th and November 11th. Only one link-up per purse please.
*Note: Besides bags and purses, for this event also acceptable are clutches, backpacks, wallets, etc.
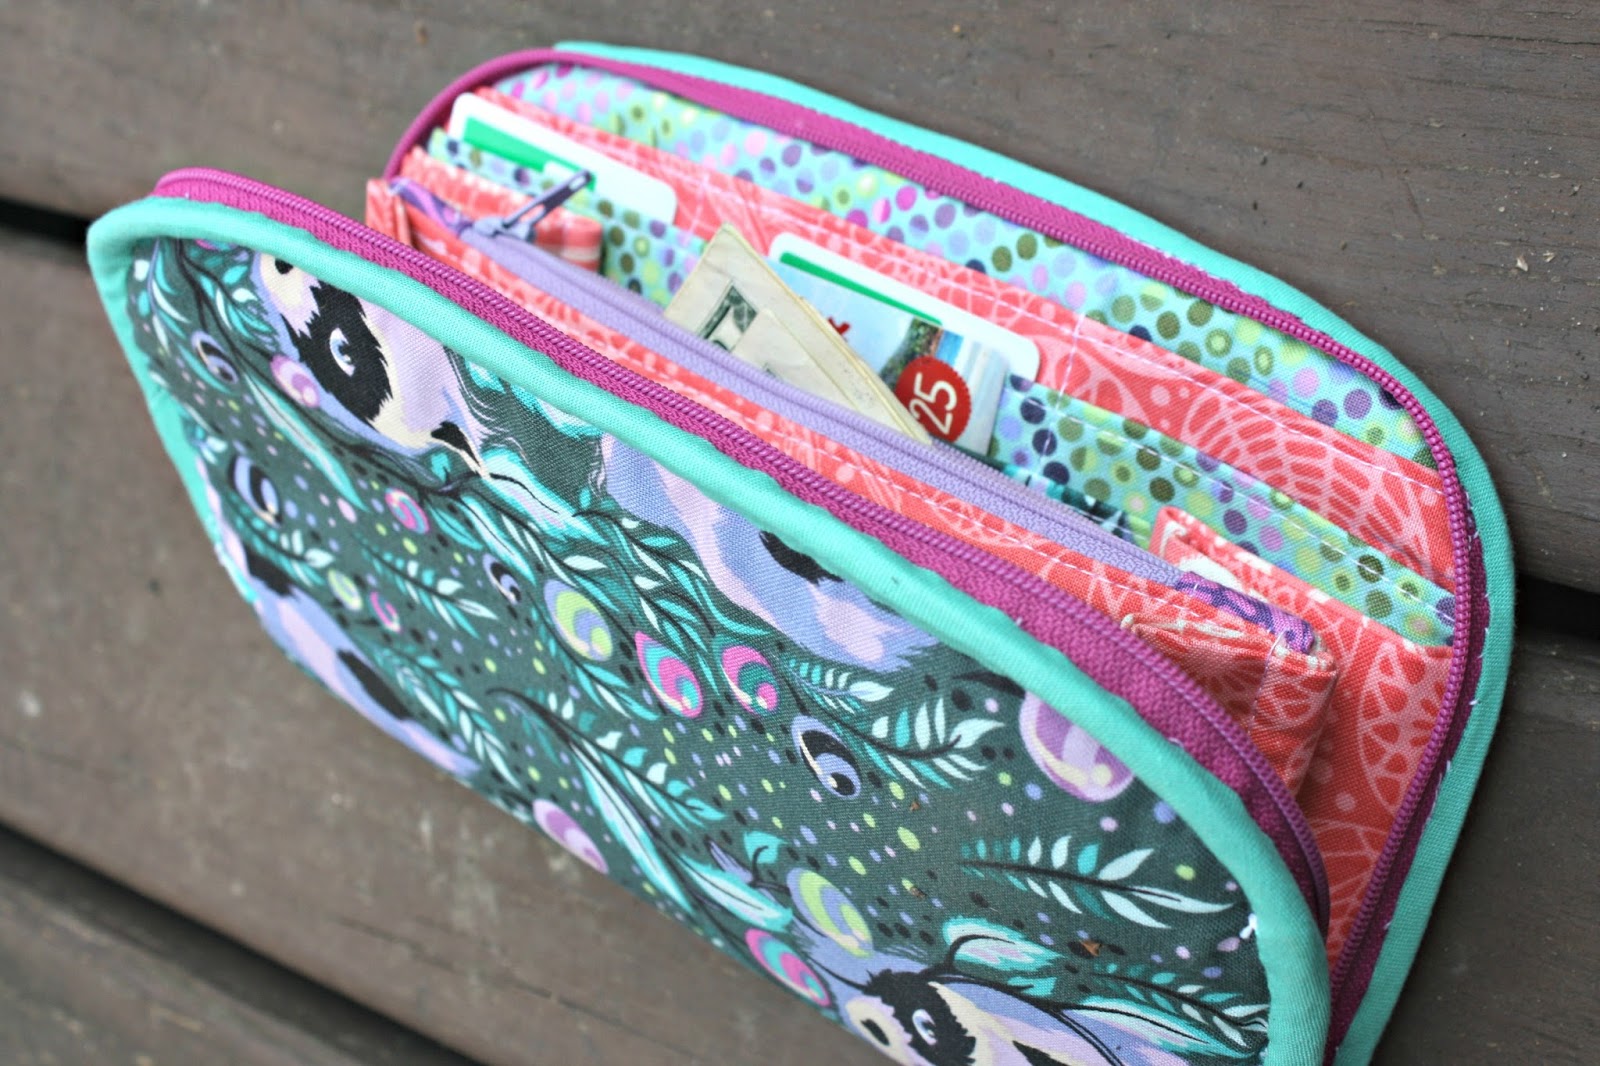
Greenbacks Wallet Trio
Prizes
This year, there will be 1st-4th prize winners chosen from all those that submit a purse during the event. There will also be a randomly-drawn winner out of everyone who enters!
1st prize – 4th prize will receive an AWESOME prize pack courtesy of Pat Bravo, genius fabric designer extraordinaire! The prize packs will each include 3 Pat Bravo sewing patterns (La Boheme Skirt, Barcelona Bag, and Capri Bag), a pack of Pat Bravo Aurifil Threads (thread pack may vary, as there are 3 different packs), and 10 Pat Bravo fat quarters (fat quarters may vary).
In addition, the 1st prize – 4th prize winners will also receive a copy of Sara Lawson’s new book, Big-City Bags!! The book releases November 5th, and you can pre-order your book now!
Retail value of each prize pack: $127.
There will also be one randomly-drawn winner out of all purses entered, and this winner will receive a $50 gift certificate to Sara’s publisher, Martingale (as well as a copy of her new, not-yet-released book, Big-City Bags!).
Retail value of prize pack: $77.
Judging
Purse Palooza will be judged this year by Kay Whitt of Serendipity Studio. Kay writes the most stylish and fun-to-sew clothing patterns and bag patterns out there.
Thank you to all of the wonderful sponsors that are supporting this event!
Quick peek: There are a few things that I like about this book without doing any in depth reading yet. I really like the Spicy Girl Messenger Bag, the author’s use of Wonderclips in her (their?) process and the fun designs.
I have been thinking about Pam’s comment about the Petrillo bag being too large for her as a handbag. I don’t remember if she made this comment on her blog or podcast. Podcast, probably. Anyway, this comment has been on my mind, because of the way I use bags larger than a handbag – the ‘class’ of bags I would call totes.
I take public transportation a lot, and when I drive, I try to group my errands so that I can take the car out one time even if I make multiple stops. I don’t mind driving, but it isn’t very convenient (traffic, parking, my lack of patience) all the time. Also, it wouldn’t be my first choice of activities if I had my choice between sewing and driving (in my fantasy world, I would have a driver at my beck and call).
This practice means that I often have stuff (library books, forms I signed for school, letters and packages I need to mail) I need to drop off at one place, bring with me to another place, etc. Instead of dumping all the stuff in the trunk and then putting it in and taking it out of one bag, I put the stuff for different stops in different totes and grab the one I need at the appropriate stop.
This might seem like tote bag overkill, but it allows me to get everything sorted out in my house and gives me a justification** for making as many tote bags as I want. 😉 Further, making as many tote bags as I want gives me a reason to buy yards and yards of beautiful fabric (Philip Jacobs, I am looking at you!) to make more tote bags.
All of which brings me to Purses Bags Totes. I really like the Jane Market Tote which I would consider a classic shopping style bag. However, there are many, many fabulous tote bag patterns in this world and I intend to make as many of them as I can. The authors of Purses Bags Totes really have a fun sense of style. Fabric notwithstanding, the pleats, angled zippers and interesting cut out shapes really make the patterns contained in this book different and interesting.
The Cutie Backpack (and I don’t even really mind the name), pg.57, has a wonderful quarter circle pocket on the outside. Their bag, called, simply, Tote Bag, pg.73, would be great for shopping similar to the Jane Market Tote. It is a little different and would add some interest to the drudgery that shopping can be. Imagine people stopping you and asking you about your bag.
The Citrus Handbag, pg.11, reminds me of the Aeroplane bag by Sew Sweetness. It is a little smaller, but would make an excellent coordinating handbag with the Aeroplane Bag, if you made them with similar fabrics.
The weird part about this book is that there is barely any introduction. The General Instructions, pg.4, page is a few paragraphs long, then the authors launch into making pockets. I see that the header of the first pocket page also says “General Instructions,” which leads me to believe that is one big section. I would have liked a paragraph introducing the layout of the book that told me they were providing general instructions on pockets and the pockets could be interchanged with the different projects. I am assuming that is what they mean, but who knows?
The book comes with a CD and I have no idea what is on the CD. Yes, I can look at it and will later, but nowhere does it say that the patterns are on the CD. I would have liked to see a list or a note in each pattern saying “full sized patterns are on the CD; print using…”.
The pictures are really good, as far as I can tell without making one of the bags. Some of the handle and bias tape making techniques could be adapted and used for other bags because of the detailed photos enhanced by instructions.
I like the charts used to explain cutting and fusing directions. They are very clean.
All in all I like this book and see a few bags I would like to try to make. I am definitely putting Purses, Bags, & Totes on my Amazon wish list.
As you know, I will be First Lady of the NSGW in 2017. Sounds pretty fancy, I know, but I won’t have a paid staff or a clothing allowance and it will be a ton of work. DH and I have to plan the annual conference. There will be several ladies (about 12, I think) who will be helping me plan the events for the ladies. It is common practice in this group, as well as good manners, to give thank you gifts. Since there is no shortage of fabric at my house, I thought I would see about making gifts. I may not end up going this route, but it is a good, and fun, first step. Much better than shopping, I think.
I first thought of the Anna Maria Horner Multi-tasker tote, but wasn’t really happy with that choice (too much fabric, hard straps to turn). One AMH MTT once in a while is no problem, but 12 one after another? I might rip my hair out. I put it on the back burner and thought it would be my go to option. Truthfully, though I was still casting around for an idea that really floated my boat.
WSFC Handbag
At the West Seattle Fabric Company, I saw a little tote bag, or fabric handbag, that made me take notice. I thought it would be a better option: smaller, more useful, no difficult straps to turn, good size, nice body (e.g. stands up). They didn’t have a pattern, so we we searched the web and TFQ found a tutorial that we thought would work.
My job, while TFQ went to work one day during my visit, was to figure out whether the tutorial, with the addition of handles, would work or if we would have to modify the tutorial further.
I figured that we would have to modify the size, definitely. Also, in my experience web tutorials aren’t tested as well as some other patterns (though I have used some patterns that were pretty terrible in the directions department), but the shape was right and the size was pretty good. Just to keep those of you off the edge of your chairs: this tutorial turned out to be pretty good in terms of directions.
Supplies and tools
Fabric for outside and lining
Wonderclips
Peltex
Sewing machine
thread
Iron
Ironing Board
graph paper
mechanical pencil
drafting ruler
rotary cutter
rotary ruler
Pins
Optional: fusible interfacing for handles
The tutorial from the Sometimes Crafter is also very helpful. Note that her basket is square and if you do not make your basket (handbag) square, you cannot use her folding trick for sewing.
When I make a bag, I like to get all the fiddly bits out of the way. When I am on a roll, I don’t want to stop to make handles or pockets or whatever. I want to grab them and add them, thus I changed around the order of how I made the bag from the way the tutorial arranges the steps.
I did, actually, make the pattern first, so you could do that before the fiddly bits.
Make the Handles
Cut two strips 4″x19″ or whatever length you want your handles. I wanted someone to be able to slip her hand under a handle, thus the length. Feel free to adjust the length to suit your needs. You may need to make one or two of these to figure out what works. They are fast so don’t roll your eyes. 😉
Optional: if you want added body for the handles, use some fusible interfacing. Cut the interfacing about 1/4″ smaller than the handles and center the interfacing before you press it to the wrong side of the handles. Choose whatever weight you think is appropriate for your use.
Fold the newly cut strips in half and press.
Open both handles.
Fold the raw edges towards the center line. Press the new folds only. Press carefully so you don’t press out the center pressed line.
Fold along the center line and press the entire strap.
Fold to center line
You should have a piece that is 1″ x 4 layers.
Top stitch the open end of the handles with matching thread.
Top stitch the closed end of the handles with matching thread.
Set aside until after you sew the body
Make the Pattern
Get your graph paper.
In the above photo, I just used plain paper and a rotary ruler, because I didn’t have graph paper handy. I would DEFINITELY use graph paper. I used it in the second version and it made the process of pattern making faster and easier.
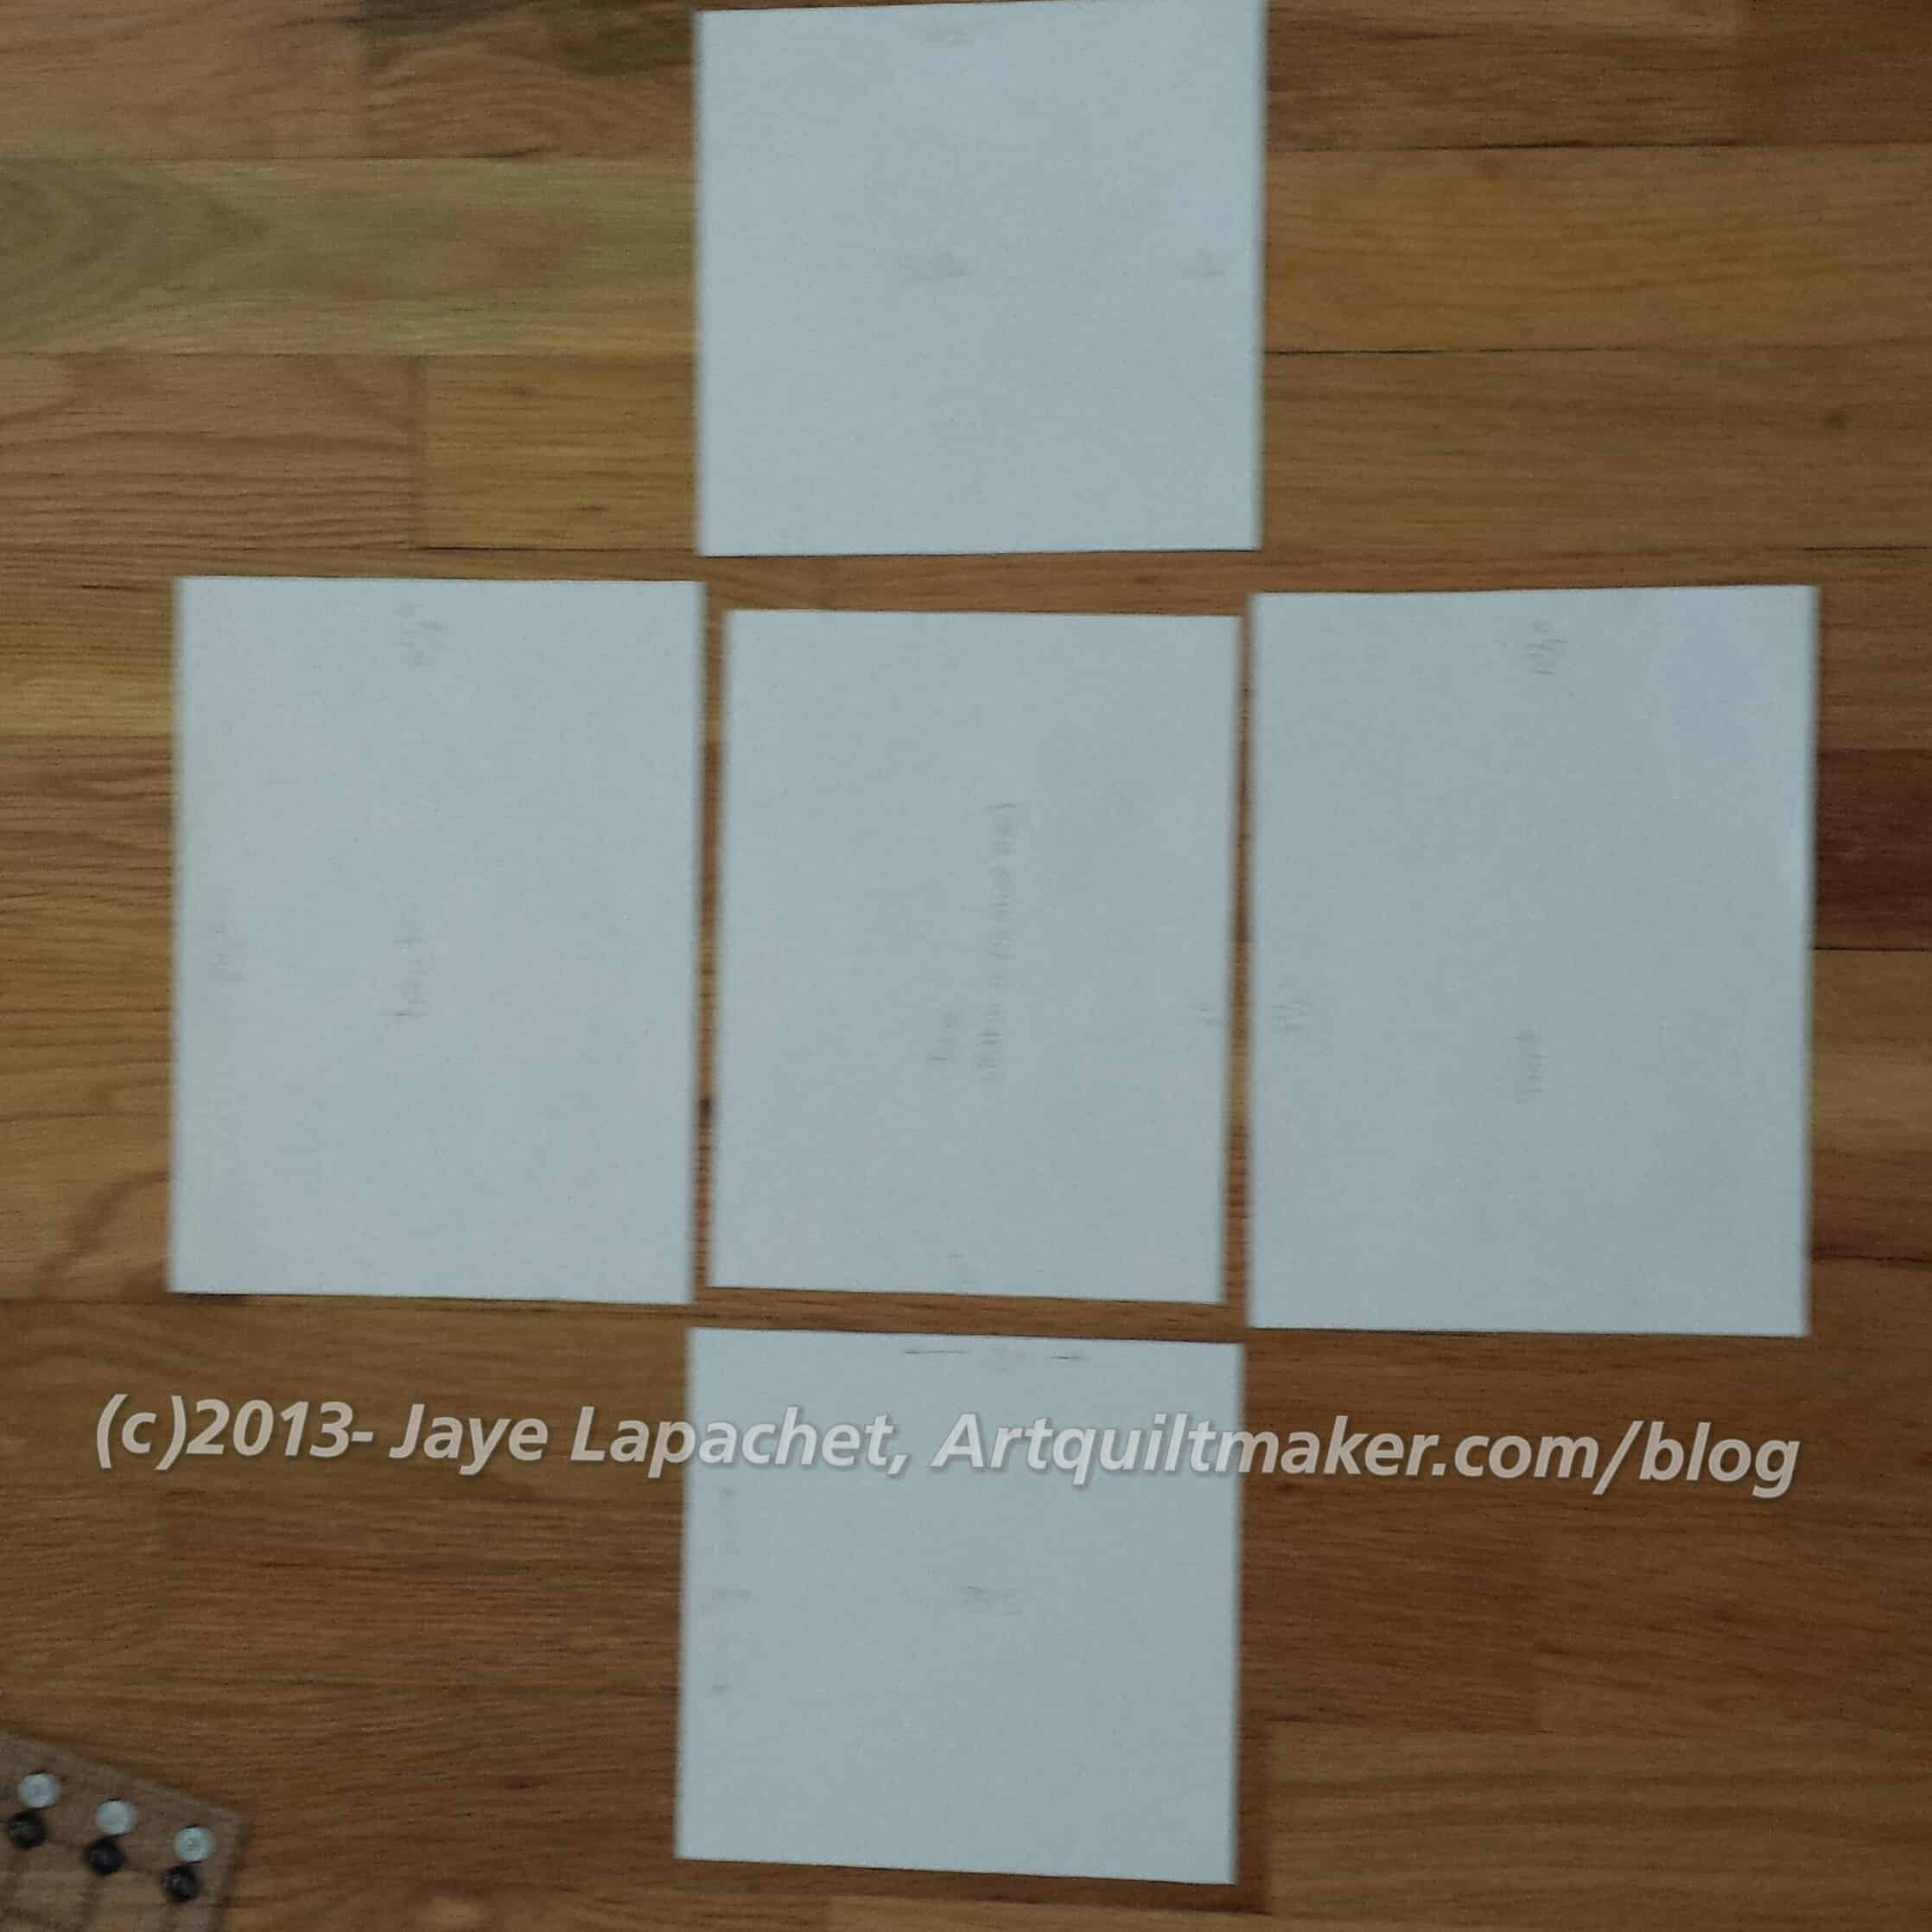
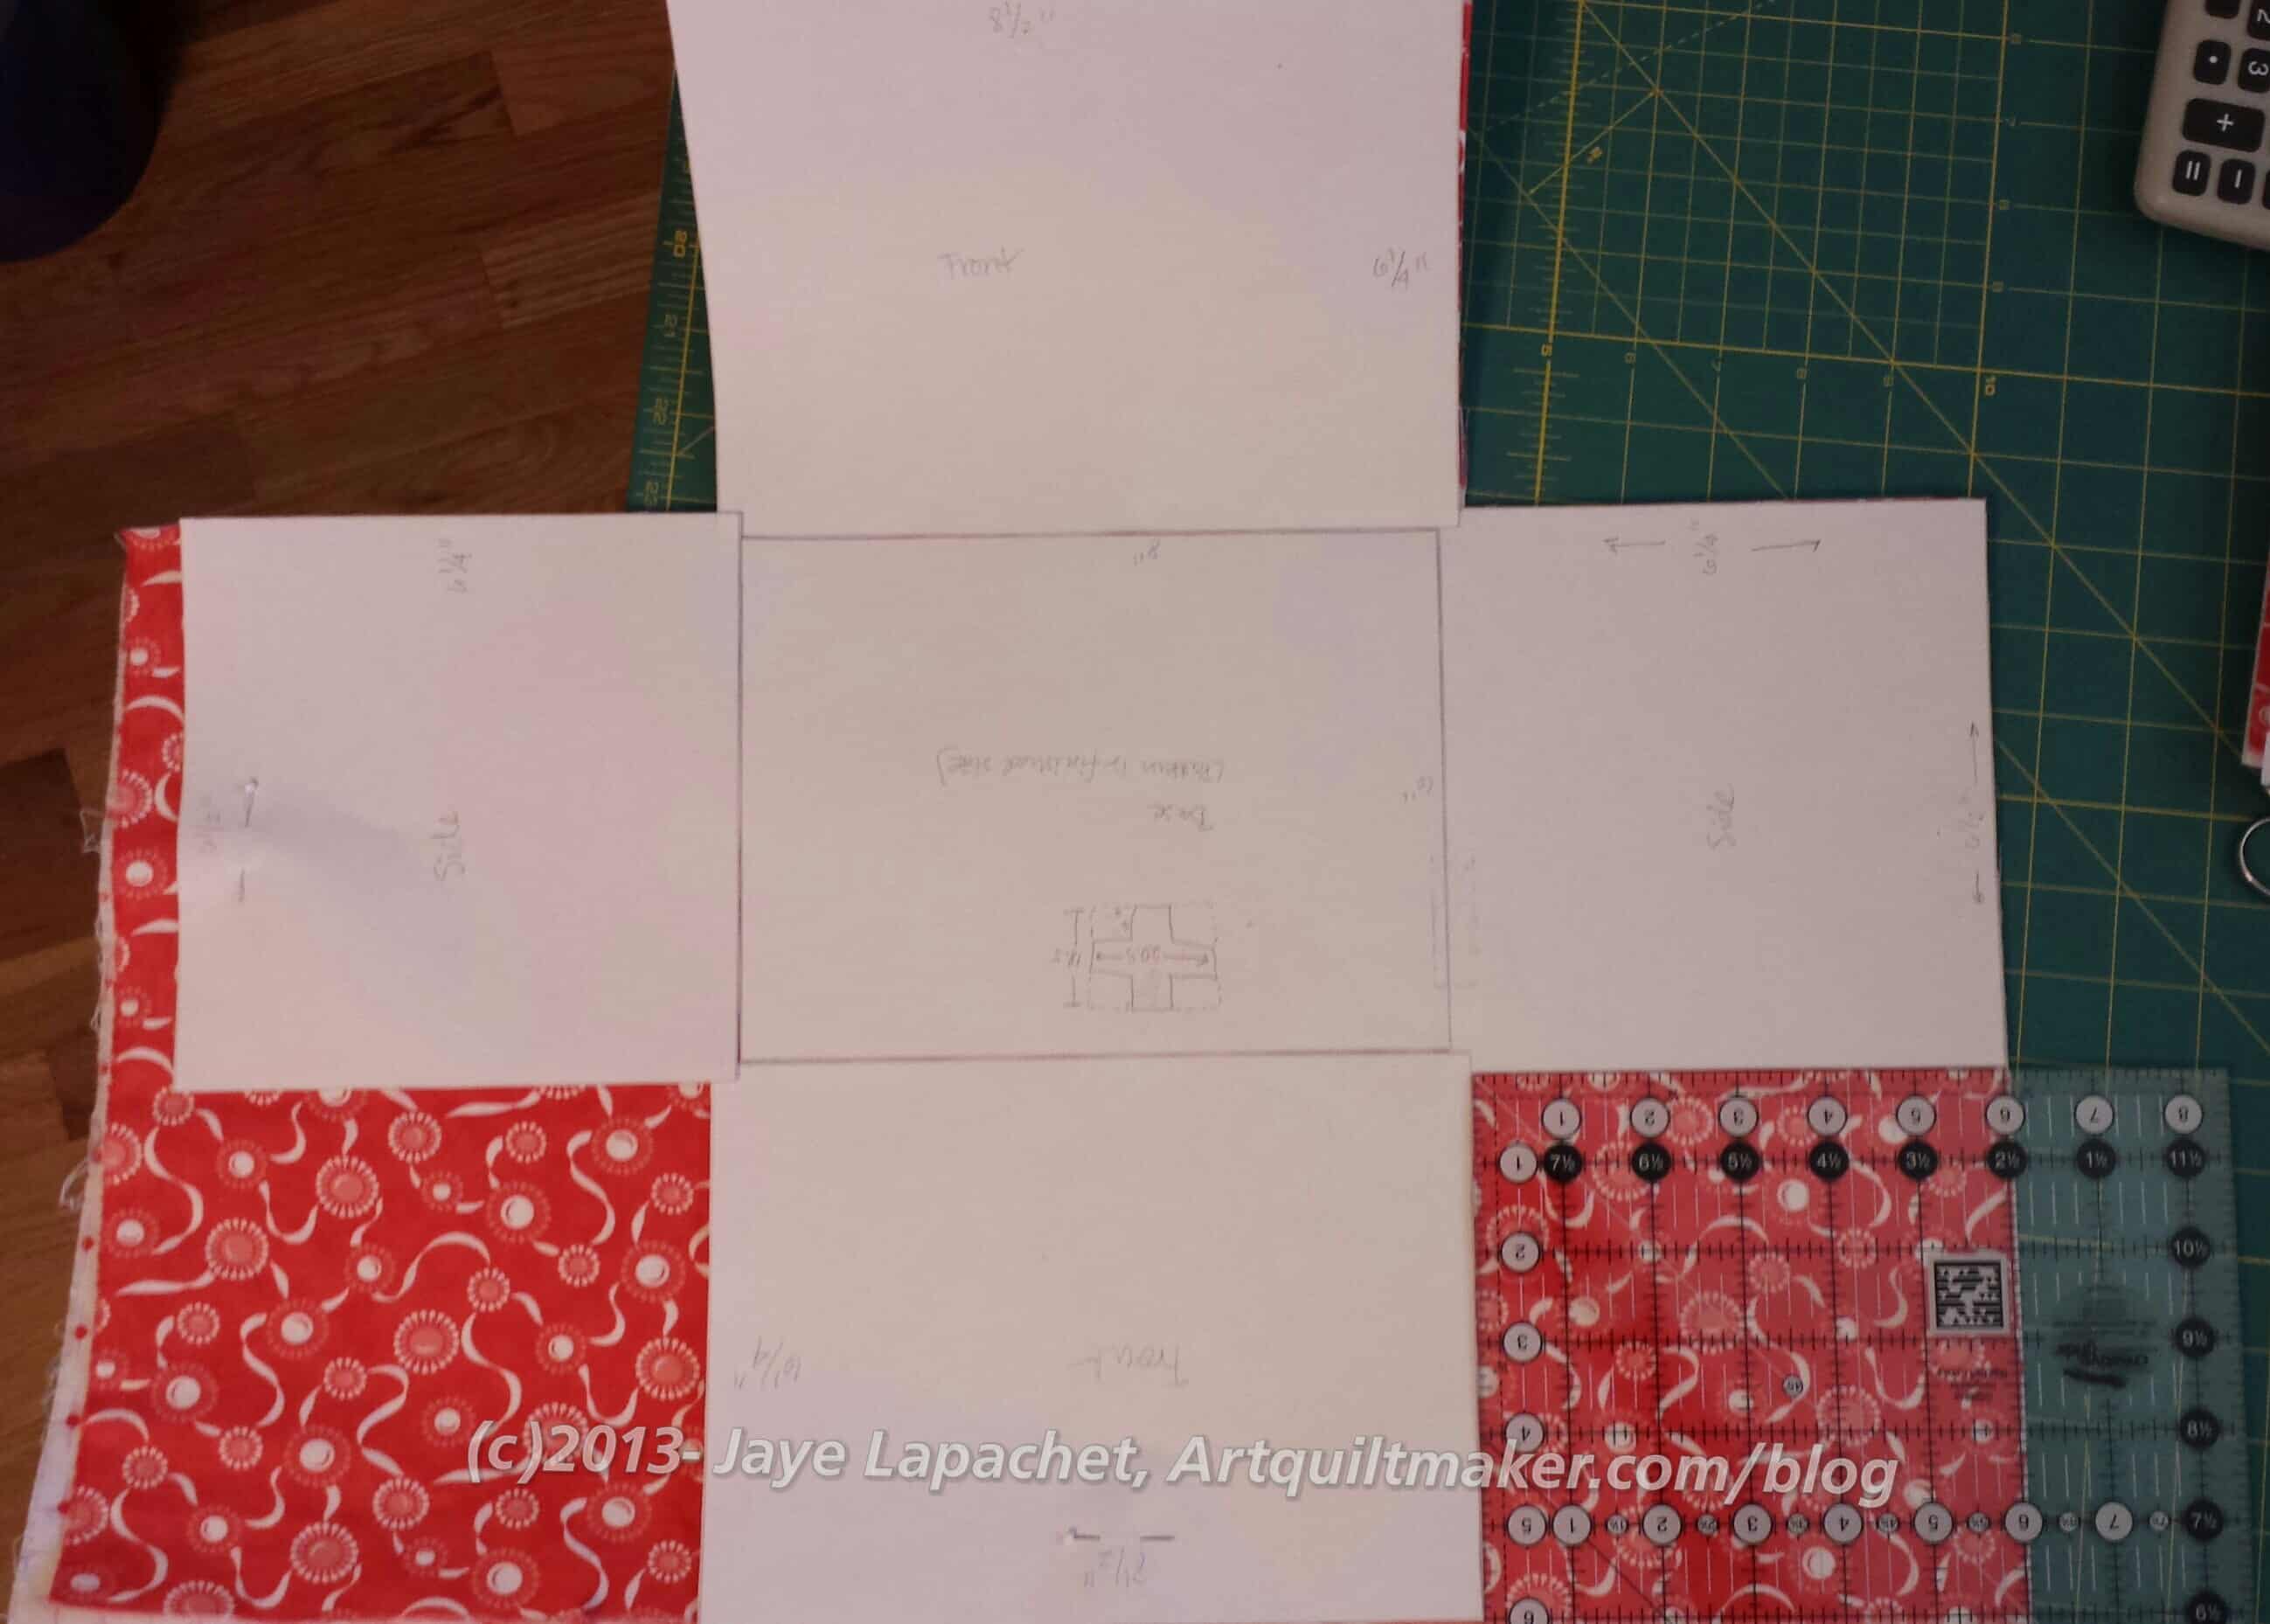
Your pattern will end up as the shape of a cross. You may have to tape your pattern together, like I did. Here are the sizes to draw out or use the sizes listed in the tutorial :
Basic size of bag is 8″x4″
Sides: 4.5″x6.25″
Bottom: 4.5″x 8.5″
Front: 4.25″ x 8.5″
Back: 4.25″ x 8.5″
Seam allowances are 1/4″
The above sizes are from the second version, because I liked the proportions better. Before I commit to 12, I will tweak the dimensions further. Don’t worry! I’ll keep you in the loop. 😉
Get your ruler, paper and pencil and draw the rectangles described above.
Cut out your pieces and lay them out.
Layout your pattern so you can get an idea of the size. Carefully tape the pieces together and find fabric that works both in size and design. Nota bene: you may want to hold back the front and back pieces. Read the section below on cutting fabric and decide.
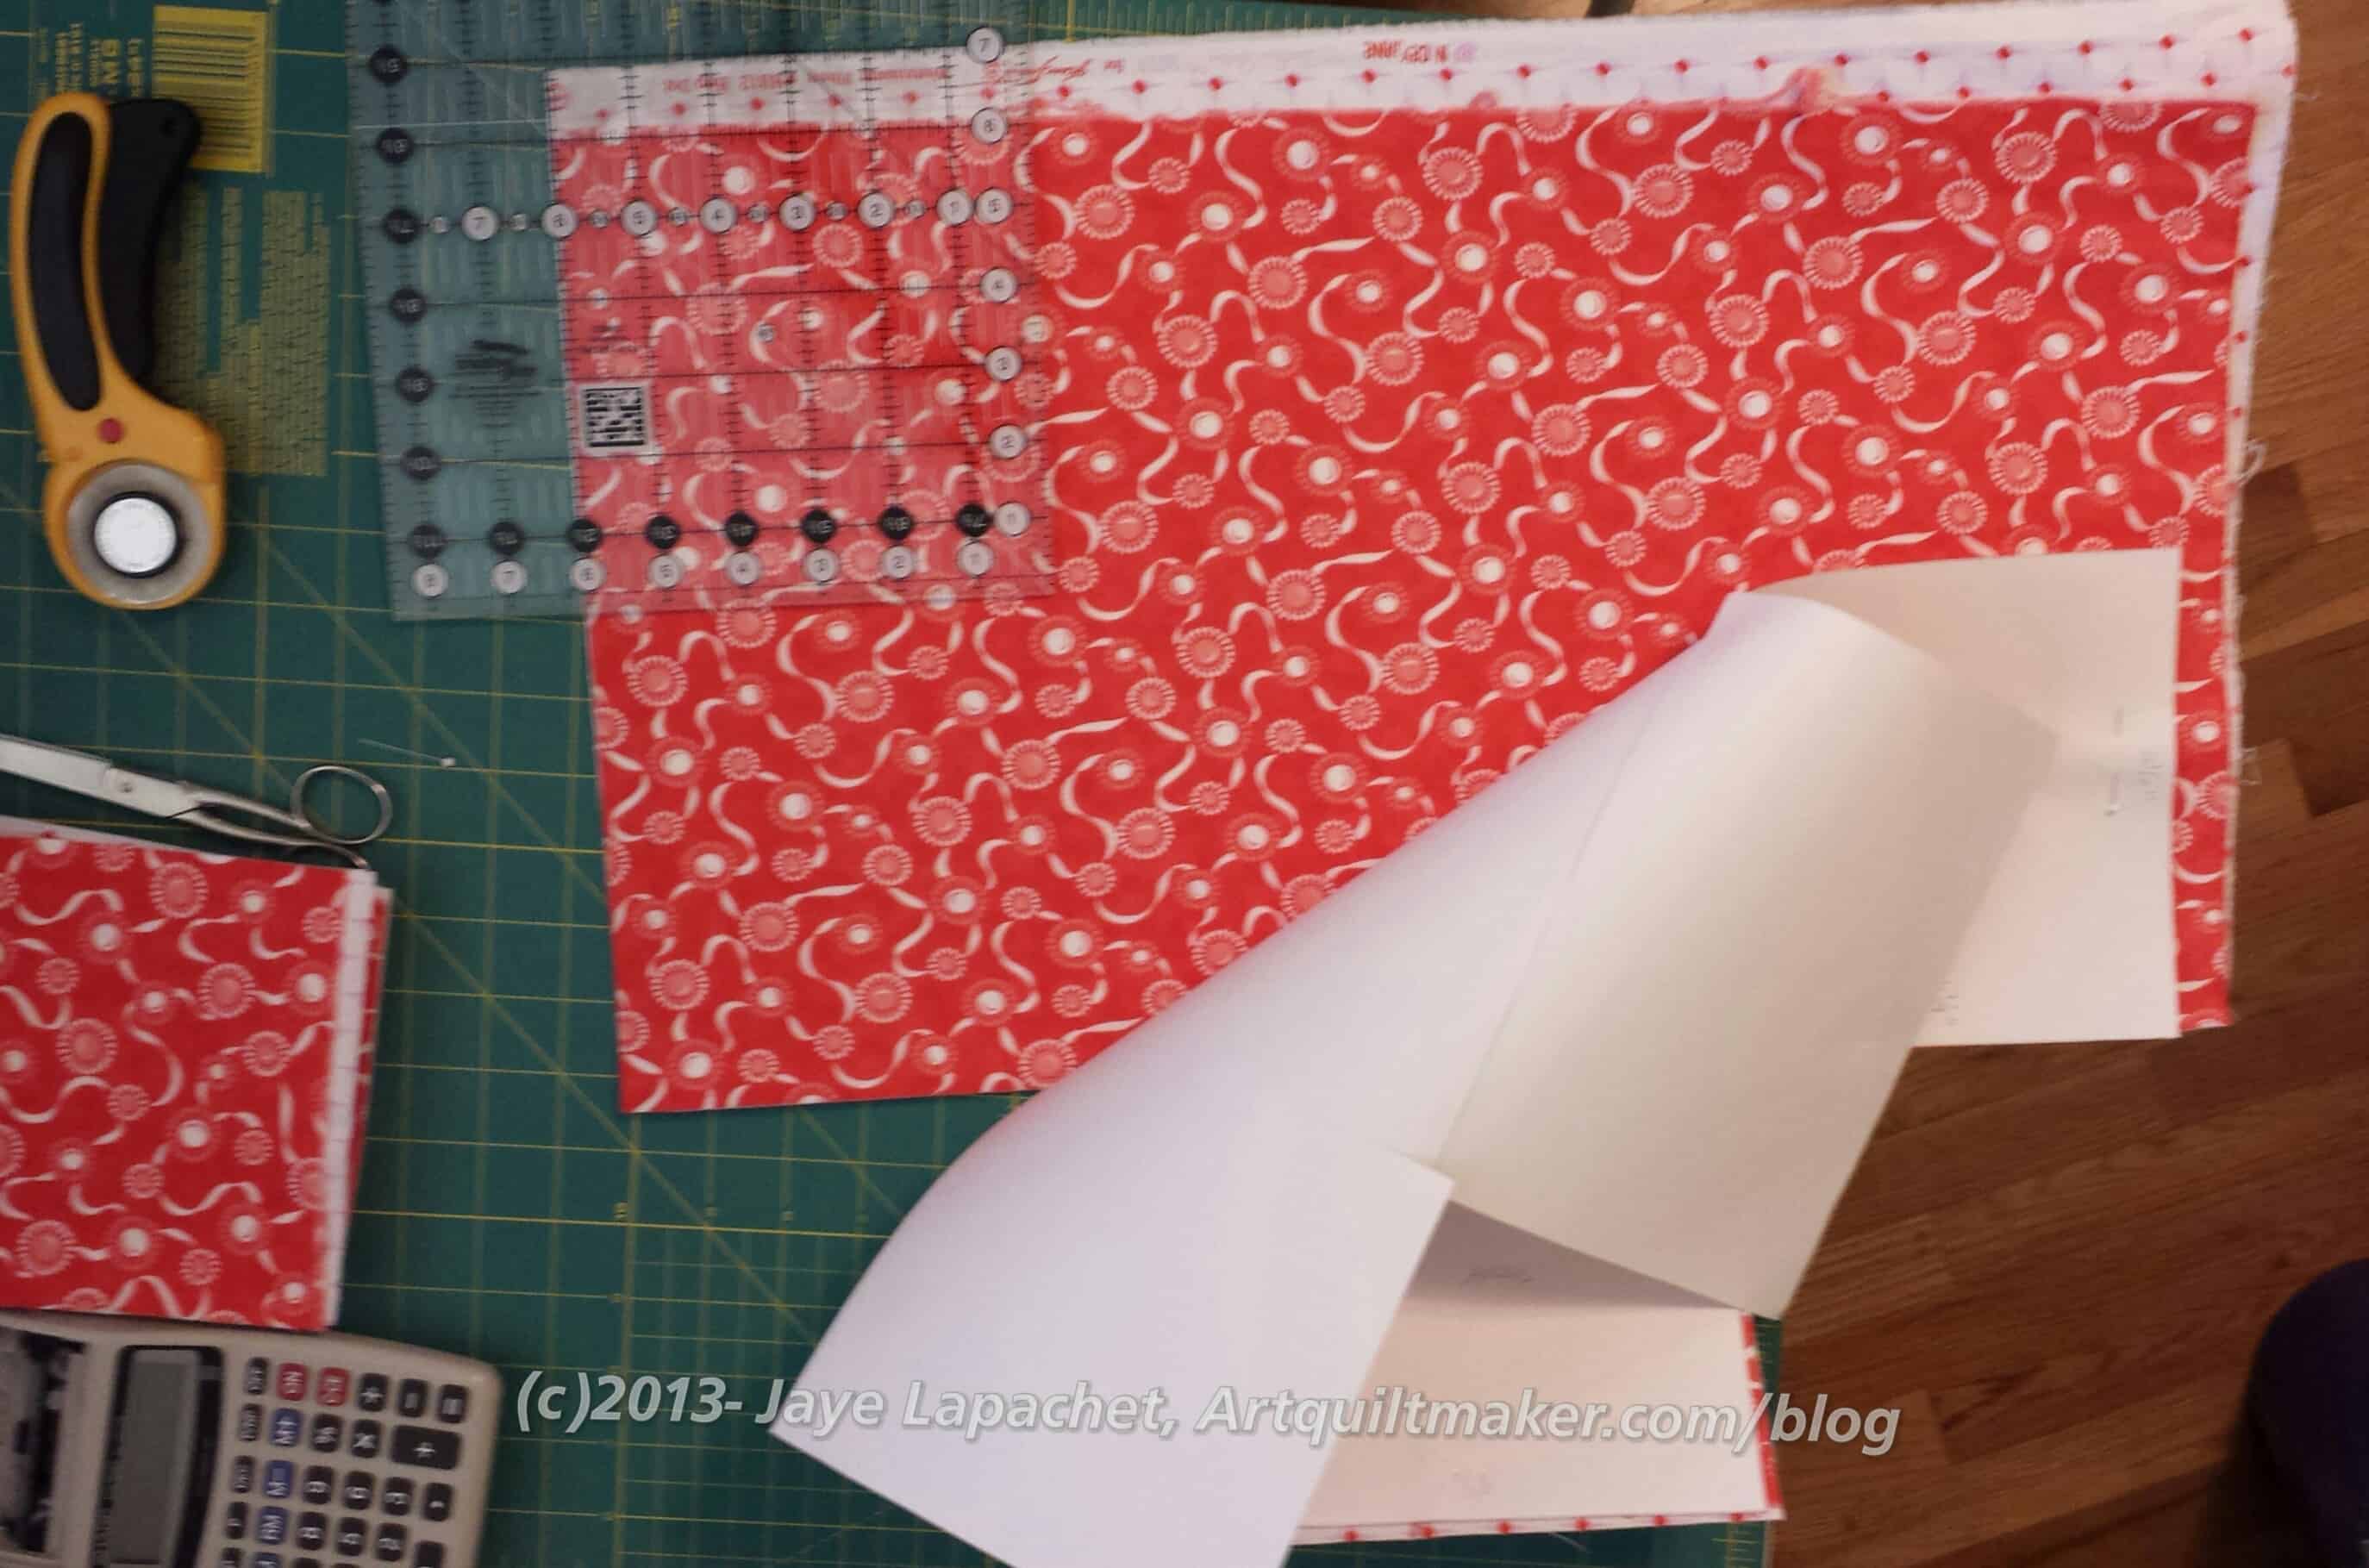
Cut the Fabric I tried to keep the pattern to a size where I could use 1/2 yard of fabric. It was difficult with the size I was trying to make. I have a lot of half yards, so I really wanted that size to work. Some of my seam allowances are a little scant, but it will work if you can work with pieces that are slightly small. This takes practice and careful sewing.
If you don’t want to worry about this, then hold the front and back pieces aside (e.g. don’t tape them to make a cross shaped pattern). Cut out the the long strip that comprises the two sides and bottom.
Now cut out the front and back separately, then sew them to the side/bottom strip to make the cross.
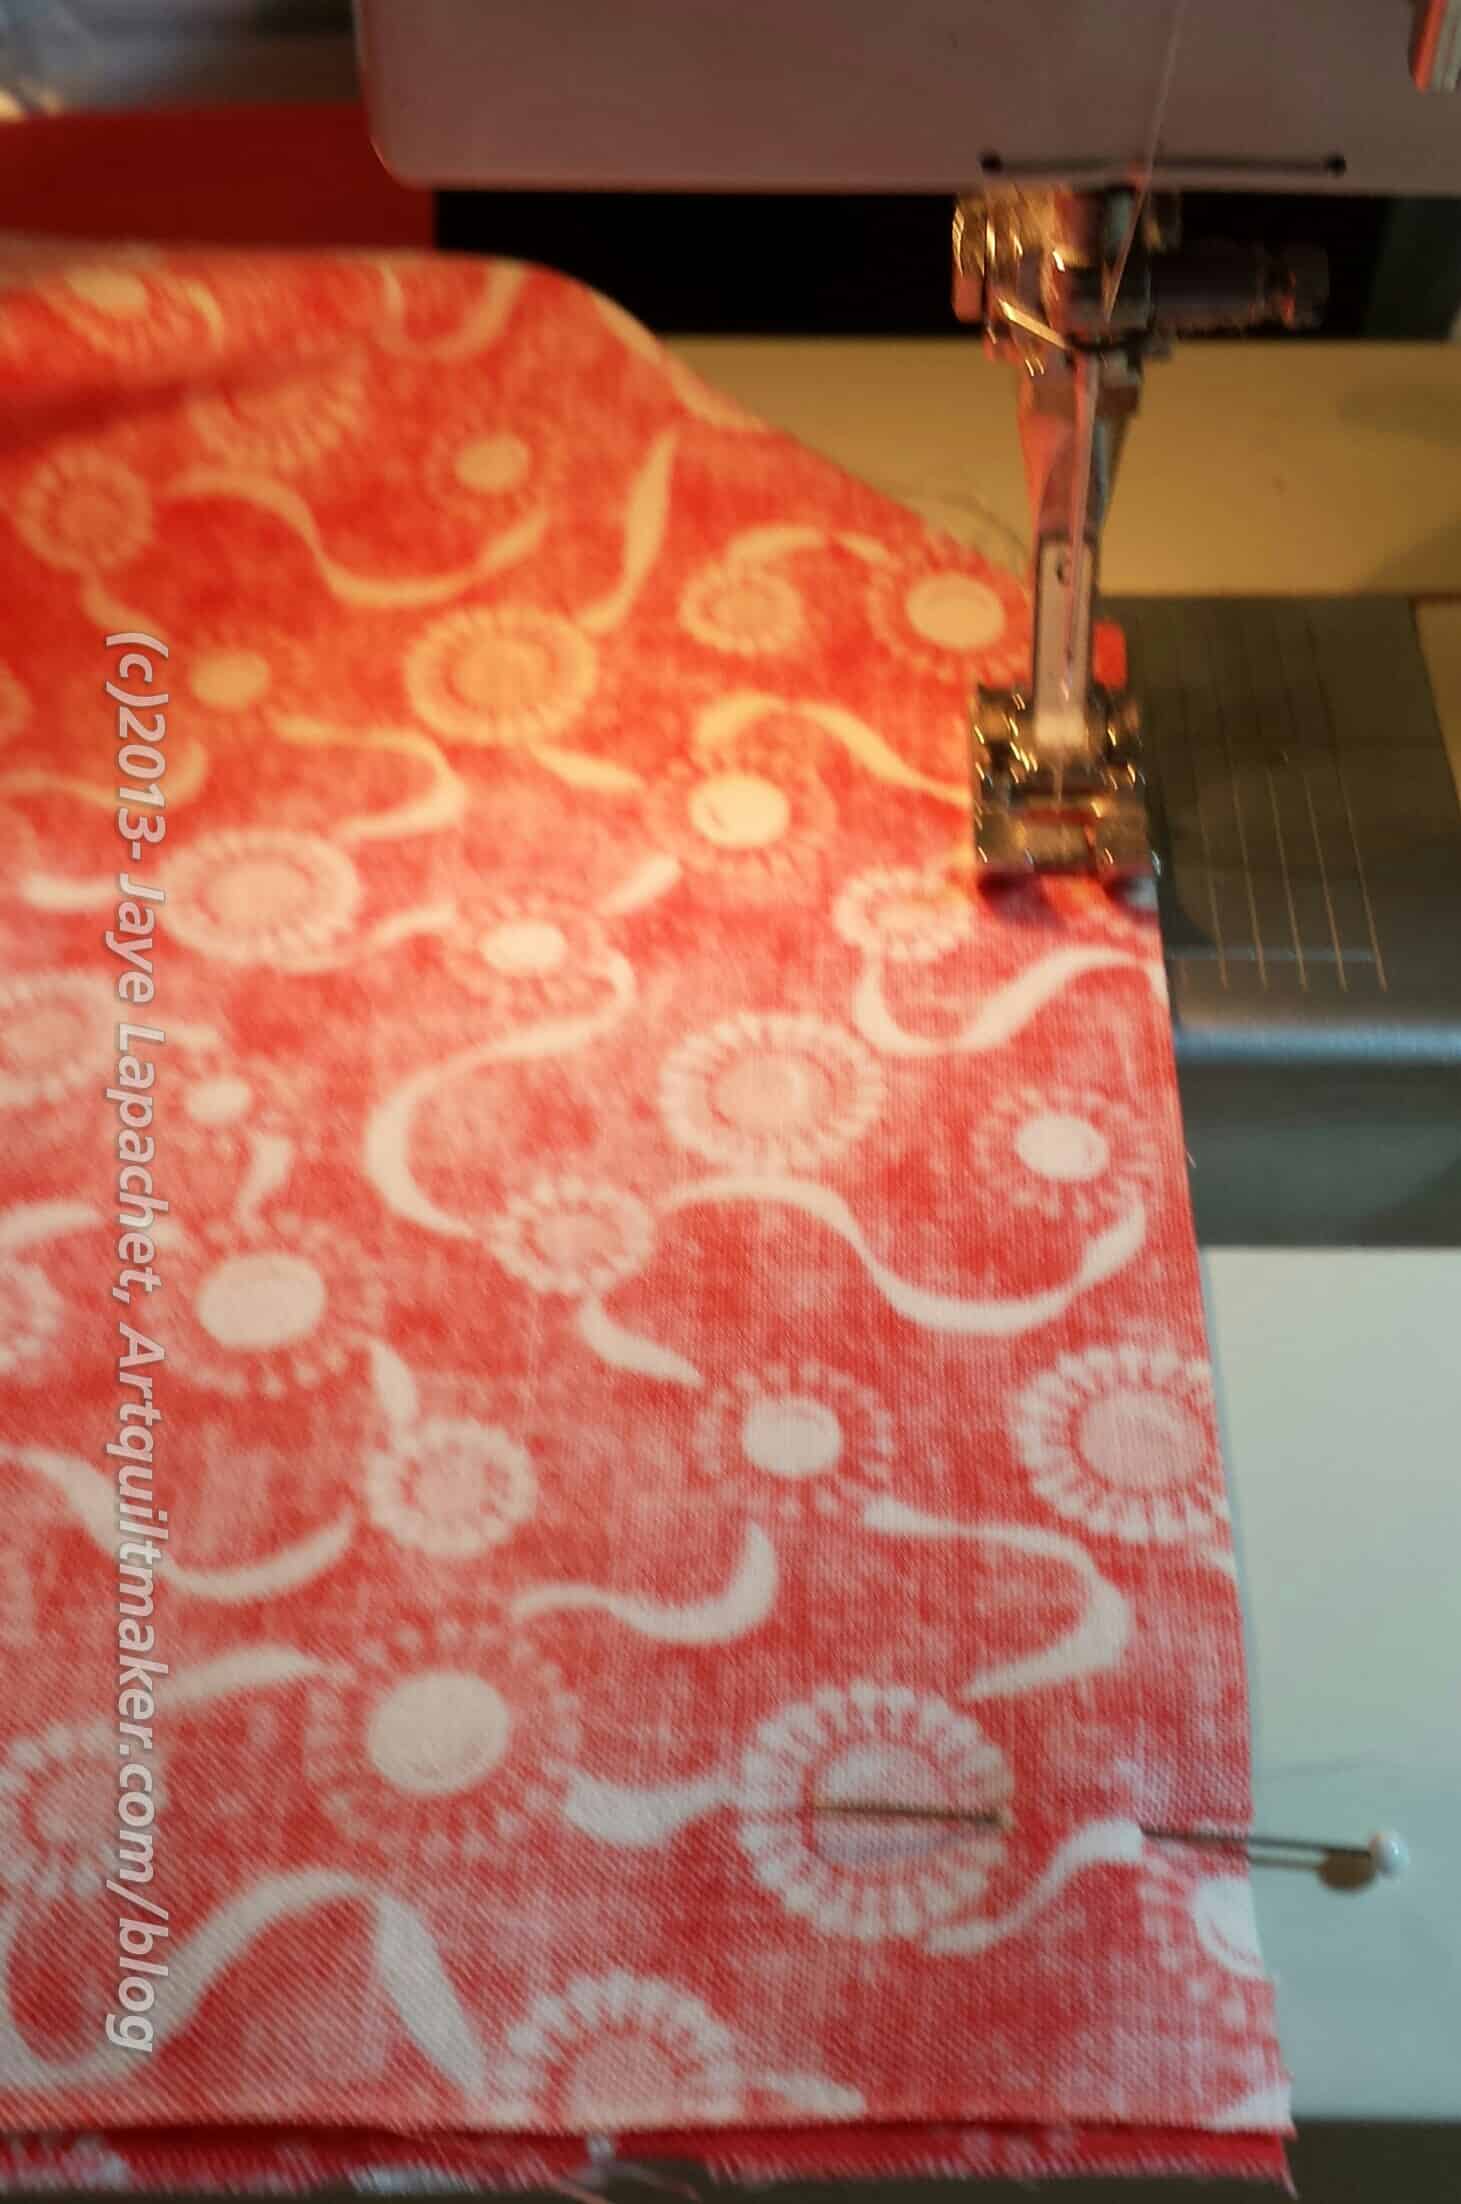
Pin the pattern to the fabric to keep it in place while you cut.
Instead of cutting around the pattern, I used a rotary cutter and ruler to cut the same size. I took out some of the pins to move the pattern aside. I kept some pins in the pattern and fabric so that I could reposition the pattern easily to make the other cuts.
Move around the whole cross, trims the corners away per the pattern until you have a cross made out of the fabric. Do the same thing using the lining fabric and the Peltex.
Sew the Body
Lay the cross of fabric in front of you right side up. Fold the top of the cross towards the right leg of the cross, lining up the right side of the top leg with the top of the right leg. The angle along the fold will be on the diagonal. Sew 1/4″ seam from the diagonal fold to the raw edge.
Do the same for all four corners (eight edges) until you have a fabric box with the top open.
Pin the lining to the Peltex.
I used Wonderclips and they worked like a charm.
Closest to you, near the Wonderclip is the edge of the fabric. Note that the Peltex wasn’t wide enough to cut it out the width of the pattern, but I added a little sliver later and that worked fine.
Once the lining and Peltex are sewn you will start to see the shape of the handbag.
After sewing the body together fold the front and back of the bag in halves and then quarters and finger press. Pin the end of each handle, making sure there are no twists, to the quarter finger pressed mark. One handle goes on the front and one on the back.
Put the outside of the bag into the lining with the right sides together. Tuck the handles out of the way and pin in such a way that you leave an opening at least 3″ wide to turn the bag right side out.
The thing will be hard to turn. Don’t yank too much, just poke and pull gently.
After you have turned the bag, pull out the straps and press carefully. Press especially carefully the section that isn’t sewn.
After pressing, sew a double line of stitching to secure the lining to the outside and close up the open edge or use a decorative stitch.
Cute little finished bag. TFQ kept this one and will use it for knitting projects. The Bonnie and Camille bag is more of a square bag.
The pink diamond bag is the second one I made. It is a little skinnier and longer, e.g. the side is bigger.
I sewed the inside bottom opening I used for turning and the bag is done. I haven’t used it yet, because I entered it in the Fair and don’t want to get it dirty or anything before that event. I will take it to guild this weekend and next and show it off.
It occurred to me that one good thing about this bag is that it wasn’t too easy and it wasn’t too difficult. There was the right amount of challenge in the making.
I have to say I love that Soft & Stable. I’ll have to see if they have it at Joann or Beverly’s. The way it makes the bag stand up is awesome!
Now I am thinking about the next one. My list of to dos or changes to the next version are:
put iron-on vinyl on the bottom of the bag to protect the fabric
make the sides bigger, but enable them to close so the same shape is maintained and it is easier to get stuff in and out of the bag. Tutinella suggested that it might be a good idea to add an inch or so to the flap to accommodate this change
I may change the zipper pocket to a cell phone pocket or group of pockets that can hold things like pens and cell phones.
add side pockets on the outside. Tutinella did this, so I can get tips from her
make the padded inside pocket larger to accommodate my iPad AND its case. An inch and a half would probably do it.
I don’t know why I can’t just be happy with a bag as is. I can’t, though. I can’t help myself.
This week we are finishing. You may already be done. If so YAY!!! If not, keep at it! You can do it!
Petrillo Bag Complete
Me? Yes, I am mostly finished. I have a bit of hand stitching of the inside to do then I can say I really am finished. I will put up a completed project post when I am done.
As I have mentioned, I was out of town for part of last week including the time I usually spend sewing. That meant that I had to get back in the groove of where I was with this bag. I found that I rely on regular sewing time to keep me on track. Not having that time completely put me off my game.
It turned out that more ripping was in store for me. I had forgotten to, not only, cut the inside flap piece for the main flap used on the top of the bag, but also to sew it when I put the main flap together. Sara clearly says in Step 17 what to do and I just missed it. Sigh.
I ripped out the Main Flap top stitching, put in the inside Flap piece to line the Main Flap and resewed.
Then I thought I could make some progress, but when I tried to sew the flap to the back of the bag (Step 29) I found that I had sewed the straps too close to the top of the bag (Steps 24 & 25). Sigh. More ripping ensued. I would recommend stopping an 1″-1.5″ away from the top of the back of the bag.
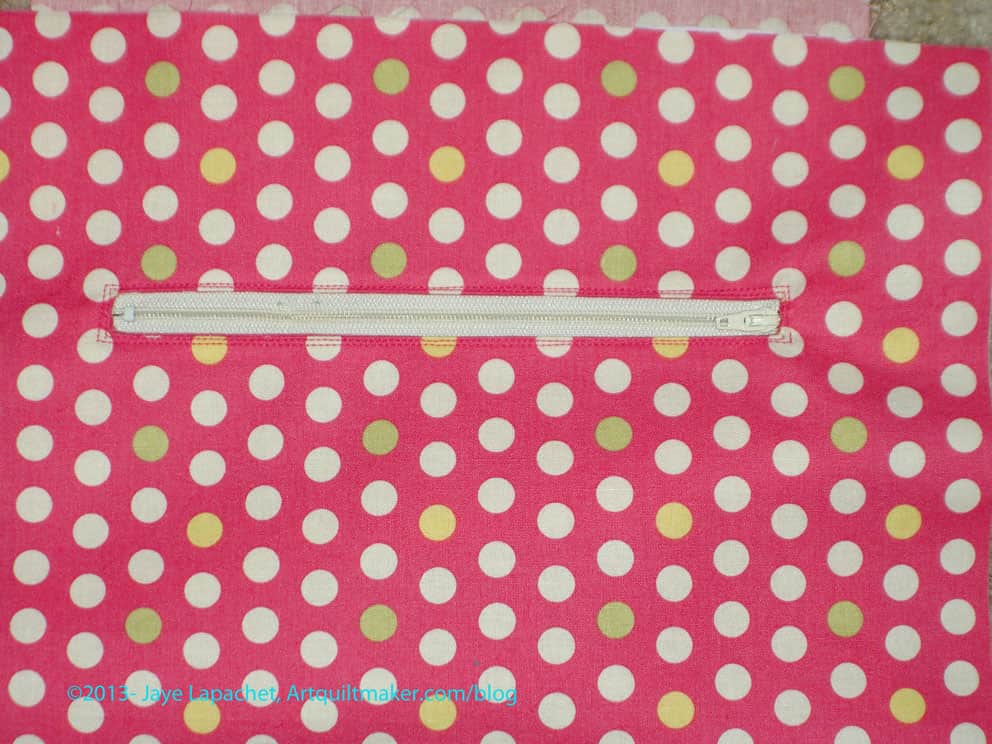
Zipper Pocket
I also started the inside of the bag. The inside of the bag starts with the zipper pocket (Step 33). I did Steps 33-36, which include cutting the opening for the zipper. As soon as I cut the zipper opening, I was sure I had the placement of the pieces wrong. I stared at the picture in Step 33 and the picture in Step 36 and they didn’t compute in my mind. I emailed Sara and she was kind enough to email me back fairly quickly to reassure me. I still was not convinced, but I soldiered on. As she promised, the zipper pocket worked out fine.
Do I seem like I am struggling with this bag? I am a bit. It is really hard for me to read directions and do what they say. I am much better when someone shows me what to. I got through it which gives me an image in my mind. I’ll be able to breeze through the next iteration of this bag. Yes, there will be a second bag. 😉
I have to say that I do like the shape of this bag. Good thing since there is so much ripping. 😉
Inside Petrillo Bag
The inside of the bag, which went together very well, after I made the zipper pocket and the padded pocket, seems a little big to me.
More Hilarity
Tutinella made a second Petrillo bag and wrote about it recently. The thing she did differently was add side pockets, which is a great idea. I might add side pockets to my second bag. I may also add inside side pockets.
Another thing I like about this bag is the opportunity to use new products. I have talked a bit about the Soft & Stable, but the Shape Flex is on my mind today. I still have the skirts I planned, to make. One thing that was holding me up was lining. The pattern I have does not call for a lining, but quilt weight fabric is not very thick, most of the time, so I will need something under. I am not sure my clothing skills are up to the task of a lined skirt out of the gate. I got to thinking about the Shape Flex and may try it to give a bit of weight to the fabric and to provide a kind of lining. I will have to give up some drape, so I will need to think about it. Let me know if you have experience with using Shape Flex on clothing.
I have to say that I am amazed at how Sara could have conceived of this bag and the way it goes together. I thought the same thing about the Anna Maria Horner Multi-tasker tote, which is a great bag, if you haven’t made one.
This week we are working on the sewing. Before we can get to sewing the bag together, there is still some prep to do. Please note that this is not a tutorial on how to make this bag. I am just recording my experience and noting things I had trouble with. If you want to make the bag (and I think you should), buy the pattern and read the opening post. Keep in mind that I don’t learn well by reading directions, so I have more trouble than most when reading patterns. My trouble is no reflection on Sara’s pattern directions.
Prep
I was so relieved to finish the cutting. What a lot of work that was! Anyway, I was so relieved that I got right down to the business of putting the bag together. Since adding the magnetic snaps is one of the first steps, I immediately realized that that I had bought the wrong ones. I didn’t buy the sew-in snaps. I bought the ones with the arms you have to bend. This is absolutely NOT Sara’s fault. Yes, I did read the instructions for purchasing supplies, but I didn’t know there was such a thing as sew-in magnetic snaps and simply didn’t see those two words on supply list. UGH! A delay!
I ordered them immediately from Tantalizing Stitches’ Etsy Shop, which is the vendor Sara recommneds. I received the sew-in snaps in about 2 days. I put them in relatively quickly using a small zigzag. The sew-in snap was covered with a clear plastic square and I had to sew over the plastic, which was odd. My machine did it, but I had to yank on the piece a bit to get it started since I was sewing the plastic covered snap to the Soft & Stable (=very thick!). I went around twice just to make sure it would stay in place. The hard part was keeping the snap straight. It didn’t end up completely straight, but since the important part is the circle, I figured it didn’t matter as long as it was in the middle. These are sewed to the Soft and Stable so there is no distortion of the fabric.
I know I could have used the magnetic snaps that you bend, which I think Pam did, but I did like the sew in snaps: no cutting of the fabric.
A lot of the prep was preparing to sew the whole bag together and some of the prep involved some top stitching and sewing parts together.
Straps
I was pleased to see the way Sara creates the straps. None of that turning tiny strips inside out nonsense. She creates them using the folding method that I like. Hooray!
Sewing
Flap with Accent
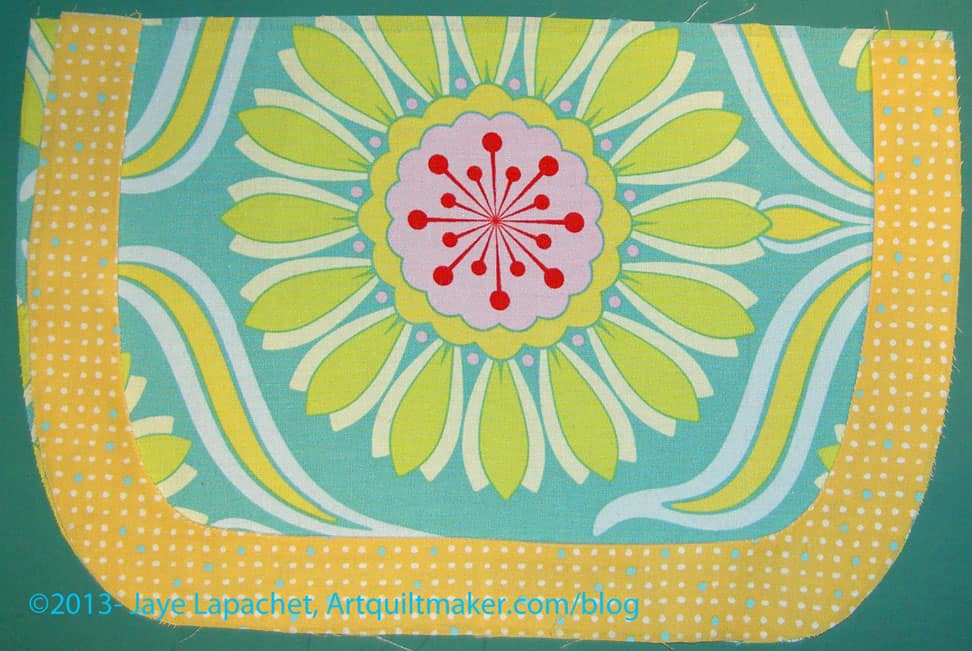
I decided not to do the gathered flap after having some trouble with the gathers. I can’t remember whether I have done gathers before. This was not unexpected as I was a little unsure of the gathers from the beginning. They do add some interest to the bag, but I kept wondering if they would catch on something as I navigate my way through the public transportation systems I frequent. Sara suggested just cutting out a flat piece of fabric using the Flap pattern piece, which is what I did. I also liked that I was able to highlight one of the motifs of the fabric
I was a little confused by the directions in Step #14, covering the flap, but I decided Sara meant topstitching and went with that. I was able to apply the accent with no problems, though, as usual, turning under a small seam allowance, like you would do for applique’ was a pain. I think you could do a regular quilt binding around this piece, if you didn’t mind a little bit of dimension.
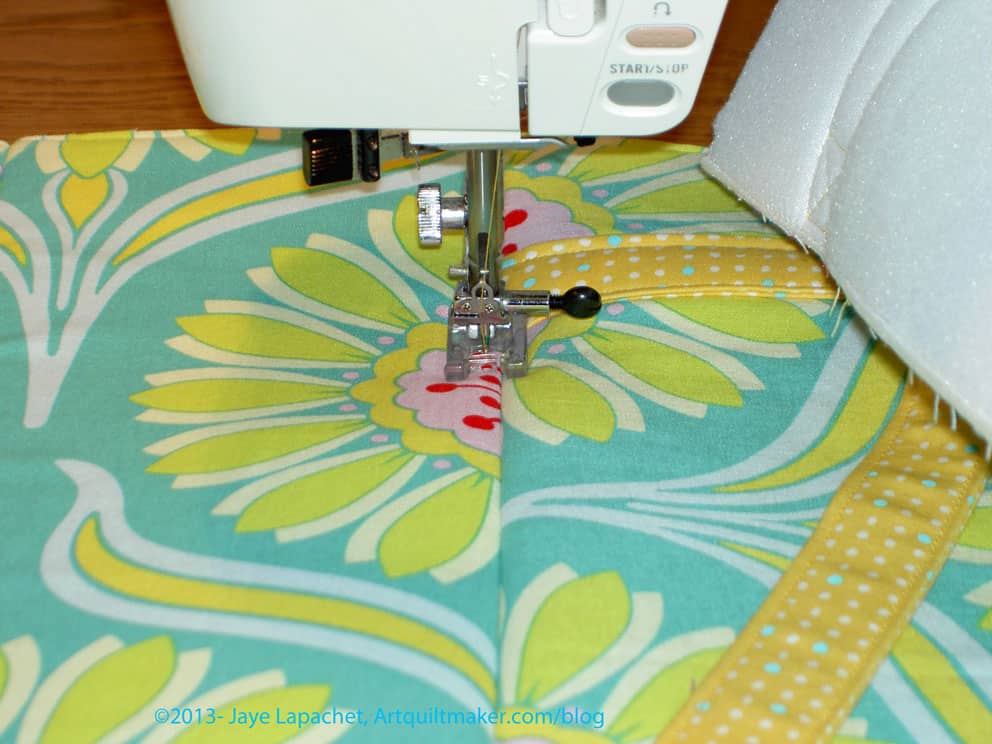
Tutinella suggests topstitching the bottom, which I thought was a great idea.
I used my clear applique’ foot and just measured using the inside of the right hand side of the foot, which gives me a line of stitching about 1/8″ away from the bottom of the bag.
One thing about all the prep is that you don’t have to stop to do prep. Once the prep is done, the bag starts to go together very quickly.
Petrillo Bag
I was really surprised at how well the Soft & Stable acted with my machine. I thought I would have to fight with the machine, because of the layers (fabric + Soft & Stable, occasionally 4 additional layers with the straps).
The first round of stitching was really satisfying because of the quick way the bag started to look like something. Yes, the above photo shows it being flat, but it still starts to look like a bag.
Finished Outside of bag
The directions say to draw a line 4 3/4″ from the top of the front of the bag. The purpose is to show you where to stop sewing the straps. You need to stop sewing, because the flap flap slides underneath the straps to keep it closed.
I missed that part of the directions and sewed the straps to the bag all the way around. when I realized what I had done, I knew I had to rip. Bleah. It is very hard to rip through all of those layers. I also had made the little squares with Xes through them at the top of the bag which made the ripping even more arduous.
I did it, though, and after an hour and a half I had the bag back to where I should have been.
If you read between the lines of my last post, I was a little ahead of those of you, because I had already gathered my supplies back in March and had started to cut. I did want to be a little ahead of you, so I could give you some tips and tricks if I found any.
Nota bene: Kay at Tantalizing Stitches sent the sew-in magnetic snaps out the day after I ordered them.
Fabric
The fun part was choosing fabric. You can see the colorways below, but the particulars about what I chose are:
For the exterior: Heather Bailey’s Pop Daisy from the Pop Garden line (Westminster Fibers #HB02). It is a few years old and had been slated for a back, but called to me when I looked in the Fabric Closet – green, yellow, red print
For the lining: Savon Bouquet by Verna Mosquera for FreeSpirit – pink polka dots
Straps and accents: City Weekend by Oliver & S for Moda (Pattern #11165, I think. It might be L1165)- yellow
I am not sure what possessed me to choose these colors and this combination of the three. It was grey and foggy at my house the day I chose the fabrics, so, perhaps, I was seeking cheerfulness. I also wanted to use some dots for something. I do like a light interior for bags. It is hard to see what is inside if the chosen fabric is too dark.
Organization
Petrillo cut pieces
Week 2 is all about cutting, so I did the cutting. It took me awhile to get the cutting done. I would say it took me about 3-4 hours. I was doing laundry, ate lunch and went to pick up the Young Man in between, so it is hard to say. It did take me a long time as I was trying to be really careful and not miscut. Don’t plan on doing it in a few minutes.
Additional supplies
There are a lot of pieces to cut for this bag, so take the time to be organized. I would add the following to the supply list:
sticky notes, though paper will do as well
Wonderclips
pen
I like to pin a piece of paper or sticky note to each cut pattern piece with the corresponding name from the pattern, e.g. Lining Flap, and the size. Even if it doesn’t help me truly be more organized, I feel more organized.
I also felt like I needed a spreadsheet to track everything that I needed to cut. I think it would look like a main column of what parts needed to be cut and a main row of the materials out of which the parts needed to be cut. I might also put dual columns for each put a tick mark in one noting I needed to cut a part from that materials and the second column for when I had done it. I could have just ticked off the lines on the pattern. I didn’t because I didn’t want to confuse myself for the future use of this pattern.
Cutting
Sara wants you to cut the fabrics in the order listed on the pattern. In some places, she has you cut a smaller piece before a larger piece. I like to cut all the larger pieces first, so I rearranged a few, but really tried to stick to her pattern directions. I would like to see a layout sketch for the pattern pieces on fabric in the directions.
There is enough fabric to cut all the pattern pieces. Sara did a great job estimating yardage.
I did cut one piece wrong early on and had to piece together enough of the lining fabric later for one of the bottom pieces. As I haven’t made this pattern before, I am hoping it will be ok. I am going to rummage through the fabric closet and see if I have another piece of the pink fabric (shown above) and cut a whole piece out of it. You could add an additional quarter of a yard, if you are worried about screwing up the cutting.
I just used my rotary cutter to cut the Soft & Stable where possible. I did notice, during cutting of the Soft & Stable, the sounds of paper being cut. I couldn’t feel any paper on it, especially something like paper covering a fusible. I am not sure what it is made of or if it was a good idea to use a rotary cutter, but I did want to speed the process along as much as I could.
This Petrillo bag by Tutinella is one of my favorites. I love the use of the map fabric, especially how she carefully placed the legend. I think Tutinella (great name, don’t you think? It is fun to say!) is a girl after my own heart. She writes “I’m a typical girl – no matter how many bags I have, I want more!” in her post about this bag. I also love how she calls her husband/significant other Mr. Right. I wish I had thought of that first! This is one of the great bags you can see in the Sew Sweetness Flickr Group, so go and take a look.
You might remember that I saw this bag a few weeks ago and extolled its virtues, most of which had to do with it being a vertical bag that was good sized, but not a Rotator Cuff Injury inducing size. I posted a ‘warning’ in a post on March 18 that we would be starting soon and Pam, of Hip to Be a Square fame, talked about the bag along in her episode 121 podcast. We have finally gotten our acts together, other projects in order and are ready to go. Pam already posted the notice of the ‘Along’ yesterday and I am following along in her footsteps to catch my readers as well.
Here is the schedule that Pam laid out:
Week 1 (week of 4/7/2013) – assemble pattern pieces, supplies, and get fabric cut out.
Week 2 (next week, starting on 4/14) – sew the bag.
I may have to modify it to:
Week 1 (week of 4/7/2013) – assemble pattern pieces, and supplies
Week 2 (week of 4/14/2013) – Cut out the fabric
Week 3 (starting on 4/21) – sew the bag
Week 4 (starting 4/28) – finish up
I know that we all have a different working pace and obligations. Pam works quickly, so don’t be intimidated by her pace. I have to be out of town a couple of times this month and I like to work slowly on bags. Pick (or make up) the schedule that works for you. Pam is in the middle of her Labyrinth quilt, so the only hope I have of finishing the Petrillo bag anywhere close to when Pam does is to get started immediately and sew like a demon. 😉 I would advise you to focus on having fun.
If you need to buy the pattern you can get it instantly (or nearly instantly) as it is a downloadable pattern. It is only $8.
There are some specialty supplies you need to probably get online. Sara suggests different places to get the supplies. I had seen Soft & Stable at the Road to California quilt show I attended last year. I was interested in trying it, but didn’t buy any as I didn’t have a suitable project at the time. Thus, for this project, I ended up buying the Soft and Stable from ByAnnie.com. I am not affilated with that site and don’t think it was the absolute cheapest site, but I was in a rush and wanted to make sure I got the right stuff. Amazon was out at the time. The package was sent out really quickly. I received the Soft & Stable in a few days.
I bought the snaps from AGraffSupplies on Etsy. I am not affiliated with that site. They had the snaps cheaper than Sara’s preferred vendor. I compared and I am pretty sure the snaps were the same. The confusing part about both Etsy shops was that it was hard to tell how many I was buying. I ended up with a big bag of magnetic snaps – many more than I needed. I’ll have to go on a bag making binge to use them all up. Nota bene: These turned out to the wrong ones. You need to buy SEW-IN magnetic snaps. I didn’t even realize such a thing existed.
I bought the Shape Flex, which seems to be muslin with fusible on the back from Beverly’s online.
Pam made the Aeroplane bag pattern and says “Sara’s patterns are awesomely written with clear instructions and lots of pictures”. Pam is making one change to the bag construction; rather than using the Soft & Stable, she will be using “a combination of Pellon Decor Bond (a home dec weight interfacing) along with Pellon Fusible Fleece.” If you want to make changes like that, then Pam is your girl. I wasn’t happy with the floopy results of changing out fusible fleece for two layers of regular batting and some interfacing when I made my last Chubby Charmer, so I am going to stick with the directions on supplies for the most part. It is also a good opportunity for me to try the Soft & Stable as well.
As Pam said, in addition to posting my progress here, I’ll be posting pictures to Sara’s usual Flickr group so she can see our work as well.
Go forth and make a Petrillo bag!
**Thanks to Sara at Sew Sweetness for allowing me to use her image.