In my previous machine applique’ tutorials, I used designs where the direction of the motif didn’t matter. When I went back to review the tutorial (yes, I do use my own tutorials!) in preparation for doing some machine applique’. I was preparing to applique’ letters, which have a definite right and wrong way. I realized I had omitted directions for using directional motifs (where the direction of the motif matters, such a numbers or letters) for applique’, so I had to figure out how to do them again.
In order to understand this tutorial, you will need to look at How to Applique’-TJW and the 3 Fusible Applique tutorials (pt.1, pt.2 and pt.3). All of these are part of a whole.
Supply List:
- Notebook for notes
- Pen (to take notes) 😉
- Mechanical Pencil
- Sharpie with thin- medium point (or similar)
- Fabric to suit your design
- mid-level Fabric Scissors
- Ruler
- Paper backed, double-sided fusible web, such as SoftFuse, Steam-a-Seam 2 or Steam-a-Seam Lite. There are many brands. Use your favorite. Follow the directions.
- Applique’ pressing sheet
- Tearaway stabilizer (the size of your background) – I use Pellon 806
- Painter’s tape or similar easy-to-remove tape
- Iron
- Ironing surface
- Background fabric – large enough to accommodate your design with the spacing you desire
- Piece of fabric to use for your motifs- the size of your design
- Sheet of drawing paper the size of your design
- Optional: light box
- Thread to match your satin stitch needs
- Sewing machine
- Foot suitable for zigzag or satin stitch
- Optional: Paper scissors
- Pins
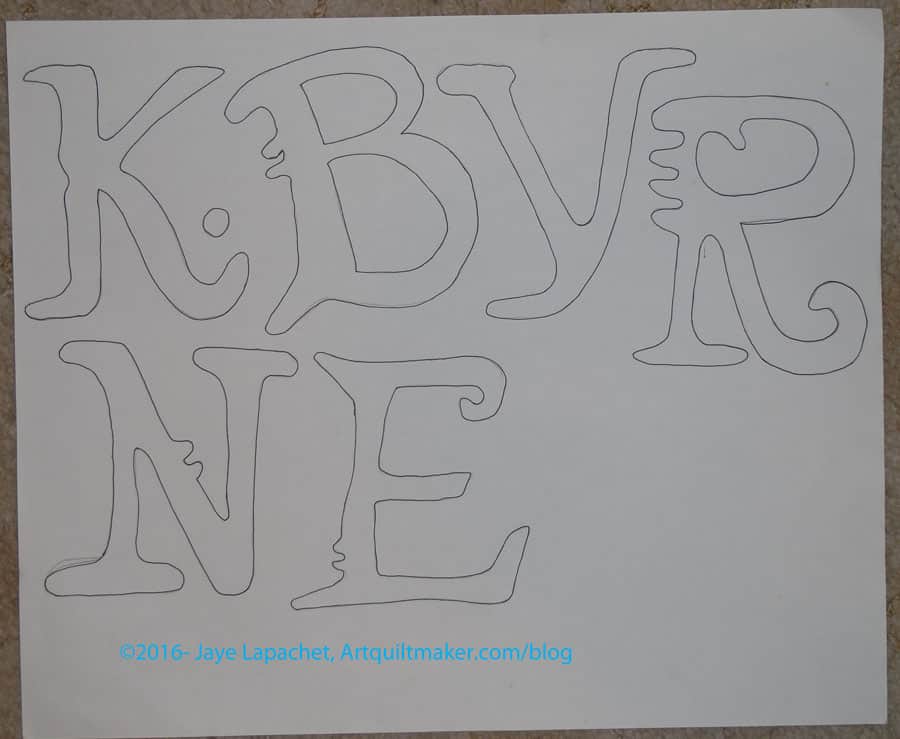
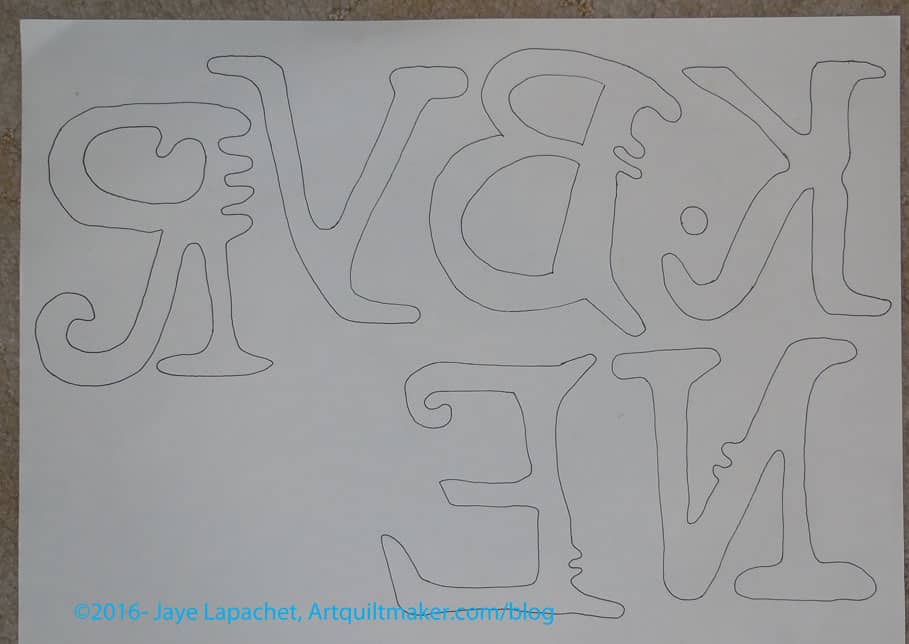
- Draw out your design. I used a pattern for the letters I wanted to applique’. You can draw or print your design. There are a lot of free clipart you can use. Since I had a pattern, I laid out the pattern, placed a piece of drawing paper over the letters I needed and drew out the design using a pencil.
- Trace over the pencil lines you used to trace the design with a Sharpie. The lines should be dark. Make sure the Sharpie does not bleed through to your table.
- Flip your drawing paper over and put it on your light box. You can also tape it to a window or sliding glass door. The wrong side of the letters or directional motif will show through.
-
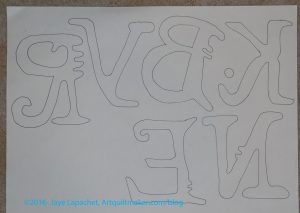
Directional motifs backwards on drawing paper Using your Sharpie, trace the letters again on the wrong side of the paper. You will be tracing the backwards image of the letters.
- Leaving the paper taped to the window (or laying on the light box), tape a piece of paper backed fusible, paper side UP, over your design which is on the window or light box.
- Trace the backwards design on to your paper backed fusible using a Sharpie. **Nota bene: my Sharpie tended to smear on the paper of the fusible. I couldn’t find a pen that worked well, so be really careful to keep your hand out of the way to avoid smearage.
- Once finished, remove everything from the window or light box.
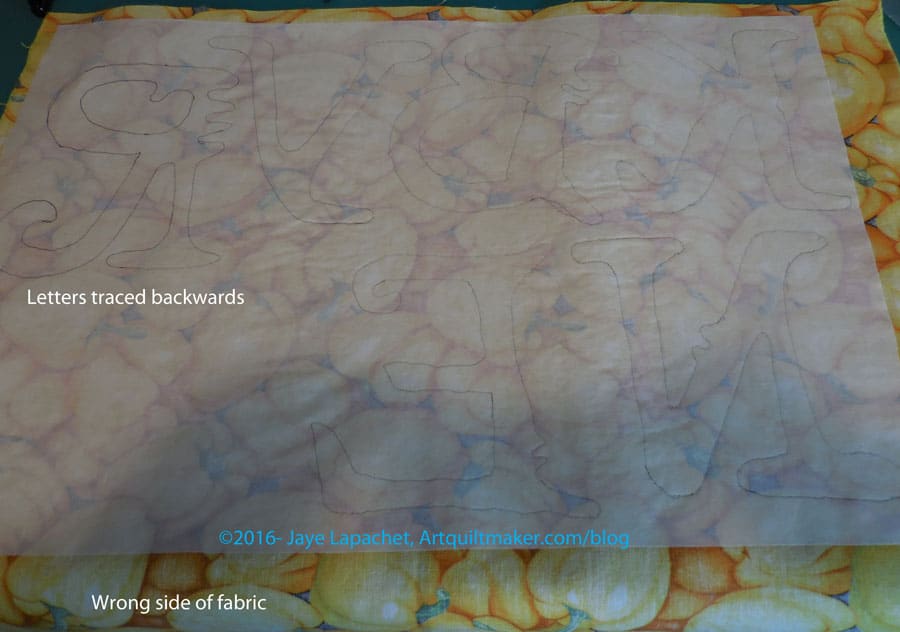
- Place the fabric you will use for your directional motifs right side down on the ironing surface. The fabric should be sized slightly larger than the fusible.
- Place the fusible on top of the fabric with the paper side up. Make sure no edges are over your ironing surface.
- Place your applique’ pressing sheet over everything.
- Press according to the directions on the fusible package.
-
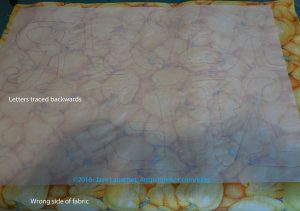
Fusible pressed to fabric Once you are finished pressing, you will have a piece of fabric with fusible on the wrong side. The motifs (letters) should appear backwards and you will see the wrong side of the fabric.
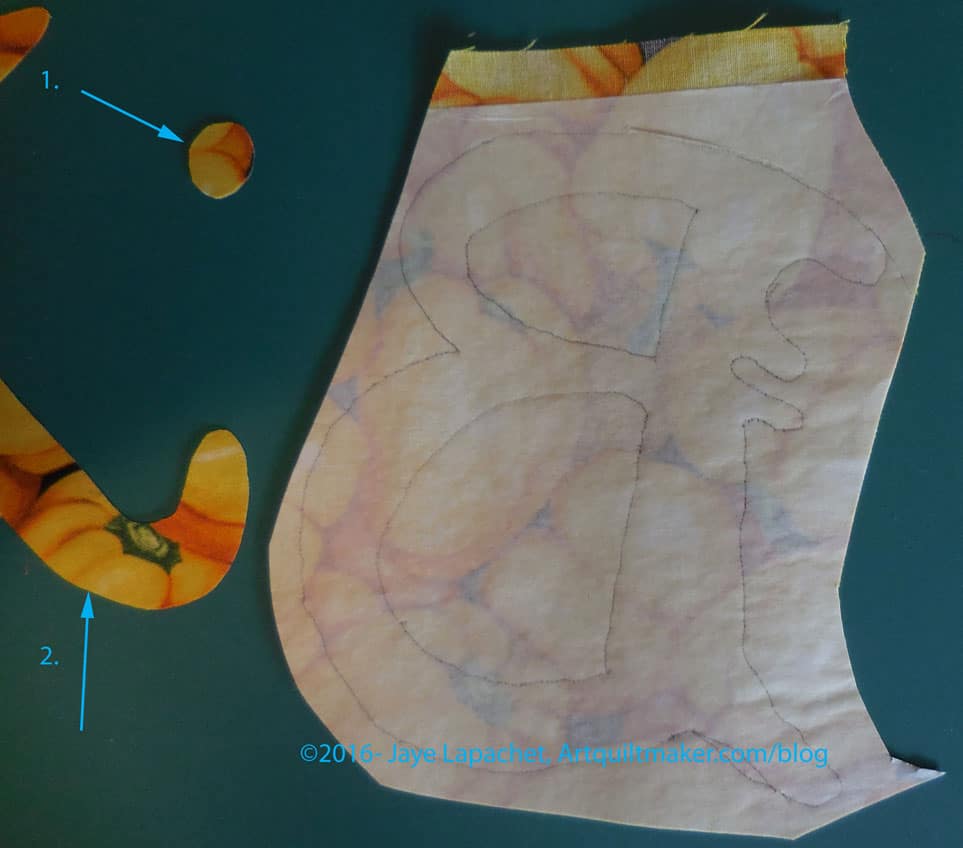
- Decide on which scissors you will use. I always have a fight with myself about this. I don’t want to ruin my Ginghers, which are super sharp and great for cutting out detailed types of designs by using them to cut through paper. I also don’t want to ruin the edges of my motif with a pair of papers scissors that will not be sharp enough to cut through the fabric. I have a pair of Fiskars that I end up using for this task. Not ideal, but the best I am willing to do.
-
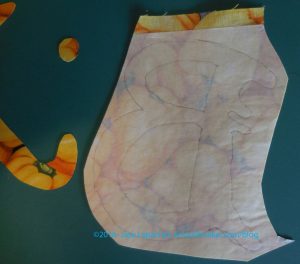
Cut out directional motifs Once you have decided on scissors, cut out your designs (letters, in this case). First I do a rough cut, then I cut with more detail.

Cut out directional motifs – detail - Layout your background fabric on a flat surface, right side up. I use my ironing board, so I don’t have to move the motifs in order to press. If I have to sew two pieces of fabric together to make a large enough background, I press the seam open.
- Take each motif, one by one, and peel off the paper. Carefully place each prepared applique’ motifs in their desired location before moving on to the next one. With motifs such a letters, I use a ruler to make sure they are straight.
- You should be able to see your design correctly. If you are using letters they should not be backwards and you should be able to read the word.
- Place your applique’ pressing sheet over everything.
- Press your applques so that they are stuck to the background fabric.
- Set up your sewing machine with the correct colored thread and a foot suitable for zigzag or satin stich.
- I set the zigzag to 3.5 (width), 0.7 (density). I like my satin stitch to be a little open, but you can adjust it to your favorite length and density.
- Cut a piece of tearaway the width of your motif and twice as long
- Fold the tearaway in half.
- Pin the double layer of tearaway to the back of the background fabric. Pins should be out of the way of the machine foot.
- Satin stitch all the way around each motif, carefully negotiating curves so the satin stitch looks smooth.
- Trim and/or tie off all threads.
- Tear away/cut away the excess tearaway stabilizer.

HOORAY! You did it!
Wow, I’ve yet to do this, but it will be a go-to method for sure! Thank you for sharing Jaye!
I hope it is helpful!