As mentioned, this top was sort of unplanned. It did, however, come together very well and last week, I was able to finish the top, back and batting.
I am a little sad to give it away as I really like it. Of course, I like most of the quilts I make as donations, but this one is particularly pleasing to me for some reason.
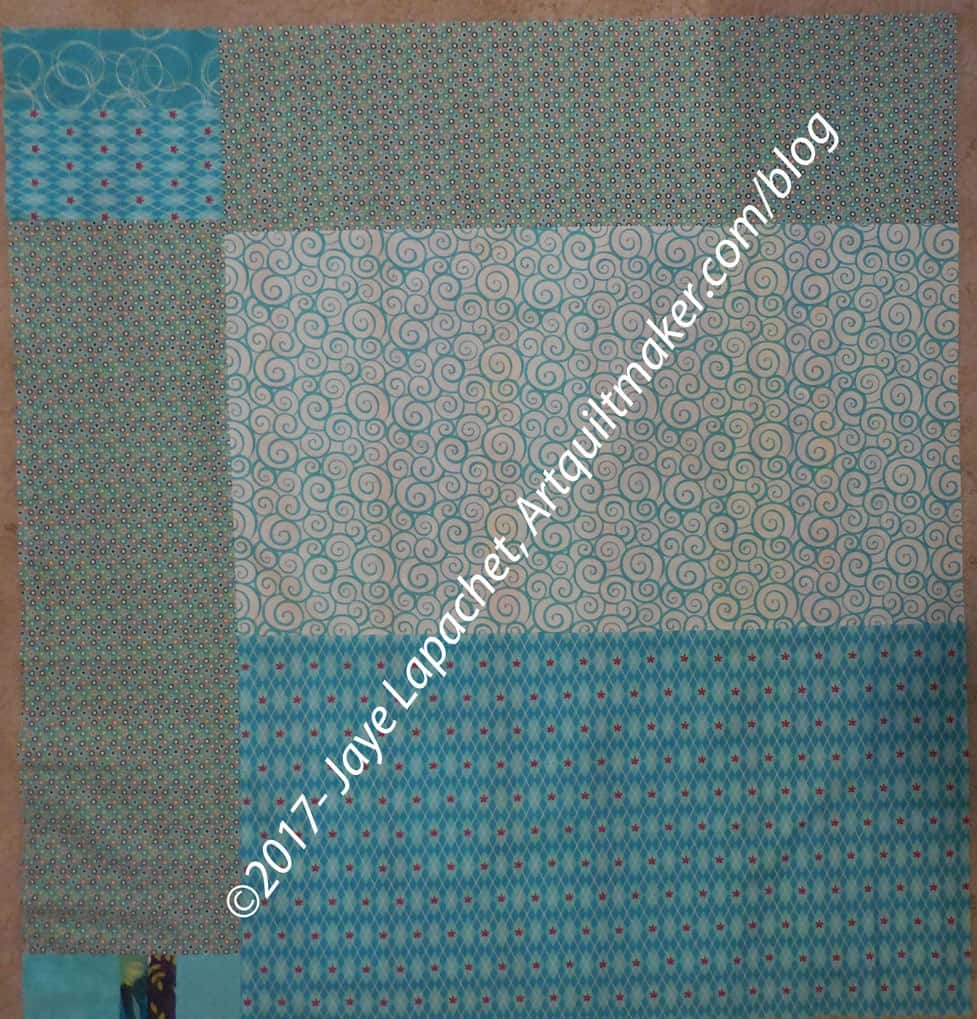
Ends Quilt back – March 2017
The back is fairly plain. Several large half yards of fabric and I was done. I also put the batting together with Heat Press. There might be more Heat Press than batting and I hope that the quilt won’t be stiff as a result.
I finally put all the finished quilts from last year on the Gallery page. On the Gallery page, you can see a list of all the quilts I have ever made. Not all have links to photos, but I am working on that. Take a look
I have updated the tutorials page. Have you looked at it recently?
I also updated the Lanyard tutorial. Have you made a lanyard for your guild meeting nametag?
Media
The Quilt Alliance has a new post about saving our quilt stories.
Frances of The Off Kilter Quilt podcast and QuiltFiction fame has a new story posted. You must sign up for her newsletter in order to read it. Well worth it as her newsletters are short and sweet, but packed with info.
Projects & Patterns
Remember the Lined Drawstring Bag from InColorOrder? She has a new post out that details all the variations for her bags. One of them is a shoe bag. I was thinking about Grand Parlor and making shoe bags for the 9-10 pair of shoes I bring. Kismet, I think! She also has a slide show of all the bags she has made. Take a look.
I like some papercrafts and like them even more when they flow over into fabric. You might remember the paper wreath tutorial I posted, which I then translated into fabric. I found a Scandinavian Heart tutorial that is made from fabric. It would be a great gift! The Quilting Daily (@QuiltingDaily) tweeted the link out originally.
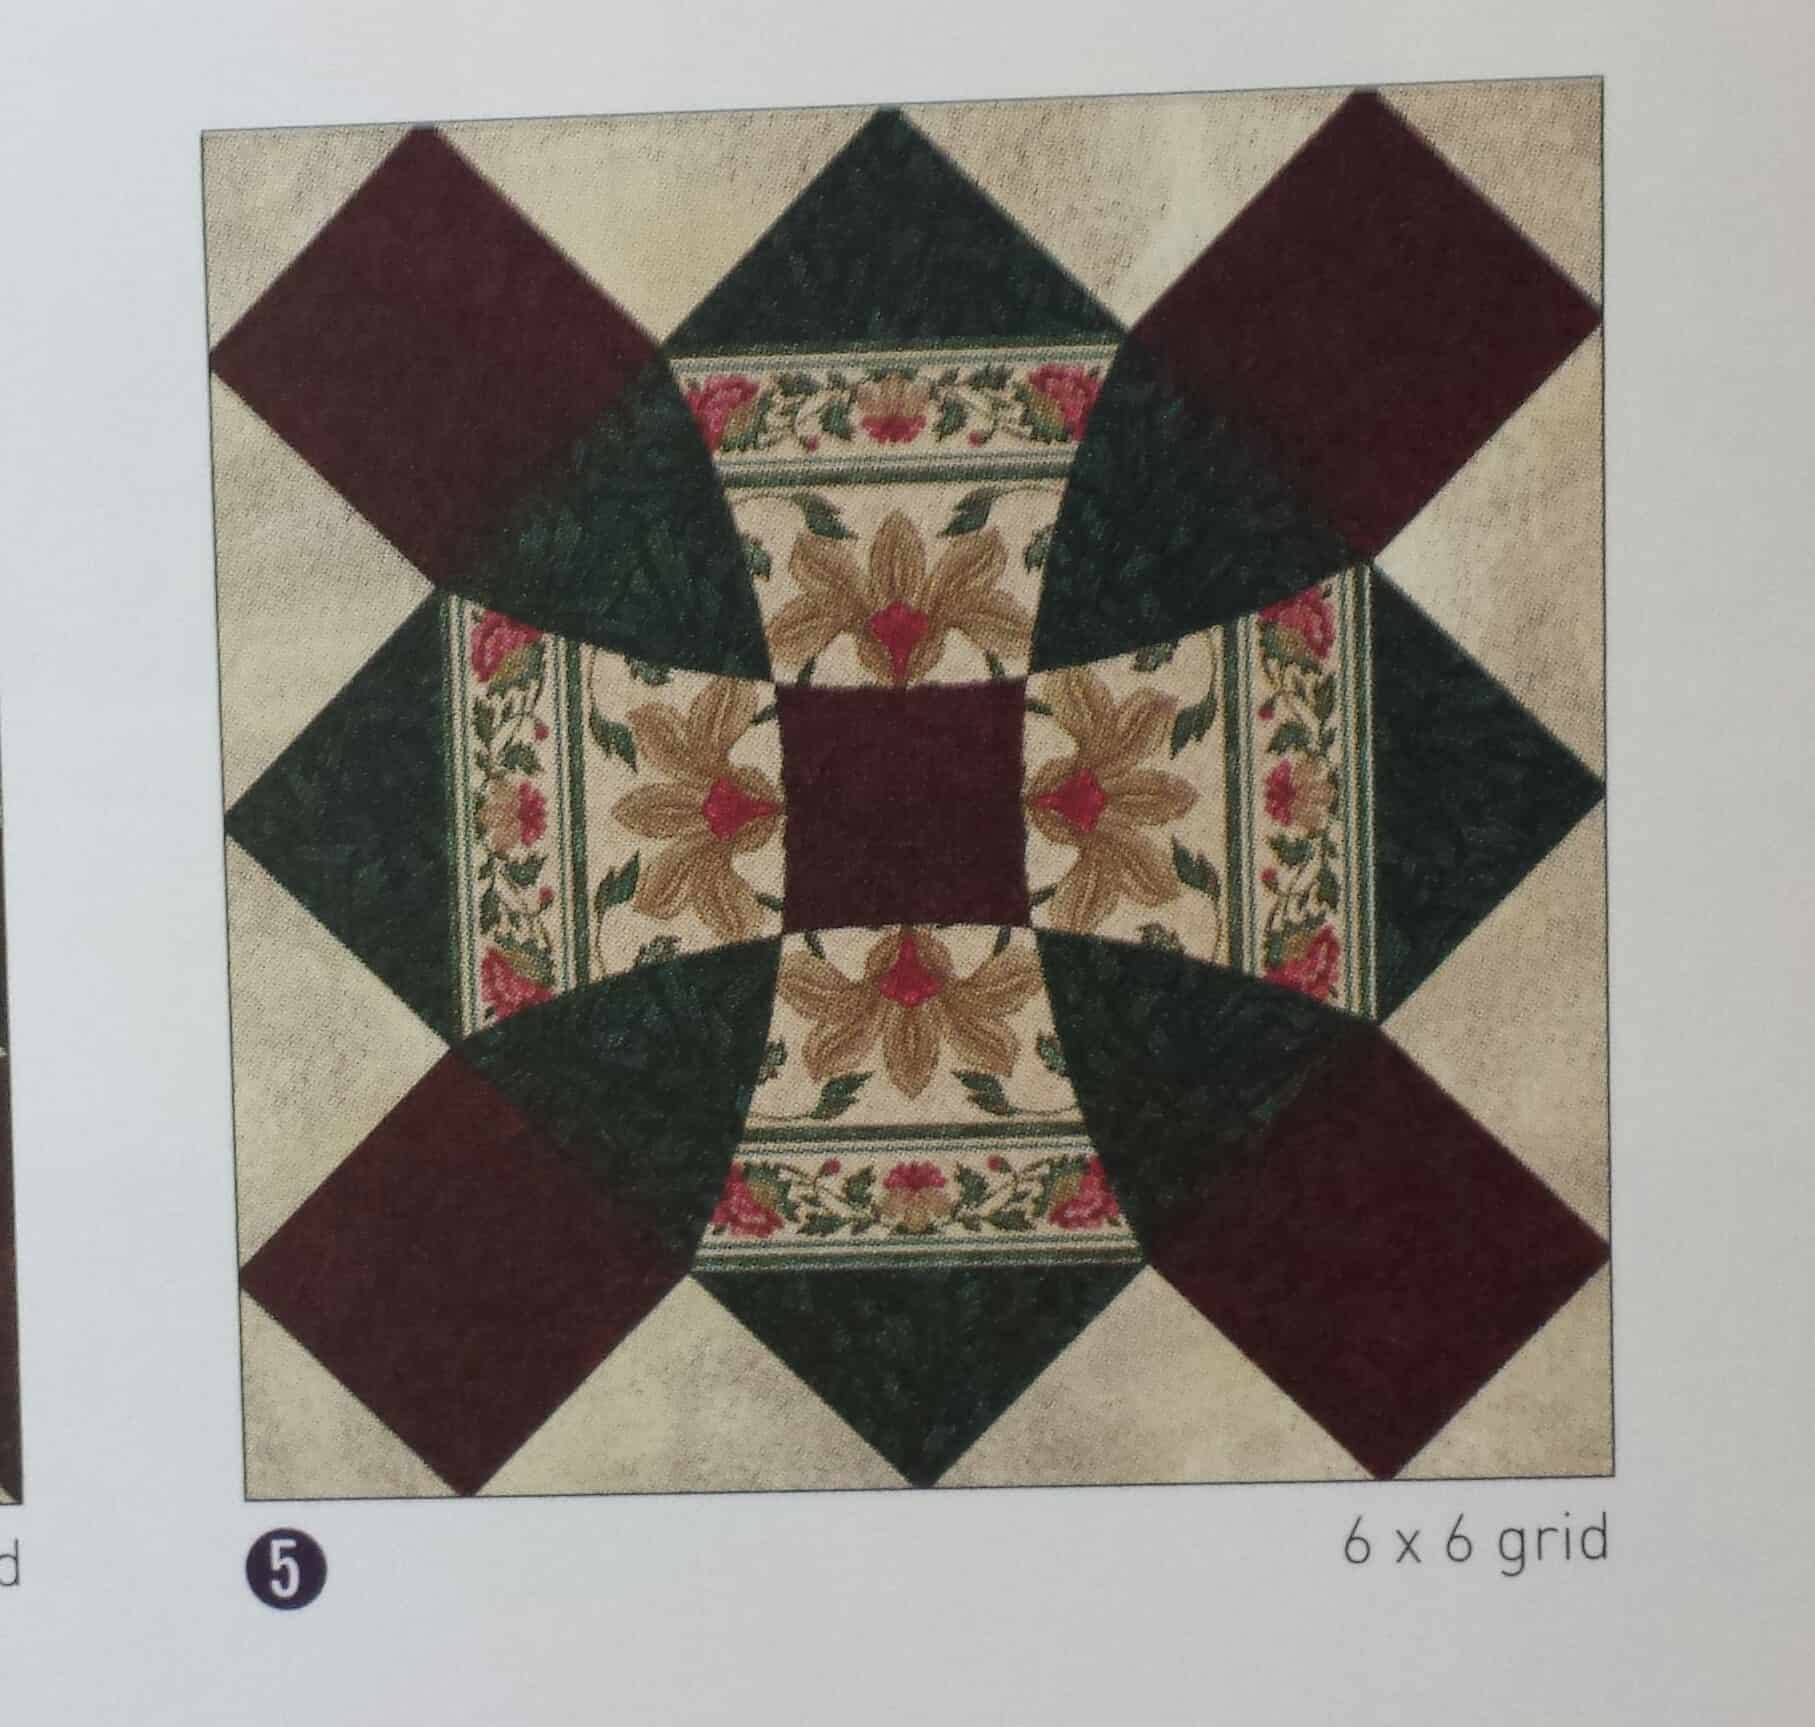
I went on a little EPP tangent looking for a Jack’s Chain (now called Ferris Wheel) pattern. It started on the PaperPieces.com site, but branched off into a search and then down a rabbit hole to different sites. One site with multiple interesting patterns is Imaginesque, a UK site. I saw a very interesting block with no name, beyond Block 21, but infinite possibilities in terms of color transparency.
Imaginesque also has a pattern and instructions for Block 49, which looks like a flower to me. I haven’t thought much about curves in terms of English paper piecing, but seeing these blocks makes me start to think about it.
I spent some time burrowing around in the Imaginesque site to see if I could find an explanation for the numbered quilt blocks. I found block number 1, though it is just posted as another pattern and doesn’t seem to be any sort of specific project. Imaginesque is no longer updated, but there are a lot of posts with patterns to explore.
Techniques, Tips & Tricks
I heard about the ‘flat back stitch’ for sewing together EPP recently. I didn’t know how to do it, but tried and like that the stitches do not show on the front. The video I had marked was actually a JPG, so I had to go searching for one to see if I was doing it right. 😉 I found one by Step Gingerly that is useful, but there are a lot of different ones you can review.
Cluck Cluck Sew has some great tips about healthy sewing. As usual DO NOT self diagnose. Go to the doctor if you have pain. Her tips, however, are useful and sensible. I have been taking Pilates for awhile, but my new focus is stretching. I have been feeling tight and creaky, so back to stretching for me. What about you?
Events, Exhibits & Projects
Some people attended QuiltCon and, kindly, wrote about it. Quiltin’ Jenny was instrumental in getting Frances to Savannah, I believe. Quiltin’ Jenny’s post talks about 6 things she saw there. There is so much more in her post than 6 things. It is a fantastic post and you should go read it. Frances has a special podcast where she talks about her experiences there. I know there are a lot of other posts, so go read some of them and plan to be in Pasadena in 2018. HollyAnne of String & Story and Quilts for a Cure also has a post, which is a more general recap, but has fantastic pictures. She posted a lot of insightful thoughts on the quilts.
Are you participating in the Scientific Quilter’s March-a-Long?
The Chester County (Pennsylvania) Historical Society is holding a Quilt Day in May. Check their newsletter for details. Thanks to AQSG’s Barb Garrett for the tip.
The Virginia Quilt Museum is showing a stunning exhibit of early applique quilts from the Mid-Atlantic region. It is a small but serious exhibit which includes 20th century examples of appliqued beauties. The museum is located a short hop off the interstate in Shenandoah Valley’s Harrisonburg, Va. See the website for details on hours etc. Thanks to AQSG’s Neva Hart for the tip.
Pat Bravo and Mr. Domestic are having an EPP party in April 2017.
Quilt San Francisco 2017 Show and sale will be presented by the San Francisco Quilters’ Guild on Friday, March 24 10:00-7:00 and Saturday, March 25 10:00-4:00. Check the website for more details.
Pine Tree Quilt Guild presents their Springtime in the Pines show on May 6-7, 2017 at the Nevada County Fairgrounds, Grass Valley, Calif. Admission is $7 and there is free parking.
The Roseville Quilters Guild presents Oceans of Fabrics, Waves of Quilts, May 19-20, 2017. It will be held at the Lutheran Church of the Ressurrection, 6365 Douglas Blvd, Granite Bay. It will be open Friday 10-5, Saturday 10-4. Admission is $7.
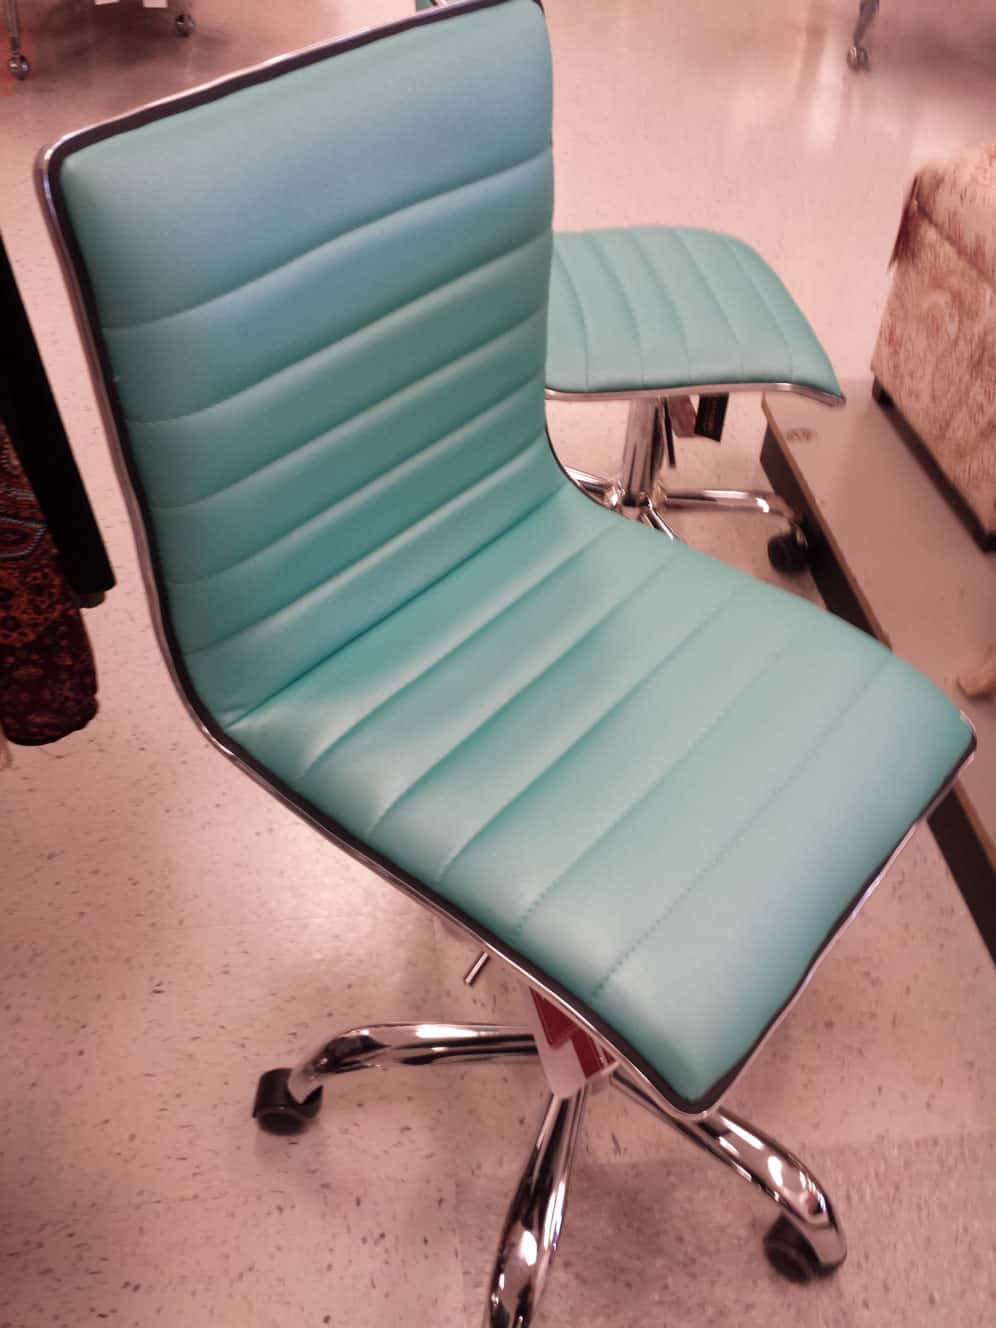
There is a TJ Maxx near my house and, as it is the one outlet type store I can actually stand shopping at, I go in for a look occasionally to see what they have. I have found some great finds: dresses for #politicalwifery, a set of sunflower plates for a gift swooned over by the recipient and recently a chair for my workroom.
I had a chair. It was an office chair we got for free when the bank DH worked at (about 1,000 years ago) was purchased and they were closing his location. It no longer moved up and down and was not hideous, but not pretty either. I saw this chair and knew it would be perfect or the new look I am working on for my workroom. It is slightly lighter weight than my old one, so I can’t pile up as much fabric on it, but all parts function and it is pretty.
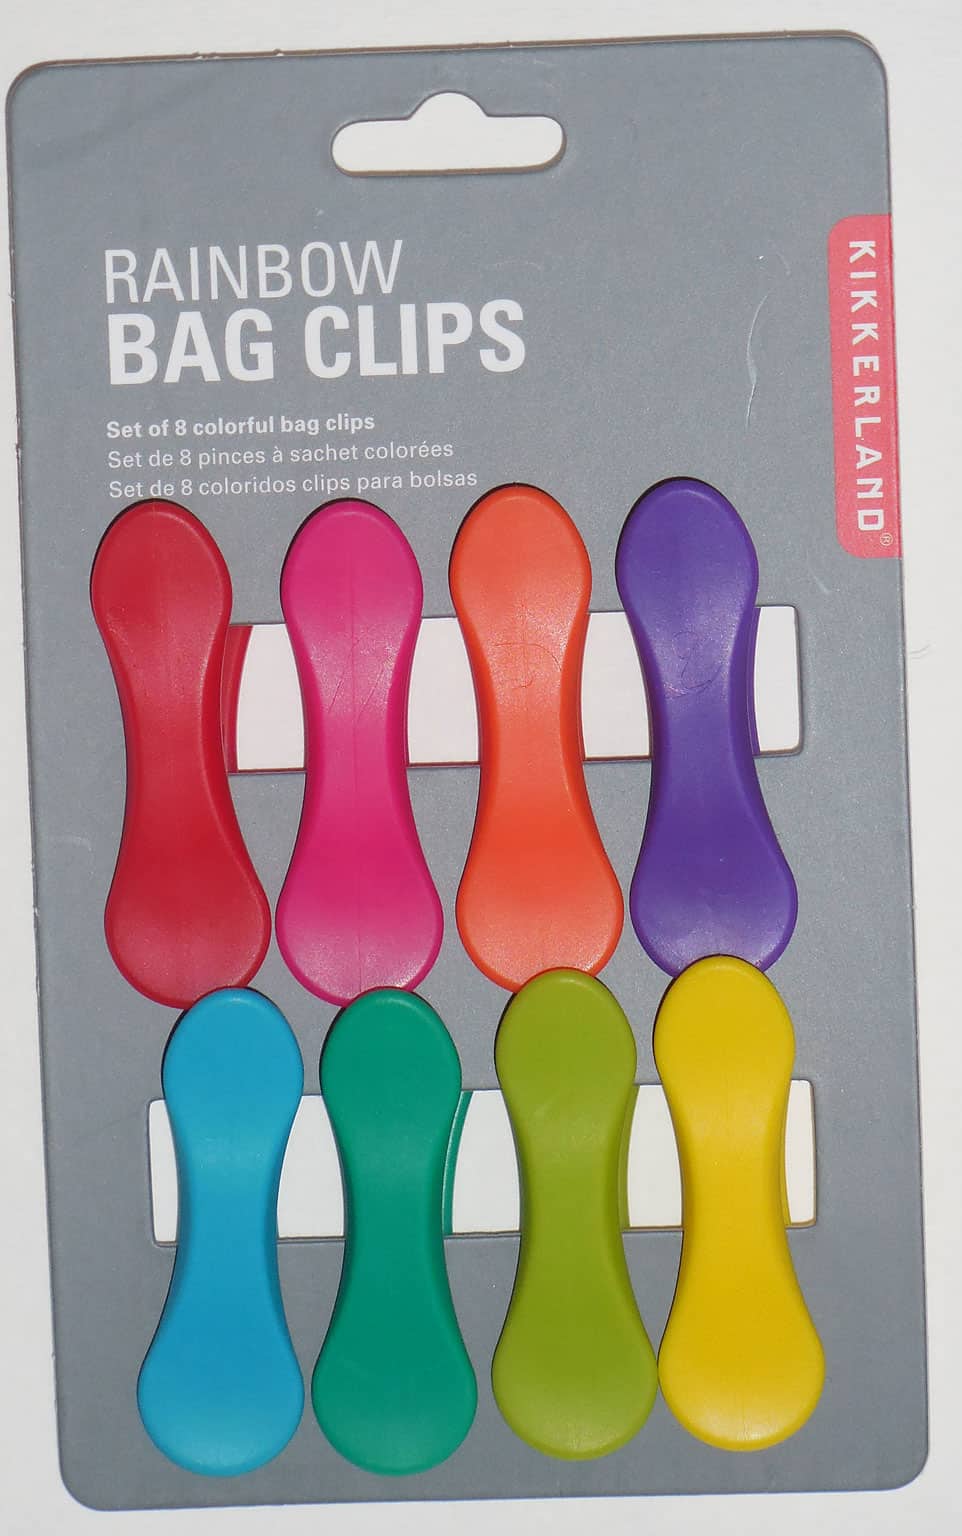
Bag clips
I bought this pack of bag clips not for chip and bread bags in the kitchen, but for my workroom. They are too pretty to hide away in the pantry. I have decided that the things I use should be pretty.
I have a very tiny update for the En Provence Mystery quilt. I have enough of the Peaky & Spike blocks finished to make 9 patches.
In fact, I may be completely finished with the Peaky & Spike blocks. I don’t know what goes in the corners and haven’t taken the time to look it up.
This block, the only one I have laid out, is not sewn. Laying it out, however, gets it closer to being sewn. I hope you don’t think this is a poor showing!
I have to say that it occurred to me that I might want to use the blues from the Blue Lemonade Hunting & Gathering box for the colored 4 patches. If the clue asks for 2 inch squares, I’ll be golden or In like Flynn. I have to find the clue and look it up.
I have done a little more on this piece since I took the photo, but it is slow going so not much.
Despite my protests yesterday that I wasn’t in a rush to finish this piece, I really do want to finish it so I can start the La Passacaglia. Having two large EPP projects seems ridiculous and I only have a certain amount of handstitching time, so focus is the requirement.
My big push now is to make dots on white stars. I need a lot of them and can’t move forward without them. I think I have three in process, but a number of strips cut, waiting.
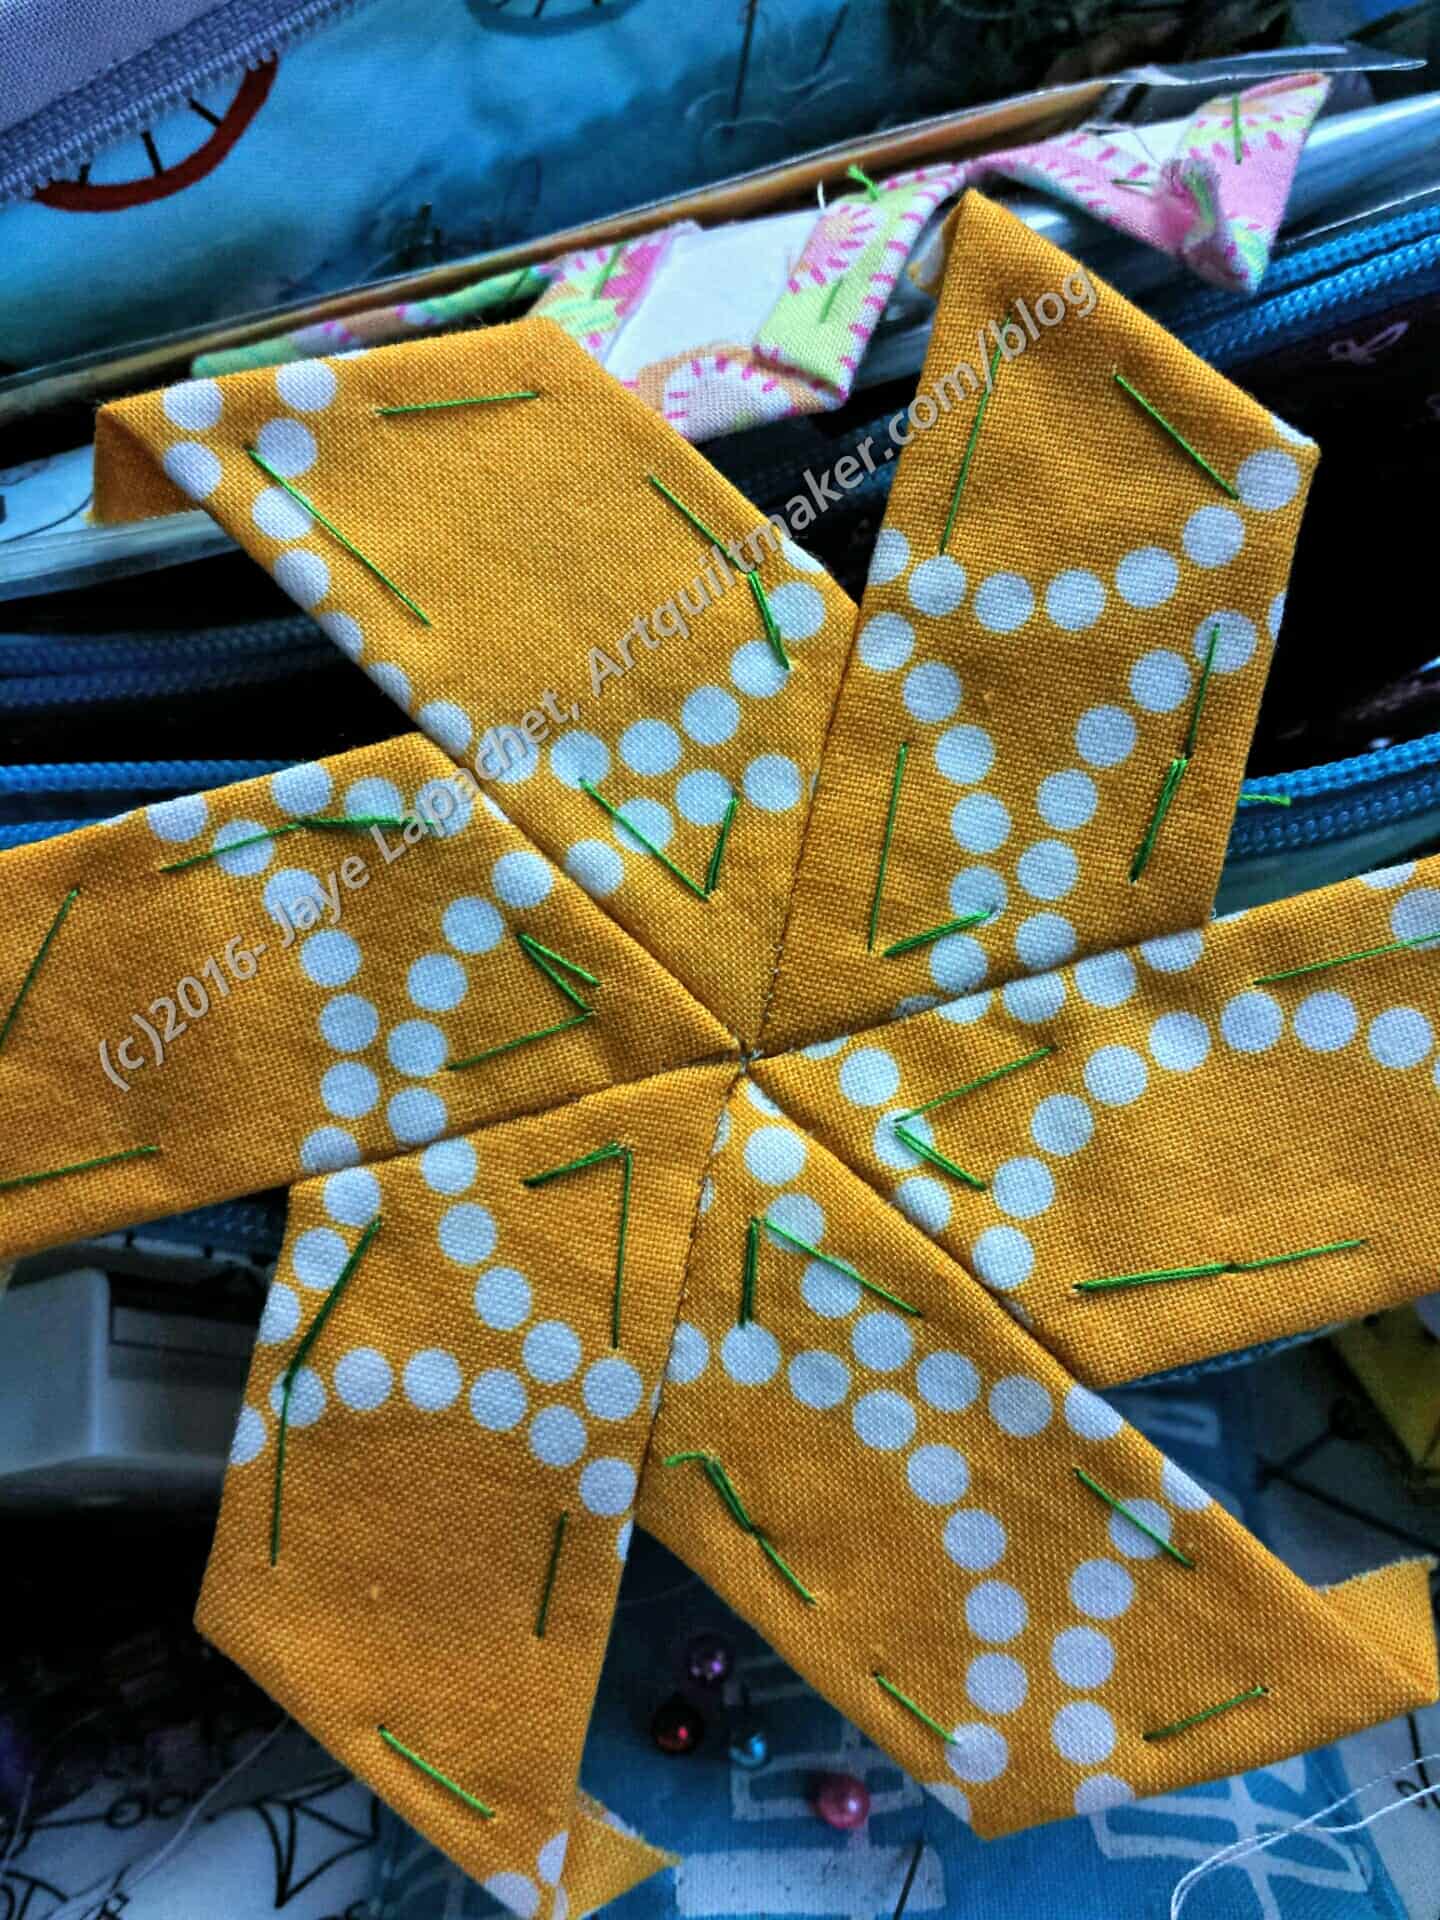
I haven’t been happy with the right sides together method of whip stitching my EPP pieces together. I don’t like the stitches showing on the front. No matter how careful I am, I seem to always get a few stitches showing. ERGH!!!
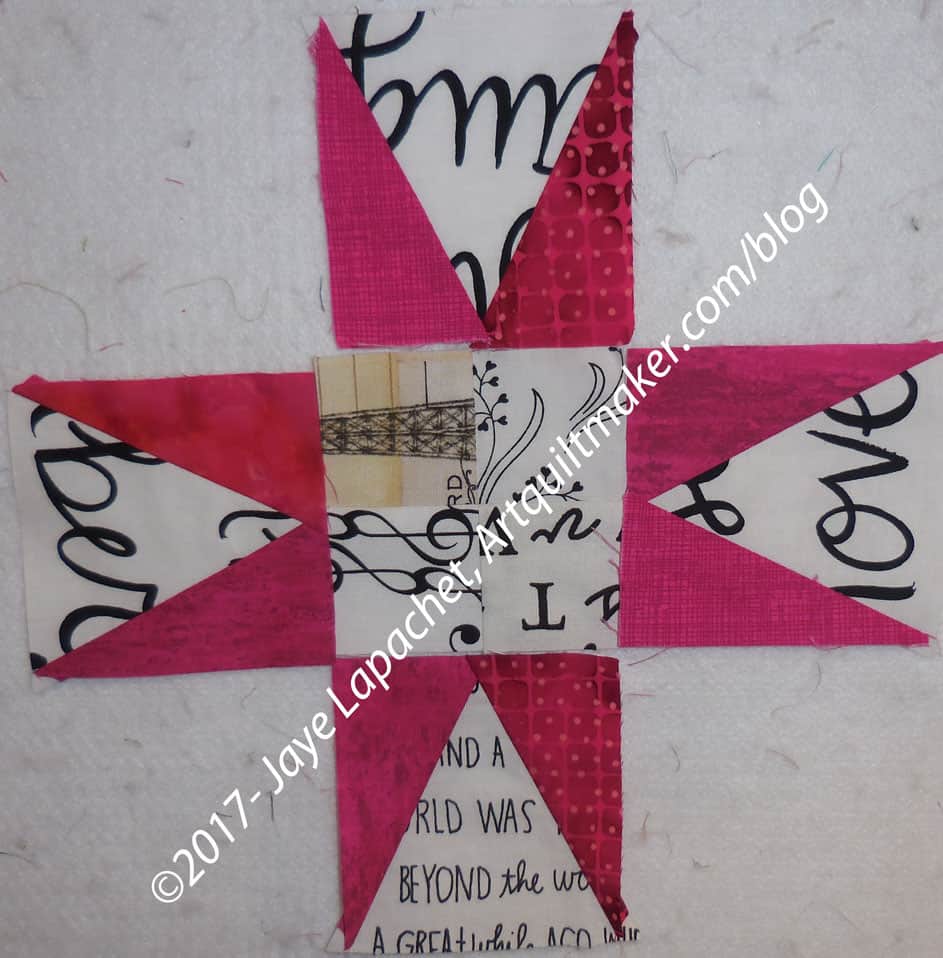
Finished star using flat back stitching
I mentioned recently that I had heard about the Flat back stitch for sewing EPP shapes together. I watched the video thoroughly, eventually, and tried it. I like the technique, although it isn’t without hassle and have modified my stitching accordingly.
One thing the video shows is starting inside a seam. The idea is to slip the needle between the fabric and the paper, catching the knot on the inside. I never thought of that!
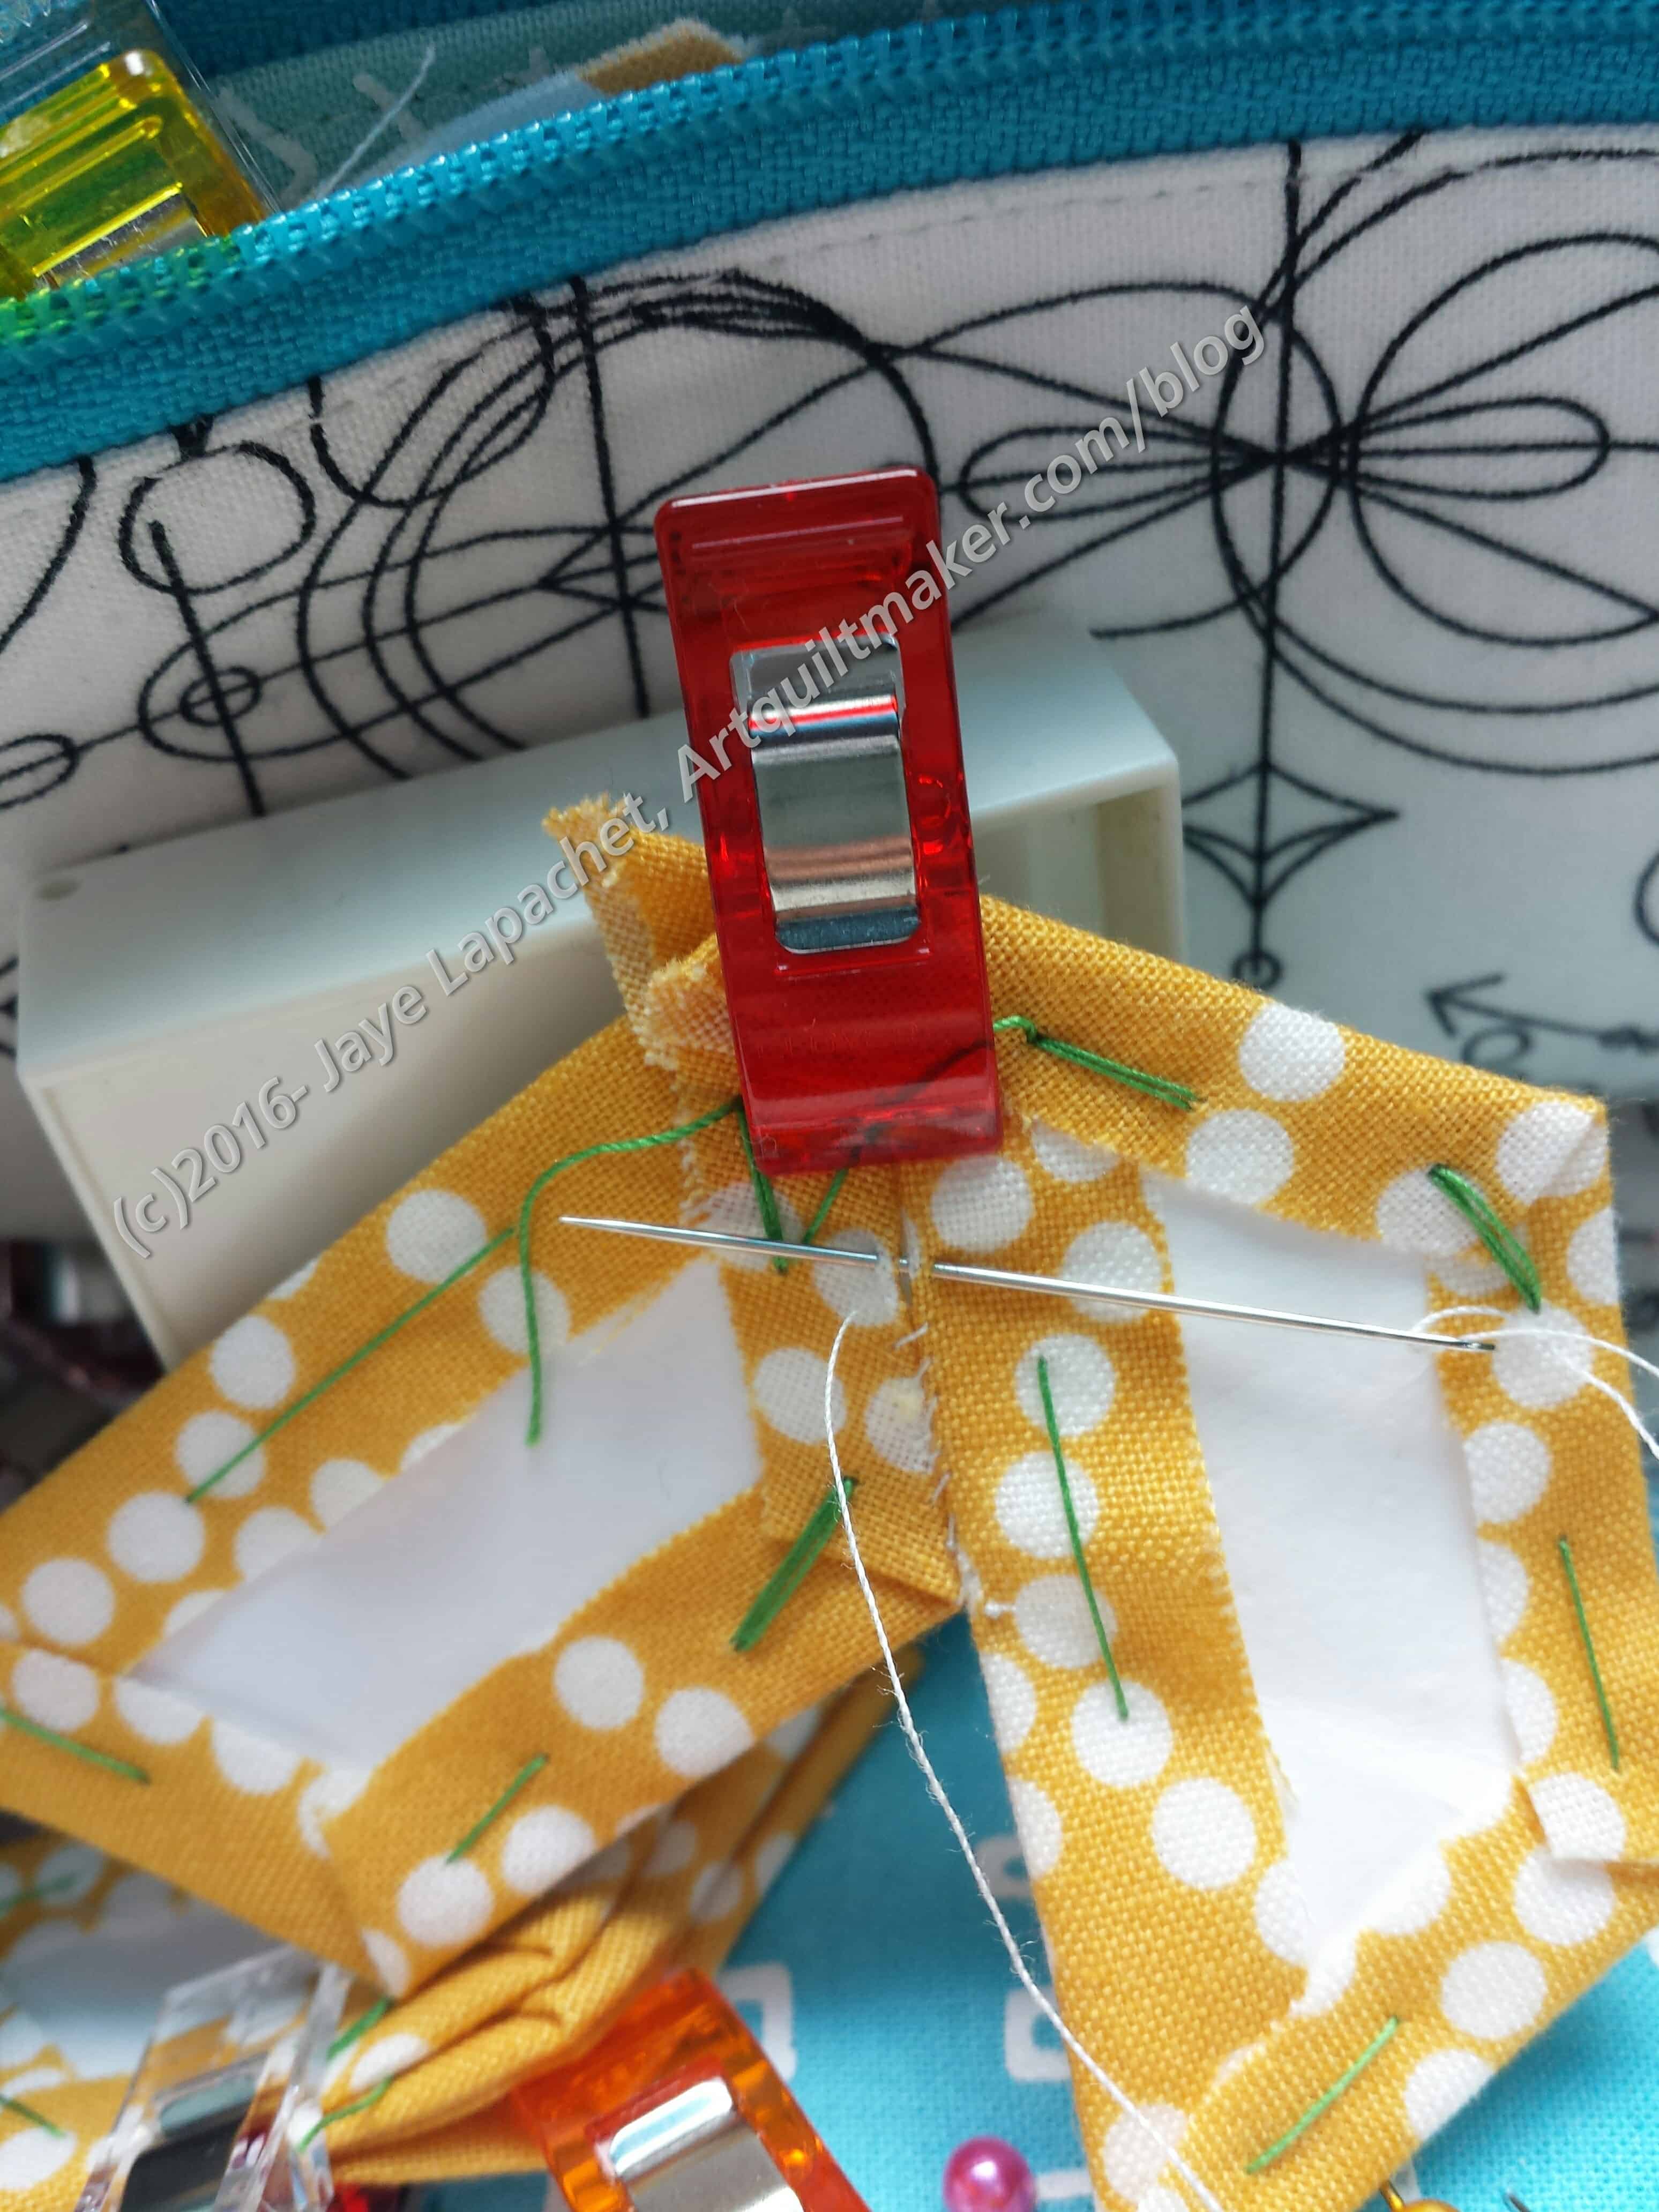
Flat back stitch using WonderClips
I have been using WonderClips to hold my pieces together. It is imperfect at best despite the fabulousness of WonderClips. The video shows using regular transparent tape. Another great idea.
There are a couple of other good things about the flat back stitch. First, you don’t have to bend the paper/card pieces when you insert a piece (Y seam idea). This makes the card last longer. Second, the stitches don’t show at the beginning of the line of stitching, which they can if you are even a tiny smidge not careful. DIY Addict has some info about this after the 2:50 minute mark on her video.
This technique takes me longer, but I like the look and really am not in a rush to get another star attached to this piece.
I am a sucker for embroidery threads. Not really the floss that comes in hanks, but the Perl Cotton balls, the Aurifloss and, now, Sue Spargo embroidery threads.
I admire Sue Spargo’s work, because of the cheerfulness and liveliness of the designs. Her book, Stitches to Savor: A Celebration of Designs, is a favorite. I admire her work with the simple shape of the cups and want to do something similar with cakes. Can you imagine how fabulous a cake quilt would look with embroidery designs applied to it to simulate frosting and cake decorations?
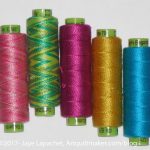
Sue Spargo Threads from Stitch
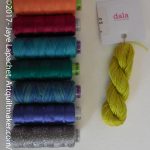
Sue Spargo Threads from Thistle Dew
Of course, given the colors I bought, the cakes would be cheerful, and, possibly, unappetizing. 😉
You may noticed that I have mentioned Sue Spargo embroidery threads a few times recently. After visiting Thistle Dew and Stitch quilt shops, I was hooked. Both shops had these threads and it was the first time I had seen them. I have a lot of Perl cotton, etc, but couldn’t help indulging in a few spools. I want them all.
I have used them on Under the Sea and they were great to use. I need to get inspired by Gerre and use them more.
The title should make a post unnecessary, but I am going to write anyway.
“You must disrupt your normal patterns so you can see the world with new eyes” (pg.45)
I don’t know about you, but I have a routine. Several, actually. I have a routine to get my day started, though it varies depending on the day. I have an evening routine and a work routine. If someone were to look at the week overall, they would see a larger routine overlaid on top of these other, daily, routines.
I am not sure about disrupting these patterns right at the moment, but my patterns for working on my quilts can, and, according to Bloomston, should be disrupted. One of the things Bloomston learned in her Drawing 101 class was to “seek surprises” (pg.45). I took down my design wall in order to sell it. The sale didn’t go through and I haven’t put it back up yet. It is a hindrance, but the surprising thing is that I am finding I work on more projects simultaneously than I did with the design wall up.
Huh.
Don’t get me wrong, I need my design wall. It is a vital tool, but at the stage I am in with my various projects, I can do without it.
Seeking surprises could mean using different fabrics. My SIL did this recently. She made a GREAT quilt, which is totally not in her colors.
There is a section in the chapter where Bloomston relates her experience learning to see art or a piece of art on which she was working ina different way. “We dove beneath expectation, convention, intention, and ego. We spoke about art as liberation from conscious thought. We discussed abstraction and pure form-pure mark making” (pg.46). I get a new view when I hear people talk about their perceptions of art.
“…seek the unexpected” (pg.46). This is the best advice.
There is another worksheet that is all about doing the unexpected. Do the unexpected. What does that mean for you?
Nota bene: we are working through Carrie Bloomston’s book, The Little Spark. Buy it. There is a lot more to each spark than what I am writing and the original chapters will help you. Go buy Carrie Bloomston’s book, so you get the full benefit of the fabulousness! You can see my book review, which is what started this flight of fancy.
You can find the last spark on the blog about a month ago.
I was in a mood on Friday when we left for Grass Valley. DH said he wanted to leave mid-morning so we could avoid some of the Sacramento/ Friday night traffic. We left just before 1pm and sat in traffic. This just added to my ‘mood.’
Two good things came out of this. I worked on the Ends Donation Top while I waited and Saturday I woke up much happier.
Saturday is a big day for NSGW events, so we were up and at ’em on the early side. The dedication started at 10 and by 10:45, we were free to do our own thing until 1 or so. We off loaded our stuff at the hotel then went looking for the quilt shop. Everything was within walking distance of our hotel so we were able to get our steps in as well.
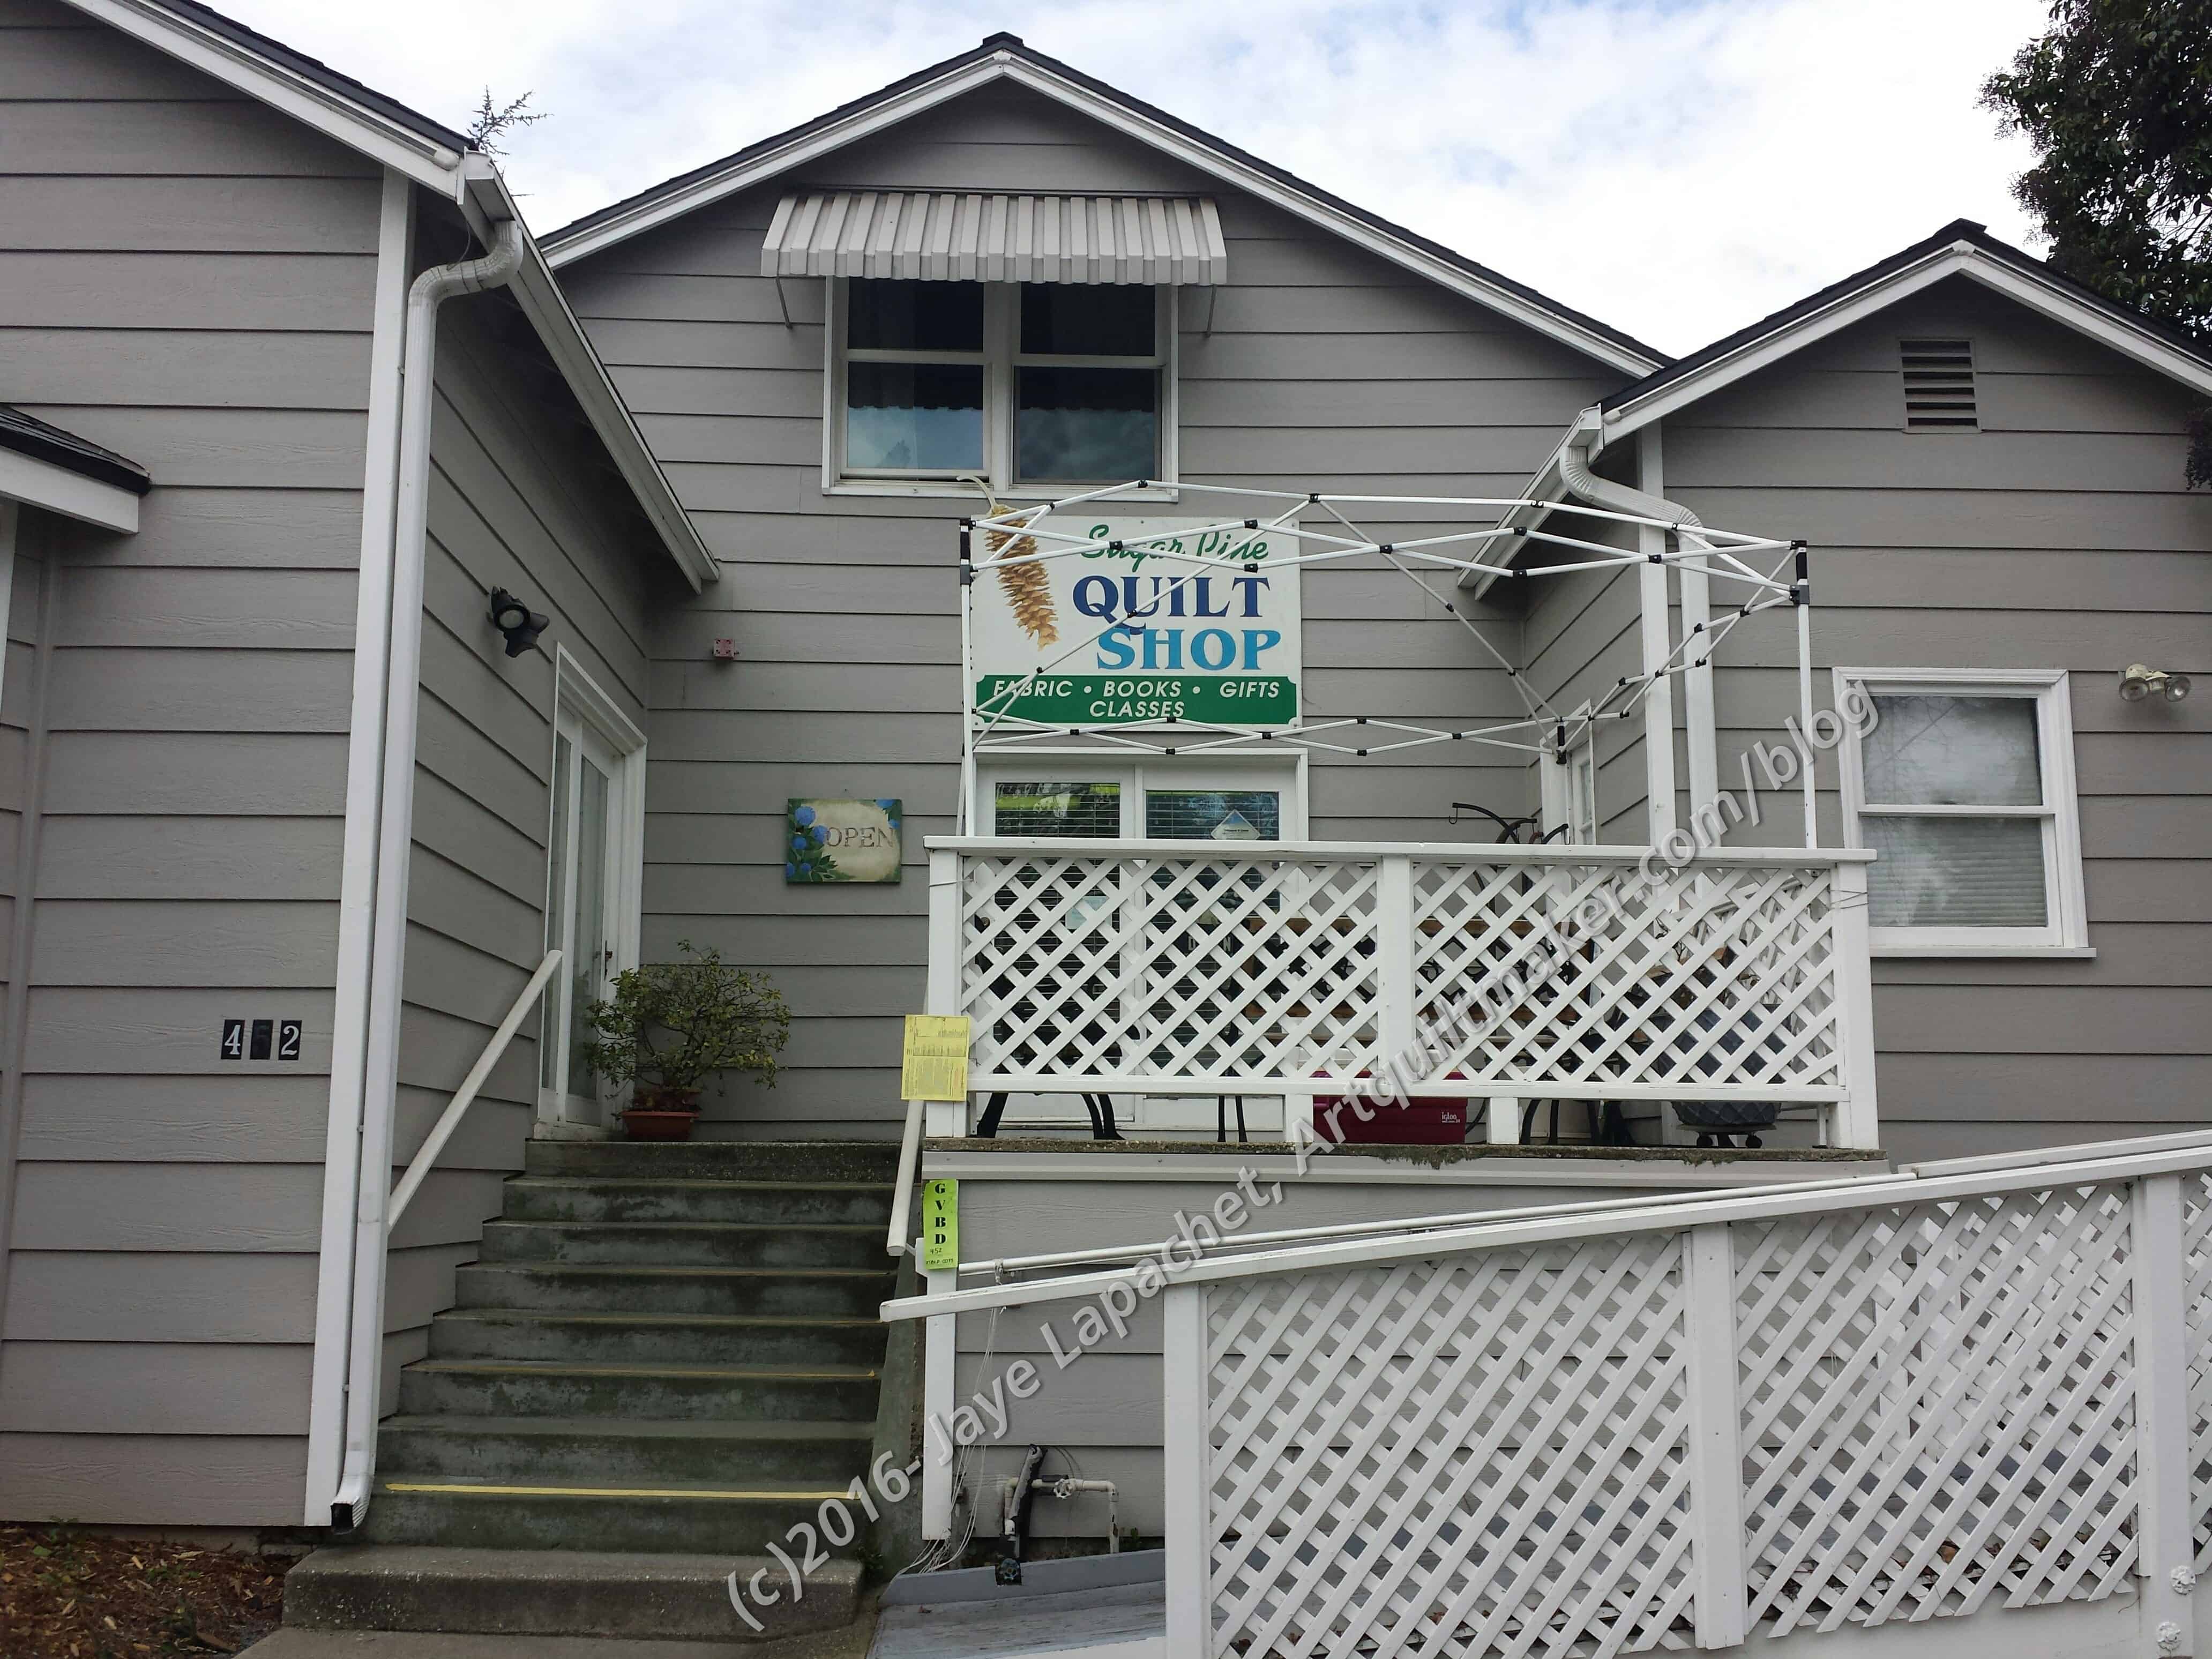
Sugar Pine Quilt Shop, Grass Valley, Calif
We found Sugar Pine Quilt Shop fairly easily, especially after I figured out the correct address. Yes, DH came with, so he cramped my style a little bit.
Sugar Pine Quilt Shop, looking towards front door
Still, the people were friendly and the shop was stuffed with fabric, patterns, fat quarters, tools, notions and everything quilty.
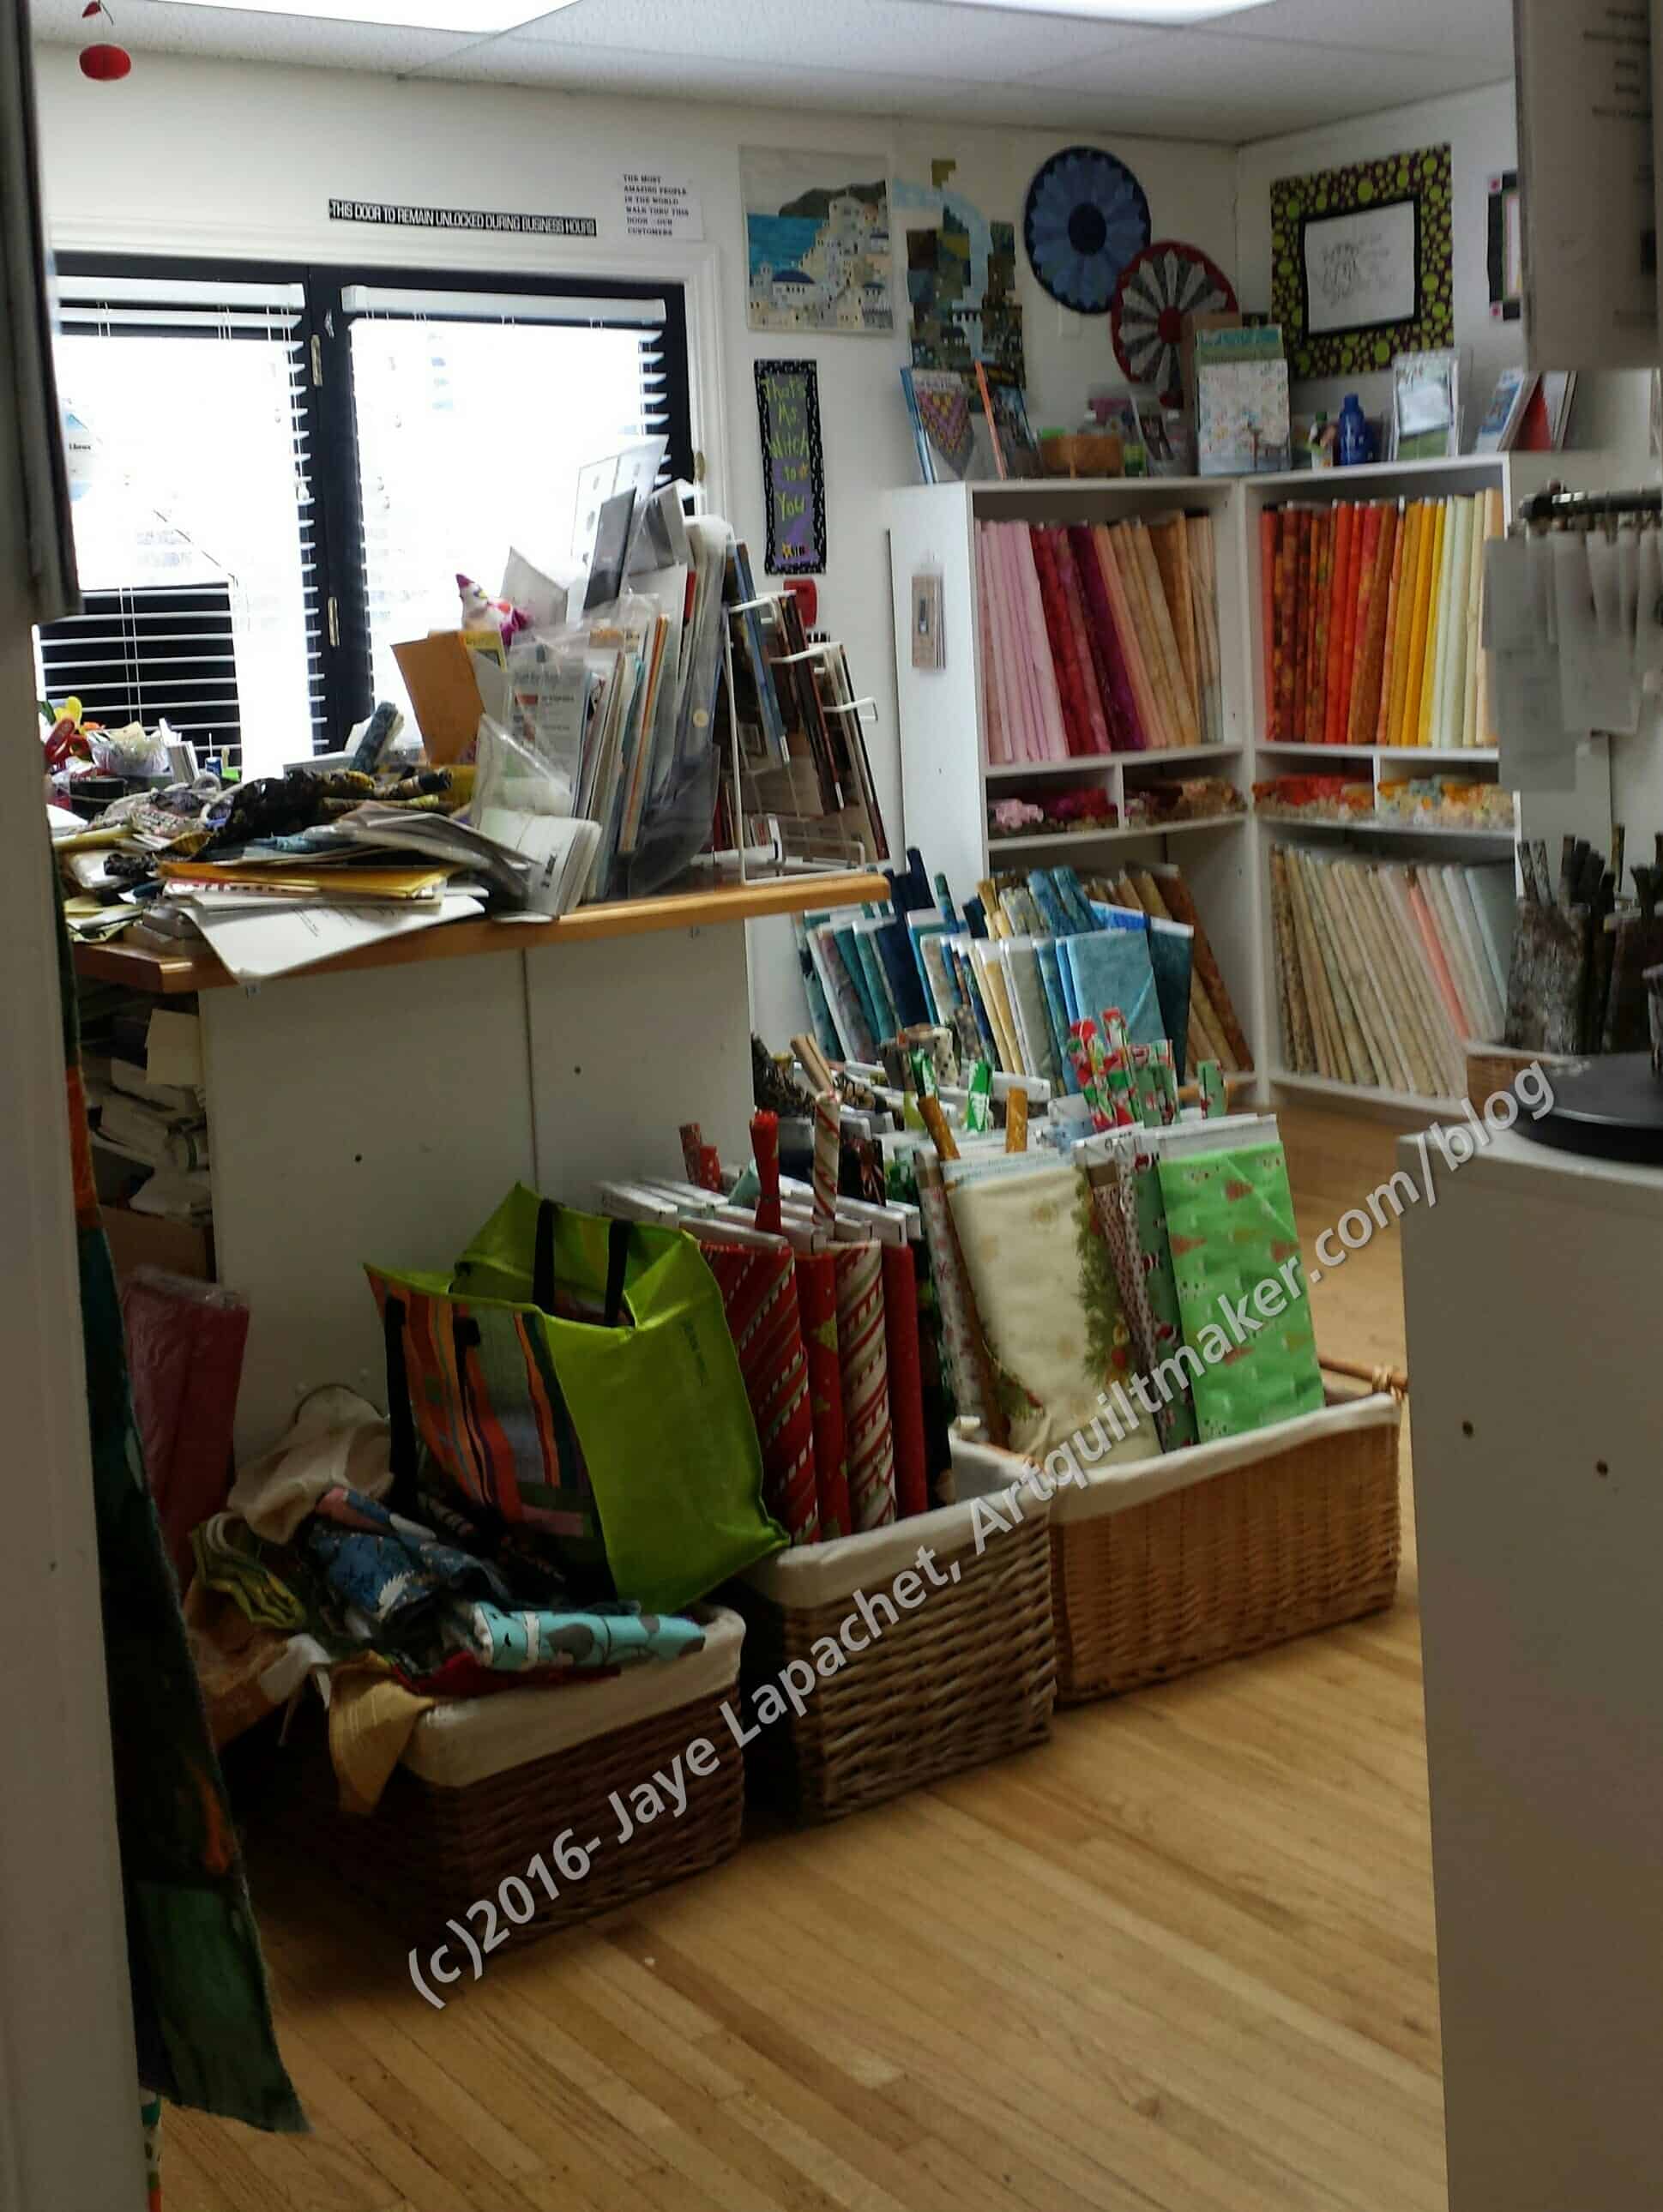
Customers walk up to a patio and walk into the shop through French Doors. To the right, when you walk in, is the cash register/payment station (on the left in the photo – white counter). A bunch of other rooms are off of that room. If you turn left, you can make a U-turn into the room with repros, batting and a lot of books and the cutting counters. If you turn, also to the left, but not as sharply, you go into a room with Kaffe prints, notions and non-kid novelty prints. I saw a lot of Frida Kahlo related prints, Dia de las Muertos prints and Hawaiian shirt prints.
They told me that they try to keep fat quarters of all their fabrics on hand, but if I couldn’t find one, they would be happy to cut one for me. FQs were stuck in between the fabric and the bolt in many cases, which was awkward when I tried to carry a bolt around. They kept flapping around. They didn’t fall out, though, so that was good.
In the main room, aside from the cashier, I saw a good number of Fig Tree prints.
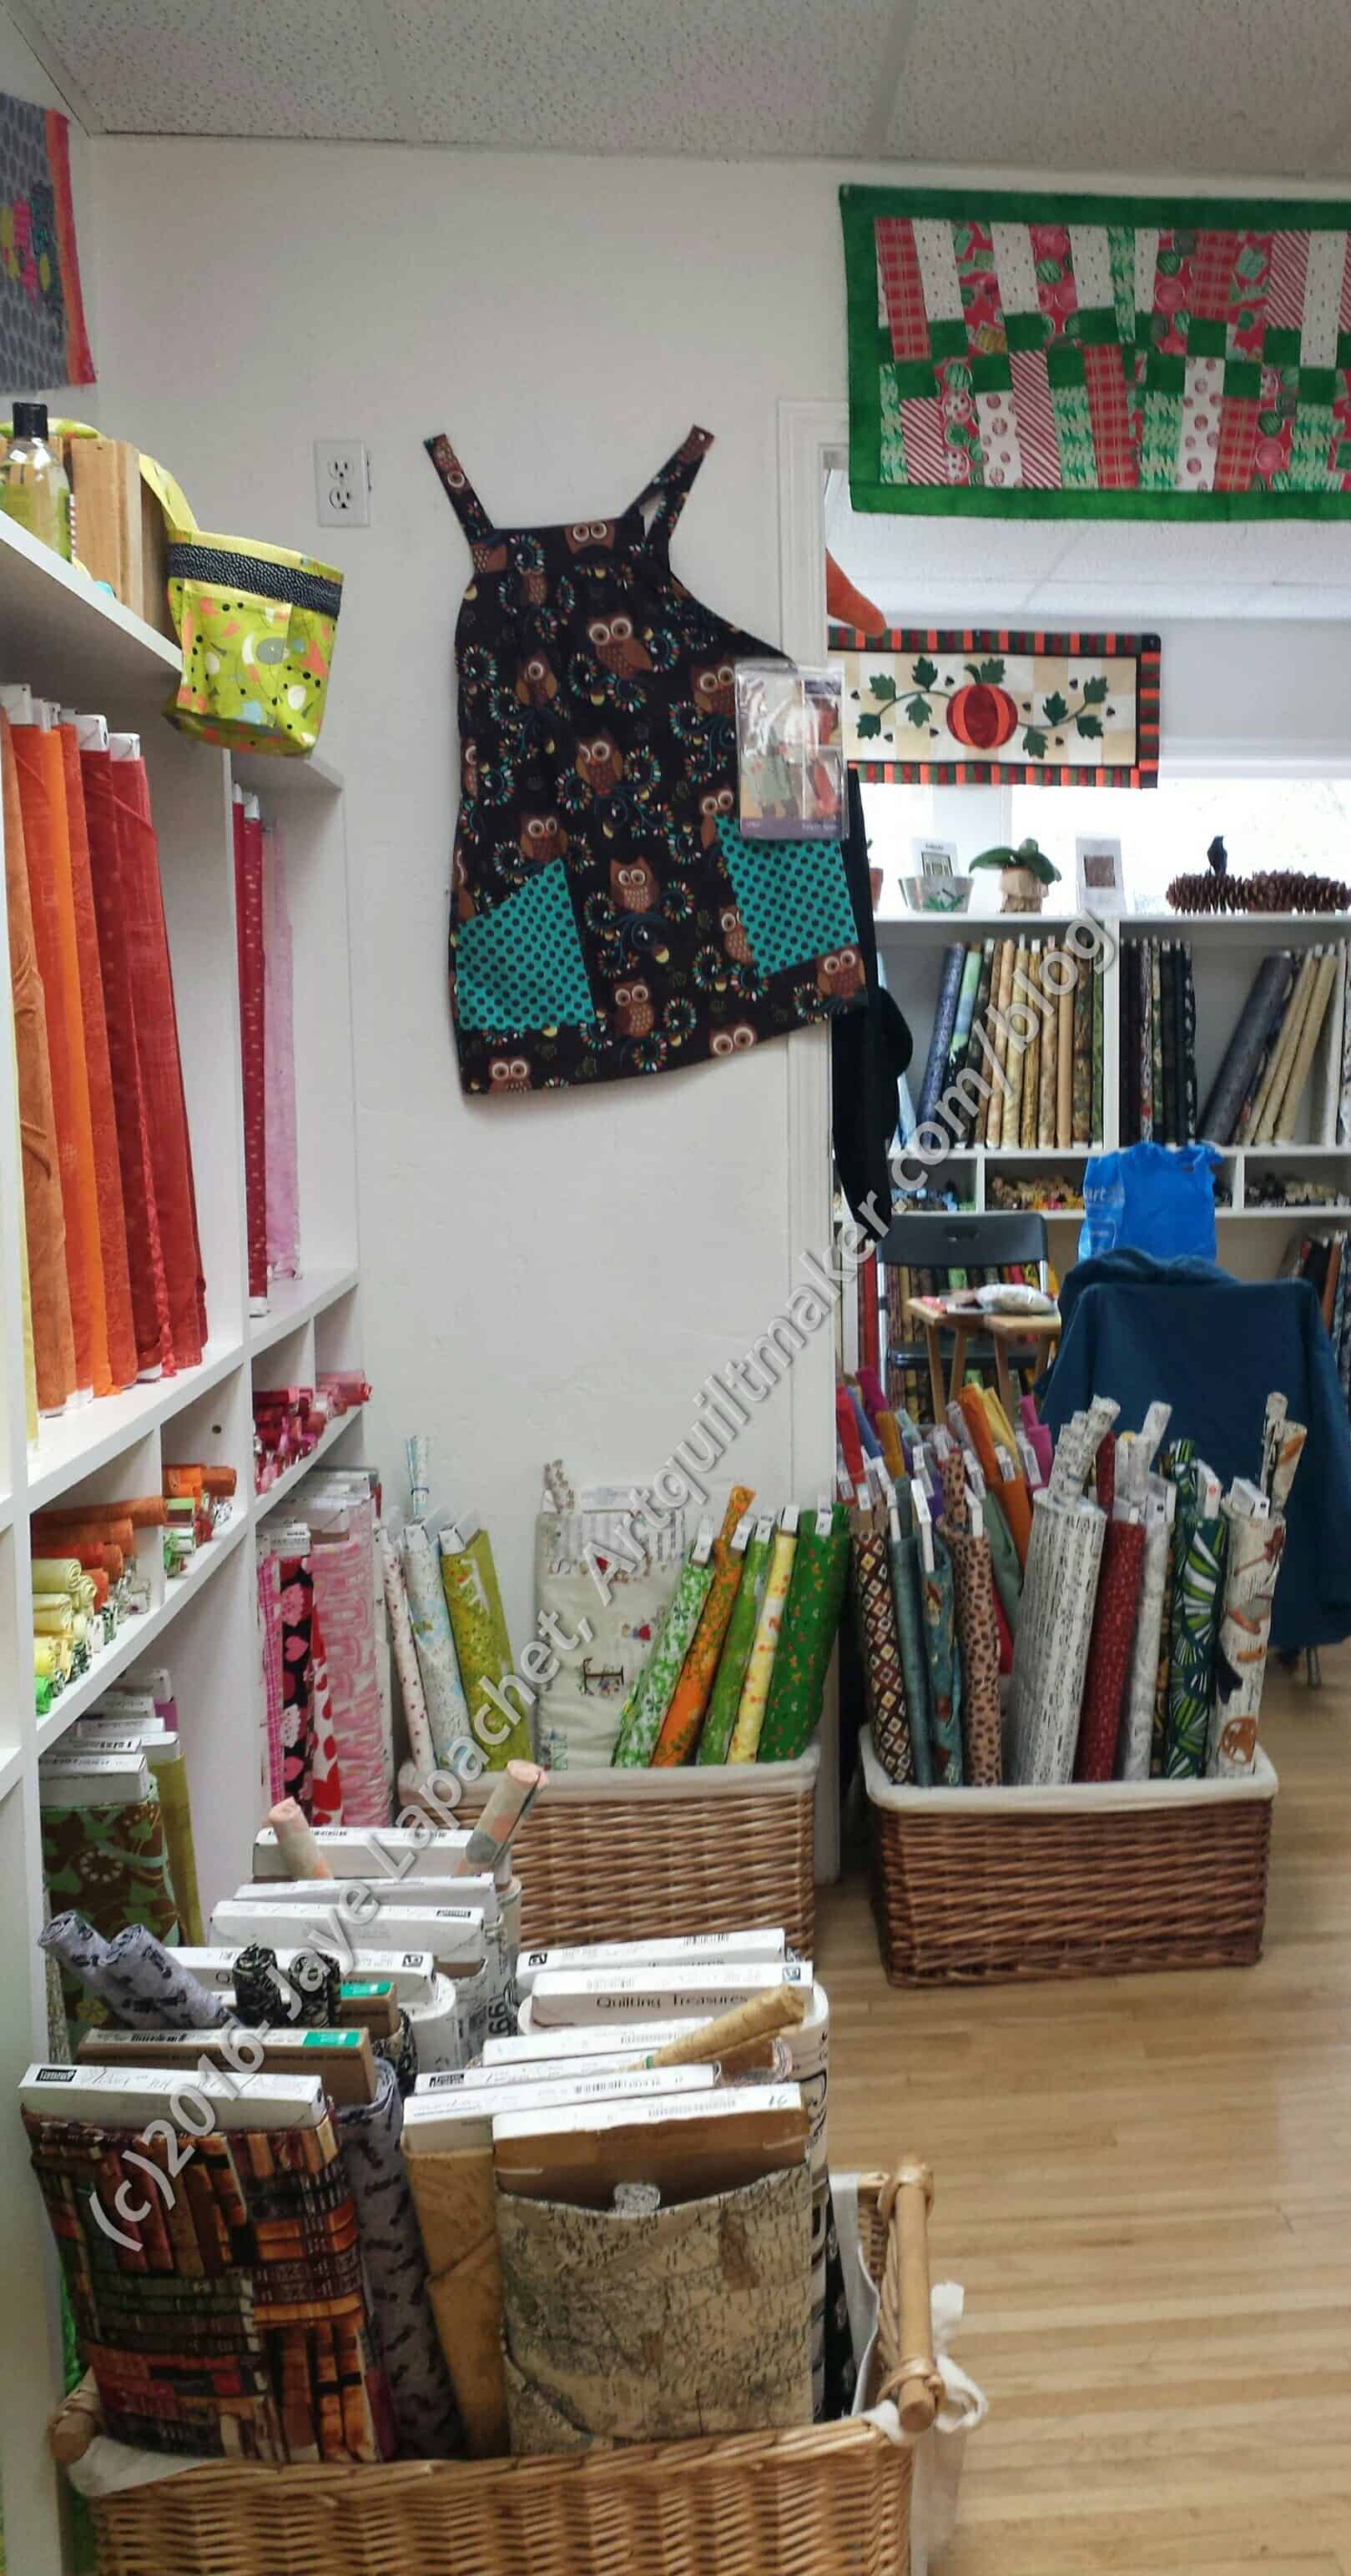
Sugar Pine Quilt Shop, Interior
Behind the main room were two more rooms connected by a large opening. I couldn’t tell if this building used to be a house and, if so, how the rooms would have been laid out.
The shop mostly had fabrics that wouldn’t fit on shelves in baskets on the floor rather than just on the floor. This kept the bolts corralled, but made them a little hard to look at.
The place was STUFFED with patterns. Everywhere I looked there were patterns. They had a large selection of books, as well, most of which I did not recognize. One of the books I saw was More Layer Cake, Jelly Roll and Charm Quilts by Pam and Nicki Lintott. I have to be sure and tell Frances. I didn’t look at it, sadly, because it was way up high on a shelf and DH was waiting… I’ll find it somewhere else.
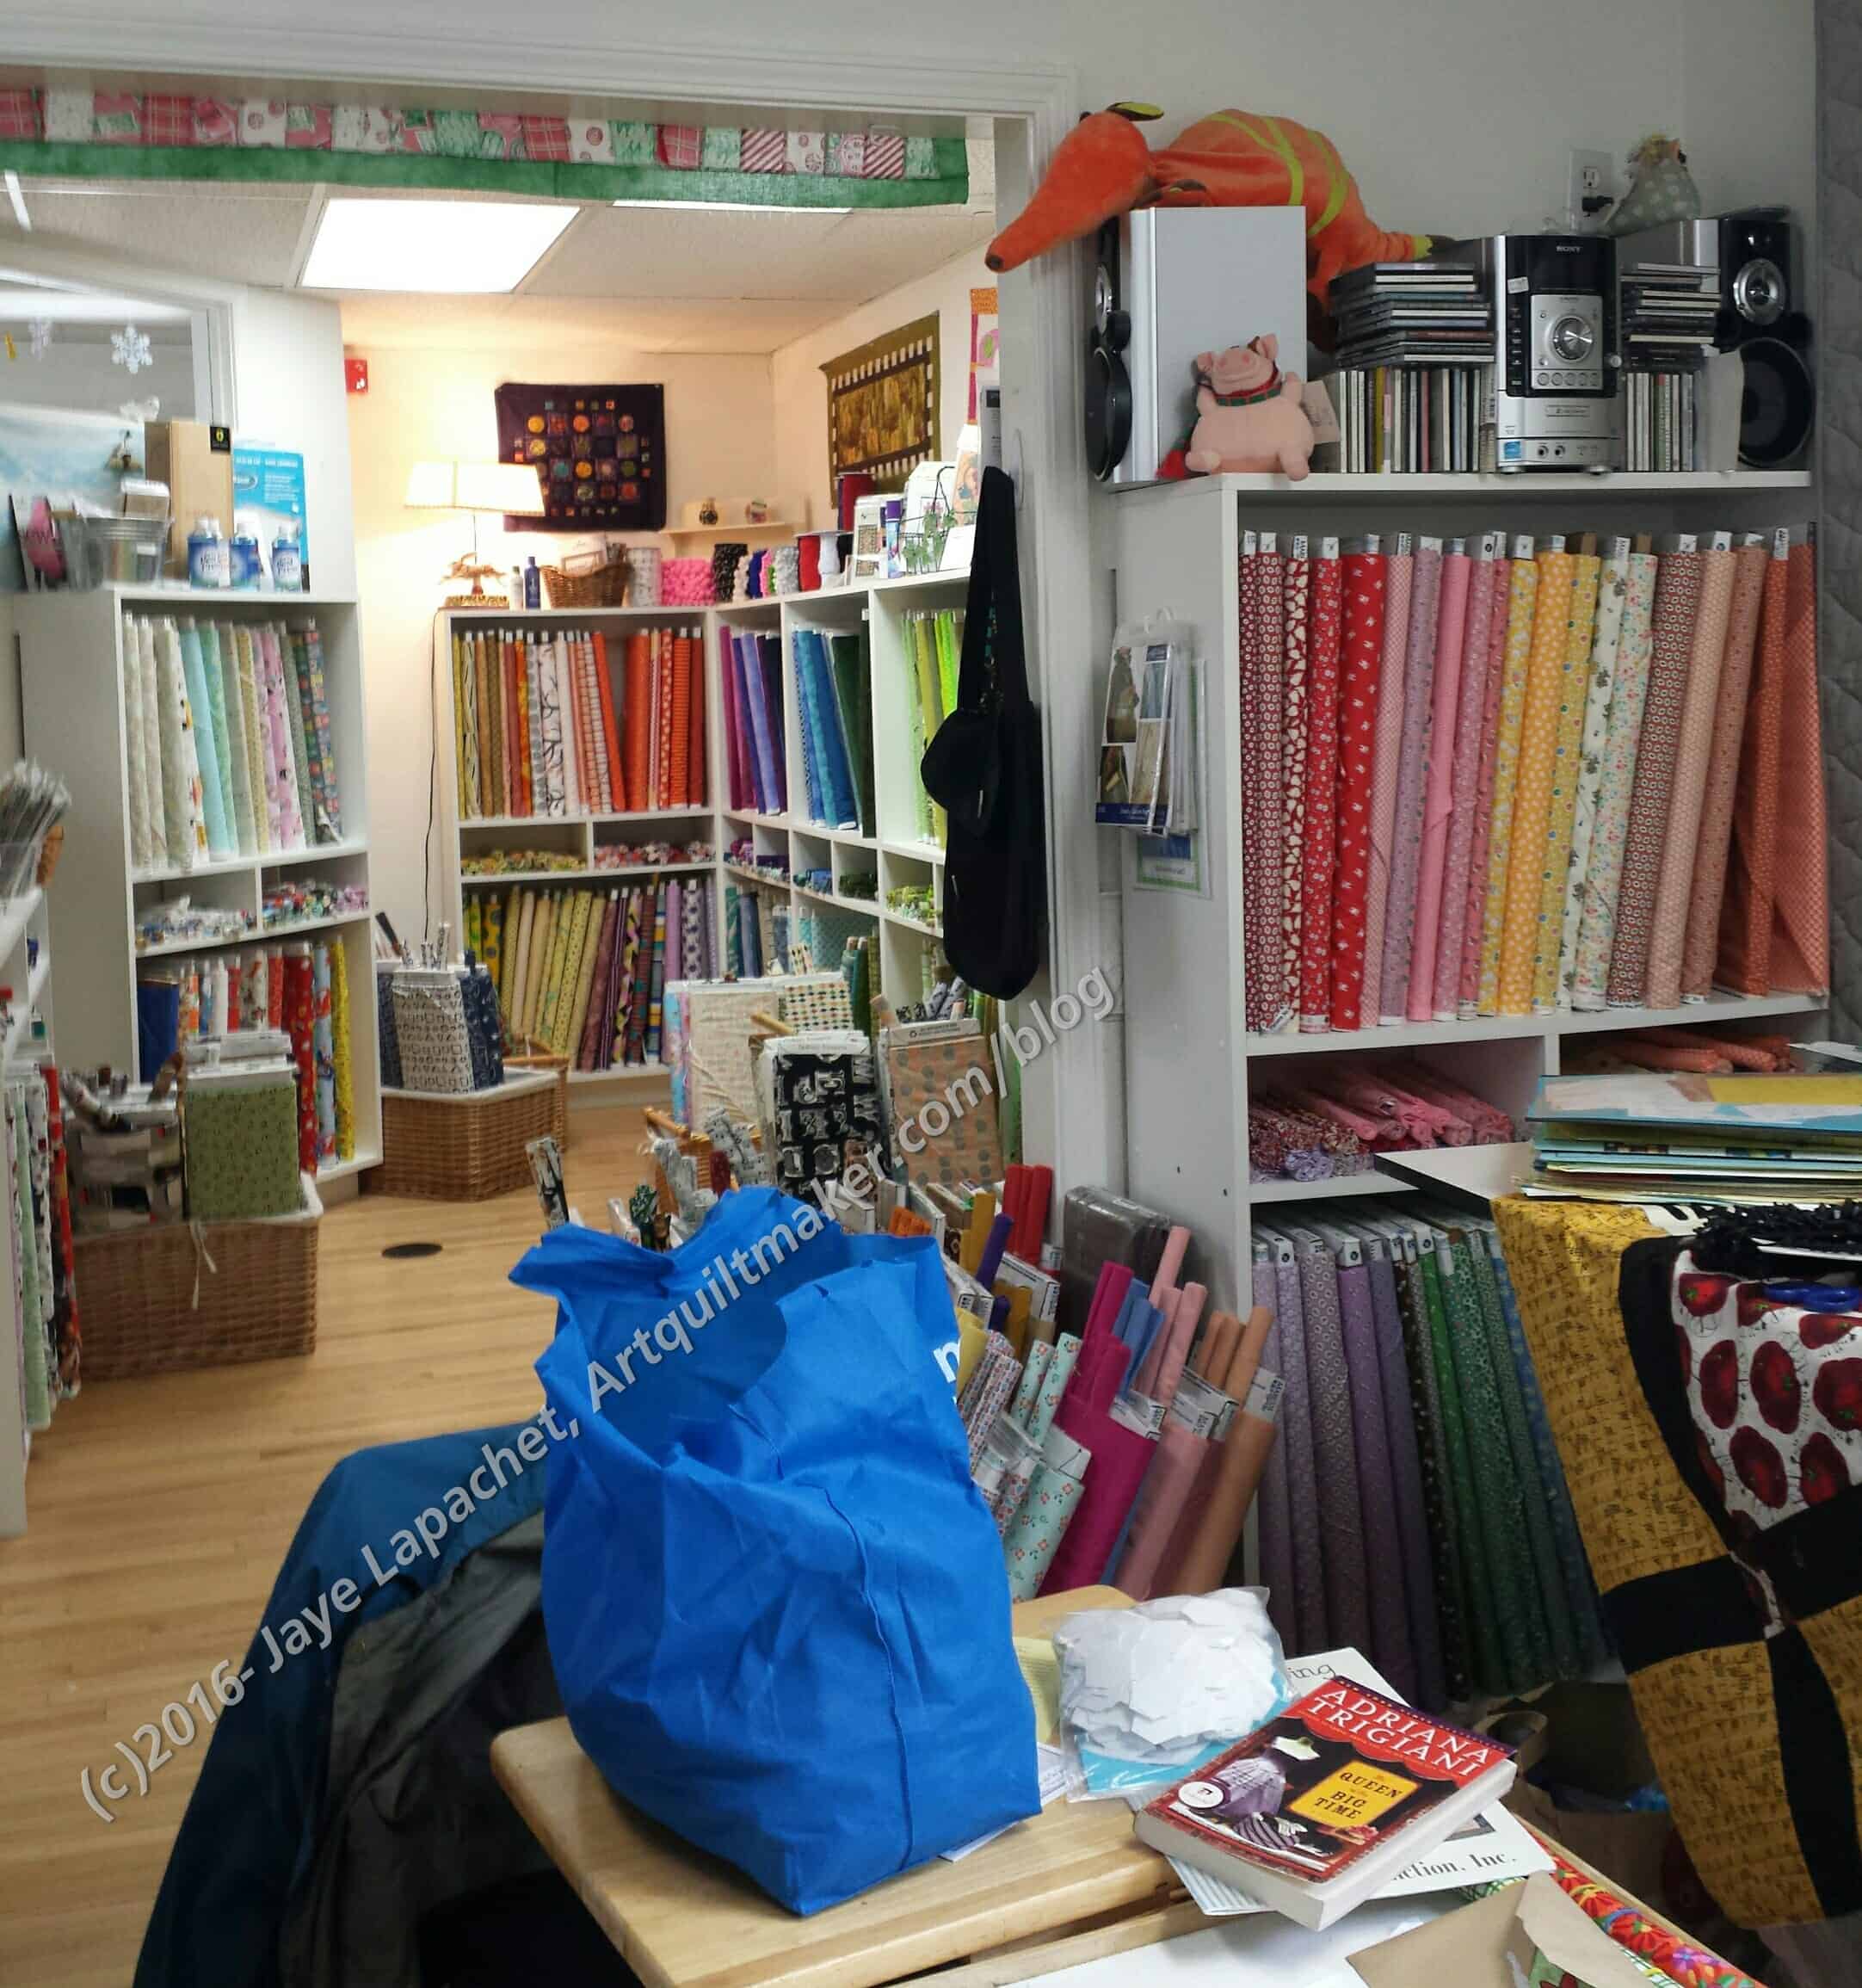
Sugar Pine Quilts, Interior
That blue bag was full of walnuts. Not fabric walnuts, but real walnuts. Don’t ask me why, I didn’t ask and I don’t know. They might have been shelling them to make crushed walnuts for pincushion filling*?
There was a lot going on at this shop in terms of prep for sales. They were cutting kits for pattern packets, sorting patterns, putting away fabrics after cutting FQs. It was busy.
Not a ton of modern fabrics, but enough variety to keep me interested. I had never seen Marcus solids and had a chance to see them at Sugar Pine.
I would recommend a visit to Grass Valley. I took some time to look at the shops in their lively downtown streets. There are a lot of interesting shops that have things I might actually buy. It is a good place to visit in addition to having a quilt shop.
Visit!
Sugar Pine Quilt Shop
452 S Auburn St
Grass Valley, CA 95945
(530) 272-5308
*Due to potential nut allergies, I use plastic pellets to give some heft to pincushions. I have never seen them at quilt shops, so I buy them at Beverly’s.
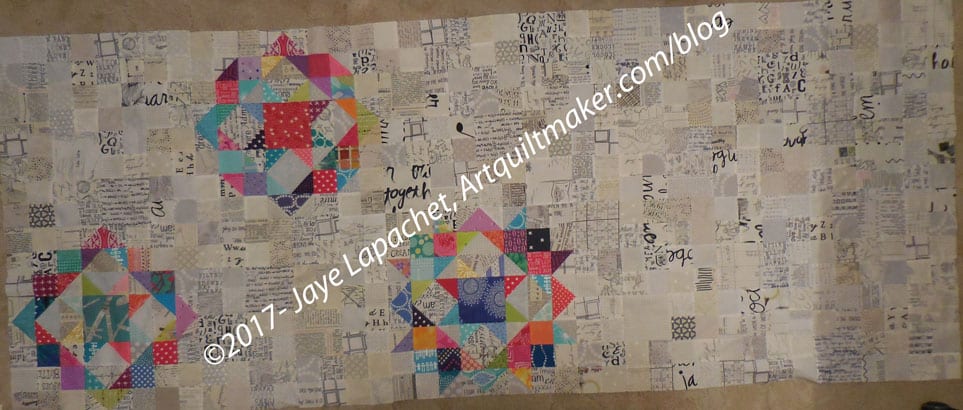
This is big. Fortunately, I know and can accept the width. It doesn’t mean that it is small. It isn’t. Even this partial section is big. It is 80″ wide* as you see it. I will be 112″ wide when I sew the last four blocks to the top section.
This is a perfect example of me not making small quilts.
*Thus the wonky photo. I am not tall enough to take the photo, don’t have a large enough floor or design wall.
I have a box of quilt ‘dreg’ ends. Dreg is an ugly word as it conjures an image of grounds in an empty coffee cup or discarded tea leaves. These are simply pieces and parts that don’t have an immediate need or use. For some reason, I decided to go through the box in which they are stored. I think it’s part of the recent tidying frenzy in which I have been engaging.
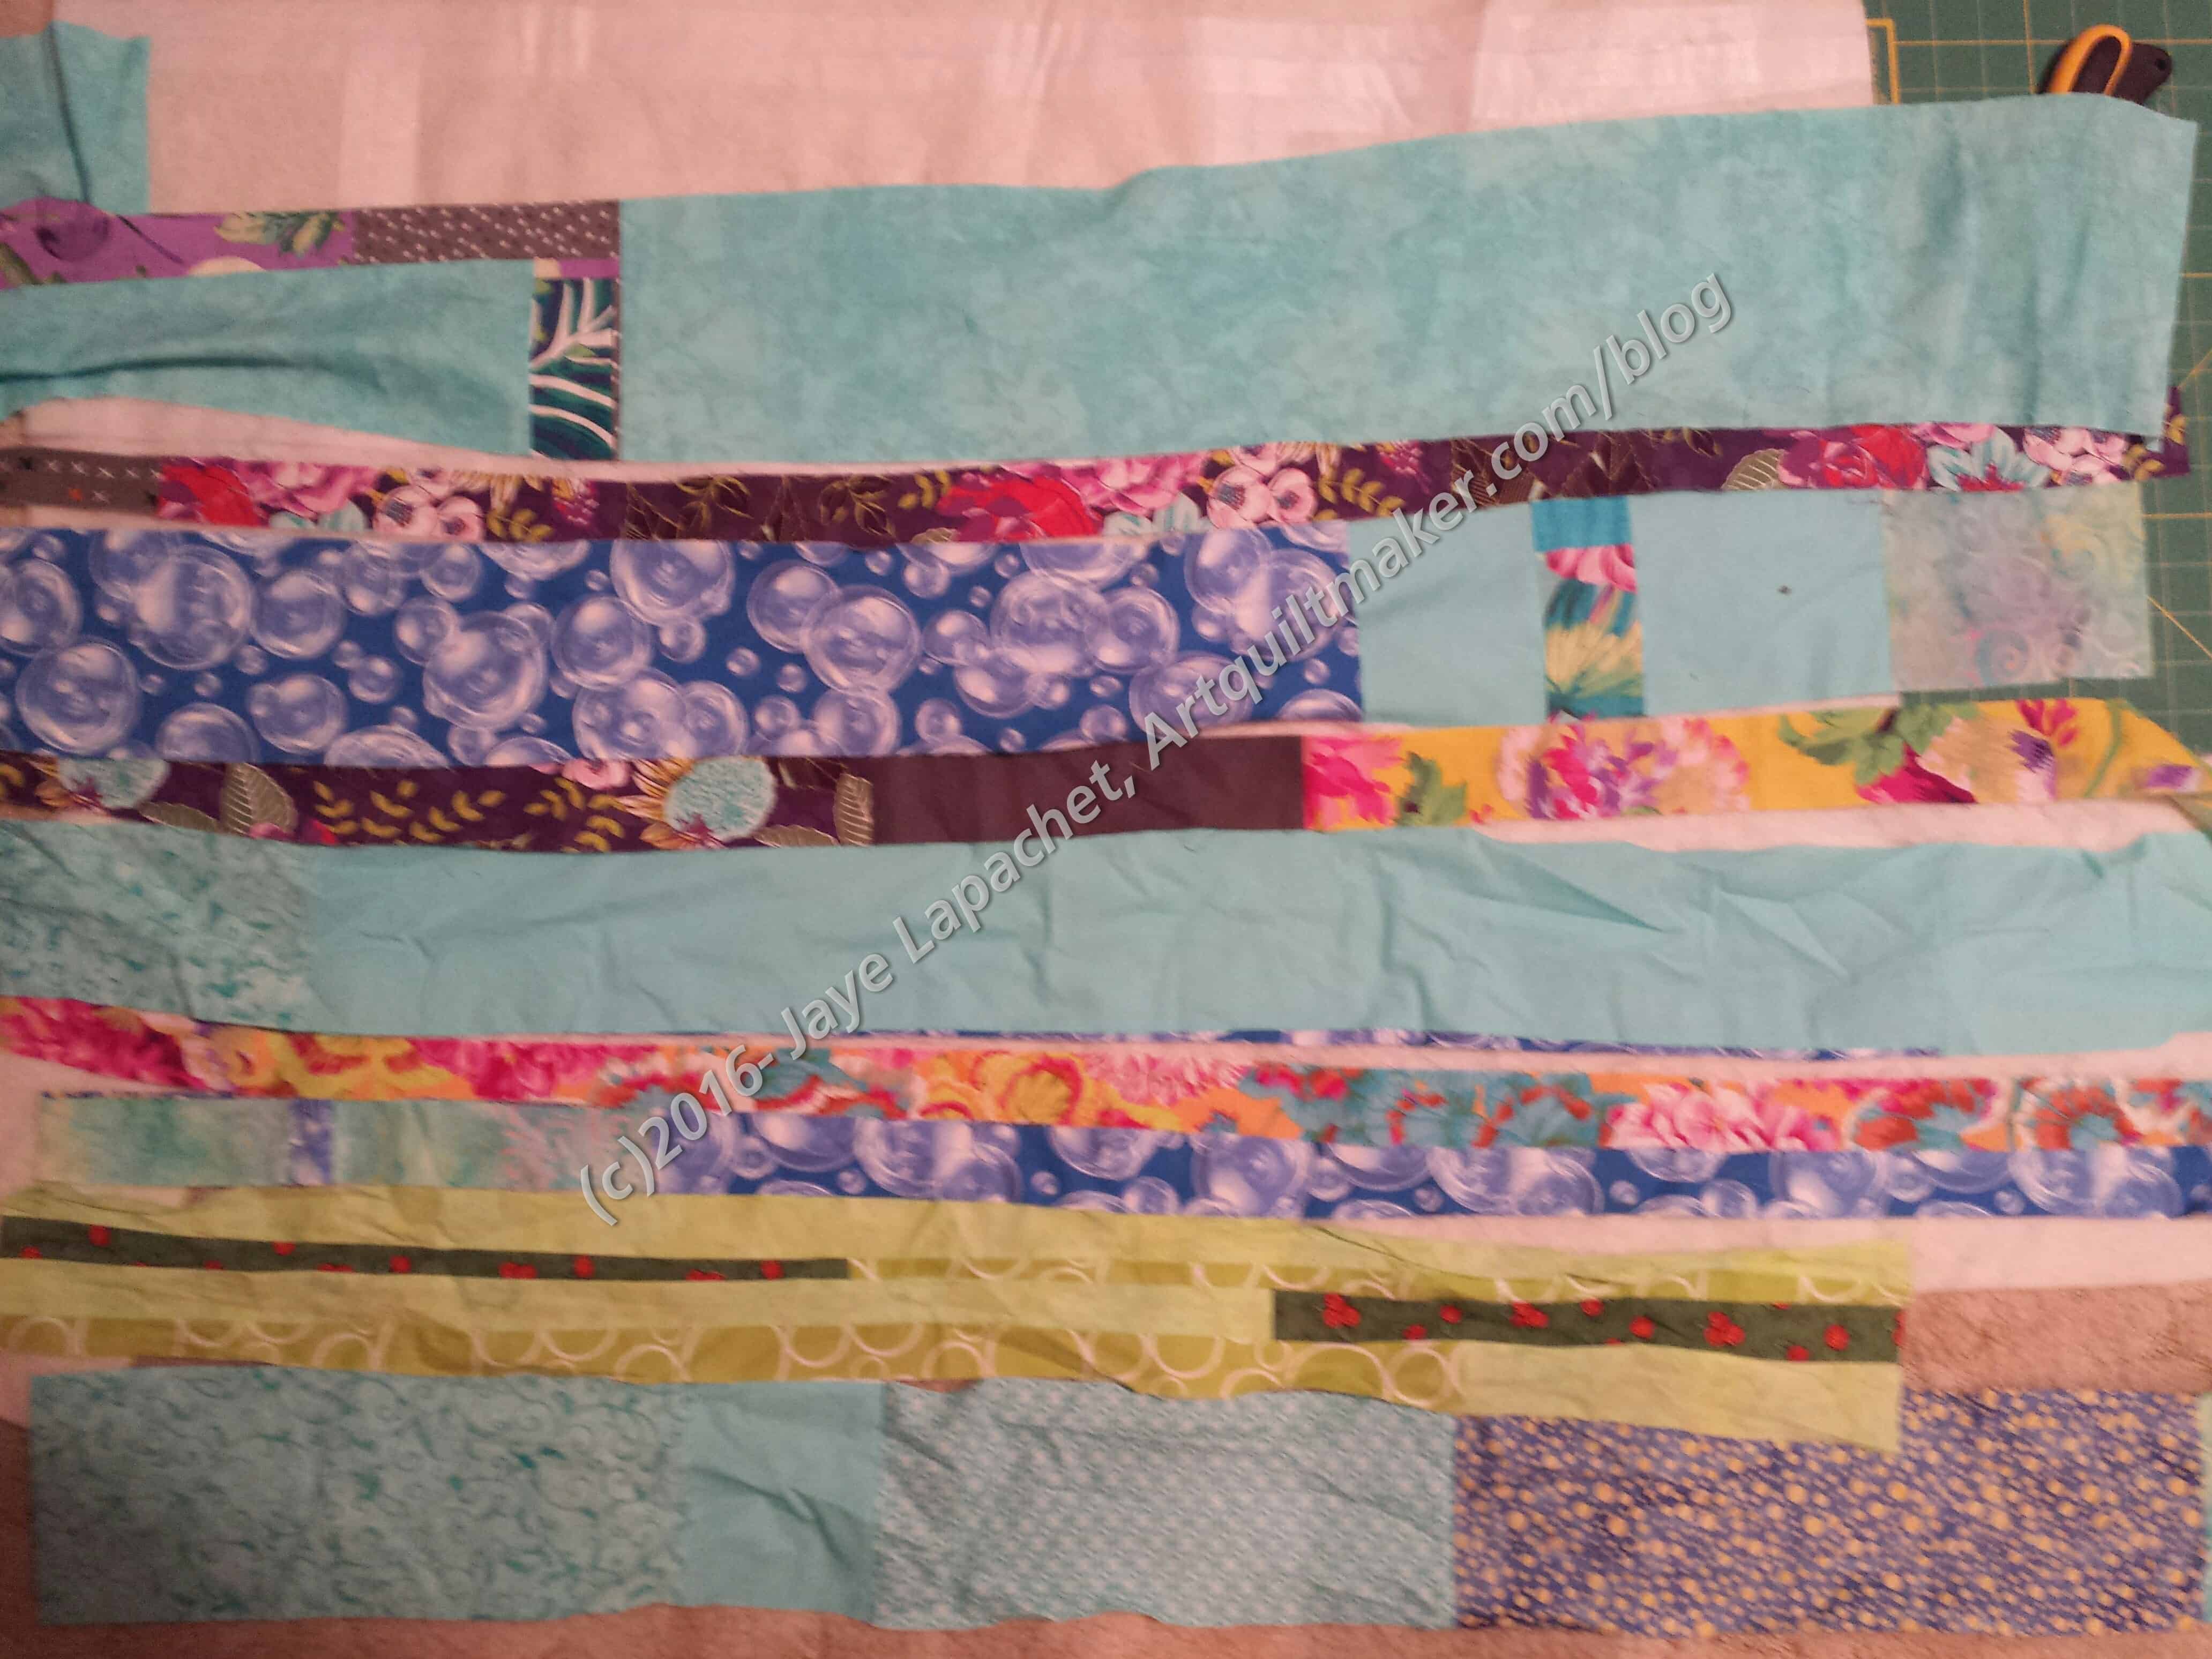
Ends Donation Top
Initially, I thought I would put some batting scraps together to make a baby quilt sized batting. However, I found a bunch of fabric edges. They were cut from past quilts when they were squared up. I started laying out these fabric strips to get them out of the way. At one point, I looked over and saw a kind of improv strip top developing.
The next day I had some free time so I pressed and straightened up the strips. Then, I pinned sets together in preparation for sewing. I still have to sew the strips and see what happens.
Since I didn’t have time to sew, I built up a batting from scraps in preparation for the donation quilt. I don’t know if I will have enough pieces to make a batting for this top. It will be close. I have some long thin strips left. I don’t really want to use the tape up to attach them as it will use so much of the Heat Press. I might just sew them on to make the batting large enough and get the strips out of my house.
As usual, I was #podcastdeliquent, but was resolved to make some progress so I listened to some podcasts interspersed with the book, Jane Steele. I had to intersperse the podcasts, because the beginning of Jane Steele was so dark* that I was feeling depressed.
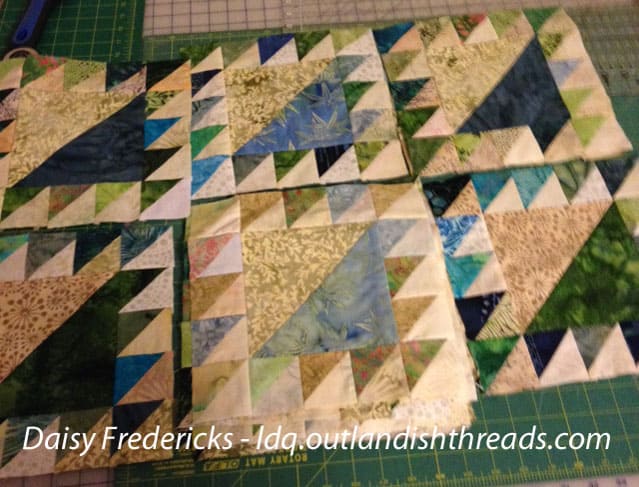
One of the podcasts to which I listened was Lazy Daisy Quilts (and Reads). She is the one who turned me on to Jane Steele. She has been working on Lady of the Lake quilt blocks. That is an old pattern. Since I didn’t see any photos on her show notes, I went and looked the block up in Jinny Beyer’s The Quilter’s Album of Patchwork Patterns**.
Daisy’s Lady of the Lake
I was confused, because what I saw in the book didn’t jive with what I remembered of this block. I thought my memory was faulty. Still, what I saw was a cool block. Daisy was right when she said the block didn’t have a lot of other names, but it does have a few.
Lady of the Lake n.165-8, 165-9
First, I saw a Flying Geese type block. I see that there are HSTs****, but they look like half mad Flying Geese. Beyer says about 165-8: “Lady of the Lake, Finley, 1929. See 201-2, 201-3 [these are the same, or very similar, blocks from different sources]. ‘Lady of the Lake, named after the poem by Sir Walter Scott,published in 1810… The Lady of the Lake quilt appeared in a surprisingly short time after the publication of the poem, the one shown here having been made in Vermont before 1820… it is one of the few that seems never to have been known by other names.’ Finley, 1929.***
Beyer says about 165-9: “Lady of the Lake, Aunt Martha series: The Quilt Fair Comes to You, ca.1933. Also known as: Pennsylvania Pineapple, Aunt Martha series: The Quilt Fair Comes to You, ca.1933.
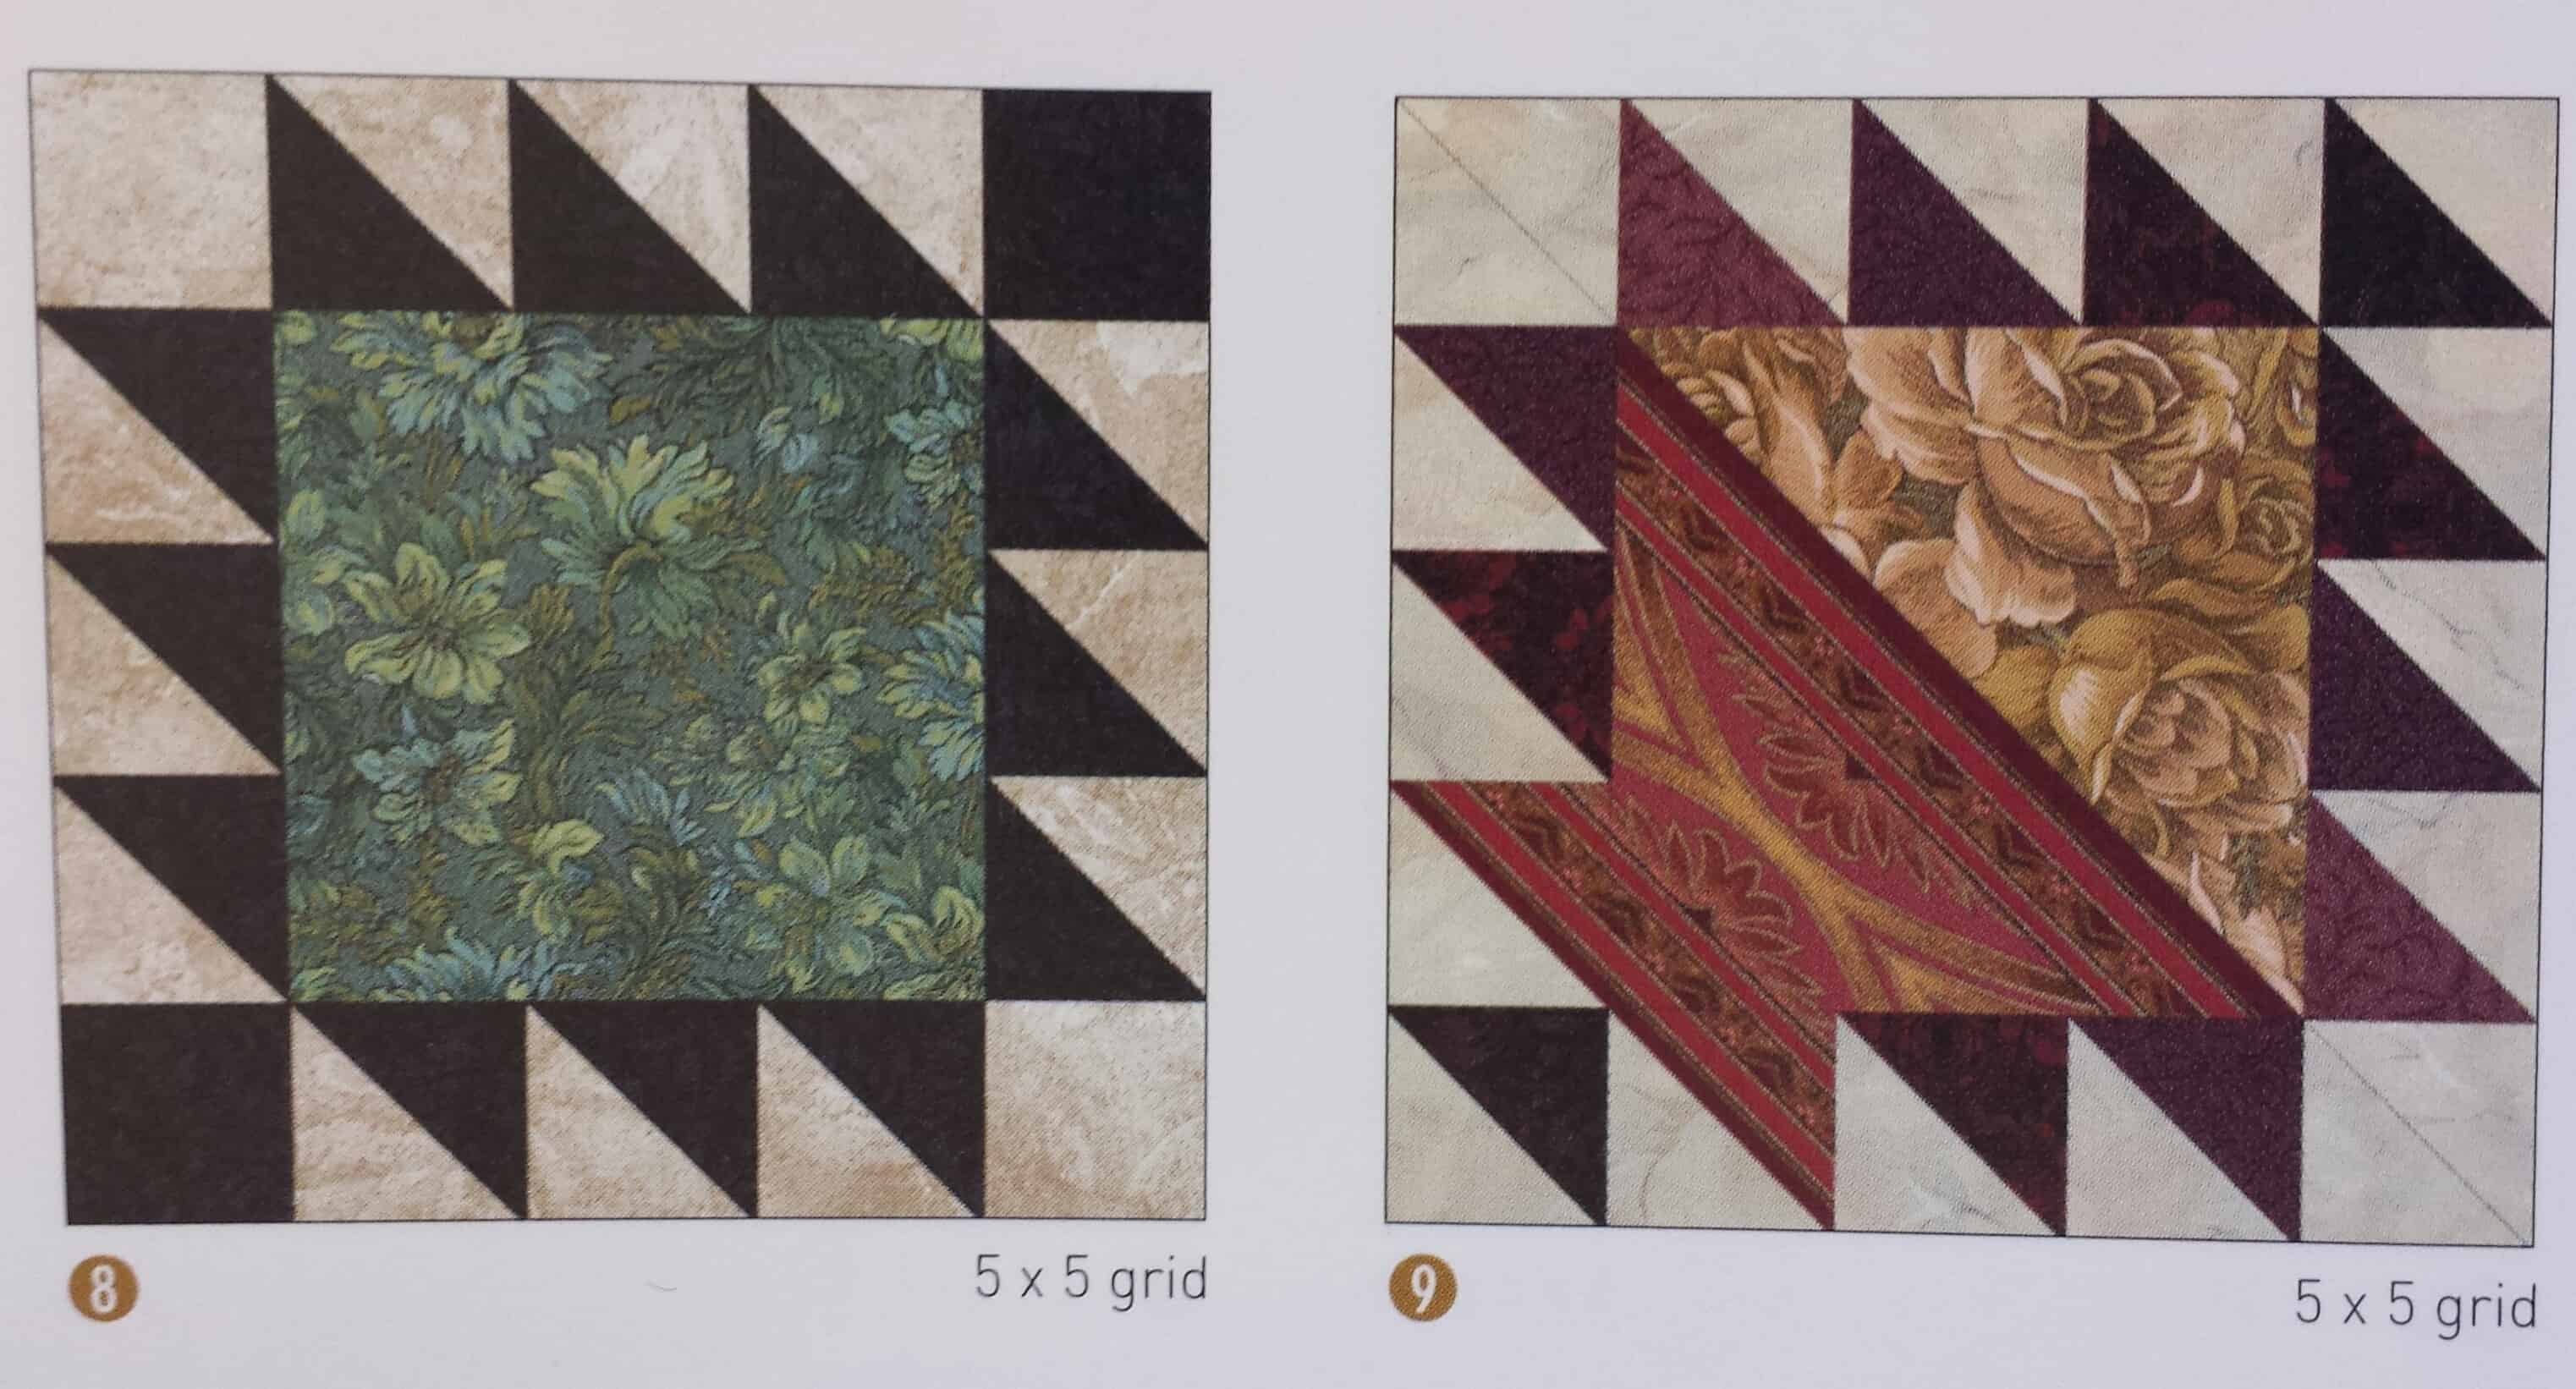
Lady of the Lake n.191-8, 191-9
Multiple listings were given in Beyer’s book, so I went on to the next one. These look like an evolution from the Cake Stand block, though I don’t know which came first, so I can’t say which evolved from which, if they did.
The above are more like Daisy’s block and more like what I was thinking Lady of the Lake looked like. Beyer writes about 191-8 “Double Sawtooth, Nancy Page, Birmingham News, Jul 16, 1940.” No AKA.
Beyer writes about 191-9 “Lady of the Lake, Ladies Art Company, 1987. Also known as: Hills of Vermont, Nancy Page, Birmingham News, Aug 9, 1938.”
Lady of the Lake n.322-5
There is a final reference in Beyer’s book, n.322-5 and it is also named Lady of the Lake. Beyer writes “Lady of the Lake, Nancy Cabot, Chicago Tribune, Jun 17, 1933. Also known as: Galahad’s Shield, Nancy Cabot, Chicago Tribune, Oct 23, 1937.” I find it interesting that the alternative name also references the Arthur legend.
My little spiral into research led me away from the original questions, which was what Daisy’s blocks looked like. She was kind enough to send me the photo above so I could see.
*I did end up liking Jane Steele and would recommend you read it. Read Jane Eyre first. Though it is not necessary, Jane Steele refers often to the content of Jane Eyre. I enjoyed Jane Eyre and thought it was one of the better, and less confusing, of the classics.
**If you still haven’t purchased The Quilter’s Album of Patchwork Patterns, you really need to do so. It is such a great resources for inspiration and history. Go buy it NOW!
***While patterns may have been created much earlier, the references in Beyer’s book refers to the first time she was able to find a published reference.
****BTW, if you plan to make this block, check out the Triangle Technique to make eight at a time.
I gave a group of gifts, as described in a recent post, to my friend Mary who is making a dress for me.
This is the first time I have followed my advice and given a group of gifts. I have made all of the items before; just never given them away as a group. I wouldn’t have recommended it to you if I didn’t think it would be a good idea. However I had to test it and I am pleased with how it came out.
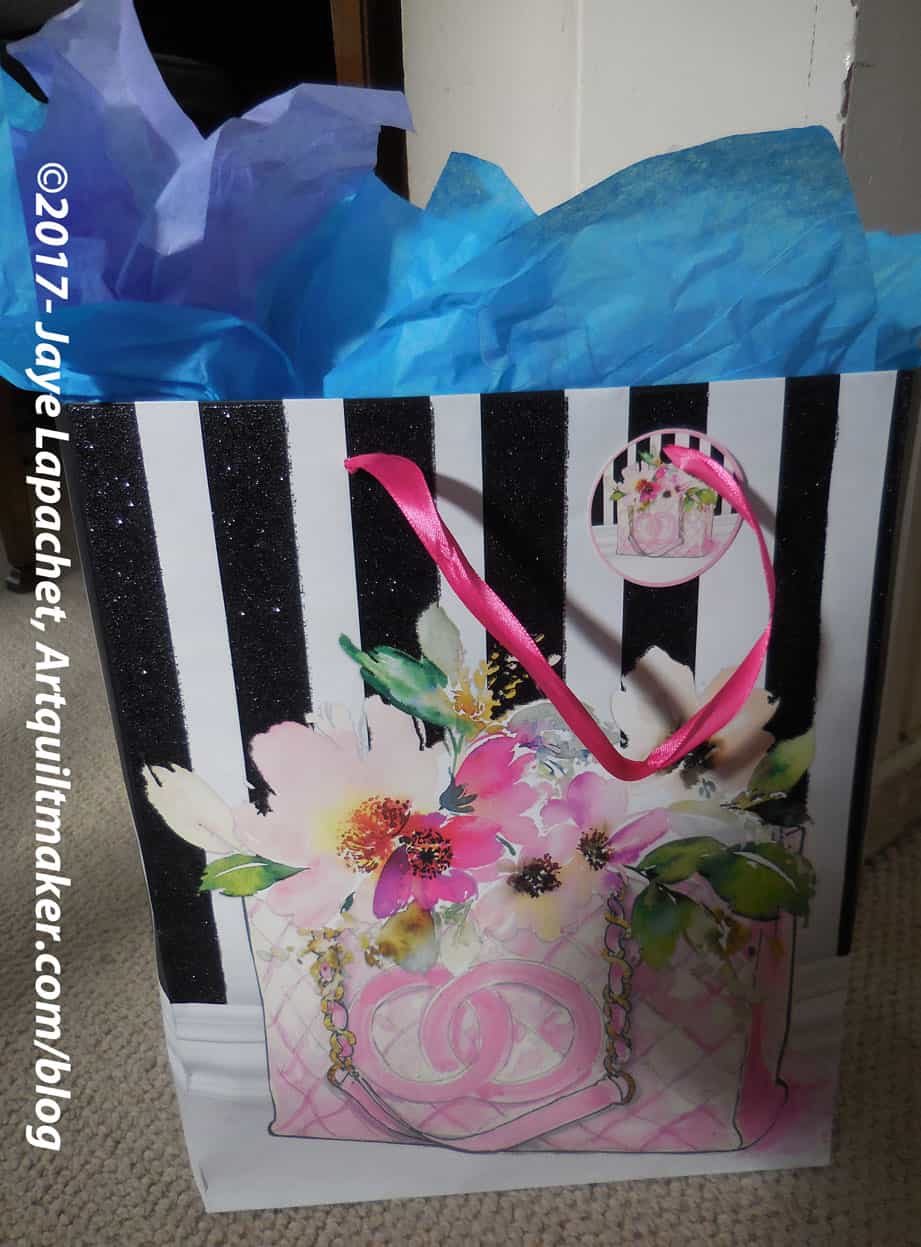
Wrapped Gift Group
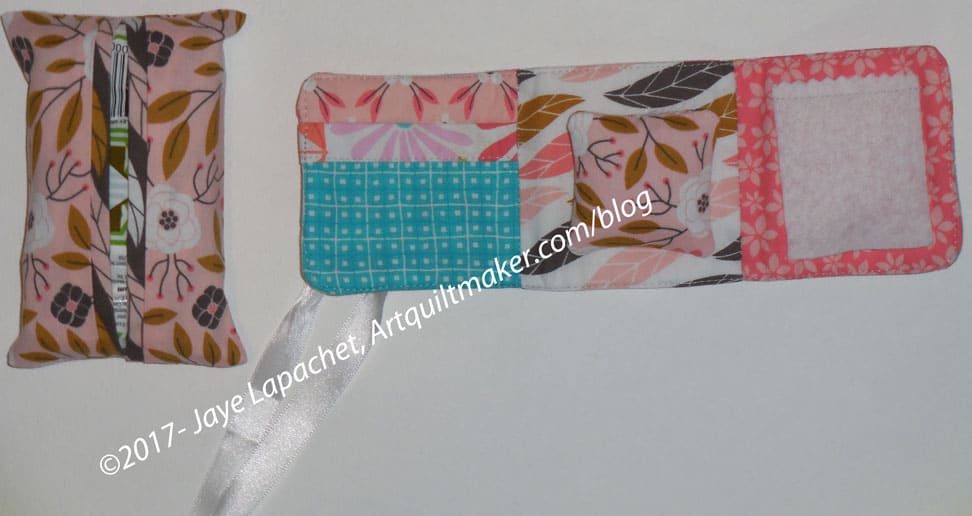
The One Hour Basket, which is the carrier, though I did wrap the whole thing, contains a journal cover (with journal), a pencil roll, on the go tissue cover, needle safe, pincushion, lanyard and scissor sheath. I think the mix of items is good, though I could have put a little tissue paper underneath to fill up the One Hour Basket some more.
I wanted the whole set to match, so I used pieces from two FQ bundles I received at the BAM Retreat. I have much more to use, so I can make more items, if I can think of what to make.
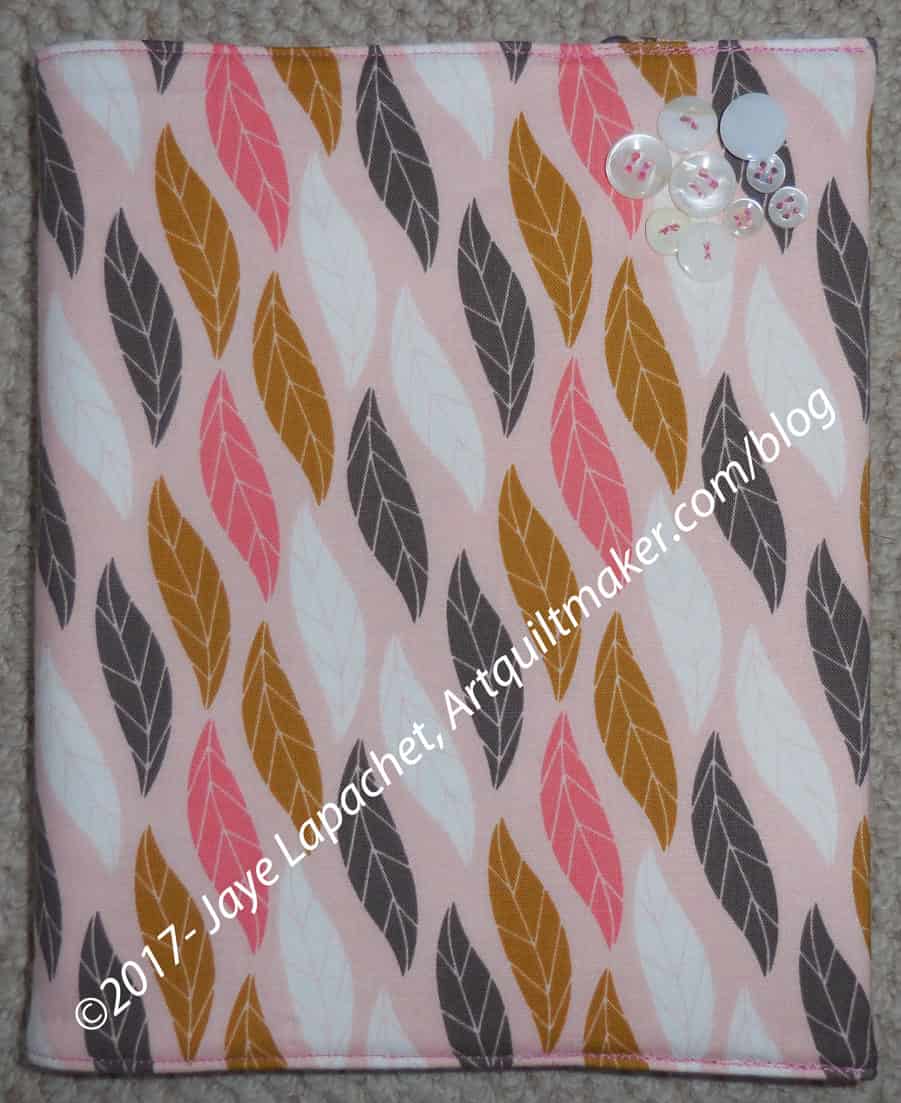
Mary’s Journal Cover
As you know I normally make journal covers using mosaic piecing. Mosaic piecing is good for using up scraps and for leaders and enders. Since I was using a constrained color palette, I used two fabrics and didn’t piece the front or inside cover. In order to make it less boring, I did embellish the cover with some buttons.
I used buttons TFQ bought for me at Road to California in 2012 and some colored thread. The embellishing is simple and I don’t think I have ever embellished a journal cover before, but I think it worked really well on this piece. Mary said that she could use it for committee work since the Miquelrius journals have sections with different colored page edges. I am thrilled.
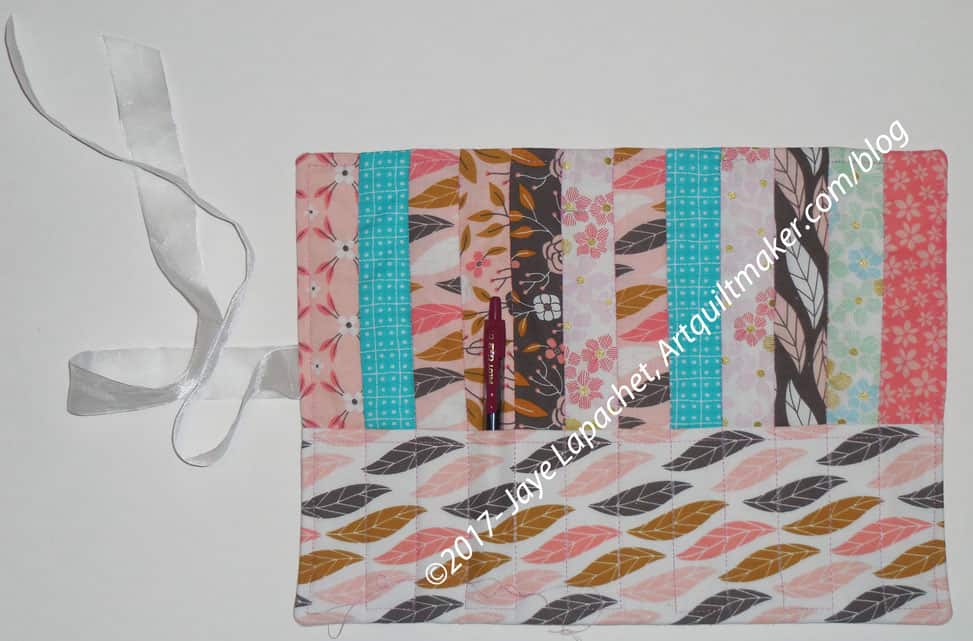
Mary’s Pencil Roll
As mentioned, I love the Pink Chalk pencil roll pattern. I am so sorry it is no longer available as I have made a number of them and it is a great gift. Try to find a used copy on Etsy or somewhere. It is well worth the hunt. Since I have the pattern I used it to make a 12 slot pencil roll for Mary. I always put a pen in so that people know its intended use. It is a good size for crochet hooks as well, though YMMV on those. I haven’t tried it.
Mary’s Pencil Roll back
This piece was GREAT for using up many of the different patterns in the fabric line (above photo). You can see all the different choices. I did use the turquoise more than once just to add some contrast. For the back I used a coordinating print from a different line. I wanted to mix the group up a bit so it didn’t get too monochromatic. There is a baby poop brown print in that line that I am sure would look fantastic, but I couldn’t bring myself to use it.
Mary’s Pencil Roll closed
Yet. I am thinking about what else I can make for Mary and it might come into play, but most likely not. I have plenty of other fabrics.
Mary’s Tissue Cover
The tissue cover seriously takes less than half an hour to make. I used the video mentioned in the Updated Gift Ideas post and it is so easy. I should have used a better contrasting fabric for the lining, but the fabric work well together. I don’t use one, personally, but I should. I am now out of travel packets of Kleenex which means I’ll have to get more. It is much nicer to put one in, as with the pens in the pencil roll, so people know what you have made. It prevents confusion.
Mary’s Needle Safe
I have a couple of needle safes that I use for various projects. This one has three parts: pincushion, needle holder and a section with a pocket where one can store a small needle threader, a pack of needles or one of those rubber circles used to pull the needle through thick fabric. The pattern for this project asks that the maker use fabric for the needle storage. I have always used felt. Wool felt is pretty good because the lanolin helps keep needles sharp. I don’t always have wool felt in the right colors, so I use what I have an cut it with a decorative blade.
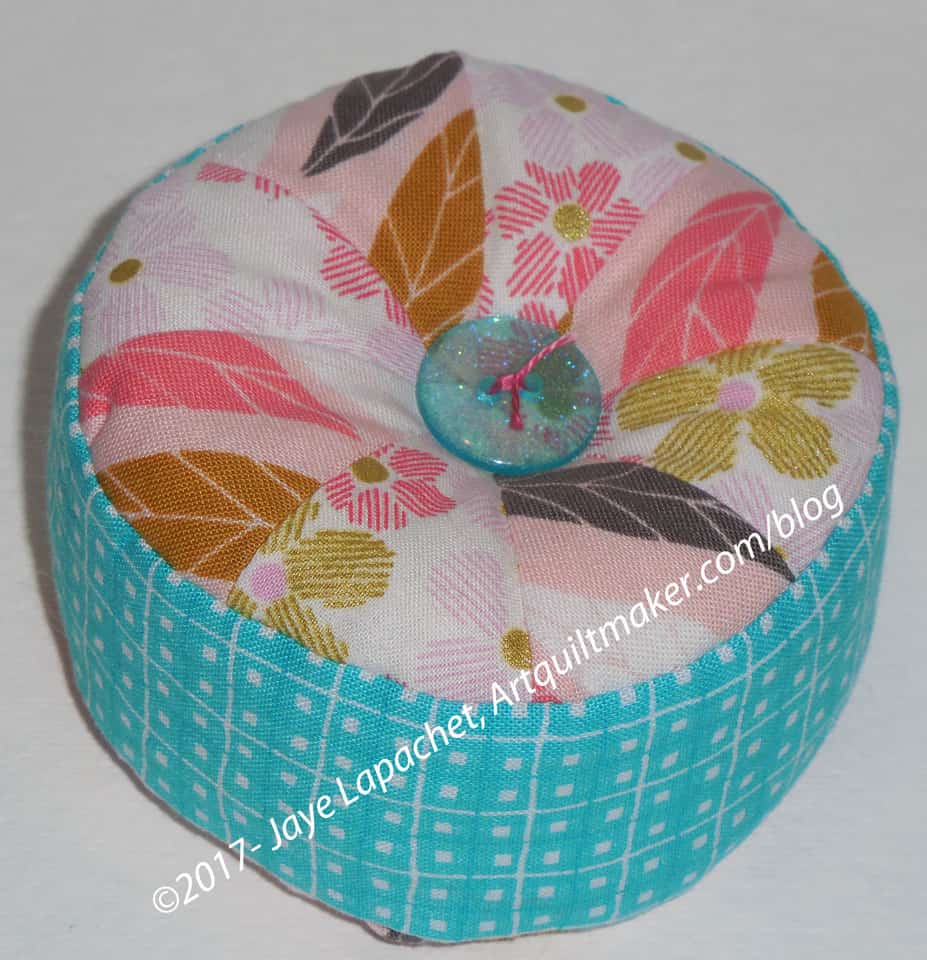
Mary’s Pincushion
The pincushion is just fun to make, for me. I love this Fig Tree pattern, because it looks like my ideal of a pincushion. I need to make a few more of these so I can get the contrast right. The colors and motifs on the fabric I used blend quite a bit. It is a nice effect, but I want to experiment with more contrast. I often have a hard time finding the right buttons. Yes, of course, I could buy buttons, but I prefer to use some from my button box. I found the perfect buttons this time. I love the see-through aspect and the color.
I am pretty happy with the filling. I use a combination of Craft (Beanie Baby) pellets and wool roving. The pellets give the pincushion some weight and the wool roving feels nice.
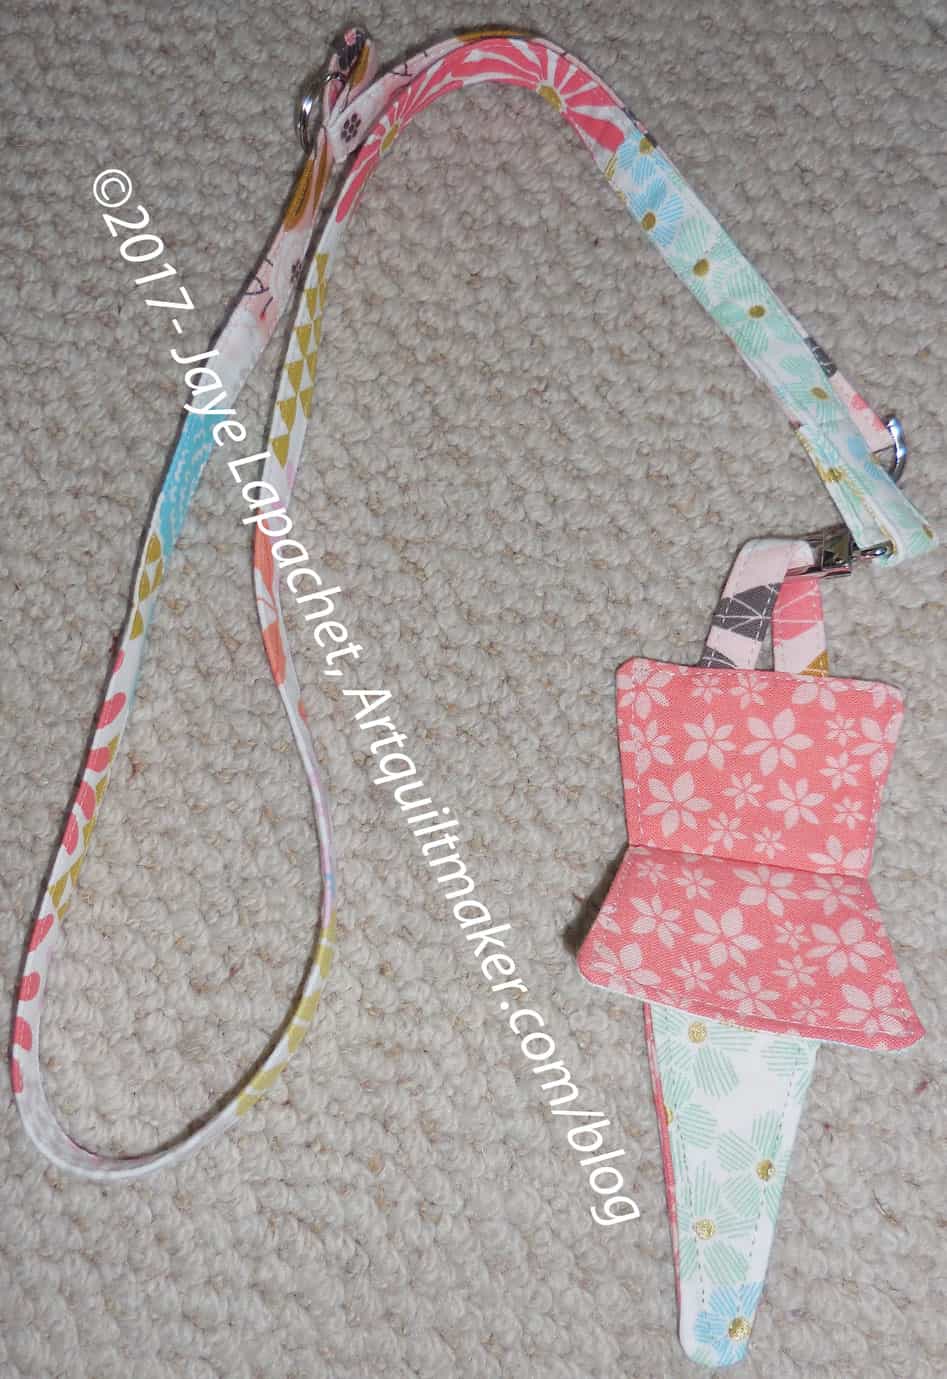
Mary’s Lanyard & Scissor Sheath
I was pretty happy with the items above. I decided at the last minute to add a lanyard and a scissor sheath. Why not? I was shocked that I couldn’t understand my own lanyard tutorial. I am sure the instructions made sense to me at the time. I had to rewrite them, so I did that as I went along. My machine was unhappy going through all the layers of lanyard as I finished it, so I had to be careful. Both are done and I think they add something to the whole gift basket.
None of these projects take very much time. I did multiple items in one day. Over the course of approximately 3 days, I was able to make everything including the handwork. Try out a similar project. You have a friend that would adore it.
Update: Check out Tooly McToolston, another gift I made for Mary C.
I received this as an unexpected gift and my first impression was “UGH! Twenty MORE projects I’ll never have time to make.” It wasn’t on my list, but neither did I have it. Immediately thereafter, I was distracted and enchanted by the color and patterns of the fabric. The writing was also engrossing.
My despair quickly disappeared. While I am not much for project books, the difference in this book being primarily useful household items – aprons, showls, stool covers, placemats, cushions, a kimono and other items. There was one miniquilt.
The best part of this book is the visuals. There is some kind of image on each page. Some are step outs, others show sewing and lots of inspiration photos. All are well photographed and interesting in color, composition and design.
All of the projects use Kaffe’s fabrics. The benefit of this book is how to use his fabrics successfully. The large flower prints are the showpieces. The pebbles, lattices, dots, stripes and zigzags point the viewer through the tone-on-tones to the showpieces. This book shows that there is method to the seeming madness of Kaffe’s groups/lines of fabrics. This book also shows that throwing a bunch of large flower prints together doesn’t necessarily work.
My favorite project is the tea cozy. I seem to be fascinated with tea cozies and will have to make one to get it out of my system. I have had an idea to make tea cozies for the whole family in the colors of their kitchens, but haven’t gotten around to it yet. Looking at the projects made me interested in the shawls. However, I think that I would only make one if Kaffe made organza.
I think the main value of this book is how the fabrics are combined as well as the simple designs that show off the motifs.
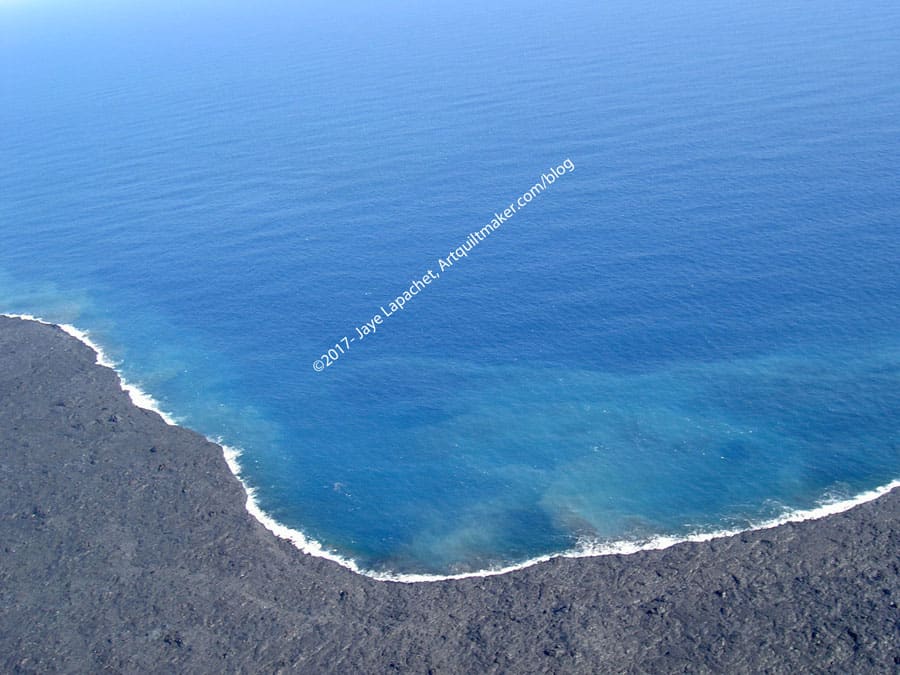
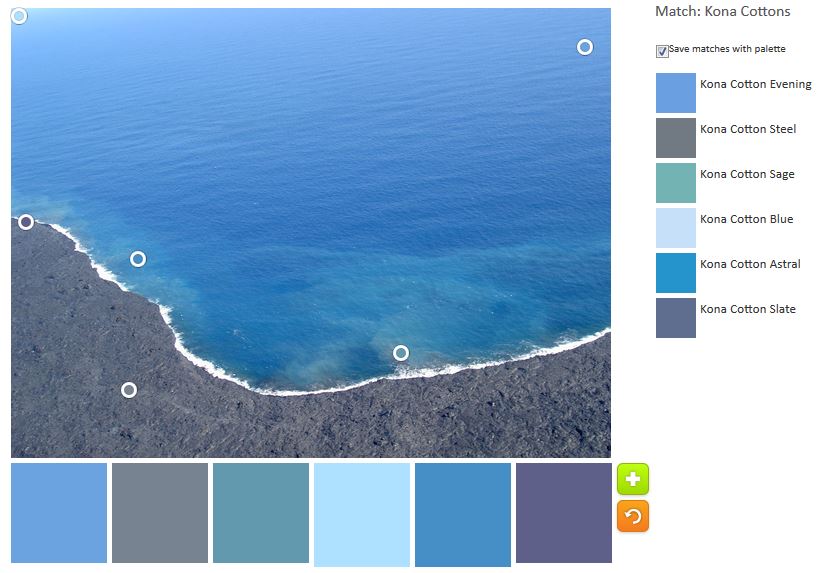
Available photos to use for the ColorPlay are feeling thin on the ground. I dug deep and chose a photo from our trip to Hawaii a few years ago and took it to the Palette Builder for some play. I can certainly get my blue fix from Hawaii, right?
ColorPlay March 3
The original photo is quite simple. I would guess not that interesting.
ColorPlay March 3 n.1
However, I found I was wrong. Even the default palette is interesting. It is a nice array of blues and even the grey of the lava fits right in.
ColorPlay March n.2
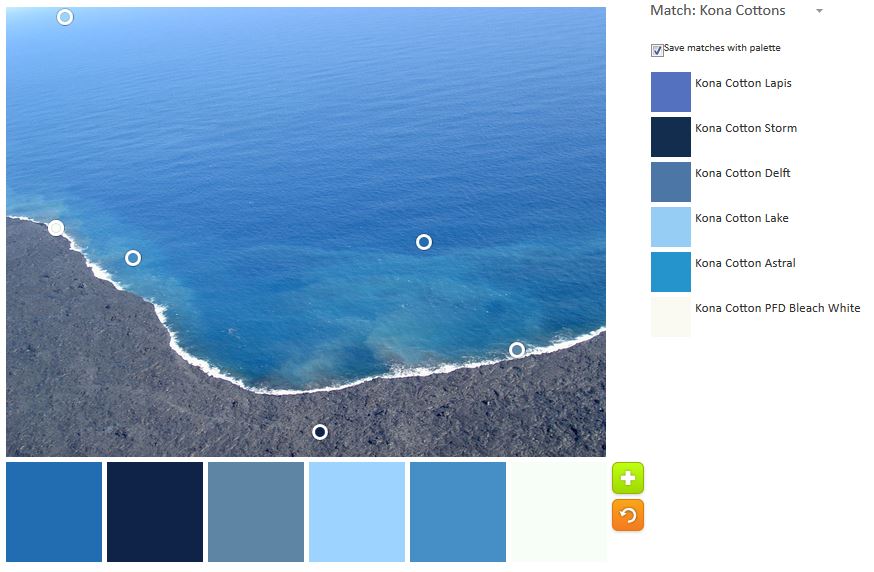
There is not a lot to do with a simple photo primarily in monochromatic colors. Still, I made an effort and came up with a different palette that is similar, but a little different.
ColorPlay March 3 n.3
The third palette is only a slight variation. Some of the choices repeat, but the overall look is different than the other two.
I am only doing three today, because of the simplicity of the photo. All three give an excellent overview of the Kona blue variations available. As usual, let me know if you make anything from one of these palettes.
Last week I made myself a One Hour Basket. I needed something to corral some charm packs and mini-charm packs. I used The Dahlia print from the Classics Collection by Martha Negley (Rowan). This fabric was supposed to be a Schoolhouse tunic, but I didn’t quite have enough, so I will enjoy it this way – at least a bit of it.
I thought the glass brick fabric was a good companion to it.
I was very pleased to get these pre-cuts organized, then I found another stack. I have to stop. I really do. 😉