Supplies:
Why Miter?
- You can sew 2 or more borders together first then put them on your quilt top and miter them
- Blends prints well
- Lines up linear designs such as stripes
- Add some pizzazz to a block that needs something extra, especially if you have to add coping strips
How to Miter:

- Cut top and bottom border strips to the quilt top side lengths, plus an additional 2x the border width plus 1″. The 2x the border width gives you enough space to make the 45 degree angle. The extra 1″ is added for insurance. You can always add more “insurance”.
- Formula: quilt top side lengths plus (2x the border width) plus 1“
- Example: When the top of the quilt is 45”l and you want the side borders to be 5”w: 45 + (2×5”=10)=55”+ 1” =56
- Sew the top border to the quilt top, starting and stopping ¼” away from the ends of the quilt, backstitching at each end.
- Repeat for the other 3 borders. The corners will be flapping around.
- Fold the quilt top in half diagonally, right sides together, creating a triangle.
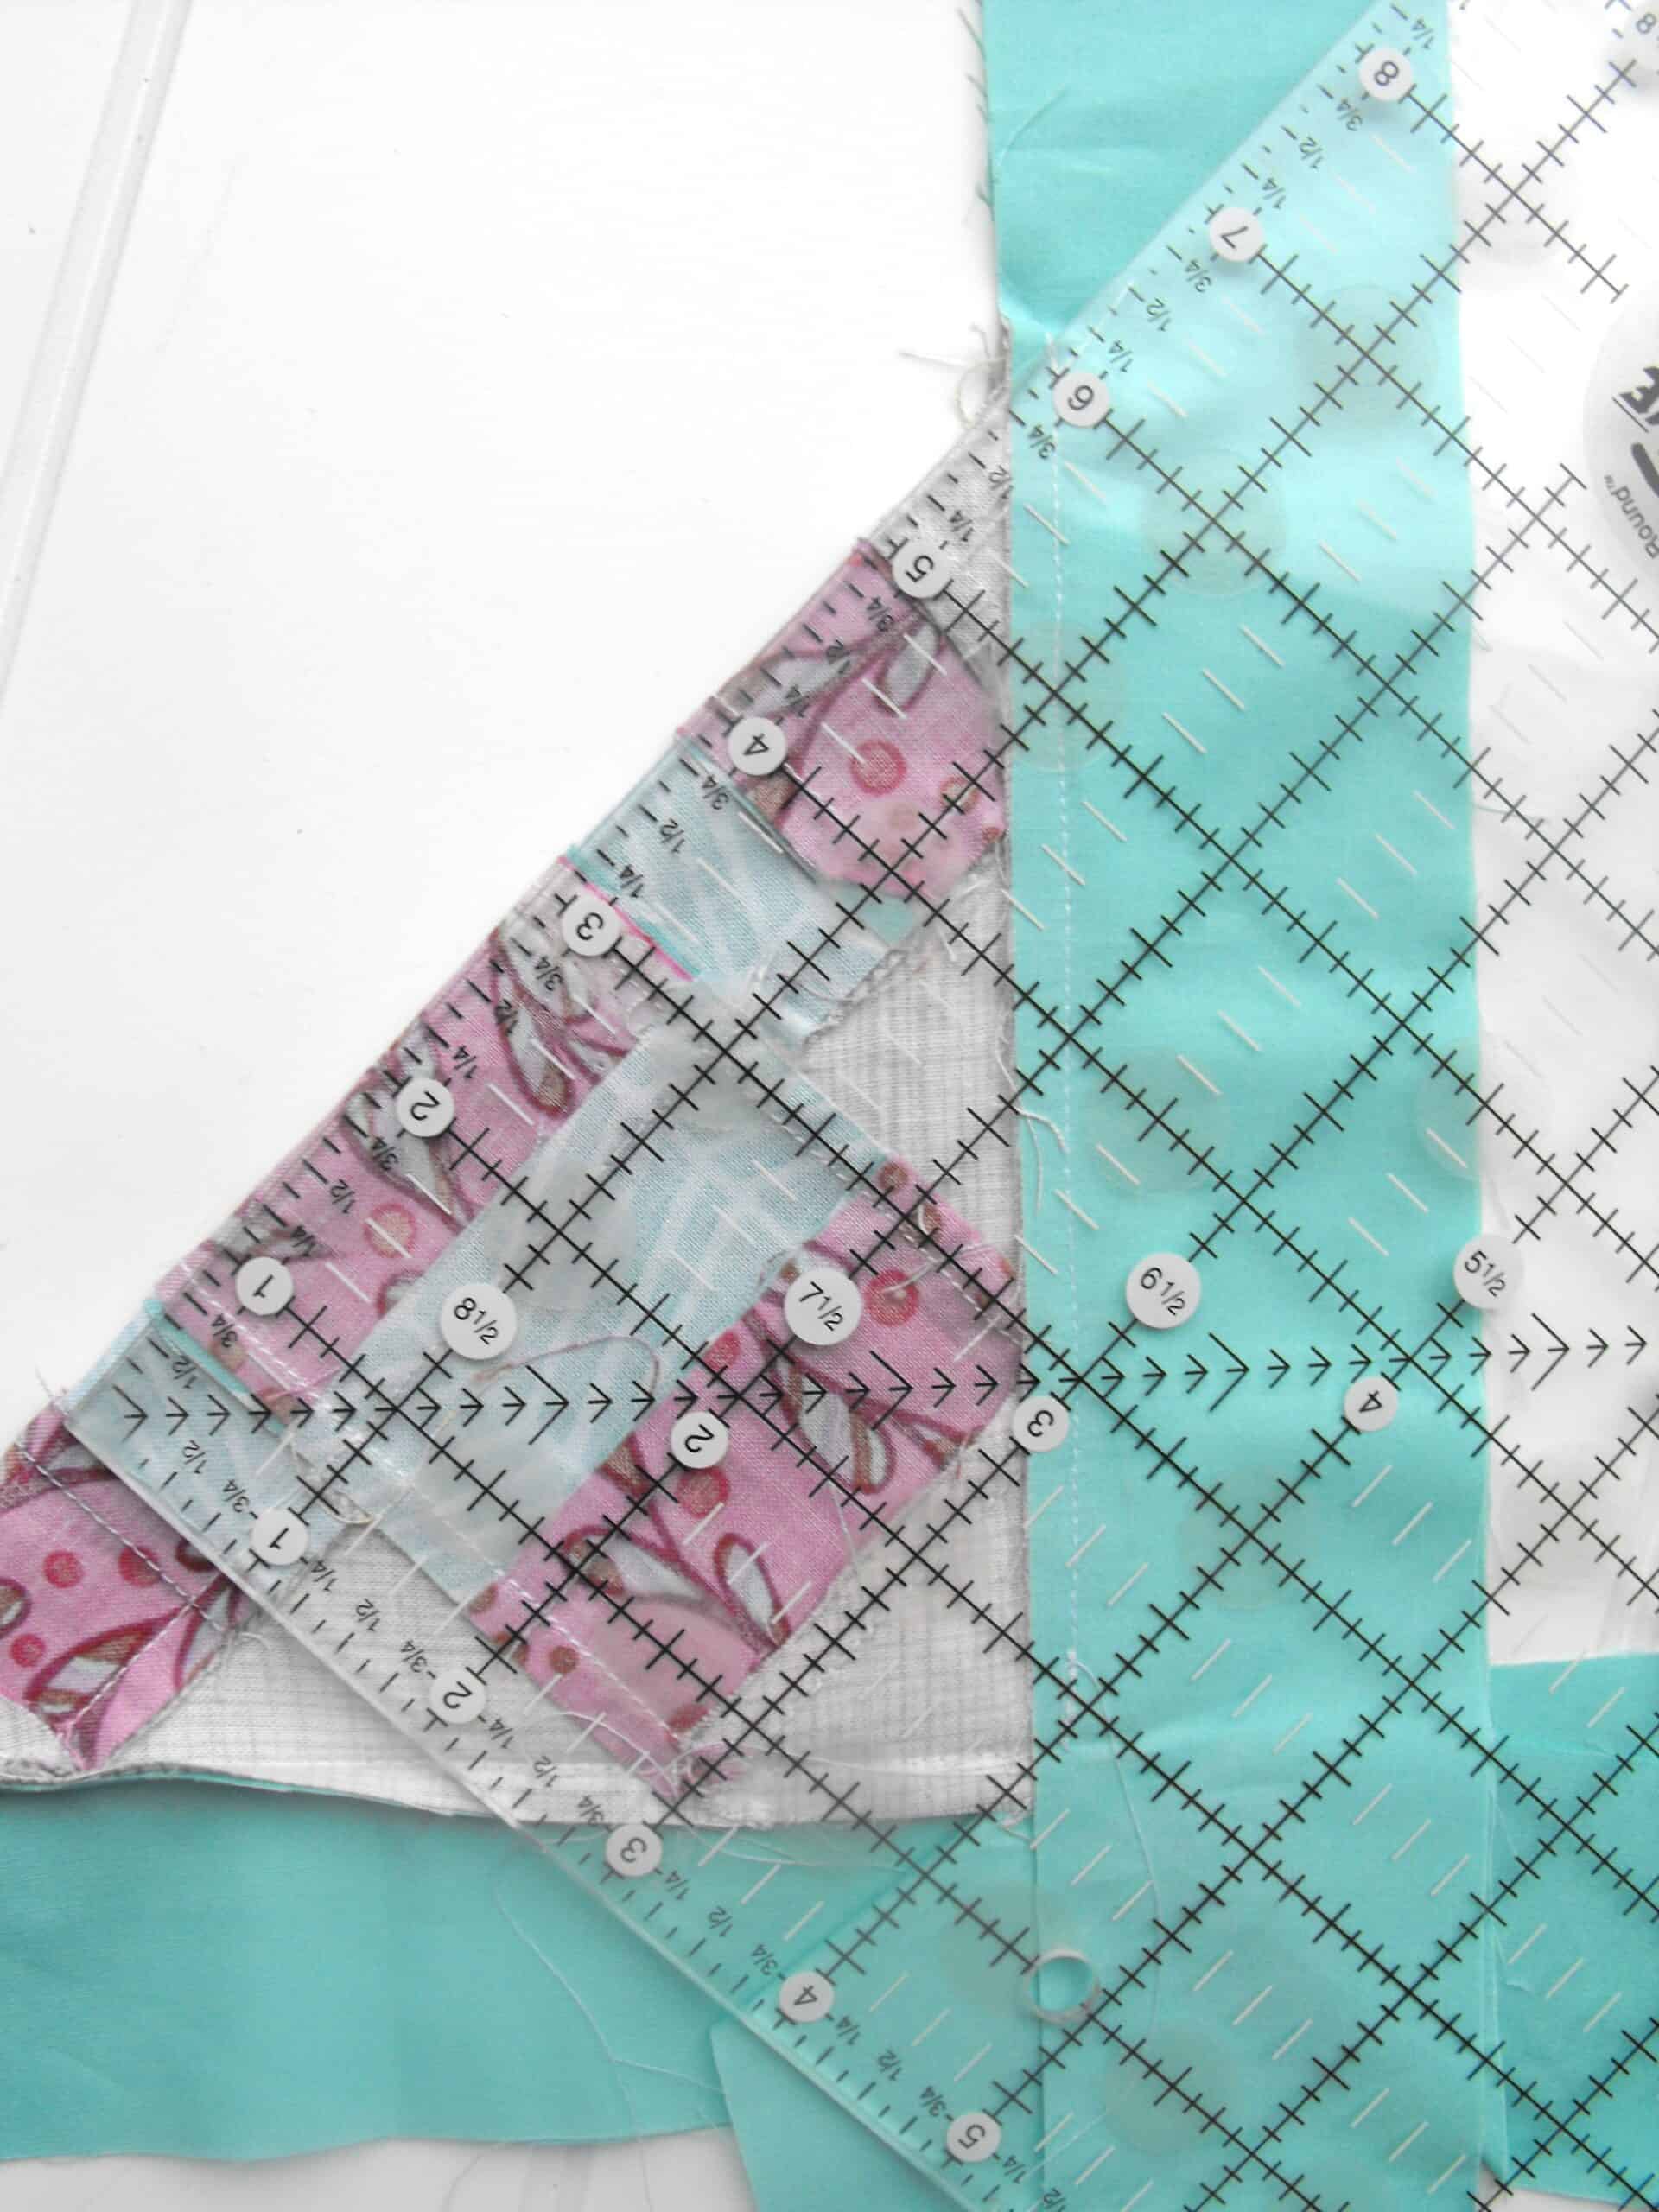
- Line up two adjacent borders; for example, the top border and the right-side border.
-
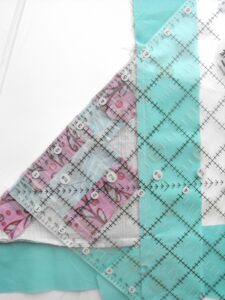
Fold quilt in half diagonally Place the ruler along the 45-degree line.
-
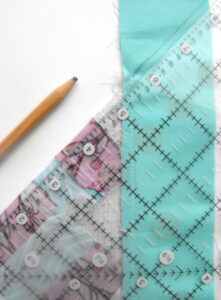
Draw a line When lined up, draw a line using a pencil and a ruler along that 45 degree angle and extend it over the borders.
- Pin firmly in place.
- Locate the stitch line you made when you sewed the border to the quilt top and begin sewing there.
- Sew from the stitch line out toward the end of the border, directly on the pencil line.
- Backstitch at the beginning and end
-
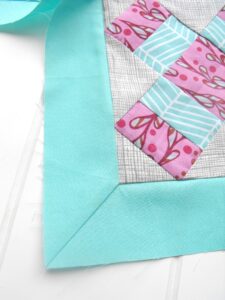
Sew and open to reduce bulk Open up the quilt top to check the miter. The corner where the three seams meet should lie flat when viewed from the front. There should be no tucks or gaps. The borders should also be square.
- When the corner is perfect (or at a point that you’re happy with it!), refold the top to reveal that 45 degree stitching
- Trim the seam (the extra border length) to 1/4″.
- Press open to decrease the bulk of fabric at the seam corner.
- Repeat these steps with the other three corners


Resources:
How and Why to Miter – Quilting Hub tutorial