Sewing Pleather

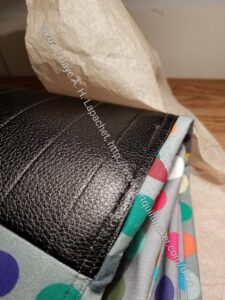
Ripping tissue paper off of pleather

I have complained recently about the pleather I have used for the bottoms of the Ultimate Carry All Bags sticking to my machine bed. I thought of using tissue paper like I talk about in my Vinyl Tips & Tricks post, but didn’t do it until my Mom mentioned it as well.

Finally, when I was sewing the binding on to the exterior and lining, I used some tissue paper. It worked like a charm. I’ll put it in my bag of tricks.

Red Dot Bones Pillowcases

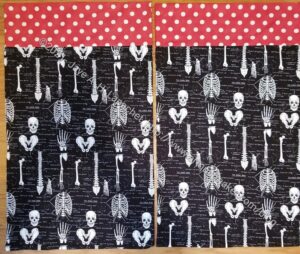
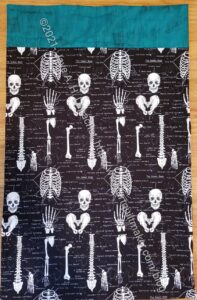
Red Dot Bones pillowcases

I actually finished 3 pillowcases over the weekend. These were the ones I had planned to make for a long time. They go with the Red Scribbles quilt. My SIL asked especially for pillowcases made from this bones fabric. I don’t usually make things to order, but felt like doing it. She may be surprised at the dots. I hope she likes them! I’ll give them to her as an early anniversary gift.

Cutting for La Pass M3

I feel like I am juggling everything, especially my projects. I know many of you have worked full-time for years. I didn’t. I worked part-time or consulted the whole time my YM was growing up. I was fortunate to be able to do so, but also gave up a lot of stuff, such as cable TV. Now I am working full-time and I like my job, but I don’t like working 40 hours per week. It cuts into my life. Still, needs must.

M2 took a long time, probably because I was trying to piece sections on to a large Rosette, but also, because of time. I took so long that M4 will arrive any minute and I have barely started M3.

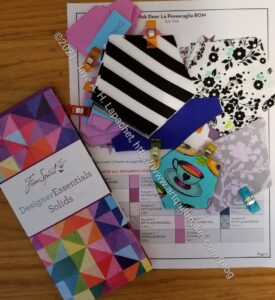
La Passacaglia Month 3 cut pieces

As a result, I am working on cutting pieces for M3. You can see mostly pieces I didn’t have to fussy cut. i did the easy ones first, though a couple required some centering like the teacups.

I used the flower portions of the skunk fabric, because I don’t want skunks on my quilt. I know people think they are cute, but after smelling one, I don’t want to be reminded of that smell. I cut the stripes the way Tula suggested on her EPP video (see, starting at 7:33). Now I have to do the dots and the other pieces.

My plan is to finish all the cutting, then start on Month 4, catching up with Month 3 when I can. I hope to only be behind on one month not all the months. Who knows? I might be able to catch up.


APfE v.2 Started

I bought the supplies for the ByAnnie A Place for Everything Bag when I was waiting for the La Pass BOM to start. A lot of people in the group decided to make the bag to keep their project in. I thought it was a good idea and bought the supplies.

I thought I would make it over Labor Day weekend, but didn’t get around to it. I have been strategizing and finally decided that cutting all the pieces that needed to be quilted and quilting them first would really help with making the bag once I had time to sit down and do it.

I spent a good portion of time on Saturday picking out fabric. At first I was sure I would use Brocade Peony fabric, but I just wasn’t feeling the love. I searched through a lot of fabric and, finally, I chose a Philip Jacobs Chrysanthemum print because it was different. It is darker than I usually like, but had some pink and turquoise in it, so I can those colors as accents.

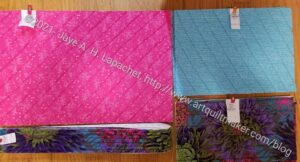
APfE v.2 quilted pieces

Sunday, I quilted almost all day. Well, I cut out pieces for the bag and quilted. I know it doesn’t look like a lot of work, but the quilting really took forever. I got more done than I thought I would, but I still have a lot to do.

I plan on making as many of the smaller pieces as I can, and, of course, cutting out the regular,non-quilted pieces so when I do have time to put the bag together,  I won’t have to stop to make handles or zipper tabs or whatever.

I am really pleased with what I got done on Sunday.

Bones Pillowcase

Green Bones Pillowcase

I am trying to make a few gifts for Christmas and upcoming birthdays. Here is a pillowcase I made over the weekend for a friend of the Y.M.’s.

The fabric is Robert Kaufman print that actually got reprinted. I asked a shop to email me if they ever got it again and they did! I bought three yards and have used almost all of it on Pillowcases.

New Donation Top

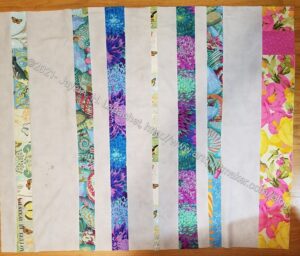
End n.11 in process
End n.11 in process

I was feeling like a slacker especially after seeing how many donation quilts were brought to our in person (!!!) guild meeting last week.When I went back and looked, it had really only been since July that I made a donation quilt, Ends. n.10 with the rest of the Pop Parade scraps.

On Saturday, I started working on another Ends donation top. This is Ends n.11 and I will hand it in to Peggy soon.

I found a whole bunch of edges of old quilts when I rearranged some stuff that was going back into my workroom*. Sigh. I thought I was doing so well keeping up with making stuff with the edges of the quilts I finish. This is an old stash, stashed before I thought of these ends quilts.


*N.B. I have three weeks to get all of my stuff back into my room before the Y.M. comes home for Thanksgiving.

Rosette #1, Month 2 Finished

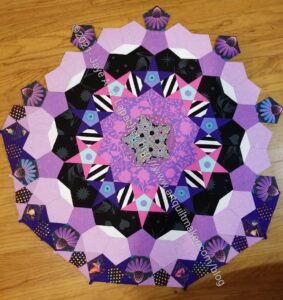
Rosette #1 with M2 ring

I finally finished Month 2, which was to add another ring to Rosette #1.

The ring I added is partial. You can see some of it on the bottom. The Anna Maria Coneflowers are also part of the Month 2 ring.

This is one of the large rings. Not all of the rings will be this much work, but all the months have about 100 pieces to stitch together.

I made a small start on Month 3, but Month 4 has already been shipped and I am behind.

My UCAB Finished

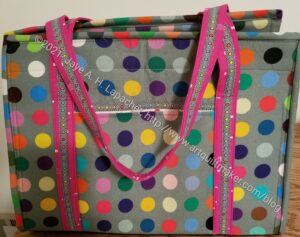
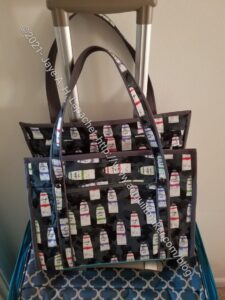
UCAB: Front, closed
UCAB: Front, closed

My UCAB is finally finished. This will replace part of my travel bag and it will fit nicely on the handle of my sewing machine travel bag.

I am happy with how it turned out and I am glad I feel comfortable putting the project together as I think it will make a great gift if and when I decide I have time to make more of them.

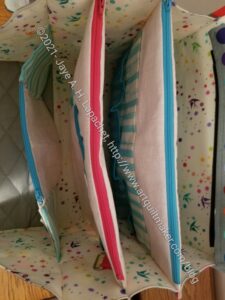
UCAB: inside pockets from top

I am not 100% happy with the project, but I think that is true for all of my projects. I get to like them better after I have lived with them for awhile. 🙂

One thing I think I forgot to do was put Shapeflex** on the inside of the pockets. Some of them are a little floopy. They will be fine once I get some stuff inside them.

I still haven’t decided how to marry the use of this bag with the use of my Pink Tupperware box. I am not sure I am ready to give it up, though it is clearly not big enough for the stuff I need at Sew Day or when I travel.

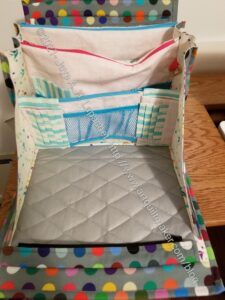
UCAB: front, open
UCAB: front, open

As I may have mentioned, I didn’t install the front zipper. I wanted the front to be the front. In the pattern, the designers put the ironing pad in the back because she, rightly, doesn’t want you sewing over a zipper. I just omitted the zipper and made an open pocket. I think it will be much more useful and I think having the front (with the ironing pad) open to the front is much better. I didn’t want the front of the inside opening from the back. Also, I will be able to slip things, like my phone, into that front pocket easily without unzipping.

I haven’t made any pouches to use with this bag, like I talked about back in March of last year. I put some square ‘rings’ in the seam of the pockets, so if I have one to attach to the inside of the bag, I will be ready. I wasn’t careful about the way I placed the pockets and both ‘rings’ ended up on the same side of the bag. I don’t think it will make much difference, but we will see.

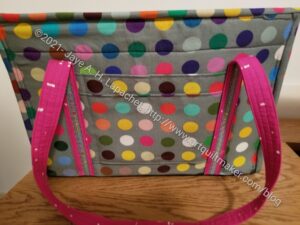
UCAB: Back
UCAB: Back

The back is a tight fit over the handle of my sewing machine rolly bag, but it does fit. There is another open pocket, for which I am sure I will find a use.

One thing I did was use Renaissance Ribbon as a trim on the handles, over the pink, and on the front pocket. I want to do more of that type of trim. I think it looks nice.

Stay tuned for some ‘in use’ pictures.


**I use affiliate links and may be paid for your purchase of an item when you click on an item link in my post. There is no additional cost to you for clicking or purchasing items I recommend. I appreciate your clicks and purchases as it helps support this blog.

Finished Journal Cover

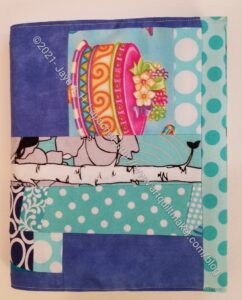
Journal Cover - closed
Journal Cover – closed

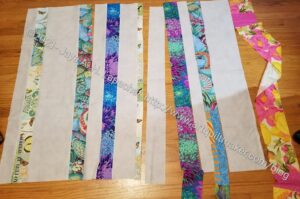
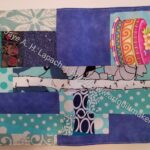
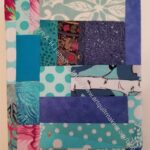
I am still tidying up after all the work in my workroom. One of the things I found was a piece of ‘made’ fabric (improv piecing) that was just the right size for a journal cover. I sat down and made one!

I am still not completely up and running, so it was good to make something that involved, at least, a little piecing.

I just used flannel for the inside. I didn’t add an inside cover. I did that once before and it seems to work fine.

The Back of Rosette #1

Back of Rosette #1 with M2 in process

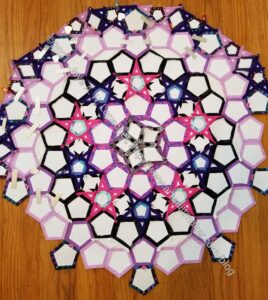
I have been asked several times to see the back of Rosette #1. I thought this was a very odd request, but after about the third time, I am guessing it is simple curiosity.

I have been thinking about this piece and realized that this is a very different piece from most English Paper Piecing.

I think most people are familiar with sewing hexies. This is more complex and very different looking than hexies. Even though 500+ people are working on the Pink Door BOM, that is a small number compared to the number of quiltmakers out int he world. I think my guild is fortunate to have 2 members working on this project. That is  A LOT for one small guild.

I have always thought that EPP was a great way to do complex designs and after reading All Points Patchwork, I wasn’t scared of any complexity. Perhaps I should have been a little scared of this project as it is not easy.

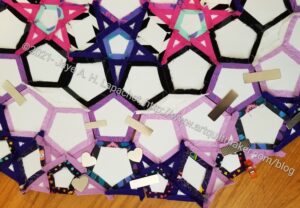
As you can see, and as I have shown before, there are a lot of different shapes. The shapes don’t really matter (bias doesn’t really matter) as all of the fabric is stabilized with papers. You can see the white in the photo above. Those are the papers. I could take them out from the pieces that are completely surrounded, as I have a little in the Half Hexie Star project. I want to keep them in as long as possible. I am not sure why. Some are starting to pop out, but I keep shoving them back in.

Back of Rosette #1 with M2 in process - detail
Back of Rosette #1 with M2 in process – detail

I am using SewTites**, mostly, to keep the pieces together until I can sew them. Fortunately, I have collected a lot of SewTites, because at one point I was using them all.

I try to keep the back neat. This is one of the large rosettes (I think there are 4 large rosettes) and it is a challenge to handle as I sew.

I have gained some skills and developed some strategies, which have helped. I lay the piece on my cutting table and use the table to hold the weight of the piece while I am sewing M2  pieces to Rosette #1.

I also have started sewing joins together before I sew a whole seam. This keeps things in line.


I still have not started M3 and I know the next shipping date is soon. EEEKKK!


**I use affiliate links and may be paid for your purchase of an item when you click on an item link in my post. There is no additional cost to you for clicking or purchasing items I recommend. I appreciate your clicks and purchases as it helps support this blog.

Book Review: Quilts from the House of Tula Pink

Quilts from the House of Tula Pink: 20 Fabric Projects to Make, Use and LoveQuilts from the House of Tula Pink: 20 Fabric Projects to Make, Use and Love by Tula Pink

I had to read this in my browser to write this review as I kept falling asleep as I read it at night. I didn’t fall asleep because it was boring; I fell asleep because I was tired. I think I have to be sitting upright to write reviews. 🙂

As I have worked on La Pass, I have gotten more interested in Tula Pink. I have watched most of her Tula Talk Tuesday videos and have gained a lot of respect for her work ethic, design ideas, her ability to have fun along the way and to connect with her customers. I was somewhat disappointed in this book. I wanted to learn more about Tula Pink the person. Instead I was handed more patterns for projects. The projects were fun and whimsical and some of the projects are interesting, but I have enough projects. I want to learn about inspiration, what inspires Tula and more about where she came from. I know it is too much to ask, because everyone needs their privacy, but I still want to know. Despite this disappointment, there are some interesting things about this book.

As I said, I borrowed this on Kindle. The Library’s hours are much reduced and I can’t take time from work to drive over to the library to pick up the print book. It is much easier for me to write reviews when I have the print book. I can flip back and forth and refer to page numbers for you. This will be a much more basic, not as detailed review.

One weird thing was that on the title page, Tula’s name was spelled ‘Tule’. The librarian (cataloger) in me always studies the title page. Not sure if it is just this copy or if she used to spell it that way. Strange. Also, where was the copy editor???

The first few pages after the title page and before the contents page has the beautiful photos we come to expect from Tula. I like how some of the quilting extends beyond the photo onto the page.

The first section of the book is called Techniques and Designs. It includes techniques that Tula uses in her quilts such as Easy Corner Triangles, Half Square Triangles, Tula’s Totally Tubular Tube Technique, Fussy Cutting Method, Scrappy Fusing Technique, Squaring up Strips, Nesting Seams method, and her binding method. Tula also talks about sketching out your design, selecting fabric and thinking about quilting designs.

After the Techniques section comes the projects section. The first project section is her storytelling quilt pattern section and the other one is Color Block quilts and projects. She also has Haiku quilts and projects.

If you have the Simple Folded Corners ruler I talked about you don’t need the Easy Corner Triangles method. However, it is an interesting method, especially where she talks about the measurements.

Tula’s Half Square Triangles method isn’t rocket science. I do like her attitude, however. She writes “Piecing is often discussed in terms of easy and hard. The reality is that there are only so many ways to sew a couple of pieces of fabric together, and none of it takes a college degree to accomplish.” I think this is true, straightforward and well said. She goes on to talk about thinking of piecing in terms of the time it takes.

Tula’s Totally Tubular Tube Technique is a method for creating offset strips. I might be able to use this.

I am pleased to say that Tula shows how to nest seams . Yay! I am not the only one who still does that. I wonder what would happen if other modern quiltmakers knew she nested her seams?

Tula talks about color. Her methods are no different than the methods I teach, but she has better names for them: The Starlet, The Chorus Line, and the Centerpiece Theory. She also talks about creating color stories and I like the way she illustrates this by giving examples of things to think about that represent the colors in the story. For example, for a warm color story Tula suggests you think about “sunsets, fire and gerbera daisies”. These items represent warm colors exactly. She goes through cool, monochromatic, analogous, and complementary. Thinking about items in a certain color family is a great way think about colors. It trains your eye to think about visual images in terms of where colors fall on the color wheel. The examples she uses are all from her own lines of fabric and are very interesting.

The author has a few pages on quilting and discusses home vs. professional quilting. Tula gives the pros and cons of both, disparaging neither.

There are 20 projects in the book. Each pattern has about 7 pages. Tula weaves a small story around each quilt, which I find entertaining and endearing. The quilts are mostly made from squares and rectangles, so not very difficult. I noticed that there were a few triangles in one quilt. Not all of the projects are quilts. She also shows you how to make a framed silhouette, a shower curtain, a clock, pillows, a lampshade, a sleeping mask, and a sketchbook cover. Some of these have buttons, hand embroidery and others use different interfacings.

Throughout the book are hand drawn images of project steps, finished projects (in addition to the photos) and details. The images look like they were colored in with colored pencils. The end of the book has all of the templates. Finally, there is also an index, which makes my librarian heart sing.

None of the projects are very difficult. They all have some humor associated with them. This book is worth a look if you want any of those things or you just like Tula Pink.

View all my reviews
Maria’s Potholders

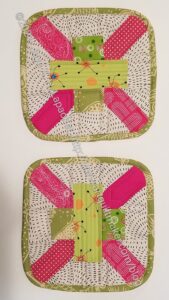
My guild had their first in person meeting over the weekend. Maria organized a swap as a fun thing to welcome everyone back. I joined and was assigned Maria who wanted potholders.

Maria's potholders
Maria’s potholders

Potholders are almost the last thing I would consider making. When I use potholders I want them to protect my hands from the heat and I have not found that homemade potholders do that. Still, Maria wanted potholders, so I made potholders.

I had some Insulbright on hand, so I used that in addition to two layers of batting. The sandwich was super fat. I didn’t want to do very much thread sinking, so I didn’t quilt it as much as I could have, but they turned out pretty thin in the end. I hope all the layers will protect Maria’s hands.

She also wanted lime green. Since I made her a pillow before, I decided to stick with that theme and use the same block. I had to redraw the block in EQ8, because I couldn’t find my block from the swap. The proportions came out a little different in this piece, but I think they still look good.

I didn’t think about a hanging loop until it was too late to put one on. Oh well.

I added in pink because I like pink and it made the potholders look cheerful and celebratory. The theme of the swap is Celebration! so the colors fit. I made a gift bag in the same fabric as the binding. The gift is ready to go.

Digital Printing or …?

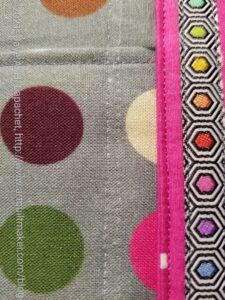
I am using some Windham digitally printed fabric for the exterior of my UCAB. I am finding it to be kind of delicate.

I bought pieces at two different stores, so I am pretty sure the problem lies with the printing process and not the storage at or the transportation of the fabric to the stores.

Holes left after ripping out

First, I found that the holes were very noticeable after I ripped out some stitching. Sometimes this happens, but they were still visible even after I rubbed the fabric down.

As usual, I did wash the fabric in hot water with Retayne before I used it.

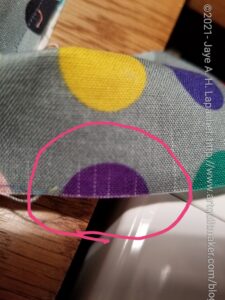
Runs in the fabric
Runs in the fabric

I also noticed that this fabric gets runs – not color runs, but like runs in stockings – if I am not careful. This happens when fabric is ripped. In this case I don’t know (and don’t remember) how the fabric was separated from the bolt.

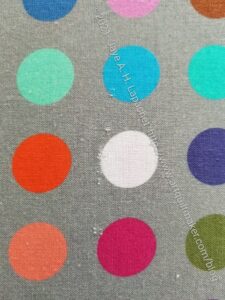
Windham Digitally printed fabric

I needed some more of the fabric and when I got the second half yard I noticed some flaws.

I don’t know that much about the process of printing on fabric. I only have a few experiences with my printer and with buying from Spoonflower.

I don’t know if the experiences I am having are because it is digitally printed or because of this particular fabric or for some other reason.

I like the fabric and hope this was an anomaly.

Working UCAB

Mom's UCAB to go
Mom’s UCAB to go

While this is Mom’s UCAB, I tested it on my travel sewing machine bag to see if it would work for me. The key is to adjust the back sleeve to fit over your rolly bag handle. I have no idea if there are standard sizes for those, so make sure you check before you sew everything to the exterior.

I plan to put my smaller items in the UCAB. I am not sure how I am going to reconcile this bag with the Tupperware box.

The picture below shows the bag empty, but trust me when I say I filled it up. It isn’t completely filled.

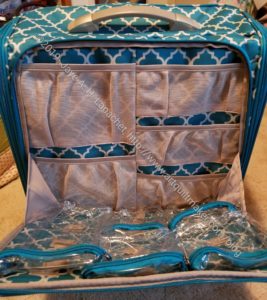
Sewing machine cart - front pocket
Sewing machine cart – front pocket

I need mine to contain all my to go items – notions and rulers, etc. I put them in the various pockets of the sewing machine bag, which has a lot of pockets, but it makes some of the zippers hard to open.