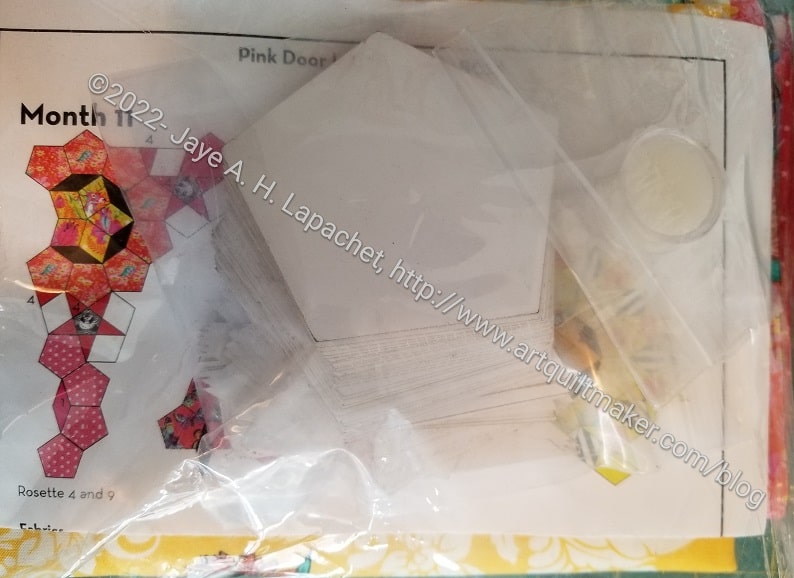
Yay! Month 11 is here! The pretty pink package arrived the other day and I getting ready to baste.
This was supposed to be a beast because Pink Door had to move some of the rosettes due to shipping delays. It doesn’t seem awful to me.
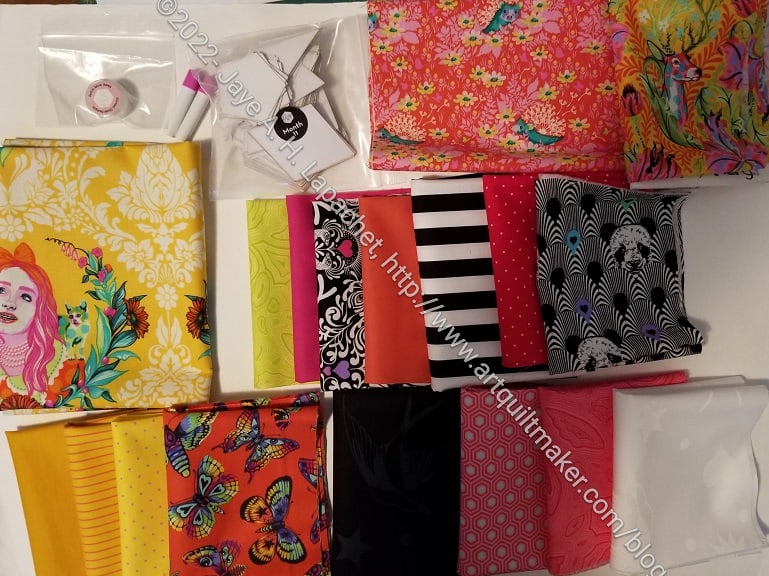
La Pass Month 11 Fabric
There is a lot of fabric, however. This is the first month that will include Tula’s new line, Tiny Beasts.
The rosettes also include the Alice fabric. The directions say to fussy cut her face, but I am going to skip that part. I’ll figure out a way to use the other parts of the fabric.
All the fabric is washed, so I can get started as soon as I have a spare minute.
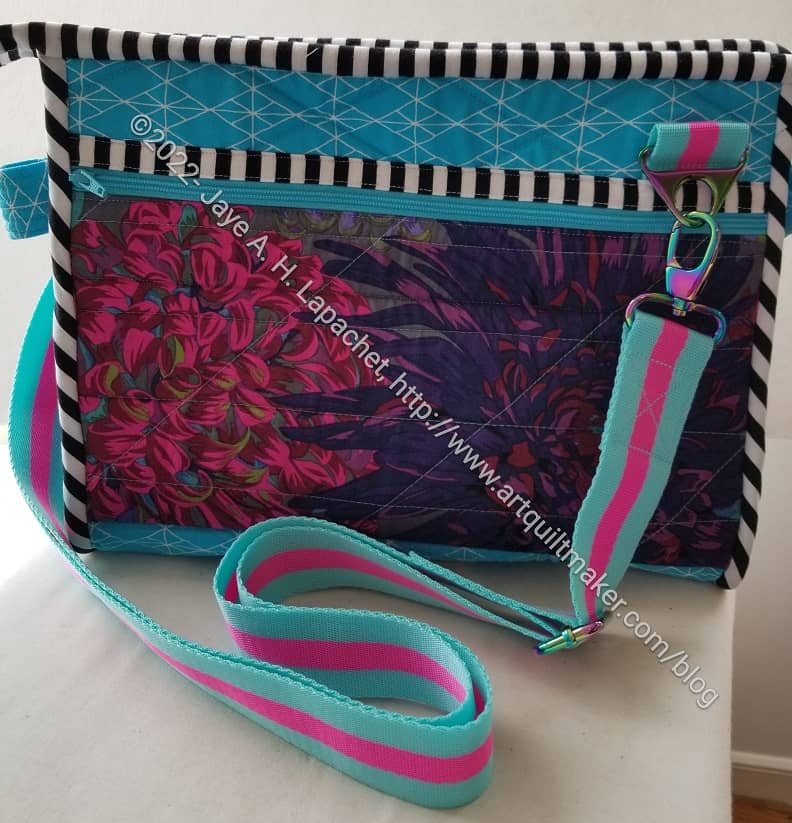
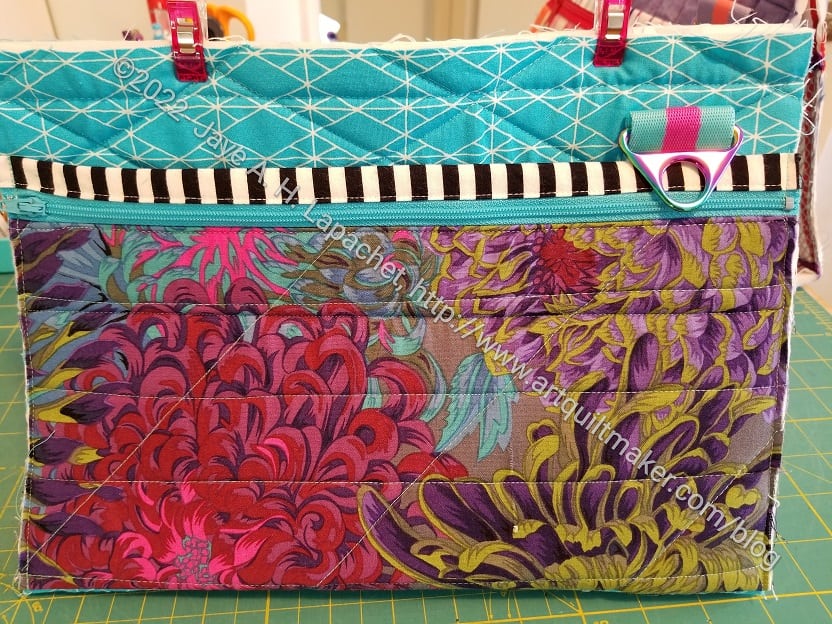
I finally finished all the Take a Stand /Without a Trace bags I was making. This one is mine and it matches my A Place for Everything bag. I don’t know how I am going to use this bag, but I am sure I can figure something out.
I am kind of happy to be finished with the ByAnnie bags. She has great shapes and useful patterns, but they seem so unnecessarily complicated.
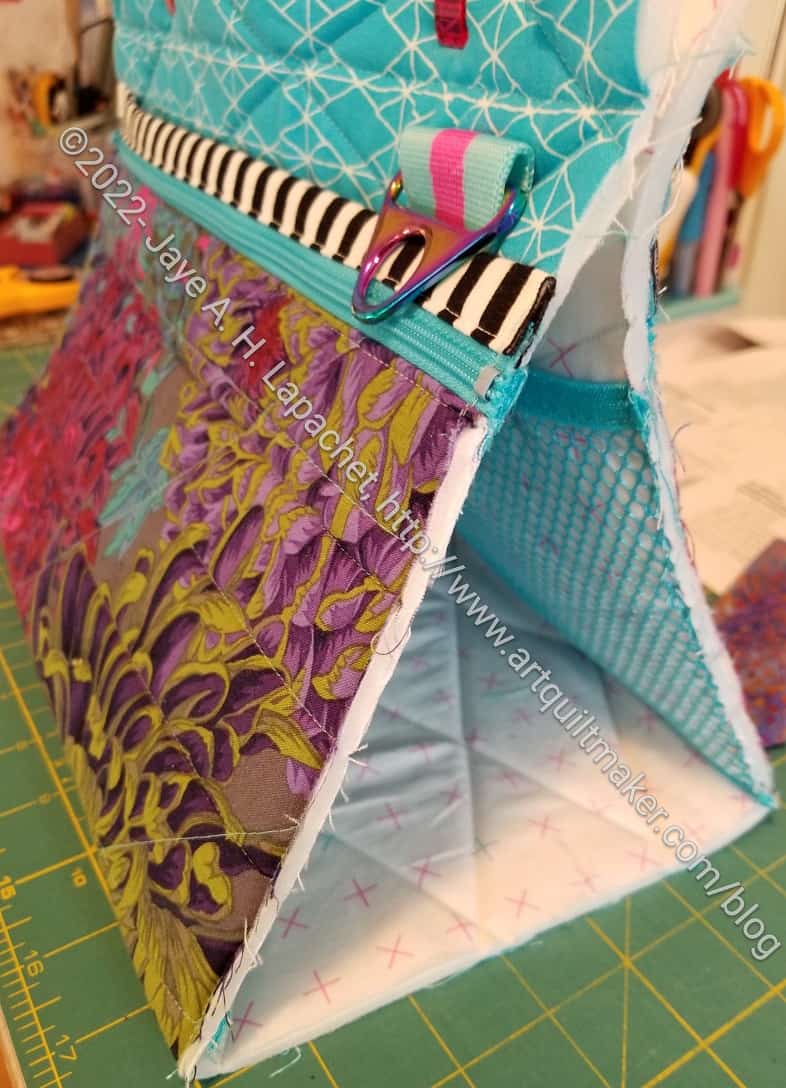
Take a Stand Front pocket- inside
There are also things I don’t like about the bags. ByAnnie doesn’t always finish the inside of her pockets. It might seem stupid, but I don’t like any raw edges showing.
After seeing Tula Pink cover the zipper joins with ribbon, I now do that, which also covers some raw edges. You can see the with grey dots ribbon at the top of the inside of the front pocket. ByAnnie does say to seal some of the edges, so I did that with the bottom before I assembled the whole back. I don’t consider those raw edges to be completely covered, but they are ok.
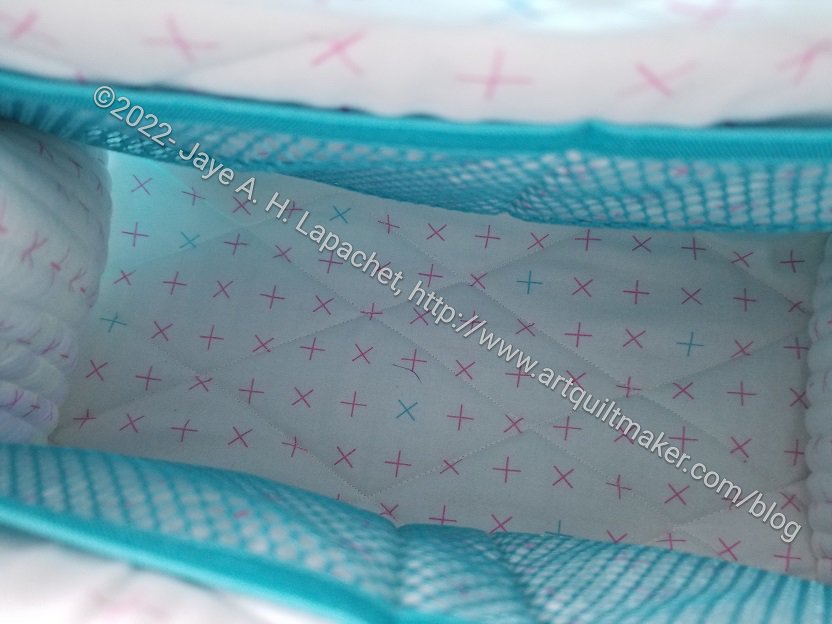
Take a Stand inside
I didn’t do anything very special with the inside of this bag. I used some Zen chic fabric I consider to be a background fabric. I like it and I have used it for other bags I made for me.
The inside is light and airy and I will be able to see whatever I store in it.
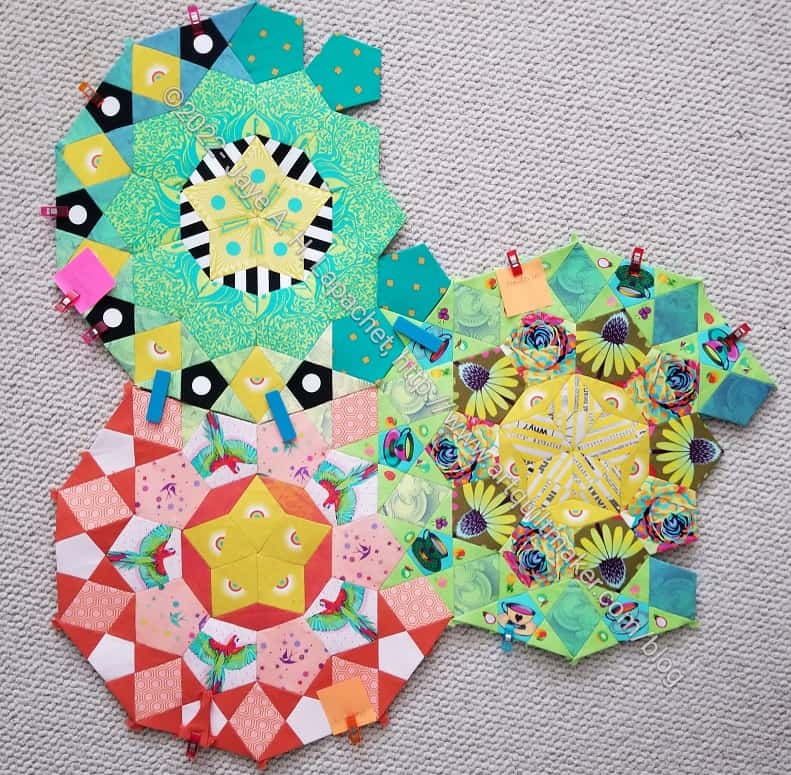
This is a La Passacaglia heavy week here on the blog.
You can see the new fabrics I highlighted in my post “That was Then This is Now” the other day in the Month 7 rosette (upper left).
If you look at where the Sew Tites are placed, you can see where I will join the two sections (Month 7 to Month 6 and 10).
La Pass: Joining months 6,7 and 10
I spent some time the other night adding the various pieces I needed to Months 6 and 7 so I could join them to Month 10. The yellow arrows point to the star points as well as the star points/diamond combination (middle top).
I am ready to sew the three rosettes together. I was going to do it Friday, but got home too late and was tired.
I definitely get a different view when the rosettes are even set together. This realization makes me wish I had spent more time looking at the rosettes together.
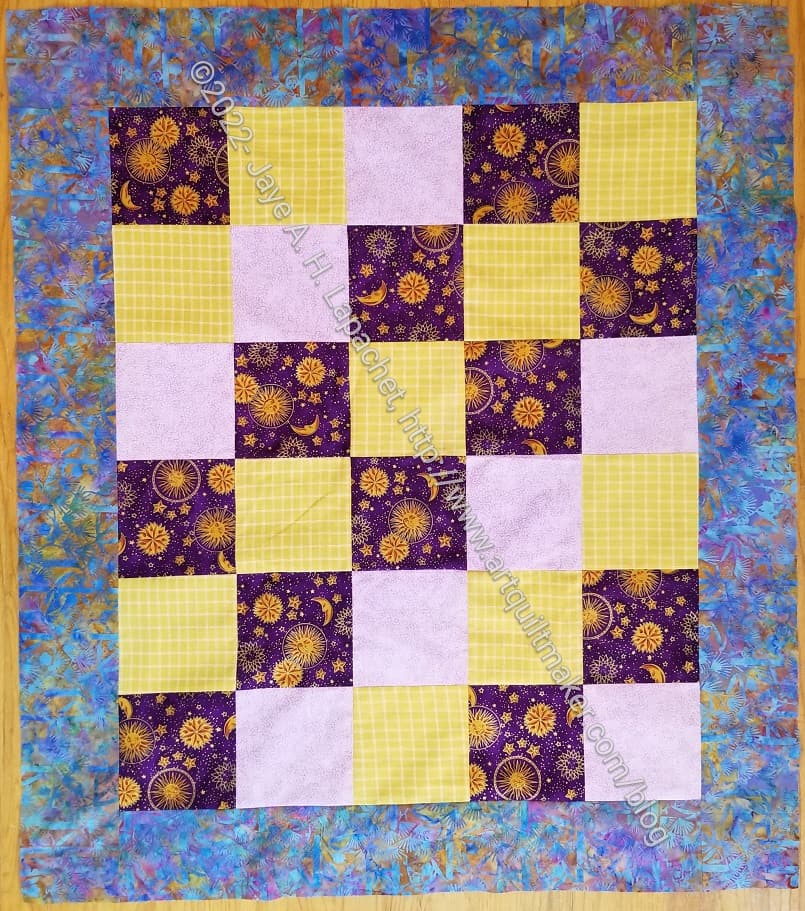
After seeing one of the donation quilts quilted by Lee Ann last month (? or maybe the month before?), I decided to make another of the Plus quilts with a charm pack I have had for a long time.
The piecing is done with a charm pack from American Jane. I am working through charm packs I don’t think I will use in other work.
I like American Jane, but the colors are just dull enough that they don’t go with other fabrics I use. This charm pack has been hanging around my workroom for too long. It is time for it to go.
Because it is a charm pack and I am not using a pattern, I am missing 3 5inch squares needed for one more 9 patch. The sticking point for moving on with this quilt is finding fabrics that will do with the others so I can finish the last 9 patch.
My goal for this weekend is to find 3 charms (or 5inch squares) that won’t look out of place with the other fabrics. I am sure I have a red I can use, and probably a cream, but will have to look for a third fabric.
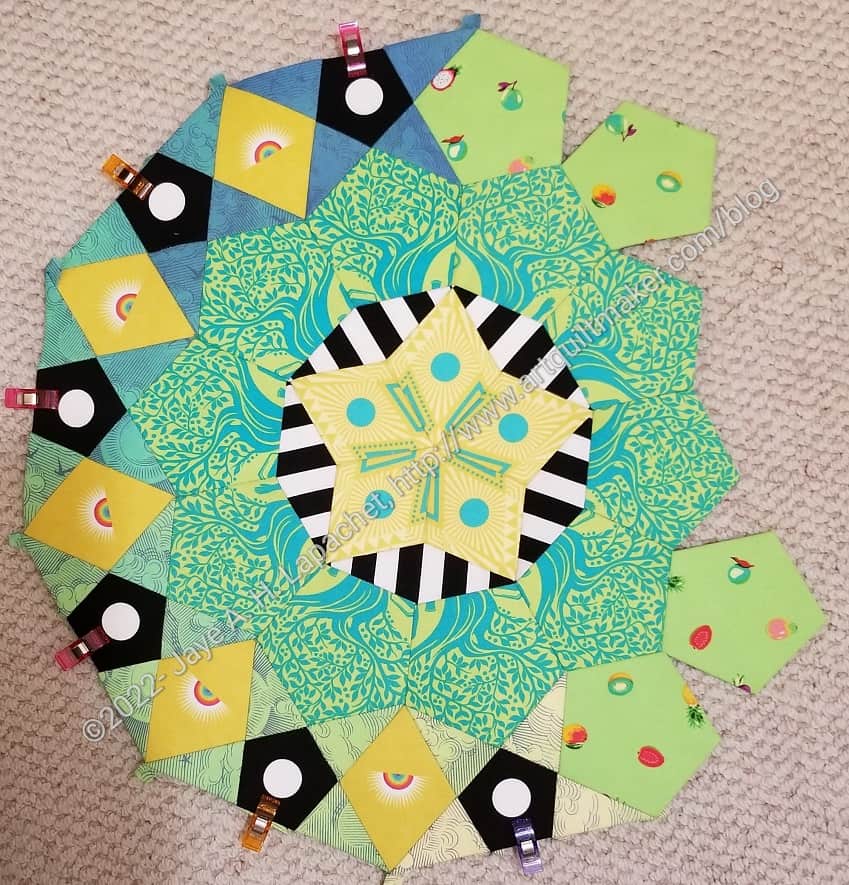
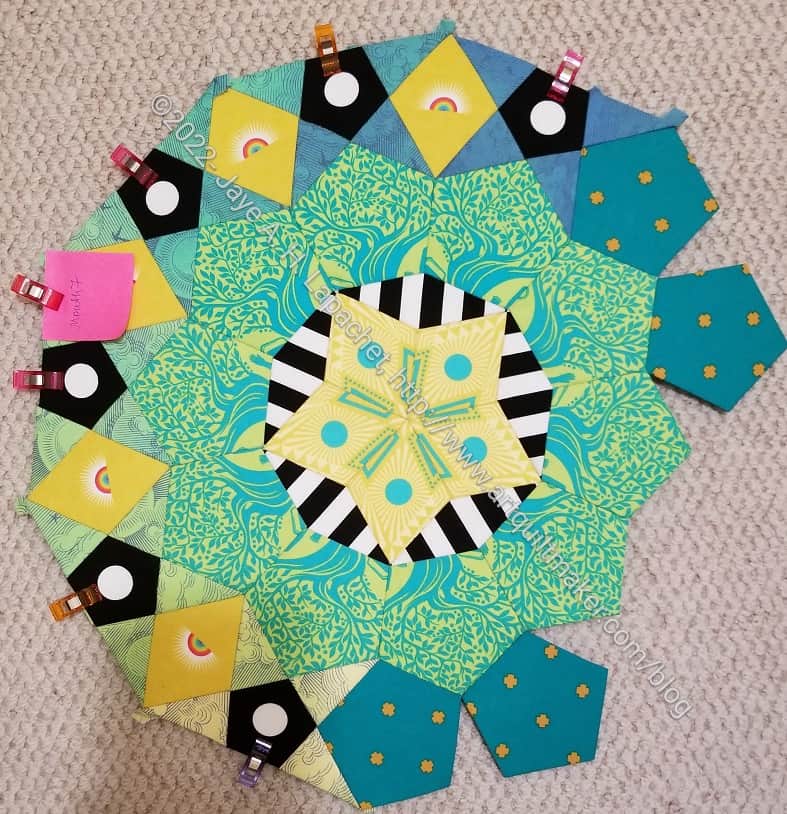
As mentioned, I had to change out some of the fabrics on Month 7. Month 7 looked like:
Notice the light green Fruit Snacks fabric on the pentagons on the right?
Now this rosette looks different. I didn’t want Fruit Snacks to be next to other Fruit Snacks, so I changed out the pentagons to the emerald fabric I used in Month 9.
Too many Fruit Snacks
I like the way it looks and the Fruit Snacks star points can be seen.
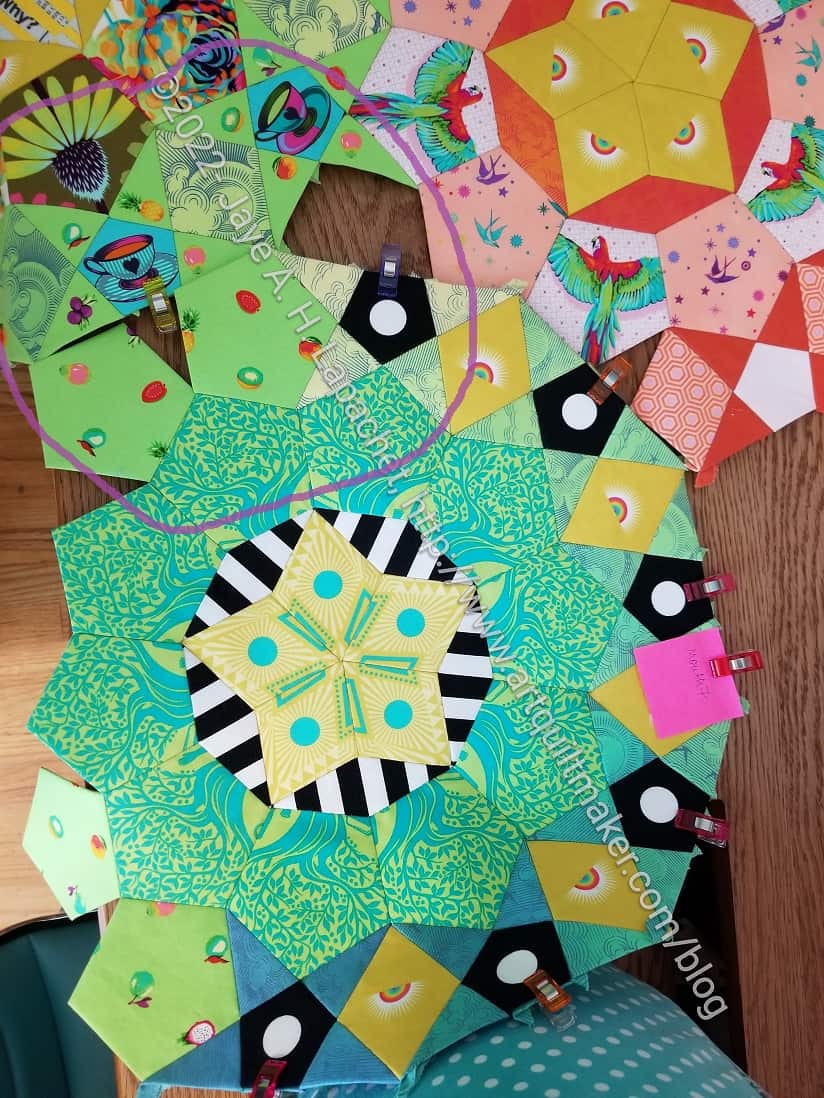
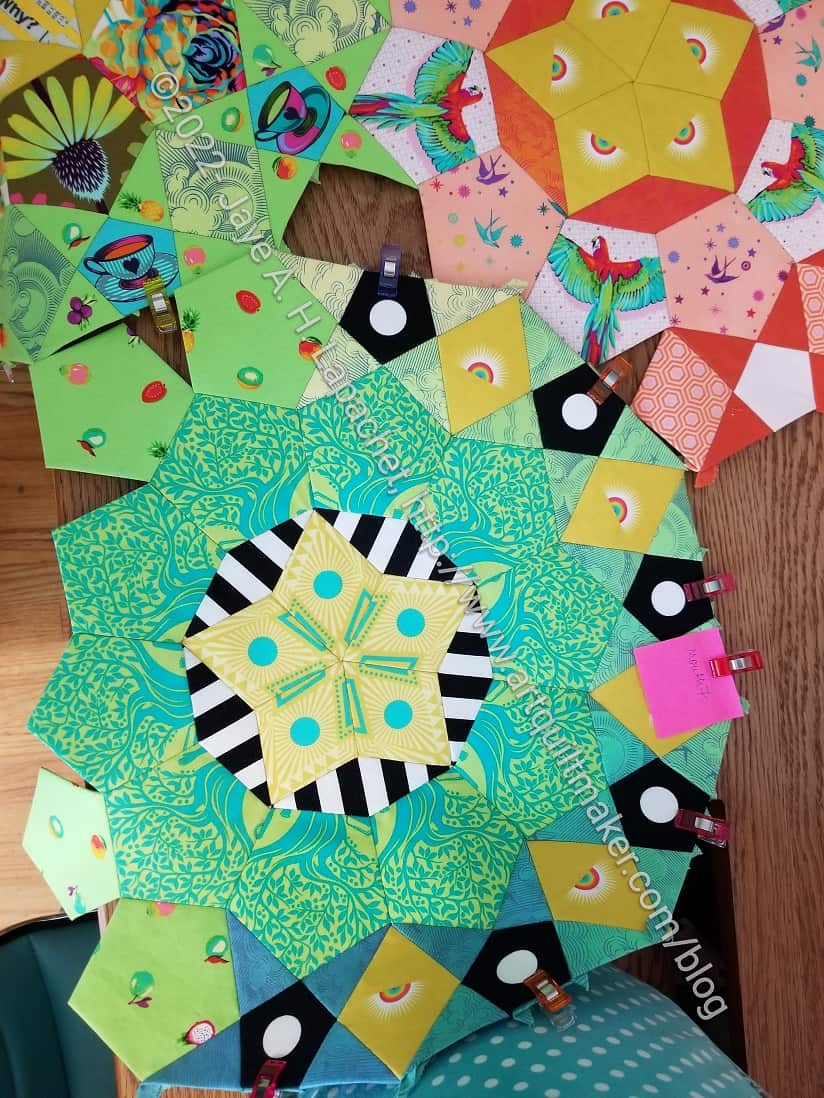
Of course, joining more rosettes gets more complicated, because joining pieces are required. What I call ‘joining pieces’ are pieces that need to be added in between the rosettes so there are no holes. I am not sure why these weren’t included when we sewed the other rosettes, but it doesn’t matter.
Joining 3 Rosettes
It was easy for me to add one more rosette to those two rosettes I joined the other day except I had to include a joining piece.
When I set the three together, I saw the hole. I went and looked at the layout map we received and also at the book. The book, not clear in the best of circumstances, was pretty clear on this point.
This meant I had to figure out what to do. Or do nothing.
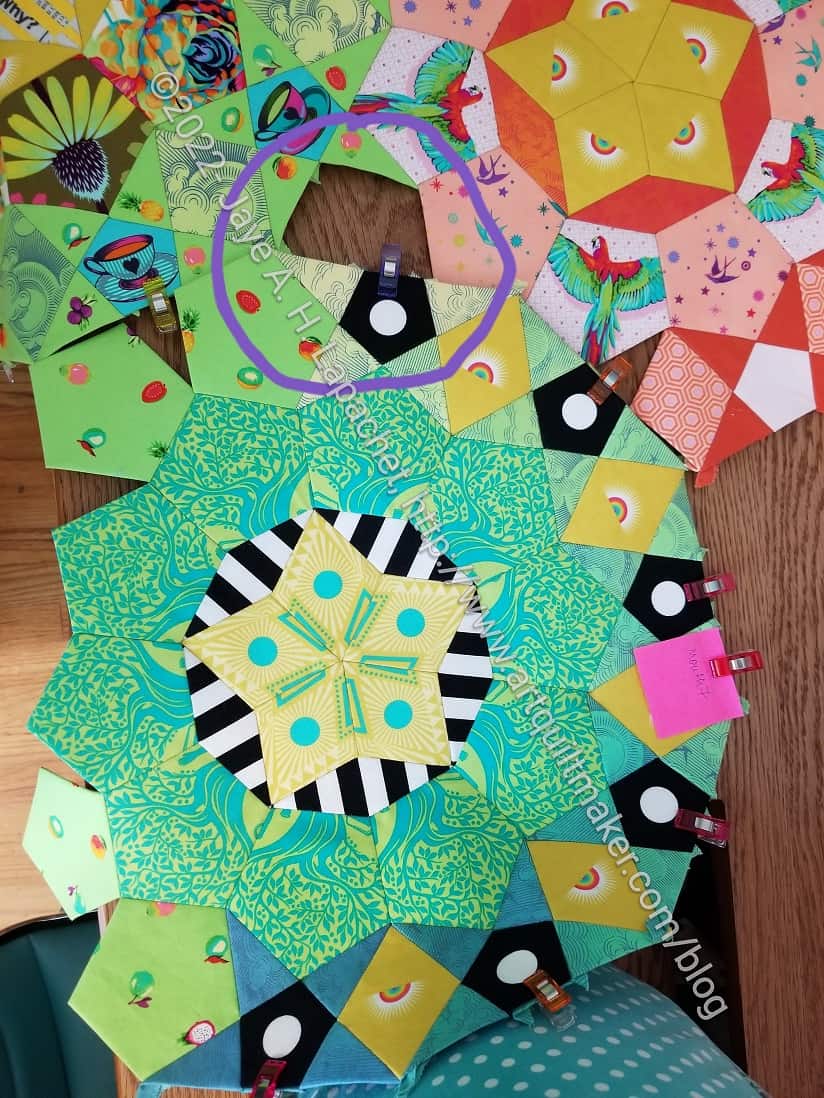
Joining 3 Rosettes-target
Laying the rosettes out allowed me to look at them to see how the rosettes fit together.
The circled point is where I had to fit in a fabric. I wanted it to look as though the rosettes fit together well. That spot is not is not ideal as it is not really any part of any of the three rosettes.
The start point was already cut and basted. It is attached to the bottom rosette with a clip so all I had to do was decide on a fabric for diamond.
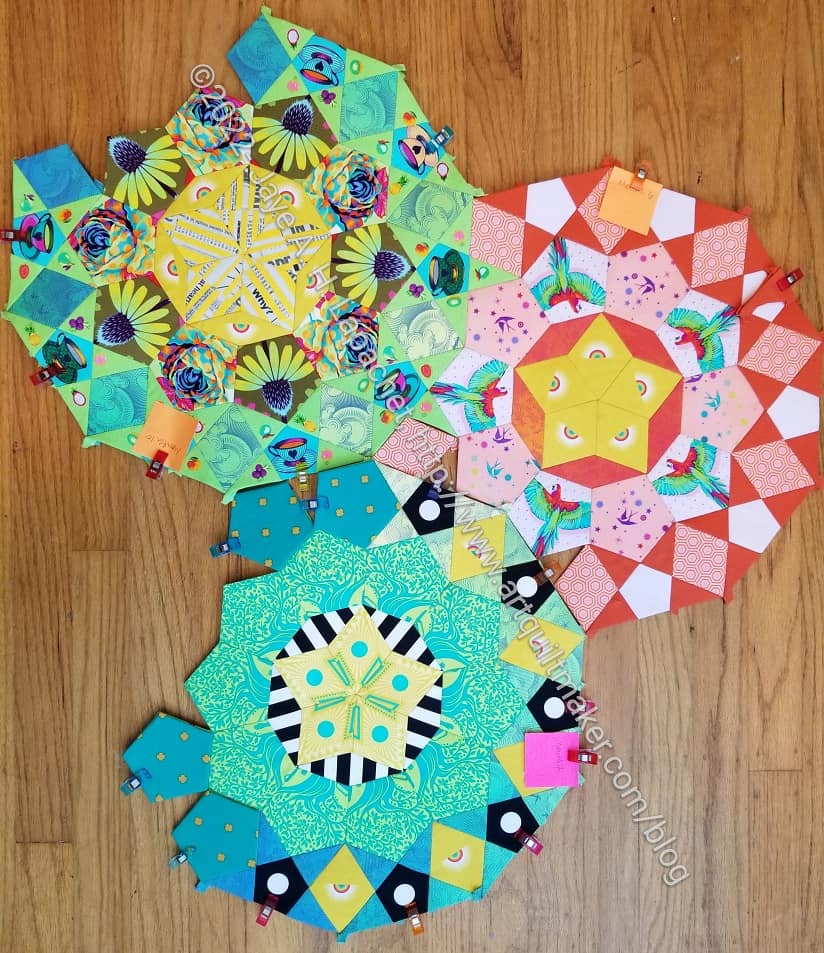
Joining 3 Rosettes-full
After looking at the whole piece I decided on the peach hexagon fabric. Look carefully in the middle to see it laid together in the spot. It kind of looks, which was my intention, like the peach and orange rosette is peeking through from behind the green rosettes.
I got distracted by finishing the Take A Stand bags, so I haven’t joined them together yet. I still may be able to do it before M11 arrives.
I finished Month 10 a few days ago. As mentioned, I am waiting for Month 11 to arrive. I started looking at the piecing directions for all of the rosettes and decided to dip my toe into joining some.
I was a little stunned after working out the details and doing the sewing. I am not going whole hog into joining all the rosettes, mostly because I have nowhere to store larger pieces. I do plan to join more as I have time.
I think the two look great and I can’t wait to see more of what happens as I join the pieces
I keep calling this bag the Without a Trace bag rather than the Take a Stand Bag. Do you remember that TV show, Without a Trace with Poppy Montgomery? I liked that show. I started the three on April 30, finished Mom’s in time for Mother’s Day and am on my way finishing mine. Yes, this one uses the same fabrics as my APfE v.2. They are a set. Will I make a Running with Scissors to go with them? I don’t know. I am done with ByAnnie patterns for awhile.
I was able to spend enough time on Saturday and Sunday getting the pockets on, concealing the strap holders and generally fiddling with the details.
I had to pay attention to covering up the strap that holds the shoulder strap. You can see it above because a triangle ring is hanging off the top. I originally cut those pieces of webbing too long. I couldn’t figure out what was going on when I attached the first one, on Mom’s. I finally did realize that it was too tall. I ripped it off, trimmed and resewed. Then I trimmed the straps for the other two. I checked the directions and know I cut them properly, so there was something I didn’t understand.
Take a Stand – pockets on, side view
With that whole escapade fresh in my mind, I carefully placed these straps. Note they are placed so the end is covered by the pocket. That means that I had to be sure the end WAS covered by the pocket.
I eventually succeeded and now need to put the ends, the top zipper and bind everything.
**Obviously, you should shop at local quilt shops. However, I use affiliate links and may be paid for your purchase of an item when you click on an item’s link in my post. There is no additional cost to you for clicking or purchasing items I recommend. I appreciate your clicks and purchases as it helps support this blog.
I took some time to choose fabric for my Mom’s piece and was able to finish on Saturday. It is ready to hand in for quilting.
The batik is not an obvious choice, but I think it works. I chose it because of the bits of gold included in the surface. I also didn’t want an exact match to any of the other fabrics because they would blend into the border.
Purple & Gold Donation Back
That particular batik, and its sister on the back, have been hanging around my fabric closet for a long time. It was time to use them up.
I don’t get a lot of fabric usage bang for my work, because the main part of the quilt was Mom’s fabric and work. Still, every little bit helps and the point is to make something beautiful so someone knows I (or someone) cares.
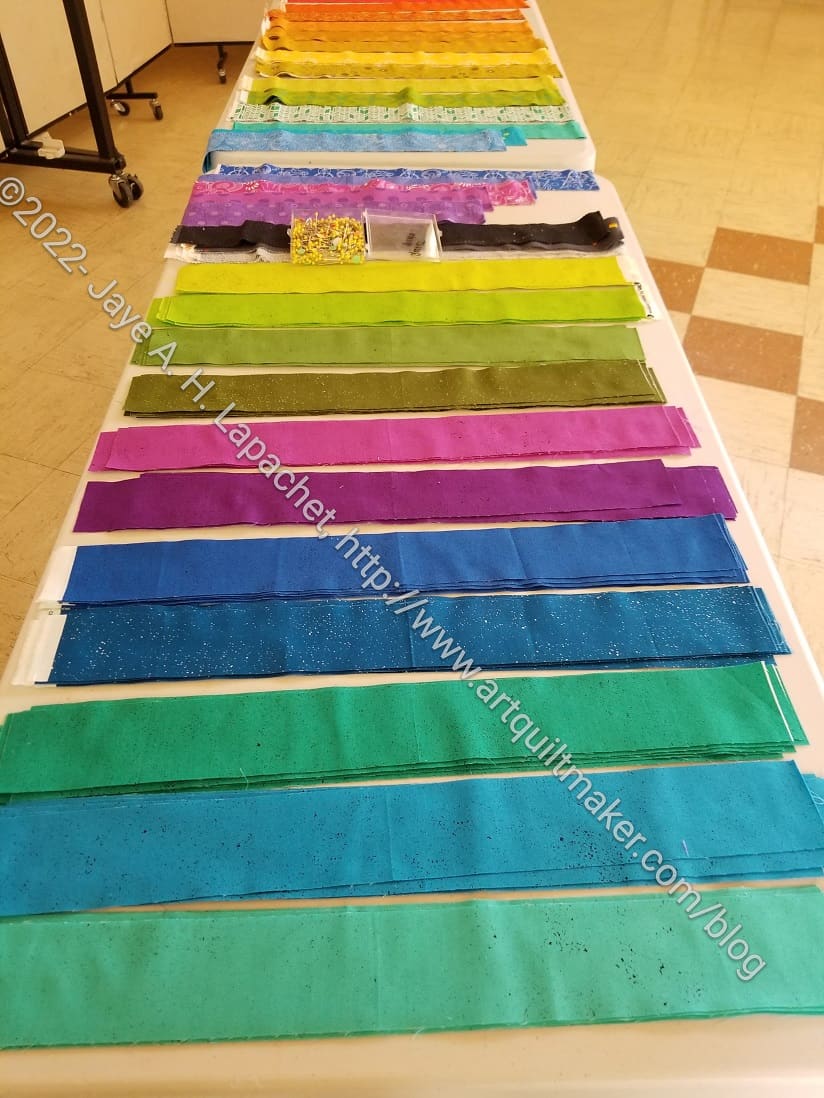
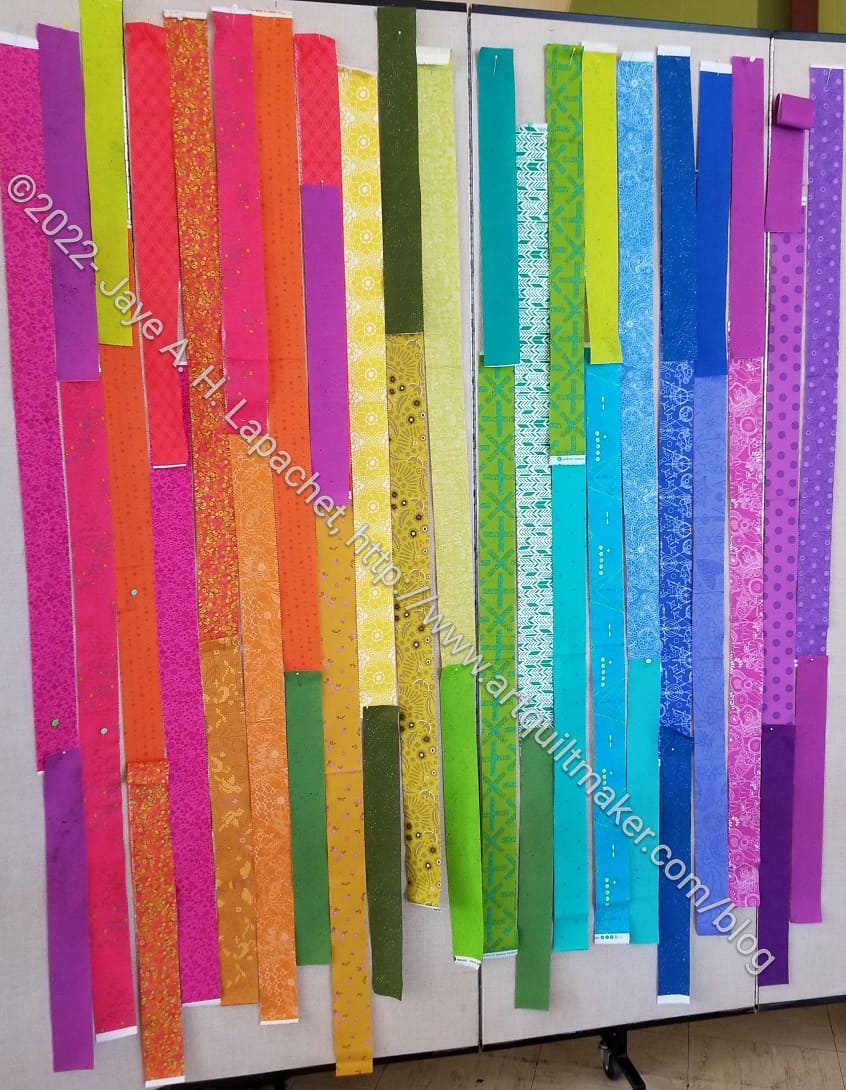
Remember when I talked about Sew Day? I mentioned a future donation quilt (no progress yet). I talked about some Sew Day Improv I worked on with Tim and Mary to create a quilt that would keep someone warm and comfy. I also talked about basting La Pass Month 10. What I didn’t talk about -yet- was Amy’s amazing rainbow quilt.
The first thing I saw was the line of strip stacks laid out on two long tables.
Rainbow – first draft
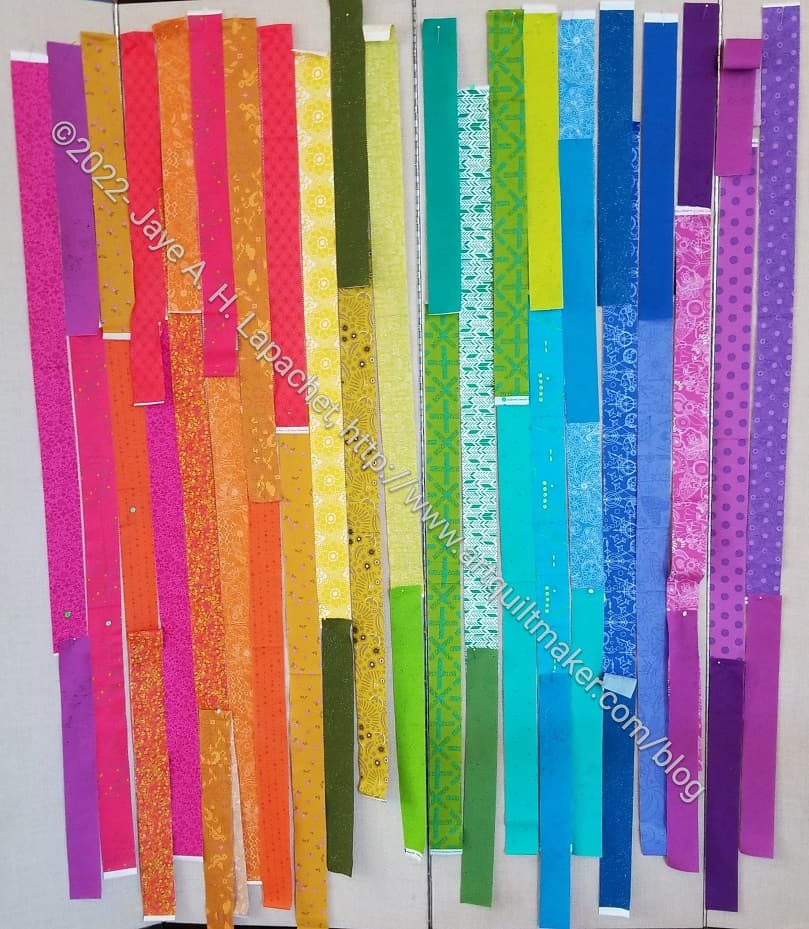
As the day progressed, I began to see the piece take shape. Amy struggled with not having a complete set of colors/shades/tones to make a smooth transition between colors. She was determined to make it work. I could sympathize after working with the various Fabric of the Year quilts. Unlike painting, generally we work with certain fabric prints and can’t alter them (yes, I know there is fabric painting and dyeing, but you know what I mean) like painters can on the fly.
Amy’s Rainbow – 2d draft
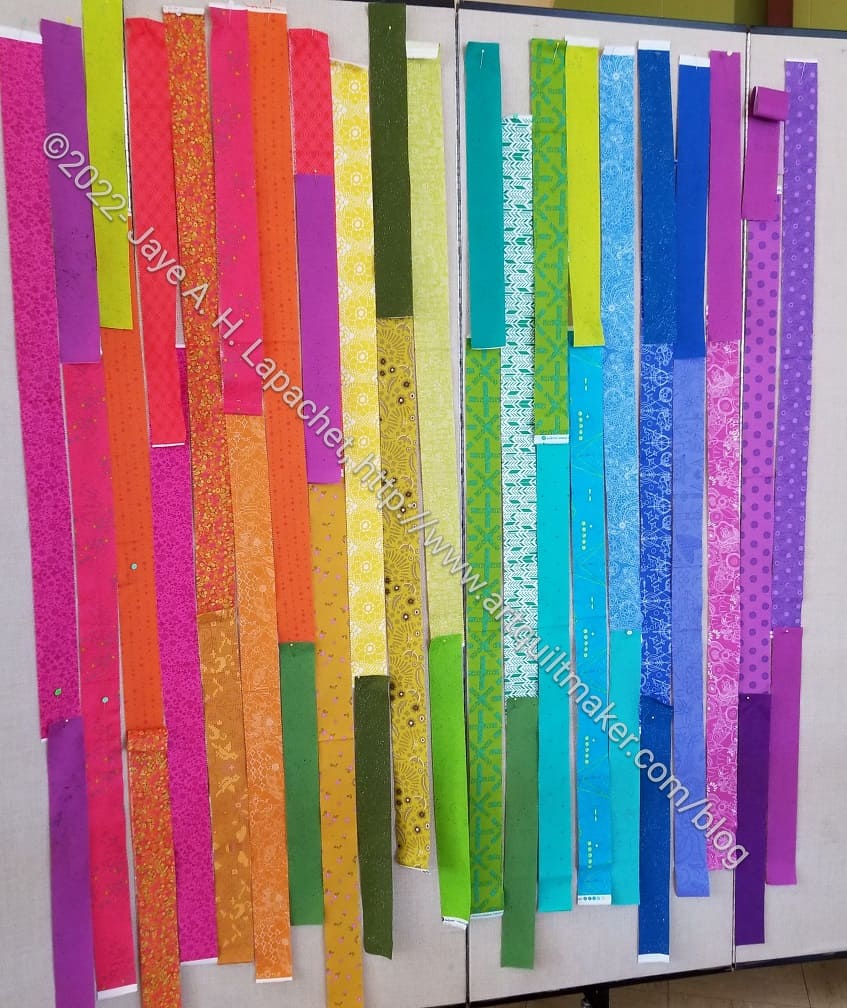
The piece progressed well, I think. There was a lot of moving around of strips and a lot of people got involved.
Amy wasn’t super picky that everything flowed into one another. I think the rest of us were more invested in the outcome than she was.
Amy is cleaning out her workroom and I think this was a set of Allison Glass strips she wanted to use. I didn’t hear what her plans were for the final piece.
Amy’s Rainbow – near final
I did not get a picture of the final piece. This is close, though, to the final layout.
Maria helped Amy sew, so the piece could get finished by the end of Sew Day.
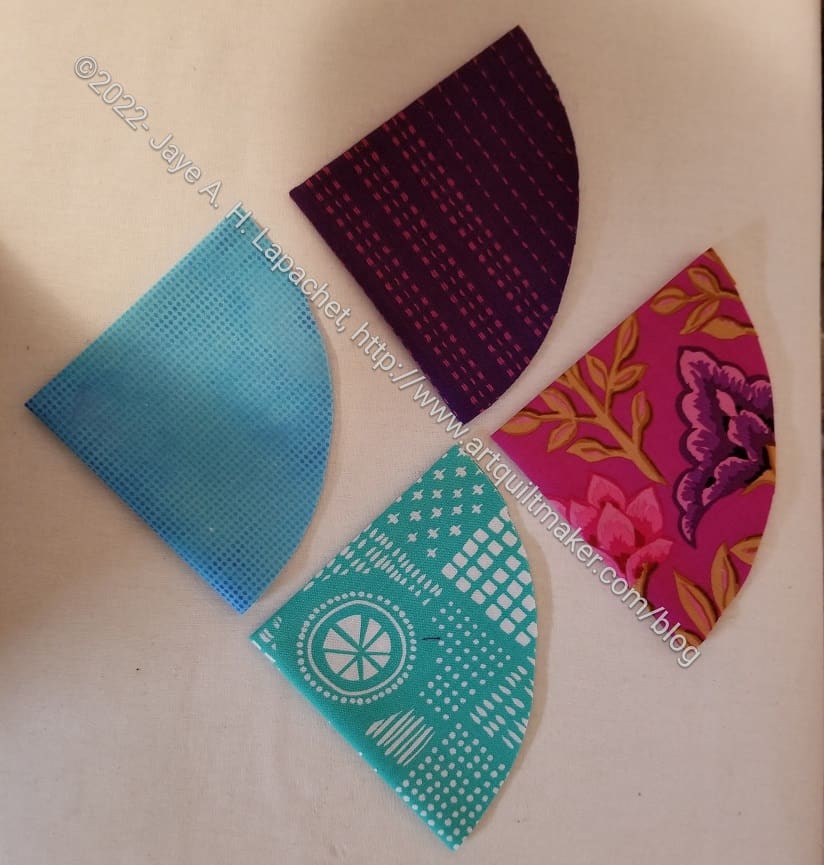
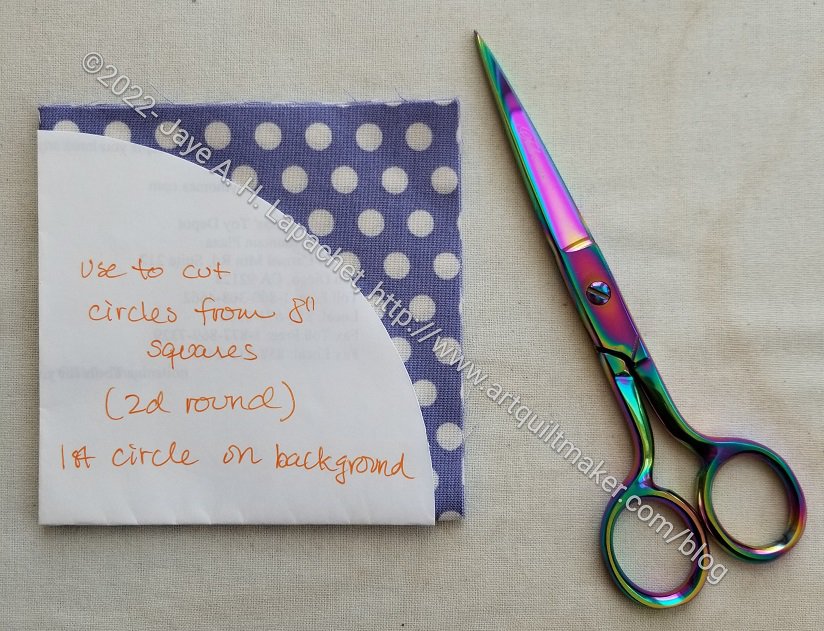
I have finished cutting out the circles and am now starting to pair the circles with the backgrounds. I hope to sew these this week in the evenings.
I didn’t really sit down and cut all of the circles at one time. Each time I had a break or a few minutes free I would cut 1 or 2. I finally completed the task a few minutes at a time over a few days.
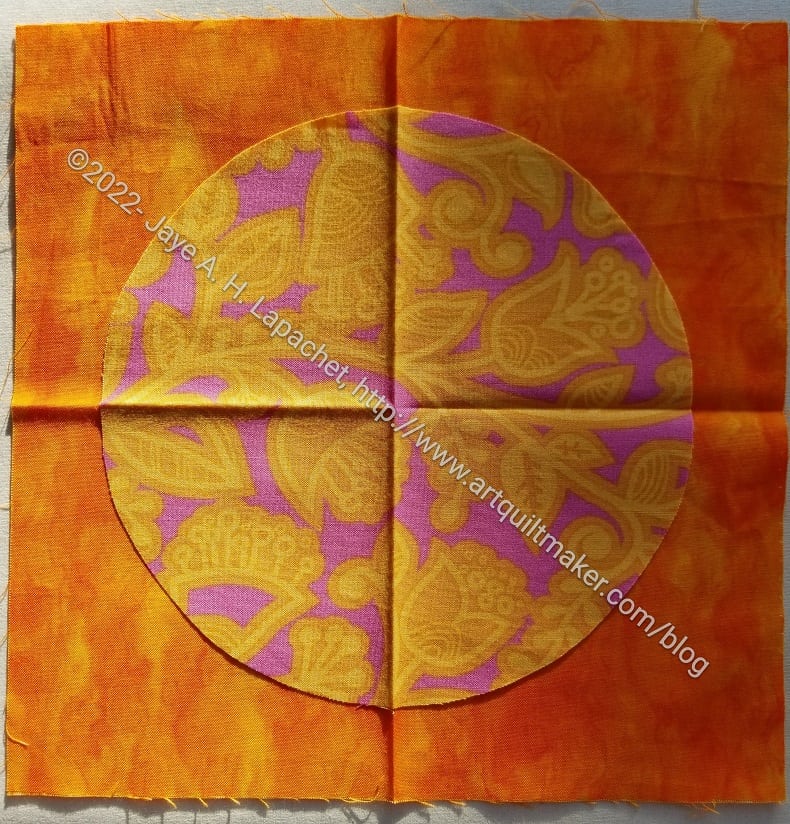
Backgrounds and circles paired
The pressed cross is so I can line up the circles in the middle of the background. I prefer to line the circles up exactly even though this is a bit of an improv process.
Now I am not sure if I want to press the creased out then sew or just leave them in. I’ll have to press creases in again later, but I don’t want the creases to interfere with the sewing. I want the circles to be flat along the background.
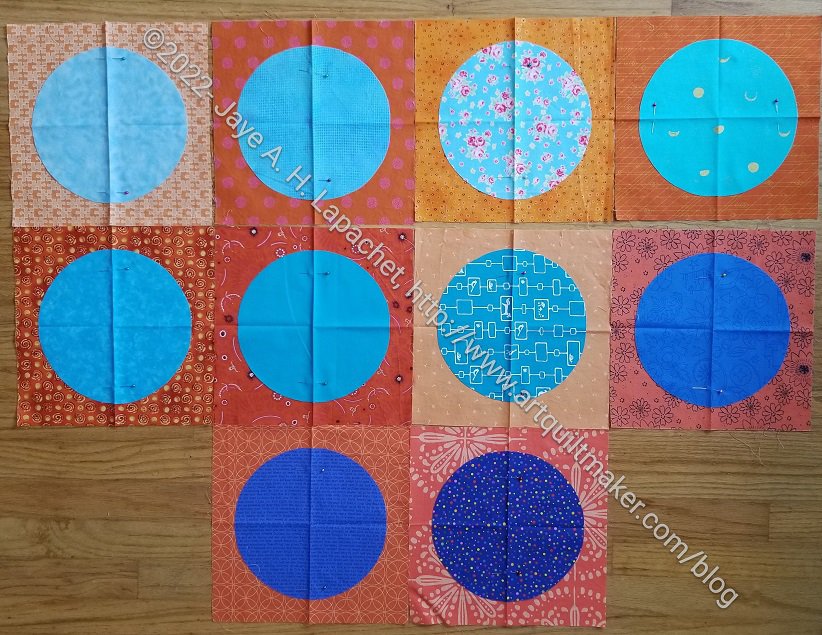
Orange You Glad: selection
I have sorted the ‘ready to sew’ backgrounds by the color of the circles. This is a selection of the blues. I want to match the thread color to the circle so it doesn’t show up much.
I should be less tired, but I’m not. DH was out of town, which should be a good time for me to rest, but I did an extraordinary amount of driving to be with him to attend some events.
Work has been stressful. I am working on getting a new contract, which will be in a different department. This means that I have to prepare my work to hand over to the next person. I know you are thinking “really? again?”. It is the nature of contract work. I am constantly having to get my contracts renewed or find new ones. It isn’t ideal, but I have a lot of flexibility, which I like.
Still it is all tiring and people in the department are whispering about my contract ending, which is just annoying. I am looking forward to some time off.
I haven’t done much sewing except for my work on La Passacaglia. I have had an hour here and there to do some hand stitching. I love that project. I think I will go work on it now.
Mostly I grabbed handy fabrics and cut squares out of them, then folded and pressed them. I didn’t spend a ton of time deciding on whether a certain fabric would fit in with the orange. I did eliminate fabrics as I was choosing, if they were too close to orange and wouldn’t show up or were obviously not suited to the project. I also eliminated all browns, blacks, predominantly white fabrics and fabrics with too much white in them.
The paper template is a circle I made the right size by using a compass or a plate. I don’t remember as I had to use both for different sizes of circles we agreed upon for this project. The circle template is folded into quarters.
The scissors have to be sharp. I want a smooth cut the first time. I hold the paper in place with my left thumb and fingers, but you can also use WonderClips or pin the template in place.
Friend Julie has some great photos of making the templates, using the templates and holding them in place in her blog post today.
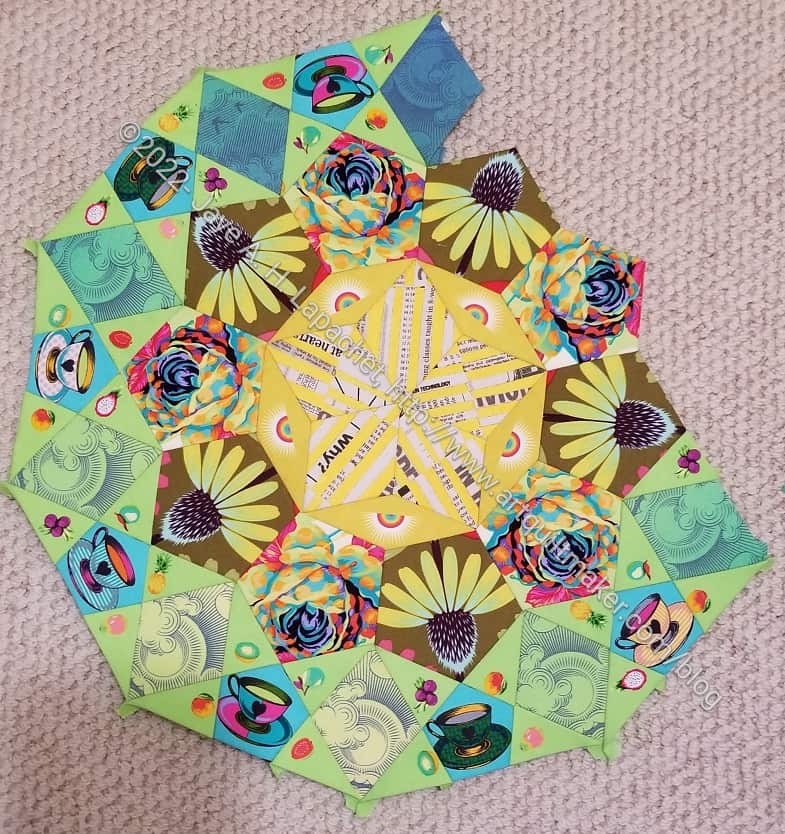
I am speeding along in sewing the Month 10 rosette together. I will probably have to find another project on which work for the rest of the month. I am making good progress.
I changed out a number of fabrics this month. I added the coneflowers. I wanted a little space for the roses to shine. I wasn’t sure if the coneflower fabric would provide space, but I think it does. It also continues a mini theme from Month 2 (Rosette #1).I have a couple of other coneflower fabrics in different colors and hope to be able to add them in as well. I’d like to add at least one more coneflower fabric to balance out the two I already have.
I also used a Carrie Bloomston fabric for the center, replacing the Curiouser and Curiouser cat fabric. The rainbows don’t show up as well, but I still prefer the newsprint fabric to the cat fabric.