I was still recovering from my oral surgery last Friday as I prepared for Sew Day after work. With a full week of work and the aftereffects of the surgery under my belt, I was tired. I thought hard about staying home, but decided to go. I wanted to see my friends and participate in the Destash party.
In order not to completely exhaust myself, I decided to bring as little as possible with me. I needed a small project without a lot of pieces and parts. For example, I did not want to bring a sewing machine. The La Pass BOM would have been the perfect project, but it is delayed again.
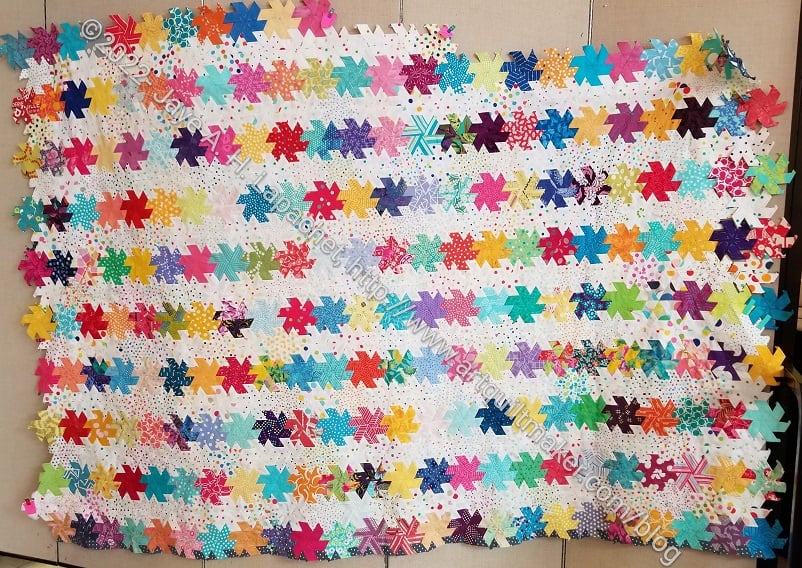
It occurred to me that I could bring the Half Hexie Star quilt, put it up on the design wall and make a plan to get it finished. Looking at it and making a plan had been on my list for a long time and Sew Day provided the perfect opportunity.
I did it! And it worked!
I now have a plan to finish this quilt. I can see the light at the end of the Half Hexie tunnel, which is a finished quilt. This is very exciting. I thought this would be one of those quilts I would finish in 10 years.
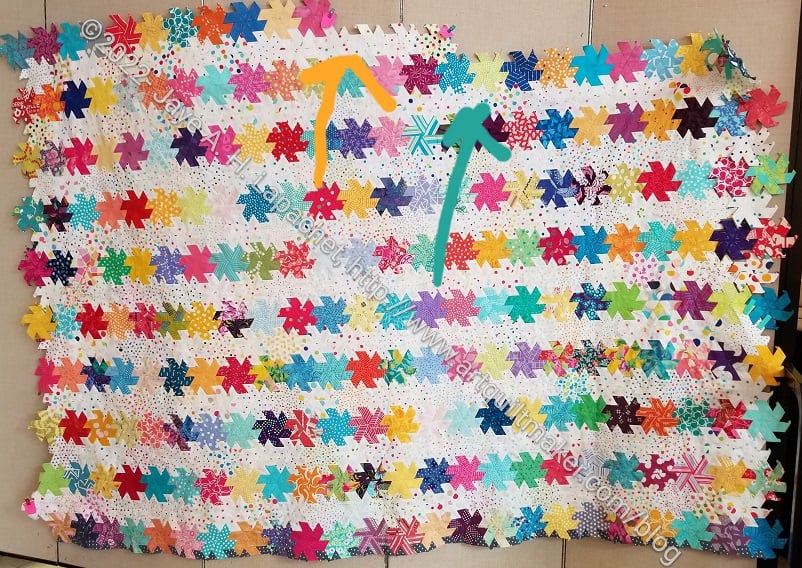
First, this may be the first time I have ever put this quilt up on the design wall and looked at it vertically. I have laid it out on the floor, but seeing it on the design wall is better.
Second, I figured out what I needed to do to even up the sides. I plan to finish the two rows I have started on the top (see arrows) and call it done. I am not going to add more rows to make it bigger.
A lot of people came and talked to me about the quilt. One of my guild mates asked what the final size would be. I looked at her, confused. She clarified that she wanted to know whether the pattern said it would be a twin or another size. She also wanted to know if I made enough stars to complete the pattern. Clearly she doesn’t know me that well. I laughed and said I wasn’t using a pattern. I said it would be as big as I felt like making it. This was a foreign concept to my guild mate.
At that point, I decided that it would be pretty much as big as we could see on the design wall right then.

I haven’t measured it, though it would have been a good time to do it.
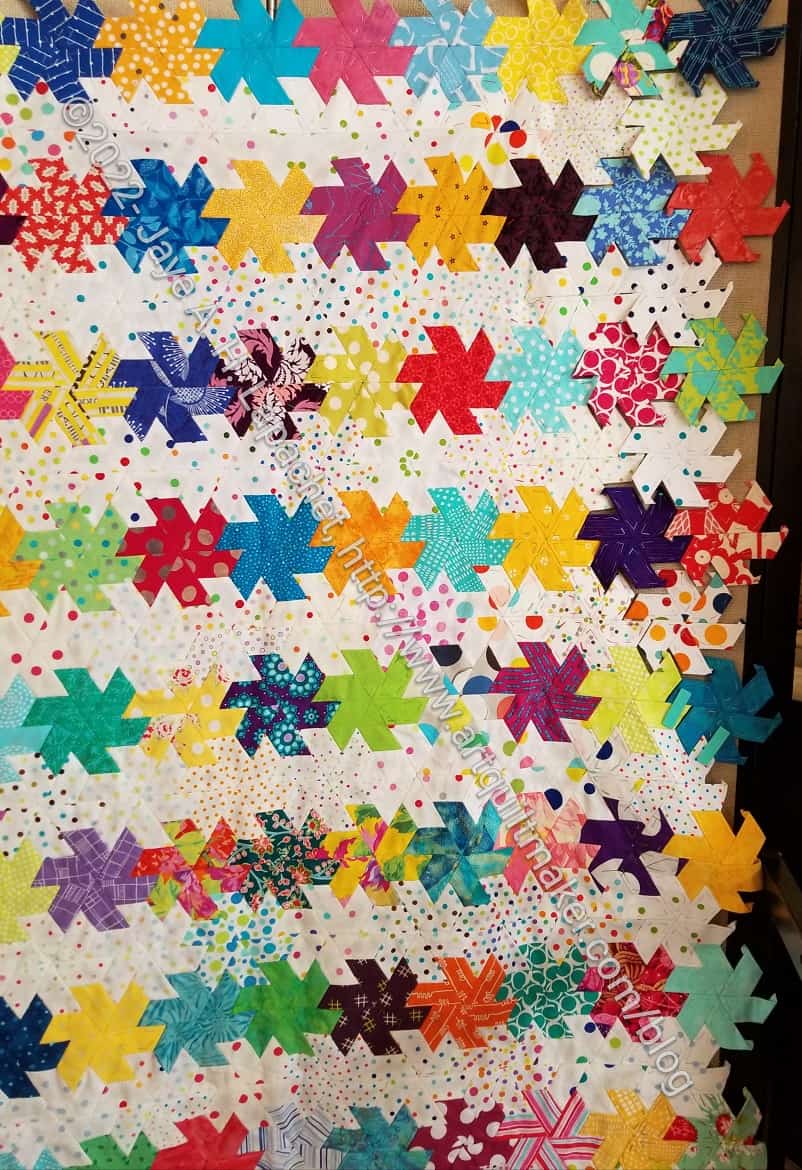
Next, I tried to think of ways to square up the sides. I pinned stars to the sides to make each side as even as possible, so I could see what I had.
The top and bottom just need some diamonds and triangles fitted into the open spaces in the stars. The top and bottom will be easy.
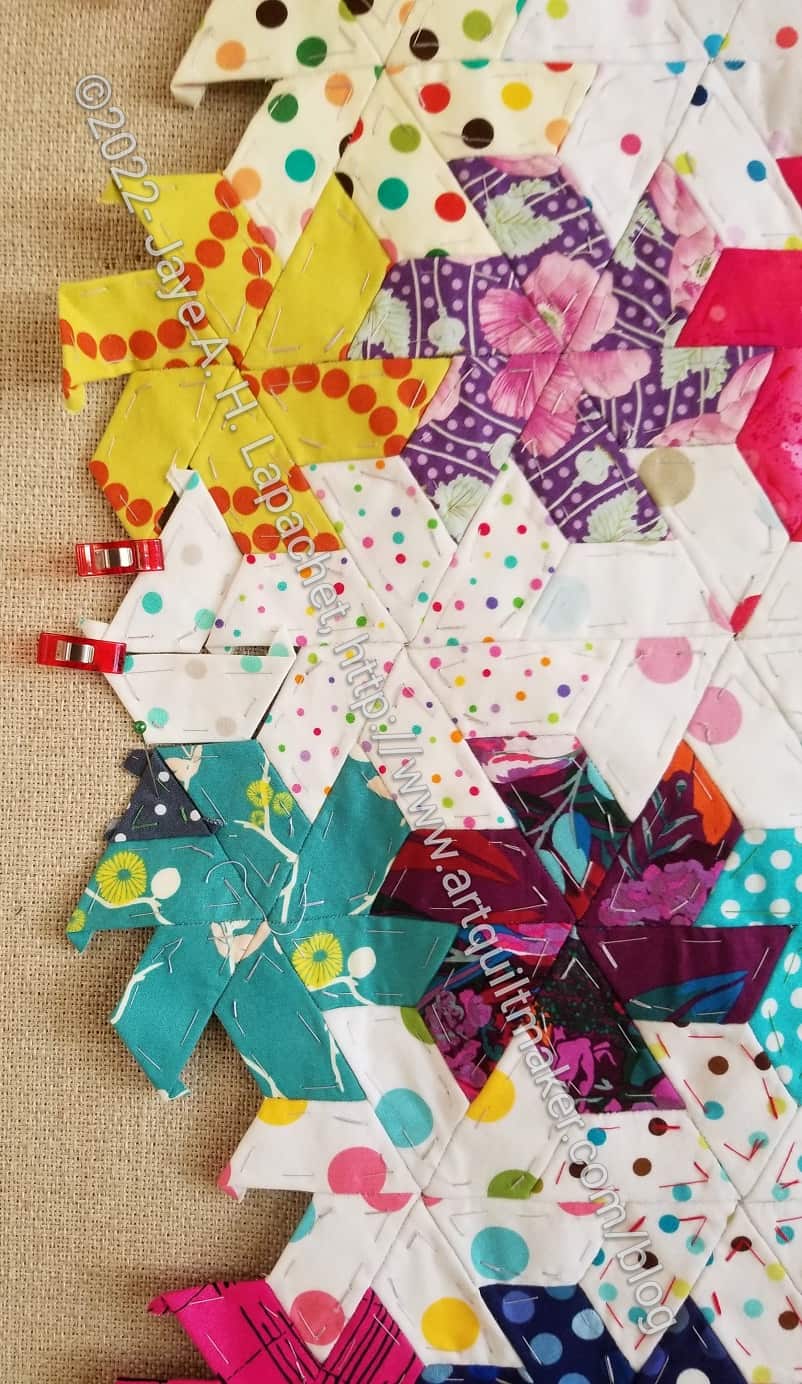
For the sides, I thought about putting a couple of the half hexie pieces using background fabric in to the sides as a way of getting the sides to be more square. I even sewed some as a test. I was going to go with that solution, which would have made a gentle zig zag edge. I didn’t feel it was an ideal solution.

Then Lindsay arrived and we discussed it further. She thought I could add in the triangles and diamonds without the background pieces. It wouldn’t make the edge square, but there would still be a gentle zigzag. The triangles and diamond pieces would match the look of the bottom better. I like this idea much better and will work on it.
Finally Mary C said that I could use the edge as is – already folded under – and fold the backing under, then whip stitch the top and bottom together rather than applying a standard binding. I think this is a really good idea. If I can work with Colleen to make it happen, I will.
I am pleased with the various solutions. I am also glad that I will be done with this top soon.
Really nice.
Thanks!
This is such an amazing piece, I love how it’s ending up with your finishing plan.
Thanks! I am so relieved to have a plan.