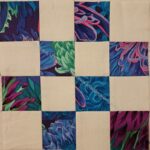
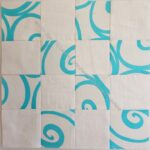
I don’t know if I started off strong or not. I am diligently using 2.5 inch squares as leaders and enders, so I am slowly working up a nice stack of blocks.
Commentary about works in progress, design & creativity
I don’t know if I started off strong or not. I am diligently using 2.5 inch squares as leaders and enders, so I am slowly working up a nice stack of blocks.
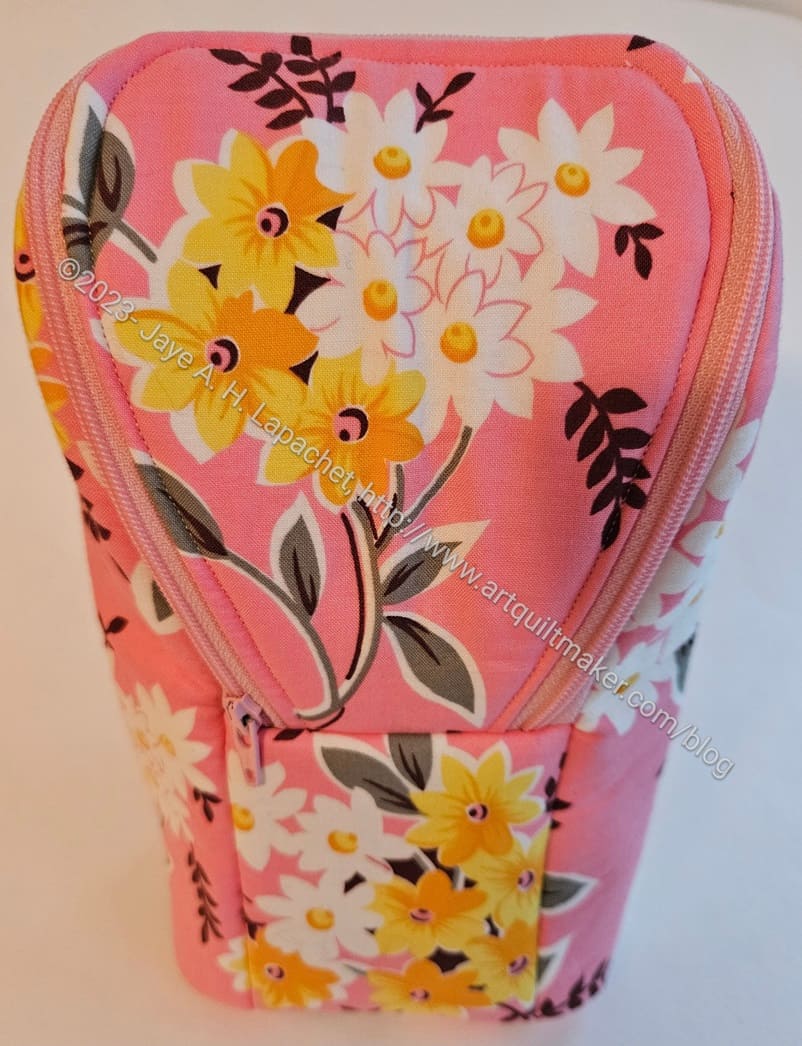
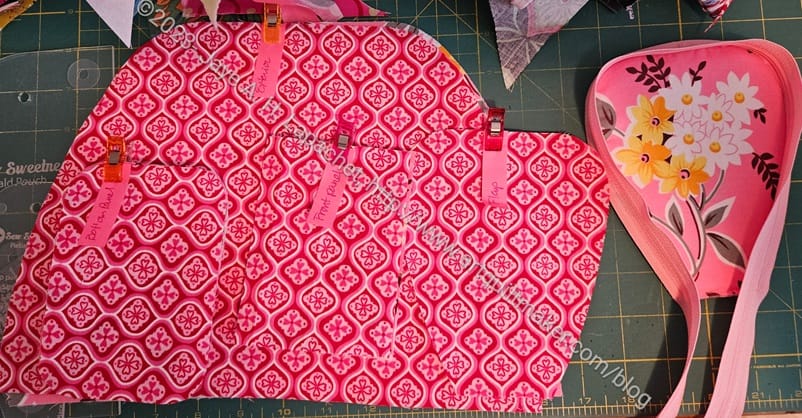
This Pink Piebald went really quickly and I am pleased. There are a couple of techniques I need to practice and some other things I want to do differently to make this pattern more to my liking.
I am super pleased with the fussy cutting on the front. The flap is big enough for a whole spray of flowers, which I think adds a nice look to the pouch.
The front panel has less space, but I was able to center flowers on the whole piece.
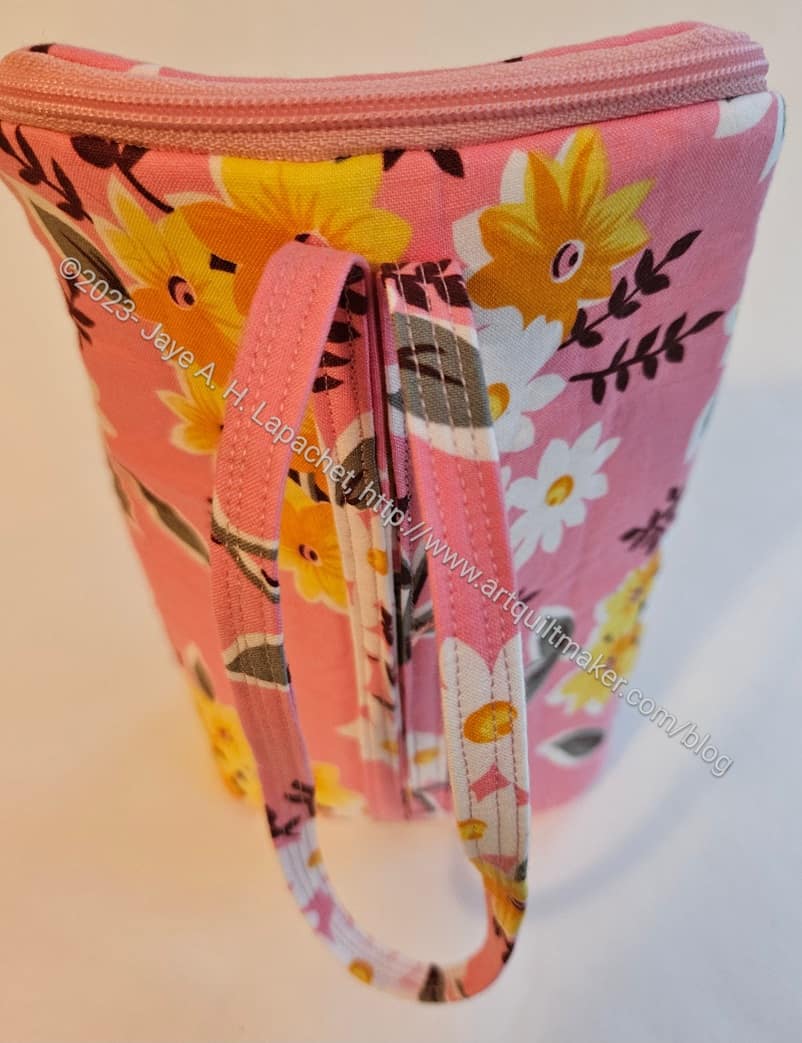
The back requires a much larger piece of fabric and I didn’t really fussy cut it. I didn’t think it needed the extra care since the back is partially covered by the strap. I did try to center one of the motifs, though the strap means you can’t really see it.
As mentioned, the strap is longer than the pattern shows. I tested it out as a wristlet and I think it will work. SIL#4 knits and I thought it might be a good project-on-the-go bag. I am going to ask her. The audience for this bag won’t really care or notice, I don’t think. I think they will be pleased they can use the pouch as a small purse.

I ended up making the inside (lining) from the fabric I originally planned to use for the exterior. It is a little darker than I usually use, but I didn’t want to waste the pieces I had already cut. I think next time, I will see about fussy cutting a surprise onto the flap lining.
As a reminder, this pattern is from Sew Sweetness and is from Minikins Season 3.
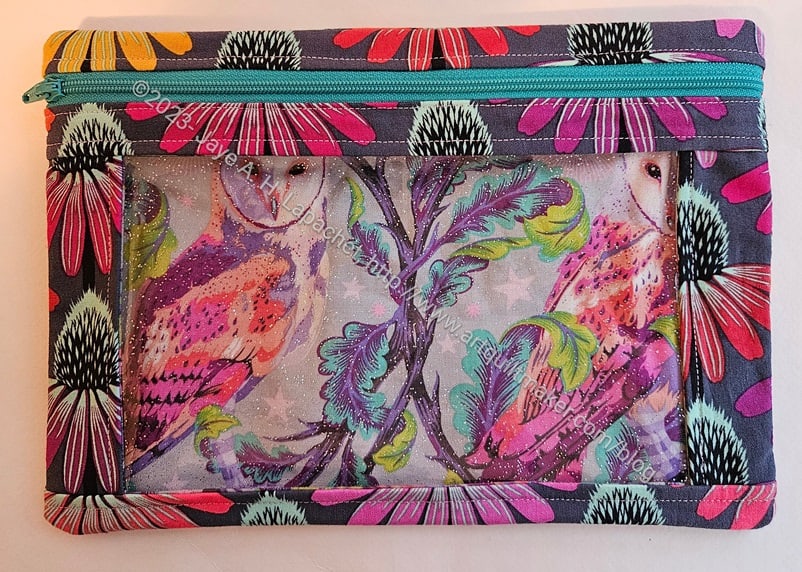
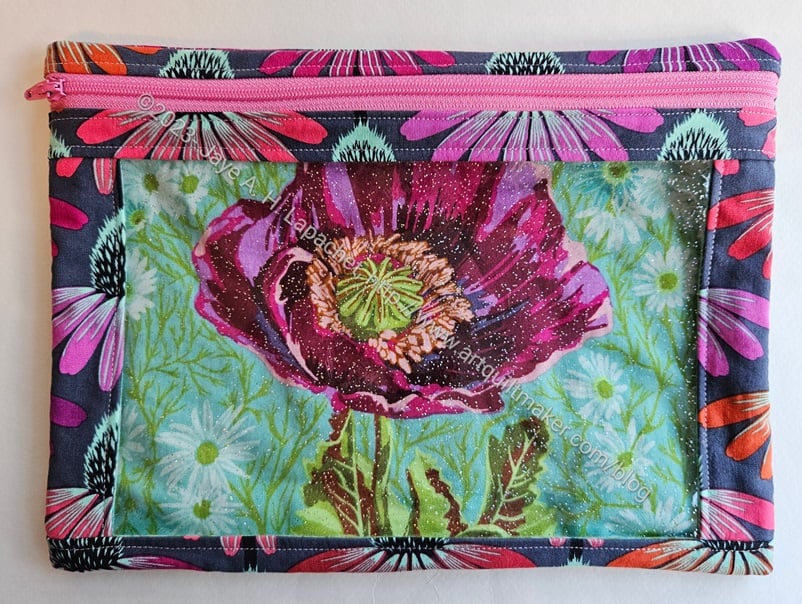
If you ever watch the TV show Ghosts, you will know Flower. I watched the beginning episode of the season and decided that some Tula owl fabric would be good for this latest I Spy.
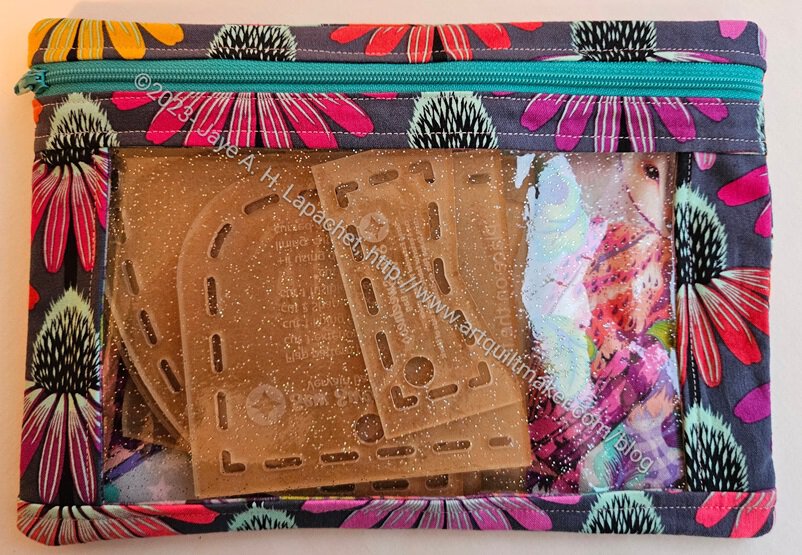
I know I always say that I don’t want animals looking at me from my quilts, but these I Spy pouches seem to be immune. Anyway, the owls will most be covered by the Vervain templates that now live in this pouch.
I know I have said this before, but these pouches make me really happy.
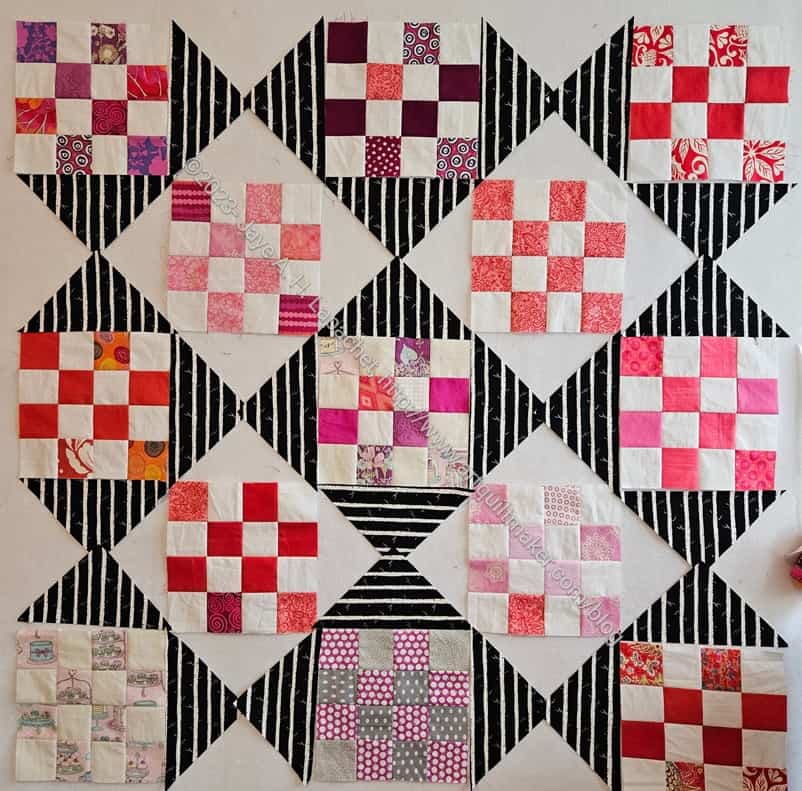
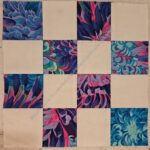
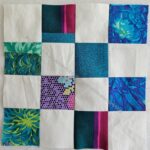
I started the fourth QST donation quilt. I wanted to use the pink 16 patches I had been making and this pattern is still interesting enough for me to want to make another top.
I am quite enamored of pink lately, for some reason. I am going with the flow and not trying to fight off the urge to use some pink.

I thought about using something other than white for the background, so I did a little testing. It didn’t really work out, so I ended up going with white.
I am glad I used my mantra “make visual decisions visually”. Even a solid (lower left hand corner) was a little too much pink for me. I could have tried other pinks, but decided just to get it done, so I cut up some white.
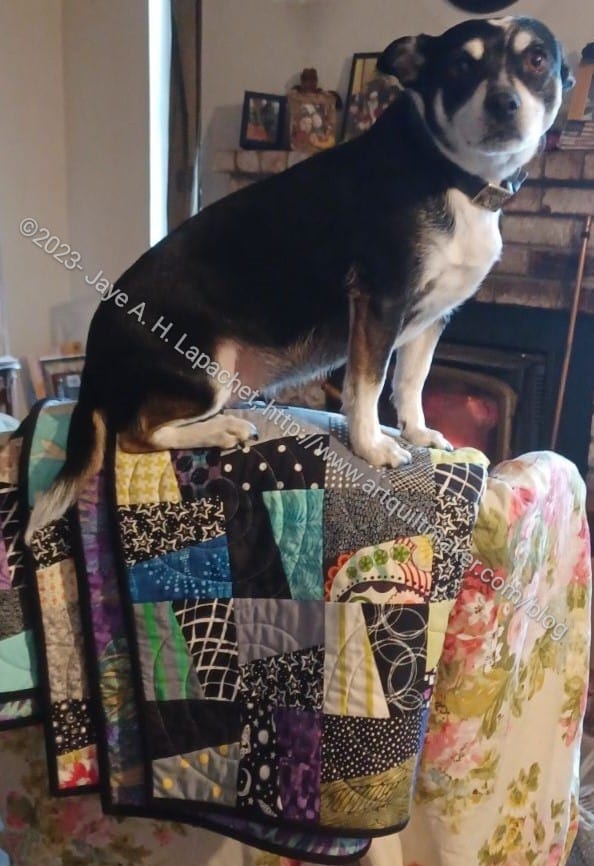
My dog-sister, Tootsie, was caught on camera sitting on my stepdad’s Windmill quilt. She is a piece of work!
My mom thought that I would be angry seeing the dog on the quilt. I wasn’t. I knew that the dog wouldn’t have been on the quilt for long as one of the Parental Units would have shooed her off.
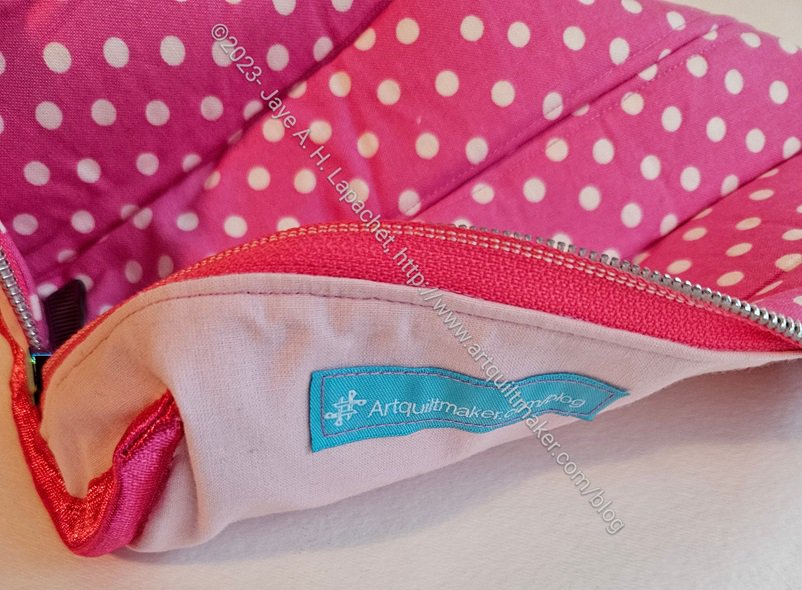
I started sewing the newest Piebald pouch with a little trepidation. I remember finding the project hard when I made it before.
I started out with the fabric you see as the exterior. I wasn’t super happy with it, but couldn’t think what else to use. I didn’t want to use the pink dots again as I didn’t want to feel like I had to use them in every project. I am super happy I thought of the Flea Market Fancy from Denyse Schmidt for the exterior. It is working very well, especially because I wanted to fussy cut the flap and the front panel.
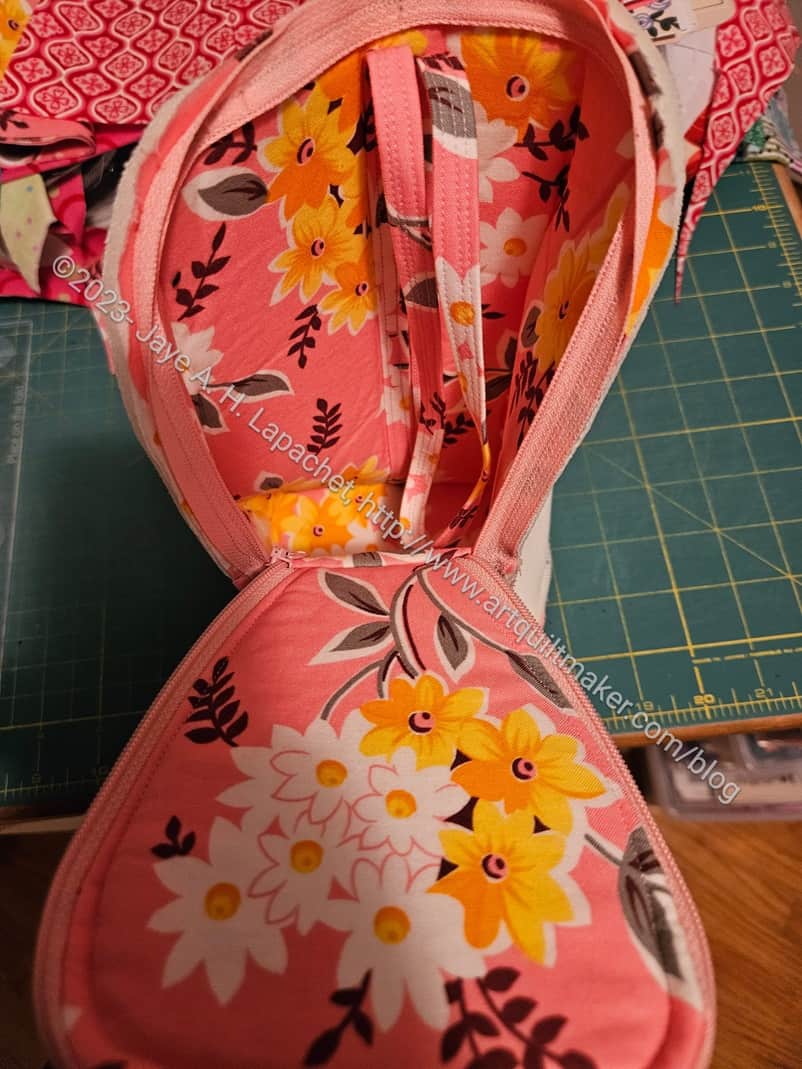
I am also happy that Sara uses the same size pieces for the lining and the exterior. I just switched the exterior fabric to the lining with no problem.
The sewing is going much better than I expected. Quickly I had the exterior standing up and ready for the lining.
One thing that was confusing was the handle. I think I measured correctly, but it came out much longer than the picture shows. I decided to keep it and call the extra length a wristlet.
I finally made something for myself.
This is the Bluestem pouch pattern from Sew Sweetness. As mentioned when I made the pink one recently, it is part of Minikins Season 4.
I plan to use this pouch for my pens, post-its and other bits an pieces that I take to guild meetings and Sew Day.
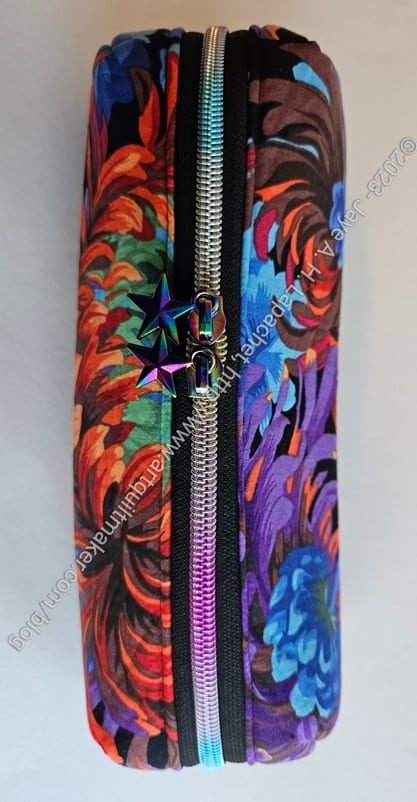
I decided on the fabrics as part of the latest President’s Challenge at the guild. I have had some of the Chrysanthemum fabric for awhile, but I got another piece for my birthday. The goal of the President’s 2024 Challenge is to get people to ‘use the good stuff’. I have been trying to do that, but it is difficult. When I started this pouch, the day had come to do it.
I am taking the President’s 2024 Challenge a bit farther in that I am also using the fun zippers I have been buying. I really like those rainbow zippers. The new zipper pulls also look great.
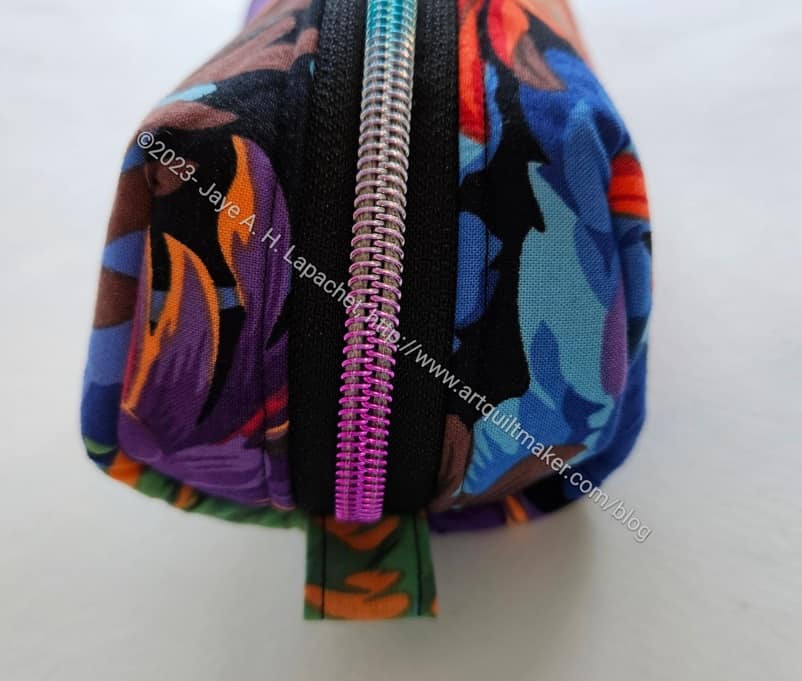
I used the orange stitch fabric, because I like it. I have used some of it, but also tend to hoard that particular print. I decided I could enjoy looking at it as I used the pouch just as well as when I came across it in my fabric closet.
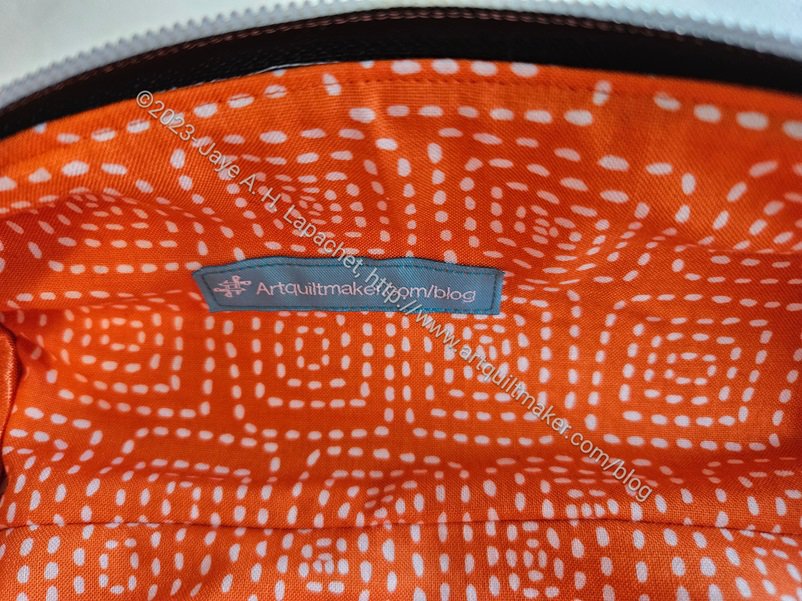
I remembered to put a label on the lining before I sewed the lining together, which makes me smile.
I am struggling a little with covering the inside raw edges. Still practice makes perfect, right?
Knowing other librarians is a good thing! I have a new acquaintance who works at the Fine Arts Museums of San Francisco. These museums include the deYoung and the Legion of Honor. I recently saw that the deYoung was exhibiting Fashioning San Francisco: A Century of Style. It is about haute couture worn in San Francisco. I love seeing these types of dresses, so when we were emailing back and forth I mentioned a forthcoming (mythical) trip. My acquaintance offered FREE tickets. I was thrilled and took her up on it right away.
Of course, the day we chose turned out to be one of the worst weather days of the season. We went anyway. We drove carefully and at a moderate speed. We had no problems on the way there or back. I appreciated the all wheel drive of my Subaru and the fact that I didn’t have to drive on dirt roads.
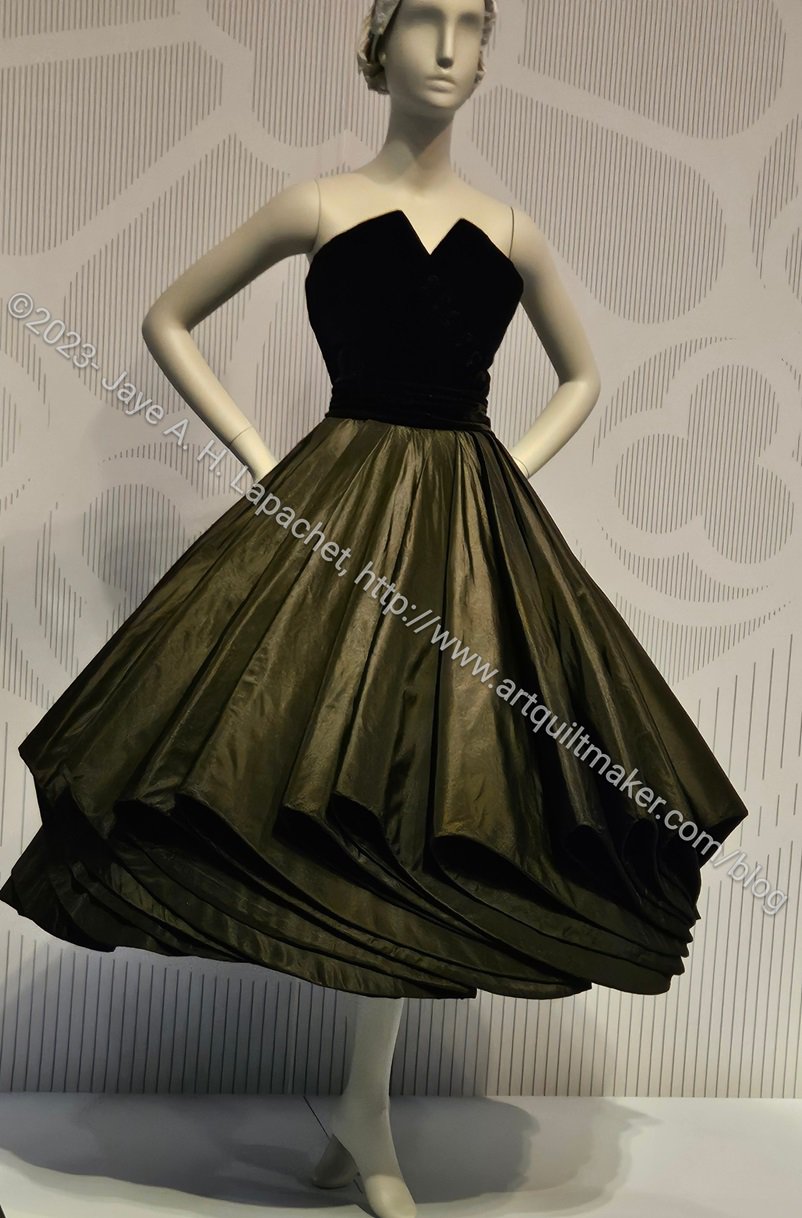
The exhibit was nominally arranged by time period. That was clear at the beginning and at the end, but the time period of ball gowns are hard to pinpoint.
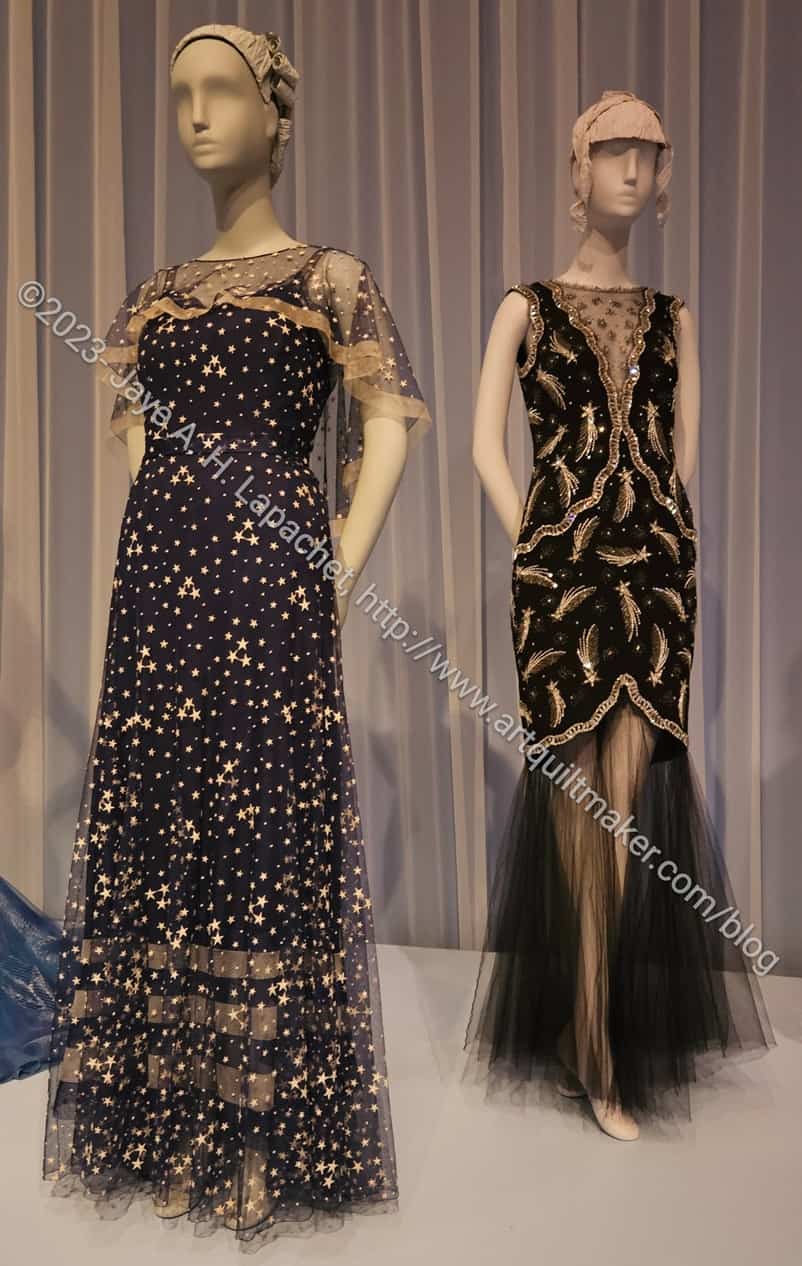
I really liked the use of sheer fabrics such as tulle in the various dresses. I think the technique provides structure and wearability to gowns, but also adds interest. Skating dresses use this technique a lot to show off skin without encouraging a wardrobe malfunction.
The neck insert in the dress above on the right gives the idea that cleavage is being shown off, without providing any access. Am I slightly prudish? Yes, a bit. I don’t like men leering at me and that affects the type of dresses I like and want to wear. I prefer an air of mystery when I dress up.

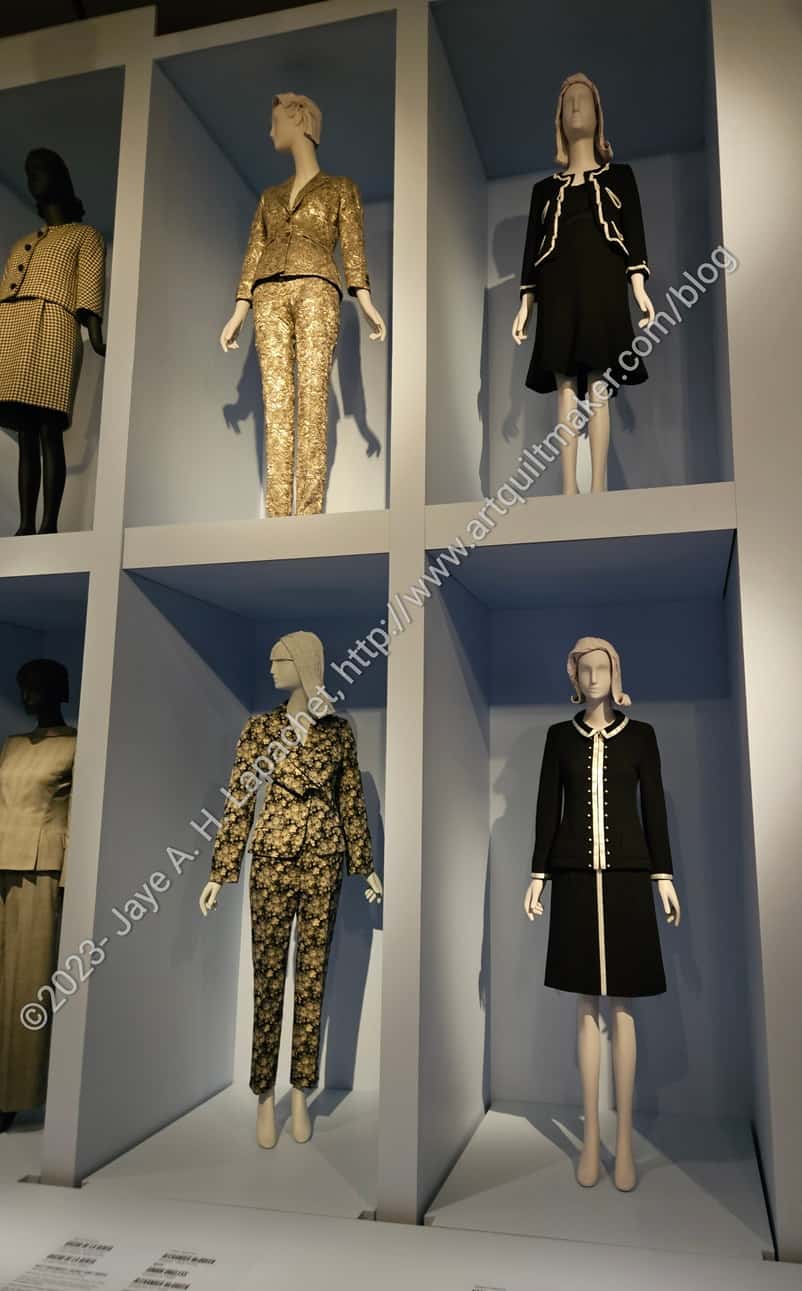
I am definitely a Christian Dior girl. I really liked the simple lines of the designs they exhibited.
The dress in the center is wonderful! I am not a fan of the color, but really like the design. I’d love a cocktail length dress with the same design as the bodice.
I also like the dress on the left. I can do without the color, but the simple lines in turquoise would be fabulous.
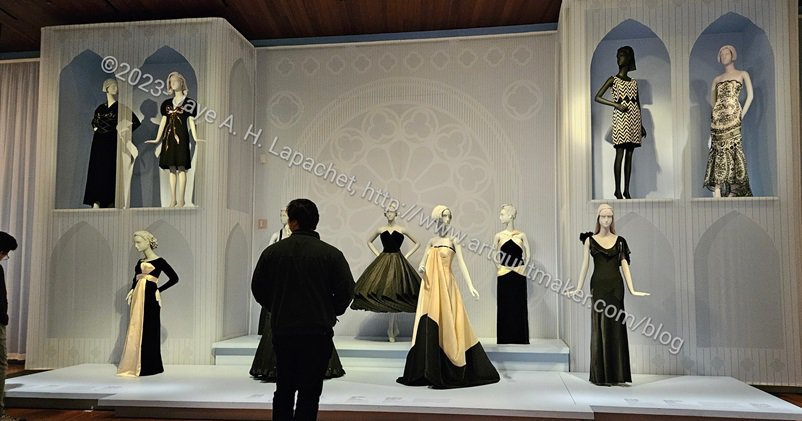
I also like Little Black Dresses. There was a description of how they came about, which I thought was interesting. I liked most of the more form fitting examples of these LBDs. I could do without the center dress that is super drapey. I know these are all art, but I can’t help, but think about wearing them. All of these dresses were worn, but I can’t imagine wearing the cream and black one in the center above without a couple of pages to hold up my hem.
When I was running my most recent quilt class, I wanted to add more classes so my students would be well prepared for designing their own quilts. I kept trying to think of quilt blocks that required different techniques. One block they did not want to learn was Cathedral Windows. Next time I teach the class, I’ll teach that technique as a pincushion rather than a block. I think that will be more appealing and pincushions are also fun.
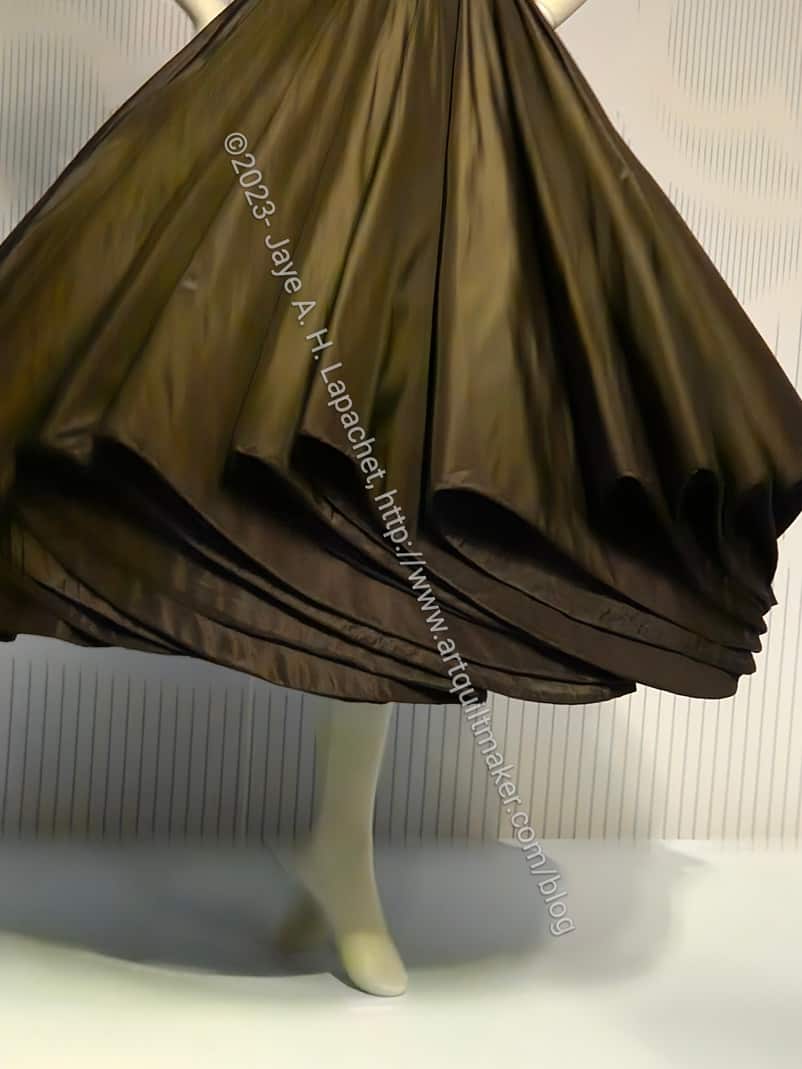
One of the dresses made me think about whether or not I could add a technique that looked like the hem of the dress. First, I love the simplicity of this dress. While I don’t love strapless dresses, this one has structure, so I might even wear it.
I suspect, however, that the star is the skirt and that someone taller than me would really do this dress justice. What embellishment does the skirt remind you about?
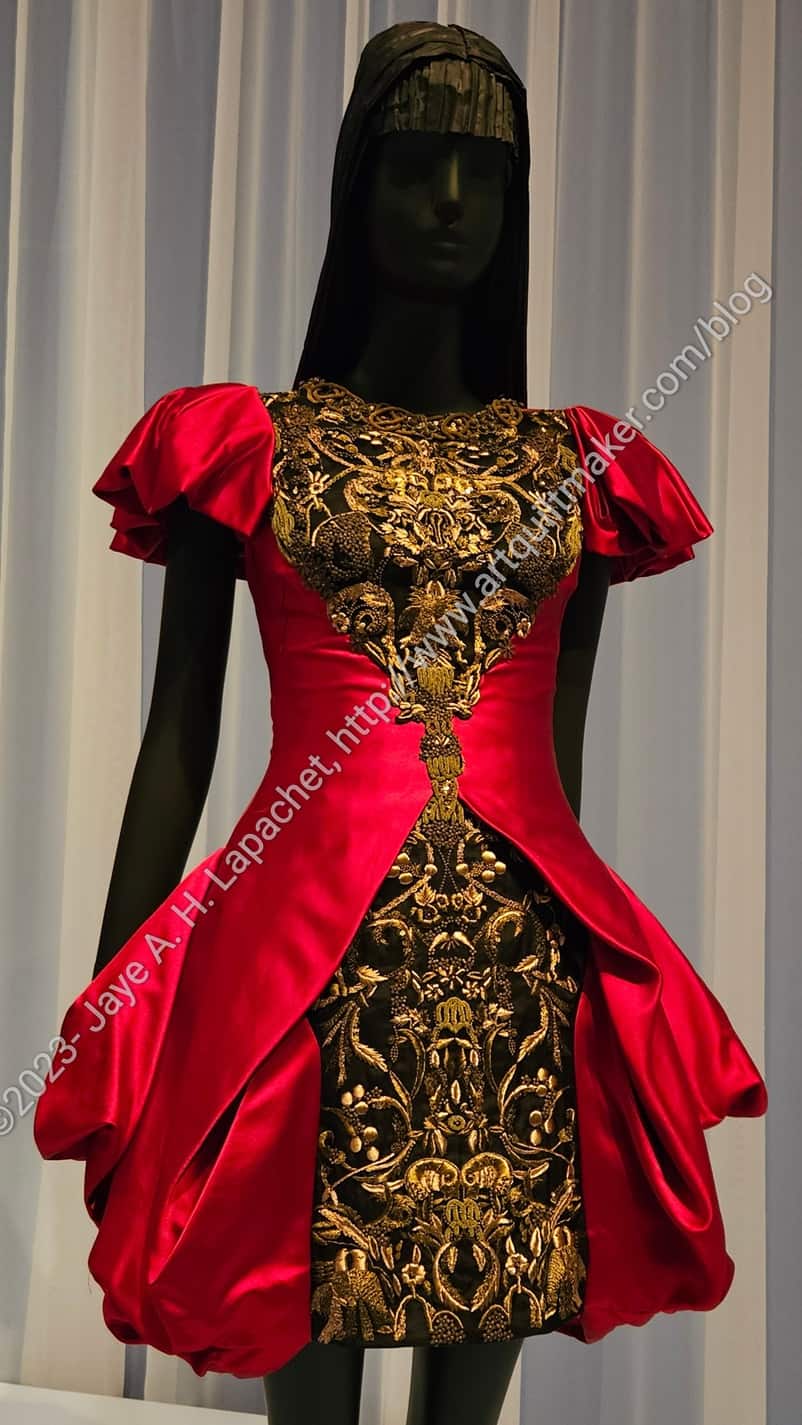
I wasn’t a fan of the more modern arty dress designs. One dress had no stitching. It was held together with staples and grommets. As mentioned, I can’t help thinking about wearability. That being said, I did like this Alexander McQueen mini dress.
It looks fairly wearable. It is short, but not TOO short. I like that it has a rounded neckline close to the neck, isn’t strapless and has sleeves.
I also like the texture of the lace contrasted with the red ‘coat’ over it. The shininess of both materials make it look perfect for a black tie event.
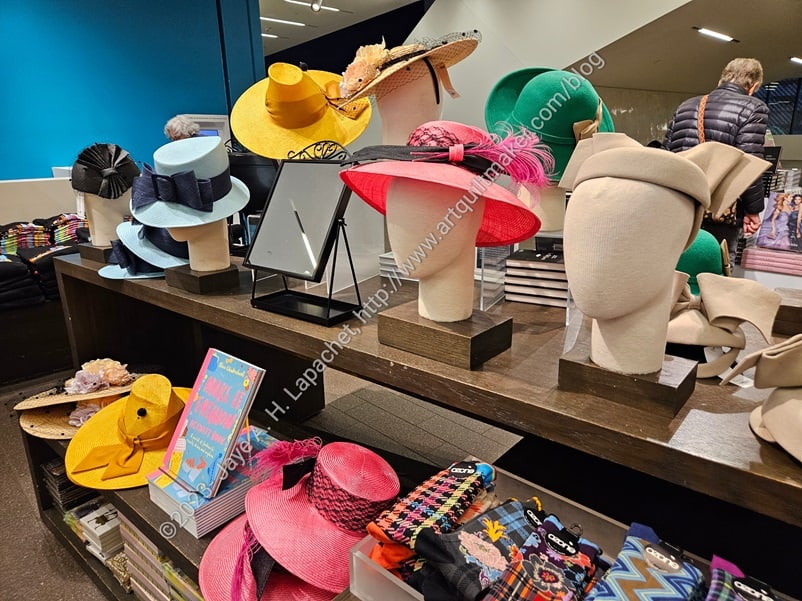
I had to look at the gift shop. I am always on the hunt for postcards. I found a few, but they never seem to have the ones I really want. I did see a display of 1940s style HATS in the gift shop. I was amused, but also tempted.
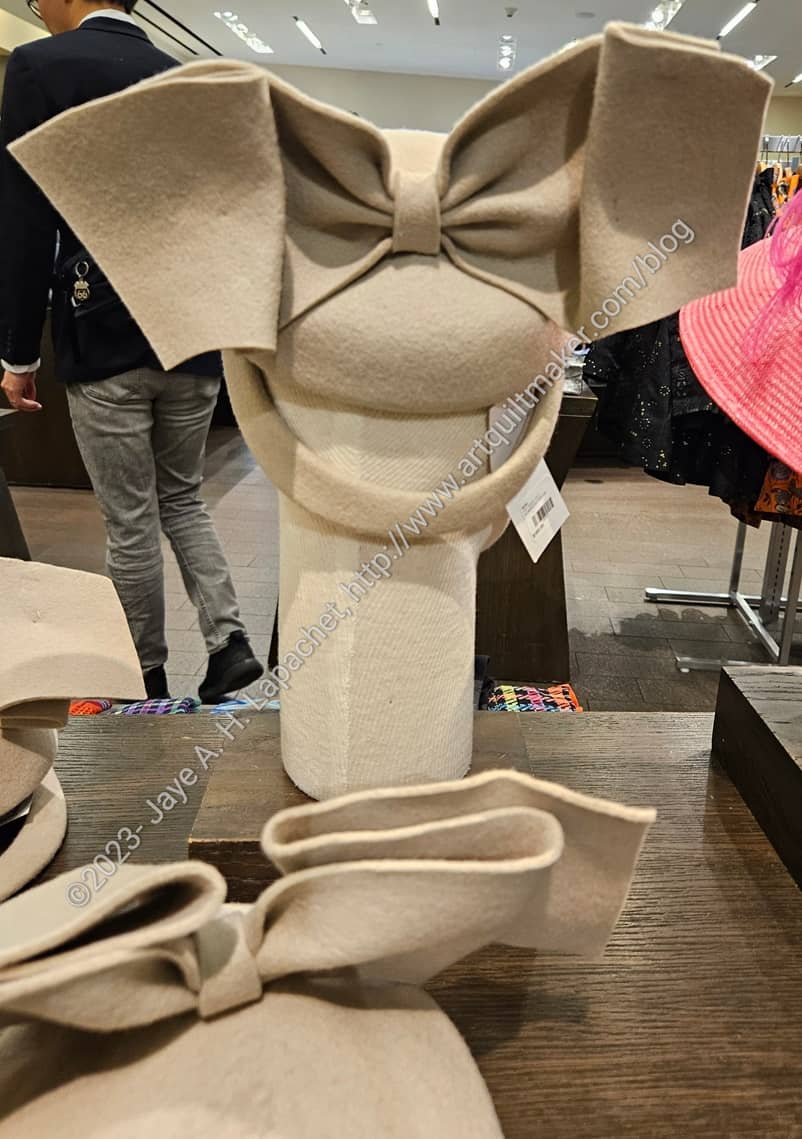
The beige hat, right side, in the photo above would be great in black. It has a fantastic bow on the back. I took a photo, because I wondered if I could use the shape as an embellishment for a bag or pouch.
Yes, I wanted the catalog, because it was big lush and fabulous. Also, I love these kinds of books that mesh fashion or pop culture with history. I knew I would only look at it a few times and wouldn’t really read it until I was old and grey. I’ll check it out of the library.
I mourned the loss of sewing time, but really got inspired by viewing the exhibit. I did enjoy spending time with DH as well.
I had to go to the office twice last week. That sound so weird to say after years of going 4-5 days per week. Anyway, I always sit near a friend so we can chat if either of us can get a break.
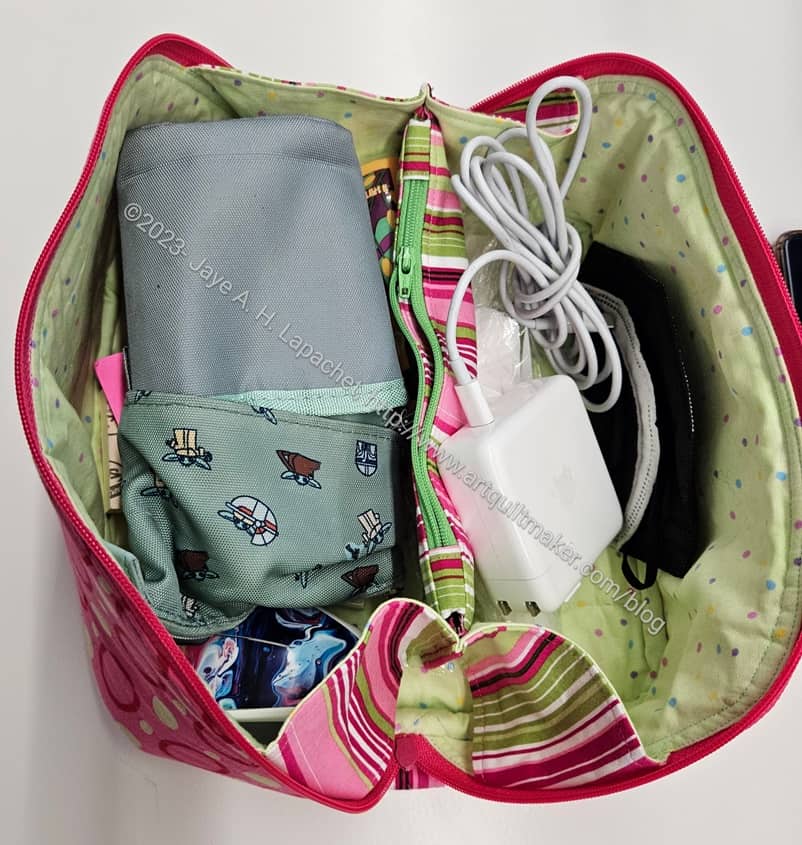
She had her Enigma with her and was using if for all the computer bits and bobs we have to haul around.
I am so glad she is finding it useful.
Am I on fire? I don’t know. I just keep cutting out bags and sewing them together.
I am doing a series of pink bags and pouches for a project that I will tell you about later.
This one is the Piebald pouch. I made one for my friend before and have been wanting to make another. As I was combing through my I Spy pouches full of templates, I came across the Piebald templates and thought it was a sign.
I cut out most of the pieces at lunch one day this week, including some Denyse Schmidt Flea Market Fancy in pink. DH was out on Wednesday night so I started sewing. The more Sew Sweetness bags I make, the easier the new ones are.
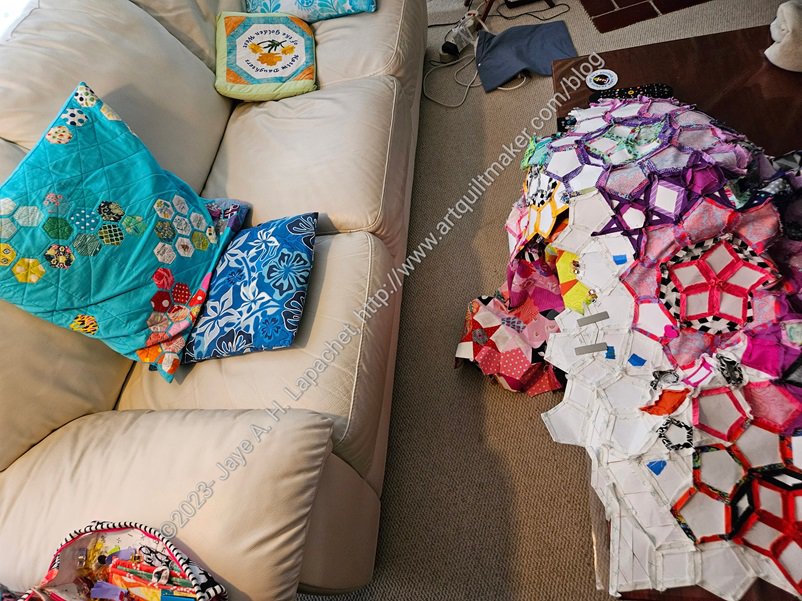
The other day I talked about working on La Pass. I was feeling some kinship with women who worked on large projects in small spaces as I worked on it after laying out the border.
This is what it looks like when I work on it in our living room. The quilt takes up the whole coffee table and my supplies are on the table next to where I sit. In the photo you can see my Sew Together bag in the bottom left. A larger table would be better, but it works as is.
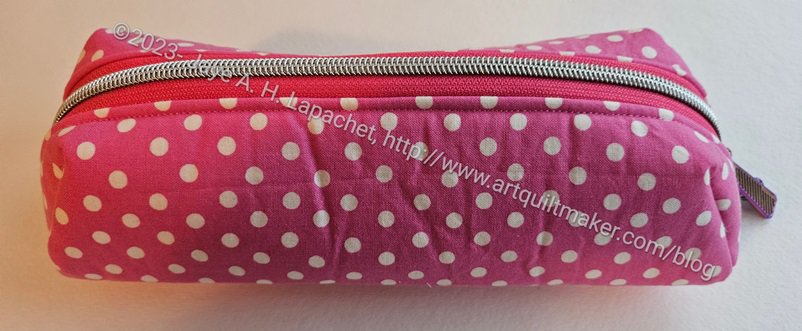
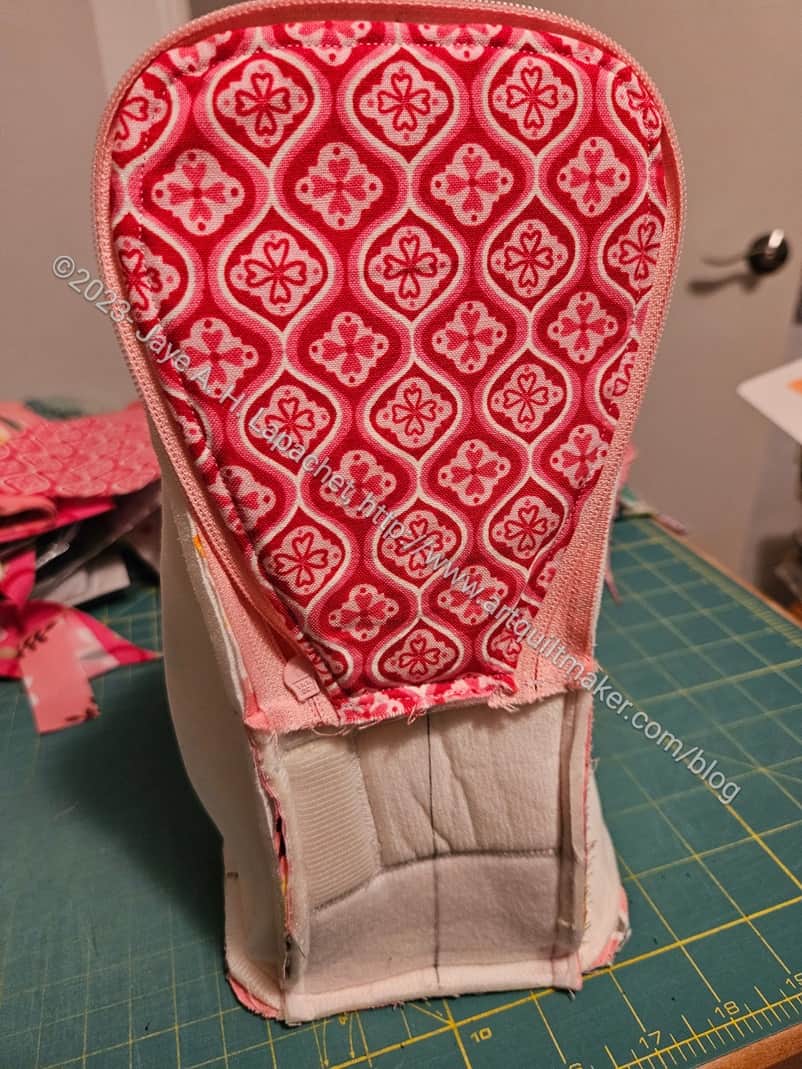
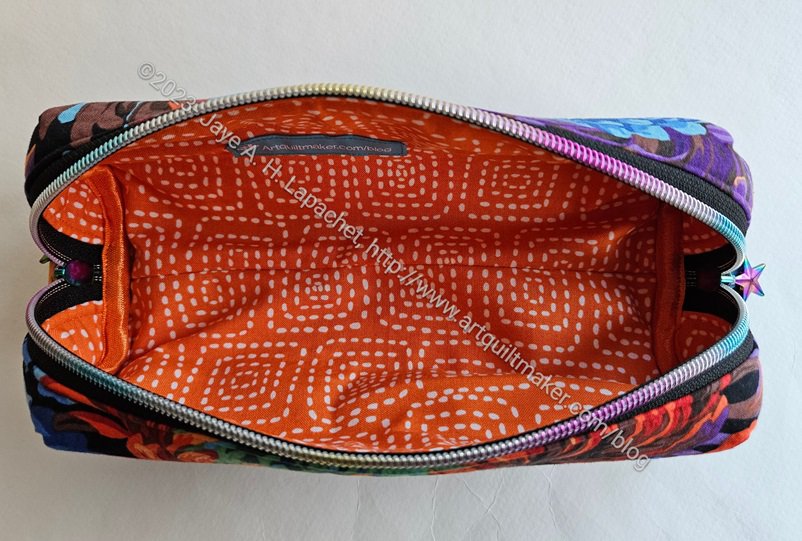
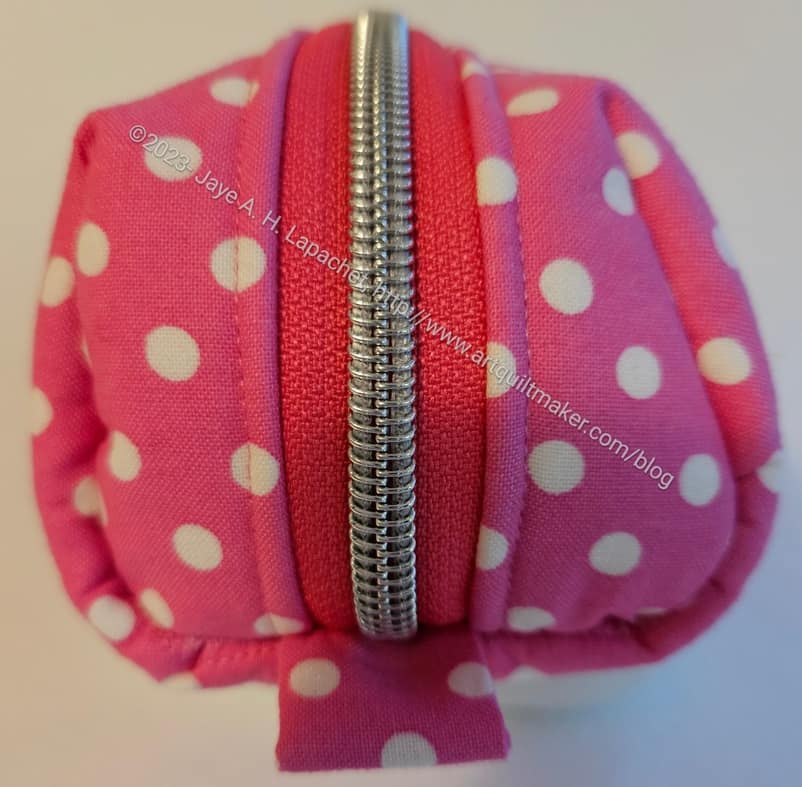
I finished the first Bluestem. It is a small (pens would fit well), firm pouch with the opportunity to use fun zippers and zipper pulls.
I have the idea to make a group of pink bags for a fundraiser or raffle gift and this is the first of the possibilities.
This pouch doesn’t take very long to make. The main pattern piece is an odd shape and I couldn’t imagine how the bag would be put together. I had to watch the video and that helped a lot.
I have to say that, unlike other Sew Sweetness Squad members, I don’t watch the whole video before I make a bag. I just get started, then watch the parts that I need to watch when I am confused by the directions. Sometimes I feel bad about that, but it works for me.
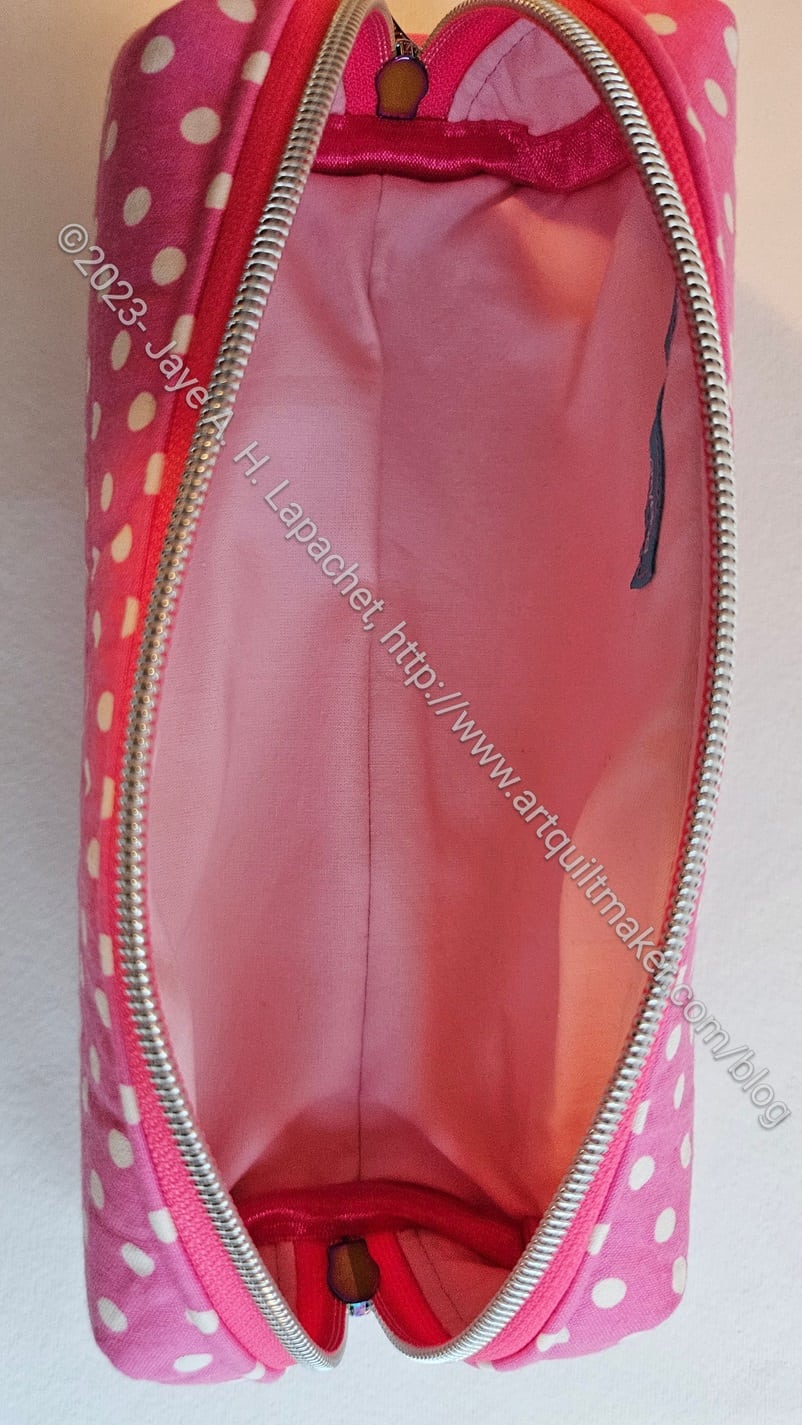
The construction made me worry about raw edges at first, but Sara uses some doublefold (foldover) elastic** to cover the inside raw edges. I am not great at that part of the process, but I am getting better!
You can see the foldover elastic peeking out at the top of the photo, left.
I am pleased with that pale pink solid. It’s from Art Gallery and just looks perfect.
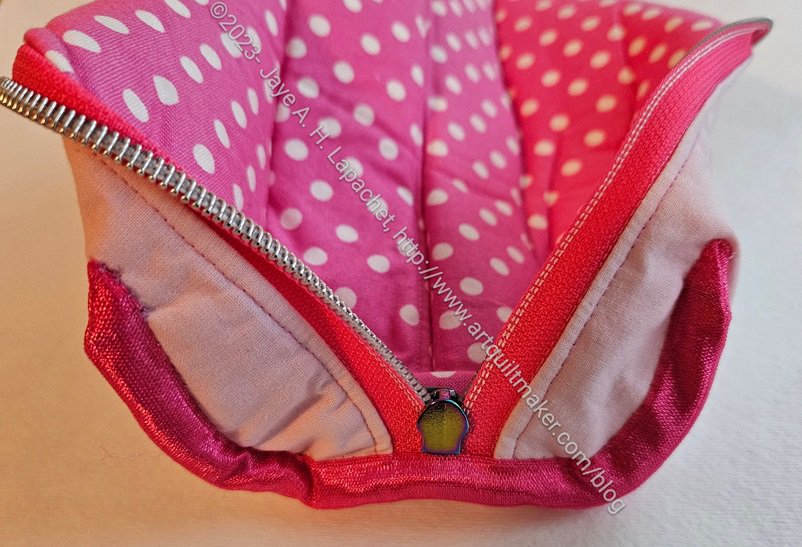
I am also pleased with how the zipper and the foldover elastic came out together. I admit that I hand stitched one side of the elastic. I just wasn’t confident to stitch both sides at once on the machine. I plan to make more of these, so I’ll get there.
I also remembered to add a label!
**N. B. : Obviously, you should shop at local quilt shops and small businesses. However, if you are too busy or can’t find what you need there, I use Amazon affiliate links and may be paid for your purchase of an item when you click on an item’s link in my post. There is no additional cost to you for clicking or purchasing items I recommend. I appreciate your clicks and purchases as it helps support this blog.
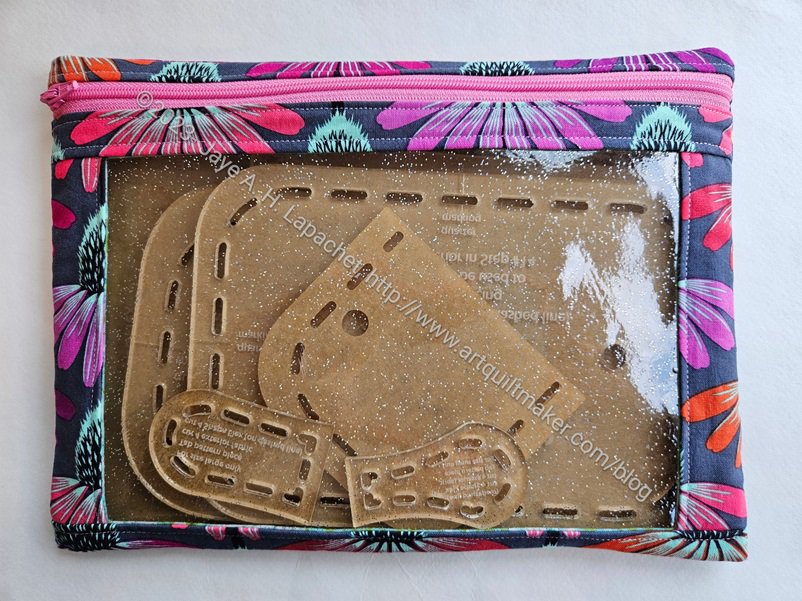
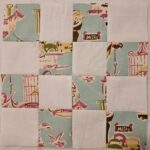
I got some new templates this week, which means I needed a new I Spy pouch in which to store them.
I cut this pouch out after work on Monday and sewed it up during Craft Night. I only had to whip stitch the bottom closed and I could fill up the bag with my templates.
I made an effort to make the window (lining) fabric look good and used some fabric I received for Christmas. Normally, the fabric isn’t seen, but I wanted to make this super pretty.
I am planning to make another pouch for the other set of templates. I could have made two at a time, but I thought I would have to adjust the size and I didn’t want to worry about that on Monday. I just wanted to sew.
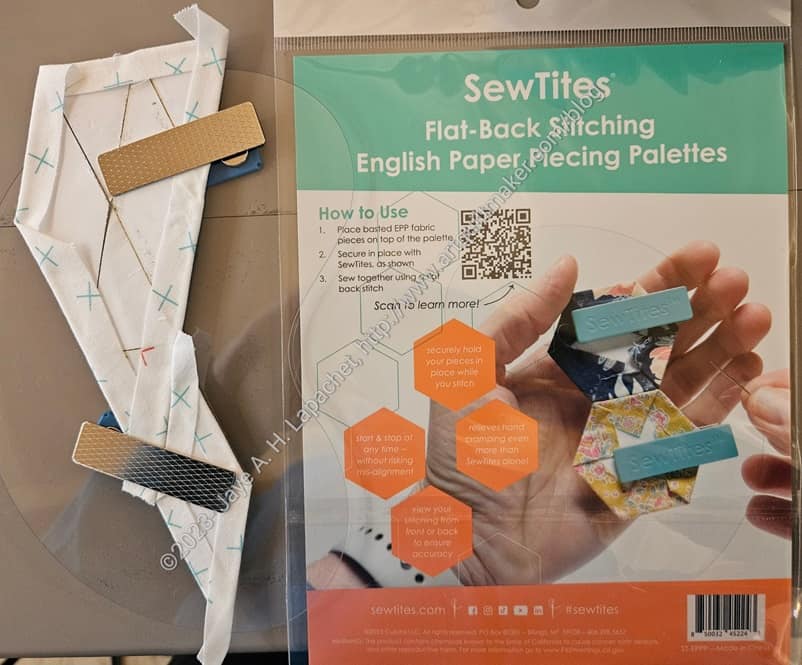
I received a Sew Tites EPP Palette** for Christmas from Julie. I wasn’t able to try it out until I was able to get back to the La Passacaglia border.
The package comes with 3 different palettes of varying sizes. They are a kind of kidney shaped and made from thin plastic.
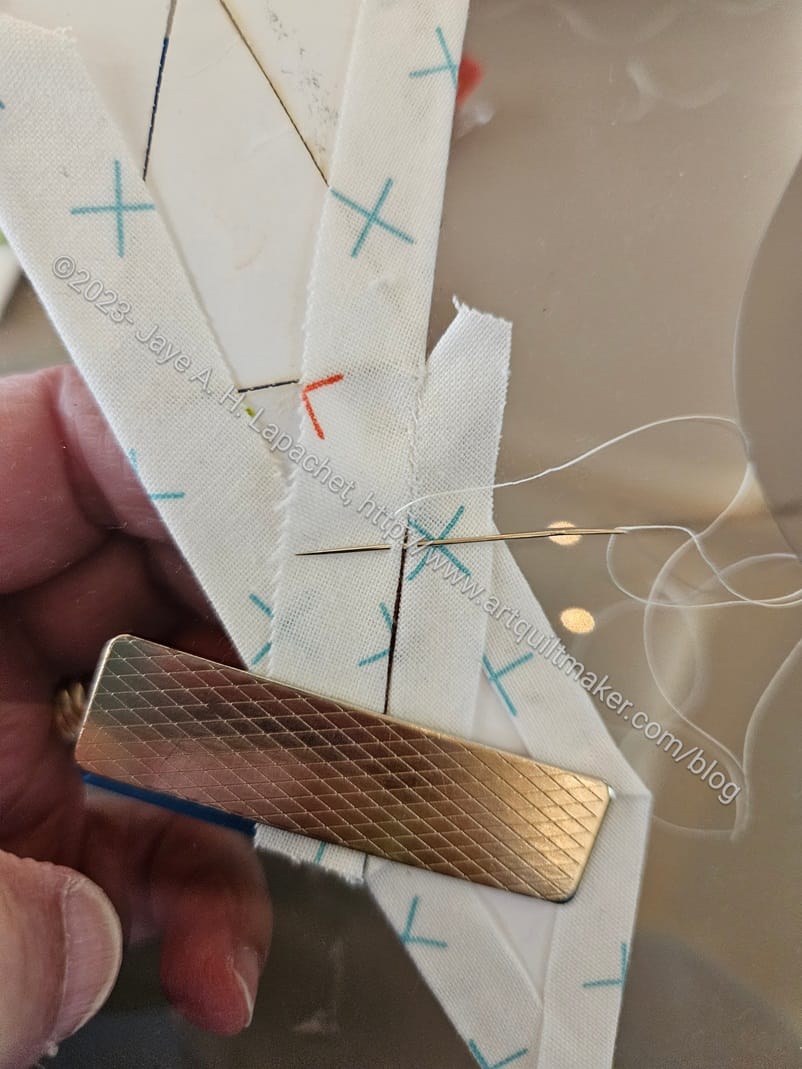
There is a lot to hold when stitching EPP pieces together and it is very easy for the pieces to get out of alignment. I found that using one of these to start stitching is super useful. I have started to use it to anchor a few pieces in place while I get started stitching them together. Once I am about halfway through the seam, I take the piece off the palette and continue stitching. By that time, I need a little bit of play in the pieces.
Another benefit is the Sew Tite magnets have something on which to hold besides the EPP pieces themselves. You can see in the photo above that only about 2/3s of the magnet is on the EPP pieces. Without the palette, the magnets move around more.
This is a good tool and I am really glad I have one.
**N. B. : Obviously, you should shop at local quilt shops and small businesses. However, if you are too busy or can’t find what you need there, I use Amazon affiliate links and may be paid for your purchase of an item when you click on an item’s link in my post. There is no additional cost to you for clicking or purchasing items I recommend. I appreciate your clicks and purchases as it helps support this blog.
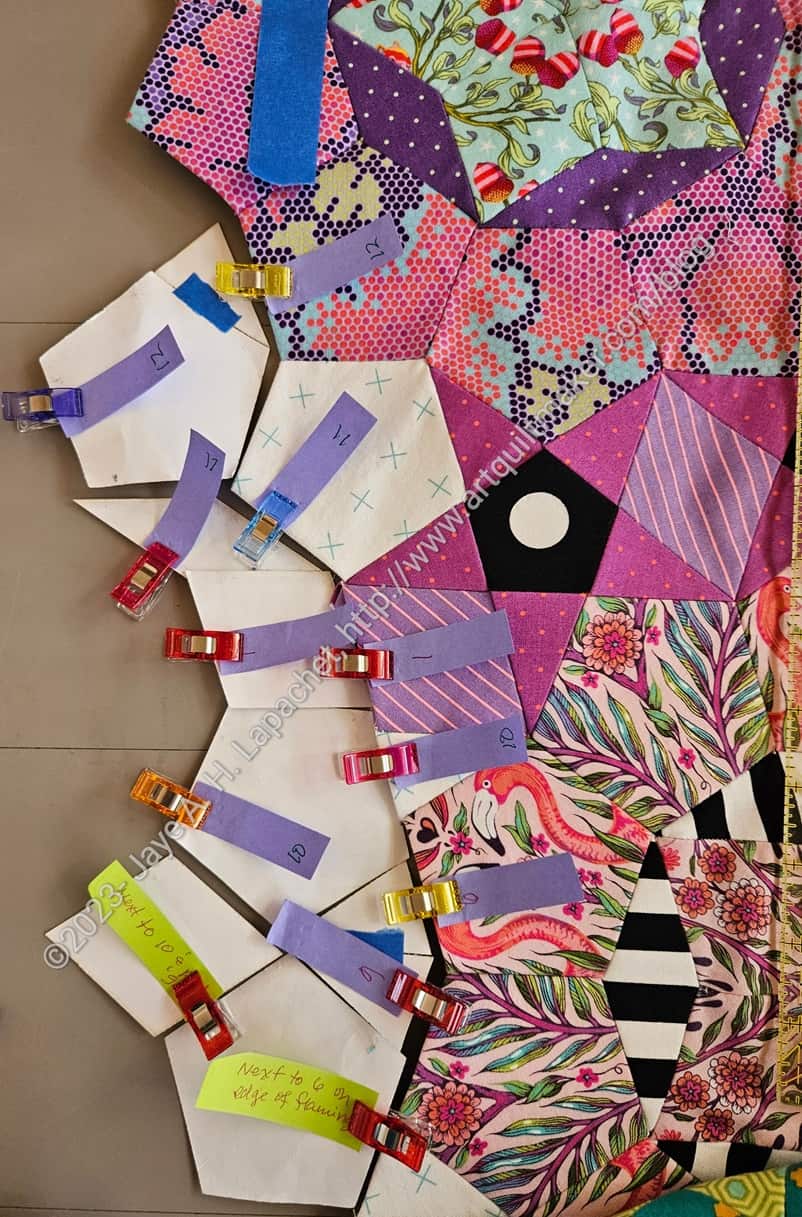
I finally started working on the La Pass Border again. I took the quilt and all the supplies to Sew Day and laid out the pieces for another section of the La Pass border.
As I explained, I lay out the paper pieces I need, label them, then do the basting and, finally, the sewing.
I am about to reach another side of the quilt where I already worked on the border. I don’t know if I am done with that side yet. If nothing else, I am finishing my first pass. I may need to continue and get to a point where I can add a straight piece of border on each side.
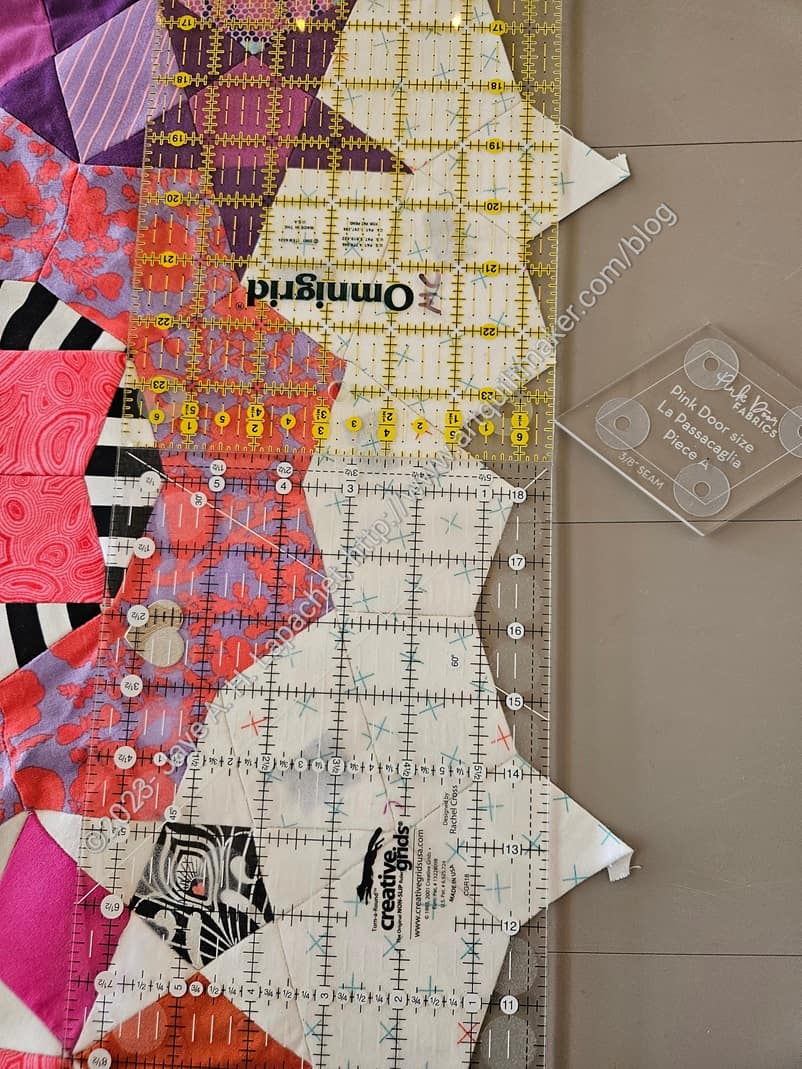
I am thinking of trimming. One of the good things about working on this at Sew Day is that I can lay a bunch of the piece out and see more of what I am doing. At home, I need to lay it out on the floor and at the moment, there isn’t space.
In this image, I thought maybe I had enough of a border. However, I think I may need to add more later.
It is so nice to work on this again after dinner.