Pockets

Ultimate Carry All large Pocket #1

I spent the weekend working on my Ultimate Carry All Bag. I really needed to get on it since a few people have already finished it, like Cyndi. I am supposed to be one of the leaders, after all!

I already made the small front pocket, which is actually the third sewing step. As I think I mentioned, I don’t recommend skipping steps, but I needed to create the tutorial. Needs must.

Ultimate Carry All large Pocket #1 back

With the small front pocket done, I only needed to create the two larger pockets. The one shown above is pocket #1 and is almost finished. I haven’t sewn up the sides or made the pleat in the bottom.

The green pocket with the pink binding on the mesh is the back of pocket #1. This is a hack I added. There was nothing on the back of this pocket. I know I might put stuff in it and forget about it. Still, why not have more pockets? More pockets are better IMO.

Pocket #2 has the pen holder. I don’t like white elastic, so I used more of the ByAnnie double fold elastic. I like the variety of colors and the elasticity. I wasn’t sure I would put the pen holder elastic on, but I did. Actually, I shortened it and added another Clippy pocket I thought it would be useful.

I made a ton of t mistakes and a lot of ripping went on over the weekend. These pockets are not difficult, but the instructions are unique. Also, I am experiencing a low level of anxiety generally and that is making it hard for me to focus on something as complex as bagmaking. Working on the HRTs is satisfying and not too difficult.

Warm Spiky 16 Patch

The other day I talked about making some HRTs with the intention of making a new donation top. I got inspired by some 16 patches that I made while my subconscious worked on Frolic! I also have the Warm Windmill on my mind.

Warm Spiky 16 Patch on the design wall

For the past few days, I have been cutting and sewing HRTs and trying to relax. I am coming up with a quilt top that I really like.

Snip! Snip!

Cutting from Craft Night

The other night we tried Virtual Craft Night. I think it worked pretty well and I got some cutting done. Usually, we do handwork, but I wanted to get those Frolic! pieces cut. Since I was in my workroom with the computer, I decided to rotary cut. I balanced the computer on my cutting table and cut away.

The blue pieces are sets I need for the Frolic! half and quarter blocks. I still have to figure out the last few pieces. There are some blue and pinwheel pieces I need to cut as well; I am just not sure what exactly I need to cut.

Bonnie‘s directions are great; the problem is that I have already done part of the cutting for the full blocks. This means I need to figure out what I have left to cut. I couldn’t do it while on the virtual session with my friends. I had to think and that requires being alone.

The beige and orange pieces will be used to make another Spiky 16 Patch quilt. Yes, this will be another another non-Color Strip donation quilt. Some recent orange and red and pink donation blocks inspired me. I had to figure out how to cut those spiky rectangles all over again.

Traffic Jam Top Finished

Traffic Jam top finished

I finished Traffic Jam. This was an easy pattern and the quilt really went quickly, much more quickly than the Color Strip quilts.

This doesn’t mean I am giving up on those Scrap quilts. They are clearing out my scrap bins for something good. I just needed a break and wanted to play along with Vicki Holloway.

I made a back as well, so I get more fabric usage on my spreadsheet.

.

Frolic! Whole Blocks Done

I have been sewing a little each day on my lunch hour (who needs to eat?) and after work. It is keeping me sane while I help DH get used to working at home. A few seams a day really does make a difference.

Frolic! Whole Blocks

Now I am finished with all of the whole blocks. The next step is half and quarter blocks. Yes, I am going to make them.

Almost Perfect Binding

I am working on another Running with Scissors tote. Yes, I am a glutton for punishment.I am trying to get my head around the process.

I was able to get the stripes in order this time, which was great.

Running with Scissors tote binding

I also did the binding really well. I am pretty pleased with how it looks.

This time I did better , thought I still don’t have a handle on the process. It is as foreign to me this time as it was last time. I think this might mean I have to make another one. 🙂


Mini-Charms are NOT 2.5

Traffic Pattern block #1

As you know, I have been working on the Traffic Jam pattern. I am using Mini-Charms that have been laying around for awhile. One thing I know, but came to my attention again was that Mini-Charms are not 2.5 inches square. they are about 2.5 inches square, but not exactly.

I decided to ignore that fact on the first block and found that the 4.5 inch corner pieces didn’t fit. It should come as no surprise, but sometimes I need to see for myself. Sigh. Also, I often hope for a little magic. There was none to be found.

After taking apart the parts of the block I had sewed, I decided to trim the 4 patches. This can be tricky, so I took pictures of what I did.

Center Ruler over 4 Patch

First, I centered the ruler over the 4 Patch block.

I have the 4.5 x 8.5 inch Creative Grids ruler**  that fits my hand very well. I use it all the time so I also know it very well. By focusing on the total size of the 4 patch(4.5 inches), I was able to find the center of the block on the ruler.

You can see by looking at the 4.5 inch square that there are pinked edges outside of that line.

Prepare to cut other 2 sides of block

Next, I trimmed two sides and flipped the block around.

In the picture on the left, you can see that I have trimmed all four sides of the 4 Patch and it is exactly 4.5 inches square.

Also, I don’t have those pinked edges. This is now the perfect size and will fit with the 4.5 inch plain squares in the block above.

Trimming mini-charms

While I am on the subject, this concept applies to the single mini-charms as well.

You can see that the mini-charm is not exactly 2.5 inches. It needs to be trimmed. I trim all of my extra mini charms, so I have fewer problems when I put donation blocks together.

Don’t assume your patches are the right size. Measure and trim as needed.


**I use affiliate links and may be paid for your purchase of an item when you click on an item link in my post. There is no additional cost to you for clicking or purchasing items I recommend. I appreciate your clicks and purchases as it helps support this blog.

Blue Strip Donation Top/Back Complete

Blue Strip Donation Top

Last Friday, I think, I finished the top and back of the Blue Strip Donation quilt. the piece is going in my bag to take to guild if the meetings ever start up again. I am feeling a bit lonely today. I know the social distancing is important for the health of the country, but I need a little more interaction than I am getting.

Anyway.

I am really pleased with the way the top came out. I had a half yard of two different yellows. The one I used on the border is Califon by Mark Lipinski. I like it, but it was languishing, so I thought I might as well use it.

Blue Strip Donation Back

The back was super easy! I had one large piece of blue and just needed to add a little bit to make it bigger. WHEW! No back drama this time.

Finished: Warm Windmill

Finished: Warm Windmill

The Warm Windmill is finished. I think I already added it to my spreadsheet, so no additional fabric usage. I am pleased with the way it came out.

I need to figure out if I am going to keep it until I can show it at a guild meeting. I am getting a pileup of quilts around the house, so I am inclined to send it along to its new home. We’ll see.

Finished: Warm Windmill (back)

Traffic Jam in Process

No pinching the blog! There is green in these blocks. 🙂

In between piecing Frolic! over the weekend, I used the Traffic Jam pattern as leaders and enders. I used up my stash of Marmalade Dreams mini-charms as well as two other packs of mini-charms. I had to scrounge for additional mini-charms, because I was a little short of the Marmalade Dreams I needed to make a small donation quilt. I think it will be fine once it is finished.

Frolic! Moves Along

You probably think Frolic! is taking forever. I think it is so you wouldn’t be wrong!

Frolic! Mid March 2020

I pieced a lot this weekend, what with COVID-19 keeping me at home 24/7 (no, I am not sick, but everything is cancelled), I really had nothing else I wanted to do. I finally finished sewing together all of the whole blocks.

After not getting a response to my plea for the Amy Bradley fabric, I am cutting the last bits very carefully and scrounging every last bit. I won’t have enough to use for the half and quarter blocks, but I found another fabric that will work as well. It has a similar blue to the background of the Amy Bradley fabric, so will blend in.

Various & Sundry 2020 #4

Media

I read this essay on receiving a quilt as a gift and really thought it was spot on.

Remember Mel from the Great British Baking Show? Well, she is making a quilt along with a co-presenter on a podcast. It is described as “Mel Giedroyc is quilting. No really, she’s making a quilt. … Each week on this brand new podcast follow along as Mel Giedroyc and her presenter pal Andy Bush add to their patchwork quilt with new squares of material donated by friends, famous types and most importantly the listeners! They’ll find out the stories behind the fabrics, develop their sewing skills and naturally, have a big old chat. And a cup of tea. And probably some biscuits.… A Somethin’ Else production. ” I haven’t had a chance to listen yet. What do you think?

I found an article on the group project to finished a deceased quiltermaker’s map of the US.

Barbara Brackman talked about Kim McLean recently in a blog post. Kim makes quilts based on traditional designs (lots of applique’). She makes them fresh and new by using Kaffe Fassett Collective fabrics. One of the things Barbara mentions is the trail of inspiration Kim used for one of her quilts. I found it so interesting. It reminded me of that scene in the elevator in 9 to 5 where the secretary is talking to the stock trader about how she came up with the idea of a trade or stock purchase.

Quiltmaking hits the mainstream on CBS This Morning with Jenny Doan!

Want to know about Rose Kretsinger? Thanks to Frances of the QuiltFiction podcast and the Off Kilter Quilt, I can offer up a video. “Assistant Curator of Exhibitions, Jonathan Gregory, discusses the life of quilt designer Rose Kretsinger (1886-1963) in this 2009 video from the International Quilt Study Center & Museum archive.”

Patterns, Projects and Tutorials

I saw flower pincushions and they made me smile. I thought I might be able to figure out the pattern by looking at the photos, but I think this is one pattern I would have to buy.

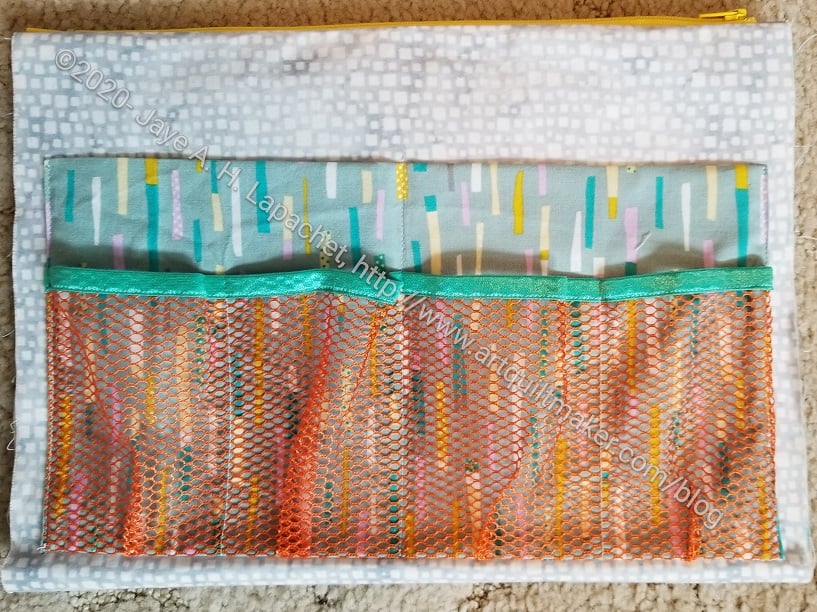
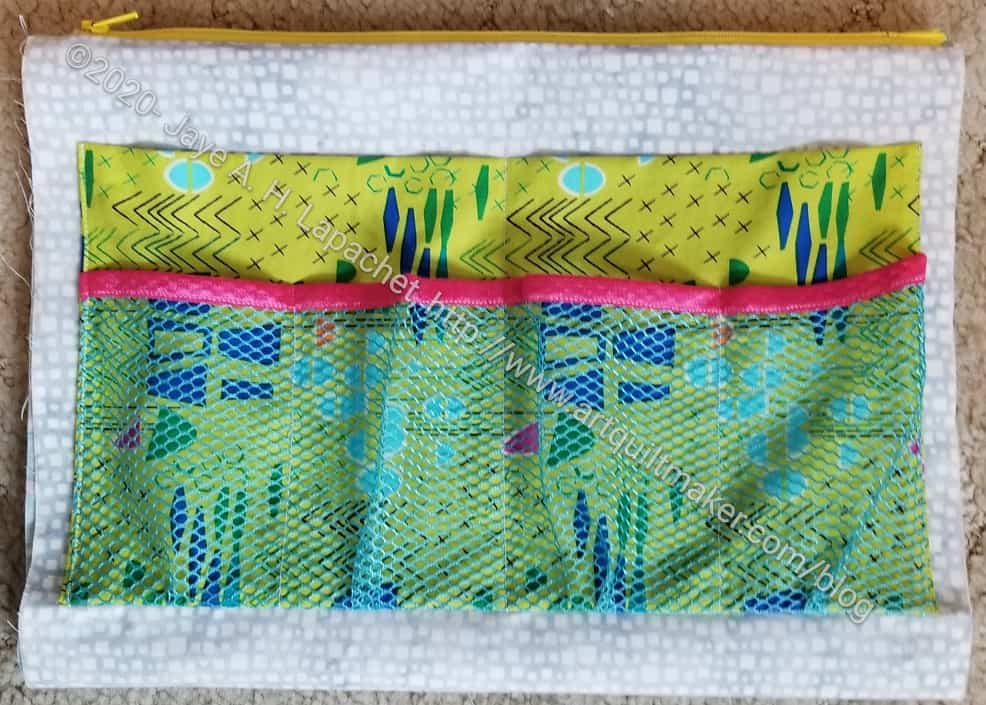
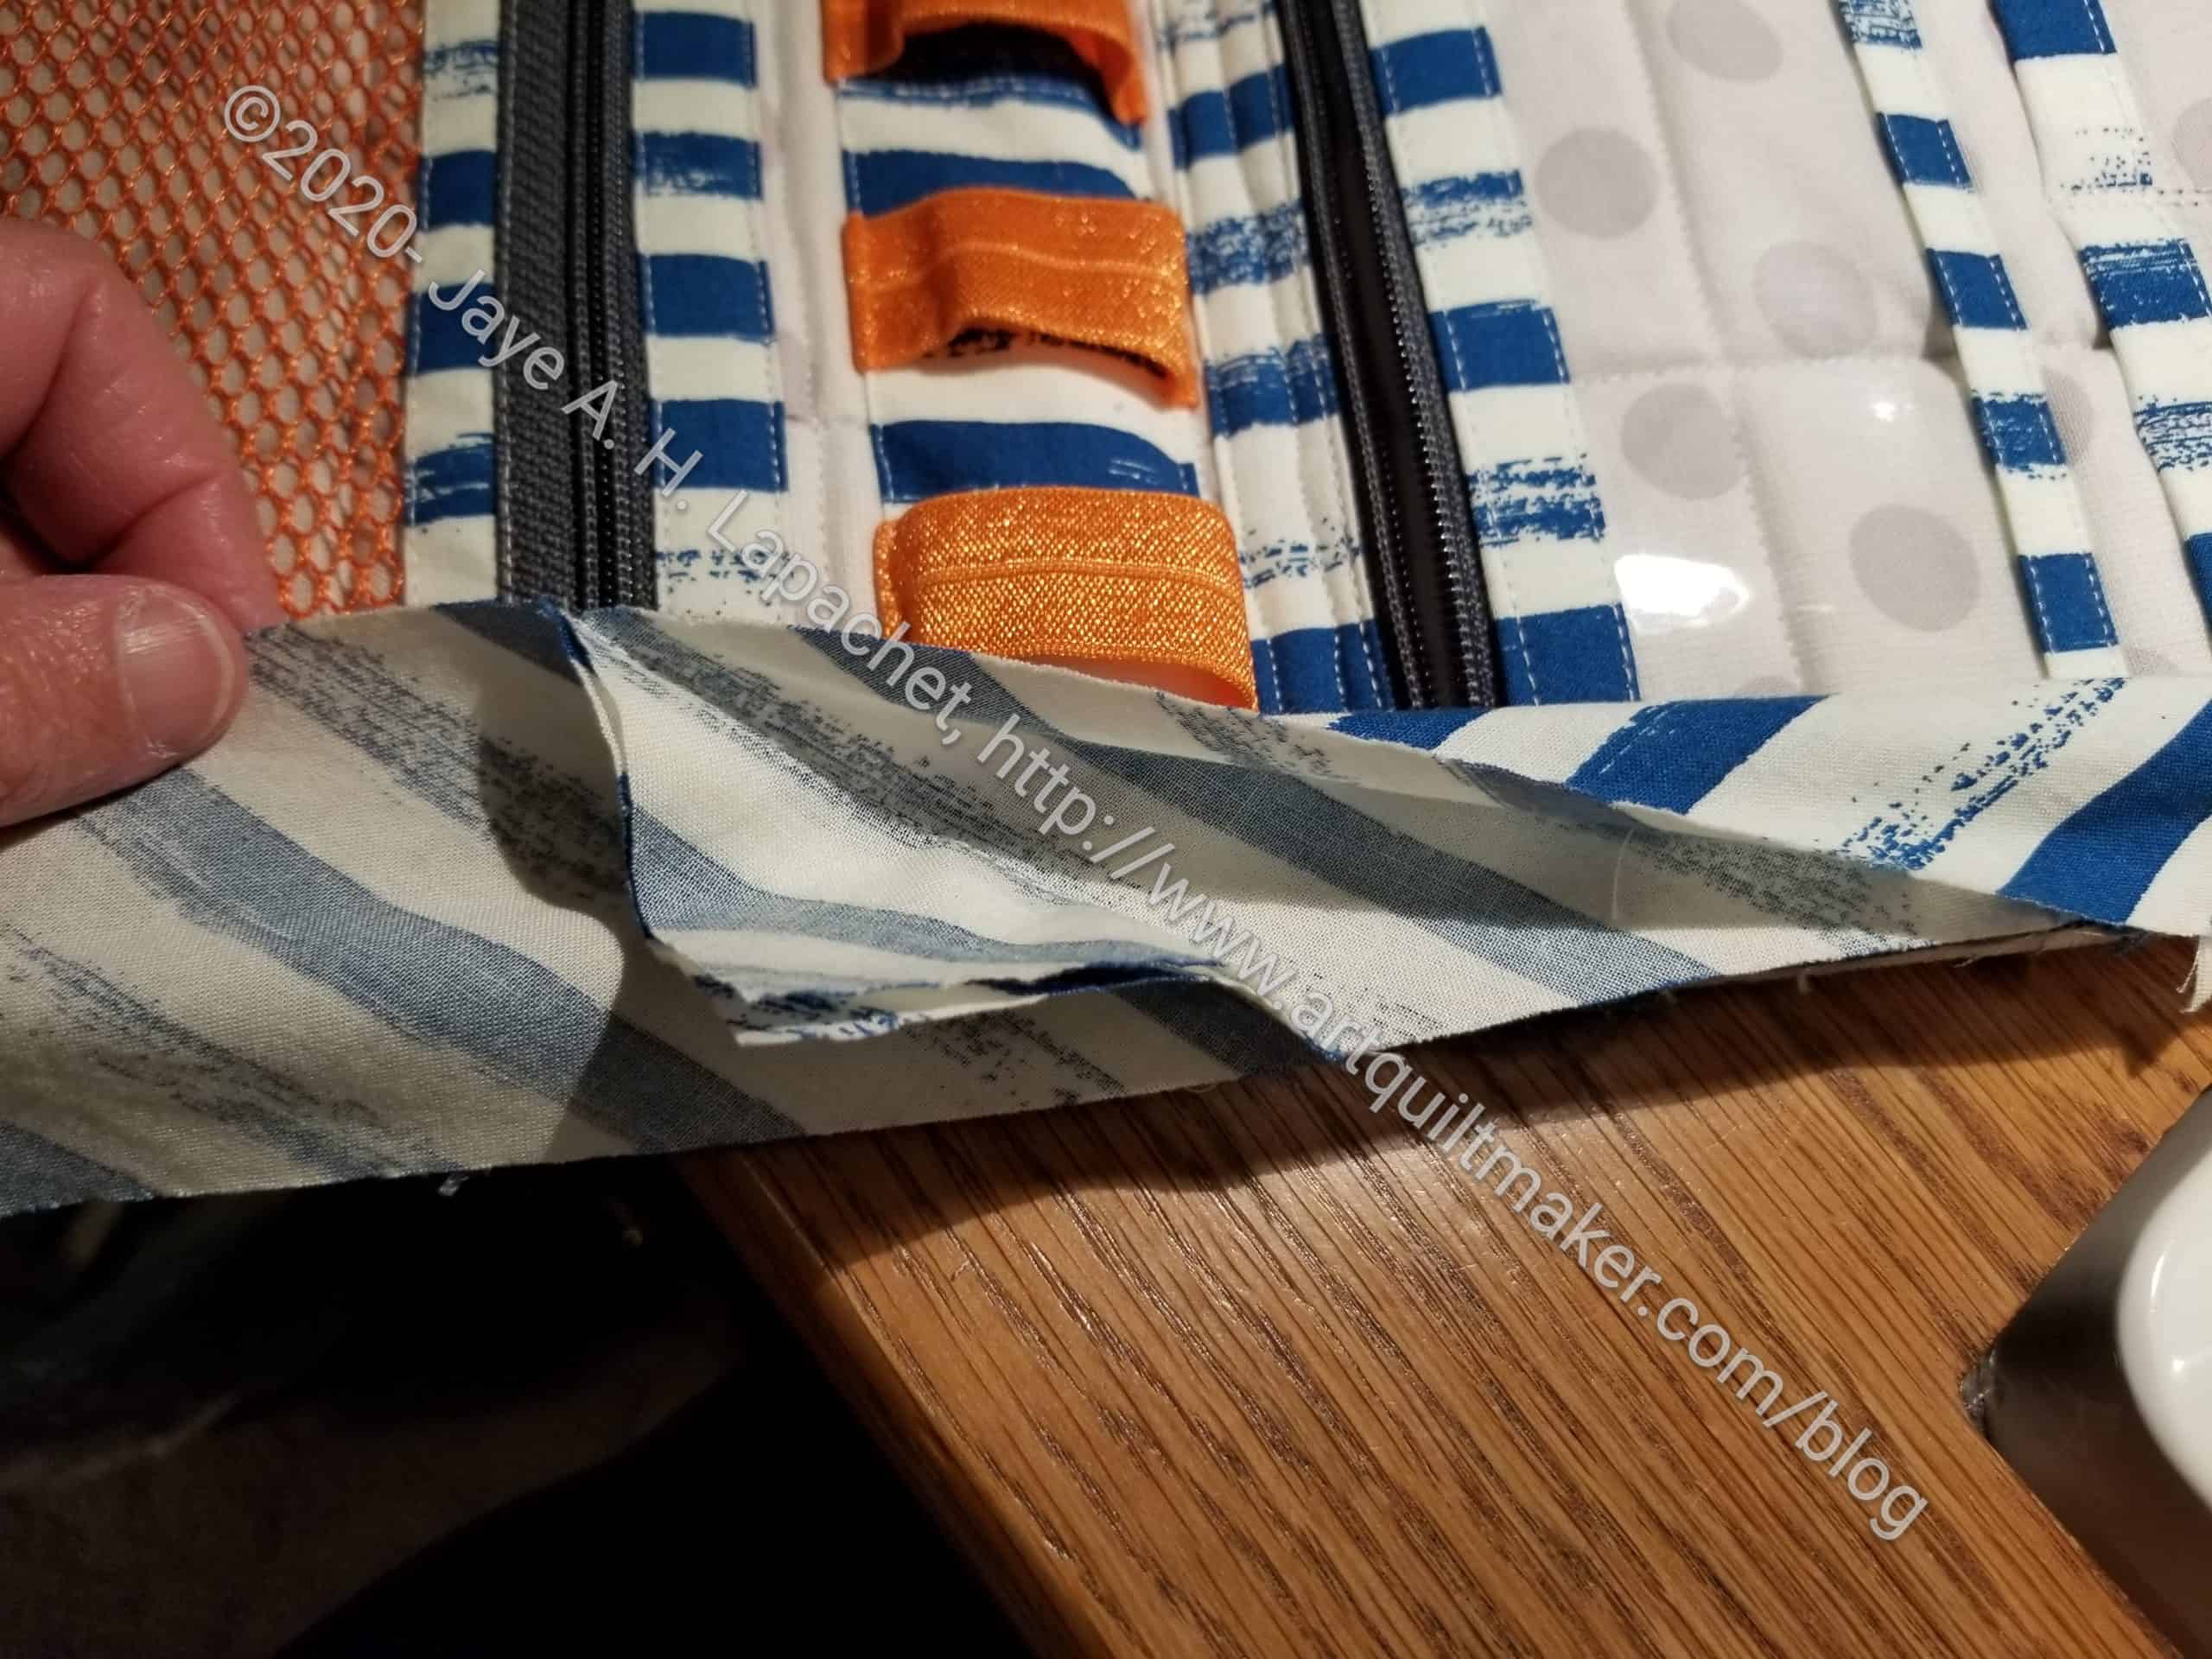
HandyLim Mum has a wordless double zipper pouch tutorial. It is surprisingly effective. Yes, I want to make one.

From Sewing Times, another wordless tutorial, comes a great cosmetic or go on retreat small bag. It has outside pockets and a small handle. Yes, I want to make this one, too.

Pink Pony Designs is a new designer of bags to me and she has great bags. I really like the shape of the Hollywood Handbag. She also has acrylic templates for some of her bags, which can be used with a rotary cutter to cut out bags. Her work is gorgeous – lots of leather (fake leather?), etc. She has a few free patterns as well.

Inspiration

Check out the gallery of improv quilts by Janet Steadman at the Pacific Northwest Art School.

Paul Klee’s personal notebooks are now online.

Barbara Brackman has a blog post about the pattern Broken Circle AKA Suspension Bridge. I really love the first example in red and white.

Other Artists

I sometimes mentioned QuiltDivaJulie. She makes a ton of tops! Recently she referred to a friend, Lynne Tyler, who is telling the story of how they met. Lynne is illustrating the series of posts with quilt mages. One REALLY grabbed me. It is a letter quilt, but the letters spell out the names of colors. Not blue, red, green, but turquoise, vermillion, malachite. I love the letters, but I also love the ingenuity in naming the colors. It makes them exotic, fabulous.

Supplies, Tools, Notions and Fabric

I found one of the best machine reviews I have read. The review covers a Juki TL-2200QVP Mini, mainly, but mentions other machines as well. I don’t have a Juki, but I have several friends who love theirs.

Traffic Jam Donation Top

Vicki Holloway of My Creative Corner3 induced me to try out the Traffic Jam Sew-a-Long with her FB group.

Traffic Pattern block #1

Traffic Jam is a free pattern by Pat Sloan. I didn’t need a pattern to make this quilt. I just started sewing my mini-charms together and cut the background fabrics to fit the standard 9 patch layout.

I did seek out the pattern after Vicki mentioned the secondary pattern that appears when the pattern is made with sashing. In the first photo, I didn’t see the secondary pattern, but in checking out the Linky photos, I did see it. Not sure I will add sashing and cornerstones, but we will see.

I am using that beige-ish fabric as the background as I probably won’t use it for one of my own quilts. I have no idea why I bought it, but it works pretty well for this piece. I have a yard and will make as many blocks as I can with that much fabric.

I am using mini-charm packs of Marmalade Dreams by Valori Wells. I collected a bunch of them at some point – at some quilt event. I probably won’t use them for another project, though I do like them.

Blue Strip Donation Top Close to Finished

Blue Strip donation Top - without outer border
Blue Strip donation Top – without outer border

I made some progress over the past several days on my newest donation quilt. I want to get the top done so that I can gain back the design wall. I just have the outer borders to sew on. I also have the back to make and, perhaps, the binding, but I think I will leave the binding to someone else.

I am pleased with how it looks, but dismayed at how few of my blue scraps were used. The blocks required one to a few yards, but my blue scrap drawer is still full and hard to close. More quilts!