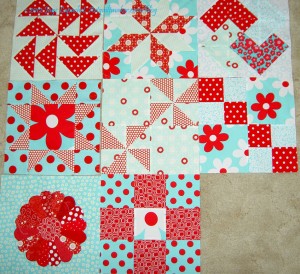
Sampler Class: Fusible Machine Applique’ Tutorial Part 1

Frances and I are back in action with the Sampler class. I am excited, but nervous because I haven’t done this in awhile. The next class is about fusible machine applique’.
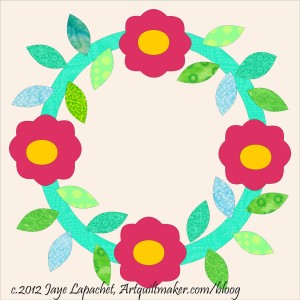
Flower Wreath
Flower Wreath

Supply List:

  • Notebook for notes
  • Pen to take notes 😉
  • Mechanical Pencil
  • Fabric (at least 4 different, preferably more greens to create variety in the leaves; scraps work well)
  • Fabric Scissors
  • Paper scissors
  • Small ruler
  • Glue stick
  • Template plastic
  • Dinner plate or compass
  • Fusible web, such as Misty Fuse or Steam-a-Seam 2 or Steam-a-Seam Lite
  • Applique’ pressing sheet
  • Tear away stabilizer (the size of your background)
  • Iron
  • Ironing surface
  • 3″x5″  piece of fabric backed with 2 layers of tearaway stabilizer
  • Flower Wreath pattern sheets
    1. Aqua-Red Sampler Blocks
      Aqua-Red Sampler Blocks

      Cut a piece of fabric for the background .5″ to 1″ bigger than the finished size of the block. If you have a regular background fabric, use that, if not use a coordinating fabric. I took a look at my current blocks to help me decide what background I wanted to choose. This is a coordinated scrappy quilt, but I also wanted to find a background that would work well with the applique pieces that I was planning to put on top of it.

    2. After cutting out a background, you need to put it aside for the time being. You will need it after you make the templates and the ring.
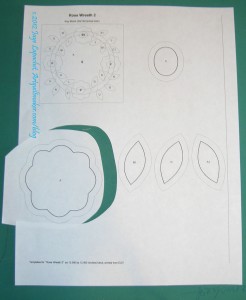
    3. Rough cut pattern out for templates
      Rough cut pattern out for templates

      Cut out all the templates from the paper. Leave a little of the paper around the edges. Feel free to adjust the design of the flowers or leaves, if you want the shapes to be a little different.

      All patterns rough cut
      All patterns rough cut

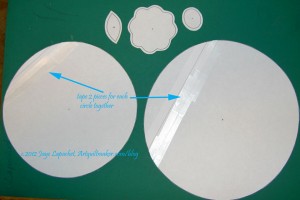
In the photo above, you can see all of them templates rough cut out, except the circles. The circles print from EQ7 on two sheets of paper. You will need to rough cut the two pieces for each circle and then tape them together. In order to tape the pieces together, hold each piece for one circle in a hand up to the light and match them up you. Before you hold them up, have the tape ready just to tack the pieces together. You can use a light box for this procedure also.
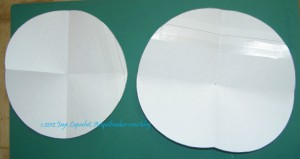
Fold circles in quarters

Fold circles in quarters to make a line down the centers. This will help you line them up to make the ring for the wreath.

I never did this before and had to figure it out, but it works pretty well.
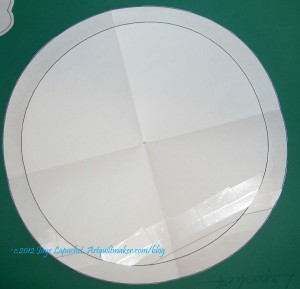
Layer Circles
Layer Circles

Using the folds, layer the circles together so you can see the black line of the upper circle. Draw a line around the smaller circle using the smaller circle as a template. You will be drawing on the larger circle. Use a soft implement (pencil or roller ball pen) that doesn’t skip to draw the circle. Once you have drawn the circle, you can put the smaller circle away with your other templates. I use a zipper bag for all of the pieces and parts.
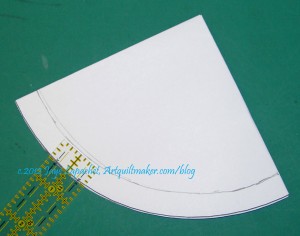
Check width
Check width

Fold up the larger circle. Check the width of the ring of the wreath using a small ruler to make sure it is even. Once you are happy with the line. Cut along the line without opening the circle.
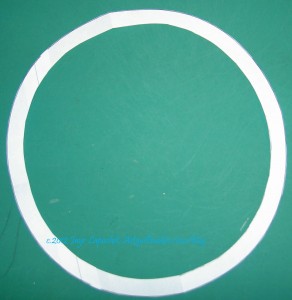
Complete Ring Pattern

Once you have cut out the ring, open up the ring.

Now you are ready to make the templates. Grab all of your patterns, your template plastic and your glue stick.

  1. Glue the paper templates to the template plastic.
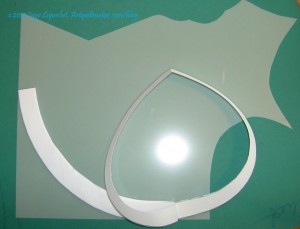
    No template plastic on folds
    No template plastic on folds

    The only tricky part is for the ring. I avoid the folds in the pattern and only put the template plastic on the parts of the ring where the fold isn’t. Why? Because I want to be able to fold this piece and put it in a zipper bag. Also, by adding the template plastic in quarters you save template plastic and you can use smaller pieces. Finally, you don’t end up with a circle of leftover template plastic.

  2. Trim the templates to the line on the pattern.
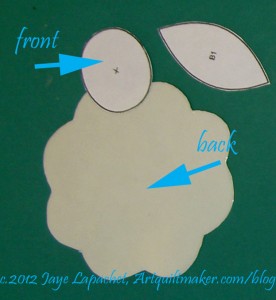
Front & back of templates

Depending on the kind of template plastic you have, your templates will look something like the photo above.

Part 2 will talk about choosing fabrics etc.

You can find more detail about machine appliqueing directional motifs, such as letters in a separate tutorial.
A-B-C Challenge Sashed

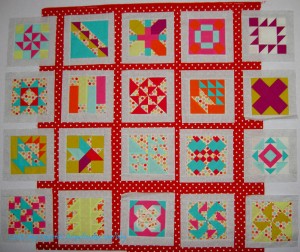
A-B-C Ready to Sash
A-B-C Ready to Sash

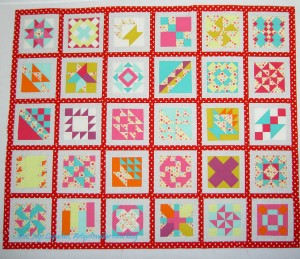
You will be pleased to know that the sashing drama is over. The quilt top is double sashed.

“Double sashed” means that I have sashed each block and then added sashing between the blocks.

A-B-C Sashing Complete

I did not chunk this quilt and I am partially sorry I didn’t.

One of the benefits of chunking is that all of your sashing lines line up. When you put a quilt together in rows, it is possible that your sashing lines will be off from row to row.

I did not sash, because I didn’t want to have the checkerboard problem I had earlier this year with the inside border for  FOTY 2011, which was that the white looked weird because it didn’t line up problem. I wanted to have really long pieces of sashing so that there would be as unbroken a line as possible.

At this point I am not sure it would have mattered. I am pleased with the red and white dot fabric I used. I think it is inspiring me to have a Year of the Dot in 2013. We’ll have to see if I can figure out what that means.

A-B-C Sashing in process

Next step is to figure out what else I need to do for the borders. I worked on different things last weekend, but didn’t come up with anything that excited me. If I had more of the Sevenberry red dot, I would put a thin line of the grey around the edge and then a fatter strip for the border. I don’t want to go hunting for more fabric. I’ll find something I have to make it work.

Black Friday Sew-in

Sandy from Quilting… for the Rest of Us announced the Black Friday Sew-in on Big Tent yesterday. Here is her message:

” Do you, like me, want to avoid the Black Friday shopping rush like the plague? Join me for our second annual Black Friday Sew-In! I’ll have a giveaway on my blog that day–instructions will be there for how to enter. I’ll also be opening up a linky for any bloggers or podcasters who want to do their own giveaways for BFSI. Plus, if you’re on Twitter, follow the fun using #BFSI (Same hashtag as last year but that’s okay–you’ll be able to review last year’s fun if you just keep scrolling down.)

Event Details

  • What: Black Friday Sew-In
  • Who: Quilting…for the Rest of Us Quiltcast Supergroup
  • When: Fri Nov 23, 2012, 12 am – noon EDT “

Pam at Hip to Be a Square has been mentioning on her last few podcasts. Hope you will be able to join in. If you are not on Twitter, you can watch along via Tweetchat by typing in the hashtag #bfsi and watching the scroll of tweets fly by.

Creative Prompt #180: Trapezoid

Trapezoid bone (smallest in the distal set)

trapezoid is the alias of Niel Cicierega (Urban Dictionary)

Trapezoid American folk music group

Issey Miyake Trapezoid

Trapezoid calculator

Definition: In Euclidean geometry, a convex quadrilateral with at least one pair of parallel sides (see definition below) is referred to as a trapezoid in American English and as a trapezium in English outside North America. The parallel sides are called the bases of the trapezoid and the other two sides are called the legs or the lateral sides. A scalene trapezoid is a trapezoid with no equal sides or angles, in contrast to the special cases below. A trapezoid with vertices ABCD is denoted Trapezoid small icon.png ABCD.

Take 5 minutes to do any kind of artistic response: poem, doodle, quilt, pastel, pencil. ANYTHING counts. No rules; just do it!

Post the direct URL (link) where your drawing, doodle, artwork is posted (e.g. your blog, Flickr) in the comments area of this post. I would really like to keep all the artwork together and provide a way for others to see your work and/or your blog.

The Creative Prompt Project, also, has a Flickr group, which you can join to  post your responses. I created this spot so those of you without blogs and websites would have a place to post your responses.

I know what you are all going to draw, paint or sing and what I am going to draw, so I am going to stop trying to find non-math Trapezoid things.

FOTY – Late October 2012

FOTY - Late October 2012
FOTY – Late October 2012

The time is really flying by. I was thinking about ordering my turkey next week (maybe the week after). I bought some pumpkin for Thanksgiving and Christmas pies last week in my attempt to get ahead of the major shopping in the next few weeks. I am behind. Behind in blogging, my house feels like a wreck, behind in cutting new and used fabric. Everything.

Case in point: it has been almost two months since I last posted FOTY fabrics. The last blog post was in late August! Gracious!

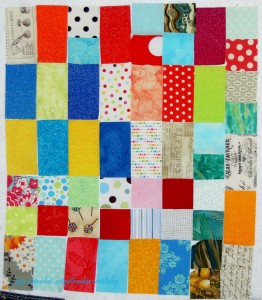
Still I was able to get some new fabrics cut up. I was also able to scrounge some squares from fabrics I have been using. Are you able to see the projects I was working on in this group?

I see some blocks I made, a journal cover I made and a few fabrics slated for journal covers I will make. One reason I love this project is that it is like a memory book in fabric.

Even More Doing Good

Patchwork Wheels in Progress

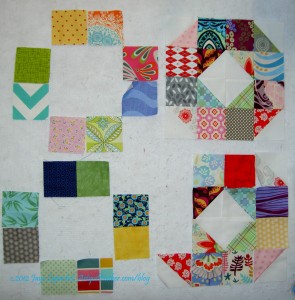
I decided to try out the 3rd quarter blocks (though I thought they were for the 4th quarter. I am behind – whatever), Patchwork Wheel, for the Charity Girls at BAMQG. The kits I picked up made 2 blocks each and they are quite…exciting? Loud? Wild? blocks. I don’t know which. I kind of like their exhuberance, though.

The square parts were already cut, but I had to make the HSTs. No problem. They included the fabric cut the parts and I drew a line down the middle and sewed. Worked like a charm.

I have to say that I did start putting these together stupidly. Instead of waiting to finish the HSTs and then put the blocks together in 4 patch segments, I sewed allt he squares together and had to put them together in rows. Yes, I could have unsewed, but I didn’t.

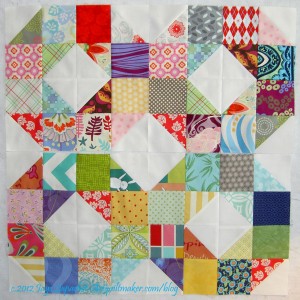
Patchwork Wheels Finished

They came out well. There is nothing hideous about them.

When I saw the four of them together, i decided I wanted to make an entire top from such blocks just to see how it would turn out. Jennifer is saving some kits for me, so I can make more blocks and sew them together in a quilt.

Yes, the fabrics are wild and crazy, but I think they will be perfect for some kid with a wild streak in her. It hought of making some HSTs for the the project using my Triangle Technique but I am not sure if that would be helpful. Each pair of squares makes 8 HSTs and I think the blocks look better scrappy. I’ll have to see.

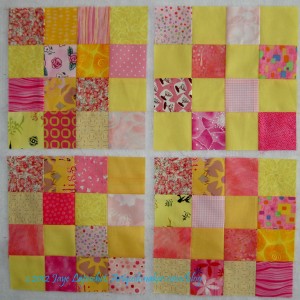
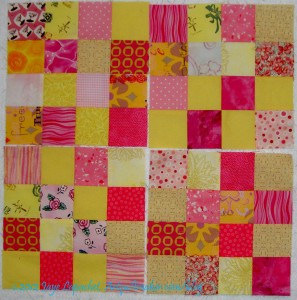
Donation blocks 1-4/Yellow & Pink

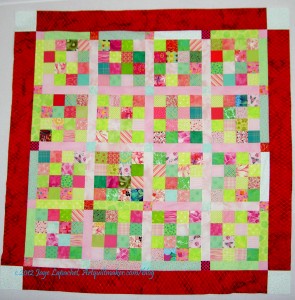
I wanted to finish another top before the next meeting , as a result, I have been making yellow and pink checkerboards.

These blocks are really cheerful and I am enjoying making them.

I am doing something a little different with these blocks. After the mosaic result of the pink and green blocks, I decided to be a little more choosy about the pinks and yellows I chose. The pink with the gold rings (upper left block, lower left corner, last row, 2d patch) is about the darkest pink I am using. All of the yellows are light and cheerful. I weeded out some of the Pat Bravo yellows-tending-towards browns for this particular project. There are a couple of pinks that are a bit too light and some different pinks that blend a bit with one of the Pat Bravo yellows, but all-in-all I am happier with how this project is turning out.

Donation blocks 5-8/Yellow & Pink

At the moment I am out of yellow and need to cut some more before I can make more blocks. I do have some that I sewed together randomly to white, black on white, etc. I could rip those out, but I don’t know if I am that ambitious. We’ll see.

I want to clear off my sewing table of 2.5″ squares and pink and yellow were what I had left. Good thing they go together. I might give away the rest of the squares and move on to something else. We will see.

Pink & Green Donation Quilt back

Finally, I took a photo of the back for the Pink and green donation quilt. These colors are a little darker than the fabrics on the front of the quilt, but they are first quality fabrics that I was not going to use in my own work. I really liked some of them, but the pattern or the colors prevented me from putting them into a quilt. I hope someone will enjoy this back.

Jennifer told me today that the group has made 93 finished quilts for charity this year. I think the one I put the binding on might be 94. I would love to believe that is some kind of record for a guild. Probably not, but I like to think this program was a success. Jennifer and Deborah are rock stars.

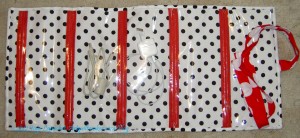
Finished: Charger Case

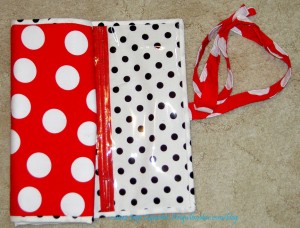
Charger Case Open - with chargers/cords
Charger Case Open – with chargers/cords

After the skirt misadventure, TFQ and I decided to make a charger case. I was using a very elegant vegetable bag crammed full of tangled cords and that was the inspiration.

We used a SewCraftyJess tutorial for a jewelry case and modified it slightly.

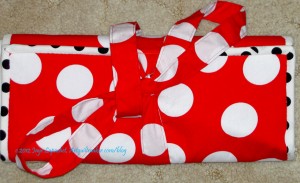
Charger case - closed
Charger case – closed

Some of the modifications we made had to do with size.I also noticed that Jess, who did the tutorial, must have had a different type of vinyl (I used the leftovers from my clear bag project), because she did not need a roller foot or tissue paper. I need both of those at various times to force the vinyl through the machine. I don’t think this is problem/issue if you are using some of the flannel back oilcloth and keep the flannel side against the machine bed. For the purposes of this charger case, I couldn’t guarantee that I could have something between the vinyl and the machine bed at all times. This is when I put the tissue under the vinyl. Yes, the bits of tissue paper had to be picked out with tweezers, but that was the lesser of two evils (the first evil being me screaming and berating the vinyl, my machine, etc). I have some tweezers with very sharp points and long handles and they worked very well.

Charger case - half open
Charger case – half open

Also, as the layers built up (vinyl twice for top stitching, zipper, etc), the thread started to break, so I lengthened the stitch length and that worked better. I might use a larger thread than 50wt if I made another charger case.

I thought not stitching the back to the front would be a problem, but it seems not to be, though you could stitch all the way through the layers if you wanted.

The tie was a bit of a puzzle. I ended up machine sewing it to the center of the binding on one of the short ends. It seems to work fine. I might try velcro or a magnetic snap if I made this again. I used the technique for making the ties that I use for making bag handles (4x desired width, fold in half and press, fold outside edges to press line and press again, fold on original press line, stitch around entire outside edge). The ties would have had more style if I had made a point at the end.

I am pretty happy with how it came out, though I am thinking that aqua dots might have been a better choice for the inside. I wanted something light so I could see what chargers were where. All of these little tweaks are why I made things more than once – to see if my imagined tweaks would work better.

PIQF Part 3

I have mentioned the quilts, but not delved in, so here we go. Again, if you forgot or are new here, you can view my set of PIQF 2012 quilts on Flickr. I have been uploading them in dribs and drabs. It takes time to add the names of quilts and makers and I am not inclined to spend all my free time uploading photos. It might take me weeks to get through that, so go and look, read my blog, then go back to Flickr and look at more quilt photos later.

Renewed Jelly Roll Race at PIQF

As I said, the Renewed Jelly Roll Race was at the show. Sharona, of New Pieces, encouraged me to enter last year and the encouragement followed me to this year. Friends gave me lots of nice comments about seeing it there. It was hanging straight, too, which was a relief. Thanks for your support, friends and all.

While I did whine a bit about the various aspects of the show in one of the previous posts, there were some good quilts there.

I saw quilts by friends. Amy won an award. Pamelala had three quilts in a new style on display. Awesome to see her artwork evolving. Maureen’s jar quilt was in a primo location. Kathleen had her Wonky 9 patch in the New Quilts of Northern California exhibit with mine. Marie had two quilts, one was a lovely pink quilt. Yes, I am feeling the pinky love lately. I do see another pink donation quilt in my future. Chris had two quilts in the show, both continuing her explorations in quiltmaking. Marci G really showed off her computerized machine quilting expertise in her quilt.

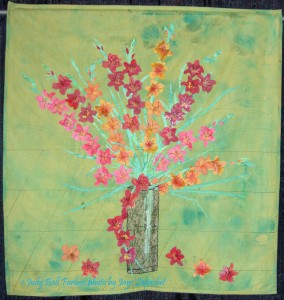
Friday's Flowers by Judy Ball-Farber
Friday’s Flowers by Judy Ball-Farber

If I had to choose, I might pick this quilt to be my favorite of the whole show. I really like certain types of flower quilts and this one has the added bonus of great colors.

I like the spray of flowers. The artist also machine quilted additional leaves, etc, I think, to lighten up the piece. If she had appliqued them on, the piece would be too heavy. As a result, there is a space between the sprays and the leaves. Again, as a reward to viewers who look longer and closer, the machine quilted leaves fill in any gaps that might show.

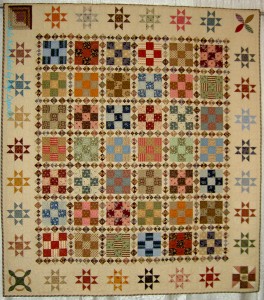
Civil War 9-Patch by Julie Kuto

TFQ and I often ask each other, when visiting a quilt show, what quilt made an impression on us or what quilt are we thinking about. As shocking as it may seem to you, Julie Kuto’s Civil War 9-Patch is the quilt that I thought about the most during the show.

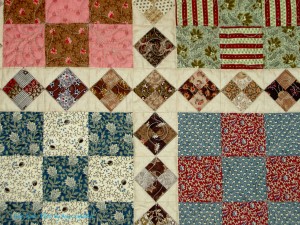
I am not thinking about this quilt because of the fabrics, as they are obviously not my style. What I liked about this quilt was the combination of 9-patches and 4-patches. The 9-patches are about 6″. I didn’t have a ruler with me, so I didn’t measure. The 4-patches fit next to each square of the 9-patch, so they must be 2″ finished and on point. Small, yes, but not impossible and great for scraps. I would love to see a lot of people make this quilt, or the 9-patch/4-patch combination in different fabrics. It is always so fun for me to see different interpretations of quilts.

Civil War 9-Patch by Julie Kuto detail

Julie does a great job with contrast in the 9-patches. I would want the 4-patches to stand out a bit more than they do , so I would pay attention to the contrast. When I say ‘stand out,’ I don’t mean jump out as the primary element of the quilt. I mean I would like the viewer to know that I went to a lot of trouble to piece 4-patches that small! I would want them to blend into the temperature of the quilt in general.

As an aside, Julie’s quilt, while not my colors, does not depress me like some quilts made in the Civil War style do.

Line Study #1 by C. Krugel

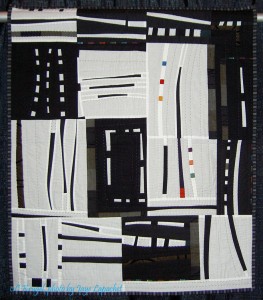
I thought this was an interesting quilt. I think it is one of the most well done pieces of this style that I have seen.

There is the right amount of color. The black does not overwhelm, e.g. the artist paid attention to the ratios of black and white to each other, which helped make the quilt successful. There is the right amount of color. I also like it that there are some curves and that the pieced strips mimic each other, provide continuity, without duplicating each other.

Line Study #1 by C. Krugel detail

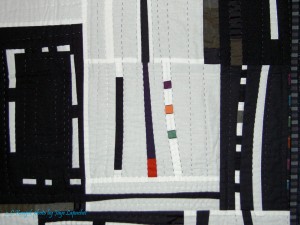
The quilt looks very sheer in the white areas, in that you can see the seams. I don’t think it detracts from the overall look of the quilt, but I think I might have done something differently.

I think the piece is hand quilted, though it may just be partially hand quilted. I like the way the lines show up. They are also spaced enough to add interest without looking done by a computer. I like it that the viewer can see them pretty well (contrast of thread and fabric is good).

Hanami by Leslie Harris

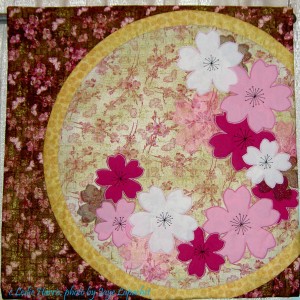
There are a couple of things I like about Hanami. The most is important is the flowers. The varying size of the flowers creates a lot of movement in this piece.

There are some flowers behind the more prominent top flowers made from fabric that blends into the background more. These flowers are a surprise reward for looking closer at this quilt.

I also like the stitching in the center of each of the flowers as well as around the edges. The stitching adds a lot of interest to the main flowers, which are mostly made from solids. The stitching relieves the flatness that can be a quality of solids. It is machine done and Ms. Harris did a great job.

I try to find something good in all of the quilts I view at the show even if they are not my style. I noticed that stitching is still very popular. I will venture out on a limb to say that there was more hand stitching this year than I remember. I could be wrong, though. I don’t actually count quilts with various techniques.

Here is a selection of links from past PIQFs so you can compare some quilts:

PIQF 1999

PIQF 2005

PIQF 2009

More of Doing Good

Pink & Green Donation Top

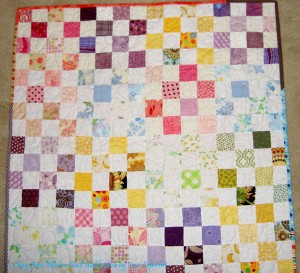
I have been, as they say, feeling the love for making donation quilts. I have talked about how good it makes me feel to make the various donation quilts I have made such as the pink and green one shown here.

I recently had the opportunity to actually finish one of the donation tops someone else (or multiple someone elses) made for the group by hand stitching down a binding. It felt like such a small thing to do, but then I had the opportunity to give one of these quilts to a child in need. I asked, the guild leadership agreed and the quilt is in transit to provide comfort to a  girl who doesn’t know what her body is doing. I felt so good knowing one of those quilts is being sent to someone I know.

I am a sap, I know, but sometimes I need to be reminded why doing good is important.

BAMQG Donation Quilt

The binding I stitched down is for a quilt made from the checkerboard blocks the guild did in the first quarter of this year.

I don’t know if I made any of these blocks, but I recognize some of the fabrics. Perhaps they used fabrics I donated? I don’t know.

I have to say that there is something to be said for using blocks of many colors. My versions with the sashing and monochromatic color scheme have a very different look. Mine are bigger also, because of the sashing and borders. I don’t think I have seen one of my tops completed by someone else yet. I am scared and eager to have some of them go out into the world.

BAMQG Donation Quilt detail

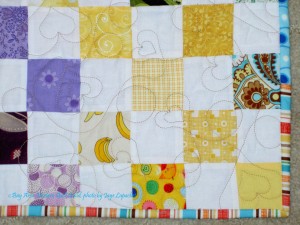
The binding uses leftovers, which was interesting. I tried to line up the colors in the quilt with the binding colors. It worked ok, but did not match exactly all over the quilt. That is ok.

Whoever did the quilting did a great job. The hearts are subtle and I hope they convey love.

UGH! I am making myself sick now. This post is DONE!


26 Projects – October Update

I skipped September, because I was sewing slowly due to the rotator cuff injury. I didn’t feel like I was making any progress. It was a good idea. I feel like I am back in the saddle.

  1. Original Bullseye: needs border, backing, quilting and binding, which are all hard to do if you can’t find the project. It is lost. I know it is in there somewhere. As I mentioned, I did a test and found that my original idea didn’t work. I think a plain border will set off the blocks fine IF I ever find the top. Bleah!
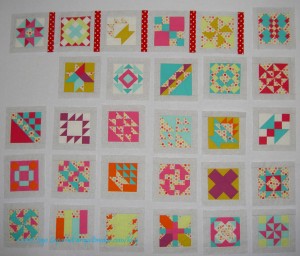
  2. A-B-C (A-Z) BAMQG Challenge – I finished all the blocks and a few extras. I have a total of 30 and they are all sashed. I have a couple to trim and may have done that by the time you read this, then I will make some decisions about sashing.
  3. Aqua-Red SamplerFrances contacted me about getting back in the saddle. We met yesterday! Hooray!
  4. The Tarts Come to Tea: I haven’t quilted on this since April 2011. I need to work on the quilting. I was making good progress and then got sidetracked. Quilting the Whole Cloth quilt is getting me back in the swing of quilting, so perhaps there is hope for this piece.
  5. Garden: I started this piece in a class with Pamela Allen in 2006. As mentioned, I used this piece for my beading demo for the 2012 EBHQ Voices in Cloth show (March 17), which means that I added some beads. I finished machine quilting this piece, removed some of the beads and have started to put beads back on to it. I think it might be done with the few beads I have put on it. I have to look at it and decide. If it is done, then I need to put a facing and sleeve on it.
  6. Pointillist Palette #4: Fourth is a series of 6 quilts; needs tiny square patches sewn together. Mrs. K. gave me more PP fabric. I think it is a sign to work on this.
  7. See: needs satin stitching.
  8. Self Portrait: started in 2006 at a class at Quilting Adventures in Richmond, Virginia. I like the piece, but don’t know where to go from where I am. Mouth? Hair?
  9. Spiderweb: I woke up one morning thinking I would work on this project. I found that I had already designed the border blocks! Yay! I want to sort through the blocks and make sure I have  just enough to make a quilt for my bed. That means I will have extras. I could make a quilt that would cover my house with the number of blocks I have already made. Progress. Hooray!
  10. Under the Sea: class project; like the design, but not the colors much.
  11. Flower Sugar Hexagon: sewed more hexagons together. Sewing Y seams is a bit of a chore, so I get tired of doing it after awhile.
  12. Young Man’s t-shirt quilt: have cut up the t-shirts and am still in the process of applying fusible. He cleaned out his drawers and found some more t-shirts to add to the quilt. Oh Yay! <– just a bit of sarcasm
  13. New: Super Secret Project: top, back and binding made. Ready to go to the quilter.  Stay tuned. 😉
  14. FOTY 2011: at the quilter, needs binding.
  15. Flowering Snowball: Back from the quilter; need to hand stitch the binding.
  16. Stepping Stones: at the quilter, made binding, which she will sew on for me and then I need to stitch down the binding.
  17. New: Wonky 9 Patch: needs quilting and binding.
  18. Corner Store:  Top and back are made. It is ready to go to the quilter.
  19. New Super Secret Project #2: Top and back are made. It is ready to go to the quilter.
  20. Infinity blocks: blocks sewn together into a quilt top, borders on. Back and binding made; ready to go to quilter.

Finished or Abandoned projects that were on the list:

  1. Stars for San Bruno #2: Finished! YAY!
  2. Pavers. Finished! YAY!
  3. Kissy Fish: Finished! Yay!
  4. Stars for San Bruno #3: Finished! YAY!
  5. Food Quilt: Finished 5/24/2012. YAY!!!!
  6. Renewed Jelly Roll Race Quilt: Finished 9/9/2012 YAY!!!
  7. Whole Cloth Quilt: Finished 10/5/2012 YAY!!!

Abandoned

  1. Flower Garden: The flowers were too spiky. This is going to Pam for a cat bed.
  2. Pineapple: will remake blocks at a later time with more care.
  3. Moon and Stars: This quilt was barely a quilt and was not interesting. I realized I didn’t want to devote time to it. So, I finally just decided to give up and get it off the list. I will send it to Pam for a cat mat?

Hunting and Gathering

  1. Spin Wheel: really not started, but supplies gathered. Cutting fabrics as I go. TFQ does not consider this a UFO, which is why I have moved it to the Hunting and Gathering section. She says, and I have to agree, that quilts are not ‘projects’ until the sewing starts. OK. I’ll go with that.
  2. Windmill quilt.

I am pretty pleased. I have 6 projects off the list and 8 with a definite plan.

Creative Prompt #179: Wheel

Ferris Wheel

Carousel

Definition: A wheel is a circular component that is intended to rotate on an axial bearing. The wheel is one of the main components of the wheel and axle which is one of the six simple machines. Wheels, in conjunction with axles, allow heavy objects to be moved easily facilitating movement or transportation while supporting a load, or performing labor in machines. Wheels are also used for other purposes, such as a ship’s wheel, steering wheel and flywheel.

Common examples are found in transport applications. A wheel greatly reduces friction by facilitating motion by rolling together with the use of axles. In order for wheels to rotate, a moment needs to be applied to the wheel about its axis, either by way of gravity, or by the application of another external force or torque.

Wheel of Fortune (TV show in the US)

Wheel rims

alloy wheels

Wheel of Fortune quilt block

Wheel of Time (novels)

Riesenrad

hamster wheel

Patchwork Wheel (aka Cheyenne) quilt block

Buddhist Wheel of Life

spinning wheel

asleep at the wheel

bicycle wheel

Wagon Wheel quilt block

prayer wheel

Broken Wheel quilt block

Wheel of Fortune tarot card: The Wheel Of Fortune card, like other cards of the Major Arcana, varies widely in depiction between Tarot decks. Basically, this card has been modeled ever since the tarot’s inception in the 15th century after the medieval concept of Rota Fortunae, the wheel of the goddess Fortuna. Images generally show a six- or eight-spoked wheel, often attended or crested by an individual (sometimes human; sometimes a Sphinx-like half-human) attired in an Egyptian-style headdress. In some decks, such as the AG Müller, the wheel is also attended by an individual wearing a blindfold; and often there are people sitting or riding on the wheel whilst others are shown falling from it.

The wheel is not always shown inscribed with any lettering. Where this is the case, the letters T-A-R-O can often be found aligned against four of the spokes, which can also be interpreted as R-O-T-A, the Latin word meaning “wheel”. In some decks, such as the Waite, the wheel is also inscribed with additional alchemical symbols representing the four elements of Earth, Air, Fire and Water (which are also said to be represented throughout the Tarot by the four ‘suits’ of Pentacles or Discs, Swords, Wands and Cups respectively.[3] These emblems can also be seen on the Magician’s table in the Magician card (Card I)).

On the Waite card shown, though not necessarily on others, there are also four winged creatures in the corners of the card, representing the symbols of the four Evangelists (The Lion, the Ox, the Man and the Eagle). These four Evengelists are also represented the four fixed astrological signs: Leo, Taurus, Aquarius and Scorpio. In addition a representation of the god Anubis is seen rising with the wheel on the right side, while the snake-like Typhon descends on the left. On the wheel, alternating with the letters T-A-R-O are the Hebrew letters ?-?-?-?, usually transliterated as YHWH (Yahweh), the name of the God of Israel.

wheelchair

Seattle Great Wheel

color wheel

potter’s wheel

reinventing the wheel

ship’s wheel

flywheel

Millennium Eye

Take 5 minutes to do any kind of artistic response: poem, doodle, quilt, pastel, pencil. ANYTHING counts. No rules; just do it!

Post the direct URL (link) where your drawing, doodle, artwork is posted (e.g. your blog, Flickr) in the comments area of this post. I would really like to keep all the artwork together and provide a way for others to see your work and/or your blog.

The Creative Prompt Project, also, has a Flickr group, which you can join to  post your responses. I created this spot so those of you without blogs and websites would have a place to post your responses.

PIQF Part 2

PIQF+ Purchases
PIQF+ Purchases

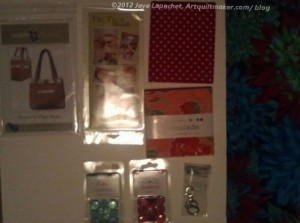
As I mentioned, my purchases at PIQF were quite modest. I need another bag pattern like a need a hole in the head, but I do want to try another one from the Chubby charmer company. I want to see if all of their patterns are as good as the “Chubster.”

I really just liked the buttons. It occurred to me that this particular color scheme would go well with the Aqua-Red Sampler. I don’t know if I will put them there, but I’ll try it out and see. Adding buttons might not be good for teaching, but it might make me happy. Make visual decisions visually, right?

I decided to participate in the pincushion challenge swap with BAMQG as a result of buying the Fig Tree pattern. There were a few things that didn’t make sense, but once I got a personal lesson from Joanna Figueroa, I was good to go. I forgot to go back to another booth and buy some crushed walnuts, but I imagine I can find nice filling somewhere else.

I didn’t buy the Marmalade charm pack at the show. See the previous PIQF post where I talk about the ‘baked goods’ problem. We went to the Granary on our way home and I bought it there.

Maureen turned me on to The Granary and I like that shop. Their prices are retail prices, but not outrageous. They have a GORGEOUS color wall. If you need to match or coordinate fabric, go there! The owner was cutting for TFQ and she remembered me buying fabric recently, which impressed me as I have only been in there 2-3 times. Great customer service! They have a nice selection of rulers and more than your average selection of notions. It is definitely worth checking out.

Since I have so many bag patterns, I figured that the clips and D rings wouldn’t go unused. I liked the size, finish and packaging. When I made the Bird Watcher Messenger Bag, I had a devil of a time finding a set even remotely suitable.

Gifts
Gifts

The other lovely thing that happened was that I got to see Mrs. Kristen and her sister-cousin, Vicki. We met at the show and then we sat down for a snack together and made each other laugh. As I have said a zillion times, but cannot be said too much, Mrs. Kristen is one of the loveliest people I know. I am hoarding her for myself and refuse to introduce her to you. Sorry.

OK, to be honest, I am not that sorry. She brought me gifts. I didn’t ask for anything, but she brought me gifts. 😉 She is not only a lovely person, because she makes me laugh, but also because she brings me gifts. She is supportive and generally nice to be around, too. Aside from fabric (dots and Pointillist Palette fabric), she brought me some rhubarb. I make a special rhubarb pie at Thanksgiving and Christmas. I used to be able to get canned rhubarb here, but they don’t seem to sell it anymore. I buy fresh, when I can, in the summer and stew and freeze it, but more is always welcome. The pie is scarfed down. I think I might be strung up if I didn’t make it. She and TFQ liked each other (or appeared to like each other), which was an added bonus.

As I mentioned, work sucked on Monday and Tuesday, so I’ll see if my budget allows for some more retail therapy.

More Fun with Skirts

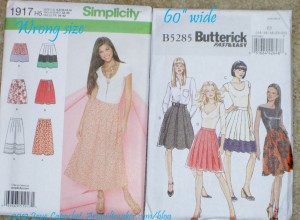
Skirt Patterns, annotated

You might remember I had high hopes of making a skirt. This past weekend was the weekend, because TFQ was here to walk me through the process. On Saturday, we pulled out the patterns, the fabric and got busy.

We cut out the pattern pieces, measured my waist (UGH!!) and TFQ read the directions for the Butterick pattern. We chatted, she read and then she told me that we needed 60″ wide fabric not the 45″ wide fabric I had. I flew upstairs to get the other yard I had, but it still wasn’t enough.

She reminded me that I had bought two skirt patterns, so I ran upstairs (our plan was to cut on the dining room table) and got the other pattern. Again, we chatted, she read and then she told me that I had bought the wrong size. Bleah.

Our options were to go get 60″ wide fabric, get a different sized pattern or bail. I had had enough of skirts for one day, so I bailed.

I had hoped to have a new skirt this week, but, alas, that was not to be. Don’t worry, I am not completely demoralized and I am not giving up. I’ll go get some 60″ wide fabric and the other pattern in a different size and we will try again.

Lessons learned:

  1. Measure before buying pattern
  2. Learn where the pattern tells the maker what size fabric to buy.

PIQF Part 1

My day yesterday left me rather cranky and irritable and if that comes through on this post, I won’t publish and will see if I can uncrankify it. Work has a way of sucking all the good feelings I get from a few well deserved days off right out of my system.

Anyway.

Renewed Jelly Roll Race on display

I took a day and a half off of work last week and went down to Santa Clara to the Pacific International Quilt Festival to visit the Renewed Jelly Roll Race, which was on display. TFQ and I usually go and she missed a year last year. We got ourselves organized again and were back in the saddle this year – sort of. Our trip was abbreviated a little because of family obligations for me. Despite having less time to view the quilts, I think we both agreed that we saw plenty.

I am concerned that once the 49ers stadium is built, the parking will no longer be free or there will be no available parking on game days. I look at these next few years as, possibly my last chance to go to the show. Yes, I am being melodramatic and borrowing trouble. I’ll get over myself.

The show was not as crowded as usual on Thursday and Friday, but I thought the preview was more crowded. I loved not having such large crowds on Thursday and Friday, because it was much easier to take photos. However I was concerned about what that meant for attendance numbers. Both days, I saw lots of white hair and not many strollers. I didn’t attend on Saturday or Sunday, so I’d like to know if you saw more younger quiltmakers on those days.

In terms of quilts, the show had the same look – lots of landscapes and portraits especially. I noticed lots of pattern quilts being shown, especially quilts made from patterns or classes by Judy Niemeyer. I still took a lot of photos.** I wonder about entering a quilt made from a pattern. What do you think about that? Should the quilt have been altered in some way or is it ok to enter a pattern quilt in a show that is an exact replica of the original?

The Best of Show winners were in the “more is better” philosophy. I apologize for being snarky, but I think design counts for something and since I heard a podcast on what judges look for, I have been disillusioned by Best of Show quilts. Still and all, there was lots at the show from which I was inspired. The stitching is still getting better and better and there was a lot of hand work to satisfy that craving.

The vendors were meh. I had put myself on a strict budget and it wasn’t difficult to keep to it. There were a few things I would have bought, but, in general, the offerings were old and expensive. I saw only a few vendors carrying Jelly Rolls, Layer Cakes and the like and the variety of choices was slim. One vendor told us it was very hard to receive the ‘baked goods’ that you actually order and that Moda does one run of them, sends what it can and does not reprint. I suppose I can understand not reprinting the “baked goods” as they have so many lines coming out each year. I, personally, cannot keep up with all the lines and have kind of given up on getting the newest latest and greatest.

I did see quite a few of the Tonga Treats and Bali Pops, which I thought was interesting and didn’t remember seeing last year. I really liked the colors from the Macaron line of fabrics by Hoffman, but didn’t buy any. I still might. Still, I wanted to see what was new and exciting in the quilt stuff  department and just didn’t get that fix satisfied. I bought a little fabric, some dotty buttons, a couple of swivel clips and D ring sets and a Tonga Treats pack for a project I have in mind.

The SD card went bad on my camera while I was at the show. Fortunately, I only had about an aisle and a half left. Unfortunately, it was the aisle with New Quilts of Northern California on it.  TFQ took photos of the last quilts, so you will have a complete set of the photos *we* liked. 😉

I bought a new SD card, but the camera can’t seem to read it. I like my camera and think it takes good photos. It will be hard to create interesting blog posts when I can’t take photos.  I’ll have to deal with that problem sooner rather than later.

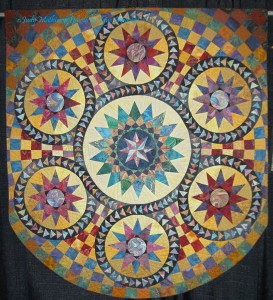
Marbled Star by Judy Mathieson

There were quilts in the various special exhibits that I liked. There was an exhibit of quilts inspired by the floors at Bristol Cathedral, including a smaller version of her quilt, Cosmati Stars, by Judy Mathieson. This is an offshoot or further examination of an exhibit we saw a few years ago, also at PIQF, of mosaic floor tile inspired quilts by Christine Porter.

Improvements the Mancusos need to make:

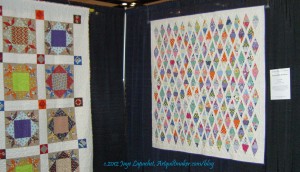
  1. Replace black drapes behind quilts with white drapes. It will make the space seem lighter and larger as well make it easier to take pictures.
  2. Include a special exhibit of Modern quilts (perhaps the Modern Quilt Guild should organize it?) to draw in more of the Modern quiltmakers.
  3. Encourage vendors to bring new stuff.
  4. Consider moving the show back to the City in order to provide more options for public transportation, which would, in turn, increase attendance.
  5. Create a category for bags and other small accessories.

**I will be uploading all of the photos to my Flickr account, but it will take me some time. There is a link above, but you will need to return later to see them all.

Sketching #171

CPP Response #171: Perch

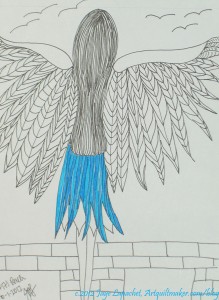
I cannot get this bird woman out of my mind. I have drawn her before and I am sure she will appear again. I think she represents more of an escape than wanting to fly. Here she is perched on the top of the building and ready to fly.

I was inspired by the idea of perching on the edge of a chair, but I didn’t want to draw someone perched on the edge of a chair. This idea came to me when I was looking through my sketchbook for the budgie photo and came across the response to prompt #119. I drew another woman ready to fly instead of the budgie. I think I like the feathers in this response better.

Take a look at the original prompt and draw, paint or sing something in response to it. I would love to see what you create.