All Rolled Up Tote – Finished!!!

All Rolled Up Tote - finished (closed)
All Rolled Up Tote – finished (closed)

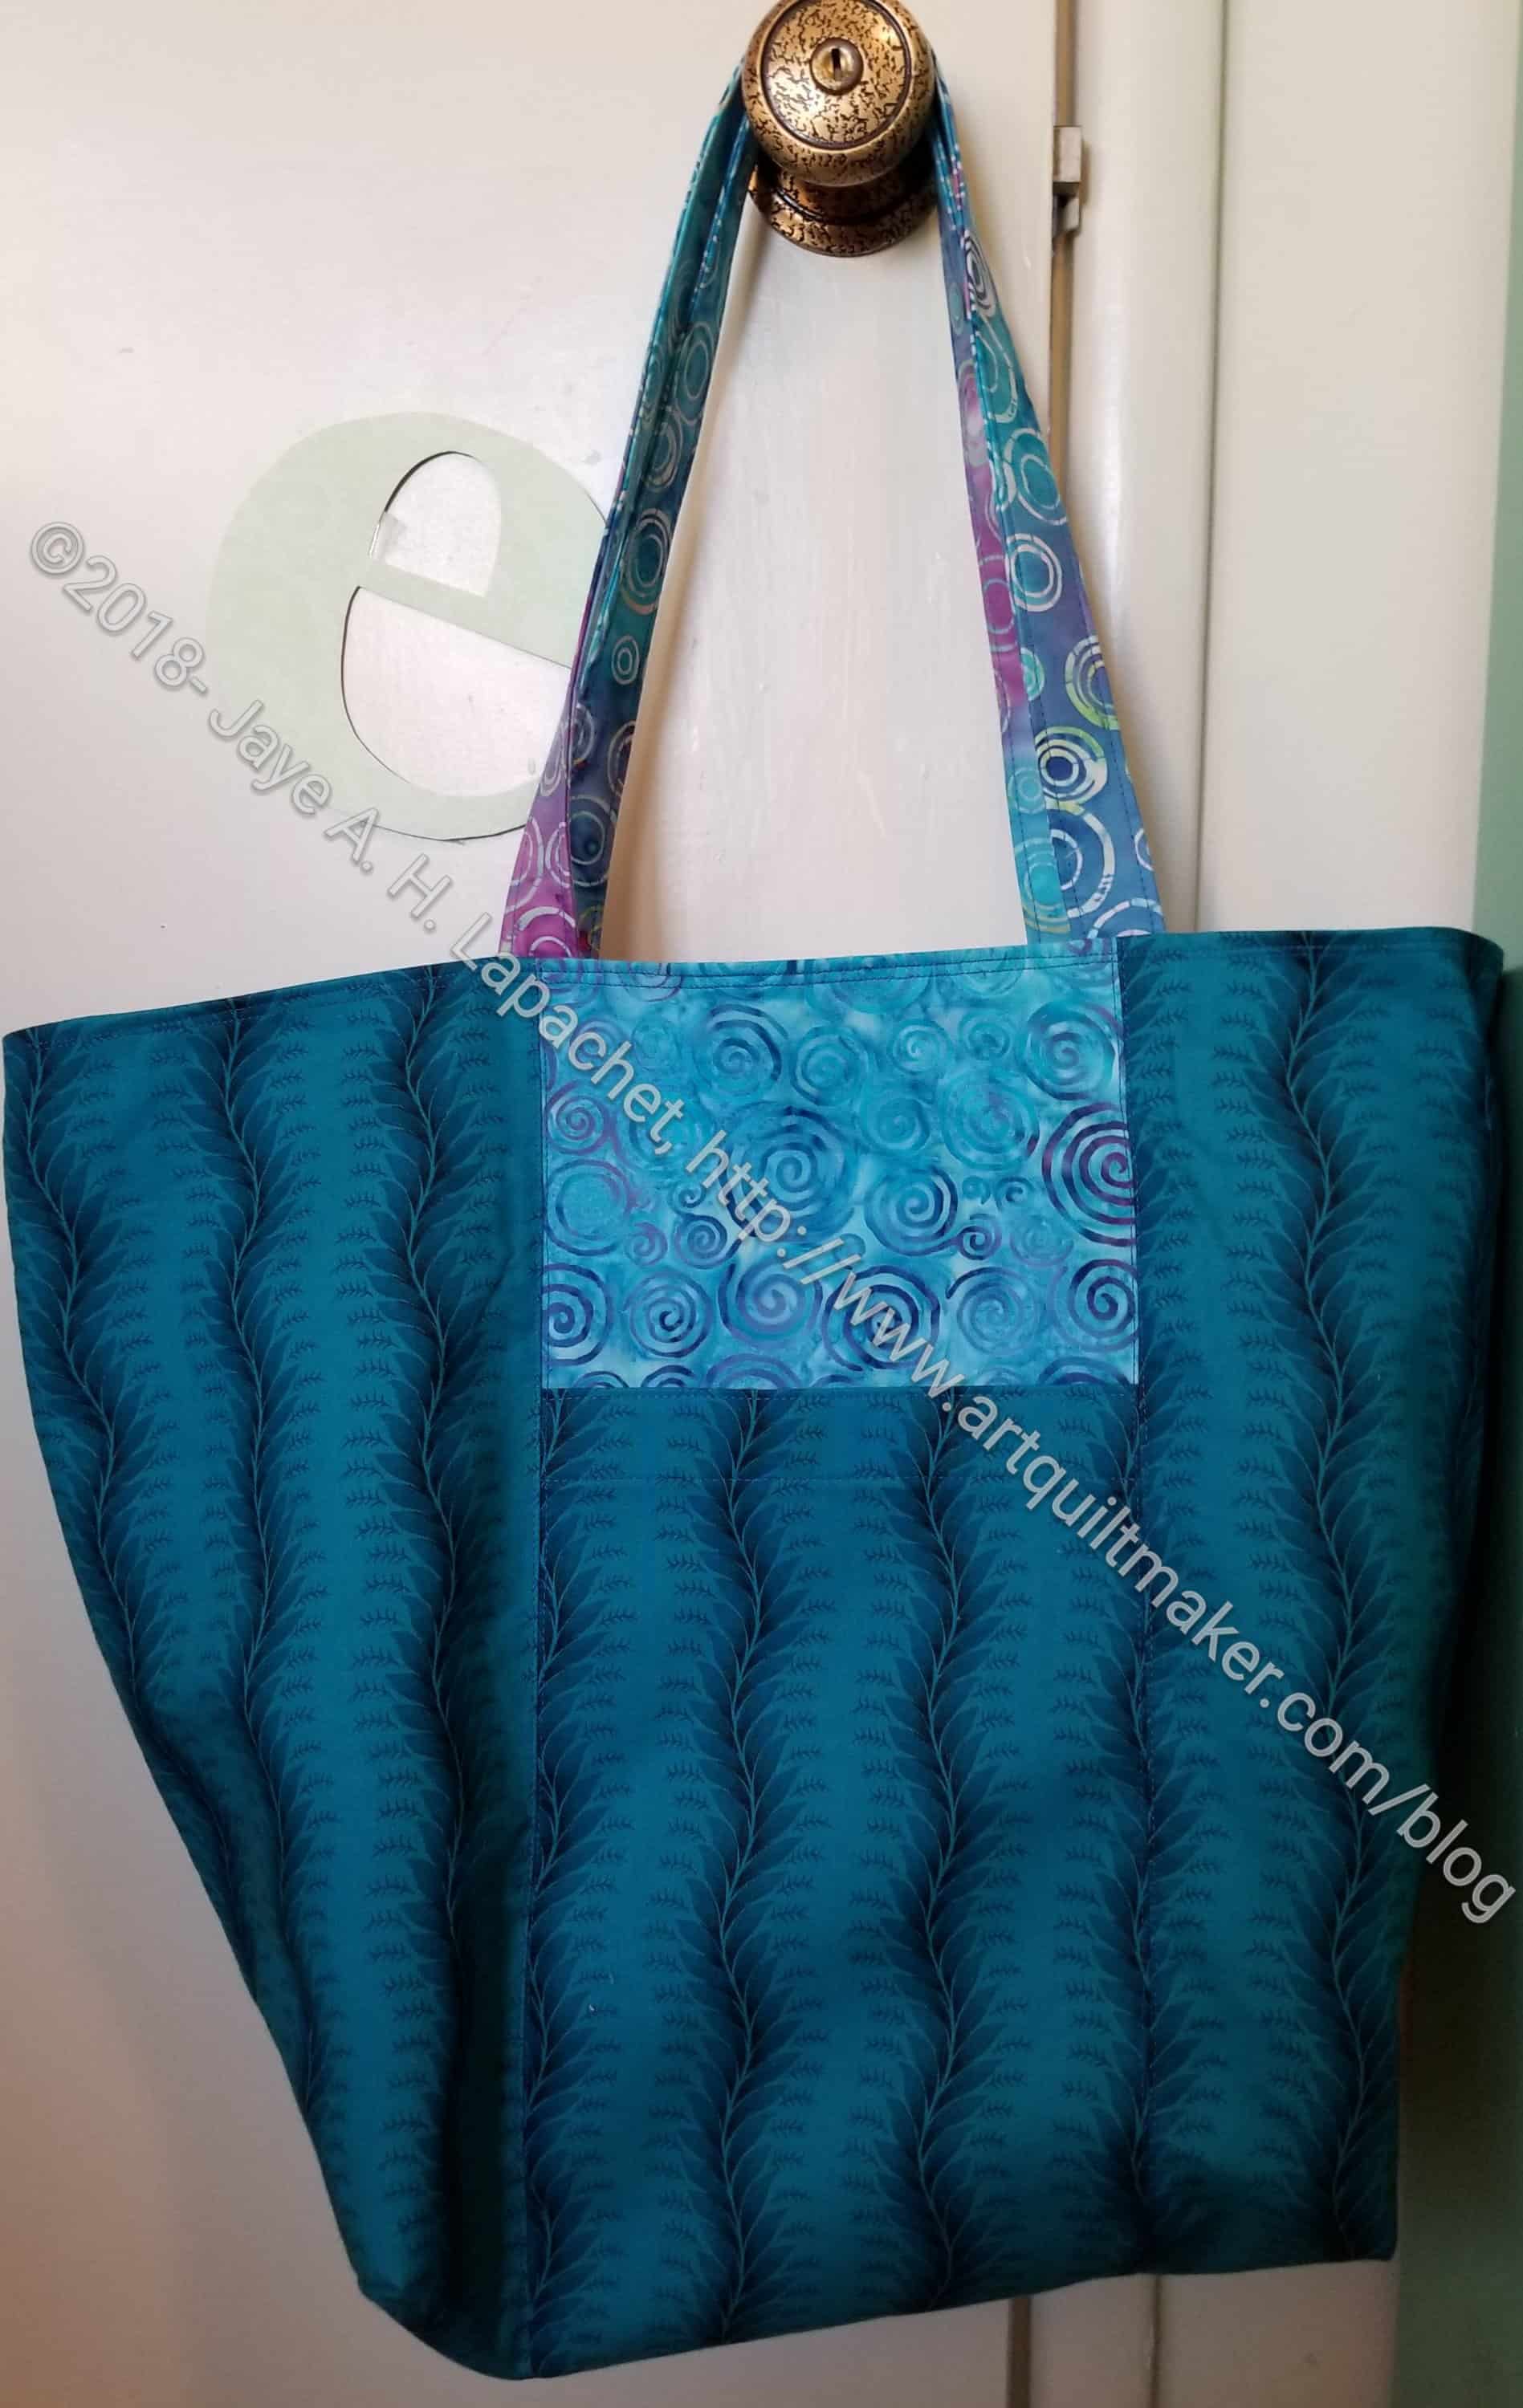
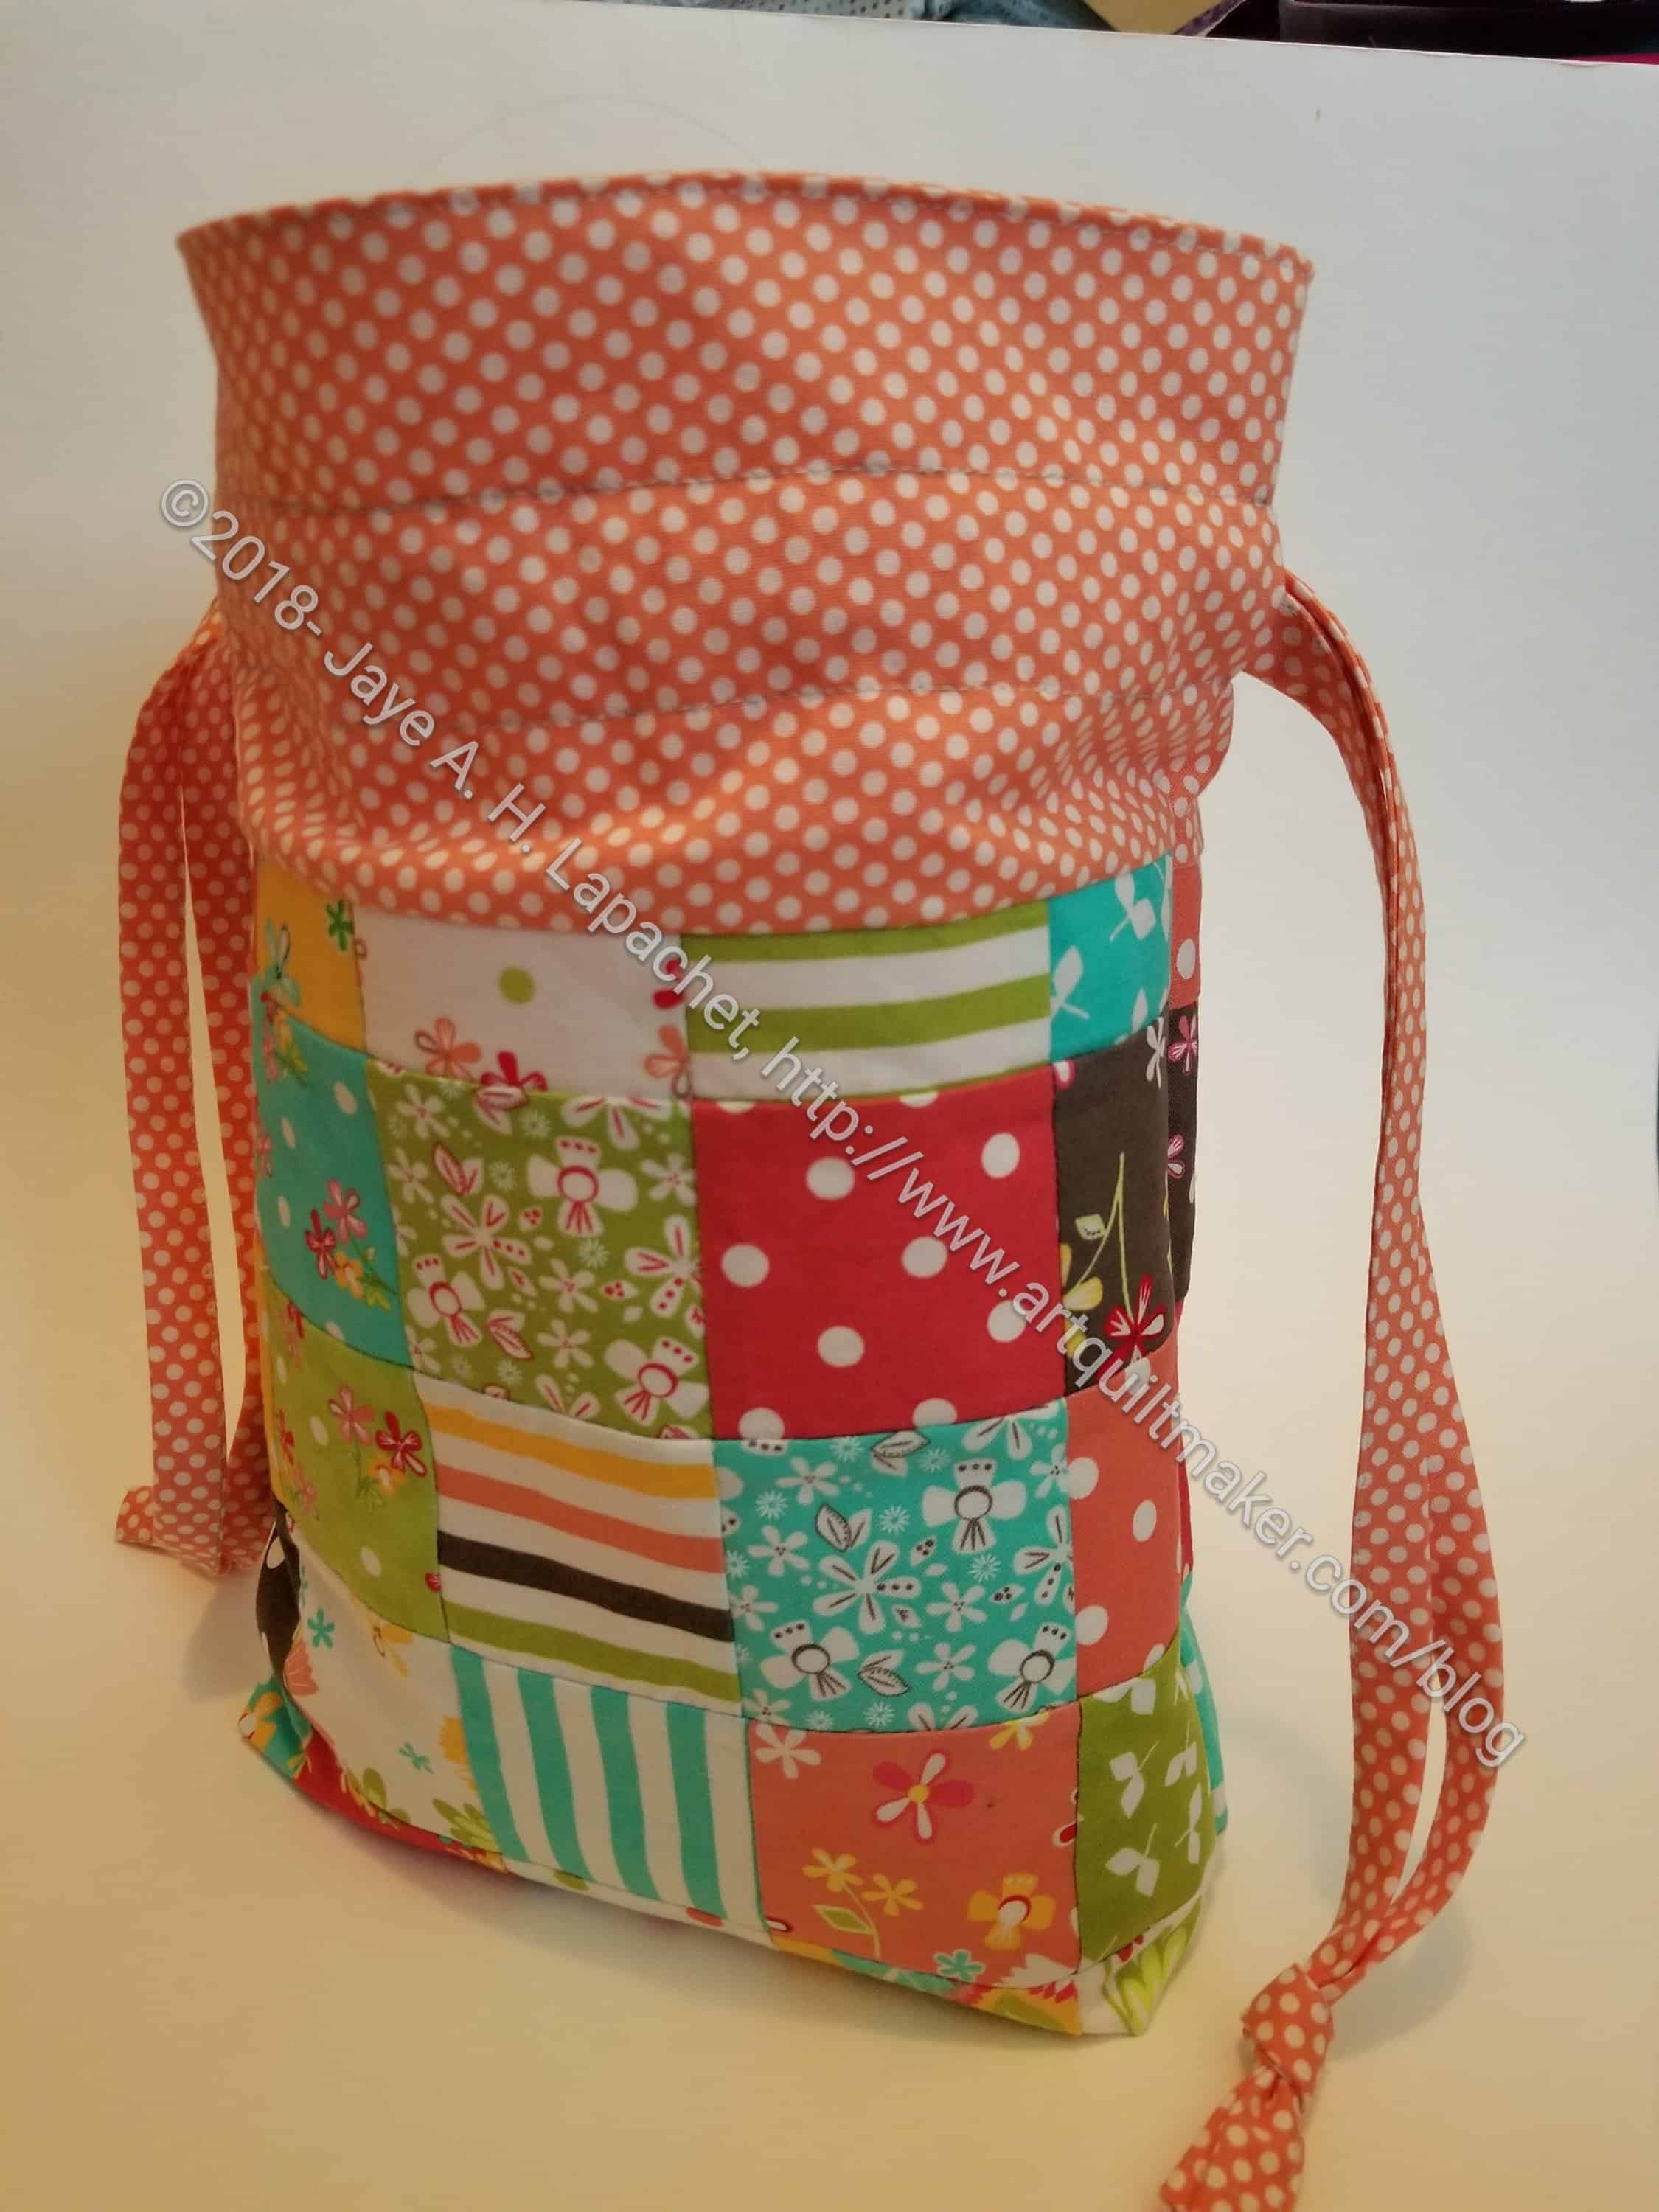
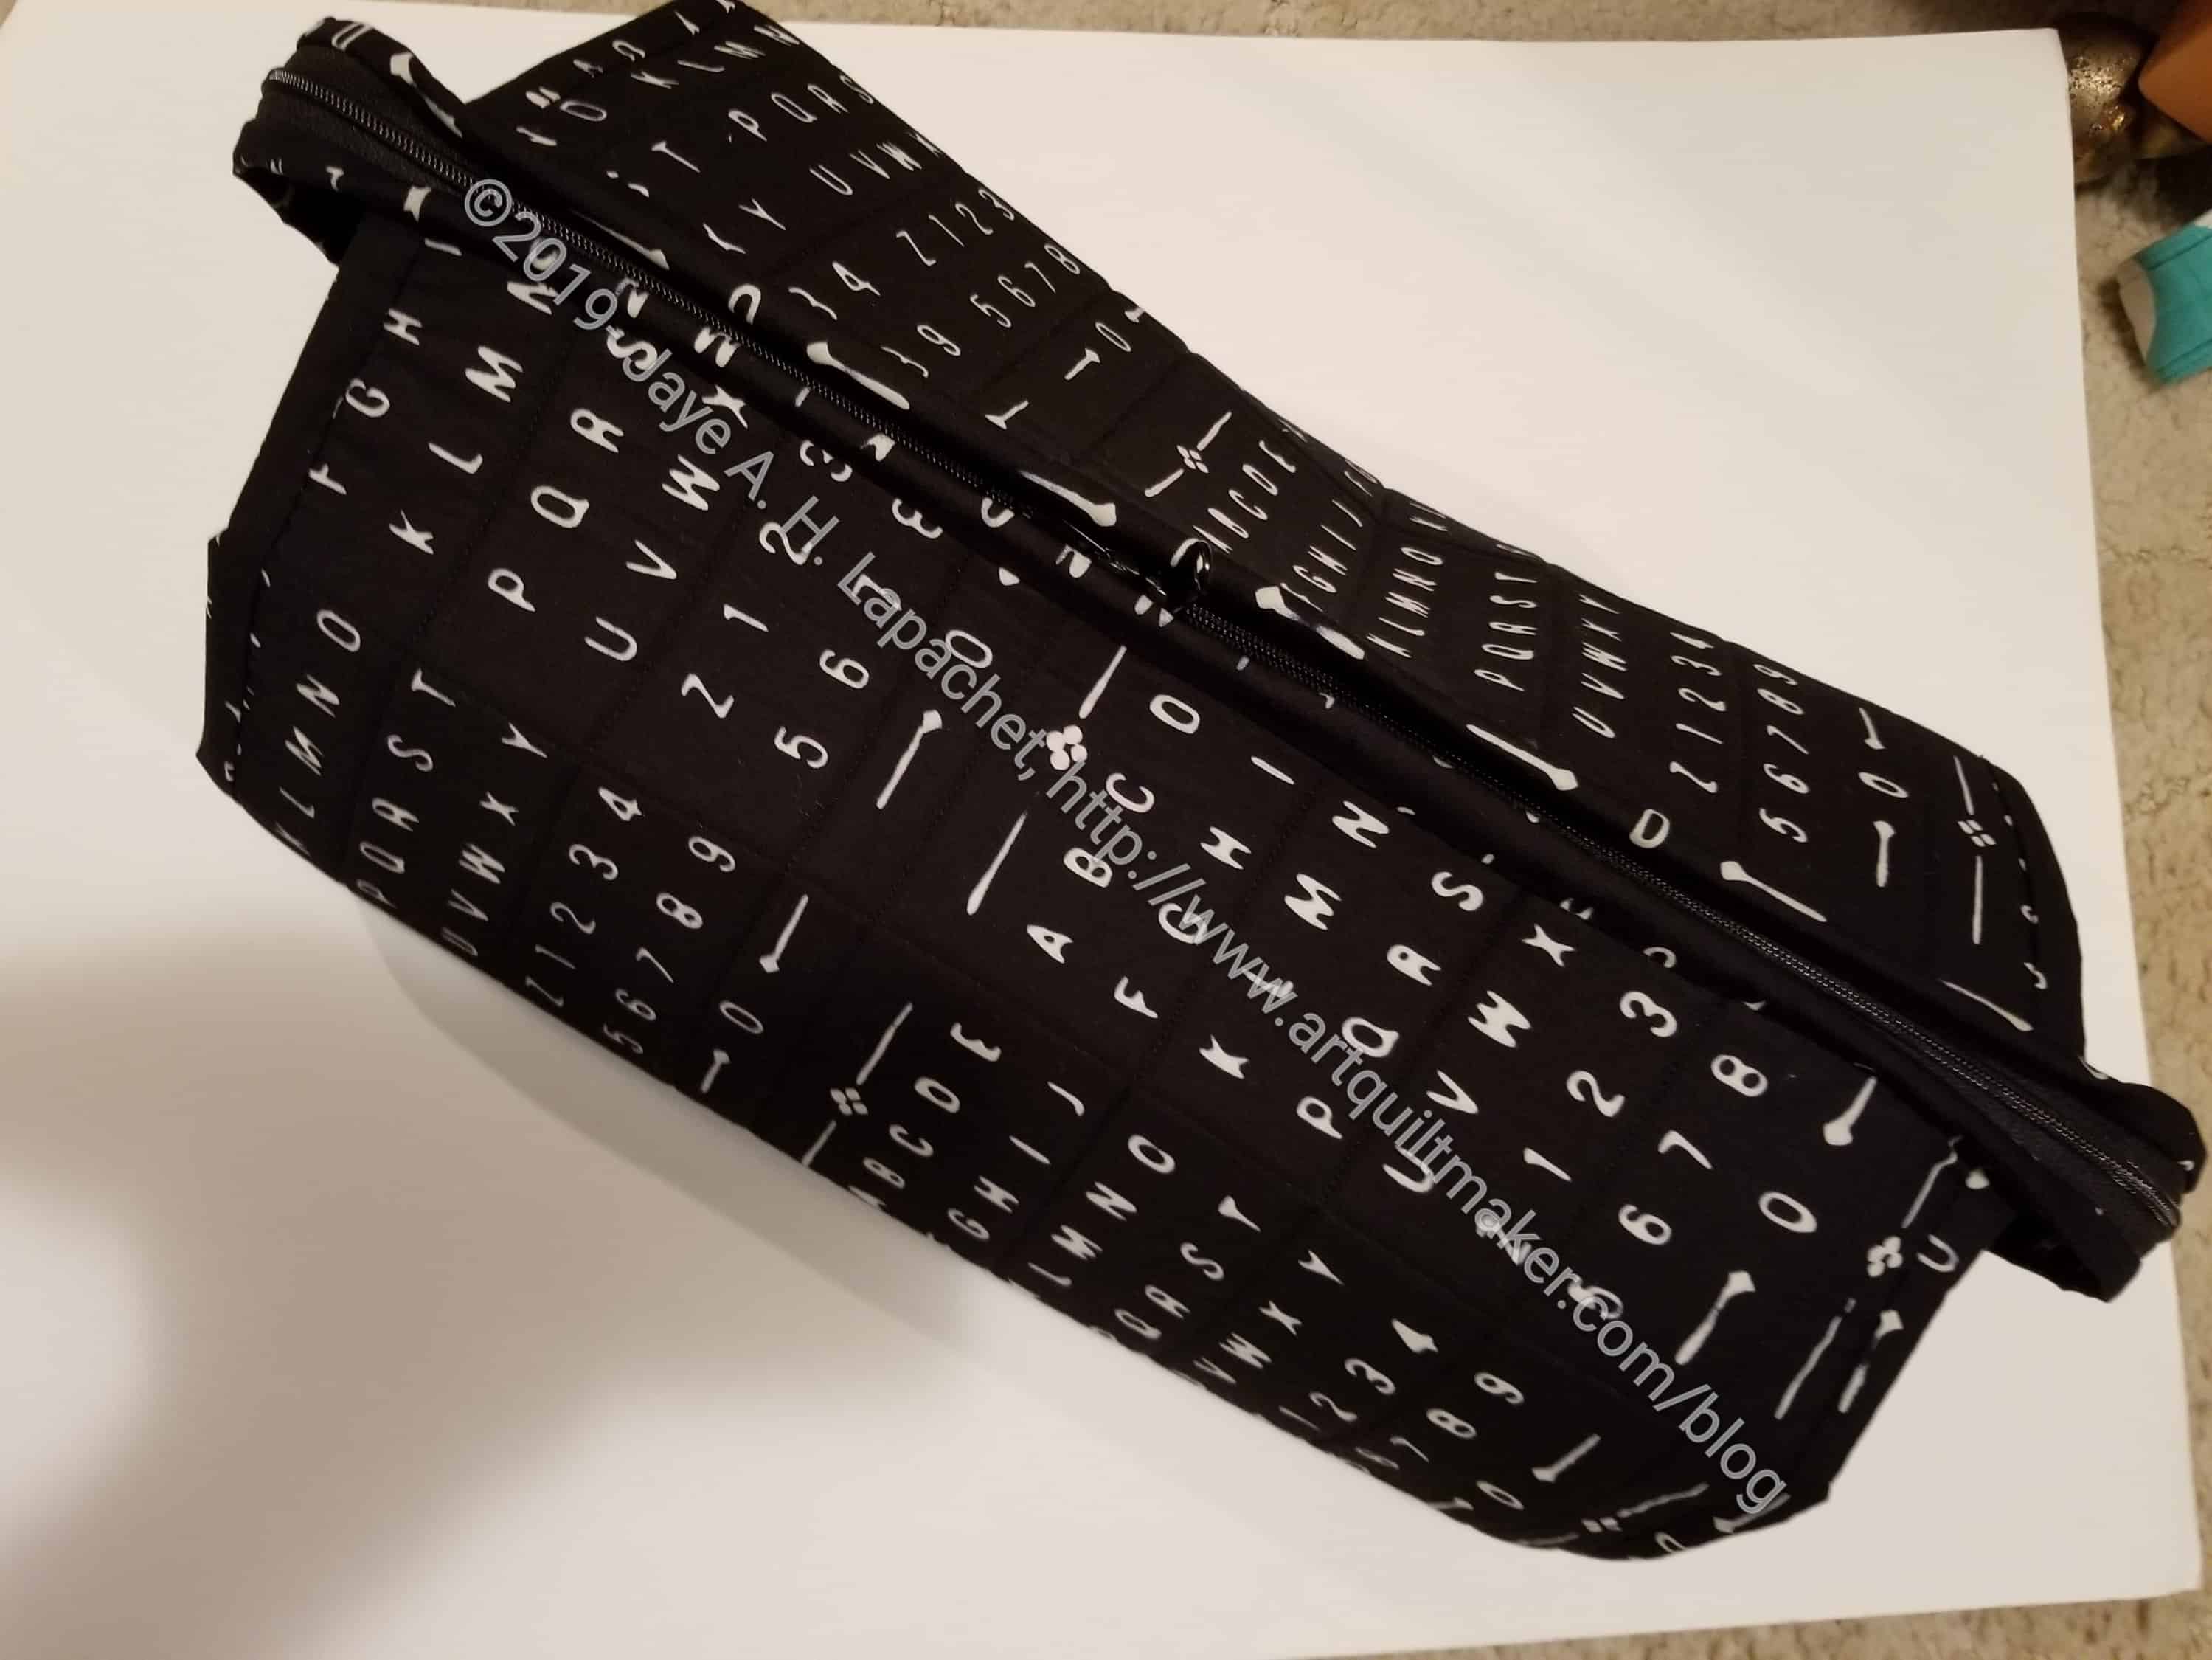
I am thrilled to tell you that I finally finished the All Rolled Up Tote!

Yep. Finished. Done. Complete.

It was a big project. Not difficult, but with a lot of steps. The steps made it somewhat daunting. I say daunting only because the project was unfamiliar and the sheer number of steps seemed impossible to complete. I had done most of the techniques before, if in different patterns, so that wasn’t the problem. I have a new appreciation for video tutorials.

All Rolled Up Tote - size comparison
All Rolled Up Tote – size comparison

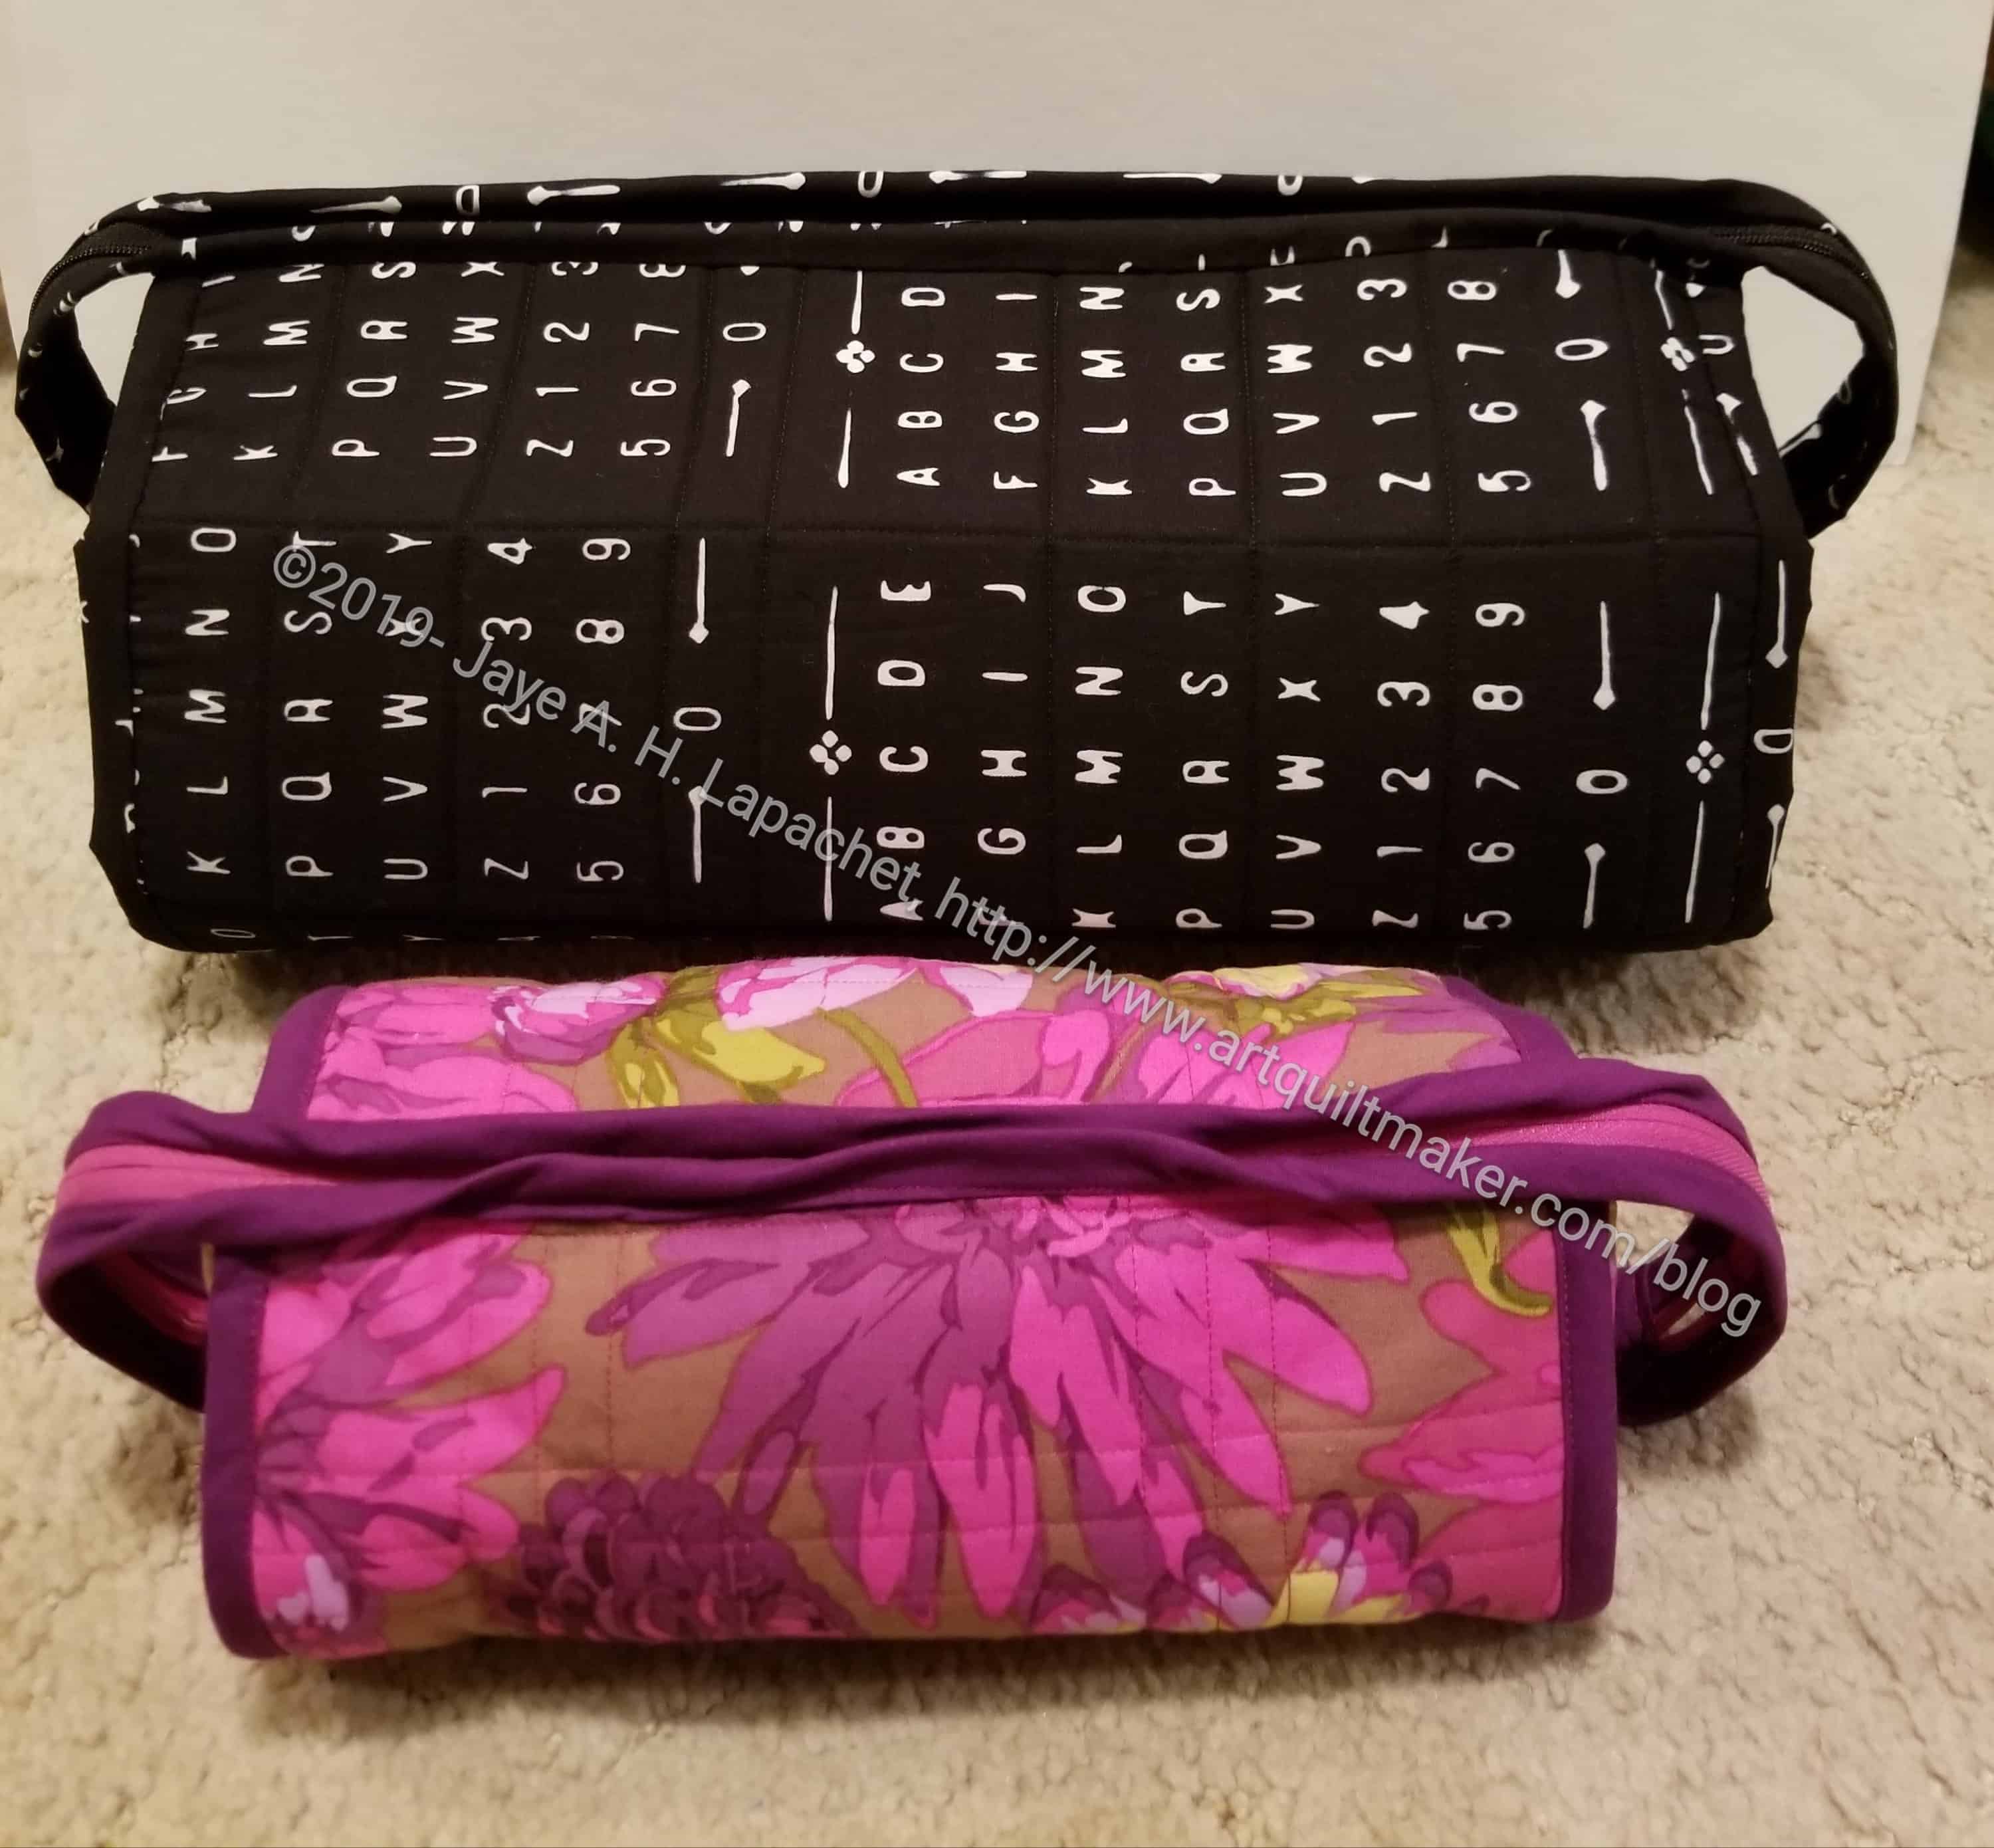
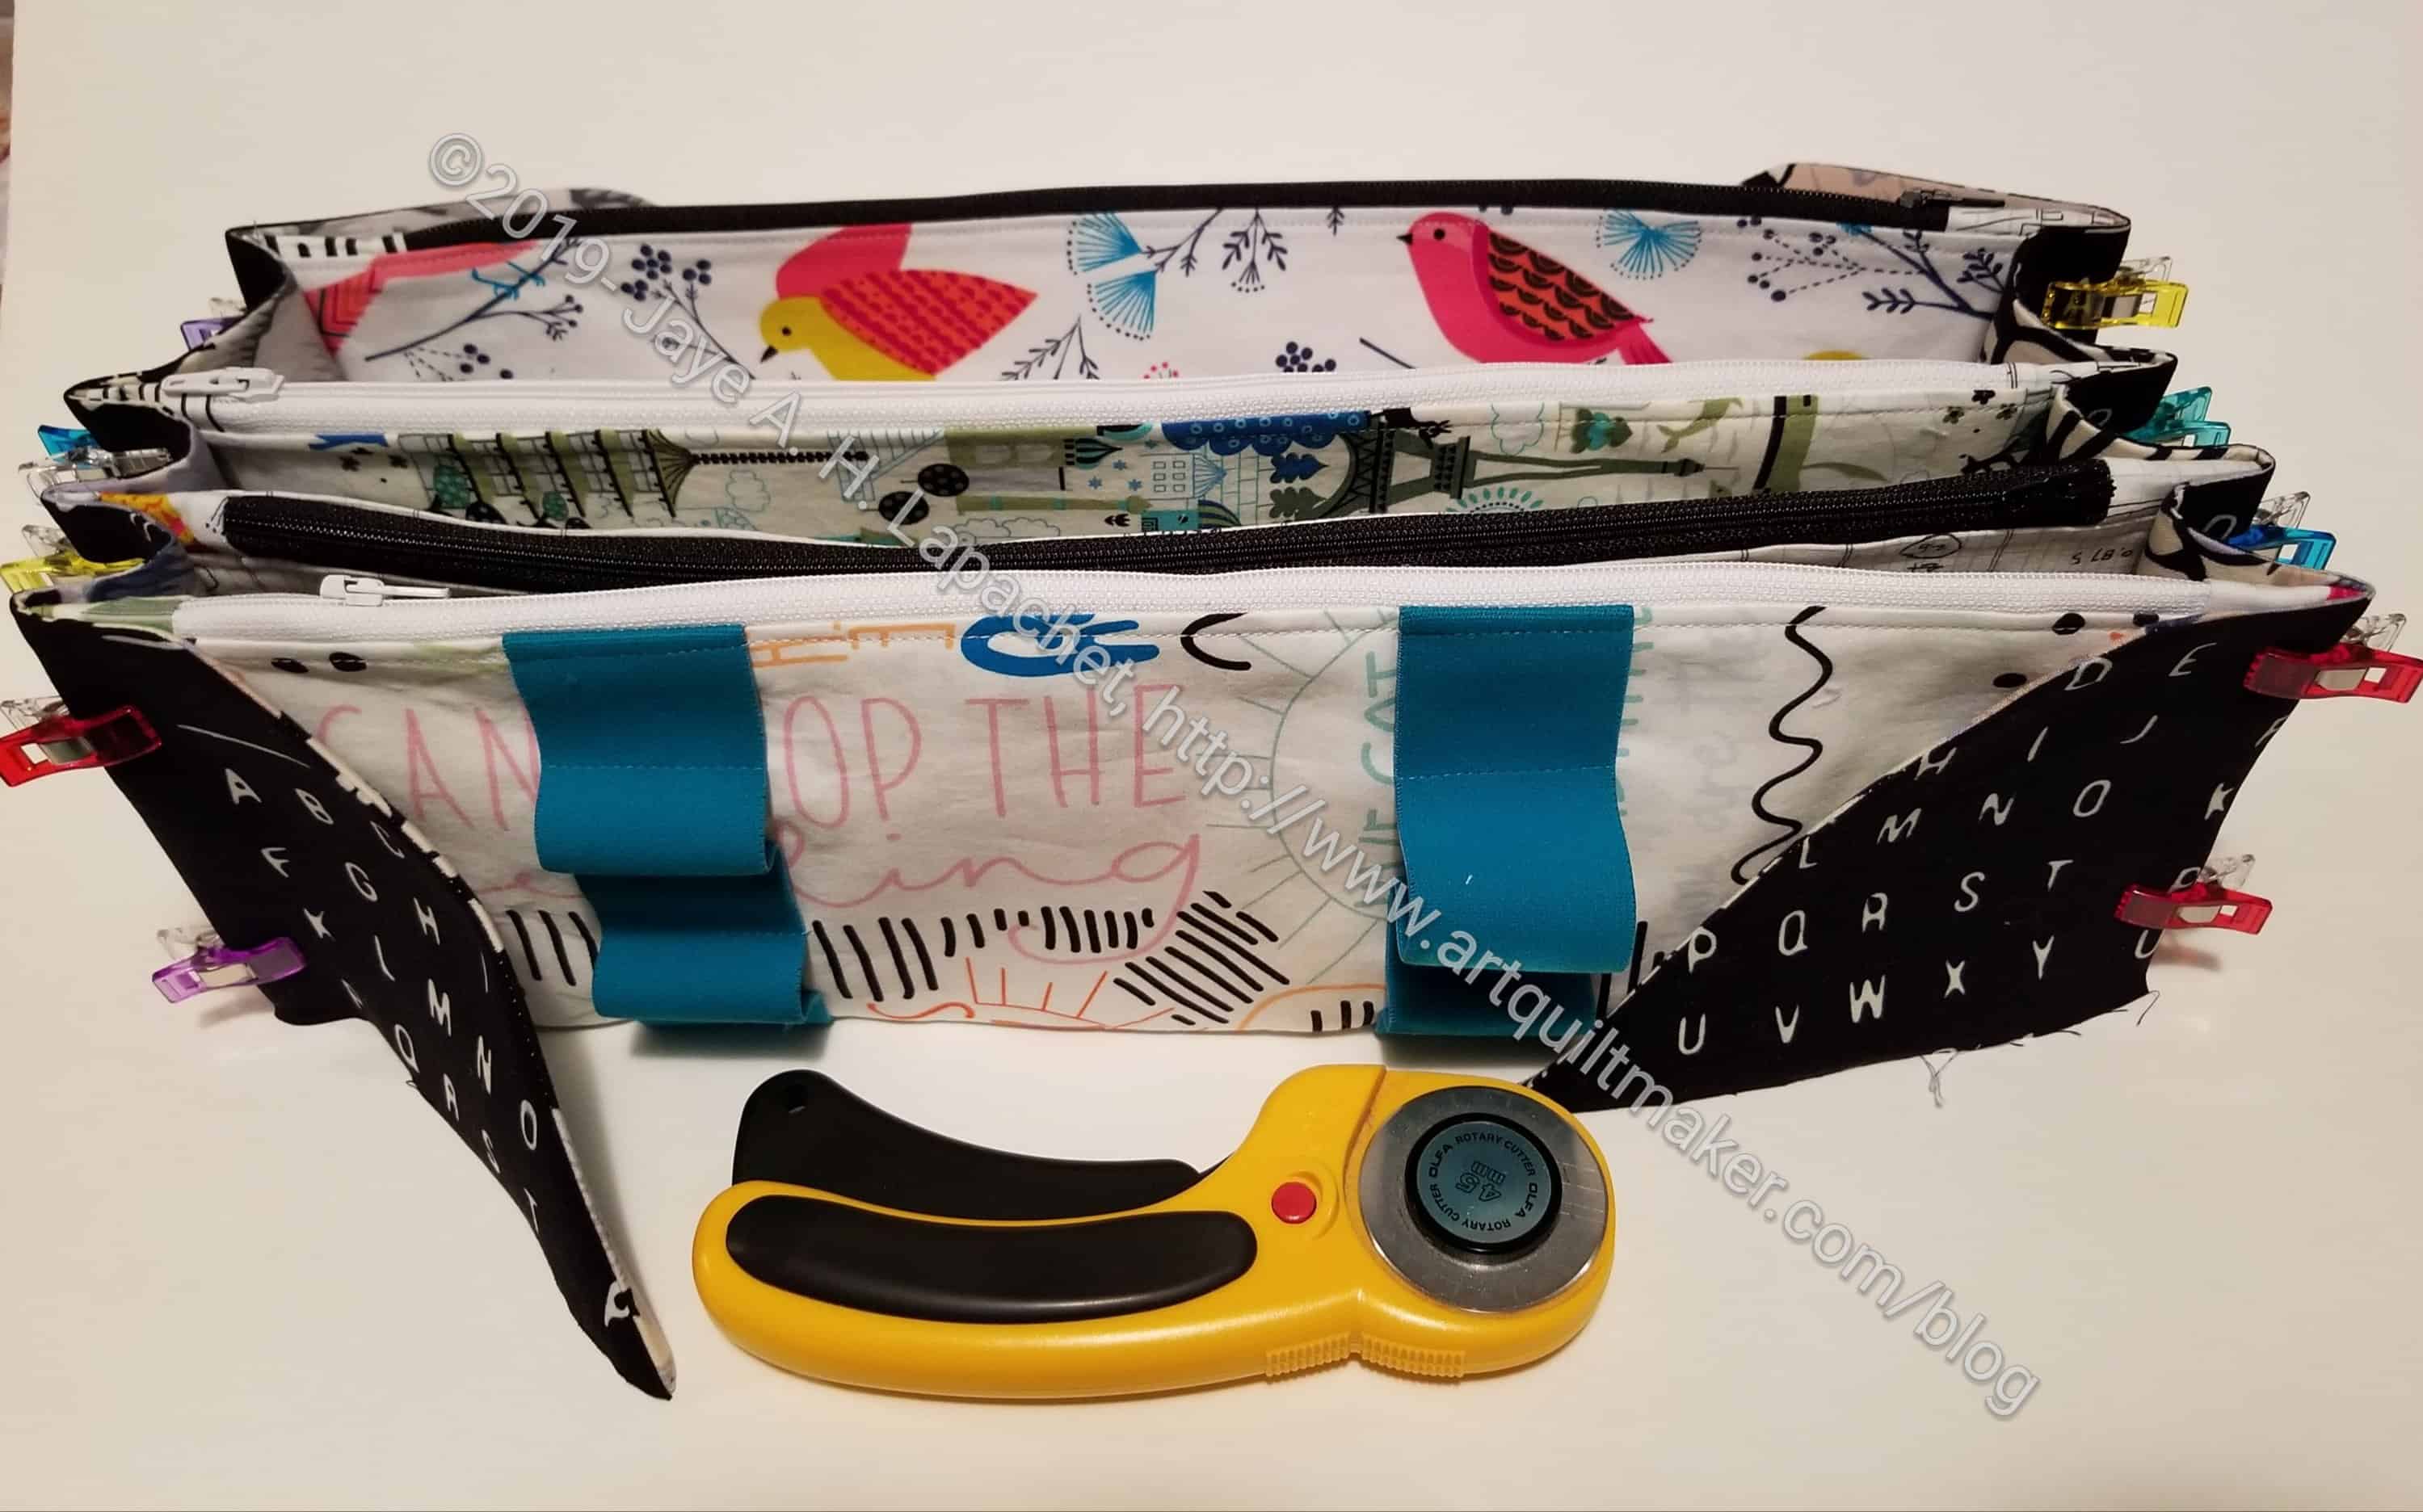
The Tote is HUGE. I didn’t really understand how huge until I had sewed the main parts of the project together. It is really hard to understand the size without seeing the thing in person. I have included a photo with my most recent Sew Together Bag side by side with the the All Rolled Up Tote for comparison. I know many of you are familiar with the Sew Together Bag.

All Rolled Up Tote - open
All Rolled Up Tote – open

I am thrilled that I made such a complicated and different project. It is similar to the Sew Together Bag, but the construction was different in some places.

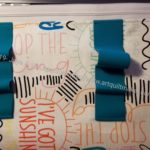
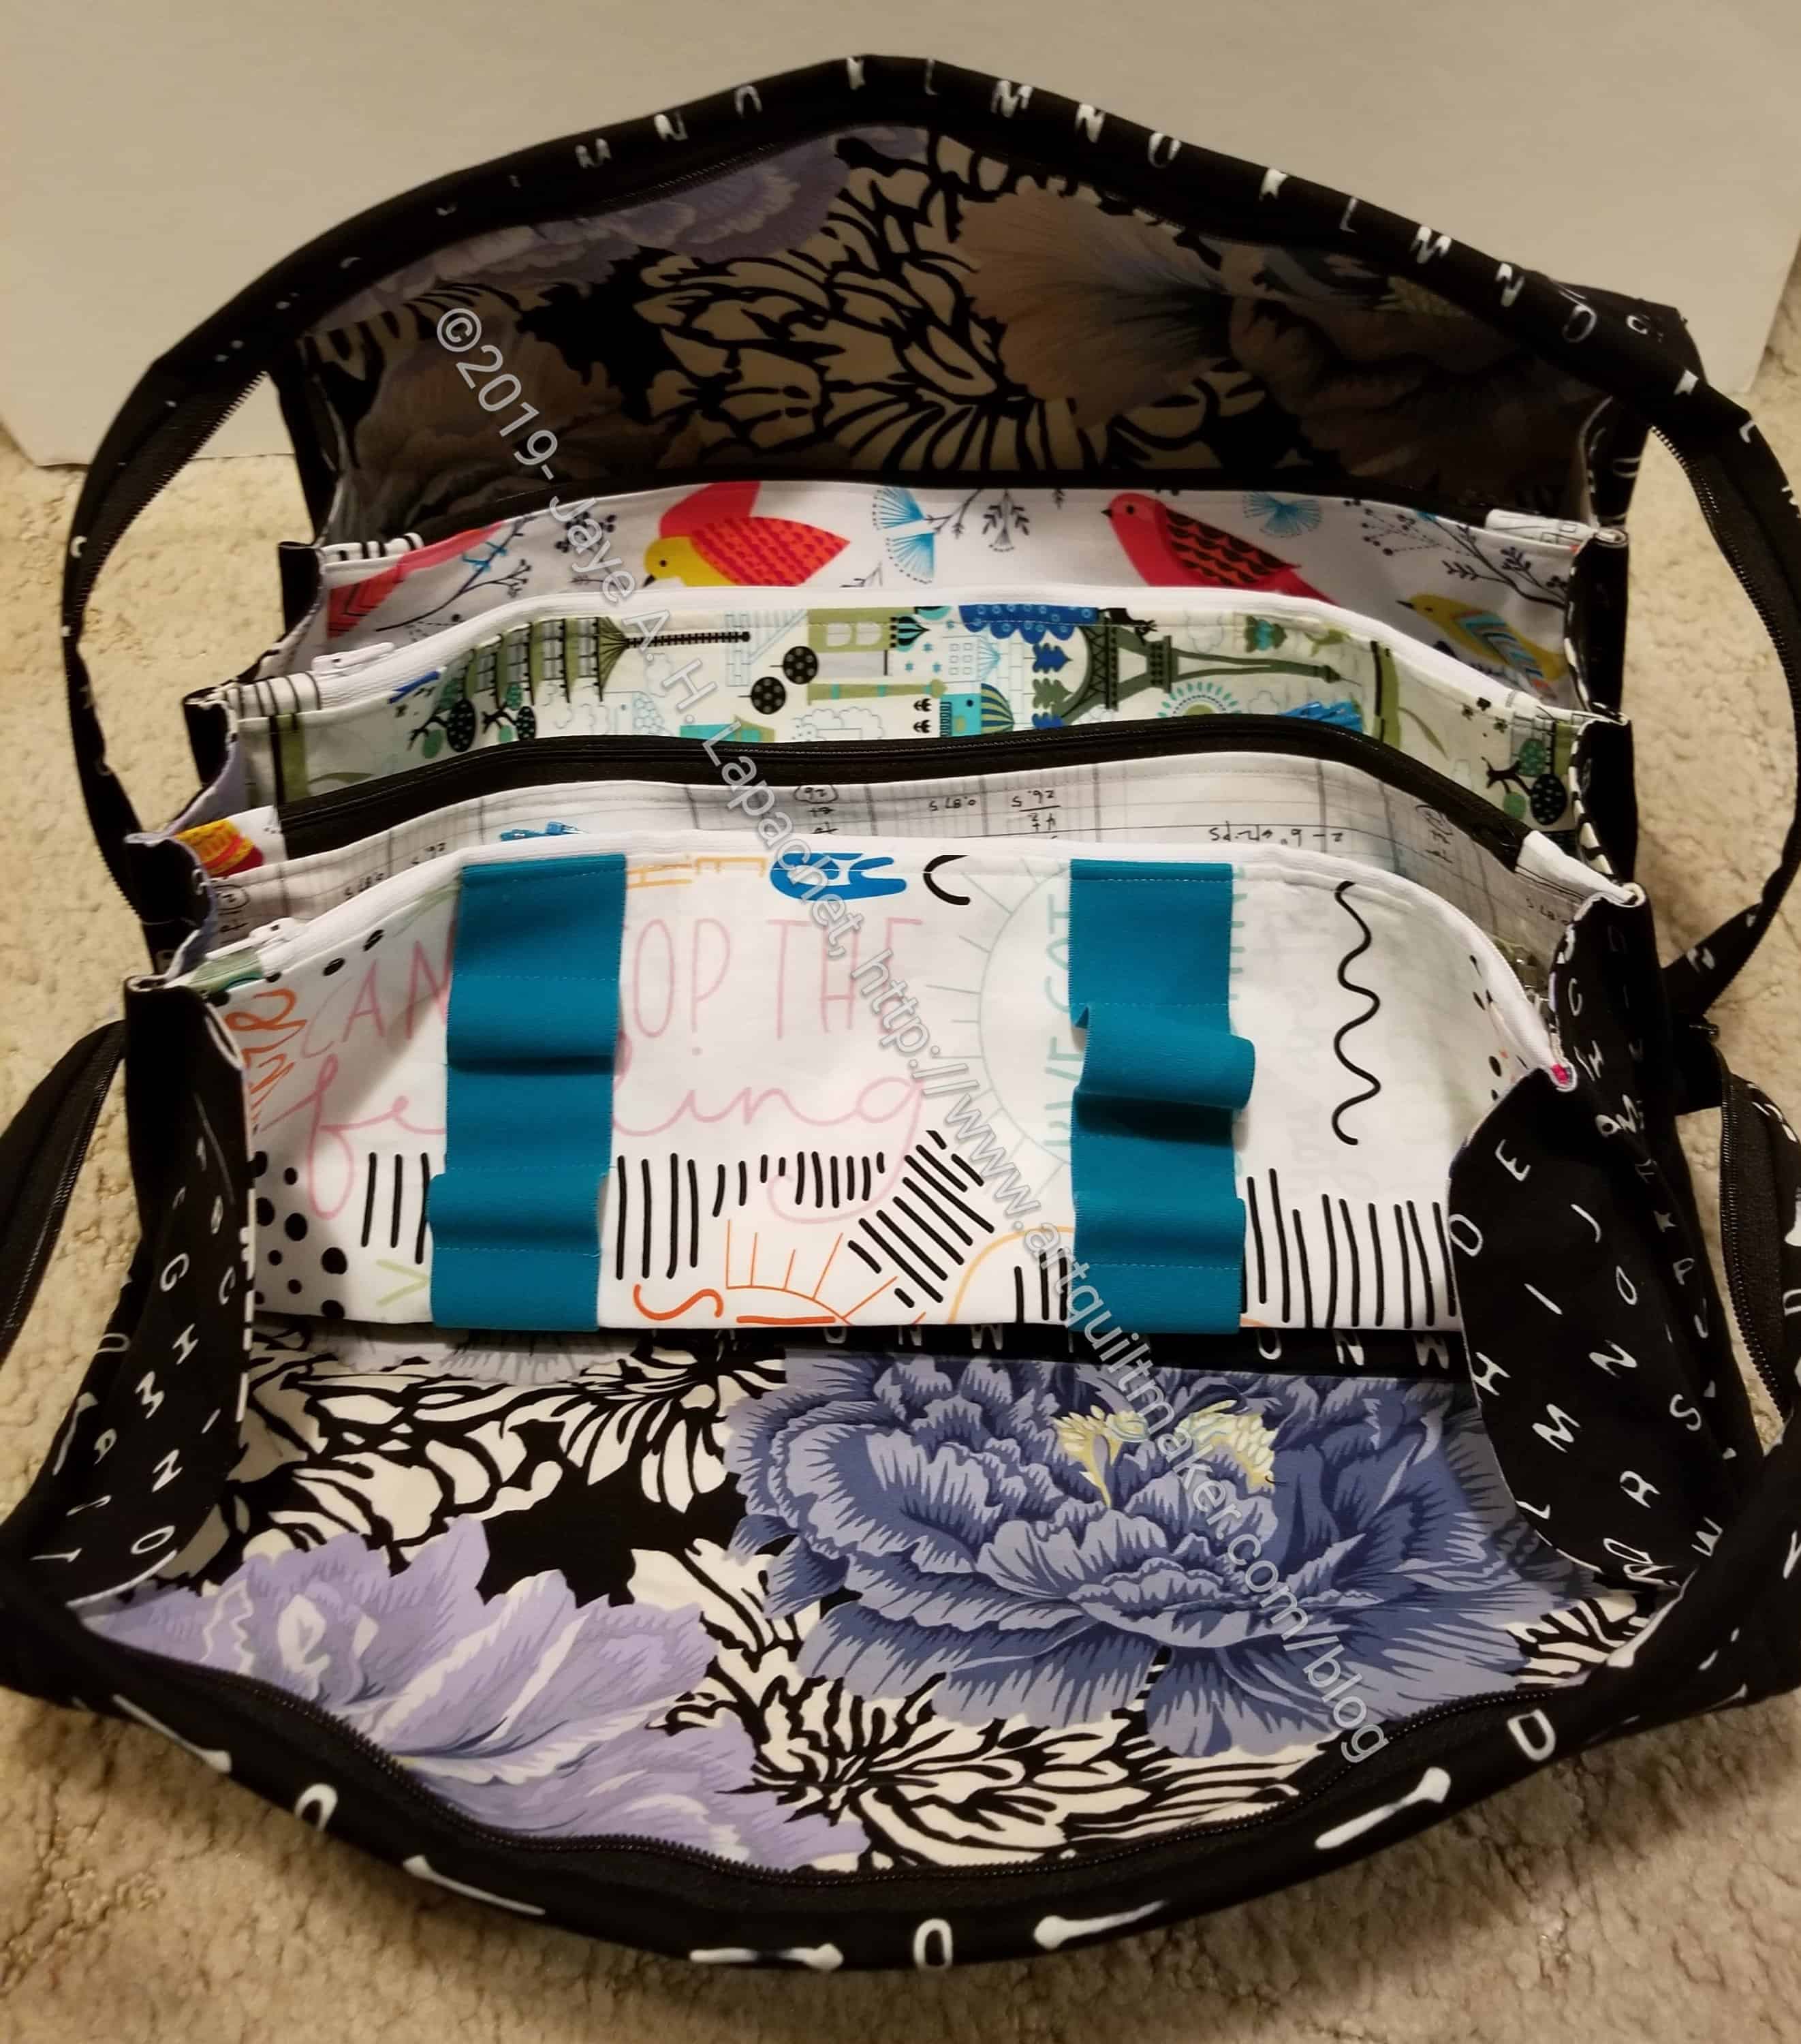
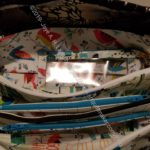
The other thing I did differently was the front panel (see blue/turquoise vertical strips). This panel calls for a 1/4″ piece of elastic to be installed horizontally. I didn’t want any pens I might want to carry around to be accidentally opened and bleed on to my fabulous Philip Jacobs fabric. I also thought the 1/4″ inch elastic was not sturdy enough and looked a bit cheap. I decided to install wider elastic, which I happened to have, having bought it somewhere along the line. I measured out a few items that I might want to have with me, if I carry this around as a project bag, and sewed the elastic down. I think it looks nice.

All Rolled Up Tote - sleeve view
All Rolled Up Tote – sleeve view

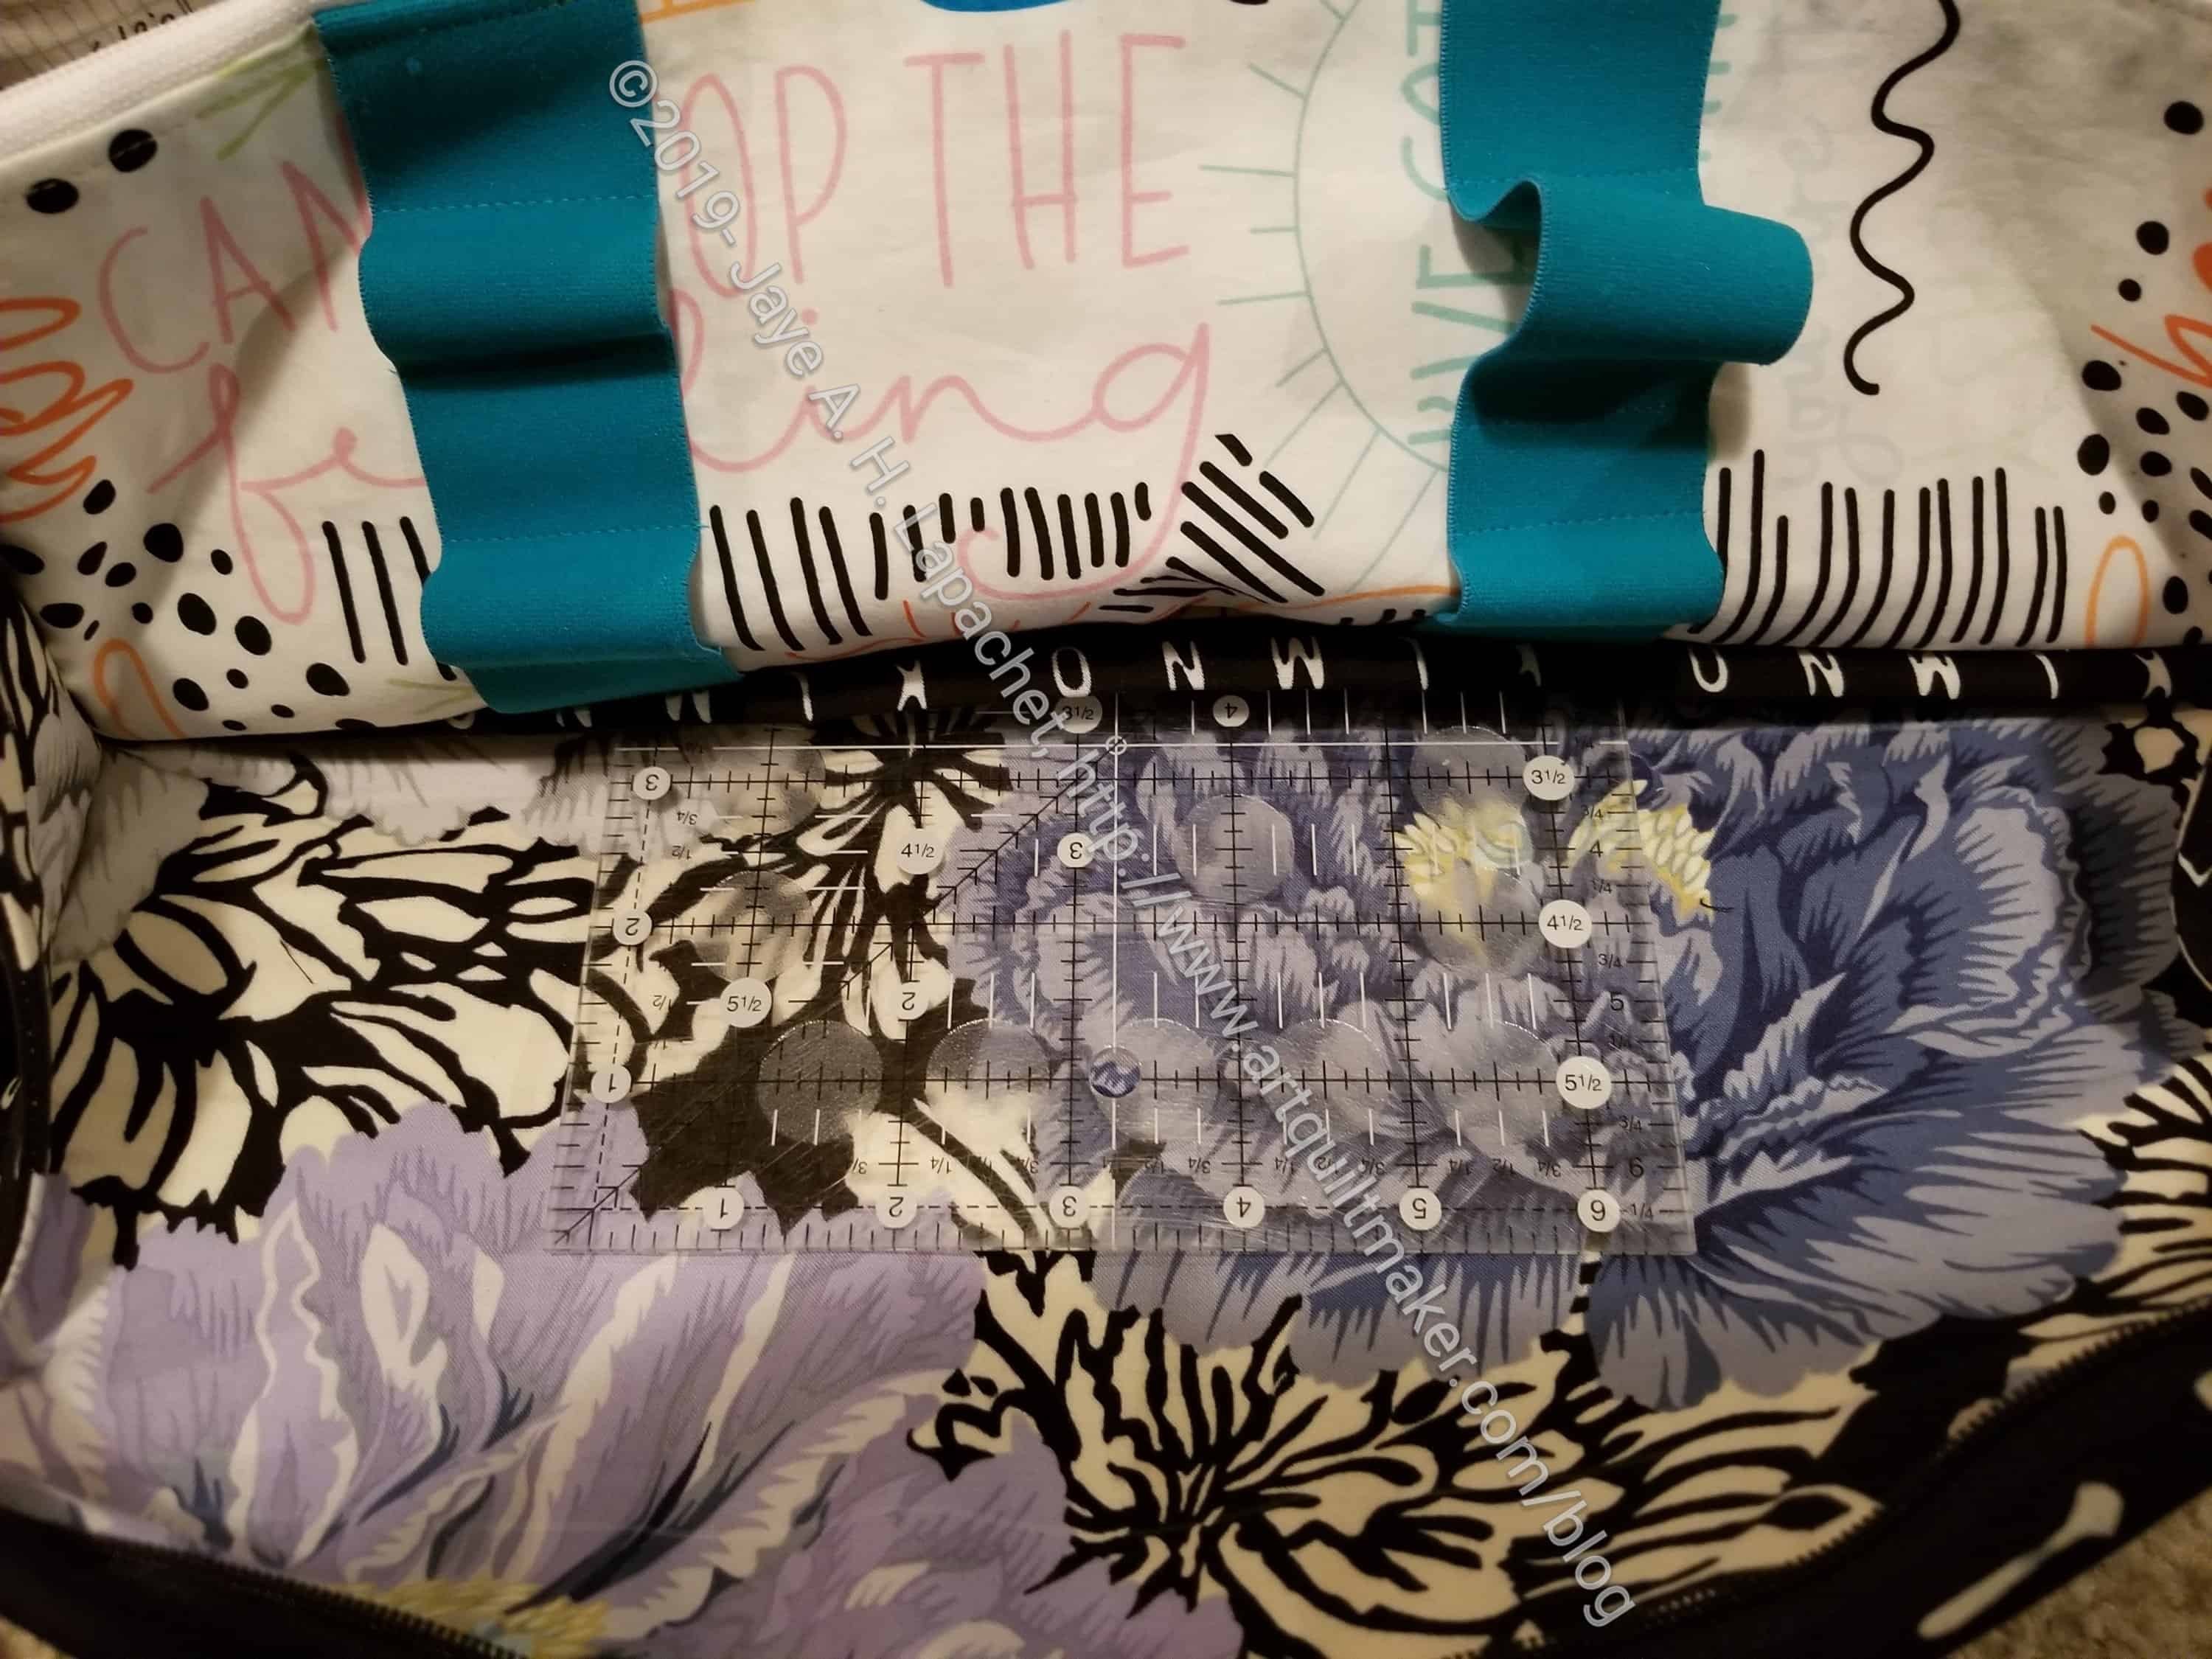
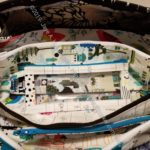
One thing that was hard to understand without the video was the sleeve. I tried to understand it before watching the videos and it was a mystery. Finally, I watched the videos and could see what it was for. There is an extra area below the pockets (thus the changes in construction in comparison to the Sew Together Bag) where one can store flat items. I put a ruler halfway into the sleeve (see right), so you can see the sleeve. I haven’t tried filling this bag yet as I haven’t quite decided how I will use it, so use of the sleeve may change once I decide.

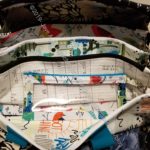
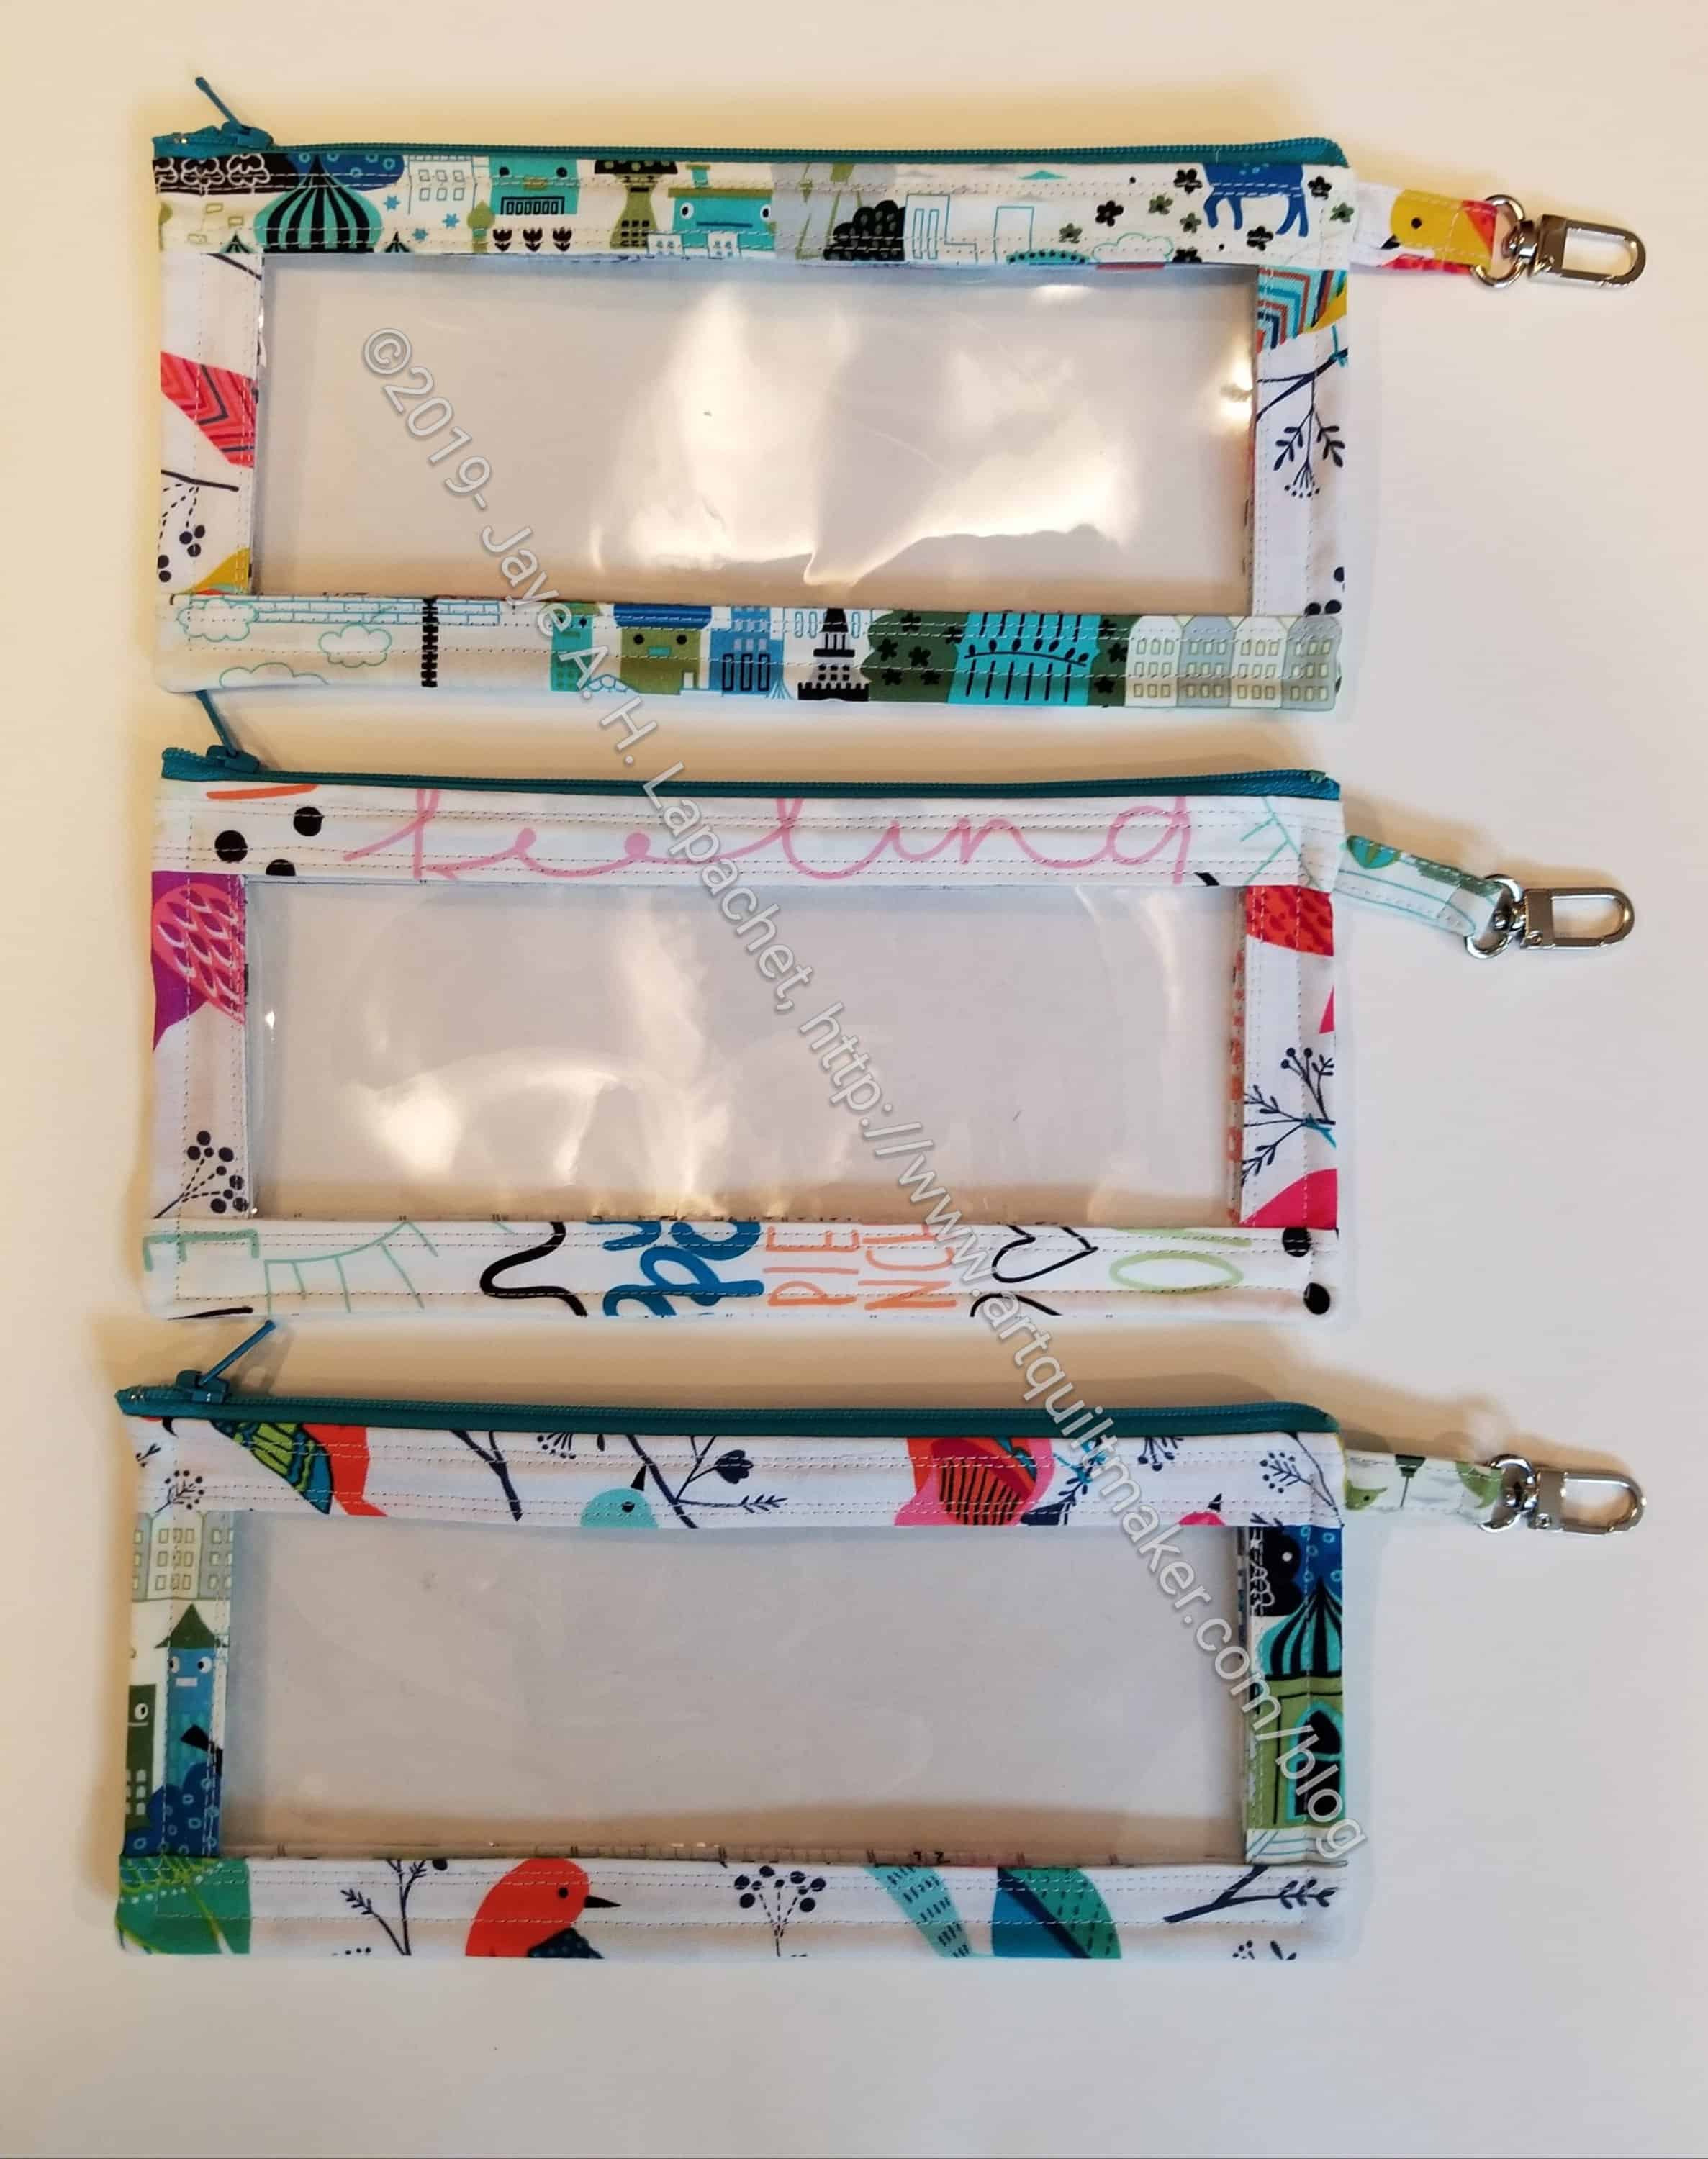
My pouches fit nicely in the Tote. Of course they are the correct size, but my lobster clip plan worked well. It was pretty easy to clip and unclip them from the D-rings on the tote. Crafty Gemini shows putting WonderClips into one of the pouches, which might be a good idea, since I could take the pouch out and put it somewhere if I knew I had to refill it because I had used my ‘on the go’ supplies (like clips) for a project. I also think that these little pouches might make good small gifts. They do require a lot of steps, but are unique as well.

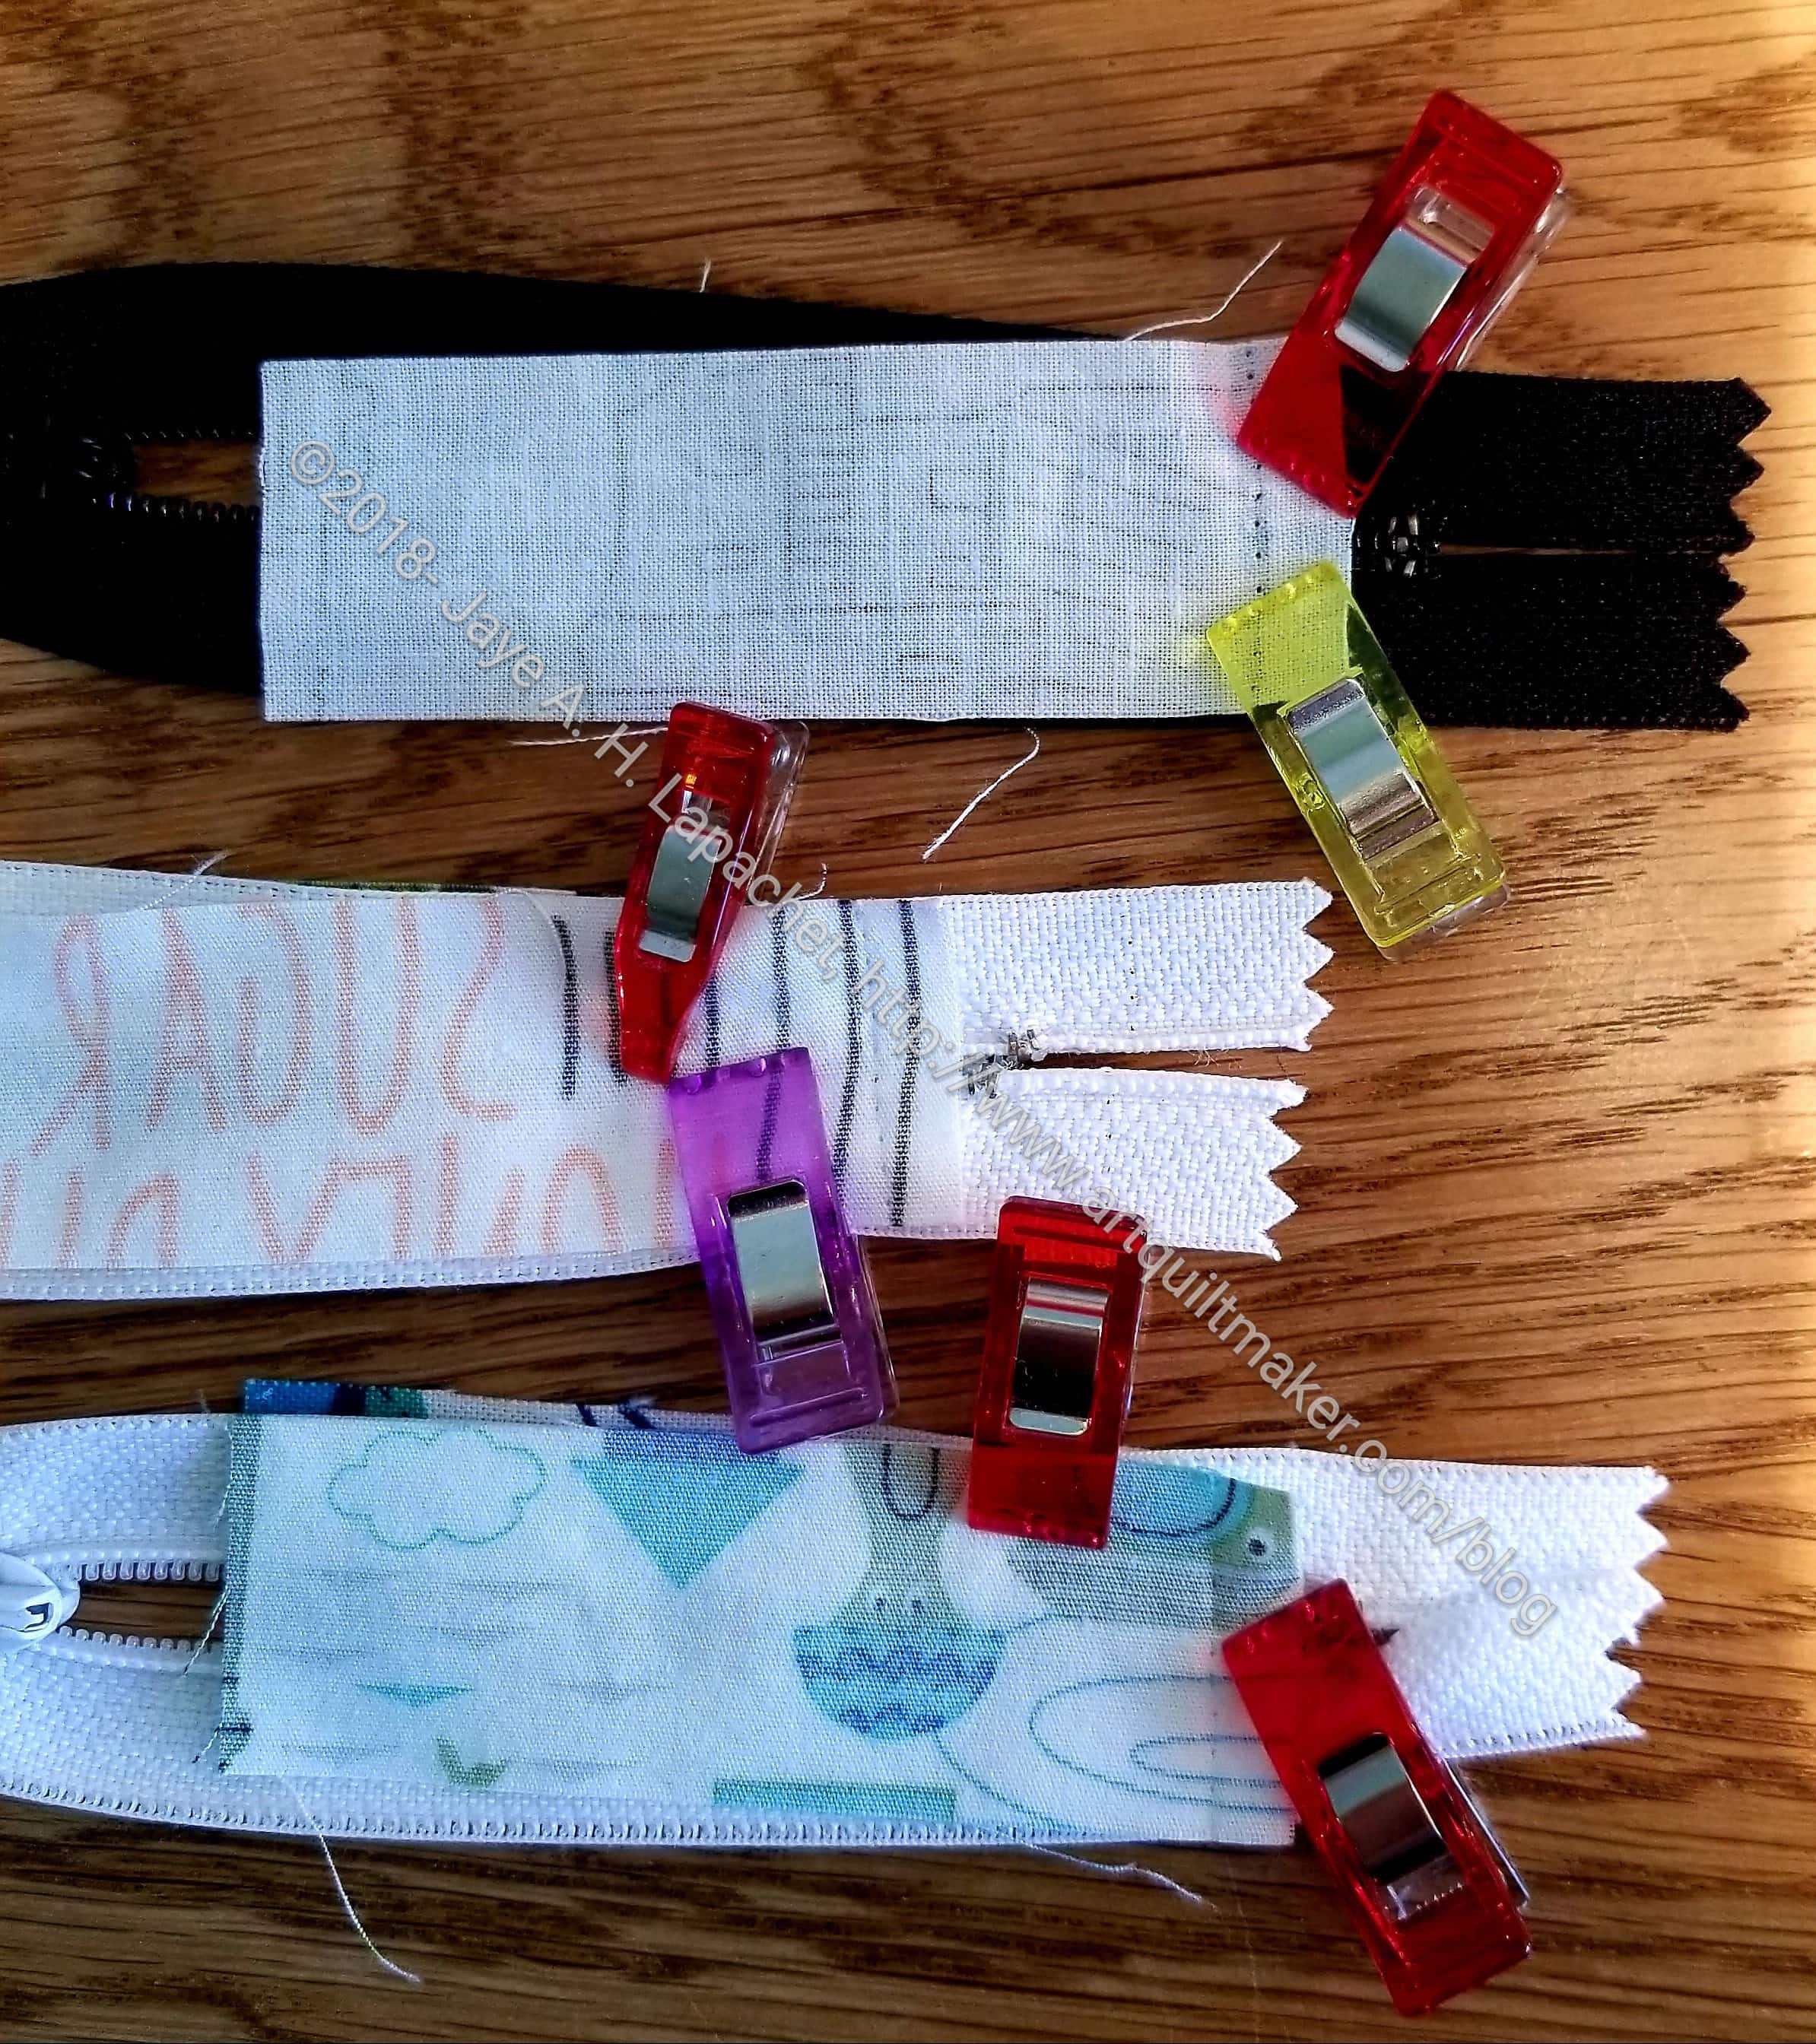
One issue I had with the pouches was zippers. I happened to have zippers that were the exact right size. Crafty Gemini doesn’t say anything about having zippers the right size. In terms of whether we needed to secure ends or add a zipper tab. I might do that next time just to make sure everything was sewn together tightly. I am concerned that the zipper ends will come out.

Some of the problems I had with a recent Sew Together Bag were alleviated by the pattern’s suggestion that makers hand sew on the second side of the binding. I did hand sew the second side of the binding. It took me somewhere between 4-6 hours, I think. I am pleased with the way the binding turned out. No sloppy looking stitching because of multiple layers and a cranky sewing machine.

I am I still contemplating handles. Some of the other people in the Organizer Club who made this project added handles, but I wasn’t completely happy with their design. If I were to add handles I think that I would like to add them all the way around the bottom of the project in a loop design. I imagine that these would not go over the top of the bag, so access would not be impeded.

Off hand I can’t think of other changes I would make to another version of this bag, but I have the feeling I want to make another one. *I*, of course, don’t need another one, but I am sure I know someone who needs it as a gift.

A Few More Half Hexie Stars

White half hexie stars - January 2019
White half hexie stars – January 2019

In between everything else I have going on, I have been working on the half hexie stars. I need about a million more stars, so I just work on them whenever I don’t have any other handwork pressing.

I especially need white background stars so I have been concentrating on those fabrics lately.

One problem I had with this batch was matching the centers. WonderClips, which has worked perfectly well before, were not working. They didn’t seem to be clipping strongly enough. My pieces kept slipping, making the centers off. Some were just a smidge. Others had to be ripped out.

Half Hexie Star - matching centers
Half Hexie Star – matching centers

Alison saw my double point pins at the last Sew Day. Someone in Rosalie Dace‘s class said I had to have them, so I bought some. Alison mentioned to me that they were for matching up points. I don’t usually have a problem in regular piecing, but since I was having a problem with the half hexies, I thought I would try them. They are not ideal, but they help a lot. You can see from the photo that I use clips and the double point pins. I am now using two pins and a clip. This strategy seems to be working.

Sew Day

Sew Day was on January 5. It seems like a long time ago, but I was so thrilled with the projects I got cut out. Yes, I did prep work.

I used Thanksgiving tablerunner n.1 on my dining room buffet all through Christmas because someone spilled on my everyday tablerunner. I took it to the dry cleaners after Thanksgiving and it was after Christmas before I had the time to pick it up. Thanksgiving did not fit into my Christmas decorating scheme, so I decided to make a seasonal tablerunner for the buffet.

Mod Lights Quick Curve Ruler pattern

On the way back from Portland, I stopped at Stitch again. Stitch is a mostly modern shop in Ferndale that I have visited at least one other time. After being closeted in Portland for a week, I was ready for a treat. Part of the treat ended up being the Mod Lights pattern, from which I will make a tablerunner.

Yes, I am still excited about the Quick Curve Ruler and the fabulous results. I had to buy the mini version for this project, but I intend to use it for another project, as yet undetermined, as well.

QuiltCon: Free Spirit solids

I pulled out some solids I bought at QuiltCon. They have a more contemporary feel than the typical dark red and green of traditional Christmas. I also had enough of the background left from the MetroScape quilt to use as background. That fabric is a little sparkly and will look festive.

I won’t use all of the solids shown in the photo, right. I’ll use one of the pinks, the lime (bottom left) and the turquoise. I also chose,from the back of the fabric closet, a dark green  to light green Pointillist Palette ombre.

Having assembled all of these project pieces, I was also able to cut them all out.

Classmate Bag for Lindsay -open - BAM Swap
Classmate Bag for Lindsay -open – BAM Swap

Next up was another Classmates tote. This you will have to wait to see as it will be a gift and I know the recipient peeks in to look at the blog. I made this previously for the BAM Swap, so you can see it there. I left some of the fabric for n.2 at home, so I was only able to cut out half of it. It was ok, as the person was at Sew Day and would have recognized some of the fabric.

Little Cell Phone Wallet pattern

Finally, I cut out two more Little Cell Phone Wallets. These most recent two have been on my list for sometime. It took some doing to find the white dots on black fabric (Michael Miller or Kaffe dots??). I know I bought some fat quarters for the purpose of this wallet. I couldn’t find it anywhere, which was extremely frustrating. Finally, I rummaged around in my black bin and found enough leftover from the tunic to make the wallet. Just enough. Later I found the FQs in my ‘to be washed’ pile. Sigh. Regardless, those are ready to sew as well, except for the tabs for the D-rings so I can use the chain rather than a fabric strap. I am excited to get them off my list.

Sadly, I took no photos on BAM’s Sew Day.

Last week, I was feeling a bit sad and lonely so I went to Katrina’s Sew Time at Scruffy Quilts. This is basically time to sew in the company other others. I am so often alone that I needed a bit of human contact so I went. It really was just what the doctor ordered. Despite the time away from home, I got energized and spent the following day crossing house and work things off my list with alarming speed.

Classmate Bag by Terry Atkinson

I finished cutting out the Classmates tote, so that is ready to sew. I was able to bring the fabric I forgot to bring to Sew Day. I also did a little organization of the pattern. I find the pattern to be very strangely written. I like to know what pieces I am cutting out as I cut them out. I like to know so I can choose the fabrics carefully. That is not included in this pattern and that made me choose strangely for the BAM Swap (the BAM Swap bag doesn’t look bad, but I would have chosen different had I known what I was cutting). I went through and amended my pattern so that I will know what is what in the future.

Flapper apron for me

Finally, I cut out another Flapper apron. I know! I know! This one is for me. I already made one for myself, but I decided to send the first one to a friend. It wasn’t exactly what I wanted, so I am making it over.

Yes, over two Sew Days, I cut out a lot. I haven’t sewn any of it yet, but will get to it soon.


All Rolled Up Tote – Pouches

All Rolled Up Tote - pouches (front)
All Rolled Up Tote – pouches (front)

Part of the All Rolled Up Tote pattern includes some pouches that can be clipped on to the D-rings I inserted when installing the pockets.  I worked on those over the weekend and was able to finish them up. I am not 100% happy with the zipper ends, but done is better than perfect.

They turned out larger than I thought they would. Yes, the finished dimensions were readily available, but somehow I had it in my mind that they were about 3/4s the size.

All Rolled Up Tote - pouches (back)
All Rolled Up Tote – pouches (back)

I am pleased with how they turned out. The fabrics are cheerful and they fit well into the Tote itself. I also think the pattern would be useful for gifts to others. Even without the Tote, they could be clipped to other bags.

The clips are the one thing I did differently than the pattern suggests. I put the lobster clips on the pouches rather than in the All Rolled Up Tote. I wanted to minimize interference with items I put in the Tote and thought the D-ring in the Tote would be less obtrusive. I also thought that I might want to fill these with something that I would want to transfer to other bags, so the lobster clip would allow me to clip the pouch on to other bags without needing that other bag to have a lobster clip. I’ll have to start adding D-Rings to my other bags!

I just have a bit more to complete before the All Rolled Up Tote itself is complete.

Gift Post #10: Alison’s Bag

As you know, members of my guild make bags and then the rest of the members bring small gifts/goodies with which to fill them. This time we had a new position for which to make a bag. The Member-At-Large position was somewhat undefined, so there was some discussion about whether the job that had been done was bag worthy. I felt bad not giving a bag to a board member when, despite her work, everyone else on the board was getting a bag.

Allison's 2018 Bag
Allison’s 2018 Bag

As a result, I pulled fabrics and made a Jane Market Tote. The hardest part of these bags is the cutting. I always forget how many pieces I need to cut. I take responsibility, because I have such trouble understanding patterns. I’d love a system where cutting was uniformly described across all patterns. If wishes were horses…. Still, once cut, this bag goes together easily.

I add interfacing to the outside pieces, which makes the bag pretty crisp, though still foldable.  I also set the straps in the top seam rather than sewing them to the outside. This means that three seams cover the straps and provide security.

Various & Sundry 2019 #1

Patterns, Projects & Tutorials

I know that Christmas and the other gift giving holidays have passed, but it is never too early to start collecting ideas for next year. Making stuff takes time! Marie Bostwick has some ideas and brief directions on some quick gifts on the Fierce Over 50 blog. She also has some links to tutorials and patterns she has found on other blogs.

Sarah, over at Sarah Goer Quilts, pointed me to a list of BOMs and QALs for 2019. I say work on your own list, but if BOMs and QALs float your boat, then go for it. One is about Harry Potter! I am sure this is not an absolutely comprehensive list. Be sure to check your local quilt shops for other options.

There are other online BOMS as well. Rebecca Bryan is leading the Stargazer BOM. Lee Heinrich over at  Freshly Pieced is offering an HST BOM.

Today’s Quilter issue 44 has a gorgeous Mariner’s Compass quilt. You can find the templates on their blog.

Scrap fabric twine seems like a good idea. I found a video and a tutorial. Good TV project. You could use the twine to wrap gifts. Thanks to Kristen!

Kitty Pearl, one of my fabulous readers, mentioned Teresa Down Under video tutorials, after I mentioned working on the All Rolled Up tote. I watched one that made an HST where one side of the block is made up of two triangles. I used these units in the Scrapitude Carnivale quilt. Teresa seems to have many, many tutorials and I liked the cheerful music.

I saw the Running with Scissors tool bag by Annie. OMG! It is fabulous and I am trying not to buy it and make it. I have just made a couple of tool totes already and haven’t filled them up yet. Perhaps I will make one for a swap or a gift? Have you made one?

Fabric, Notions, Supplies & Tools

My friend, Mary, turned me on to Maker’s Mercantile, which is mostly, it seems, a knitting supplies vendor. They also carry Sue Spargo wool felt. She has come out with bunches of different colors. They are hard to see online, but still yummy and hard to resist. They also carry some precut Sue Spargo shapes, specifically flowers. they are on my list, but I have to restrain myself as I already have enough handwork projects to choke a horse.

I got a zipper pull (to hook on to a zipper to make it easier to pull) and love it. I use it on my first Sew Together bag. I have been wanting to buy some more. Someone recommended Tiffany Green Designs. I haven’t purchased anything yet, but she has a lot of nice charms with lobster type clasps.

Tips, Tricks & Techniques

Patti posted on my guild’s website about a boxy bag dimension calculator. This is a useful tool, especially when you want to venture out on your own. The site also has interesting garment patterns so take a look around.

Sara of Sew Sweetness bag fame has produced a video tutorial about Tapered Corners and it is now posted on the Sew Sweetness site. This technique is useful for making pillow corners and bag corners not look so ‘pokey outy’ – long and thin once the fabric is turned. Corners will look more professional. The video is realtively short and this is a useful technique to incorporate into your bag of tricks. Templates for the tapered corners are now posted on the site alongside the video.

Other Artists

Julie got a Quick Curve Mini Ruler when we were at PIQF together. She also got a pattern for a pumpkin quilt.  and started working on them on our last quilt adventure. She has some progress posted on her blog and you can see how cute they turn out.

I write in a journal every day. It is more usual for me to write than it is for me to skip writing. I also think a lot about why i write. I don’t have an exciting life (a fact for which I am grateful), so who, in the future, would care about my sewing projects, my worries and how much I got done on any given day? Danny Gregory put my random thoughts about why into a coherent couple of paragraphs in a recent blog post. He draws a lot more in his journal, but I think the reasoning is the same. He wrote:

“In the end, honestly, these drawings and words were much more for me than they were for my friend or some strangers. Getting it down on paper, controlling the narrative, putting bookends around it, gave a sense of the finite to my experience.

And it helped me understand better why Frida would paint her nurse, her hospital bed, her scars. Why Vincent painted himself with a bandaged ear. Why my favorite artists painted screaming popes, bayonetted innocents, dying horses, dead wives. Not for the shock value that intrigued me as a sniggering adolescent, but to make the incomprehensible meaningful  to them — and ultimately the world.

The art we make is not just a means of gauging our talent or our progress or making pretty things to hang on the wall or sell in a gallery. Art making is the way to commemorate and honor love and suffering and all the vicissitudes of life — and share the wisdom we gain in the process.”

It doesn’t really matter to me if nobody else in the world writes down their thoughts. I don’t really care if nobody ever reads what I write. I barely ever read what I wrote, though I do go back and look up drawings for quilts and other projects sometimes. I write to help me deal with the world – an often unfair, violent and incomprehensible world. I feel like I can put my worries and concerns into a book and shut it. Then I know they are documented and I can go back and revisit them, but I don’t have to keep them in my head.

Green Strips Donation Blocks

Green Strips Donation Quilt

I am making good progress on the quilt from the scrap strips.

I finished the blocks as I worked on the All Rolled Up Tote and was able to start setting them together. It turned out that I came up two blocks short. Fortunately, I had partial blocks made of strips, so I just finished them up and everything was fine.

I decided to use some Kona Cream for the background. After cutting it up, I thought some green would have been better, but I am sticking with my plan. I don’t want a bunch of rectangles laying around. Even with the Cream, which has a distinct yellow cast to it, I think the quilt will be suitable for a boy or a girl.

All Rolled Up Tote – Serious Progress

The All Rolled Up Tote is finally starting to look like something. It is amazing to me how I can sew and sew on a bag project and it looks like a bunch of disparate parts, then all of a sudden it looks like something. It’s like magic.

All Rolled Up Tote - pockets assembled
All Rolled Up Tote – pockets assembled

Just as I needed the sides, the fabric arrived from HipStitch and I had time to wash it. For once I cut the outside properly and was able to move forward.

As I said, it is similar in shape and use to the Sew Together Bag, but much larger. The finished size is 15in./L x 9in./W x 6in./H. I placed my rotary cutter in the photo above so you could get some idea of scale. This bag is much larger than the Sew Together Bag.

I am also finding the construction to be a little different. For example, the pockets are assembled separately unlike the Sew Together Bag. I am sure I will find some other differences when I get farther along.

Gift Post #9: Juggling Balls

Three juggling balls
Juggling Balls in the drawstring bag

You have seen a few posts about these juggling balls in the past few weeks. Well, I finally finished them. I didn’t get them done in time to give them to my niece for Christmas, but oh well. I am still pretty pleased with the way they came out and I am thinking about making another set.

As previously mentioned, I got the idea for the balls from All Points Patchwork, a comprehensive guide on English paper piecing. I wrote a review about it recently.

Juggling Balls drawstring bag

I didn’t want to just hand over 3 balls, so I looked for a bag to make in which they could be stored. Quickly, I remembered the drawstring bag by Jeni Baker of In Color Order. I found the tutorial, but after working through it a little I found some missing information. After some investigation I was forwarded to another version of the tutorial. In fairness, Baker sells a pattern for this drawstring bag with several size variations. I believe I bought it at one point, but wasn’t able to put my hands on the pattern quickly. The size (approx 10.5″ x 8.5″) in the tutorial was fine for my purposes. Perhaps a little big, but fine.

Juggling Balls drawstring bag-3/4 view

I had a bunch of the mini-charm packs of Prairie by Moda, which is what I used to make the juggling balls. I used more of them to make the bag with a Barbara Jones peach dot print for the accent and the lining. I am not sure I would make patchwork again for the bag, though if I had some orphan blocks I might use them. It would be quicker and more elegant to use two or three fabrics. Still, what I made is kind of cheerful.

More New Donation Blocks

A few days ago, I wrote about some new strip donation blocks I was working on. I have made a few more as I have worked on other projects. I think they are looking good.

Mrs. K was interested and pointed out some challenges with my previous post. I know she didn’t do it intentionally, but I was glad to be reminded that I am not one of those people who hides information so I can sell a kit.

Strip donation blocks

Each block is 4.5″ x 8.5″ unfinished. I sew them  with whatever strips I have, trying to keep the bias straight since I am not using  a foundation. Once I have a large enough piece, I trim it with my Creative Grids 4.5 x 8.5″ ruler. This is a ruler I use all the time. I keep it on my cutting table for quick cuts, because it fits my hand really well, but is also useful for cutting 2.5″ squares and other sizes I am Hunting and Gathering.

My plan is to alternate them with plain blocks. I will make enough for 5 rows of five blocks, which I think is a total of 20 blocks. I’ll have to actually draw a picture to be sure.

This is an exercise in scrap clearance and workings towards my goal of using 100 yards of fabric (net).


Bonnie Hunter has a pattern using the same technique, but with foundations and set a different way. Having a real plan might be better for some of you than my random way of working.

Gifts for Me – 2018

I got a lot of nice quilting gifts for Christmas. I know that seems like a long time ago, but I have been posting like crazy on other topics. I never know what is of the most interest to you. Gifts to me seem trivial compared to what I am making and other quiltmaking thoughts I have. Thus, this is the first chance I have gotten to sit down and show you what great family and friends I have.

Christmas 2018 gifts for me

Mostly the family gave me books. I have some good ideas for using the Quick Curve Ruler from the two books I received.

I really need more bookshelves. I am working on updating my database so it includes all of my books, but things take time.

The book on the upper right hand corner is a book called Ode to Color and I am hoping to use that for creativity posts on Fridays. I haven’t done anything about it yet.

Gifts from Julie-2018

Due to my crazy travel schedule, Friend Julie and I didn’t get together until almost the New Year to exchange gifts. She bought some of these gifts right under my nose!

I am really appreciative that my friends and family respect and support this crazy passion of mine.

Book Review: Contemporary Curved Quilts

Contemporary Curved Quilts book cover

Contemporary Curved Quilts: Curved Piecing Using the Quick Curve Ruler by Jenny Pedigo and Helen Robinson for Sew Kind of Wonderful

Here are a few basics about this book:

  • it is a project book
  • you need the Quick Curve Ruler to make the included projects
  • this book does NOT include the ruler

This is a short Landauer Publishing book. The text is 47 pages long and the projects start on page 10.

The Introduction (pg.5) gives some minimal information about the inspiration for the book. It mostly discusses the projects with “marketing speak” such as “this book is filled with eight fun quilt projects with a curvy flair…” (pg.5). It isn’t bad; the words just aren’t informational.
The interesting part of this section is the brief paragraph about the authors. It gives some background about them. I didn’t know they were sisters.

I am pretty enamored with the Quick Curve Ruler right at the moment after my success with MetroScape. I discovered that not all the quilts using the ruler look the same. I found this out by looking online and at patterns. Until I received this book, I had never seen a group of the authors’ works all in one place.

The Techniques section (pg.6-9) shows how to make blocks using the ruler. This enables the maker to learn the basics and make his/her own designs. Once the technique is mastered s/he wouldn’t necessarily need a pattern. It gives plenty of information for the maker to make a group of blocks and then set them together in an original layout.

The patterns start right after the Techniques section. No messing around. I really like the first three patterns, Crazy Eights Pillow (pg.10-13), Midnight Mosaic Runner (pg.14-17), and Fresh and Trendy Quilt (pg.18-23). Part of what makes these quilts attractive is the quilting. While stitching tops and backs together is not the focus of this book, the quilting patterns selected and skills used enhance the appeal of these projects. Chic & Checkered (pg.44-47) is another project I would consider making.

The Sassy Stars Quilt (pg.35-37) and Argyle Abby Wallhanging (pg.38-43) are also interesting. There is something slightly off, however, for me about these two projects. It could just be the fabrics or colors or some combination. They both have appealing aspects. I’d love to see them in other colors. A medium-extensive online search brought up no additional colorways.

This is a short book. It doesn’t purport to be anything other than what it is: a project book and it excels at this goal. The projects are interesting and different looking even though they use the same specialty ruler. The authors have really used their creativity in pushing the uses for the ruler far.

Buy this book and the Quick Curve Ruler now and get making some curved blocks!

All Rolled Up Tote – Pockets

All Rolled Up Tote pockets

I finished the pockets for the All Rolled Up tote. As mentioned, this is part of the Crafty Gemini 2018 Organizer Club. You can buy the stand-alone pattern on her site. Above three of the pockets are shown. I have decided to alternate where the zippers start to lessen bulk.

The first pocket, which will go in the front of the bag has elastic on it for writing implements, glue sticks, etc. the pattern calls for a 1/4″ piece of elastic placed horizontally all the way across. I thought a thicker elastic placed vertically would work better for me. I didn’t want tips of pens to be too close to the fabric in case they should open and stain. I am also not a fan of that 1/4in. elastic. I think it looks a little cheap. My fat turquoise elastic (I wish I could remember where I bought it in case I want to make another) looks super fun as well.

Progress!

Gift Post #8: Pillowcases

Shark Pillowcases
Shark Pillowcases

I started out making these for the YM. Then I decided that I would give them to my cousin (he is a few years older than the YM and more like a nephew) instead. I don’t usually get an acknowledgement of gifts I send, so I have no idea whether or not he liked them. *I* like them and that is what is important to me.

I put the cuff on the wrong way on one of the pillowcases. I had no idea there was a right way and a wrong way on that shark fabric, so he probably won’t notice.

The Friday Creativity posts will return soon.

Zipper Tab Techniques

Zipper Tabs in process

Does anyone have any good tips on keeping the zipper tabs in place before sewing them? I pull the zipper pull down to get it out of the way of the sewing machine foot, which makes the zipper fabric at the top flop around. As you can see, I have used WonderClips to keep the zipper fabric and new zipper tabs in place so I can sew them. I have tried pins, but the clips are better. It is not ideal but I can’t think of anything better.

I posted to the Crafty Gemini Facebook page and some people had some good ideas: tape, staples and sewing the ends together until they won’t come apart. I am thrilled to have some new ideas. I am not sure why I didn’t think of these things.

What do you do?