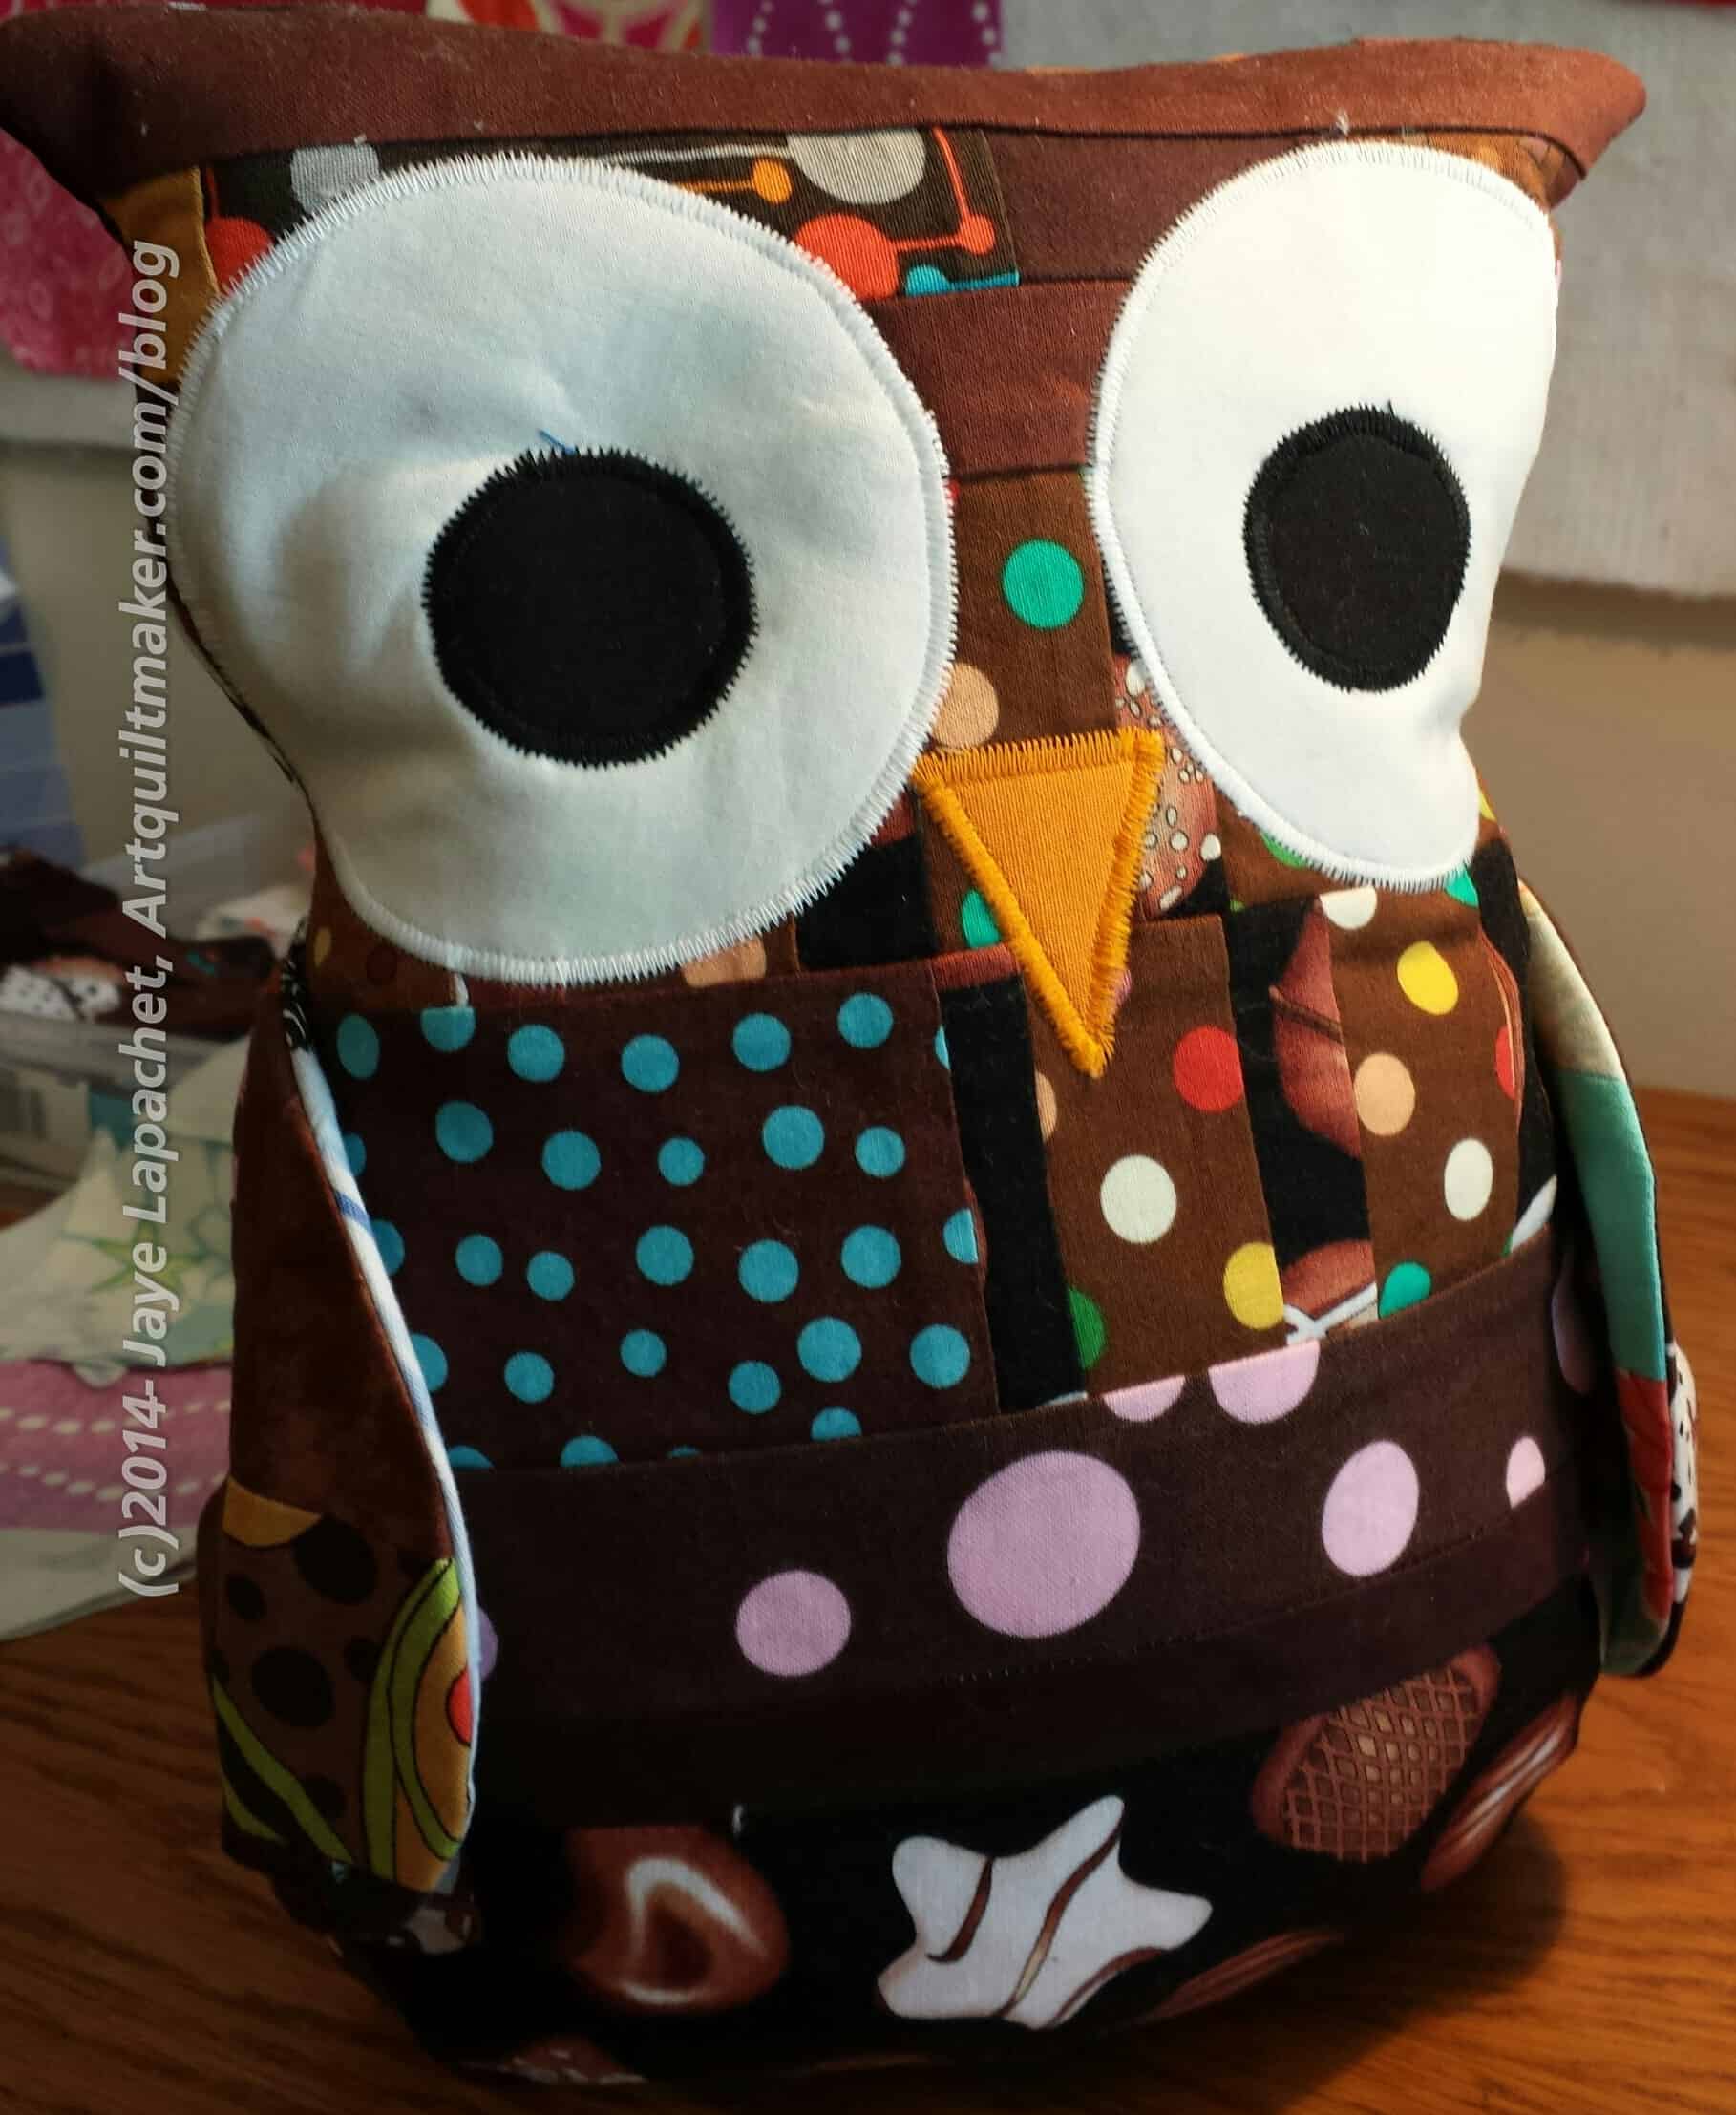
Meet Henry 2

Henry 2 (needs bottom stitched closed)

I made another Henry for another friend, which I mentioned last time. He is almost completely together. The last part is sewing up his bottom. He is also covered in lint, so I really need to use my lint roller on him.

I had enough almost enough schnibbles (sorry, Amanda, I’ll have to refill my schnibble bag before I can fill the next cat bed) and supplemented it with some leftover batting. I also found another bag of trimmings from an old, old quilt. Fabric is still sewn to the batting, so I think I will rip the fabric off the batting before I try and use either for a project.

I added on the beak and eyes using a loose satin stitch.

I also made the wings 3D again. I thought that was a fun touch.

He didn’t go together as easily as Henry 1. Some of the thick seams that result from the mosaic piecing process ended up in awkward places. This caused seams I was trying to match to get out of alignment, forcing me to rip more than I normally would.

I tried not to curse and only to put good energy out there into Henry as I don’t want to send a gift filled with bad juju. Goofy, I know, but there you have it.

Last Merit Badges

5 Years Worth of Work

I think the last time I sewed merit badges was almost a year ago. That can’t really be right, can it? Perhaps I just didn’t write about it.

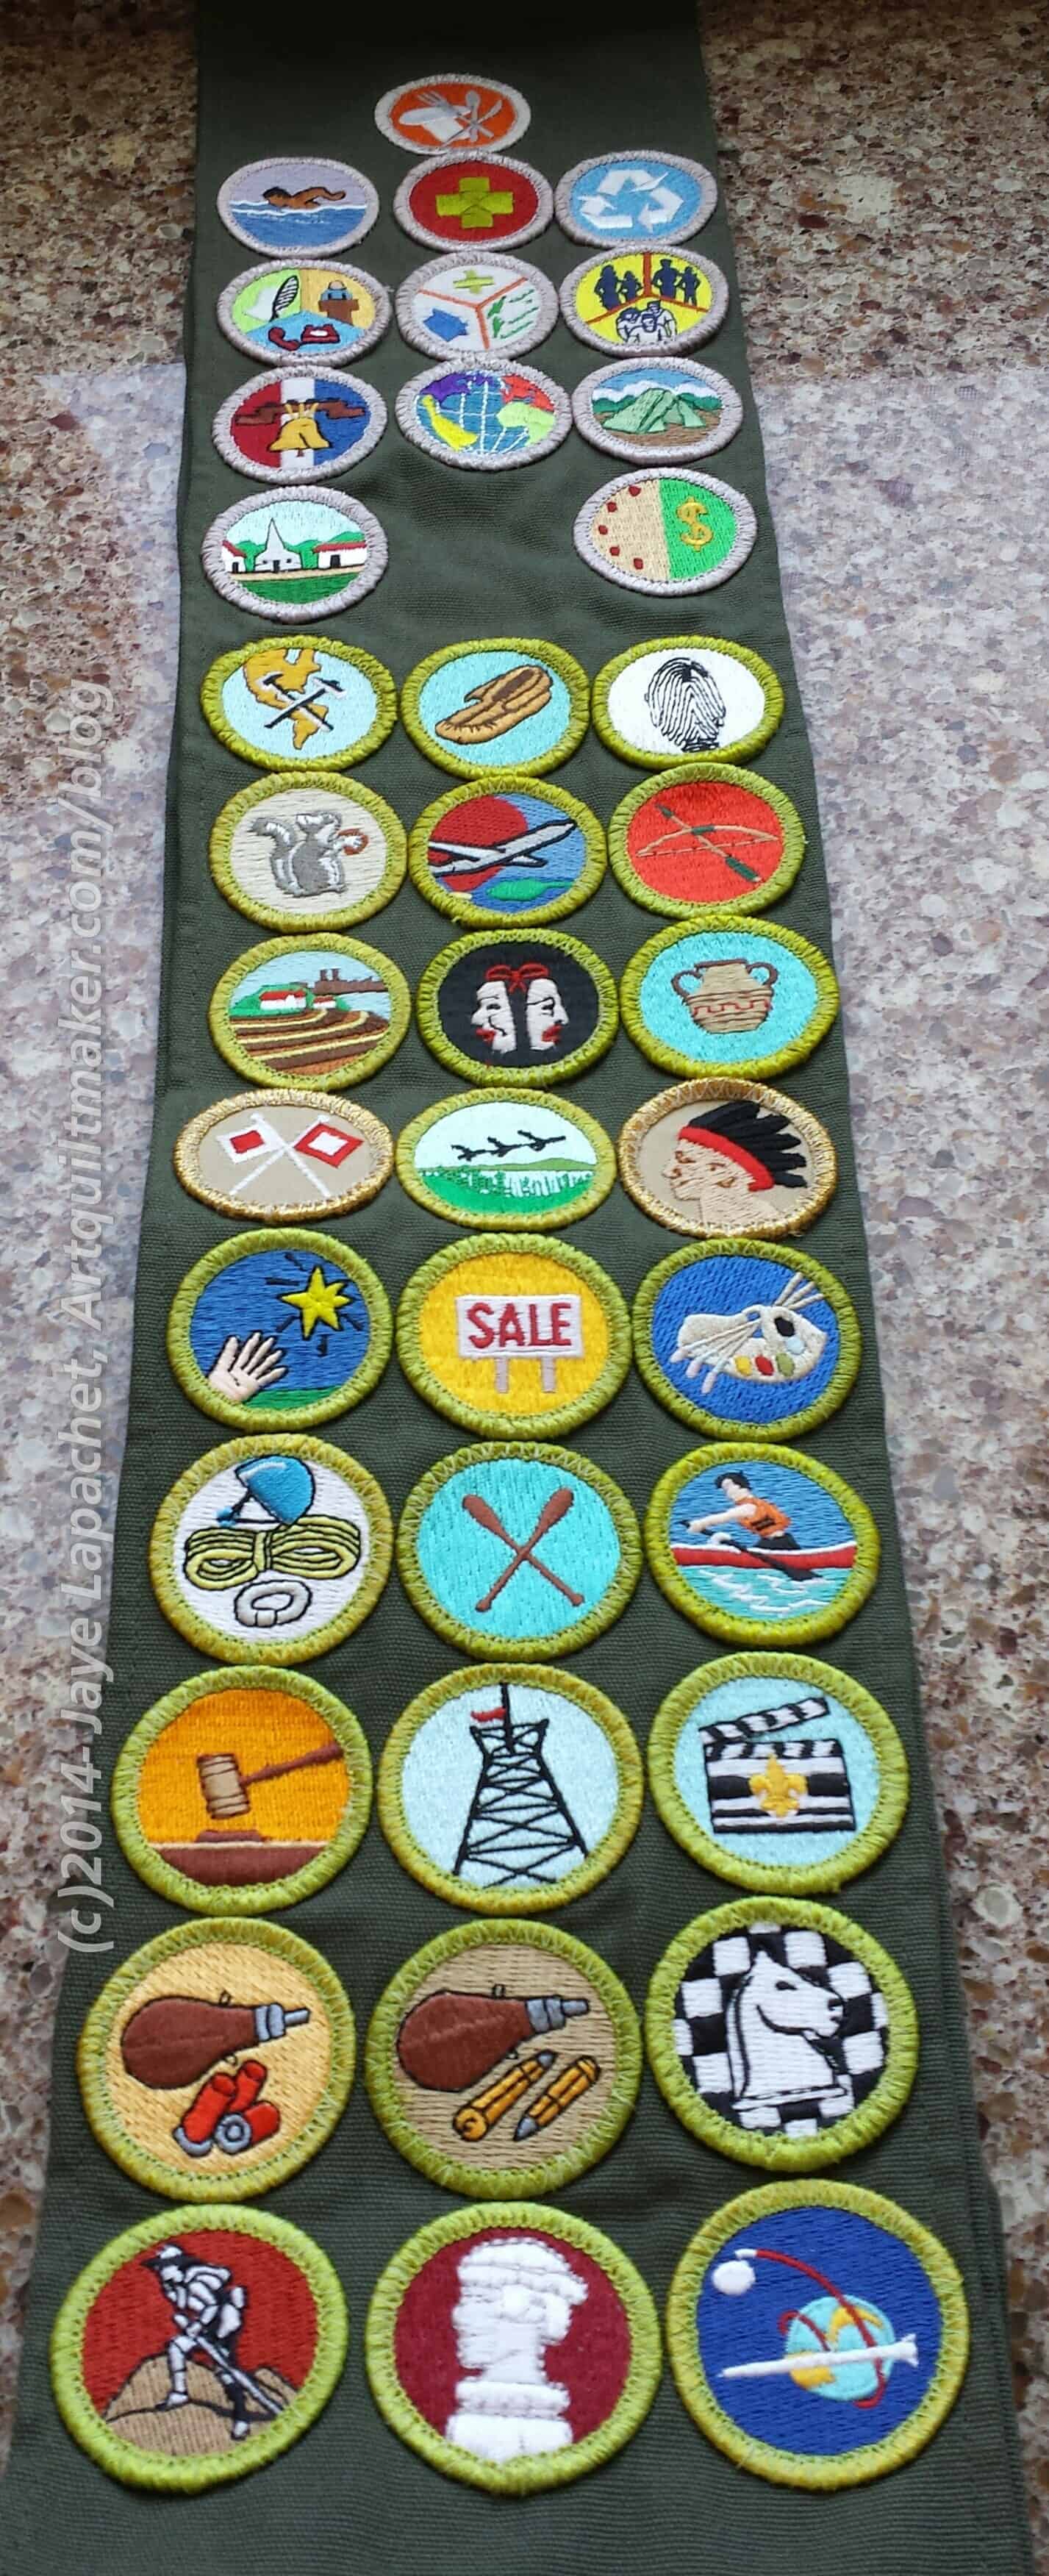
The Young Man earned 5 merit badges since last May’s Court of Honor, a couple of them were at his last summer camp as a youth scout. The others he just had to work at on his own.

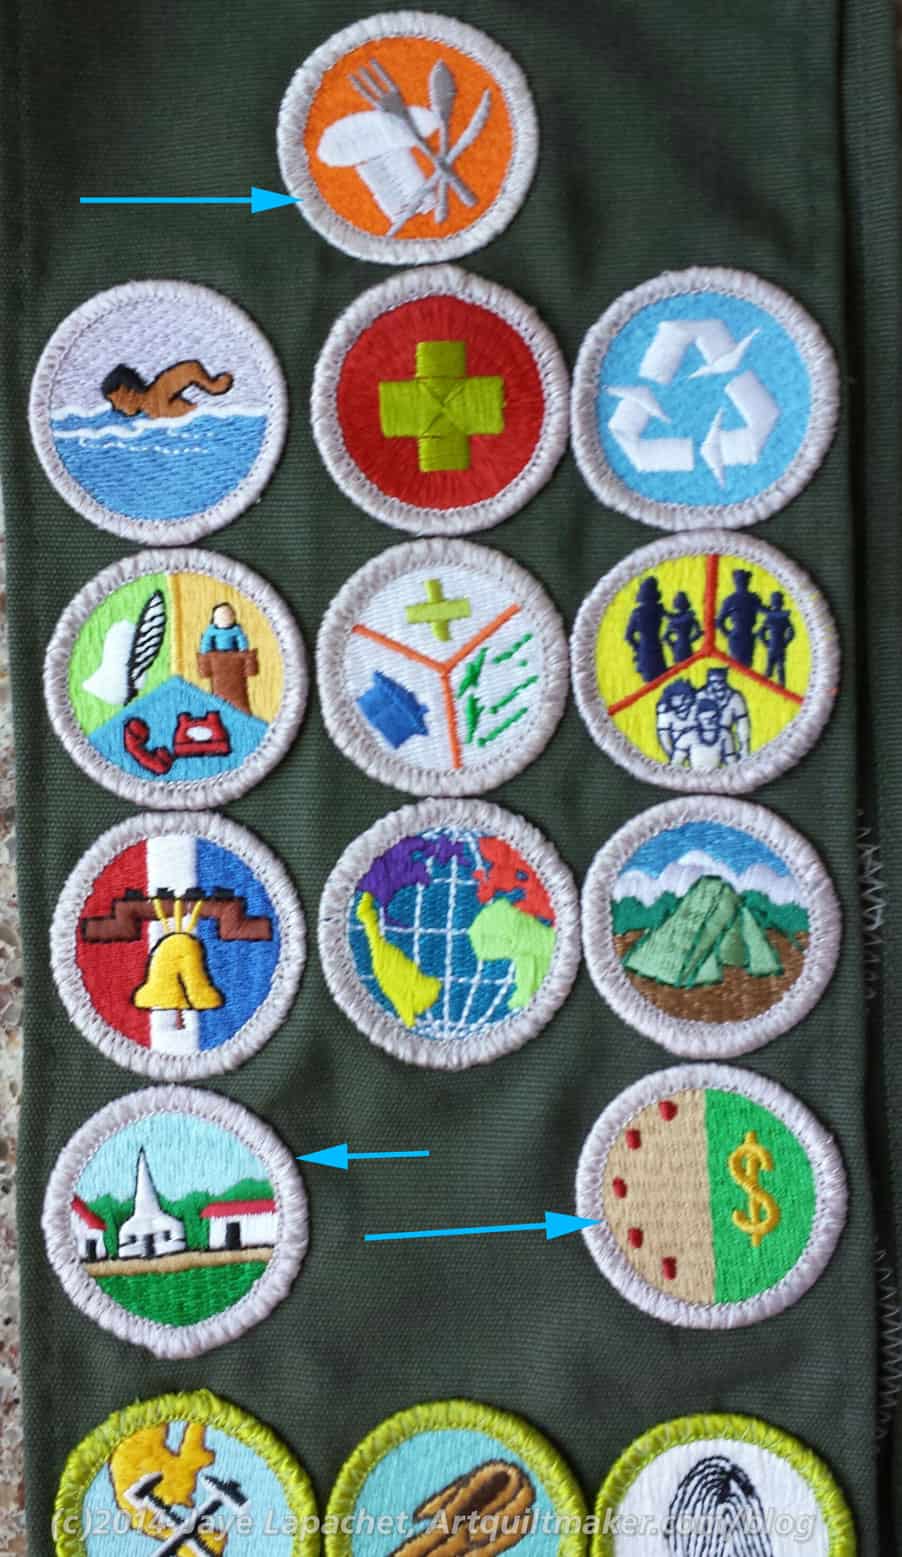
Eagle Required
Eagle Required

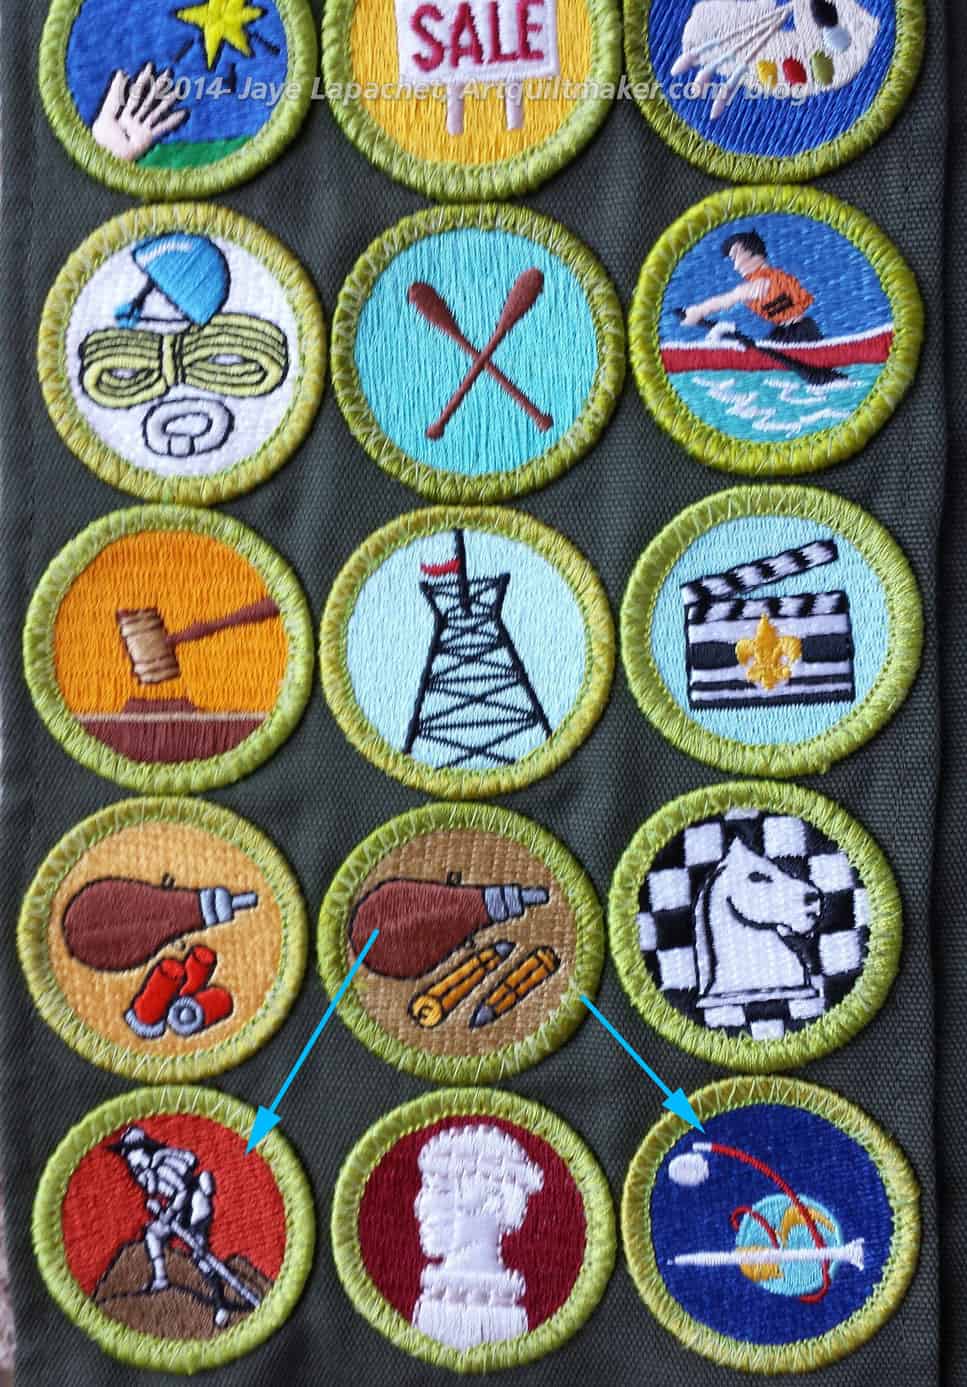
So, the other day, I sewed on 5 merit badges: Cooking, Personal Management, Space Exploration, Scout Heritage, and Citizenship in the Community. Three of the above were Eagle required. Most are really useful skills, though they still don’t have sewing. The empty spot is for the last merit badge. He has one more to earn before he can be an Eagle. He just has to do the paperwork and then he will get that one signed off. With luck.

Non-Eagle required badges

These little pieces of cloth represent a lot of work and for a kid whose organizational skills make librarians cringe. It is amazing that he could get this far.

I know I should be saying this when he gets his Eagle, but I am so proud of what he has done so far that I just can’t help myself.

To make this more quilt/fabric related, I use the following to sew on the merit badges:

  • Aurifil #2600 for the  Eagle required badges
  • Aurifil #1231 for the non-Eagle required badges
  • Janome zigzag: 3.5mm width, 1.5mm length. You can go about 1mm longer on the length. I just don’t like the stitches to get beyond the border.
  • Janome clear applique foot

Current Projects – October 2014

The title of this post is so boring I just don’t know if I can stand it. It says what it is and you can find it easily but there is nothing interesting in it at all. 26 Projects was a lot more interesting.

I can’t believe it is October. January-Febuary-March seem like they were yesterday and now we are full on in Fall and thinking seriously about Thanksgiving and Christmas. Yes, Halloween is in there, too.

Finished 2014 Quilt Projects

  1. Disappearing Pinwheel: finished 5/30/2014
  2. Fabric of the Year 2012: finished 4/24/2014
  3. Flower Sugar Hexagon: finished 7/1/2014
  4. Fresh Fruit: finished May 3/3/2014
  5. Infinity Quilt: finished 3/3/2014
  6. Scrapitude Carnivale: finished 6/3/2014
  7. See: finished 8/11/2014
  8. Spiderweb: finished 2/22/2014 WHEW!
  9. Star Sampler: finished 7/3/2014
  10. Wonky Nine Patch – finished 9/6/2014

Finished 2014 non-Quilt Projects

Still WIPs

I still have WIPs. Who doesn’t, after all, but the list is getting a lot smaller.

  1. Aqua-Red Sampler – Frances and I haven’t really worked on this for a long time. I really want her to finish her hexagon block before we move on. I think she has progressed so much since we started that I wonder if I should just tell her how to put the quilt together and be done with it.
  2. The Tarts Come to Tea: I still haven’t worked on this since April 2011, though, periodically, I think about working on it.
  3. Pointillist Palette #4: Fourth is a series of 6 quilts; needs tiny square patches sewn together. I still haven’t worked on this, though, I do think about it. The Lunns have a new line of PP fabric out. I am curious to see the new colors. I only saw a few at PIQF
  4. Self Portrait: started in 2006 at a class at Quilting Adventures in Richmond, Virginia. My career counselor breathed new life into this project for me. She asked a simple question and the end result was inspiration for this piece, but I kind of lost steam again after printing images on paper to try out different designs. Lately, I have been feeling like I need to finish this piece as it should be a good reminder for some other stuff going on in my life. Perhaps that will spur me on.
  5. Under the Sea: class project; like the design, but not the colors much. Possibility for abandonment. I have to face reality.

Ready for Quilting

Wow! Everything on this list is new, as in it was never on the original 26 Projects list.

  1. Fabric of the Year 2013: top, back and binding made; ready to take it to the quilter
  2. New:* Super Secret Project #4: at the quilter
  3. Table runner: Basted; needs quilting and binding. I am planning on free motion quilting this myself for practice, which may be a challenge when my main machine is not working. (Not on original list)

In the Finishing Process

Nothing at this time, which is kind of odd.

In Process
I decided that I had better put in an ‘In Process’ category. The difference, at least in my mind, between ‘In Process’ and ‘UFO’ is that I am actively working on a project that is “In Process.”

Hunting and Gathering

  • Blue Gradation Quilt: cutting 2.5″x4.5″ blue rectangles
  • Blue Lemonade: cutting blue, green, purple 2″ squares
  • FOTY 2014: cutting out 3″x5″ rectangles.
  • Pink Gradation Quilt: cutting 2.5″x4.5″ pink rectangles
  • Spin Wheel: really not started, but supplies gathered. I probably have enough fabrics and just need to decide to start.
  • Stepping Stones #2 using Bonnie & Camille fabrics Bliss, Ruby, Vintage Modern: made two test blocks, but still in the thinking stage while I decide on the background colors. I want the contrast to be good.
  • Stepping Stones #3 using the Macaron pre-cuts from Hoffman. I just remembered this project. It isn’t started, but I have all the pre-cuts and should think about actually using them.
  • Windmill quilt: Still hunting and gathering. I will use a grey for the background, because if I use more of the cut fabric patches, the pattern will be lost. The pieces are too oddly shaped and I don’t want to lose the pattern in a mass of scraps

Abandoned

Nothing so far for 2014

You can find the last update for the Current Projects list provides a good comparison to this month.

I thought you might want to take a look at the first list I made, the one with the 26 Projects. I started the list in October 2011. I have made REALLY GOOD progress. Up until last month, I was still planning to stop this post when I had no more projects from the original list to write about, but now, that the end is in sight, I am not so sure. It is so useful to keep track of all of my projects. Since I still have some pretty old projects on the list, I don’t have to decide right now.

*New – Project started after I started working on the 26 Projects list

Church Ladies Apron

Church Ladies Apron
Church Ladies Apron

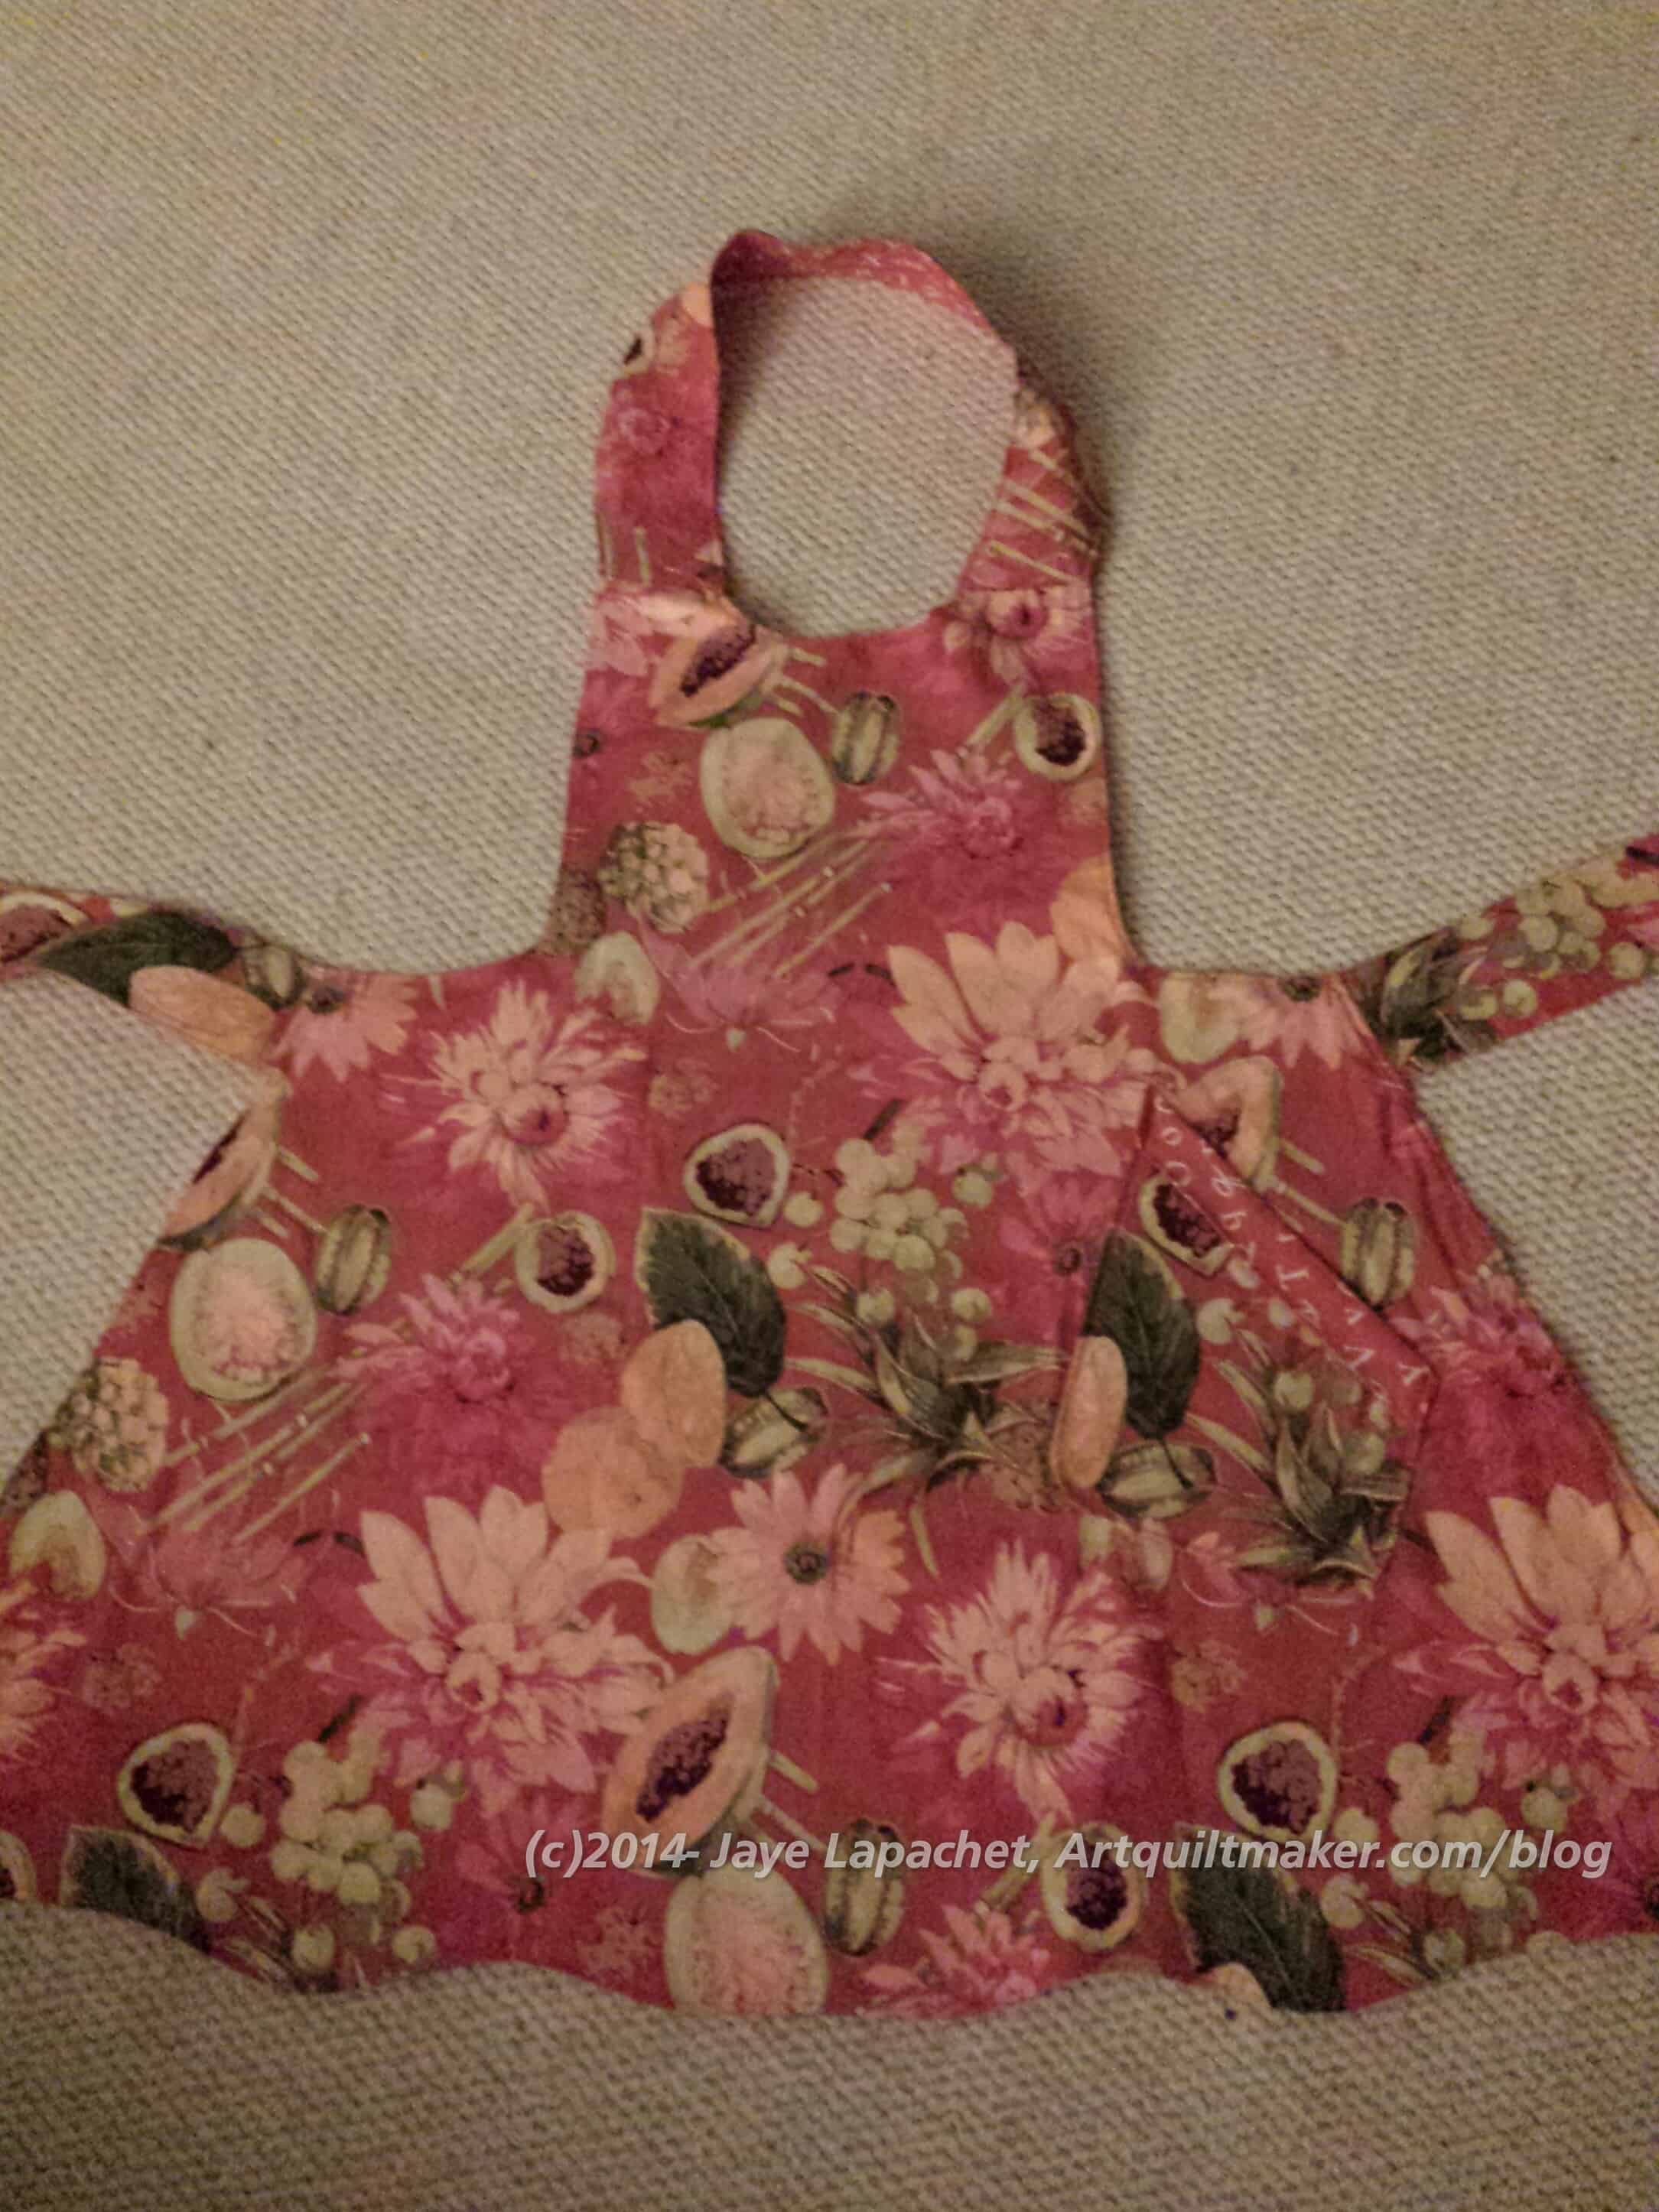
I finally finished one of the aprons I started 1,000 years ago. I needed a translator to help me and TFQ signed up for the job. Of course, I felt stupid when TFQ read the directions and explained what I needed to do, because it seemed so simple. I found it easier to hear from someone else what to do. It really makes me wish I had learned more garment sewing when I was younger. I am sure she didn’t roll her eyes at my lack of understanding.

Anyway.

The first apron is finished. I am happy. I wasn’t really very far away from putting it together and it didn’t take very long to sew it together. TFQ really helped, not only with the reading, but also with the pressing.

Finished is relative, however. I was sinking threads the other night and found a raw edge on the neck piece, where it slides into the body of the apron. I haven’t decided if I will take that part off and resew it or just use a bit of Fray Check.

I haven’t decided it I like this apron. I think I am still a little angry at the pattern for being written the way it was. I still have one more to finish (so I have a choice, you know). Soon I should be wearing the apron to keep grease and other food yuck off my clothes.

Creative Prompt #281: Island

Tropical island

Island is a novel trilogy by Canadian author Gordon Korman. The books are set in contemporary times and designed for young teenagers.

Definition: “An island /?a?l?nd/ or isle /?a?l/ is any piece of sub-continental land that is surrounded by water. Very small islands such as emergent land features on atolls can be called islets, skerries, cays or keys. An island in a river or a lake island may be called an eyot or ait, or a holm. A grouping of geographically or geologically related islands is called an archipelago, e.g. the Philippines.

An island may be described as such despite the presence of an artificial land bridge, for example Singapore and its causeway, or the various Dutch delta islands, such as IJsselmonde. Some places may even retain “island” in their names for historical reasons after being connected to a larger landmass by a wide land bridge, such as Coney Island or Coronado Island. Conversely, when a piece of land is separated from the mainland by a man-made canal, for example the Peloponnese by the Corinth Canal, it is generally not considered an island.

There are two main types of islands: continental islands and oceanic islands. There are also artificial islands.” (Wikipedia)

Angel Island State Park, the largest island in the San Francisco Bay offers some of the best views of the surrounding Bay Area.

The Big Island

Ellis Island

Copenhagen Island Hotel

Trooper Island Camp was developed by the Kentucky State Police as part of a long range program of public service to the youth of Kentucky

Hog Island Oyster Co.

Catalina Island

Anne of the Island by L.M. Montgomery

No Man Is an Island is an expression emphasizing a person’s connections to his or her surroundings. It can also refer to:

Mercer Island Books

Prince Edward Island

Earth Island Institute organizes and encourages activism around environmental issues and provides public education.

Jungle Island is an interactive zoological park where you can meet some of nature’s most amazing creatures.

Island of the Blue Dolphins

Macinaw Island

Staten Island Ferry

The Island (2005 movie)

eyot

Easter Island

desert island

atolls

Gilligan’s Island

Treasure Island

ait

stranded on a desert island

Island Chase Subtraction is a multi-player racing game that allows students from anywhere in the world to race one another while practicing their subtraction facts

Greek islands

skerries

Virgin Islands

cays

Coney Island

In his last major work, the Island, the evils that Aldous Huxley has been warning us about in his earlier works – over-population, coercive politics, militarism, mechanization, the destruction of the environment and the worship of science will find their opposites in the gentle and doomed Utopia of Pala. (Woodcock,18)

the Farallons

Greenland

continental islands

Island County, Washington

CSU Channel Islands

Fashion Island, Newport Beach


Coronado Island

Post the direct URL (link) where your drawing, doodle, artwork is posted (e.g. your blog, Flickr) in the comments area of this post. I would really like to keep all the artwork together and provide a way for others to see your work and/or your blog.

We are also talking about this on Twitter. Use the hashtag #CPP

The Creative Prompt Project, also, has a Flickr group, which you can join to  post your responses. I created this spot so those of you without blogs and websites would have a place to post your responses.
Russian Rubix Border Marches On

TFQ said the nicest thing to me on Sunday. It went something like “you should sew. I will press for you” And we did. I worked on the Russian Rubix border and finished the Church Ladies Apron that was making me crazy. More on that later.

Russian Rubix Top Border

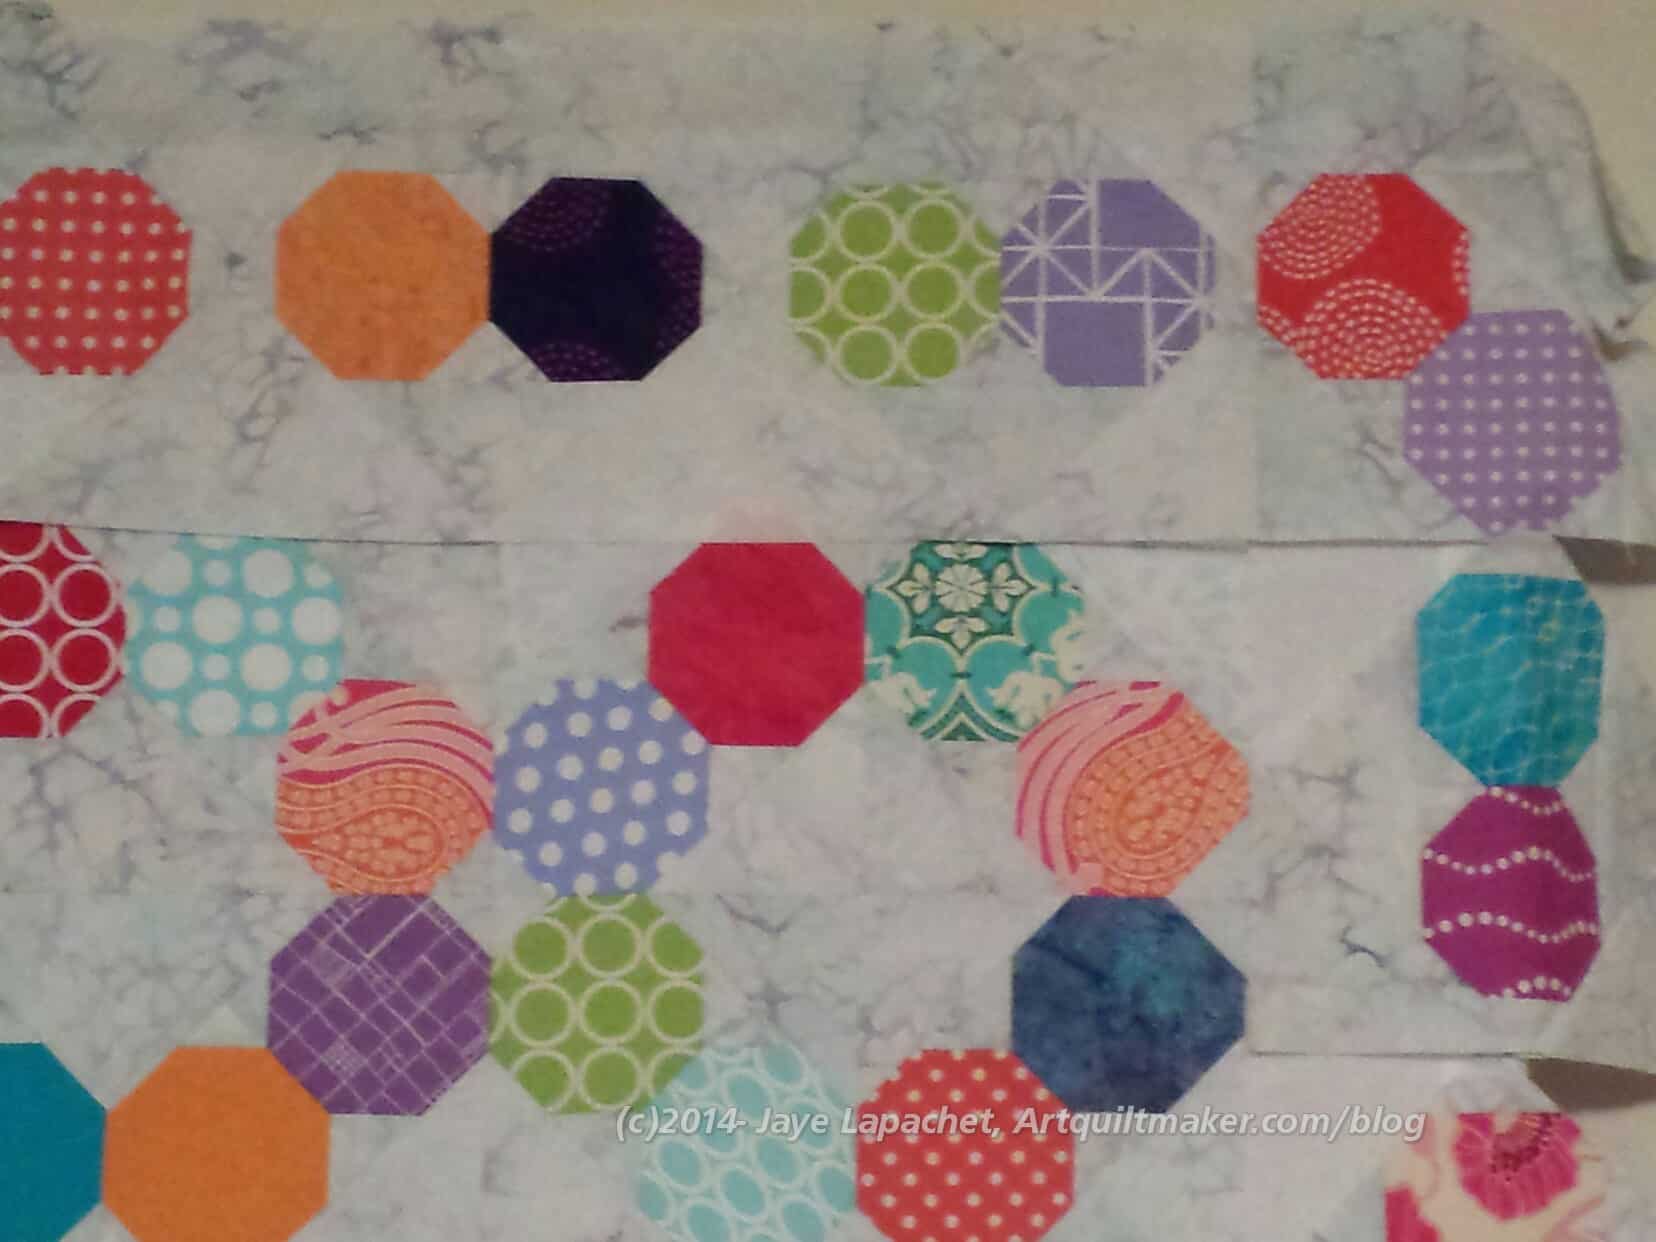
I tried to get the whole top border pieced, but couldn’t quite make it. I made good progress and am pleased.

I was worried that the math wouldn’t work out, but I think it will. I wish I had made the sides first so I could sew one on and make sure that it worked. Instead I have to wait until I make both sides and sew them on. Oh well. I’ll plan better next time.

No, I probably won’t. 😉

Corner detail
Corner detail

Regardless, I think that it will work and it will take some time for me to get the border made. In the meantime, it looks nice and I am pleased.

Thinking about Machine Quilting

I saw a recent article, Turning Practice into Play by Betsey Langford**, in the November 2014 issue of the AQS magazine. The article was about practicing machine quilting. The article proposes a playful, and useful way to practice machine quilting. It made me think about my recent experiences with machine quilting.

Finished: Kelly Bag
Finished: Kelly Bag

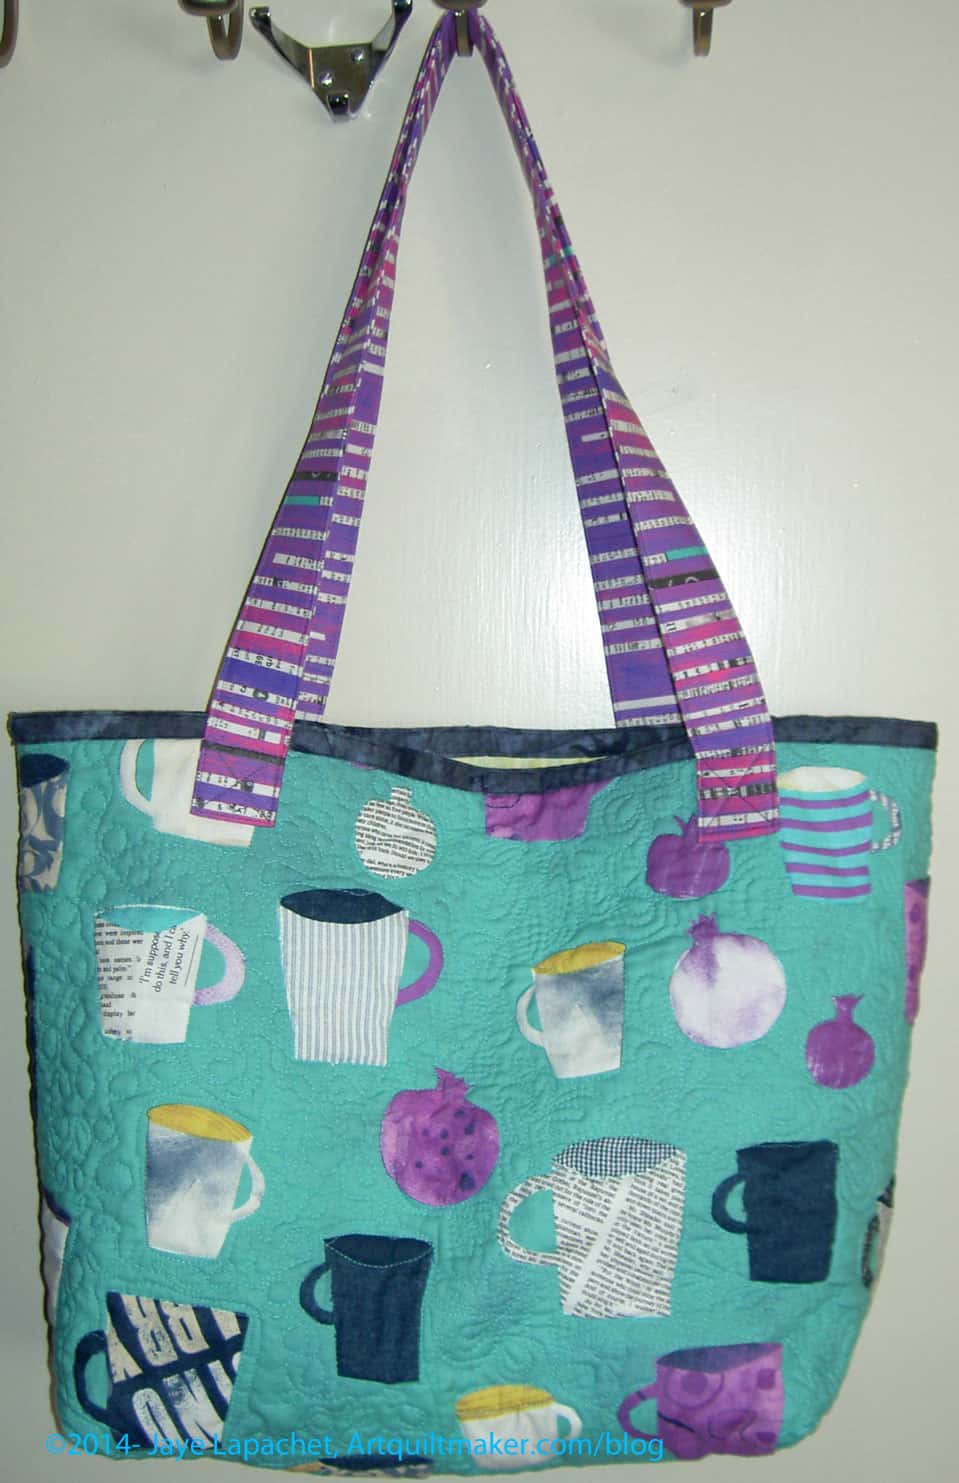
I think that my recent experience with the Kelly Tote is validated by this article. One of the reasons I never really practiced machine quilting outside of classes was because it felt futile. I know the 12″ squares are a good manageable size to get the feel of machine quilting, but then what? What would I do with them? My thought process was ‘nothing’ so I would use ugly fabric and then I wouldn’t be at all motivated to practice. Practicing machine quilting on a half yard of fabric and then making the tote made the process seem less futile. It made it seem like I was practicing AND preparing something that I could use.

Hideous test piece of FMQ

This article is in the same vein. Langford talks about using various surface design supplies, such as Tsukineko inks, paints, Inktense pencils, etc to make designs and then following those designs to practice FMQ. The surface design piece gives practice on using those tools while providing something interesting to machine quilt. I relied on the motifs on the fabric in the Kelly Tote. Creating your own motifs gives the quiltmaker more freedom of expression.

Betsey Langford also gives ideas for items to make with the product of your machine quilting exercises. The way I feel about the tote bag sums it all up until I want to use one of the author’s ideas. All in all, it gave me some ideas to expand my machine quilting / FMQ practice in a fun way.


**Nota bene: I found references to this article, but could not actually find a link to it. I will add one later if I find one.

PIQF 2014 pt.2: Inspiration

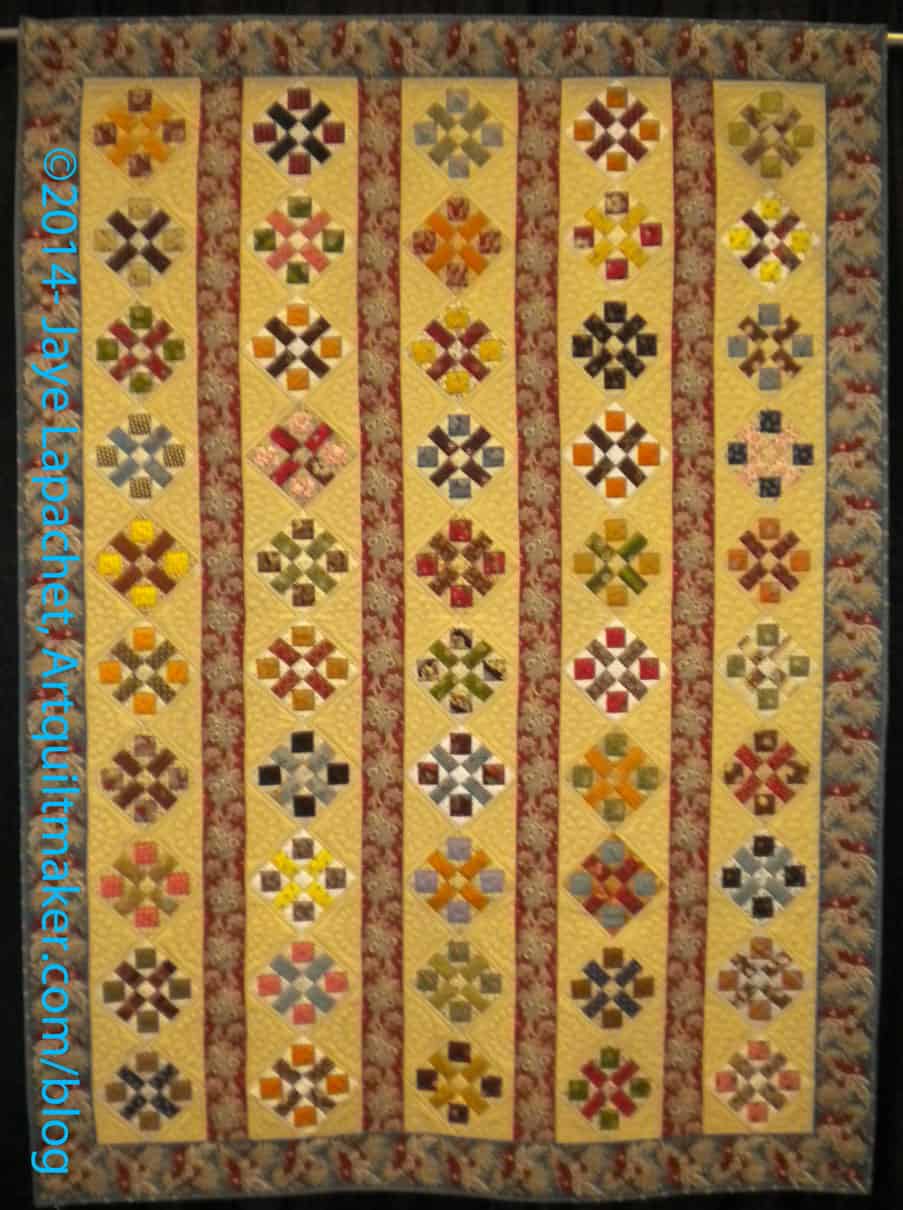
Civil War Elegance by Linda Bergemann

We did get inspired by one quilt and may start a joint project based on that quilt. The quilt is called Civil War Elegance by Linda Bergmann of Elk Grove, California. As an aside, I noticed that a lot of nice quilts came out of Elk Grove. The color is not one of them, my taste, of course, but there are a lot of nice aspects of this quilt. I like the row aspect. I also like the style of fabric chosen for the border and in between the rows. I like that there is a definite, strong pattern. Again, the colors of that fabric are not to my taste. Of course, all the colors go together in the quilt very well. The scrappiness of the blocks is also very appealing. I often have a hard time getting past colors that aren’t my favorites, but the scrappy blocks drew me in a little bit and I think it is possible that this could be a very engaging quilt in different colors.

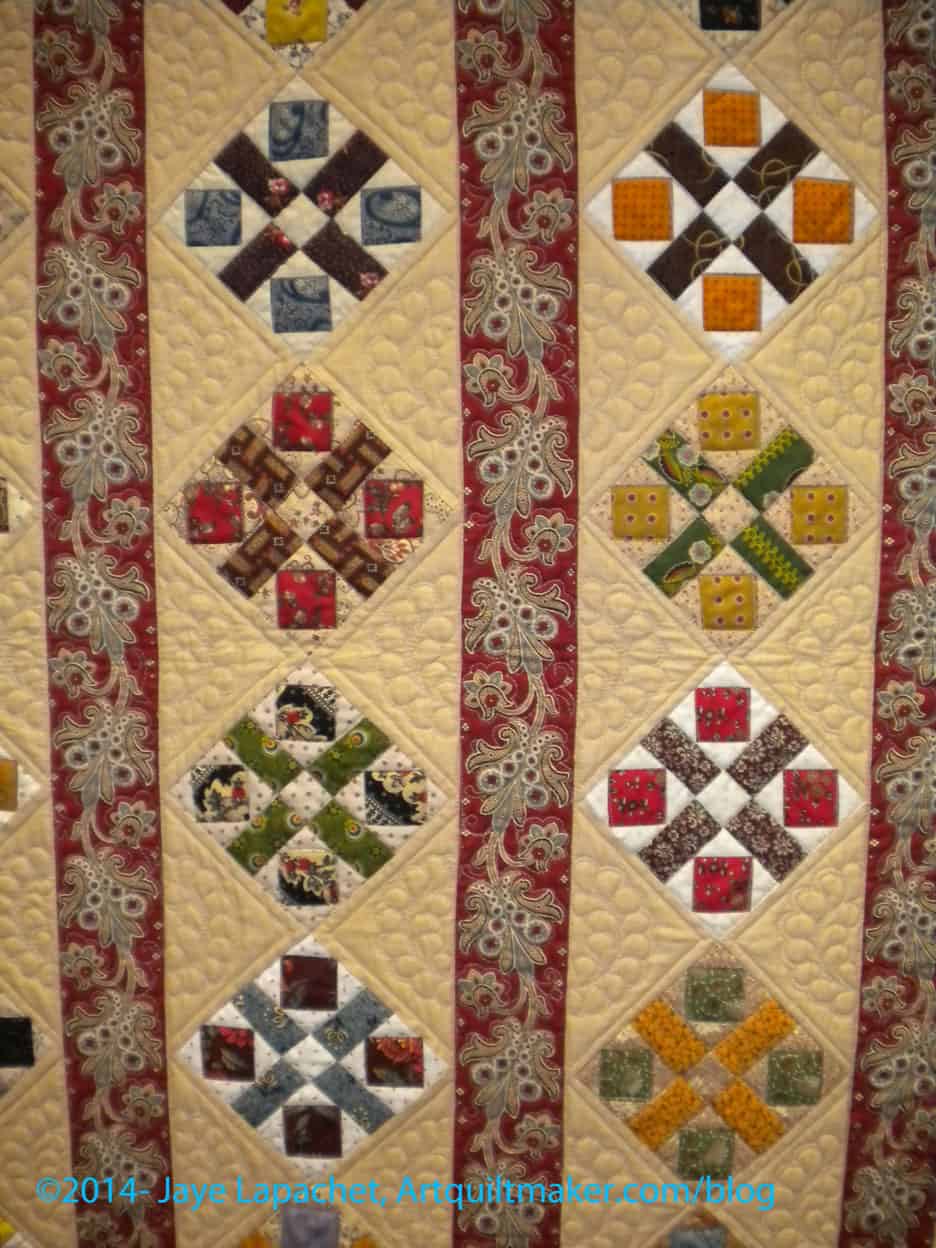
Civil War Elegance by Linda Bergemann, detail

The blocks are interesting. A bit fussy in terms of number of pieces and size, but an interesting opportunity for fabric usage. I think it would lend itself to scraps.

We decided to do the project. We worked in EQ7 together and made the pattern, deciding on a 5″ block.

We will use a series of similar, cool greys for a scrappy background in the blocks. We discussed whether to use a consistent color in the crosses or what color scheme we will use for the pieces. We decided that we would each make 2 blocks (I will make one for each of us and TFQ will make one for each of us) a week for the next month and see how the blocks looked together. Then we will decide how to proceed.

We are on our own for the overall background. If we lay them out the same way Ms. Bergmann did, then we will be on our own for the border print between the rows. That is too far down the road to know yet.

**Copyright notice is for photos/image only; not for quilts

PIQF 2014

TFQ came down for a visit and we went to the Pacific International Quilt Festival on Saturday. In the past we have gone in time for the Preview on Wednesday, stayed over night on Thursday and Friday and really indulged in quilt show ecstasy. TFQ was not able to come down for the last year or two and I didn’t stay over at all last year. This year we just spent one day and that seemed fine.

Overall, the quilts at the show seemed dark. I think I have been looking at a lot of quilts with white or light or light grey backgrounds lately. These are the feel of quilts I have been making lately also, as you know. The show quilts seemed darker to me. There were a lot of pictorial quilts and a lot of quilts with serious surface design.

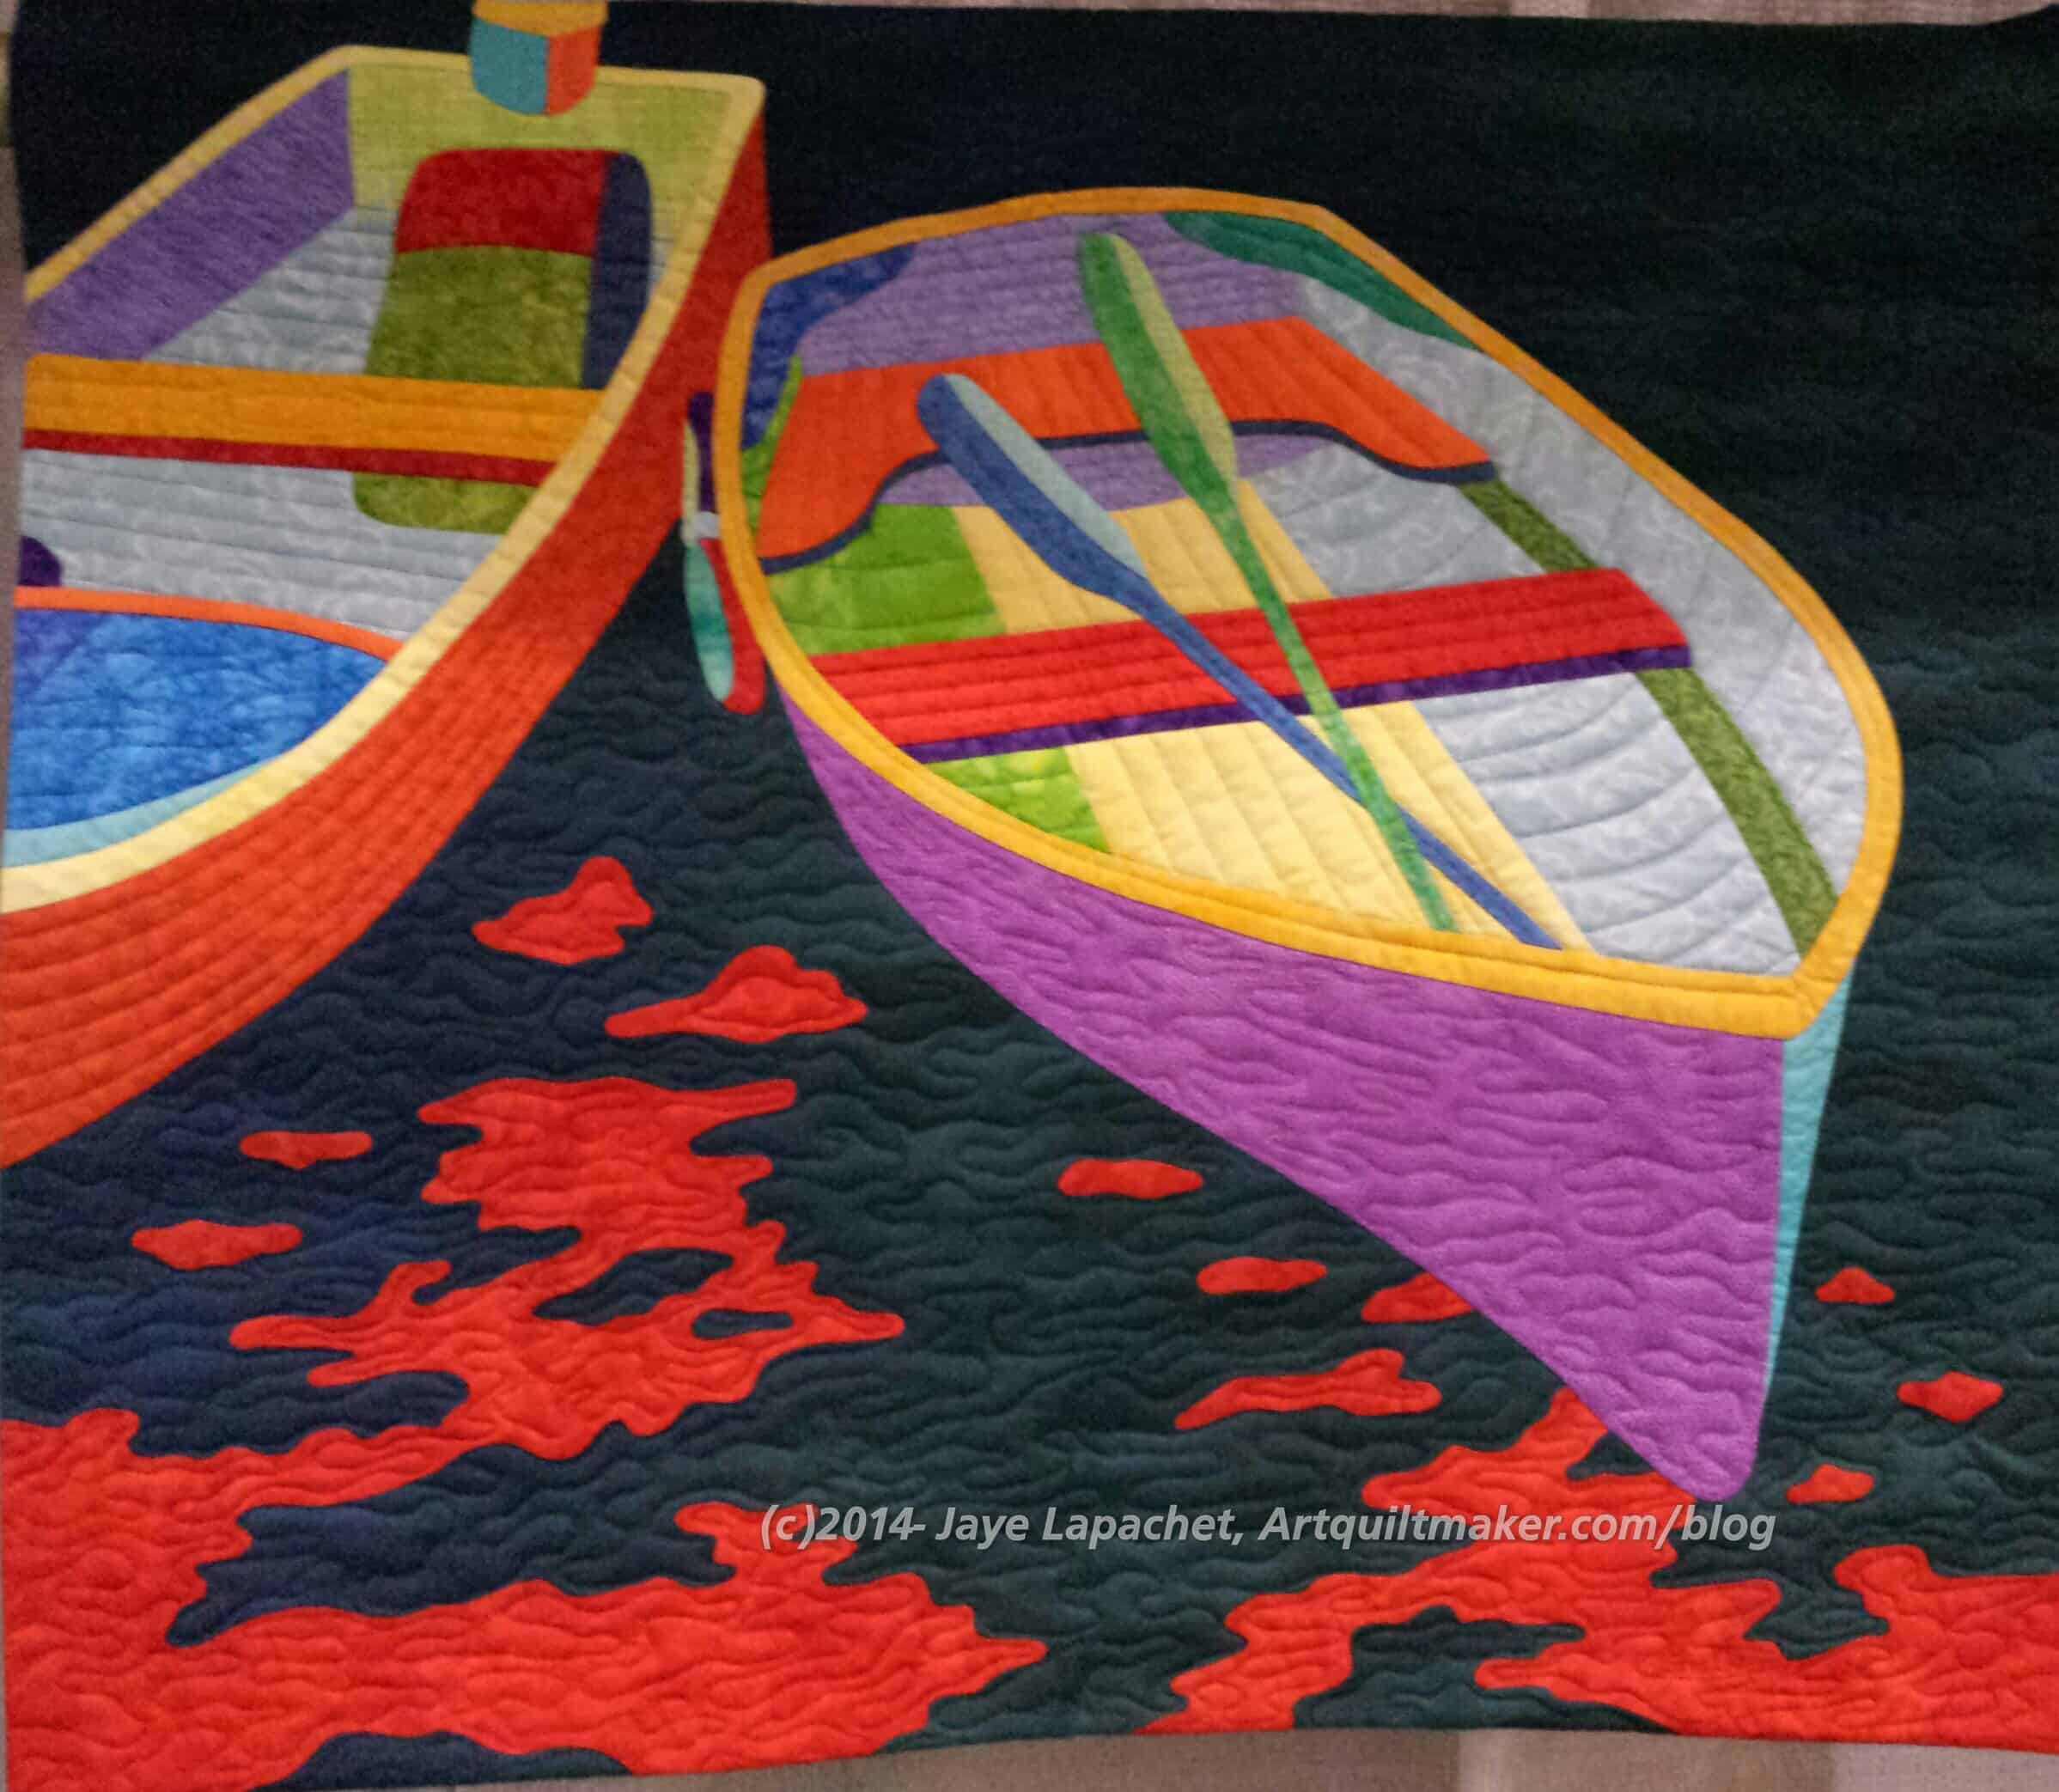
Dinghy by Shelly Burge

I took a few photos of quilts that struck some chord. One was a quilt depicting dinghies, which would normally fall into the not so appealing pictorial quilt. TFQ was the first one to notice this quilt. This one, surprisingly was interesting because of the use of color.

I really like that violet solid on the left side of the hull. I also like the oars and the inside of the hull on the left side of the left hand dinghy.

I am on the fence about the water. I like the bold choice of the red, but I can’t decide when it was a good choice.

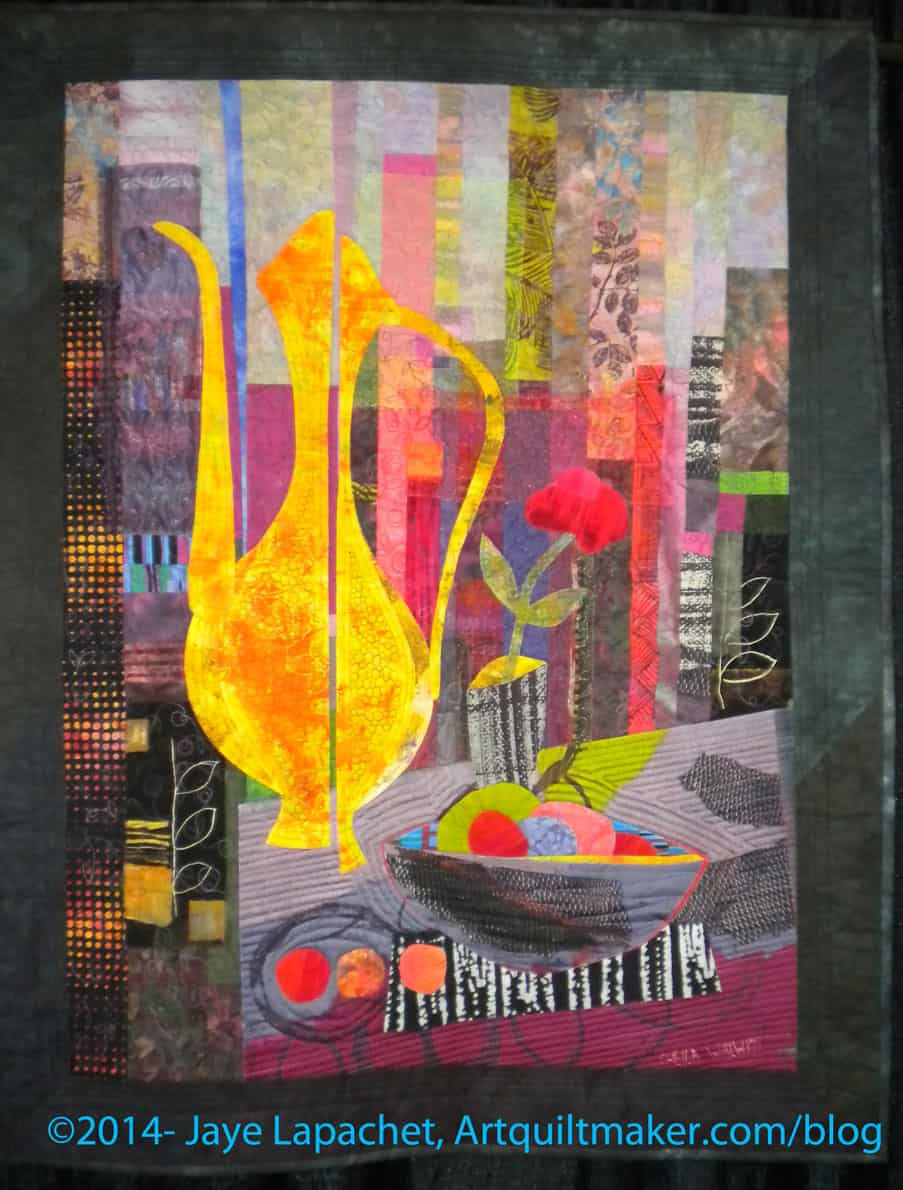
Sheila Walwyn, South Africa, Still Life with Copper Pot

I am not sure how this quilt will look to you, but it was really appealing to me from a Tarts Come to Tea point of view. As you know that quilt is on my list to finish and one thing stopping me is how to quilt a couple of the larger vessels.

If you look closely at the tall, gold pot, you will see the quilt and it makes me wonder if something like that would be suitable for the Tarts? The roundness of the circles would echo the roundness of the large teapot. If it is appropriate, could I actually do the quilting?

In terms of this quilt, I like the still life idea and I also like the use of different fabrics for the background.

Dina Carmiel, Israel, A Touch of Autumn

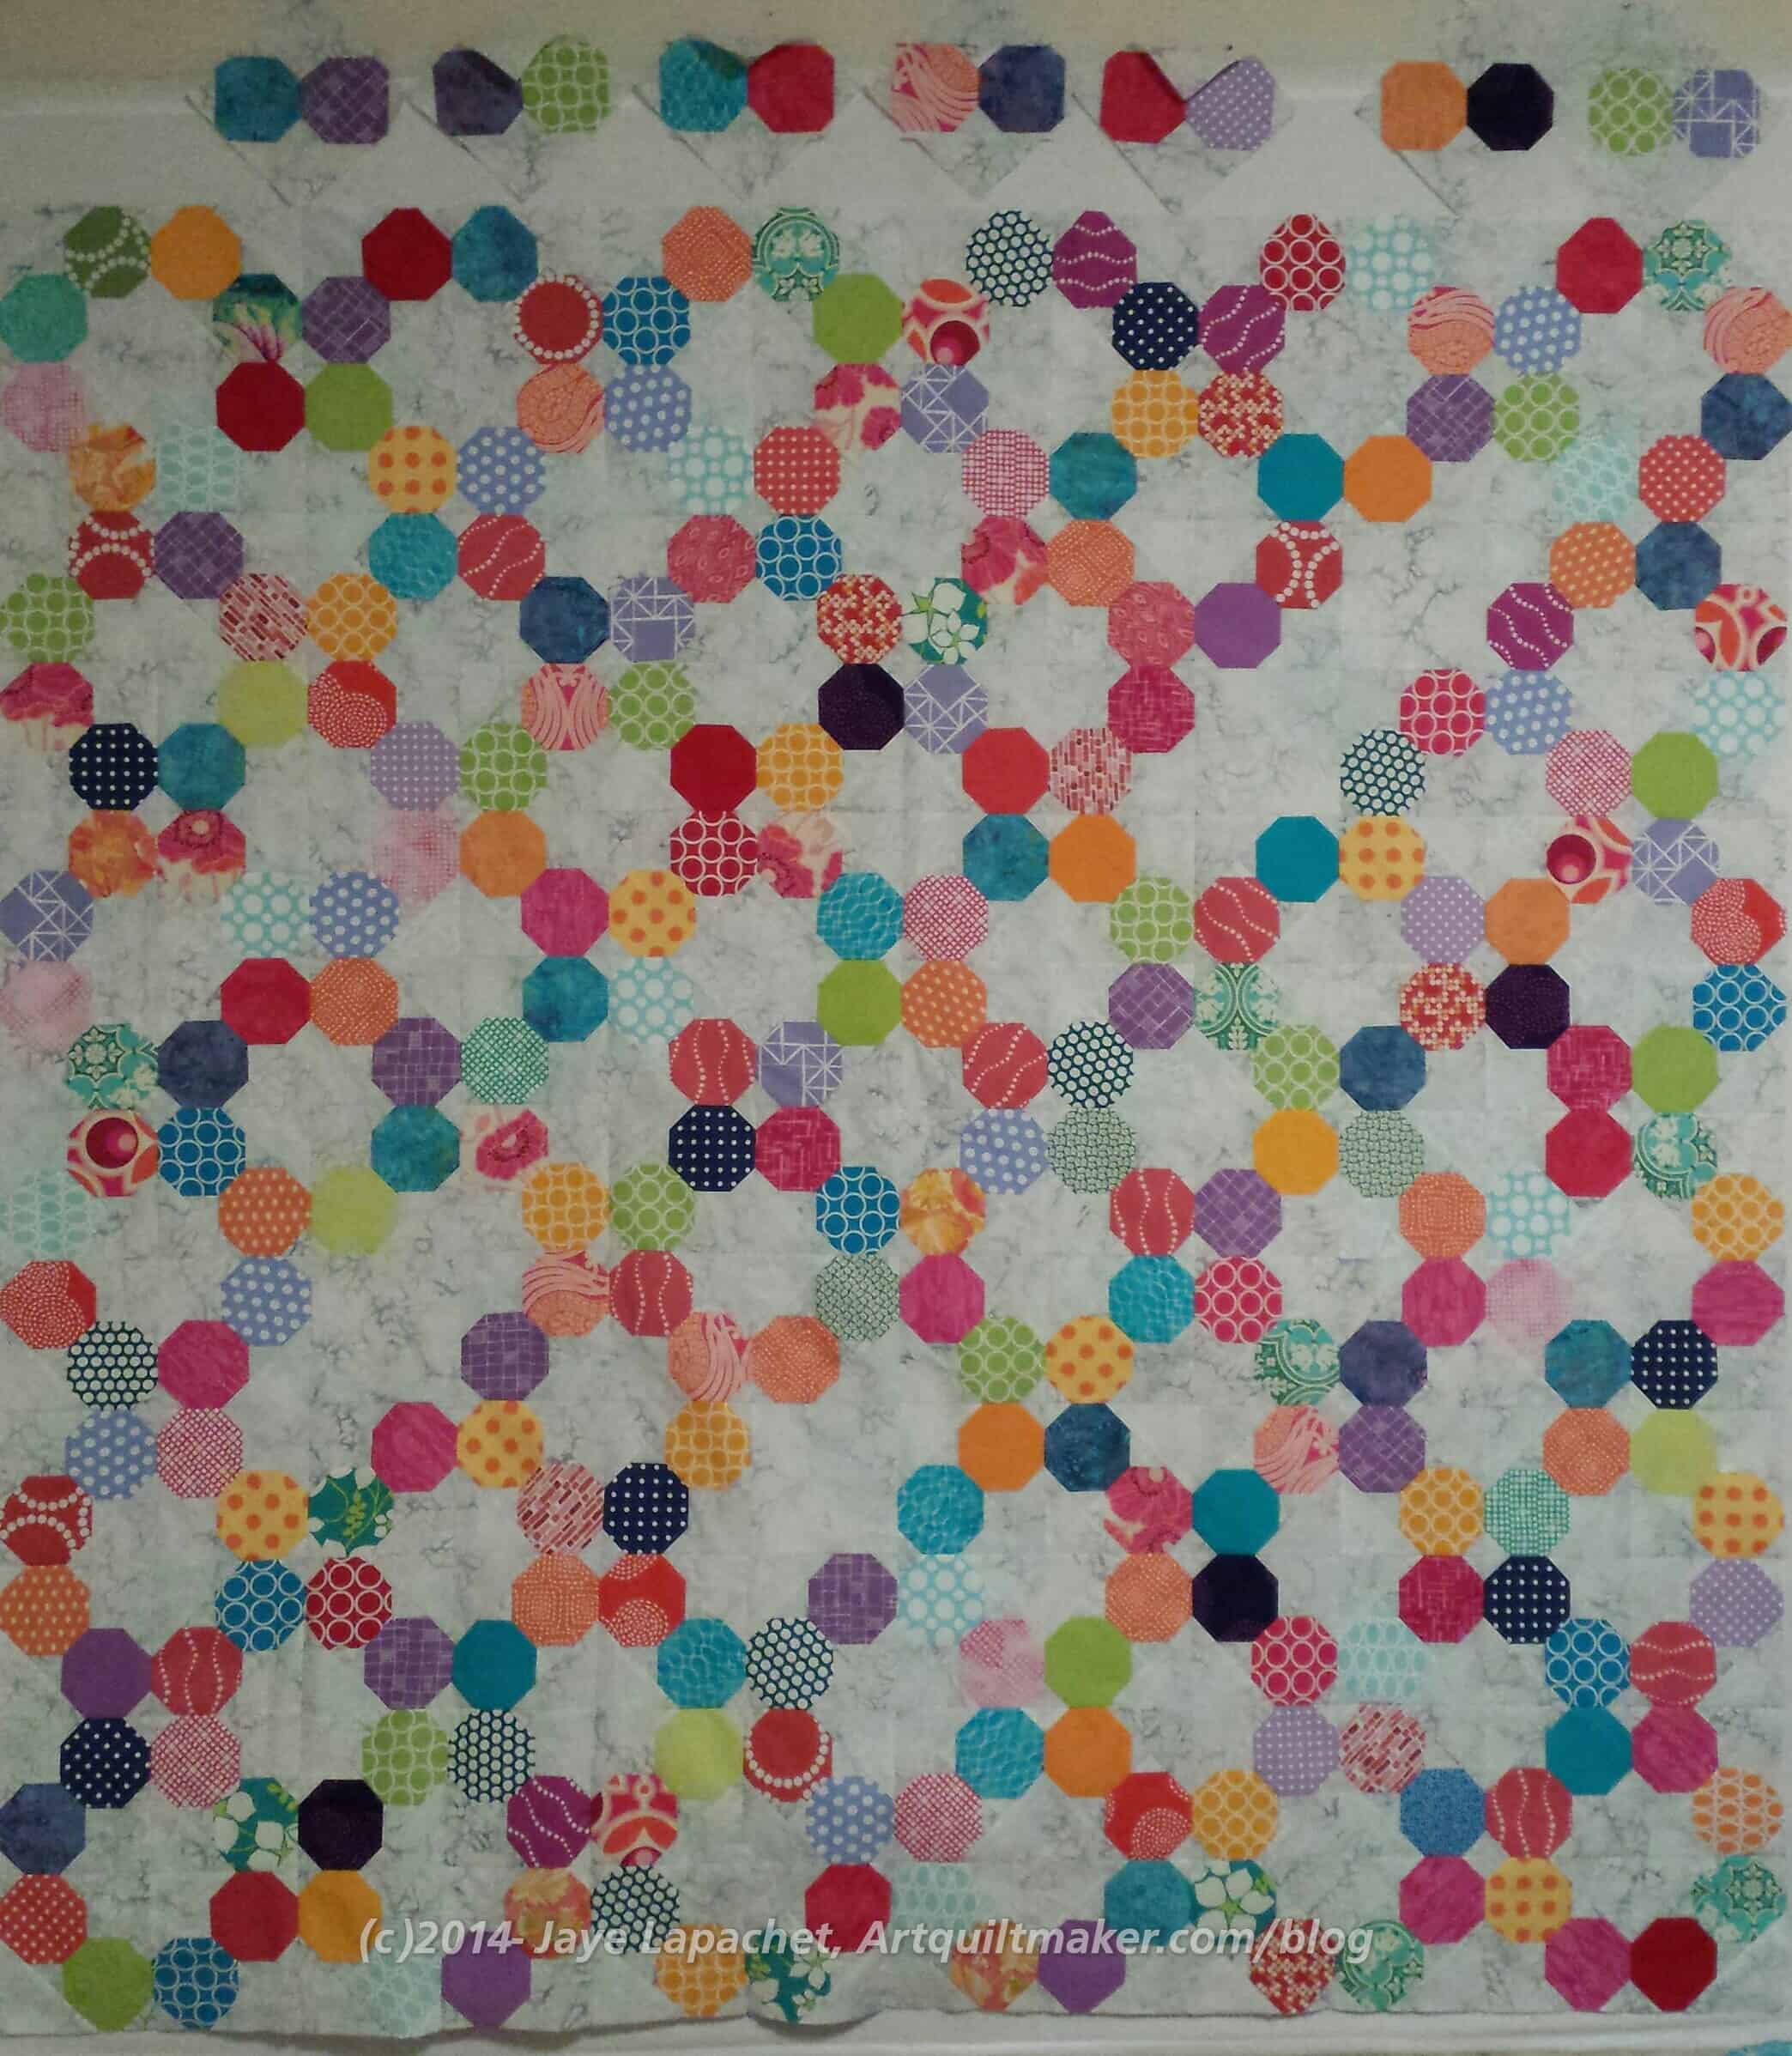
I have been thinking about the leftover octagons from the Russian Rubix. I thought of making them into snowballs, but wasn’t 100% happy with that as a finished block only. When I saw Dina Carmiel’s A Touch of Autumn I got a new idea that would make the piece much better. Take out the hexagons from the piece on the left and add some nine patches and I think that it could be an interesting project and an interesting donation quilt. I like the secondary pattern and it would give me a good opportunity to work with the same colors I have been using. Another series, I guess.

In a way I was looking for true inspiration for current projects and I didn’t even really know it. I found inspiration for 2 projects and, possibly, a third.

It was a great opportunity to visit the vendors. I hadn’t been at a quilt show, really, in awhile and it was appealing to see a lot of different fabrics in one place. I was really looking forward to seeing the vendors. There were a lot of the same vendors who have been there forever, but some new ones as well. We saw some really bright and cheerful fabrics. One of my favorite booths was Quiltin’ Cousins. I love the look of their booth as well as the fabrics. The other booth that was great was Beyond the Reef, which sells rolls of Hawaiian fabric, though in recent years they have brought different fabrics to PIQF. They were really nice and cheerful in that booth. They seemed to be having a great time. I bought some Flatter along with some fabric. I have been wanting to try it and it just seemed like a good time to get some.

Civil War Elegance by Linda Bergemann

We did get inspired by one quilt and may start a joint project based on that quilt. The quilt is called civil War Elegance by Linda Bergmann of Elk Grove, California. Stay tuned for more info.


**Copyright notice is for photos only not for quilts

More Border on the Russian Rubix

Russian Rubix Top
Russian Rubix Top

I made some progress over the weekend and it felt good. The whole top is sewn together and I have started work on the border. I didn’t have enough time to do as much I as I would have liked, but I have to be happy with what I was able to do. I really wanted to keep working on the border and will again this weekend or next.

Upper Right Hand Corner, Russian Rubix

I am not the sort of person who measures out every little piece, so I can just hope that the border works out. I will know when I get to the end of the top row. I know all you math people are screaming about how crazy that would make you, but that is the way I work. It could be that I am making trouble for myself to allow myself the opportunity to fix it. I don’t think so, but you never know.

I will talk about them more, but I have to say that I really like the Fons & Porter Setting Triangles Ruler. I could not figure out the Marti Michell version of the same tool. The F&P ruler is really making setting those border blocks together easy.

Previous Posts:

High School History Art Project

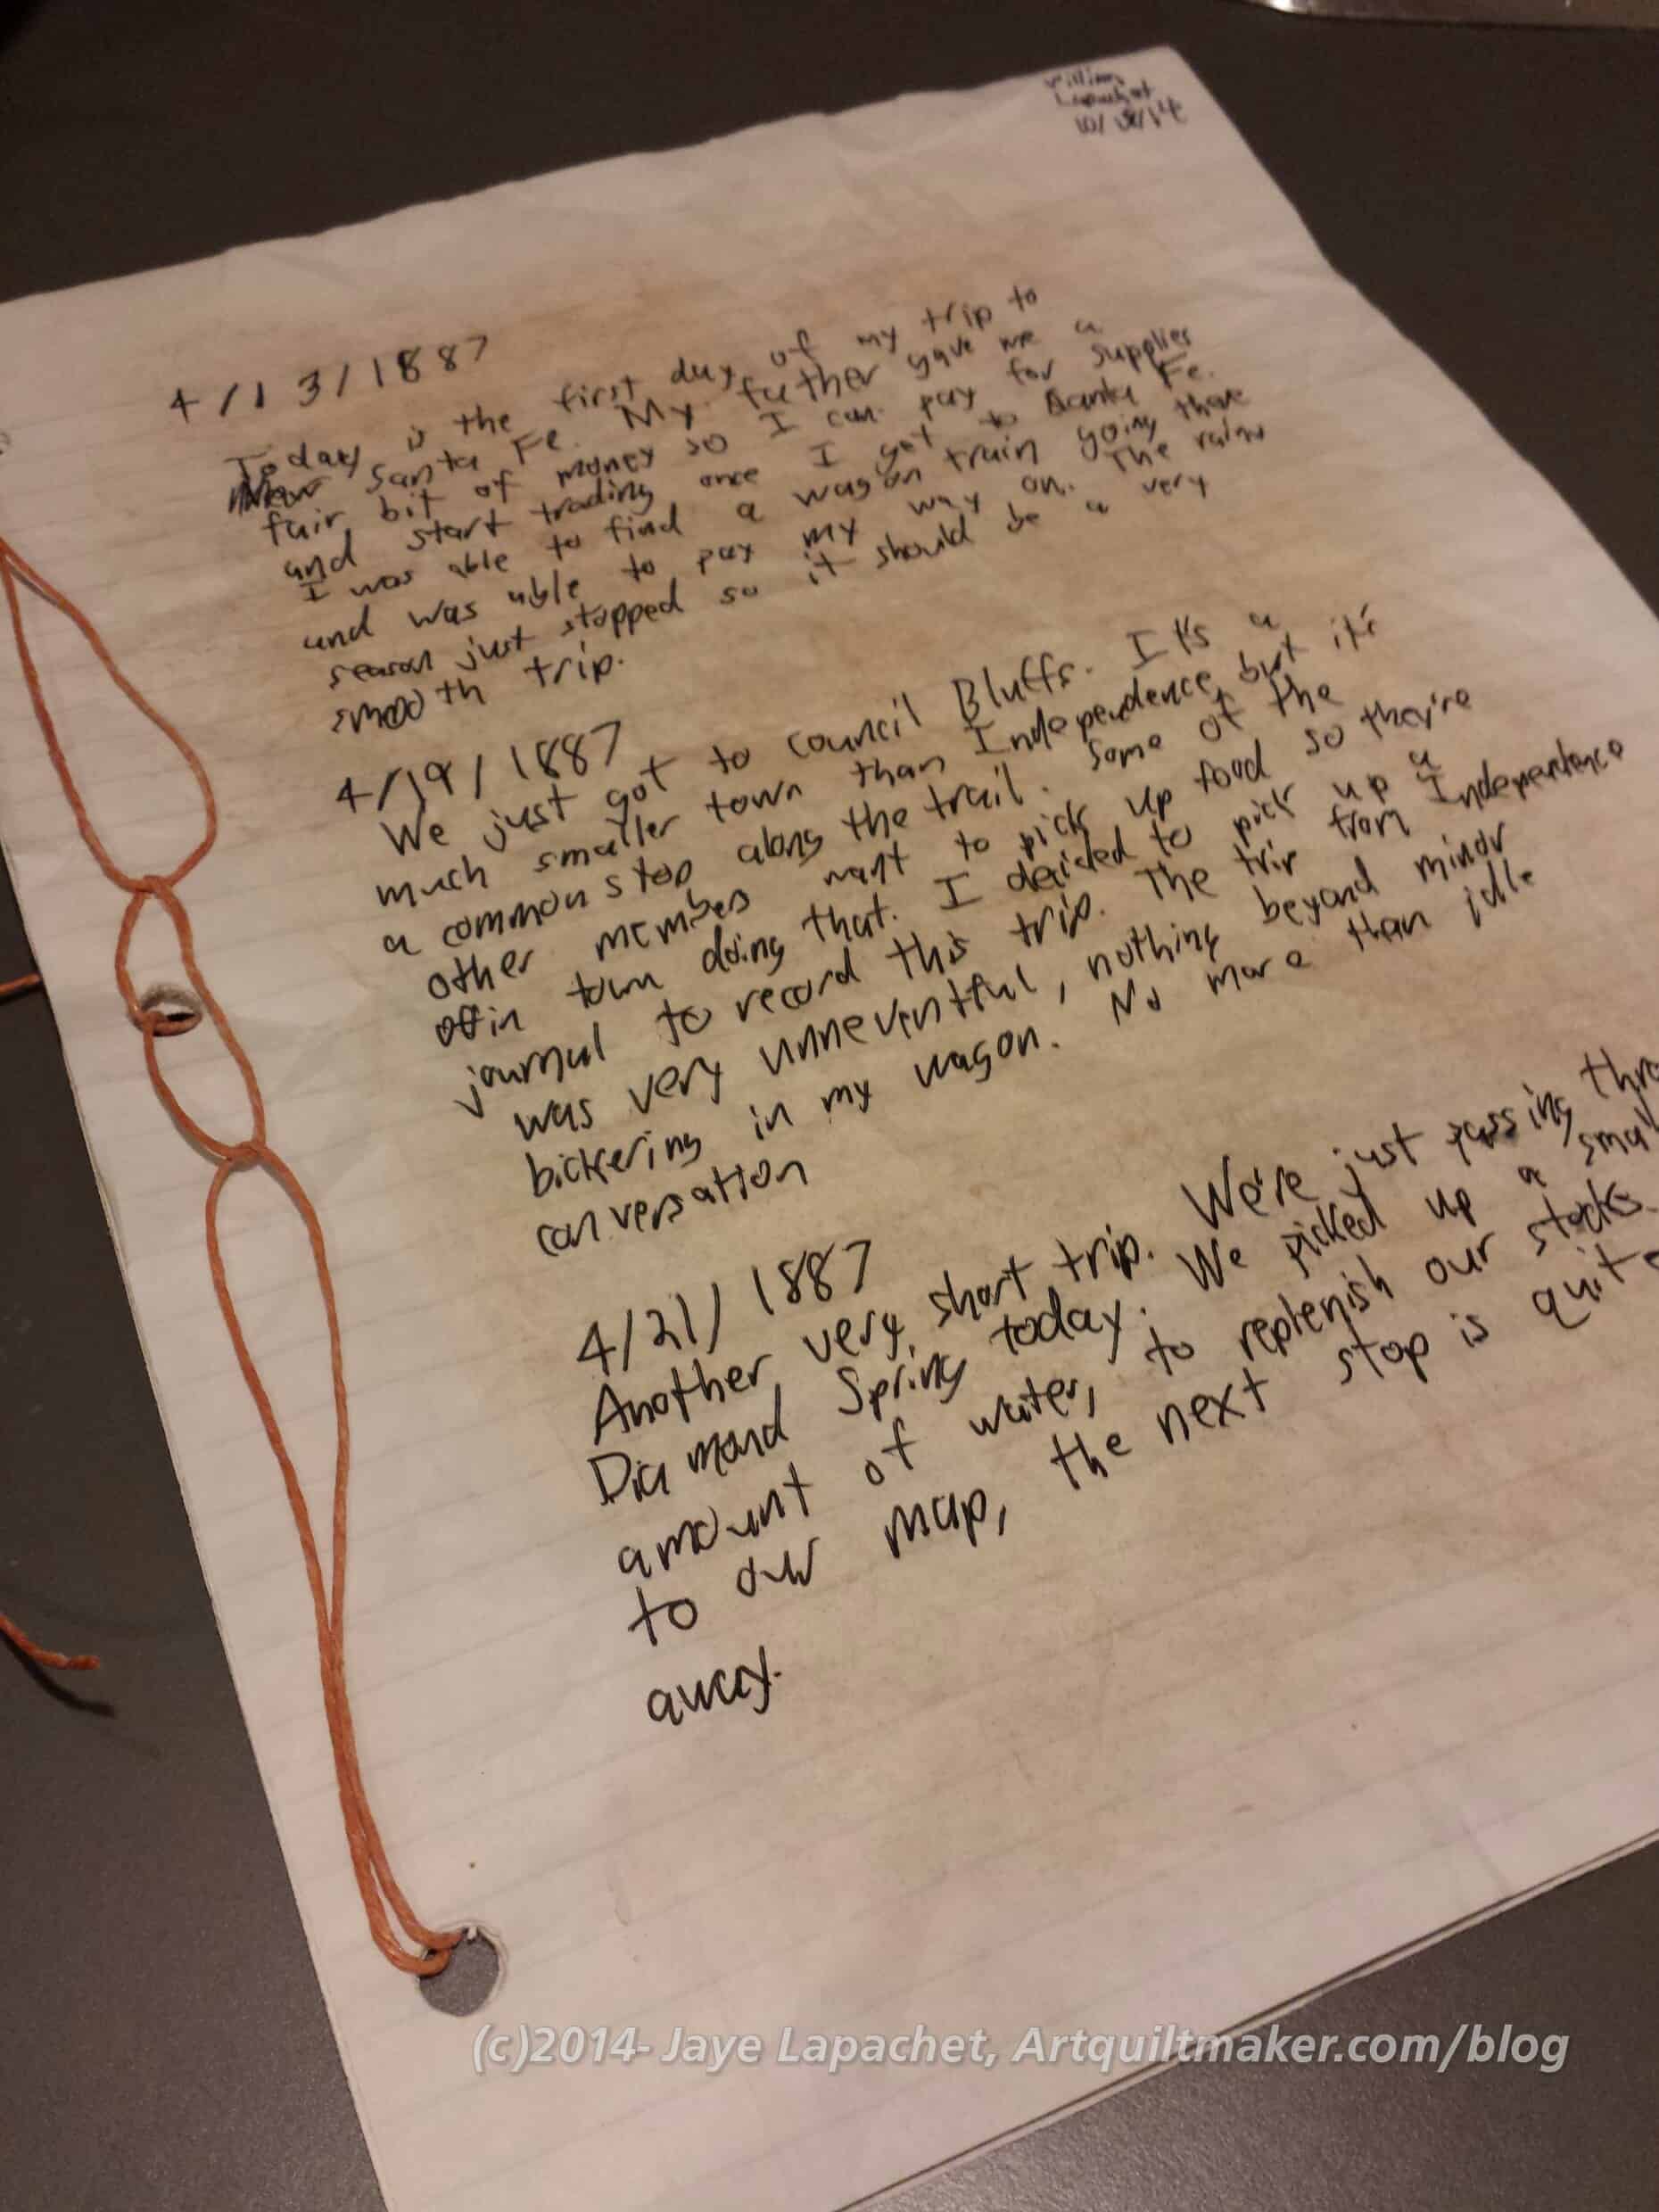
The Young Man came home the other day and told me about a project/assignment he had for history. he had to write 5-10 entries in a journal of a character to be assigned on the Oregon Trail. He was assigned an 18 year old young man with $45 dollars. We brainstormed a little bit on the content and then he said he wanted to make the paper look old for extra credit.

I thought about this and suggested tea dyeing. I am not a tea dyeing kind of girl, nor do I do much with paper arts, but I thought I could make this happen. After work, on my way to the gym I asked him to let his tea bags dry out a little bit and determined to do the tea dyeing when I got home.

When I got home, he found me the ‘old looking paper’ he wanted to use. This was interesting, because it turned out to be college ruled binder paper. Huh? I wasn’t in the mood to argue and it was his project.

I spread the paper out on the kitchen counter and squeezed and rubbed the tea bags on the paper. To dry them, I microwaved the paper on high for 10-20 seconds. The effect was ok, but not as dark as the Y.M. had hoped. He did a second round with the tea bags, which made it better, but still not great.

Cinnamon 'Dyeing'
Cinnamon ‘Dyeing’

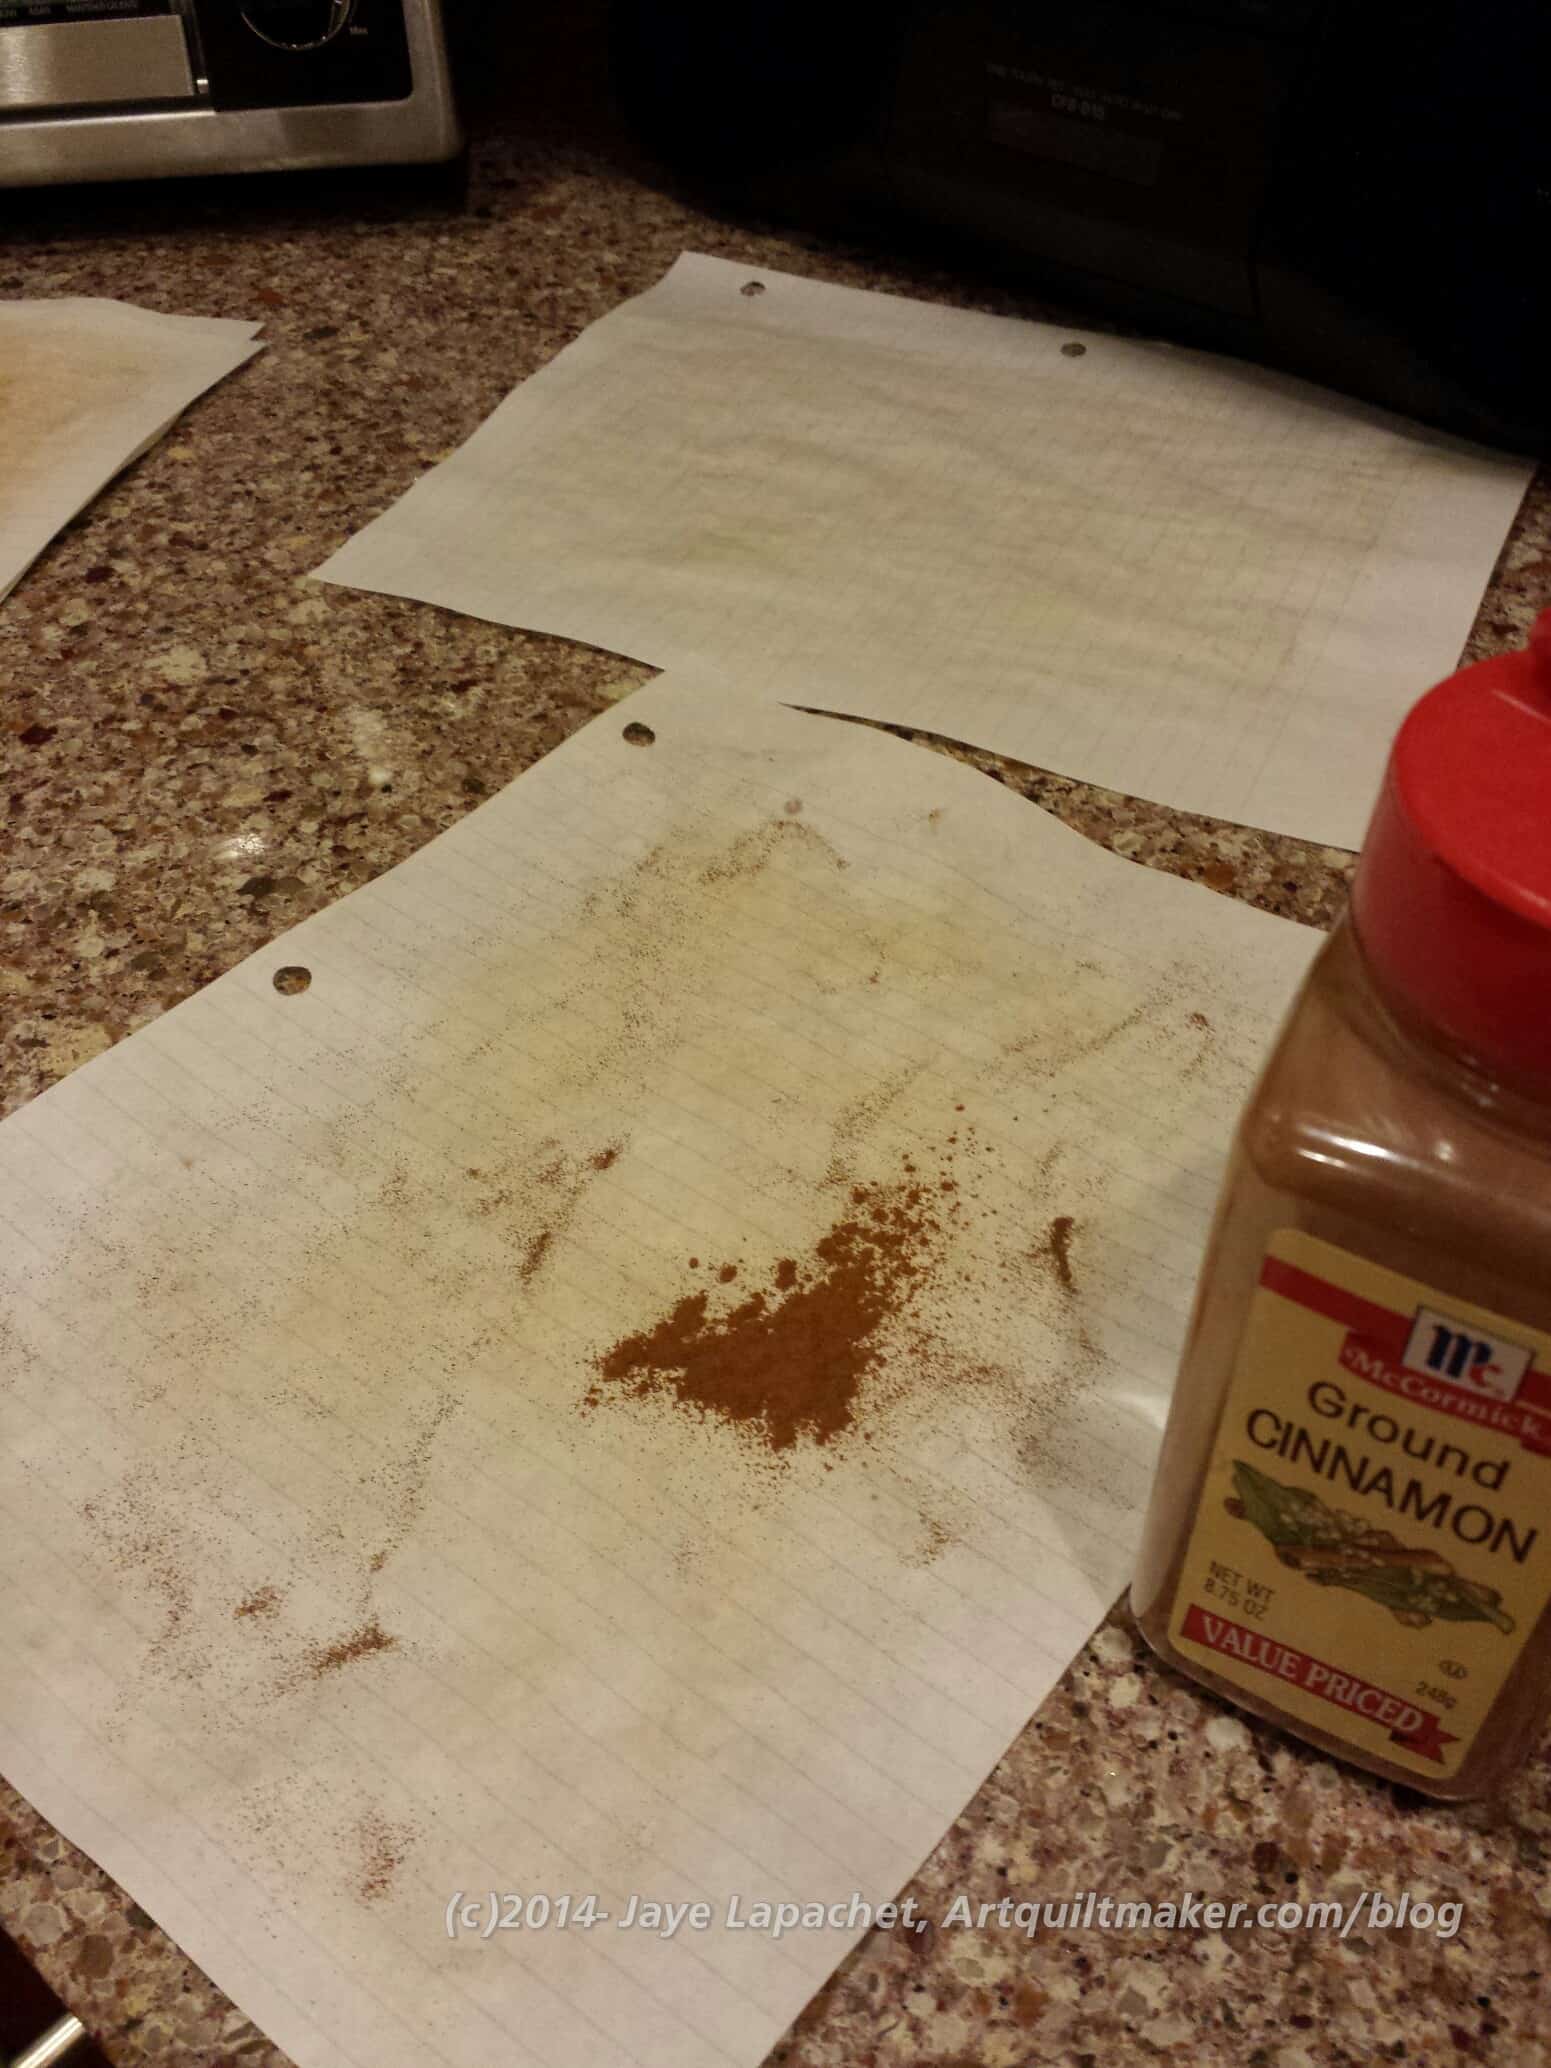
After dinner, as I was tidying up, I spied my giant bottle of cinnamon. It is the right color, so I poured some on the paper and rubbed with my fingers. The paper was really gritty, but also way more brown than the tea and not wet. The Y.M. was really happy with the effect.

Once the paper was finished, he took it and began writing the entries.

In the morning, I cut a piece of my book binding thread and, on the way to the train, I told him how to ‘bind‘ the papers together and tie them off. He didn’t take the time to make a cover, but, for the short time we had to do the extra parts of the project, I thought it looked good. I hope his teacher agrees, especially since the project smells like cinnamon.
image

Nephews Success

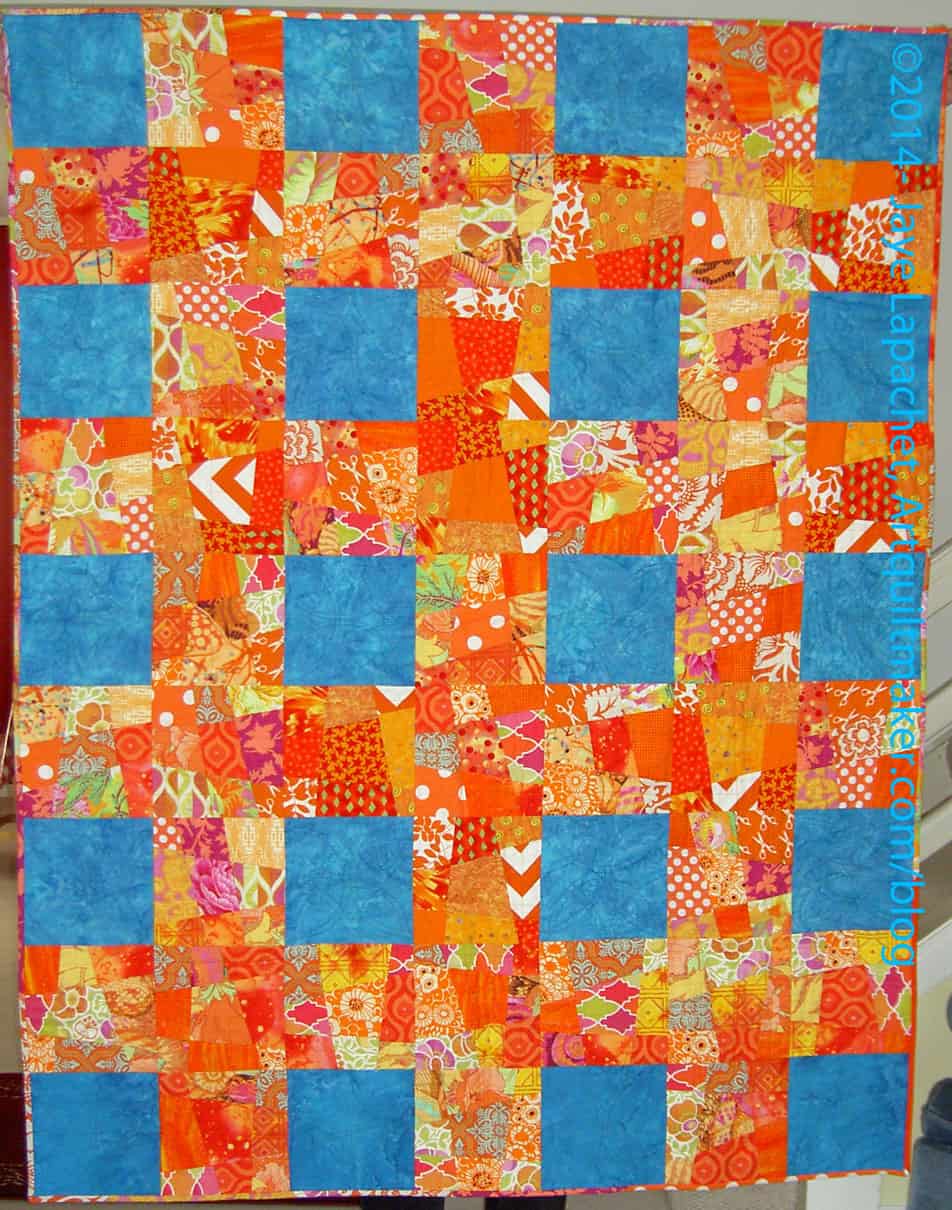
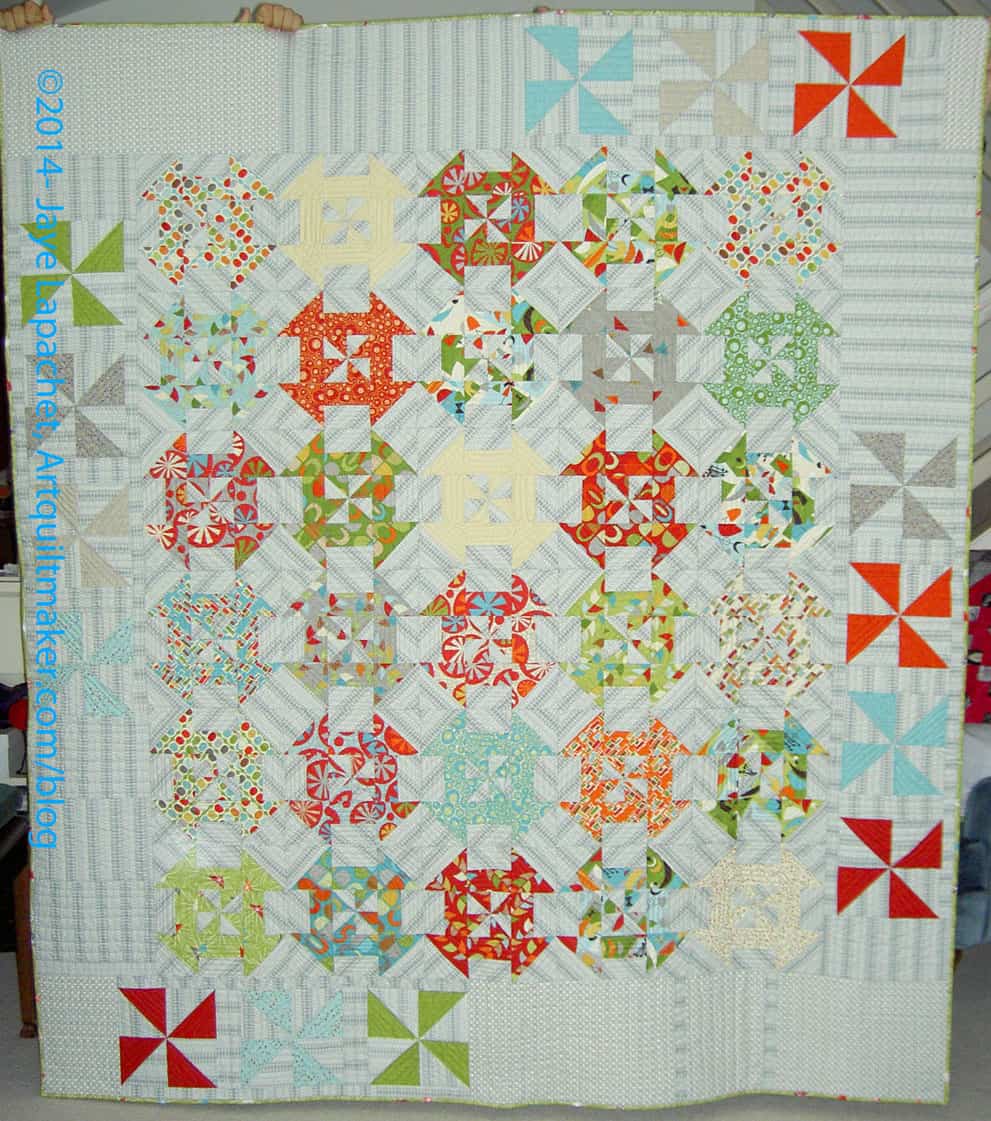
I finally got my act together and sent off the latest niece-phews quilts to the intended recipients. The Disappearing Pinwheel and the Wonky Nine Patch headed off about a week ago to two brothers, the youngest of my nephews. I was thrilled to finally get them out of the house. All reports were that the boys liked them. The boys liking them is the most important part. Truly. An added bonus.

Finished: Wonky 9 Patch

The orange of the Wonky Nine Patch was a bold choice. I made it, because when I started the quilt, Aidan told me, in an offhand way, he really liked orange.  It stuck in my head and when I saw Kathleen’s quilt, it all jelled in my head. I was a little nervous about the orange, because some of the prints were tending towards the girly side. Also, boys, and kids in general, change their mind as often as they change their underwear…almost.

I didn’t say anything to anyone (Shhhh! Don’t tell!) and nobody has said anything to me. Aidan’s mom said the colors were perfect and I am so glad.

I have to say, again, probably, that I love that blue batik. It isn’t turquoise, but it also isn’t really in the navy family. It is a great water blue. If I see it again, I’ll buy 10 yards. That is probably too much, but I’ll have enough.

Disappearing Pinwheel Finished

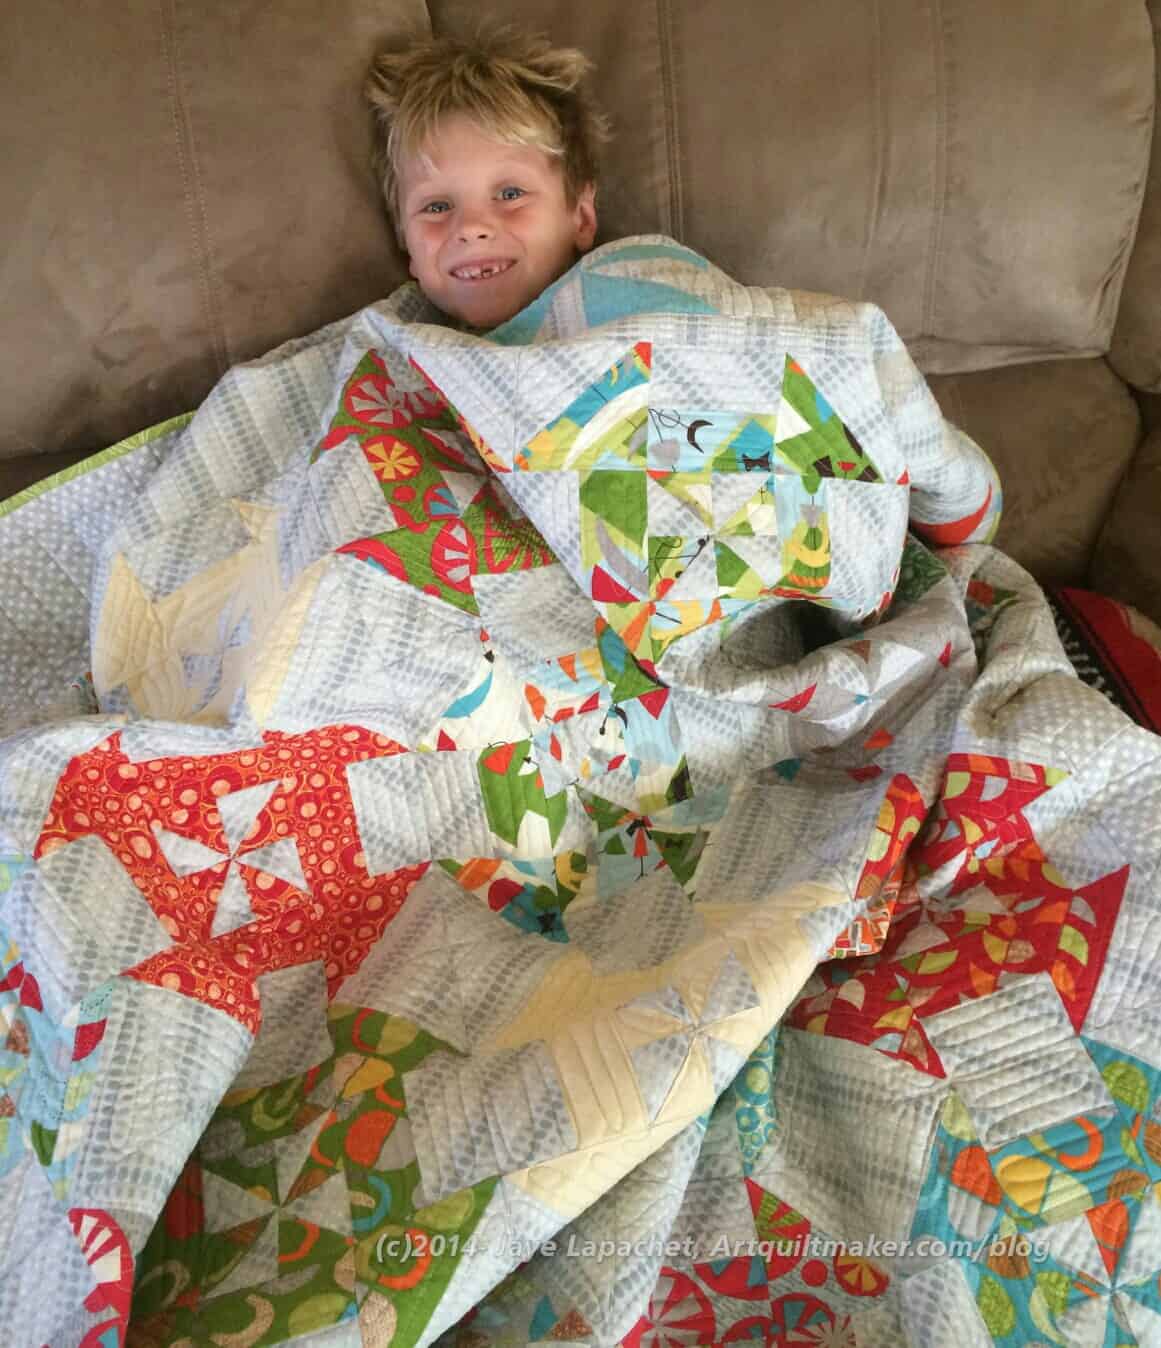
Pierce, the youngest of all of my nieces and nephews, got the Disappearing Pinwheel. I was concerned, again that it would be too girly, but the grey makes it boyish.

Looking at it again really makes me like the layout. If only I had thought to switch a pinwheel block with one of the Disappearing Pinwheel blocks, that would have added interest.

I have a loose project making quilts for all of my nieces and nephews. So far I have made 7 quilts for 7 youngsters. I have 8 more to make. As you know, I make them when I feel like making one or when I  get inspired to make a quilt and then don’t know who should get it. I started out with the idea that I would give each niece or nephew a quilt when they graduated from college, but that didn’t quite work with my creative process. Some of the younger kids may end up with two quilts – an additional quilt when they get to college. We’ll see.

Aidan with quilt
Aidan with quilt
Pierce with quilt
Pierce with quilt

Creative Prompt #280: Instrument

musical instrument

Oxford Instruments is a leading provider of high technology tools and systems for research and industry.

Instrument (2003 movie)

rental instrument

dental instrument

Definition1: “A musical instrument is an instrument created or adapted to make musical sounds. In principle, any object that produces sound can be a musical instrument—it is through purpose that the object becomes a musical instrument. The history of musical instruments dates to the beginnings of human culture. Early musical instruments may have been used for ritual, such as a trumpet to signal success on the hunt, or a drum in a religious ceremony. Cultures eventually developed composition and performance of melodies for entertainment. Musical instruments evolved in step with changing applications.

The date and origin of the first device considered a musical instrument is disputed. The oldest object that some scholars refer to as a musical instrument, a simple flute, dates back as far as 67,000 years. Some consensus dates early flutes to about 37,000 years ago. However, most historians believe that determining a specific time of musical instrument invention is impossible due to the subjectivity of the definition and the relative instability of materials used to make them. Many early musical instruments were made from animal skins, bone, wood, and other non-durable materials.

Musical instruments developed independently in many populated regions of the world. However, contact among civilizations caused rapid spread and adaptation of most instruments in places far from their origin. By the Middle Ages, instruments from Mesopotamia were in Maritime Southeast Asia, and Europeans played instruments from North Africa. Development in the Americas occurred at a slower pace, but cultures of North, Central, and South America shared musical instruments. By 1400, musical instrument development slowed in many areas and was dominated by the Occident.

Musical instrument classification is a discipline in its own right, and many systems of classification have been used over the years. Instruments can be classified by their effective range, their material composition, their size, etc. However, the most common academic method, Hornbostel-Sachs, uses the means by which they produce sound. The academic study of musical instruments is called organology.” (Wikipedia)

Definition2: “A device used to determine the present value of quantity under measurement” (Wikipedia)

A digital creative studio in Portland

Native Instruments is a leading manufacturer of software and hardware for computer-based audio production and DJing.

Science and technology

Music

Other

Post the direct URL (link) where your drawing, doodle, artwork is posted (e.g. your blog, Flickr) in the comments area of this post. I would really like to keep all the artwork together and provide a way for others to see your work and/or your blog.

We are also talking about this on Twitter. Use the hashtag #CPP

The Creative Prompt Project, also, has a Flickr group, which you can join to  post your responses. I created this spot so those of you without blogs and websites would have a place to post your responses.
Jackie in Black & Grey

Jackie's Donation Blocks
Jackie’s Donation Blocks

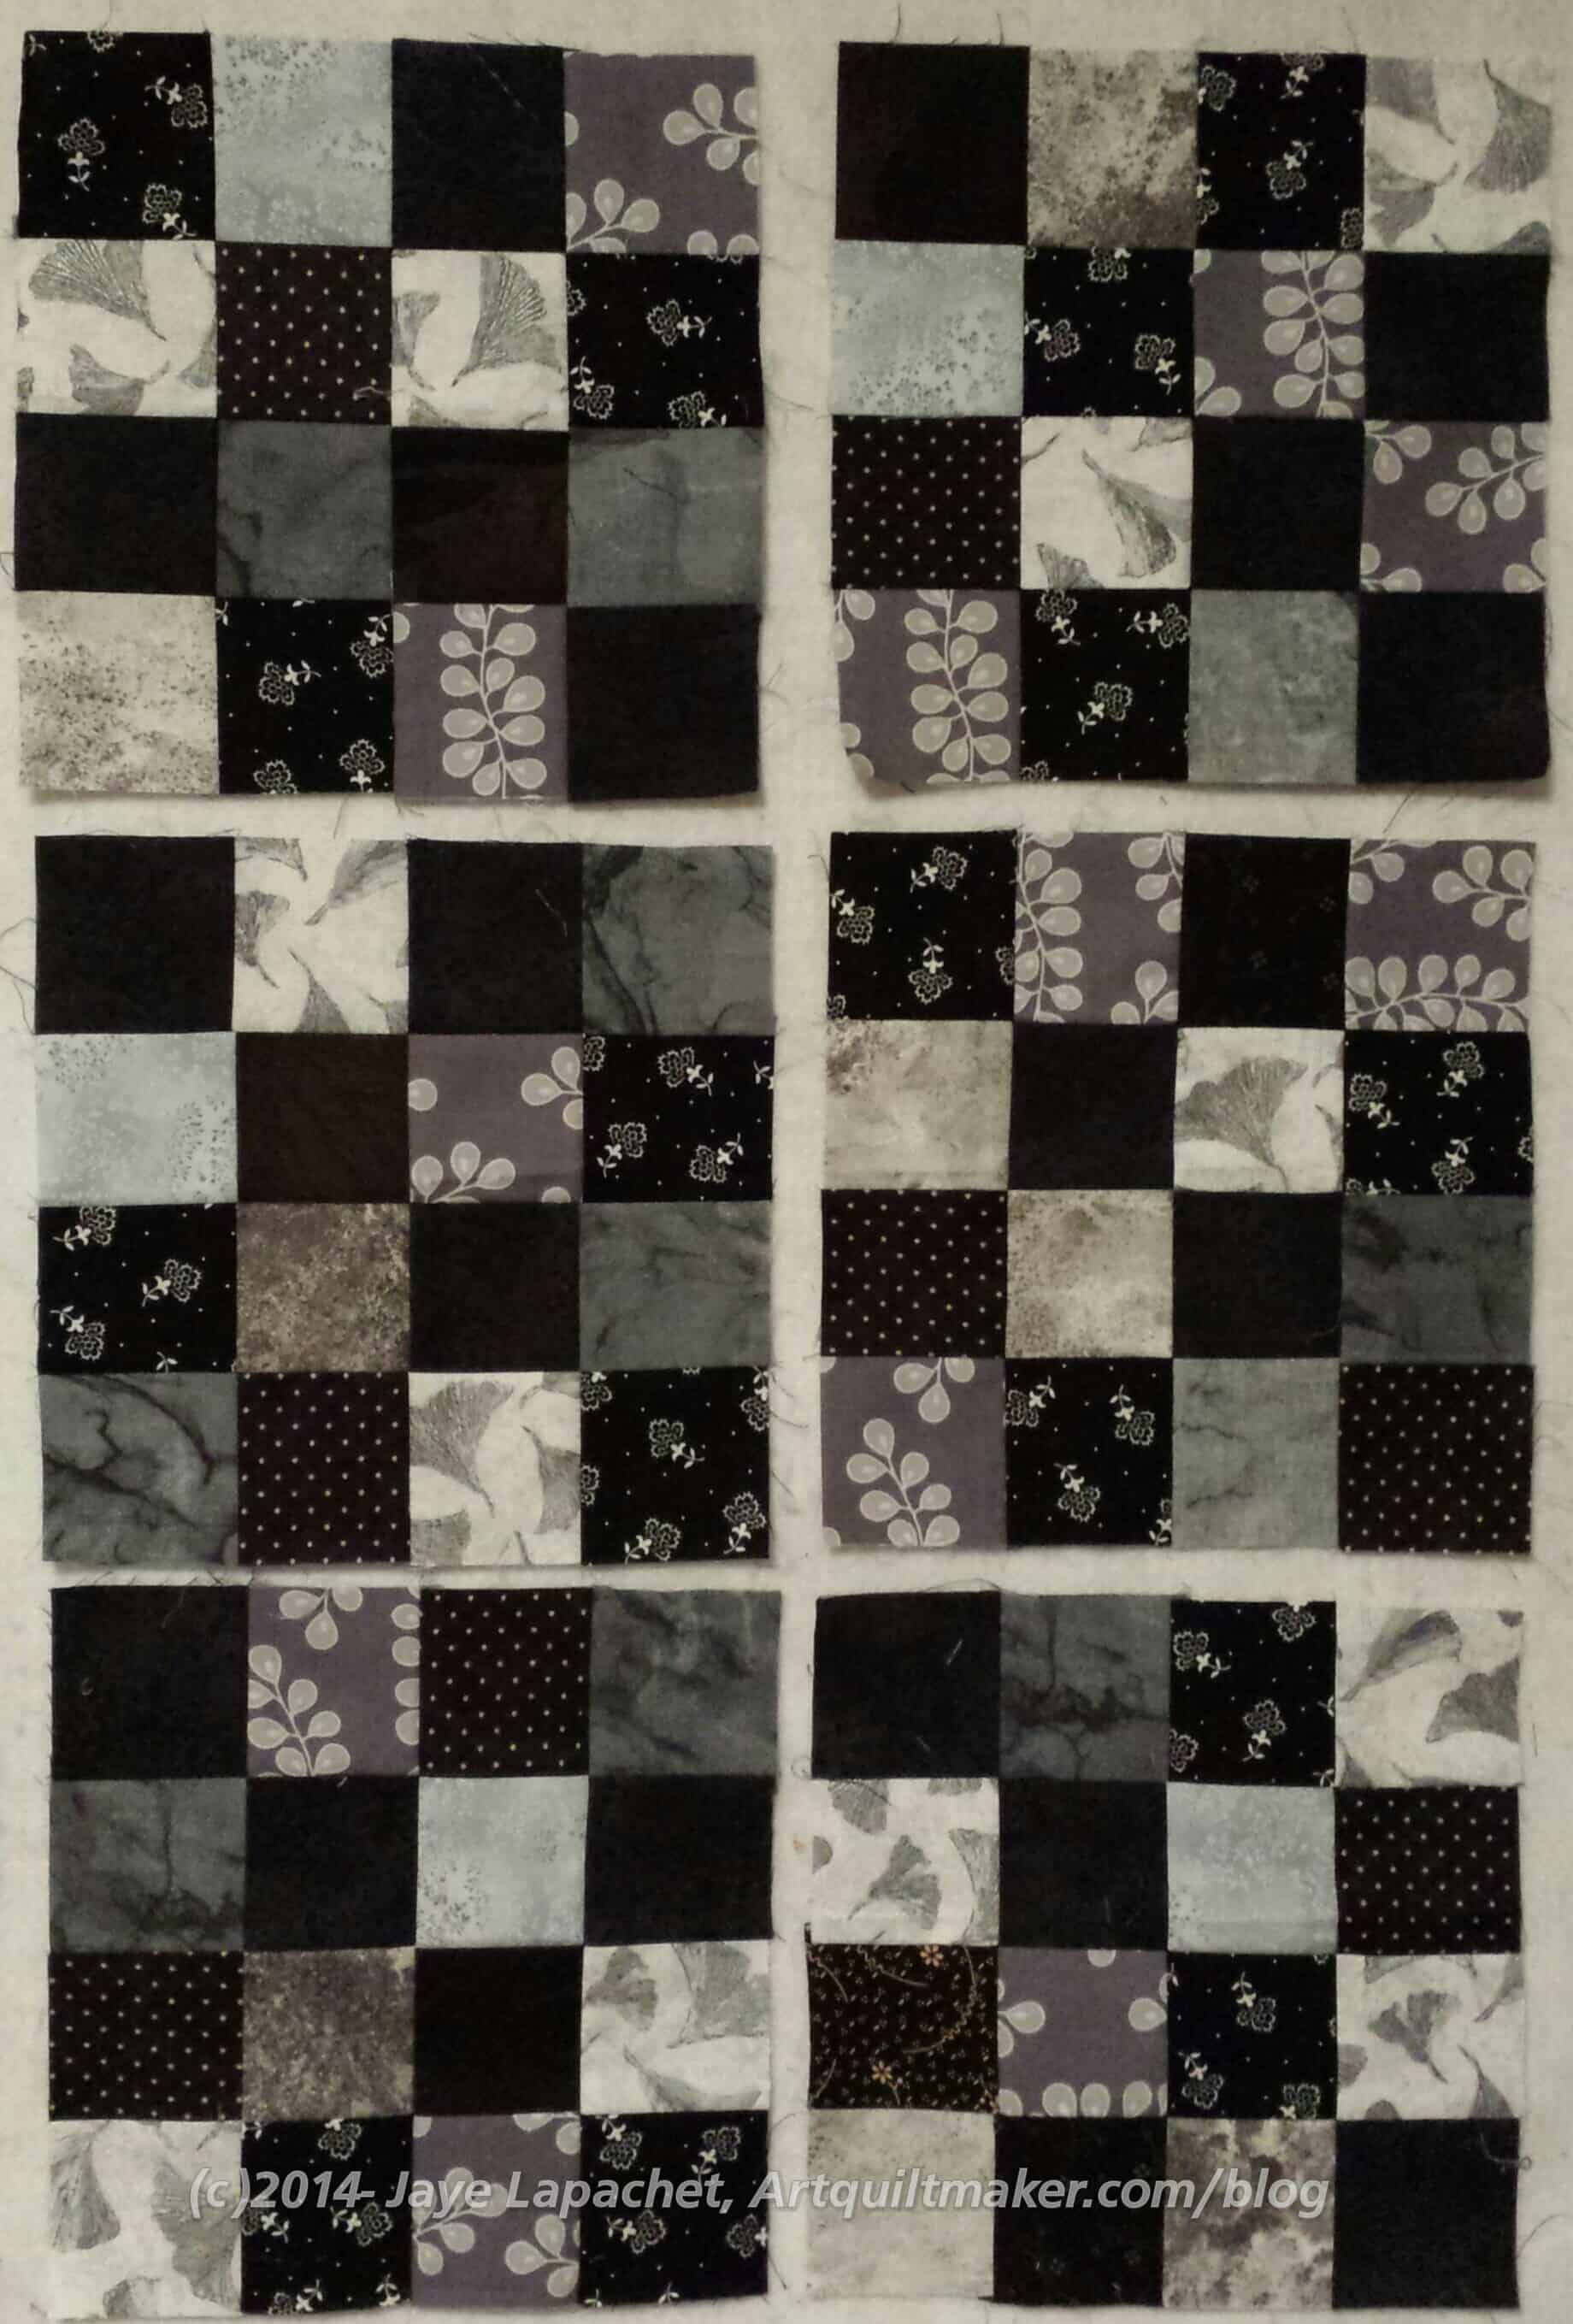
I haven’t been able to make it to my PO Box recently and when my mom went for me, what a bonanza! Lots of fun goodies, including some blocks for the Black & Grey Teenaged Boy Donation Quilt from Jackie! WOW! What a great surprise and these blocks will really look great with the others I have.

I know I keep saying this, but I really, really need to put all the blocks out and take another picture. I need to see where I am.

This makes me think that I am continuing to make blocks for some reason that I don’t know or I haven’t decided to reveal? Perhaps these blocks are some kind of therapy?

I’ll think about it later.

As Promised, A Journal Cover

Blue Tree Journal Cover

I have two blue journal covers in process. One is finished (read on!) and the other is still in the piecing stage. When I wrote the previous post, I thought I used a picture of the other journal cover, but I actually used the picture of this Blue Tree journal cover, which is, happily, also the one I finished. For once I was organized even though I thought I wasn’t. 😉

Anyway, I was about to finish all the pages in a journal and I needed to finish a new journal cover. I buckled down last weekend and put the finishing touches on this one. I finished just in the nick of time.

This journal cover is named after the fabric in the middle, which is a slice from a back I made some months ago with trees, White Birch trees, I think, printed on it.

Surprisingly, to me, at least, I started off with the front cover being the part of the journal cover you see on the left. It is ok in terms of interesting-ness, but nothing special. What was preventing me from using the other side, which I really liked, as the front was the Wizard of Oz fabric, which ended up smack dab in the middle of the part that was the most interesting.

I kept looking at the back and since the front and back are interchangeable, I just switched the cover around and am now using a new front. I like it and don’t even see the Wizard of Oz fabric.