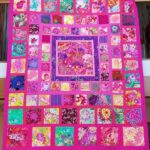
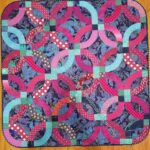
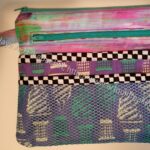
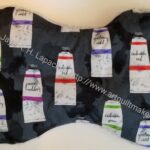
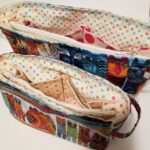
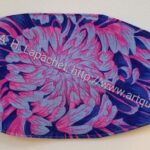
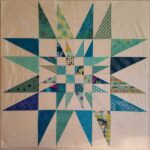
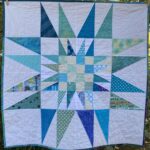
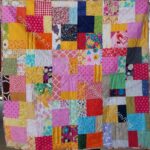
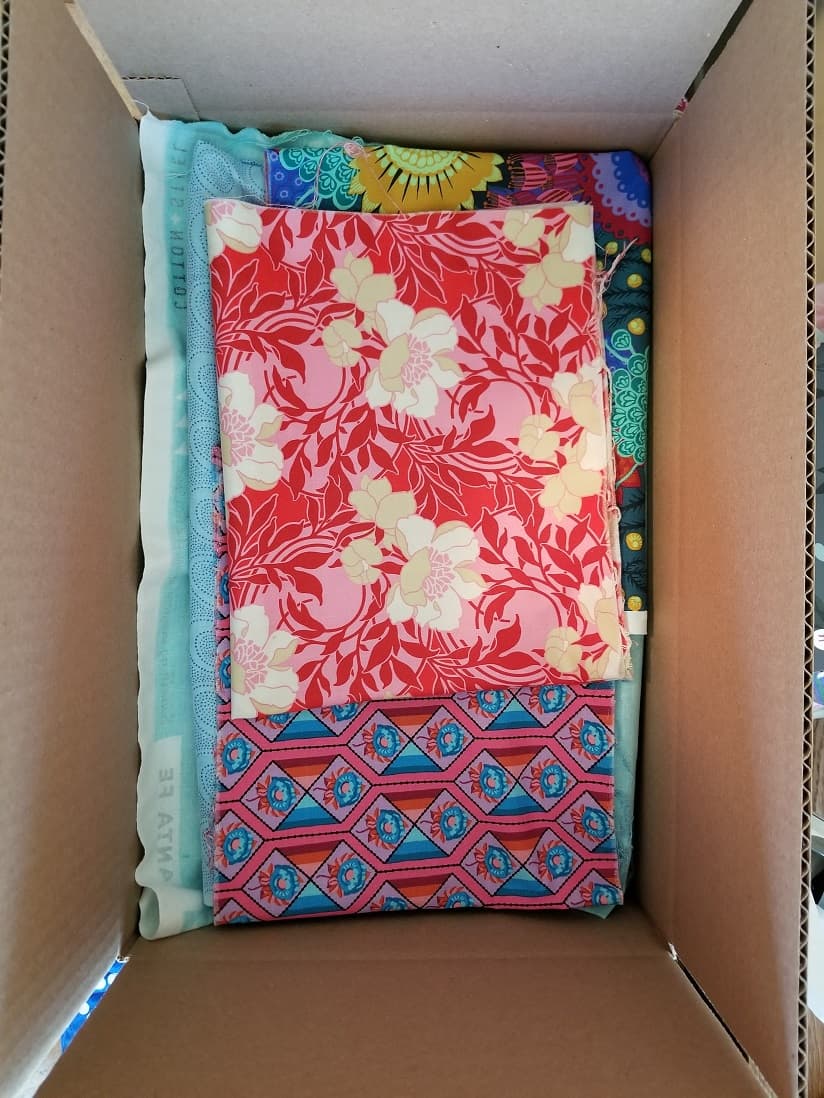
I mentioned the other day that I folded up some fabric and put it in boxes temporarily. As I was doing that, I came across another group of fabrics that I think I want to make into a quilt.
I had been looking at the Kaffe violet urns and the Philip Jacobs Chrysanthemums for awhile. I wasn’t sure what to put with them, but I think the group of fabric I put together and photographed will make a good quilt.
The two mentioned fabrics will definitely go together. I like the darkest blue (middle right), but I don’t know that it really goes with this group. I also think that bottom green has to go.
I am not sure what I will make, though I think it will be something with an Irish Chain kind of look. I also want to fussy cut the urns so the motif is highlighted.
Anyone whose email is on my Feedburner list has been moved to the WordPress feed. If you have not verified your email, then you won’t get any emails. I have deactivated the Feedburner feed, so if you weren’t able to make the change up until now, you will no longer be hearing from me. 🙁
If you have no idea what I am talking about, then ignore this admin talk and read on for quilty goodness.
Projects, Classes, Patterns & Tutorials
Check out Friend Julie’s village blocks. I think this is a larger project. Are you working on these blocks?
As I said, I am gearing up for the La Passacaglia project. The first month’s shipement of the BOM is shipping at the end of this month. <squeeeee!!!> The BOM group is really fun and I can’t wait to read the messages every night to see what people were talking about. Many of the participants are trying to organize their supplies. To this many are making the A Place for Everything 2.0 bag from byAnnie. I, too, would like to make one as I do think it would be a great bag for this project. I might make one, but I don’t have the bandwidth right now (have you read my posts about clearing out my workroom?). I do enjoy thinking about it, though.
Tula Pink has a FB video where she talks about her process for making byAnnie patterns. One of the things she highlights is the way she chooses fabric with fussy cutting in mind. I think I am seriously going to make the A Place for Everything bag for the La Pas project. When? Who knows. Soon. Maybe. I enjoyed the TulaTalk video, though she does say ‘like’ a little more than I like. ?
If you want to learn the basics of EPP, Naudia Tatum has an EPP 1 video where she discusses making the Smitten BOM with Pink Door. This BOM has already started, but you can stretch your imagination to your own project and learn about the tools she uses. She goes into a good amount of detail. From what I have watched, I agree with her on most points about tools. She uses the Jen Kingwell template grips**. As she shows how to use them, they look just like True Grips**, which are what I am used to using. I use a different kind of thimble, but any thimble that works for you is fine. The second part of the video discusses cutting.The third part discusses glue basting. I don’t glue baste, but I was interested in her discussion of the direction of her dog ears (at about~50 minutes). I can use that information, I think even though I will be thread basting.
A good follow-up to Naudia’s video is another one by Tula Pink. The thing I like about this video is how she talks about choosing fabrics. She says choosing fabrics for EPP is like eating an elephant. If you try to cram the whole thing in your mouth, you will choke. Watch this video. It is really helpful.
Yes, I have EPP on the mind!
Barbara Brackman’s Flora Delanica block-of-the-month has setting and fabric options posted, now that all the blocks are finished.
Media
In another video Tula talks about the new Free Spirit pre-cuts. In an offhand sort of way she highlights that nobody ever knew where to measure pre-cuts when they had pinked edges. FreeSpirit is now cutting layer cakes and 5 inch charm packs with straight edges! Yay!
Alison has shop called And So There. She makes beautiful cards, journals and other paper products. Take a look at her small journal with the scissor motif.
Textiles in Lockdown is a podcast by Ruth Singer which “explores the research project ‘Textiles In Lockdown’ which she has created for Gawthorpe Textiles Collection. During August 2020 Ruth created surveys to delve into the stories of textile making practice over the months of lockdown. 180 hobby makers and over 120 textile professionals responded to our survey to share their stories.” The “Gawthorpe Textiles Collection is an internationally renowned collection of global textiles located in the heart of Pennine Lancashire. The Collection is an accredited museum and independent registered charity with a focus on education, well-being and the preservation of traditional craft skills.”
Books, Fabrics, Notions & Supplies
I was led to the FIGO fabrics site and spent a happy amount of time looking at their current and forthcoming fabrics. I love their solids and Bijou is interesting.
I found an article on Fons & Porter in the Quilting Daily. I think I saw it on Friend Julie’s blog. While their quilts may not be your style I have always admired them. I watched their shows on Friday nights while the YM and my DH were at Scouts. I would draw pictures of interesting blocks in my journal and try to make them later. This is an interesting article about the trajectory of their business and what they have been doing since they sold it.
Russel Wright Pitchers
I read an article about Russel Wright and his ceramics in the Wall Street Journal while I was waiting for a meeting to start. That sent me on a journey to find out more about him and his work. I read an Artnet article. I love his dishes and, especially the pitchers. They have a great shape. I saw a blog post, which shows more of his work and links out to the Metropolitan Museum of Art article about him.
**I use affiliate links and may be paid for your purchase of an item when you click on an item link in my post. There is no additional cost to you for clicking or purchasing items I recommend. I appreciate your clicks and purchases as it helps support this blog.
As I mentioned a few days ago, I watched a video suggested by Pink Door to get ready to make La Pas. I didn’t really feel like I needed to watch it. After all, I have been working on the Half Hexie project for years. I was tired from a long day of Workroom Refresh and needed a break so I sat down and watched it. I found it to be interesting and helpful.
I have most of the tools I need, though I did toss a few more True Grips** and a new kind of thimble to try into my cart as I perused the Pink Door site while watching the video.
The thing I found helpful, was watching Naudia cut and organize her pieces. It was also helpful to see what supplies would be coming in the BOM shipments. The video with this information was especially helpful as I think about making a bag to organize all of this stuff. I have a better idea of the types of pockets I might need. I am thinking I will want to carry stuff around so I can work on this project on the go. So far I need pockets for the following bits and pieces:
Book, which has the pattern*
Tools and supplies
Rotating mat
Rotary cutter
Scissors
I will definitely need a pocket for prepped or cut pieces and their papers
Pink Door cutting guide
extra fabric
thread
What else??
I also liked the way she showed using a rotating cutting mat. Of course, I have used one before, but in a different way. Her rotating cutting mat is really small – good for one piece at a time. Mine is really big, so I may think about buying a smaller one.
*The pattern not included in the BOM subscription. This wasn’t a surprise as Pink Door made that very clear. The pattern is included in the book, Millefiori Quilts**, which is the first Willyne Hammerstein book. Yes, this book is expensive, but worth the money if you make one or two of the quilts. Also, it is beautiful to look at since the quilts are so amazing.
**I use affiliate links and may be paid for your purchase of an item when you click on an item link in my post. There is no additional cost to you for clicking or purchasing items I recommend. I appreciate your clicks and purchases as it helps support this blog.
In Process or To Make
The ‘In Process’ is used to denote projects on which I am actively working or are on the design wall waiting for me to stitch. I am continuing to try not to put away projects. I find putting a project away ensures I never work on them, because I just lose steam.
Quilts
The circle quilt is on the design wall
Small Projects to Make or in Process
Most of my progress involves thinking or just cutting.
One Hour Basket for my stuff that tends to accumulate on the dining room table. I may switch to one of the Minikins projects or a Catch All Caddy for this purpose.
One Hour Basket for DH’s stuff that tends to accumulate on the dining room table. I may switch the pattern to one of the Minikins projects for this purpose.
Percheron Pouch cut out and ready to sew
Retreat Organizer – another project from the Crafty Gemini Organizer Club, also on my list, but not yet started. Recently, I saw one of these made up and I am not so nervous about it
Superbloom tote using Hindsight fabric – not started
Tessuti Japanese Apron – cut out and ready to sew. I am figuring out how to make it reversible.
Ultimate Project Organizer – another project from the Crafty Gemini Organizer Club, also on my list, but not yet started
Ultimate Carry All Bag gift – Bag-a-Long for BAM – I have the inside pockets as well as the front panel made and am looking forward to the next step
Ultimate Carry All Bag for me – I have the inside pockets as well as the front panel made and am looking forward to the next step
I decided that some of my projects are in a different class because they are hand piecing or embroidery or beading. They take longer. Thus I created a new category and have moved some projects here.
Still WIPs
I still have WIPs. Who doesn’t, after all? A project in the ‘UFO’ category means I am stalled. A nicer way of saying UFO is a WIP. The list is a lot shorter and the projects are newer, for the most part.
Handbag Sampler – this is still the forgotten project. It should be on the UFO list. The blocks were teaching samples when I taught a sampler class some time before I started writing the quilt class sampler tutorials. I found one block recently, but otherwise I actually don’t know exactly where the blocks are hiding. I crawled up in the far reaches of my fabric closet to see if I could find them and they weren’t where I thought. I am sort of mystified as to where they could be. I haven’t even found a picture of all the blocks. Sad.
Lobster – I think I might make this into a tablerunner for the buffet. I think that will be a good and fun use of the piece even if the colors aren’t quite right for the dining room.
Pies and Points from 2016 Victoria Findlay Wolfe class. The last time I worked on it was when Julie and I had a playdate in April 2018. I brought this piece with me so I could cut more elements (Julie has a Sizzix). I lost my excitement about this piece shortly thereafter and still have to get it back. Thus, I had to move this to the WIPs area.
Pointillist Palette #4: Fourth is a series of 6 quilts; needs tiny square patches sewn together. No progress.
Serendipity Lady – I am still planning to take this piece to be framed.
Who Am I? – This piece is still languishing. Perhaps having a larger design wall will help me regain momentum. The amount of satin stitching I was facing was a problem until I thought of BIAS TAPE. I am going to make the words with bias tape, perhaps different widths, then I won’t have to sew the satin stitching. Red Scribbles and Friend Julie helped me come up with this solution. Now I just have to do it!
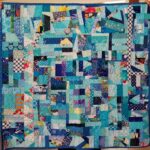
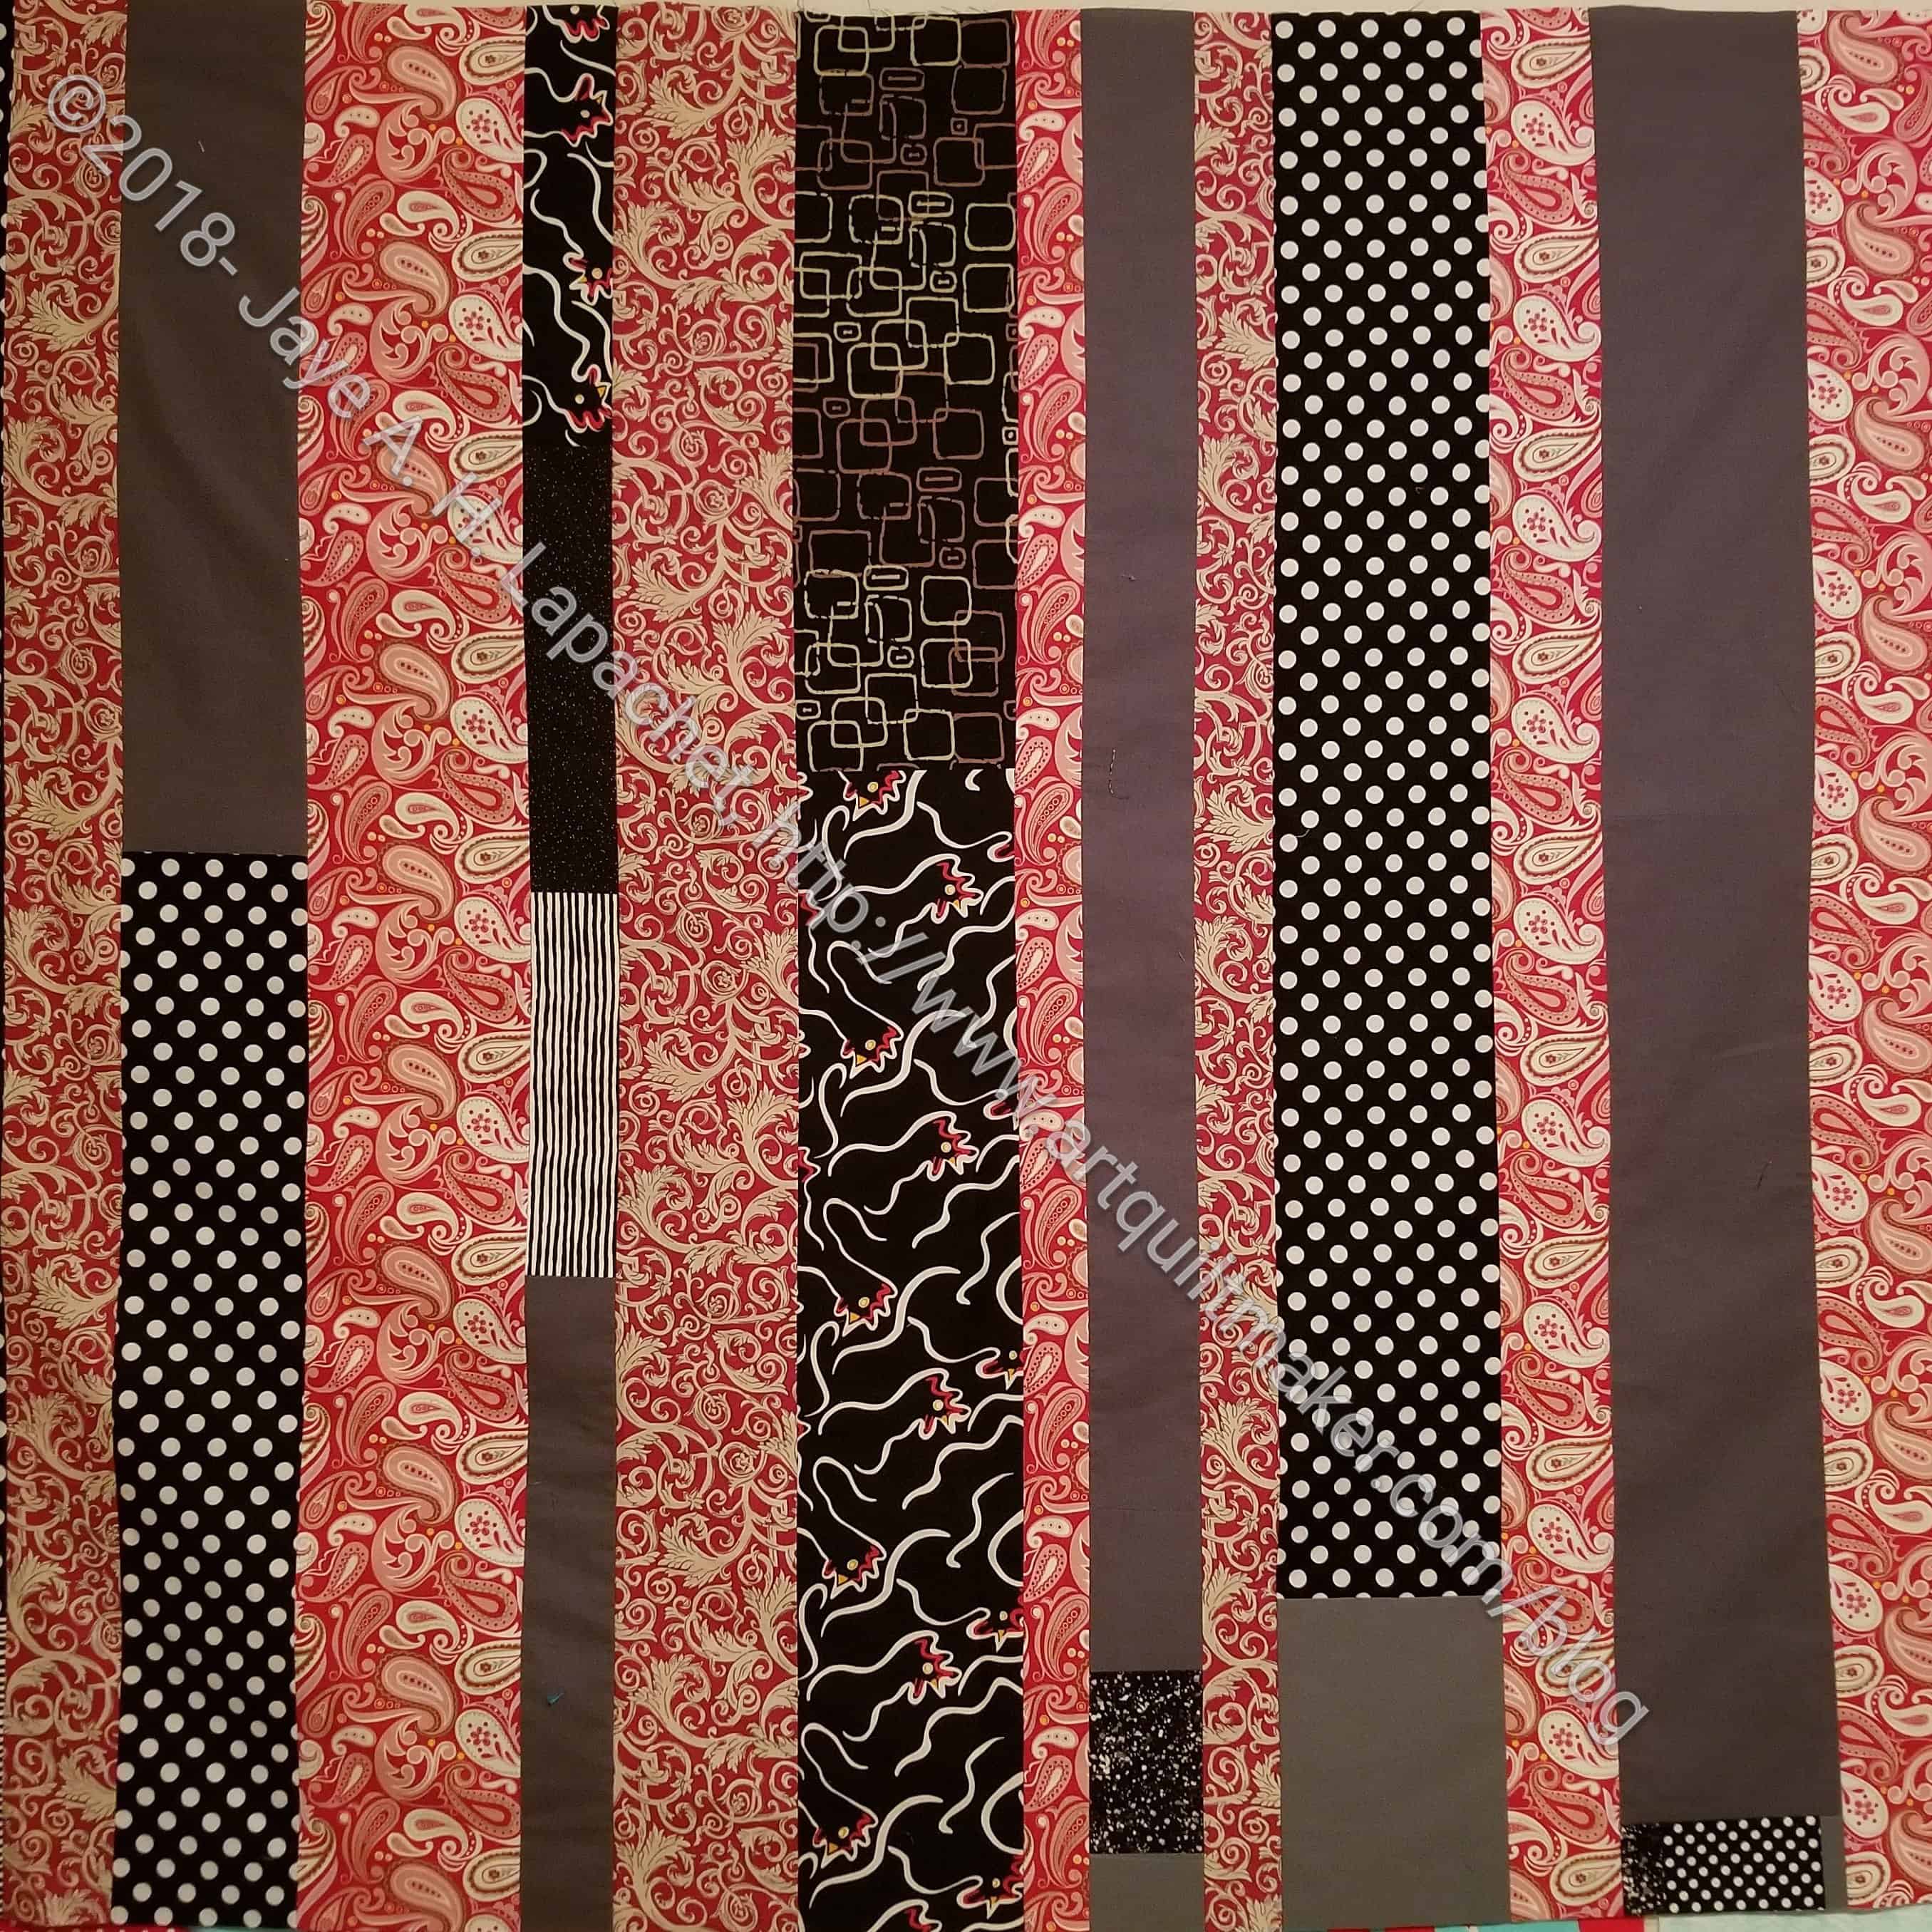
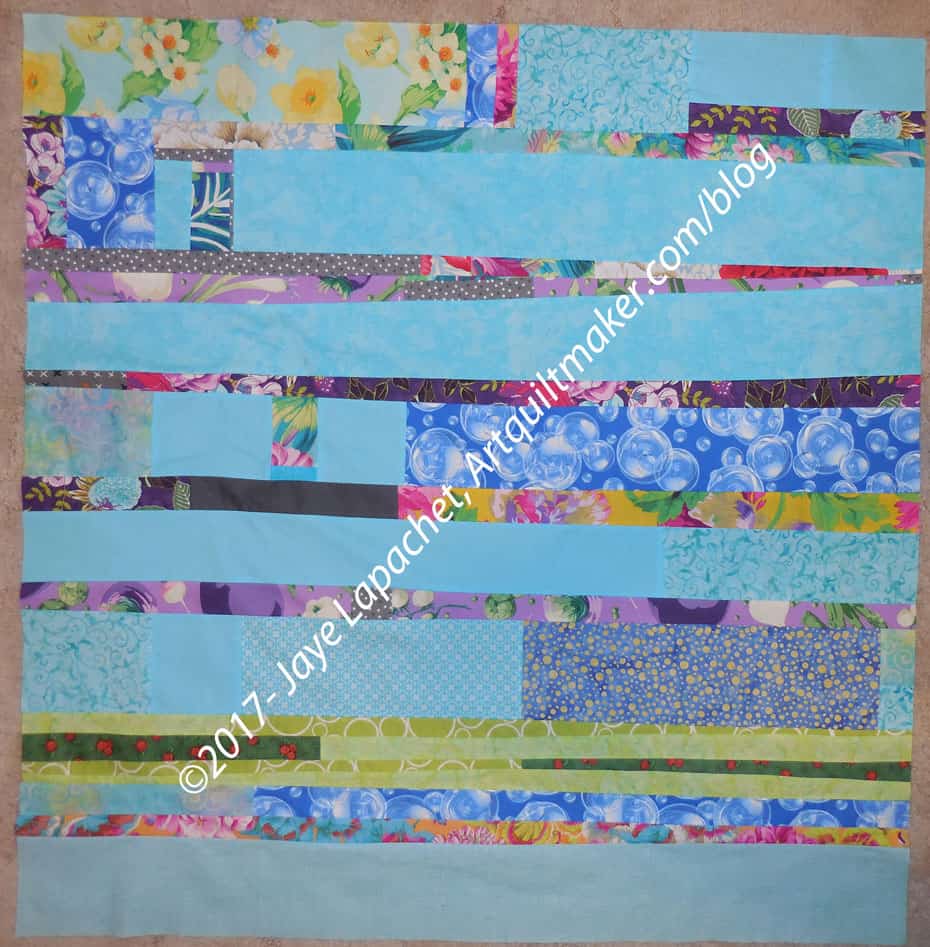
These quilts are all made from the edges that are cut off of other quilts as they are being squared up. Sometimes I make the backs larger than needed so I get some large-ish pieces back. Those pieces are hard to store, so making some donation quilts out of them is a good idea.
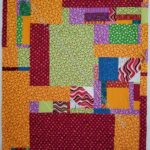
Ends (n.1) – see more information – this is the top that started it all!
You could also put scraps together into strips, add some background and make one of these. These are very improv-y and there isn’t a pattern. It is a good way to do something good with fabrics I wouldn’t otherwise use.
I know I should, but I almost never put all of my ingredients out in little bowls, measured and perfect, before starting to cook.
I do not like the spackling and sanding part of painting.
I do not like waiting in traffic. I like moving forward.
I like to move forward: start and go. Usually, I do not start, because I know I need to do prep and I don’t like it. Quiltmaking is the exception.
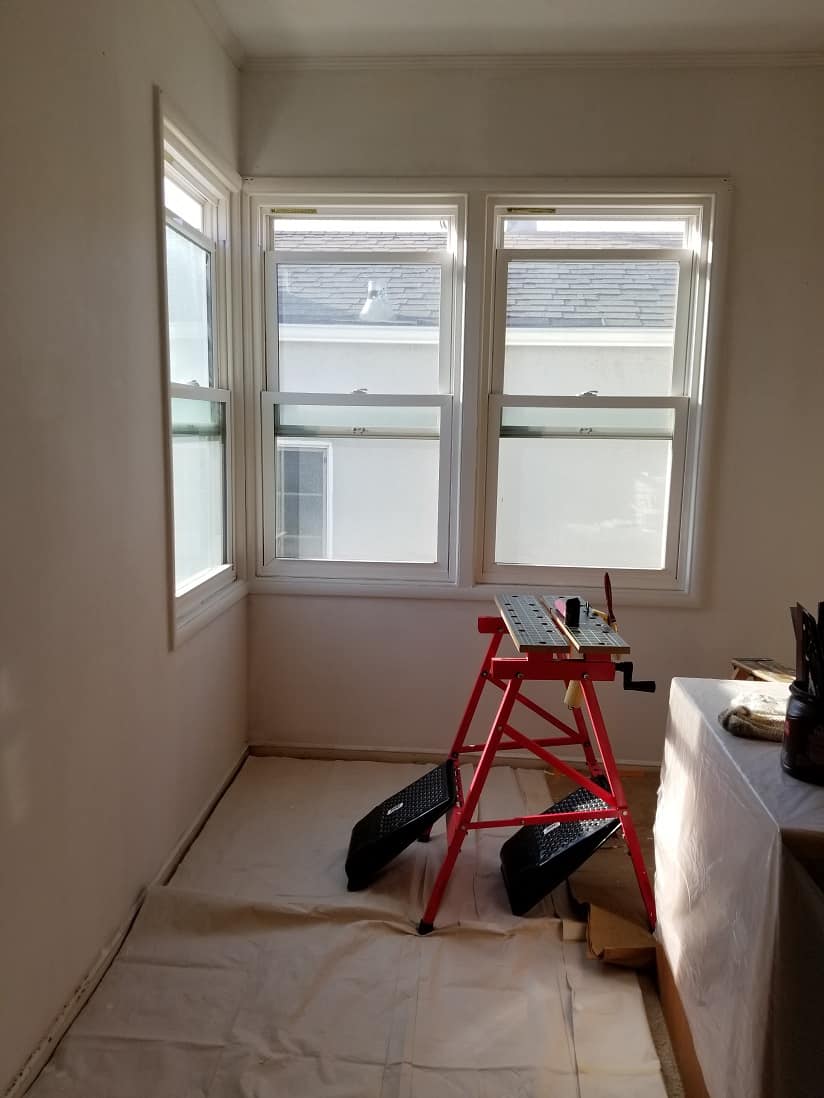
Primer on the wall
My DH is good at preparation part of painting. Meticulous, in fact, which is good since he is preparing the walls for paint. And he is making good progress. Yesterday he put primer on the walls. The primer is white so I can start to see what my work room will look like. It looks so much more fresh and white. I am pretty excited to get rid of that life sucking beige.
A long time ago I used to paint. When the YM came along it became impossible. I would just put out paints and he would need me. By the time I got back to it the brushes would be ruined and the paint dried out. It wasn’t feasible anymore.
It actually worked out. At the time, I was said, but I got rid of a lot of painting supplies and began to focus on quiltmaking. I am happy that I did. I think having 100 canvases around the house would be much harder to deal with. Also, I wasn’t a very good painter. I enjoyed it, but I would never have been great.
Auntie’s View
Before that I painted a picture of a view I looked at as a kid. The view is from inside my godmother’s kitchen out into the dining room and is completely stylized. I don’t really know why this view made such an impression on me, but I remember sitting in the kitchen and looking that way a lot.
The walls were not violet. The stove, a space age looking electric behemoth, was on the left inside the kitchen door. Auntie (what we called my godmother) never made cakes like that and the Christmas tree was not in the dining room. The overall arrangement was correct.
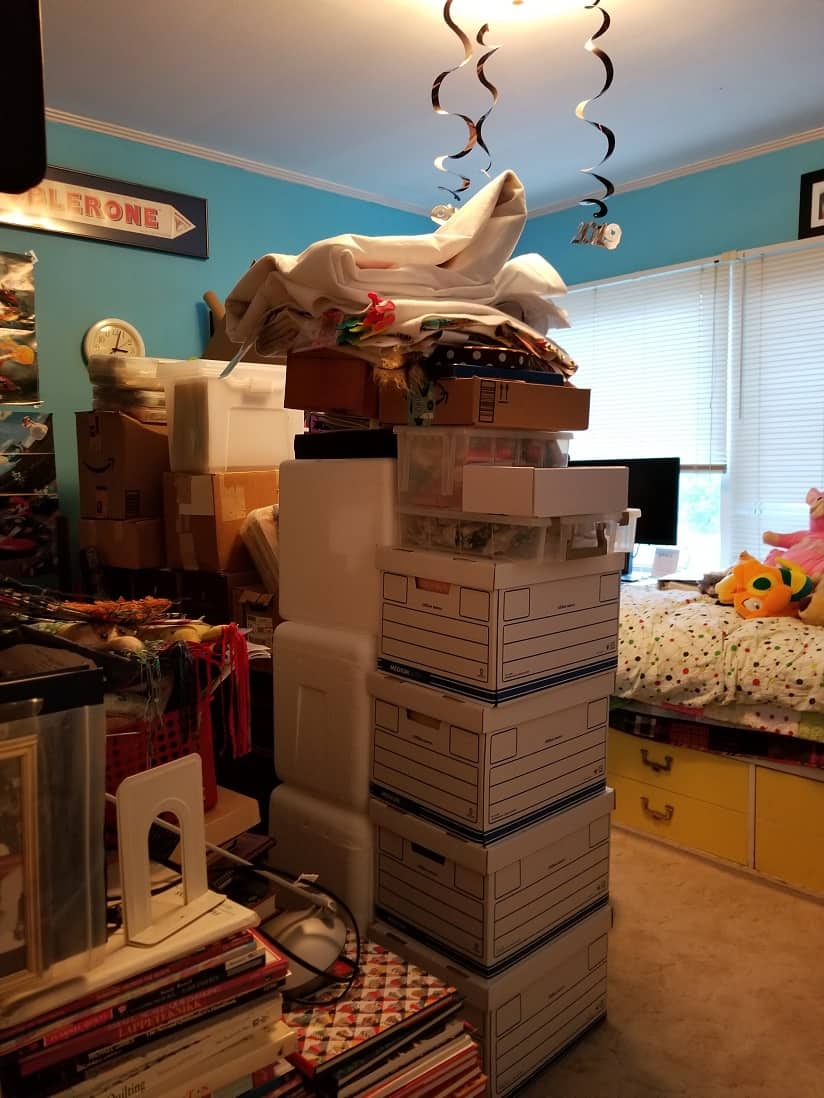
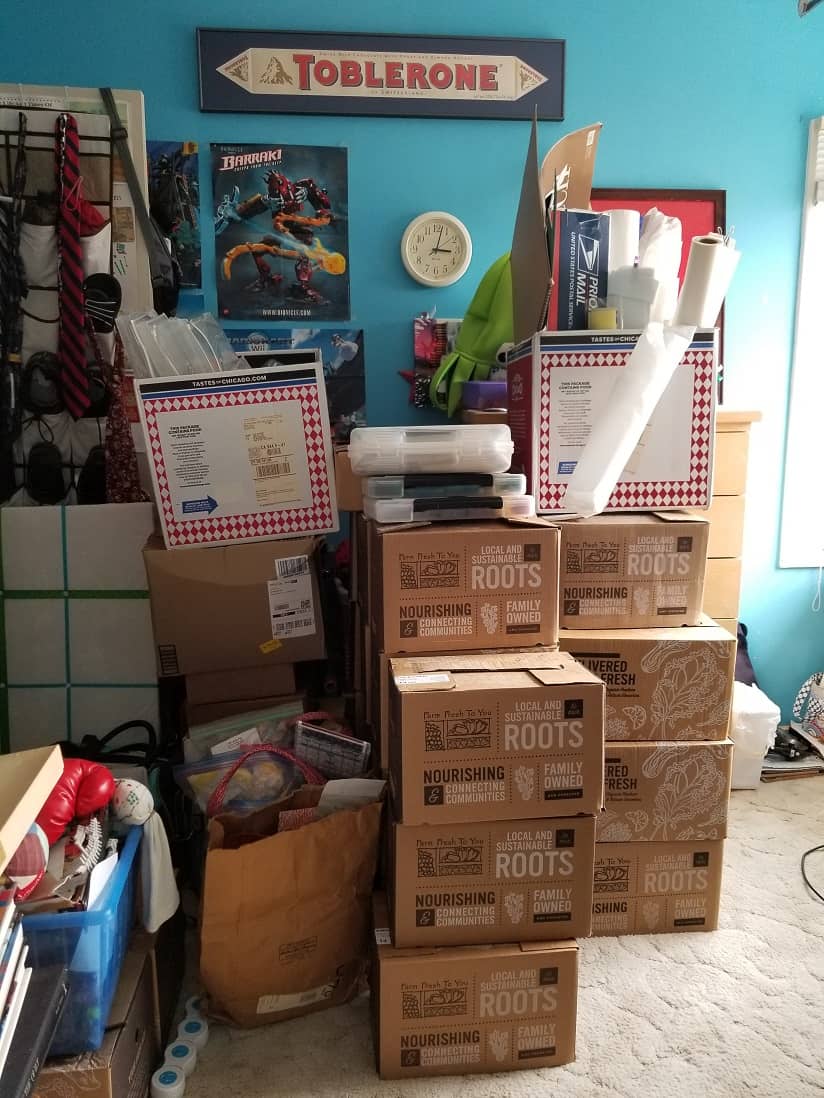
This is the best looking, most organized room in the house, the YM’s room. Our bedroom, actually, has not escaped the rehoming of stuff, but it has the least amount of stuff.
All of these boxes are fairly organized, though I couldn’t tell you exactly where any one thing is, but when I see the top of a box, I know what is in that box. If you want something in the bottom box, tough luck. The other thing is that we can’t really do anything. I have a small space to work (and occasionally write a blog post), we can watch TV and sleep, but that’s it. No sewing, no cutting, no EPP unless it is hand work that needs no prep, no extra fabric nothing else. I like to be able to sew whenever I want, so this is difficult.
My mantra is that it will be awesome when it is done.
Workroom is almost empty
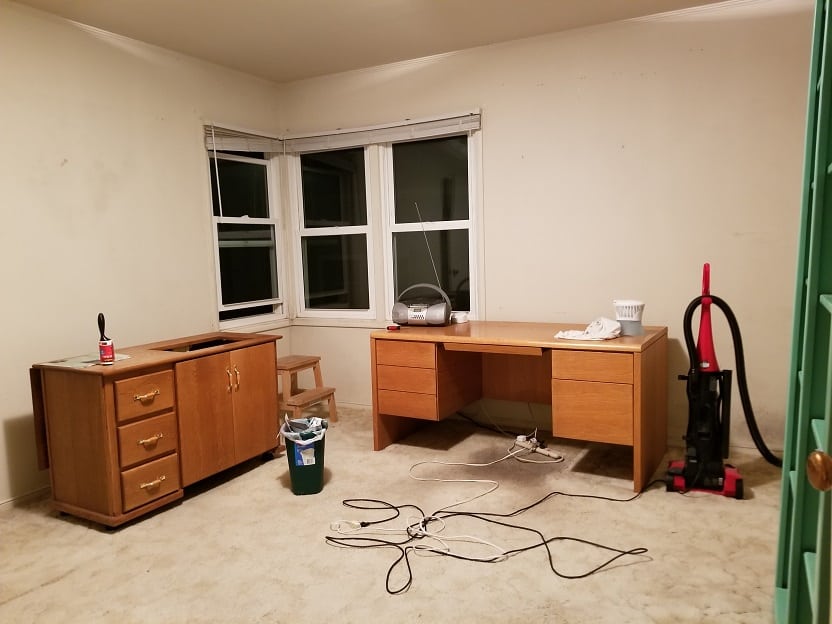
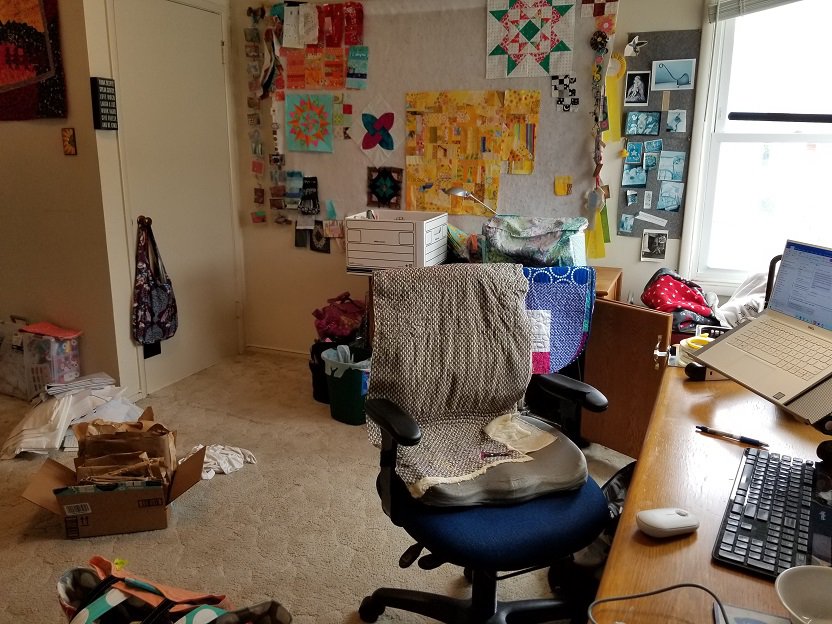
One reason for all this disorganization is that there is almost nothing in my workroom.
My sewing table and my work desk are still in the room, only because they are too heavy and awkward for the two of us to move downstairs. The green bookcase you can see peeking out of the right of the photo is in our dining room now.
DH has scraped the walls and will spackle and buy paint tomorrow. The goal is to have the room done by the time he goes back to work next week.
I know it will get better, but right now it is horrible to live here.
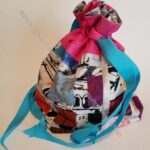
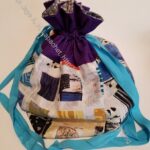
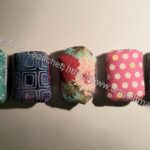
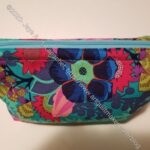
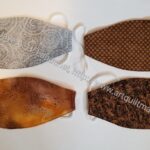
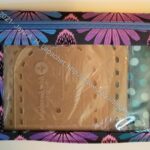
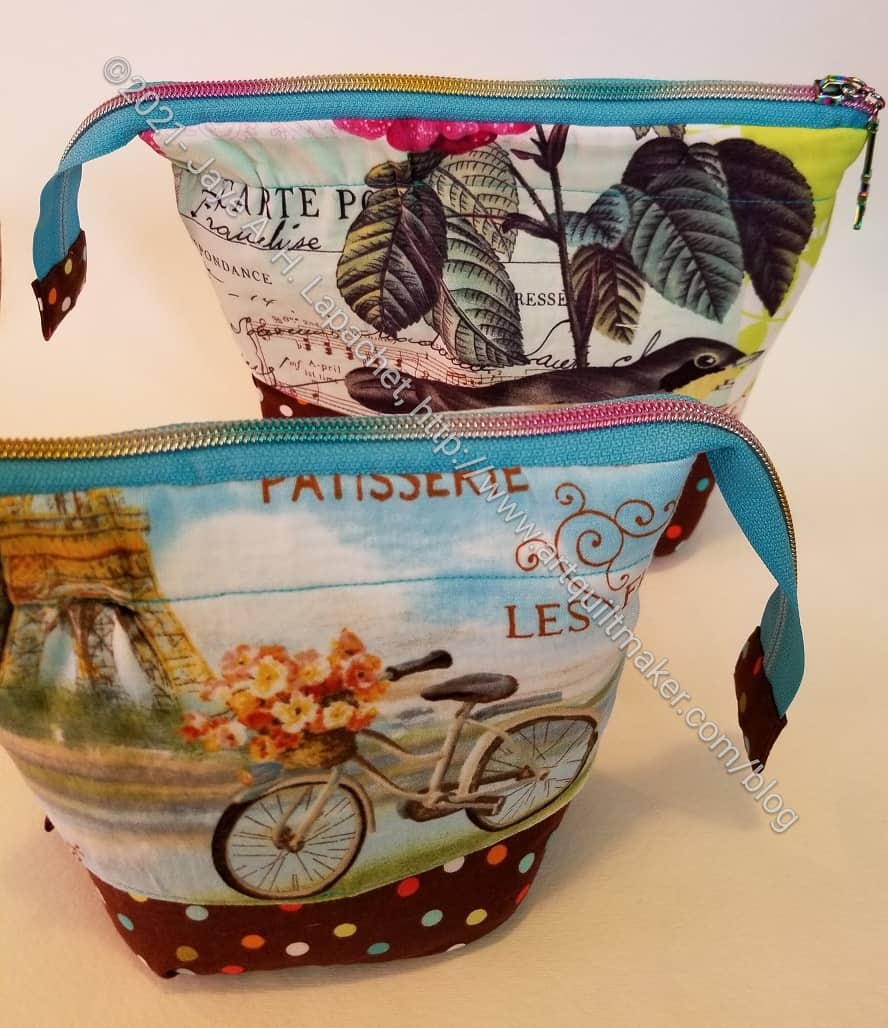
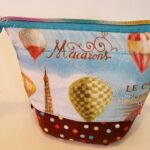
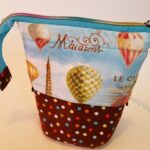
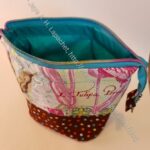
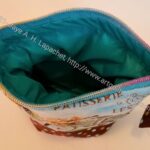
A month or so ago, as I waited to start my new contract job, I finished these Falabella Pouches. I didn’t write about them sooner, because they are gifts for my younger (middle) sister and her birthday is today.
She is an artist and has no qualms about asking for what she wants. She wanted something to hold her pens, etc.
The Falabella Pouch is part of Sara Lawson/Sew Sweetness’ Minikins 3 set of patterns. I want to make more of the various Minikins patterns since I bought all three ‘seasons’. Her request helps me with that goal.
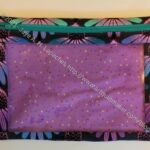
Falabella – back of medium pouch (down
Falabella – back of medium pouch (up)
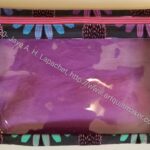
This is a pouch that gets taller if you pull up on the zipper or smaller if you pull down on the zipper tabs (shown vaguely in photos above).
Falabella – medium pouch open
Falabella – large pouch open
I used ripstop nylon for the inside. If Lil Sissy’s pens open, I wanted some kind of fabric that was marginally cleanable. This was a difficult fabric with which to work. It frayed a lot. Some people said to burn the edges, but I was too chicken to do that.
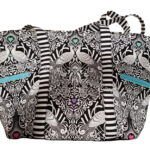
Large Falabella Pouch
This was the first time I used Zipper-by-the-Yard for a project. I bought it specifically for this project, because I found some zipper pulls with the Eiffel Tower on them. Lil Sissy loves Paris, so these are perfect. I used Sara Lawson/Sew Sweetness’ video on adding a zipper head to zipper tape.
I have tried this activity before and never been successful. The video has one trick in particular that makes the activity work. I couldn’t believe how successful I was! I also did not use a fork, which is what Sara demonstrates. I used the self adhesive towel holders** I bought from Amazon. I can see how a fork would work just as well.
I bought the zippers from the Sew Sweetness site and can’t wait to try them again. I want to make another Piebald with a double zipper and now I know I will use this zipper head technique to do it. I know I must sound like an idiot, but I can’t tell you how gleeful I feel about this zipper!
Anyway, I sent these off last week, after admiring them for a few weeks. I hope Lil Sissy likes them.
**I use affiliate links and may be paid for your purchase of an item when you click on an item link in my post. There is no additional cost to you for clicking or purchasing items I recommend. I appreciate your clicks and purchases as it helps support this blog.
Boxes and boxes are filling up the YM’s room. There are a lot, because they are small and filled with books. I used all of our CSA boxes that we have not been able to return due to the pandemic. They turned out to be a good size for books. I ran out eventually and had to scrounge random amazon and other boxes. Eventually, my mom bought me some boxes from Home Depot and that was the last of what I needed.
The YM is coming for a visit in a week and I need to get all of these boxes out of his room
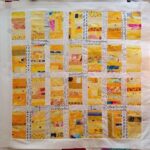
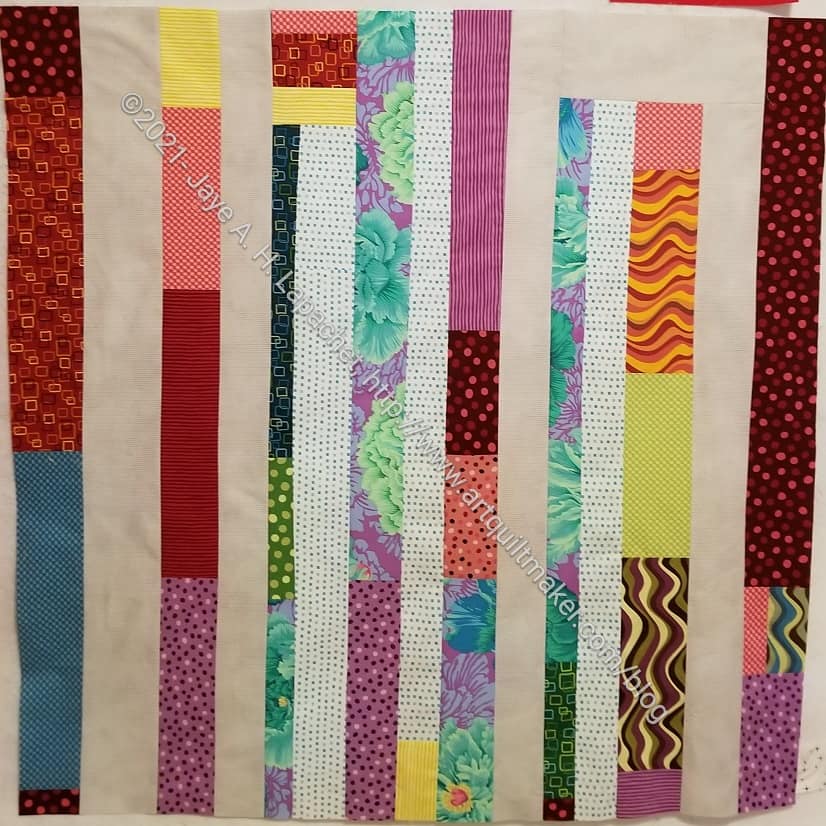
Slowly but surely this piece is growing. The top section, which I think of as the main piece, is about 20×20 now. I am working on growing the bottom piece to fit on to the top piece. At the moment the bottom piece is made up of 3 different pieces.
I find that I need triangles in these pieces to add interest. The additional, non-yellow, colors add interest, but I find that if I have too many squares and rectangles the eye doesn’t move around as much. In this piece, however, there isn’t much contrast and that helps the eye not linger on the squares and rectangles.
I learned this from the Green Thing, the first top in this series. Those bars, which aren’t even really green, provide a focal point, but I find that the focal point takes away from the rest of the quilt. Good thing I’ll have enough green scraps to make another!
I spent last Saturday doing the final clear out of my workroom. It is kind of horrifying to do something like this. It shows how much stuff I have. I don’t feel bad about it, but I need to use it. I produce a lot, but I need to produce more. Now that I have a better idea of what I have, I can use more of it. I am also going to be more careful about what comes into my workroom going forward.
View south
The other thing is the dust. There are places that are inaccessible so the dust bunnies are large.
The view in the photo, right, doesn’t look like much, but I moved a lot of random stuff out of that corner. I had organized everything I could, but it was still kind of a jumble of projects and other random stuff. There is still some project boxes and my thread box there, but the corner next to my design wall is a lot more clear.
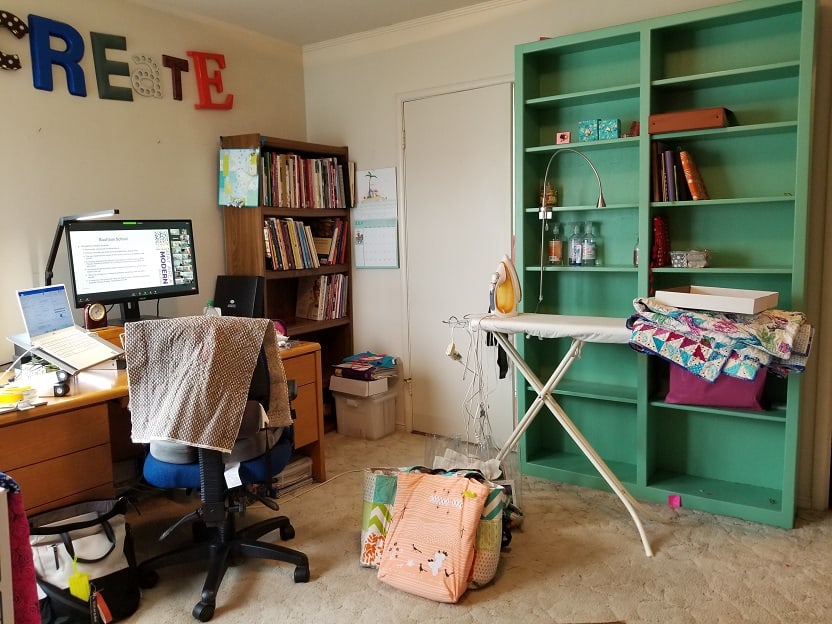
View east
I am getting rid of some ugly pieces of furniture. That brown bookcase in the corner is out of the room as I write this and will be leaving my house soon. It is too short and too ugly for the future. I hope to bring in some fresh white bookcases. I haven’t picked them out yet, but I will.
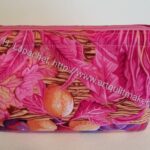
Boxes of fabric
Clearing out the last bits from my workroom is a big drag. It has to be done, but is a big drag. It’s like moving. Stuff that has always been in a spot has to be moved. A lot of it has to be wrapped up, you need boxes. Bleah. It’s just a lot of work. I keep thinking of the end result.
I had a pile of just pressed fabric and a pile of fabric waiting to be pressed. I decided to put them all in boxes. It was a good opportunity to check out some fabrics I hadn’t seen in awhile. I picked out another group of fabrics for a different quilt. Stay tuned for that post.
The removal of everything gives me two opportunities to go through my stuff. I am donating a lot of books. I also threw out a bunch of stuff I didn’t need to keep around. I hope to go for another round when I put everything back.
In a way the sewing I am doing at the moment is all about getting stuff off the floor so I can move it out of my workroom before the painting starts.
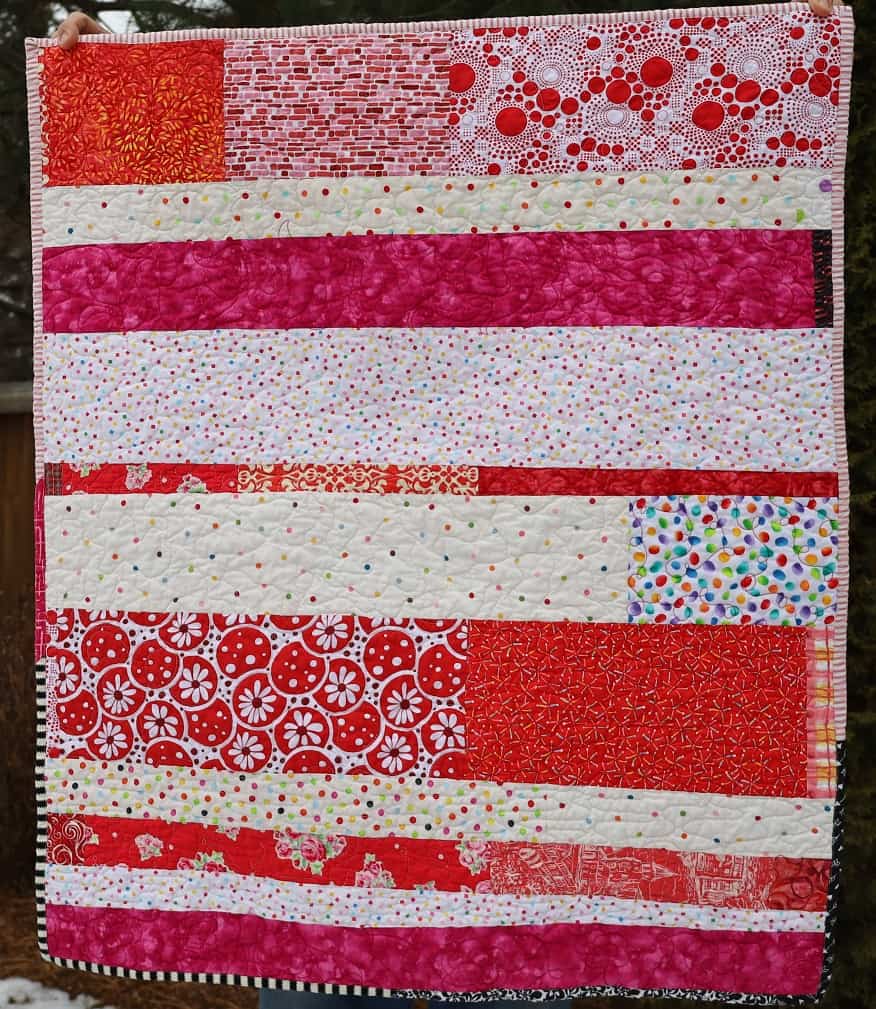
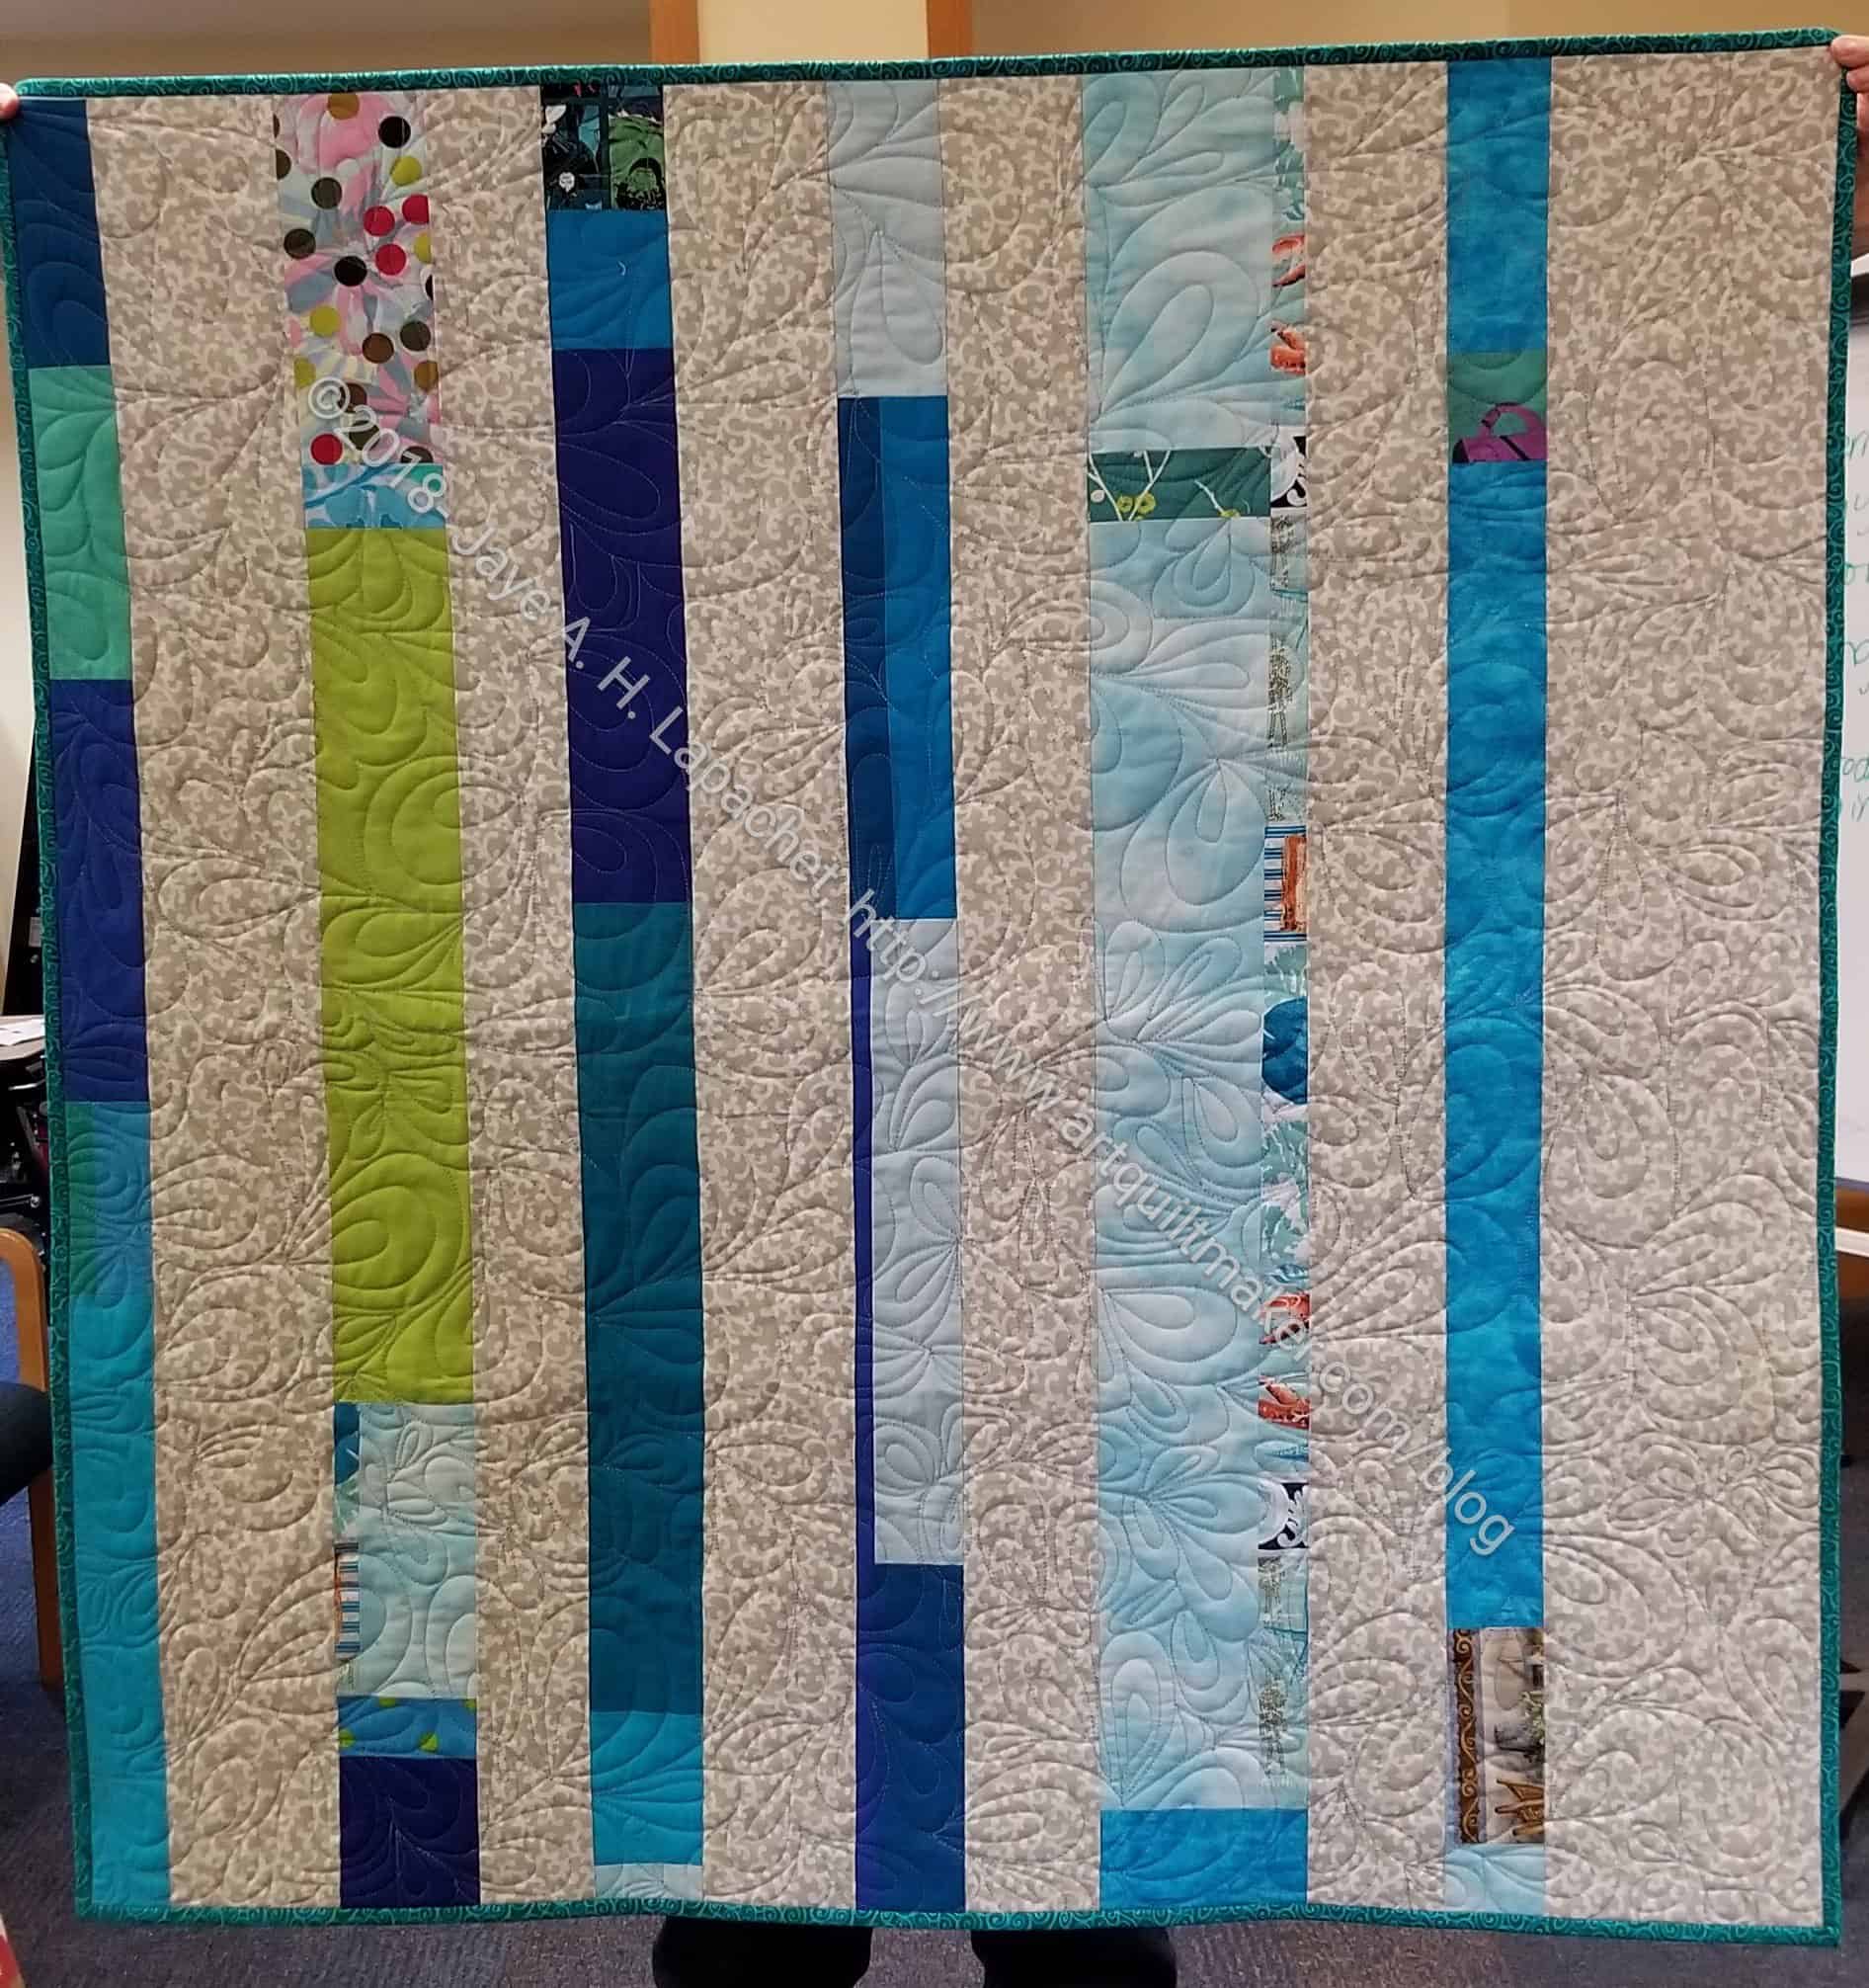
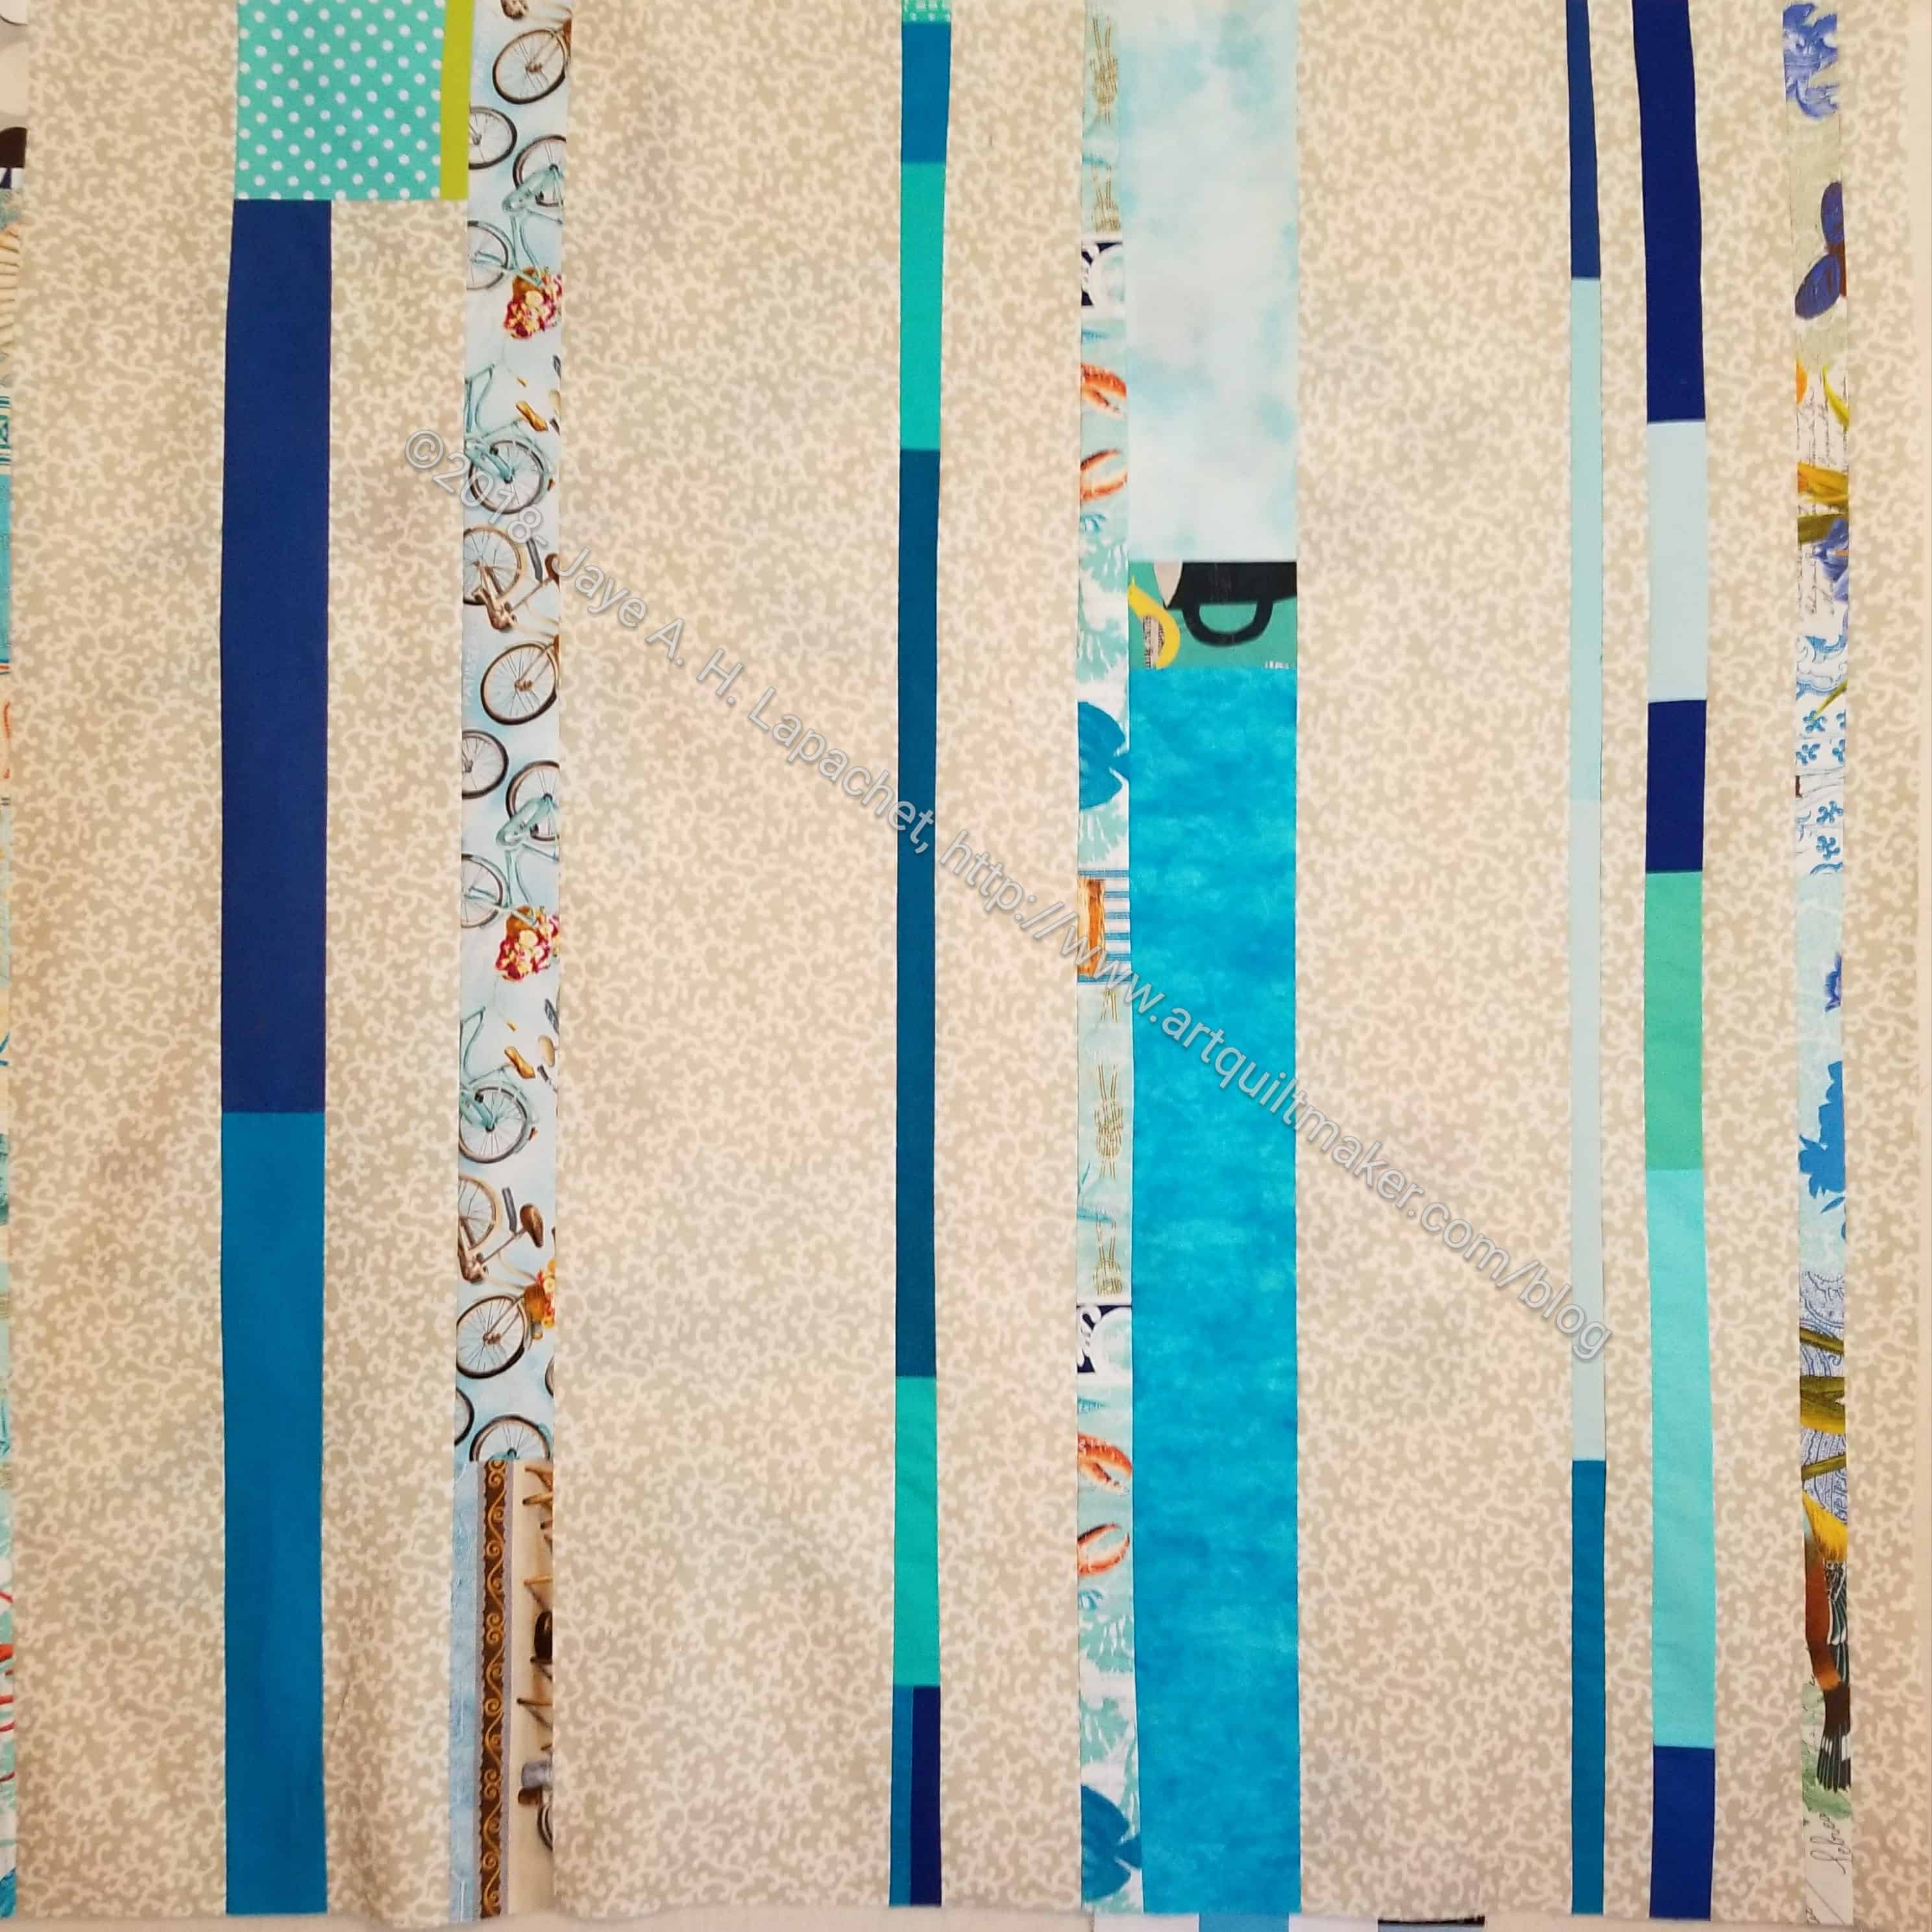
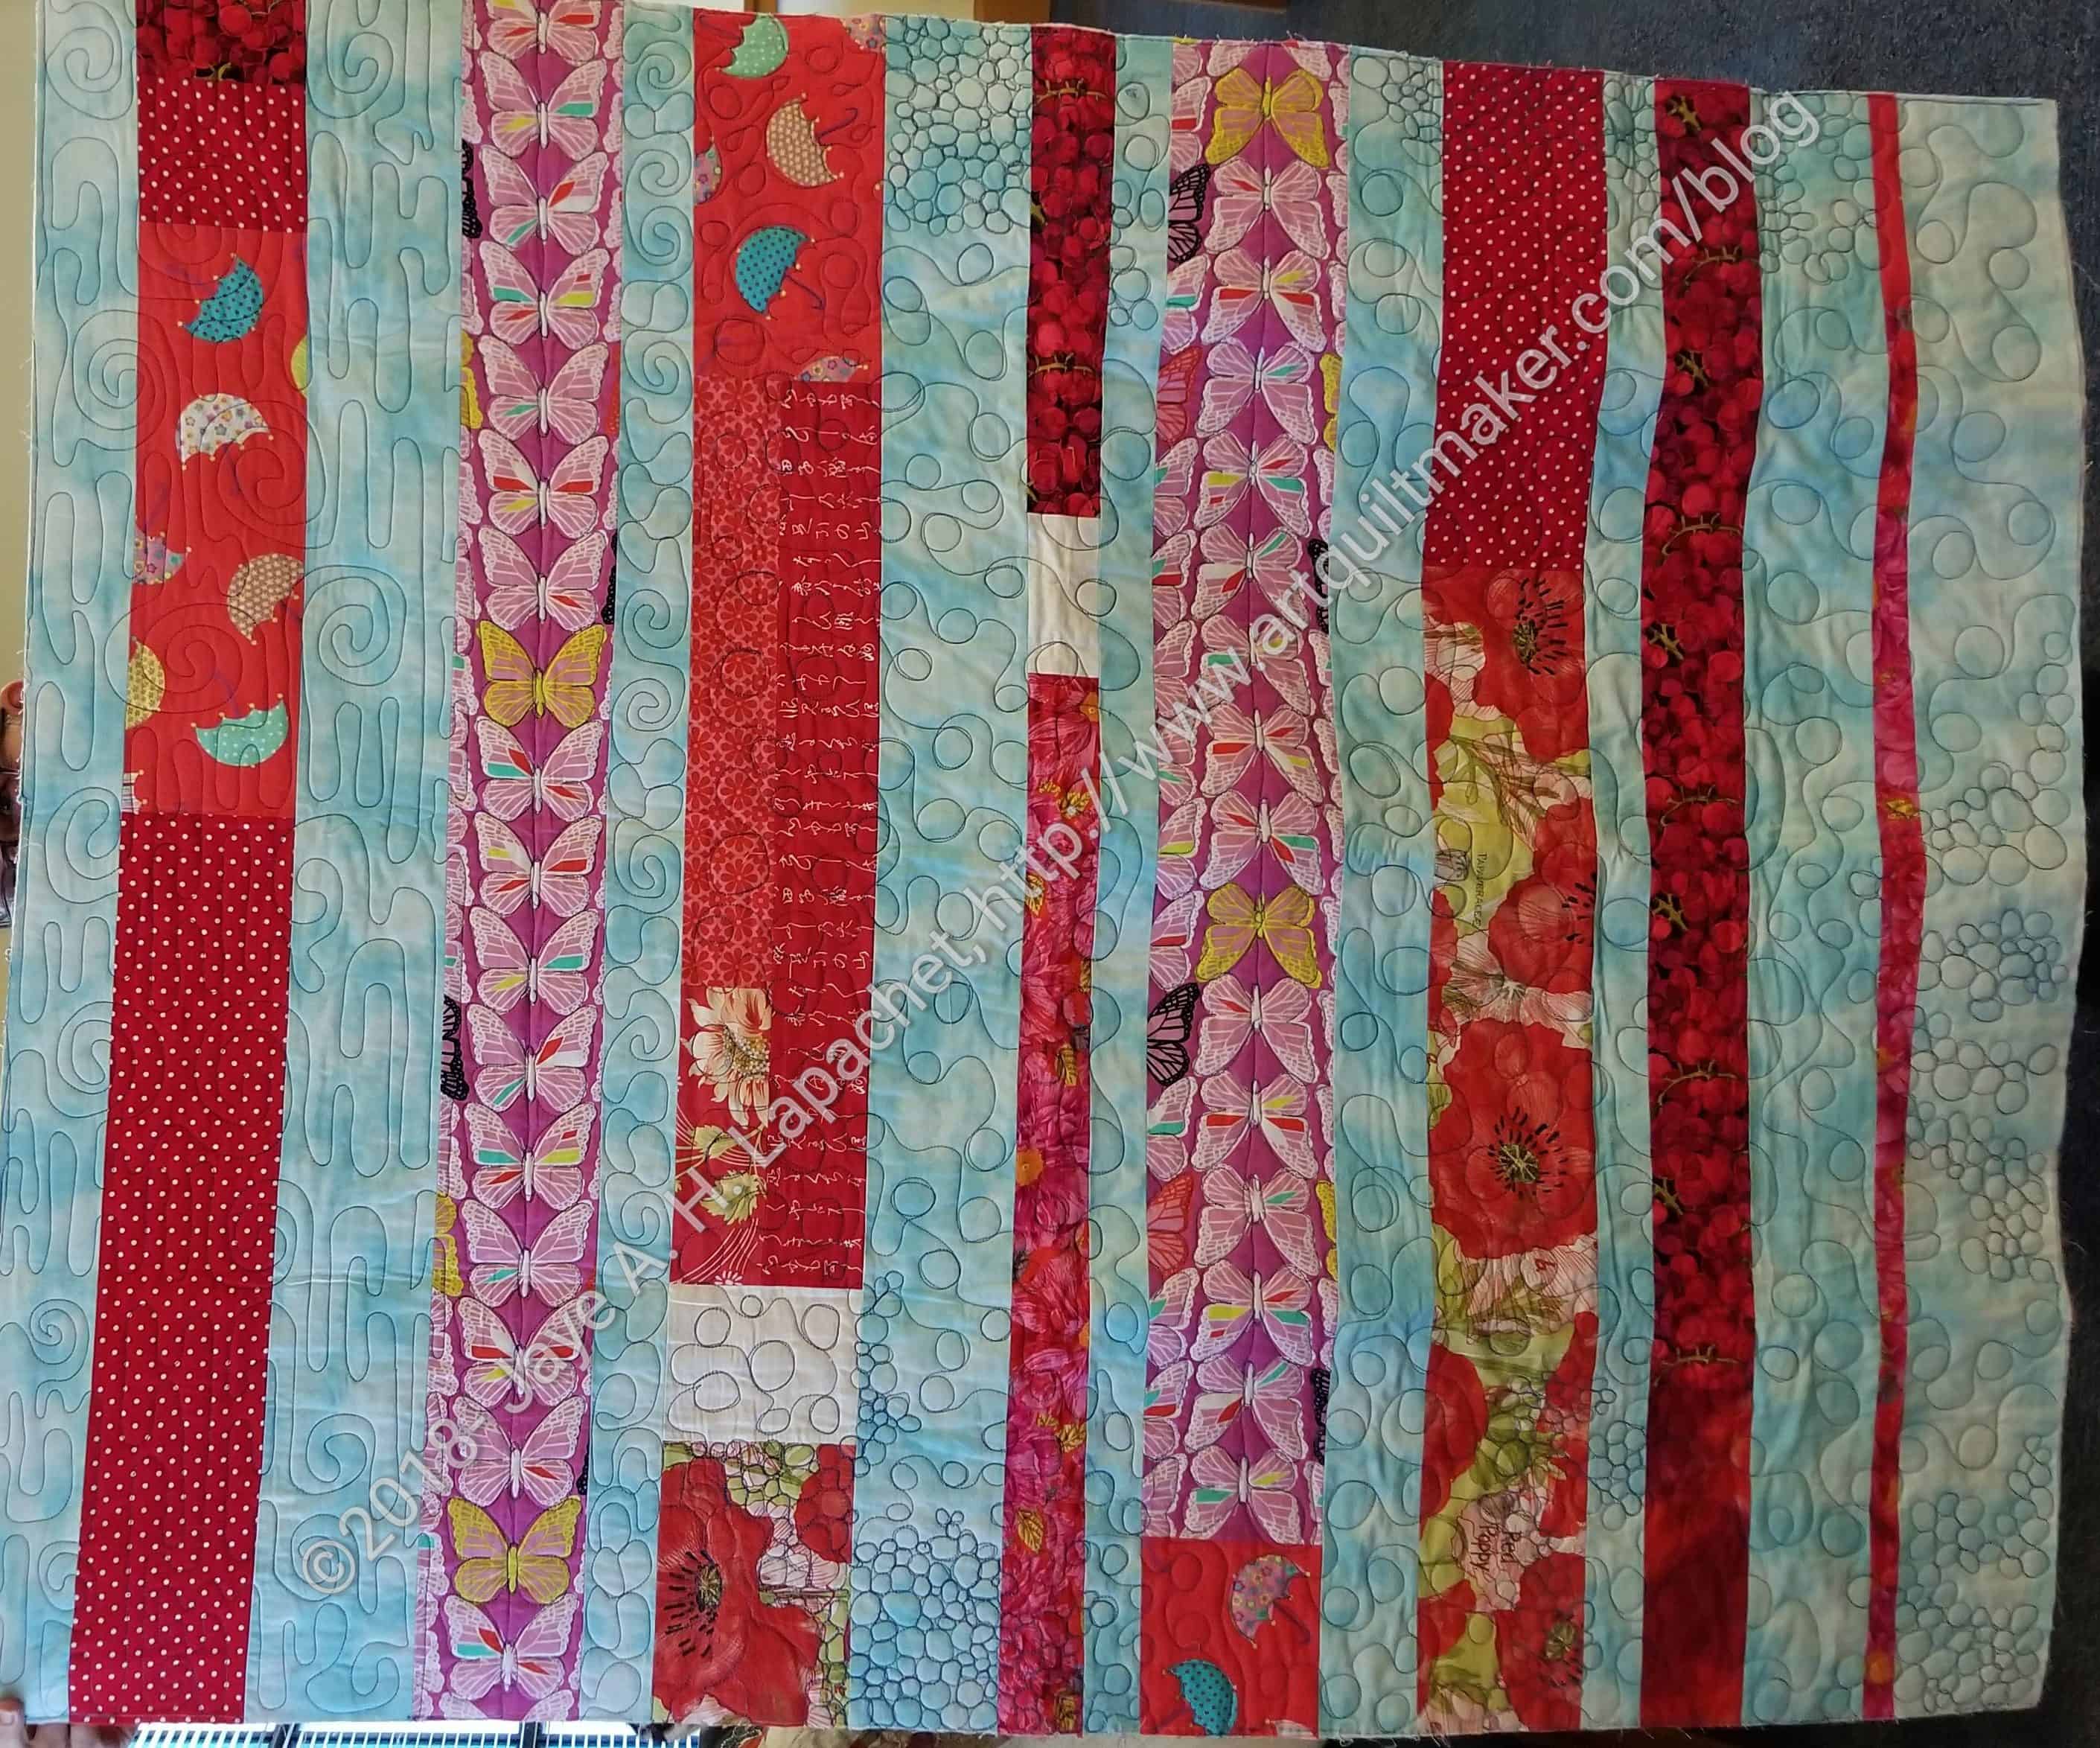
The other day I organized bits of batting and the edges that came back from my quilter after she quilted a quilt. I have at least one more quilt to make from ends.
This one is the fourth quilt I have made from the Pop Parade fabric. Most of it is not Pop Parade, but you can see the Pop Parade clearly.
I also used some Dit Dot Evolution fabric for the background. I bought the fabric online and it is the wrong color. I was going to give it away, then I thought I could just use it for donation quilts, so I did. I prefer clear white, but I prefer to use fabric rather than just give it away. Someone will like this quilt. It isn’t at all ugly even if I didn’t use my preferred fabric.
I have to make a back, which I would like to do before I go to the next Sew Day.
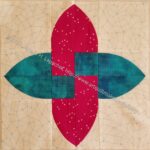
In the course of cleaning out my workroom, I found this block. It was crumpled up and dusty in the bottom of a bag I haven’t used in a long time.
I made this block in my second quiltmaking class. That class was focused on drafting blocks. None of the blocks were straightforward, so drafting and making templates was the only way to get them made. I drafted the pattern for this block before making the templates and piecing it.
In my early days of the quiltmaking, I primarily used solids. I did have a wild streak that you can see in the border. I fussy cut all of those pieces so that it looked like the block had a special border. I didn’t do a spectacular job on the fussy cutting, but considering it was one of the first dozen blocks I ever made, I am pretty proud of it.