As I mentioned back in August, I want table runners for Thanksgiving. I don’t have many Thanksgiving decorations and I can’t bring myself to make napkins yet. I want napkins, but I can’t deal with all that brown and years of decorative stitching required right at the moment.
Thanksgiving PanelThanksgiving Panel
I bought two Thanksgiving fabric panels at Forget Me Knots in Bandon, Oregon. Friday, I put the table runners together.
How it happened was that I was going through the fabric on my ironing board, cutting the pieces I needed for various projects and putting yardage away. My goal was to allow DH a brief window to iron. When I got to the table runner panels, I decided putting them away would be silly and I just did what I needed to do to move those projects along.
Small contemporary tablerunner
The small contemporary table runner was easy. It just required cutting apart from the rest of the piece. I didn’t add any piecing to it. Just basted and it is ready to quilt.
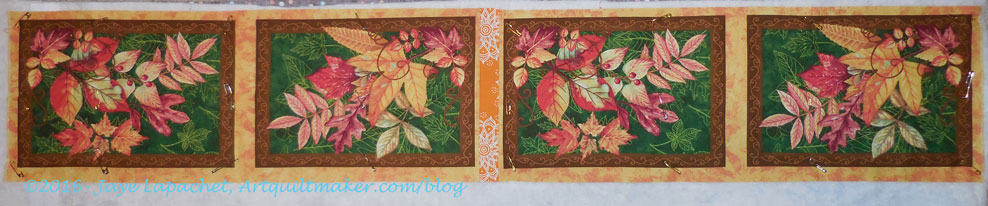
Traditional table runner and mat
I pieced two sections of the traditional panel together. I think some of the pieces and parts of the panels were supposed to be coasters, but I think these sections (right) are too big to be coasters, but there are too small to be placemats, so I don’t know what their original purpose was. I like the leaves. The green is a little odd.
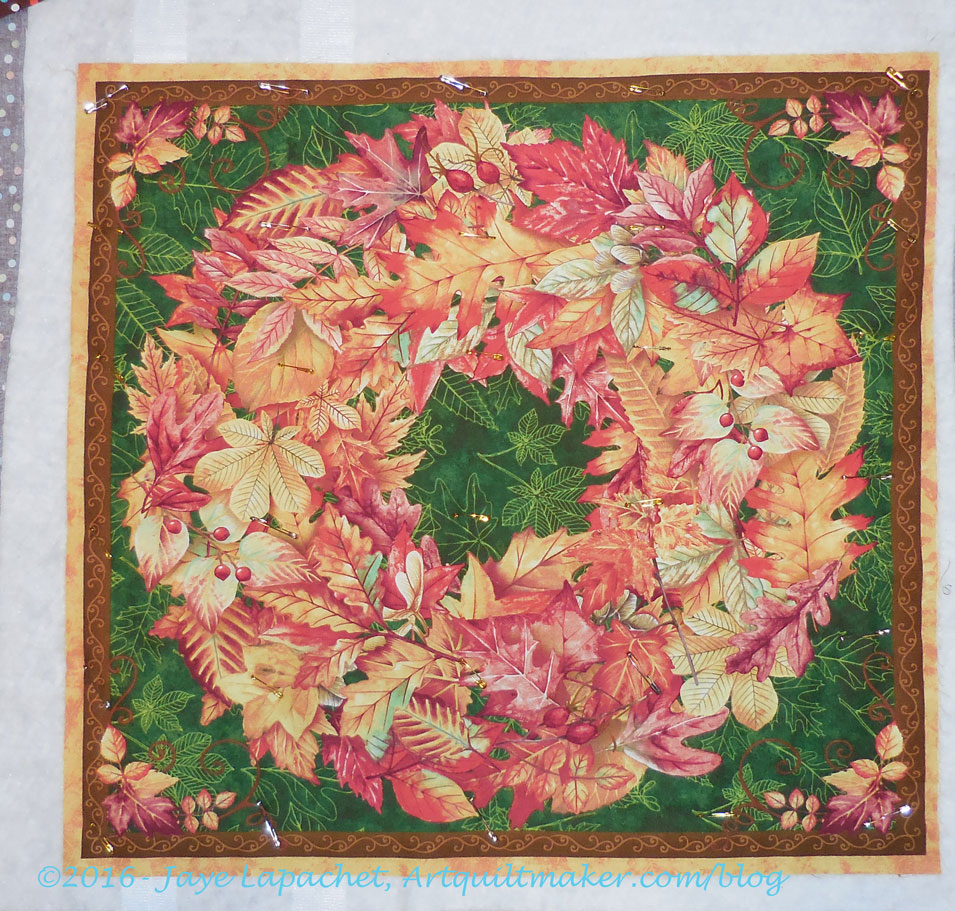
Thanksgiving Table Mat
The traditional panel also had a square leaf wreath, which I will use it as a table mat on the coffee table.
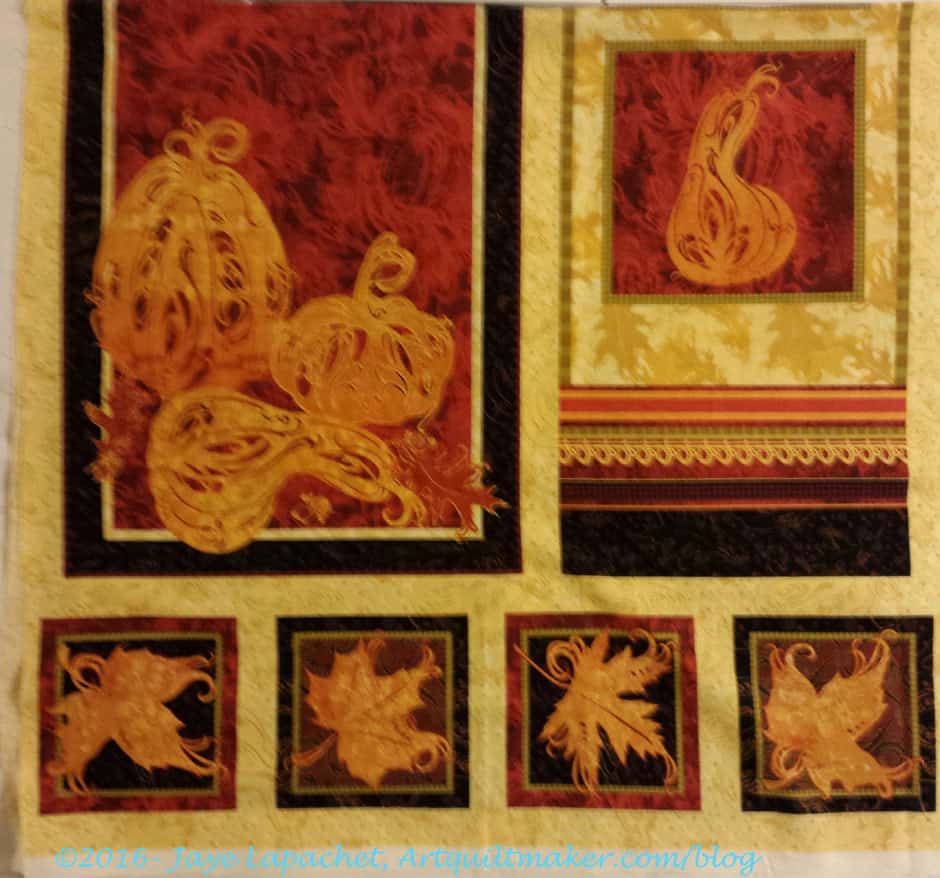
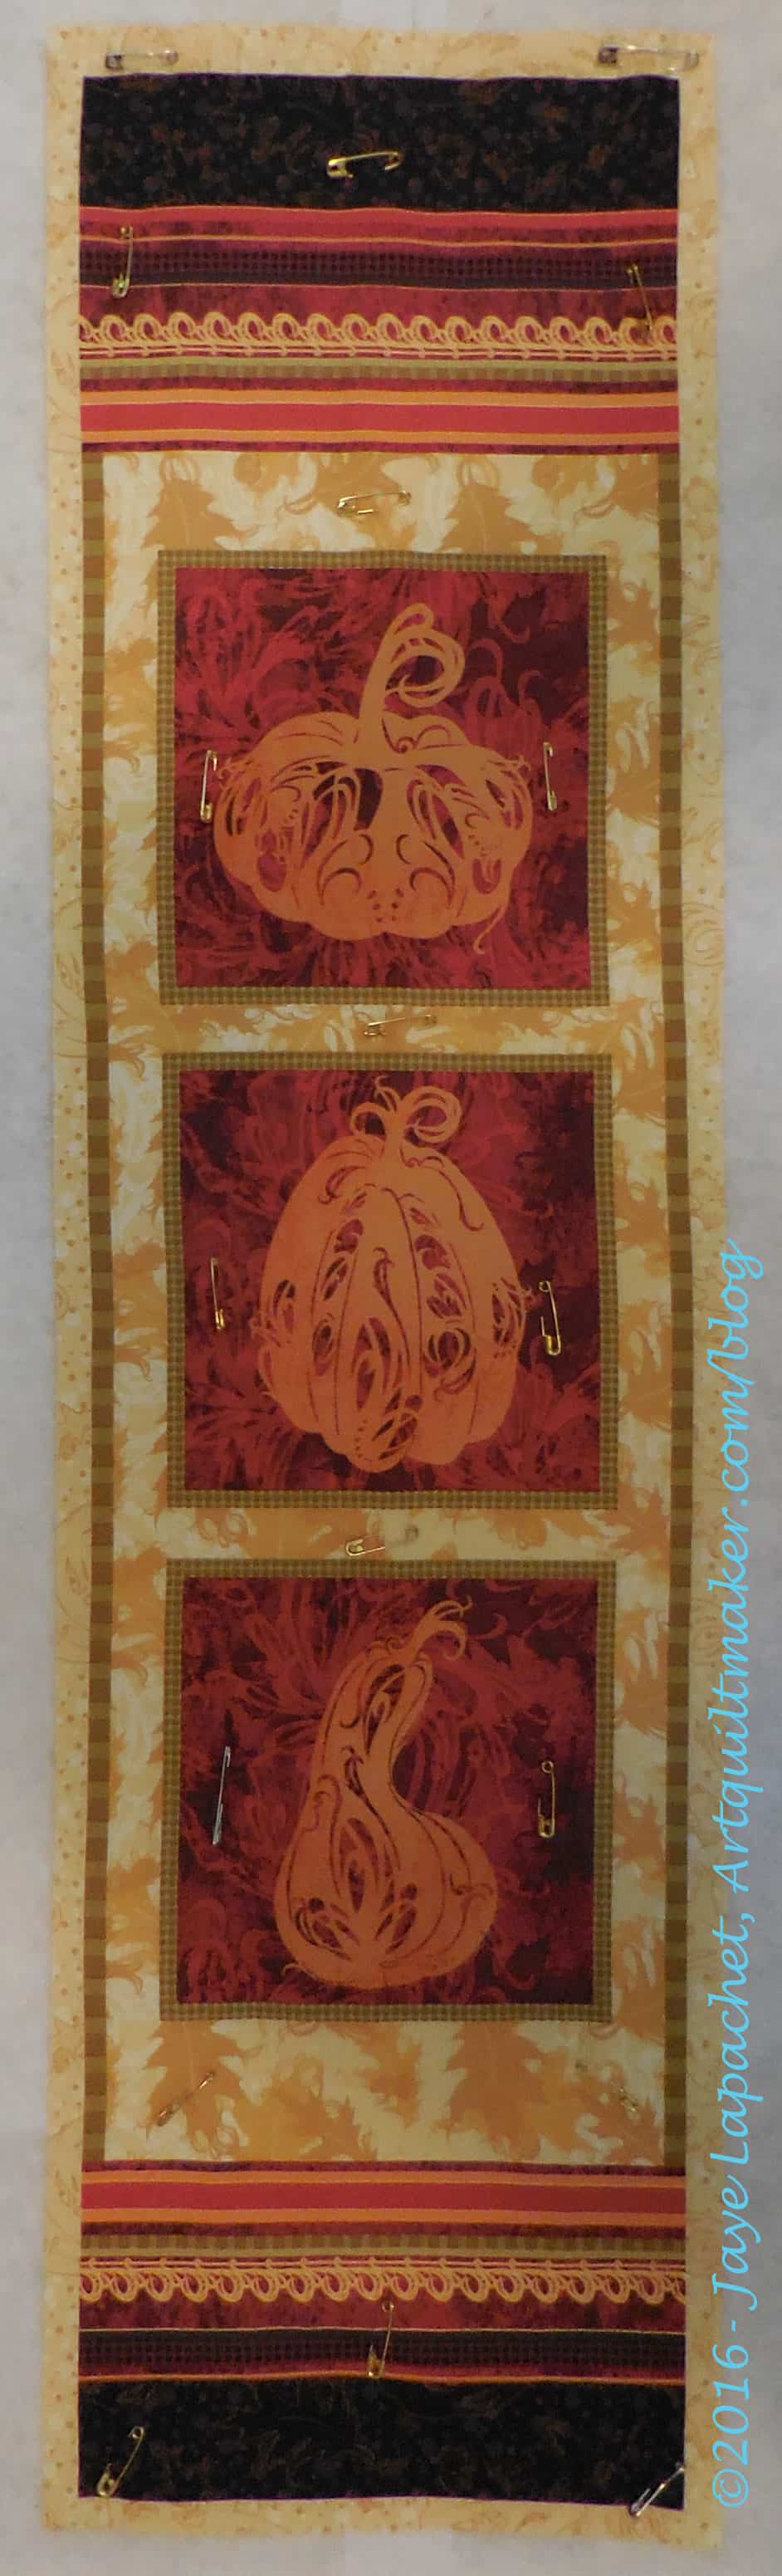
Contemporary Thanksgiving Tablerunner
Finally, my favorite is the one to which I added the most piecing. I am not sure that pumpkin orange fabric was exactly right, but it is close enough and doesn’t match. It will add interest.
While at my SIL’s I looked through some quilt magazines I brought with me for her. We looked through the magazines and discussed the various projects. I had looked through the magazines before, but looking through them with my SIL made me see them differently.
I actually like looking through magazines with almost any other quiltmakers. I get a different perspective on the project as I talk with another person.
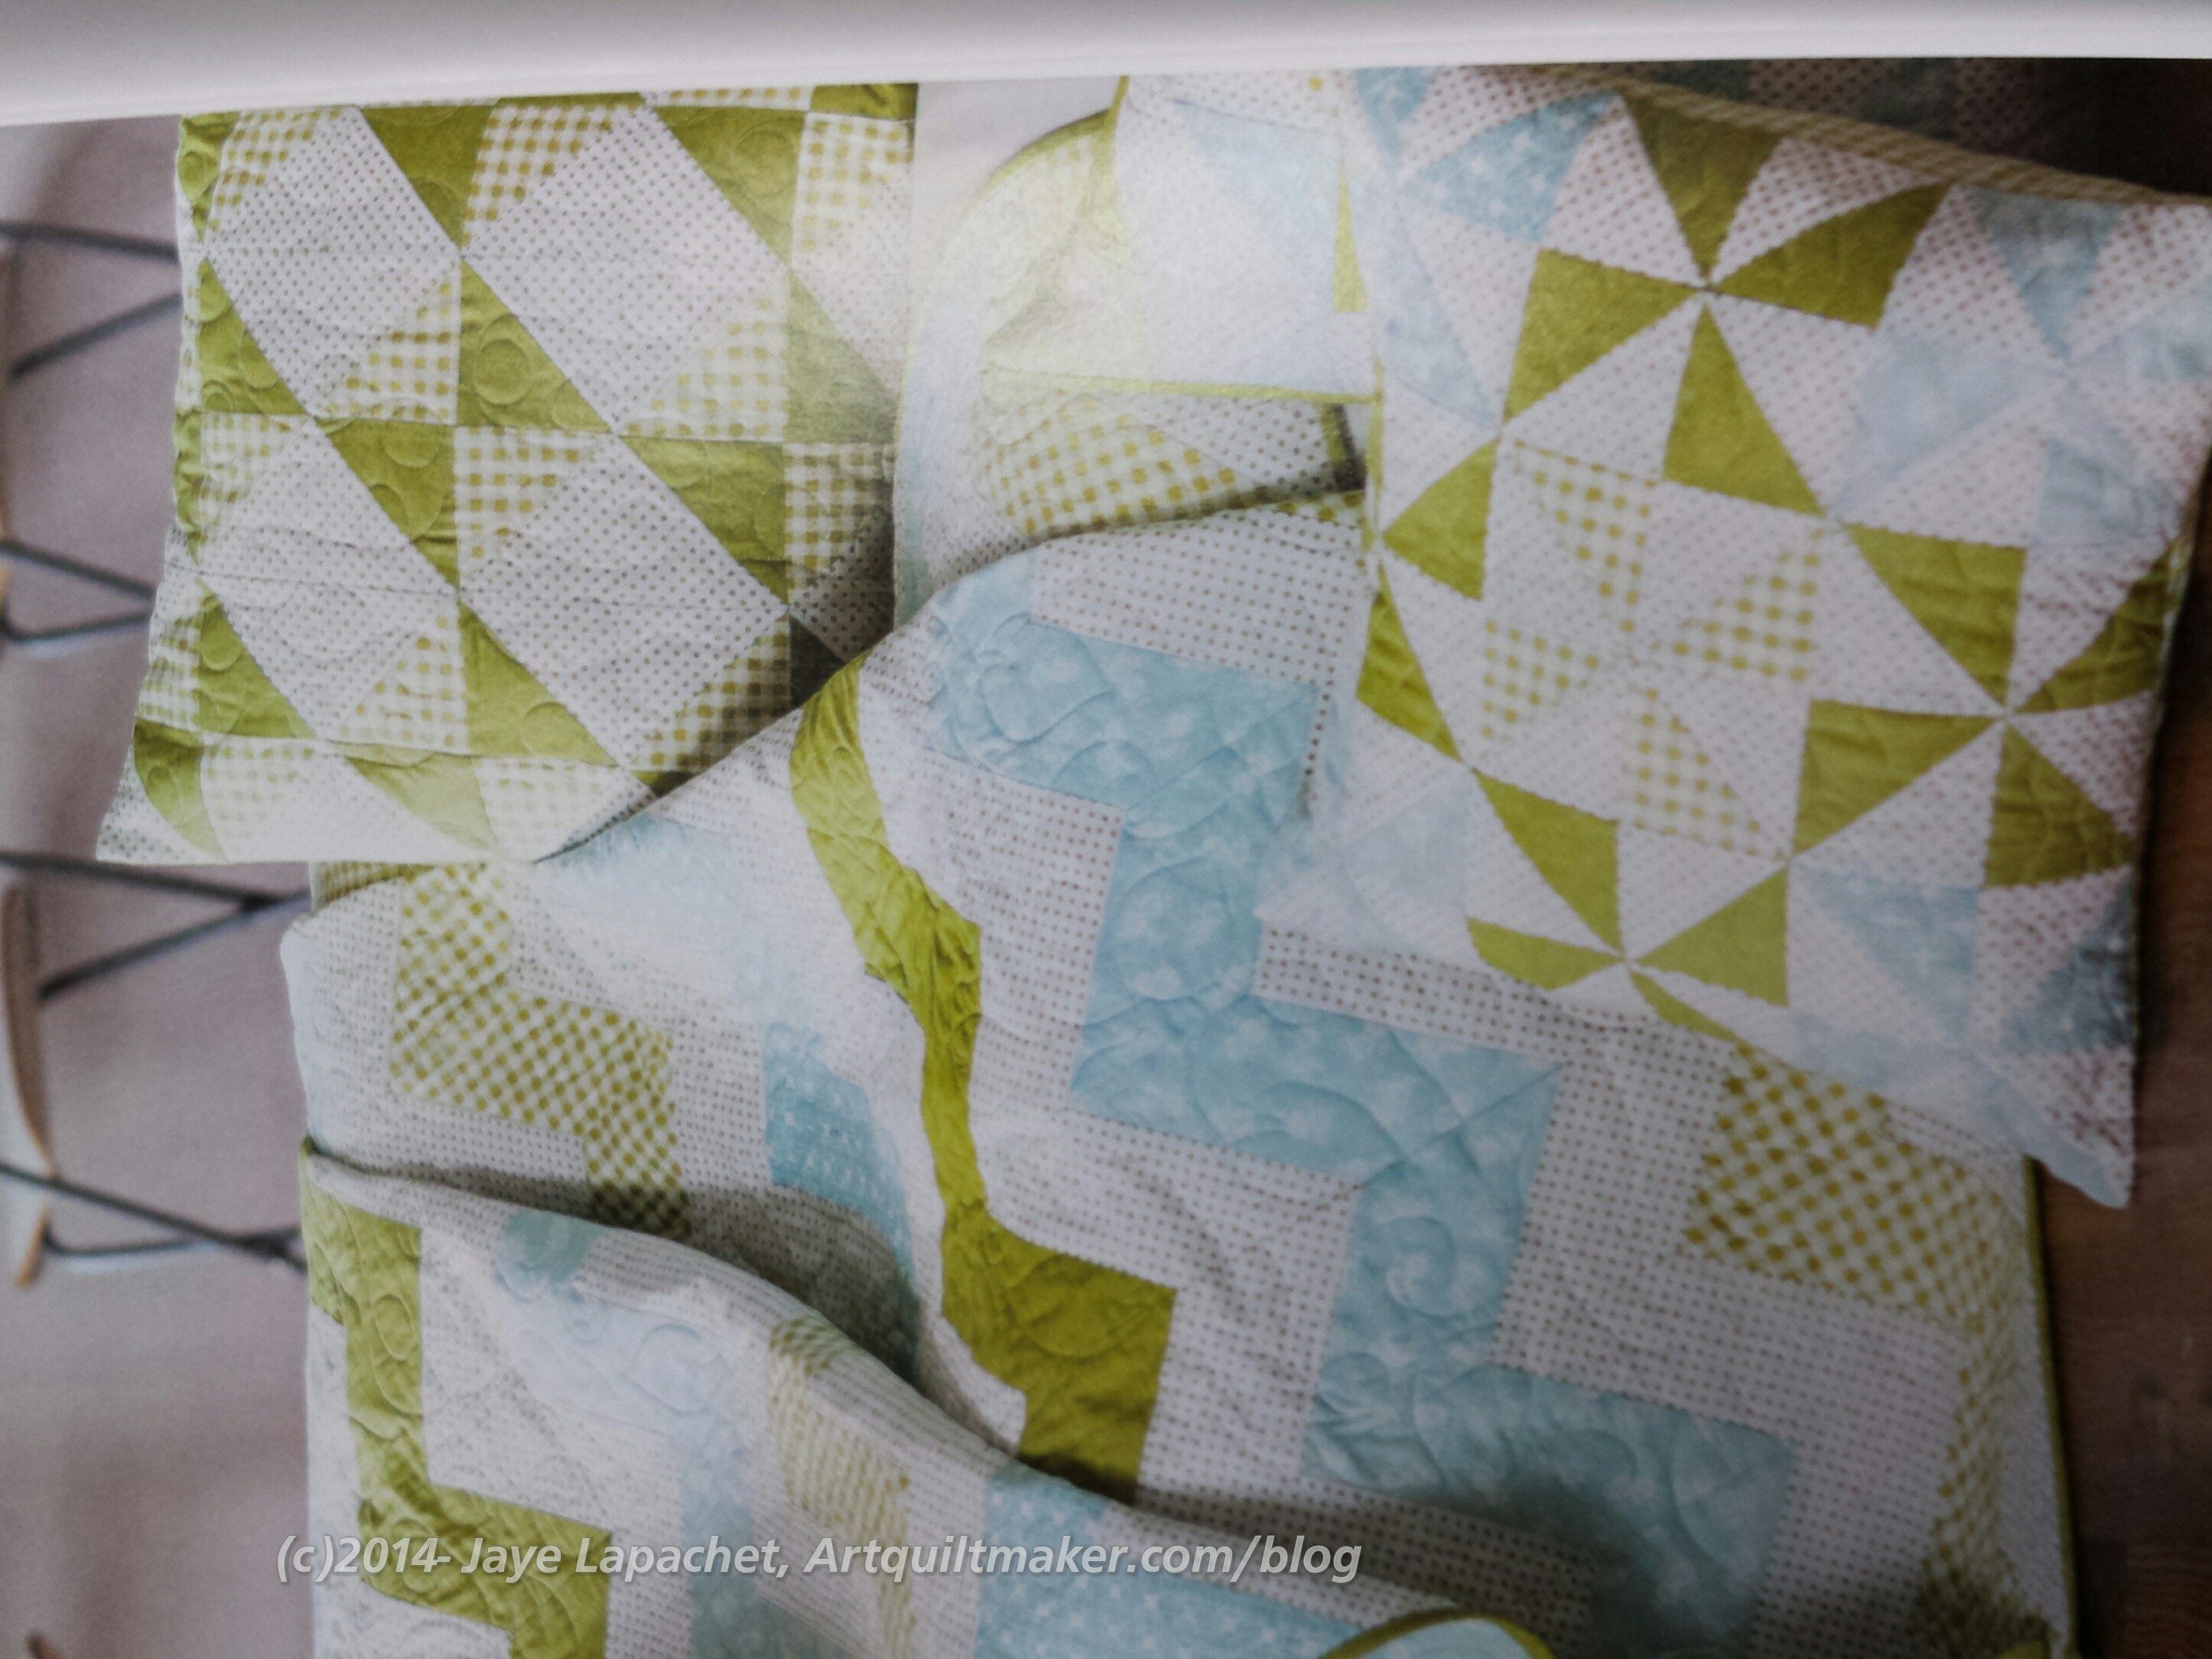
Pillows from Magazine
In the magazine, I caught a glimpse of some pillows. These were projects made from leftover HSTs. One had a very interesting pinwheel pillow.
The thing I like about that design is that it is simple, but interesting. The maker used at least four fabrics. It is hard to see the light blue in the corners so there could be more. The more fabrics keep the design simple, but make it interesting and not boring.
I have an idea to make the perfect work bag. I haven’t yet found a pattern out there, but with the right knowledge of techniques and an ok pattern, I can probably make something that will work.
After reviewing Big City Bags by Sara Lawson, I put the book in my database (I am a librarian after all!). In the course of testing the records and the search results, I came across Lisa Lam’s The Bag Making Bible and had to look through it for more ideas.
If you have this book and Big City Bags, you have everything you need to make almost any bag out there. Big City Bags by Sara Lawson has good techniques, but is mostly a project book. Lisa Lam‘s book focuses more on techniques, but has projects to go with each technique. The projects are not the focus of the book. In fact they are even hard to find, hidden as they are in the midst of detailed instructions for techniques.
One of the different aspects of this book is that the techniques build on each other. This is a more down and dirty, ‘here’s everything you need to know’ kind of book than Big City Bags. It goes from very basic (explaining parts of the sewing machine-pg.14) through intermediate (explaining a pattern with a glossary of terms) to advanced (modifying patterns). You will have to think, because skills or techniques you learn in one section are referred to again in another section.
On careful examination of the table of contents, I saw that the projects were, indeed, named and given a page number as a subheading under the main point/heading of the chapter. I like this idea, because by scanning the list of techniques, I can find projects that will illustrate the technique I want to learn.
The book is laid out in a pretty standard way: Table of Contents, Foreword and Introduction. The introduction has one line that explains the premise of the book “I have purposefully moved away from quick and easy bag projects because I believe that when you spend a little more time in creating something special you will cherish the results all the more.” This is a great description of the premise of the book.
The first sections after the above are all about the basics. They start with Basic Equipment. The author has good photos of the basic equipment, some of which I have never seen in a bag book. I like it that these unusual tools are included. I did wonder why no rotary ruler was included in the list, though a rotary cutter is included.
The sewing machine section includes some information on machine stitches and photos of the machine feet.
The next section is called Anatomy of a Bag, which covers all the aspects of a bag from parts you have heard of like flaps to parts like the gussets, which are less common.
The basics continue with ‘Getting Started’, which discusses using patterns, ‘Understanding Patterns’,’Fabric Preparation and Cutting,’ Modifying Patterns and then the book continues on to the techniques and projects. The ‘Understanding Patterns’ section is good also for garment sewing.
‘Choosing Fabrics’ is very complete. It includes a description of different types of fabrics and the pros and cons of each. The section talks about how best to use the fabrics for bags. This section has a subsection on choosing interfacing and interlining. Again, there are descriptions and definitions of different types and weights of interfacing.
I like the section called ‘Working with Colour and Pattern.’ The author has some beginner level suggestions. While there is no color wheel, the section gives the reader some suggestions about choosing colors as well as using pattern/motifs.
This is where the projects come in. The techniques are all associated with projects and the project teaches the reader those associated techniques. For example, in the Structure and Reinforcement section, there is a chart of ‘Volume Adding Features’. These are darts, pleats, etc and the chart tells the reader the benefits and suggested uses of each. The project photos have good detail shots and lots of instructions which, together, help understand how to use the featured technique while putting the project together.
The book has sidebar boxes throughout the book. The color and pattern section has boxes about using texture and sourcing fabrics. Some of the sections have a ‘Need to Know’, which covers important concepts that don’t fit into the other text.
I like the section on ‘Linings.’ It includes a chart of different types of pockets (charts are a good way to get a lot of information across quickly) as well as photos of the linings.
As with Big City Bags, zippers are covered really well. This book helps me understand what Sara Lawson was doing when I followed the directions for her Flush Zipper Pocket on the Petrillo Bag pattern. I was able to make the pocket from Sara’s excellent directions, but didn’t understand the underlying concept until I read this book. This is a great example of why these two books work really well together.
Information about zippers leaks over into the section called ‘Closures.’ Again, Lam includes a chart of different types of closures with benefits and suggested uses. There are photos different types of closures and how to insert them. I really liked the instructions on adding a pull tab to a zipper. This would have really helped me in some projects I have made recently.
Different types of trim, such as tassels, and edgings, such as piping, are also covered. Ready made handles and the different types of pockets that can be used are defined and instructions are provided.
I do think this book, and most bag books, could have benefited more from photos of the inside of the bags. I thought this, especially, when I saw The Organized Office Bag project. There are plenty of gorgeous pictures of the outside, but, frankly, the inside is heart of the matter for me. How many pockets are there?
This is a comprehensive book and would be a great addition to any bag maker’s library. It is a necessity for anyone who wants to understand bags and their components to an extent of designing or modifying patterns.
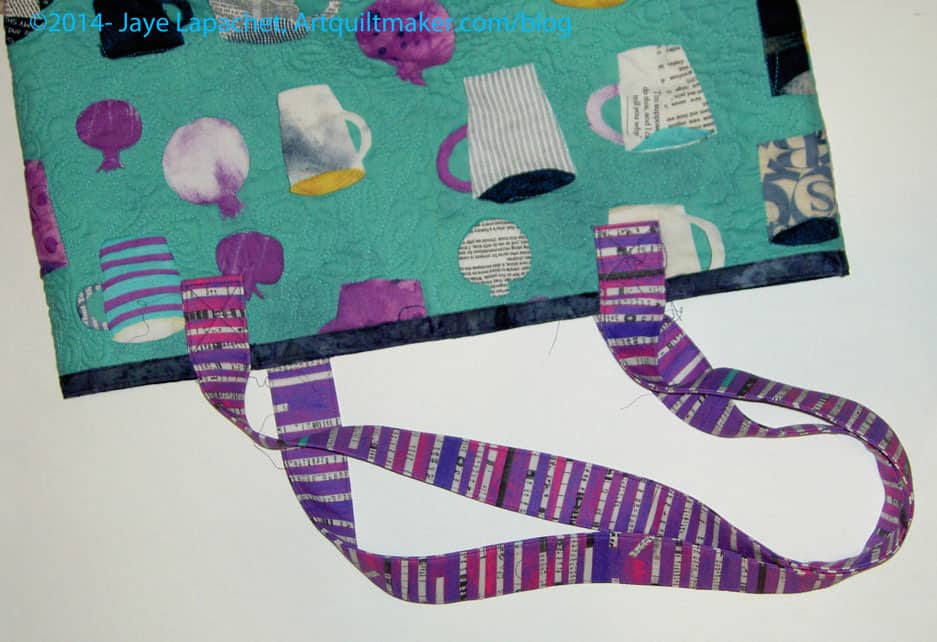
A little while ago I participated in Kelly’s monthly BAMQG Challenge, which was to quilt a half yard fabric sandwich. The goal ended up being to make a bag from this piece. I wasn’t entirely happy with the quilting, but I didn’t sincerely dislike it either. The quilted piece laid around for awhile, but it was on my mind. It is only recently that I made time to start the bagmaking part. Part of the delay was because I couldn’t understand and extrapolate out from Kelly’s excellent directions. You know me. Sometimes I can read and read and the words look like gibberish. She was very patient with me and agreed to give me one step at a time. Broken down I could do it.
Supplies:
1 yard of fabric (2 different half yard pieces will add interest)
1/2 yard of fabric for straps and other fiddley bits
12″ x 42″ (or WOF) ShapeFlex
12″ square of coordinating fabric for binding
batting slightly larger than 18″ wide to accommodate the half yards above
Sewing machine and supplies to machine quilt/free motion quilt
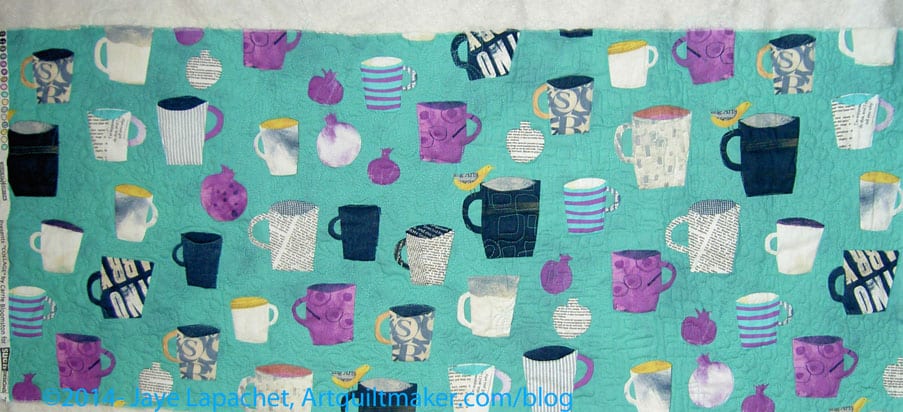
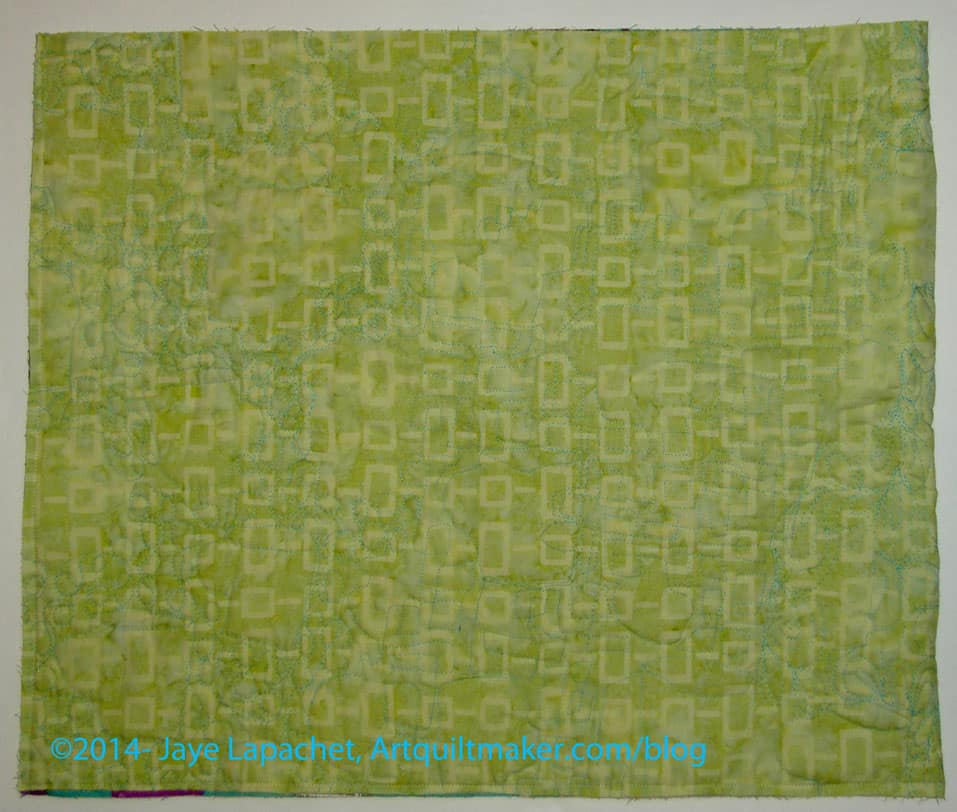
Layer and sandwich 2 half yards of fabric with batting
Full Piece Quilted
Free motion quilt piece as desired. Shown is the piece that I did back in April. I know pieces of fabric don’t magically quilt themselves and I am not saying they do. It took me some time, but it is good practice and this is a good use for those practice pieces. Go back to the previous post and look at the different quilting designs I used.
Kelly didn’t have me make the straps until after the bag was put together. I like to make all the fiddley bits first, so they are ready to go when I am on a roll making the bag and ready for them. That means: make the straps whenever you want. You should make them your favorite way. Here are the directions for making the straps that I used for this bag:
Cut 2 strips 6″ wide by WOF. You could make them 5.5″ and they would be a touch skinnier.
Cut 2 strips 5 3/4″ x WOF from ShapeFlex (If you make the straps skinnier, you need to adjust the size of the ShapeFlex. I cut it smaller to reduce bulk in the seams, which can get quite hefty without trying.
Press ShapeFlex to wrong side of fabric, following the manufacturer’s directions.
Fold each 6″ fabric backed piece in half and press well.
Open the pieces you just pressed and fold raw edges to the center.
Press folded edges.
Fold entire strap on original center fold again. Raw edges should be inside and strap should measure about 1.5″.
Optional: Depending on what you want to use the bag for, you can further line the straps with something like Timtex or Soft & Stable.
Topstitch along both edges very close to the edge. You can use a decorative stitch or two lines of straight stitching to add interest
Squared up Quilted Piece
Square up your quilted piece by trimming the excess batting and raw edges.
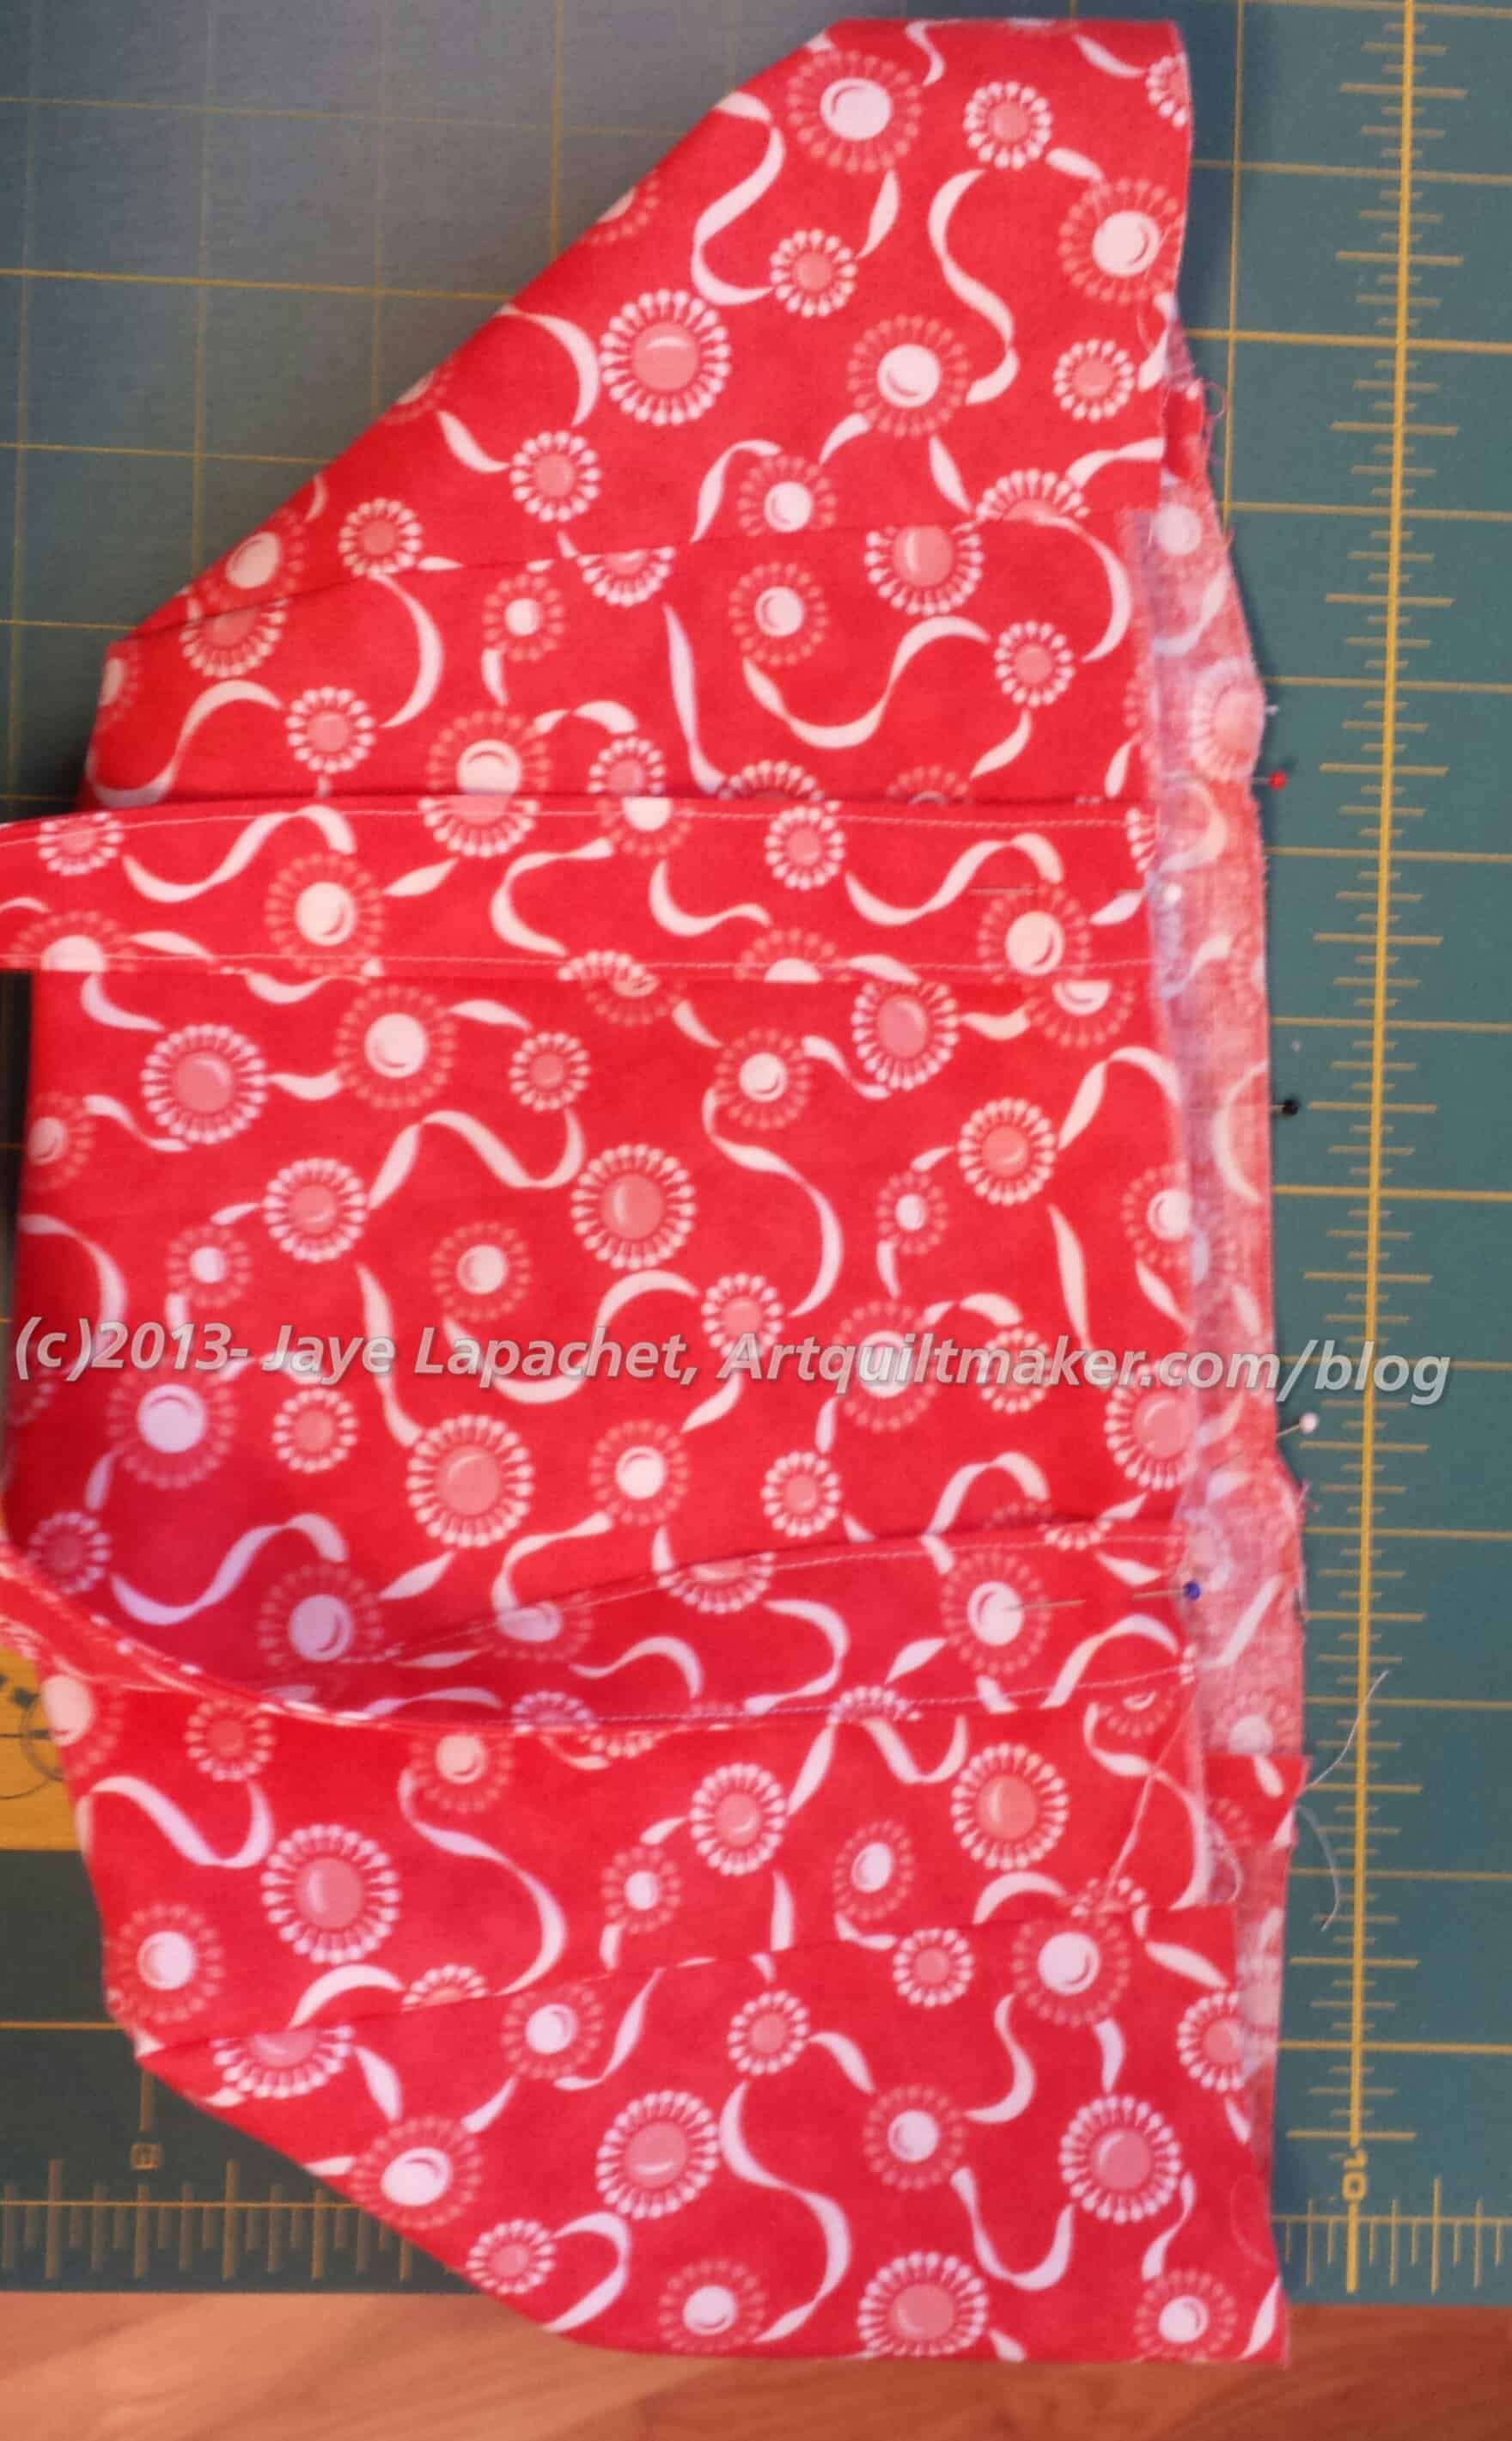
Fold trimmed piece in half RST* and sew along side and bottom edges ONLY. Only the top will be open. You will have a flat piece that looks like an oversized iPad cover.
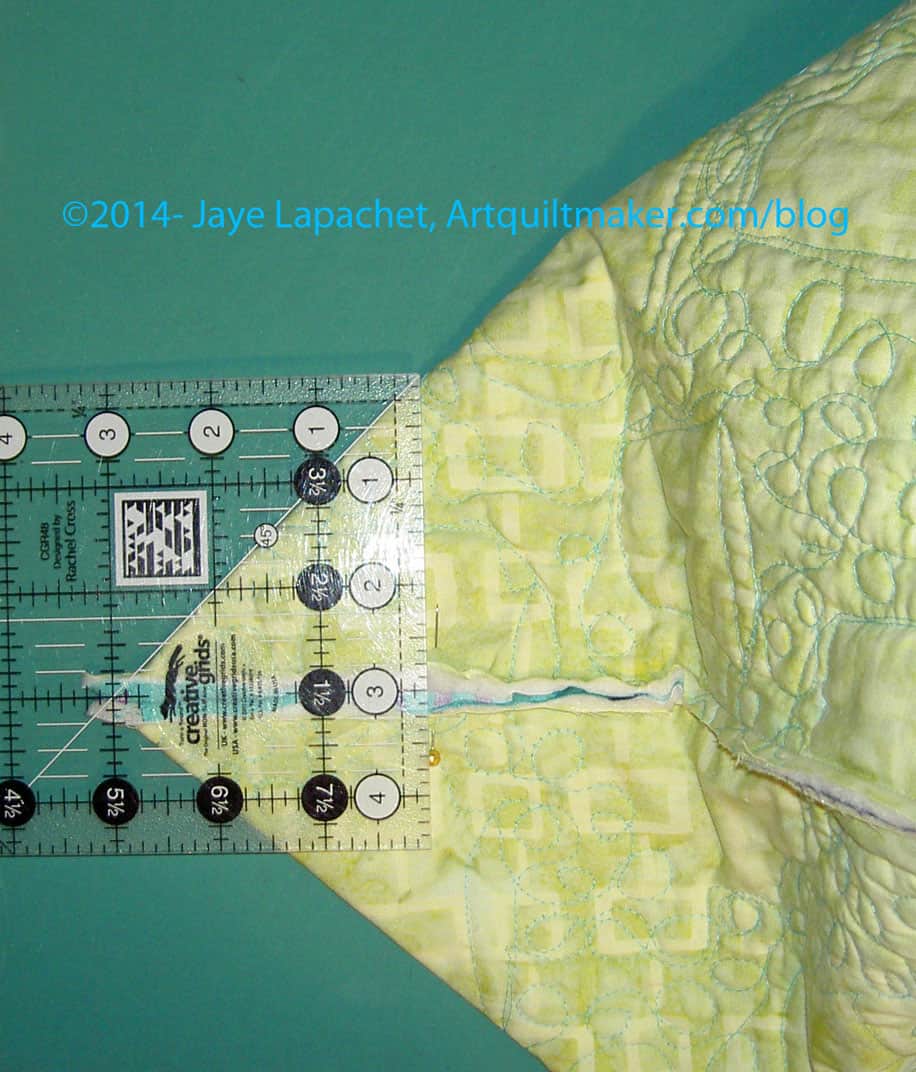
Measure to Box the Corners
Box the corners. Kelly does a minimum of 2″ from the side seam. FYI: there is no seam on one side, so I pressed the fold and treated the folded part as a seam. I used my Creative Grids 4.5″x8.5″ ruler to try out different corner sizes. I ended up doing a 3″ box, using pins to try out the size and see what I liked. You can see in the photo that I was able to use the side and bottom measurements to help decide. I had to see how big the bag would be and how it work as a bag I actually used. Once I decided on the size of the boxed corner, I drew a pencil line across the corner to know where to sew. I placed a couple of pins across the drawn line to hold the bottom in place. Then I sewed on that line to make the box. in the picture, I sewed along the short end of the ruler from diagonal line to diagonal line using the center seam as the straight line.
Corners Boxed
Optional: Trim off the excess corners to reduce bulk. I like to do this because I don’t like the excess to interfere with my stuff once I start using the bag. Also, small stuff that migrates to the bottom of the bag gets tangled up with them. Since this bag doesn’t have pockets, small stuff will migrate.
Press raw seams open. You’ll have to stick the iron inside the bag.
This is the point where, when I make the next version, I will sew binding over the raw seams. If I knew someone with a serger, I would serge them, but I don’t, so binding it is. I could just leave the raw edges, but that just seems wrong. On this version of the bag, I did this step later, but it makes sense to do it after the corners, so there is not a lot of other stuff to worry about and you won’t have to fold the ends of the inside binding over, because you can cover the raw edges of the inside binding when the top binding is sewn.
Make a bias binding like you would for a quilt. You will need about 50″. I cut my square (see list of supplies) into 2.25″ wide strips on the diagonal. The Judy Martin Point Trimmer ruler makes it really easy to sew the strips together. I suppose you could use straight of the grain binding, but I think a bias binding works well.
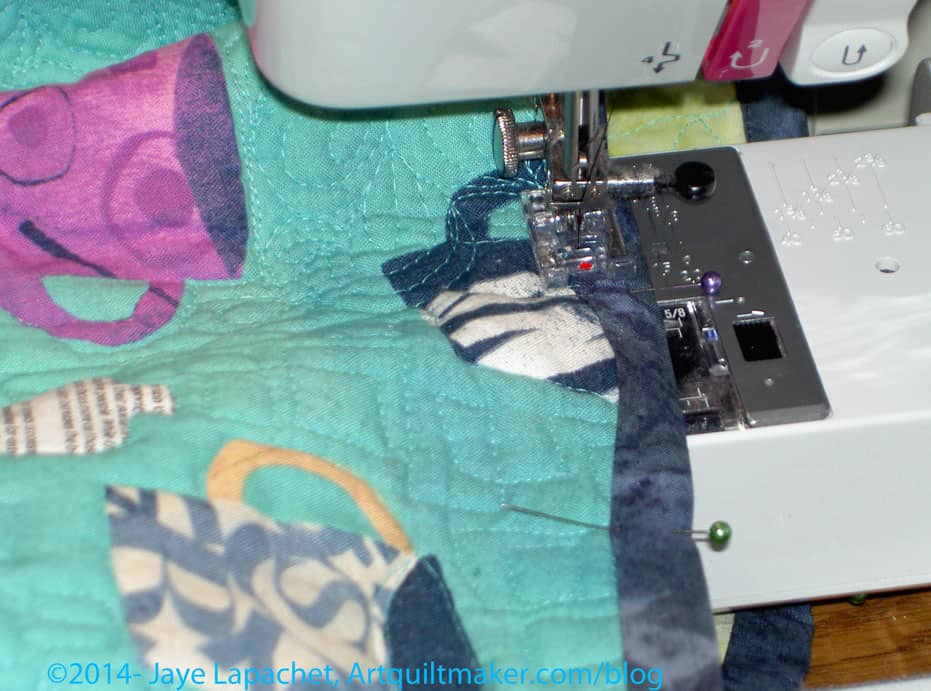
Add binding
Bind the top, covering the edges of the binding that covers the inside raw edges (step above). I sewed along the bottom first, making sure I caught the underside as well as the top. When I finished I sewed along the top of the binding as well. I thought it made the bag look more finished and added some interest (must be my favorite term today). I used an extra piece of binding leftover from the Spiderweb quilt and I am glad I used something that mostly matched. On another version, I would plan ahead better and use a coordinating fabric or the strap fabric.
If you haven’t made your straps, make them now.
Test the length of the straps until they are right for your height. I used WonderClips at different lengths to find the right length, then I trimmed the original length to my custom length, which was about 36″.
Flatten the bag carefully so the edge of the side is folded. This means that the edge of the side measures an equal amount from the side seam to the edge of the side as is the top. Measure two inches from this fold.
Place a pin at 2″ that you just measured.
Measure 2″ down from the top and place a pin parallel to the top of the bag. This makes a half square where you will place your strap.
Fold the end of the strap 2″ up and place the folded edge right beneath the bottom of the binding.
Sew the straps to the bag, making a box with an X in the middle. Go around the edges and the X a few times.
Optional: After you sew on the straps, sew along the fake edge of the side (see step 14) from the top to about 4″ from the bottom. Do this on all sides to make the bag into a box.
You are finished! You have made the bag. Hooray!!!
A Variety of Notes:
Crazy as it sounds, I am now thinking of fabrics I can quilt that would look awesome in bag form. I know. I think I have lost mind.
I like my bags to have pockets, but I also don’t like the stitching to show through, so I didn’t put any in this bag. You could make a lining and add it before you sew on the binding, then you wouldn’t have to cover the raw edges with a binding. You could sew the pockets to the lining. You’ll have to figure the measurements out yourself. Of course, your beautiful quilting would be covered.
I have a weird image of myself wearing a lanyard to a guild meeting with a lot of tools, at my fingertips and never lost under fabric or pattern pieces, hanging off of it. Like a chatelaine that the mistress of an English or French great house or castle would wear, only more quilty.
This is probably a stupid vision, because I would get a neck ache carrying around all this stuff and it would look a bit geeky as well. I did warn you that it was strange, and I just never know what images will pop into my head and inspire me.
A good reason to go to a guild meeting, probably the best reason, is to see what others are making. At a recent BAMQG meeting, Susan brought scissor sheaths she was making for the ladies at a retreat in which she participates. These scissor sheaths stuck in my head and I looked up a couple of YouTube videos with directions. They are very easy to make.
I took the best of both videos to try and make my own.
Supplies
Template (cardboard or rotary version)
Interfacing to give the piece a little body. Batting would do as well.
First, I went looking for templates. I didn’t have a heart shaped die for the Accuquilt, so I looked for fan or Dresden Plate rotary templates. I knew I had some and thought those would work.
I had a few different ones and tried the rounded Dresden petal template first. the first one I made turned out ok. I needed to reinforce the stitching in several places and I didn’t like cutting around the rounded bottom (thinner end) of the template.
Despite my annoyance, any of the above templates, as well as the Accuquilt heart shaped die (not really covered in this tutorial) will do.
Directions:
Cut
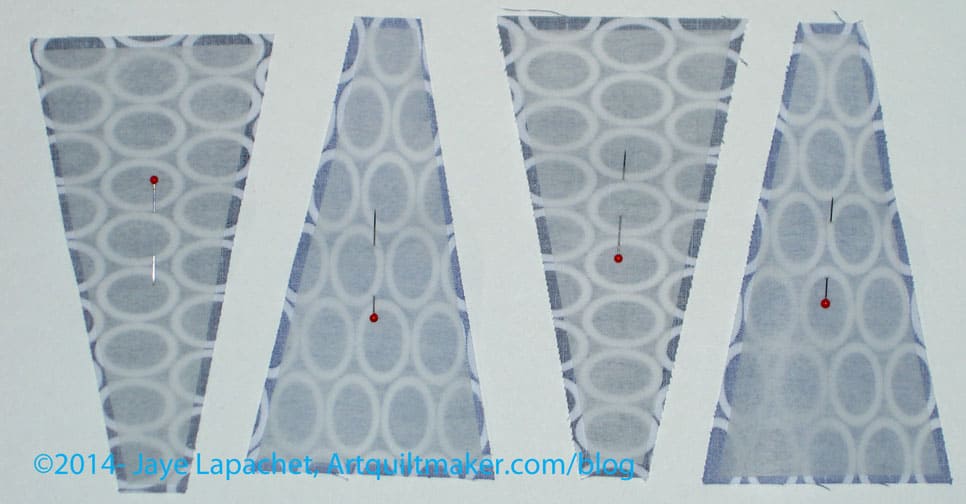
Cut Fabrics
4 pieces of fabric from your template (this tutorial does not cover the modifications needs if you are using the Accuquilt Heart shaped die)
Pin Interfacing to Fabric
2 pieces of interfacing or batting slightly smaller than your template
Note
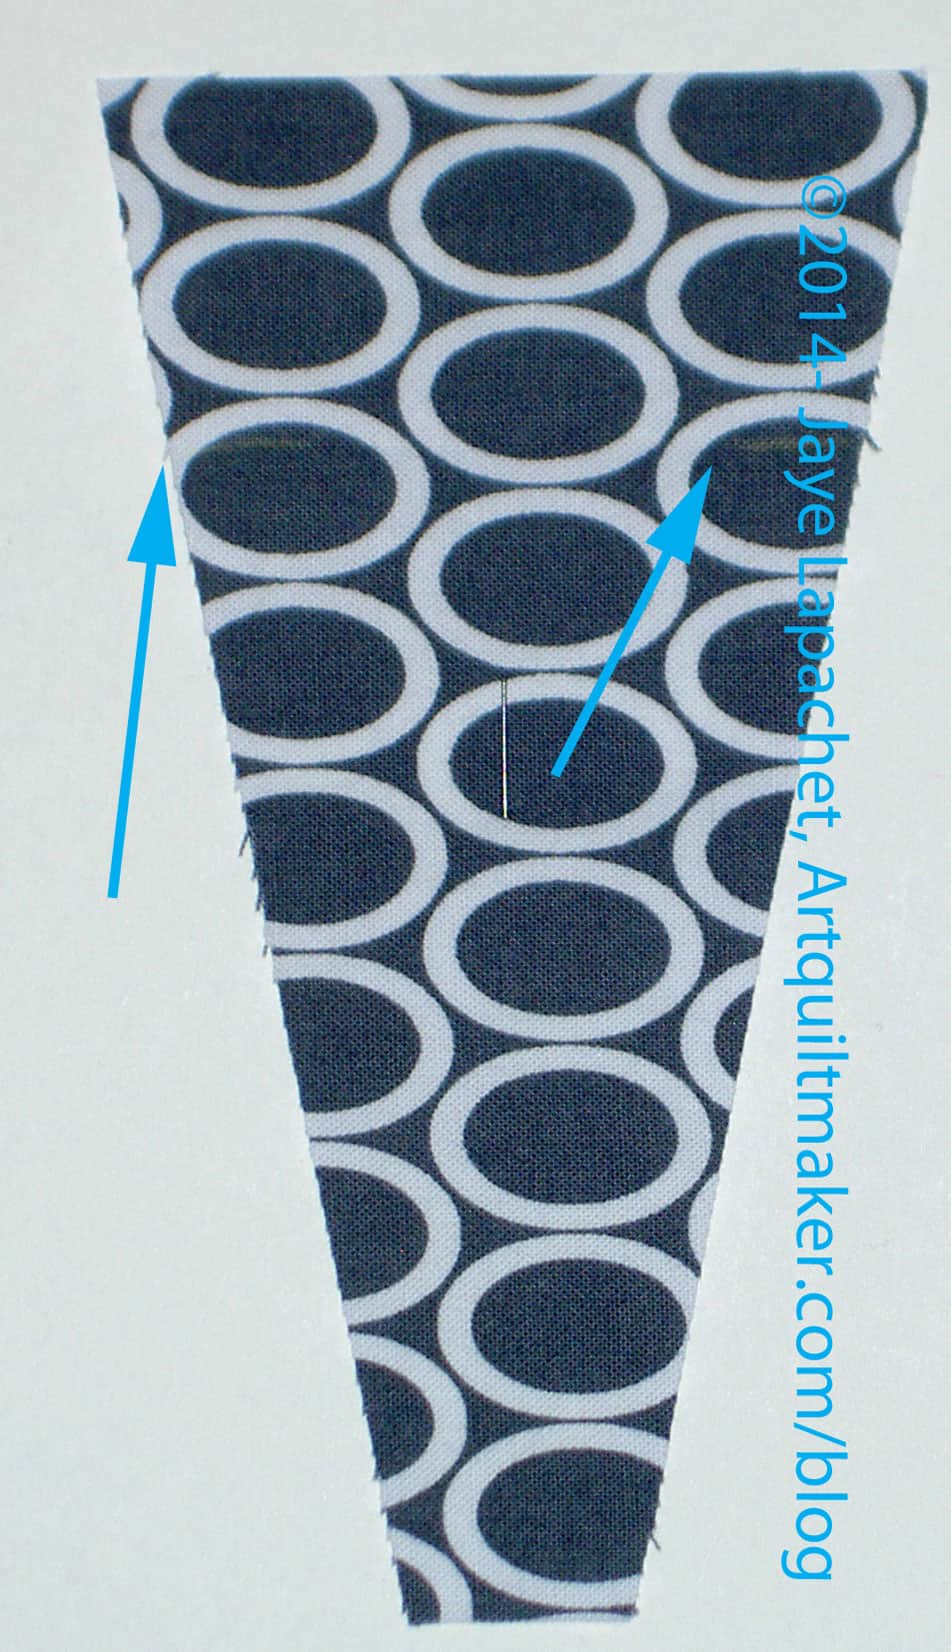
Mark notches
Make notches or markings where you want the top fold to be – about 1-5/8″down from the top. 1″ works well for some fabric looks.
Pin the interfacing, if it is not fusible, to keep in in place while you sew until after you turn it. ShapeFlex will work if you have some.
Pin Interfacing to fabric
Sew
Two right sides together, leaving a small space to turn,using a scant 1/4″
Try to catch the interfacing (if it isn’t fusible)
Clip and Turn
Optional: Clip curves, if you are using a Dresden Plate template that has a curved edge.
Turn pieces right sides out
Trim, Poke and Press
Trim the corners if you are not using a rounded Dresden template.
Poke out corners and curves carefully so the outer edge is smooth
Press so the pieces look nice
Sew
Put two main parts together (4 Dresden fan pieces that you have sewn and turned)
Sew from notches/markings
Sew around bottom 2-3 times staying on the line to reinforce the bottom
Finish
Trim the bottom corners
Turn whole piece right sides out
Fold down front petal
Press
Optional: stitch folded petal down using hand-stitching needle and thread or you could add a button or bead as an embellishment.
Scissor Sheath, finished
Final Thoughts
Now I am thinking of sets of Pincushions, needlecases and scissor sheaths. Watch out world! 😉 However, these are kind of a pain to make, so I don’t know how many I will make.
You could add a tab with some hardware so you can attach it to your quilt club lanyard.
Back in December, I put a post up on the Bay Area Modern blog about making lanyards, which was a personal challenge that the president put out to the guild. I wanted to do it, but I haven’t done it for myself yet. It is on the list.
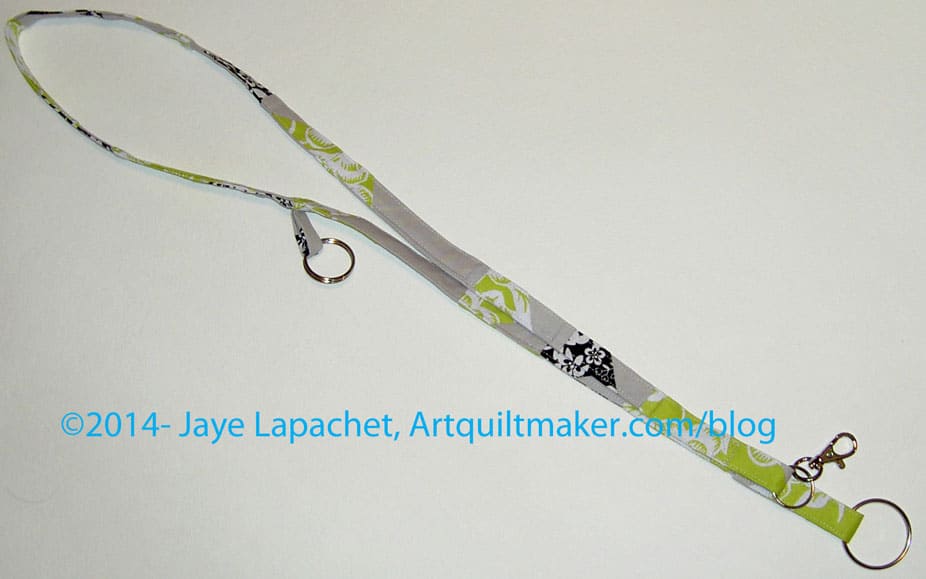
It took me some time to get around to making any kind of lanyard, but I finally did in response to the Orphan Block Challenge also put out by BAMQG. This one will be given in to a pool of small gifts and then I will get something back. I kind of like this lanyard, but am ok giving it away, too.The best part is that now I have a better idea about how to do it.
First I took a look at the Two Peas in a Pod tutorial. There are several tutorials listed. I picked this one, because it was the first one I looked at and I could follow it easily. Frankly, I already had an idea of how I was going to make the lanyard, but I needed to see how someone else did a few of the parts.
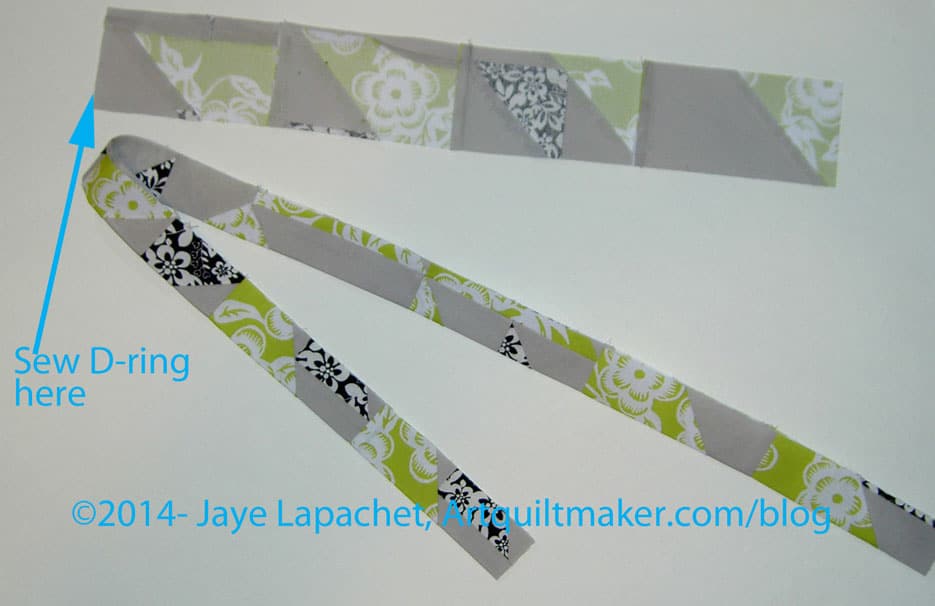
Then, I squared up the blocks a little bit to make sure the blocks to make them easier to cut into strips.
Since this was an orphan block challenge, next, I cut the blocks into 2.5″ strips. The blocks were 9″ or 10″ blocks (I don’t know -I didn’t measure) and I got about 3 strips from each one with skinnier bits leftover. It doesn’t matter what size they are as you can use regular fabric or a Jelly Roll strip and discard the leftovers.
After cutting, I sewed the strips together until I had a piece that was long enough to go from my belly button, around my neck to right below my collarbone (about an inch below or so).
Sew another strip that is long enough to go from your collarbone to your belly button.
Take both strips, fold them in half and press. Open them up and fold the raw edges to the center and press.
Sew D Ring Here
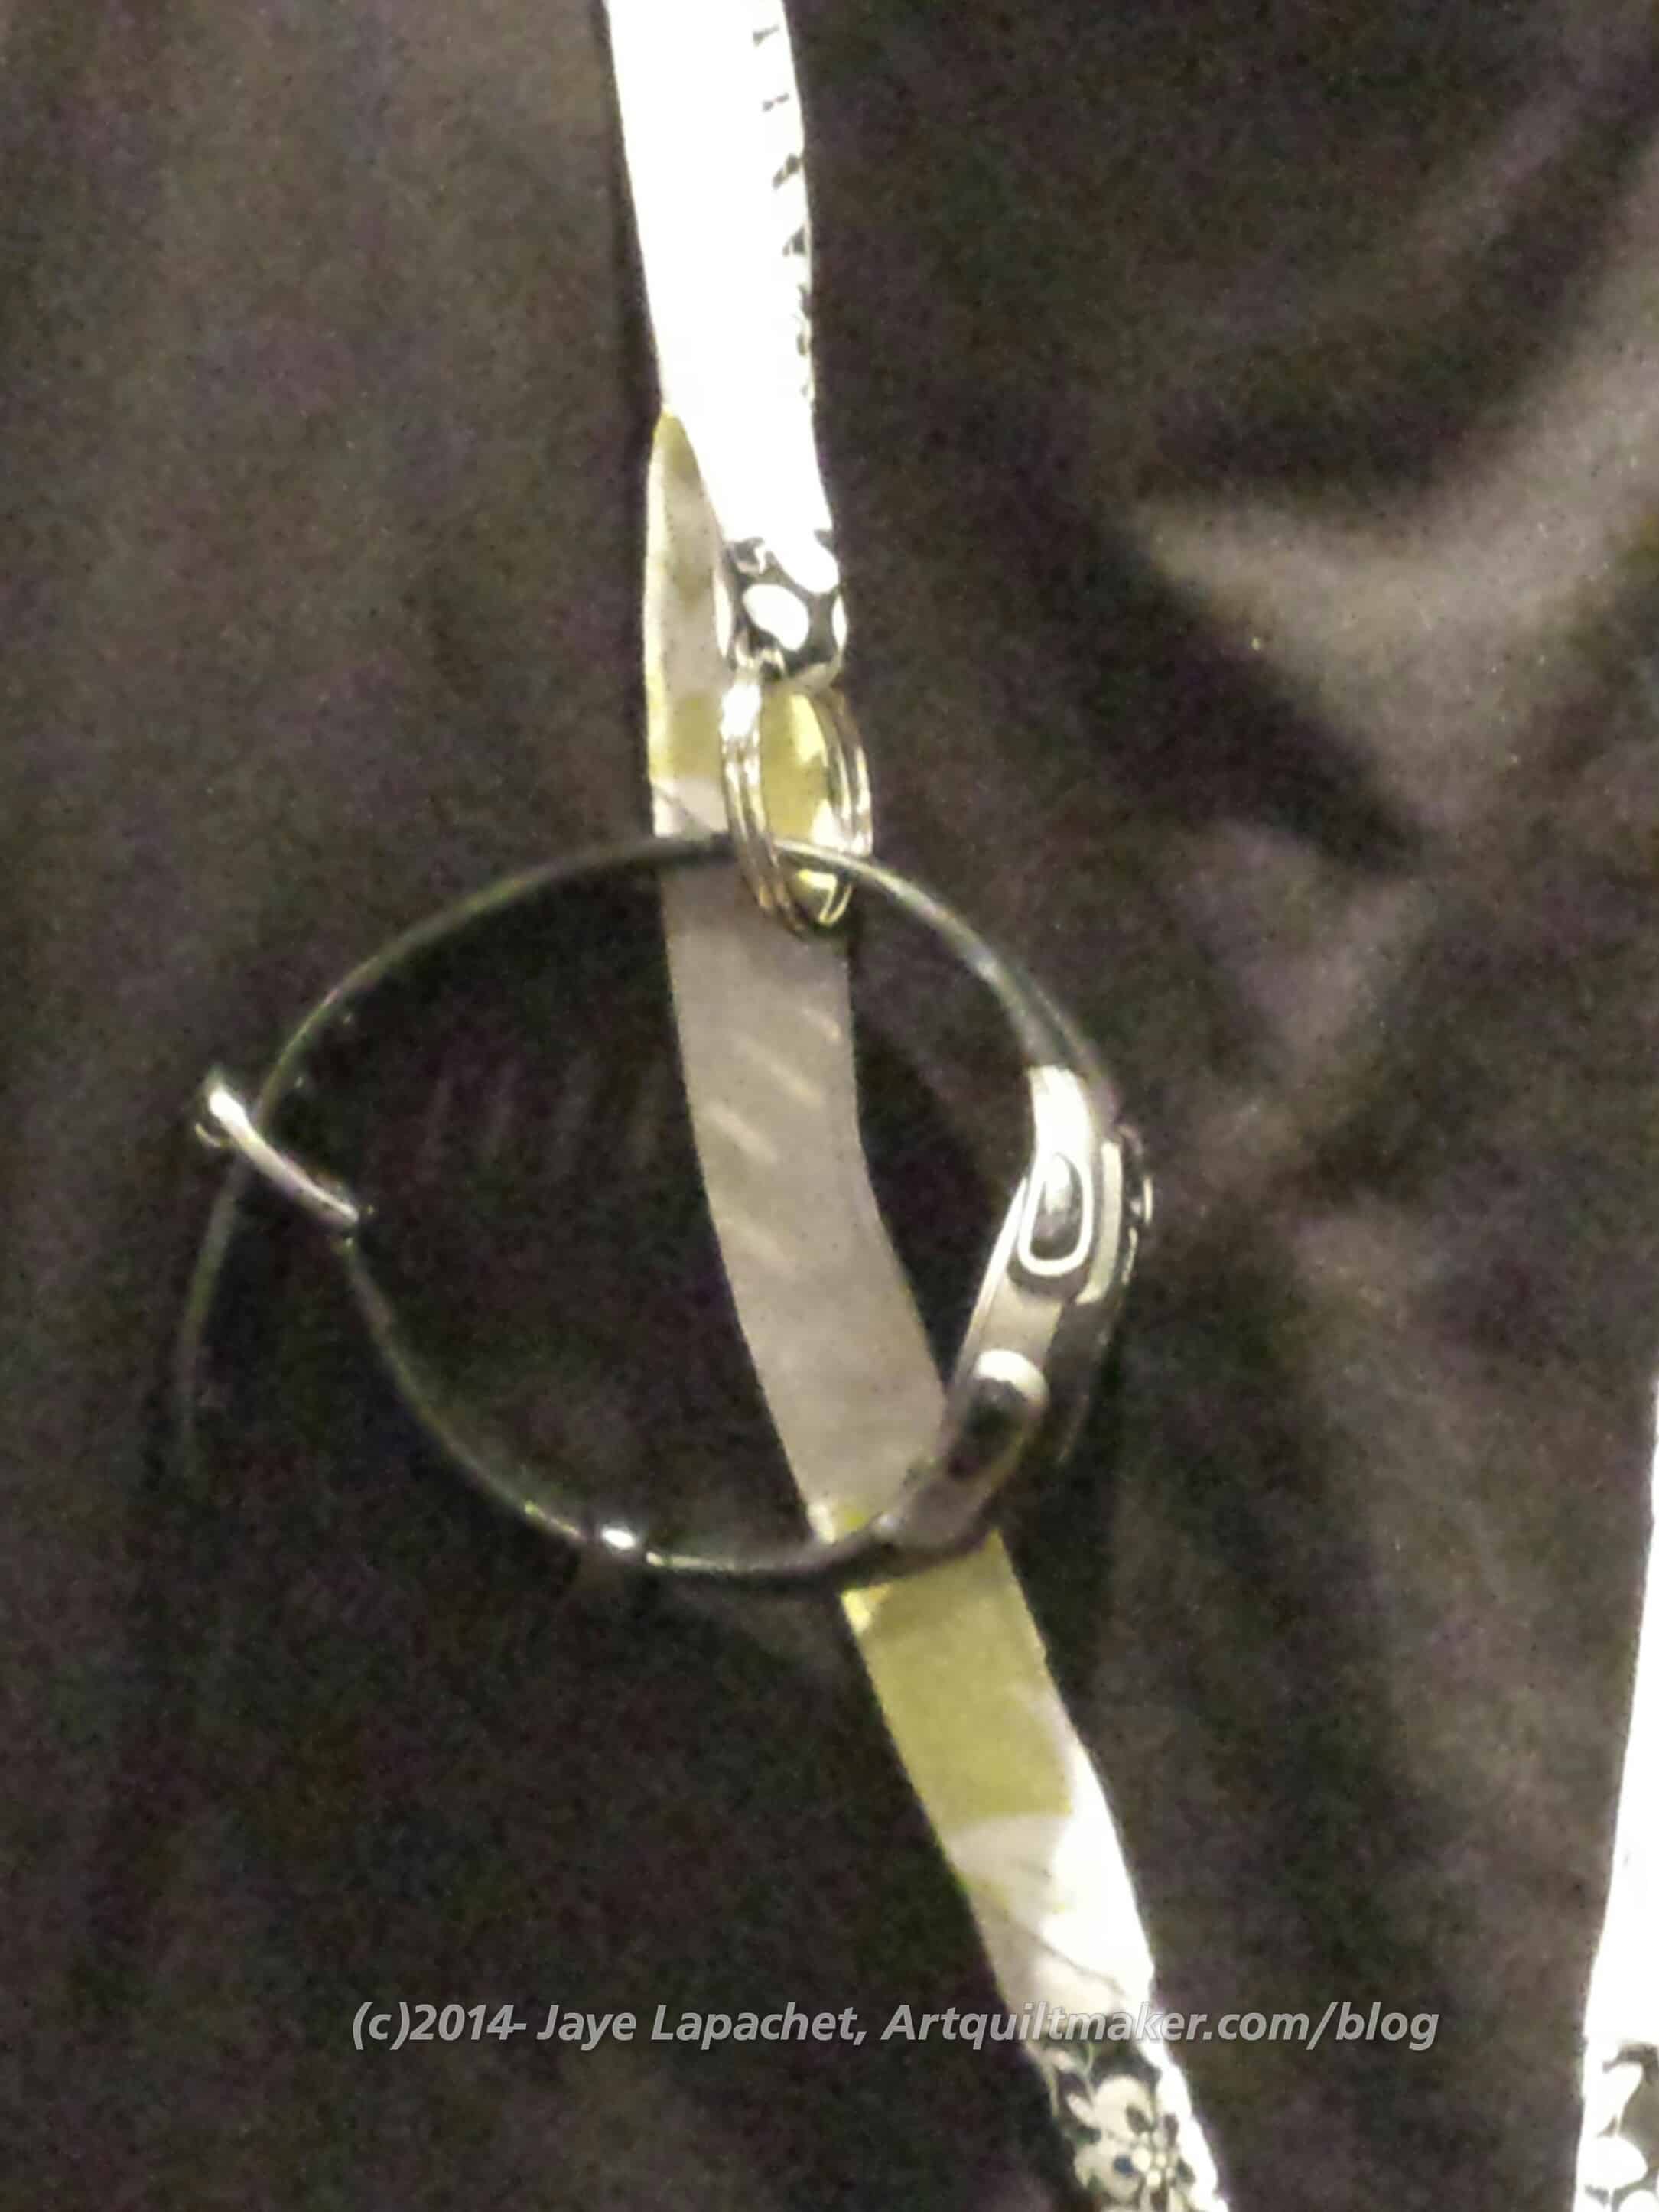
Then I wanted to add a loop at the shoulder so my nametag would be at eye level or I could use it to keep track of my glasses. Cut this piece about 4″.
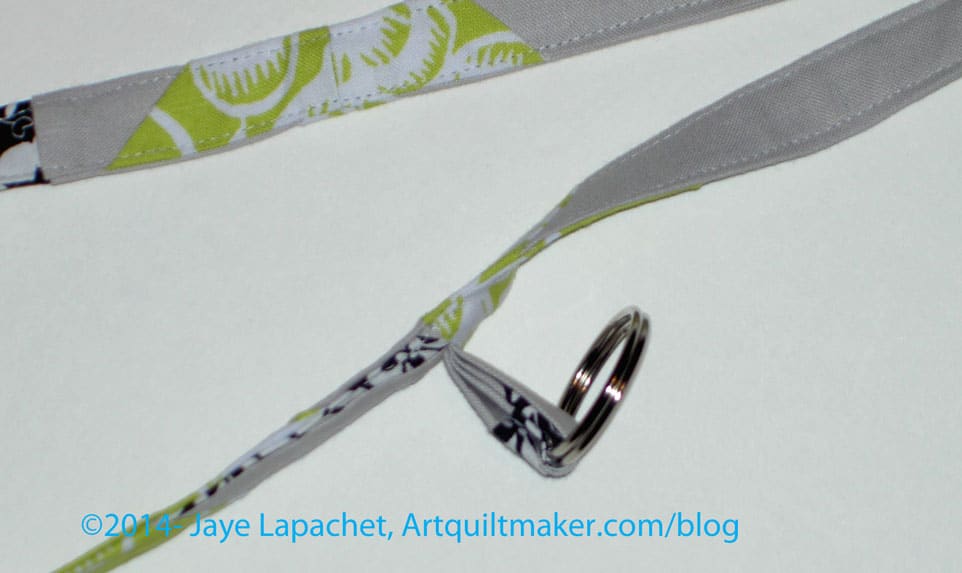
I took one of the leftover skinny strips (from the block above), folded it in quarters, top stitched both sides, slid the fabric piece through a ring and sewed that piece to the right side of a strip that had not yet been sewed. Once you slide the strip of fabric through the ring, you will have a U if you hold both of the raw edges, one in each hand. The ring will be dangling from the bottom of the U.
Collarbone Loop
Nota bene: In the picture, the strip to which you have to sew is upside down. Make sure you sew the the loop with the ring in the bottom to the right side of the strip. Nota bene due: In a subsequent step, you will fold the whole piece in quarters and top stitch. You may want to measure and sew this loop to avoid the folds that will take place later.
Collarbone Loop
After you have your extra loop added, you should sew the strip to the other strips and keep adding strips until the piece is long enough. You will need a bit of extra length to fold up to accommodate the Swivel hook and other loop, so don’t cut it off too short.
Now you have a long strip about 37″ long. This measurement is from the Two Peas in a Pod tutorial. I cut mine a little shorter to accommodate my height and torso length.
Fold your long strip in half and press. Yes, the glasses loop will be a pain. I haven’t figured out how not to make it a pain. If you know of a way to make it easier, let me know.
Open your piece and fold the raw edges towards the crease in the center. Once you have completed this the raw edges will be encased in the center.
Top stitch very close to the edges on both sides. If you want to be fancy, you can do a double line of stitching or a decorative stitch. Depending on the size of the ring holder, you may have to skip the area where the ring holder is, or go around it.
Now hang the strip around your neck. Trim the ends if you think they are too long.
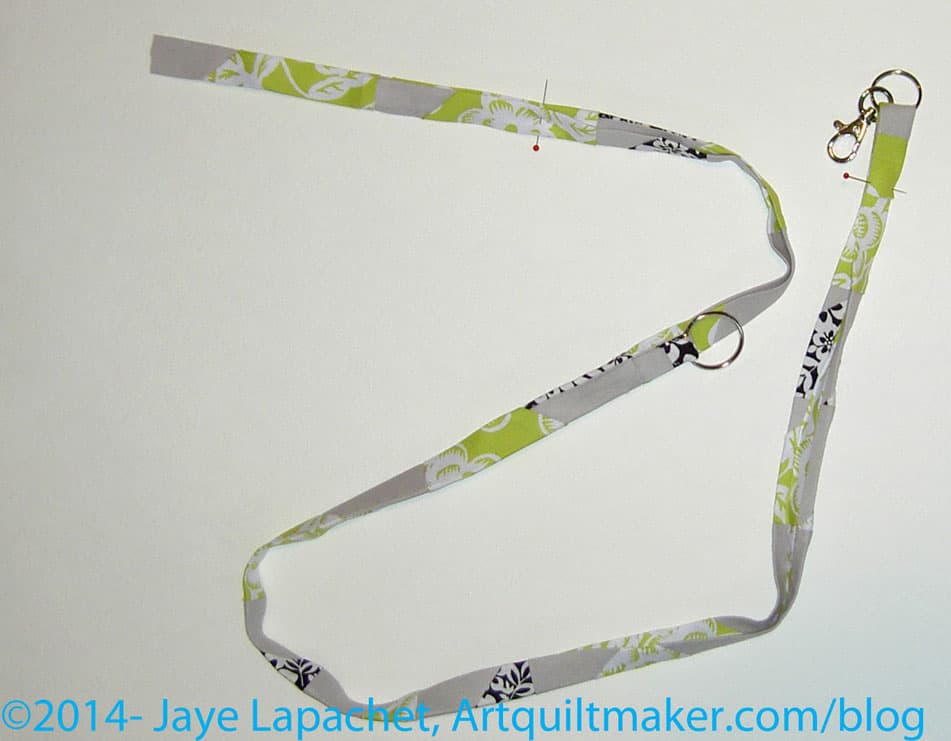
Take the loop and thread one end of your strip through it. Pin in place. WonderClips work well, too.
Thread Strip End Through
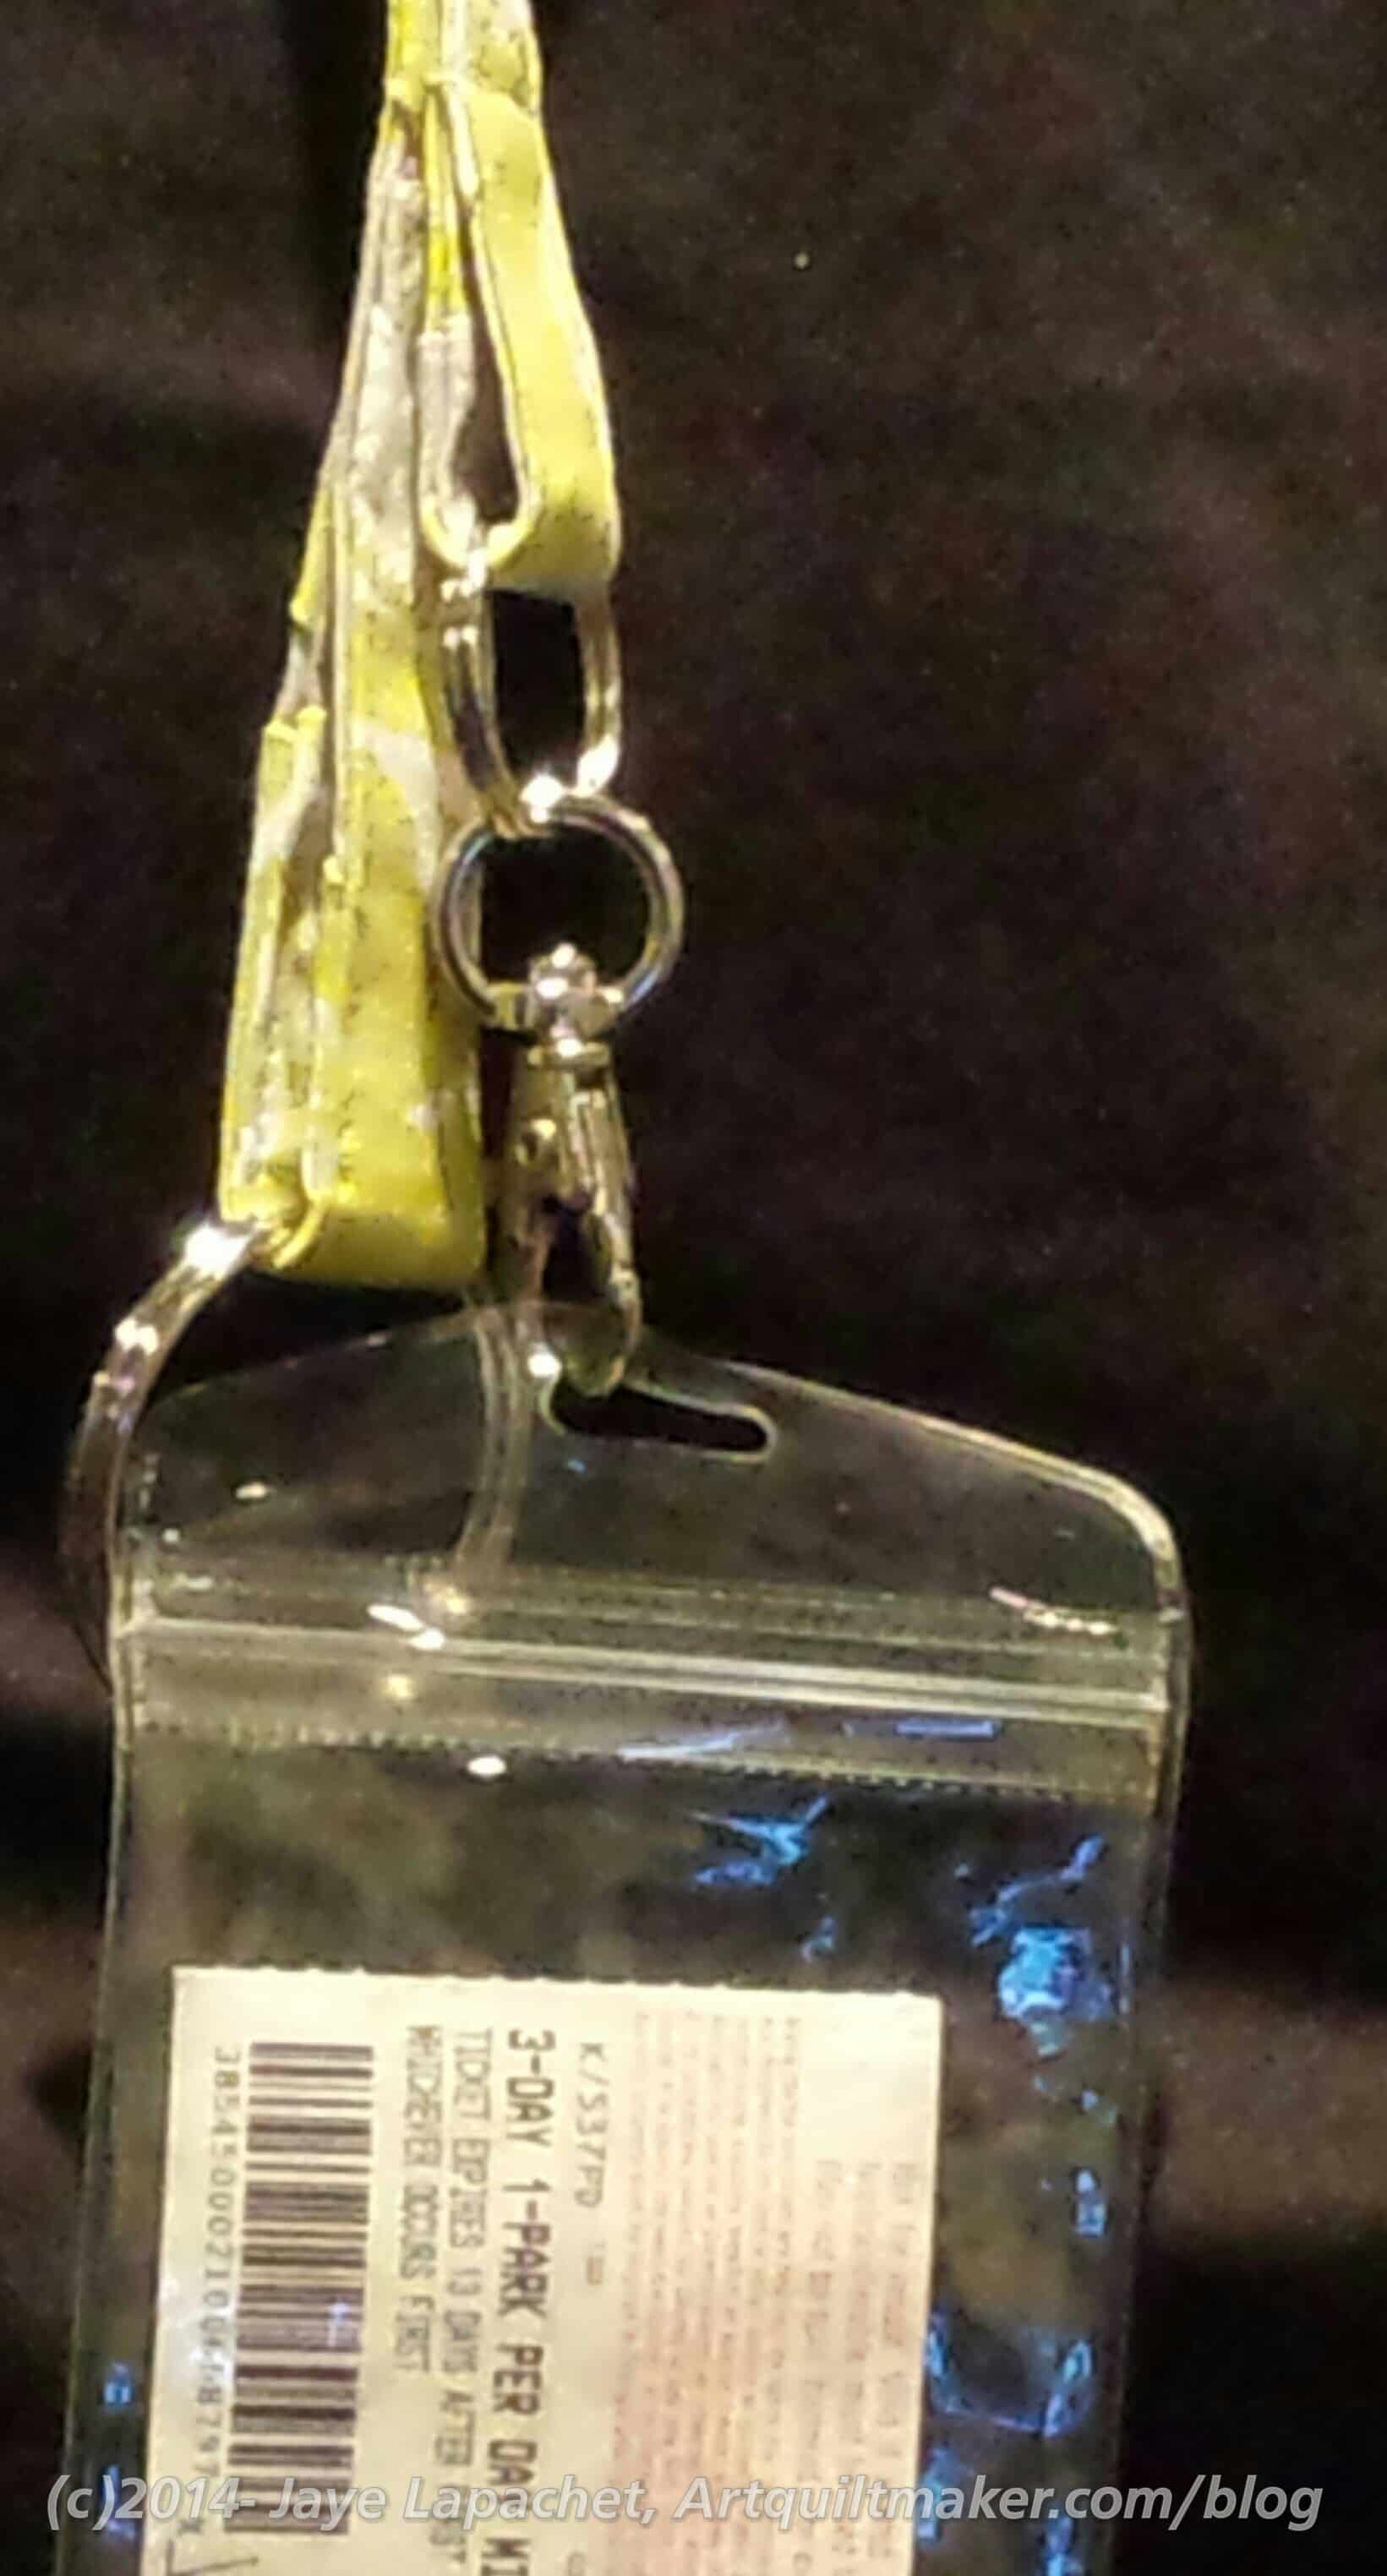
Take the other end of the strip and thread the swivel hook through it. Pin in place or use WonderClips.
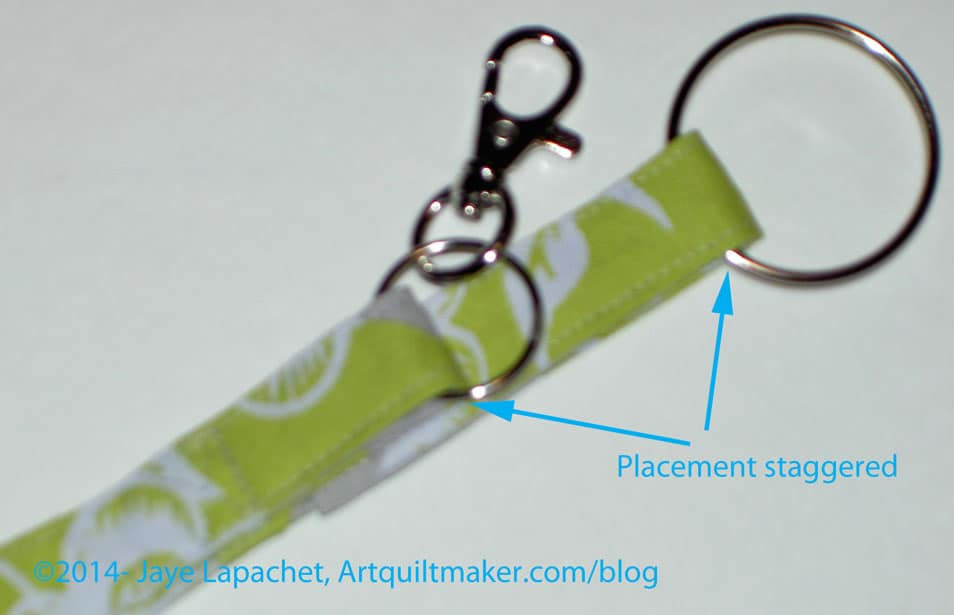
Now you are ready to finish off the ends. The different tutorials tell you to do it in different ways. I went with the the way the Two Peas in a Pod tutorial suggested. I hadn’t really thought about dual hardware on the bottom, but it works.
Staggered
I staggered the placement of my loop and swivel hook so they wouldn’t clank together as I (or the user) walked around. This means that I had to adjust the placement of the two pieces. It took a little bit of trial and error, but, ultimately, I am happy with the placement. As an added bonus, I had fewer layers to sew over as I finished the lanyard. That step is optional.
Think about what you might hook on to your loop and swivel hook before you decide on placement.
Place the lanyard carefully around your neck. Make sure to smooth out the twists, if any, so the lanyard lays flat around the back of your neck and on your chest.
Reinforcing Thread Box
Once you are sure everything is smooth, pin (or WonderClip) the two ends together and sew. I made “thread boxes” (the same technique you use to reinforce areas of stress when making a bag) out of my sewing line in order to keep the lanyard together and looking nice.
Change your needle so you are using a new and very sharp needle. Sew two reinforcing boxes, the top one going through all layers. Move the swivel hook out of the way to sew the bottom box to finish the lanyard.
Collarbone ring in use
Pain and Suffering
There are a couple of places that will be difficult. Using orphan blocks or mosaic piecing means that there will be extra seam allowances. With these comes the possibility of really thick seams [See above where I refer to the glasses loop]. To mostly avoid these thick seams, use 3 unpieced lengths of fabric for the neck and loop pieces. 1 Jelly Roll strip (2.5″ wide strip) will work.
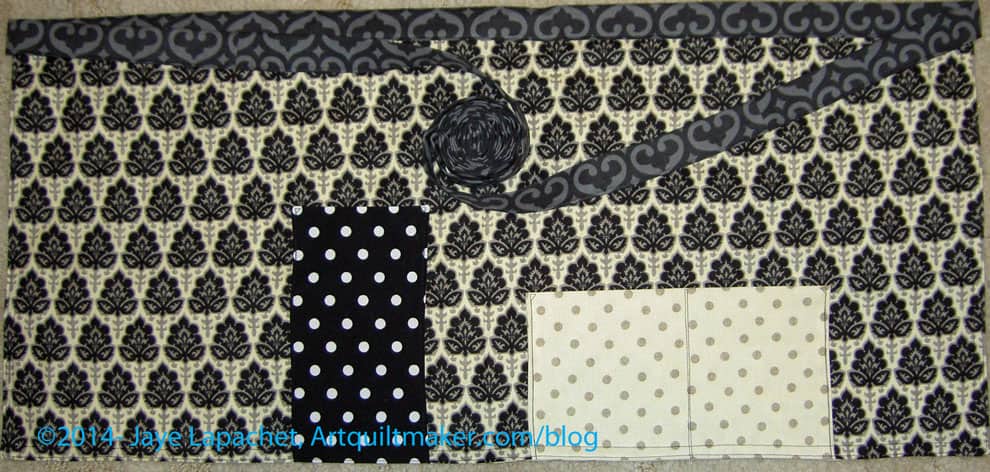
These had been on my list for a long time. I bought this pattern and two kits when we were on the North Coast in February. Making the aprons, which I think of as Cafe’ Aprons, has been on my list since then. I had washed and ironed the fabric and then moved the fabric carefully around my workroom for a couple of months. I finally got myself together to make them last week. I think my list, which has seen little movement in recent months, has been nudging me.
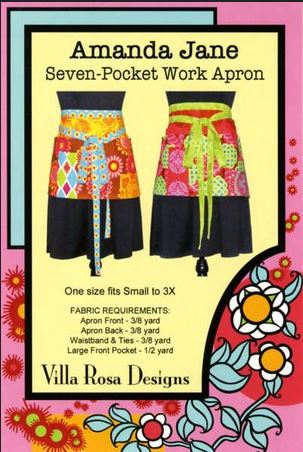
Apron Pattern
The pattern is on a little card, about the size of a postcard. I like the marketing idea, especially when I see a variety of these Villa Rosa Designs cards in stores on a rack. They are like candy and I want to buy 12. The idea is genius – one card, one project. Clever. Cheap possibilities. The size of the card, however, in terms of following the directions makes it very hard to read. I guess I am getting old, but I was squinting at the directions quite a bit.
The size also does not allow for very much explanation and several times I had to sit down, read the directions over and over, a little at a time, imagining the steps in my mind before I could take the next step. I can’t blame it completely on the size of the card. I am bad at following directions. This was especially true for the tie. Once I understood the directions, it was simple, but a photo would have been very helpful.
I see, now, also in small print, that Boutique Patterns has posted a page of tips and tricks regarding this pattern. The straps are covered on this page, so I should have looked; it would have been helpful. Once I figured out the straps, I liked the way they were attached to the apron.
As an aside, I liked how they show the apron, as made from the directions, looks on two different sized models. If I were making it for a more statuesque friend, I would definitely make the Apron front and backs taller than 13″ called for in the directions.
Bright Cafe’ Apron
When I finally made them I made three, one right after the other. I like to get accessories like this right and the only way I can do it is to go over the steps in fabric until I have the process down in my mind. I bought the kits to make a couple of gifts and the first one didn’t come out well, because I missed a crucial part of the pattern. I don’t think I want to give it as a gift, but we will see.
Little Black Dress 2 Cafe’ Apron
I think that this is a fairly easy pattern to modify slightly, as described above or in terms of pockets. I thought the small horizontal pocket was kind of a dumb size so I made it larger. I also didn’t hem the pockets, but doubled them in size, folded the fabric in half and sewed them closed. This made each pocket fully lined. That kind of pocket is easier to make than doing the hems. Less chance of burning my fingers on the iron, too. I thought that not having the wrong side of the fabric showing and having everything fully lined made the apron nicer.
Little Black Dress Cafe’ Apron
I wasn’t that happy with the kits I bought. I loved the fabric, of course, but there wasn’t enough for the Apron back and the fabric for the large pocket was not wide enough. Fortunately, I have plenty of fabric around and was able to fill in the gaps. It could be that this was explained to me when I bought the kits and I forgot.
I think this apron would be a nice quick gift for quilt or cooking friends. It is more of a work apron than a hostess apron, but would work for a variety of crafts as well as not-too-messy-cooking.
You have probably noticed that I make a lot of bags. Mostly I give them away. There are only a few (Springy bag, Jane Market totes) that I actually carry around. Part of that is that I am one person and one person only needs so many bags. Still, I do like to make them.
As I have said in the past, I carry a bunch of stuff with me to work in a bag on public transport. The bags have to be sturdy, have lots of pockets, be on the large side and relatively stain resistant. The bags I carry to work have been Timbuktu bags for the past several years. They work but they aren’t perfect. They are large enough, have enough pockets, but they look like everyone else’s bag. Also, I am kind of over the backpack thing with my work clothes.
When I made the Petrillo Bag, I did so because I liked the shape, mostly.
In the case of making the bag, I don’t have control over the finish, but I can choose the colors and pattern. I probably have an equal, if different, amount of control over color the as I do if I bought a bag in the store.
Using the ShapeFlex plus layers of fabric plus interfacing. That is a lot of layers to go through and my backup machine wasn’t happy. I could make a better, sturdier bag if I had a tougher machine, perhaps an industrial machine or pseudo industrial machine. There is no way I am even going to consider buying an industrial machine, but I still want to make bags. I may never do it, but there is a place where you can go and rent table saws and welding things…Tech something. They have industrial machines there. Perhaps I will go and see if I can use theirs.
I worry most about setting the bag in something and not being able to get the stain out or having the stain leak through the bag. I like my bags nice and when you take public transport, it is hard to keep things nice. This is why Sheldon has ‘bus pants.’ I tried using the fusible laminating stuff on the Scrap Lab Backpack and that worked OK. It isn’t like using regular oilcloth. I suppose I could just make a new bag if the old one got stained or boring…
Tomorrow is my only day at work before Thanksgiving until December 2. I am cooking for Thanksgiving and ‘need’ the prep time. I also need to go to the dentist and clean up the house and sew and laze around. The whole Grama thing has been really hard and even though I was off for a week at the end of October/beginning of November, I need more time off.
None of that is either here nor there, except that you should watch for the Pie Day photos that I will tweet out. I don’t know if you like it, but I always have fun tweeting Pie Day photos. I plan to make a pie for my mom’s priest who was awesome while my grandmother was sick. He was a great support to her and is a super nice guy.
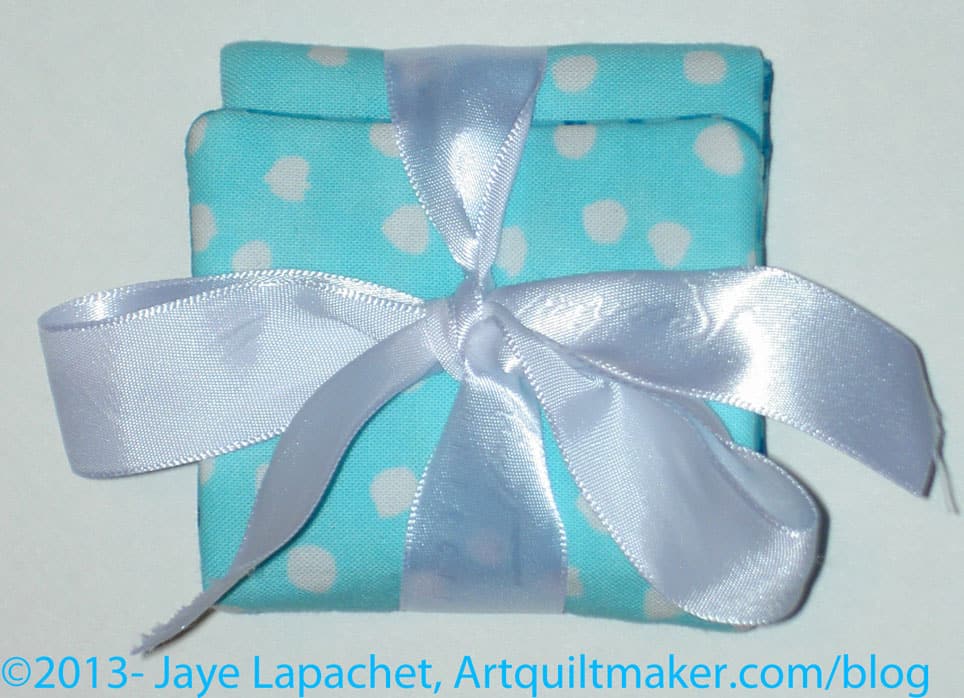
So, two paragraphs in and no discussion of sewing. Let’s get to it. I made a second needle case. I couldn’t help myself. I needed to get it right. It still isn’t exactly right, but is much better. I did it last Sunday and then worked on the hand stitching on Monday night.
The problem this time is that I put batting in and I think I just don’t like batting for small accessories like this. I think batting should be in quilts and something thinner (not sure what yet) should be in journal covers and needle cases.
The changes I made to the pattern are:
Put ShapeFlex on all the major pieces. This gave it more body, but not quite enough to forgo the batting.
Machine sewed the ribbon on to the main outside piece right after adding the ShapeFlex to the fabric and then pinned it carefully out of the way
No binding; sewed around and then turned the whole thing
Stitched the top and the bottom of the pocket accent (directions say bottom only)
Needle Case #2 Open
This pattern really doesn’t take very long. I am going to Joann to see about some ShapeFlex sometime this week and may look for fusible flannel as well. I don’t know if there is such a thing, but I will look. Flannel might be sticky enough without the fusible.
Only on one front: napkins. I have started to buy some Christmas gifts, but that job is still majorly in process. I have started, slowly, because I have to spread the cost out.
We use cloth napkins. They may not be more environmentally friendly considering the manufacturing process and that we have to wash them every week. Still, they get a lot of attention when we have guests, which usually leads to interesting conversations, so I keep using them. I also don’t like the feel of paper napkins on my face. My pretty, pretty princess face. 😉
I had an idea awhile ago to make napkins for every holiday. I made napkins for Valentine’s day, 4th of July and Labor Day. I may have made more, but I don’t remember. I never got to Christmas or Thanksgiving. Frankly, I should concentrate on Thanksgiving, because that is when we have the big family party and I would get a lot of compliments. Still I haven’t done it.
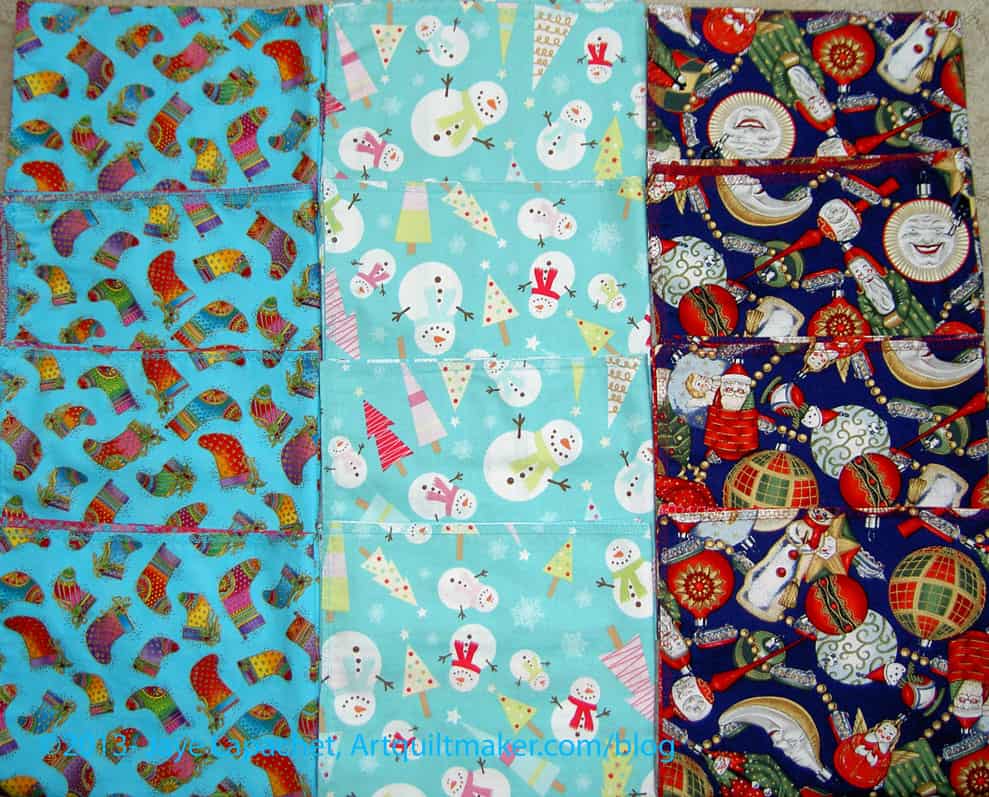
Christmas Napkins
However, when I started my ‘small projects extravaganza‘, I got out some Christmas fabric to make gift bags, then I decided to make some napkins instead. It had been long enough since I made any new ones that I forgot how tedious they are to make.
I have to say that the fabric on the right creeped me out the whole time I was sewing it. I love the vintage glass ornaments, but there are a couple of faces on that fabric that look a little too much like horror movie characters for me. I will stick to using the other two types during Christmas for myself.
Still I made 12 – all the fabric I cut – and now I can move on.
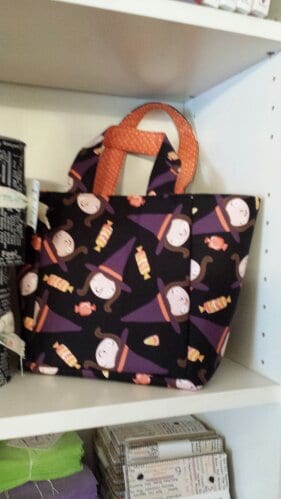
As you know, I will be First Lady of the NSGW in 2017. Sounds pretty fancy, I know, but I won’t have a paid staff or a clothing allowance and it will be a ton of work. DH and I have to plan the annual conference. There will be several ladies (about 12, I think) who will be helping me plan the events for the ladies. It is common practice in this group, as well as good manners, to give thank you gifts. Since there is no shortage of fabric at my house, I thought I would see about making gifts. I may not end up going this route, but it is a good, and fun, first step. Much better than shopping, I think.
I first thought of the Anna Maria Horner Multi-tasker tote, but wasn’t really happy with that choice (too much fabric, hard straps to turn). One AMH MTT once in a while is no problem, but 12 one after another? I might rip my hair out. I put it on the back burner and thought it would be my go to option. Truthfully, though I was still casting around for an idea that really floated my boat.
WSFC Handbag
At the West Seattle Fabric Company, I saw a little tote bag, or fabric handbag, that made me take notice. I thought it would be a better option: smaller, more useful, no difficult straps to turn, good size, nice body (e.g. stands up). They didn’t have a pattern, so we we searched the web and TFQ found a tutorial that we thought would work.
My job, while TFQ went to work one day during my visit, was to figure out whether the tutorial, with the addition of handles, would work or if we would have to modify the tutorial further.
I figured that we would have to modify the size, definitely. Also, in my experience web tutorials aren’t tested as well as some other patterns (though I have used some patterns that were pretty terrible in the directions department), but the shape was right and the size was pretty good. Just to keep those of you off the edge of your chairs: this tutorial turned out to be pretty good in terms of directions.
Supplies and tools
Fabric for outside and lining
Wonderclips
Peltex
Sewing machine
thread
Iron
Ironing Board
graph paper
mechanical pencil
drafting ruler
rotary cutter
rotary ruler
Pins
Optional: fusible interfacing for handles
The tutorial from the Sometimes Crafter is also very helpful. Note that her basket is square and if you do not make your basket (handbag) square, you cannot use her folding trick for sewing.
When I make a bag, I like to get all the fiddly bits out of the way. When I am on a roll, I don’t want to stop to make handles or pockets or whatever. I want to grab them and add them, thus I changed around the order of how I made the bag from the way the tutorial arranges the steps.
I did, actually, make the pattern first, so you could do that before the fiddly bits.
Make the Handles
Cut two strips 4″x19″ or whatever length you want your handles. I wanted someone to be able to slip her hand under a handle, thus the length. Feel free to adjust the length to suit your needs. You may need to make one or two of these to figure out what works. They are fast so don’t roll your eyes. 😉
Optional: if you want added body for the handles, use some fusible interfacing. Cut the interfacing about 1/4″ smaller than the handles and center the interfacing before you press it to the wrong side of the handles. Choose whatever weight you think is appropriate for your use.
Fold the newly cut strips in half and press.
Open both handles.
Fold the raw edges towards the center line. Press the new folds only. Press carefully so you don’t press out the center pressed line.
Fold along the center line and press the entire strap.
Fold to center line
You should have a piece that is 1″ x 4 layers.
Top stitch the open end of the handles with matching thread.
Top stitch the closed end of the handles with matching thread.
Set aside until after you sew the body
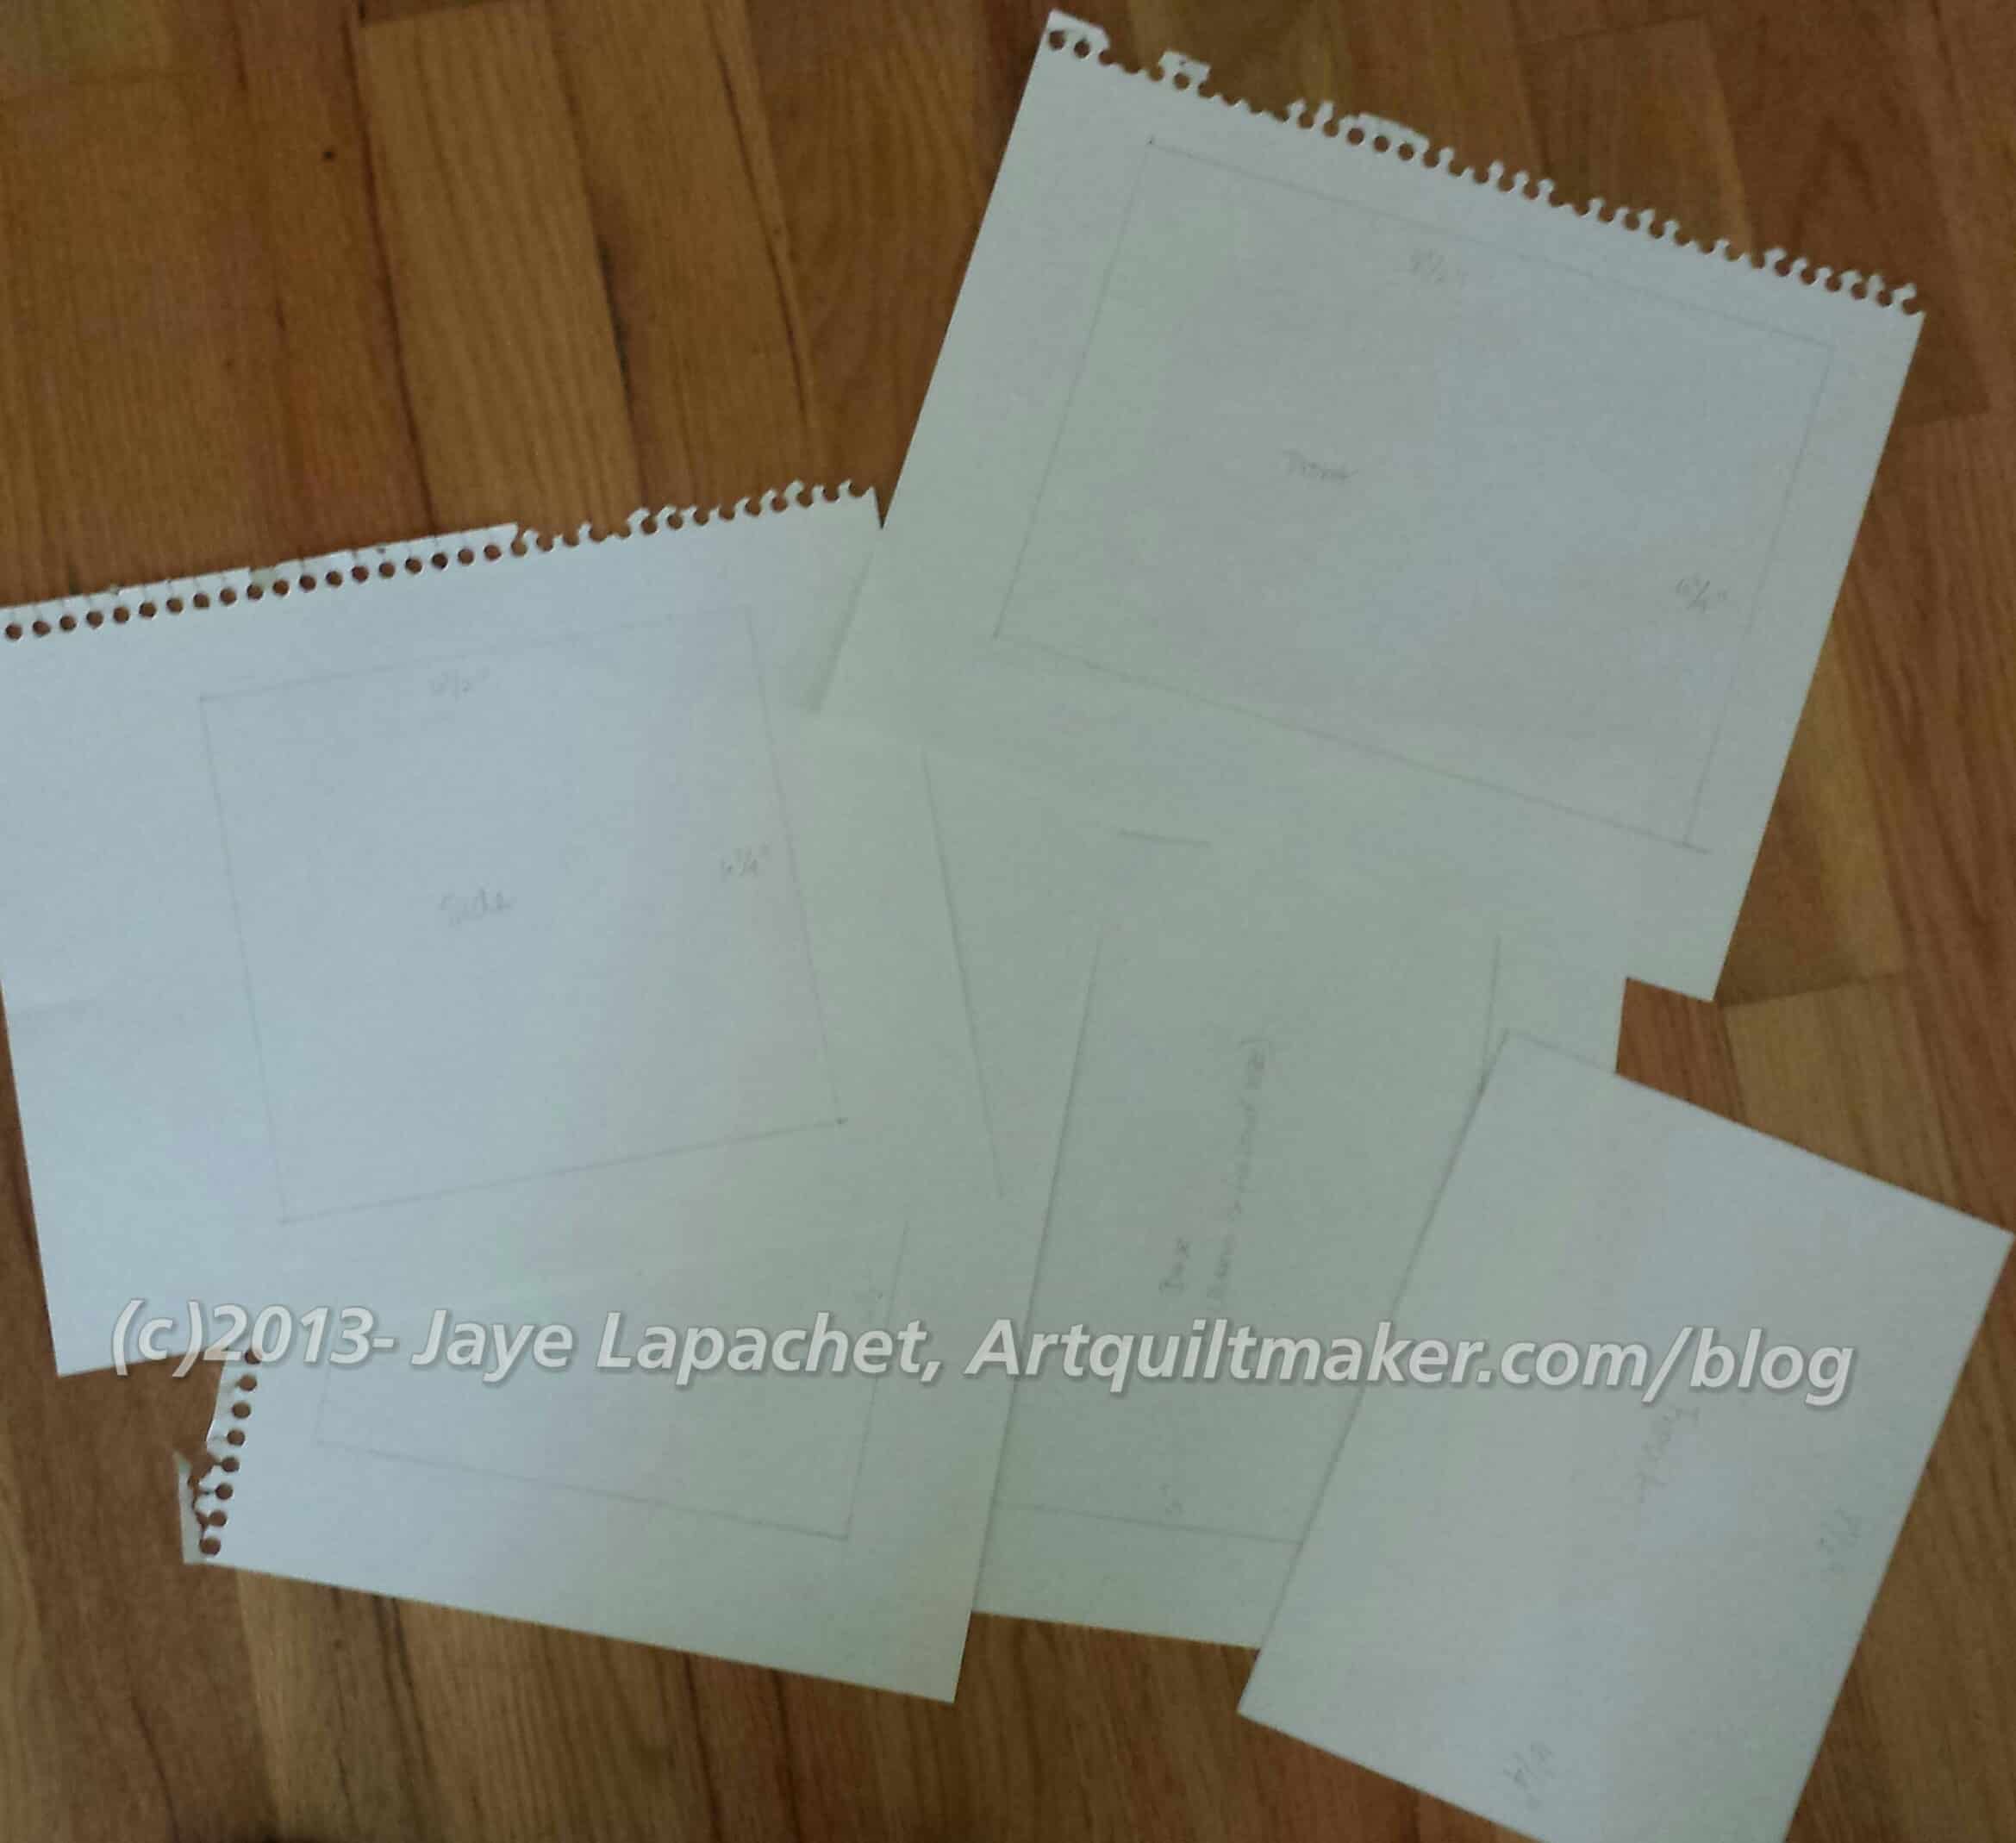
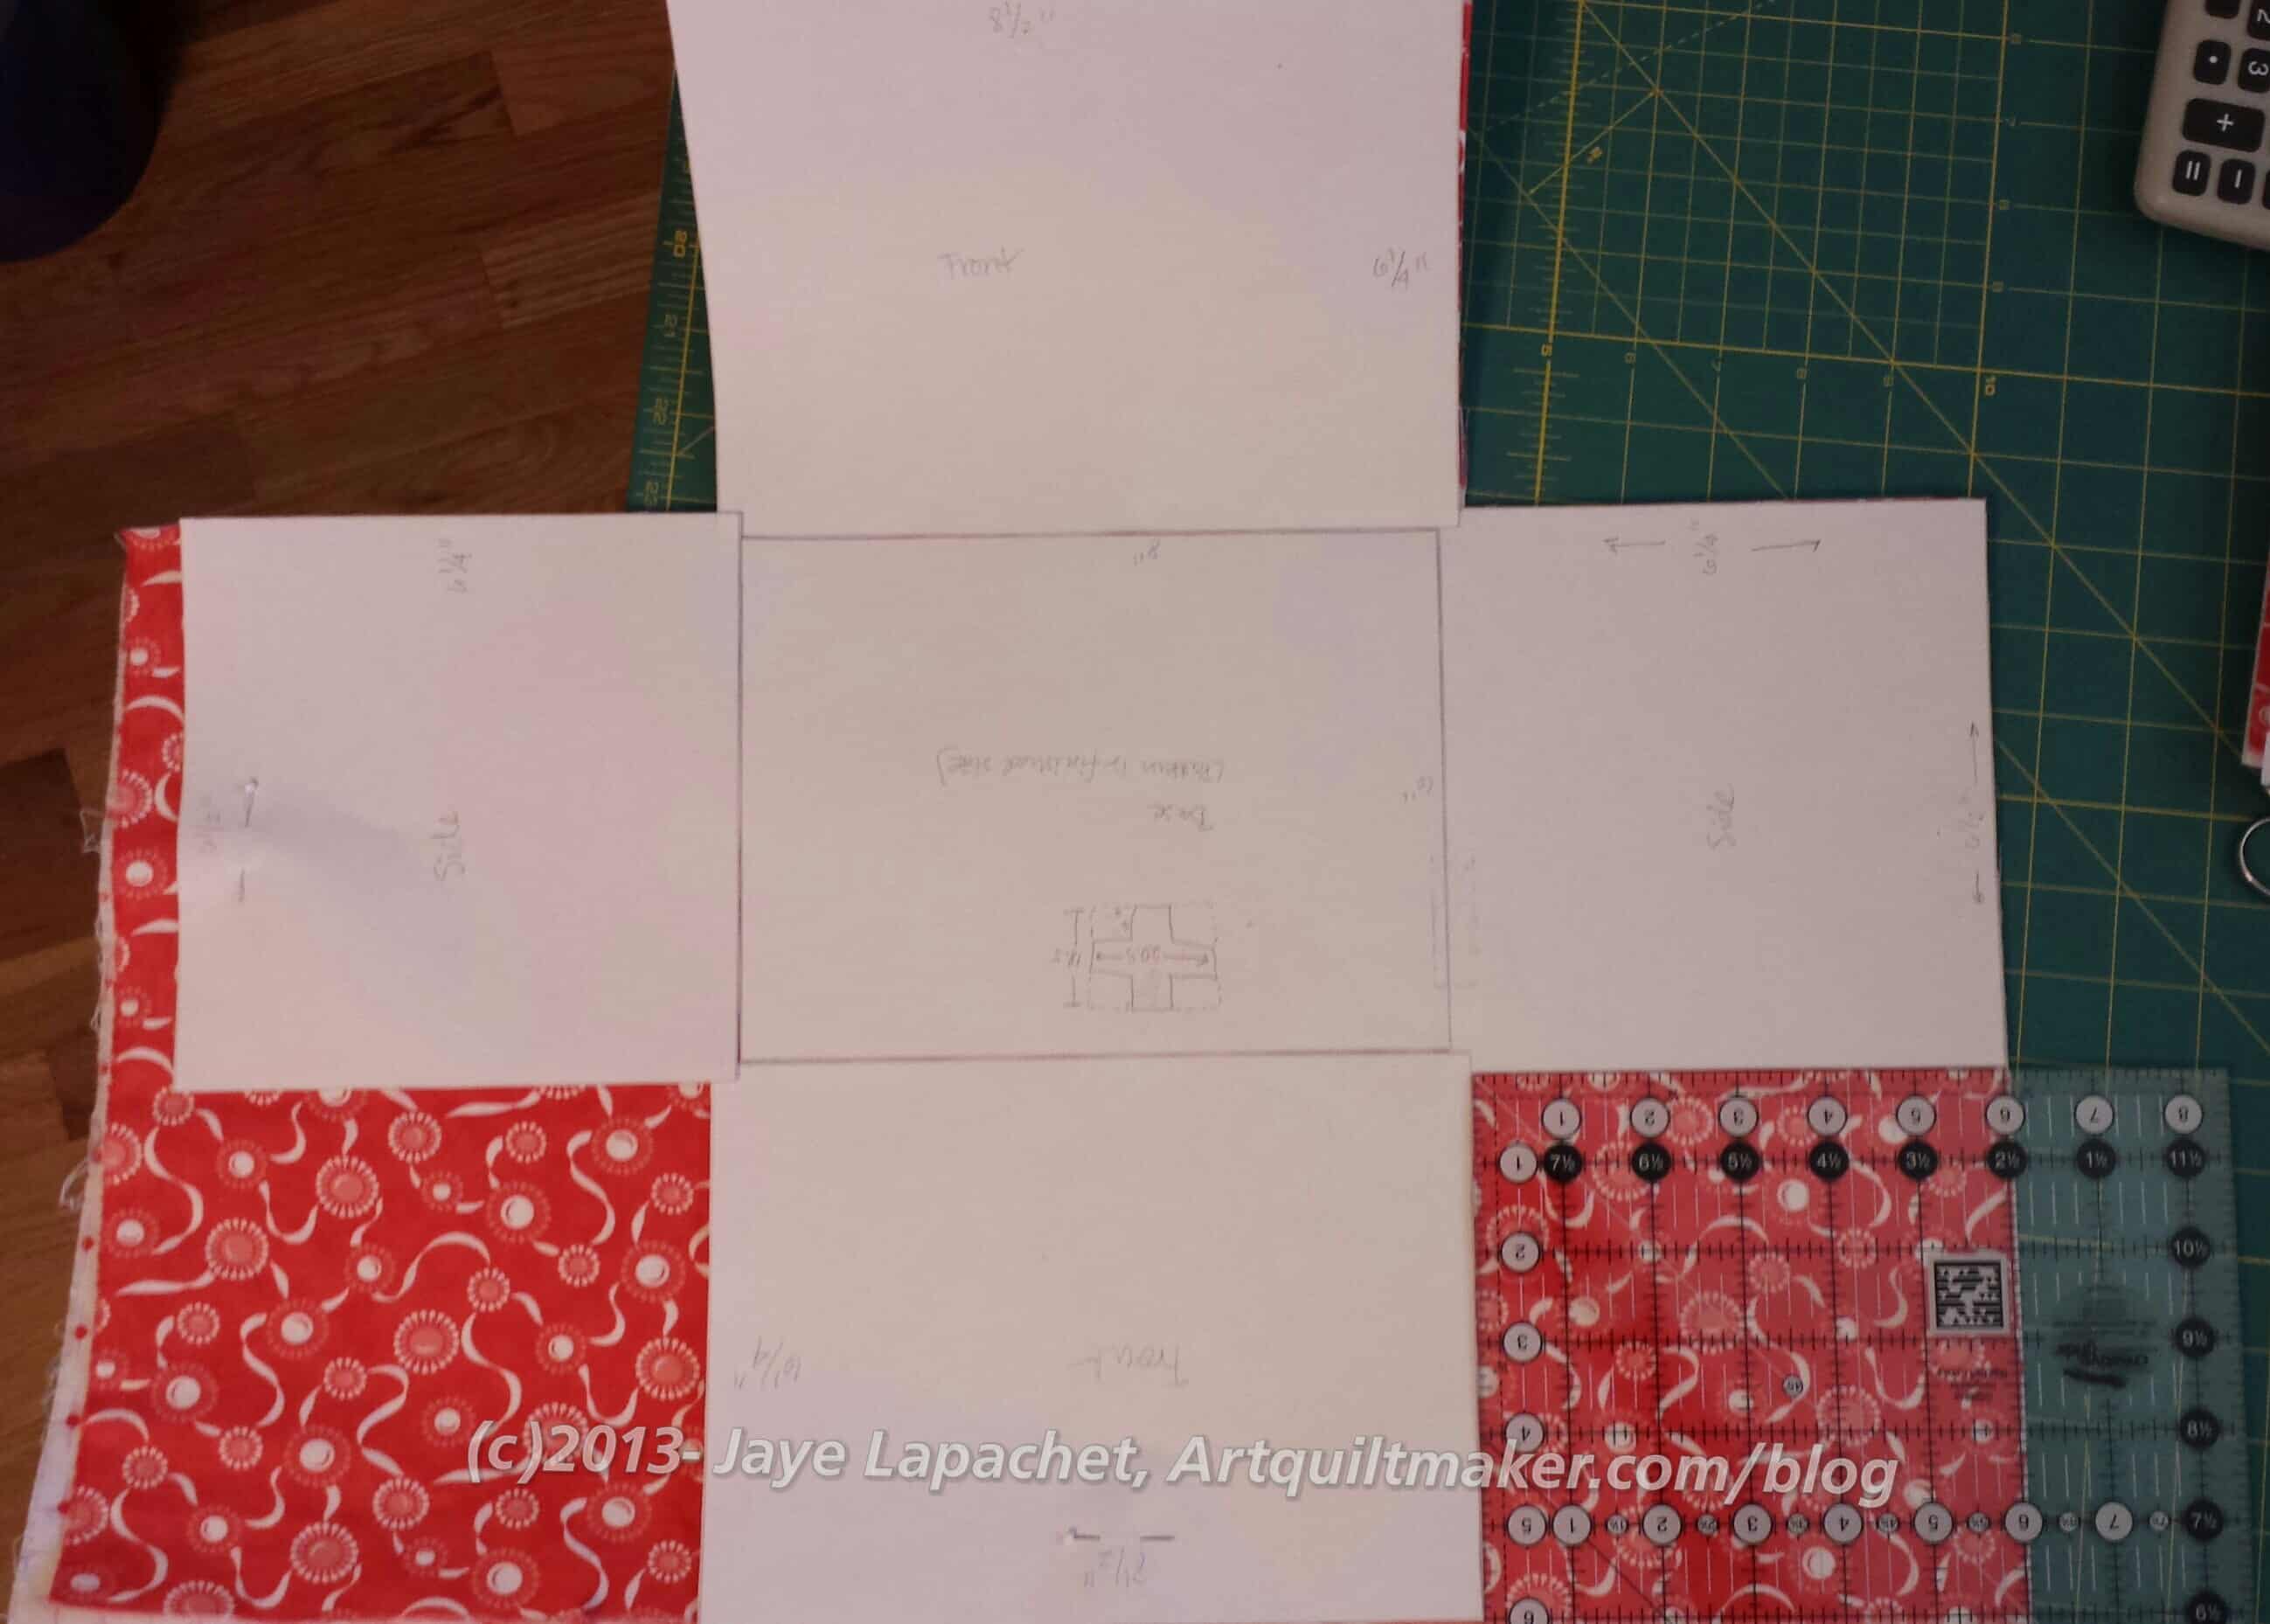
Make the Pattern
Get your graph paper.
In the above photo, I just used plain paper and a rotary ruler, because I didn’t have graph paper handy. I would DEFINITELY use graph paper. I used it in the second version and it made the process of pattern making faster and easier.
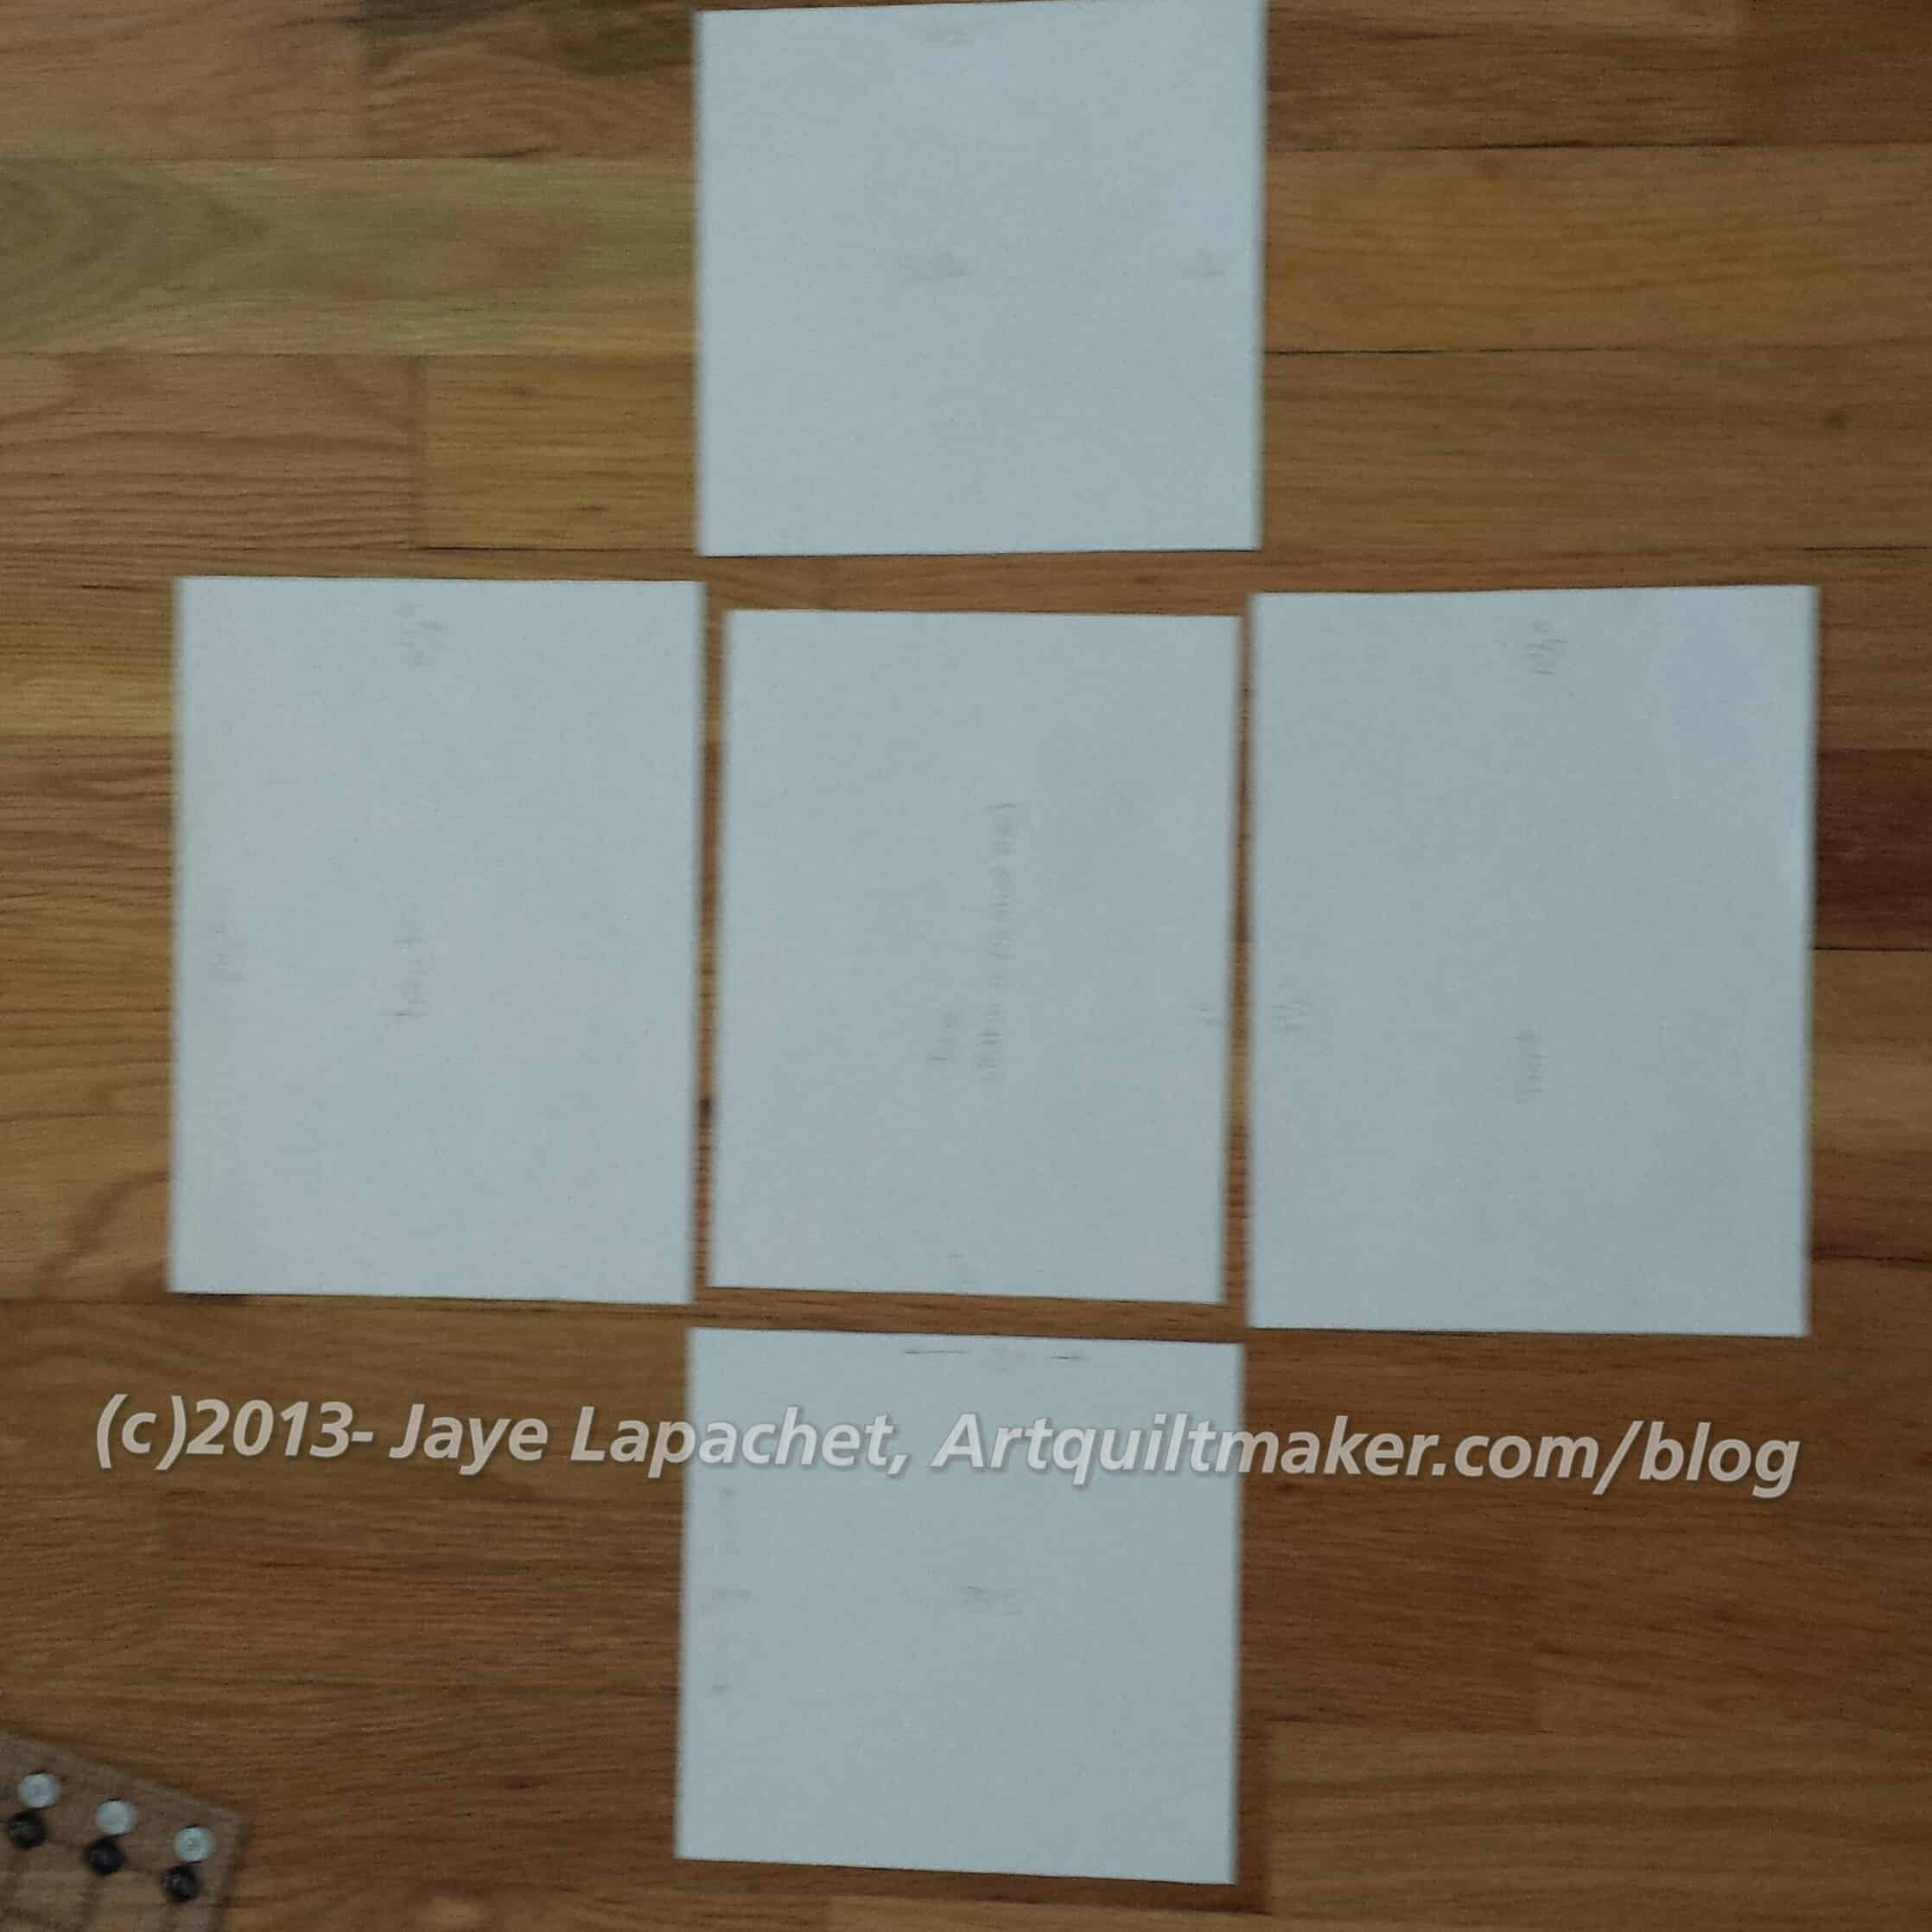
Your pattern will end up as the shape of a cross. You may have to tape your pattern together, like I did. Here are the sizes to draw out or use the sizes listed in the tutorial :
Basic size of bag is 8″x4″
Sides: 4.5″x6.25″
Bottom: 4.5″x 8.5″
Front: 4.25″ x 8.5″
Back: 4.25″ x 8.5″
Seam allowances are 1/4″
The above sizes are from the second version, because I liked the proportions better. Before I commit to 12, I will tweak the dimensions further. Don’t worry! I’ll keep you in the loop. 😉
Get your ruler, paper and pencil and draw the rectangles described above.
Cut out your pieces and lay them out.
Layout your pattern so you can get an idea of the size. Carefully tape the pieces together and find fabric that works both in size and design. Nota bene: you may want to hold back the front and back pieces. Read the section below on cutting fabric and decide.
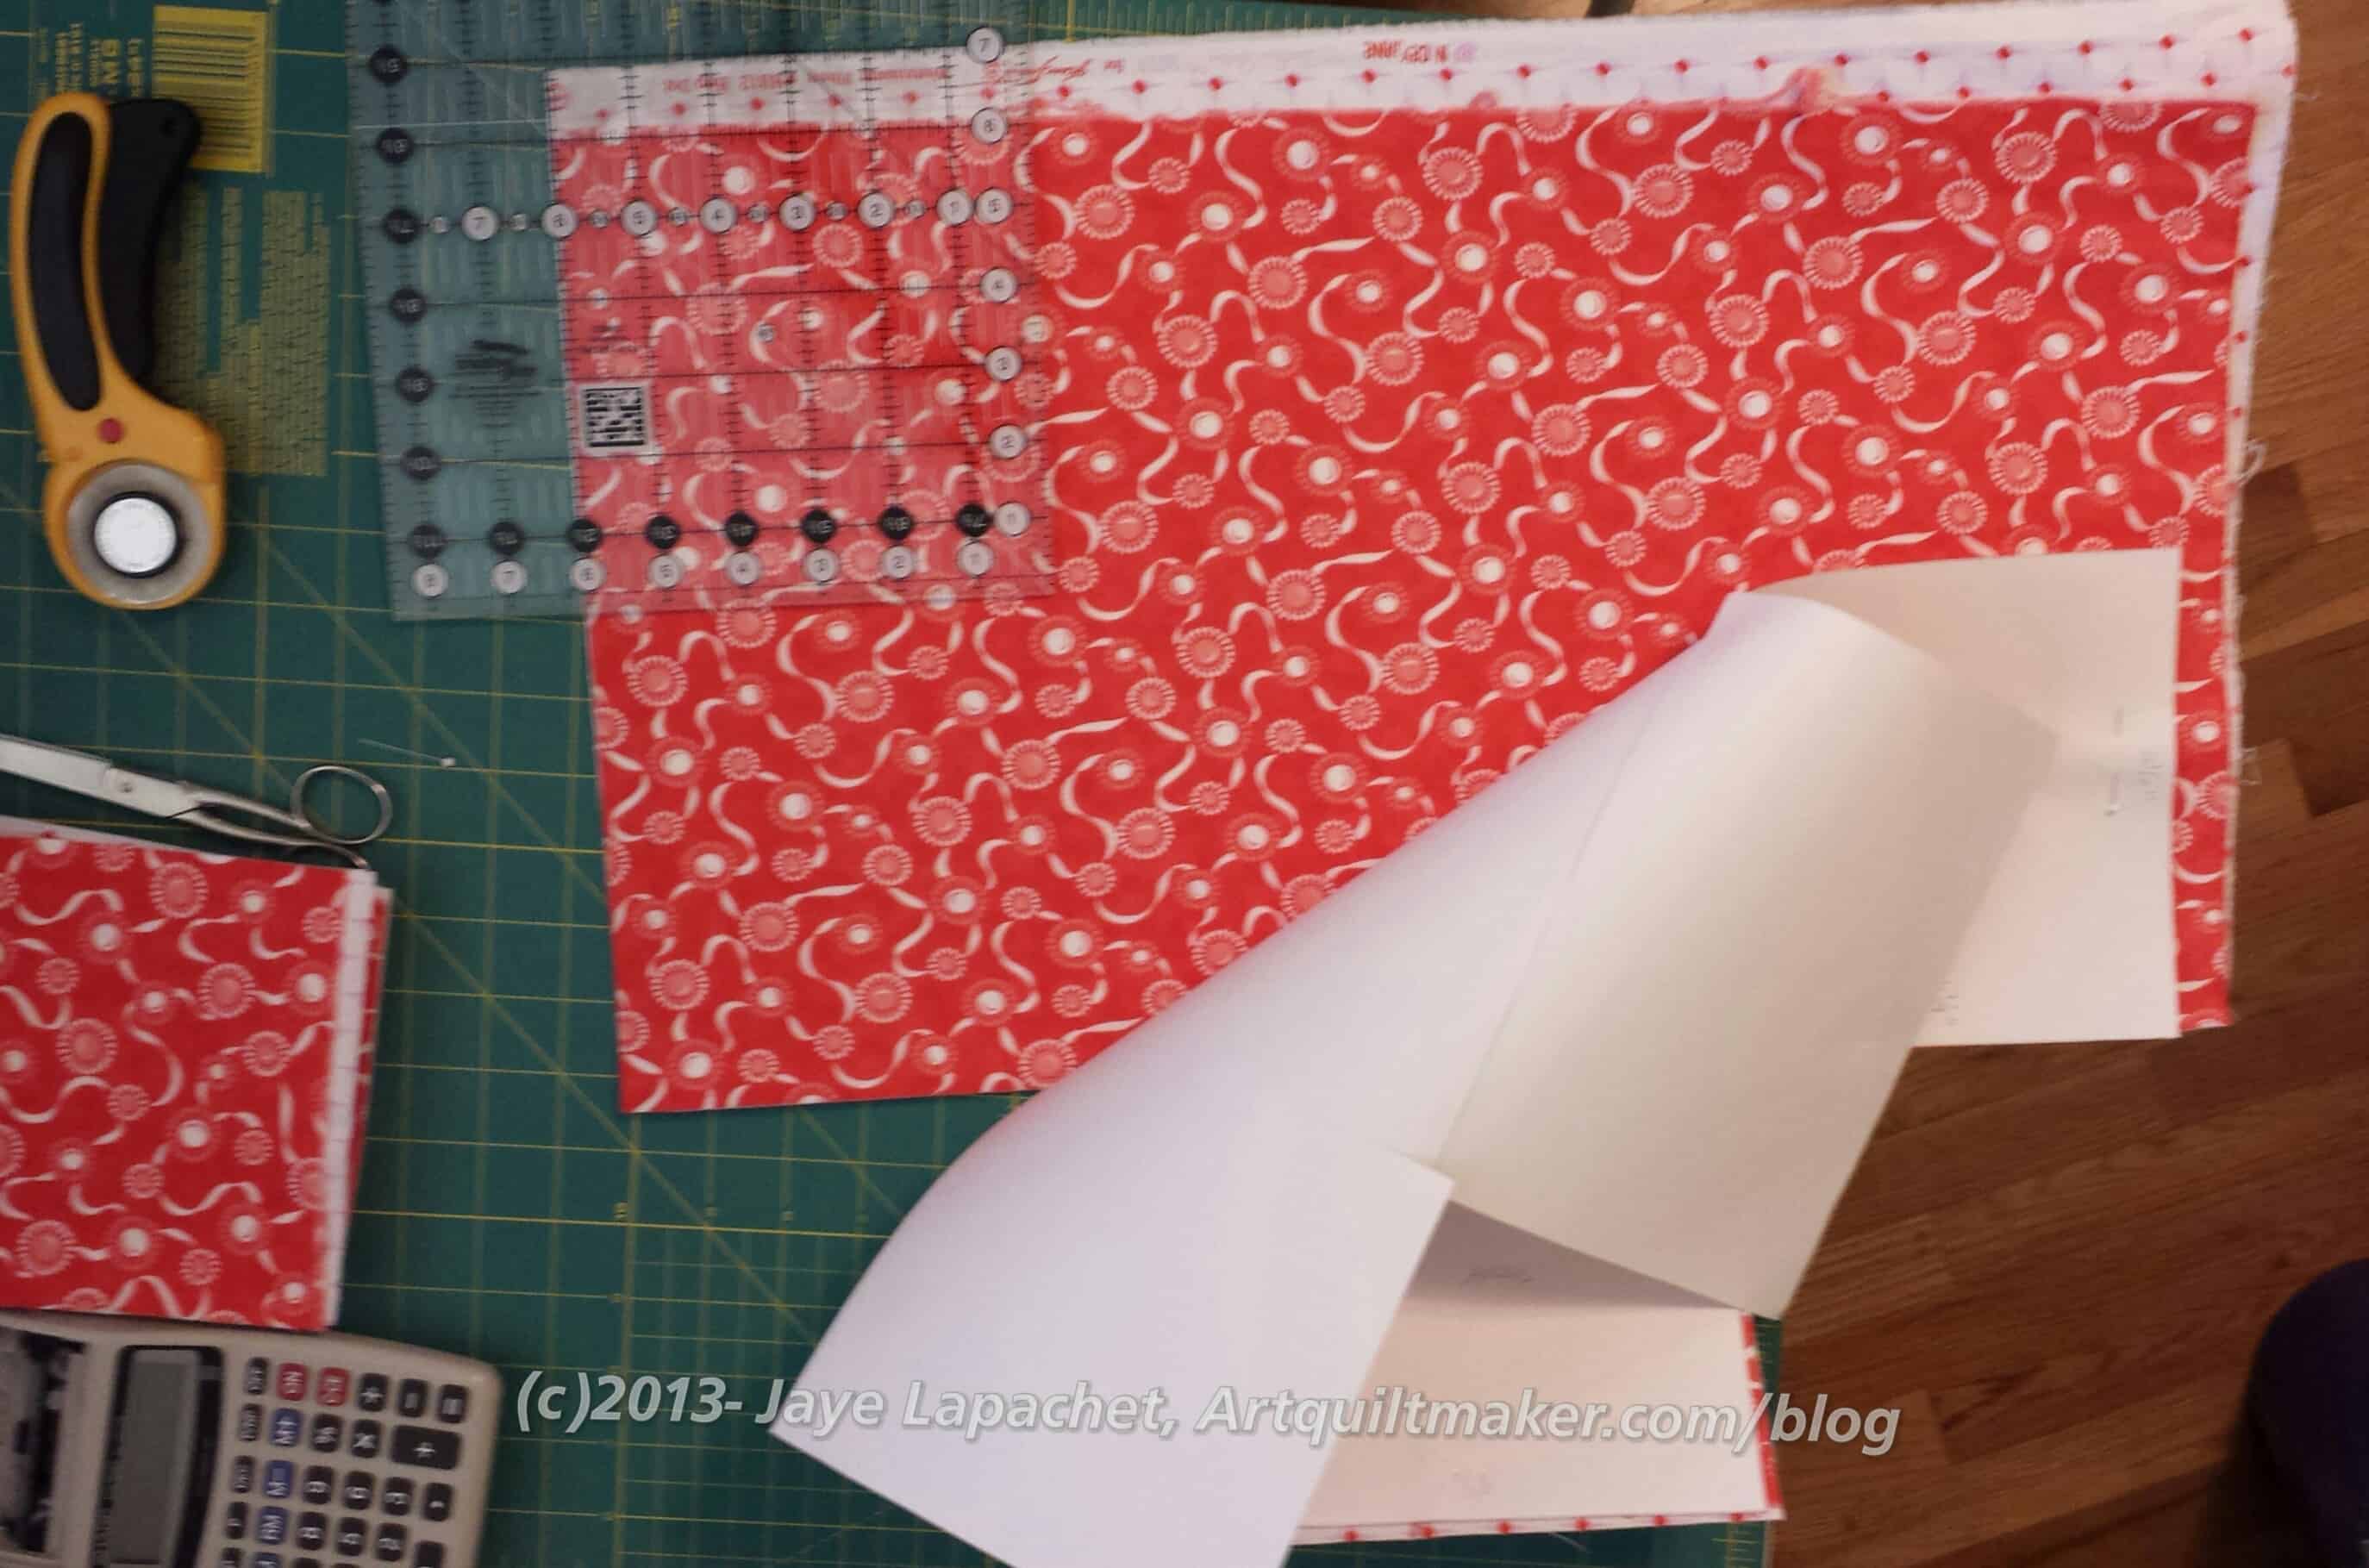
Cut the Fabric I tried to keep the pattern to a size where I could use 1/2 yard of fabric. It was difficult with the size I was trying to make. I have a lot of half yards, so I really wanted that size to work. Some of my seam allowances are a little scant, but it will work if you can work with pieces that are slightly small. This takes practice and careful sewing.
If you don’t want to worry about this, then hold the front and back pieces aside (e.g. don’t tape them to make a cross shaped pattern). Cut out the the long strip that comprises the two sides and bottom.
Now cut out the front and back separately, then sew them to the side/bottom strip to make the cross.
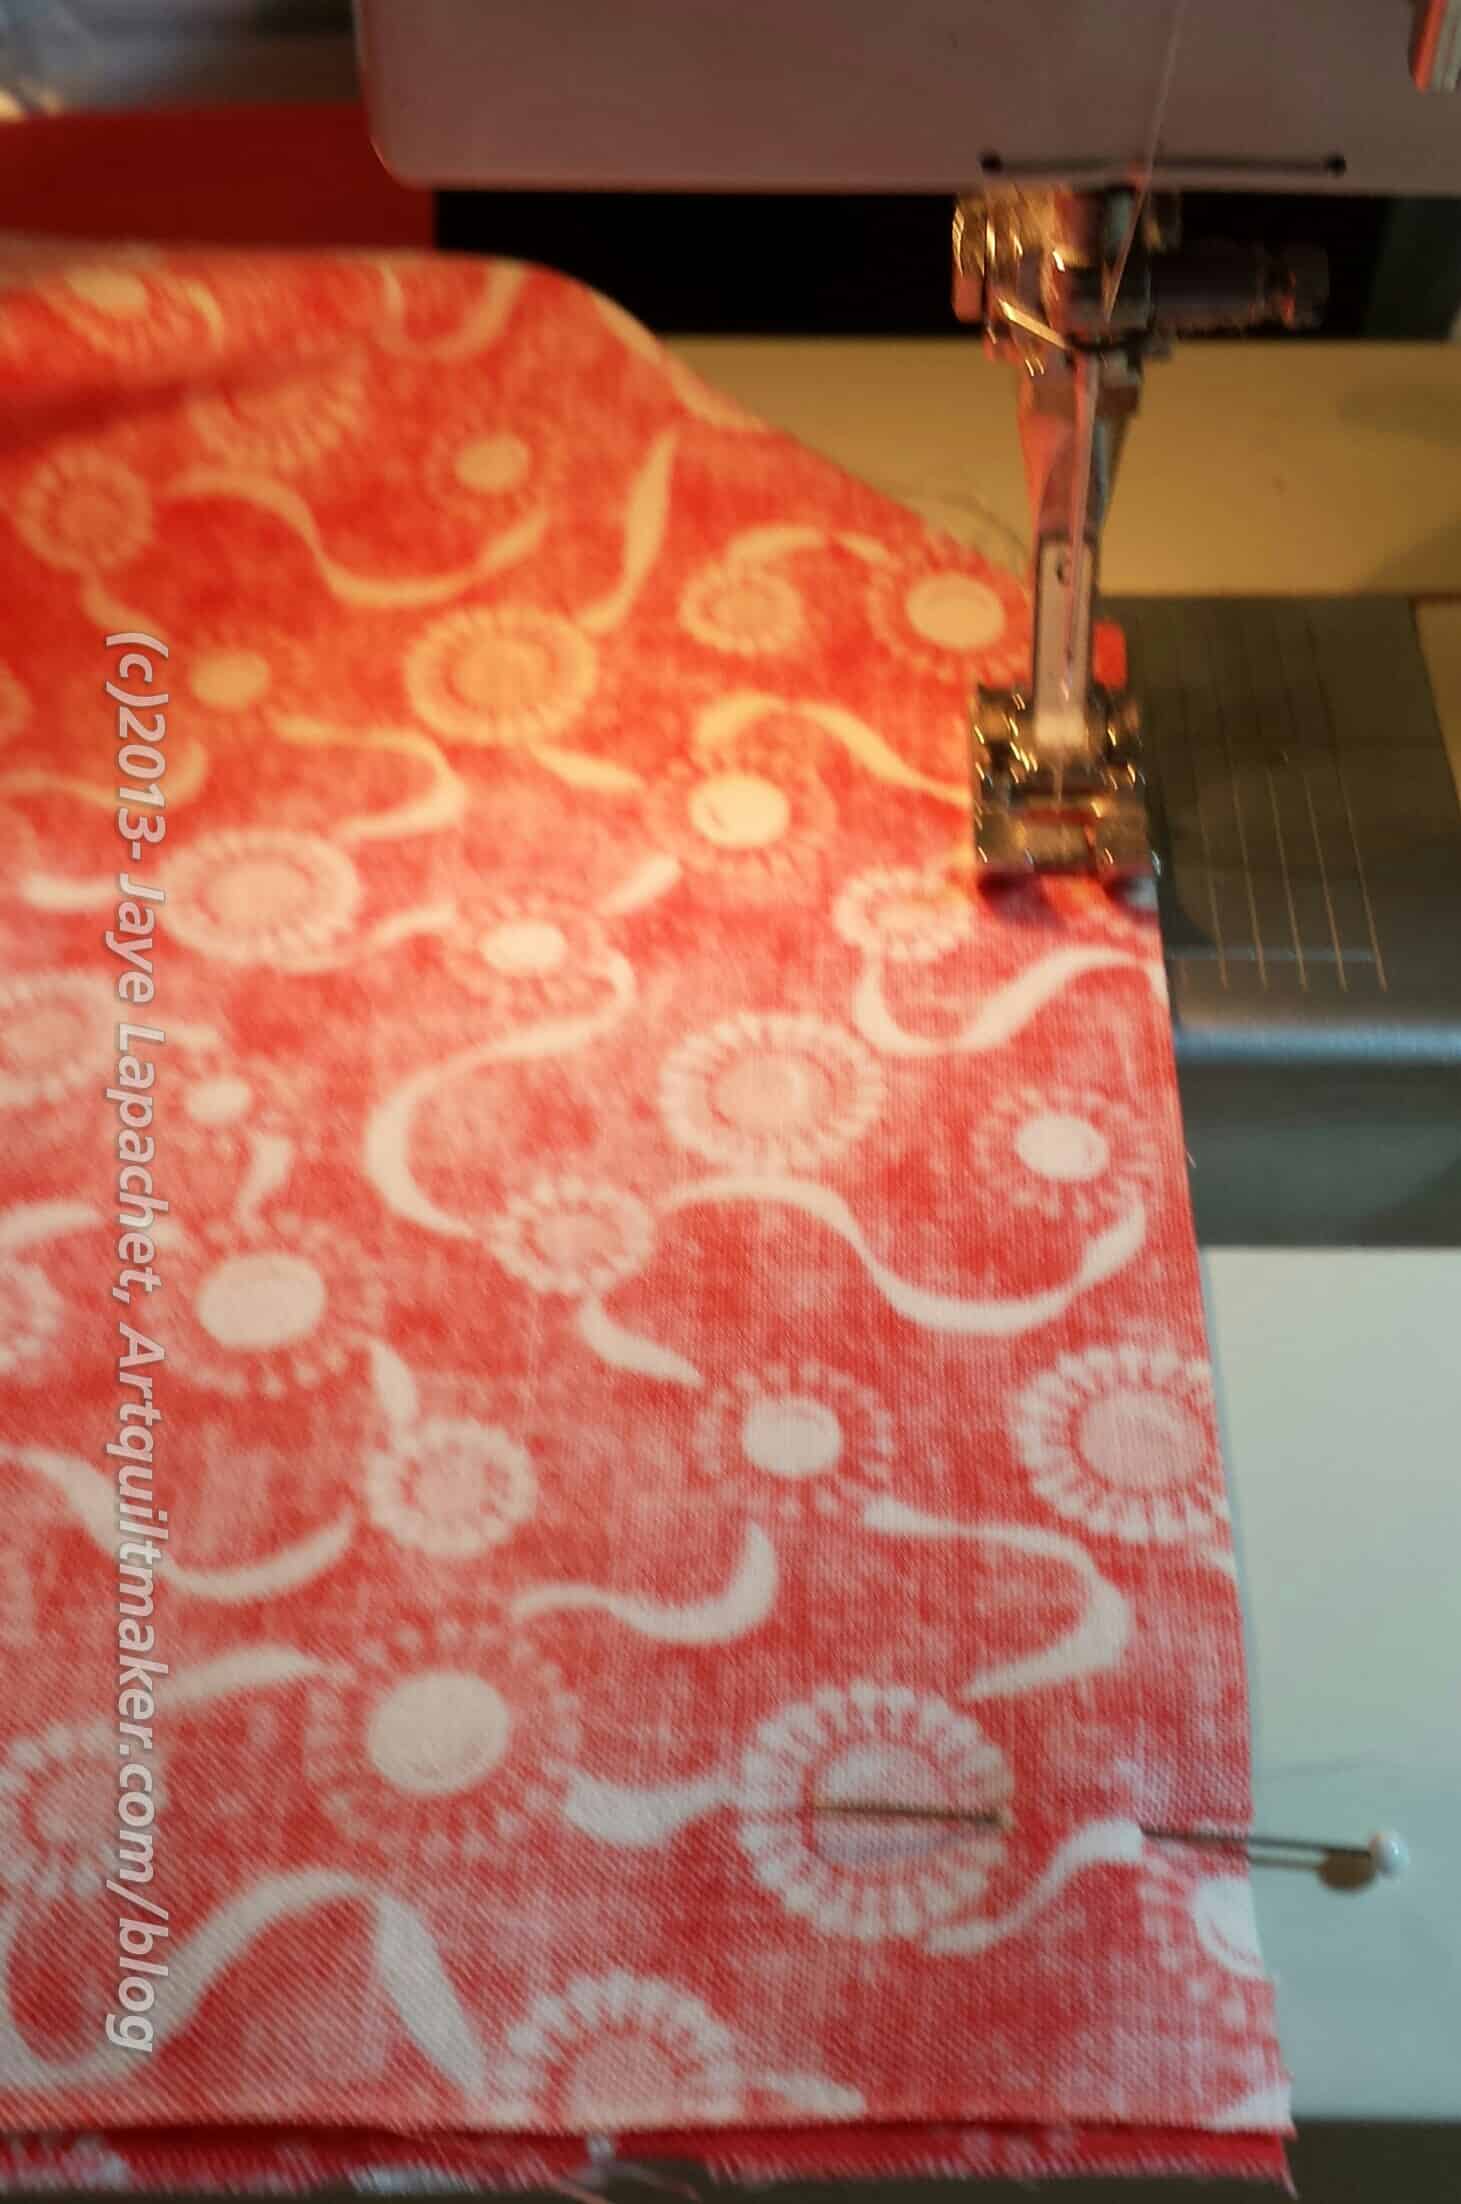
Pin the pattern to the fabric to keep it in place while you cut.
Instead of cutting around the pattern, I used a rotary cutter and ruler to cut the same size. I took out some of the pins to move the pattern aside. I kept some pins in the pattern and fabric so that I could reposition the pattern easily to make the other cuts.
Move around the whole cross, trims the corners away per the pattern until you have a cross made out of the fabric. Do the same thing using the lining fabric and the Peltex.
Sew the Body
Lay the cross of fabric in front of you right side up. Fold the top of the cross towards the right leg of the cross, lining up the right side of the top leg with the top of the right leg. The angle along the fold will be on the diagonal. Sew 1/4″ seam from the diagonal fold to the raw edge.
Do the same for all four corners (eight edges) until you have a fabric box with the top open.
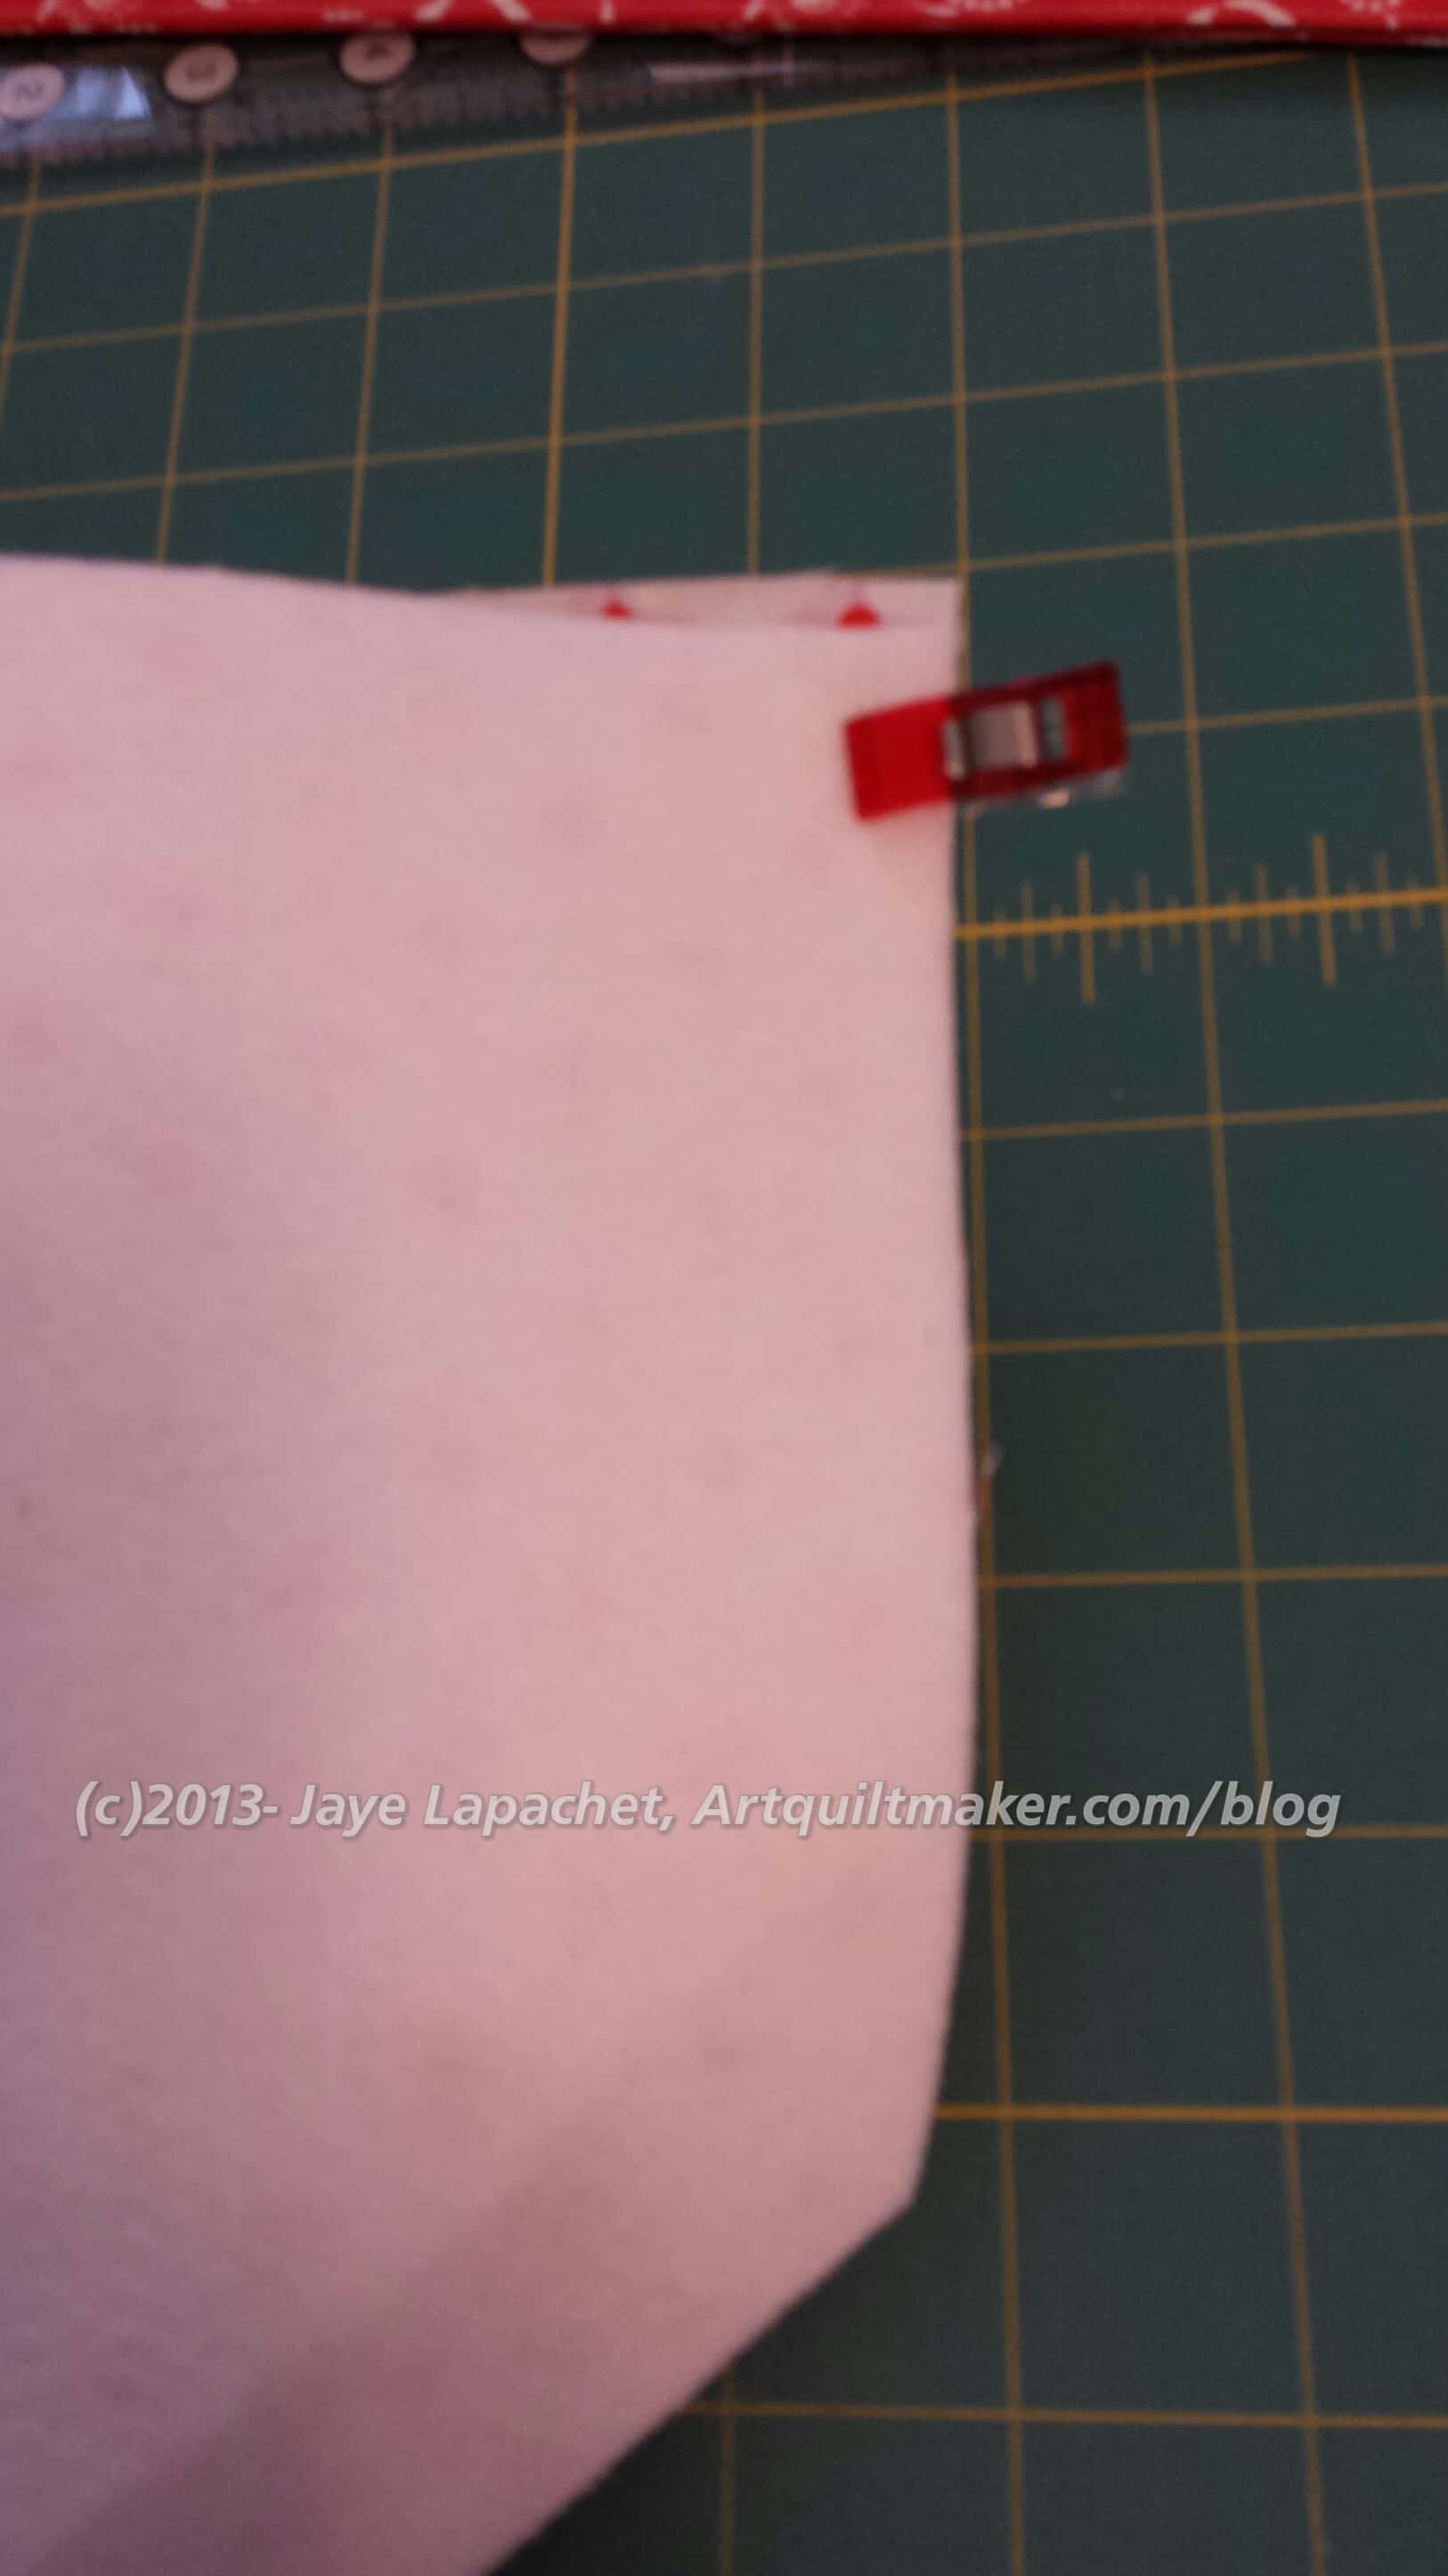
Pin the lining to the Peltex.
I used Wonderclips and they worked like a charm.
Closest to you, near the Wonderclip is the edge of the fabric. Note that the Peltex wasn’t wide enough to cut it out the width of the pattern, but I added a little sliver later and that worked fine.
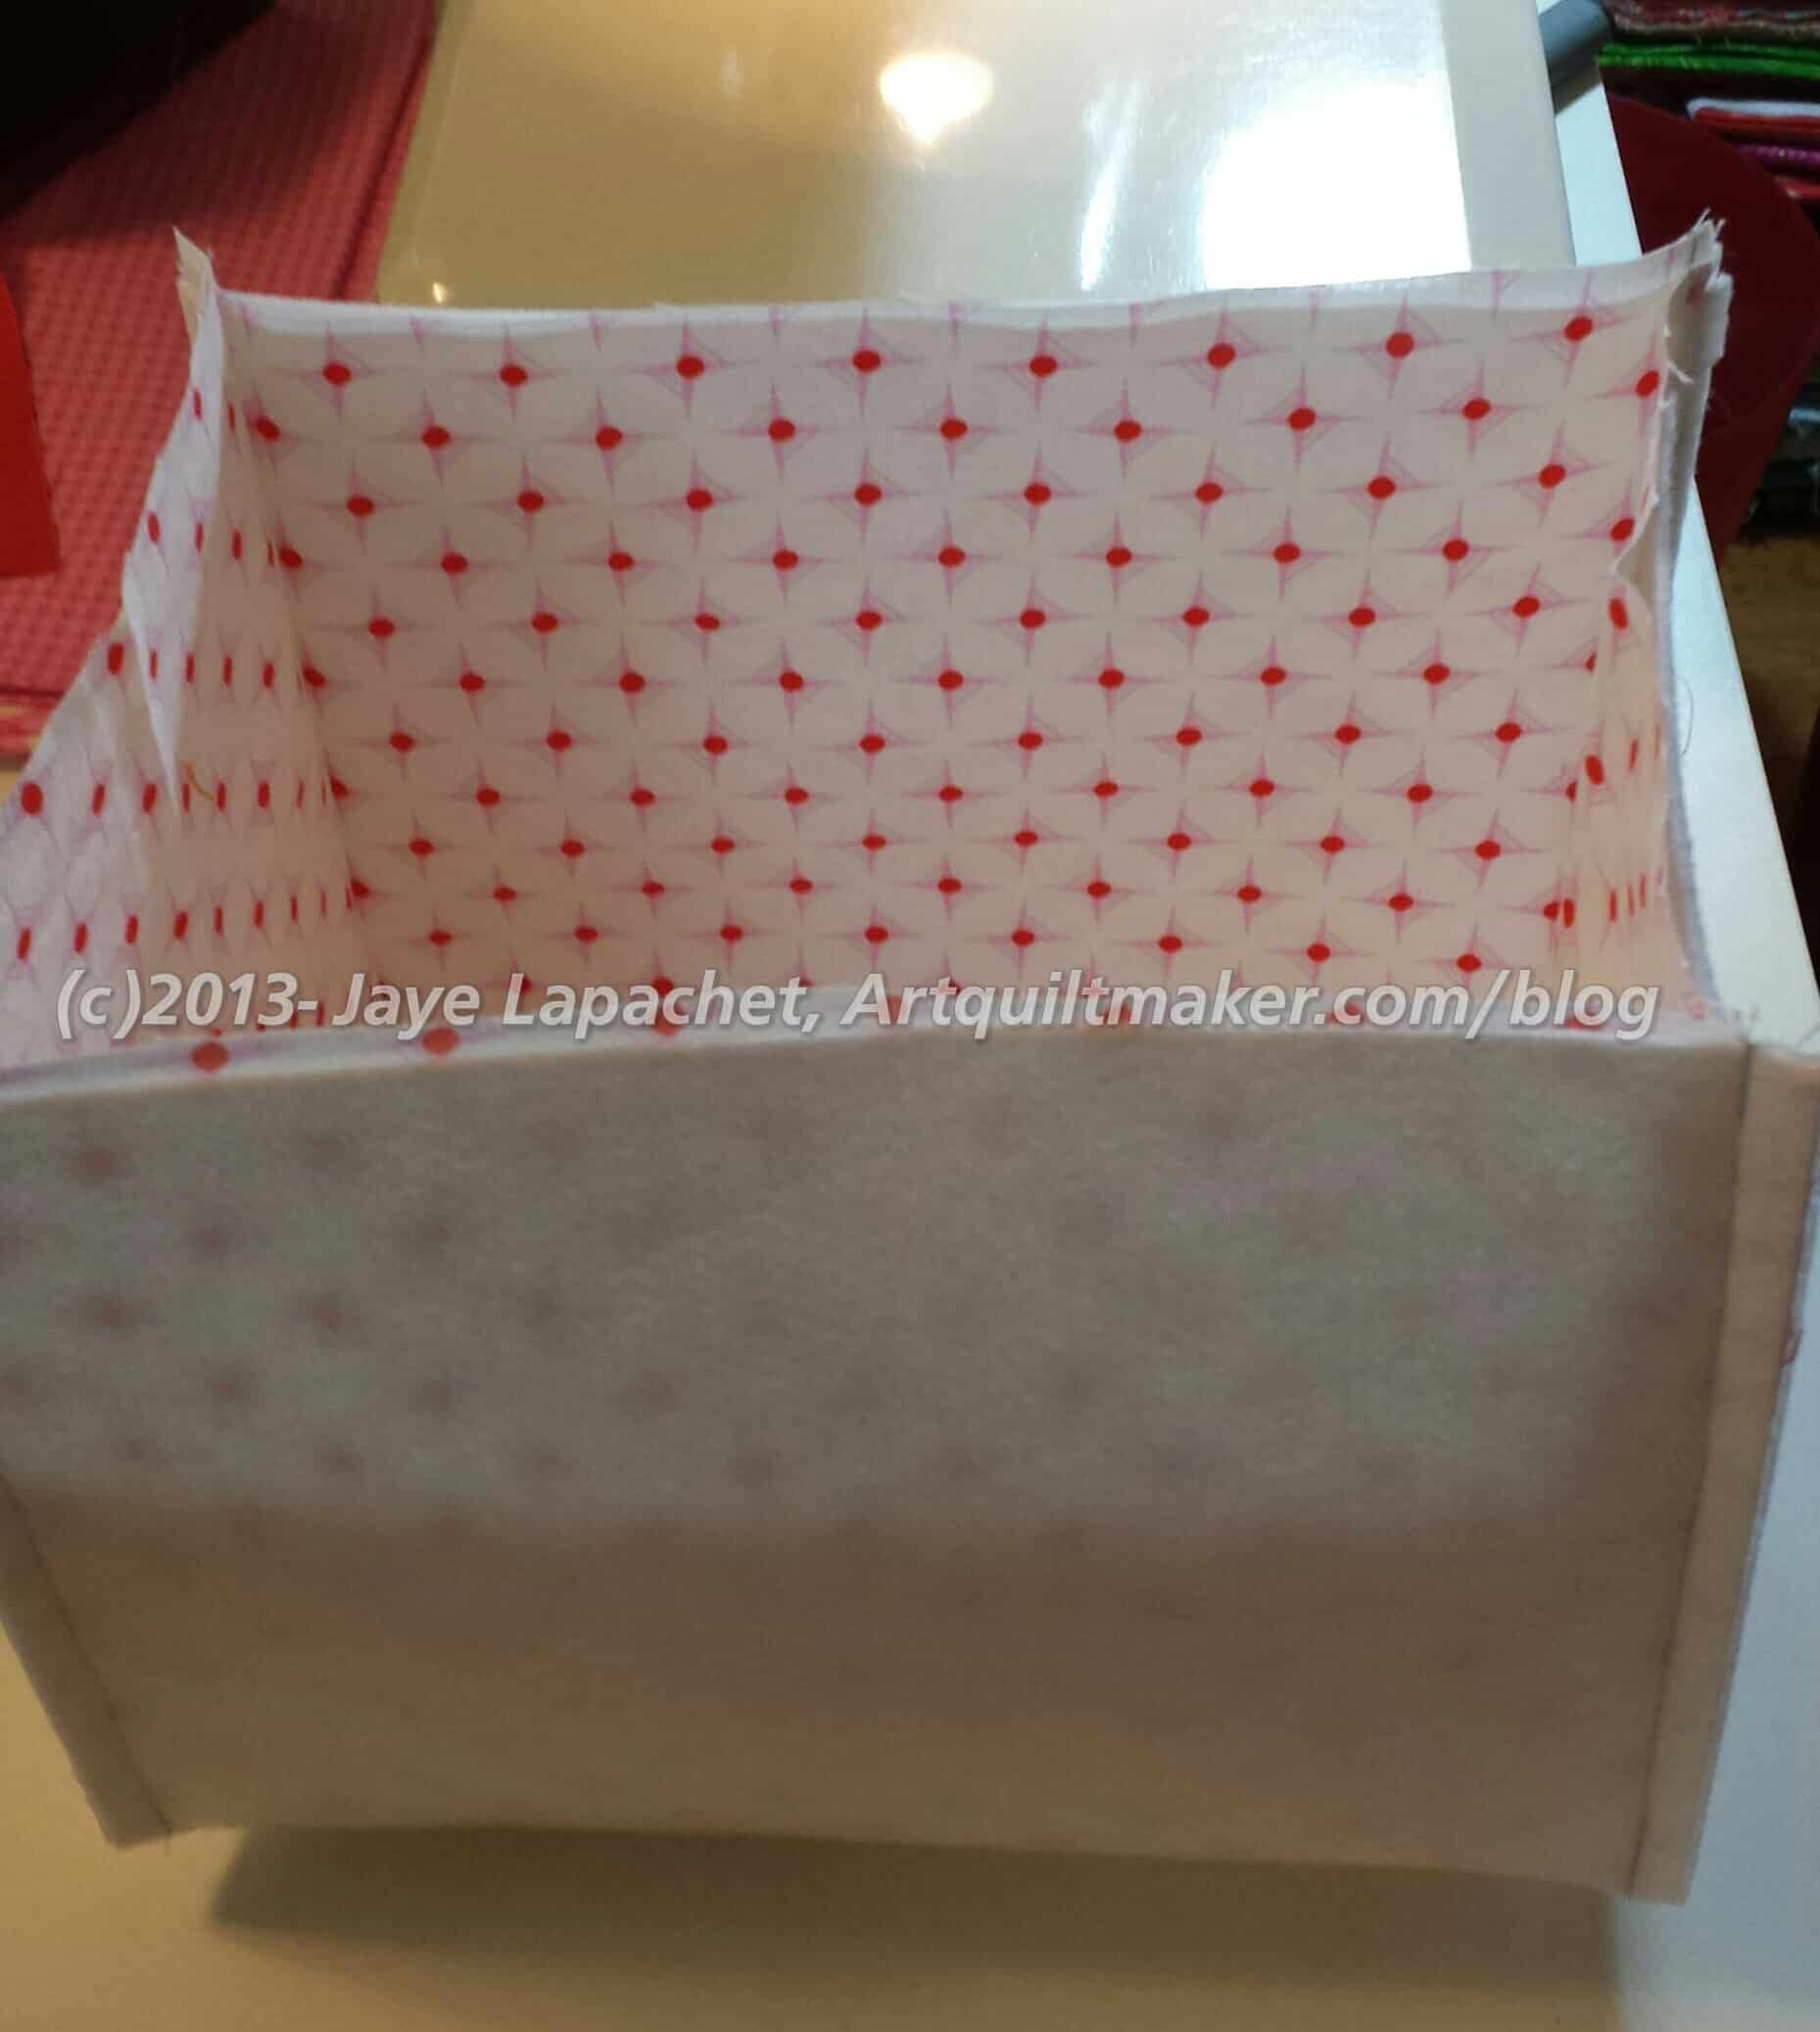
Once the lining and Peltex are sewn you will start to see the shape of the handbag.
After sewing the body together fold the front and back of the bag in halves and then quarters and finger press. Pin the end of each handle, making sure there are no twists, to the quarter finger pressed mark. One handle goes on the front and one on the back.
Put the outside of the bag into the lining with the right sides together. Tuck the handles out of the way and pin in such a way that you leave an opening at least 3″ wide to turn the bag right side out.
The thing will be hard to turn. Don’t yank too much, just poke and pull gently.
After you have turned the bag, pull out the straps and press carefully. Press especially carefully the section that isn’t sewn.
After pressing, sew a double line of stitching to secure the lining to the outside and close up the open edge or use a decorative stitch.
Cute little finished bag. TFQ kept this one and will use it for knitting projects. The Bonnie and Camille bag is more of a square bag.
The pink diamond bag is the second one I made. It is a little skinnier and longer, e.g. the side is bigger.
I sewed the inside bottom opening I used for turning and the bag is done. I haven’t used it yet, because I entered it in the Fair and don’t want to get it dirty or anything before that event. I will take it to guild this weekend and next and show it off.
It occurred to me that one good thing about this bag is that it wasn’t too easy and it wasn’t too difficult. There was the right amount of challenge in the making.
I have to say I love that Soft & Stable. I’ll have to see if they have it at Joann or Beverly’s. The way it makes the bag stand up is awesome!
Now I am thinking about the next one. My list of to dos or changes to the next version are:
put iron-on vinyl on the bottom of the bag to protect the fabric
make the sides bigger, but enable them to close so the same shape is maintained and it is easier to get stuff in and out of the bag. Tutinella suggested that it might be a good idea to add an inch or so to the flap to accommodate this change
I may change the zipper pocket to a cell phone pocket or group of pockets that can hold things like pens and cell phones.
add side pockets on the outside. Tutinella did this, so I can get tips from her
make the padded inside pocket larger to accommodate my iPad AND its case. An inch and a half would probably do it.
I don’t know why I can’t just be happy with a bag as is. I can’t, though. I can’t help myself.
This week we are finishing. You may already be done. If so YAY!!! If not, keep at it! You can do it!
Petrillo Bag Complete
Me? Yes, I am mostly finished. I have a bit of hand stitching of the inside to do then I can say I really am finished. I will put up a completed project post when I am done.
As I have mentioned, I was out of town for part of last week including the time I usually spend sewing. That meant that I had to get back in the groove of where I was with this bag. I found that I rely on regular sewing time to keep me on track. Not having that time completely put me off my game.
It turned out that more ripping was in store for me. I had forgotten to, not only, cut the inside flap piece for the main flap used on the top of the bag, but also to sew it when I put the main flap together. Sara clearly says in Step 17 what to do and I just missed it. Sigh.
I ripped out the Main Flap top stitching, put in the inside Flap piece to line the Main Flap and resewed.
Then I thought I could make some progress, but when I tried to sew the flap to the back of the bag (Step 29) I found that I had sewed the straps too close to the top of the bag (Steps 24 & 25). Sigh. More ripping ensued. I would recommend stopping an 1″-1.5″ away from the top of the back of the bag.
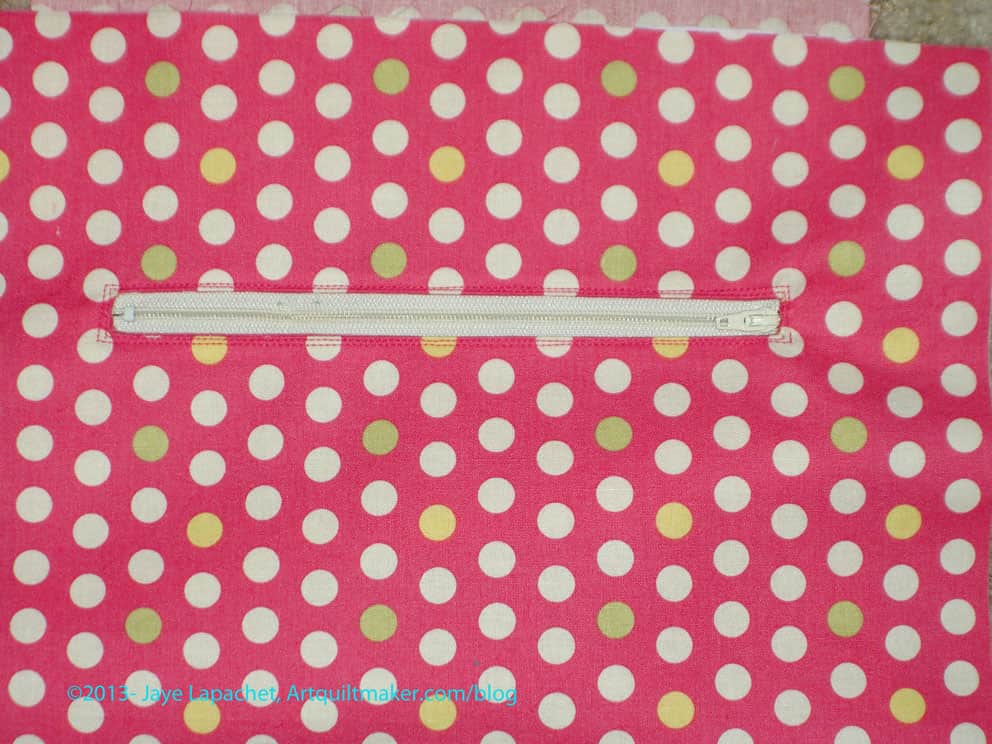
Zipper Pocket
I also started the inside of the bag. The inside of the bag starts with the zipper pocket (Step 33). I did Steps 33-36, which include cutting the opening for the zipper. As soon as I cut the zipper opening, I was sure I had the placement of the pieces wrong. I stared at the picture in Step 33 and the picture in Step 36 and they didn’t compute in my mind. I emailed Sara and she was kind enough to email me back fairly quickly to reassure me. I still was not convinced, but I soldiered on. As she promised, the zipper pocket worked out fine.
Do I seem like I am struggling with this bag? I am a bit. It is really hard for me to read directions and do what they say. I am much better when someone shows me what to. I got through it which gives me an image in my mind. I’ll be able to breeze through the next iteration of this bag. Yes, there will be a second bag. 😉
I have to say that I do like the shape of this bag. Good thing since there is so much ripping. 😉
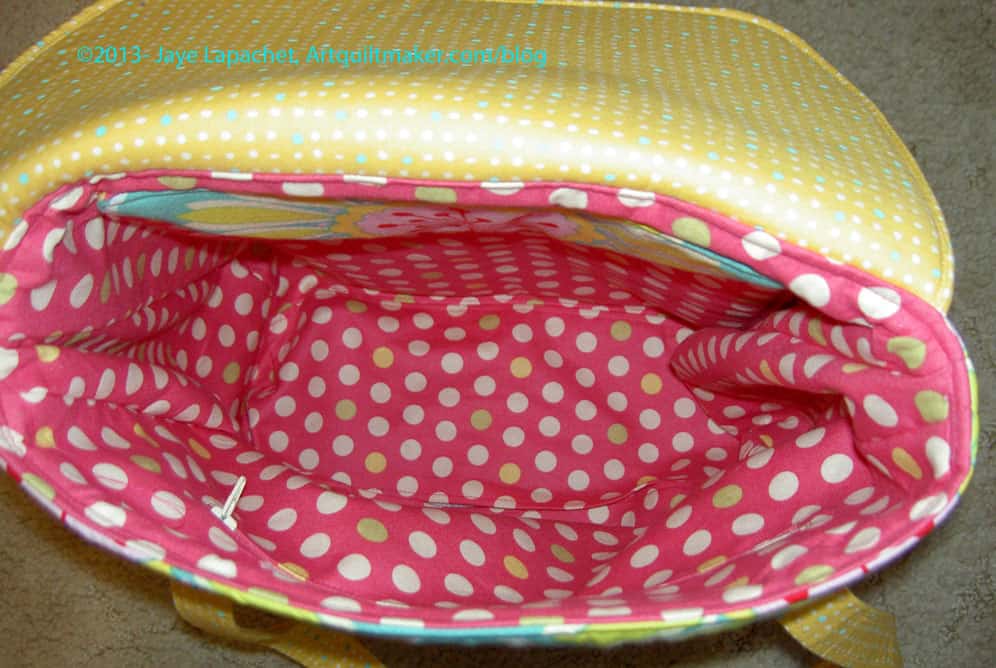
Inside Petrillo Bag
The inside of the bag, which went together very well, after I made the zipper pocket and the padded pocket, seems a little big to me.
More Hilarity
Tutinella made a second Petrillo bag and wrote about it recently. The thing she did differently was add side pockets, which is a great idea. I might add side pockets to my second bag. I may also add inside side pockets.
Another thing I like about this bag is the opportunity to use new products. I have talked a bit about the Soft & Stable, but the Shape Flex is on my mind today. I still have the skirts I planned, to make. One thing that was holding me up was lining. The pattern I have does not call for a lining, but quilt weight fabric is not very thick, most of the time, so I will need something under. I am not sure my clothing skills are up to the task of a lined skirt out of the gate. I got to thinking about the Shape Flex and may try it to give a bit of weight to the fabric and to provide a kind of lining. I will have to give up some drape, so I will need to think about it. Let me know if you have experience with using Shape Flex on clothing.
I have to say that I am amazed at how Sara could have conceived of this bag and the way it goes together. I thought the same thing about the Anna Maria Horner Multi-tasker tote, which is a great bag, if you haven’t made one.
This week we are working on the sewing. Before we can get to sewing the bag together, there is still some prep to do. Please note that this is not a tutorial on how to make this bag. I am just recording my experience and noting things I had trouble with. If you want to make the bag (and I think you should), buy the pattern and read the opening post. Keep in mind that I don’t learn well by reading directions, so I have more trouble than most when reading patterns. My trouble is no reflection on Sara’s pattern directions.
Prep
I was so relieved to finish the cutting. What a lot of work that was! Anyway, I was so relieved that I got right down to the business of putting the bag together. Since adding the magnetic snaps is one of the first steps, I immediately realized that that I had bought the wrong ones. I didn’t buy the sew-in snaps. I bought the ones with the arms you have to bend. This is absolutely NOT Sara’s fault. Yes, I did read the instructions for purchasing supplies, but I didn’t know there was such a thing as sew-in magnetic snaps and simply didn’t see those two words on supply list. UGH! A delay!
I ordered them immediately from Tantalizing Stitches’ Etsy Shop, which is the vendor Sara recommneds. I received the sew-in snaps in about 2 days. I put them in relatively quickly using a small zigzag. The sew-in snap was covered with a clear plastic square and I had to sew over the plastic, which was odd. My machine did it, but I had to yank on the piece a bit to get it started since I was sewing the plastic covered snap to the Soft & Stable (=very thick!). I went around twice just to make sure it would stay in place. The hard part was keeping the snap straight. It didn’t end up completely straight, but since the important part is the circle, I figured it didn’t matter as long as it was in the middle. These are sewed to the Soft and Stable so there is no distortion of the fabric.
I know I could have used the magnetic snaps that you bend, which I think Pam did, but I did like the sew in snaps: no cutting of the fabric.
A lot of the prep was preparing to sew the whole bag together and some of the prep involved some top stitching and sewing parts together.
Straps
I was pleased to see the way Sara creates the straps. None of that turning tiny strips inside out nonsense. She creates them using the folding method that I like. Hooray!
Sewing
Flap with Accent
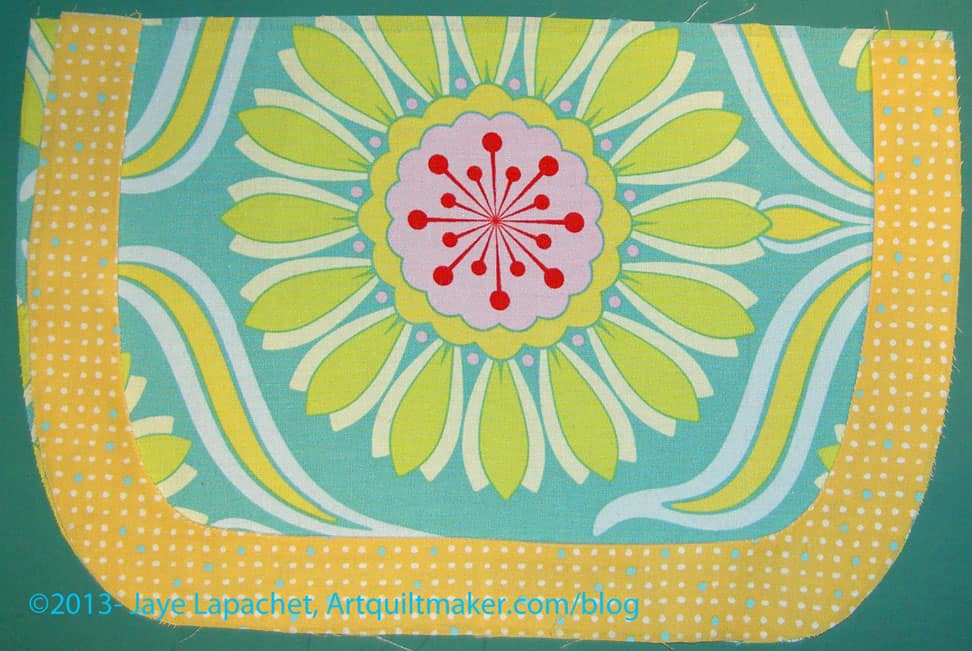
I decided not to do the gathered flap after having some trouble with the gathers. I can’t remember whether I have done gathers before. This was not unexpected as I was a little unsure of the gathers from the beginning. They do add some interest to the bag, but I kept wondering if they would catch on something as I navigate my way through the public transportation systems I frequent. Sara suggested just cutting out a flat piece of fabric using the Flap pattern piece, which is what I did. I also liked that I was able to highlight one of the motifs of the fabric
I was a little confused by the directions in Step #14, covering the flap, but I decided Sara meant topstitching and went with that. I was able to apply the accent with no problems, though, as usual, turning under a small seam allowance, like you would do for applique’ was a pain. I think you could do a regular quilt binding around this piece, if you didn’t mind a little bit of dimension.
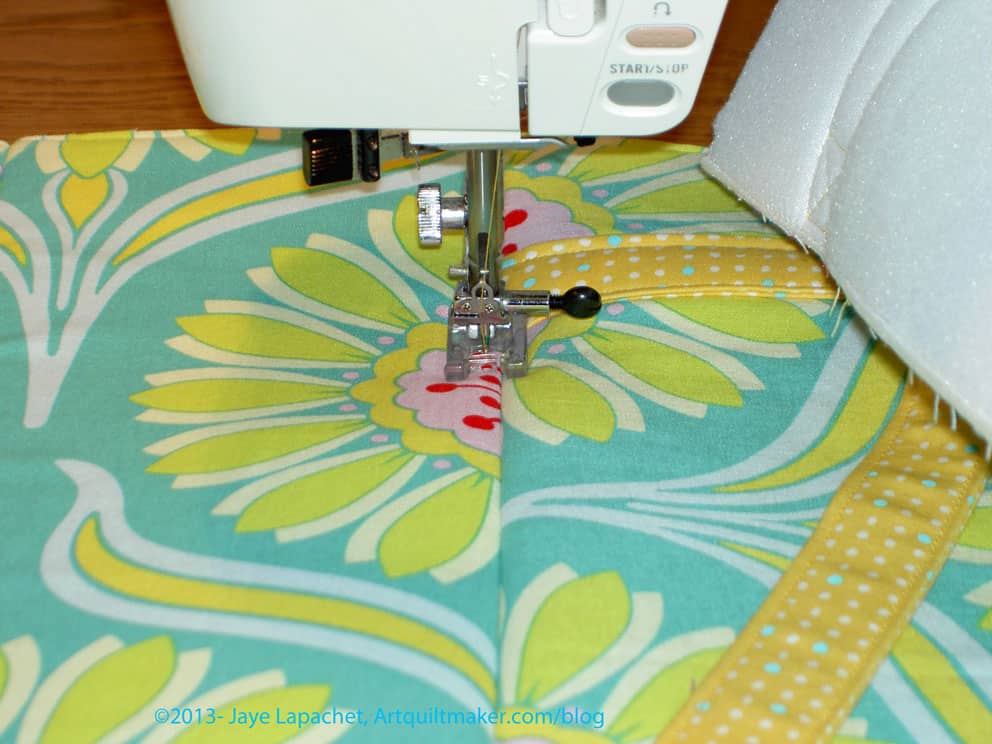
Tutinella suggests topstitching the bottom, which I thought was a great idea.
I used my clear applique’ foot and just measured using the inside of the right hand side of the foot, which gives me a line of stitching about 1/8″ away from the bottom of the bag.
One thing about all the prep is that you don’t have to stop to do prep. Once the prep is done, the bag starts to go together very quickly.
Petrillo Bag
I was really surprised at how well the Soft & Stable acted with my machine. I thought I would have to fight with the machine, because of the layers (fabric + Soft & Stable, occasionally 4 additional layers with the straps).
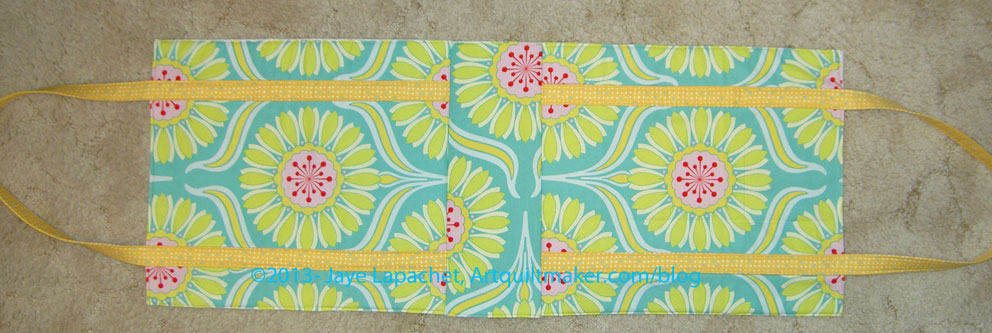
The first round of stitching was really satisfying because of the quick way the bag started to look like something. Yes, the above photo shows it being flat, but it still starts to look like a bag.
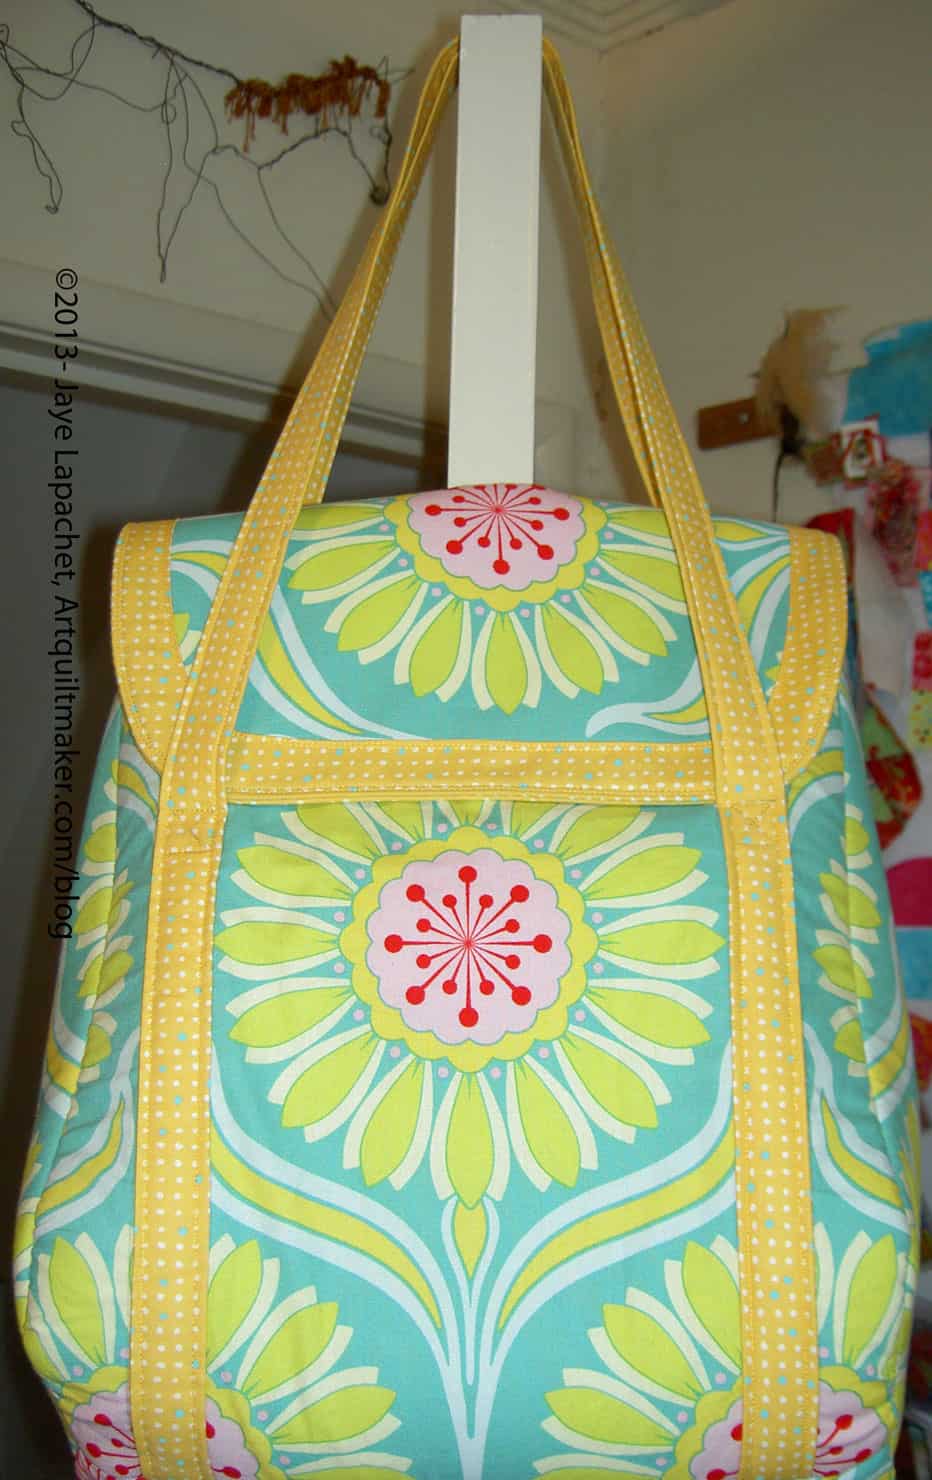
Finished Outside of bag
The directions say to draw a line 4 3/4″ from the top of the front of the bag. The purpose is to show you where to stop sewing the straps. You need to stop sewing, because the flap flap slides underneath the straps to keep it closed.
I missed that part of the directions and sewed the straps to the bag all the way around. when I realized what I had done, I knew I had to rip. Bleah. It is very hard to rip through all of those layers. I also had made the little squares with Xes through them at the top of the bag which made the ripping even more arduous.
I did it, though, and after an hour and a half I had the bag back to where I should have been.
If you read between the lines of my last post, I was a little ahead of those of you, because I had already gathered my supplies back in March and had started to cut. I did want to be a little ahead of you, so I could give you some tips and tricks if I found any.
Nota bene: Kay at Tantalizing Stitches sent the sew-in magnetic snaps out the day after I ordered them.
Fabric
The fun part was choosing fabric. You can see the colorways below, but the particulars about what I chose are:
For the exterior: Heather Bailey’s Pop Daisy from the Pop Garden line (Westminster Fibers #HB02). It is a few years old and had been slated for a back, but called to me when I looked in the Fabric Closet – green, yellow, red print
For the lining: Savon Bouquet by Verna Mosquera for FreeSpirit – pink polka dots
Straps and accents: City Weekend by Oliver & S for Moda (Pattern #11165, I think. It might be L1165)- yellow
I am not sure what possessed me to choose these colors and this combination of the three. It was grey and foggy at my house the day I chose the fabrics, so, perhaps, I was seeking cheerfulness. I also wanted to use some dots for something. I do like a light interior for bags. It is hard to see what is inside if the chosen fabric is too dark.
Organization
Petrillo cut pieces
Week 2 is all about cutting, so I did the cutting. It took me awhile to get the cutting done. I would say it took me about 3-4 hours. I was doing laundry, ate lunch and went to pick up the Young Man in between, so it is hard to say. It did take me a long time as I was trying to be really careful and not miscut. Don’t plan on doing it in a few minutes.
Additional supplies
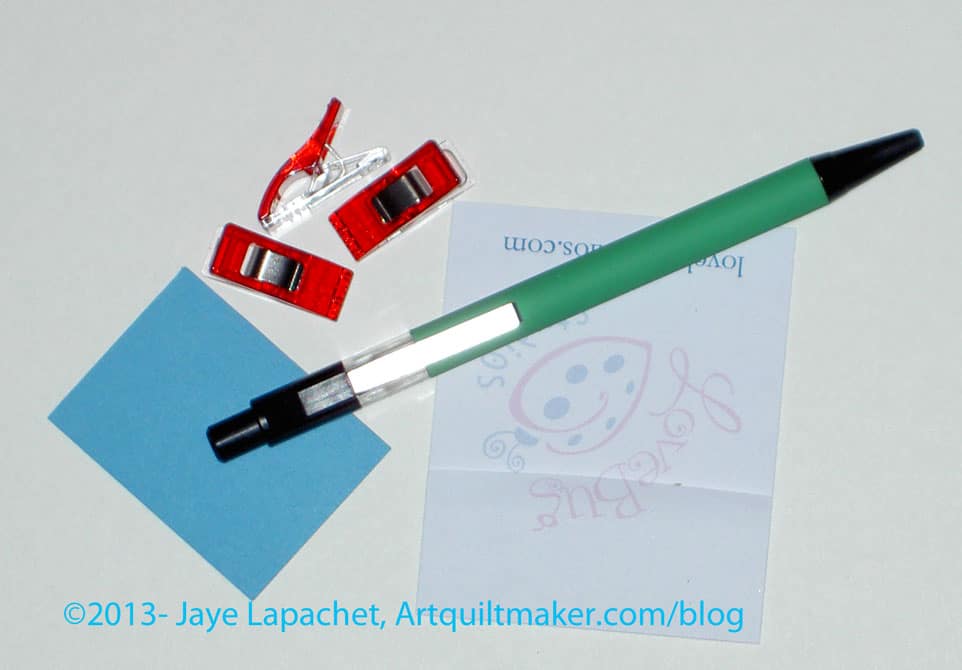
There are a lot of pieces to cut for this bag, so take the time to be organized. I would add the following to the supply list:
sticky notes, though paper will do as well
Wonderclips
pen
I like to pin a piece of paper or sticky note to each cut pattern piece with the corresponding name from the pattern, e.g. Lining Flap, and the size. Even if it doesn’t help me truly be more organized, I feel more organized.
I also felt like I needed a spreadsheet to track everything that I needed to cut. I think it would look like a main column of what parts needed to be cut and a main row of the materials out of which the parts needed to be cut. I might also put dual columns for each put a tick mark in one noting I needed to cut a part from that materials and the second column for when I had done it. I could have just ticked off the lines on the pattern. I didn’t because I didn’t want to confuse myself for the future use of this pattern.
Cutting
Sara wants you to cut the fabrics in the order listed on the pattern. In some places, she has you cut a smaller piece before a larger piece. I like to cut all the larger pieces first, so I rearranged a few, but really tried to stick to her pattern directions. I would like to see a layout sketch for the pattern pieces on fabric in the directions.
There is enough fabric to cut all the pattern pieces. Sara did a great job estimating yardage.
I did cut one piece wrong early on and had to piece together enough of the lining fabric later for one of the bottom pieces. As I haven’t made this pattern before, I am hoping it will be ok. I am going to rummage through the fabric closet and see if I have another piece of the pink fabric (shown above) and cut a whole piece out of it. You could add an additional quarter of a yard, if you are worried about screwing up the cutting.
I just used my rotary cutter to cut the Soft & Stable where possible. I did notice, during cutting of the Soft & Stable, the sounds of paper being cut. I couldn’t feel any paper on it, especially something like paper covering a fusible. I am not sure what it is made of or if it was a good idea to use a rotary cutter, but I did want to speed the process along as much as I could.
This Petrillo bag by Tutinella is one of my favorites. I love the use of the map fabric, especially how she carefully placed the legend. I think Tutinella (great name, don’t you think? It is fun to say!) is a girl after my own heart. She writes “I’m a typical girl – no matter how many bags I have, I want more!” in her post about this bag. I also love how she calls her husband/significant other Mr. Right. I wish I had thought of that first! This is one of the great bags you can see in the Sew Sweetness Flickr Group, so go and take a look.