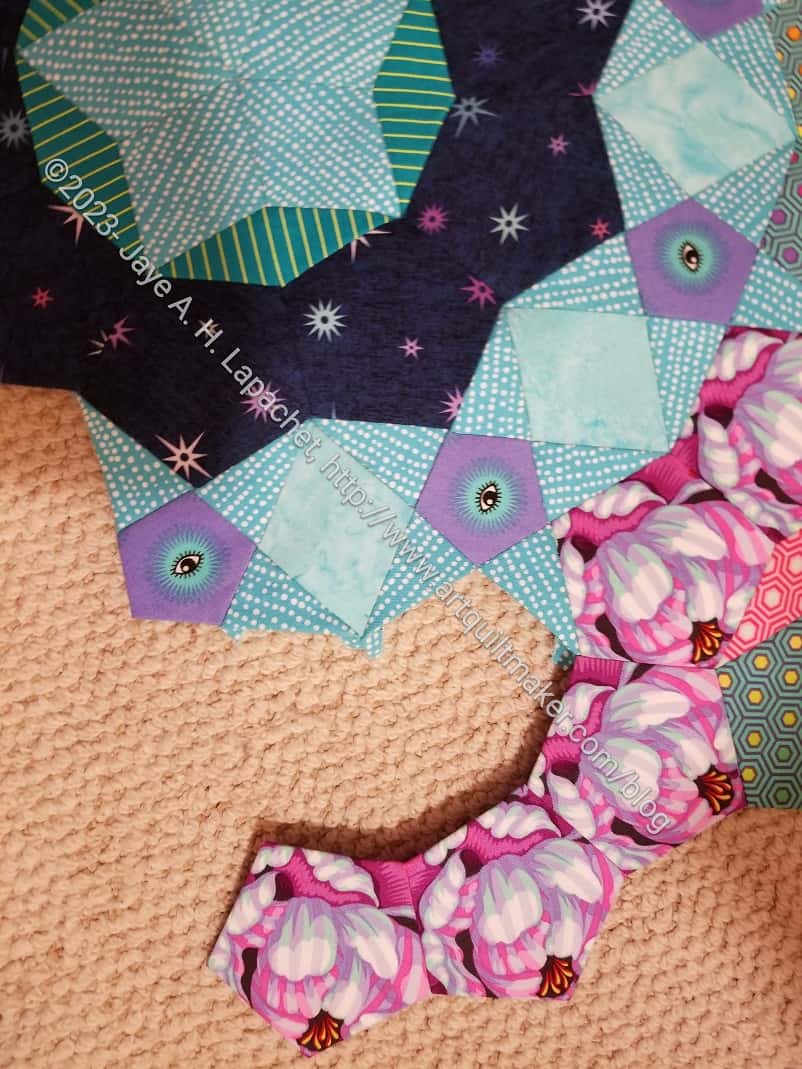
Lindsay was kind enough to give me a scrap of fabric so I could finish Month 18 without having to buy more fabric.
I inserted that skinny diamond and the two pentagons into the empty space you saw in the post last week. That is one thing I love about EPP! You don’t always have to put the pieces together in order.
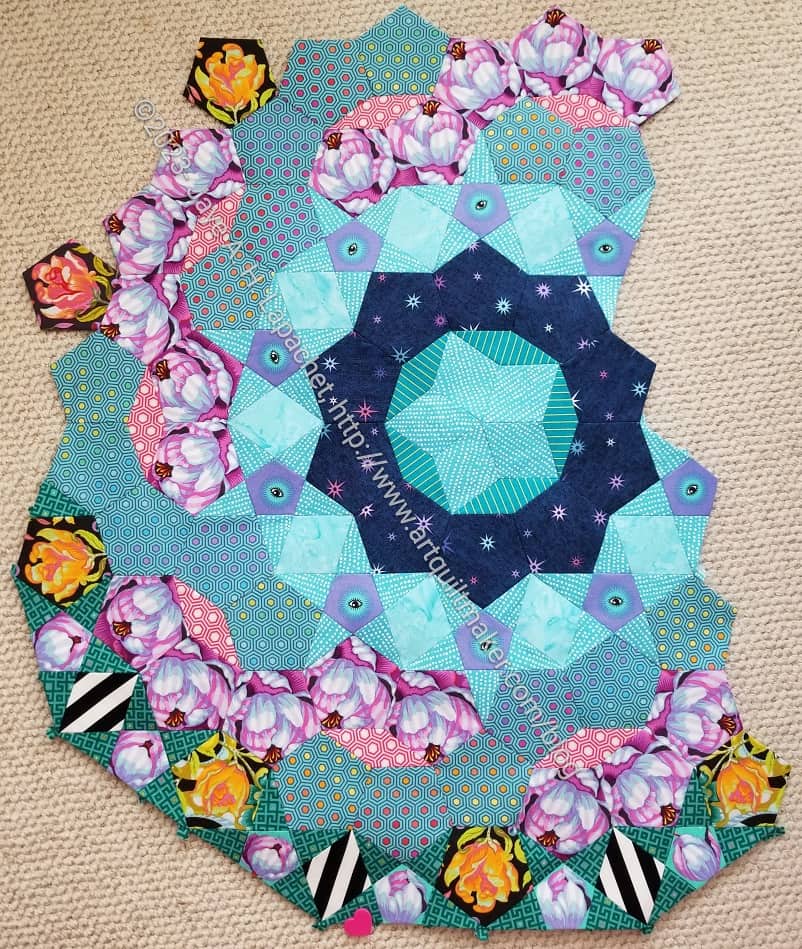
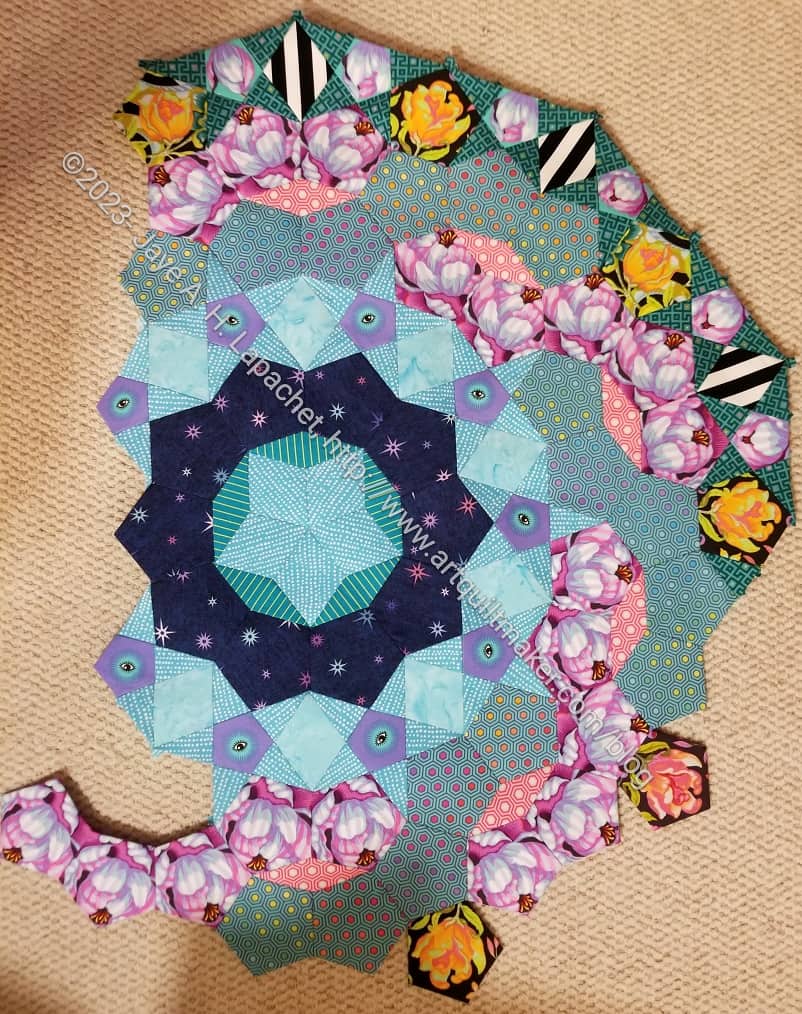
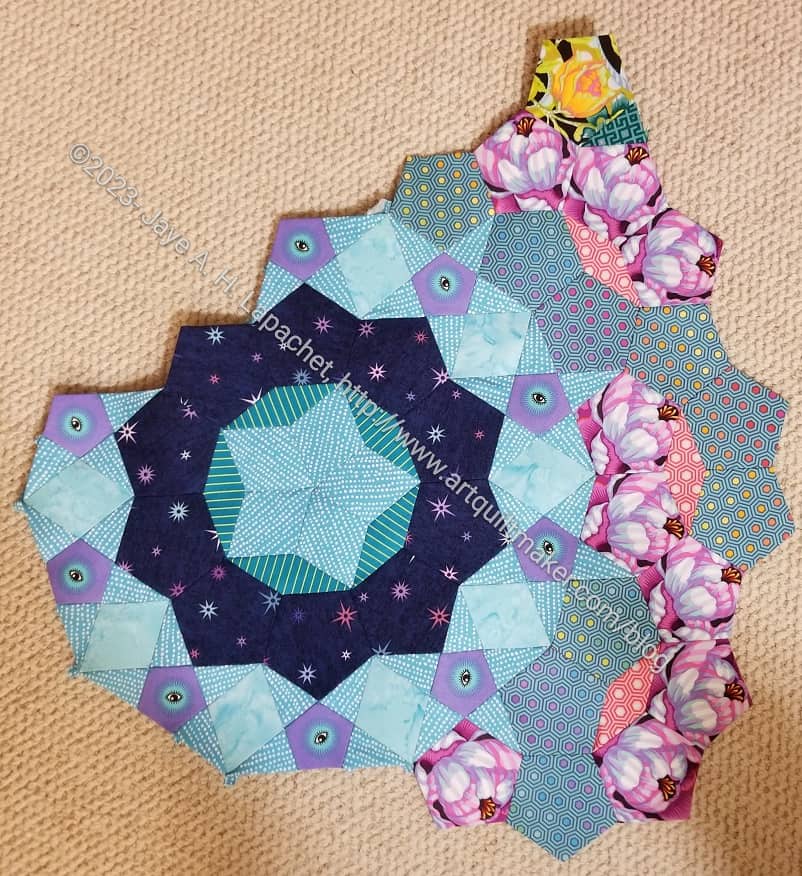
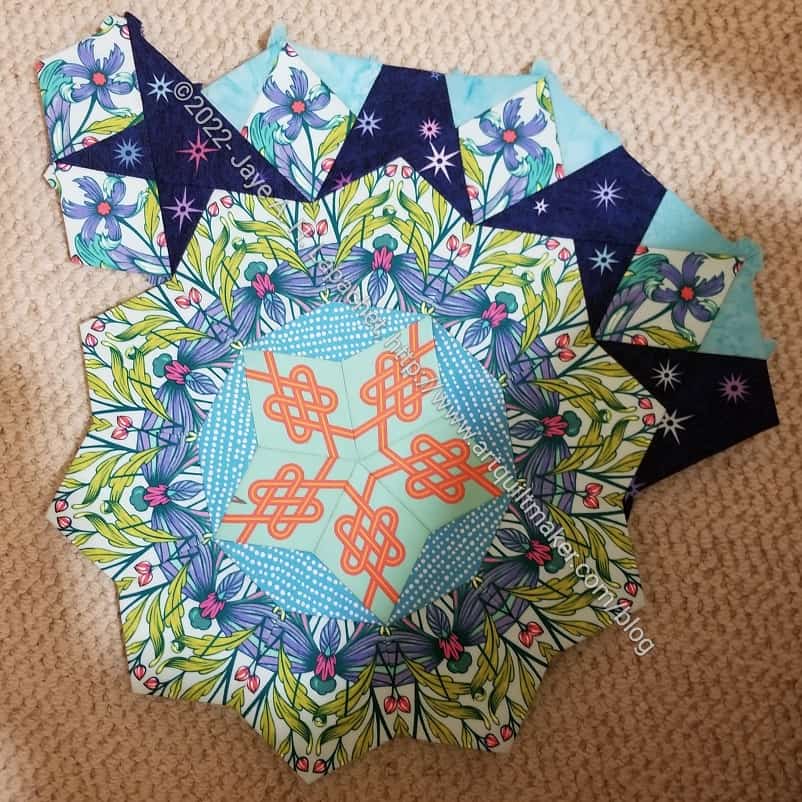
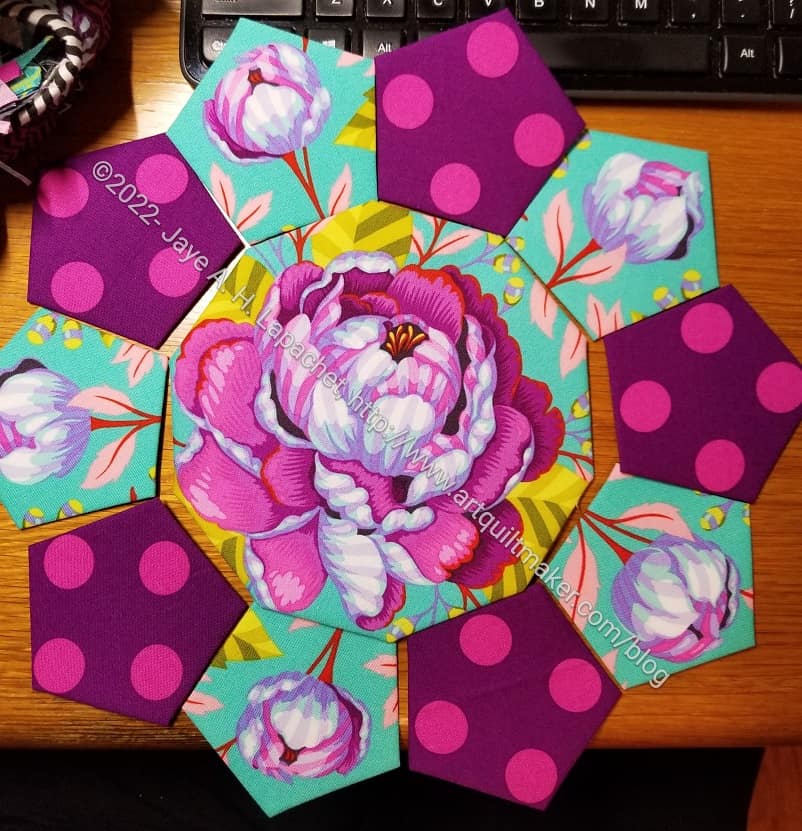
La Passacaglia Month 18 – finished
The finished rosette is a partial rosette.I have enough fabrics to finish the blue and peony ring. I think the woven design would look good finished.
I am still mulling over the edging of this quilt. One of the options is to finish all the rosettes so the edge is more round. I really don’t want to cut off the edges of the piecing I have done, but may end up doing that.
All the quilts I received back from Colleen have slowed me down on La Pass. I am continuing to work on Month 18 and am almost finished with it.
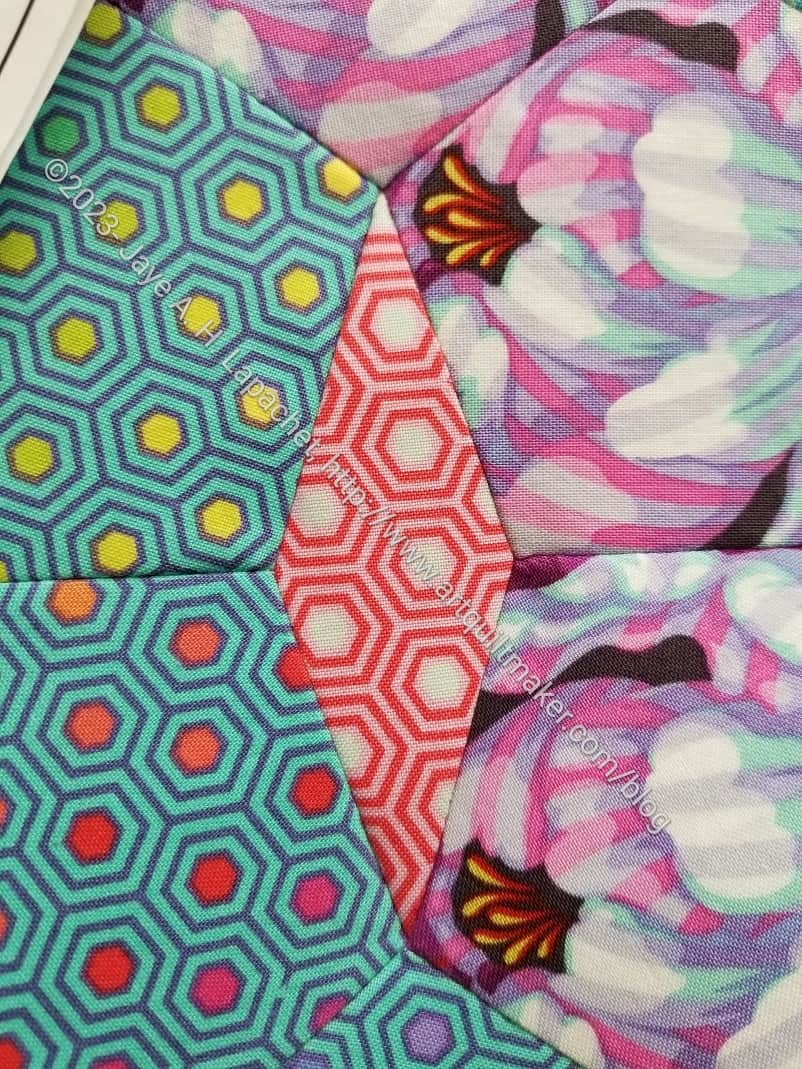
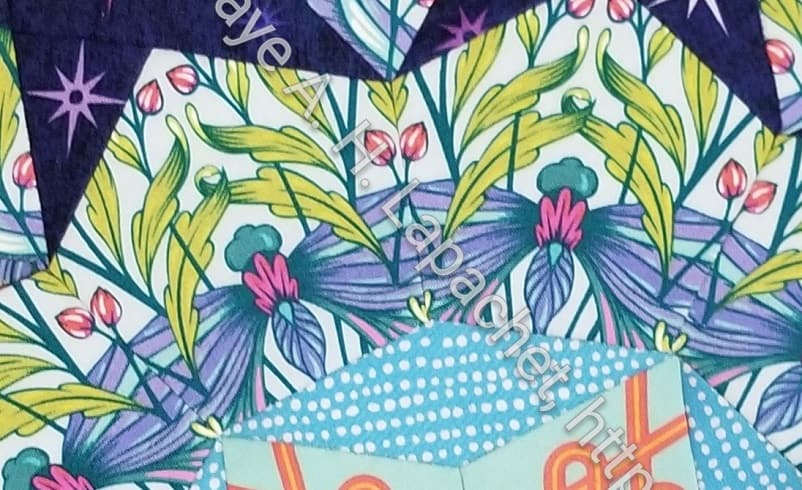
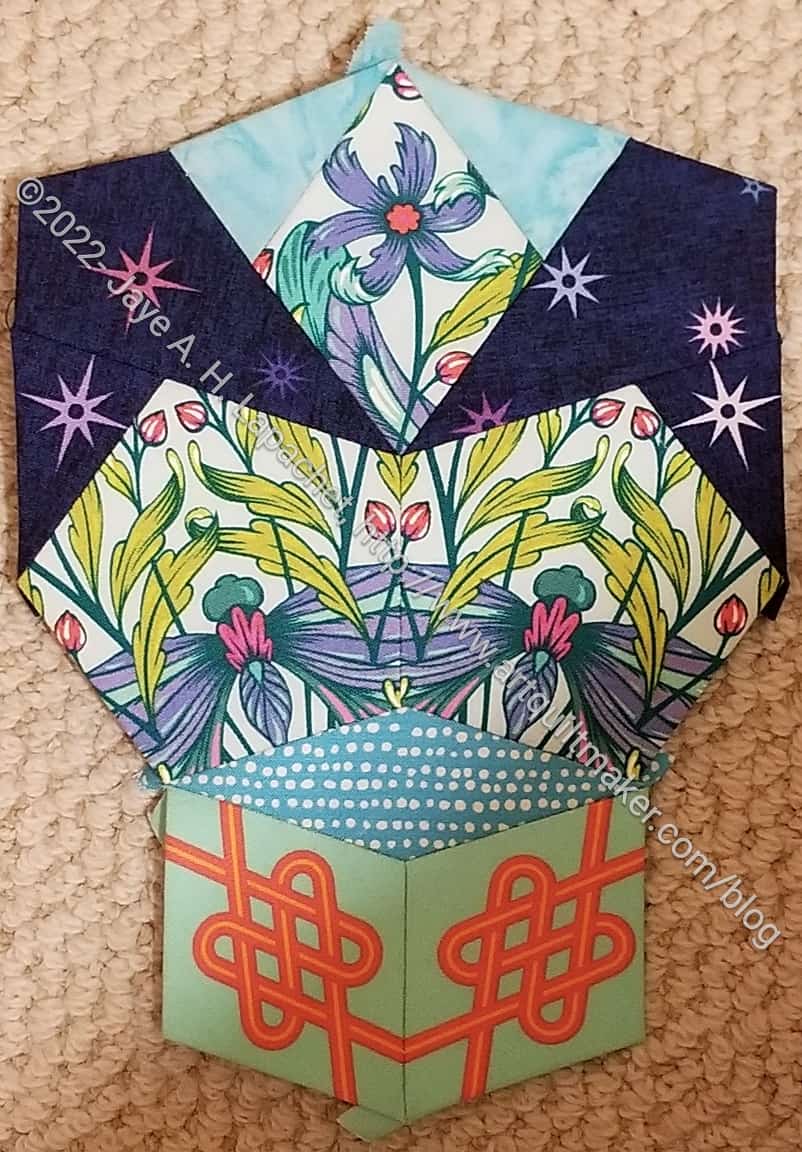
I really wanted to do the weaving motif (?) and I forgot I wanted to do that until I had finished cutting all the fabric. Month 18 was my last chance, so I went for broke. I wish Pink Door had done different layouts like the spikes (in M16).
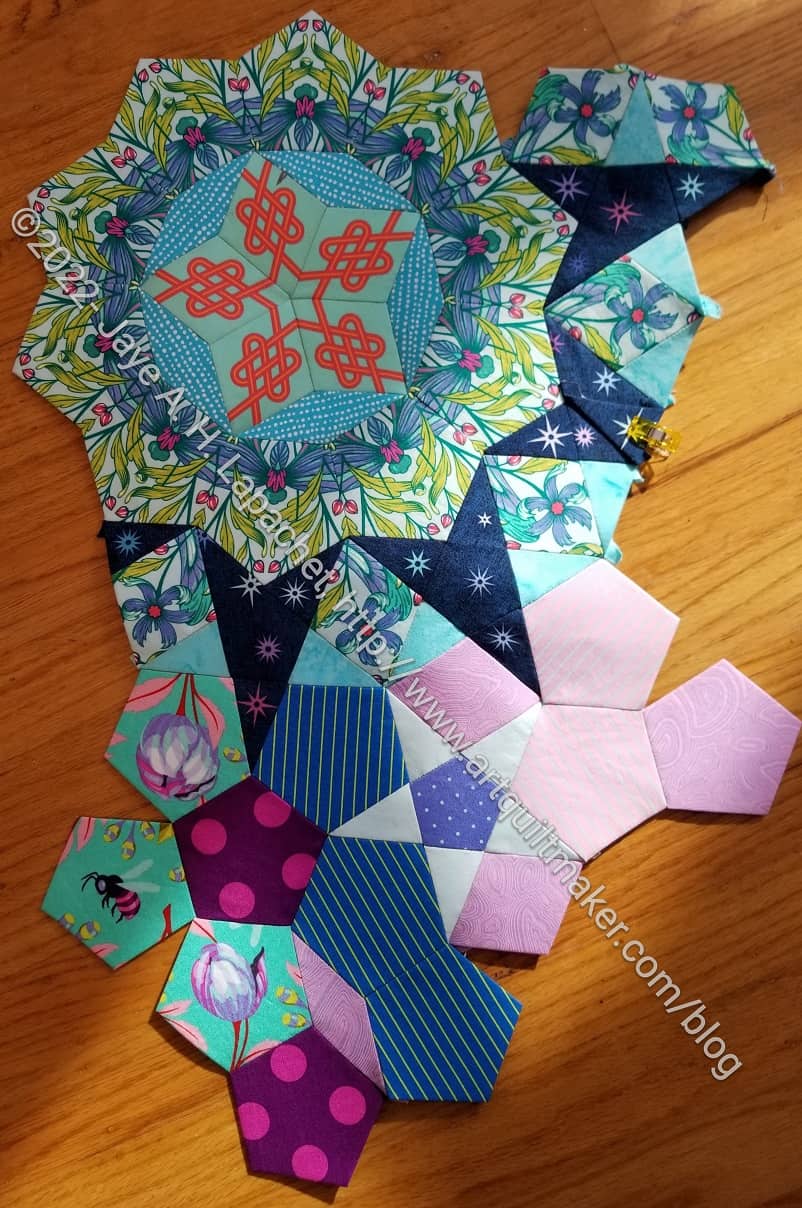
La Pass M18 in process
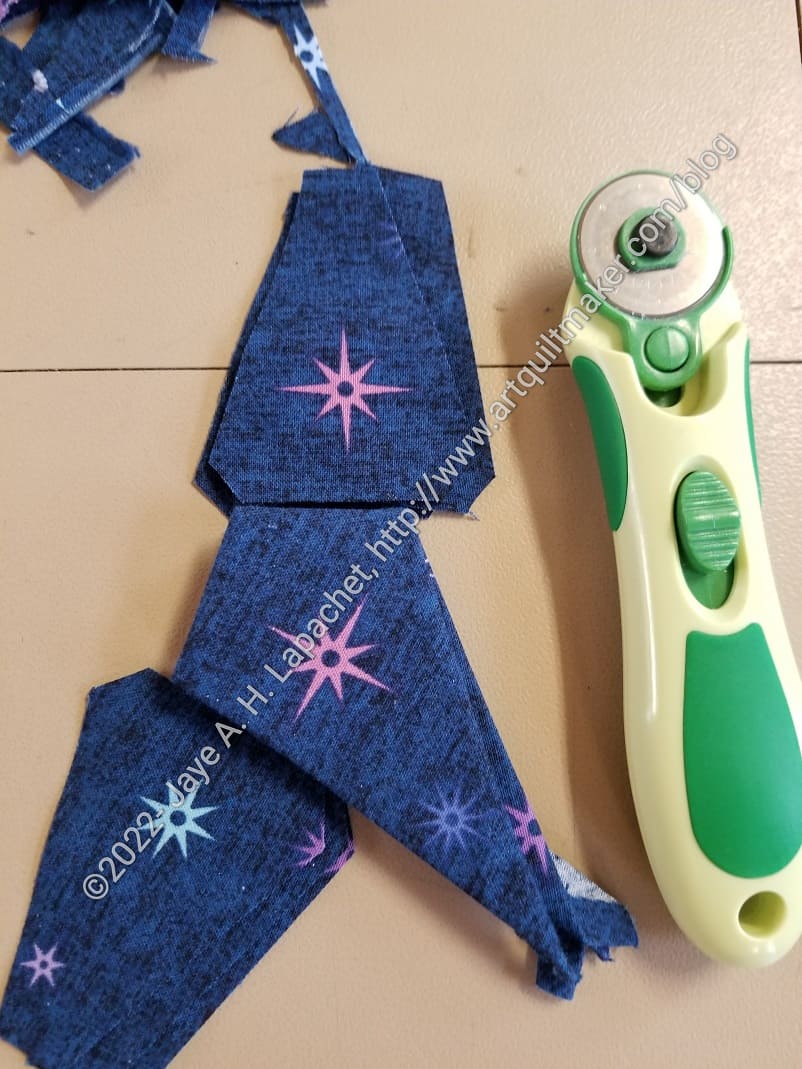
I also kept changing fabrics, so I had to sew as much as I could, then go back and cut and baste more fabrics, then sew again. I also cut a few things wrong.
I am slowly making my way through this block. It seems to be taking forever.
This is one of the larger rosettes and I changed a few fabrics, which is part of the reason it is taking longer.
It’s hard to watch others in the group putting their entire quilts together. I keep reminding myself that it is not a race. Also, I ripped out some so I could piece a woven motif in the larger pentagons. I forgot, which I why I had to rip.
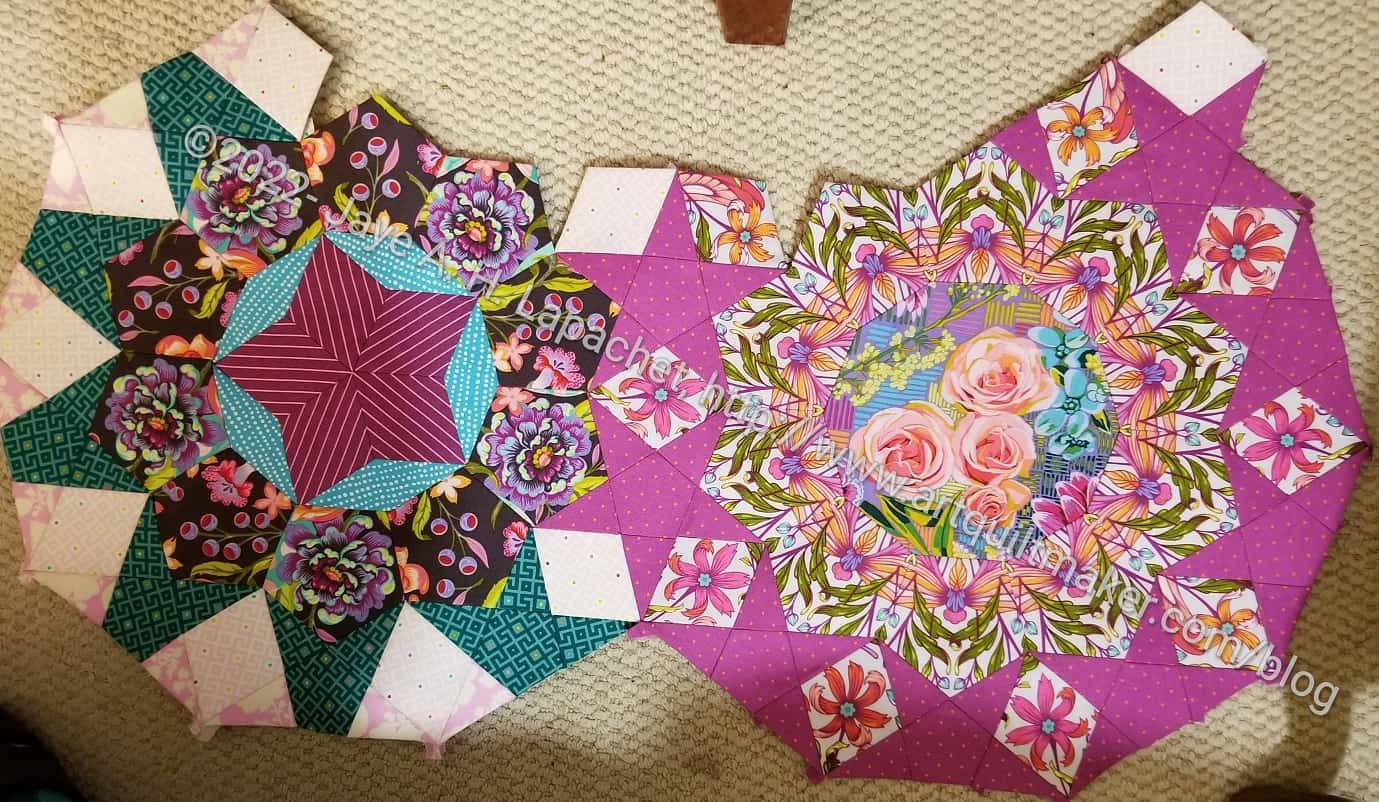
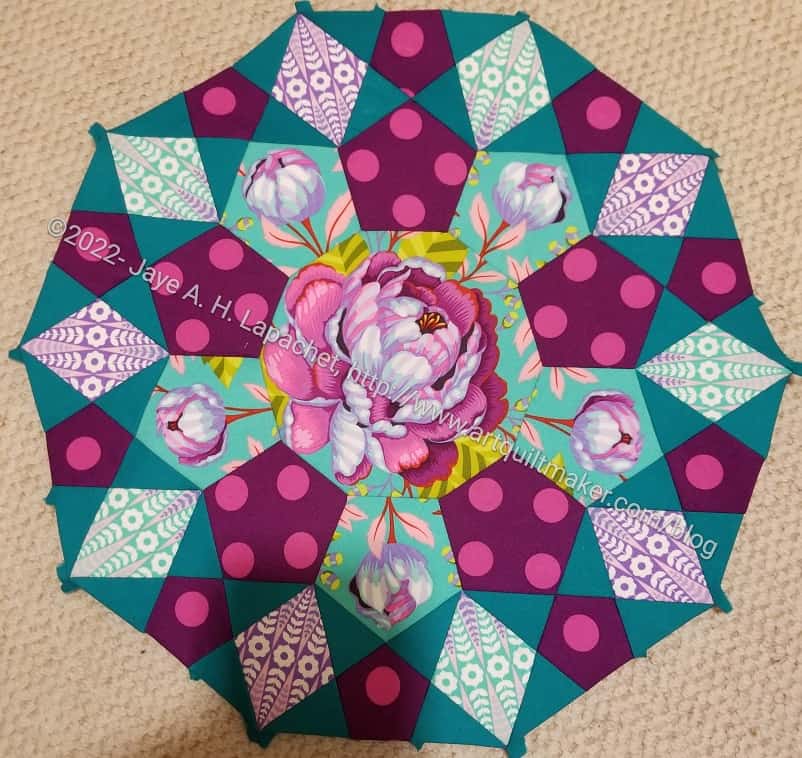
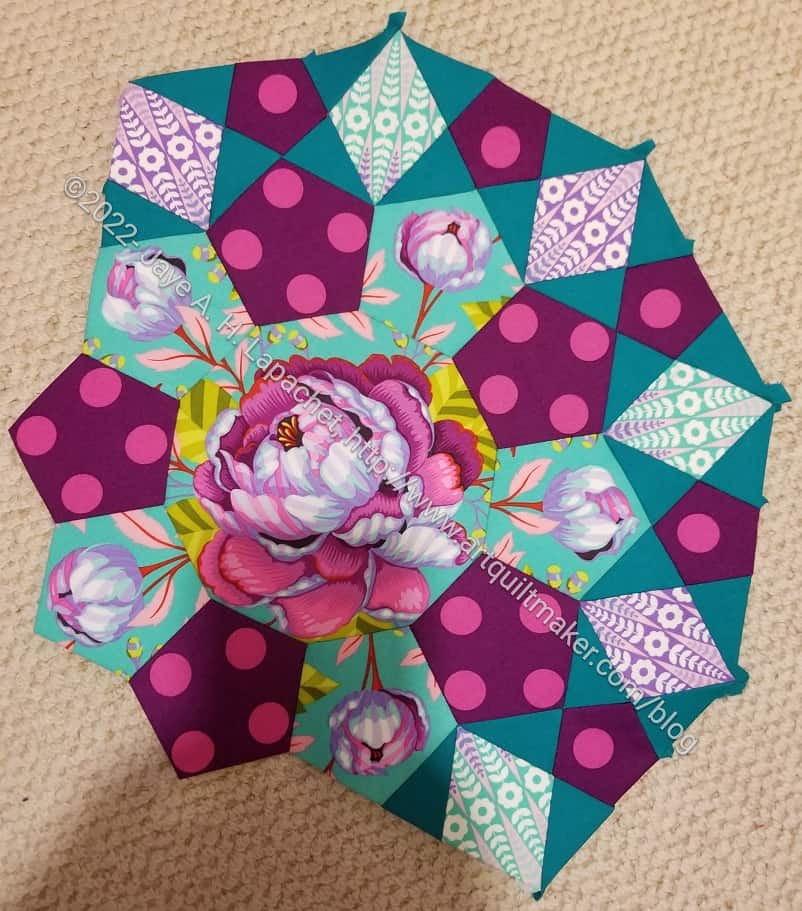
I finally finished Month 16! This is the second to last month (remember? Pink Door had to switch around M17 and M16 because of fabric shipping issues?)
This month consisted of 3.5-4 rosettes. I finished this piece a few weeks ago. You saw it already, I know, but I wanted all the pieces from the whole month together.
The other two rosettes, which are connected took me much longer. I am not sure why. I worked steadily on them even through the holidays, but still, they took forever.
La Pass: Month 16 Rosettes #2 & 3
I don’t think the challenge was the design or the number of pieces. The changes I made to the design might have contributed. Maybe I was just slow or there were a lot of pieces or I had to rip out a lot. Who knows. I still enjoyed the work and can’t wait to get back to the next month, M18.
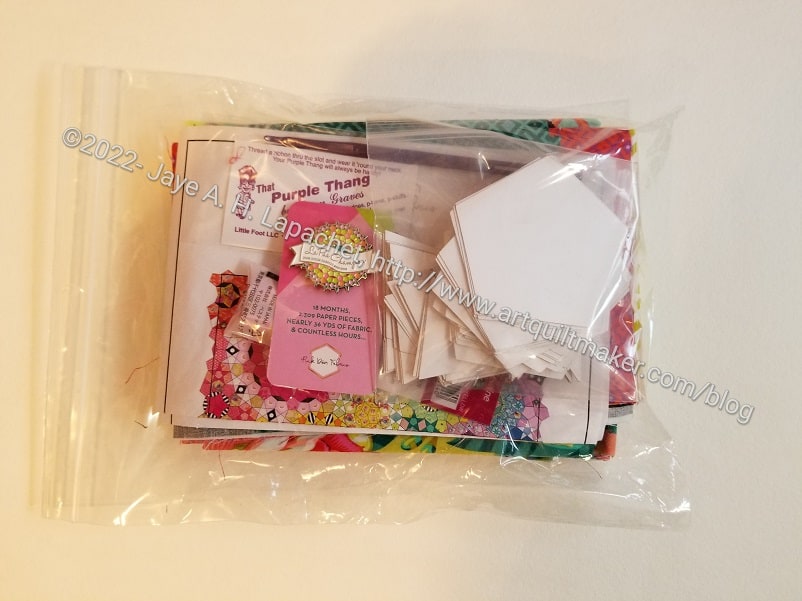
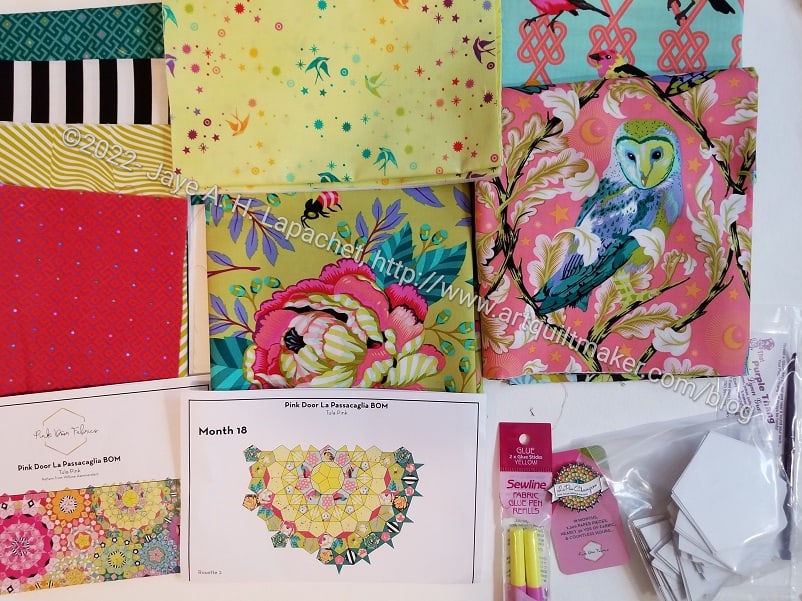
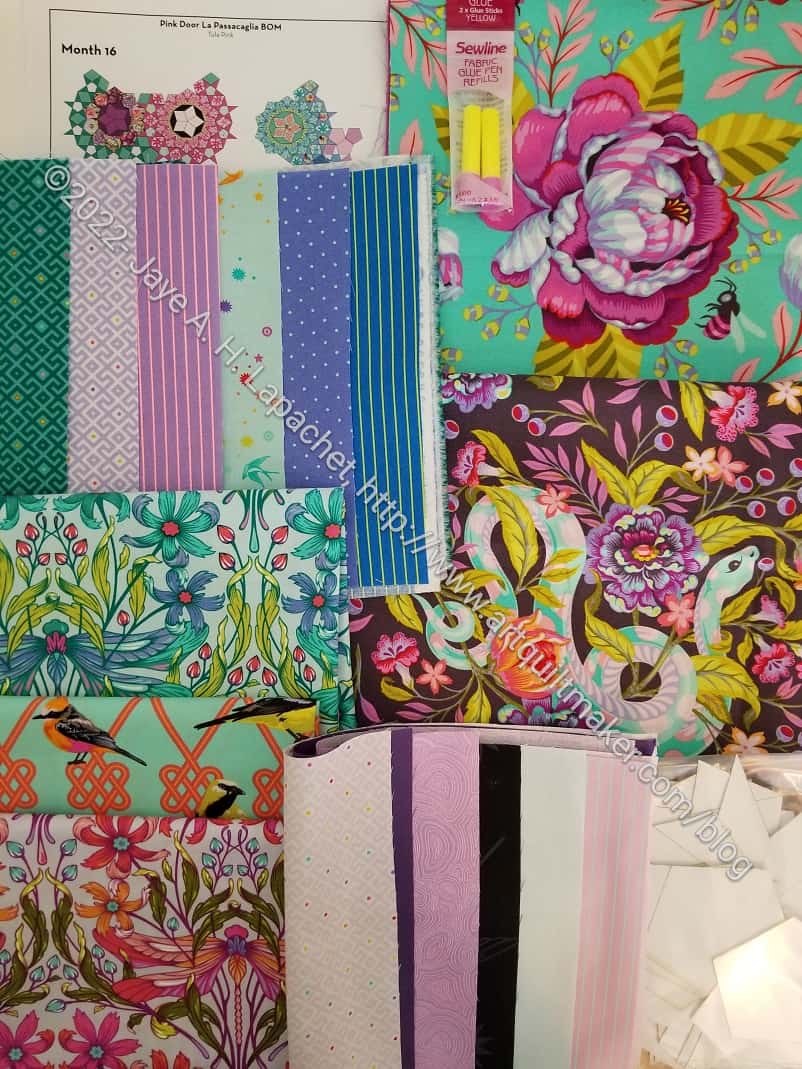
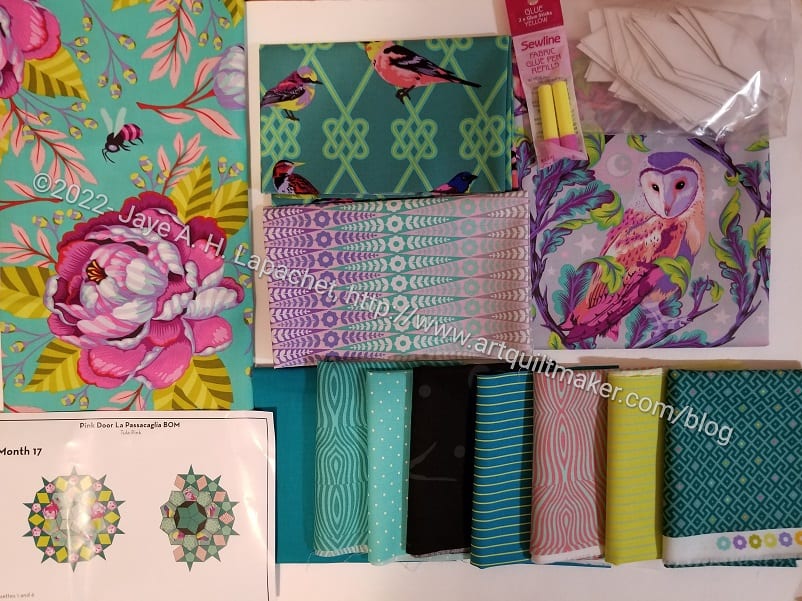
My last BOM packet for La Passacaglia came a few days ago. <insert crying emoji here>
It was a fat packet with a lot of fabric for the last rosette. I probably won’t use most of it since I am changing the predominant color from green to blue.
La Pass Month 18 fabrics
I’ll use fabrics that I used in the Month 16 rosette. I found more of the fabrics wrapped in each other when I went to wash everything, so not all of the fabrics are shown. Since I won’t be using most of them, you can ignore the selection. LOL!
As mentioned the other day, I had cut only enough pieces for one (of three!) Month 16 rosettes. The M16 process is taking me forever. I cut and basted at Sew Day, but I guess I didn’t make as much progress as I thought. I was cranky and irritable that day.
Or it feels like it is. The other day, I left work at 4 and started cutting and basting.
M16 Rosette #1 fussy cutting detail
I used the same fussy cutting layout for the pink rosette as I did for the blue part of Rosette #1. I like how the blue one looks and hope the pink one will look similar.
I also didn’t use the snake heads for the green rosette. I used the fabric, but cut the flowers out of it and avoided the snakes. Apparently, insects are ok, but snakes are categorized with animal heads in my quiltmaking mind.
I also rearranged the colors quite a bit. One of the remaining M16 rosettes will have more spikes.
I finally finished the first rosette for Month 16. This month feels like it is taking forever and I haven’t even started writing the New Years cards, which take up a ton of after dinner time.
I am pretty pleased with the blue parts of this rosette. As I said before, the dark blue and the turquoise batik look GREAT.
I had to cut more pieces. On Sew Day, I only cut pieces for this one section and that took up some time in the evening the other night. The next rosette is in process and I will, with luck, have a progress report soon.
I am working steadily on Month 16. I am in love with the changes I made to the colors. The prescribed colors were ok. Mine are fabulous. Yes, I sound prideful, but too bad. They are good.
I still tried to use as much of the fabric provided as I could. Some I just don’t like and don’t want to use fabrics I don’t like.
As mentioned before, I am adding in more turquoise to call to the large rosette from next month.
Yes, I made an error in the piecing in this rosette. I saw it when I took the photo. I’ll fix it tomorrow….or tonight.
I also have to cut the rest of the pieces for the other two rosettes. I have some of them cut, but not all.
I am really pleased that Lindsay is doing this project with me. She inspires me and I learn a lot from her knowledge.
She showed me her spike motifs a few months ago. As soon as I saw what she had done, I wanted to try it. This month is the month!
Basically, the design requires combining the fabrics in different ways to create a different look. I combined a pentagon and one of the long skinny triangles to make the largest piece. I used the dark blue Contempo fabric to really highlight the design.
La Pass: Month 16 start
I haven’t cut out all the pieces, but I had cut enough to start trying out my fabric choices and to see how the spikes would look. I also had to change a few of the fabrics. It’s ok, because I will use some of the new fabrics I chose for the last large rosette.
My month 16 BOM packet arrived the other day. I was pleased, because I had just enough time to wash the fabric before Sew Day. My plan, which has been foiled the past couple of months, was to cut and baste at Sew Day.
I was surprised at the large size of the packet that arrived. I was pleased to find that this month has a lot of fabric to use in the 3 (THREE!!!!) rosettes we have to make. They are smaller rosettes, so I am not worried. Still! THREE!!!!
La Passacaglia month 16- more fabric
As I got ready to wash the fabric, I kept finding more pieces of different designs each time I unfolded another piece.
I plan to rearrange the way the pieces are presented so I don’t know how much of the above fabric I will use.
I know I showed it to you before and it doesn’t look much different except that all the pieces are sewed together. I am really pleased with how this rosette turned out.
I am not finished yet, but I am making good progress on Month 17. The rosette with the peony center looks really good, I think.
I think the red-violet dots and the green solid look great together. They are sort of complimentary on the color wheel. I am also happy with the way the daisy fabric (in the diamonds) looks in that location. It was supposed to be the center.
The Month 17 fabrics were pretty green, but, as I said before a blue-y green not an icky green like the other months. Those large and gorgeous peonies were part of the fabric packet and I wanted to use a whole flower, not cut them into unrecognizable blobs. Thus, I decided to use Kelly Pena’s instructions for creating a large center medallion.
Then I decided to use some red-violet to highlight some of the other colors in the flower. I love those dots and should probably buy more to make sure I don’t run out (famous last words, right?) I used some of the yardage I bought to have enough buds to cut for the alternating pentagons and am pleased with the look so far.
I am so pleased with what I cut and how it looks. I can’t wait to see it finished.
My fabric and supplies for Month 17 arrived. I like the colors even though it includes more green. This particular green is more appealing to me than the previous groupings, such as Month 7, Month 8 and Month 10. It is more of a blue-green than a yellow-green.
Note: I don’t sincerely dislike any of them; I just prefer more green in nature and less green in fabric.
For those of you keeping track, you might be wondering what happened to Month 16. Month 16 will be coming at the beginning of December. Pink Door did not receive all of the fabric for Month 16 so they switched the months. No problem for me and a quick creative solution IMO. We have to make all the rosettes anyway.
I thought that Month 17 was the last large rosette so I was disappointed that I needed to change out all of the green. I moped around for a few days, then looked at the plan and realized that (duh!) there were two rosettes and they belonged in the middle of the quilt. When there are two rosettes, they are usually on the smaller side.
Tula Pink’s Moon Garden pre-order
Tula’s Moon Garden fabric is included in this month’s fabric grouping. I bought some extra yardage when Pink Door offered pre-orders and that arrived this week, too. Glad it did! I wanted one particular bird from the “In a Finch” Dusk colorway (the darker green) that just wouldn’t fit. I used a bit of what I bought and everyone (me) was happy. I won’t use the owl faces as indicated. I don’t want eyes looking at me (sorry, Tula!). I may use another part of that fabric. I’ll need to look at it and see.
I like what Pink Door has planned for the centers, but I really would like to use that large flower. I am still thinking about that. Stay tuned.
I was still recovering from my oral surgery last Friday as I prepared for Sew Day after work. With a full week of work and the aftereffects of the surgery under my belt, I was tired. I thought hard about staying home, but decided to go. I wanted to see my friends and participate in the Destash party.
In order not to completely exhaust myself, I decided to bring as little as possible with me. I needed a small project without a lot of pieces and parts. For example, I did not want to bring a sewing machine. The La Pass BOM would have been the perfect project, but it is delayed again.
It occurred to me that I could bring the Half Hexie Star quilt, put it up on the design wall and make a plan to get it finished. Looking at it and making a plan had been on my list for a long time and Sew Day provided the perfect opportunity.
I did it! And it worked!
I now have a plan to finish this quilt. I can see the light at the end of the Half Hexie tunnel, which is a finished quilt. This is very exciting. I thought this would be one of those quilts I would finish in 10 years.
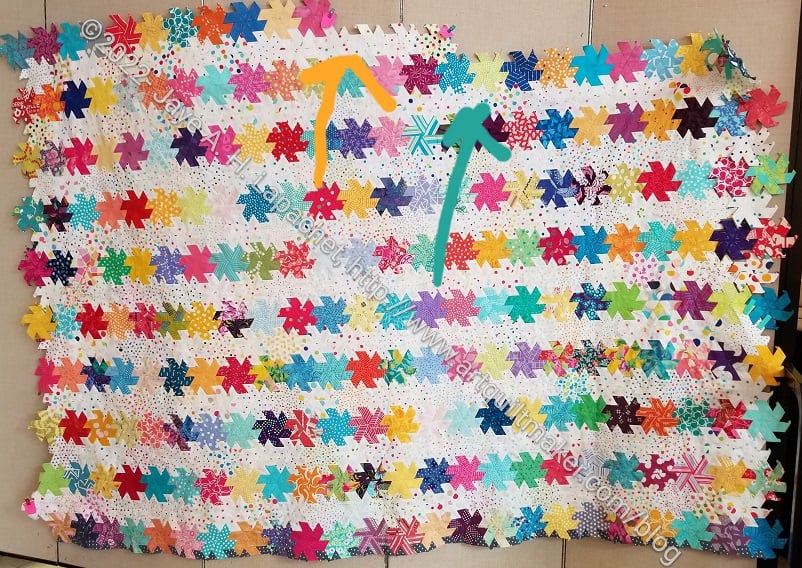
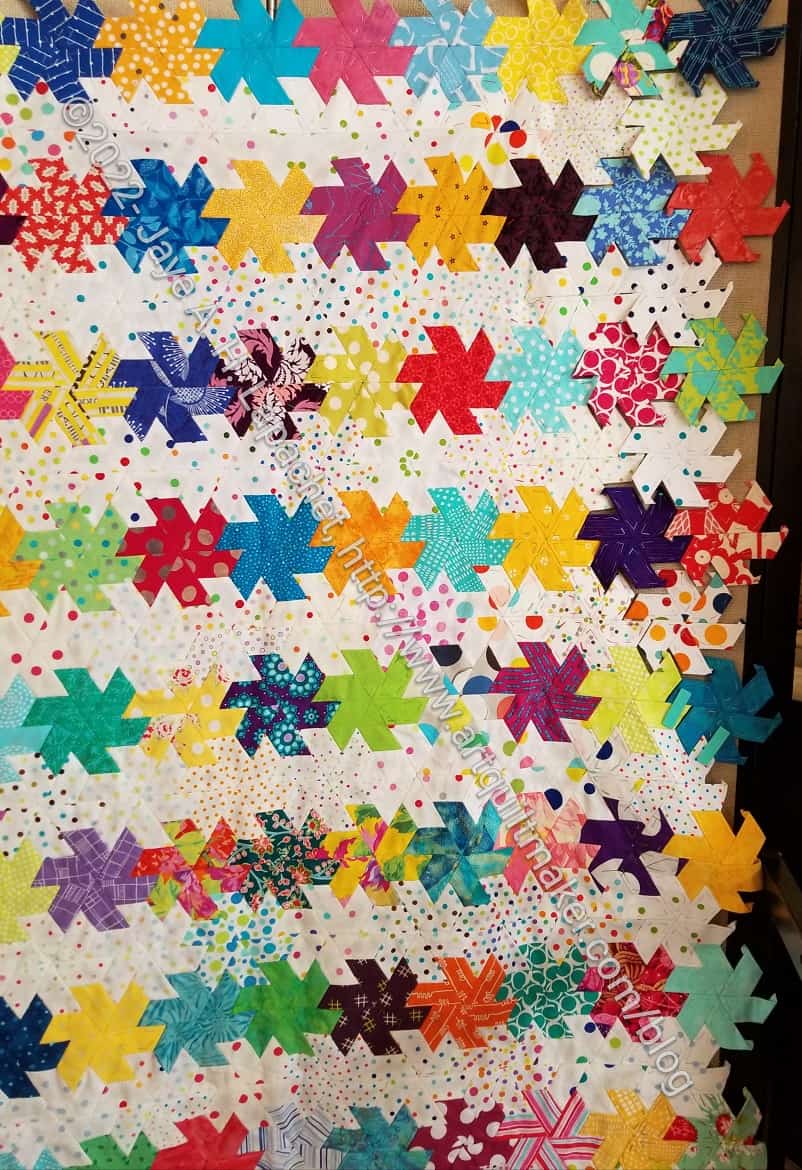
Half Hexie Star: top two rows
First, this may be the first time I have ever put this quilt up on the design wall and looked at it vertically. I have laid it out on the floor, but seeing it on the design wall is better.
Second, I figured out what I needed to do to even up the sides. I plan to finish the two rows I have started on the top (see arrows) and call it done. I am not going to add more rows to make it bigger.
Half Hexie Star: side
A lot of people came and talked to me about the quilt. One of my guild mates asked what the final size would be. I looked at her, confused. She clarified that she wanted to know whether the pattern said it would be a twin or another size. She also wanted to know if I made enough stars to complete the pattern. Clearly she doesn’t know me that well. I laughed and said I wasn’t using a pattern. I said it would be as big as I felt like making it. This was a foreign concept to my guild mate.
At that point, I decided that it would be pretty much as big as we could see on the design wall right then.
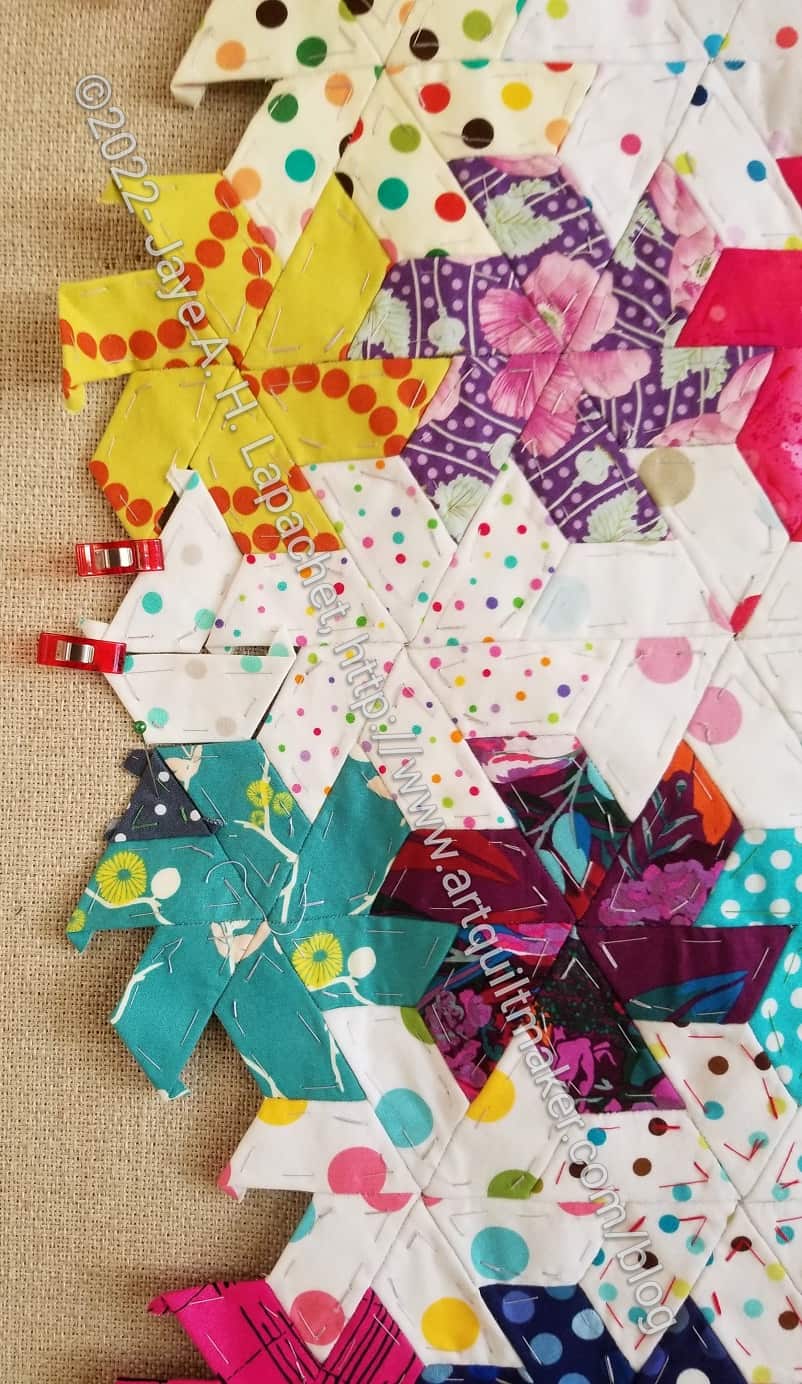
Half Hexie Stars: right side detail (to do)
I haven’t measured it, though it would have been a good time to do it.
Next, I tried to think of ways to square up the sides. I pinned stars to the sides to make each side as even as possible, so I could see what I had.
The top and bottom just need some diamonds and triangles fitted into the open spaces in the stars. The top and bottom will be easy.
Half Hexie Stars: Trying to add background
For the sides, I thought about putting a couple of the half hexie pieces using background fabric in to the sides as a way of getting the sides to be more square. I even sewed some as a test. I was going to go with that solution, which would have made a gentle zig zag edge. I didn’t feel it was an ideal solution.
Half Hexie Star: Lindsay’s idea
Then Lindsay arrived and we discussed it further. She thought I could add in the triangles and diamonds without the background pieces. It wouldn’t make the edge square, but there would still be a gentle zigzag. The triangles and diamond pieces would match the look of the bottom better. I like this idea much better and will work on it.
Finally Mary C said that I could use the edge as is – already folded under – and fold the backing under, then whip stitch the top and bottom together rather than applying a standard binding. I think this is a really good idea. If I can work with Colleen to make it happen, I will.
I am pleased with the various solutions. I am also glad that I will be done with this top soon.