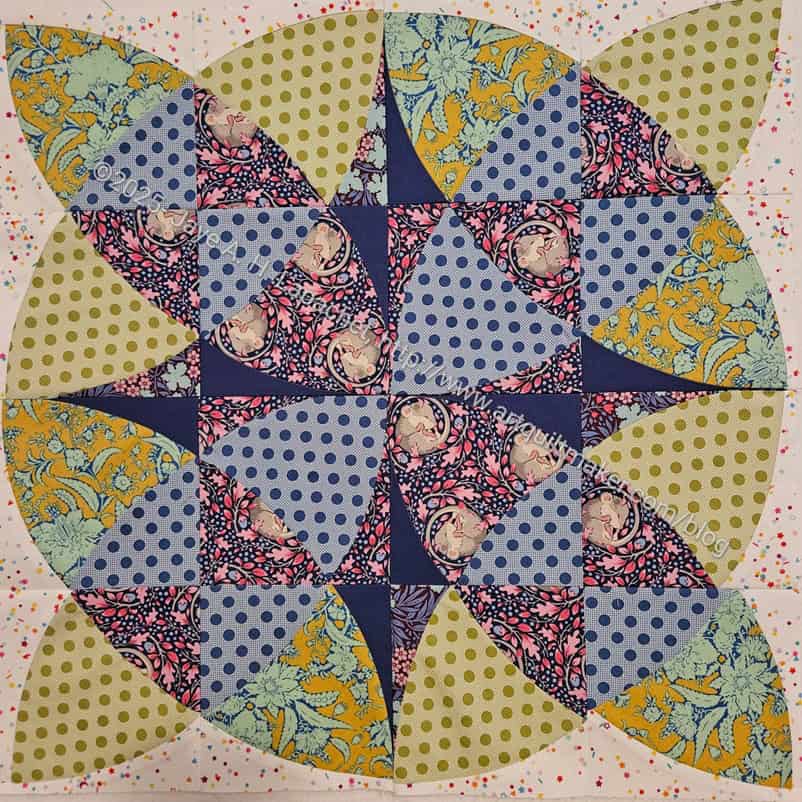
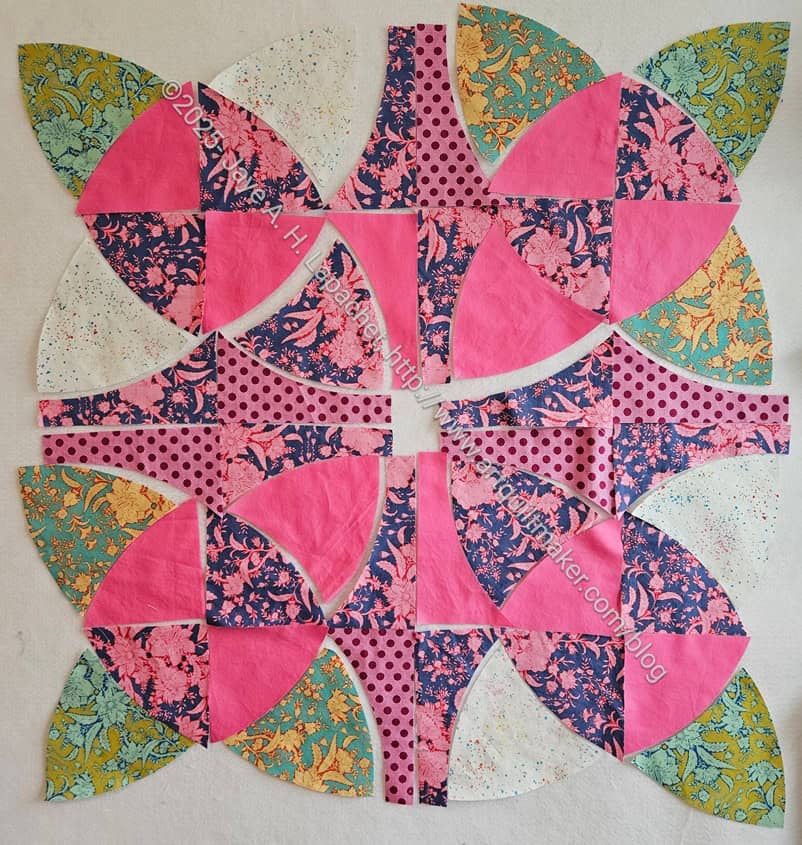
I finally sewed one of the flowers.
It is amazing how different it looks from the pre-trimmed and sewed piece.
Sewing this together really moved me along in the process. I felt able to work on the colors for Flower #1 again.
Commentary about works in progress, design & creativity
Posts about the piecing, applique’ of quilts. Don’t use for completed quilts or non-quilt projects.
I finally sewed one of the flowers.
It is amazing how different it looks from the pre-trimmed and sewed piece.
Sewing this together really moved me along in the process. I felt able to work on the colors for Flower #1 again.
The piecing on this quilt takes a lot of time. I think it is because of the curves. That doesn’t mean it is difficult, just time consuming.
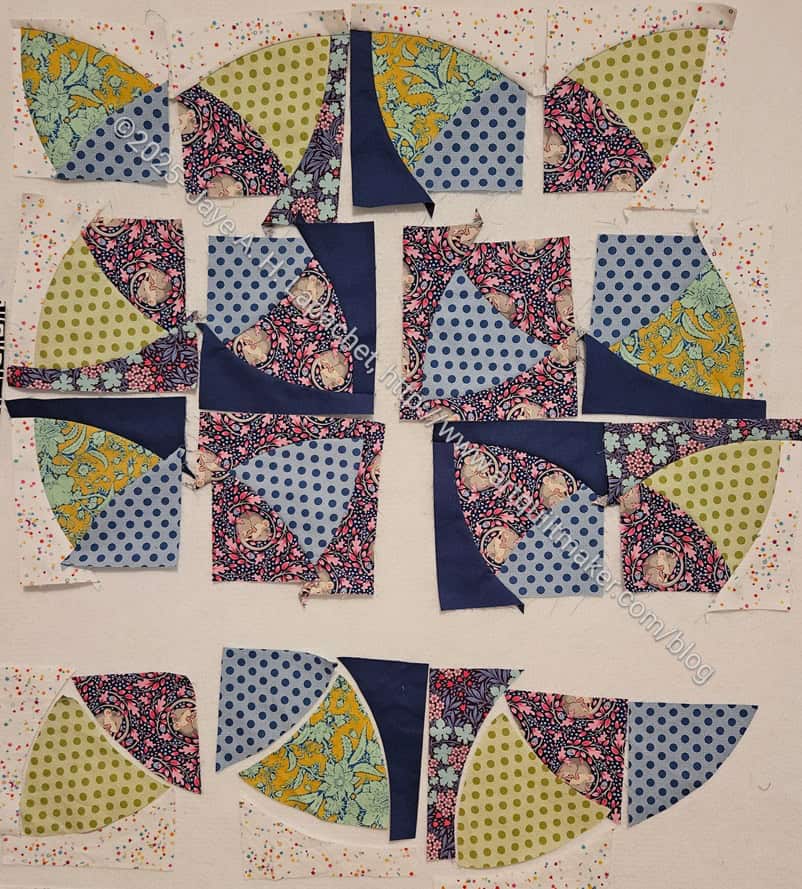
In the photo, the top left unit is pieced and trimmed. I wasn’t happy with the trimming. I ended up buying the SKOW recommended ruler, Sew Square 6**, though, despite my love for specialty rulers, I am fundamentally opposed to specialty square rulers. I would much rather the ruler I already have, the Quick Curve Ruler**, be marked well enough so I could trim with it. It isn’t impossible, but I found it to be very difficult. I haven’t decided if I need to make that upper left unit again. I don’t know if I trimmed too close to the green curved shape.
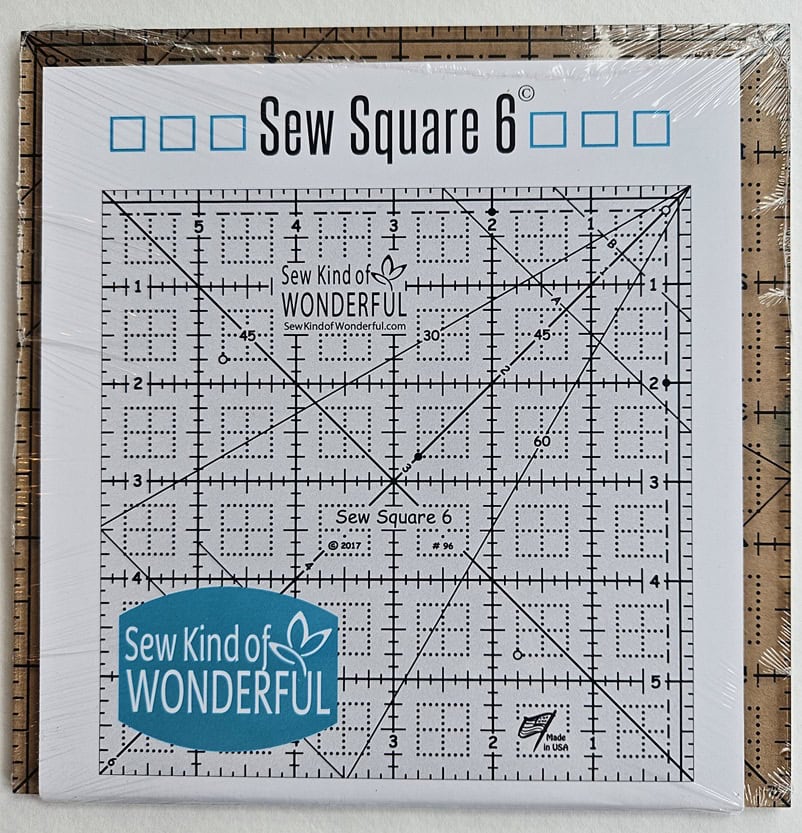
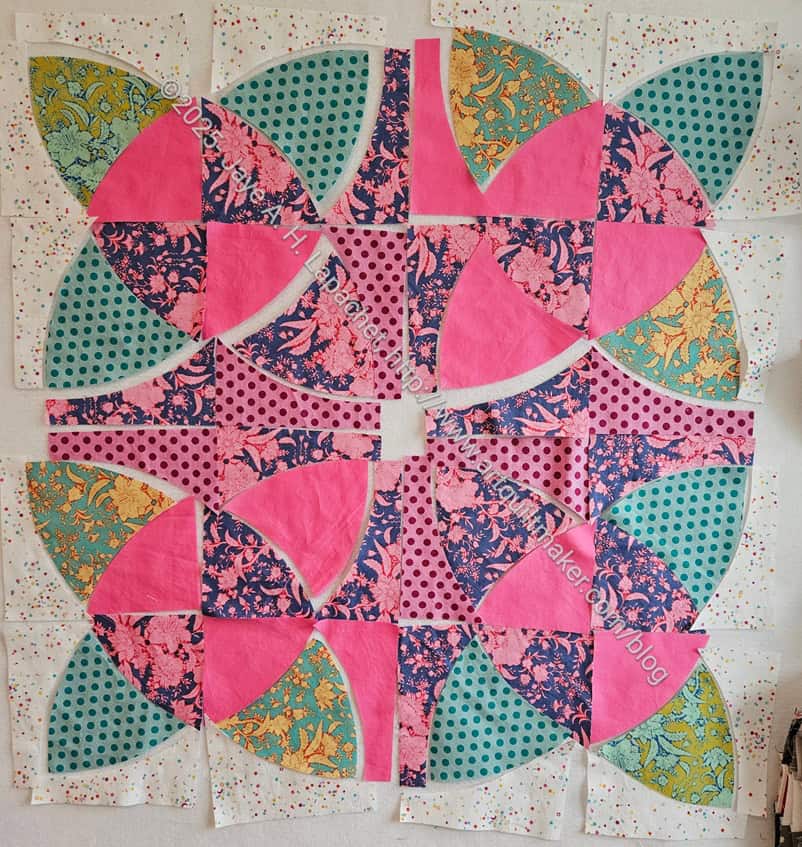
Except for the bottom row, the rest of the units have been sewn, but not trimmed. You can see how weird looking they are before they are trimmed. I bought the Sew Square 6** which I plan to use to trim the other units.
I didn’t buy the whole set; I just bought this one to see if I thought it was better than just using the Quick Curve Ruler.
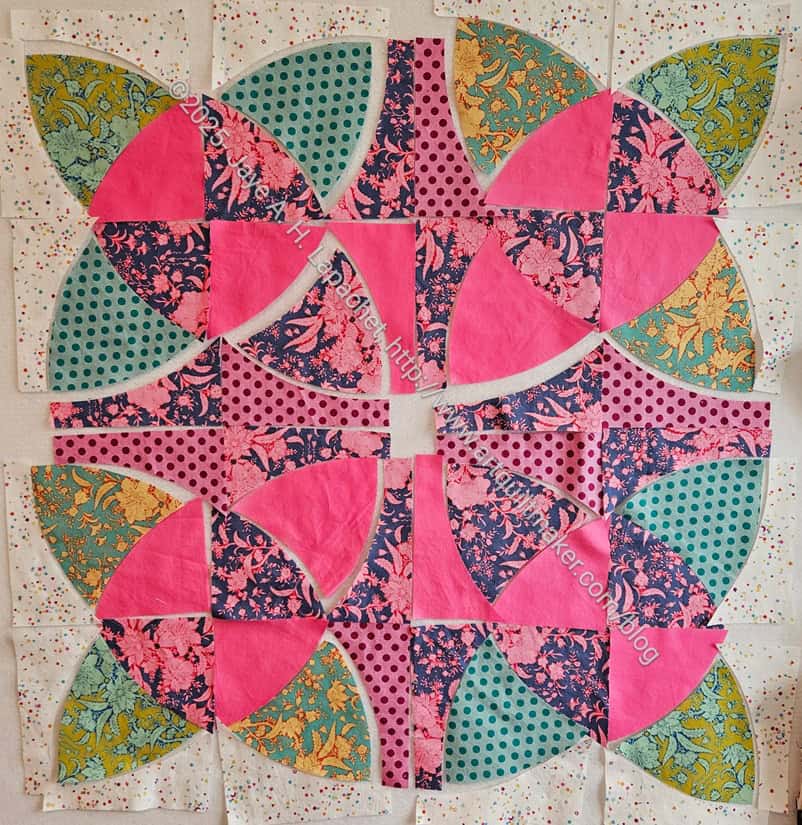
Flower 1 is still unsewn. I am not 100% happy with the color selection. I bought a few solids, which I am hoping will help fix whatever the problem is.
**N. B. : Obviously, you should shop at local quilt shops and small businesses. However, if you are too busy or can’t find what you need there, I use Amazon affiliate links and may be paid for your purchase of an item when you click on an item’s link in my post. There is no additional cost to you for clicking or purchasing items I recommend. I appreciate your clicks and purchases as it helps support this website.
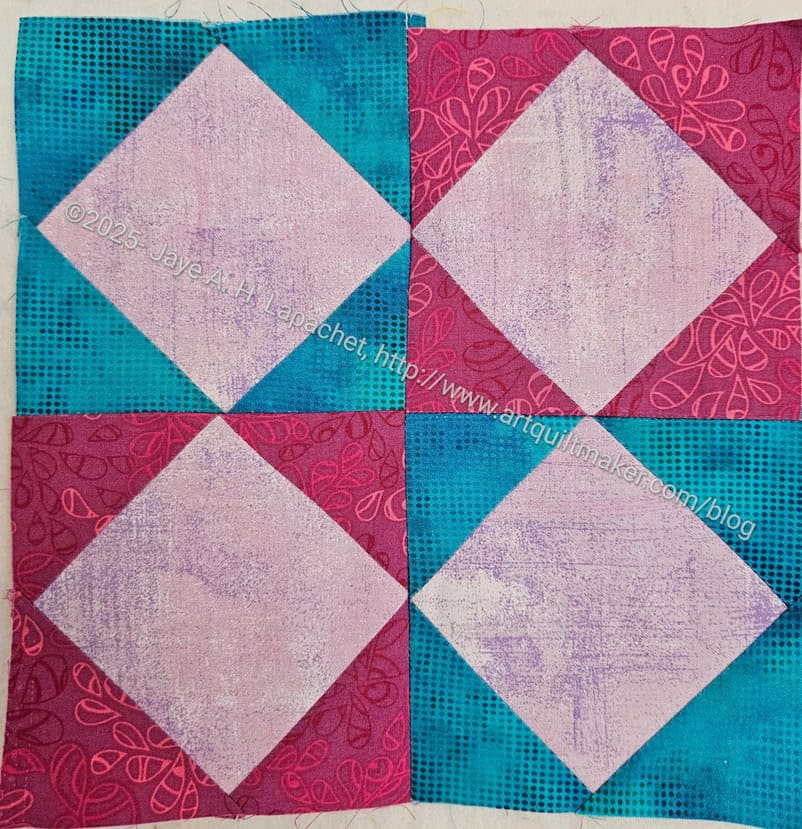
The latest Patchwork Palooza block came out on Friday and I am pleased that I finished it. I didn’t finish it until last night, but I don’t want to get behind again.
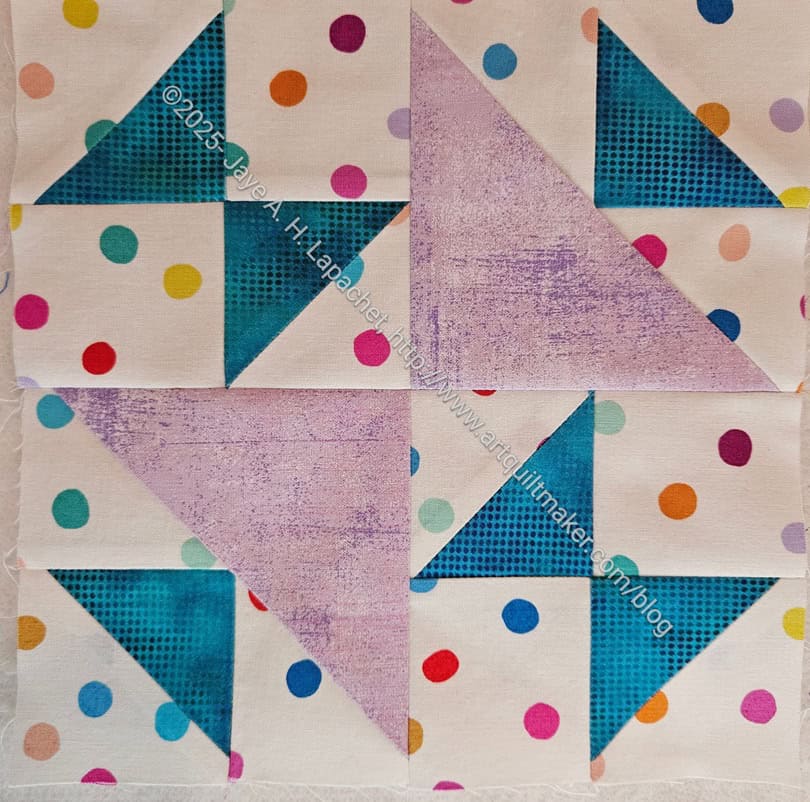
This block is called, by the Patchwork Palooza people, Set Sail. Historically it has several different names, including Old Maid’s Puzzle or Hour Glass or School Girl’s Puzzle. You can find this block in Barbara Brackman’s Encyclopedia of Quilt Patterns** as #1317.
The name Old Maid’s Puzzle is from Ladies Art Company #25. Not very P.C., as many of these names tend to be.
The Hour Glass name is from Grandma Dexter. I had never heard of Grandma Dexter and had to look it up. Grandma Dexter is listed in the bibliography of the Encyclopedia of Quilt Patterns** as a “series of booklets published in the early 1930s from the Virginia Snow Studios, apart of the Dexter Yarn and Thread Company and the Collingbourne Mills in Elgin, IL. Hmm. Interesting. More puzzles as I have never heard of that company either, but I am just interested and not an expert.
The School Girl’s Puzzle name is from Needlecraft Supply 1936, n.12.
I also found it Jinny Beyer’s The Quilter’s Album of Patchwork Patterns, where it is called as Crosses & Losses (73-9). The name comes from Ladies Art Company, 1897. Beyer says it is also known as Bouncing Betty (!!??!!) (Progressive Farmer, 1933), Fox & Geese (Finley, 1929) and Hour Glass, as mentioned above.
This is a block that I have always admired. I know I made a similar one for the Handbag Sampler. I don’t think I have ever made it otherwise, so it makes me glad to have the opportunity to try it again.
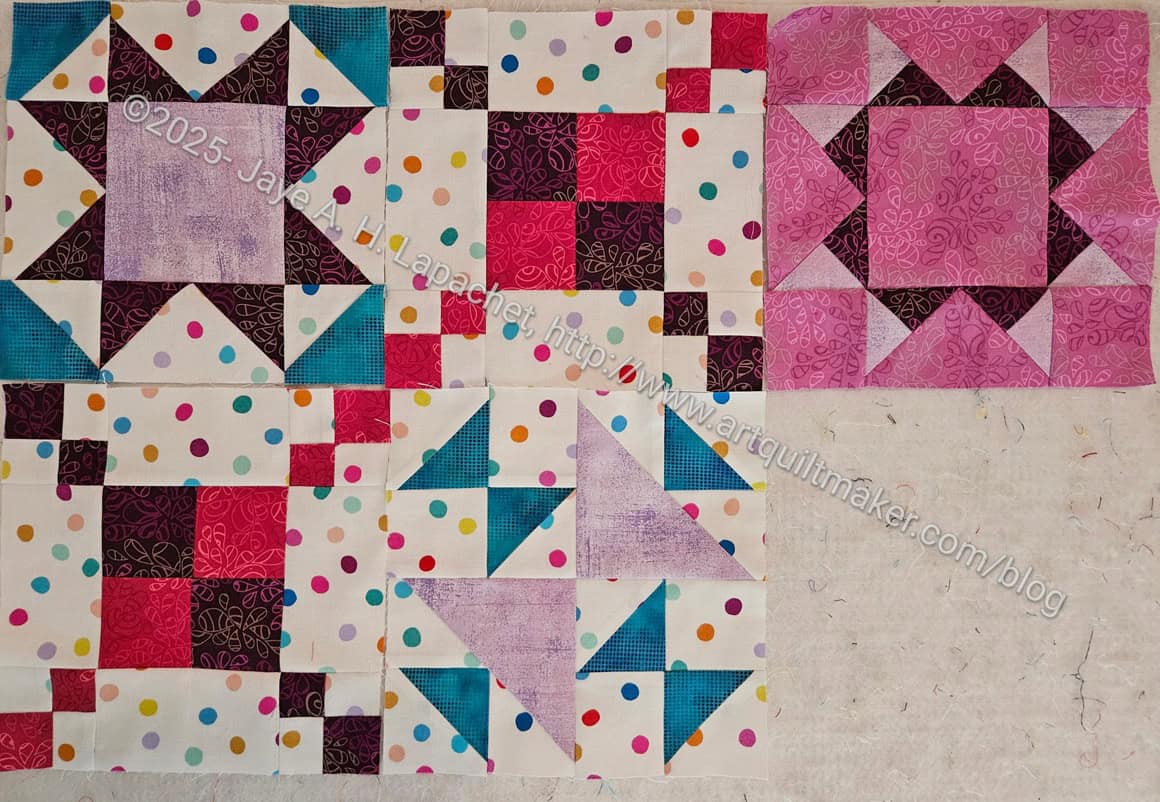
I have also made a few of the alternate blocks. I think there will be another piece of sashing, but for now, I have a few of the blocks laid out without it. I just chose some random blocks, though I see now that two of them are Sawtooth Star types. I’ll choose some others once I get more of the alternate blocks made.
**N. B. : Obviously, you should shop at local quilt shops and small businesses. However, if you are too busy or can’t find what you need there, I use Amazon affiliate links and may be paid for your purchase of an item when you click on an item’s link in my post. There is no additional cost to you for clicking or purchasing items I recommend. I appreciate your clicks and purchases as it helps support this website.

I haven’t made much progress on this piece, but I haven’t given on it either. After I posted about the most recent Color Improv finishes, I got some nice feedback and decided to get back to this piece.
I had a couple of the strip blocks and I decided to add them to the piece so as to make it larger sooner.
It has been a struggle, because I have the half 16 patch blocks for the next Sidewalk quilt as leaders and enders as well as the Four Patch Fun piecing.
So much quilty goodness!!
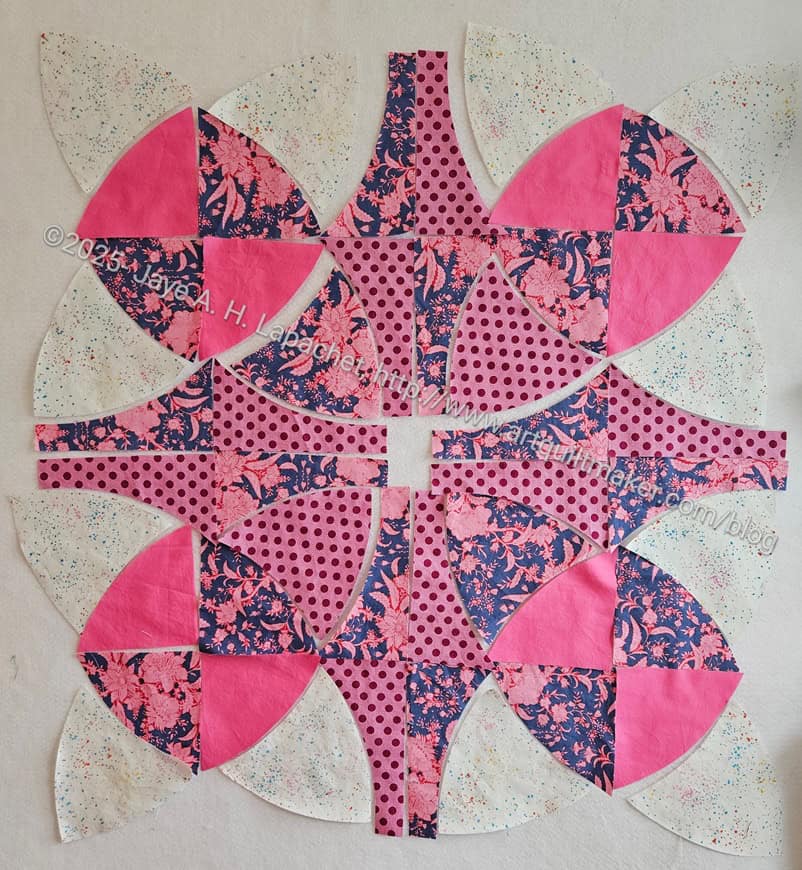
This is the second of the blocks for the Country Revival/The Sad Quilt. I was able to lay it out much easier than the first block.
I added some solids I had in my pile of Tula fabrics and I think they look really good.
I am really in love with how this looks. I can’t wait to see how it looks sewn together.
I have started block 3, but I have only 4 pieces on the design wall, so not really much to show.
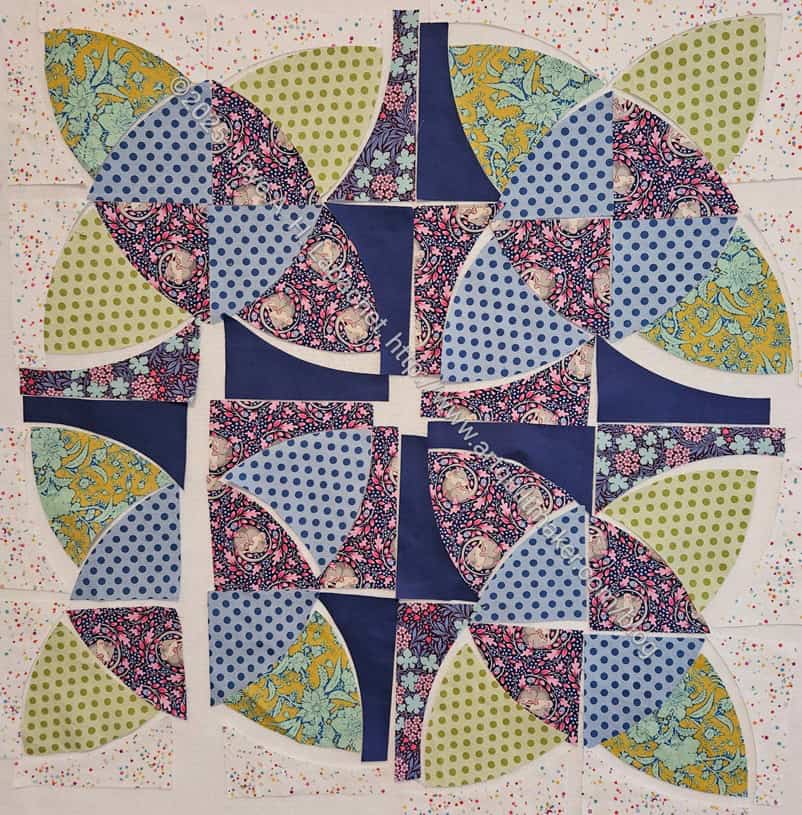
I had the Flower motif from the Country Revival pattern** on my design wall for a long time without sewing it together. It wasn’t quite right and looking at it was the only way to figure out how to improve it. I knew I couldn’t use white in the place I had put it originally-leaf area around the outside. I wanted to use white as a background and the white as shown would be lost and change the shape of the flower motif completely. I also didn’t know what to do.
I often find that if I just do something, then I can get started improving a piece.
The first thing I did was decide the white ‘petals’ needed to be replaced with green and become leaves. It was a good start.
I liked the addition of the green, but decided I needed more and different greens. In this photo there are two different Tilda fabrics. One reason is that I used some of the green on the tips of the flowers for a pillowcase for my friend. I didn’t have much left, but I wanted to include some so it would kind of match the pillowcase. I had just enough to make four leaves.
I wasn’t 100% happy with the look and feel. I really wanted an emerald green solid. I didn’t have that so I tried some dots. They were close to an emerald green and looks like a great addition to the overall look.
I still felt like there was nowhere for the eye to rest, so I moved some of the tall, skinny pieces with the slightly curved tops around. Better, but not perfect.
I added in some of the Dovetail by Ghazal Razavi background I bought at Bay Quilts with Julie a few weeks ago. It is a bright white, which I like and the many colors go well. I know it is hard to see in the photo. You can enlarge the photo to see it better.
I can’t get away from symmetry, so I cut more pieces and changed the fabrics around so there was more symmetry, e.g. the piece looked more symmetrical.
I know the changes are slight and hard to see. I changed the corner fabrics and moved some of the other greens around.
My eye was honing in on the pink dots. I wasn’t liking them, but I wasn’t sure what to do. I didn’t want to add more of the pink solid as I thought it would overwhelm the piece in general. For the moment, this is the final version of block 1. I may make some more changes, but I decided to work on a second block and give myself a rest from the pink.
I love that pink and blue Tilda fabric and it is now much less prominent. I’ll have to use it in another block.
**N. B. : Obviously, you should shop at local quilt shops and small businesses. However, if you are too busy or can’t find what you need there, I use Amazon affiliate links and may be paid for your purchase of an item when you click on an item’s link in my post. There is no additional cost to you for clicking or purchasing items I recommend. I appreciate your clicks and purchases as it helps support this website.

I spent a little bit of time yesterday starting the Patchwork Palooza Project (PPP??). I started with Block 8 as that was the most recent one. I’ll go back and do the others as I have time.
I pulled out the Art Gallery Natural Elements fabrics I bought at Quilter’s Hollow a few months ago. They aren’t the fabric pull I discussed when I first mentioned this project but I think they will look nice. Ultimately, the blocks are too small for the fabric pull since the two main fabrics are comprised of big blowsy prints.
I also added a lavender Grunge print I bought on a whim.
Talking about the fabric was the most exciting part as the sewing didn’t go well. Despite my years of experience and careful cutting this block came out terribly. I cut off all of the points. Even after I fixed it it didn’t look right. This is a write off and I’ll do it again. Maybe it can be used as the beginning of a improv piece? An improv piece that I slash up so nobody sees how terrible it is.

I finished the Handbag Sampler and it is now with Colleen getting quilted. I am pleased with the way it came out. I am even more pleased that it is done.
I am kind of amazed at the colors and fabrics I chose for this quilt. It is super bright and there is a lot to look at.
I rearranged the blocks before I sewed it together. I thought I needed to move some of the diamond fabrics away from each other. They were sort of concentrated at the bottom of the quilt, so I moved the Nosegay block to the top.
I have to admit that I feel slightly bereft finishing this quilt. I have others on my to do list, but this one seems like it might be the oldest.

Putting Chain Link up on the design wall the other day made a huge difference. I could finally see what was going on with this quilt. I made good progress over the past couple of days and am pleased that this quilt is finally going in the right direction.
In the photo, the fabrics look plaid. Except for a couple of gingham charms, there isn’t any plaid. The rainbow stripes contribute to the effect, I think.
I worked really hard on putting the strip sets together. It is a tedious task, but had to be done, so I just got on with it. Once all the blocks were in place, I could see what was going on with this quilt. I could see how to put it together and the way the design was supposed to work. I don’t know why I couldn’t see that before.
Now on to chunking.

I finally took Sidewalk off the design wall and replaced it with Chain Link. No, Triumphant gets no time on the design wall. LOL! I have a lot of quilt projects happening at the moment. This is the result of starting so much.
This isn’t actually all of the blocks. I have to find a step stool and put the last two rows up at the top. It is enough for me now to see what is happening with this quilt top.
As you can see, I have a lot of the strips sets to make. I think this quilt will go together quickly once those are done.
It is so much easier to get a grip on this design when I can see it.
You are probably wondering why I am starting yet another quilt. I am kind of wondering that myself. I seem to be in starting mode.

As mentioned a few days ago, I cut a lot of pieces for this quilt, which can be found in the book, Just Two Charm Pack Quilts* by Cheryl Brickey. I got it out of the library and used Hoopla, but if you have a lot of charm packs, you might be interested in buying it.
Cyndi turned me on to this pattern and she made a really nice version, which I know I photographed, but can’t find the photo. Stay tuned for more.
**N. B. : Obviously, you should shop at local quilt shops and small businesses. However, if you are too busy or can’t find what you need there, I use Amazon affiliate links and may be paid for your purchase of an item when you click on an item’s link in my post. There is no additional cost to you for clicking or purchasing items I recommend. I appreciate your clicks and purchases as it helps support this website.

I should have called this FINALLY Starting Chain Link. I didn’t like the way the pattern was written and that was a “launch blocker”, as we say at work. I finally sat down on the last day of the Retreat and figured out how to make this pattern work for me.
This project seems to be fraught with problems. Besides the challenges of the pattern, I cannot find the white fabric I chose to use.As you can see, I have already cut some up and sewed it into sections of blocks.
It MUST be around somewhere, but it wasn’t where I thought it was. I hope I didn’t use it for a donation quilt. We’ll have to see if this becomes a ‘design challenge.’


Work has been very busy. It is stressful and I have been sewing a bit at lunch and after work. I haven’t had much time, but my effort at the Retreat at block making has gotten the process down to a science. I can make each block in about half an hour. Still, it has taken me several days to make this batch.
With this group, I only have four more left to make.

I made really good progress on Old Town at the Retreat.
I was able to piece 15 (of 25 total) blocks. Each block has 69 pieces so that was a LOT of piecing. I was SUPER happy to be doing that piecing, I have to tell you.
Julie helped me put them up on the design wall so we could look at them.
Even with out much sashing, there is a distinct secondary design going on.

I sewed a little bit of the sashing and put that up as well, so we could kind of see what was coming.
I am excited to work on this some more.

After finishing the White Strips #3 donation top, I needed another leaders and enders project.
This grey improv scrap top has hung on my small design wall for almost a year. I am shocked at that! I didn’t realize how much time had flown by.
My grey-black-brown drawer isn’t crammed full, but it isn’t empty either and I decided that I need to work on this project to get it off the design wall and to someone who needs it. Also, it will be a relatively quick win on my fabric used spreadsheet.
At the moment, as leaders and enders, I am sewing together all the scraps that are not strips. I am sewing them into pieces that I can then sew on to the top above. You can see pieces I have placed, but not sewn. They are just temporarily in place until I can add more pieces to them to make a unit large enough to expand the top. It’s a lot of piecing, because the pieces are small.
The main piece I have already sewn together is about 32 inches wide. I need another 10 inches, at least. I’ll probably have to dig into the strips to make the quilt big enough.