Cleaning up the Junk Drawer of my Blog

The title is paraphrased and re-imagined from a phrase that DebR uses on her blog, Red Shoe Rambling. I have a lot of little bits to pass on and thought this would be a good time to do it.

More on Gabrielle Swain

I forgot my camera on the second day of class. Karen, a fellow student in the Gabrielle Swain class, was kind enough to share her photos with me. We had a little session on features of her camera, which was fun and then we took some pictures. Karen let me look over her shoulder while she took photos.


In the above piece, you can see the color placement issue that I described in Gabrielle Swain Class, Day 2. The leaf is made up of separate pieces. If you can see how the veins divide the leaf, know that each of those sections is a separate piece of fabric. In placing the fabric, Swain explained to us how to fussy cut the fabric (using the light box) so that there are no huge breaks in the color of the leaf. I think the above leaf has more color breaks than I would expect there to be in a piece, but since GS did it, there must be a reason.

You can also see the quilting pretty well in the above photo. All of this quilting is done by hand.

I liked this quilt, because of the way she breaks up the leaves and the branches. I also think the few letters add a lot of interest.


My favorite quilt of Ms. Swain’s was called Even Change (not above, click the link). I think the one on her website might be different than the one she brought to class. Still, I like the idea of temperature that she used in this quilt. The idea was that if she used a cool tone on the background, Swain appliqued a leaf (piece of fabric) in a warm tone on top of that background, then she used a cool tone for the veins. Very successful.

Thinking about Proportion

Periodically, some technique that has been rumbling around in my mind as I try and understand it, clicks into place. What is rumbling around in my mind lately is proportion.
TFQ and I saw this class sample at Black Cat Quilts when she was visiting in April. It is from the Weeks Ringle and Bill Kerr book, Quiltmaker’s Color Workshop: the FunQuilts’ Guide to Understanding Color and Choosing Fabrics. Gretchen was out of the book so I had to buy it from somewhere else. That meant that we couldn’t look at the book or the directions for the quilt.The pattern is pretty easy, so it doesn’t really require a class or a pattern.

I was shocked when I did buy the book, because 1) the colors were a shockingly ugly combination (TO ME). I have little to no appreciation for the colors in quilts made from reproduction fabrics; 2) they put that ugly quilt on the cover; and 3) how small the blocks actually were in the pattern in the book. The above picture shows blocks that are approximately 8″x4″. It was high up on the wall and there wasn’t a ladder available for me to climb and measure the blocks. Also, I forgot my tape measure. Anyway, in the book the pattern directions tell you to create blocks that are about 3″x5″ (the size of an index card). Huh???

Well, obviously, the maker of the class sample was perfectly able to enlarge the pattern. This where I started to think about proportion. I find that the proportion of the blocks in the picture above to be good. I haven’t made one of the smaller blocks, so I can’t say whether I would like that size.*

My thoughts about proportion, which started with this book/class sample encounter, have to do with how to figure out how to find the right proportions (without a lot of complicated math, thanks) of a block. It is easy to say “ok, the pattern says to make this block 3×5, so it would be easy to blow the block up to 6×10”, but what about if I want the block to be 8x something. I have a little fraction to decimal cheatsheet and I want a proportion cheatsheet as well. Let me know if you know of one.

I do have EQ6 and will probably work on it there.

Note we did get permission to take the photo.

*Aside: the smaller blocks might be a good FOTY project.

Prismacolors

At work and personally, I am doing a lot of self examination. In the course of this, we were talking about Myers-Briggs types and how some types don’t like opening gifts in front of people. That brought up a discussion of gifts and how I would really like a super large set of Prismacolors. Gabrielle Swain suggested getting the large set so that I would have every color I ever needed. I have been using a set of colored pencils that were part of my school supplies list when I lived in Austria. They are a few years old, but they have great names like hellgruen and dunkelblau and they do the job. The friend subsequently mentioned that Aaron Bros was having a monster sale and I could get a set for half off. I went to Aaron Bros last night while I was running an errand at Target and looked.

First, I was shocked at how few art supplies Aaron Bros actually has now. Their whole upper floor was filled with framing services and ready made frames. I had no idea frames were such good business.

Anyway, I didn’t buy any Prismacolors, because the 40% off sale was over. Dick Blick has the set of 132 pencils (list $190.00+) for $89. That seems like a good deal.

Swain also mentioned the Prismacolor Art stix. She made them sound like they were some special/new kind of pencil. I looked at them at Aaron Bros and they looked more like pastels to me. I am not into messy, so I don’t know if they are for me. I think I bought a couple last week and will try them out.

I am also interested in the Derwent Inktense pencils. I suppose I should learn some techniques for colored pencils, so I can really test the various pencils in an informed manner.

Making Many Bags

I figured out why it is a GREAT idea to have multiple tote bags hanging around. To date, I have made 6 bags and have 2 or 3 cut out and the fabric ready for at least one more. I have been thinking, and discussing with TFQ, the point of making many bags. The obvious answer is that it is fun to make bags. It is great fun to use large pieces of different fabrics than I wouldn’t normally use for quilts. It is also fun to buy fabrics, such as the cupcake fabric for a purpose. I came across the true answer last Friday, as I prepared to go on a trip.

The true answer is that you need extra bags so you don’t have to clear out the other bag you haven’t unloaded!

Yes, life has been crazy and I haven’t unloaded the dot/flower bag, so when I went to pack for the trip to the lake, my choices were to unload the bag or do something else. I was, as usual, in a rush and late, so I just grabbed the Alexander Henry bag, filled it up and left. Right now, I have two bags laying on the floor of the workroom full of various activities. I guess I am already packed for another trip!

The dot/flower bag also needs to be fixed. I didn’t catch all of the hem when I hemmed the top, so I need to resew that. I started to unsew it and resew it, but haven’t finished.

Gabrielle Swain Class Day 2

The second day of the Gabrielle Swain class was about the technical steps of putting the blocks together. Swain does all of her applique’ by hand and all of her piecing by machine. She wanted us to follow her through her process, but didn’t care, ultimately, whether we used her process to put the leaves together.

I thought this was an important lesson for me. I often go to class skeptical and with preconceived notions, mostly because I have had teachers who put stupid useless supplies on their list or don’t know how to teach. I am not saying that I am better than them; I am saying that you can’t be a teacher just because you say you are. I have high expectations for teachers. Anyway, when I heard that we were going to do needleturn applique, I groaned inwardly. I was too exhausted to fight and just went with the flow. As the class unfolded, I could see why she makes her quilts the way she does. She has a point and, while I may never make a whole quilt the way she taught us, I am glad I know about it so I have another technique in my arsenal and can choose it among others in the future.

In the first part of the class, GS talked about placing the fabric in such a way take advantage of the shifts in color of the hand dyed fabric. She was basically talking about fussy cutting. You end up with Swiss chees fabric, but she wanted us to understand that by paying attention to the color you could expose light and shadow to make a more interesting quilt. She also wanted us to ensure that we didn’t have big breaks in the colors, that the colors flowed together in a way that looked natural.

Swain also talked about the properties of color. She said:

  • Value: light, medium and dark
  • Temperature: warm (reds and oranges), cool (blues and greens)
  • Intensity: how true or saturated the color is; how much grey is in the mix of the color
  • Hue: more color you get in a quilt the less value

I need to do more research on intensity and hue. I have never really taken a serious color class and cannot vouch for what she said about color and hue.

The other color tip GS provided was not to use equal amounts of opposite colors. I think the ratio she mentioned was 60/40, but it could have been 80/20. Another thing for me to look up. You comments on the color theory aspect are most welcome.

Before we started the applique’, I was thinking that hand applique’ would be too much work. I took an Elly Sienkiewicz class a long time ago and really hand a hard time with the needleturn applique’. I made two blocks in the ES class. One was some kind of flower block and the other was a folded snowflake. I did finish them, but decided that my dream of a full, needleturn applique’ BAQ would never happen in my lifetime. Those two blocks will eventually go into my miscellaneous blocks quilt – a quilt I intend to make from trial, test and class blocks… someday. If I find the ES class blocks, I will post them here.

In order to transfer our pattern to the fabric, we had to ink over the lines of the pattern. I used a Sharpie, which worked very well. I taped the pattern to the lightbox and traced over the pattern straight on to the fabric with a Pilot Scuf pen. GS recommended a Pigma Micron pen, but somehow, I didn’t have the right one with me. The Pilot Scuf worked fine, but you have to make sure that the point is not squished otherwise you will get a very thick line. You have to turn the black line under, so you want it to be as fine as possible.

Before you actually start the applique’, you need to decide which way the seam lines will go once you applique’ them. You start with the piece that will be on the very bottom and build on top of the pieces on the bottom. For the applique’, the supplies recommended are:

  • Mettler 50w thread
  • Thread Heaven thread conditioner (instead of wax)
  • #11 sharp needles (I used a between and it worked fine. I bought some sharps later and will try them outthe next time I work on this quilt)

GS cuts her thread at an angle and threads the cut, angled piece through the eye of the needle. I have never understood this tip and am thrilled that I do now.


She also showed us a much easier way of doing needleturn applique’. After basting the pieces together with junk thread (who really has junk thread???), you hold the pieces in your left hand and scrape the needle above the raw edge you want to hide, towards the unsewn part of the seam, with your right hand. You hold the piece below where you have already sewn with your left thumb. This allows the appliqued edge to be smoother. It also sends the give towards the unsewn area, which prevents ripples, I think. I found it to be much easier and much faster than the way ES taught. I am not saying that the Queen of Applique’ is wrong. There are many ways of doing things and not every way works for every person. It is important to find the way that works for you and if your results are good, then you should continue to work in the method that suits you.

It was readily apparent how you have much more control when you do this work by hand. However, I can also see how, with care, this work could be done by machine.

Gabrielle Swain does a lot of colored pencil and ink work on her quilts. She showed us that as well. You can see my colored pencil work in the purple accent above.

Great class. Take her class if you have the opportunity. This post is a good description, but the real thing is well worth the money.

Gabrielle Swain Class Day 1


Another teacher to add to your ‘must take’ list. This woman knows how to teach! She knows her stuff, has confidence in her teaching and has an opinion, which I like. I don’t have to agree with the opinion, but wishy-washy “well, what do you think, dear?” kind of comments from a teacher, make me crazy.

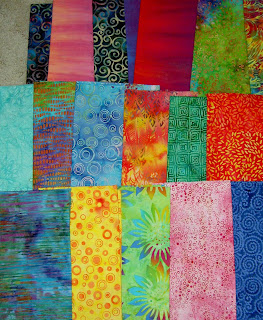
Above are the fabrics that I brought to class. Not being a hand-dyed girl, I chose batiks in a palette that I like. Her suggestion of 3 yards was a wild shot in the dark, IMO. I would improve the supply list by asking for 20-30 FQs evenly divided among all the colors. In this case, I was able to find some fabrics out of my small batch to work with, but other people were having a really hard time. Even people who had brought a lot of fabric with them.

The first part of the class was all about design. No sewing. Some people were completely mortified. I was thrilled. I actually got to spend time on my design and try out a couple of different things. One thing that Swain said, which resonated with me, was that people find their materials first and then try to find a design to fit the fabrics. I Think it is true in a lot of cases, but I don’t think it is true, mostly, for me. It is definitely something to consider and keep in mind.
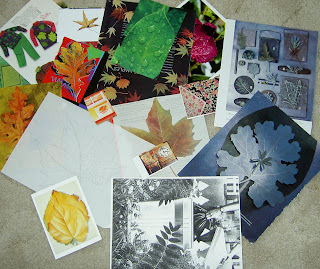

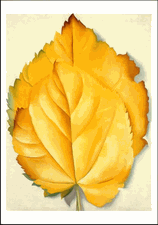
The theme of the class was leaves. Mom went through my inspiration file and pulled out many of the pictures containing leaves. Talk about a hero! I went through the pictures a few times before I started the design and whittled down the group. I finally settled on a Georgia O’Keeffe postcard of a painting called Yellow Leaves (bottom left). Apparently the real painting is at the Brooklyn Museum of Art. In surfing the web, I found an image of another of her leaf works that has to be in the same series called Pattern of Leaves.
Swain gave us large format patterns, which we could have also used, but I don’t think anyone did.
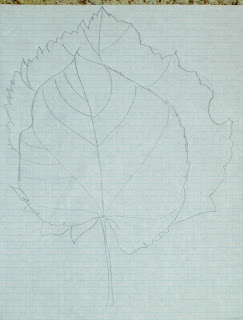

This was my first attempt and , frankly, it is pretty much a copy of the O’Keeffe work. Swain said to add another leaf (rule of odds) and turn the leaves so they were going in different directions. I had a hard time understanding what she was suggesting. She ended up explaining it by saying to align the leaves so they hit various points on the letter C. Finally, I got it and set to work.
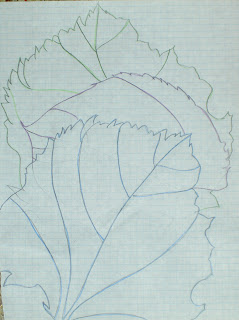
This was my second attempt. After finishing the draft, I was concerned that not enough of the two upper leaves were showing.
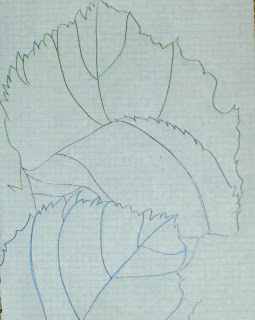
I traced my second attempt, but shifted the paper slightly to modify the spacing. It ended up with too much spacing.
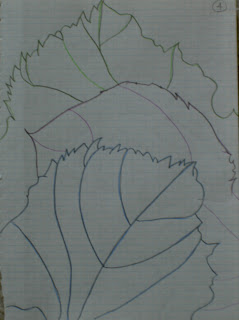

Above is my fourth attempt, which I liked. Again, I modified the spacing.
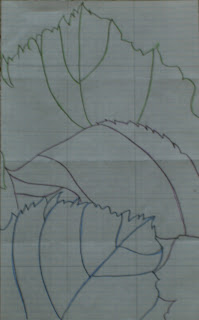
This is the final design for my project. It is the third drawing, which Swain thought was better than the fourth.

I think the above process is a good example of why spending the time on the design is worthwhile.
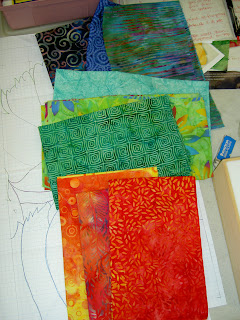
My first thought was hat I would make each of the leaves out of a variety of different fabrics. Above is my first pass at fabric selection. I was thinking that more fabrics would add interest.
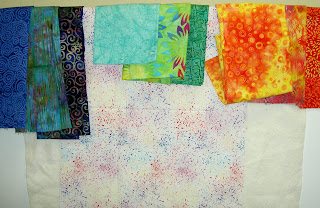
Here are my choices with the background.
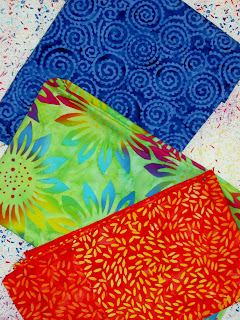
This group is good, but Swain was concerned about the strong print on the middle fabric. She thought, when cut up, the petals of the sunflower would draw the viewer’s eye in an unintended direction. She is very much about careful choices in both fabric and seam lines. There were a lot of things she said that reminded me of Ruth McDowell’s work with seam allowances.
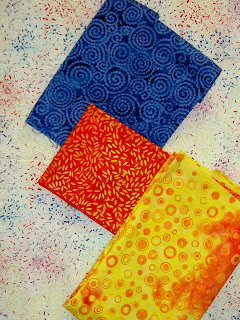
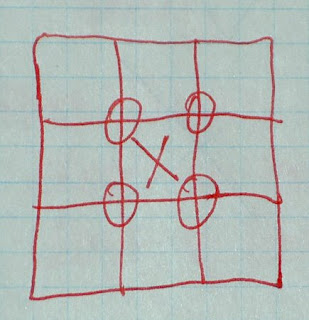
Here is my final selection. I guess it is ok. I may work on it a bit more later just to make sure I am happy with it. I like the fabrics, but the combination as leaves is a bit of a stretch. I am, however, willing to work with the colors to see how Swain’s advice works. Here is one example Swain had for a design principle. Think of a tic-tac-toe board. Put an x in the middle, because you don’t want to put anything exactly in the middle. The Os at the intersection of the squares are where she suggested we place our images, if doing this kind of a design.
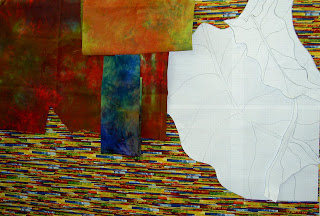
Julie’s fabric selections and pattern. Julie is Swain’s star student as Julie took her 6 month creativity class earlier this year. Sadly, none of the glow is rubbing off on me. 😉

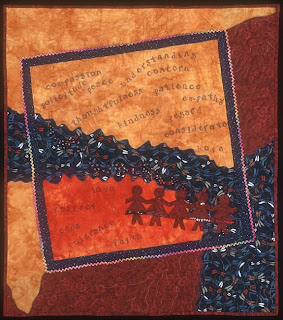
Nance O’Banion Workshop

I will be taking the Nance O’Banion workshop on Saturday with EBHQ. It is a little different than the normal quilt workshops, but I thought it would help with the visual journaling theme that I have been dipping into of late. I also hope that it will give me some ideas (and freedom???) to do more of the visual work. We’ll see!

clipped from www.ebhq.org
  • Nance O’Banion
  • Saturday, April 26, — Cloth Books and the Creative Process

    (Supply List)
    Combining found materials and cloth in an experimental setting;
    we will work to discover a meaningful narrative in the book format.
    Two sewn book structures utilizing cloth as a basis,
    a simple transfer technique, collage, rubber stamps, and
    more will all be a part of the game. Come ready to play.
    < /br>
      blog it

    Art Quilt Thoughts

    My website and blog both have Art Quilt terms in the title. I think about designs that are not block related and have made several quilts that do not use the block format. One of my favorites is What Comes Next, a quilt I made after I had a bit of time to think about September 11.

    I have a couple of art quilt designs on the drawing board, but they have not yet reached their turn in line (noch nicht an der Reihe, as we say in German). Due to the busyness of life, I have been making block quilts and focusing on color for the past few years. This does not prevent me reveling in what other Art Quiltmakers are working on or developing my own designs for the future.

    As part of this process, I read Quilting Arts and Cloth Paper Scissors magazines as well as other inspirational magazines, as I am sure many of you do. One of the things I noticed recently was how messy many art quilts are. I have a bias against messy, I will say up front. Collaging the box in September was exciting, but messy and I am sure I would have had some sort of medical emergency had I not swathed everything, including myself, in newspaper.

    I don’t call myself an artist, because, like Wayne Thiebaud, I want to let history judge my work, but I do make art quilts.

    HUH?

    I make quilts that do not use a classic quiltmaking design (block pattern, e.g.). These are my art quilts.

    I consider the above quilt to be an art quilt, but it is also not messy. It does not have threads hanging off of it or blobs of stuff piled on the quilt. I can appreciate the design choice that includes dangling threads or dots of paint placed carefully on a quilt. I think the key is that these have to be design choices to further the ‘story’ of the quilt and not have been placed there to make the quilt ‘arty.’

    Cinda Cawley (who kindly gave me permission to post her unedited words here) wrote in a post to the AQSG list, which says a lot to make me think right now:

    “I went to the Quilts=Art=Quilts exhibit at the Schweinfurth Center in
    Auburn, NY. Call me a Philistine if you must (I’ll readily admit I don’t do
    Art Quilts myself) but I was very disappointed. I try to get to Q=A=Q every
    year and I always find several things that blow me away (confirmed
    traditionalist that I am). Not this year! Do you ever go to a guild quilt
    show and feel like all the exhibitors took the same workshops? That’s how I
    felt (with a few exceptions) about these quilts. It seems as if all the
    artists were told “Take tulle, or some other transparent material, paint or
    dye it, cut it into squares or rectangles, arrange randomly on a
    background.” I love to see the work produced by the members of the Art Bee
    in my guild because even when they start from the same place they end up
    going in very different directions.”

    I have been wondering if making art quilts is a default for people? Do some people just start in on art quilts? If so, do they know anything about design? I think design matters in art quilts, but what do other people think? Does anyone care about design anymore?

    I think the underlying principle for any type of quilt is design topped off by technique. If it is a bad design, then no amount of dangling threads or dots of paint will fix it.

    Pressing Tips

    Especially lately, since I have been wondering about the Pineapple, I am interested in people’s views on pressing. I have just started to read a blog called Pink Chalk Studio (makes me think of lemonade for some reason?!?). I was breezing through the recent posts (yes, I know how to use a blog reader, but do I ever…No…not really) and she had a post on her blog about her views on pressing. Interesting to hear that she always uses steam. I’ll have to look back and see what types of quilts she makes.

    In the meantime, I need to consult with a Pineapple Queen. Anybody know one?

    Great Idea for Templates

    I know that templates are passe’ and nobody, but me, uses them anymore. I am going wax nostalgic (or give you some tips and tricks) about them anyway. I stumbled upon Be*mused, another blog, and found that she was doing an ongoing project requiring templates.


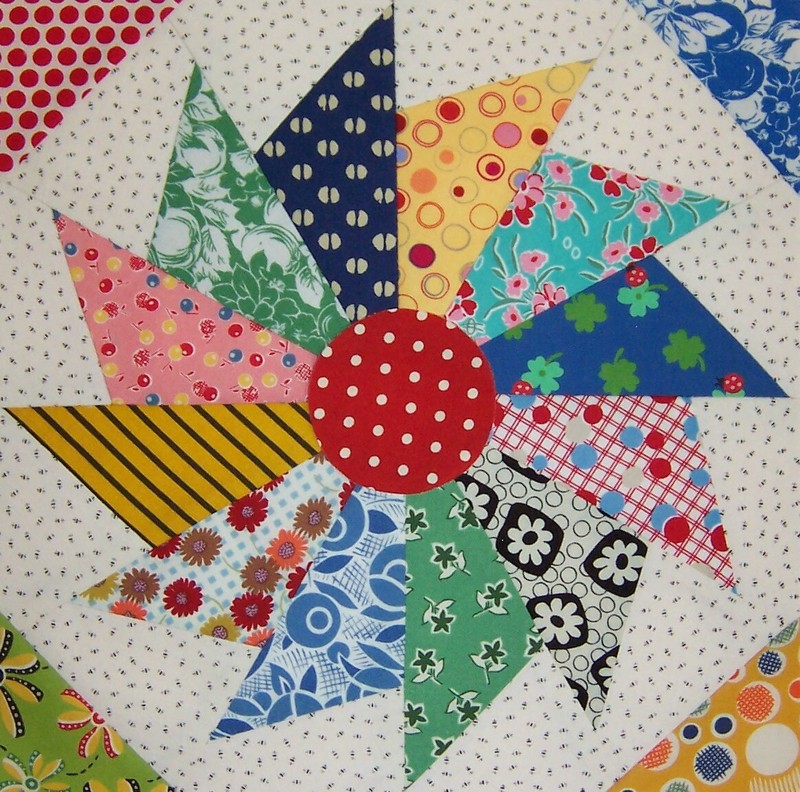
    Be*mused is making a Wheel of Fortune or Whirling Star or Whirligig pattern (above). In her post on March 8, 2007, she talks about making the templates. The brilliant technique she uses is to add an additional quarter inch to the outside edge of the templates above and beyond the quarter inch that is already added to the entire template (and rotary cutting, for that matter), so you can sew them.

    This is a great idea for this block and others where the outside edges are not going to match no matter what you do. The extra quarter of an inch give you that much more fabric to use when squaring up the blocks. The opportunity/ability to square up blocks makes the assembly of the quilt top so much easier and much less stressful.

    One of the nice things about this block is that it provides the opportunity for lots of different fabrics. Another thing is that not everyone is making one. This is a great looking and interesting block and worth the extra trouble of templates. I found it in blockbase so you don’t even have to draft the templates yourself. 😉

    QA Contest a Bust for Lack of Planning

    Today was my day to get the contest quilt done. I was struck with a brillant idea during my vacation before the New Year, but had technical difficulties and then got busy. I finally worked out almost all of my technical glitches with thanks to Deirdre, DebR and Margi and began printing the various parts today. On a whim, I decided to look at the deadline again. I found that the March 12, which had been lodged firmly in my mind, was completely wrong. The deadline was actually March 1. Bleah! At least I didn’t make the whole thing only to only to have it returned to me.

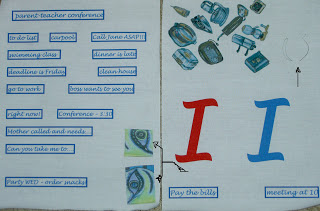
    I still like the idea and will put the project on my WIP list. Here is what I did accomplish:


    I created a bunch of images and words on my computer then printed them on Inkjet Printing fabric sheets. I needed an eye, so I tried to trace one of Pamela Allen‘s eyes from my Self Portrait project, but it didn’t work. You can see my attempts in the upper right hand corner. The fabric from the printer sheet was too thick and I couldn’t really see through well enough for the eye to look good. A stroke of genius hit me and I copied the eyes, which were already sewed down to my Portrait Project, so I hotocopied them on to a piece of paper and cut them out. Then I ran one of the fabric sheets through the printer again.


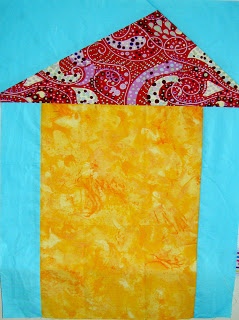
    This is the background.

    On the positive side, I won’t feel the tyranny of having to finish a project this weekend. I will also be able to work on the backs of Thoughts on Dots and the Nosegay.

    Everything Old is New Again

    Some time ago, I saw an episode of Simply Quilts on Mosaic Quilting. The artist was a southern woman named Shannon Williams and her idea was really interesting. The blurb for the episode is:

    “What can you do with all your scrap pieces of fabrics? Mosaic quilt designer Shannon Williams joins host Alex Anderson in studio to give us the answer. She uses scrap pieces to demonstrate a mosaic quilt project called Blooming Sunflower. Alex reads a letter from viewer Kelly Biddle about her mom, Peggy Biddle, and the 50th anniversary quilt she created for her parents. Then, Alex talks to Peggy on the phone in studio about her work. QLT-705”

    At the time (2003), after a class with Gwen Marston, I was working on Women’s Work and had a lot of red scraps around, so I started working on a piece using Ms. Williams’ technique.

    It is not a project in and of itself. The idea is that it is ongoing and someday will provide enough new fabric so I can cut other shapes out of it. So far, this is what I have:


    The long piece is the one I started with and the shape, after awhile, became quite unwieldy, e.g. not square or rectangular and quite useless. I was unwilling to slap some big strips on to make it a more normal shape, because I wanted it to retain that mosaic quality, so I started the second piece (shorter one) in order to sew it to the first piece and make more normal shape. I have considered hacking off a part and sewing it back on to another side/part of the original, but haven’t gotten there yet.

    I haven’t worked on it for a long time as the piece has been covered by strips that I still feel compelled to collect for the Spiderweb. I saw the mosaic pieces peeking out from under said strips the other day and was reminded that I have some reds I could add to make the piece larger. Since I haven’t done any sewing this week, I thought it would be something to share with you all.


    This is actually the first photo that I took today, but I thought it didn’t show enough of the detail nor did it show the entire piece. Perhaps I should ditch it, but I do like the way you can see how the two pieces will look together. You can also get an idea of how I simplified the piecing for the second piece.


    And here is a detail shot that shows the intricate piecing. At the beginning of this piece, I would fit any size scrap in, which made the piece beautifully complex, but also a nightmare of piecing. I need to add some of the intricate piecing to the second piece, but I haven’t gotten there yet.

    The other thing about this technique and my particular piece, is color. Since I had the red and use a lot of red, generally, I thought I would make a red piece, because I was sure to use the ‘new fabric’ later. However, there are often other colors in fabric. You can see the white and some blue flowers and the brown in the coffee cup scrap. I think the other colors add interest, but I know that my eyes gravitate to the white. I don’t have a panacea for this, but it is something that I am playing with.

    What is the Difference?

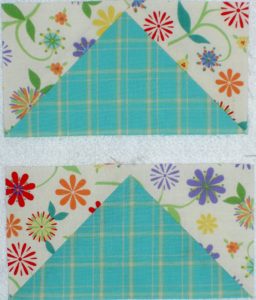
    I experimented with pressing on two of the blocks. One I pressed towards the white (example: top) and one I pressed towards the color (example: bottom). I think it is hard to tell the difference online, but in person, if you look, you can tell that the color pops forward more on the bottom one. Ruth McDowell talks about this in her classes and her Piecing book. I don’t think it is relevant for this piece, but it is an interesting exercise.