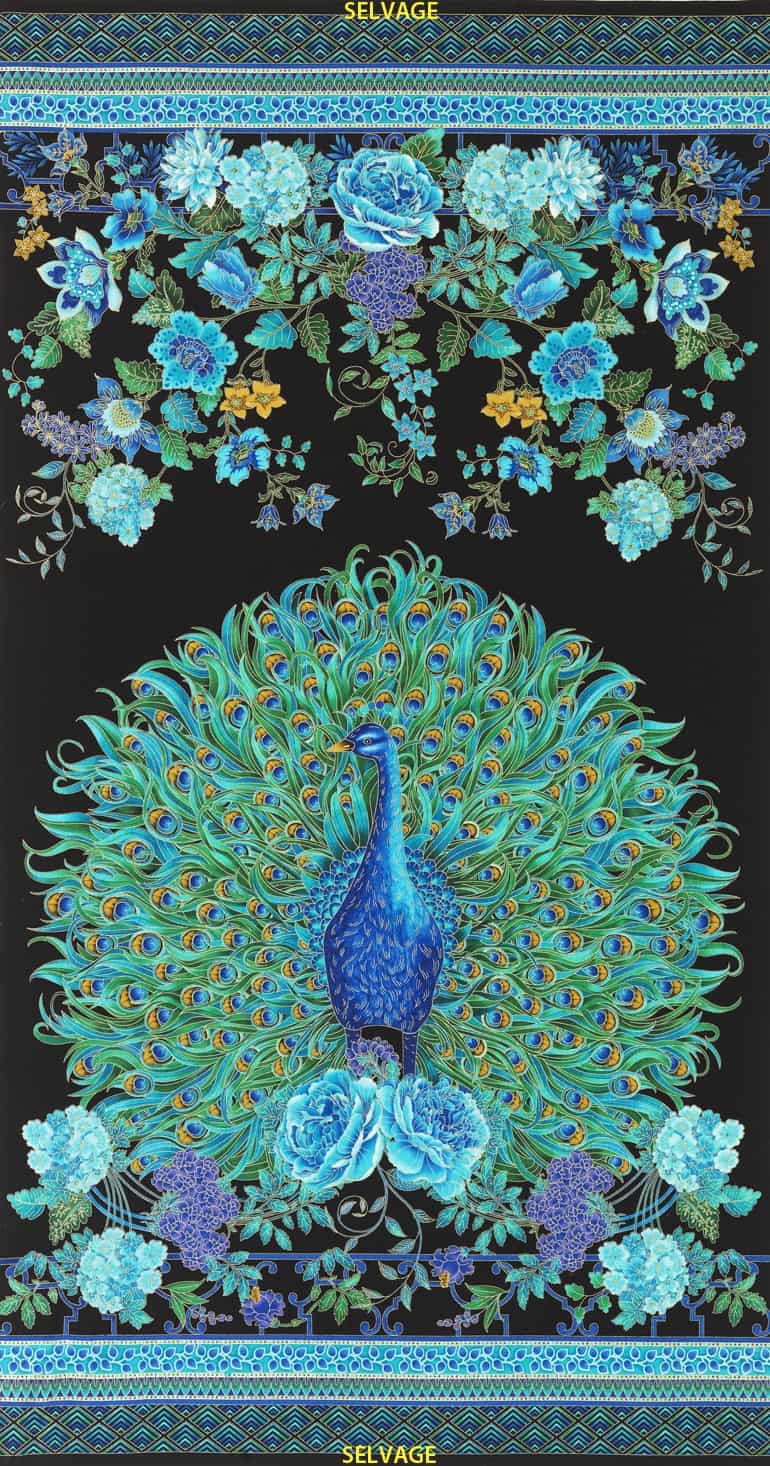
I decided to make the peacock One Block Wonder project. I was really on the fence, as you may have gathered from my previous posts, about making it. I talked about some of my concerns in the last post and had decided not to make it. Things change.
There were a couple of things that made me decide to do it. 1) I was able to find the Timeless Treasure panel on a website. 2) I saw Maureen’s blocks and 3) I really like the colors in this panel.
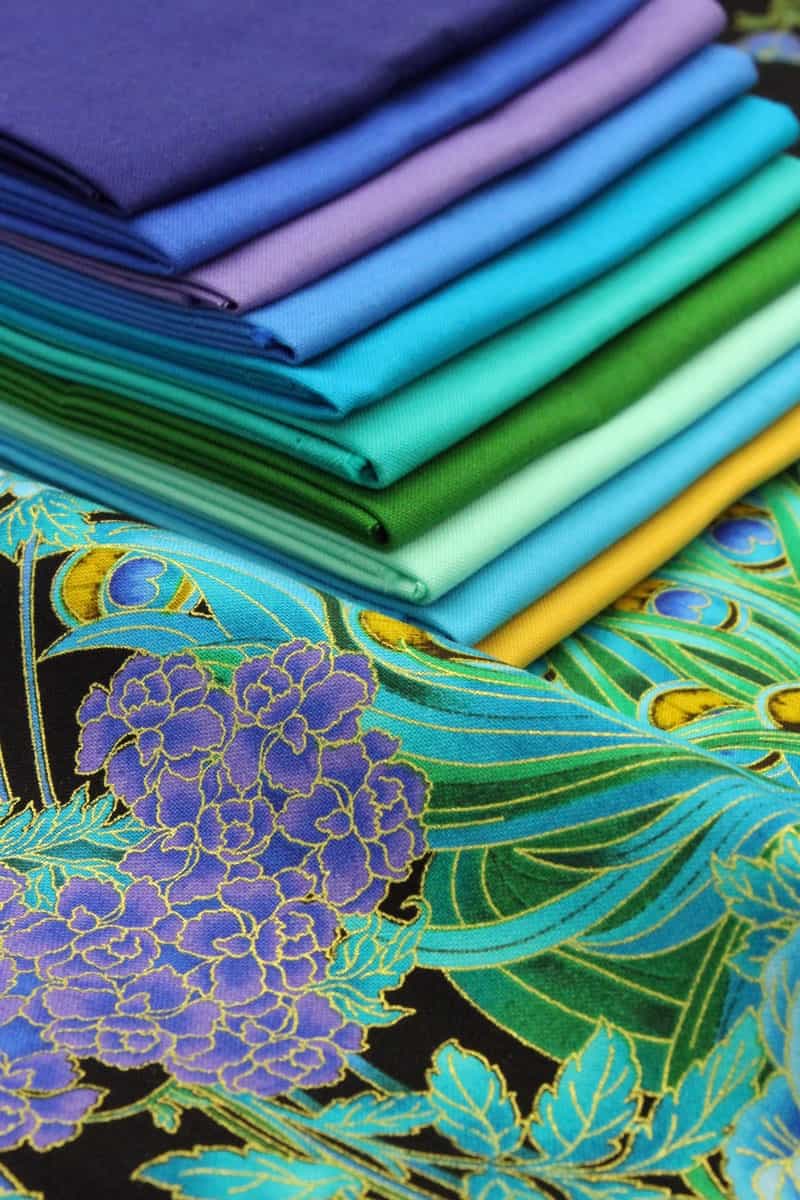
I was easily able to buy the panel from Miller’s Dry Goods, which I found unexpectedly after doing a simple Google search. The line is fairly new so I wasn’t expecting that it would be available yet. I am still interested in the group of solids shown with the panel, but they are not as important. I think they might make a good addition to the quilt, but I don’t know what the final quilt will look like, which means I don’t know how they would fit in so we’ll have to see.
Maureen read one of my previous posts and brought her One Block Wonder blocks, as well as a piece of the original fabric to show me at the retreat. I didn’t even know she had worked on a One Block Wonder and was very pleased to see what she had done. Pam’s class using a panel seems very different from using fabric, but there are quite a few similarities as well. I was pleased to see how different Maureen’s blocks looked from each other and she confirmed that it is fairly easy to avoid ending up with the same blocks, which adds to the variety of the quilt. We encouraged her to work on her OBW quilt, but she worked on other projects. I would love to see what she does with those blocks.
I do like the colors of the panel. There is no cream, as there was in the other yardage I considered, which is a bonus. I am annoyed at cream backgrounds lately. They look dirty to me.
Maureen assured me, as did looking at her blocks, that the black would not overwhelm the piece. There is plenty of blue, especially turquoise (!!!), in the panel as well.
This is a limited collection for Timeless Treasures and I only bought the panel. If it doesn’t work out, the effort will make a great donation quilt.
I had pretty much decided to skip the One Block Wonder this time. I really like how Pam’s piece came out, but wasn’t sure I could replicate her success with work as interesting or cheerful. I have seen others that are not as nice.
When I saw the fabric on sale I looked at it and really made a conscious decision not to make a One Block Wonder project. I thought really hard about the logistics, time and money required to make the project and decided no, not now. I didn’t like the fabric enough to commit. I took the book back to the library and that was that.
Yay! Done deal. Moving on.
Then, yesterday morning, I went on Instagram and saw a new Peacock range by Timeless Treasures (damn you, social media!).
The colors in the panel are much richer and bolder. The design of the panel is more complex and way more interesting. The motifs are much more stylized and lush. Oh, and, Timeless Treasures, thanks for including those awesome solids that match the panel. Just what I needed. More temptation!
This is another good reason NOT to keep your tablet by your bed.
So, now this idea is back in the thinking pile. Here are some questions for you to answer:
What do you think of the panel?
If you saw it in the store, would you think of me? (since, of course, I am always first on your mind. 😉 )
Do you think a finished pieced piece would be too dark?
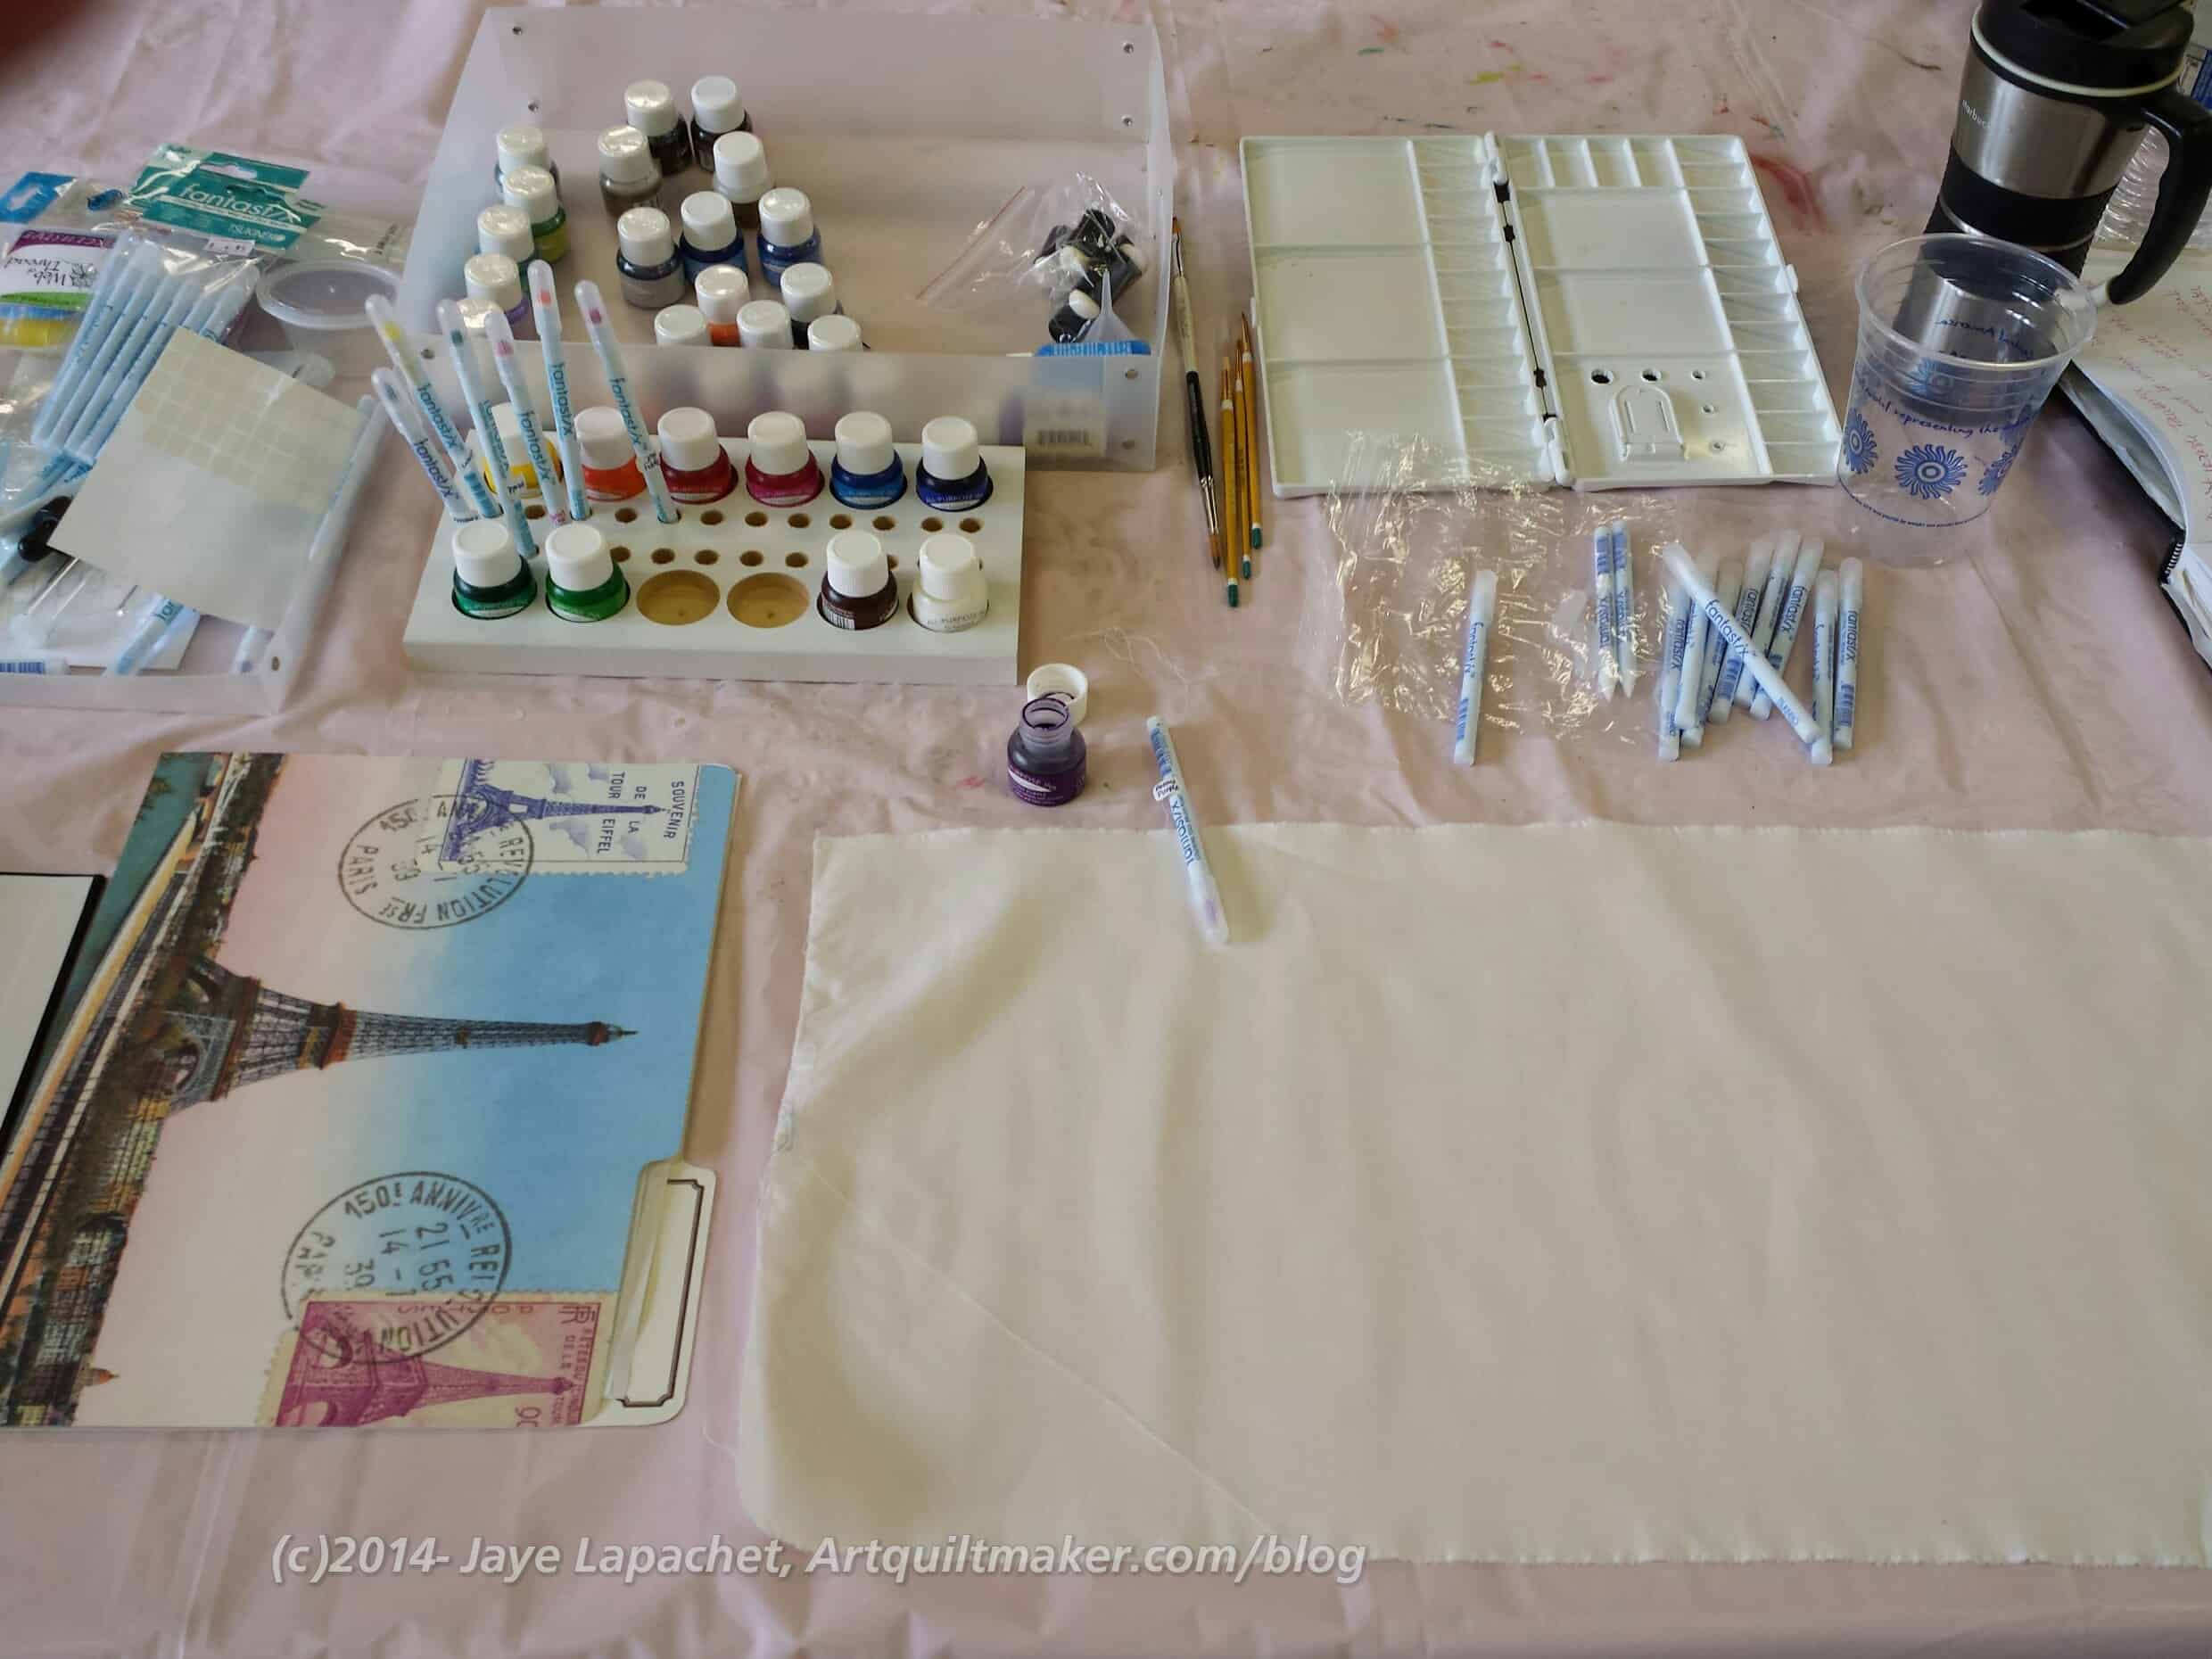
I have a lot of Tsukineko Inks. I love the idea of them. They don’t change the hand of the fabric. They purport to be permanent (have not Googled that nor do I have personal experience). They are not too messy and have fabulous colors.
Sadly, I have never had a lot of time to learn to use them or practice with them. Awhile ago, Nancy and I got together one time to try them out. I had fun and was inspired, but I haven’t really had a chance to work with them since. I love them so they have been on my mind.
It turns out that my class was with Judy Coates Perez. She is awesome and then I read my blog and found out that the first time I wrote about Tsukineko Inks had to do with Judy Coates Perez!
So, this was an EBHQ workshop and I signed up a few months ago knowing I would be on the East Coast around the same time. I signed up and made plans to be sure and be home by the time the class started.
Then I found out I was on the waiting list.
I was #8.
I had no chance of getting in. I was disappointed. Supremely disappointed.
What else could I do? I moved on. The inks stayed on the shelf.
Then I went on my trip. Practically as soon as I settled into the East Coast I got an email from the workshop coordinator saying I had gotten into the class and needed to confirm ASAP. I couldn’t believe that I, #8, had gotten into the class. That is practically a 50% dropout rate. I found out later that the dropout number was the most people who had ever dropped out of a workshop in recent memory and the most people on the waitlist who had ever gotten into a class.
I was really happy! I RSVPed ASAP and then panicked. Did I have the right colors? How could I know? I wasn’t at home to check. I panicked about it on and off until I got home. Finally, when I checked, I was completely astounded to find that I had all but one of the colors. I must have bought a ‘basics’ kit at some point. It didn’t even matter than I didn’t have that color once I was in the class.
Judy Coates Perez is an awesome teacher and I would take a class from her again in an instant. She is caring, giving and very easy going. She has a lot of extra colors (yes, I bought a few more) and supplies. Since I didn’t really have a chance to buy anything on the supply list, I scrounged a water cup from Peet’s when I got an extra cup of morning tea and bought the rest from her: brushes, etc. Fortunately, the supply list was short and sweet.
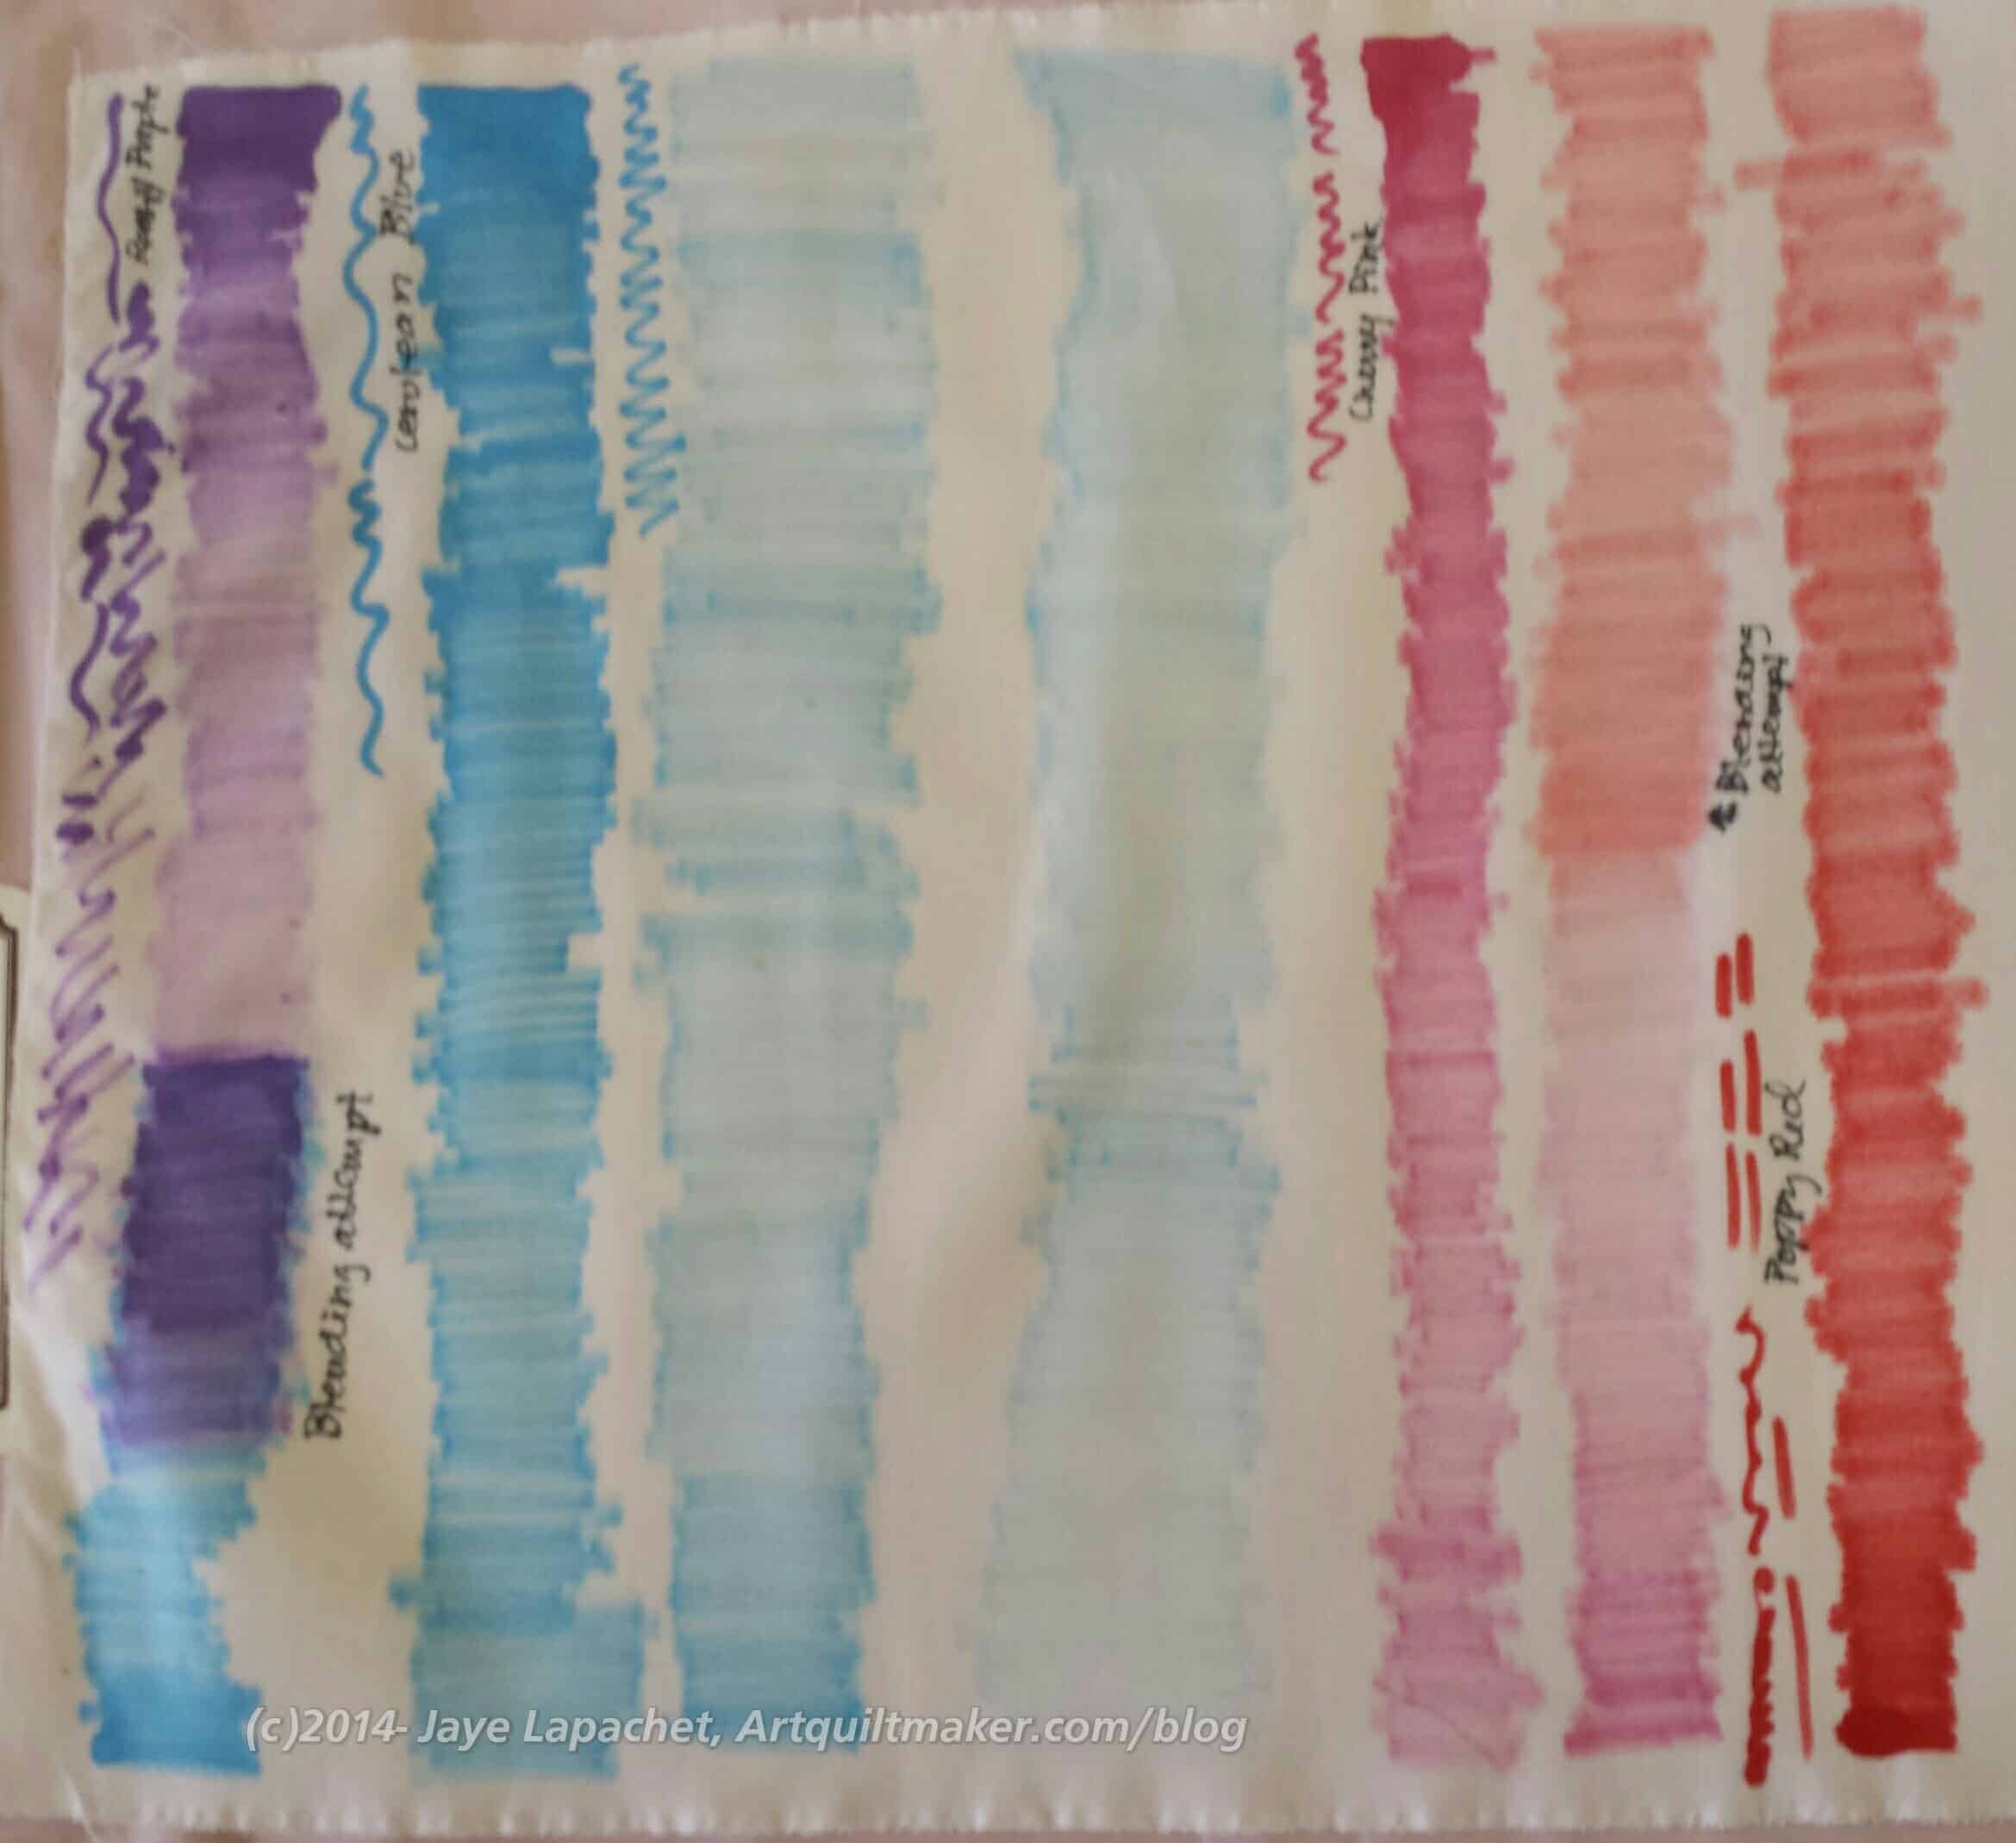
Blending
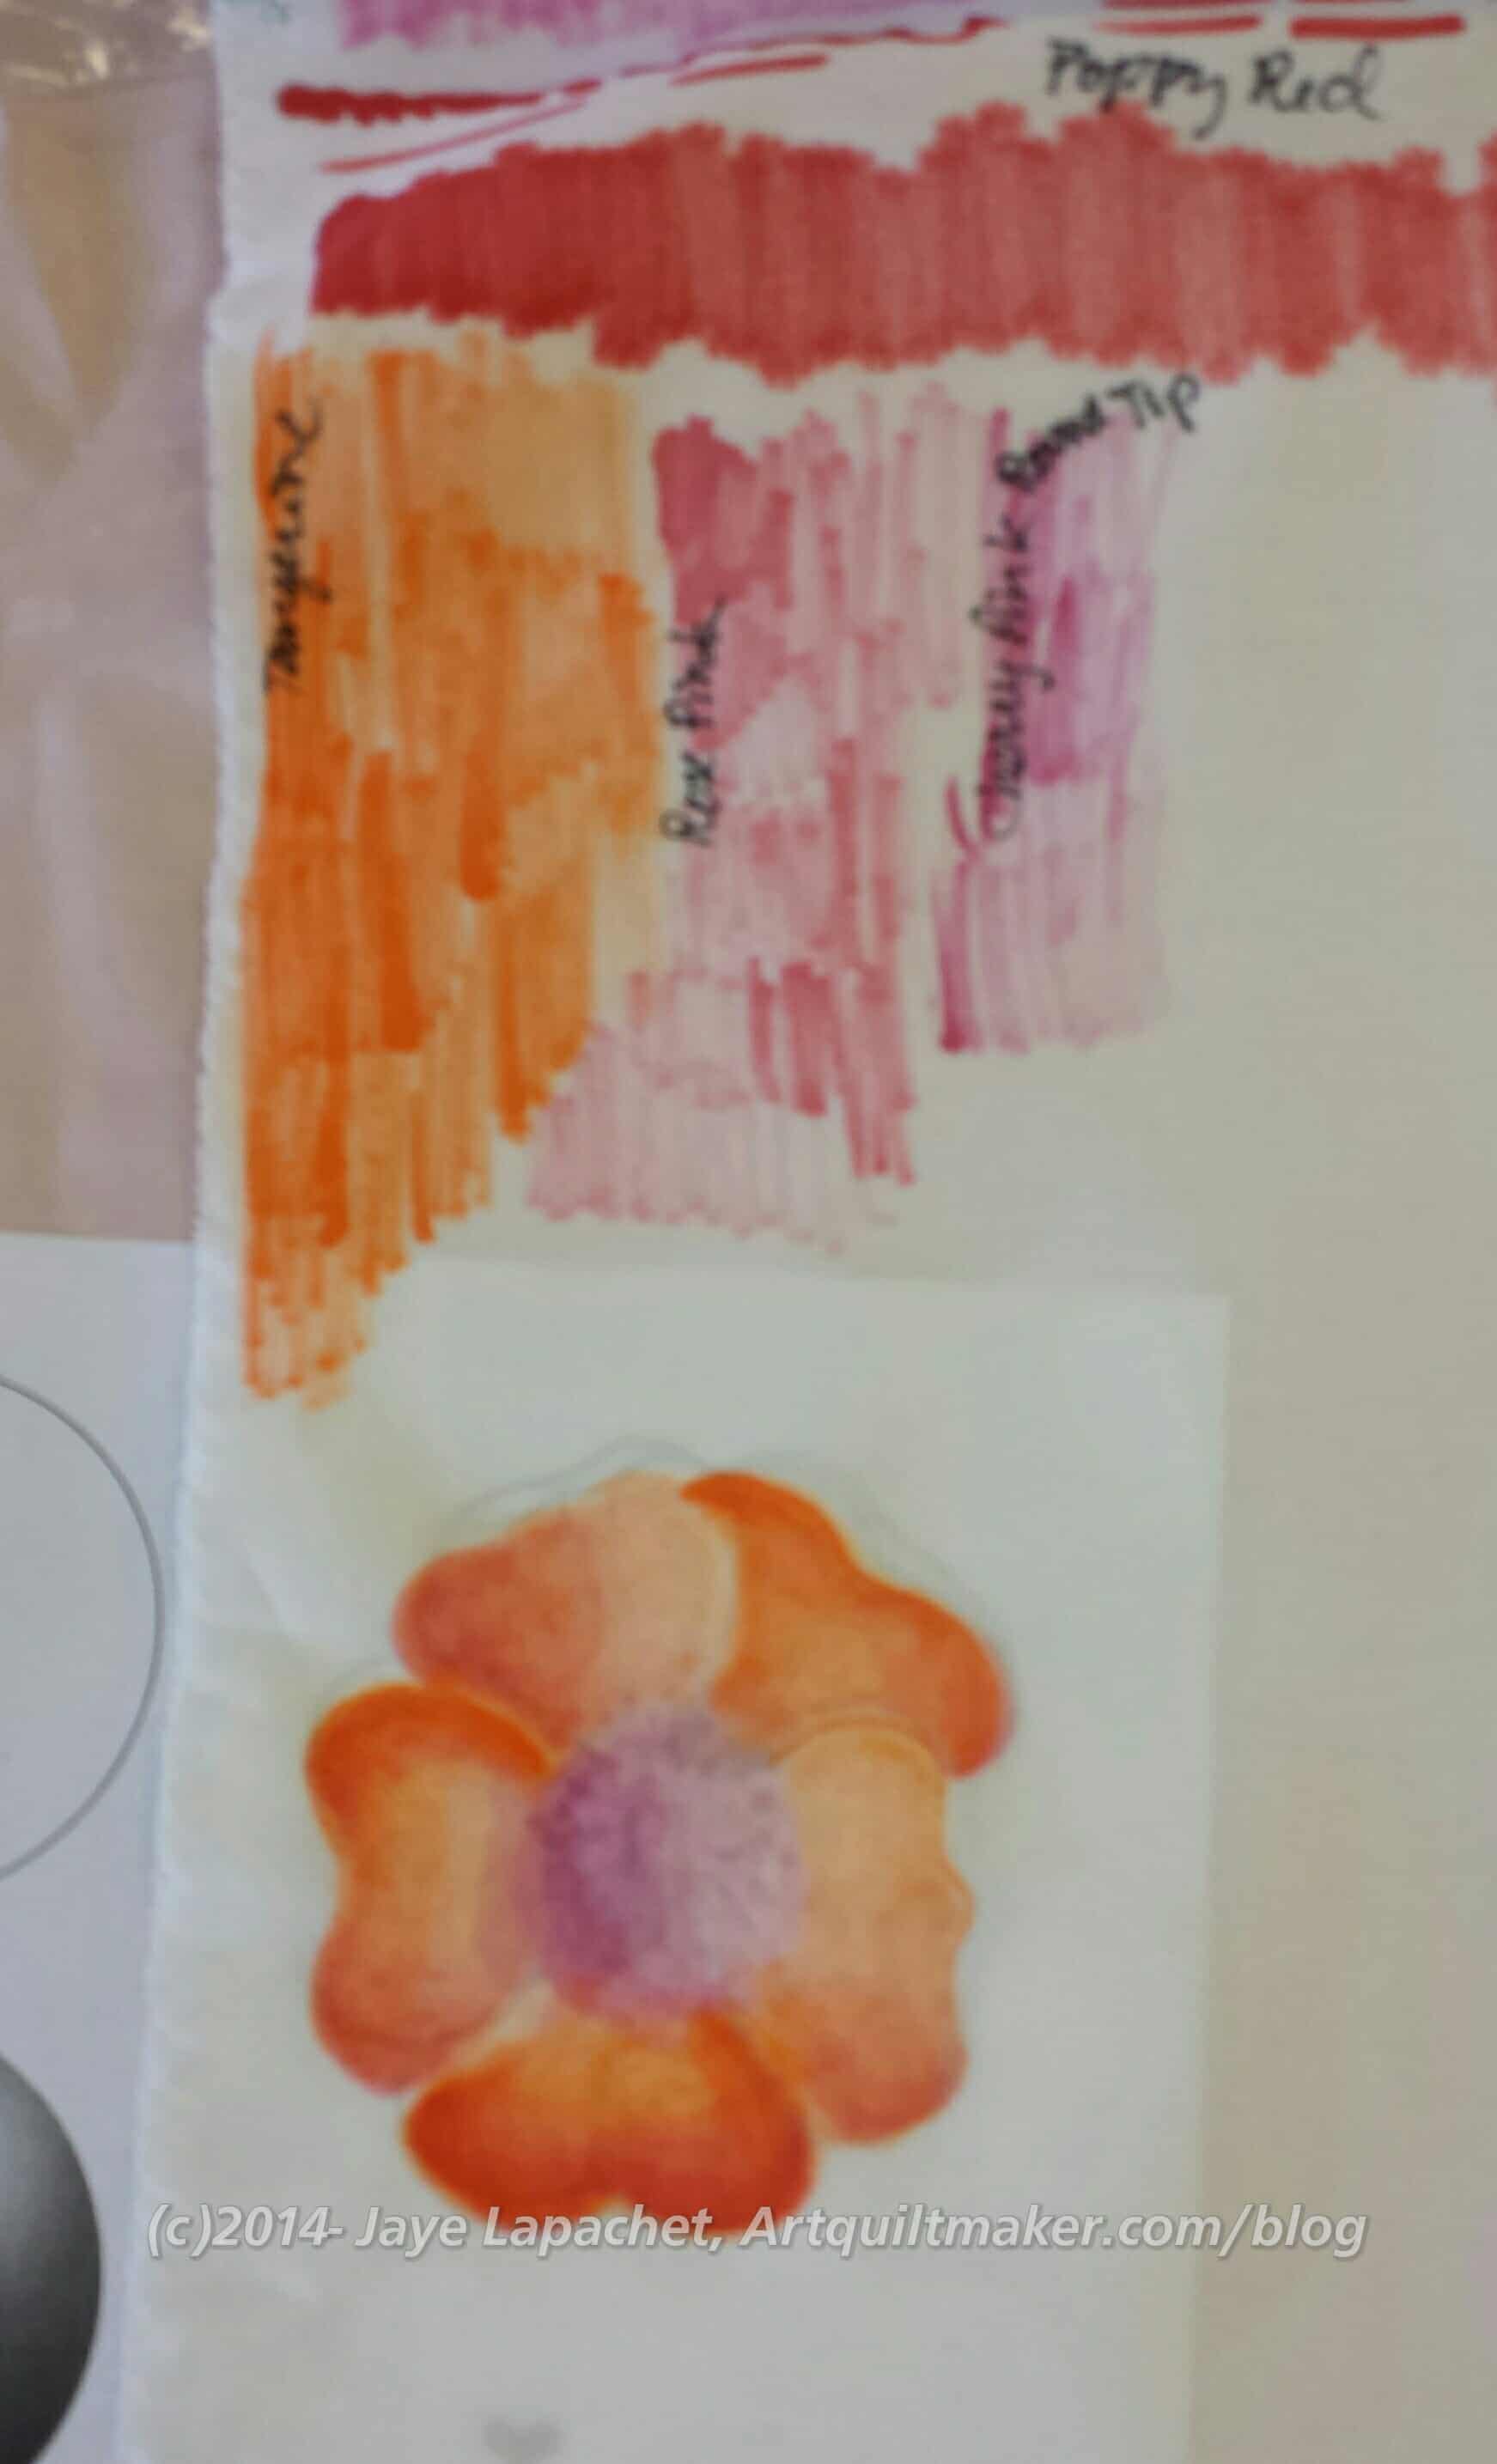
The first thing we did was work on getting used to the ink and blending. I wrote the colors down next to my practice pieces so I would know what I had done in the future.
It takes practice.
The technique requires a light touch. Having a light touch, I found is not my strength. I also found that, since I was determined to succeed, that I made an effort to calm down, slow down, be patient and realize that this technique was a commitment and not a sprint.
I really like the slow and careful way one has to apply the inks. It is soothing in a lot of ways.
Leaf and Flower
Once we started in on leaves and flowers, my rhythm was in full force and, though, my first leaf was a little heavy handed, but the practice helped and I got better. I needed to slow down and apply the ink more lightly. I tried to do that with the second leaf. It isn’t perfect, but it is much better.
The squiggly lines are me trying to get a smaller amount of ink of the applicator.
Tsukineko ink Flower, January 2015
I made a really nice flower. It isn’t as good as Judy’s, of course. For having only worked with Tsukineko inks for a few hours, I was pretty happy with my work. I can see shading and some shadows. I can also see how the blending changed the original tangerine I used for the first coat.
In the afternoon we switched to using paintbrushes. It is completely different and you make the inks more transparent and lighter in color using aloe vera gel (no additives).
I had to get used to a whole new technique, but I tried to take my patience with me into this new technique. The key with the paintbrushes is to have synthetic brushes (boar bristle for oils are too stiff and sable used for watercolors absorb too much liquid) and work in small spaces at a time.
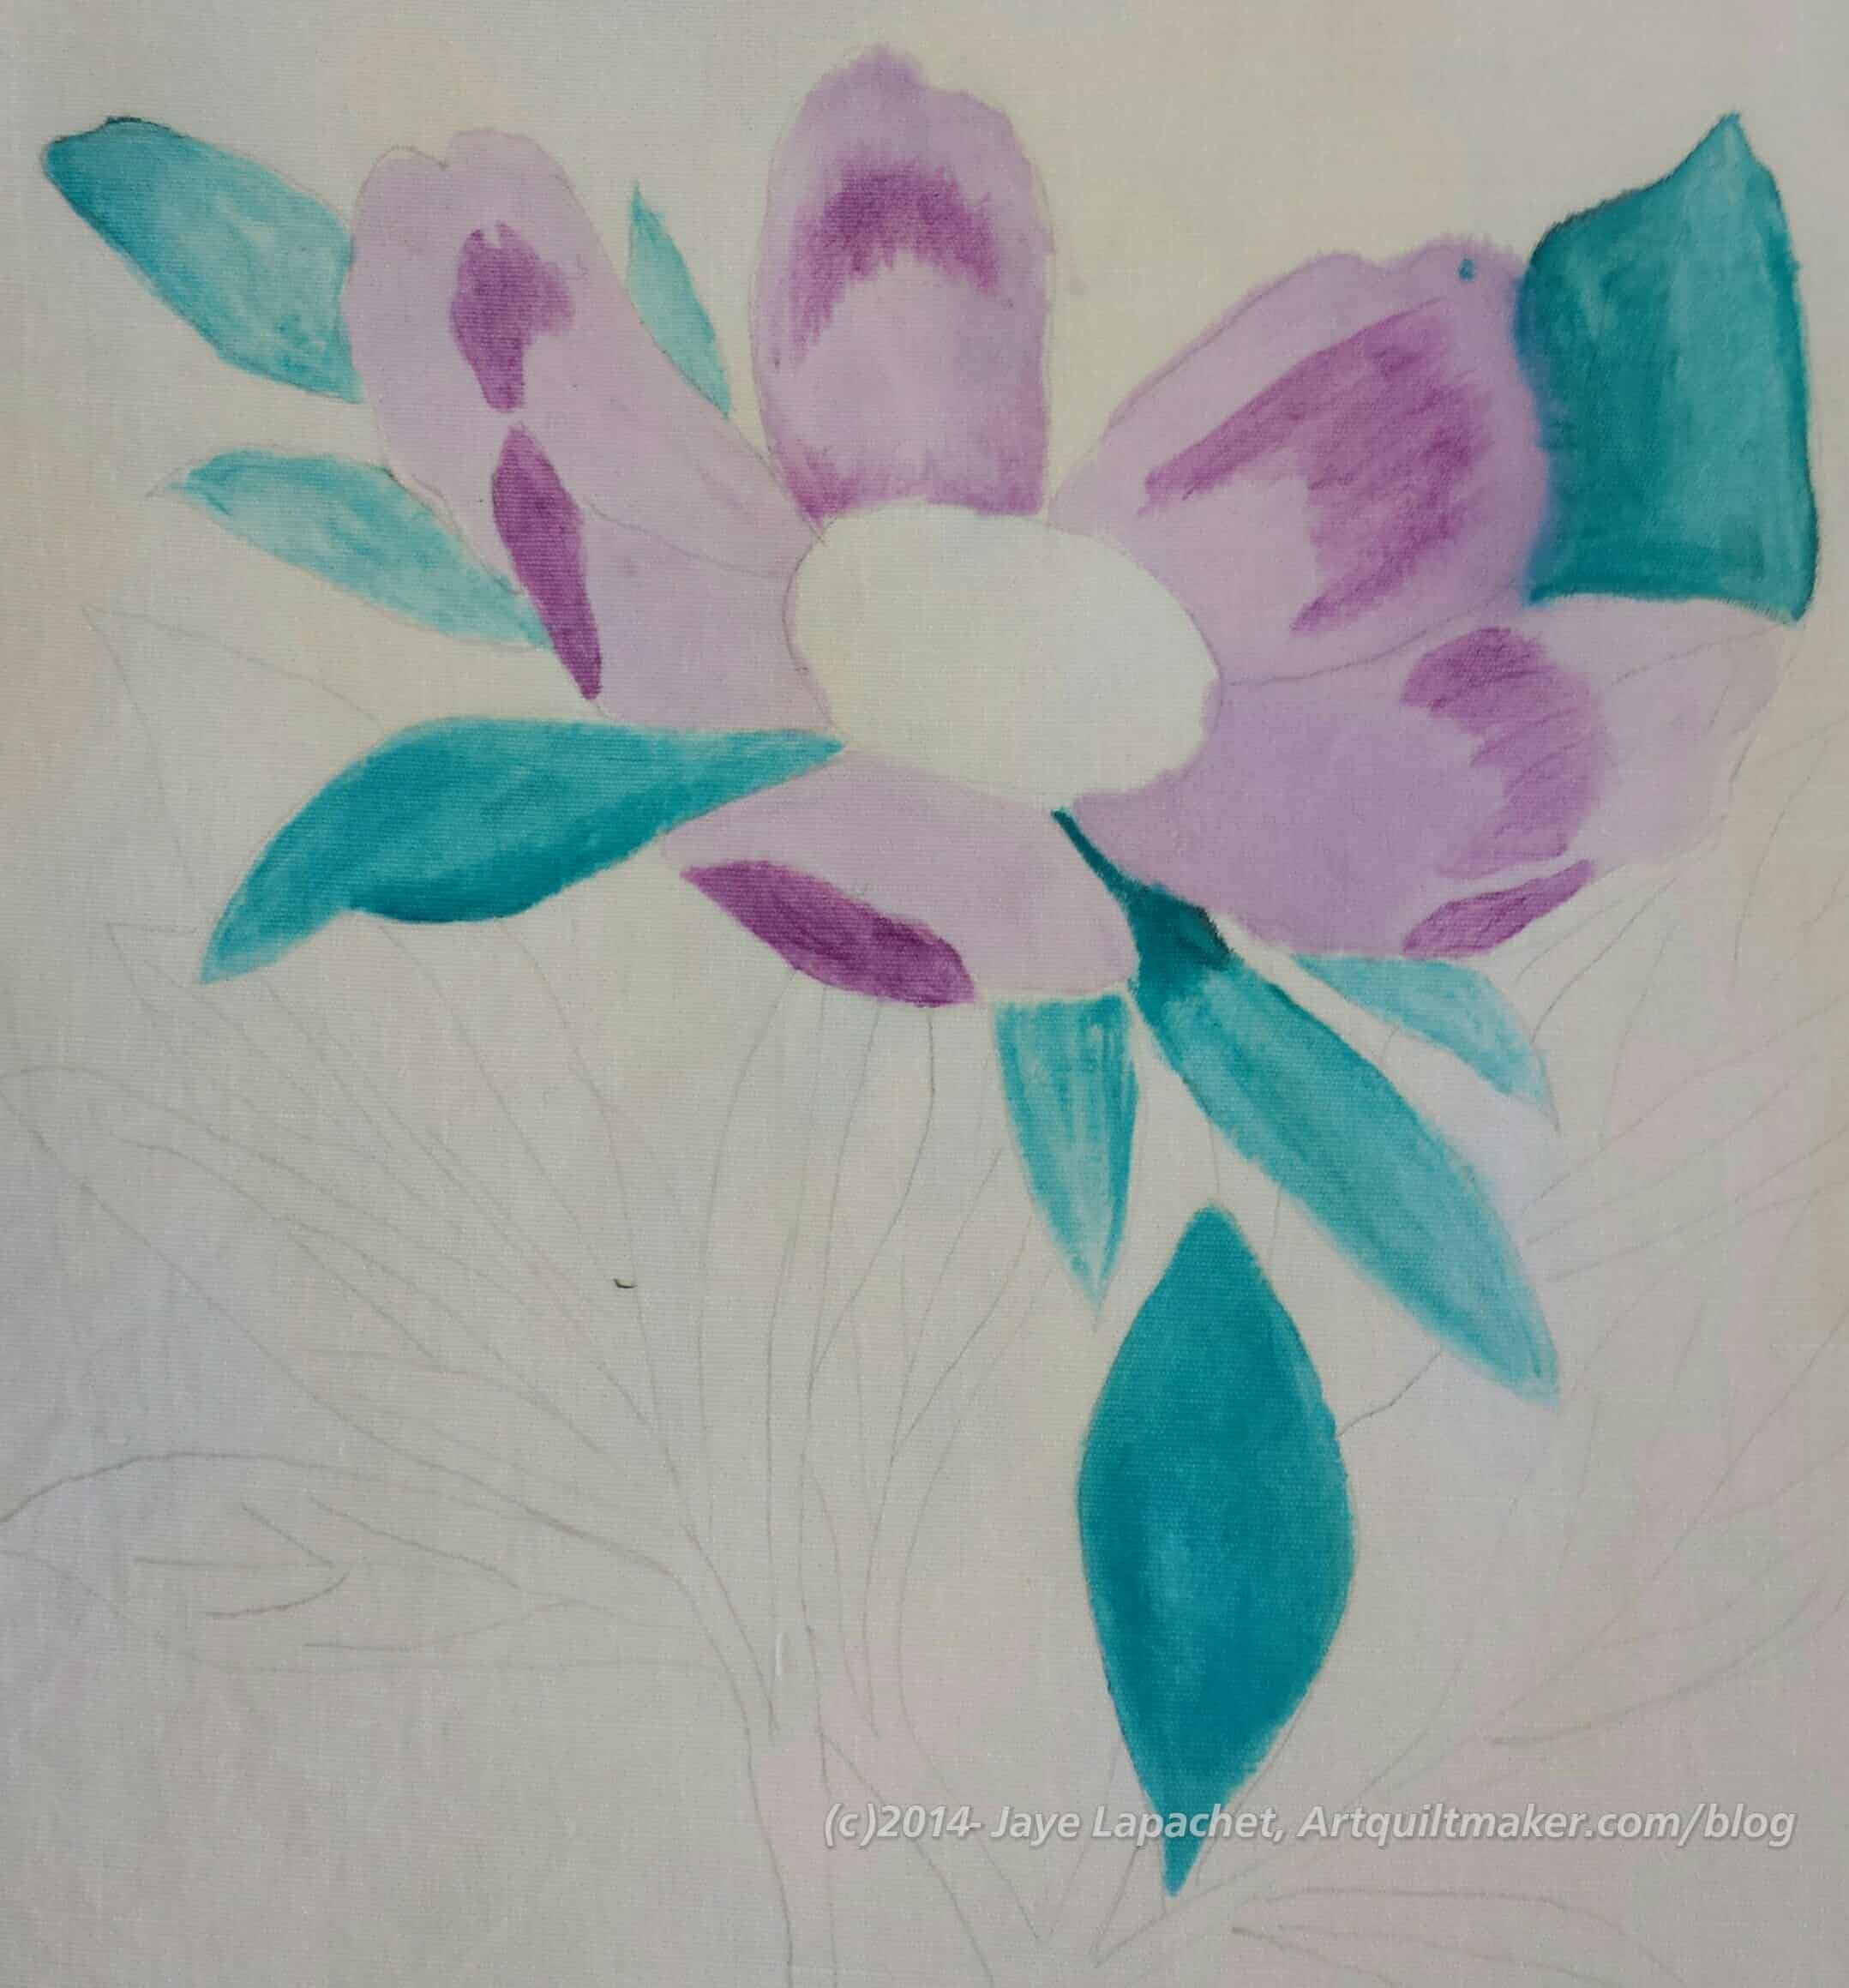
Tsukineko inks, Peony in progress
Judy had copies of botanical line drawings and I picked a peony. I didn’t want to get the snail! My neighbor did, however, and she did a really great job with it. Snails, though, YUCK!
While trying to make the ink looks smooth and even, I was also practicing managing the amount of ink I was using. I got better as I went along.
I could tell other people were getting frustrated with the technique and the inks as the noise level grew as people stood up and started to chat. I just sat and worked away at my little spaces on my Peony.
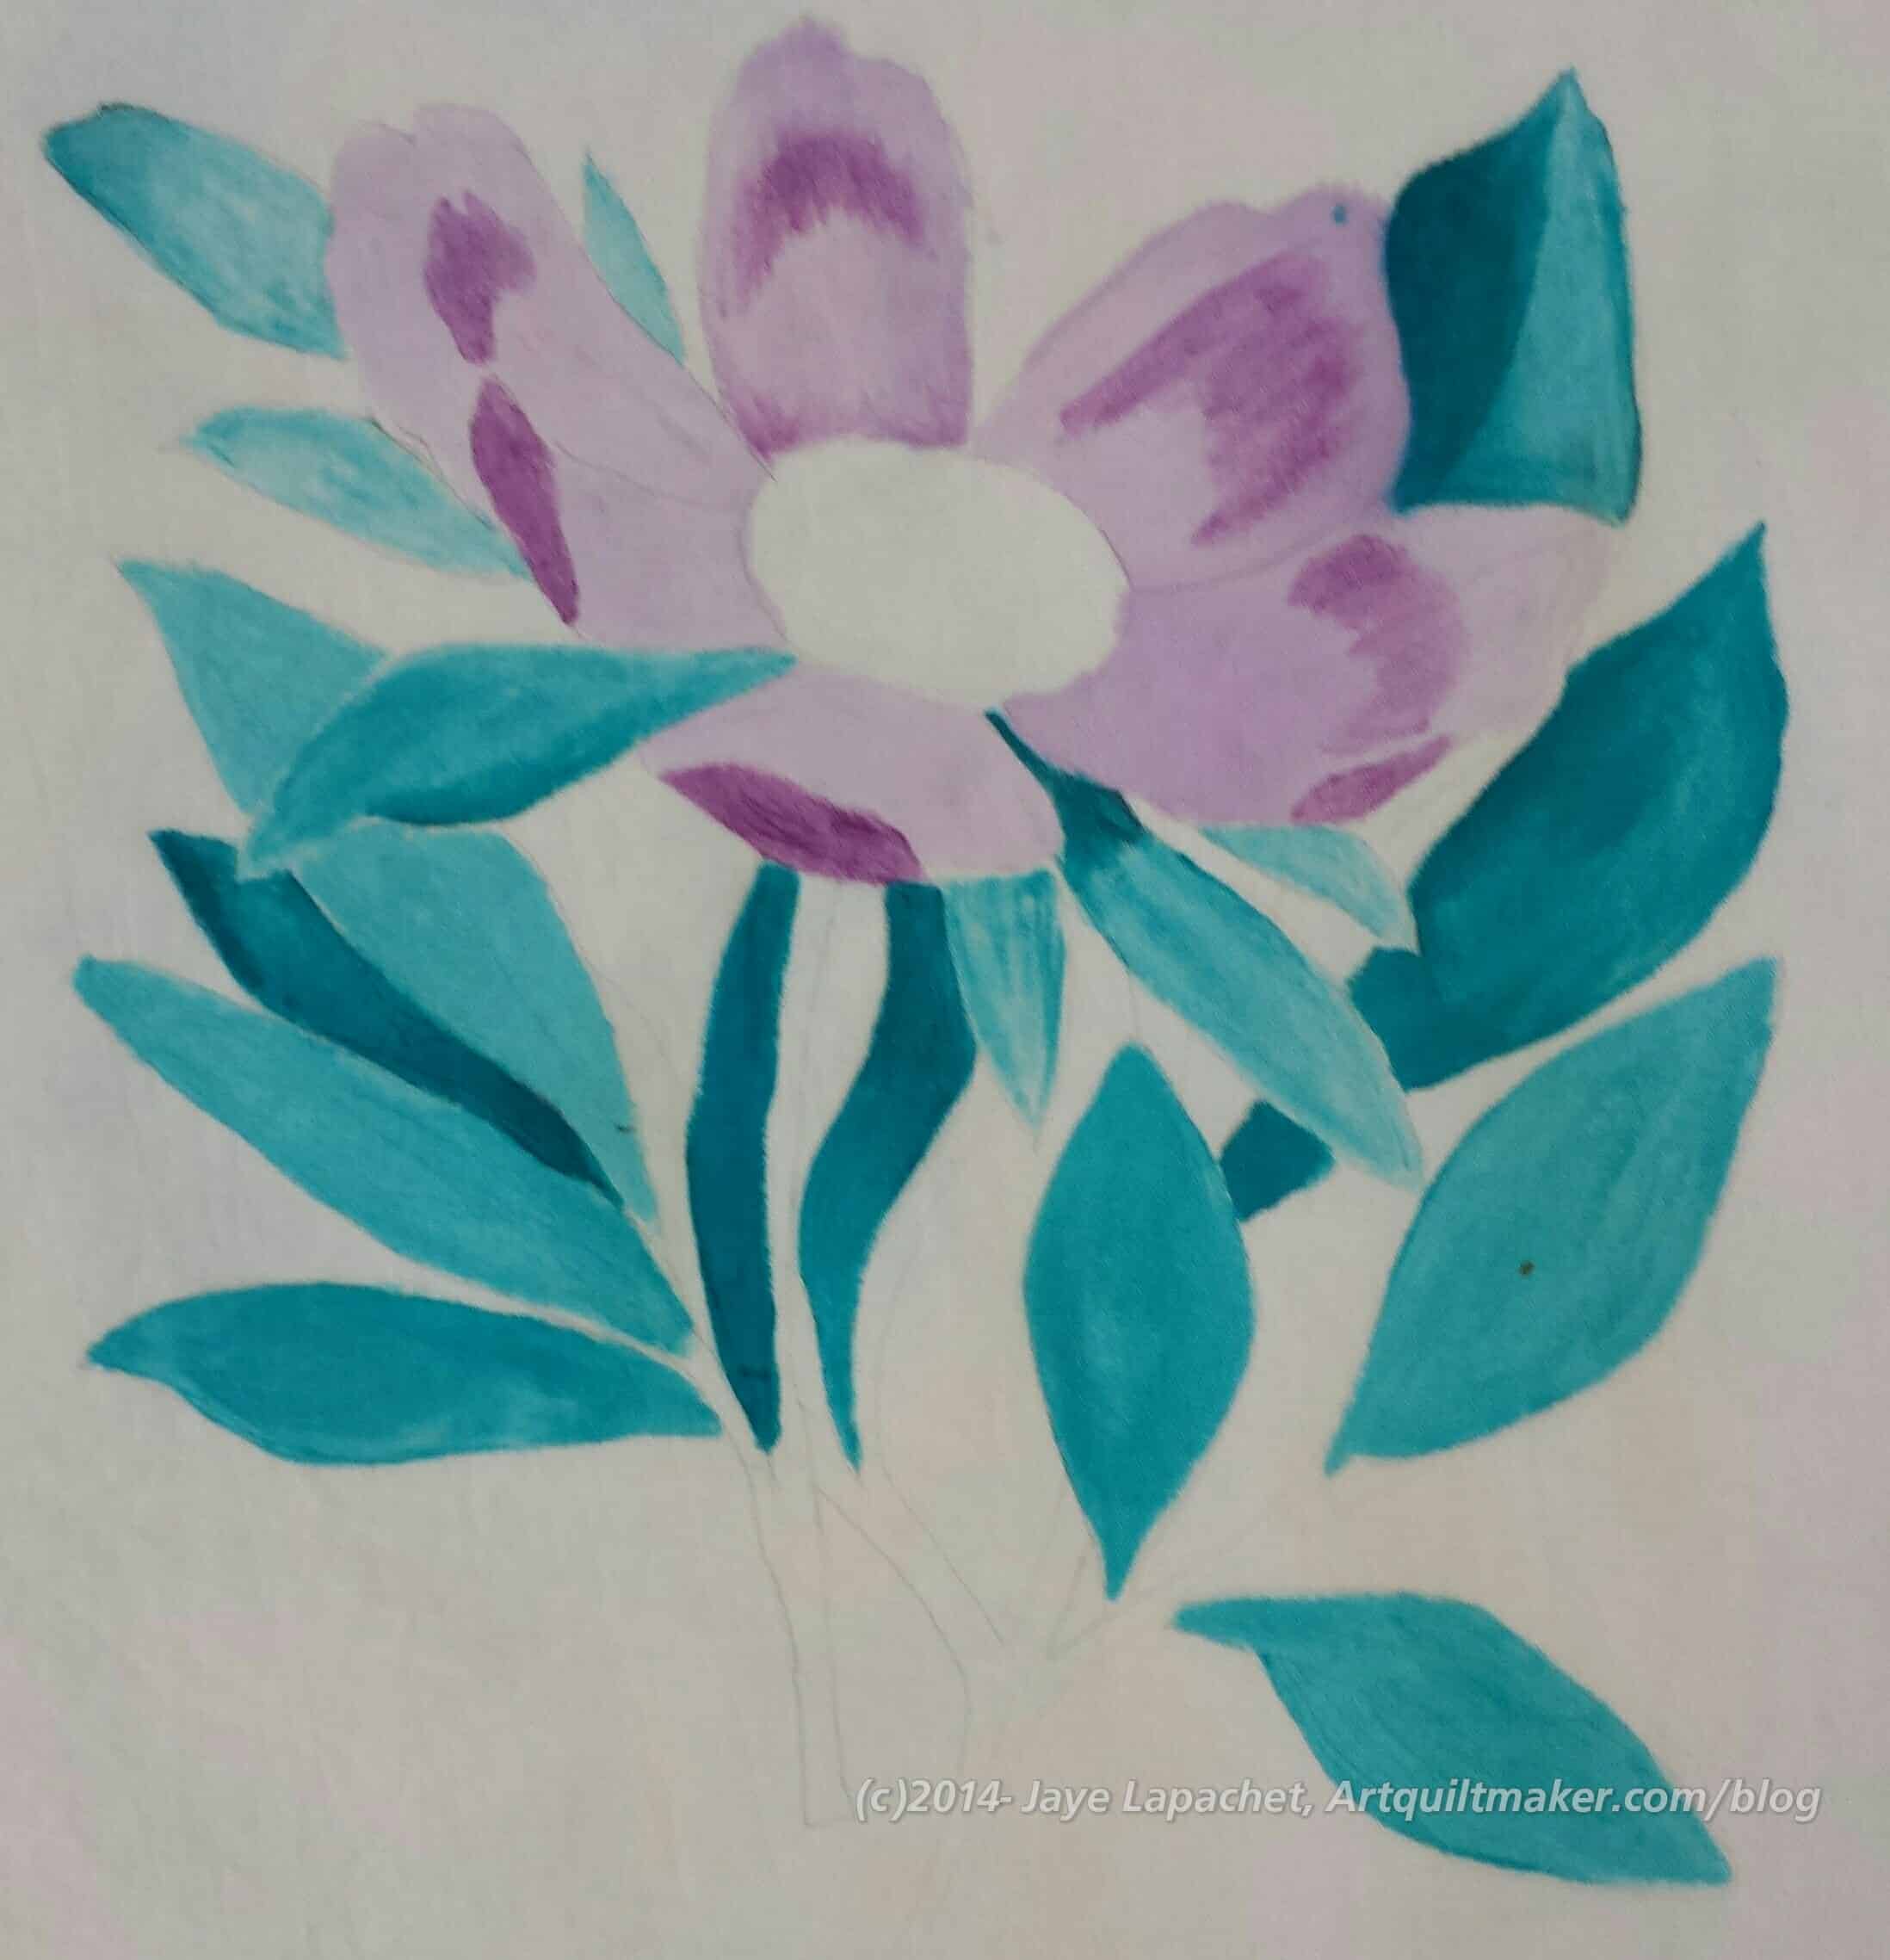
Tsukineko inks, Peony in progress 2
I used Orchid Odyssey for the petals, Thistle for the shadows on the petals and Tropical Lagoon for the leaves. I wanted to something a little different in terms of color and to try out some of my other inks.
Way too early they chivvied us along and got us to pay our bills and clean up our areas. I didn’t finish, but I am pleased with my progress.
The inks get heat set and are permanent when they dry. I learned in this particular exercise to heat set areas once I am happy with them.
I am trying to think of a way to use these inks in my work. I can’t think of anything at the moment, but will keep thinking as I want to use them.
We had a discussion at the CQFA social on Saturday about Workshop projects and how they are not always the kind of projects one wants to finish. There are a lot of variables going into the workshop -the right fabric and supplies, working in an unfamiliar environment, etc. – that conspire to make you learn something, but not always like the end result.
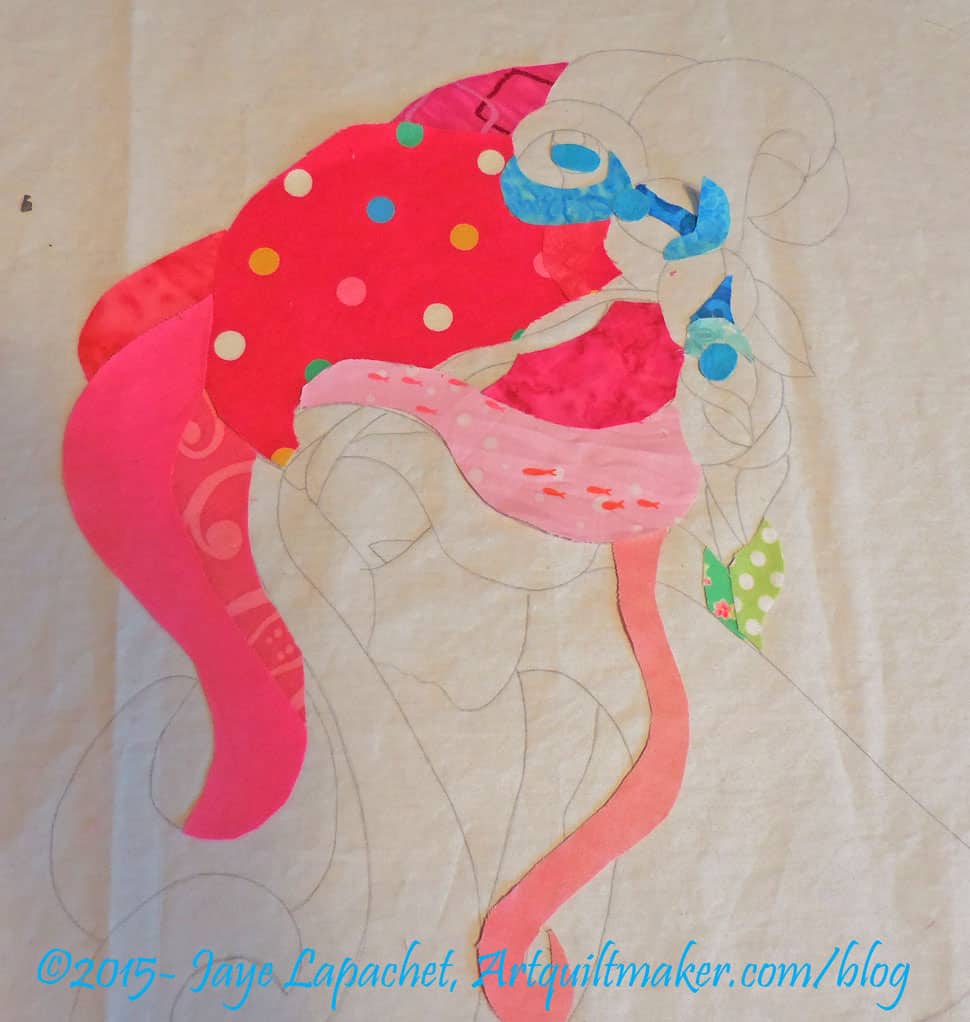
Serendipity Lady – Beginning Work
That is not the case with Serendipity Lady. I have wanted to do this design ever since I made stained and leaded glass panels back in the dark ages. Caroline’s workshop at CQFA last spring (?) gave me the means in fabric and the inspiration to make this dream a reality.
The problem was that my piece had so many small pieces that cutting out the pieces straight from the fabric became an issue. I went back and tried a few times and failed – or didn’t succeed as thoroughly as I would have liked. I didn’t want to simplify the pattern and I didn’t want to blow it up larger either. Struggling with the mechanics of making a piece does not make it fun. Finally, I put it aside to mull over.
This was disappointing, because I came home so jazzed about this project after the workshop. Creating is a struggle, but for this one, I just wanted it to work. Sadly, that is not the way ‘making’ works.
In the mulling process, I came up with the idea of making templates for each piece. I was about to embark on that line of thought using the kind of cardstock (tagboard??) I used to use for cutting the templates for stained and leaded glass panels when I had lunch with Maureen and Dolores.
I mentioned my problem to them and how I wanted to use templates and asked their advice. They both immediately went to freezer paper and patiently explained how to use freezer paper to make the templates. I couldn’t really envision the process in my head. It became clearer when they kind of walked me through the process, reminding me to trace the design backwards.
What Process Looks Like
Again, I was really excited so I came home, taped the design to my sliding glass door and retraced the pattern backwards. Then I traced the backwards pattern on to freezer paper and sat in front of the TV and cut it out.
Again, those tiny little pieces were not my friend. At the moment I have them all paperclipped together, but that is only because I keep forgetting to get an envelope each time I go downstairs.
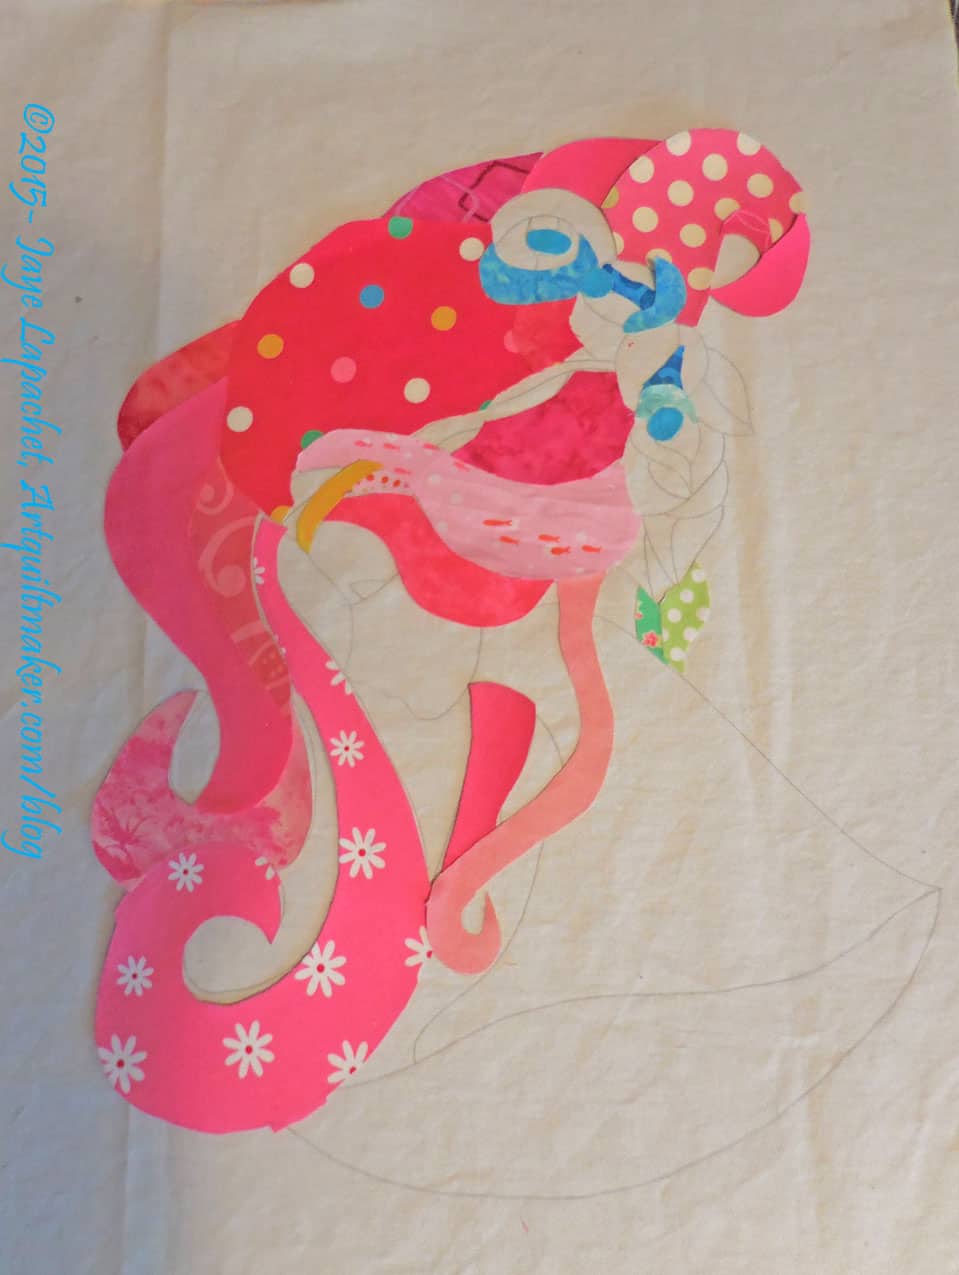
Serendipity Lady – Weekend Work
Next I started applying freezer paper to fabric. Then the real fun began. I threw out some fabrics after putting them near other fabrics and the picture really started to take shape. I am not done and I haven’t glued down the pieces yet, but I really had a lot of fun making some serious progress.
My mind is whirling with the possibilities of adding a few beads, embroidering the eyelash, etc. Fun!
I was thinking about my WIPs last Sunday as I tried to adjust to the horror that is Daylight Savings Time. There is a lot of chaos in my head about projects lately. I couldn’t figure out why until I realized that I had too many leaders and enders projects and not enough front burner projects.
At the moment my leaders and enders projects are:
The Disappearing Pinwheel
Black/grey donation quilt
Brown mosaic piecing
I really was quite happy with the progress I was making on each of those projects when they were the only leaders and enders project on which I was working. Then I finished Scrapitude and all I had with a quarter inch seam allowance were leaders and enders projects. Now none of them are looking very appealing.
To make matters worse, the Scrap Lab Backpack, as I mentioned, uses a 1/2″ seam allowance which requires a different foot, so there is no progress being made on the leaders and enders projects.
I tried to work on the DPW as a front burner project and I just wasn’t as happy. I like that project, but it isn’t exciting enough to be front burner project. This is the moment when projects get derailed. I don’t want to replenish my UFO list so I need to power through these projects and get them done.
This is a tutorial on making a LeMoyne Star. This block is also called an Eight Pointed Star. This is one of the ways that I make it. There are many methods and I encourage you to try different techniques.
Alex Anderson has a great tutorial on one of the Quilt Show episodes on making a Split LeMoyne Star.
Before you do anything else, print the rotary cutting instructions below (first item under supplies). All the sizes, etc are there.
These directions use a quarter inch seam allowance.
You will be creating Y seams.
Chain piecing is not part of this tutorial.
Respect the bias.
Do not sew into the seam allowance.
Cutting
Line Up Ruler to Cut 1 Side of Diamond
Cut a 3″x23″ strips. That should be long enough for 4 diamonds (parallelograms). Cutting a 3″ strip across the width of a half yard of fabric will generate a strip that is long enough. You will need two and using 2 different fabrics looks good.
As shown (left), line your ruler up so the 45 degree angle on your ruler is along the bottom of the strip.The side of the ruler should be lined up right in the corner of your strip.
The idea is to cut off the end of the strip, so you have the correct angle of one pointy end of the diamond. I did try my diamond ruler, but none of the lines were quite the right size, so I couldn’t use it for this particular block.
Line Up Rulers to Cut the Second End
I used the two rulers to make sure that the diamond were accurate. The first ruler, on the left, should be even with the far left [soon to be] diamond point so that it would measure 4.25″ along the bottom edge. I used that measurement to line up the 45 degree angle of the second ruler so I could cut the angle in the right place. I butted the second ruler up against the first ruler (carefully) so everything was in alignment. The second ruler (on the right) must have a 45 degree angle that intersects with a corner or this trick won’t work.
I removed the left ruler before I started cutting, as it was easier to cut with just one ruler on the mat. I was careful not to jostle the ruler in the 45 degree angle position. Line your ruler up exactly as shown in the photo. You don’t have to have exactly the rulers I have. You can use any rulers with the correct lines.
Cut 2d End of Diamond
I found that the method really does work. You will need to repeat the step above 8 times to get 8 diamonds. After the first diamond, it will be easier, since you can use the 2d cut for each diamond as the first cut for the next diamond.
Aside from having to watch out for ruler jostling, I was really pleased with how easy this was and well these diamonds came out. Don’t get me wrong, I wouldn’t have wanted to cut the 300+ diamonds for FOTY 2010 using this method, but for a LeMoyne Star, it works very well.
I cut all the diamonds at once from two strips of two different fabrics. My fabrics are:
background: Lil Plain Jane
red diamonds: Moda Bliss #55021
aqua dot diamonds: Moda Bliss #55023
Side Triangles
Cut the squares and triangles according to the cutting directions on the PDF in the supply list. The triangles are quarter square triangles, which means that you cut the triangles so the straight of the grain will be along the hypotenuse (the long side of the traingle).
If you have some reason for not being able to cut the side triangles as shown, be careful sewing the block together and then stay stitch the outside of the block once you are finished.
Pieces cut
Once your pieces are cut, lay them out or adhere them to your design wall, so you know what you have.
Cut Diamond, Face down
I like to keep them where I can see them because it helps me know where I am. As I sew, I put the sewn elements of the block back up on the design wall.
Once you have cut all the diamonds, you will need to mark them. You need to mark 1/4″ away from the seam line, because if you want this block to come out right, you cannot sew into the seam allowance. The biggest rule I have for making the LeMoyne/8 pointed star block is NOT to sew into the seam allowance. There are exceptions, but I am not going into those now.
Put your diamonds face down on a writing surface and prepare to mark. As you can see from the photo, I used my cutting mat as the hard surface. You can use a table or whatever else works for your work area. I used the Sewline pencil to make the marks. Pilot SCUF pens, a mechanical pencil, etc also work.
Get ready to mark the seam allowance on all of your pieces (squares, triangles, diamonds).
Mark with Perfect Piecer
I like using the Perfect Piecer ruler by Jinny Beyer for marking weird angles, because I only have to move the ruler once to mark the ‘corner.’
With the Perfect Piecer (they aren’t giving me free stuff, BTW!), you put the ruler in the ‘corner’ as shown in the photo. Where I have placed the circle is a hole. Note it is a small hole, so a regular No.2 pencil usually won’t work. Stick your Sewline (or other fabric marking implement with a very thin point) in there and make a dot. Voilà!
You will need to use two different parts of
Ruler Angle Does Not Fit Side
the Perfect Piecer ruler to make the marks on all four ‘corners’. There is no angle for the sides of the diamonds, so just use the straight edge (as I describe below). You don’t need to know the angles, if angles make you crazy. Just match up the shape of the ruler with your cut piece.
Use Straight Edge for Marking
You can certainly use any kind of ruler. Take your regular ruler and line up the 1/4″ line with the cut edge. Make a line around where you think the quarter inch would be. Make it longer, so you don’t have to go back and do it over. Move the ruler to the opposite cut edge of the diamond and cross your first line with a new line. It makes an X. I have done this numerous time and there is no problem using an X instead of the Perfect Piecer dot.
Beautiful marks!
In case you were wondering what the marks look like, the photo (red diamond with blue circles, left) shows examples.
The upper left hand mark inside the blue circle is the mark made with a Perfect Piecer and the Sewline pencil.
The lower right hand mark is made using a regular rotary cutting ruler and the Sewline pencil. Either mark works, as I said. You will use these marks to stop and start your seam lines. NO sewing into the seam allowance!
You will need to mark the squares and the triangles, too. You can use the Perfect Piecer to mark those pieces as well.
At this point, you might want to use some Mary Ellen’s Best Press to stiffen your pieces since you will be sewing along a lot of bias edges. You can either spray it on all of your pieces all at once, or as you are getting ready to sew. If you don’t want to use Mary Ellen’s Best Press or spray starch, no problem. Just keep in mind that you are working with bias edges, so work with them carefully. You don’t need to be afraid of bias edges. Just work slowly and carefully. Respect the Bias! 😉
Position Triangle over Diamond
Sew Segments Together
Now you are ready to sew!
First, position one of your side triangles over the diamond as shown, right sides together. You are lining up the diamond with the left non-hypotenuse side of the side triangle.
Line up the marks you have made on the diamond with the marks you made on the triangles.
I used pins, but only stuck them through vertically one time to keep them in place until I got to the sewing machine.
You can give the pieces a little press to stick them together, too, if you want.
Sew from Mark to Mark
Next you sew from mark to mark. Stay out of the seam allowance! You can back stitch, if you want, but stay out of the seam allowance. Start sewing at one mark and stop at the second mark. Easy!
An Aside: You are probably wondering about the lemon fabric. I press fabric on my ironing board and if I am pressing a lot of pieces, then I will put a larger piece of fabric so that I can get more bang for my buck. As I press the smaller pieces the larger piece gets pressed as well.
Press Carefully
You can press now. If you do, press carefully (remember the bias, respect the bias) towards the diamond. If you don’t want to press until later, that is ok, too. I usually create the entire segment (2 diamonds, one triangle) before I press.
Now you have your first piece. YAY!
Not hard or scary, right?
Repeat this step for all of the diamonds that will be in the same position as my aqua with white dot diamonds.
2d Diamond with Pieced
The next step is to sew the second diamond on to the segment (above: aqua with white dot & Lil Plain Jane fabrics) you have just made. You will be doing an inset seam. An inset seam is also called a Y seam. A lot of people hear this and panic. It isn’t difficult, but you can’t chain piece them and you have to pay attention. This method is similar to sewing hexagons together. Y seams really expand your quilt block piecing repertoire.
As you can see I have lined the red diamond up with the segment I sewed and am ready to line up the pieces, pin and sew.
Line Up 2d Diamond & Pin
First, line up the marks on the triangle and the diamond.
I just used vertical pins to make sure that everything was lined up before I sewed. I put a pin in the middle of seam line right before I sewed just to hold everything together.
You will be sewing in two stages. I like to sew the triangle to the second diamond before I sew the two diamonds together.
Sew 2d Diamond
Next, place the group of 3 patches (2 diamonds and a triangle) under the needle, lining up the marks so that the needle misses the seam allowance and goes straight into the first mark.
Sew from mark to mark. The triangle and the second diamond will now be sewed together.
Sew from Top to Middle
Second, line up the new diamond with the diamond you have already sewed to the triangle.
Line Up 2d Diamond & Pin
Match up the marks on the top and sides of the diamond. Right sides should be together.
Put the top of the 2 diamonds into the machine. You will start sewing at the mark, which is 1/4″ in from the top of the diamond. Sew between the two marks, avoiding the seam allowance.
Top View of Sewing Mark to Mark
Sew down to the mark at the bottom of the diamond. If the pressed seam allowance looks like it will go under the needle, move it out of the way with your finger, the tip of some sharp scissors or a stiletto.
Stop at the second mark.
Remove the piece from the machine.
Segment 1 Complete
Once you have sewed the the three patches together, you will have one full segment completed.
Next, press the 3 seam allowances into a swirl. This is similar to what you do with hexagons. As a guide, use the first seam that you pressed after sewing the first diamond to your triangle.
The reason I suggest the ‘Swirl’ is that it reduces bulk later. This particular pressing point isn’t as important in terms of bulk as the center, which has a crazy number of layers, once finished. Consistency is good, though.
Repeat to make four of the above segments.
Sew Quarters into Halves
Segment and SquareSew Square to Segment
Line up the square to the [red] diamond, matching the marks.
Arrange your pieces like I have done.
Line up the marks in the square with the marks on the outside side of the bottom (in the picture it is red) diamond.
Press, if you like. Pin, if you like. Go back to the sewing machine and sew from mark to mark.
Repeat this step for all four segments.
Sew Square to Segment 1
If you just look at the next photo, you might have a heart attack. Please don’t. Add the square is not hard. The key is to NOT sew into the seam allowance.
Two Quarters of the Block
Once you have two segments sewn to two squares, prepare to sew the two quarters together.
An Aside: You can actually sew into the seam allowance on any seam that will end up on the outside of the block. If this thought is going to make your head explode, then just remember my mantra: don’t sew into the seam allowance and you will be fine.
Line up 2 Halves along the Center Diamond
Sew Diamond Only
Sew the [red] diamond to the aqua diamond on the bottom. Stay out of the seam allowance and sew mark to mark.
Seam Line After Sewing Diamonds
After Diamonds are Sewn
It looks weird once you have sewn the diamonds together, but it will work out.
Line up Square
Line up the square with the [aqua] diamond and sew from mark to mark.
You Finished Half of Your LeMoyne Star
Two Halves of Block
Center detail
Finally, we are ready to sew the two halves together. You should have pressed in such a way that you can nestle the diamonds together using your pressed opposing seams.
Match up the marks with pins. I used really thin ones this time. I normally use the kind shown in the center detail photo, but switched to thinner ones as I worked on this step, because my normal pins weren’t giving me the results I needed for this tricky piecing. Note that I don’t pin right in the center. I pin well where I am not going to sew and may put another vertical pin in the center temporarily. There are so many layers in the center that it doesn’t always make sense to pin there. Do what works for you.
Sew Halves Together
Line up your piece carefully.
Hold on to your pinned halves tightly.
Sew over the center only. Start about an inch from one side of the center and stop about an inch after the center.
Sewing only a couple of inches makes it much easier to rip out, which I had to do. You might think that this will be a piece of cake, which it might be for you. It can be tricky also, because of the many layers of fabric that you are sewing through. My sewing machine did not want to go straight over that center section, which is why I had to rip out the first time.
Take the piece out of your machine, open it and see if you were able to match the center.
Once you have the center matched to your satisfaction, sew from the edge of one diamond across the entire center to the edge of the opposite diamond. Remember the mantra? Refrain from sewing into the seam allowance.
Finished and Pressed (full)
Once you have sewn the squares to the last sides of the last diamonds, pressing becomes very important. I have indicated with the circles how your pressing should look. If you need to re-press, spray the piece with water and that will make it easier.
By creating a swirl during the pressing of the center, you will reduce bulk for your quilting step. You will thank yourself if you quilt your own quilts. Your quilter will thank you, if you have someone quilt your quilts.
Finished and Pressed (detail)
Once you have sewn the squares to the last sides of the last diamonds and pressed the piece, you should have a gorgeous block and feel very proud of yourself.
I bought some Tsukineko inks some time ago and never had the chance to use them. As time passed, I lost my inspiration and the inks languished.
Mark Lipinski did me a real favor when I was at his house and I don’t even think he knows. He asked me about my art quiltmaking in the process of the podcast. He was trying to get to know me and, instead, he changed my focus. I had gotten away from surface design and was focusing on piecing. I don’t know why, but it was my reality. By asking me Mark made me think about art quiltmaking again.
As a result of that innocent question, I have started to go back to some older art quilt projects. I finished the beading on Kissy Fish, but before I finished, I was looking for some green beads. In searching for them, I found the inks. Soon after I was talking with Nancy and another friend and suggested that we work with these inks together. I am much better at new supplies when I have another person to work with. So we got together and tried the inks.
It was really fun. I didn’t make great art, but it was really fun.
The other night I caught a new episode of Love of Quilting and Jo Morton was a guest again. She was showing another technique for making half square triangles. I first became aware of Jo last year when I watched a previous episode of Love of Quilting.
Jo Morton is a fabric designer, writer and quilt designer. She has a website, where she sells, apparently, self-published, books, and a blog. She is also a designer for Andover Fabrics and has a large number of collections and projects on their site.
Based on what I saw Marianne and Jo do on the show, I tried the technique and was pleased with the results.
I got in touch with Jo, who was very quick about getting back to me, and asked whether she had technique sheets or sections in her books discussing the scalability of her techniques. She said that the market is geared towards projects and she didn’t have technique sheets. Too bad. I had trouble with her Flying Geese technique, but found the half square triangle (HST ) technique to be one of the best I have seen. It is straightforward, there is a minimum of dealing with bias and the squares magically appear all at once.
Since she didn’t have technique sheets, searched the web. I found a similar one posted on Wet Canvas. The Wet Canvas tutorial does a good job of showing the different ways of using the half square triangles. Most of the techniques were the square method (like what I describe below, but with one square making 2 HSTs, rather than a larger square making 8 HSTs) like the p.s. i quilt tutorial. I am also interested in the Quilt in a Day method and this tutorial talks about that. B’s Modern Quilting has the fish tutorial method.
I started with 5″ squares, which is the size they used on the show. The 5″ squares make 8 HSTs. I thought this would be a great way to use charm packs.
2 5Draw an XPut 2 squares together
First, I drew an X, corner to corner, on the lighter square. Then I put the 2 squares right sides together and pressed them. If I had wanted to pin I would have pinned far away from any of the lines. I walked on the wild side and didn’t use pins.
Next, I sewed on each side of the lines, 1/4″ away from each line
Measure 2.5
After sewing, I measured 2.5″ from the side of the square.
Cut in a + Configuration
Cut the square in a plus configuration 2.5″ (middle of the X). I think you could cut on the pencil lines, but you have to cut in a plus configuration at some point and it seems to make sense to cut in the plus configuration first.
Cut in +, then X
After you cut the plus, you will have four squares, each with a line drawn diagonally across the middle. Cut the squares in half diagonally. You can use the line as a guide. It is more important to line your ruler up corner to corner.
HSTs from 5
The result is 8 2″ half square triangles. The above are actually a thread or two larger than 2″, which leaves the perfect opportunity for trimming to make them an absolutely perfect 2″.
Trim
Trim the squares to 2″. Trim on all four sides. Don’t be tempted to trim just on two sides. Line the 45 degree angle line on your ruler up with the diagonal seam line on your HST and trim on all four sides.
Beautiful HSTs
Now you have 8 beautiful HSTs. The bias edges shouldn’t be scary for you on the regular method, but this method makes HSTs much easier. I think this would be a fabulous method to make a lot of HSTs in a short amount of time. It is similar to a tutorial that p.s. i quilt posted, but times 4. I am planning to try out different sized beginning squares to see what sized HSTs I come up with.
I talked over the math with my DH and came up with a chart showing the different sizes you can make with this technique.
This is a thinking girl’s tutorial to making flying geese. Knowing how to make Flying Geese allows you to make Sawtooth Star blocks, Dutchman’s Puzzle blocks, borders and other parts needed for your quilts.
You are going to have to use the technique with your own measurements to make the geese that fit your project. There are many other ways to make flying geese.
Cut 2 Squares for each Flying Geese Element
This fabric will be used for the ‘wings’.
Draw diagonal line from corner to corner
Turn the squares over and draw a diagonal line from corner to corner. You will need to do this on all of the squares for your Flying Geese.
Cut background
Cut background, or goose, fabric.
Lay wing 1 on goose
Lay first square that will be a wing on the goose (background) fabric and pin. Make sure the pin is out of the way. You will be sewing on that drawn line, so you will need to pin far enough away so the pin doesn’t interfere with the operation of the machine.
Sew along line
Sew along line and trim threads. I use a foot that has an arrow on it. I can line that arrow up with the drawn line and sew away.
Trim
Trim 1/4″ through the wing and the goose away from the sewn line as shown above. Press the wing so the front of the wing fabric is showing.
Lay 2d square on goose.
Place the second wing on the other side of the background fabric.
Trim 2d sewn wingSew and trim second wing
Sew and trim as above. Sew so that you cross the previous sewing line.
Press back 2d wing
Press back the 2d wing and, voila’, you have a Flying Geese element.
You need four of these to make a Sawtooth Star or eight of them to make a Dutchman’s Puzzle.
Julie, over at the Intrepid Thread, has created a tutorial for an iPad bag in conjunction with Cutting Corners. Aside from the bag being cheerful, I like the directions. There are a ton of photos and the words are pretty clear. This is a long tutorial, so put a new ink cartridge in if you plan on printing it.
I bought a gift of fabric from Julie and she was kind enough to offer to include a card. She sent the fabric out in a timely manner as well. Great service.
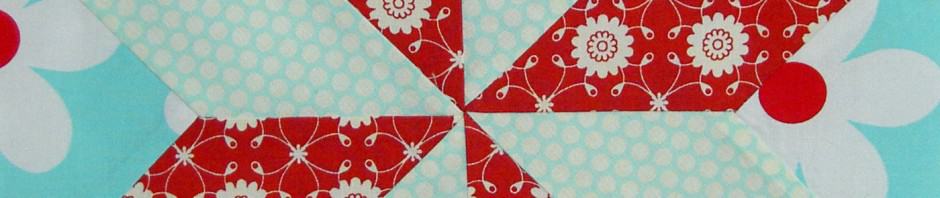
I love this quilt. It was part of the Red and White show in NYC. Don’t you love the different borders? I might make one.
Media
I was listening to Creative Talk Radio with Pat Sloan recently. She had an interview with Joanna Figueroa, which was about a half an hour long. I really enjoyed hearing about her and about her new project with Quilts & More magazine. It starts with the April issue. I will have to seek out that magazine and see what it is about. Pat also had an interview with Eleanor Burns on that same episode as well as the news that she is moving her podcast to the AllPeopleQuilt.com website.
As a result of the podcast, I decided to try out the Fig Tree Quilts Fresh Vintage subscription for awhile. They called me to get some payment information and Joanna Figueroa picked up the phone. What a thrill! Who cares about Brangelina!
I have purchased this publication before. TFQ and I were together when I bought issue 10 that has the fabulous Tea Basket quilt in it. I haven’t made that quilt, but still admire it. I am looking for something a little different and hope that this magazine will provide it.
Sandy of Quilting for the Rest of Us podcast has started to write some book reviews. I flatter myself that I inspired her, but I know that she wrote book reviews on some other subjects for previous jobs. Go check out one of her first books reviews.
Penguin has come out with some new editions of classics such as Black Beauty, The Secret Garden and Emma. The creative part of this everyday publishing phenomenon is that they are being released under a new imprint called Penguin Threads and the covers are hand sewn. I saw a brief article in the Atlantic that featured wonderful pictures. In the images the stitching can be seen. The colors are cheerful without being glary. There is a lot the article doesn’t say, such as how many are being made? Are they all hand stitched or only the first one? Cool, in any case.
The Quilt Index had a great Double Wedding Ring quilt up last week. The background was Nile Green – kind of a combination aqua and green – which provided a real WOW factor to this quilt. The maker really had some guts.
Linda Kemshall has a new blog. She is a UK artist who works on DMTV and Thr3fold Journal. I wrote about her, and her daughter Laura, in a blog post some time ago.
Stars for San Bruno
As you know, I finished the first quilt top and am gearing up for the second. Someone offered me some fabric and replied to my query about her being sure she wouldn’t mind sending it along to be used with a very entertaining quip: “It’s been on my shelves for a couple of years now. I figure if I haven’t even pulled it off to audition it in that time it’s better off going to a home which will make it feel much more needed and useful. I’m all about helping my fabric self-actualize.”
Trying to Do Good
I like to do charity projects that fit with my life and my interests and help people locally. You have seen me make pillowcases. I have made about a dozen so far. I finally got my act together and called the hospital to arrange a time to donate them. I left a message. A few days later, a chipper, cheerful and young woman called me back and left a message telling me they have a ready supply of pillowcases and don’t need any. She told me to take them to a town about 20 miles away. She was very nice, but I am still annoyed. I guess some hospitals are getting too much of a good thing.
Fabric
Quilted Fish Fabrics
I have to admit that I didn’t remember buying this fabric. Also, I didn’t have a receipt for it, except what came with the fabric when it was shipped. I don’t usually purchase fabric from Fabric.com, so I was really confused.
It is very strange and has really put me off buying fabric lately. If you bought this for me, will you, please, confess so I can write you a thank you note? I also want to get over this feeling of losing my mind. Thank you!
UPDATE: I have a secret fabric fairy. Thanks, Mrs. K.!
I think this might be alliteration week. First, Food Fabric FQs and now Twirling Triangles Test.
I got the Pyramid Ruler from Fons & Porter and decided, once I started sort scraps for various scrap projects, that it was time to use it.
Last weekend, one of the tasks I did was try making the Twirling Triangles patches. First I cut a strip from Kona Snow that was 4″ wide. The strips had been sitting around for a little while.
Sewing Scraps to Strips
Then, I went through my scrap basket and cut pieces that were 4″x5.5″ and carefully sewed the squared scraps to the strip. Frankly, 4″x5.5″ isn’t exactly a scrap and that became apparent as soon as I started trying to cut pieces. I don’t have a lot of scraps that size. Why would I?
Pieced Strips Ready to Trim
Once I had sewn patches to the strip, I only had to cut the Kona Snow strips to make the strips sets above. The size of the commercial printed fabric patch meant that I didn’t really have to measure. I just used the printed fabric as a guide.
Trimming using Pyramid Ruler
The Fons & Porter Pyramid Ruler is very easy to use and that trimmed corner on the top is awesome!
Test Pieces Arranged
Here are the test pieces laid out. This ‘block’ is about the size of a dinner plate!
Test Pieces Arranged #2
I think the patches are too big, because they make blocks that will be enormous. I think I will cut them down.
Cutting Down the Wedges
I think I have pretty much decided to cut these wedges down to the size shown above. I believe the strips will have to be cut 4.5″ wide and the scraps will be cut 4″x4.5″ wide. I think it will be easier to use scraps with these sizes as well. I haven’t actually done any cutting, but will do it soon. There is always more fabric, right?
I love my Tivo. It is a relatively cheap date in terms of entertainment and after YEARS of never being able to watch a show all the way through, I finally can. The problem turned out to be, over the holidays, that we watched all of our shows. We were home a lot, and working on Christmas projects in front of the TV. Many of the shows we like were pre-empted by holiday specials. I was able to watch a lot of Fons & Porter and partially clear out that playlist.
Still I was looking for something else. I am not much for watching YouTube and other videos on the web, but I saw that Laura and Linda Kemshall now have Design Matters TV. I watched one of their free shows where Laura shows how to use photocopies in your sketchbook. I really liked the episode which was called “Those Shoes.”
First, Laura is a very calm presenter.
Second, she talks through the whole process, including tips and tricks about the paint and the process. I am not a confident art journaler and watching this video made me think that I could do what she is doing. I really think that using photocopies is a great idea.
Third, Laura is confident in a way that makes me feel confident that I could do the same thing.
Finally, the show is well produced. I don’t mean shiny and fake, but edited appropriately, no wobbly camera and good information.
There was a project in one of their Thr3fold Journal issues using a photocopied hand on a bag, the Hands on Bag project, and seeing the project with the shoes makes me want to use the shoes on a bag as well. There is a list of shows on their site. I haven’t decided whether to subscribe (cost is about $35 for 3 months). I have renewed my Quilt Out Loud subscription and was given a The Quilt Show subscription. I haven’t watched either. I wish I could watch them on my TV and that they provided a list of shows I could tick off so I didn’t have to start them and stop them when I found I had already watched one.
I also adjusted the Tivo search I have set up for quilts and am now recording Eleanor Burns’ Quilt in a Day program. It doesn’t come on as often as Love of Quilting, so I don’t have as many. The first one I saw was about 2 star blocks from her Victory Quilts book. The stars were Army Star and Hope of Hartford. Army Star has a Sawtooth Star in the center and she showed her quick way of making Flying Geese. I liked her show, which I don’t remember seeing before, because she gives the dimensions, so I can go up to my workroom and make the blocks. I tried the Sawtooth Star bit of the Army Star and found that I couldn’t finish the last bit because I don’t have the specialty Flying Geese ruler Burns uses. I also think the measurements she gave or the Flying Geese must be finished sizes, because they seem too small for a cut piece.
Creativity
Stress has been a constant, and not so welcome, companion for the past few months. I have been seeking ways to reduce my stress and this article on the effects of stress on creativity make me all the more determined to accomplish that goal. I certainly don’t want my creativity affected by work!
Lisa F from C&T publishing has a new blog called “My Blissful Lack of Focus.” I really like the layout. She talks about her creative adventures for 2011. I wish the CPP were included, but, as yet, I haven’t been able to persuade her to take part. Will YOU take part in the Creative Prompt Project this year?
Color
The Pantone color of the year is Honeysuckle. It just looks like a warm pink to me. You can download palettes for the Adobe Creative Suite application, FB ‘like’ it, tweet it, etc from the above referenced site.
Doing Good
We are making 3 quilts for victims of the San Bruno Pipeline explosion. I have been trying out different quick methods of making Flying Geese with minimal success (see above re: Eleanor Burns).
Eleanor Burns Method
I was trying to avoid the bias and get really nice crisp stars, but as you can see, I am a bit stymied in the process due to not having the correct specialty ruler. I have to decide whether to buy that ruler or just try to cut them and see what happens.
Jo Morton Method pt.2
I saw Jo Morton on Fons & Porter one day and thought I would try her method of making Sawtooth Stars. Of course, Fons & Porter does not include measurements in their show or on their site (mostly), so I went searching for a pattern/directions for the Flying Geese method, which eventually renders a star. I found one called Jamestown that had her method explained. I know that she wants to sell her books, but this was a hard method to find.
The directions were part of a pattern for the whole quilt, so my star didn’t come out the way I needed it to for the San Bruno Stars quilts.
San Bruno Star Wrong
I’ll use it on the back.
Finally yesterday, I dug out my copy of Around the Block and made them the old fashioned way.
Around the Block method
These look pretty good. I plan to make more and perhaps put them down one side of the quilt. I like them in the on point orientation.
On point orientation
I have to kind of see what other blocks I receive before I can decide how to use them. I also have to make more than 2. These are 6″ blocks.
I need a lot more blocks, so if you would like to contribute one, three or ten 😉 the parameters are:
Block background: dark blue
Block design: Yellow star (any pattern)
block size: 8? or less (we will work with any size)
Remember to sign your block!
Deadline: TBA
Contact us through our blogs for mailing instructions. Thanks so much for your generosity!
If you haven’t started listening to the Off Kilter Quilter podcast, I suggest that you go over and start right away!
TFQ taught me this method of putting quilts together. I have adopted it as my own and use it for block quilts. Very occasionally I’ll put a long border on after the center of the quilt is complete, but otherwise I try to avoid the long seams required to put quilts together in rows.
Step 1
The basic idea is to put the quilt together as you would a block. Sew smaller pieces together to make larger pieces. I avoid sewing in rows as I think the quilt gets out of square if you sew it together in rows.
Step 2
This step makes a larger piece.
Step 2A
This will be for the bottom of Block 1 in the drawing in Step 2.
Step 3
This way of sewing a quilt together makes the pieces much easier to manage, because you are mostly handling smaller pieces.
Optional Step 3A
You can also divide the border into blocks (plan it that way as you make your quilt) so you can include border pieces as chunks.
Optional Step 3B
You have to pay attention to what you do with the corners if you choose to add the borders this way. This technique works better if you are making a self bordering design.
Step 4
Refer to the drawing of your pieces in Step 1.
Step 5Step 5AStep 5B
You have to sew the bottom sashing + cornerstone to Block 3 and Block 4.
Step 6Step 7
You really need to do the two steps above before Step 5B2 even though my numbering is off. Sorry about that.
Step 5B2
I got a little ahead of myself in my drawing. Sew the sashing and the cornerstone to Block 2 and then sew Block 2 (with side and bottom sashing and one cornerstone) to Block 1 with all of it’s sashing.
Step 7A
The above step will make your next chunk.
Step 8
After this first chunk, do the same things for the rest of the blocks in your quilt and keep putting chunks together into larger and larger pieces.
I took the Dale Fleming circles class through EBHQ last weekend. Short Answer: AWESOME.
I was a little skeptical when I saw the supply list and began trying to gather the items required for the class. I talked about this class a few times in various posts in the last few months. The supplies required me to get out of my comfort zone, which is good, but never welcome.
Freezer paper for BackgroundFreezer paper on BackgroundBackground trimmed around Freezer paper
The effort was totally worth it. There was nothing on the list that was a waste. This class used A LOT of freezer paper. The above circle steps use two layers of freezer paper and, apparently, I can only use the freezer paper template once, because of something to do with the amount of glue stick glue required for the process. I didn’t really ask, because it was so early in the process I was still floundering a bit. I’ll have to try using the templates over and see if there is a problem. If I were going to make a circle quilt, as I had planned, I would use TV time to make the freezer paper templates.
JL Second Circle
Ms. Fleming was an excellent teacher. I found out later that she has magnificently minded (LD) children so she was very cognizant of the different learning styles a teacher has to teach. She had detailed step outs for each part of the process, to which we could refer. She also explained the process and then showed us the process.
I didn’t find Ms. Fleming to be a prima donna. She was generous in allowing us photograph her quilts, step outs and her demos.
JL Second Circle
I feel really confident, after the class, that I can piece a perfect circle. The circle + background above is my second circle and I think it looks great! I used a pairing of fabric that you may be wondering about. I wanted to use fabrics that were really different that I could see well. No, they don’t really go together, but the above block will stay in my class file and not become part of a quilt. Perhaps that circle quilt that has been on my mind for a few months will come to fruition?
If you don’t want to take a class with Dale, or there is not one happening in your area, you can buy her book: Pieced Curves So Simple. If you don’t like that either, check out Becky’s blog where she talks about creating and using a circle stitcher.
JL Waves
Dale taught us a variety of techniques, including hearts (tips and cleavage!), layered circles (see photo below) and waves. There just wasn’t enough time for me to focus on learning all of them. 6 hours was definitely not enough time with her and I really could have spent at least a whole additional day just working on really getting the technique in my mind. I suggested that she have a work day for students who had taken a workshop. She said she had never thought of that, but would contact me if she decided to do it.
One that I tried was the waves. Her version is a lot easier than the version that I learned in 1989 when I was taking my second quilt class at the adult school. It took a lot of freezer paper, but I finally found a use for the freezer paper roll I have had for a long time. Also, it is possible to make the strips on your piece really thin. Borders are rolling around in my head, especially for the Original Bullseye.
Dale said that after making 5 circles, you can make them on your own without notes. I got up to three during the class and in the few days thereafter. I haven’t gotten back to it.
Circle Making Alone
I really like technique workshops rather than project workshops. I like to be able to put a technique into my arsenal and then pull it out when I need it. I think I will be a lot less reluctant to think about adding circles to my quilts now that I have taken this class.
To date, I haven’t gotten back to circle making. The circle above is hanging, all alone, on my design wall. As I mentioned, my original thought in taking this class was to make a circle quilt. I think the above fabrics don’t express the idea in my mind, but I am also thinking that, perhaps I don’t really want to make a circle quilt. I haven’t decided. I think I need to make a few more test blocks just to see. I definitely want to try making a really small circle and see if I can do it.
An unexpected bonus of this class is that I am now not reluctant to change feet. Changing the snapoff feet is not an issue, but changing fee that required the foot holder to be removed somehow stopped me. After putting on and taking off the zipper foot 37 times, I have no reason to worry about changing feet.
Gallery of Dale Fleming Quilts
Butterfly by Dale FlemingButterfly Quilt by Dale Fleming (detail)Waves by Dale FlemingIt’s all about the Fabric style by Dale FlemingIt’s all about the Fabric style by Dale Fleming (detail)
Notice the slightly wonky sashing.
Circles by Dale Fleming
This was probably my favorite quilt. She did this using a different method than we learned. I tried to understand it, but my brain was very full.
Circles by Dale Fleming (detail)Circle Quilt by Dale Fleming
This quilt was made using the method we learned. After putting on the first circle, the maker uses that piece (circle and background) as the background.
Flower Petals by Dale Fleming
These look like flowers. I really like how the quilts show she is exploring the technique a lot of different ways. I think that shows mastery.
Flower Petals by Dale Fleming (detail)Straight Flower Petals by Dale FlemingFour Patch Circles by Dale Fleming
Summary: I highly recommend her as a teacher! Get her book! Take her class! Make some circles!
N.b. I think my camera is acting up, so I apologize for any bleary photos!
Last week, I posted an Odds and Ends post that included some information about a new Judy Martin video. Hope you watched it.
After I watched it I had the following question:
“I was just wondering if I cut the black line off before I stick the template on to the ruler or if I cut on the black line? Or do I leave the entire black line on the template?”
Judy got back to me with the following answer:
“That’s a good question. Do not cut off the black line. Cut on the outside edge of the black line. Technically, the center of the black line is the perfect size. However, including all of the black line in the template will compensate for the take-up due to seam allowances upon stitching. Judy Martin”


")
")


")


")

")


")

