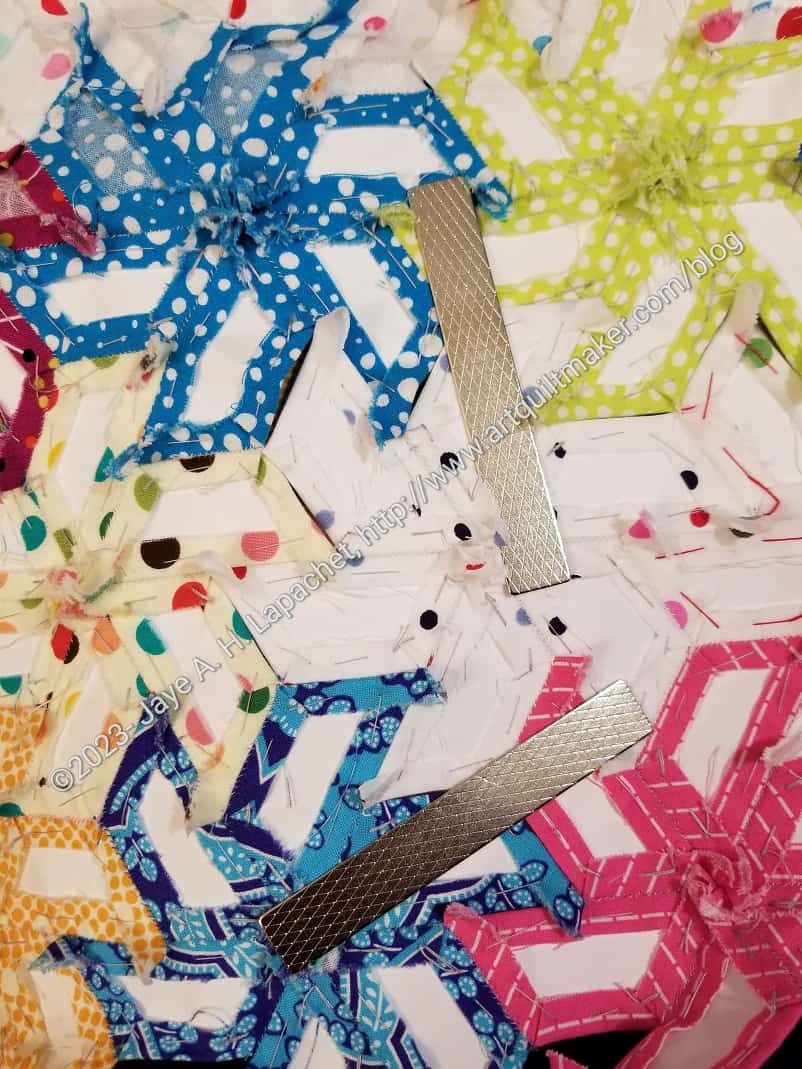
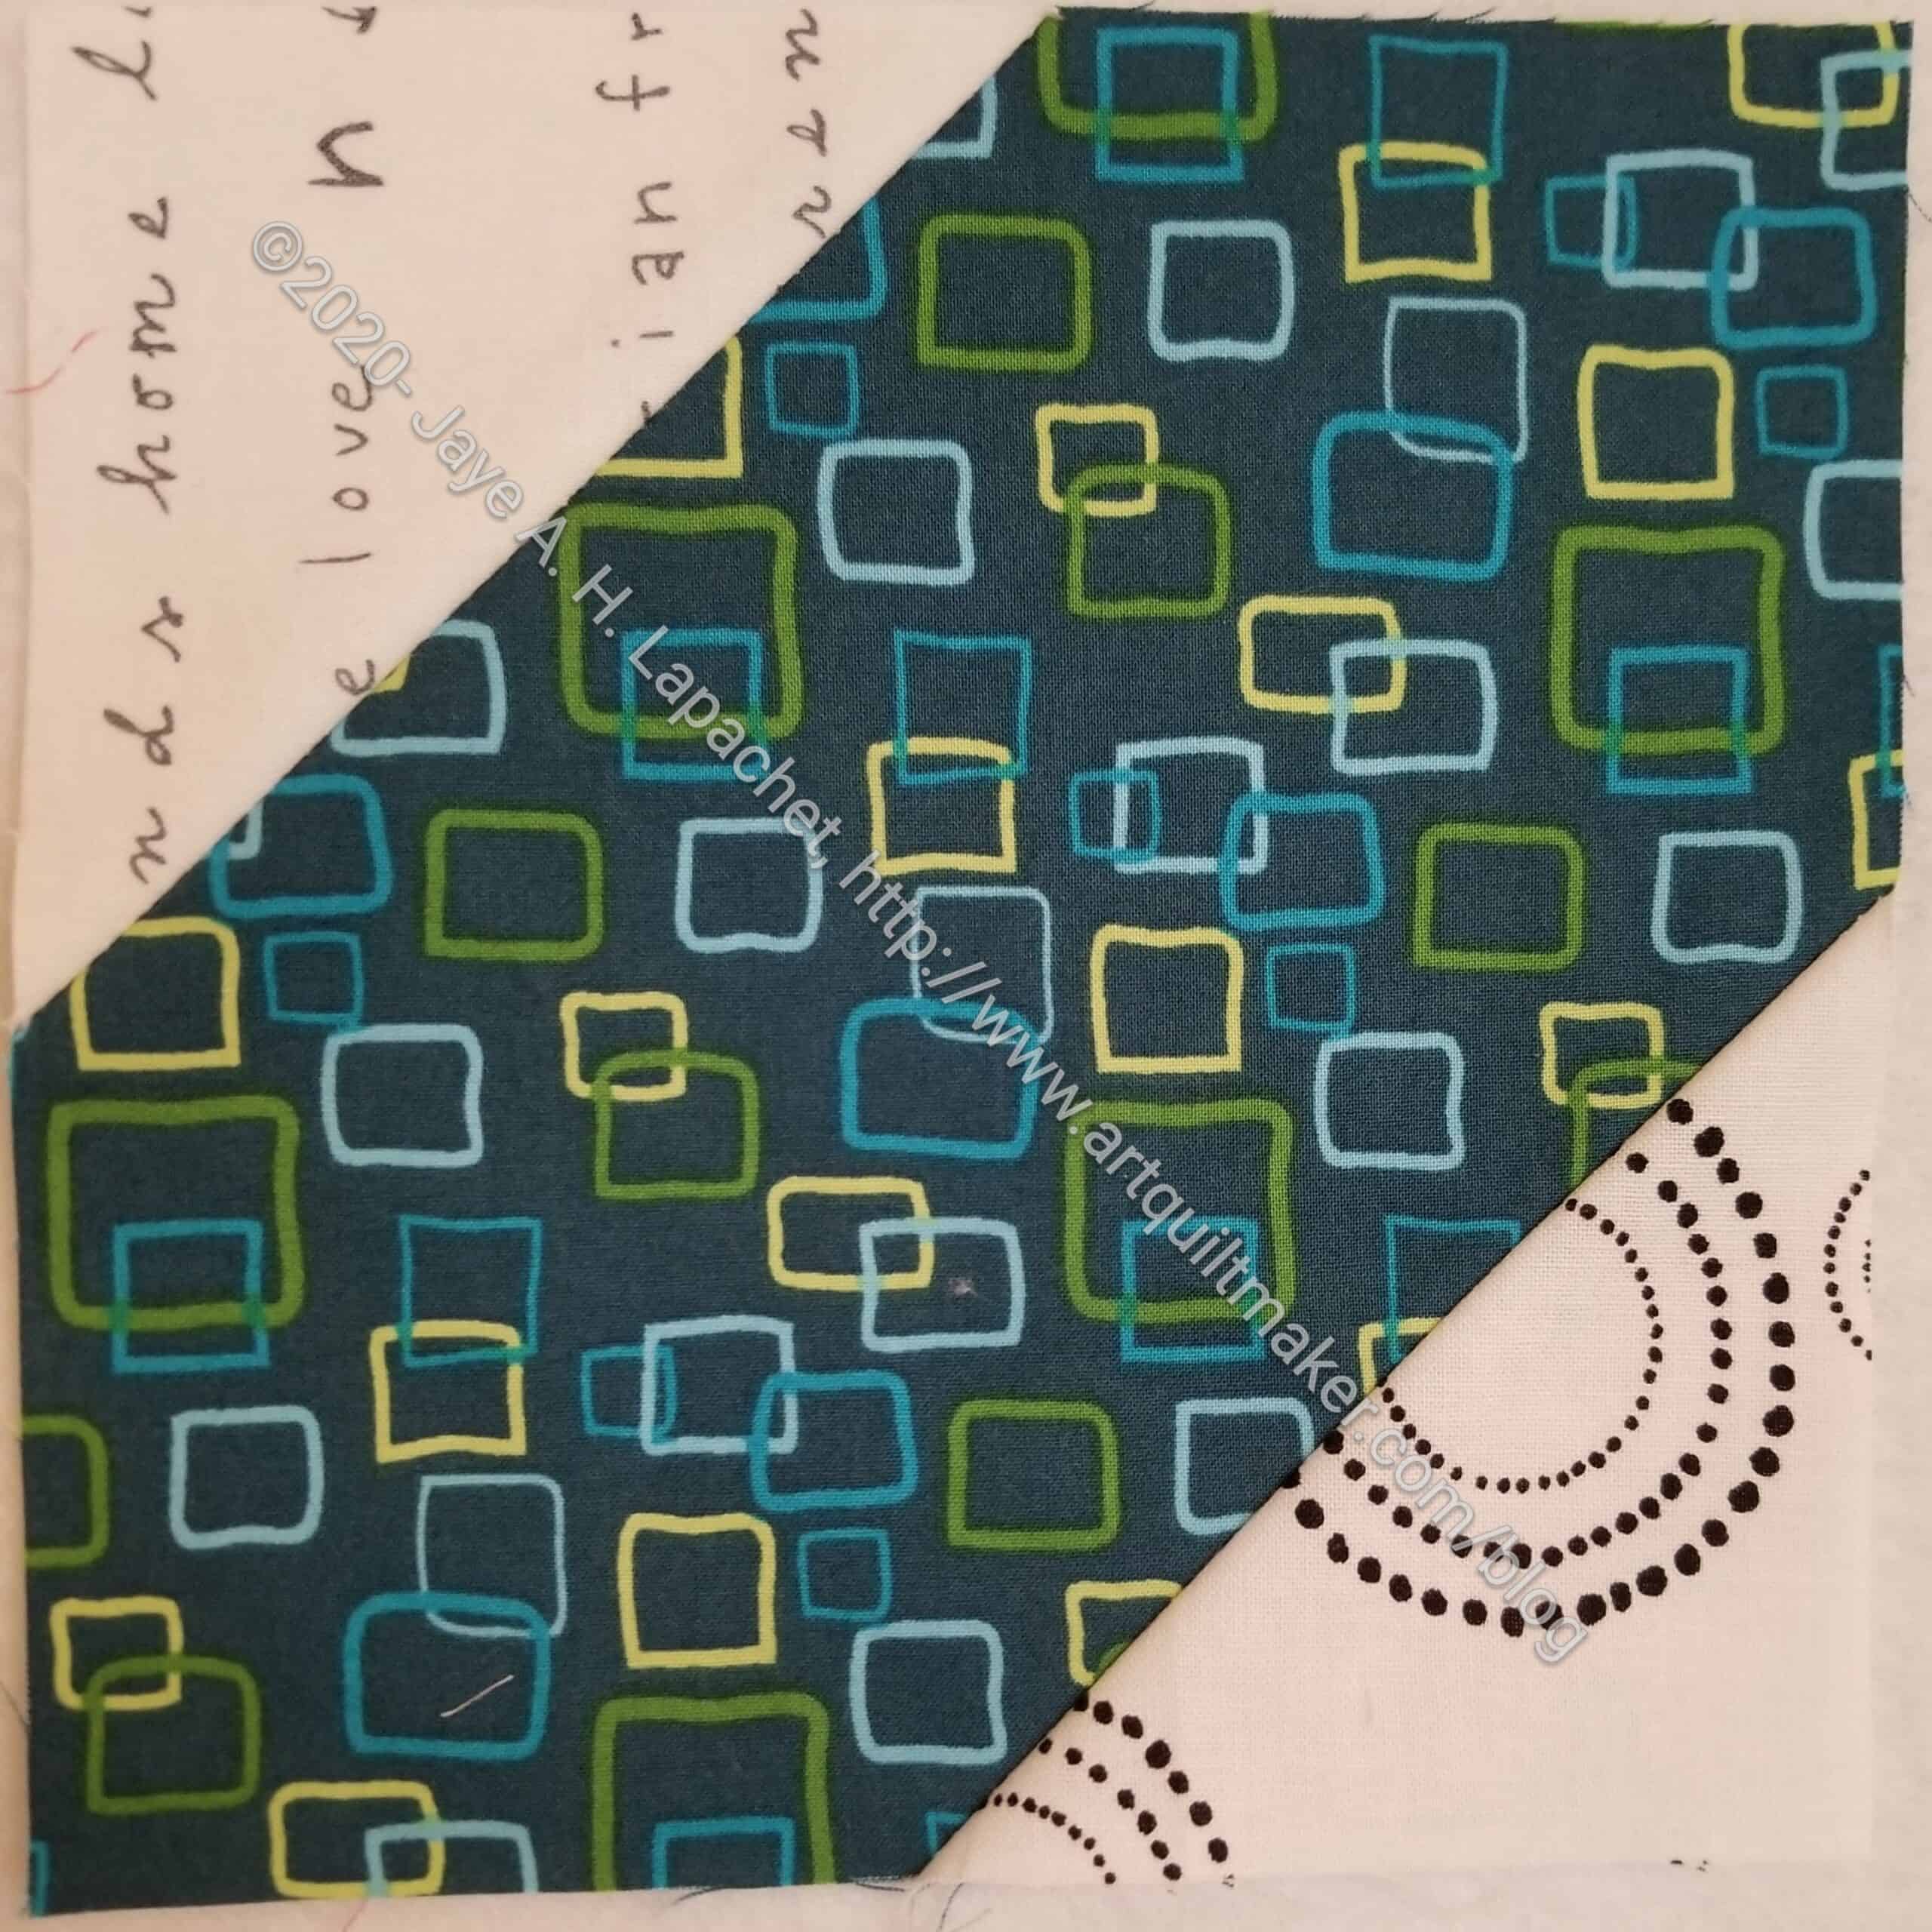
A few weeks ago I talked about the Sew Tite Magnums**. I finally broke down and bought some. I thought my opportunity to use them had past because I had sewn the two halves of the La Passacaglia together.
Half Hexie with Sew Tite Magnums
Lately, as mentioned, I have been working on the Half Hexie Star quilt. I have large section to add in and started on it on Saturday night. As I struggled to keep the four stars in place so I could anchor then sew them, I remembered the Sew Tite Magnums. I tried them out and they work really well!
I think the length really helps to keep the layers of paper and fabric in place. It was much easier to anchor the four half hexie stars on which I was working into place using the Sew Tite Magnums.
Lindsay warned me that they are hard to peel apart. She was not wrong! Still they worth the trouble and the cost. They are not cheap, which is why I don’t have dozens of them.
**Obviously, you should shop at local quilt shops and small businesses. However, if you are too busy or can’t find what you need there, I use Amazon affiliate links and may be paid for your purchase of an item when you click on an item’s link in my post. There is no additional cost to you for clicking or purchasing items I recommend. I appreciate your clicks and purchases as it helps support this blog.
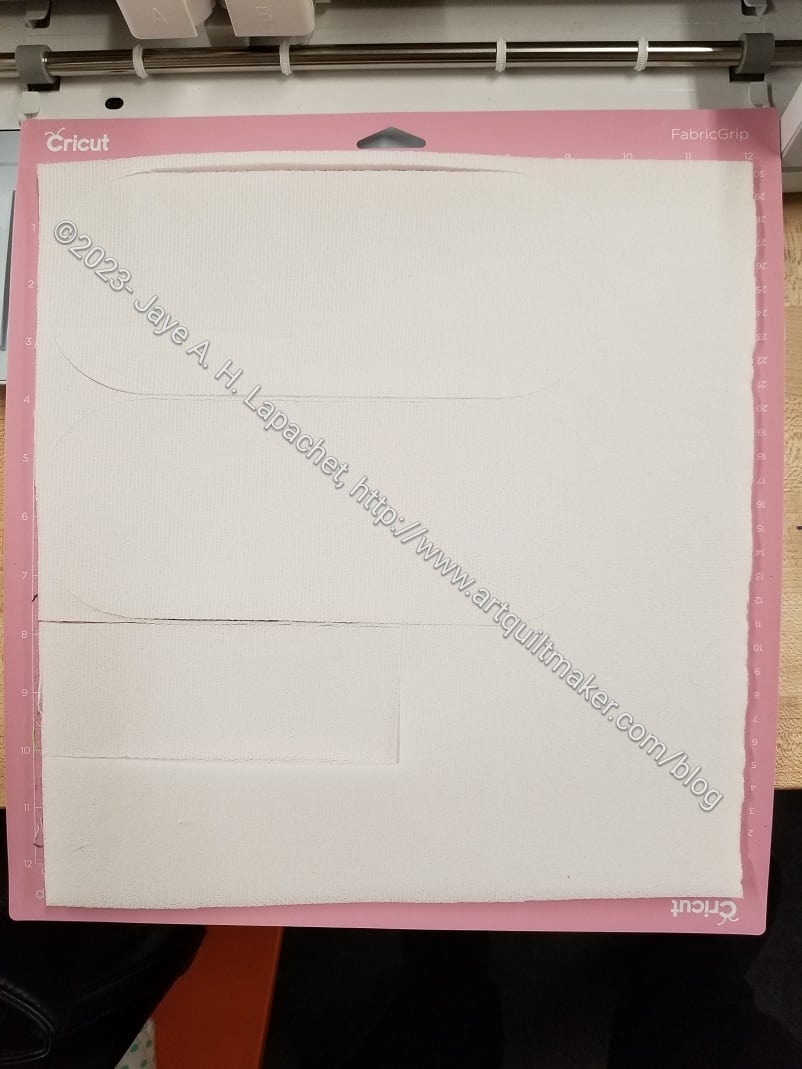
We had a guild meeting yesterday. Before the last guild meeting, SIL #2 and I visited the Makerspace that has recently been installed in the Library. Today, I left for the meeting early to try out the Cricut they have there.
Small Hackney cut out by Cricut
Short story? It worked GREAT! I cut out two bags in 1.75 hours including the learning curve.
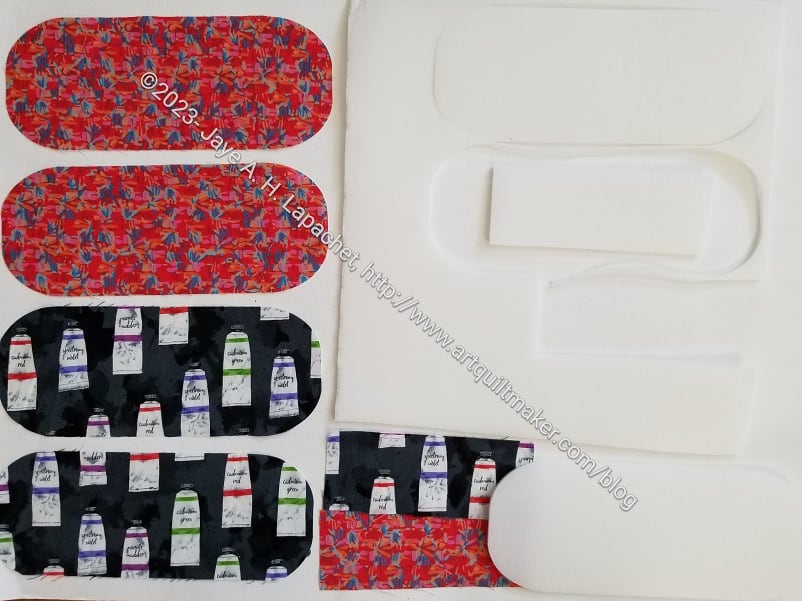
I had to prepare in advance by finding fabric and downloading my SVG files to a flash drive. Sidebar: this is one reason I like the patterns from Sew Sweetness. They come with SVG files.
I didn’t have any instructions for preparing the fabric so I went on to the Sew Sweetness site and found a video by Michelle Graham, one of the moderators, on using the Cricut Design Space. It didn’t help me prepare the fabric, but it gave me enough knowledge to work with the software once I got to the library.
I looked at a few different sites trying to find information about fabric preparation and decided I should put SF101** on the back. Later it turned out that for the Cricut Maker** you can just cut out cotton fabric. Cutting the fabric with the SF101 means I don’t have to adhere it later.
Cricut machine with my fabric
Once I got to the Makerspace, I was pretty much ready to go. The photo above shows the small Hackney pouch I cut out. I also cut out a large one. The Cricut only cuts what is on the mat. The mat they have at the library is 12 x 12**, so I couldn’t cut the gussets. Cricut also makes a 12 x 24 mat**, which I think would be useful. Just cutting what I did will save me time.
I had to load the files into the software, which shows where on the mat the pieces will cut. This information helps to position the fabric, especially if your fabric isn’t 12 x 12.
Cricut cut foam
I was really thrilled that the machine cut foam!
All in all, I think this was a good experience. The Makerspace isn’t open very often when I can visit, but I can visit on guild meeting days. I have several bags cut out, so I had better get busy.
The Hackney pieces shown at the top are for the small Hackney. I haven’t made one of those before, so cross your fingers for me!
**Obviously, you should shop at local quilt shops and small businesses. However, if you are too busy or can’t find what you need there, I use Amazon affiliate links and may be paid for your purchase of an item when you click on an item’s link in my post. There is no additional cost to you for clicking or purchasing items I recommend. I appreciate your clicks and purchases as it helps support this blog.
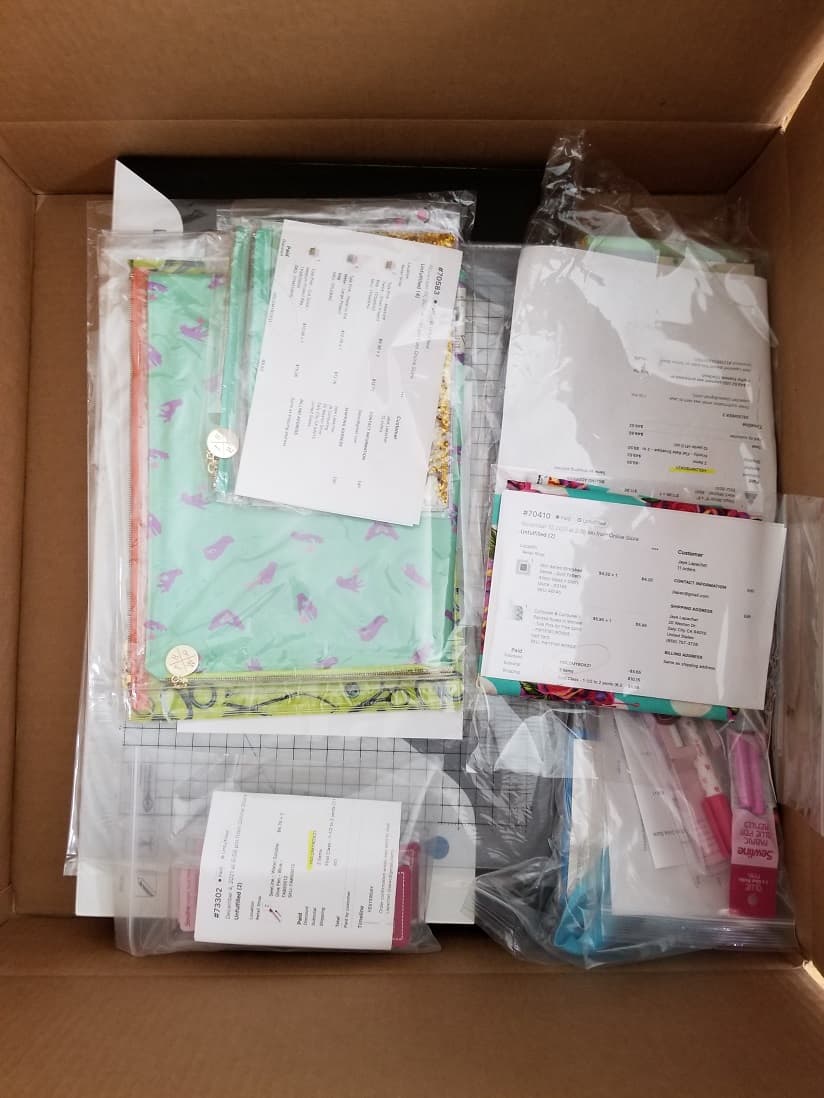
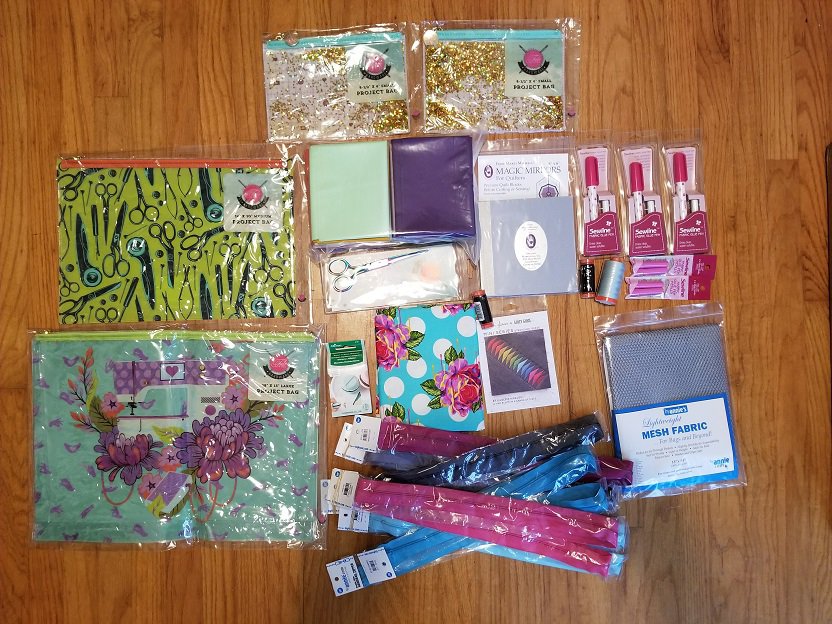
Pink Door was having a sale. I took the opportunity to pick up a few things I needed for my La Pass project, few gifts and some things I had been eyeing for awhile.
The idea was that you place your order and they hold it until the sale is over then send it. That meant that I received a giant box of quilt gifts right before Christmas. Some of the items were gifts. I’ll have to save a couple, because the box didn’t arrive in time. It is okay, because I forgot that I bought them for the recipients!
Marti Michell Magic Mirror
One of the things I bought, which was not on my mind, was the Marti Michell Magic Mirror**. Total impulse buy, but I think I can use it when I am selecting fabric for fussy cutting for my La Pass project. I could have really used this when I made the Peacock. It is a recommended tool for One Block Wonder quilts.
I also bought more glue pens – not the refills, but the actual pens. I have one, but wanted one for my travel bag and one on my cutting table as well. I got a lot of refills with the pens, so I am in good shape there.
Pink Door purchase
I am excited about also excited about the long handbag zippers that were on sale. I am sure I can use them for future bags. I got some mesh that will go with the fabrics I use for Mom’s bags.
As you can see I also got some fabric and some Tula Project pouches. It was fun to be able to shop for what I wanted for once.
**I use affiliate links and may be paid for your purchase of an item when you click on an item link in my post. There is no additional cost to you for clicking or purchasing items I recommend. I appreciate your clicks and purchases as it helps support this blog.
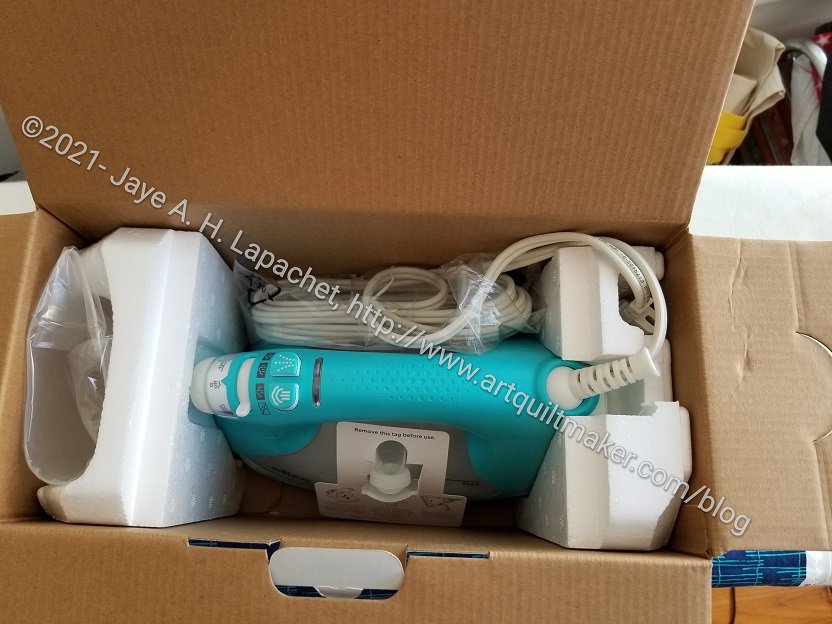
When Oliso came out withe a turquoise model right at the time I needed to replace my old Oliso, I hopped on the bandwagon.
Turquoise Oliso
The supply chain problems have affected me in various ways. I mentioned the bookcases for my workroom refresh. The iron has been delayed for months, but finally arrived last week.
Oliso actually air freighted some of the irons because of the delays and mine was one.
I can’t tell you how happy I am to have the consistent steam, the up and down feature and the longer ‘on’ time. Of course not having to set it upright is great, too. Not knocking the iron off my ironing board is a bonus. I really like these irons.
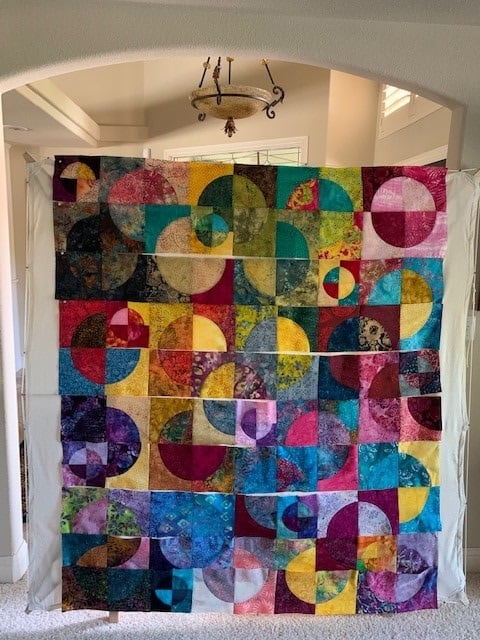
Remember when I went on and on about this quilt? I still love it and am still proud of the design.
Recently, I saw that Barbara Brackman wrote a post about the Carpenter’s Wheel block.
She was asked to write it by the Accuquilt Go** people to celebrate their new Carpenter’s Wheel die. She references a video about the pattern in her post.
Barbara shows a lot of different quilts, tells you how and where to find the patterns in Electric Quilt and Blockbase and discusses the pattern in general. It is a really interesting post.
I am not sure I would have used this die for my quilt. I didn’t know what I was doing in terms of fabric or layout when I started. Still, I do think the die is a good idea if you want to make even one of these quilts. The pattern takes a lot of cutting.
My Carpenter’s Wheel quilt is for sale, so let me know if you want to buy it.
**I use affiliate links and may be paid for your purchase of an item when you click on an item link in my post. There is no additional cost to you for clicking or purchasing items I recommend. I appreciate your clicks and purchases as it helps support this blog.
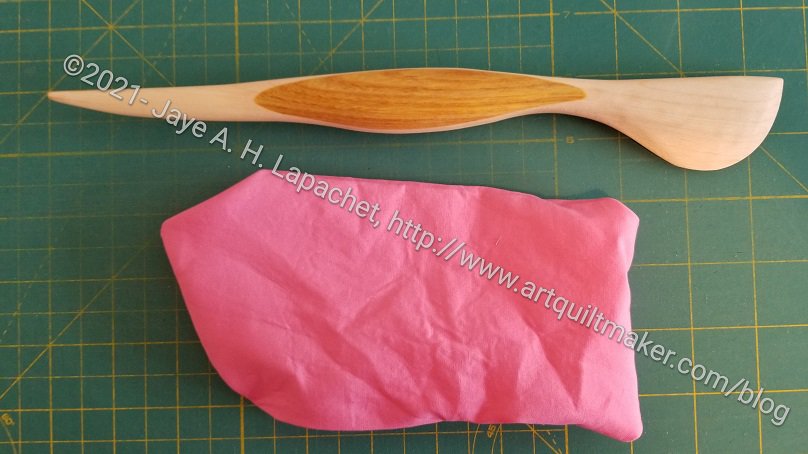
The other day I talked about Modern American Vintage, a wooden tool small business. They describe their business as making heirloom quality quilting tools.
The Bernard
I am constantly on the lookout for the perfect turning tool. I looked at their website and bought a ‘Bernard‘. This is the best turning tool I have ever used.
It doesn’t show in the photo since I took the photo before I used it, but the small end of the tool got all of my corners poked out without going through the fabric. It also feels good in my hand. I highly recommend this tool, especially if you make a lot of bags and need to poke out corners.
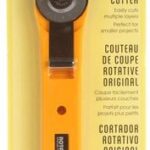
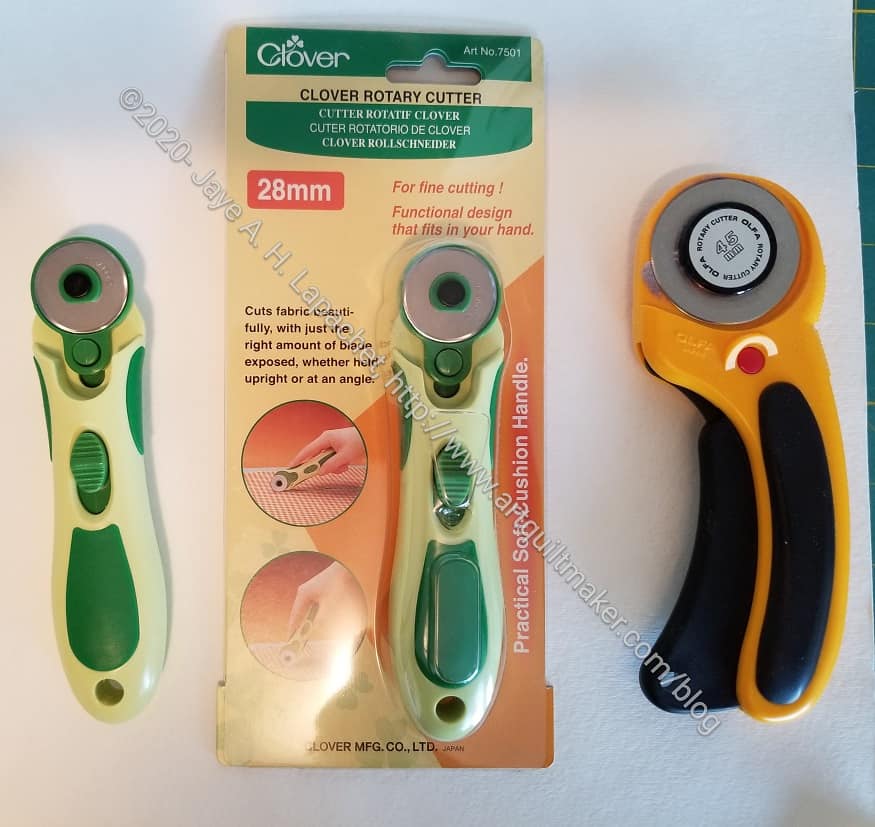
One of the things that Latifah wanted us to use in class was a 28mm rotary cutter. This is used for the inset Clammy cuts, especially on the 8 inch Clammy, which are used to cut the arcs.
I thought the class was a good opportunity to try a new cutter since I would be cutting a lot with the 28mm. The handle of the one I have isn’t comfortable so I shy away from it as much as possible. The new cutter came midway through class so I was able to try it out a little during class and a lot after class. I love the Clover 28mm cutter!**
Current rotary cutters of choice
The handle fits really well into my hand. It doesn’t have an automatic closing mechanism like my favorite 45mm rotary cutter**, but the closing mechanism is very easy and convenient to use. I am sure having a new, sharp blade didn’t hurt the experience either.
Clover has a 45mm rotary cutter** and I am tempted, but I like the curved shape of the Olfa 45mm. I’ll stick to what I have for now.
Big thumbs up to the Clover 28mm cutter**. Try it if you are in the market for a new 28mm cutter.
**I use affiliate links and may be paid for your purchase of an item when you click on an item link in my post. There is no additional cost to you for clicking or purchasing items I recommend. I appreciate your clicks and purchases as it helps support this blog.
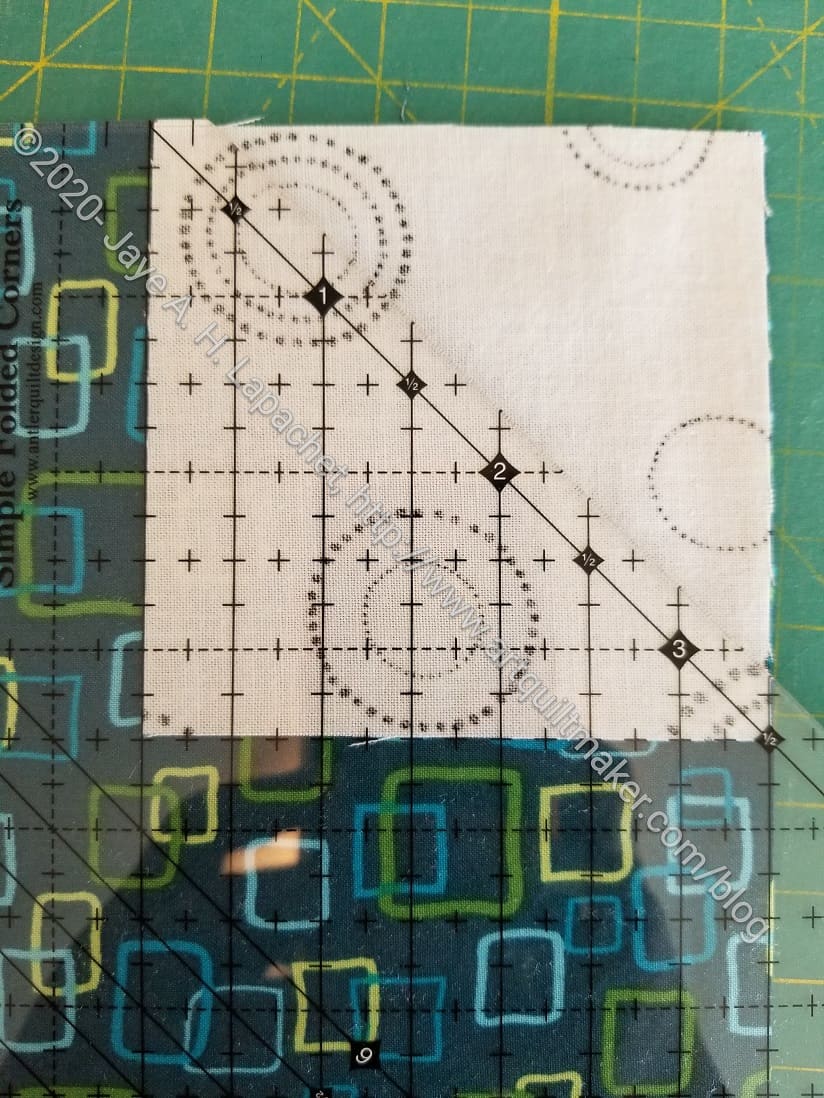
I bought Doug Leko’s Folded Corners Ruler** awhile ago but didn’t have a reason to use it until Saturday. I started working on the X Quilt last week. I was really struggling with the way the pattern was written. After reading a Bonnie Hunter post about Valentine’s Day where she mentioned this ruler**, I dug it out. I watched a video, started using it which resulted in the X quilt process moving along. I also felt happier.
Folded corners are often referred to as “flippy corners”. This ruler makes them easy. I was amazed to find that they sew up perfectly. I watched the Fat Quarter Shop video demo to get me started.
Two squares to join
First you need the two squares indicated in your pattern. I used a 6.5 inch square and a 3.5 inch square. These sizes came straight from the pattern. These sizes were one of three pairs of sizes I needed to make the quilt. I used the same process on all the sizes and it worked perfectly regardless of size.
My smallest sizes were 3.5 inch square and 1.5 inch square (for the corner). I was concerned that the 1.5 incher would be too small, but it worked just as well as the others. N.B. I did have to make sure that the small pieces did not get caught in my machine, but it was made easier because there were no dog ears. Doug Leko does have a mini version of the ruler** I mentioned, but I don’t have it and didn’t’ investigate the differences. I also noticed that Creative Grids has a ruler that purports to do the same thing**.
Line up two squares
Make sure right sides are together. Line up your squares so the corners are straight. You do not want to see the bottom square on the top or right when the pieces are lined up.
The above step requires fairly accurate cutting. By that I mean your square should be square.
Line up ruler
Place the ruler** on the two squares. Line up the solid line on the left and the XX line on the bottom with your top square.
Lines to use
When you line up the ruler, there is a solid line on the left. It is the first solid line on the left and connects with the diagonal line. This is the line you place on the left side of the smaller square. The diagonal line should be corner to corner.
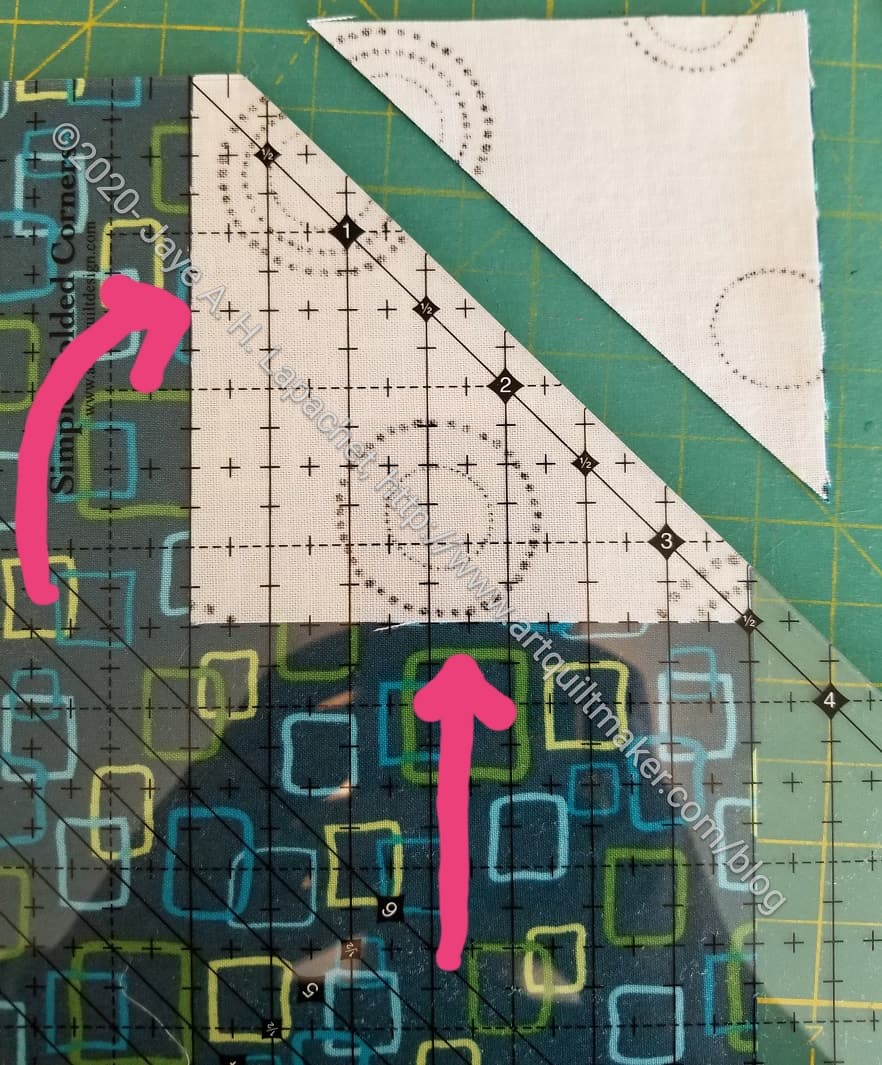
Cut on the diagonal
Cut on the diagonal. The ruler includes the diagonal seam allowance. This is a great feature of the ruler so you don’t have to guess where to sew like you do when drawing a diagonal line. Also! No drawing of diagonal lines. I have a lot of corners to add for the X quilt so this is a bonus. It saves me a little time.
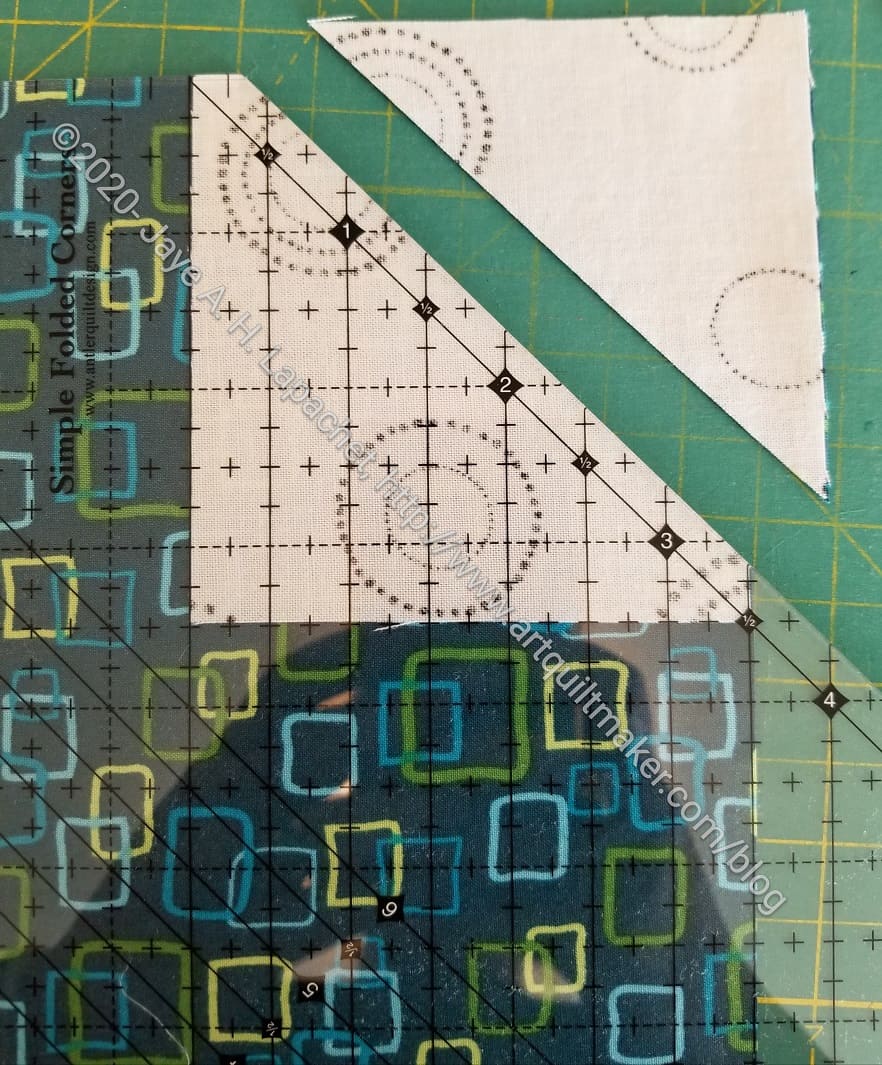
Pin then sew
I like to pin, then I sewed along the diagonal.
Press.
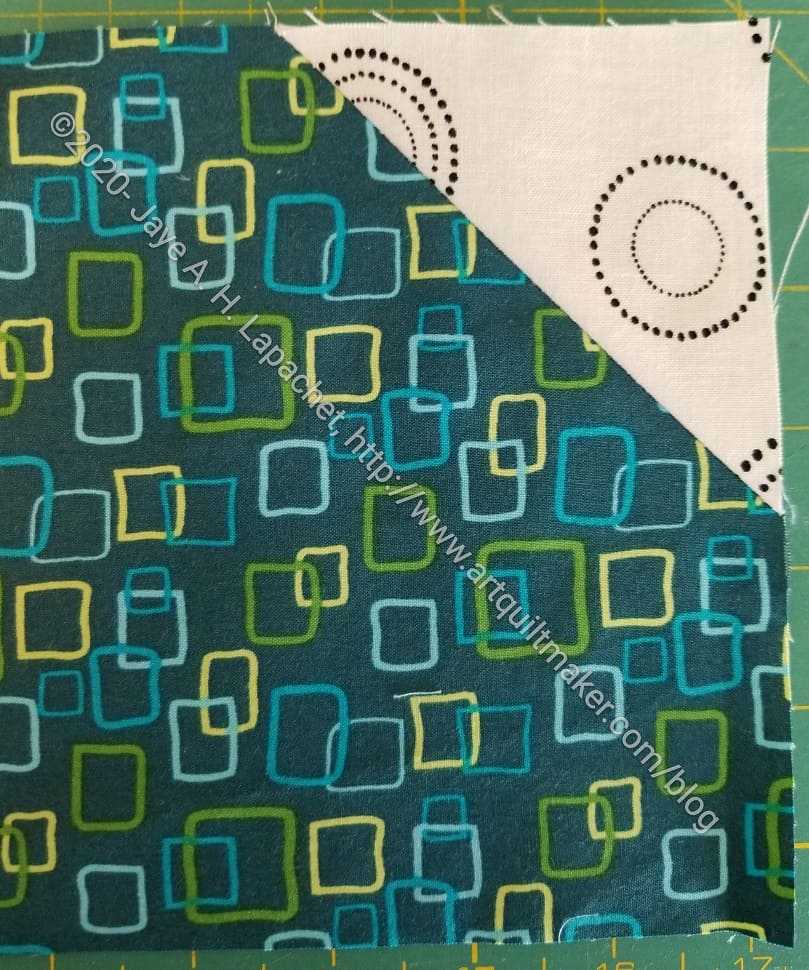
Perfect corner!
Perfect! You might think that I picked the most perfect one, but I didn’t. First, I didn’t know what was going to happen when I started taking photos for the tutorial. With very few exceptions all the corners came out lined up perfectly. Where they didn’t (1 or 2 only), I think it was because I didn’t press the fabric properly or didn’t cut accurately.
Whole Lozenge Block
The whole block came out really well, too.
I love the idea of specialty rulers. I often buy them with hope and don’t take the time to learn to use them. Or they turn out to be not as promised- not as helpful, hard to use, etc. This ruler works really well. I am super pleased not to have to draw 2 zillion diagonal lines!
**I use affiliate links and may be paid for your purchase of an item
when you click on an item link in my post. There is no additional cost
to you for clicking or purchasing items I recommend. I appreciate your
clicks and purchases as it helps support this blog.
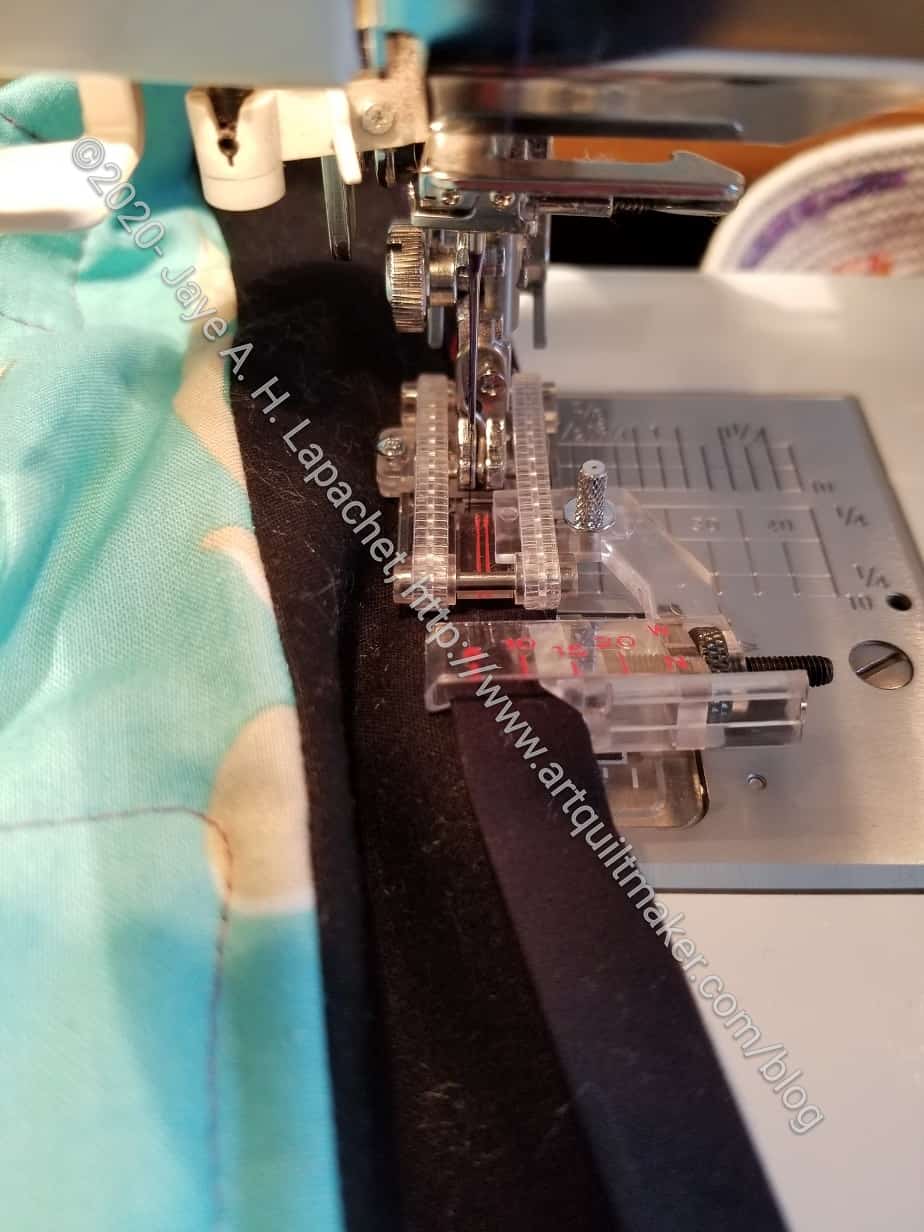
I had high hopes for the foot when I started to work on the covers for our dining room table leaves. I bought this foot when it came out new for my MC 9000.
Based on my reading, I thought this foot would help me put the binding on the covers evenly. I have never been adept at machine binding, but this tool seemed like it would solve my problems.
I started to worry, however, when I watched a few of the videos available on using the foot. The videos I watched (4-5) did not show how miter or go around corners. The videos on attaching binding did not show how to start the foot and the binding nor did they say whether you needed extra at the end. None of the videos showed a real project, only samples. None of the videos or the written directions talked about adjusting the pressure of the foot. I felt like the tractor foot wasn’t all the way down the whole time I was using it. I checked repeatedly and decided to leave it rather than getting out the machine manual.
Rotary Even Foot applying binding
I tried it anyway and determined that the foot might work well for machine quilting, but that my suspicions were true. The foot did not work well for applying the binding. It was hard to get the beginning of the quilted piece into the foot (not well documented in the videos or written directions). Once I was able to get the piece in, I found that the stitching line was nowhere near the edge of the binding, leaving a flap of fabric. Once I fixed that, I found that the binding was not being applied evenly. Something was happening on the bottom of the piece (shifting due to operator error or machine error or foot error), so there were sections of the binding that were not sewed down.
One of the things I figured out was that I can probably use the tractor foot without the binding or hemming attachment for machine quilting. One of my issues with machine quilting is seeing the stitch line while I am stitching. I think with this foot I would be able to see the stitching.
Sigh. I ended up doing a normal machine binding and decided not to care as long as it looked relatively decent.
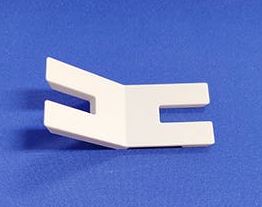
Do you know what this is? I didn’t either until yesterday, though I have had one, apparently, for awhile. I am glad I never threw it out. At least I don’t think I threw it out/gave it away.
Tim told me that he was using a coaster to manage thick seams on bags. I wanted him to show me how that was done, so we talked about it and then he looked up a video, which we watched and soooo many things became clear. I really have to find my hump jumper and start using it when I am making bags.
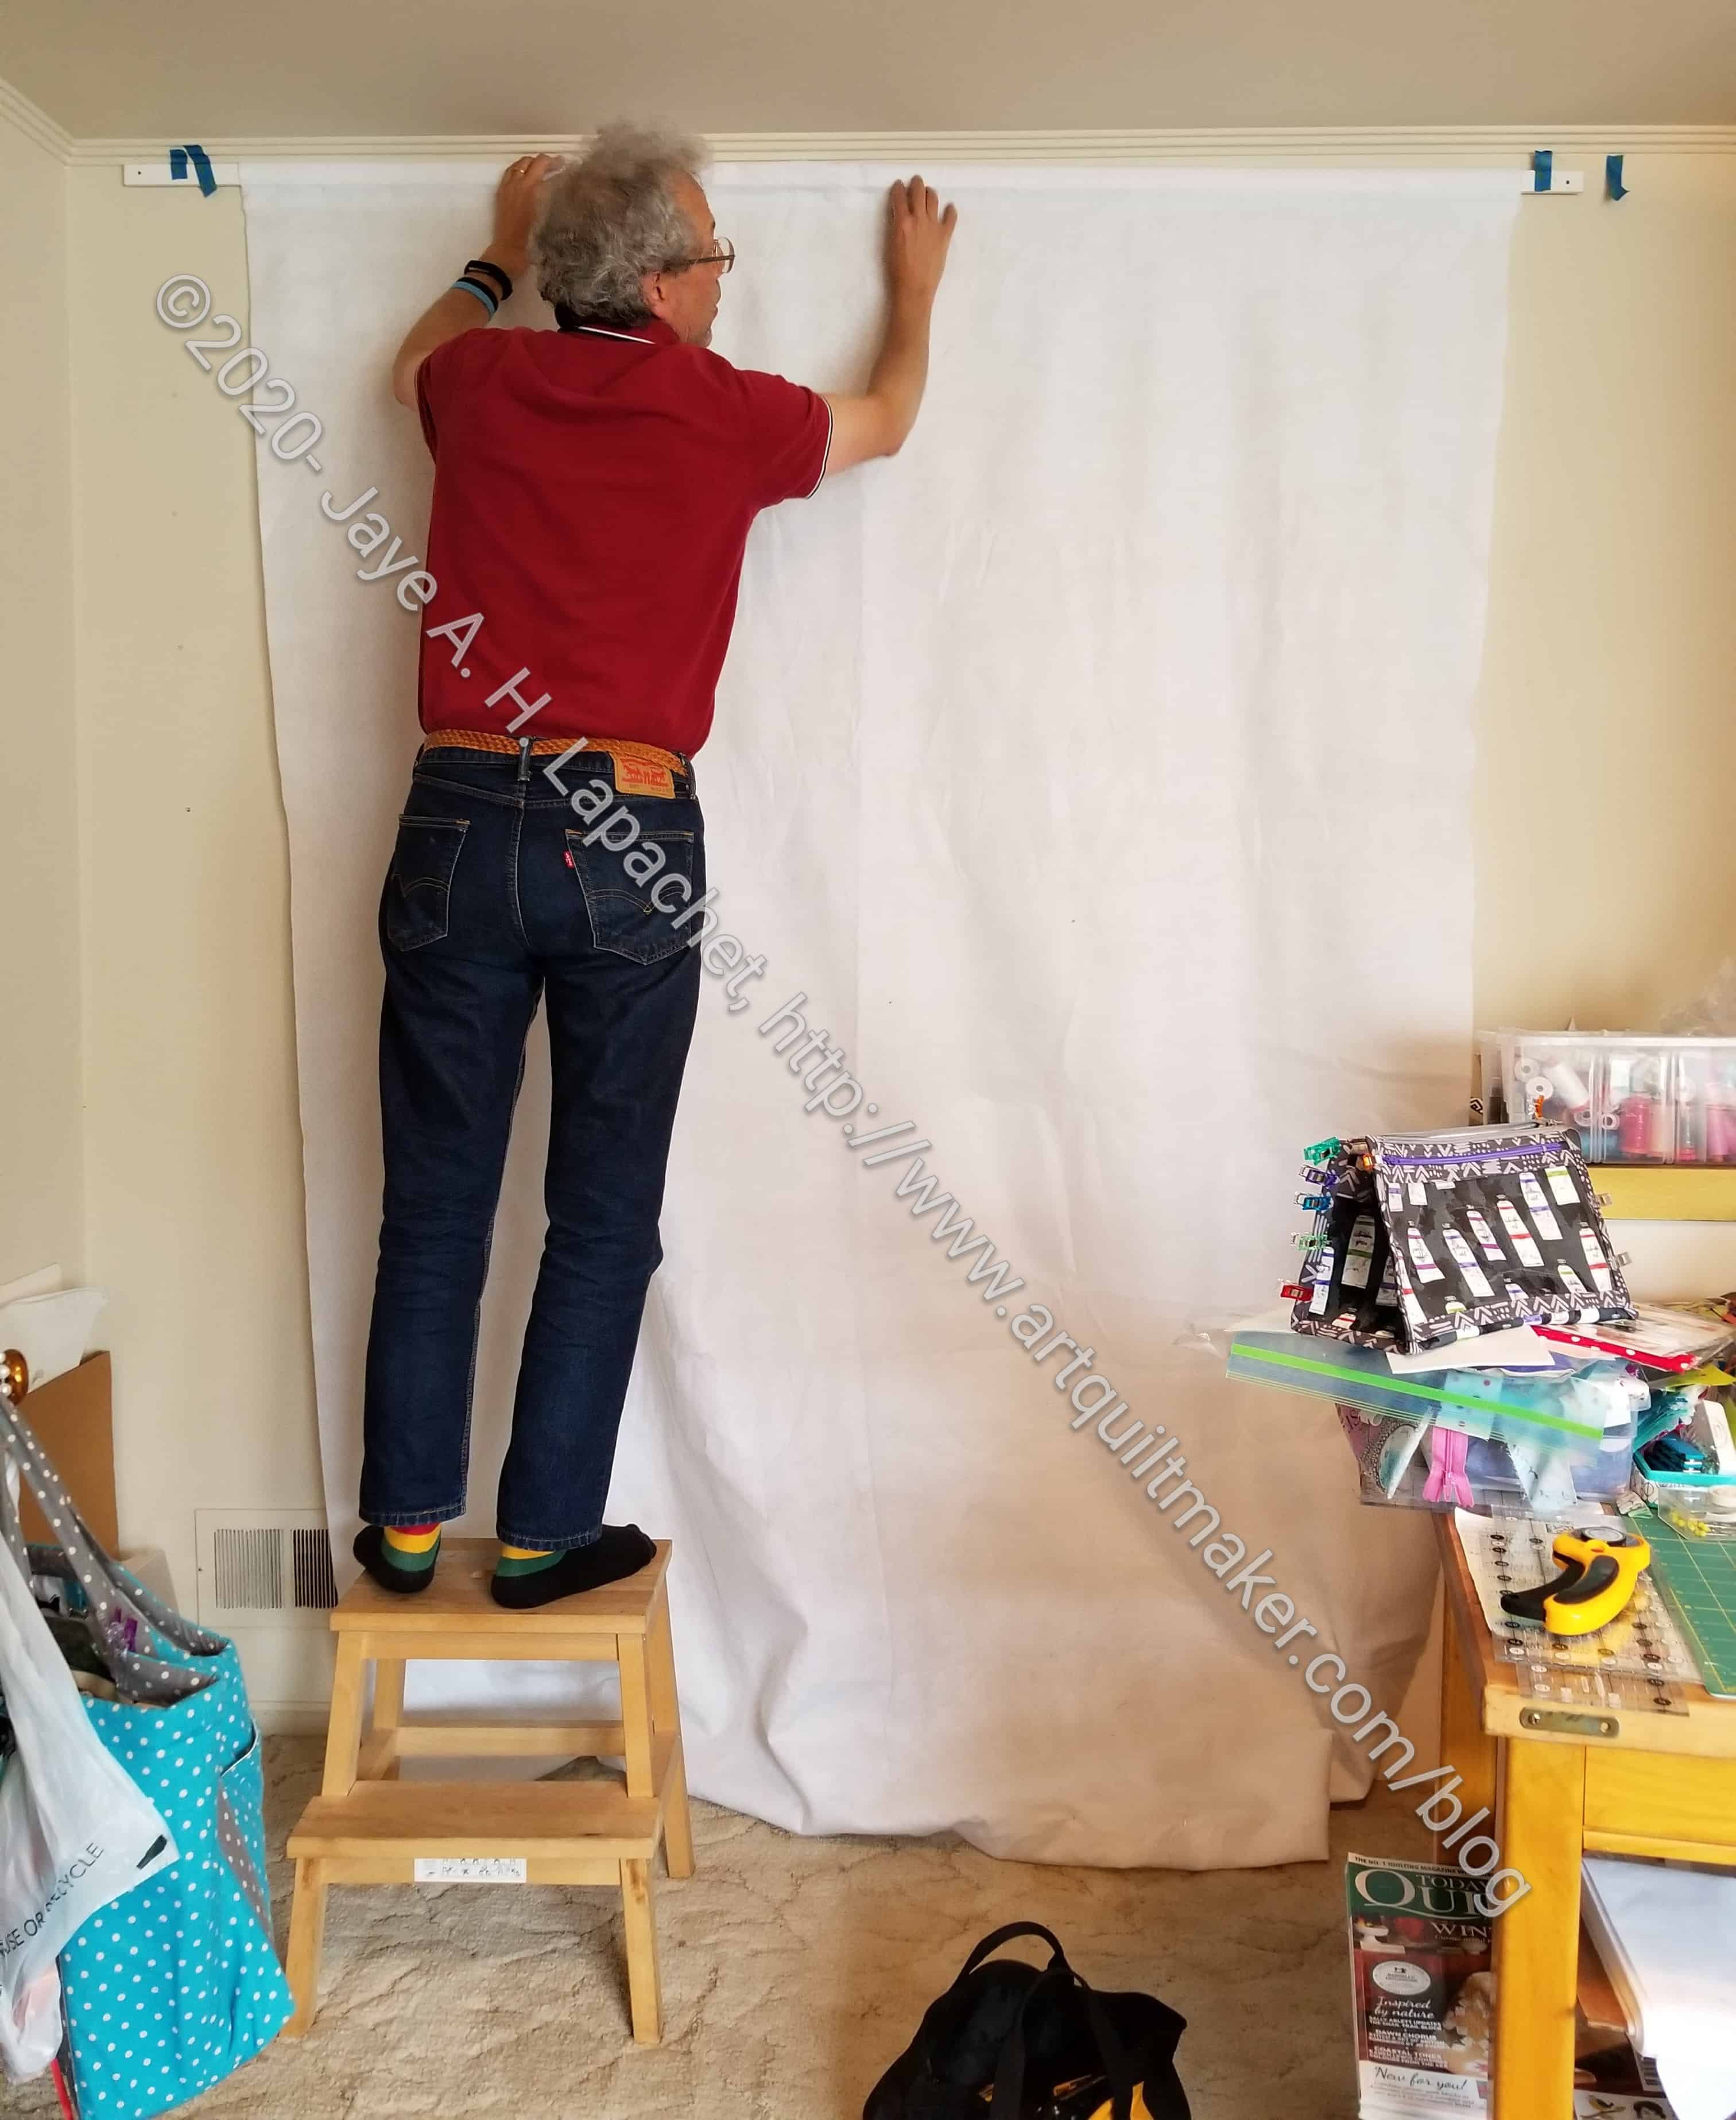
DH went out and got a piece of wood and we were able to install my new design wall.
First, I made a sleeve.
Next, we slipped the wood through the sleeve and, then, screwed the wood into the wall.
The photo, above, shows my workroom in a big jumble because I had to move everything out of the way to get the design wall up.
I had hoped that 72 inches would be wider, but 72 inches is just 72 inches. It might be better that it isn’t wider, because I would just make larger quilts, I think.
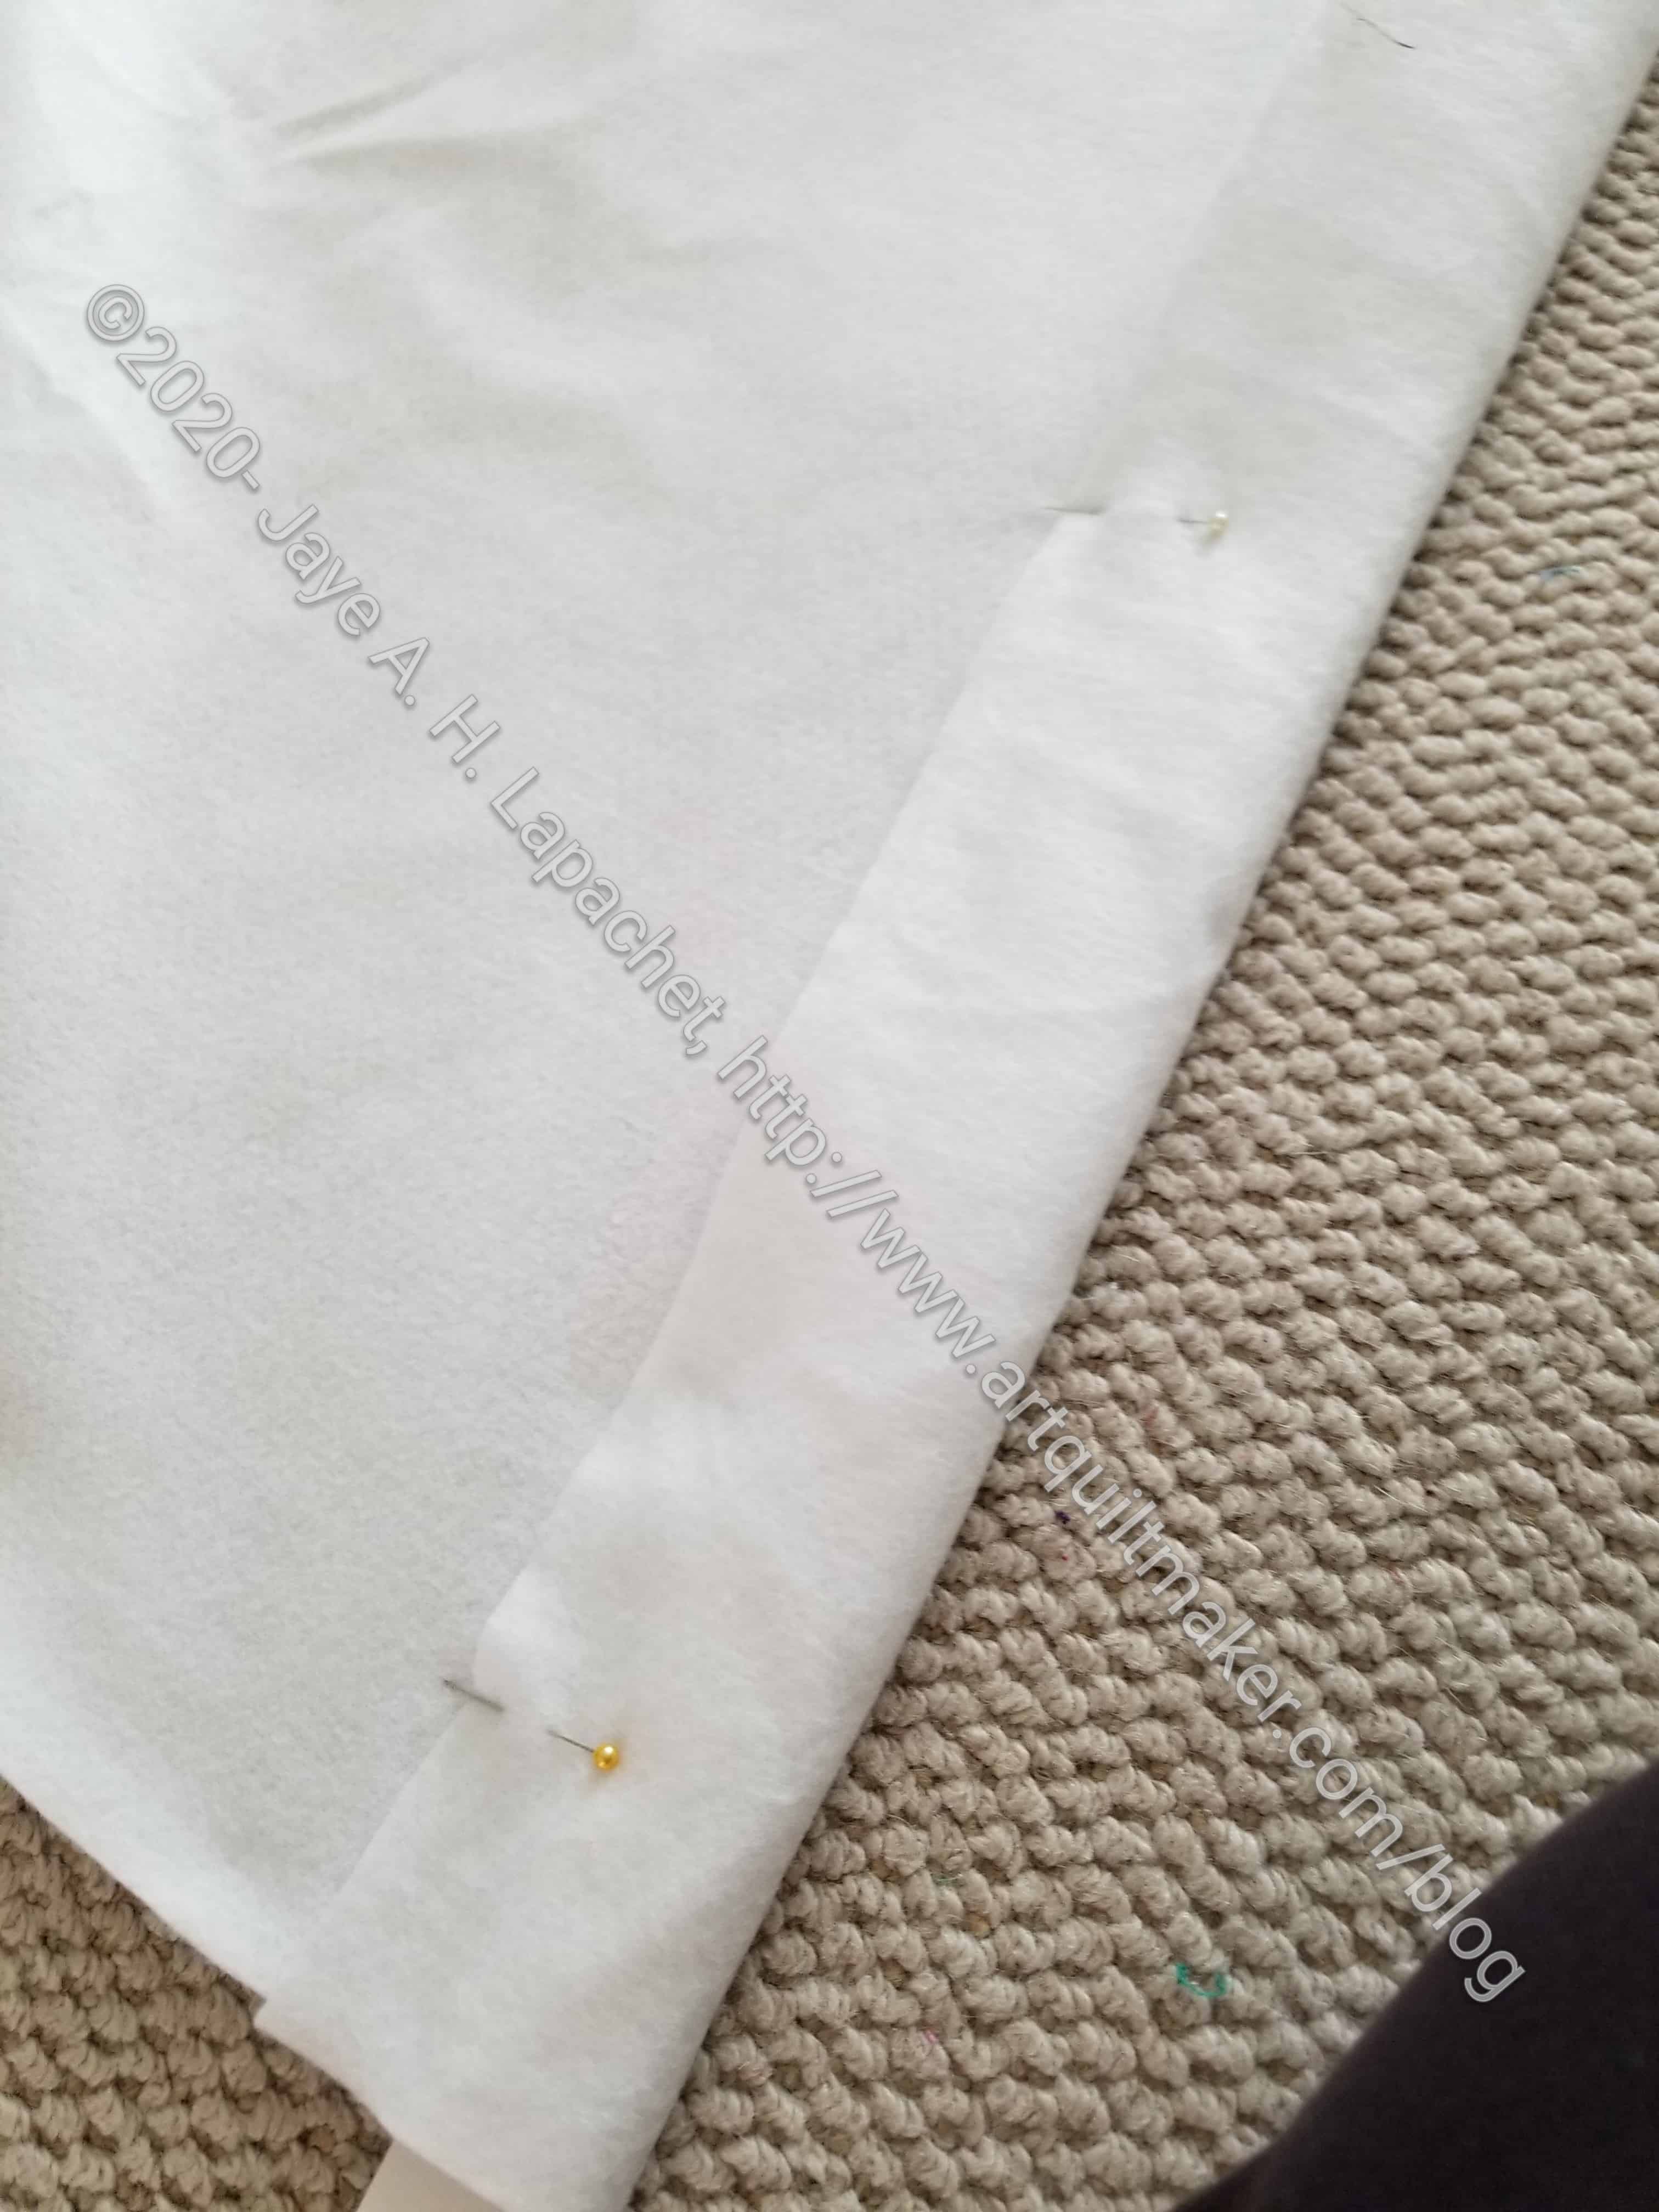
Making the sleeve
Making the sleeve was a challenge as felt stretches more than regular quilting cotton fabrics.
It isn’t quite done yet. I am waiting to see if I want to put another sleeve on the bottom before I cut off the bottom. I will have to cut part of the bottom off to make space for the heating vent.
Not long ago I received another (yes, I had one!) That Purple Thang** in my Modern Handmade subscription box. I can always add extra tools to my Go Bag, but this was a tool that I never used – or didn’t remember using. I put it in my notions tub, right next to my sewing machine. Since I received it, I have found several uses for it, most specifically threading elastic through channels on face masks.
Purple Thang with Elastic
The video patternI used last for face masks has a channel on the sides. The designer easily threads elastic through this channel, but I couldn’t keep it from bunching up. The Purple Thang has a large eye and is generally skinny, so I was able to use it. I threaded the elastic through the eye and then inserted The Purple Thang into the channel. It worked really well.
I also used it to poke corners carefully out in a gift bag I made.
So, I have found that, despite the stupid name, this is a useful tool.
**I use affiliate links. I may be paid for your purchase of an item when you click on an item link in my post. There is no additional cost to you for clicking or purchasing items I recommend. I appreciate your clicks and purchases as it helps support this blog.
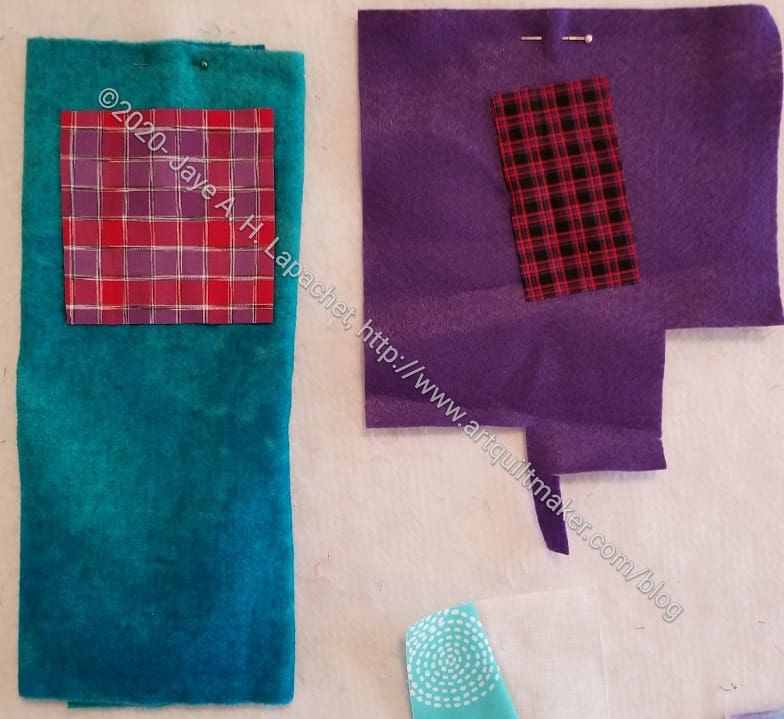
I have been looking for fabric for the design wall and have pretty much decided on felt, at least as a temporary solution. I found a site that, I thought, sold it for $4.75/yard. It turned out to be $4.75/ quarter yard! It’s partially wool, so I guess that makes sense, but it was disappointing as I had to go back to the drawing board.
There are a number of sites that sell different varieties of felt, including Joann, which sells 72″ wide, but only in a 10 yard bolt! I need 3 yards, but may get the 10 yard bolt if I can’t find it for less. I found one site that I thought would work, then the shipping was outrageous! I can’t win, it seems.
Felt Test
While I took a break from the frustrations of not being able to go to Britex and get real help, I decided to test the stickiness of different types of felt. I bought some wool felt when I visited Pioneer Quilts with Amanda, or another time I went there. I also have some small pieces of acrylic felt. I pinned them to my design wall (even the fabulous Quiet Please on my small design wall won’t hold the weight of felt) and then stuck some plaid pieces to it on Wednesday. They are still up there and not even peeling, so I think felt will work as an option.
I sold my design wall. I bought the design wall at least 5 years ago, probably more. I don’t remember exactly when, though it was at a Santa Clara Valley Quilt Association show. It was an impulse buy and I had high hopes for the additional design space. Unfortunately, it didn’t really work for me, as it turned out. I know you are thinking “how can she say that?” when I have used it for many, many projects.
I was able to use it and make quilts. It just wasn’t ideal. I felt that the fabric part was too flimsy for me. The flannel wasn’t sticky enough for me either.
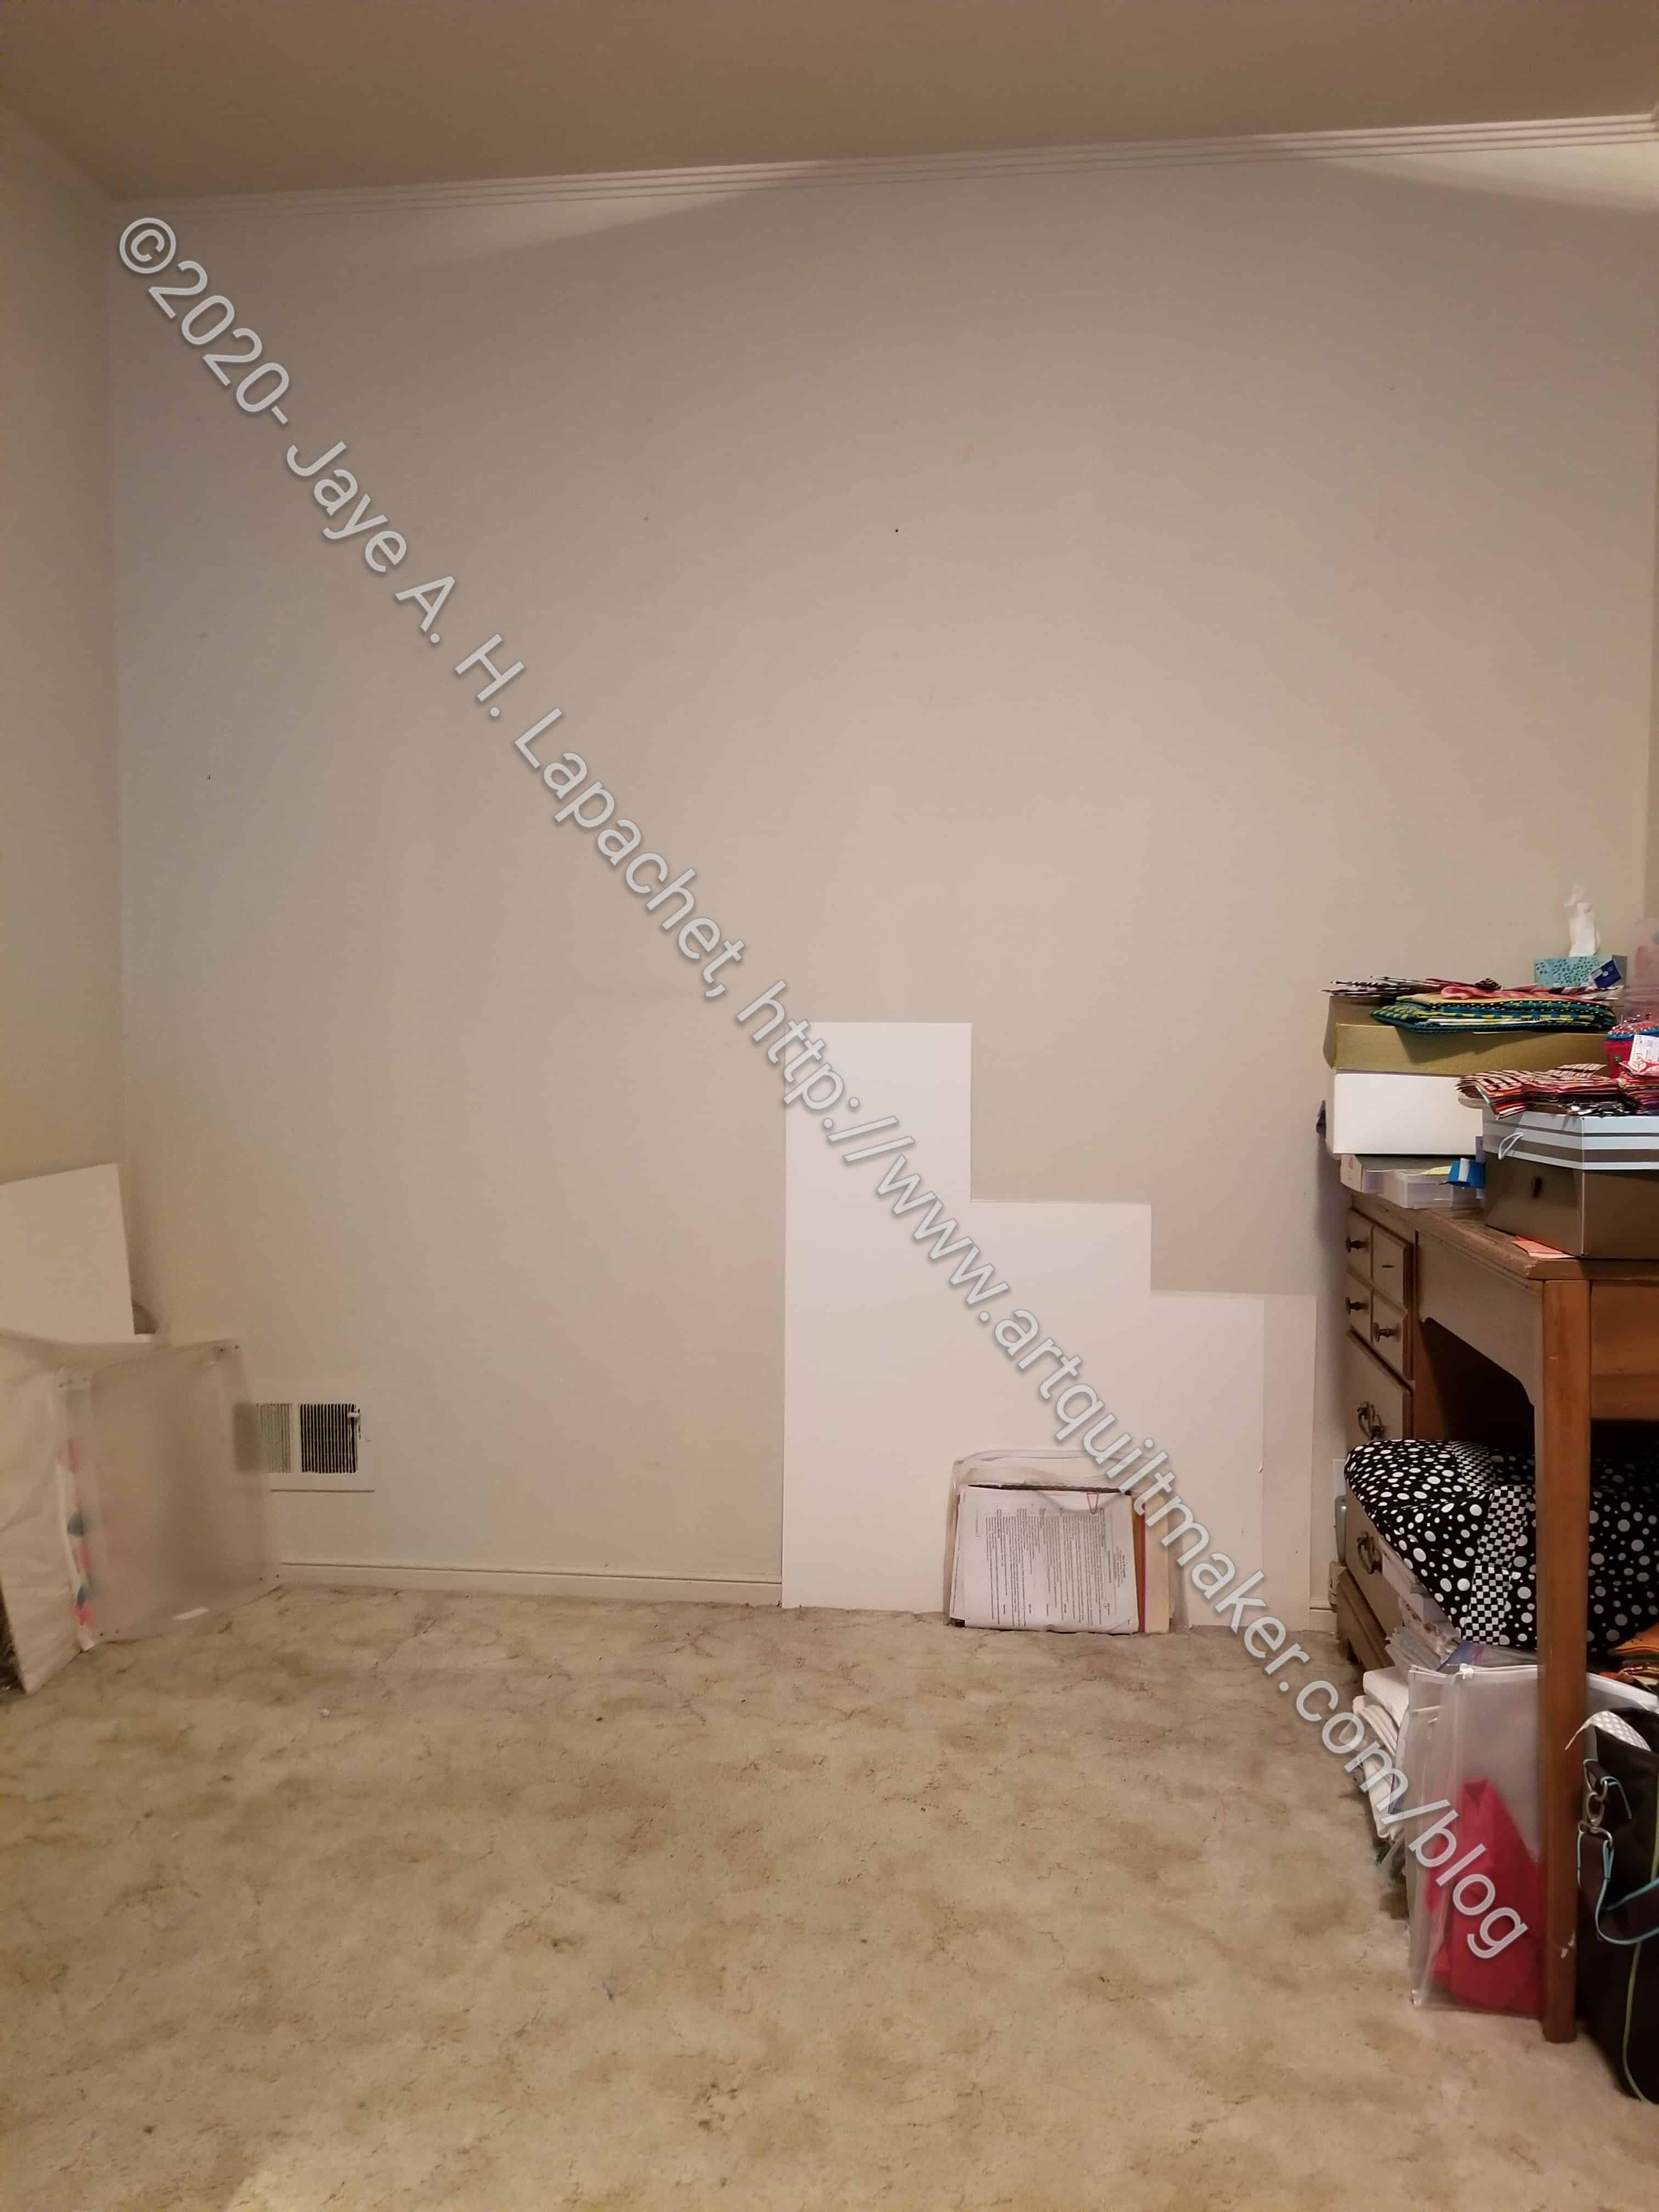
Empty design wall space
It is off to a new home and my workroom seems a little empty now.
Since I sold it I have the money to buy the supplies to build a new design wall. I have sweet talked DH into helping me. I need him to cover the Home Despot part of the project. I did some research at Britex a few years ago and think I know what I will get to cover the masonite or Insulfoam. I am using Quiltin’ Jenny’s guide as my basis as she has practical tips. My goal is to have a firm back so I can press patches and blocks on to the design wall. We will paint this room sometime, so I need to be able to remove the wall without too much trouble.