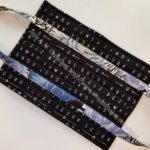
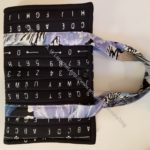
My organizational system for officer bags is a mess and part of that is not posting about this bag. The last time I mentioned it was when I was having a zipper challenge.
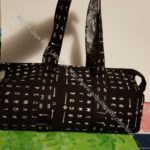
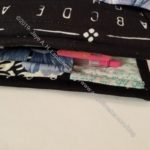
I finished it quickly, which I think was a direct result of making it right after Mom’s tote. There are some quirks to this pattern, which hit me even after making a couple of these. One of them is the handle details on the front and back. Makers have to make sure they cover the raw edges of the front and side panels.
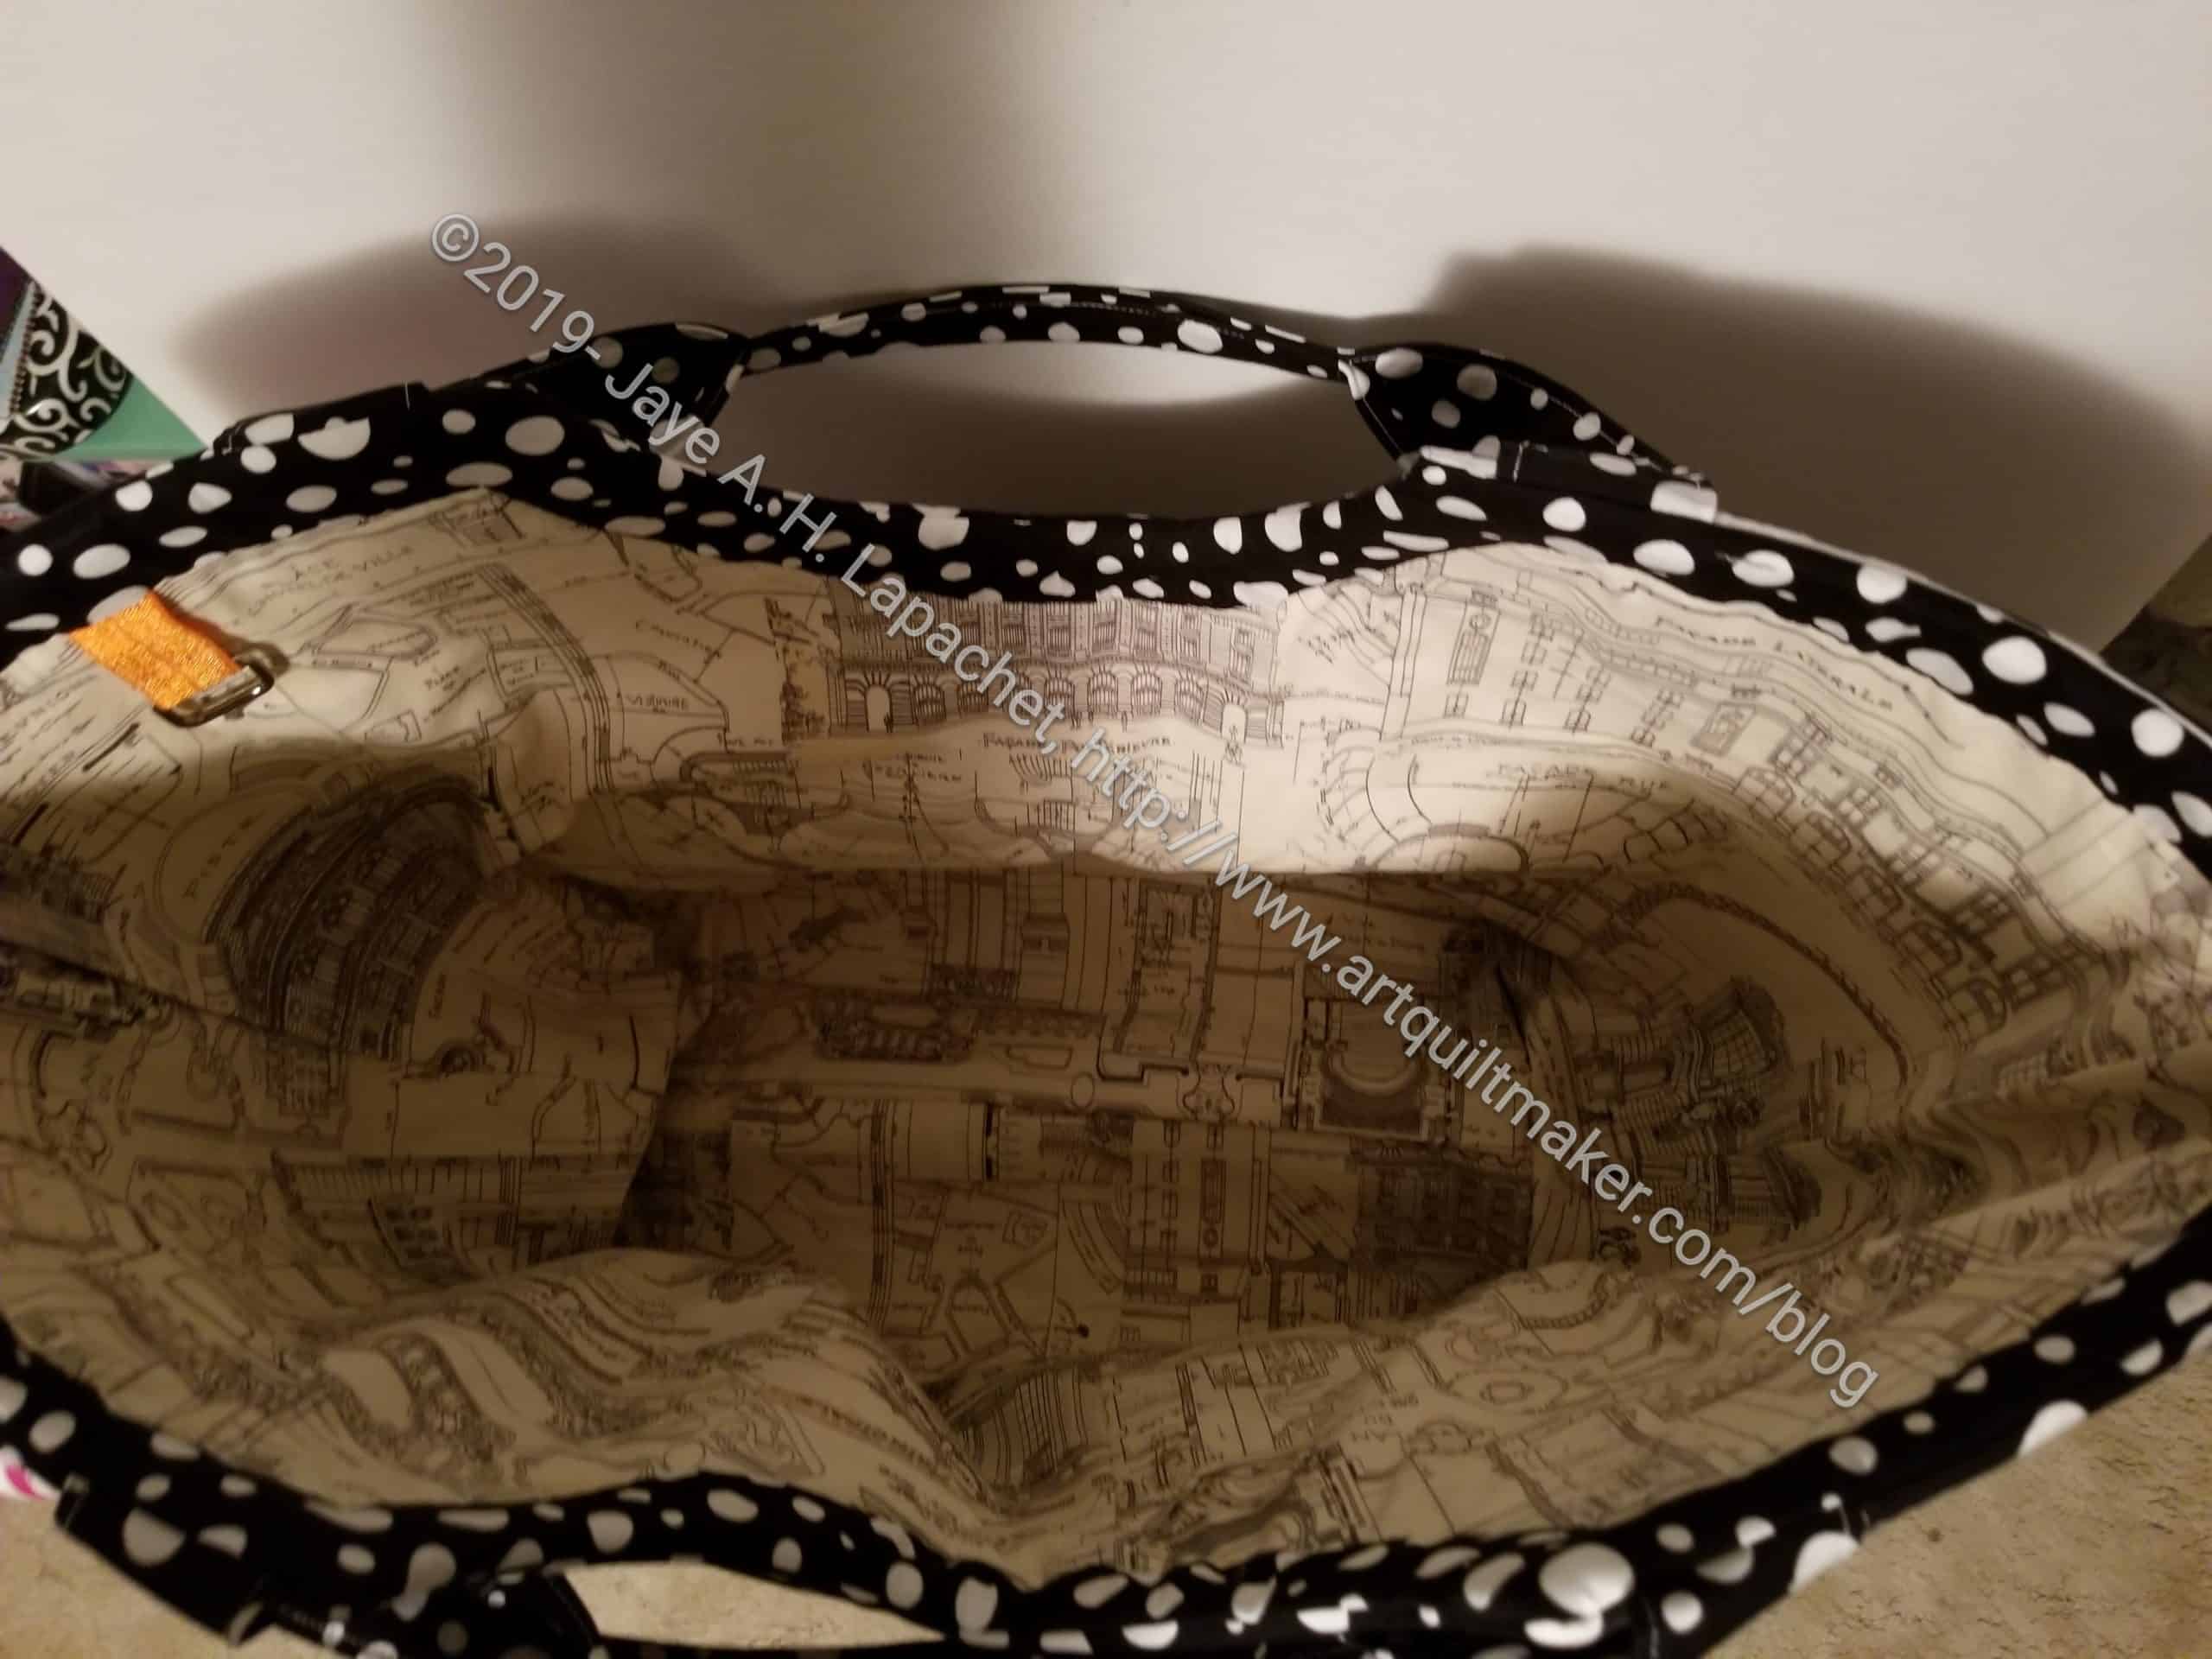
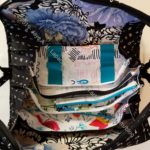
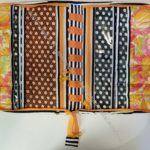
Officer Poolside Tote – inside
I am pretty pleased with the fabric selection. I would like to figure out how to put a slip pocket on the inside. I don’t think it would be terribly difficult. I think it would just require some deft measurement and having an already made up tote on hand might be the way to figure that out.
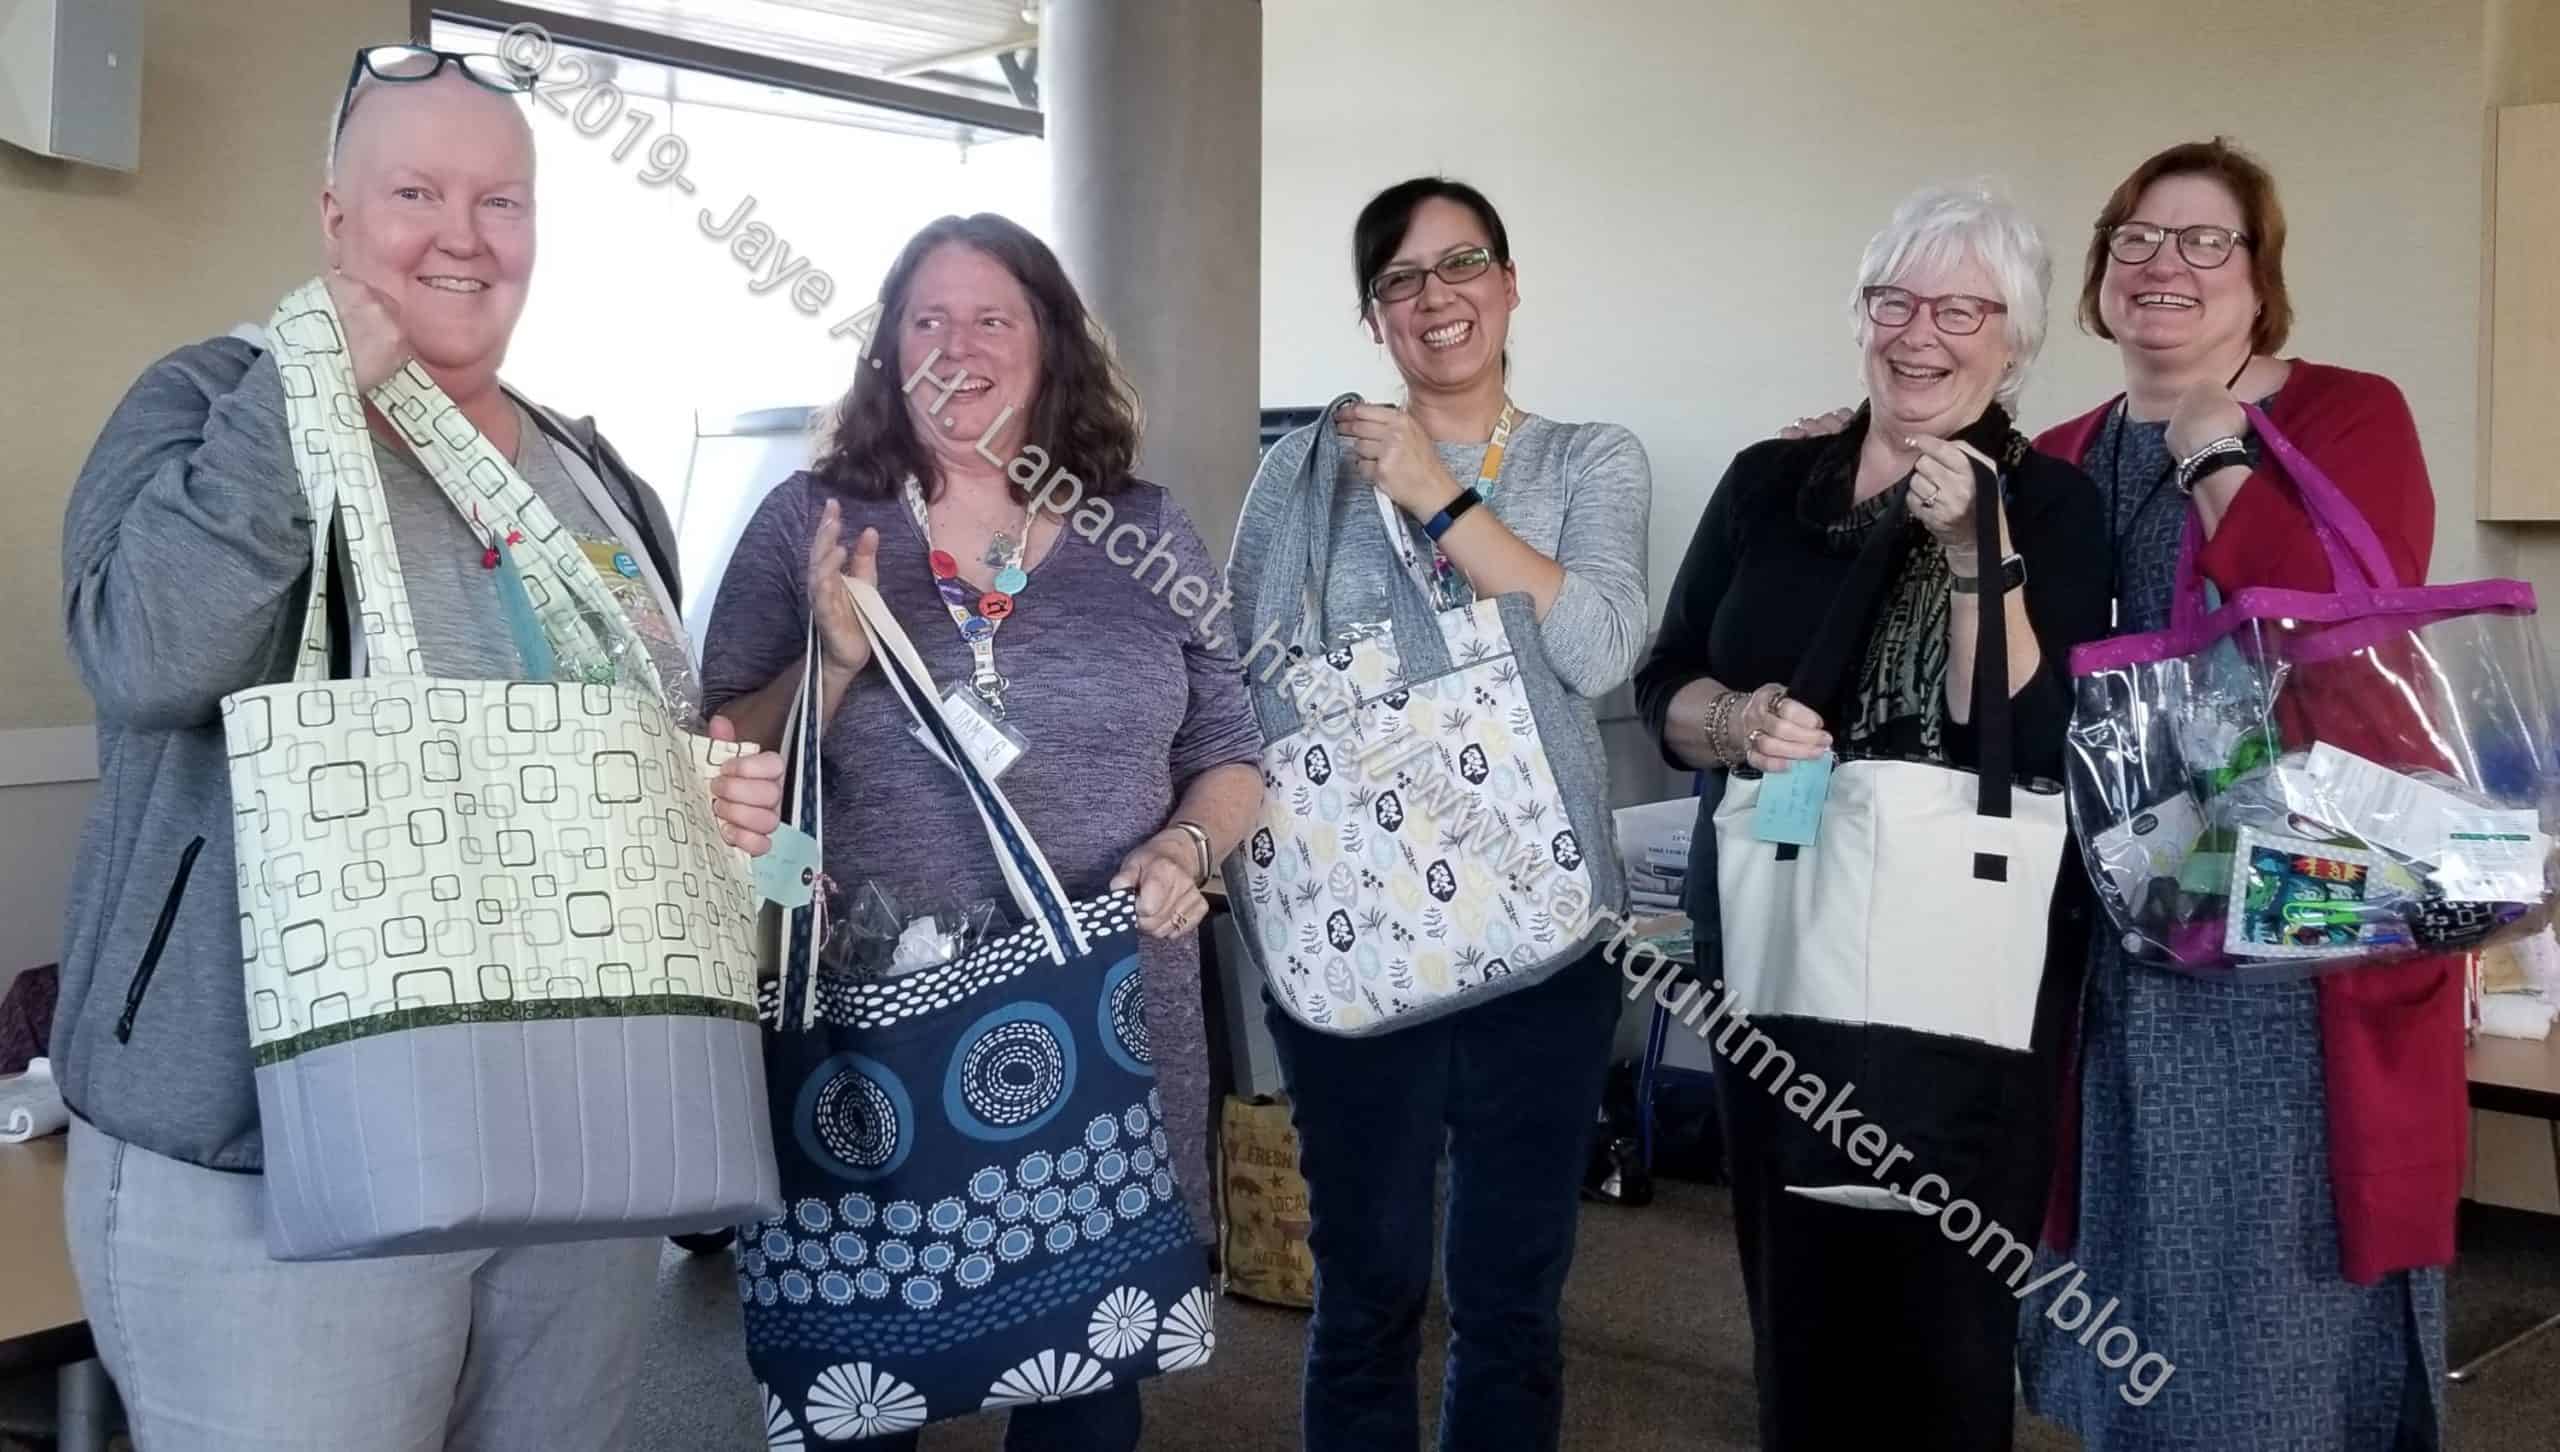
A five month project finally came to a close over the weekend.
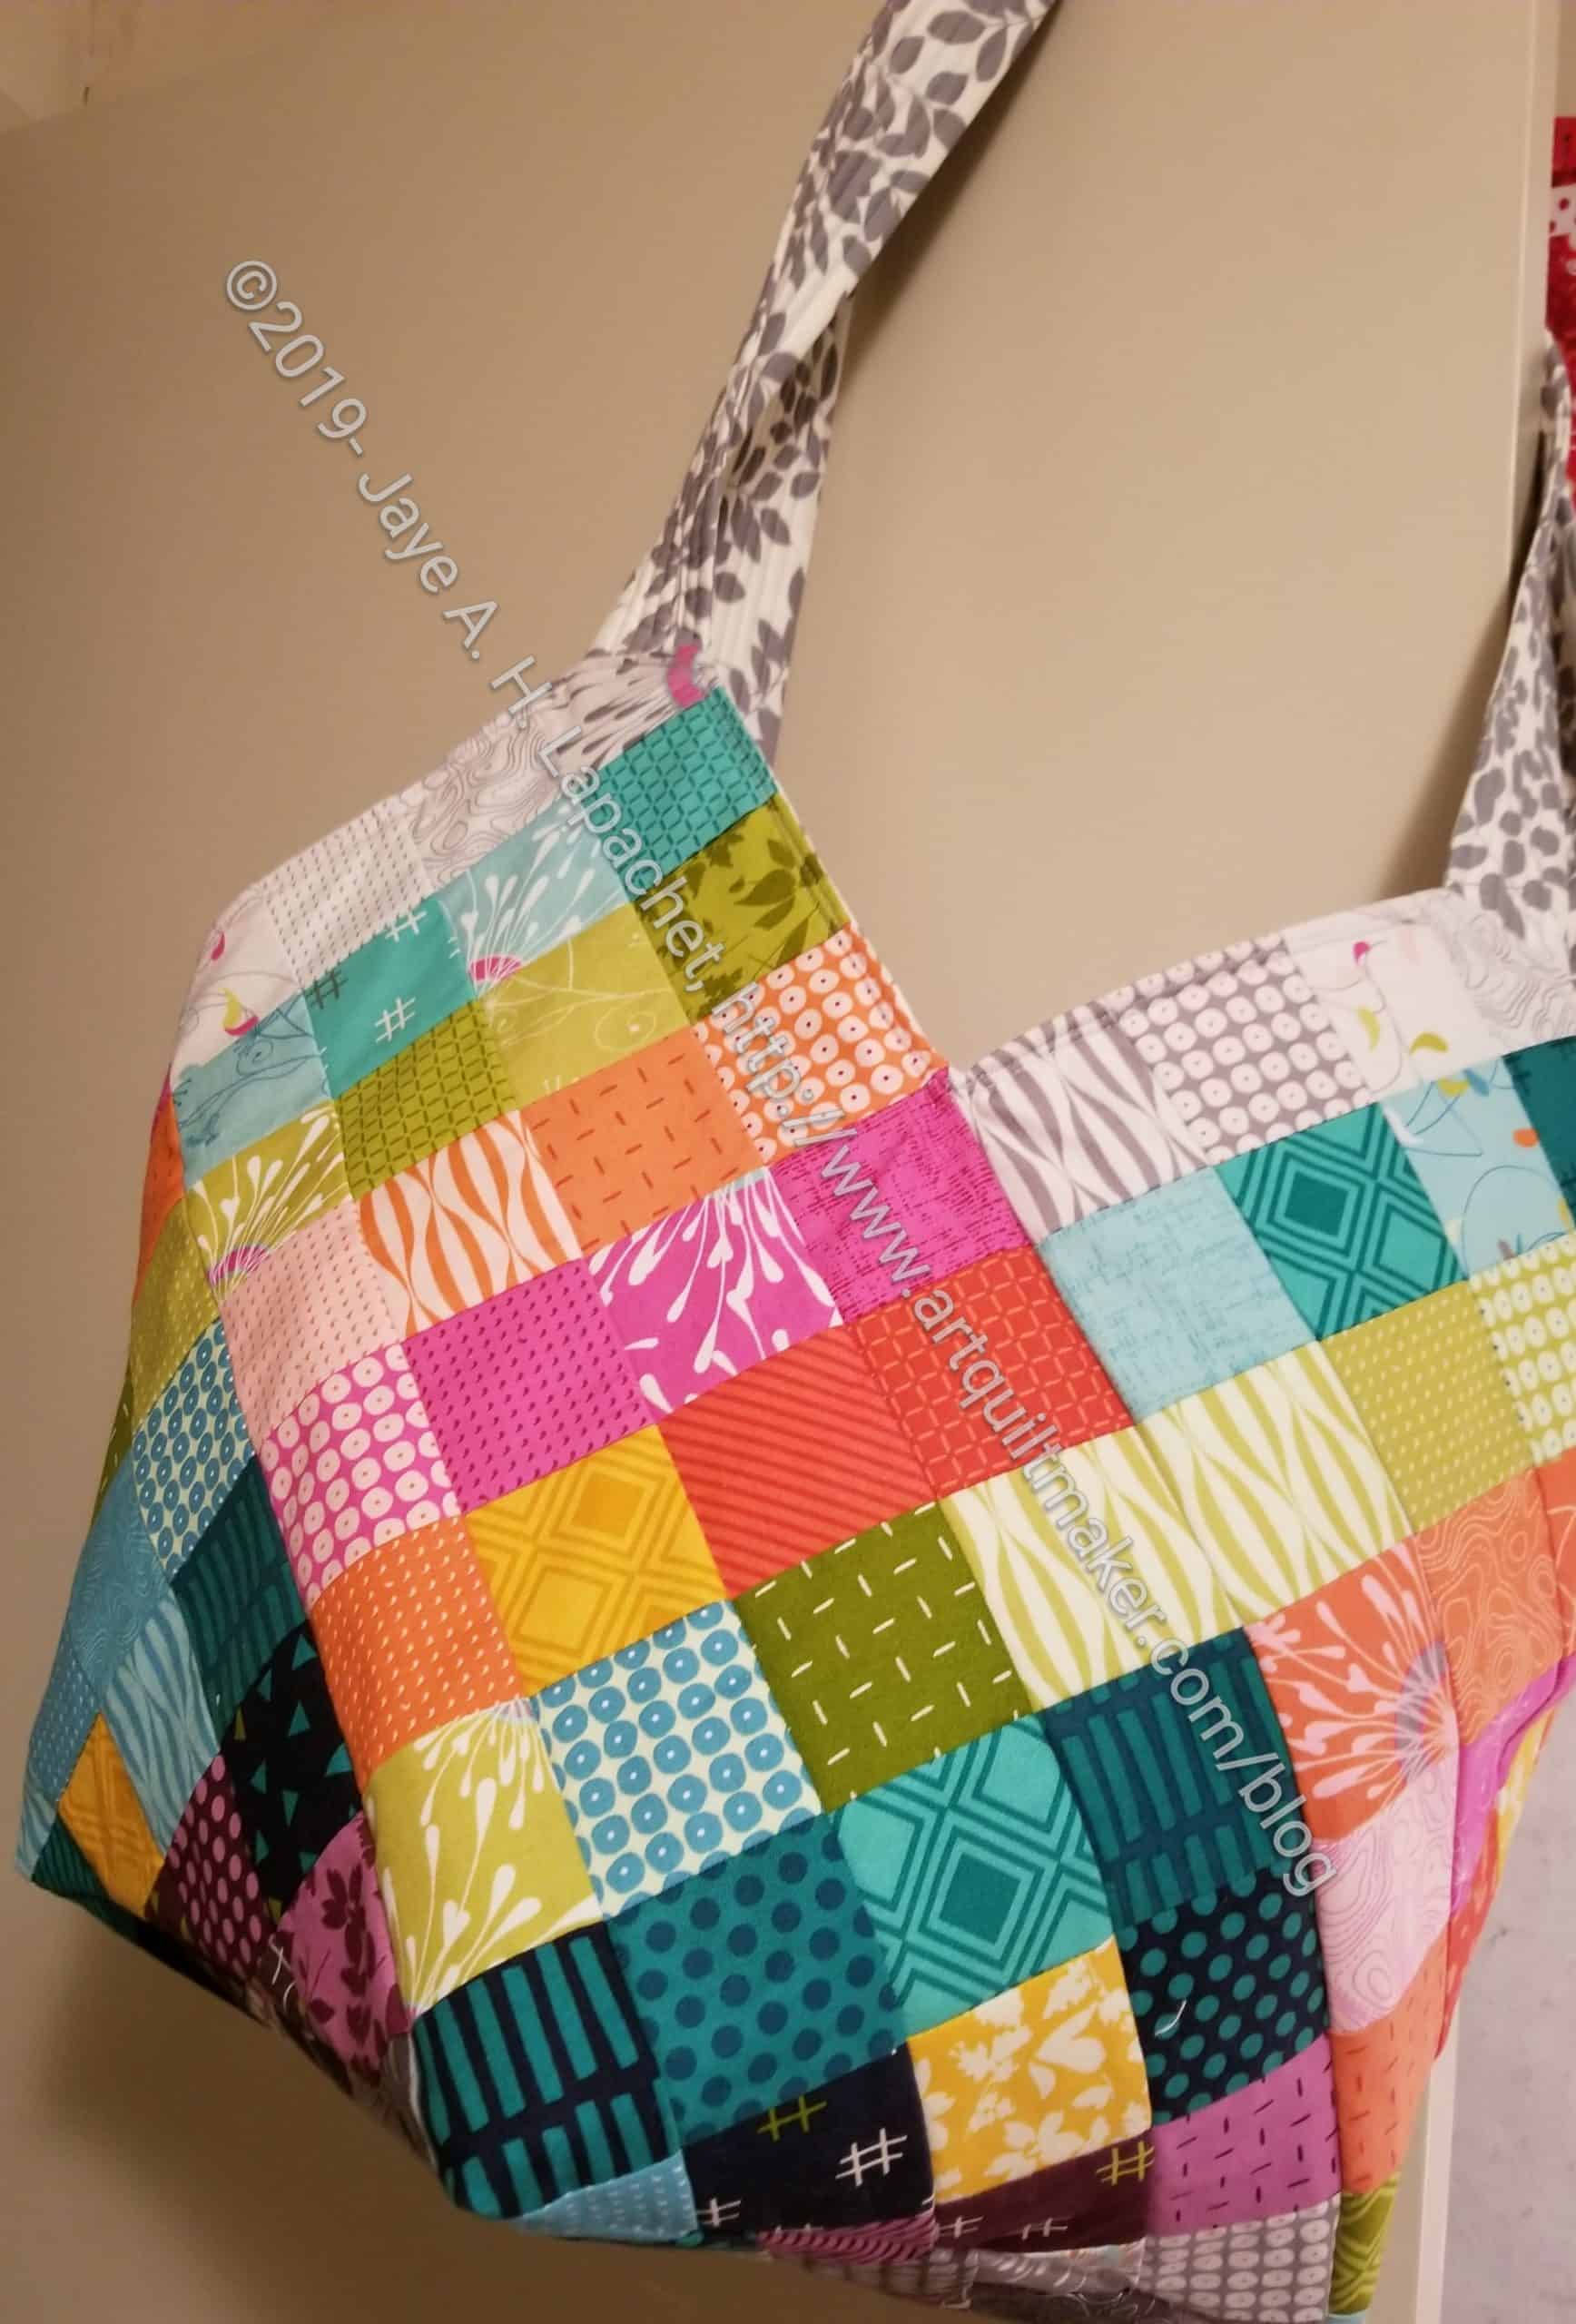
Every year for the past few years I have gotten a group together to make gifts for the officers. At first, I didn’t think they needed anymore quilt projects, so I had the idea of making them a bag and having guild members fill the bags with small gifts. This has proven to be very successful. In the last few years, I have brought postcards, so people who cannot bring gifts can convey their thanks in writing.
Both Angela and Rhonda posted photos of their gifts, which is a good way for you to see the variety of made and bought gifts. Rhonda’s bag was a quillow, so she got a bonus and the colors are perfect for her as she loves the Japanese indigo style.
We had an extra bag, so I took mine back and will use it for something else or for next year. I have to think of a way to be better organized as I forgot one person who had agreed to make a bag early on.
I don’t think I really had a good tag for this post, which means I will probably never be able to find it again. 😉 It is all about zippers.
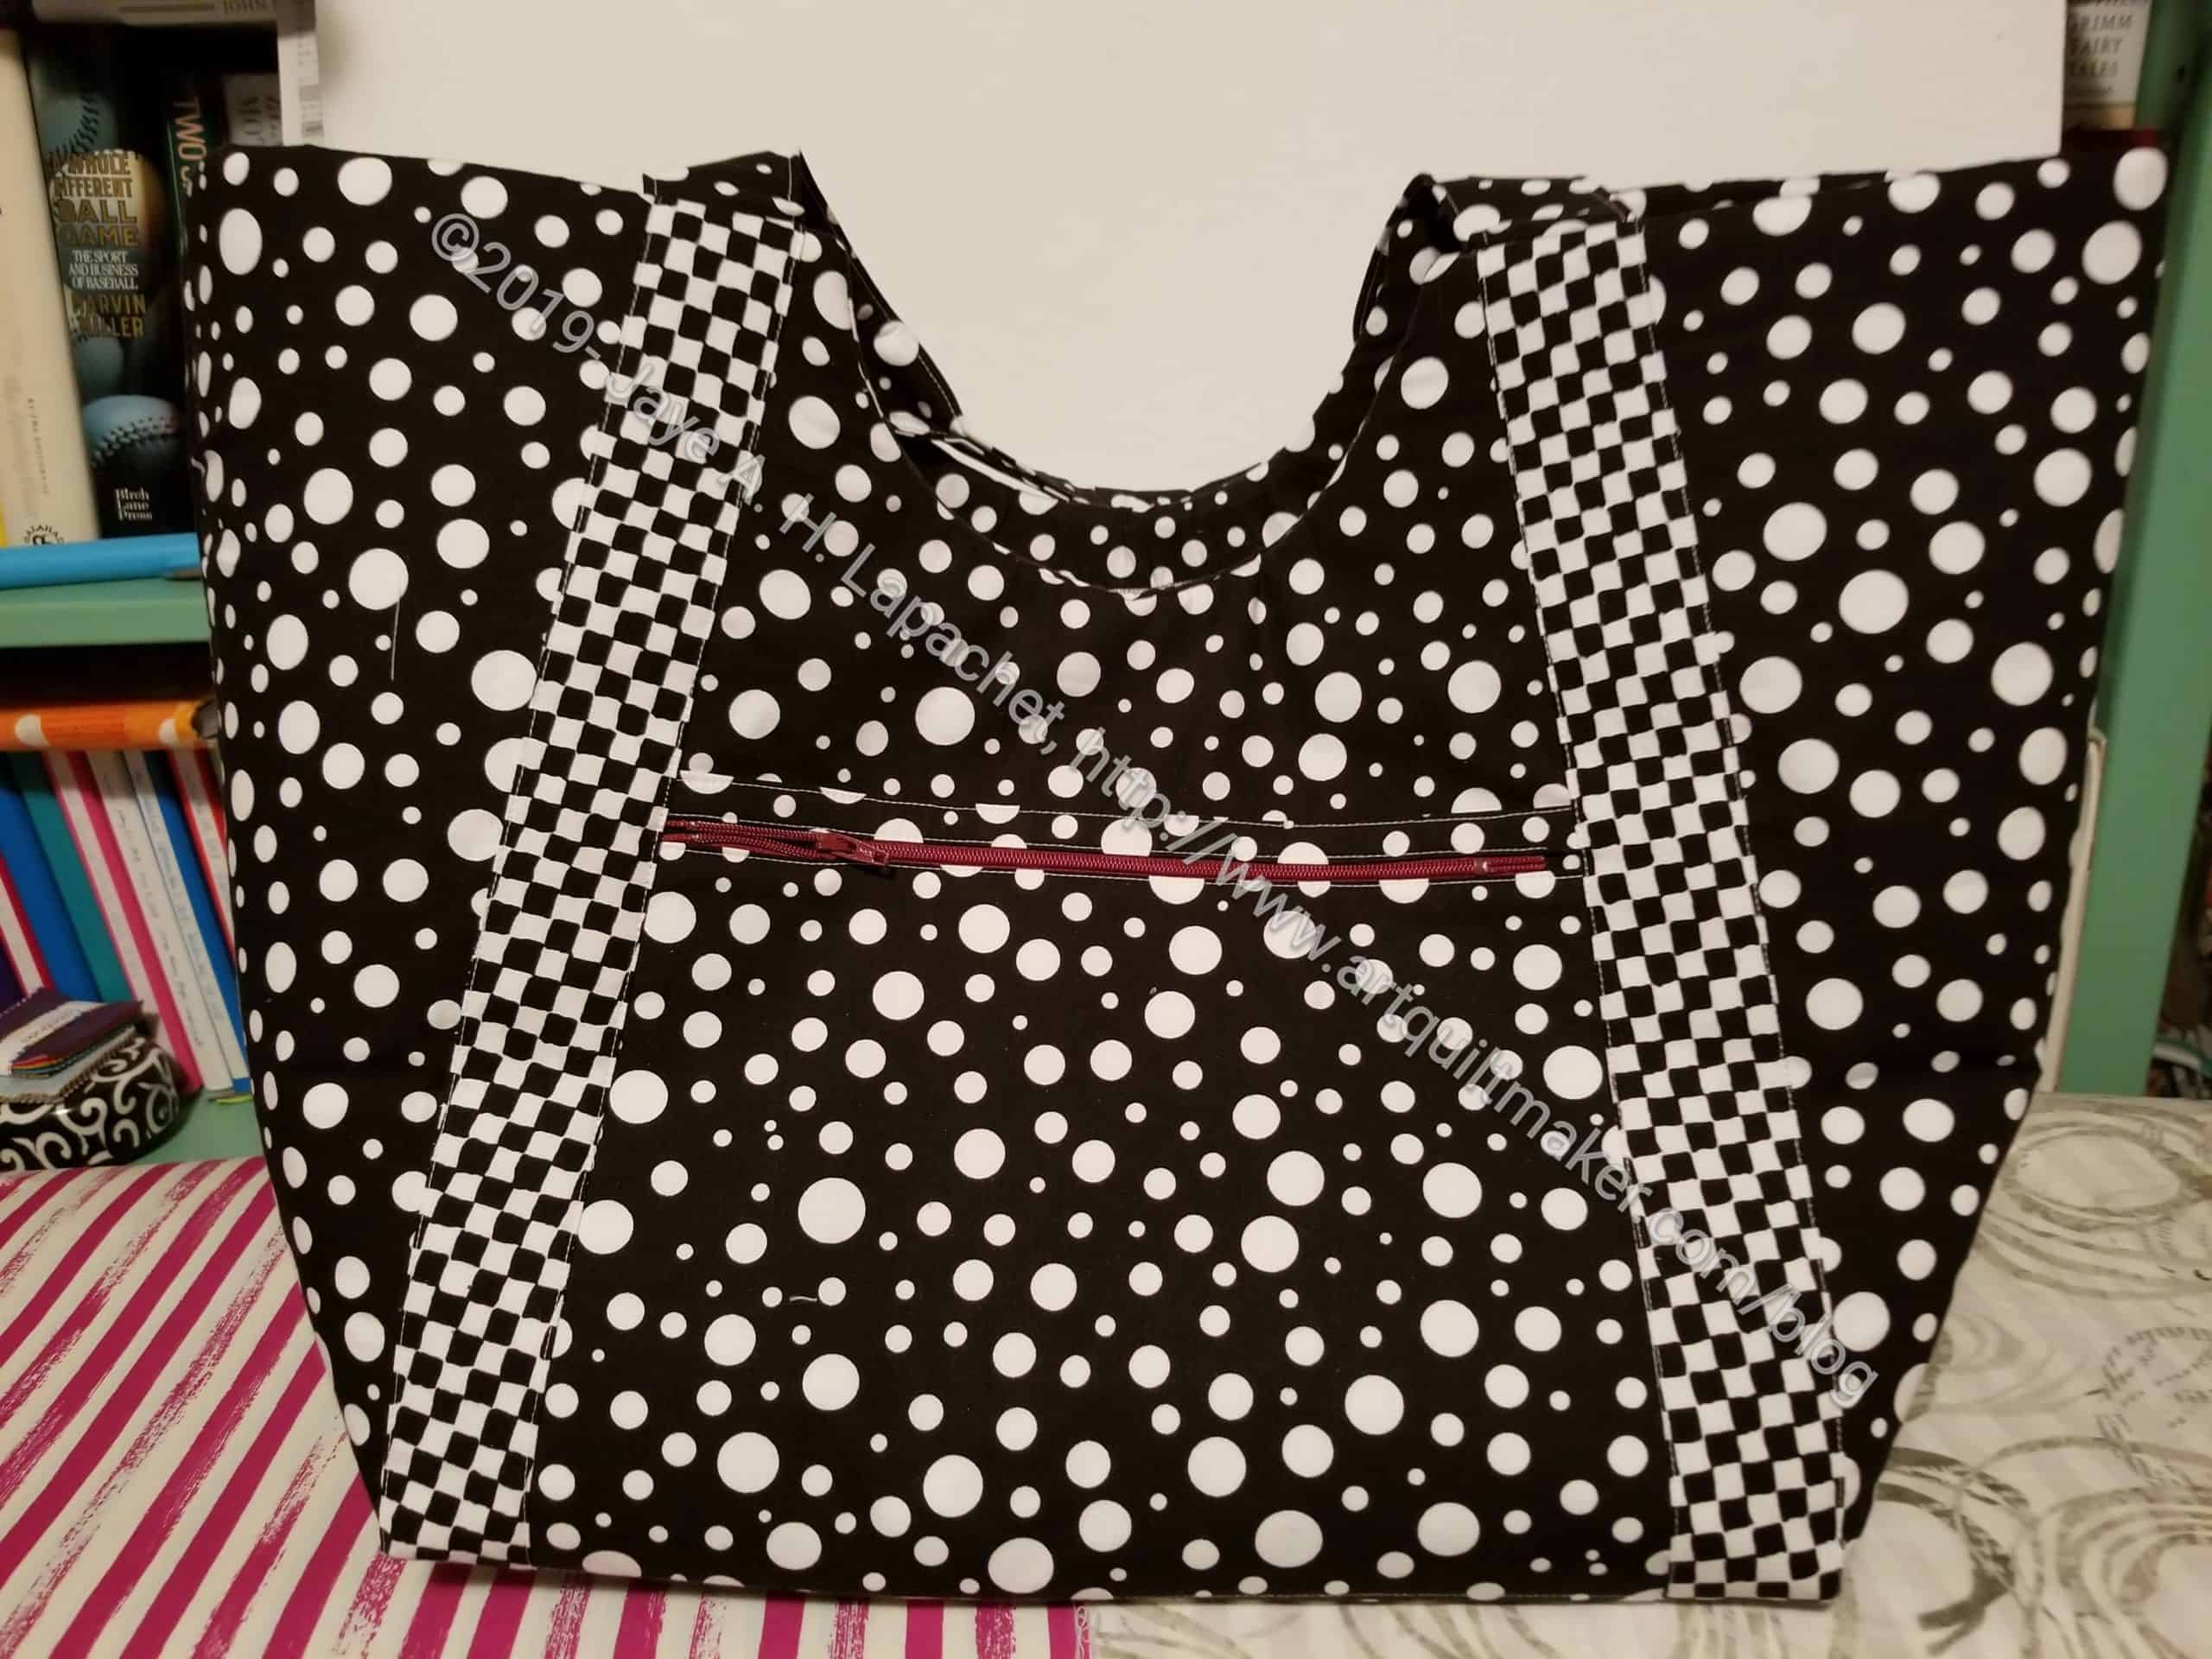
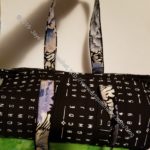
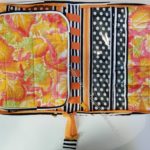
I am faithfully following the pattern for the Poolside Tote. This is the third Poolside Tote I have sewed. I am not sure why, but I always have trouble with different parts.
This time I struggled with the facing. I also wondered about the zipper. On mom’s version and on my knitting bag, I just used slip pockets. On this version, I cut zipper pockets, which I didn’t remember. I guess it forced me to make pockets with zippers.
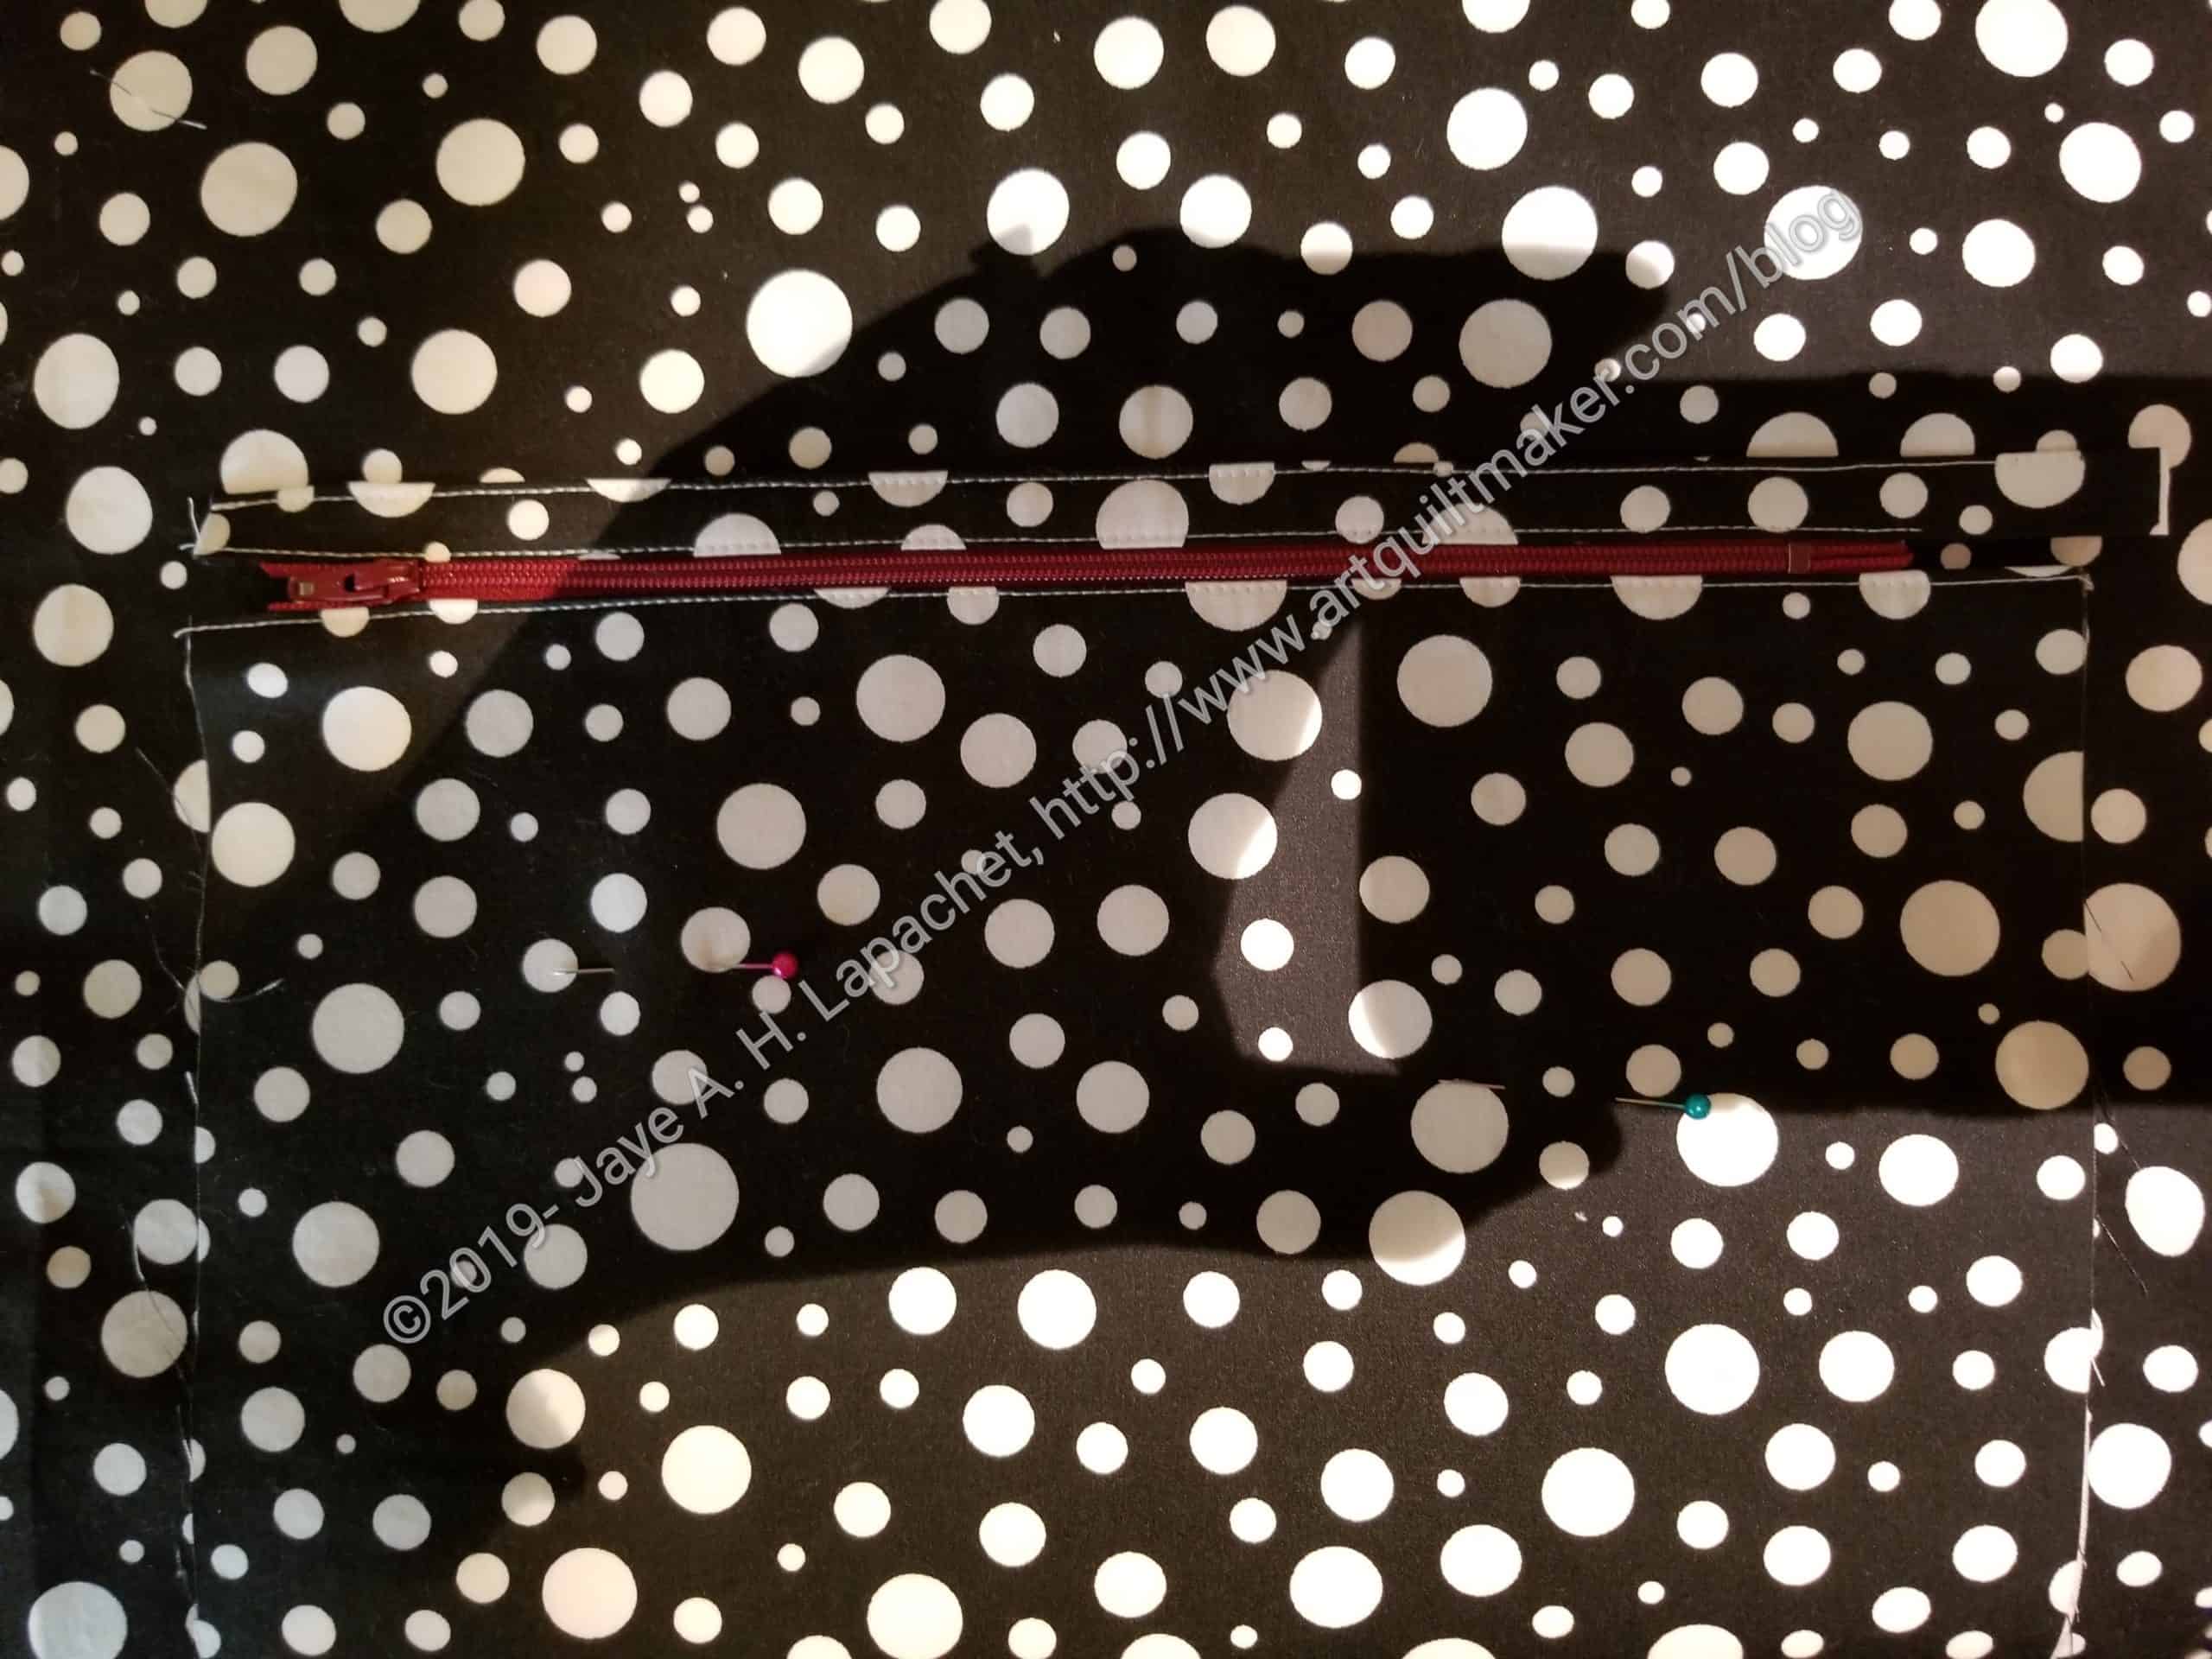
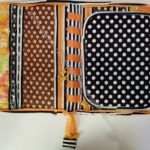
Zipper pocket
The directions for the pockets were pretty good. I didn’t have much trouble except for lining up the stitching. One side is hidden, so I leapt that hurdle. The only question I had was about the size of the zipper. The pattern called for a 10 inch zipper and that just seems weird to me. It seems too small. There are holes at the ends and no directions for zipper tabs. Obviously, I can make my own zipper tabs, but I just wonder why the designer asks for such a small zipper. I wonder if a 12 inch zipper would be better?
Are there rules for the size of zippers one includes in patterns??
This is not the end of the world. The zipper works fine and nobody will put something so small in the pocket that it will fall out if the bag falls over. This is just a puzzle about which I am curious. I might try the bag again with a 12 inch zipper.
I have worked on this project a little bit over the past several months, but decided I needed it out of my workspace. I finished it on Sunday.
It is big!
I thought of using it as an officer bag, but I really like the fabrics I used. I think I will keep it and use it to carry my hand quilting project around.
Mondo Bag lining and handles
Again, the method of construction foiled my attempts at organizing the fabrics. I still think it looks good and I really like the lining and handle fabrics.
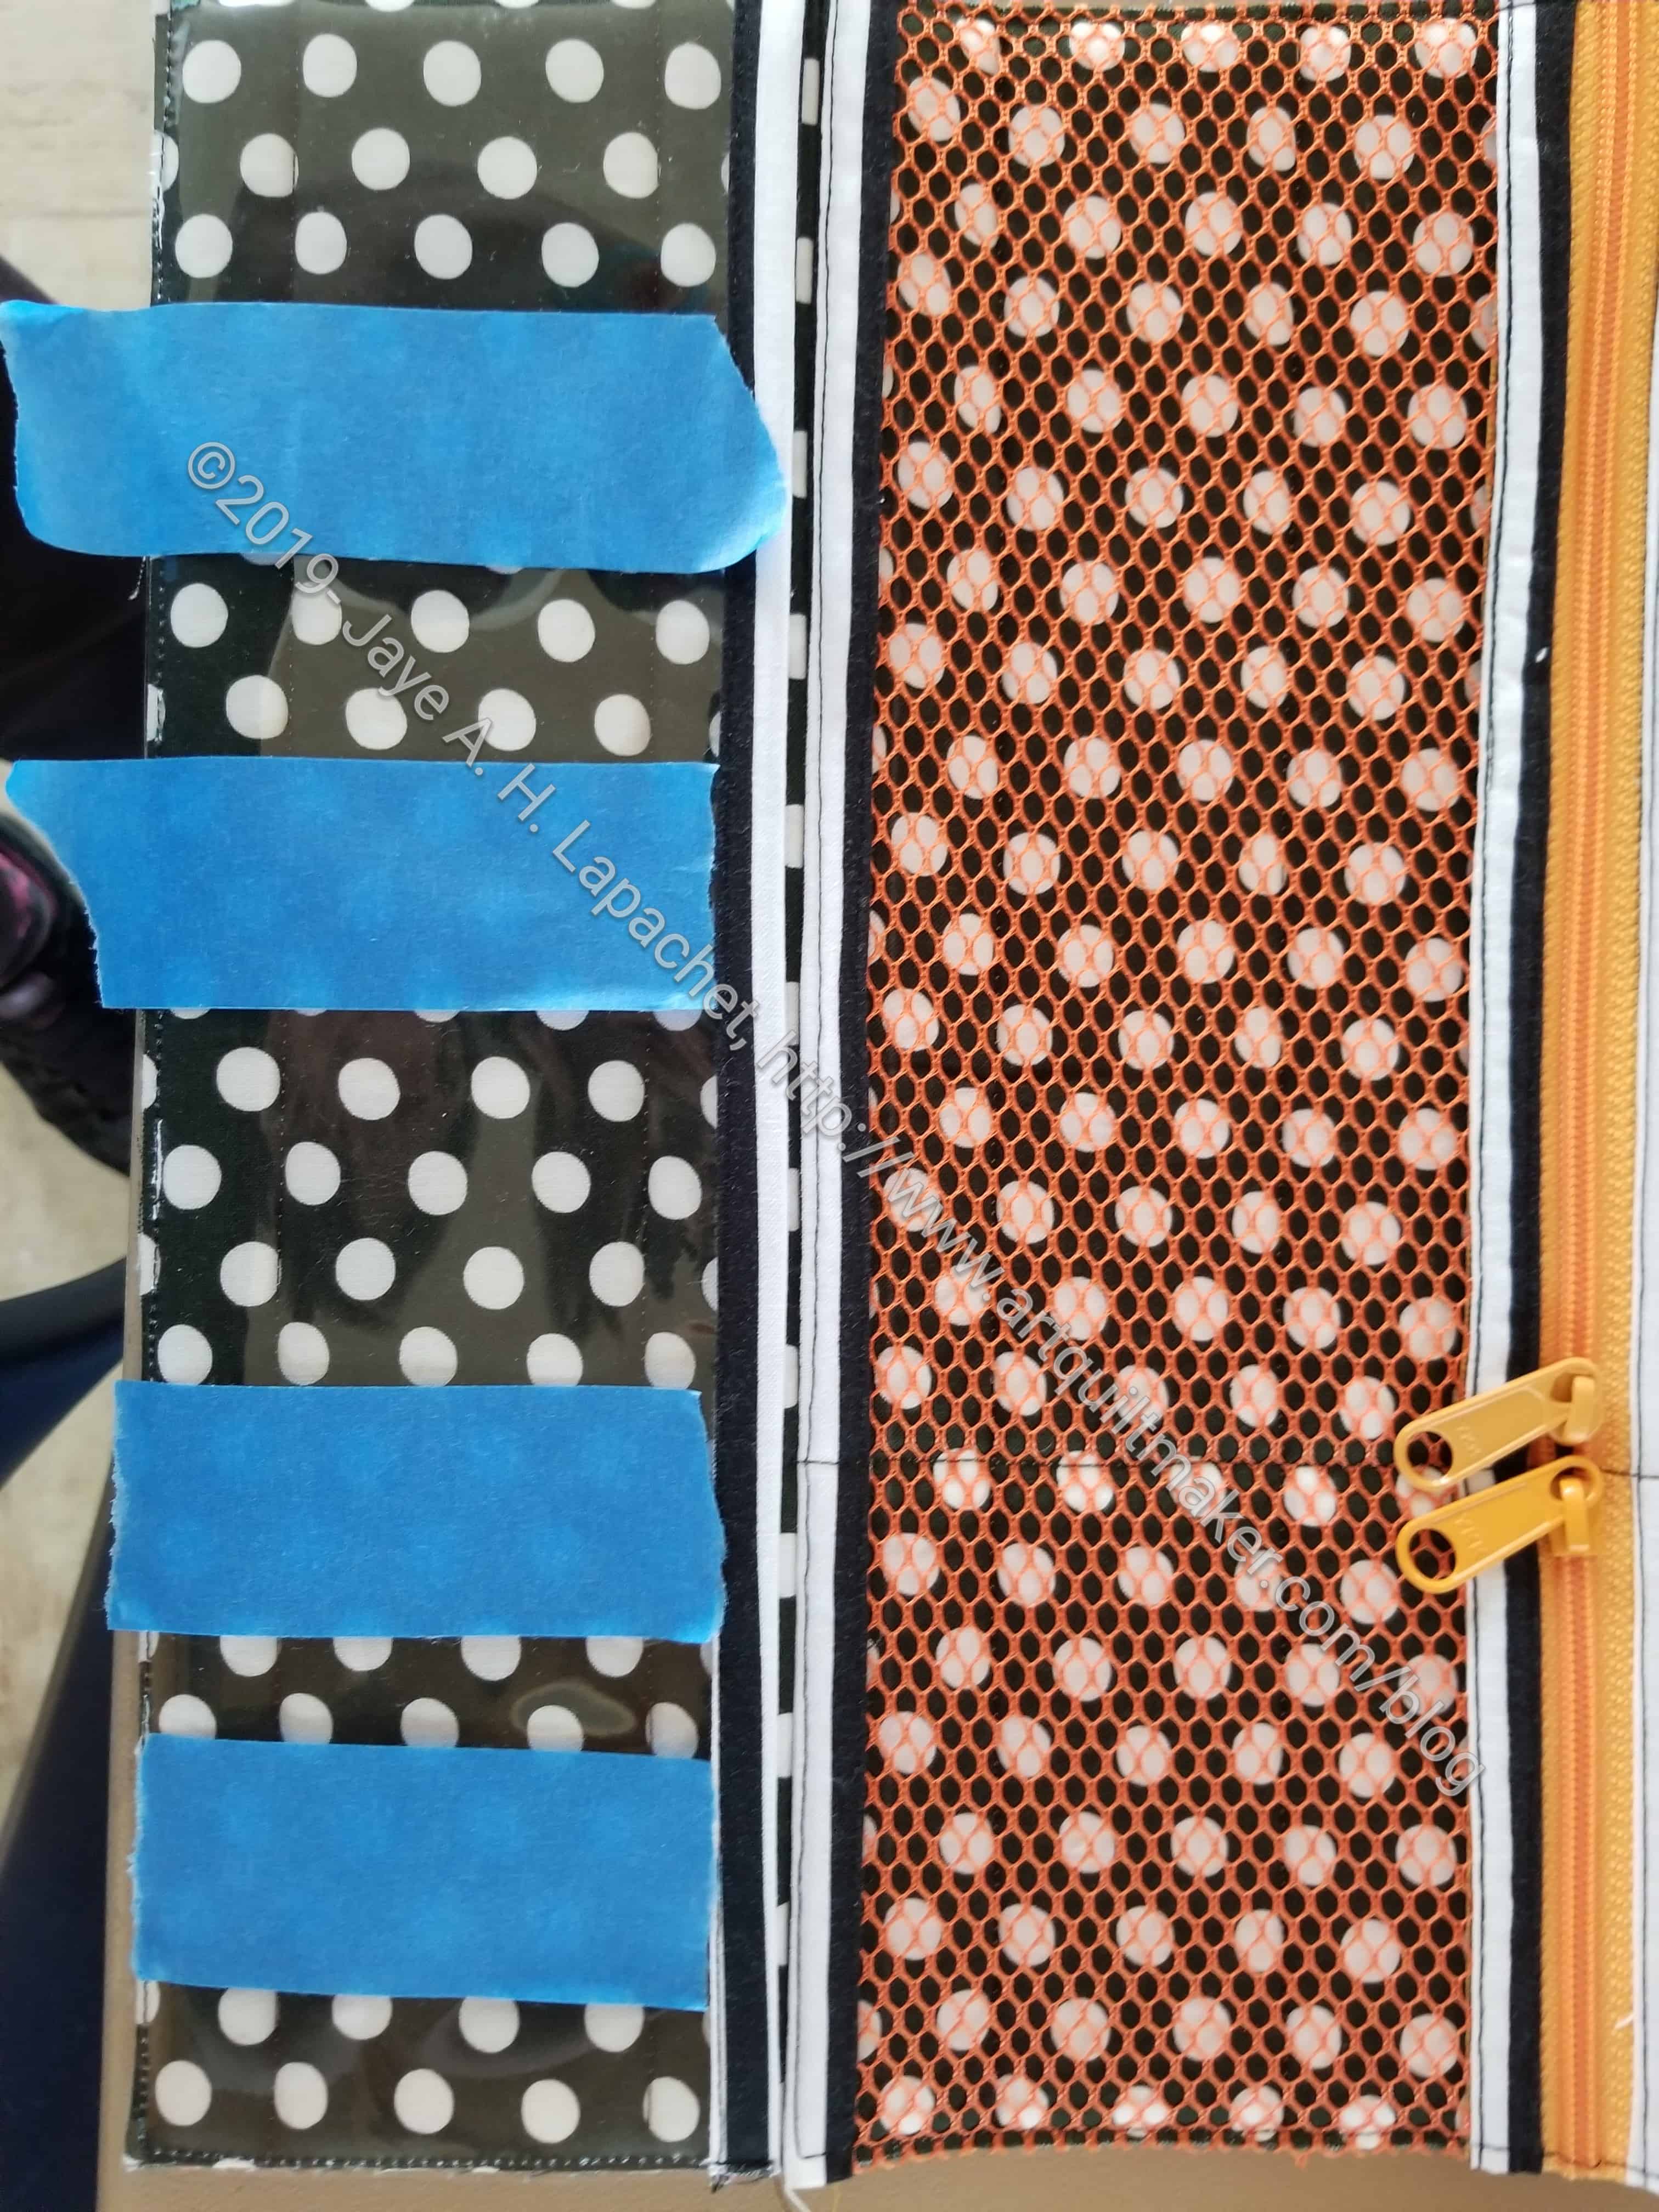
I originally planned to publish this post on September 19. Somehow, the time got away from me. While I did finish the Running with Scissors tote, this post has mostly to do with working with vinyl. I thought it might still be of interest.
Marking vinyl
One thing that happened while I was working on my project was I had to develop some tips/tricks of my own.
The pattern, in general, is really good. It says, however, in the vinyl pocket part of the pattern to mark the vinyl to make smaller pockets. It didn’t say how to mark the vinyl. I didn’t have access to the video at the time, which may have some tips. I didn’t want to use a Micron pen, though I know that the ink can be washed off of vinyl pretty easily. I also don’t have one of those wash away pens, so I decided tape would work. I used tape to mark the lines I needed to sew along.
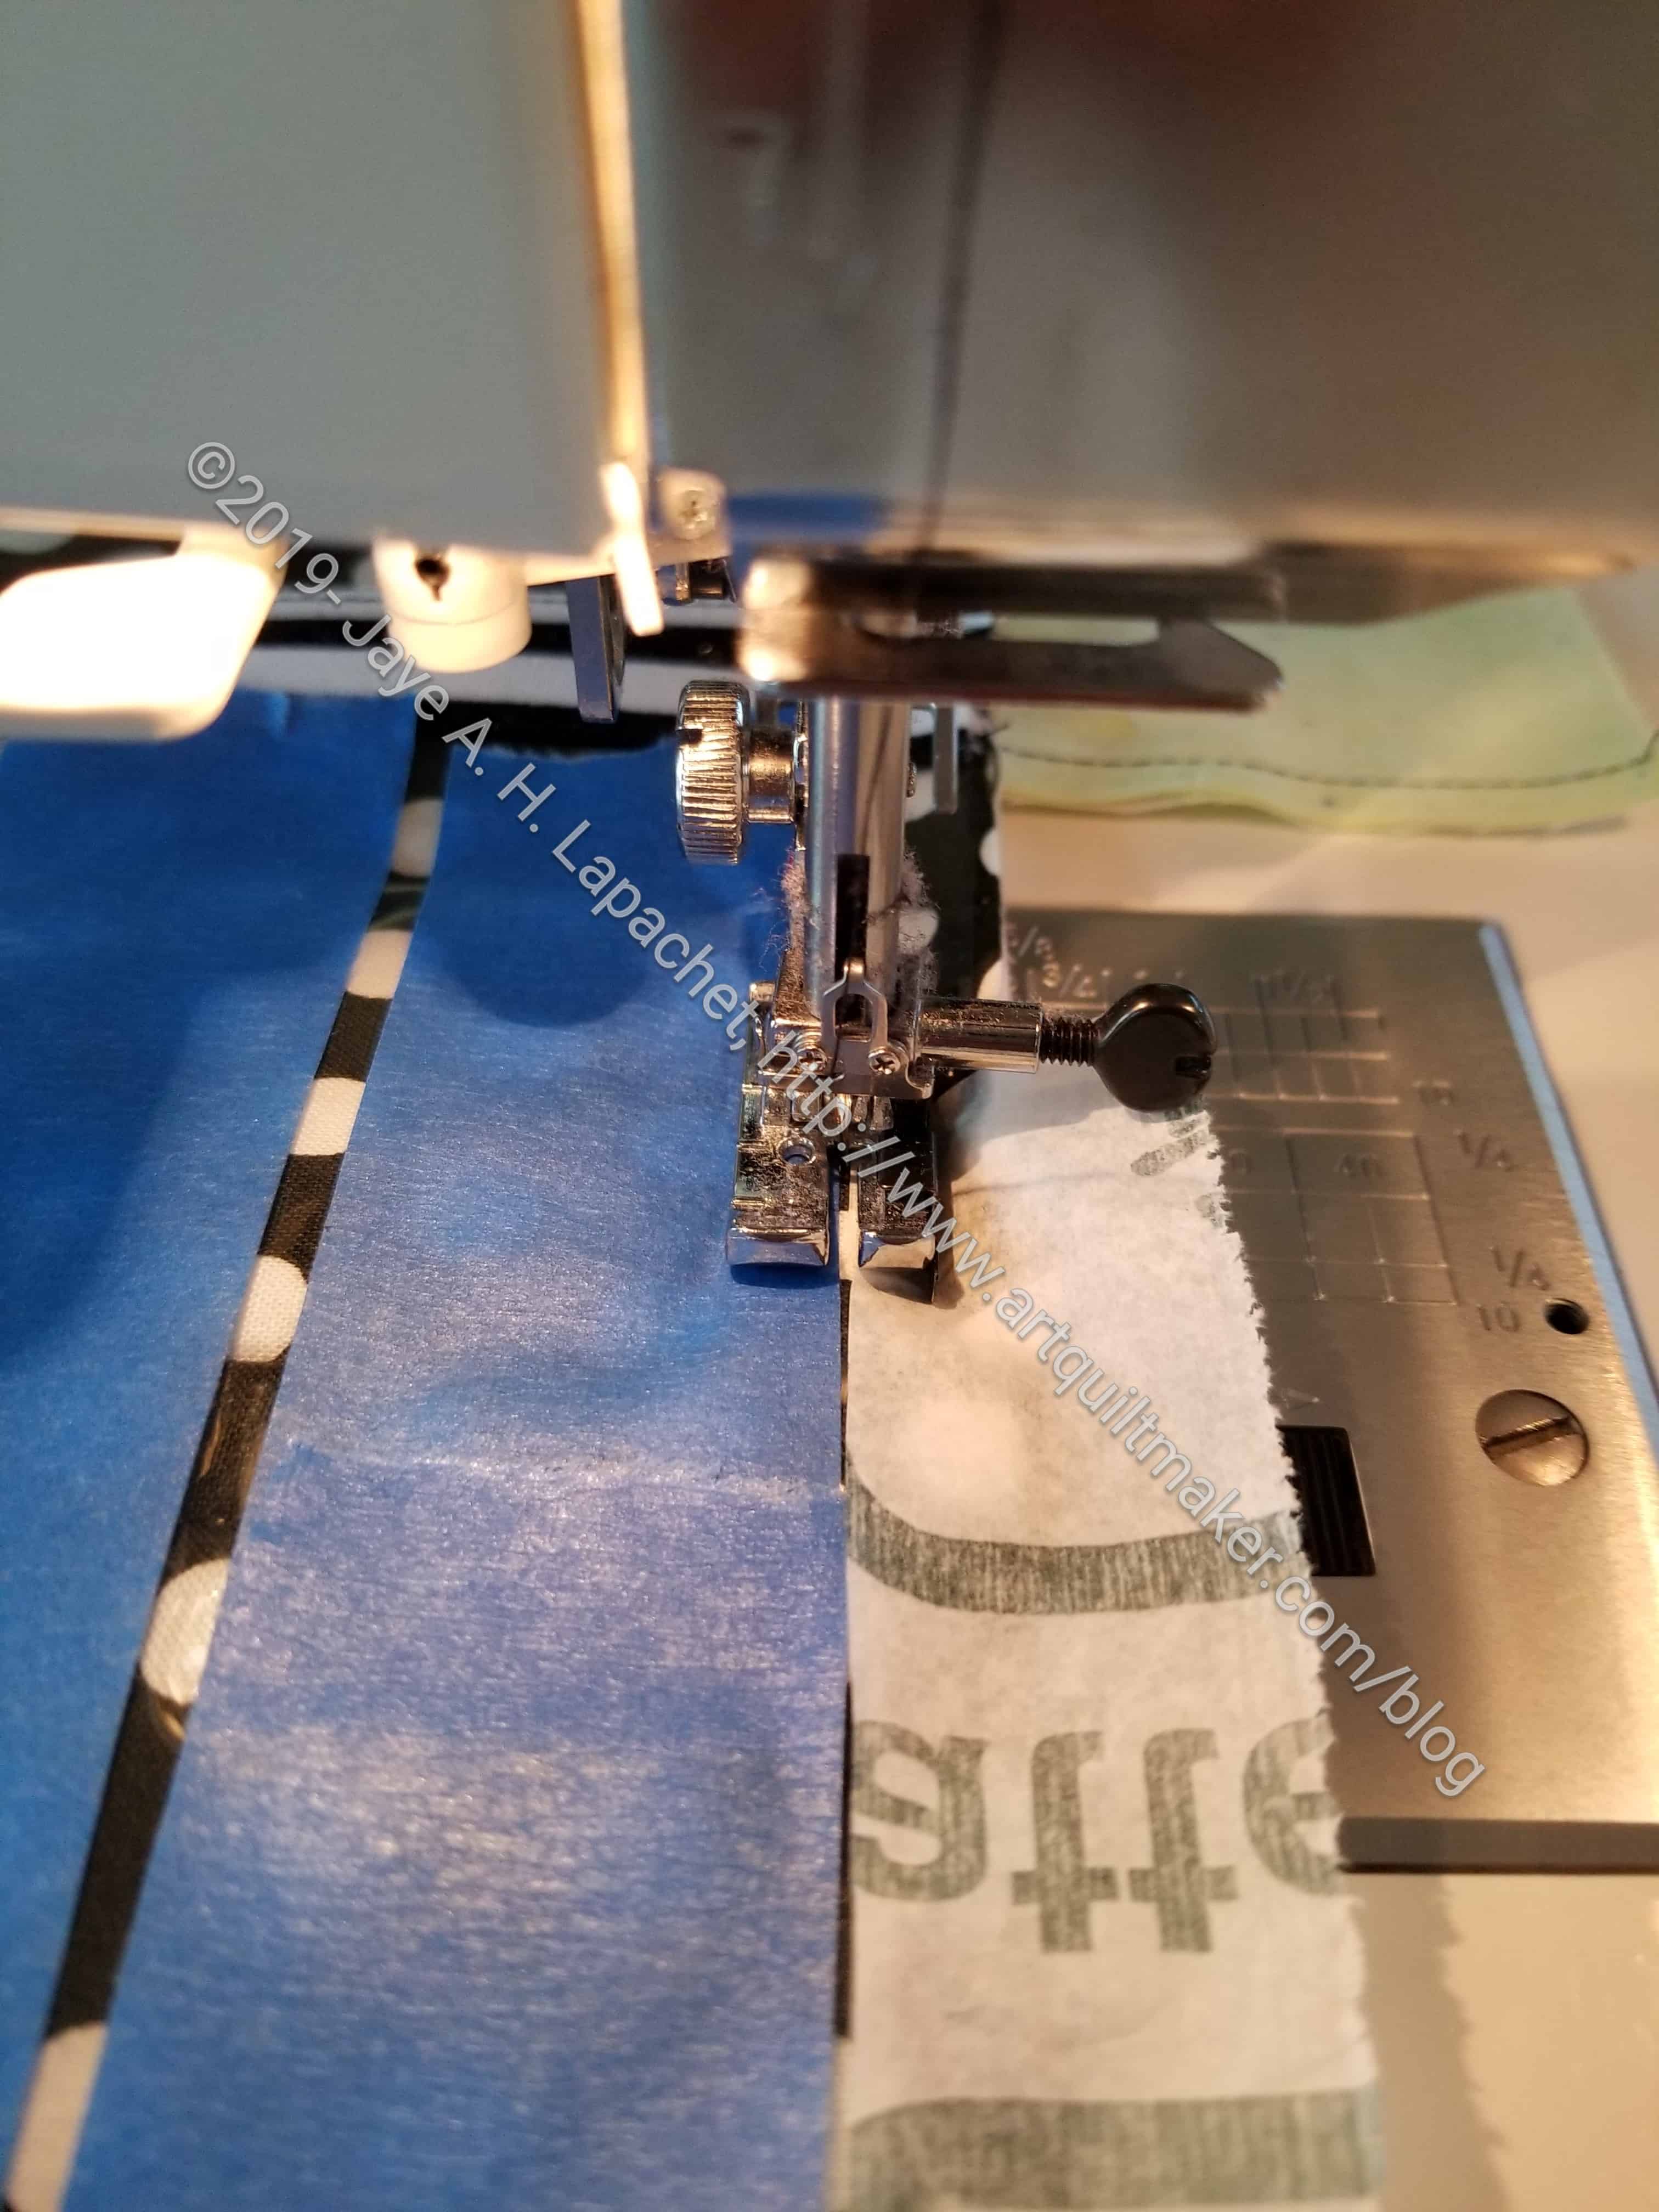
Sew along the tape
I sewed right next to the tape. I didn’t want to go through it, because that would create a mess. This was tricky, because I also needed to sew with the vinyl covered by tissue. As I have talked about many times, you need to take care when working with vinyl. I didn’t have my teflon foot with me (duh, oversight), so I used the wrapper from the vinyl. You don’t need much, but you do need longish strips. The only issue was that there was a little residue left on the vinyl from the tape. I’ll clean it off later.
Sewing over zippers
The zippers from ByAnnie are gorgeous. You can imagine that I was a little annoyed when I had to sew over the zipper ends.
I had to open the zipper – move the slide to the center, so it wouldn’t end up on the wrong side of the sewing line. That left the end of the zipper tape flooping around. I wanted the zipper teeth that would remain in the bag (not cut off) to be as close together as possible. I held it together with some tape.
This project has a lot of steps, but it does go together very well.
After Sew Day, I sewed the panels together. They look really nice! As I said, I am glad I was able to spend so much time arranging them. I sewed some Soft & Stable to the panels, but realized I have to rip it out. The directions were a little difficult to interpret on this point. I need to sew the Soft & Stable (or other lining/batting) to the lining fabric. All of a sudden, I have a lot of projects in play. I need to get at least one finished, so I can think properly.
I told you that I finished this project back in January. According to the pattern, I did finish it. However, ever since then, I have been contemplating handles. Mostly, I have been thinking of adding handles because of the way Vanessa (Crafty Gemini) stuff the thing full of tools, notions and everything sewing imaginable in the video introducing the Organizer Club**. I just couldn’t imagine how I could carry this thing around.
So, the bag sat until last weekend. Post Flying Around, I am finishing up bag projects. I talked about the 4 Zip Organizer and the Running with Scissors tote. On Sunday, I turned to this bag and decided that Sunday was the day this bag was getting handles.
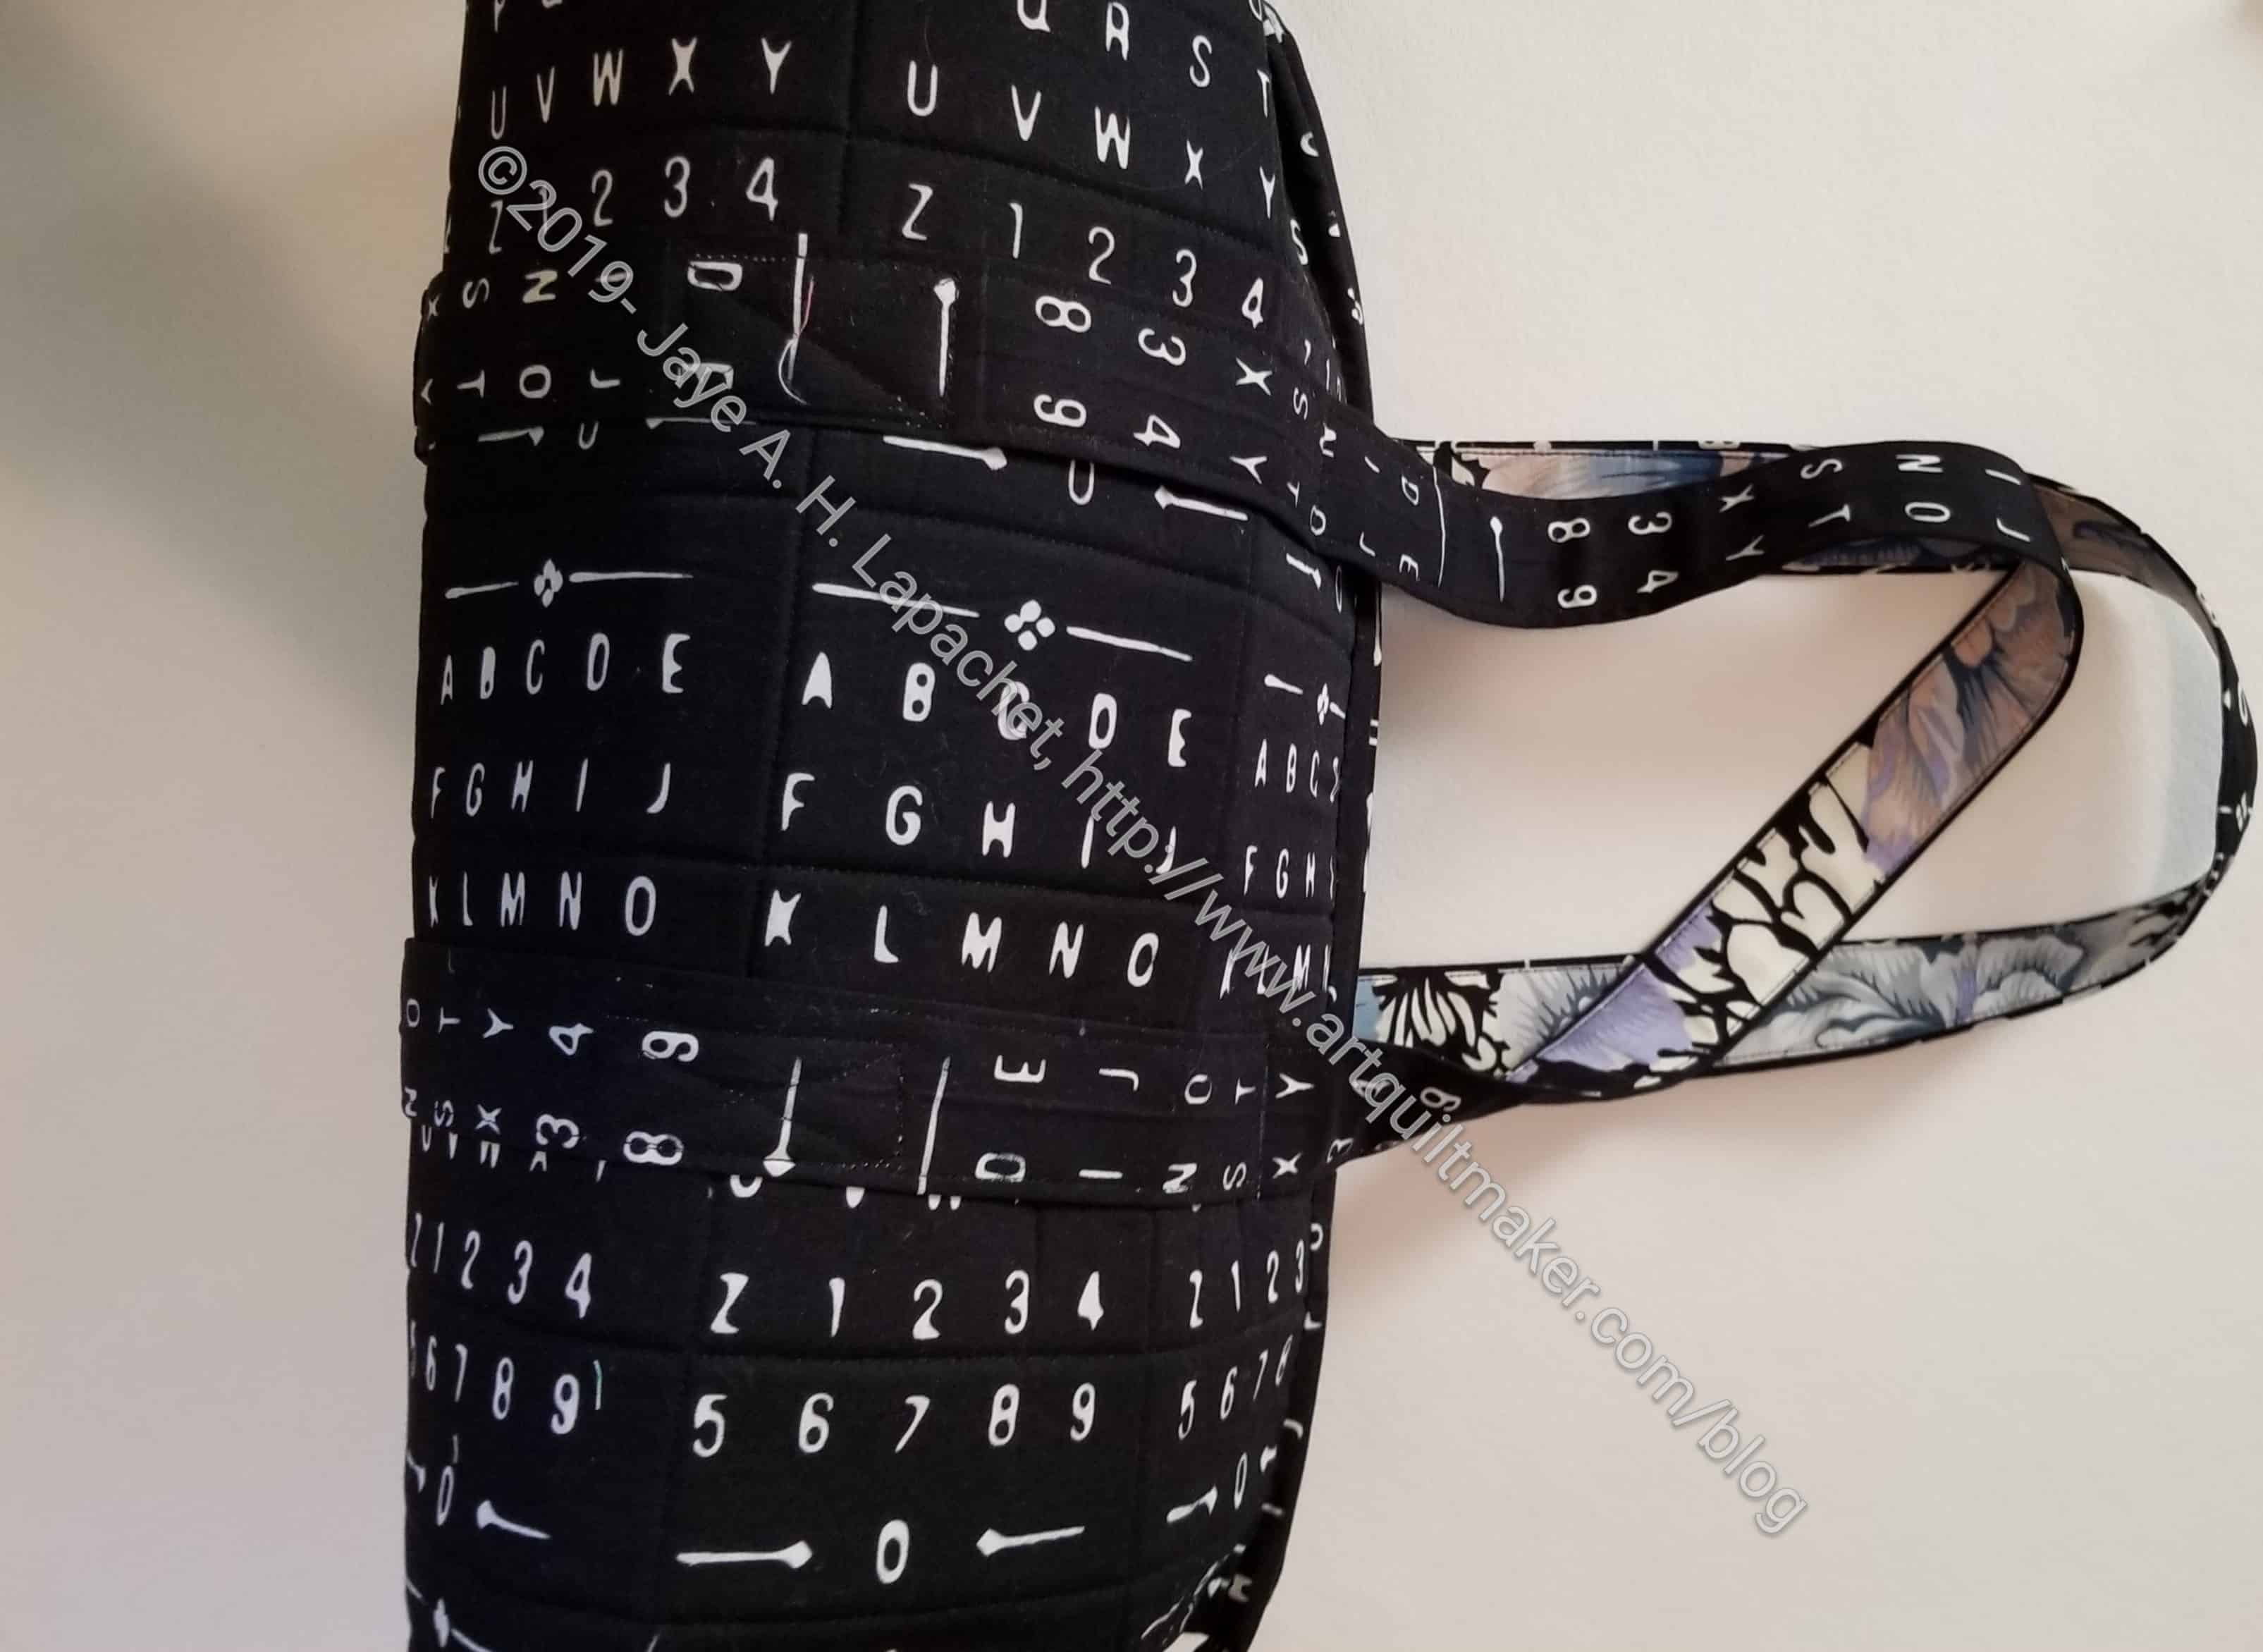
All Rolled Up tote with handles
I thought I would make really good progress on the Poolside tote I am making, but I spent most of the day slowly working on the handles for this bag.
For some reason, I am convinced that these bags need to be supported. Part of it, again, is the videos showing how much stuff can be stuffed into these bags. The other part is that I don’t want to be trying to repair bags whose handles have ripped off. Thus, you may see some similarities between the handles on this bag and the handles on the 4 Zip Organizer.
Taking good photos of these handles was a challenge. In the above photo, you can see how far they extend off the top. I made the initial strip about 80 inches long. The black & white Peony Brocade fabric acts as an enhancement, but the outside of the strap is meant to blend into the outside of the bag itself.
All Rolled Up tote with handles: showing accent fabric
All Rolled Up tote with handles
All Rolled Up tote with handles: open
Adding the handles also made the bag have more of a defined round shape. I tried to install the handles so they wouldn’t interfere with the wide opening of the bag. I think I achieved that. I think, though, that the bag takes on a different shape once holding the bag by the handles.
I am still not sure how I am going to use this bag. I wrote a dissertation about that before so I won’t got into it again. I do think that I will put Wonder Clips in one of the pouches.
**N.B. The Organizer Club is still available for purchase, but this is the club that was new in 2018, so any announcement of early bird specials is no longer valid.
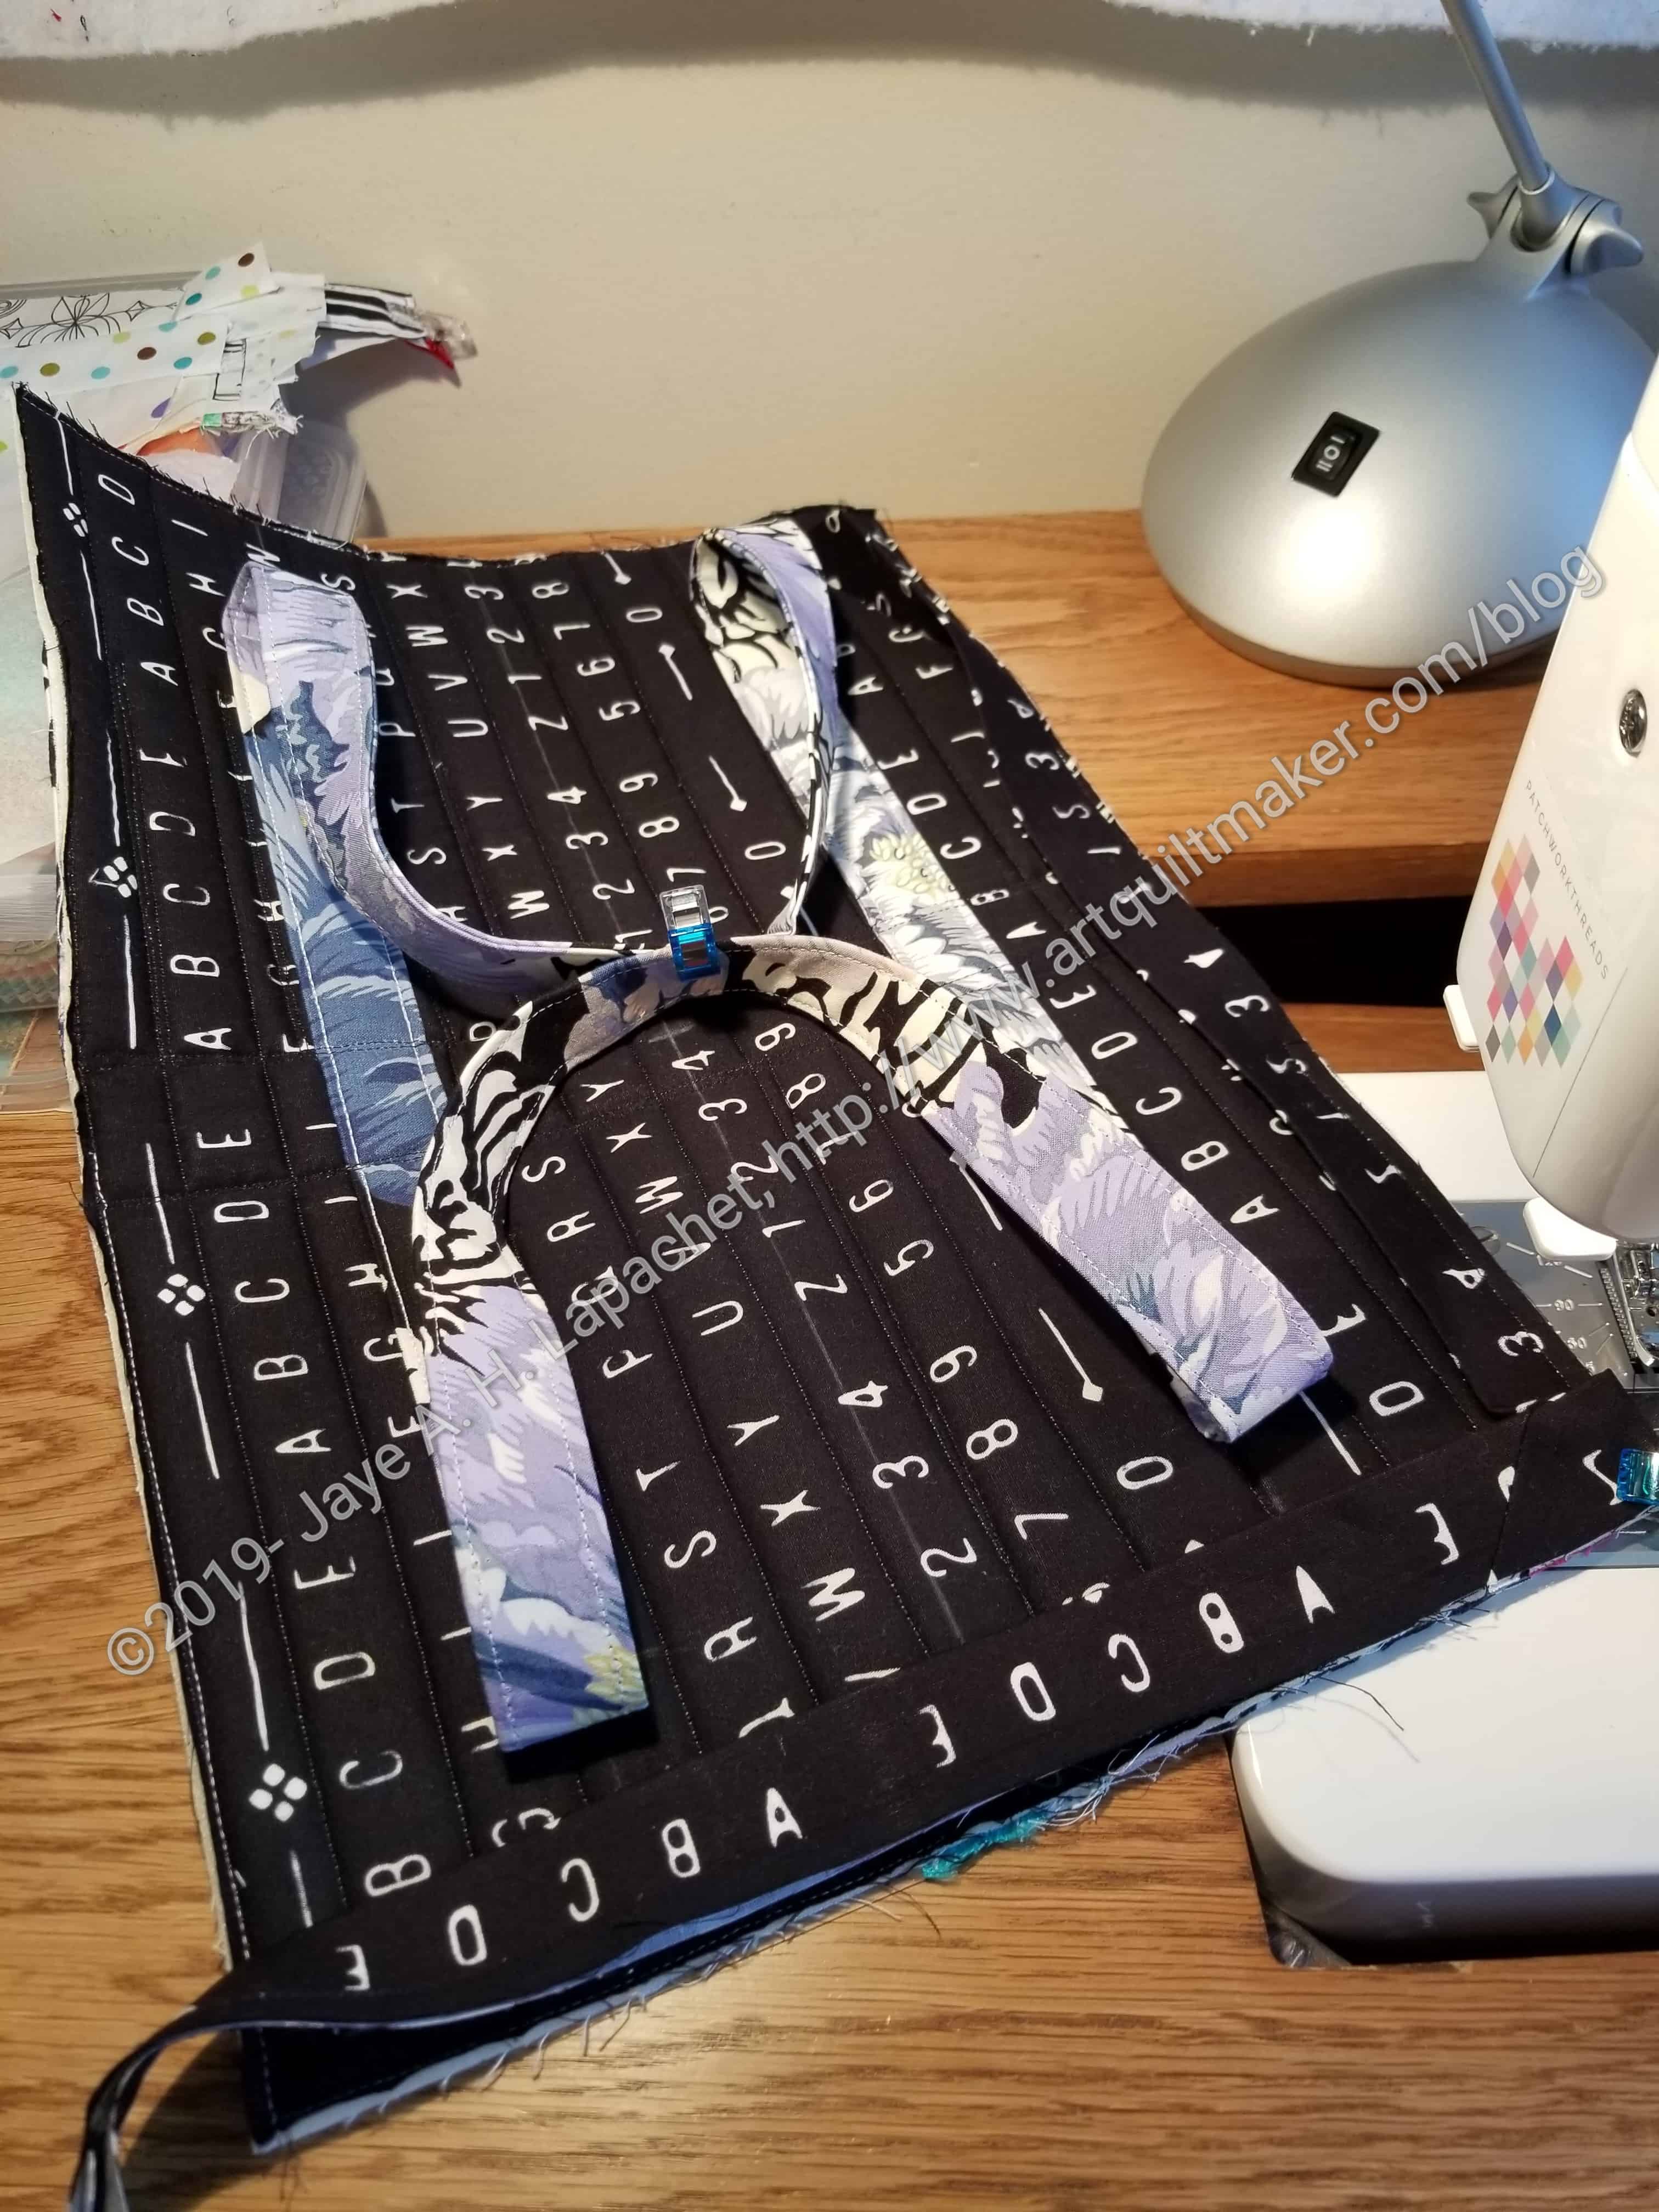
The Running with Scissors tote is finally finished. This will be a gift for a friend, but I think I will make another one. I wasn’t 100% happy with the process. I think if I make another the process will go more smoothly.
I think the ByAnnie pattern was written really well. I do really need to get hold of the video that Mrs. K bought for me. I think it will tell me why I have leftover pieces. 😉
Running with Scissors tote: with protective pad
Running with Scissors tote: with protective pad (back)
This bag has some interesting features. An add on project that comes with the bag is a pad that can be used to protect your tools from rubbing against each other when the bag is closed.
You already know that I used the center facing with thread holders on the 4 Zip Organizer. I learned about those in this pattern.
Running with Scissors tote: back
Running with Scissors tote: front
The bag also has a lot of zippers. This wasn’t much of a challenge for me since I have gotten used to dealing with zippers. In this case, however, I had to move the zipper pull from one zipper to another. That was a hassle, but it worked out in the end.
I cut the stripes wrong so the viewer doesn’t get the full effect. I want to try that again. Because of my fabric choices this bag came out a lot more Hallowe’en -y looking than I intended. I hope the giftee doesn’t mind and notices the Philip Jacobs fabric rather than the Hallowe’en look. I also need to figure out why I have extra pattern pieces. LOL!
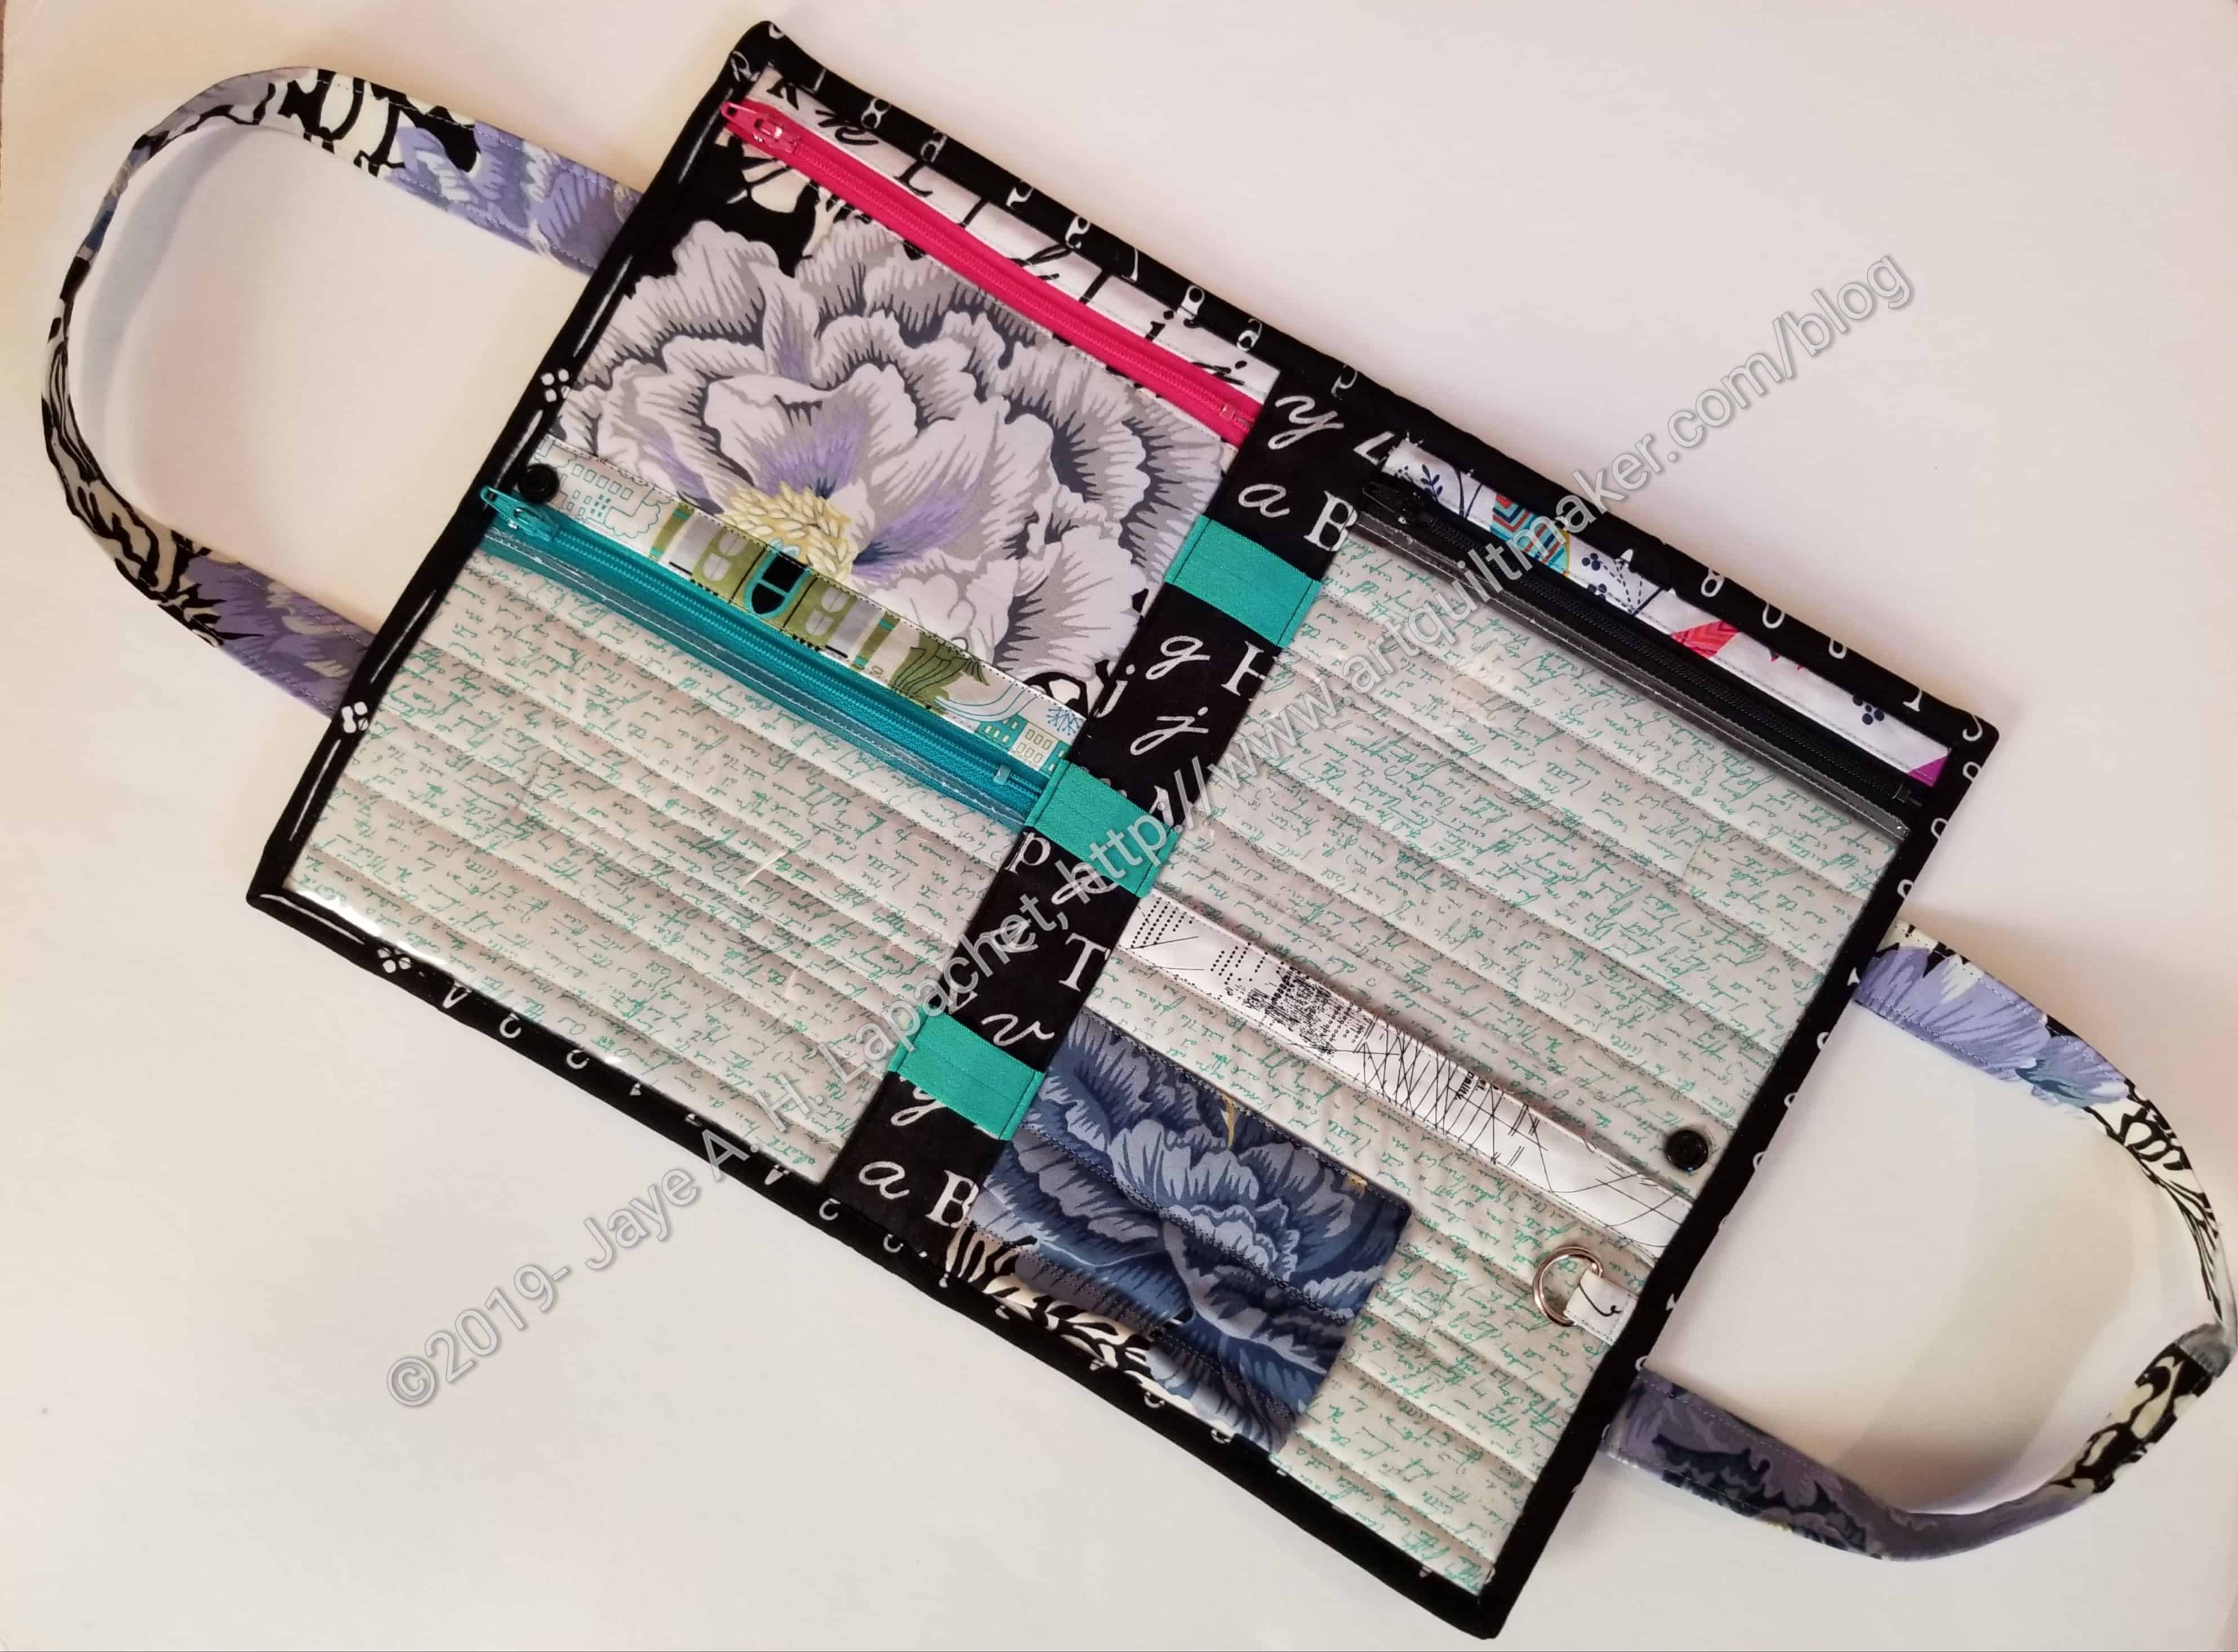
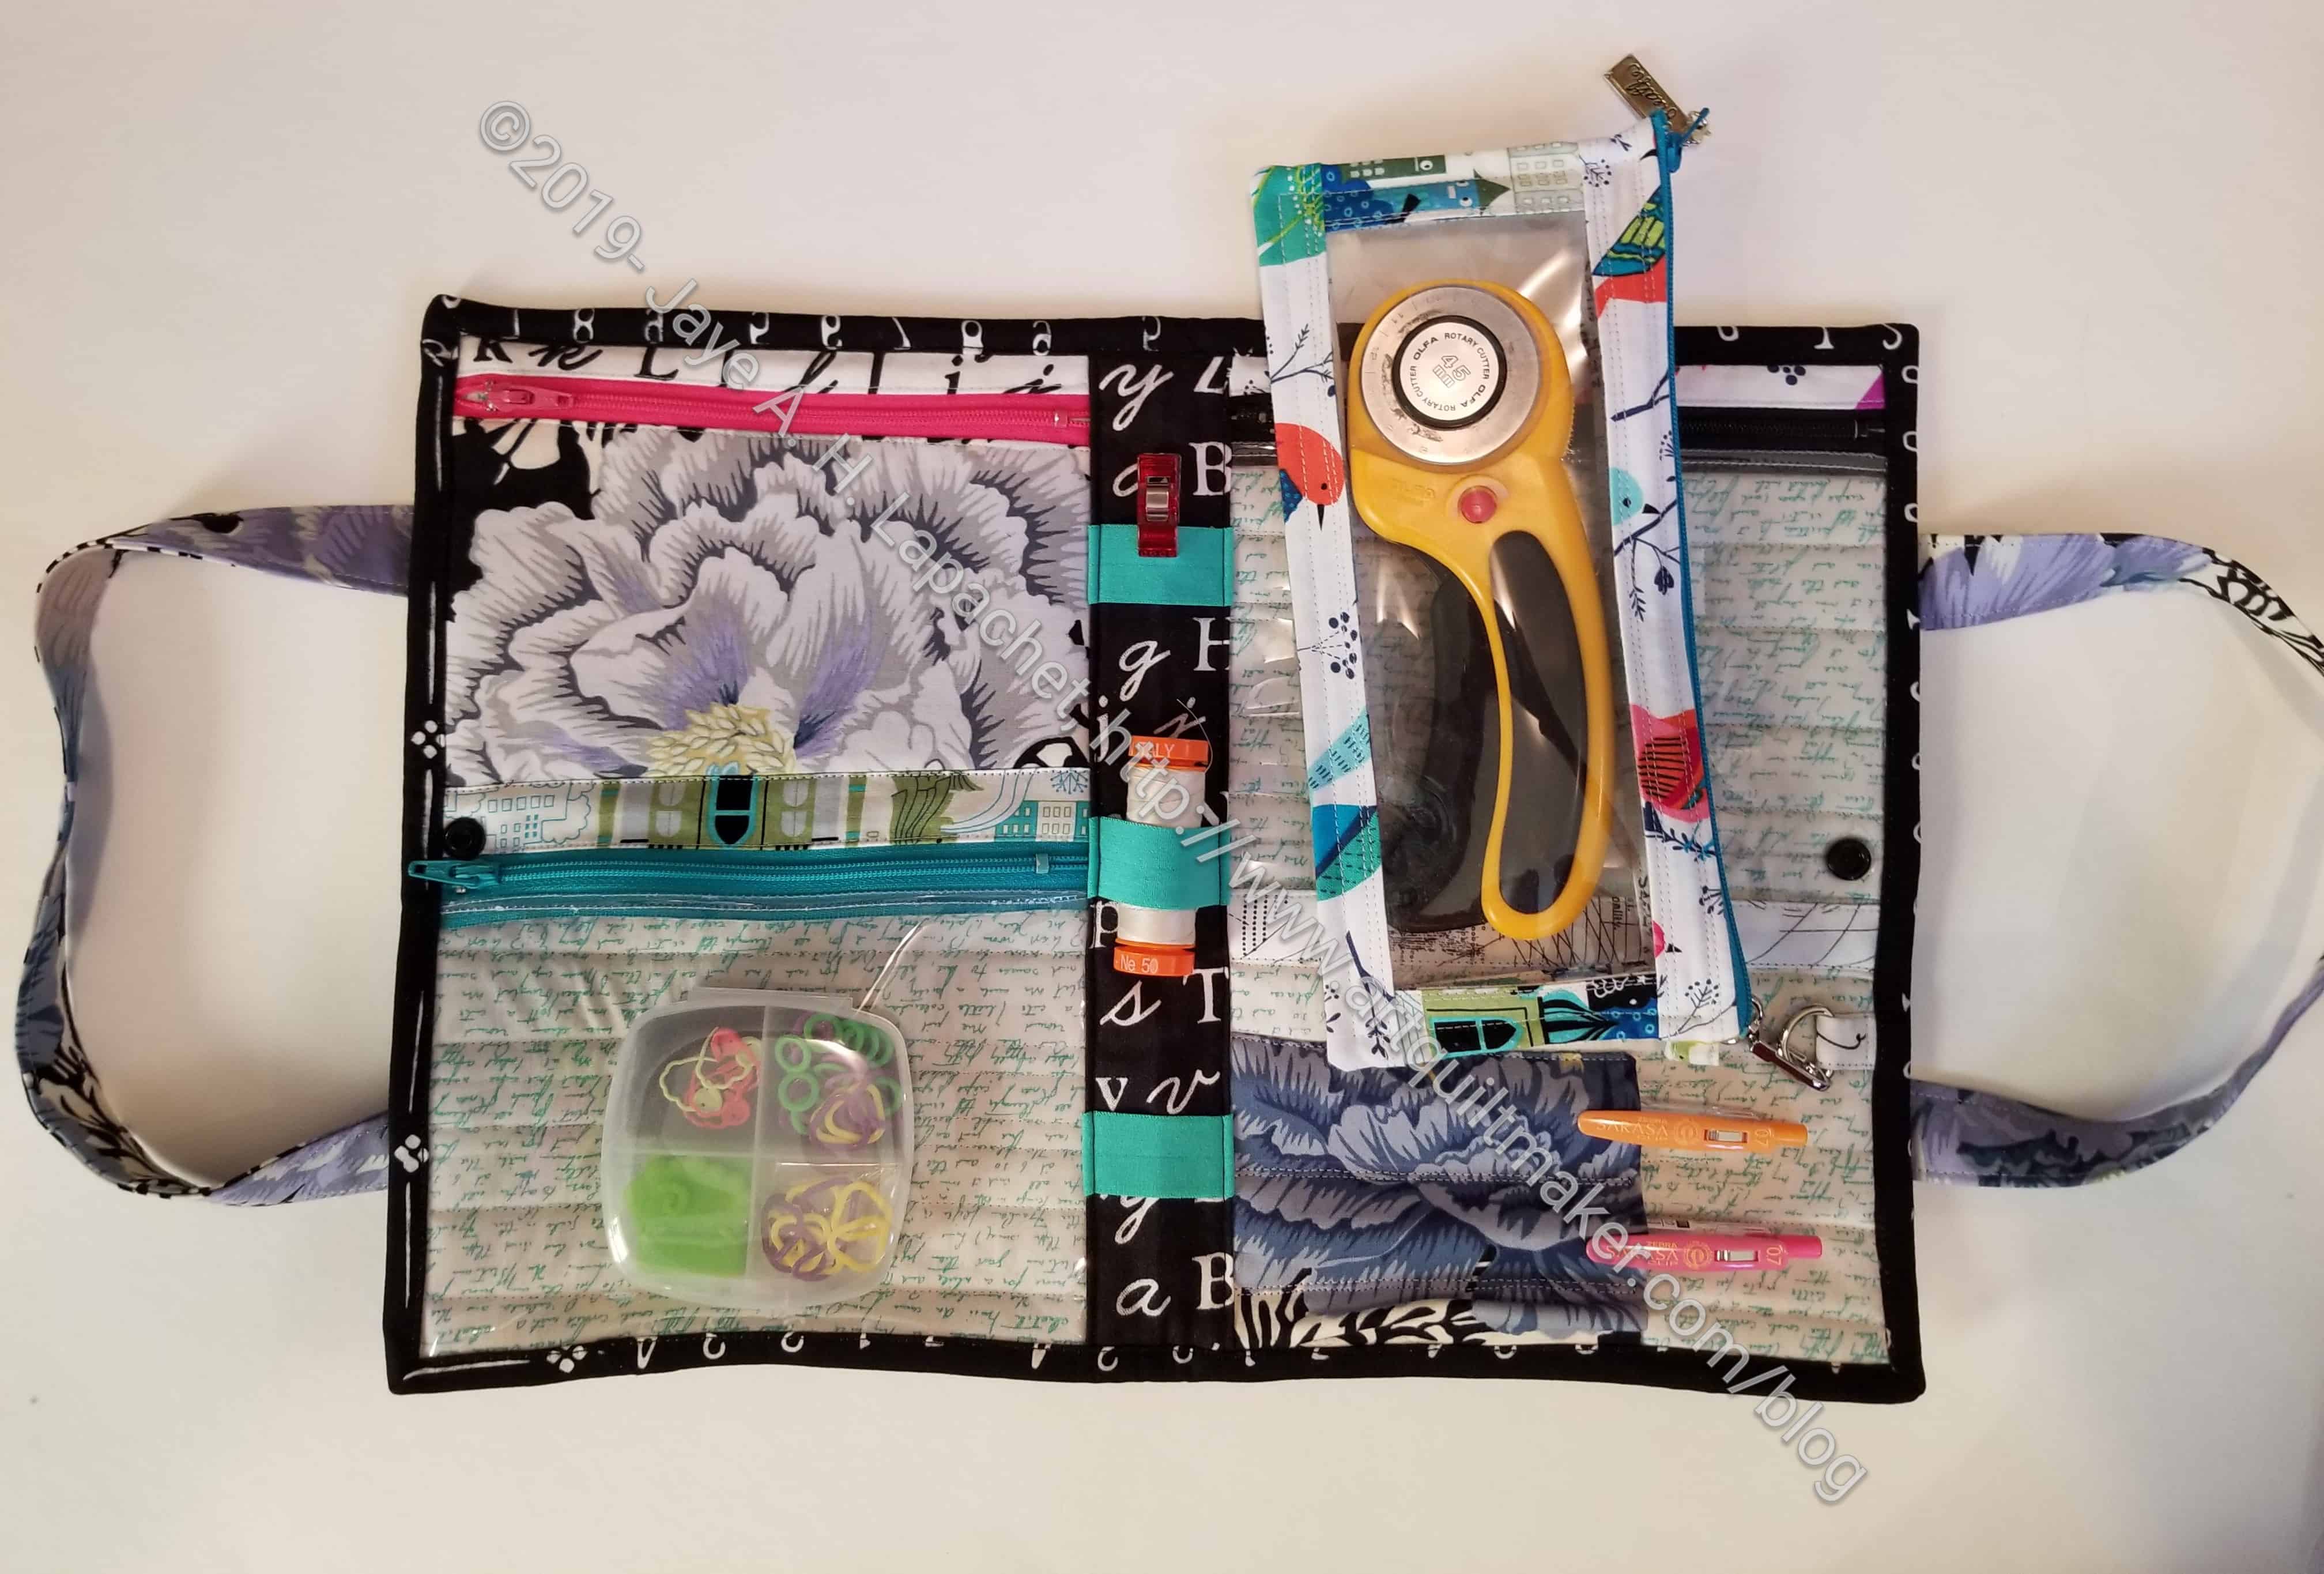
I finished the 4 Zip Organizer on Saturday after a nice long day of sewing! I am pretty excited about the recent finishes, and this one in particular because it has been hanging around for so long.
I used fabrics that went with the All Rolled Up Tote. I am trying to create a matching set of bags and totes, but I keep switching fabrics!
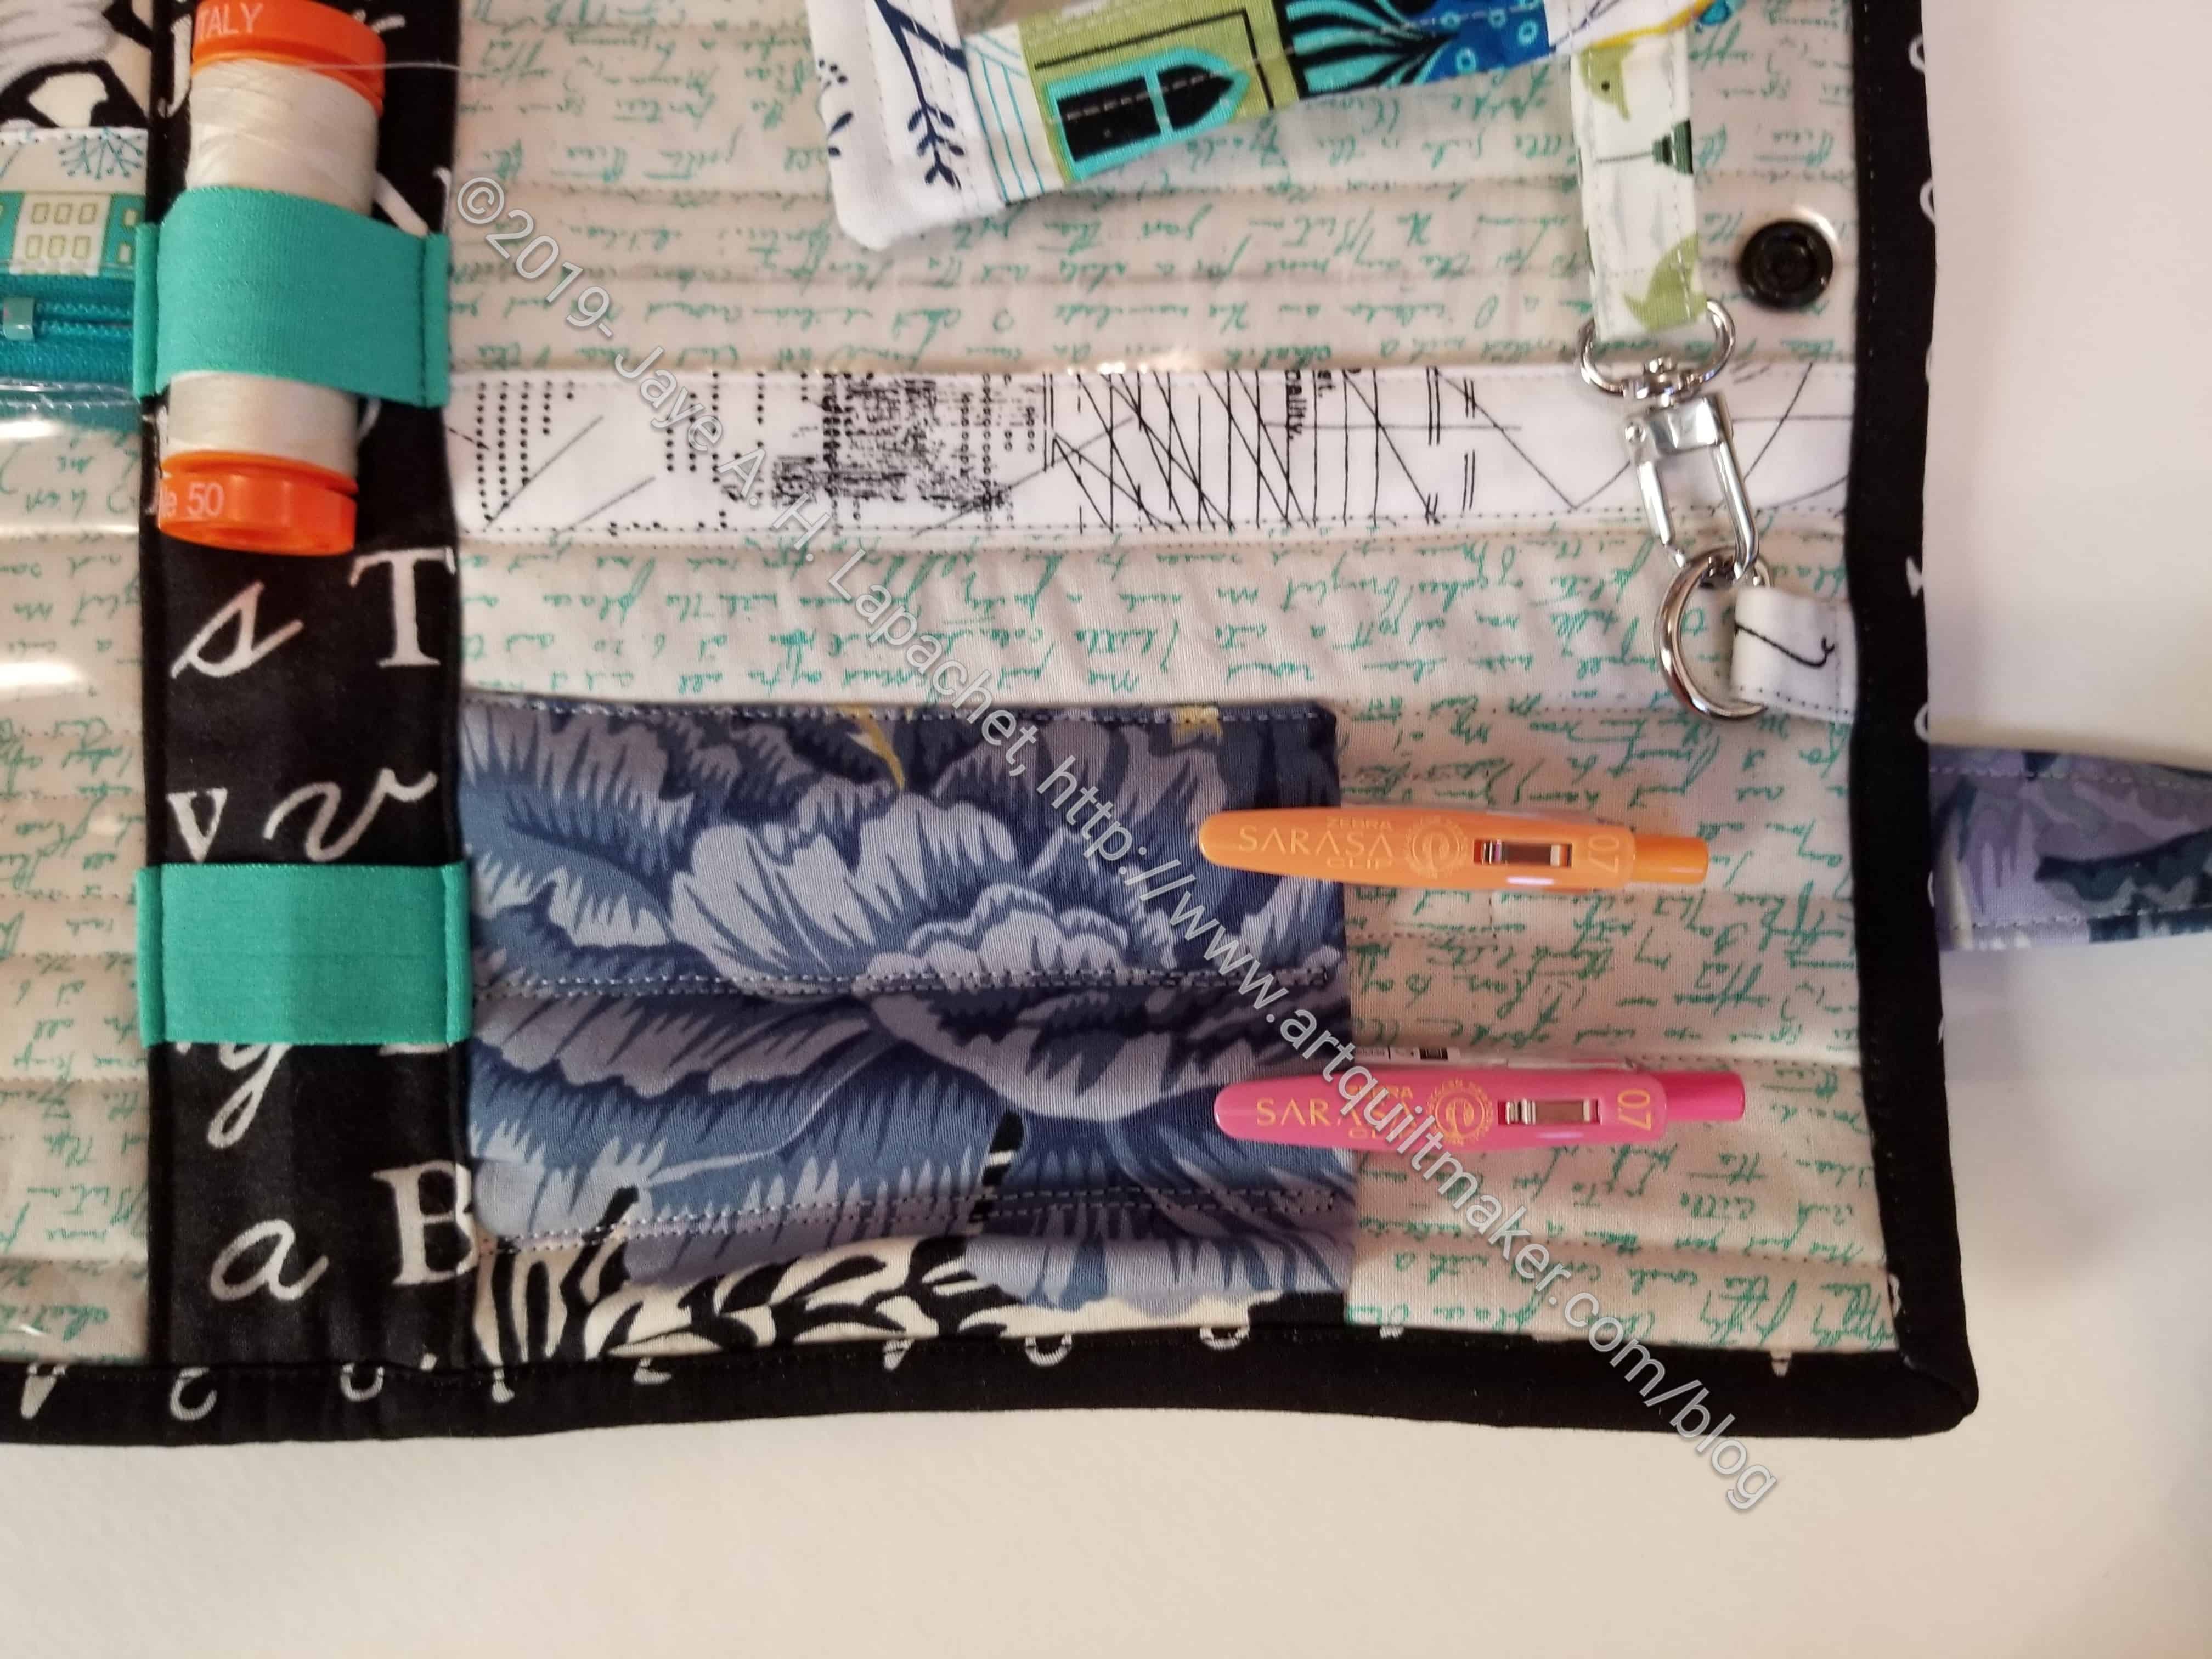
4 Zip Organizer: Pen/pencil holder, D-Ring
As you can see, my Organizer has 3 pockets and a pencil holder. The pattern talks about making 4, but I used the directions from the Classmates tote to make the pencil carrier instead. I had to add another facing to the vinyl pocket above it. Though, Vanessa’s video didn’t say to do this, I figured it out from how she explained what pieces were covering others to finish them. I had an extra zipper facing, so I was all set.
4 Zip Organizer: D-Ring in action
While I was taking photos, I decided to try out the D-Ring. I grabbed one of the vinyl pouches I made for the All Rolled Up tote and clipped it on to the 4 Zip Organizer. I filled it a little too much for this bag, but it will work.
I didn’t want to put any fabric pockets in this bag, but somehow the bit of vinyl I had left disappeared after the Retreat, so I made one fabric pocket. I fussy cut the flower and think it looks nice.
Kam Snaps tools & Supplies
After watching Vanessa’s video about snaps, I was shocked when I opened the KamSnaps supply bag. The device that secures the snaps was included! I knew I bought some snaps, but was convinced I had forgotten the device. It took me a few tries and some wasted snaps, but I finally was able to install the snap closure.
4 Zip Organizer: Thread Holder
The Running with Scissors tote had thread holders on the center facing. I decided that I would add the same thing to this bag. Why not? I know I said I would use it for knitting, but who knows? I may need some thread or storage for Wonder Clips is always needed. Fortunately, the center is kind of round when the bag is closed so it can accommodate some thread or Wonder Clips. I bought the double fold elastic from ByAnnie.
I used a variety of colors of zippers from the selection I bought recently. I was pleased that I had a few extra for this project. I thought the zippers I used would be too small, but I had to trim less zipper tape on these.
4 Zip Organizer: outside with handles
4 Zip Organizer: closed with pen holder in view
4 Zip Organizer: closed
I am pleased to check another Crafty Gemini Organizer Club project off my list.
When last we checked on our hero :-), she had to sew the main zipper in. I was able to do it, and the binding. I worked on this project on and off all week. DH was out at meetings again. I took the time to sew since work is interfering with day time sewing.
Running with Scissors Tote: Main Zipper in
I sewed the main zipper in. There was a little bit of ripping, but I did it. I am not sure what to do with the end of the zipper. The pattern says what to do, but it doesn’t make sense to me.
I also sewed on the binding. I sewed it on to the zipper. I tried to machine sew the binding down from the front, but it looked awful, especially around the curves. I unsewed the awful parts and stitched the binding down by hand, for the most part. This took about 50 Wonder Clips!
A Thousand Wonder Clips
The photo shows the Sew Together Bag I made for myself. I keep that bag downstairs and use it to work on hand projects. I had nowhere to put the thousand Wonder Clips, so I put them on the edge of the zipper. This was a good place to hold them temporarily until I could put them away. Who knew?
The Running with Scissors Tote is nearly done in the picture.
After finishing Flying Around, I needed a little break from serious quilts. I didn’t want to start a new quilt yet, though I have some fabric lying around waiting for their time in the sun. I decided to work on some bags that were hanging around. I am almost finished with the Running with Scissors tote and the Poolside Tote is cut out.
The 4 Zip Organizer won out. The last time I worked on this project was with Gerre back in June. Then, I quilted the pieces I needed to quilt and put it away to concentrate on Flying Around.
Friday was the day. I started working on it and got excited about it again. This was one of the bonus projects for the Crafty Gemini Organizer Club. Ever since I started knitting the Lightweight Raglan Pullover, I have wanted to finish this bag, so I would have a carrier for my notions.
4 Zip Organizer: Long Handle
I decided to do some different things with this piece. I made a long handle put it all the way around the bag, so it would support the weight if I stuffed the bag full. It was kind of a hassle, because I forgot and sewed all the way to the edge. That meant I had to rip, but eventually I worked it out.
Since this handle worked, I have more of an incentive to finish adding the handle to the All Rolled Up Tote. I know! Yes, that bag is still hanging around waiting for me to deal with the handle. Perhaps soon, now that I am on a Bag Binge.
4 Zip Organizer: Thread Holder
I had to add a center facing anyway, so I added some thread holders. I learned how to do this by doing the same thing on the Running with Scissors tote. I thought it would make a good addition, especially since I had that seafoam elastic, thought I think it will only hold small Aurifil spools. I am able to also use that elastic feature for Wonder Clips.
In making this, I found that the large Wonder Clips came in handy. I have only ever used them to keep my design wall under control, but they were useful in putting this bag together.
I also added a pencil holder and a D-Ring to the bag instead of one of the pockets. I thought I would like to have a pen handy (and under control). Also, I think i mentioned, I am adding a D-Ring to all of my bags, so I can move the small vinyl bags around as I fill them with critical supplies. I first came across this with the All Rolled Up Tote.
I was able to get back to the Running with Scissors tote on Sunday. Not for long, though I planned for at least 4 hours of sewing, but was distracted by various things.
I sewed the two quilted pockets on. I had forgotten to do it, or skipped doing it, in the correct sequence. This worked, though, so I now have the full compliment of pockets.
The major step was to sew the main zipper to the bag. This zipper goes all the way around the bag.
In the photo, you can also see that I started to add the center facing. I caught the handle on the other side in my first attempt so there was some ripping involved. I may be able to finish it this week.
Sew Day for September was Saturday. I know I always say this, but I really enjoy seeing what other people make. I was focused on a couple of projects of my own, so I didn’t even really get a chance to see everything that people were working on.
Patti’s Class Project
Patti’s Project caught my attention right away. She had the pieces from the guild’s recent Latifah Safir class on her table and I loved the look of the block! I loved what she had done, because of the HRTs I have been playing with on and off over the past several months. I know the design is not original and came from a Latifah Safir pattern. It is cool and makes me wonder if I could do something like it with the Split Recs ruler by Studio 180 Designs.
The class must have been great, because a number of people had brought their pieces to work on. I haven’t seen that before at a Sew Day – or I hadn’t noticed.
Runs with Scissors Tote
I worked on cutting out pieces for the Running with Scissors tote. I had pulled all of the fabric on Friday after work, so I got the whole thing cut out except for one piece, which I will cut next weekend. I hope to work on this at the mini-retreat I am attending next weekend. I am thinking of making a couple of them as gifts depending on how the project goes.
So far, the directions are very clear. I have some experience with bag directions so I was pleased. I don’t think I have made a ByAnnie’s pattern before and perhaps the good directions are a sign of quality. There are a lot of aspects to this bag, so I was a little worried. I was surprised that there was less to cut out than I though.
Lee Anne’s donation quilt
Lee Anne is a major donation quilt maker and she was working on a really cool quilt at the retreat.
As you can see this is a lozenge quilt. I am not sure if she had the fabric or used fabric from the Community Quilts stash. It is a great looking design and wonderful quilt.
Another member, who we call Baguette, and I are planning a Bag-a-Long for the guild. We had a meeting during Sew Day to organize ourselves for the next meeting. We will all make the same bag using the same pattern. Baguette and I will stay ahead of the others (or try to!) and offer clarifications and modifications to the pattern. The pattern is the Ultimate Carry All by Quiltessa Natalie. I wrote about it a little bit in my Quiltmaking Go Bag post a few weeks ago. I will definitely talk about this bag in future posts as we make it. The creator, however, has video tutorials, so I probably won’t do a Bag-a-Long on the blog.
I also had a meeting with Mary about the retreat this weekend. It will be held at the church so we had to coordinate.
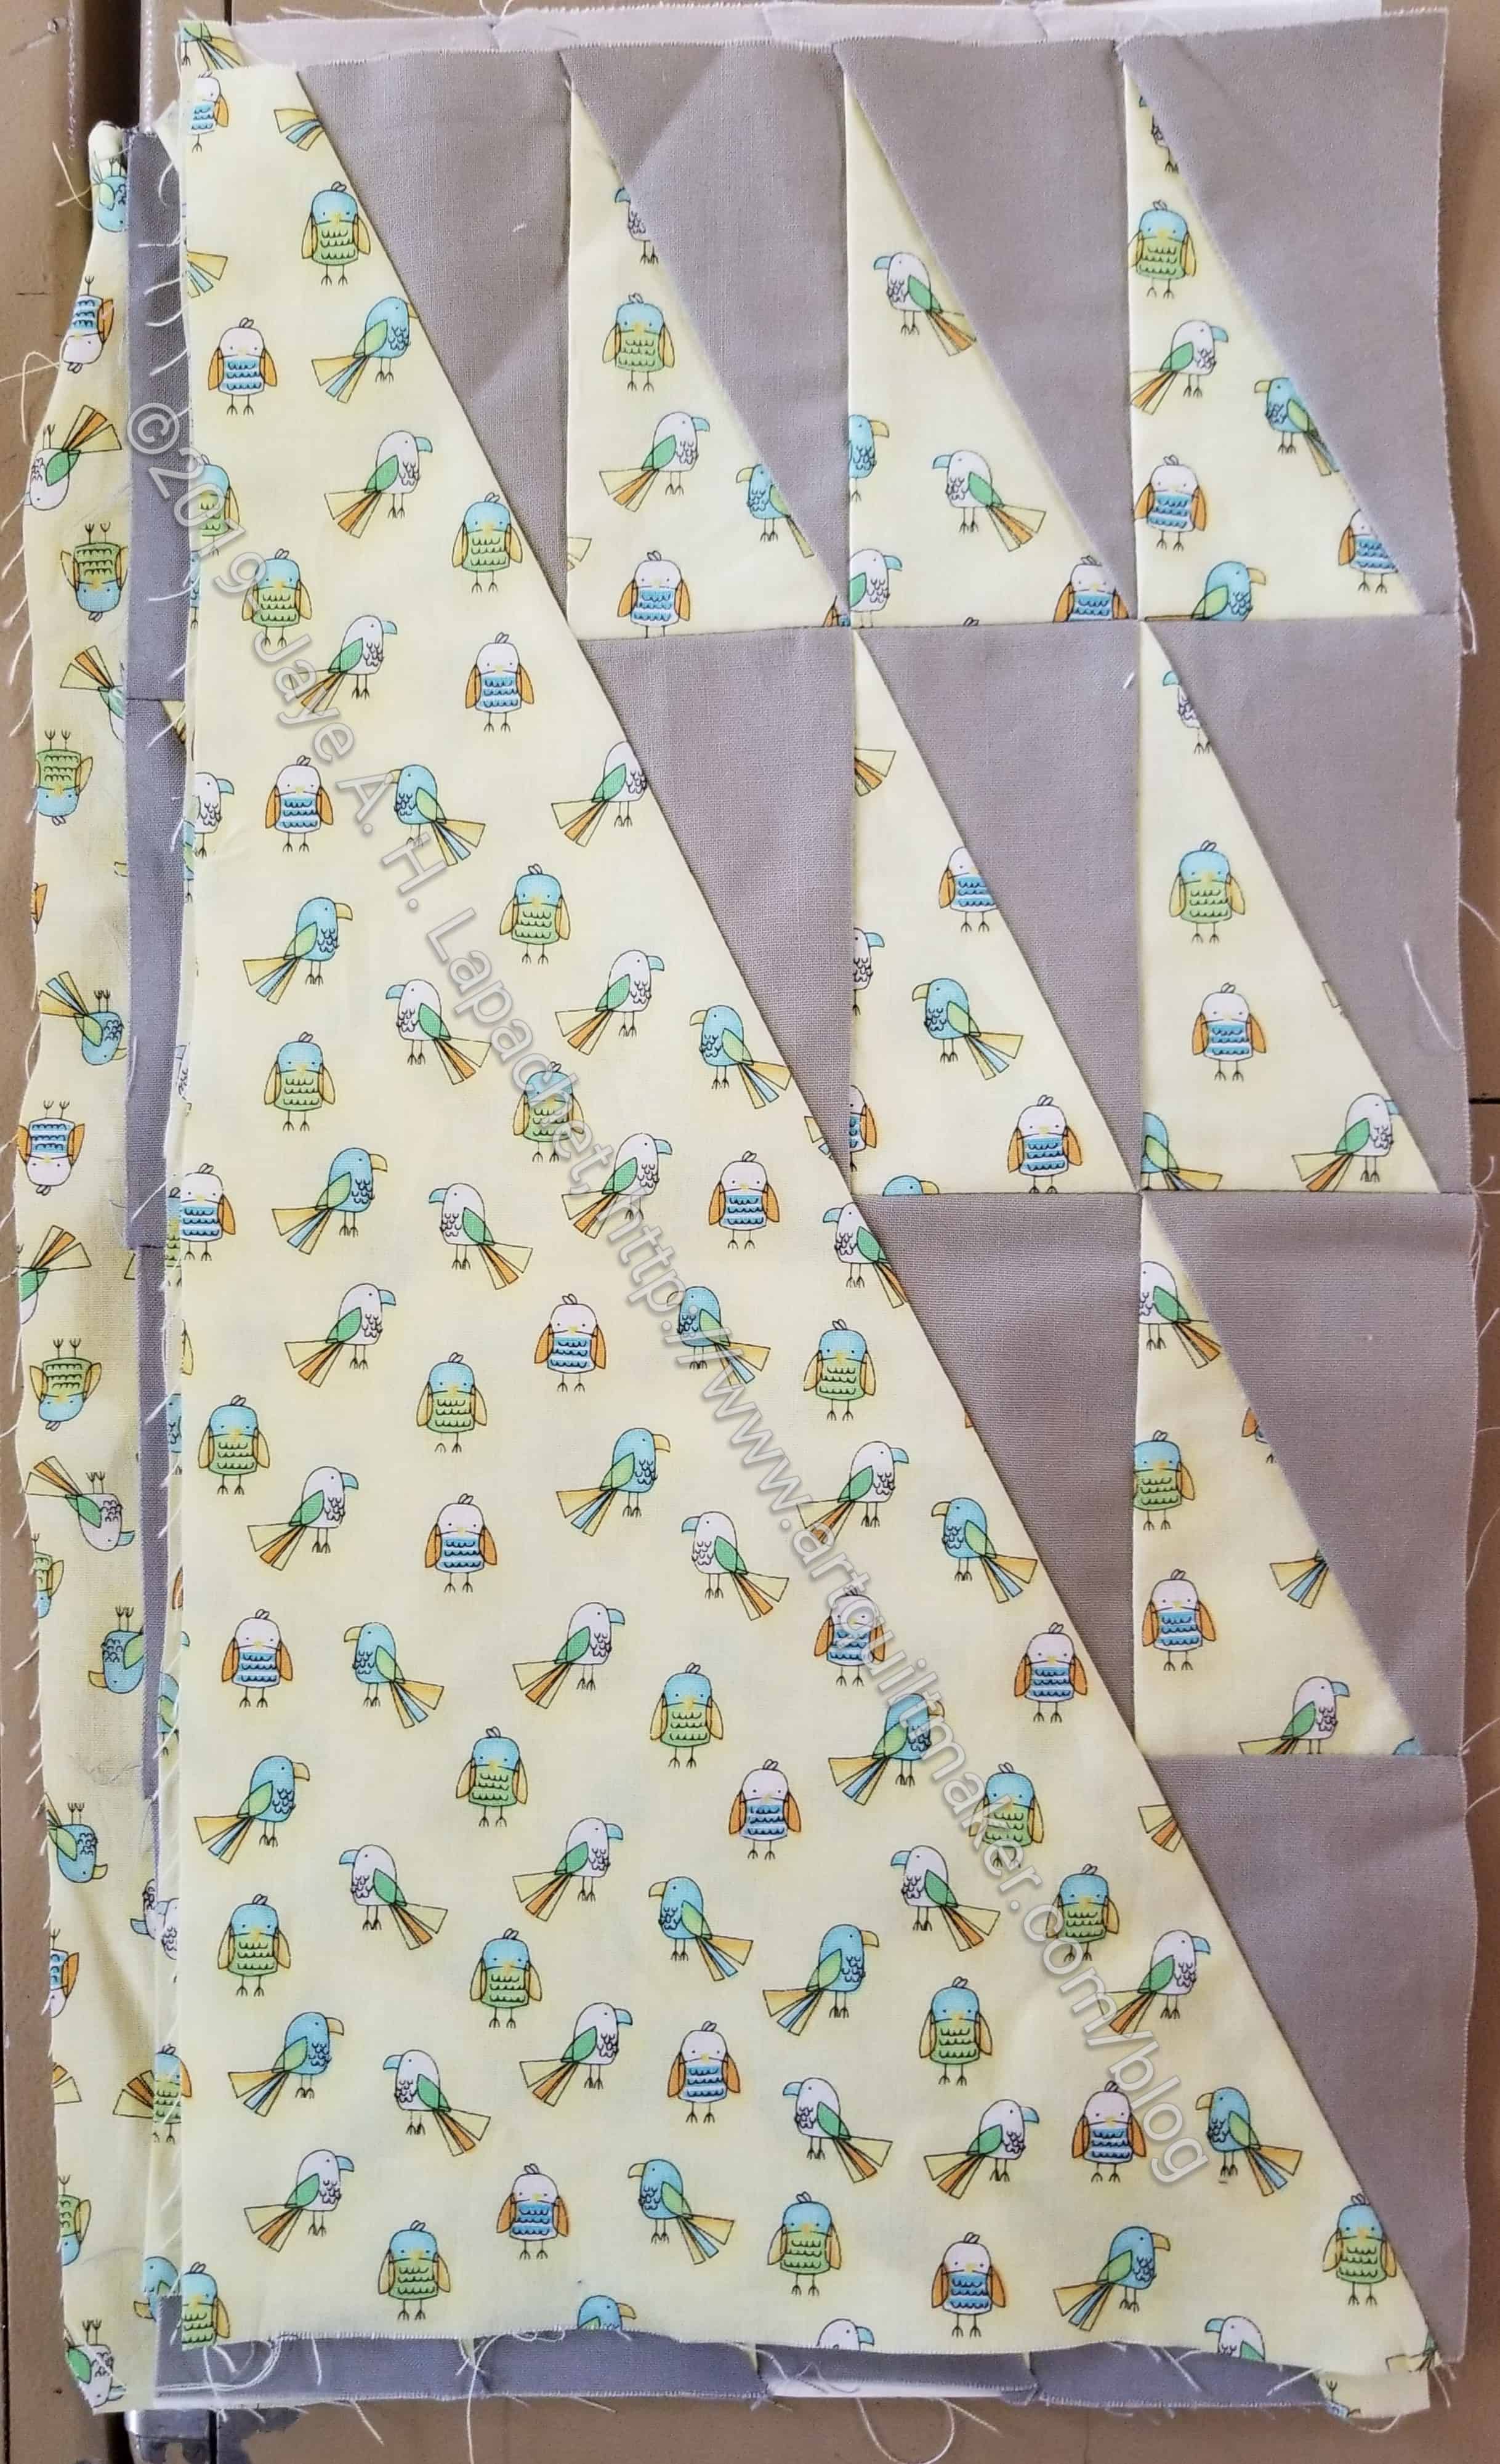
The Mondo Bag that I started in March (yikes!) has been languishing. It hasn’t been out of my mind, but I haven’t had a chance to work on it. I took it with me to Sew Day on Saturday and finished laying out the squares on it.
Mondo Bag – halfMondo Bag – other half
I may move a few around or change some out, but mostly, the bag is ready to sew together.
This bag uses the same process as the Midi Bag I made in class with Julie. The next step is to iron the pieces down and then sew. I have to look at the lining and handle directions, but my goal is to work on the bag next weekend and get the thing put together.
Sewing at Gerre’s house was great. In addition to progress on the gift bags, the Lobster and another Flapper apron, I also made a minute amount of progress on the 4-Zip Organizer.
Outside of 4 Zip Organizer, quilted
My next step was to quilt it. Quilting is always a step that stalls me on a project. this was such a small amount of quilting that it shouldn’t have been a problem. It wasn’t a problem this time and I did the quilting at Gerre’s while chatting. It doesn’t look that different now – just quilted. I have to trim the quilted piece to its correct size, but that part is done.
I wanted to work on this project over the weekend, but I was absorbed by Flying Around. Also, DH and I went out to the movies. Still, I am thrilled that I have made some progress.