The Stitch TV Show Pattern Launch Accessory Post

Lynn Rinehart's Winning Challenge Quilt
Lynn Rinehart’s Winning Challenge Quilt

This post is like a matching handbag and shoes when you get dressed. It adds a final polish. This post adds a final polish to the StitchTV Pattern Launch Extravaganza being held at the Red Hen in Georgia.

It is a little too far for me to pop in in person, so I interviewed Pam and Lynn the brains and brawn behind the StitchTV Show and am bringing that interview to you. Check out their new patterns on their site.

1.       How did you meet?

  • Lynn: We met at the Atlanta Modern Quilt Guild.  I attended a couple of meetings and the board tackled me and asked me to be on the board.  I said yes because I am still learning how to say “no” to people.  The only ones I am good at saying no to are my dogs and only because they don’t have reasonable arguments.
  • Pam: We met through the Atlanta Modern Quilters Guild. My first memory of Lynn is when she won one of the prizes in a quilt challenge, an I thought, “Who is this new person that swept in and won a prize and I’ve never met her?” I was a little taken aback, frankly, and then as we got to know each other through sew-ins and other events, I remember thinking that she was so nice that I would probably be a bad influence on her and I should watch my language more. And then we started carpooling to meetings and we’ve been buddies every since (despite my occasional bad language)!

2.       If you won a $500 million lottery, what would you do that would surprise people?

  • Lynn: I would go to Art School or, for that matter, buy an Art School.  I was kicked out of Art Class in High School because they needed people in the Band.  So apparently playing the flute was more important in my later life than drawing.  Who knew?
  • Pam: I am very boring (ed. note: nobody thinks this except Pam herself, IMO) and would do things like pay off my house and get a car that’s less than 3 years old. To no one’s surprise, I would also donate a chunk to the cat shelter I regularly volunteer for. Then I’d put together a business plan to open a quilt retreat center so I could teach without traveling, but talk to Lynn first and make sure I wasn’t talking crazy. 

3.       What strength(s) do you bring to your business?

  • Lynn: None.  Pam does everything well!  I just mostly laugh with her, not at her. I would never do that.  🙂  Oh and I am married to the tech department so that helps.  Honestly I think that I bring creativity to the partnership that complements her creativity.  We are so opposite in so many ways but it works.  I couldn’t ask for a greater friend or partner in this adventure.
  • Pam: I’m a giant nerd and don’t mind doing business “stuff”, although I still have a lot to learn.  As a trained engineer, I’m very process focused, so I’m all about streamlining things and making them run smooth and nailing down details. As a trained marketing person, I like to think I’m pretty good at creative promotion and stringing words together.  As a quilter who’s been sewing since she was 5, I know how to put fabric together, quickly, so I’m good at making samples.

4.       If you woke up tomorrow with a superpower, what would it be?

  • Lynn: Time travel.  It totally fascinates me!  The thought of traveling to historical events or experiences would be so cool.  My “fly on the wall” dream would be to be “in the room where it happens” on so much history that affected the world and our culture.  Which is why both my obsessions right now are “Outlander” and “Hamilton” 🙂
  • Pam: In an ideal world, it would be the ability to spot cat vomit in the dark before stepping on it. (ed. note: gross, but useful)

5.       What is your dream for the business?

  • Lynn: Pinky: What are we going to do today?Brain: The same thing we do everyday, Pinky. Try and take over the world.That pretty much sums it up.
  • Pam: I’d love to grow our business to a point where we can set a teaching schedule to travel once a month, and invite groups in to our own retreat center to teach there.  I’m eagerly anticipating the time when Lynn and I collaborate on show quilts, too, which may happen sooner than that whole capital-investment-in-real-estate thing that a retreat center requires.

6.       Describe your perfect home. Number of bedrooms? Chef managing the kitchen? Separate pet apartments?

  • Lynn: OH! I am a home body.  Huge house on the waterfront.  Beach or secluded lake, I love the water.  At least 5 bedrooms.  Not that we need 5 bedrooms but people will want to come visit and I would love to have the space.  Also large entertainment areas for people  and an amazing chef’s kitchen.  I do love to cook and enjoy cooking for big parties.  Pam makes fun of me but I do make new table cloths and napkins for parties to go with the theme.  I have been known to do that the night before the party.  🙂  Cloth napkins are important to me,  I love them.  Especially if they are embroidered.  🙂 Oh and I need a pool with a swim lane to do laps. 
  • Pam: Ranch style with 4 bedrooms (so I’ve actually got a guest room) and a daylight basement for a sewing room. I actually like cooking, so no chef for me, but definitely want a maid! We’d also need a shop out back for my husband and son so they can tinker on go-karts, airplanes, and whatever else their little hearts desire.

7.       Describe your perfect studio and let readers know if your perfect home would be attached to your perfect studio.

  • Lynn: Studio will be in the house, that way I don’t have to leave.  🙂  I currently have most of our basement as the studio but I would like a much bigger space.  I would like all the sewing machines in one room and would love to have additional space to setup our filming studio where it isn’t so crammed. I also need a chill space where I can curl up and read or watch a good movie.  
  • Pam:I would absolutely want my studio attached to my perfect home since I hate driving. Too many years of horrible Atlanta commuting traffic ruined car travel for me, so I’d love to live in a place where I could walk or bike most places I need to go.In terms of equipment, I’d go for a regular domestic machine and a sit-down mid/long-arm. I’d like to have my fabric storage be behind glass to cut down on the cat hair, a 4’x8′ cutting table I could walk all the way around, and actually room for a design wall.

8.       If you could photograph a quilt you made anywhere in the world, where would it be and what quilt would it be?

Lynn's First Saluki Quilt
Lynn’s First Saluki Quilt

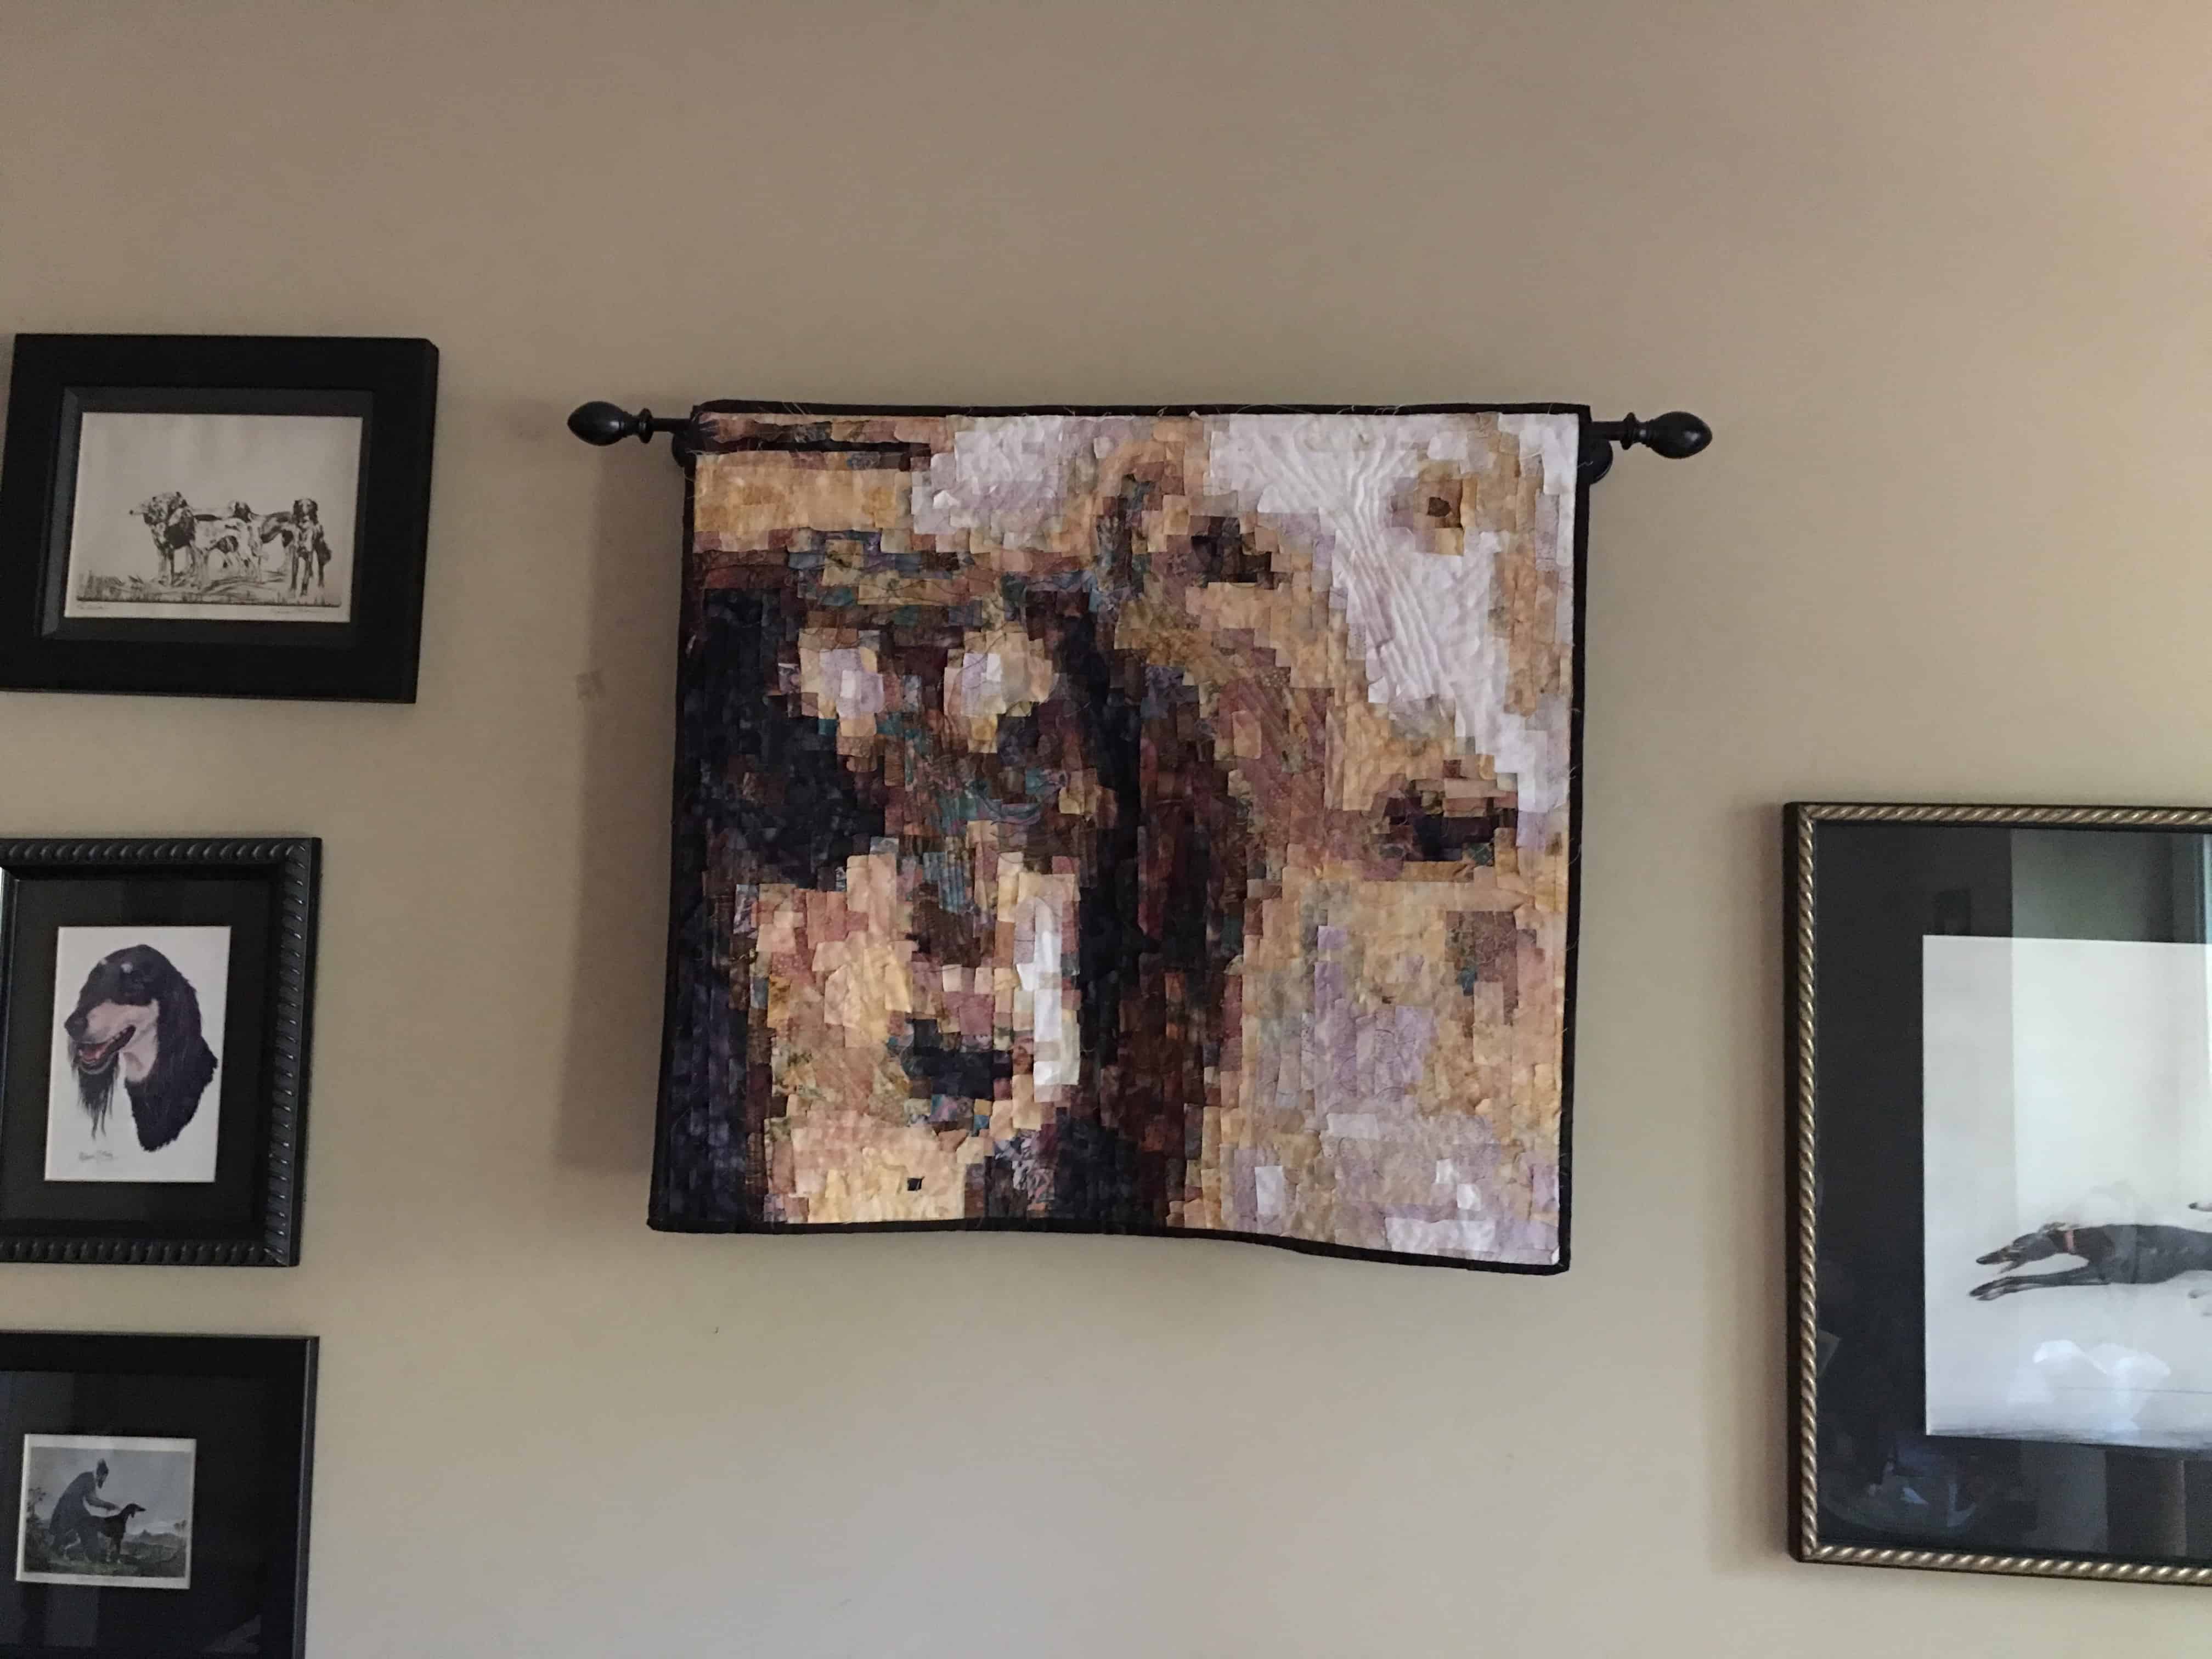
The photo above depicts Lynn’s first two Salukis, Bailey and Boaz. It is a mosaic raw edge fused technique.

Lynn's Salukis: Josie on left and Giacomo on right
Lynn’s Salukis: Josie on left and Giacomo on right
  • Lynn: I have done several of quilts that represent my dogs.  Salukis they [sic] are the royal dog of Egypt.  I would love to have them displayed around relics of ancient Egypt.  It would be amazing to see my love for this breed and the passion of quilts to be together in one photo.
  • Droid Quilt by Pam
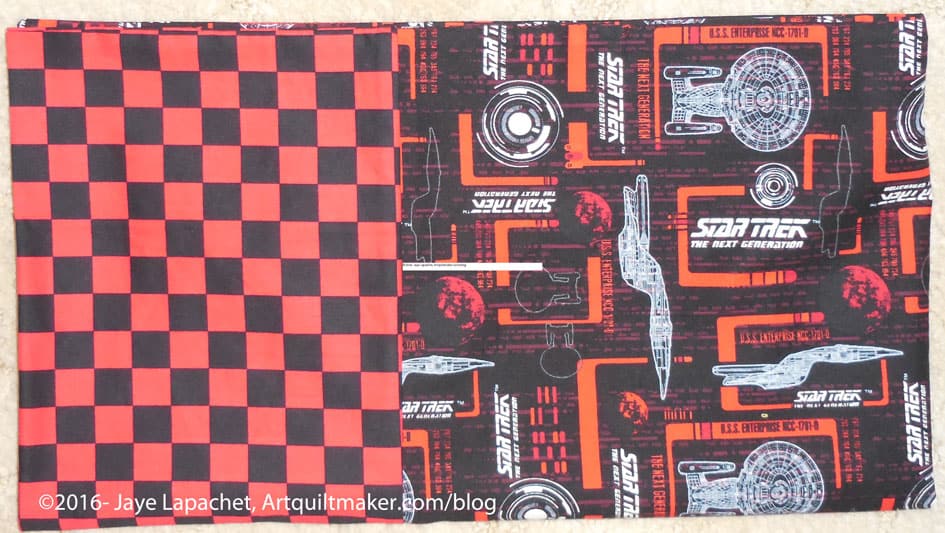
    Droid Quilt by Pam

    Pam: I would take my Droid quilt to Skywalker Ranch with the 501st Stormtrooper legion and have a field day.

9.       What is your dream project? Are you working towards it now?

  • Lynn: One of our dream projects is to work full time in the quilting industry and get to work with fabrics, quilts and the quilting people that we love.  We both enjoy teaching and giving lectures at guilds.  As we release the new pattern line for The Stitch TV Show, I think that we share our love for this art form as well as a love for the community of quilters.  I think that The Stitch TV Show is really designed to share community with other quilters.  
  • Pam: I’m not sure; there are “some day” quilts I’m planning in my head, but not sure I’d call them “dream projects”. I’d love to explore wholecloth quilting more, and have the patience to do more with intricate applique. I’d also love it if my applique circles didn’t have corners.

10.   Tell us about your favorite quilt? Did you make it? Do you still have it?

Lynn's Open Doors Quilt
Lynn’s Open Doors Quilt
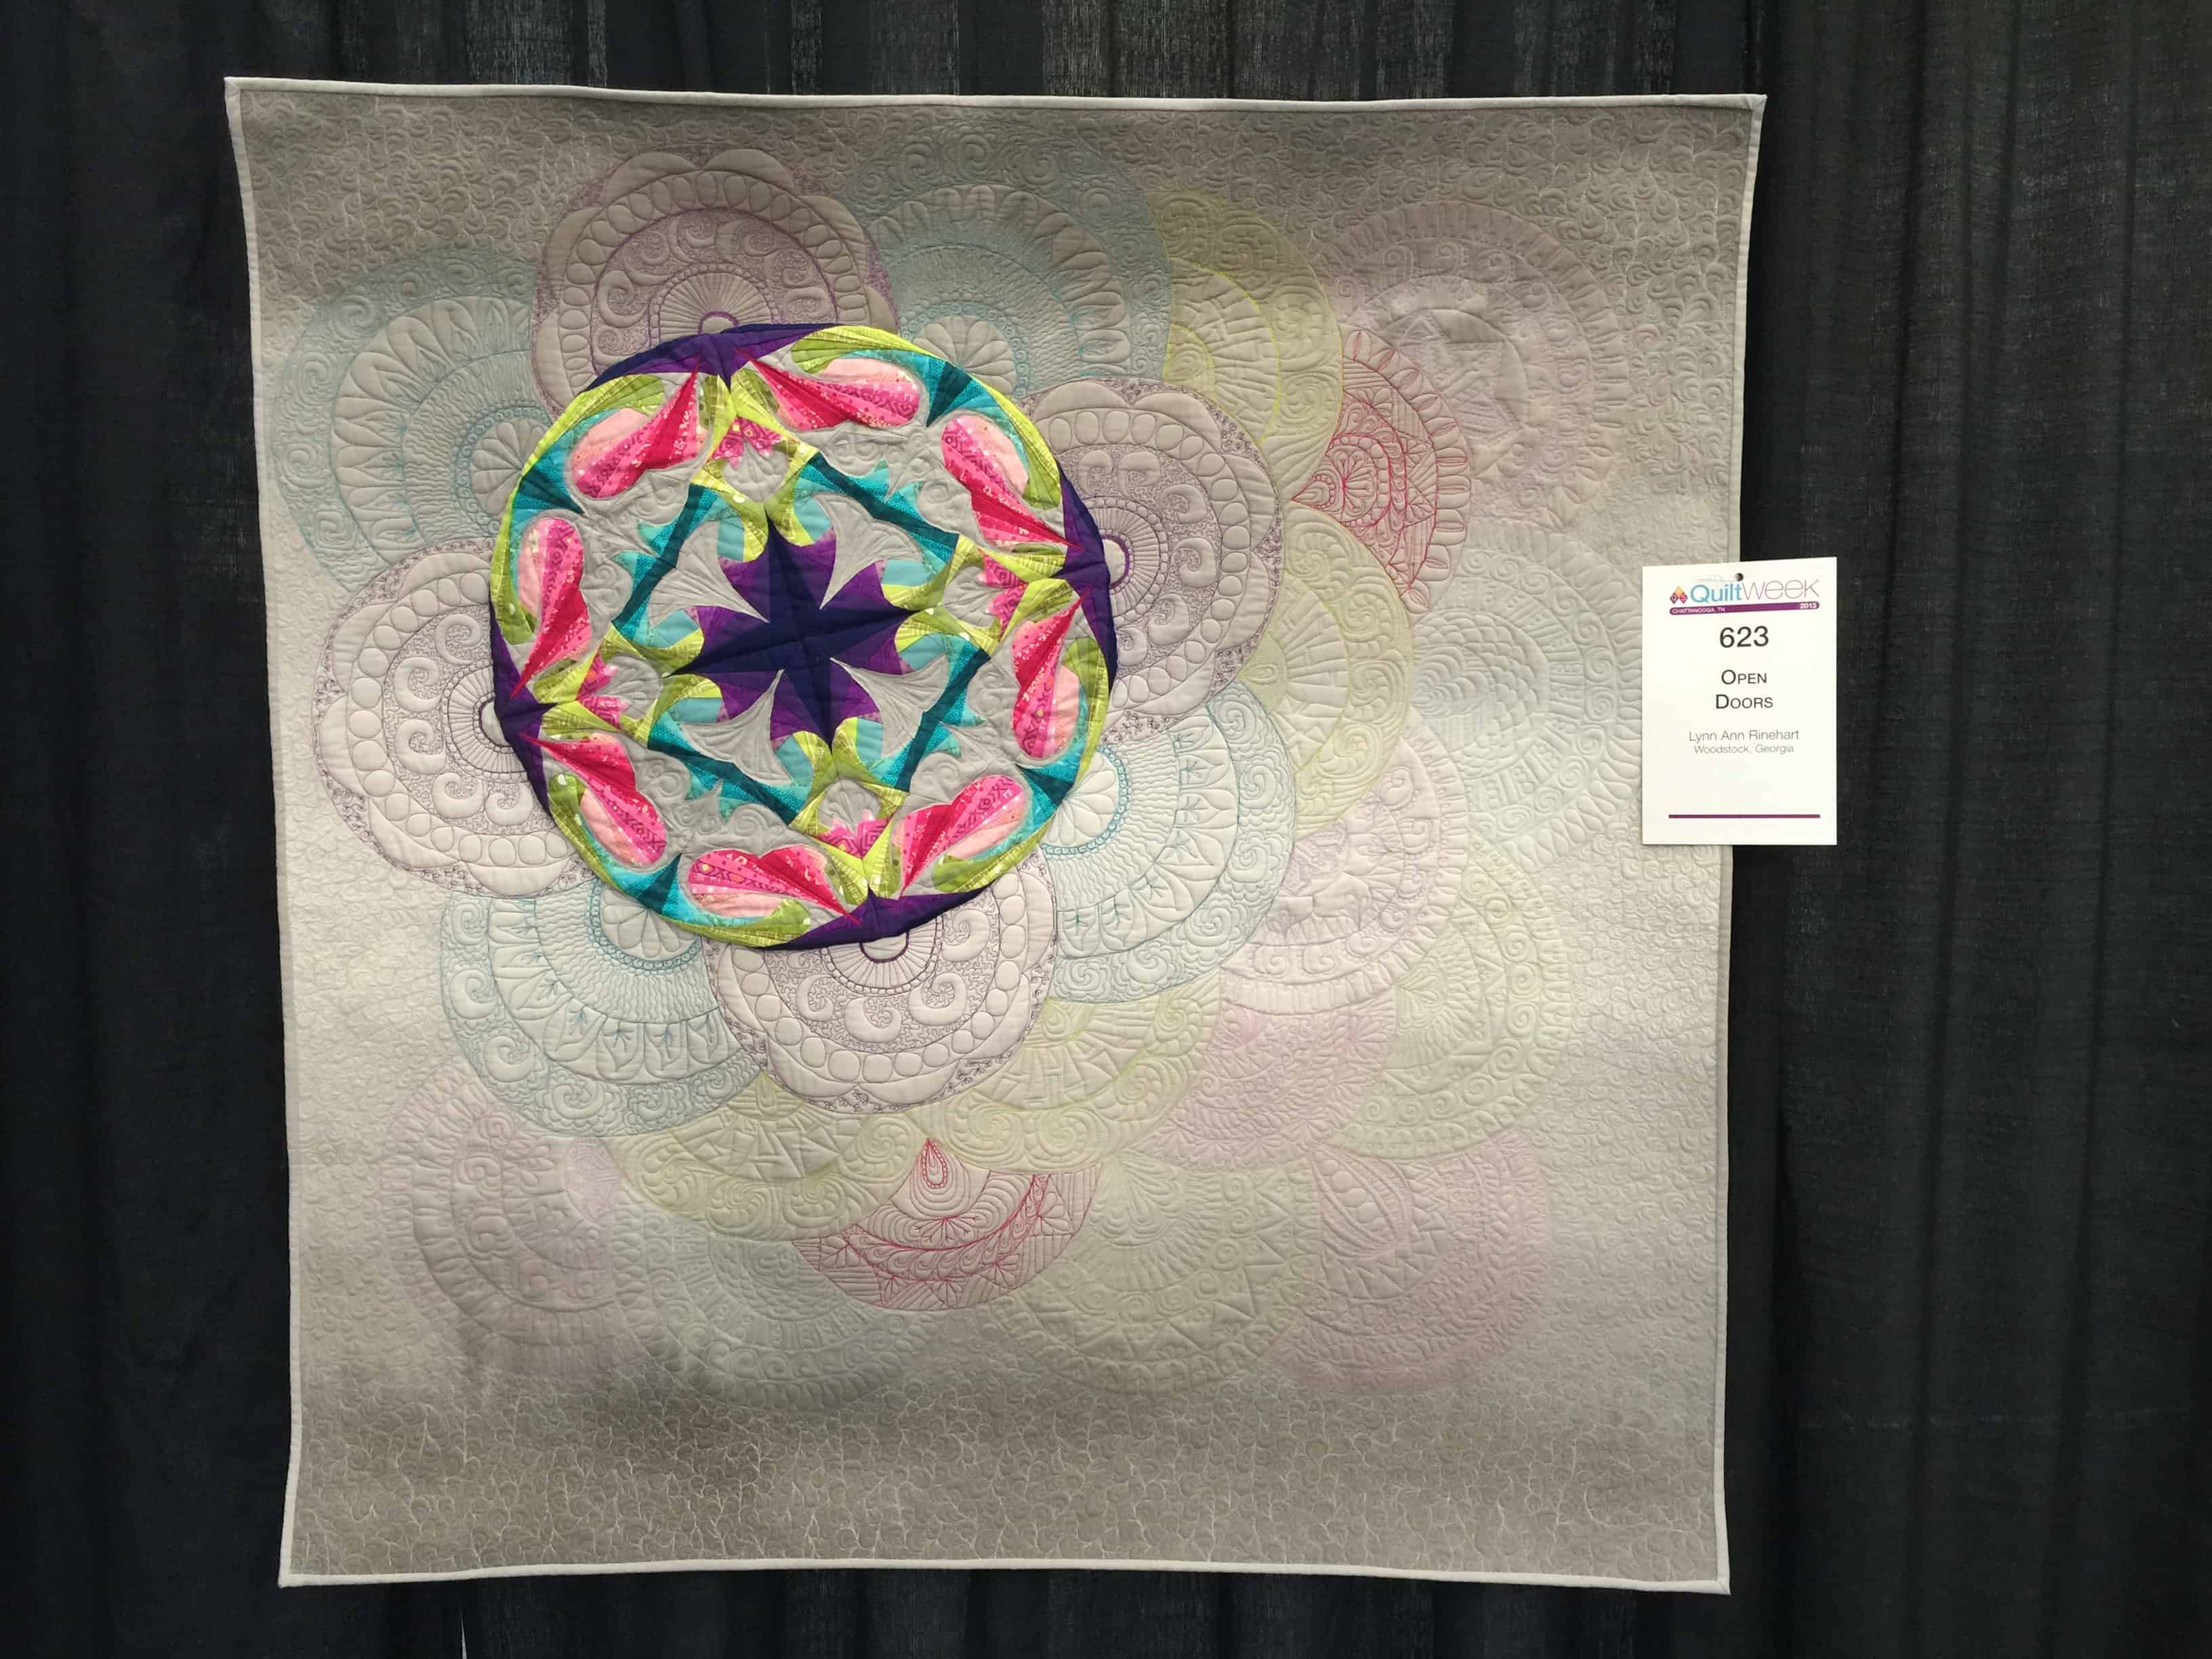
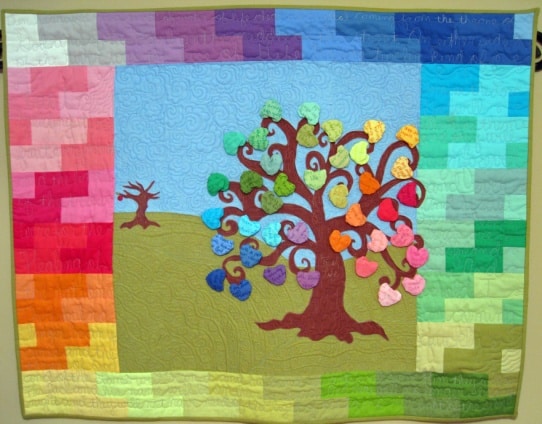
  • Lynn: I don’t know that I have a favorite.  I love so many.  I have the same issue with what is my favorite movie question.  My favorite, quilt that I have made is Open Doors.  I still own it and it hangs in my house.
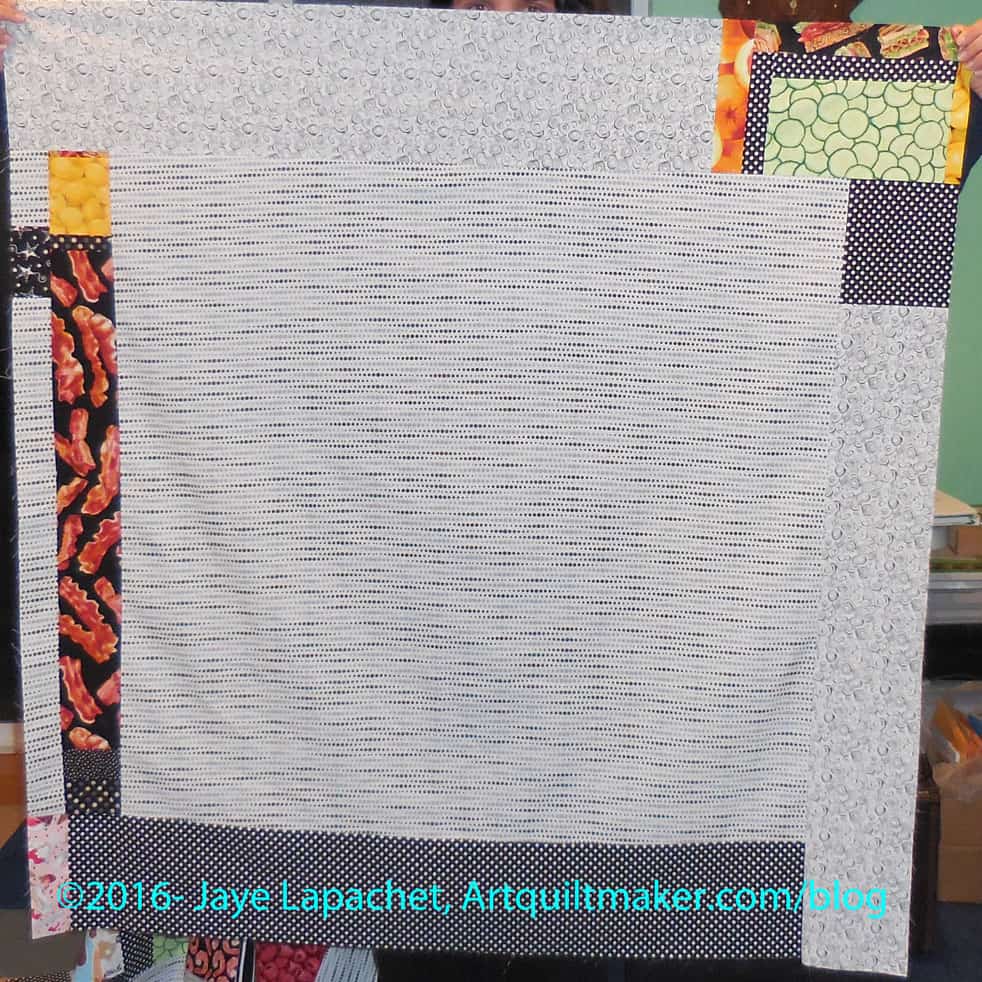
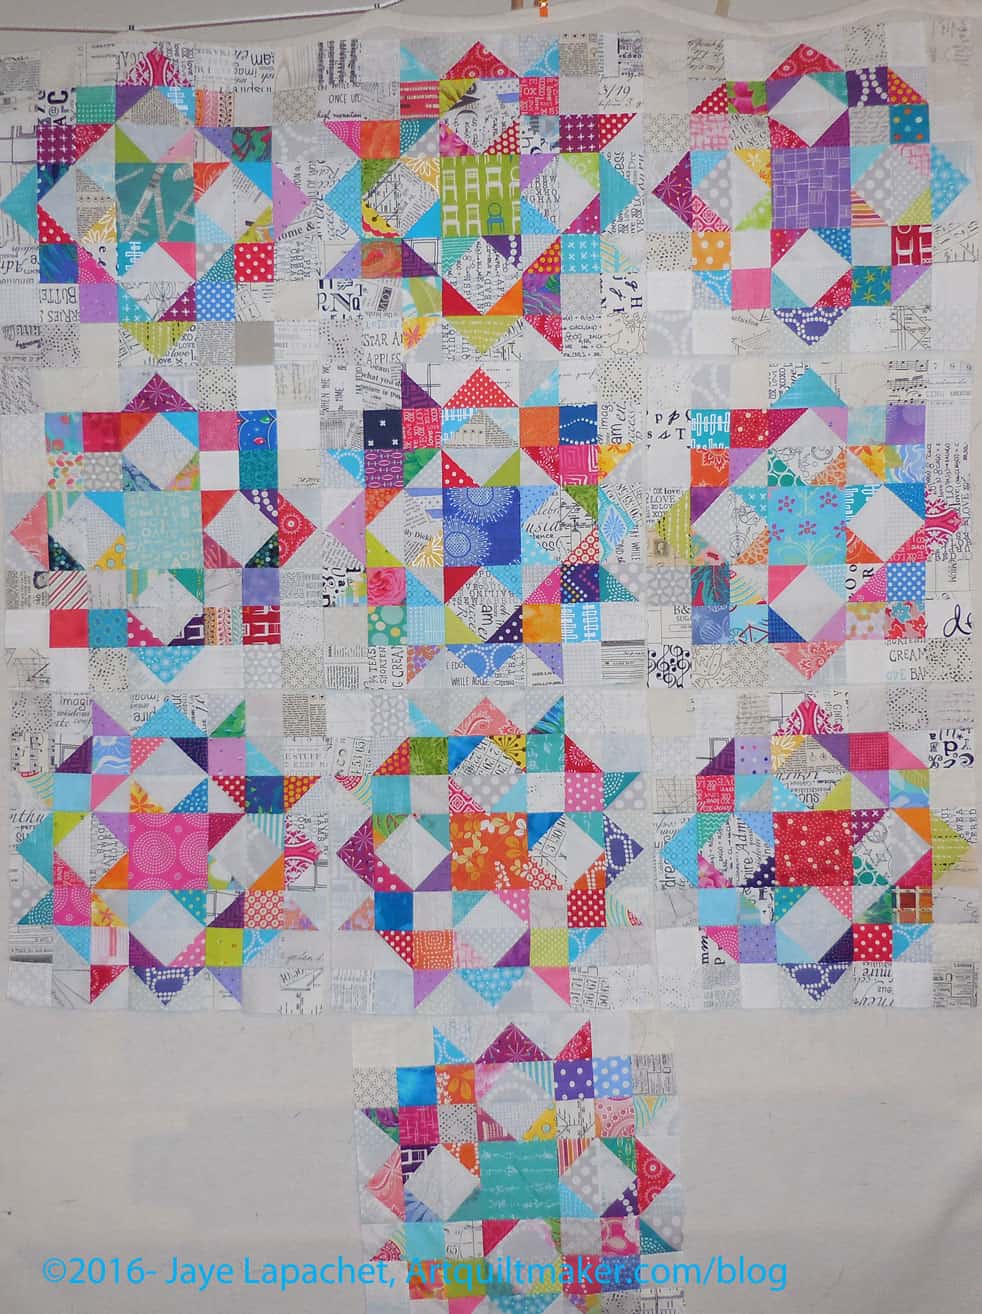
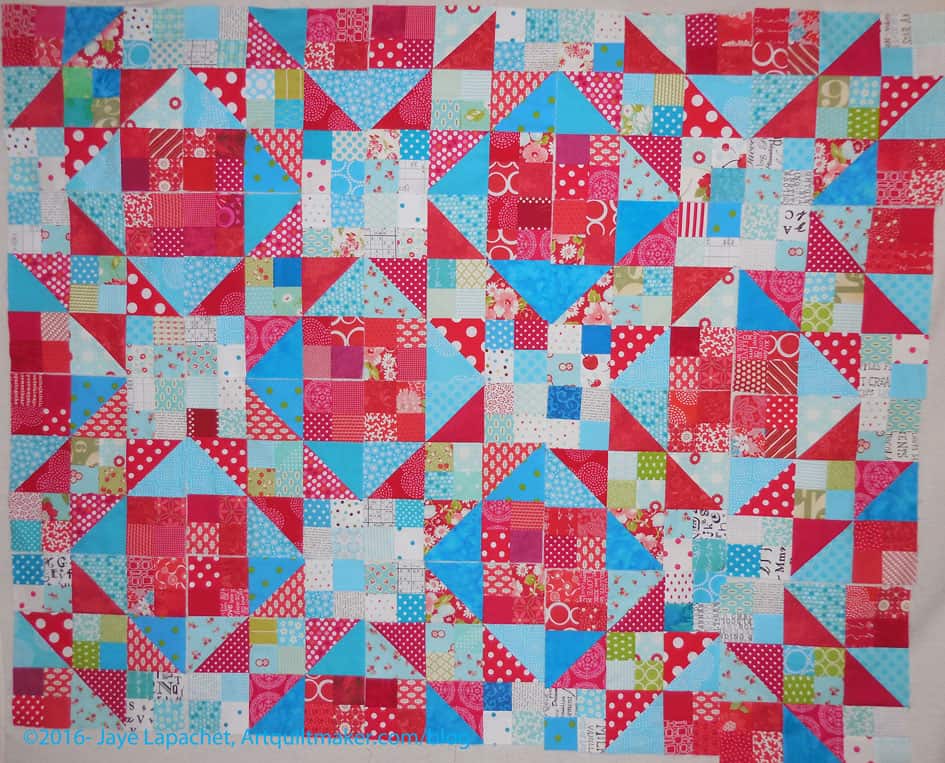
  • Pam: Hmm. That’s a bit like choosing your favorite child.  Not to say I haven’t picked a favorite (quilt or child) but it feels disloyal to call it out.  My favorite types of quilts are controlled scrappy ones.

11.   Anything else you want to tell my readers?

  • Lynn: My husband is flippin’ awesome.  (he wanted everyone to know)
  • Pam: The hole in a wooden spoon in the kitchen is supposed to measure one serving of spaghetti, but I’ll be darned if I can ever make spaghetti where I don’t have either three times more than I need, or one serving short. Maybe it’s a character flaw, or maybe I need to rethink that personal chef in the dream house!

Creativity: Chapter 2

I still want to encourage creativity and creative pursuits in YOU via a regular blog post, so here is another effort using The Little Spark book. A few weeks ago, I posted about the first chapter of The Little Spark and how to start to use this book to spark your creativity. I also reminded you that I had reviewed the book in November 2015. If you haven’t bought the book, go buy it NOW.

I feel it is important to nurture creative endeavors in myself. If I can encourage creativity in others, I get a huge bonus. It is so easy to get sidetracked by work, the housework, kids’ activities, the time suck that is the Internet and take no time for yourself. It is so easy to think that creativity is not important. Creative endeavors nurture your soul. If your soul is healthy all the other things you have to do in your life are easier and come out better.

Like in the Creative Prompt Project, any kind of art is appropriate for this creative exercise. If you are a potter or a cartoonist or a weaver, these reviews and exercises will work for you just as well as for someone who sews, makes quilts, draws or paints.

The second chapter in Carrie Bloomston’s book is called Create the Space, thus the second spark is about space. Space is a huge thing for me. For all of my endeavors, whether work or cooking or quiltmaking, I need a conducive space. Sometimes that space is my workroom and sometimes it is the car when I am traveling with DH for #politicalwifery and have my EPP on my lap. Neither of these spaces are ideal, but they work for me at the moment.

Thanks to http://www.quitecurious.com/wp-content/gallery/loft/windows.jpg

In my dreams, I dream of a large loft space with big metal windows. I want an open, bright space with many different tables so I can work on several projects at once and there are few piles on the floor. Yes, of course there are a lot of practical issues with this kind of space, but we are talking about a dream right now.

Bloomston says “Having a good work space cements you to your dreams.” (pg.13) I agree with this, which is why I am not stuck on my dream, but working away in my ok space.

I find that I go to my workspace when I feel like I have had enough of people and need to be alone. “The creative space is a launchpad, refuge, retreat, temple, labyrinth, and safety net. It gives you a sense of purpose.” (pg.13) This is so true for me. I know what to do when I walk up there and if there is any doubt, I always have fabric to iron until I get my head together.

Despite the imperfections of my space, I don’t have the obstacle of moving everyone else’s stuff before I can work (pg.13). That is a huge bonus!! Bloomston says “the Spark might not stick around for two hours of housekeeping. It helps to have the space ready.” (pg.13).

You might not have a separate room, but you can create space with boundaries. You might have to be creative (HA!), but being able to get started the second you have time is really important. Find a drawer or a cupboard where you can separate out your special tools and supplies from the detritus of daily life. “Own it. Mark it. Protect it. In this way, you advocate for yourself, your pursuits, and your special creative time.” (pg.13)

The last sentence brings up a good point. Creativity is good for my sanity, but it is hard to explain that I make quilts to relieve stress, especially when they are large and taking over my house. If I had a larger storage space for my quilts, it would be less of an issue. Out of site, out of mind.

“Clutter doesn’t help.” (pg.14) There is a lot of clutter in space and I know that is not good. Most of it is things I will get to, especially books to review.

I am constantly trying to organize. In my dream workroom, I would have a counter with drawers underneath running around the perimeter of the room, especially if the windows didn’t go all the way to the floor. My current system, if you can call it that, relies heavily bins. (bins need shelves, though, and I need more of those). Bins keep project pieces together. Ideally, I would like to have cupboards, with doors, so I could shut away the clutter, but open them so I could see everything. The fabric closet works like that, but is too small.

As I mentioned above, horizontal space is important, too. I gained a lot when I commandeered the microwave cart (now cutting table) from our remodeled kitchen. It adds 3 ~18″ x 24″ horizontal spaces. Of course, they are stacked, so only one is useful beyond storage. I would want many LARGE tables. I would want to be able to layout my projects as desired and flit between them.

Make a list of your wants and needs. Think about fresh air, a place to cook a snack, if you are not a baker or chef and your studio is a kitchen. Think about creature comforts, such as a comfy chair an ottoman with a reading lamp.

What does your ideal space look like? The Little Spark is a great book to energize or start your creativity. Please tell me how you light the spark of your creativity.


Nota Bene / Housekeeping: I am not going to tell you all of the details of all of the exercises in the book. It isn’t right for me to give away Carrie Bloomston’s content. You will need to buy the book for that. ( <—  It’s easy, just click the ‘buy the book’ link; yes it is an affiliate link, like the ones above**)  ???? That isn’t to say that you will get nothing out of the creativity posts that I am writing. You will, if you read through them and think about what I have written. I am using her material as a jumping off point. Her material is valuable and I am adding my own spin to it.

First Gathers

McCall's Apron Fabric & Pattern
McCall’s Apron Fabric & Pattern

Sometime ago, Kelly supervised my work when I cut out the aprons. This apron is different from the Church Lady apron I finished.

The pattern, which has gathers, is from McCall’s and is called Fashion Accessories “The Retro Collection” (#2811). I don’t remember when I bought it, but it has been around my workroom for awhile. I think I might have bought it when I made my first apron in a garment sewing class back in the dark ages. I am pretty sure I definitely bought it before 2010. Too bad patterns don’t have some kind of date on them. Maybe they do and I didn’t see it. Fortunately, for you, it is still available. The link above is an affiliate link.

Mom was over and since I needed supervision for sewing this pattern, we started it. Altogether, the apron took about 3 hours to make. As usual, I sewed other things in between, like the pillowcases, so it took me more time, but not longer.

Gathering the apron skirt

My dressmaker (for the Political Wifery dresses) has forbidden me from wearing gathers, so I was slightly horrified when I realized that this pattern had gathers. I also have never sewn gathers. My mom suggested we do pleats instead, which we started. Mom had to leave at this stage so we decided that since it was an apron and I would probably just wear it around the house, there wouldn’t be anyone to criticize the elegant styling. 😉 She helped me start and then gave me firm instructions. I think I did ok. Each time I got into trouble I texted her photos of my status and the relevant part of the directions, then we got on the phone and she told me what to do. What did we do before these technologies became available?

Arranging the gathers was fine, but sewing over them was very strange. It was nearly impossible to keep everything lined up properly. I think I did ok, but it was slightly terrifying. I was afraid I would do something wrong.

Waistband covering gathers

Mom helped me figure out the waistband, which is very clever once I understood the terminology.

All in all, I am pleased with my effort. I’ll never be a really competent garment maker, but I can hold my own with some projects. Stay tuned for the final!

3 Star Wars Pillowcases

Small check Star Wars Pillowcase

I ironed some fabric last week and came across three fabrics that were intended for pillowcases. Feeling the need for some finishes, I sewed them up over the weekend and will send them off to three of the nephews. The YM made it clear he was not particularly interested in these fabrics.

Big Check Star Wars Pillowcase

As usual the cuff fabrics were the most difficult to find. I have been working hard to cut pieces out of new fabrics in such a way that I will have a 12″ x WOF or so piece available should I want to use any fabric. I was fortunate to find two different check fabrics that go together, but are different enough to allow the boys to have their own.

Angry Birds Star Wars Pillowcase

The fabric in which the YM is really not interested is the Angry Birds Star Wars fabric. Even when I asked him if his new roommate would like it, I received an unequivocal no.

This is a clear indication of my sometimes uncoolness as a mom. 😉

I have 3 young nephews, though young is relative as the youngest is about to be 10 and the two others are 12. They are the youngest of all the cousins and I can still indulge in a little bit of silliness with them.

I know at least two of them will enjoy receiving mail, so I will get those off to them soon.

As a bonus, I got to mark 3 more yards off fabric used on my list.

Food Donation Quilt

Food Donation Quilt
Food Donation Quilt

I worked on a donation food quilt over the weekend. I decided, though it wasn’t a conscious decision, that I would try and use up the rest of my food fabrics and put that chapter behind me. Three food quilts is enough.

I think I also did it because I have been longing to provide another donation top and back to BAMQG.


Thus, I worked on the donation food quilt over the weekend. By Sunday night, I had a top, a back and a Frankenbatting.

I sewed it in kind of an Improv manner, but it is structured improv. I tried to use the pieces that I had and not do too much fiddly piecing.

Food Donation Quilt back

I may have enough pieces for another version when I get the Food Quilt #3 back. I think the back is large enough to provide at least a base for another donation quilt.

Not Enough Time

There just really isn’t enough time in the day-week-month-lifetime to do all of the projects I want to do. I saw another one the other day that I might be able to slip in while I do other things.

Scrap Quilt Secrets
Scrap Quilt Secrets

I went to The Granary before Friend Julie and I had lunch to wait for her. Just inside the door they have books and magazines, so I took a look at a relatively new book by Diane Knott called Scrap Quilt Secrets**. I have a lot of scraps so I am always tempted to see what clever things authors do with them.

This is an interesting book. There were a few projects in which I was interested. Not enough of them to actually buy the book, and my library doesn’t have it, so, at the moment, I can’t do a review.

There was one quilt I thought would be a great leaders and enders project. It is called 4 Patch Plaid and uses 4 Patches plus some strips and cornerstones. I see 4 low volume 4 patches and 5 colored 4 patches. I like this pattern, aside from the 4 patches, because it looks like you are looking through a window at an interesting 4 patch quilt. I can imagine making many 4 patches in between other projects and suddenly having enough to make a quilt.


**Nota bene: C&T did not send me a copy of this book and I have no affiliation with the author.

July To Do List

2016 To Do List

As I said in May, I have been using a version of Pam‘s spreadsheet to keep track of my fabric usage. My goal is not to get rid of my stash, though I do want to use my stash. This means I am not telling you my Net totals. To date I have used almost 82 yards of fabric, 18% of which is for charity. I am upset, but also enjoying keeping track of my fabric usage, because I can see that I am using fabric.

July To Do

  • Wash fabric AKA The Great Unwashed-no progress
  • Cut out 3 notepad covers for gifts
  • Finish cutting out Day in the Park backpack variation
  • Sew 3rd Petrillo Bag
  • Sew Bon Appetit apron
  • Cut out Art supplies pincushion
  • Sew Art supplies pincushion
  • Sew purple pincushion
  • Quilt Thanksgiving tablerunner #2
  • Quilt Thanksgiving tablerunner #3
  • Quilt Thanksgiving table mat
  • Create Partial Seam tutorial – in process YAY!
  • Make Chubby Charmer for SIL

*New since last post

Finished since December 2015 post

  • Pull fabrics for QuiltCon class
  • Quilt Thanksgiving tablerunner #1
  • Cut out Anna Maria Horner Multi-tasker tote
  • Cut out Art supplies Sew Together Bag
  • Finish cutting out 3rd Petrillo bag
  • Cut out Thanksgiving tablerunner #1
  • Cut out Thanksgiving tablerunner #2
  • Cut out Thanksgiving tablerunner #3
  • Cut out Thanksgiving table mat
  • ATCs for CQFA December meeting
  • Finish sewing Anna Maria Horner Multi-tasker tote -this was a gift I intended to give during Holiday 2013- sigh. Missed 2014 Holiday deadline as well. I made it for birthday 2016 and it was a successful gift.
  • Sew Art supplies Sew Together Bag
  • Cut out Purple Sew Together Bag
  • Sew Purple Sew Together Bag
  • Bind Thanksgiving tablerunner #1
  • Make binding for Flowerburst
  • Quilt Christmas table runner

Revisiting Projects: Carpenter’s Wheels

Carpenter's Wheels
Carpenter’s Wheels

The last time we talked about the Carpenter’s Wheel blocks I was trying out layouts. One reason these blocks are not next on my list is that I still have not decided on a layout. My mind keeps floating back to the round-ish layout I talked about after being inspired by Scraps Inc.

I think I really want to set these blocks in kind of a round layout and sew a million 2.5″ squares together to make it work. I might have to make a few more blocks.

I haven’t taken a photo of the layout, because my design wall isn’t large enough (I know I keep saying that) so I will really need to figure out how to take a photo and figure out if I need more blocks.

Color Palette Inspiration

Succulent Vignette
Succulent Vignette

On another of my daily walks, a bit of red caught my eye. I saw this small bit of succulent and liked the arrangement.

I tried both palettes.

Kona Palette
Kona Palette

Left is the Kona palette. The red and sunshine yellow (gold??) are really nice colors.

Bella Palette
Bella Palette

Because I liked comparing the two palettes last week, I also tried the Bella solids palette. It seems similar, even though we know that the fabrics have different names.

Revisiting Projects: Stepping Stones #2

Stepping Stones: July 2016

Even though I am planning to work on the Peacock, I am still going to show you the projects I revisted and tell you my thoughts about them.

The Stepping Stones was the first project to go up once the Food Quilt #3 was off the design wall. My other design wall where the blocks have been staring at me for weeks is just not big enough to get a good view of all of the blocks. I really thought I would work on this project next, but the Peacock called to me when I put it up.

This project needs more blocks. I think adding five more blocks along the bottom will be enough. It is a good leaders and enders project, so I will sew the new blocks while I work on the Peacock. After that, the center will be large enough. I want to finish off the secondary designs, which means adding a similar border to the one I designed for my previous Stepping Stones quilt.

As I have said many times, the photos in the book aren’t that good, so it is hard to figure out what part of the design should be emphasized. The edging blocks on the previous Stepping Stones were all different from the center blocks.

In my first version, the “ladders” are much more prominent. In the blue/aqua version, the stars seem to stand out. My colors on this version are a lot more distinctive. My first version was less murky than the book, but more so than this blue/aqua combination.

Here is a comparison of the two quilts/tops:

Looking at the two of them side by side makes me think that I may have already done enough to the sides and can start on the border blocks for the two sides and the top.

Revisiting Projects: Peacock Blocks

As I said yesterday, I finished the binding and back of the Food Quilt #3 and it is ready to go to the quilter. The top was already finished. I was trying to decide what project to work on next when I realized that I wanted to look at the blocks and projects I had been working. I started putting all of the projects up on the design wall and taking a look at them.

Pulling out a bunch of projects and putting a zillion blocks up on the design wall is a lot of work. I am exaggerating. None of my projects have a zillion blocks, though the Peacock and the Octagon 9 Patch do have a lot.

Peacock - July 2016
Peacock – July 2016

I could spend all week going through the projects with you until I made a “big reveal” and told you what I would work on, but I think you should know immediately that the Peacock blocks excited me most when I put them up on the wall. I am not sure why. Perhaps my eye is liking the dark colors?

I also realized that this is the first time I have seen these quilt blocks on the design wall.

The above photo shows a pretty raw layout, but not terrible either. I am still in that gradation mode, so I put the darker blocks towards the bottom. I don’t have a lot of the small blocks, so they will make an asymmetrical border.

I only have a couple of solid blocks, which I talked about adding as tests. The lavender definitely doesn’t work in the current location. I kind of like the way the top of the quilt (without the small border blocks) is not straight. That begs the question of what I would put to make the edges straight. I am definitely not making an edge like that.

My other immediate thought upon stepping back was that the gradation was nice, but that blocks needed a bit of space between them. I might be backing off that thought, but I will put some black behind and in between the blocks to see.

This quilt requires more work, so I may quilt one of my projects while I look at it, try things and rearrange.


Finished: Food Quilt #3 Top & Back

There was a Sew-in this past weekend (4th of July in the US) and I spent most of the time working on the finishing aspects of the Food Quilt #3. I finished the binding on Saturday and the back on Sunday. Even though I have other projects on which to work, this felt like a coup.

Food Quilt #3: Finished top

The piece is about 101″x 86″. Yes, it is huge, which means that I don’t have a full picture of the top or back. The YM was gone, it was cold outside and I don’t have a room large enough to lay out the back or top. The above photo is part of the top with a bit of the back peeking through.

Food Quilt #3: Finished back

Of course the back is larger. Again, I have shown you only part of it due to the size.

I am pleased that this is done and will see about getting this and FOTY 2015 to the quilter soon.

Machine Applique’ for Directional Motifs

In my previous machine applique’ tutorials, I used designs where the direction of the motif didn’t matter. When I went back to review the tutorial (yes, I do use my own tutorials!) in preparation for doing some machine applique’. I was preparing to applique’ letters, which have a definite right and wrong way. I realized I had omitted directions for using directional motifs (where the direction of the motif matters, such a numbers or letters) for applique’, so I had to figure out how to do them again.

In order to understand this tutorial, you will need to look at How to Applique’-TJW and the 3 Fusible Applique tutorials (pt.1, pt.2 and pt.3). All of these are part of a whole.

Supply List:

Draw out design on a piece of drawing paper
  1. Draw out your design. I used a pattern for the letters I wanted to applique’. You can draw or print your design. There are a lot of free clipart you can use. Since I had a pattern, I laid out the pattern, placed a piece of drawing paper over the letters I needed and drew out the design using a pencil.
  2. Trace over the pencil lines you used to trace the design with a Sharpie. The lines should be dark. Make sure the Sharpie does not bleed through to your table.
  3. Flip your drawing paper over and put it on your light box. You can also tape it to a window or sliding glass door. The wrong side of the letters or directional motif will show through.
  4. Directional motifs backwards on drawing paper
    Directional motifs backwards on drawing paper

    Using your Sharpie, trace the letters again on the wrong side of the paper. You will be tracing the backwards image of the letters.

  5. Leaving the paper taped to the window (or laying on the light box), tape a piece of paper backed fusible, paper side UP, over your design which is on the window or light box.
  6. Trace the backwards design on to your paper backed fusible using a Sharpie. **Nota bene: my Sharpie tended to smear on the paper of the fusible. I couldn’t find a pen that worked well, so be really careful to keep your hand out of the way to avoid smearage.
  7. Once finished, remove everything from the window or light box.
  8. Place the fabric you will use for your directional motifs right side down on the ironing surface. The fabric should be sized slightly larger than the fusible.
  9. Place the fusible on top of the fabric with the paper side up. Make sure no edges are over your ironing surface.
  10. Place your applique’ pressing sheet over everything.
  11. Press according to the directions on the fusible package.
  12. Fusible pressed to fabric
    Fusible pressed to fabric

    Once you are finished pressing, you will have a piece of fabric with fusible on the wrong side. The motifs (letters) should appear backwards and you will see the wrong side of the fabric.

  13. Decide on which scissors you will use. I always have a fight with myself about this. I don’t want to ruin my Ginghers, which are super sharp and great for cutting out detailed types of designs by using them to cut through paper. I also don’t want to ruin the edges of my motif with a pair of papers scissors that will not be sharp enough to cut through the fabric. I have a pair of Fiskars that I end up using for this task. Not ideal, but the best I am willing to do.
  14. Cut out directional motifs
    Cut out directional motifs

    Once you have decided on scissors, cut out your designs (letters, in this case). First I do a rough cut, then I cut with more detail.

    Cut out directional motifs - detail
    Cut out directional motifs – detail
  15. Layout your background fabric on a flat surface, right side up. I use my ironing board, so I don’t have to move the motifs in order to press. If I have to sew two pieces of fabric together to make a large enough background, I press the seam open.
  16. Take each motif, one by one, and peel off the paper. Carefully place each prepared applique’ motifs in their desired location before moving on to the next one. With motifs such a letters, I use a ruler to make sure they are straight.
  17. You should be able to see your design correctly. If you are using letters they should not be backwards and you should be able to read the word.
  18. Place your applique’ pressing sheet over everything.
  19. Press your applques so that they are stuck to the background fabric.
  20. Set up your sewing machine with the correct colored thread and a foot suitable for zigzag or satin stich.
  21. I set the zigzag to 3.5 (width), 0.7 (density). I like my satin stitch to be a little open, but you can adjust it to your favorite length and density.
  22. Cut a piece of tearaway the width of your motif and twice as long
  23. Fold the tearaway in half.
  24. Pin the double layer of tearaway to the back of the background fabric. Pins should be out of the way of the machine foot.
  25. Satin stitch all the way around each motif, carefully negotiating curves so the satin stitch looks smooth.
  26. Trim and/or tie off all threads.
  27. Tear away/cut away the excess tearaway stabilizer.

HOORAY! You did it!

FOTY 2016 Overflow

FOTY 2016 - Late June
FOTY 2016 – Late June

I mentioned the other day that I haven’t had a lot of time to sew lately. I have had a few minutes here and there, which I have used to press and cut fabric. This means more FOTY squares. There are a few from various projects as well, but the bulk of them thrown together look a little depressing. I’ll have to do a load of oranges or yellows to ensure that FOTY 2016 isn’t heavy on the dark side. 😉