
Category: 2008
Use for posts written in 2008
Moving Right Along
I have been trying all week to get a few free moments to show you some pictures. I am off on a trip tomorrow and don’t know if I will get to posting until the first weekend in March, which is why I want to post!
 These are the retail therapy fabrics that I bought. I have already washed and ironed them do I could use them in the 2008 Fabric of the Year quilt (see below). I was pretty disappointed in the quality of the fabric in the whole top row except for the multicolored dots on the light background (right). The green and yellow fabric with the white dots are really, really thin. You can see through them and I am sure the seams will show through if I press towards.
I found the other two by searching for violet on the site that shall remain nameless. It turns out that the fabrics are very, very dark. Not violet at all. At least not my definition of violet. [I could go into a whole dissertation on taxonomies here, but I’ll spare you. I’d like to keep a few readers.] That wasn’t the main problem with these fabrics. When I tried to press them from the front, the iron kept getting caught on the fabric. I don’t know if ‘caught’ is the right term, but I couldn’t smoothly move the iron over the front of the fabric. I had to turn the fabric over to press it.
The color is printed on the front and something about the ink makes it not smooth. I love shopping online, because I don’t have to leave my house, but this is a good example of one of the pitfalls: I can’t feel and look at the fabric before I buy it. I could return the fabric, but I have already washed and cut into it. When it is cut into smaller pieces, I am sure it will be no problem.
 Here are the two newest members of the Pineapple family. They are both a perfect… 14″. Sigh. They are supposed to be 12.5″. I made these so carefully, I don’t think it is possible to have been anymore precise. I measured each strip to ensure it was 1.75″. I also made sure the blocks were square as I sewed each row on.
I am bringing all the blocks with me this weekend and will work on them when I have time. I also spoke with TFQ about them and some possibilities are:
- the new iron
- the service on my sewing machine last fall.
I decided that I would finish this quilt even if it meant making all the blocks over. Blocks never go to waste, so I could make a lot of pillows!
 Here are the new fabrics that I cut for this week.
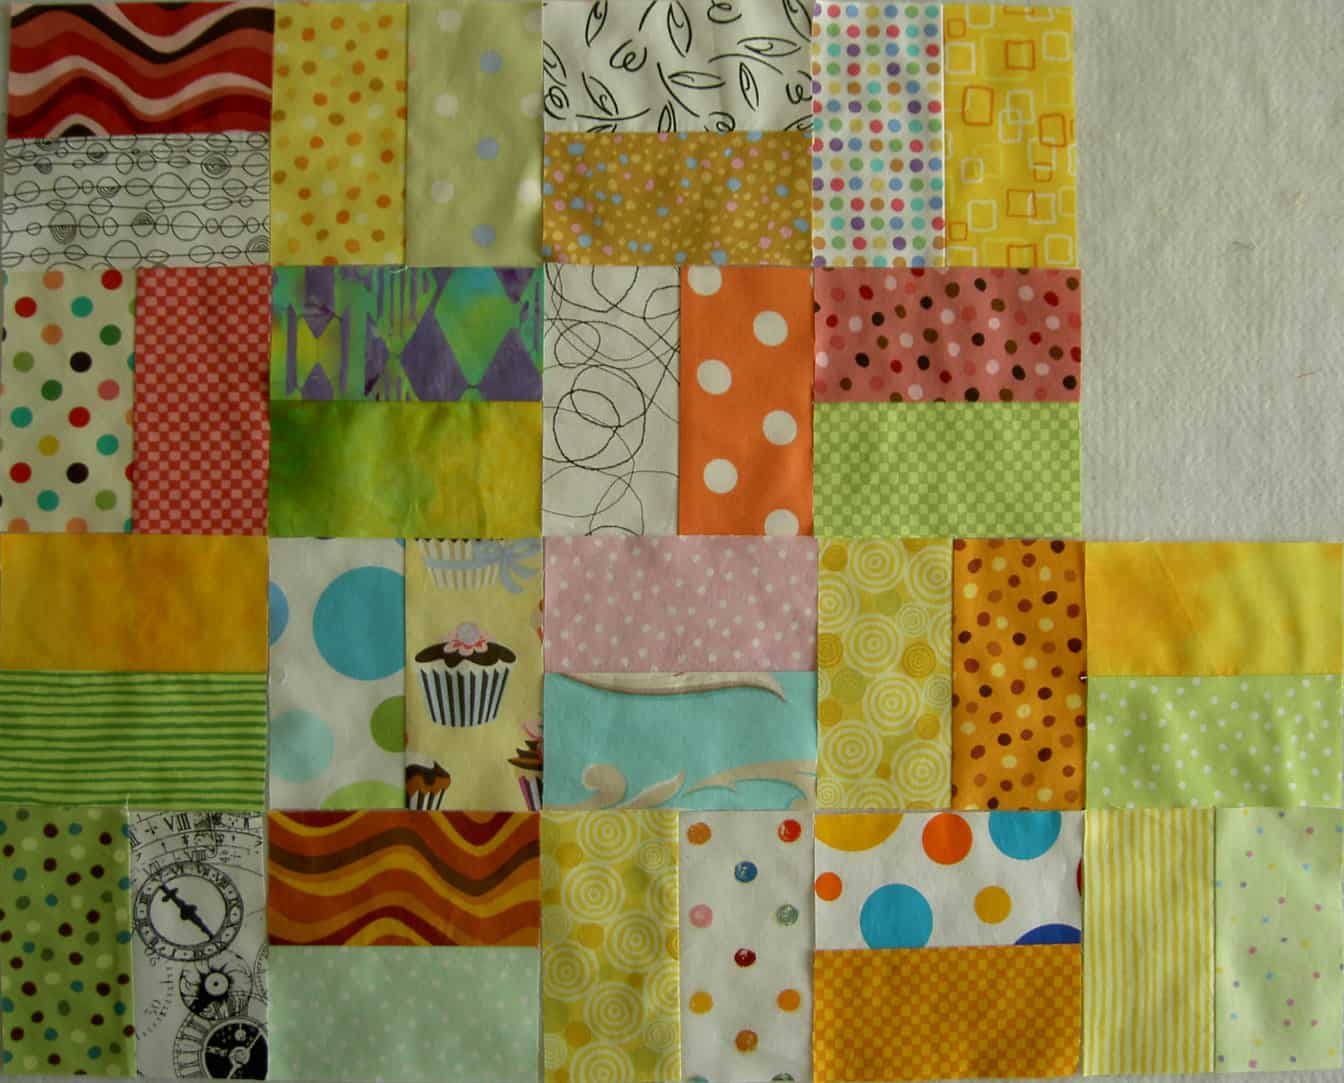
 Here they are all sewn together and integrated into the blocks I made last week.
Mind Sorbet
The Chocolate Box quilt, which I talked about in the post about the retreat is what is discussed in Judy Martin‘s February 2008 newsletter. Kristin, one of her readers writes:
“I agree that there is nothing wrong with fast quilts. In fact, in the past after completing a challenging project, I would often use a fast and easy quilt as a “mind sorbet” to cleanse the mind before beginning the next project. They are nice for showcasing big or odd prints, or for picnic quilts or for kid quilts for gifts. I do think though, if we are not challenging ourselves and not enjoying the process, we are missing something.”
The Chocolate Box is mind sorbet. I felt thick and full after working for so long on the Pineapple. I needed something to cleanse the palette and the Chocolate Box did it.That is such a great description and I hope I will be able to add it to my lexicon.
Really Look!
Friend Julie is really taking her course with Gabrielle Swain seriously. I wouldn’t expect any less, of course. It is great that she is sharing. I have been working on REALLY looking at things when I draw in my journal and this post talks about the same thing. I think I can never have enough reminders to slow down, really look at things plus what Julie says here about distilling things down to what you really need.
|

Thr3fold Journal Issue 2
Linda, Laura and Catherine are back with issue 2 of Thr3fold Journal. They have also updated their website to include a wonderful video of the three of them talking about themselves and the journal. Take a look.
|
|

Issue 3 is due in May or June.
One Night Stand
I don’t know what got into me last night, but I had a one night stand. Not the kind you are thinking of, but an art encounter where I finished a small book. I am calling it the Be Brave book.

What happened was that I had a few spare minutes while Darling Boy took a shower and my Artgirlz order was still on the floor where I had left it after I photographed it last week for you to see. I picked it up, opened up the Artgirlz creativity packet and looked at all the stuff. I was surprised to find a little bound book. I thought it was a bunch of paper. All the pages are different colors, which is fun and cheerful.
I sewed the felt to the front and did a bit of handwork on the flowers. Then I got out my rubber stamping ink and tried out many of the stamps in the Artgirlz rubber stamping pack. Then I just kept stamping and sewing and suddenly I was done.
I don’t know how long it took, but not very long, perhaps a half an hour. I could do more, but it is not a project that is sitting half done on my worktable. I can still do more later if I want.  Close up.
 Finished product. I also used some of the Stampin’ Up letters on the little marker/tag.
New Way of Drawing?
I saw Sketchcast on one of the blogs that look at occasionally. I thought it was an interesting concept and have been exploring it a little bit this evening. The intriguing part is that they provide the code so you can embed the drawing in your blog. I was surprised that they didn’t have a tagging feature. It seems to have some elements of social networking just not tagging. I didn’t find any sketches on quiltmaking.
Check it out.
Check it out.
|
|
Fabric of the Year Project etc.
I decided to do the fabric project that I discussed in two previous posts here and here. This project uses fabrics I have recently purchased in some project right away.
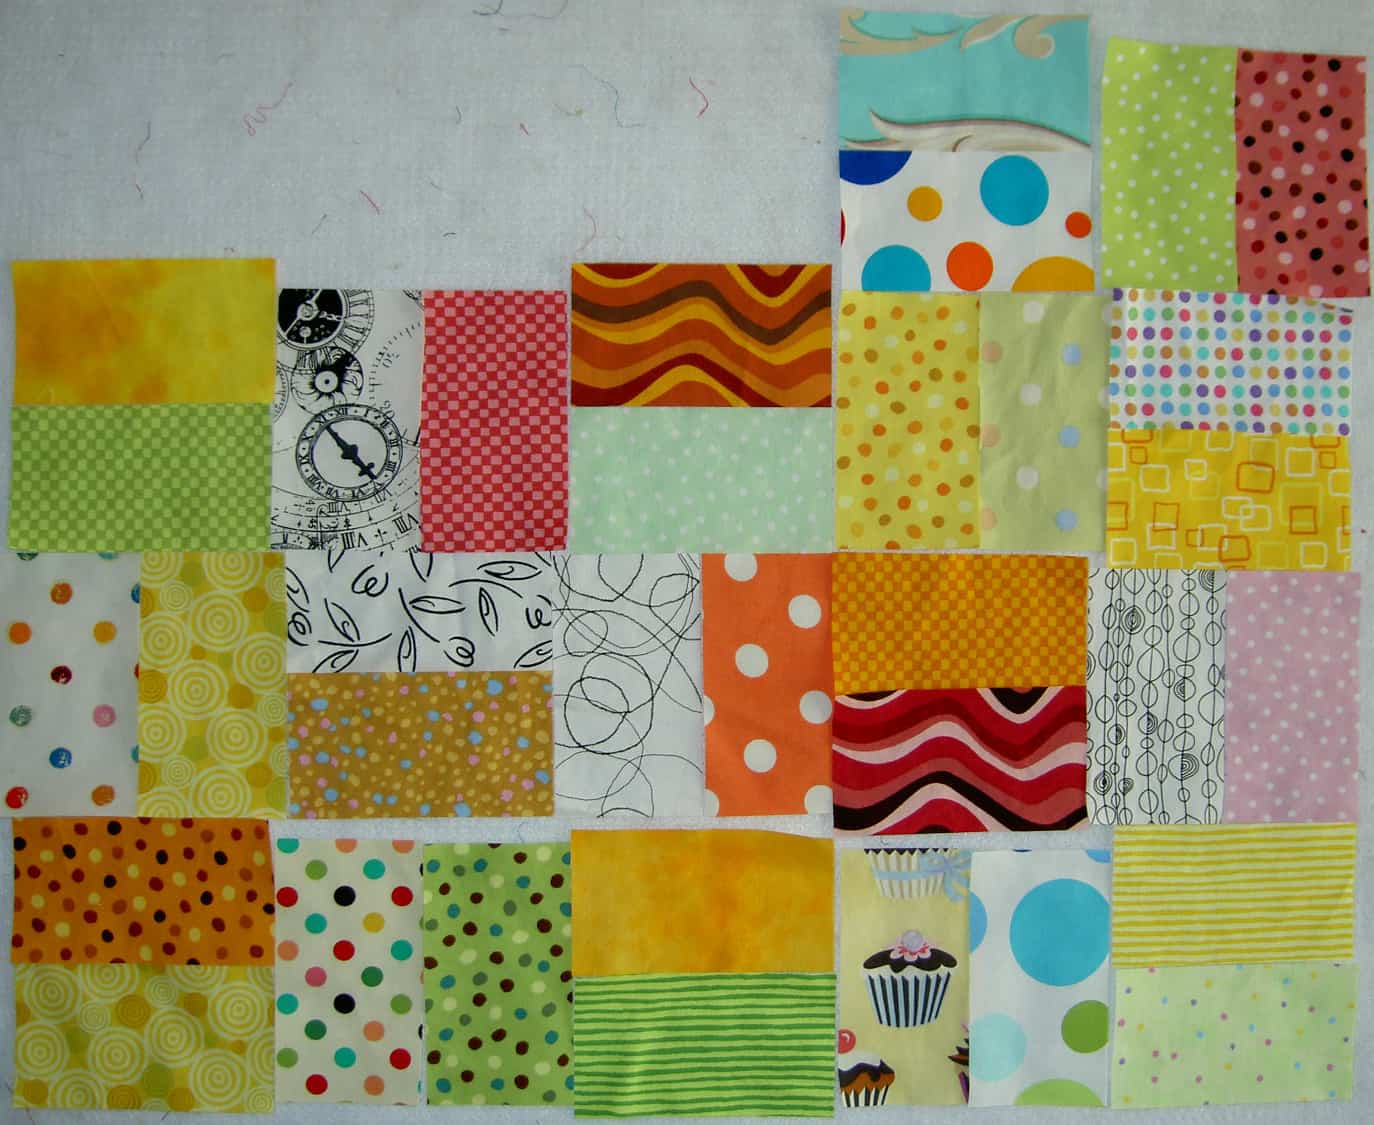
This is the fabric I recently washed (a light load). They are arranged in no particular order. I cut the pieces and slapped them up on the wall.
Above are the fabrics after I rearranged them a bit and sewed them together. You can see the test block in there as well.
I did run across a few situations I had to decide about as I pressed the fabric, so here are the complete new rules:
- 2.5″x4.5″ pieces of each fabric purchased.
- Fabrics that have been washed, but not pressed are ok to add to the mix, even if they were purchased last year.
- Fabrics purchased twice in the same year should be included twice.
- OK to rearrange fabrics as desired.
- Press to the dark.
I did find it to be fun, as TFQ said it was. I did find one fabric that I really didn’t like and will put in the Freecycle pile.
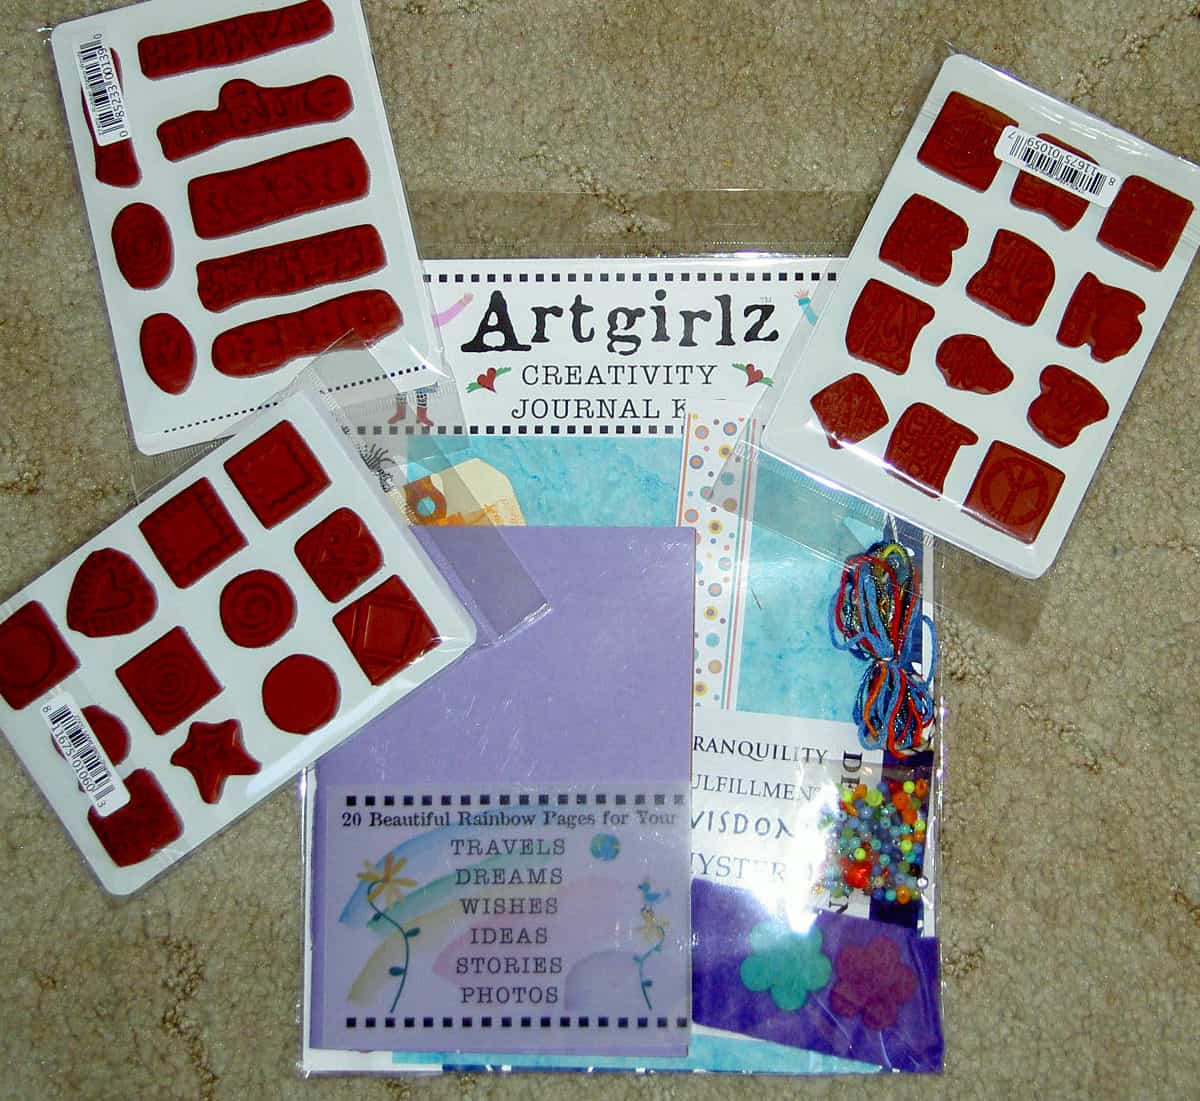
Needing some retail therapy this week and still having Friend Julie’s post on my mind drove me to the Artgirlz site. I was amazed to find that the creativity pack and the rubber stamps came within a few days, even though it was sen from Rhode Island. Nice service! The thing I have to figure out is how to mount the rubber stamps. I know how to mount them, but don’t have the mounting thingies. Perhaps there is a rubber stamp store somewhere where I can buy some. Artgirlz have some, but they have a variety of sizes in one pack and not enough of the little ones.

A few months ago when I was really trying to get inspired to do some visual journaling, I bought a few writing/drawing instruments to inspire me. I finally tried these NeoColors last week. They are like crayons, but more waxy. I wasn’t that impressed as I was looking for something softer. I probably won’t be buying more of them.

Finally, there is good news and bad news on the Cross Blocks (Flowering Snowball). The good news is that I finished another block. I have been working on this one for several weeks, which means that it was mostly languishing in my handwork bag. It is displayed above with some new fun fabrics.
The bad news is that I seem to have lost the templates. In a frenzy of tidying, the stack where the templates lived for months was swept away and no longer exists. The templates are gone now, too, and I can’t think of where I might have put them. Darn! I wanted to cut some more pieces. I can reprint them and start over, but I don’t want to get into a problem with piecing (I have had enough of that!), so I will look for them some more. Cross your fingers that they show up.
Coalescing Ideas Continued…
If you don’t go back and read the comments to some of my posts, I encourage you to do it every once in a while. I don’t get a lot of comments, so it shouldn’t really be a hardship. You can also subscribe to them on the comments page and then they will come to your e-mail! WOW! Isn’t technology great!?!
In the post I wrote about Jane Blair’s quilt, Things Change, and my friend TFQ’s project to use a piece of all the fabric she bought last year, Jeanne commented:
“I like the 2.5″ x 4.5” block; the pieces are a better proportion to the block overall.
I’ve been really happy with this project over the past year. I liked the way it got me to cut into my fabrics right away, not just for my swatches, but to actually use them. Nothing seems too precious to use once I’ve cut into it and made something with it. I actually did go out and buy more of some fabrics that I fell in love with as soon as I used them, and I actually gave away some fabrics that made me want to tear my hair out trying to use them. Well, I made napkins with pieces of it and gave the rest away.
Warning, though: do not engage in this project unless you are prepared to be confronted by the number of blocks you end up with at the end of the year. I just finished the blocks for 2007 and counted them: 685 blocks.”
first, I think Jeanne is right about the 2.5″x4.5″ block being the right size. In looking at the two hanging on my design wall, I realized that the larger one will not really go together very easily, but the 2.5″x4.5″ would go together like Jane Blair’s quilt’s setting.
And, as I said in the post, I really like the idea of knowing whether I will like to use a fabric or not. TFQ made Sawtooth Star blocks, I believe (I am going up there in a few weeks and will take photos of everything she has been working on), so the blocks were more complicated than I am proposing. That doesn’t alleviate the fact that I may end up with over 600 blocks. How many quilts would that make and could I stand to put them all together. I do love to make blocks, so it might make a difference.
I just washed a bunch of fabric, so we will see if I start this. Right now the fabric is laying on the back of my sewing chair. Stay tuned!
PPP is Over
The Pineapple Pity Party is over. It was good for me to write that post yesterday, because it was like a kick in the pants. As I was finishing the post, I started to think that it wouldn’t be that big of a deal to see what I was facing and possibly make a few more blocks. So, I went upstairs (the DSL still isn’t working up there, so I am racing up and down the stairs all day) and laid out all the blocks on the floor. This exercise coincided with some furniture moving, so it wasn’t an ideal situation.
 The piece isn’t as big as I thought it was going to be. Certainly, it covers the floor, but that is it. I wasn’t able to get a picture of the whole thing, which means you can’t get the whole effect, but I think you can get the idea.
I looked at all the blocks and compared them to their neighbors and came up with a catalog of problems.
 Top right block too big – way too big.
 Top block way too big.
 Too big again.
I have a plan of action, however, and I am happy about that.
- Make two new blocks: one center and one border and see how they compare to others.
- Try to figure out what exactly the problem is.
- Compare blocks to each other and sew as many together as possible.
- Remake blocks as necessary.
- Make pillows out of unusable blocks 😉
Pineapple at TIGQF

This is an antique Pineapple that Moving Hands shows. How did the maker get all those tiny strips to fit together?
There wasn’t a picture that I could see of the entire quilt in Moving Hands group.
Tokyo International Great Quilt Festival 2008

If you want to see some TIGQF photos, this is the place. Moving Hands has uploaded a bunch of photos, which provide some much needed relief from the world at large.
I really like the big swirl in the middle of this quilt.
Enjoy.
Tsukineko Inks
I am at loose ends right at the moment…bored actually. This is a new feeling for me as I usually have a zillion things to do and am running around doing them. It is not that I don’t have a zillion things to do, it is that I don’t feel like doing them. Part of the problem is 1) the child woke me up at the crack of dawn for some stupid, trivial (to me, not to him, of course) request and I have been out of sorts all day; 2) I have been working 5+ days a week lately with no time just to veg and that is what I am doing now; and, finally [most significantly?], 3) the Pineapple Problem is growing [probably] out of proportion. I want to sew, but seeing the Pineapples laying on my cutting table paralyzes me. I am thinking of abandoning the whole project, but I had such high hopes. I have so many dots. It seems like a big failure. If I could see the lesson in the failure, then I might do it and start over, but I can’t see the lesson and suspect that there isn’t one.
To combat this unfamiliar and unwelcome feeling, first I checked eBay for my SIL’s discontinued crystal pattern, then I tried to buy fabric on eQuilter. Got an error message and didn’t succeed. I am a master at finding web and software bugs and I don’t even try. This was not the moment to have this particular ‘skill’ rear it’s ugly head. Finally, I went to Melody Johnson’s blog, because I noticed the last time I was there the amazingly large blogroll she has. One of the blogs I found there was Frieda Anderson’s blog. She took a class in Tsukineko inks the other day. (I bet you were wondering when I would get to the point!)
I have been thinking about the T.I. inks sitting abandoned in one of my drawers lately. Thus, I was pleased to see this article about using them. It gives me a more realistic view of how they might work. Clipmarks has a publishing limit, so go to Frieda’s blog and read all about it. Perhaps I can convince Friend Julie to hold my hand while I try this medium sometime.
|
Heart Idea
I like the shape of the hearts in this quilt. Not so fond of the colors, but they aren’t terrible either. I can imagine it in turquoise, sunshine yellow, lime and papaya. Sounds like summer, huh?
|
|

Mom’s Pineapple
 Last December Mom and I decided to take a Pineapple class on the spur of the moment. I paid for everything as part of her Christmas gift and we took the class together in January. You all know the progress I am making, but my mom has finished hers and it is above. She did a wonderful job and I am so impressed with the finished product. She normally does pieces like Mary Lou Weideman.
 Here is a detail.