Hexagons Tutorial-Preparing to Sew

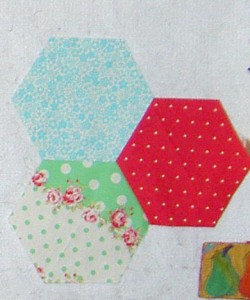
Hexagon piece
Hexagon piece

Did you follow the directions for cutting your hexagons? Did you watch the video? If so, you are ready to prepare to piece. If not, you can find the directions and information on my previous post.

Note: my hexagons are 7″ unfinished. We are preparing to machine sew the hexagons using Y seams. Leave your fear of Y seams at the door, please. This is a relatively quick method after you do the step outlined below. However, you won’t be able to chain piece.

Supplies needed:

  • Sewing machine
  • Quarter inch foot
  • Thread
  • Ironing board
  • Iron
  • rotary ruler a bit longer than one side of your hexagon (I like the Creative Grids 4.5″x8.5″ rectangular ruler)
  • thin sharp black pen like a Pigma Micron or a Pilot Scuf or a Sewline pencil
  • your hexagons

You will be working on the wrong side of your hexagons at first.

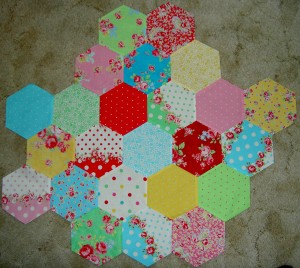
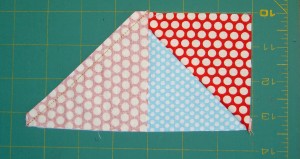
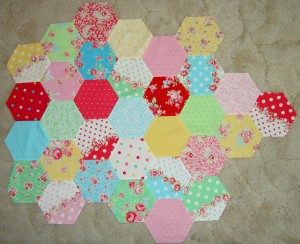
The photo of my piece (above) is similar to what your goal should be. Note that the piece I show is not the final product. I don’t know how large my final quilt will be. That is just how I roll on certain projects. You should check Sandy’s blog and podcast as she has provided some information about sizes and amounts of fabric.

I don’t think in rows, so I don’t always sew in rows (remember the Chunking it tutorial?). This project lends itself to sewing in a circle, which I find very calming.
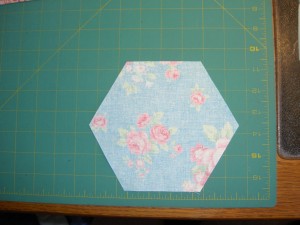
Face Down
Face Down

Take your cut hexagons and turn them right side down (wrong side up) on a surface you can draw on. I do this step right next to my sewing machine just before I sew. Take your rotary ruler and position the edge a quarter inch from one edge.
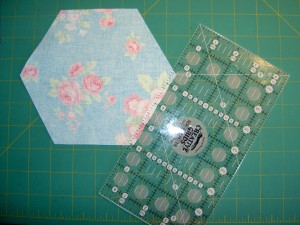
Ruler on Hexagon
Ruler on Hexagon

For example, pretend you were going to slice off a quarter inch and position your ruler that way. Note there is no rotary cutter on the supply list so no cutting, please. The goal is to end up with an X at the 60 degree angle spot on the patch.
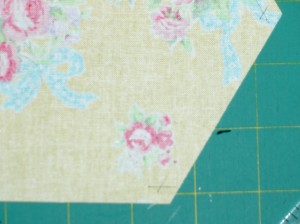
Hexagon Marked-detail

On the wrong side of your fabric, take your pen and draw a light line where a quarter of an inch should be.
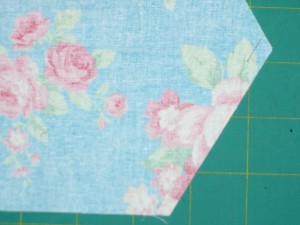
Draw a Light Line
Draw a Light Line

You won’t see it on the front if you are careful, so using one of the pens mentioned above is ok. You will be doing this at the 60 degree angle/where the corner of the patch is, if the patch had a corner.
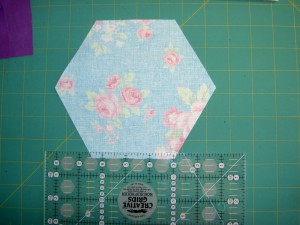
Draw Line on Next Side

When you mark the second side, you will have one X and 2 lines.
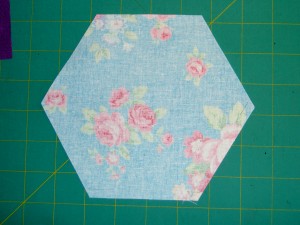
One X and 2 Lines
One X and 2 Lines

Do the same thing at each of the other angles.
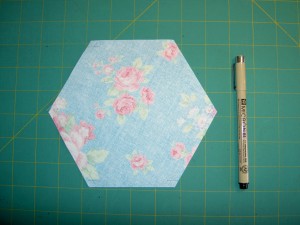
Hexagon Angles Marked

If you draw lines all the way around so you have little X-es at every angle of your hexagon. No groaning. I didn’t promise this would be a fast project, but it also doesn’t take that much time. If you are rolling your eyes, go buy the American Patchwork and Quilting magazine, because they have a method of doing this piecing in rows. Seems everyone is on the Hexagon bandwagon these days.

If the above process is just too horrendous for you to contemplate, consider the Perfect Piecer by Jinny Beyer.
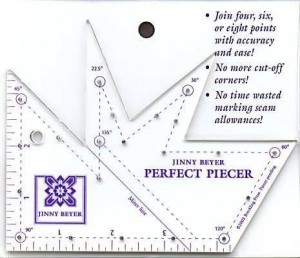
Perfect Piecer
Perfect Piecer

The 60 degree angle on the right side is perfect for making dots (not X-es) which you can use to sew between. Those circles are actual holes through which you can mark. I bought this to use for my Flowering Snowball and realized it would work with this project as well. I pushed the Sewline pencil lead way out of the pencil and was able to use it with this ruler.

Once you have done the marking, go to your sewing machine.

Do all the normal thread and needle checking stuff necessary for your machine.

Put your machine on the setting for stopping with the needle down. If you don’t have a needle down setting, adjust your sewing so you can stop with the needle down. This isn’t an absolute must, but really helps.

Position the needle right above the intersection of the x. Sew into the intersection of the X and sew all the way across using your quarter inch foot. STOP at the intersection of the second X. Do NOT sew into the seam allowance. Backstitch a couple of times.
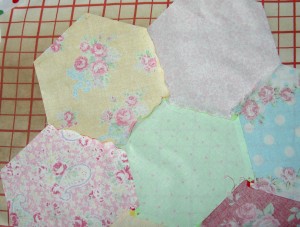
I backstitch, because there are no seams crossing one another.

Remedy for sewing into the seam allowance: rip out the number of stitches into the seam allowance. Don’t rip out the whole seam, just rip out the stitch or two that went over.

Take the piece out of the machine and reposition the next unsewn side.Same deal: Position the needle right above the intersection of the x. Sew into the intersection of the X and sew all the way across using your quarter inch foot. STOP at the intersection of the second X. Do NOT sew into the seam allowance. Backstitch a couple of times.

Hexagons Unpressed
Hexagons Unpressed

Take your piece over to the ironing board and lay it face down. Yes, I know everyone says to press right sides up. Not this time, sweetie. Face down. On the ironing board. You are going to make a swirl with the seams near each other. Look for how the other seams connected to the new ones you just sewed are pressed and press the new ones in the same direction.
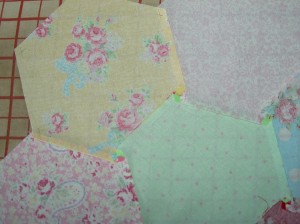
Hexagon Flower
Hexagon Flower

If you follow these directions, you will get a little flower at the intersections of the seams. That is why you don’t sew into the seam allowance. The quilt will lay flatter and the seams will be in order.

You see a slightly different method at the Blue Chair blog.

Various & Sundry 2011 #10

Mentions and Accolades

My post about the Maker Faire was a featured post on Creating the Hive. It is easy to deal with, because the posts I write here are automatically shared there. Yes, people may see some duplication, but I get a whole different audience there. Are you a member of Creating the Hive? I’ll send you an invite if you want one.

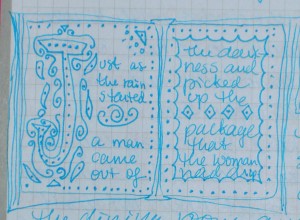
My Sketchbook from the Sketchbook Project has been digitized. You can see it at: http://www.arthousecoop.com/library/637. I was able to page through it, but let me know if you are able to do so. Regular readers will recognize the drawings. 😉

Sandy wrote a great review of the Quilter’s Academy v.1 book that I reviewed some weeks ago. She, kindly, built on the review I wrote, which I really appreciate.

Fabric Requirements?

I saw this tool for calculating fabric requirements. I have no idea if it works even though I tried it for hexagons. I just have no frame of reference for using the tool. What do you think?

Robert Kaufman also has a fabric calculator for the Android Market. I don’t have an Android, so I haven’t tried it. Perhaps Sandy will do a review?

Other Artists

Danny Gregory is a writer and journal artist. He did some podcast with artists who were featured in one of his books. I really liked those podcasts, because they talked about creative process, tools and journals. He put a recent blog post that really spoke to me. In it he says “We don’t just want a pat on the head; we want connection, reaction, insight, something that makes us see what we made in a newer light or on a deeper plain.” I try not to want this, but I have to admit that even if I don’t want approval, I do want that connection and a conversation to start. He also says “The true value of acknowledgment isn’t registered in the ego; it’s the opposite, a breaking down of the barriers between creator and audience so that we can unite in a shared appreciation of something that lends beauty and meaning to the grinding metronome of the day. We see a glimpse of the heavens together, a view that appeared to one of us first but is now a canopy over us all.
It’s even true of a joke, a shared laugh, the quick bark of recognition that our minds thought alike, we saw the other’s insight….” It seems to be all about connection.

I took a look at Leah Day site again when mom and I were talking about free motion quilting. She just bought a Flynn Frame so I showed her the site. What I didn’t realize is that Leah has great videos on her site. They are professional, but not slick. They come across as a friend genuinely wanting to share information with another friend. I was inspired.

Nina Johansson is a Swedish artist who does really great drawings. See. Be. Draw had an interview with her recently. Nina is the artist whose coffee cup drawing I adore.

Dan Rouse is a quiltmaker whose blog I found through the East Bay Modern Quilt Guild. He has a great post on pieced circles (just say yes!) on his WIP Wednesday post.

Exhibits and Such

Lisa Call has put up a Squidoo site about Quilt National 2011, which opened last week at the Dairy Barn.

The ‘and such’ part is SeamedUp. Quiltin’ Jenny posted a great interview with the Queen of Everything, Allison Rosen. Quiltin’ Jenny had a great series of posts earlier this year/ late last year (??) about cleaning out various rooms of her house. It was very inspiring and made it seem doable.

Here is a gallery of quilts from Quilts Inc. Who will Pinterest them?

Oops

I have been looking at spelling lately, especially the apostrophe problem, and shaking my head. I found a doosie in a Quilt Market Report today. Not just in the text, but as part of printed signage. I see this as a sign that the apostrophe will be gone before 10 years are over. Sigh.

I am not immune. A kind reader pointed out a date error on one of my recent posts. Thank you! Please feel free to kindly point out spelling errors and such. I want my blog to be the best it can be and am only human.

Attack of the Hexies


Attack of the Hexies

Originally uploaded by Pantsfreesia

This is reposted from Pam (Hip to Be A Square)’s Flickrstream with only slight revisions/additions:

Srsly guys. They are EVERYWHERE.

Sandy at Quilting for the Rest of Us, Jaye from Art Quilt Maker, and I are loosely doing a hexagon-along quilting type thing this this summer. Sandy and I will be sharing our process and pitfalls on our podcasts, while Jaye will share on her blog.
You can find Sandy all over the web. Click on the link and it will take you to her podcast, Flickrstream- just about everywhere.

You can find Jaye at https://artquiltmaker.com/blog/ (where you are now!) (for her blog) or on Flickr at http://www.flickr.com/photos/artquiltmaker

You can find me at www.hiptobeasquarepodcast.com for my blog & podcast.

Feel free to grab this button if you want to show some solidarity. The current size is 277×277 pixels, but it can go down to 180×180 without distortion.


Block-a-long #8: Short Columns

Frances asked me to start up the block-a-long again, so I am. She said there were some listeners who would like to do a community project.

Short Columns #8
Short Columns #8

Here is Short Columns #8, which I call Short Columns. You can find my original post about the project, which talks about the purpose and the point. I don’t have a quilt design planned, but you can certainly make your blocks into a quilt.

The last set of instructions for the last block were posted on October 11, 2010. You can go back and do the previous 7 blocks or you can start from here. Your choice! If you go back, the blocks won’t take you long at all.

BAMQG Meeting

I went to the Bay Area Modern Quilt Guild meeting yesterday. As usual, it was a great meeting. I forgot to take photos, so this is a wordy post not a photo post. (Foreshadowing of posts to come).

The business meeting part of the meeting was pretty long, but it included show and tell. I forgot to bring my show and tell (Frosted Stars), so I played the role of quilt holder.

People brought their Robert Kaufman Kona challenge quilts and they are awesome! Not everyone was done, but pieces that people showed were wonderful. Angela showed an awesome colorwash type of piece that I really want to get a photo of her piece so you can see it. Patti didn’t want to do a quilt, so she painted a canvas black, made yo-yos and glued them in color order to the canvas. It is really a fabulous piece.

I brought my friend, Carol. It was fun to have someone to chat with on the long drive to and fro. She started a quilt a long time ago. When I saw the pieces at her house, I encouraged her to come. I am pretty sure she had fun, since she picked out another quilt she wants to start on. 😉

Chris made more door prizes. She made a piece that was comprised of some blocks stretched over canvas. The person who won them was over the moon. I didn’t win anything, but she has figured out the dimensions for a composition book journal cover. To save me some time, I asked her to send me the dimensions. I’d like to make some journal covers for composition books to give as gifts as composition books are easier to find than the Miquelrius journals.

I have been wanting to recycle old fabric or clothes that are too worn to donate and Amanda came to the rescue. She is making cat beds and wants to use the trimmings from quiltmaking to stuff them. I couldn’t stop thinking about that the whole time I was trimming blocks today. I have to figure out a temporary storage solution to hold the stuff until the next BAMQG.

Julie told us about Market. It was her first time. She talked about how big Market was, meeting with fabric reps, seeing the famous quilters. She brought back leaflets of new fabrics as well as some actual unreleased fabrics. She brought Ruby! I was so glad to see it in person, because I found that I will not be buying the whole line as planned. The greys are really not my style. I might buy the swirly grey, will probably buy some of the aquas and the reds. We’ll have to see about the others. Julie called them warm greys, but, to me, they have too much beige. There are some true calicoes in the line as well, which makes me wonder if calicoes are coming back?

After the meeting is sewing time. I unsewed some blocks that I had sewed together by accident, but mostly chatted with people. Everyone else did, too. I think many of us were tired. It is a tired time of year with graduations and all.


Sketching #107

CPP Response #107: Illuminate

I managed to sketch a study of my response to Illuminate. I decided to show that instead of doing a ‘final’ based on a comment I got from a reader who said she was hoping to get brave enough to join the project.

This is what I do when I work on my responses. I make a mess first and then carefully create the final in the sketchbook with all of the other responses. This one, if I didn’t show it in this form, would probably not make it to the final form. It was in my head, but it isn’t great. I needed to look up some doodles in another journal, because I was out of ideas. I don’t know which journal, so I would have to hunt. I don’t want to spend the time and really don’t have the inclination. That means that the photo above is the final.

You don’t have to do a masterpiece. Just do something.

CPP Nearing End of Vacation

Remember I said that the CPP will continue? And that I am going to offer some creativity prizes? Anyone who posts a response to any of the prompts between now and the post for prompt #111 will be entered for a prize. Yes, I know it is end of school and vacation time. If you do a response to any prompt (there are 110), you will get into the drawing. Anyone who gets a friend to do a response will get two entries.

These will not be quilt related prizes, but creativity related prizes.

Don’t wait until the last minute. Do your response NOW and post the link in the appropriate comments section.

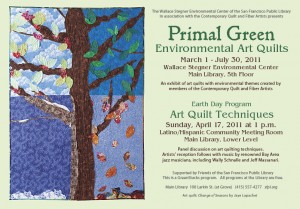
Primal Green Art Quilts on Display

Primal Green Postcard

Did you go and see the show? Primal Green is a show of environmental art quilts at the Main Branch of the San Francisco Public Library. AND! it is still on.

The Wallace Stegner Environmental Center is one of the special collections at the Main Branch and, after a year of work with the Library, CQFA has over 20 quilts and fiber art on display. The quilts all have an environmental theme. The show will hang until July 31 and be available to viewers during the Library’s normal open hours. Hope you can stop by and see it. Check the library’s website for hours. Please sign the guestbook and let us know you saw the show.

Primal Green, the art quilt exhibition at the San Francisco Public Library, has some information on the Green Stacks portion of the SFPL website. Hope you can see the show.

Hexagons Follow-up

Recently, I talked about my adventures with hexagons. The adventures continue and a few people are joining in, something I didn’t know, or think, would happen. There seems to be something about hexagons that intrigues people.

Small Hexagon Test
Small Hexagon Test

The above photo shows what I did to test out my hexagon theories.

Much larger hexagon test piece

The test kind of grew.

Hexagon-not a test
Hexagon-not a test

Now I have to admit that this hexagon piece is no longer a test. This will be a real quilt at some point. At this point, I am just sewing hexagons to each other as a kind of treat for myself in between other ‘must finish’ projects. The hexagon piece really helped me get through the pillows. The colors are cheerful and fun. I am trying to keep it even on all sides, but the edges keep creeping out into long lines of hexagons. I don’t know how big it will be – perhaps as big as the amount of fabric I have?

It is good to look at the piece in a photo format, because it helps me see where I need to put the next colors.

Clearview Ruler
Clearview Ruler

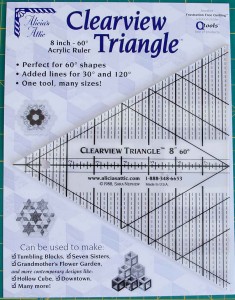
The ruler I used is a Clearview Ruler from Alicia’s Attic. They are a bit hard to find, but you can find them at the Granary. I am pretty sure that if you call them they will send you one. Why do you need this one? Because you need the tip. Any 60 degree ruler will work as long as the tip is not blunted.

Pyramid Ruler
Pyramid Ruler

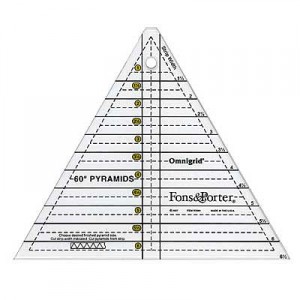
I started out using my beloved Pyramid ruler from Fons & Porter and my hexagons came out kind of squashed looking. I love this ruler, but it doesn’t work for this quick cutting hexagon method. You MUST have the tip to use the quick cutting method described in the video by Kaye Wood, which is on Little Bluebell’s blog.

You can, of course, use a hexagon ruler. You don’t need to make hexagons using the quick cutting method described by Kaye Wood.

Hexagon Ruler
Hexagon Ruler

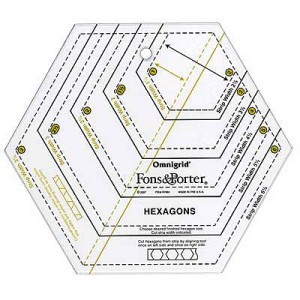
I bought the Fons & Porter hexagon ruler for the Spin Wheels project. I didn’t start out using it for the hexagon project, so I am not using it for that project. If you plan to do a scrappy hexagon, this ruler (or one like it) is the way to go. The Kaye Wood quick hexagon cutting method uses strips and if you aren’t using strips, there is no reason to use that method. I have an Easy Hexagon ruler by Sharon Hultgren, but it is too big for me and  I am getting rid of it. Check Quilt Trader’s Newsletter.

I have 150 or so hexagons cut. I am sure I could figure out how big that would be, but where would be the fun in that? I just want to make sure it doesn’t get too big. 😉

Flying Geese Tutorial

This is a thinking girl’s tutorial to making flying geese.Knowing how to make Flying Geese allows you to make Sawtooth Star blocks, Dutchman’s Puzzle blocks, borders and other parts needed for your quilts.

You are going to have to use the technique with your own measurements to make the geese that fit your project. There are many other ways to make flying geese.

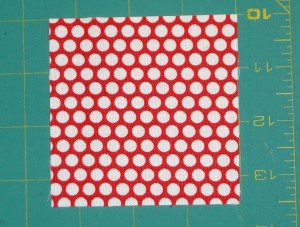
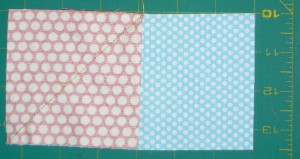
Cut 2 Squares for each Flying Geese Element

This fabric will be used for the ‘wings’.

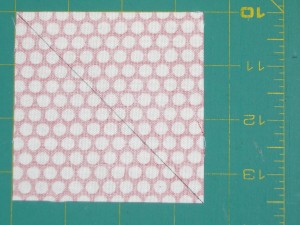
Draw diagonal line from corner to corner

Turn the squares over and draw a diagonal line from corner to corner. You will need to do this on all of the squares for your Flying Geese.

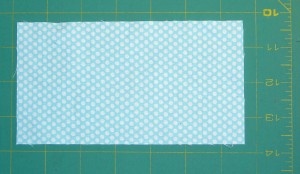
Cut background
Cut background

Cut background, or goose, fabric.

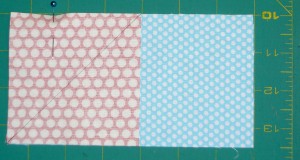
Lay wing 1 on goose
Lay wing 1 on goose

Lay first square that will be a wing on the goose (background) fabric and pin. Make sure the pin is out of the way. You will be sewing on that drawn line, so you will need to pin far enough away so the pin doesn’t interfere with the operation of the machine.

Sew along line
Sew along line

Sew along line and trim threads. I use a foot that has an arrow on it. I can line that arrow up with the drawn line and sew away.

Trim
Trim

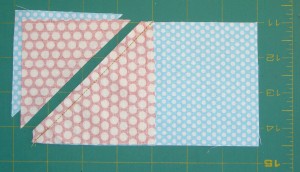
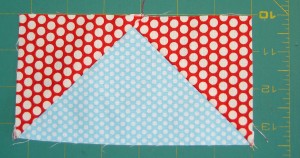
Trim 1/4″ through the wing and the goose away from the sewn line as shown above. Press the wing so the front of the wing fabric is showing.

Lay 2d square on goose.

Place the second wing on the other side of the background fabric.

Trim 2d sewn wing
Trim 2d sewn wing
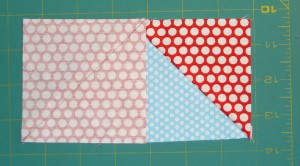
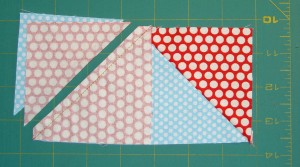
Sew and trim second wing

Sew and trim as above. Sew so that you cross the previous sewing line.

Press back 2d wing
Press back 2d wing

Press back the 2d wing and, voila’, you have a Flying Geese element.

You need four of these to make a Sawtooth Star or eight of them to make a Dutchman’s Puzzle.


Maker Faire Inspiration


FabMo.org booth
FabMo.org booth

A very kind person gave us tickets to the Maker Faire. It is something that I have heard lots of good things about, but never visited. Friend Julie loves it. Maureen and Amy from the Creative Mom podcast also rave about it. We finally got a chance to go and I have to say that the best thing about it was being inspired. I saw lots of this and that which had a nice line or good texture or something else that struck my imagination. It made it worth it to give up a day of sewing for that inspiration.

One of the things I really liked and did not photograph was the Steampunk costumes and fantastical vehicles. The ingenuity and creativity was amazing and oozing all over the place.

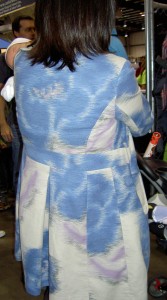
Back of Coat
Back of Coat

I don’t know this woman. I have no idea if she knew I was photographing the back of her coat. I really liked the back of her coat. It looked very tailored, yet easy to wear.

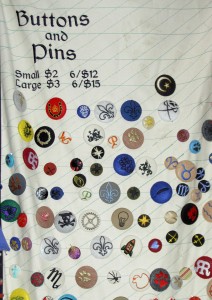
Embroidered Buttons
Embroidered Buttons

I have an embroidery module on my sewing machine. Lately I keep hearing about or needing to deal with buttons. This display gave me the idea of making my own buttons from embroidered designs I can do using my embroidery module. Cool, eh?

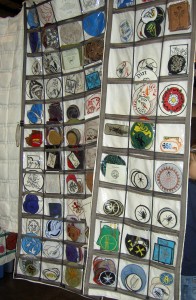
Bathroom Quilt Idea
Bathroom Quilt Idea

Every year for the past few years, I have talked about the quilt I want to make and put in one or both of my bathrooms. I saw this display and it is the same idea. I probably would make mine 4×5 rather than 3 x 12 or whatever it was. I like the idea of slipping things in and taking them out.

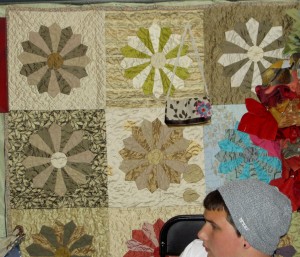
FabMo.org Dresden Plate

I don’t know anything about the above Dresden Plate,but the fact that it is in the FabMo booth makes me think the maker used FabMo fabrics. Isn’t it GREAT?

Inspiration Foot
Inspiration Foot

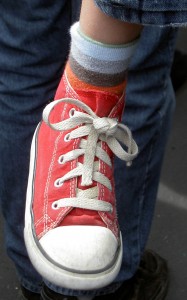
In a sea of black, denim and asphalt was this kid wearing red Chuck Taylors. I couldn’t stop looking at this foot dangling off of the dad who held him for the entire 20 minutes of the Mentos/Coke Zero show. He didn’t wiggle or talk really, his dad didn’t complain about holding him and the whole time his foot dangled down waiting for me to photograph it. The socks are an added bonus. This is definitely a photo I want to draw.


Three Quilts Return

3 Quilts
3 Quilts

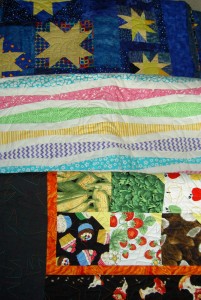
These quilts returned to me by mail last week. I just couldn’t open them, because I haven’t finished the hand stitching on the others that I got back last month. Too much piecing and not enough TV watching, I guess. I need to finish the binding on the Frosted Stars and decide if it is getting a sleeve. I may give it away, thus it wouldn’t necessarily need a sleeve, but I have nobody in mind at the moment. We’ll see.

I also need to make and put the sleeve on the FOTY 2010. I am not sure if I will use the Ta Dot in Stone (may not have enough) to match the binding or some blues like the back. I think either would be fine, but am agonizing a bit.Making the sleeve should be a task for this weekend so at least I can have the hand stitching available if I have time. That baby has to be ready by July 11.

Anyway, the three quilts (above) are back.

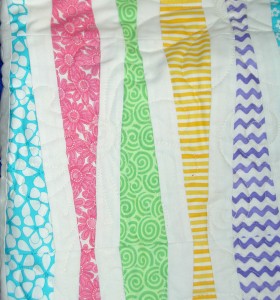
Zig Zaggy detail
Zig Zaggy detail

Frankly, I never thought the Zig Zaggy would get done. I really like the freshness of the colors and the piecing was just challenging enough not to be boring. That was fun. It is, however, a weird shape , which doesn’t exactly encourage me to work on it, but there it is, binding on and ready to have the binding sewn down. Colleen is a master, though, and it is due to her that the quilt is done. I didn’t expect this quilt back until the Fall. She did a great job on the quilting and really took the design to the next level.

Her quilting reminds me that the quilting aspect of making a quilt is really a design element. Kerr and Ringle discuss this in Quilts Made Modern, which I read and took notes on, but haven’t finished writing the review. In a quilt like the Zig Zaggy quilt, this concept really stands out.

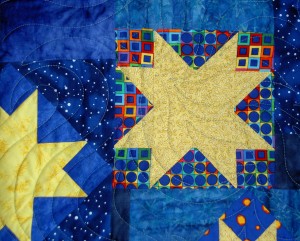
SfSB Quilted, detail

Yes, that is the Stars for San Bruno #1 quilt. All of you who contributed should be proud! In the detail, you can see the quilting. It is a kind of wind blowing pattern. I asked her to do something that would last for a quilt that would be used by a non-quilter household. I don’t usually go for all over patterns, but this one looks good for the style of quilt, I think. I am really pleased that I am keeping up my end of the bargain. I am a little bit excited about giving the quilt to DH’s cousin. I know getting something out of it isn’t the point, but I can’t help being a little excited. I’ll dial it down a bit until I get the binding on. Of course, SfSB #2 is calling my name more and more insistently. 😉

JDJ Quilt
JDJ Quilt

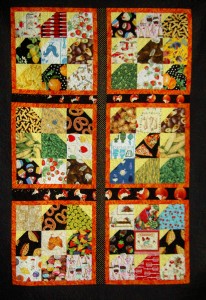
Finally, the bottom quilt is a food quilt that my mom made for my cousin. I may never see this quilt again, so here is a full photo of it minus the border.

Mom made this quilt for my cousin (her nephew) after the first quilt she made for him mysteriously disappeared. This is about the 3rd incarnation of this quilt as she kept rearranging and remaking blocks and pieces. I am sure she will write about it on her blog, so look out for that post.

CPP Vacation Nearing Its End + Prizes

The CPP is still on vacation, but I have decided to continue. I have some work stuff going on so it will be a month or so before I get back into full on CPP mode.

I am going to offer some creativity prizes to anyone who posts a response to any of the prompts between now and the post for prompt #111. Yes, I know it is end of school and vacation time. If you do a response to any prompt (there are 110), you will get into the drawing. Anyone who gets a friend to do a response will get two entries.

I am shooting for beginning of July, but I probably won’t warn you, so don’t wait until the last minute. Do your response NOW and post the link in the appropriate comments section.

See previous words and information on the Creative Prompts Inspiration Page. Do you have any ideas on changes or improvements I should make to the CPP?

Ready? Set? Go!