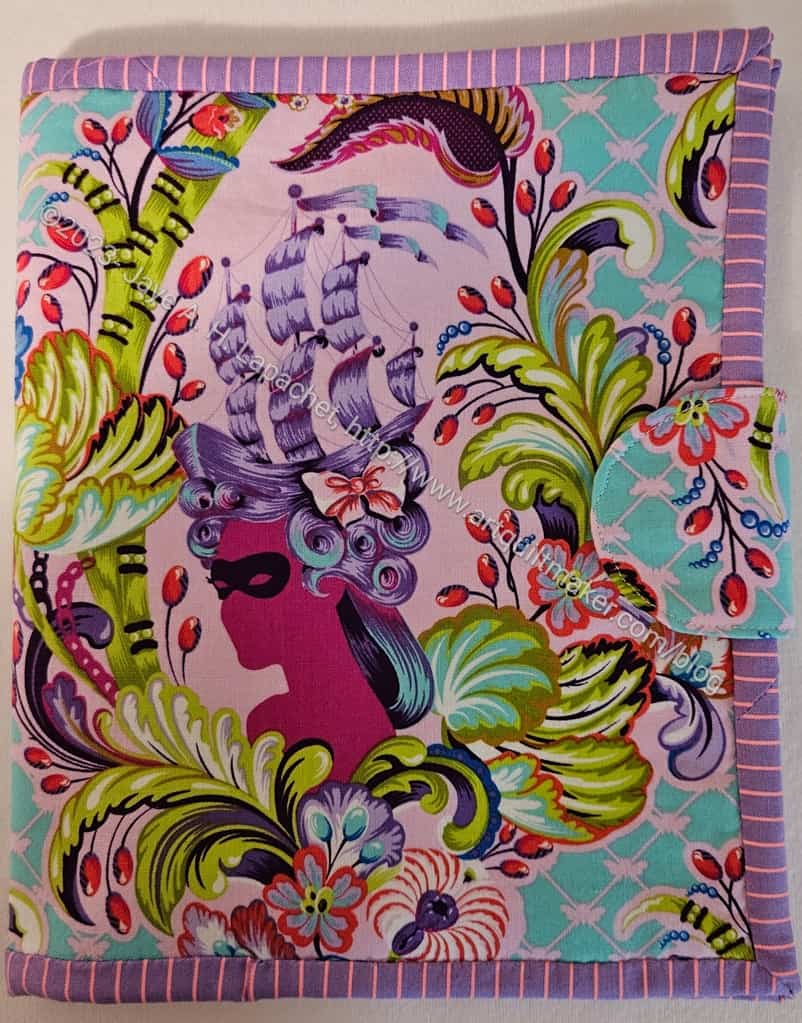
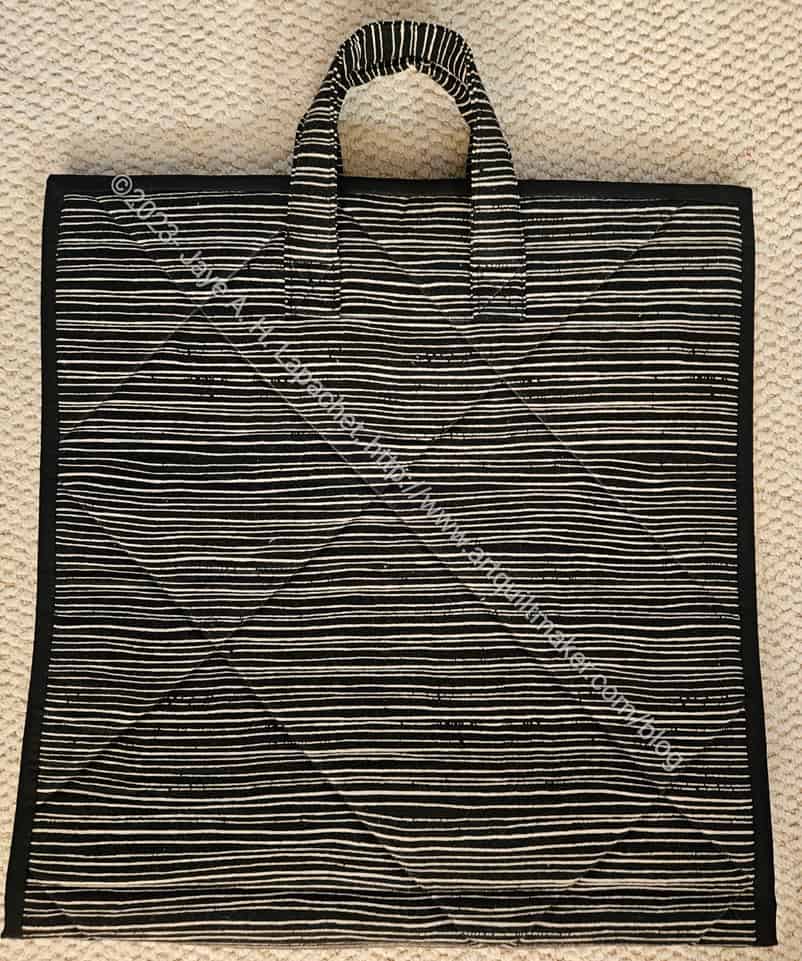
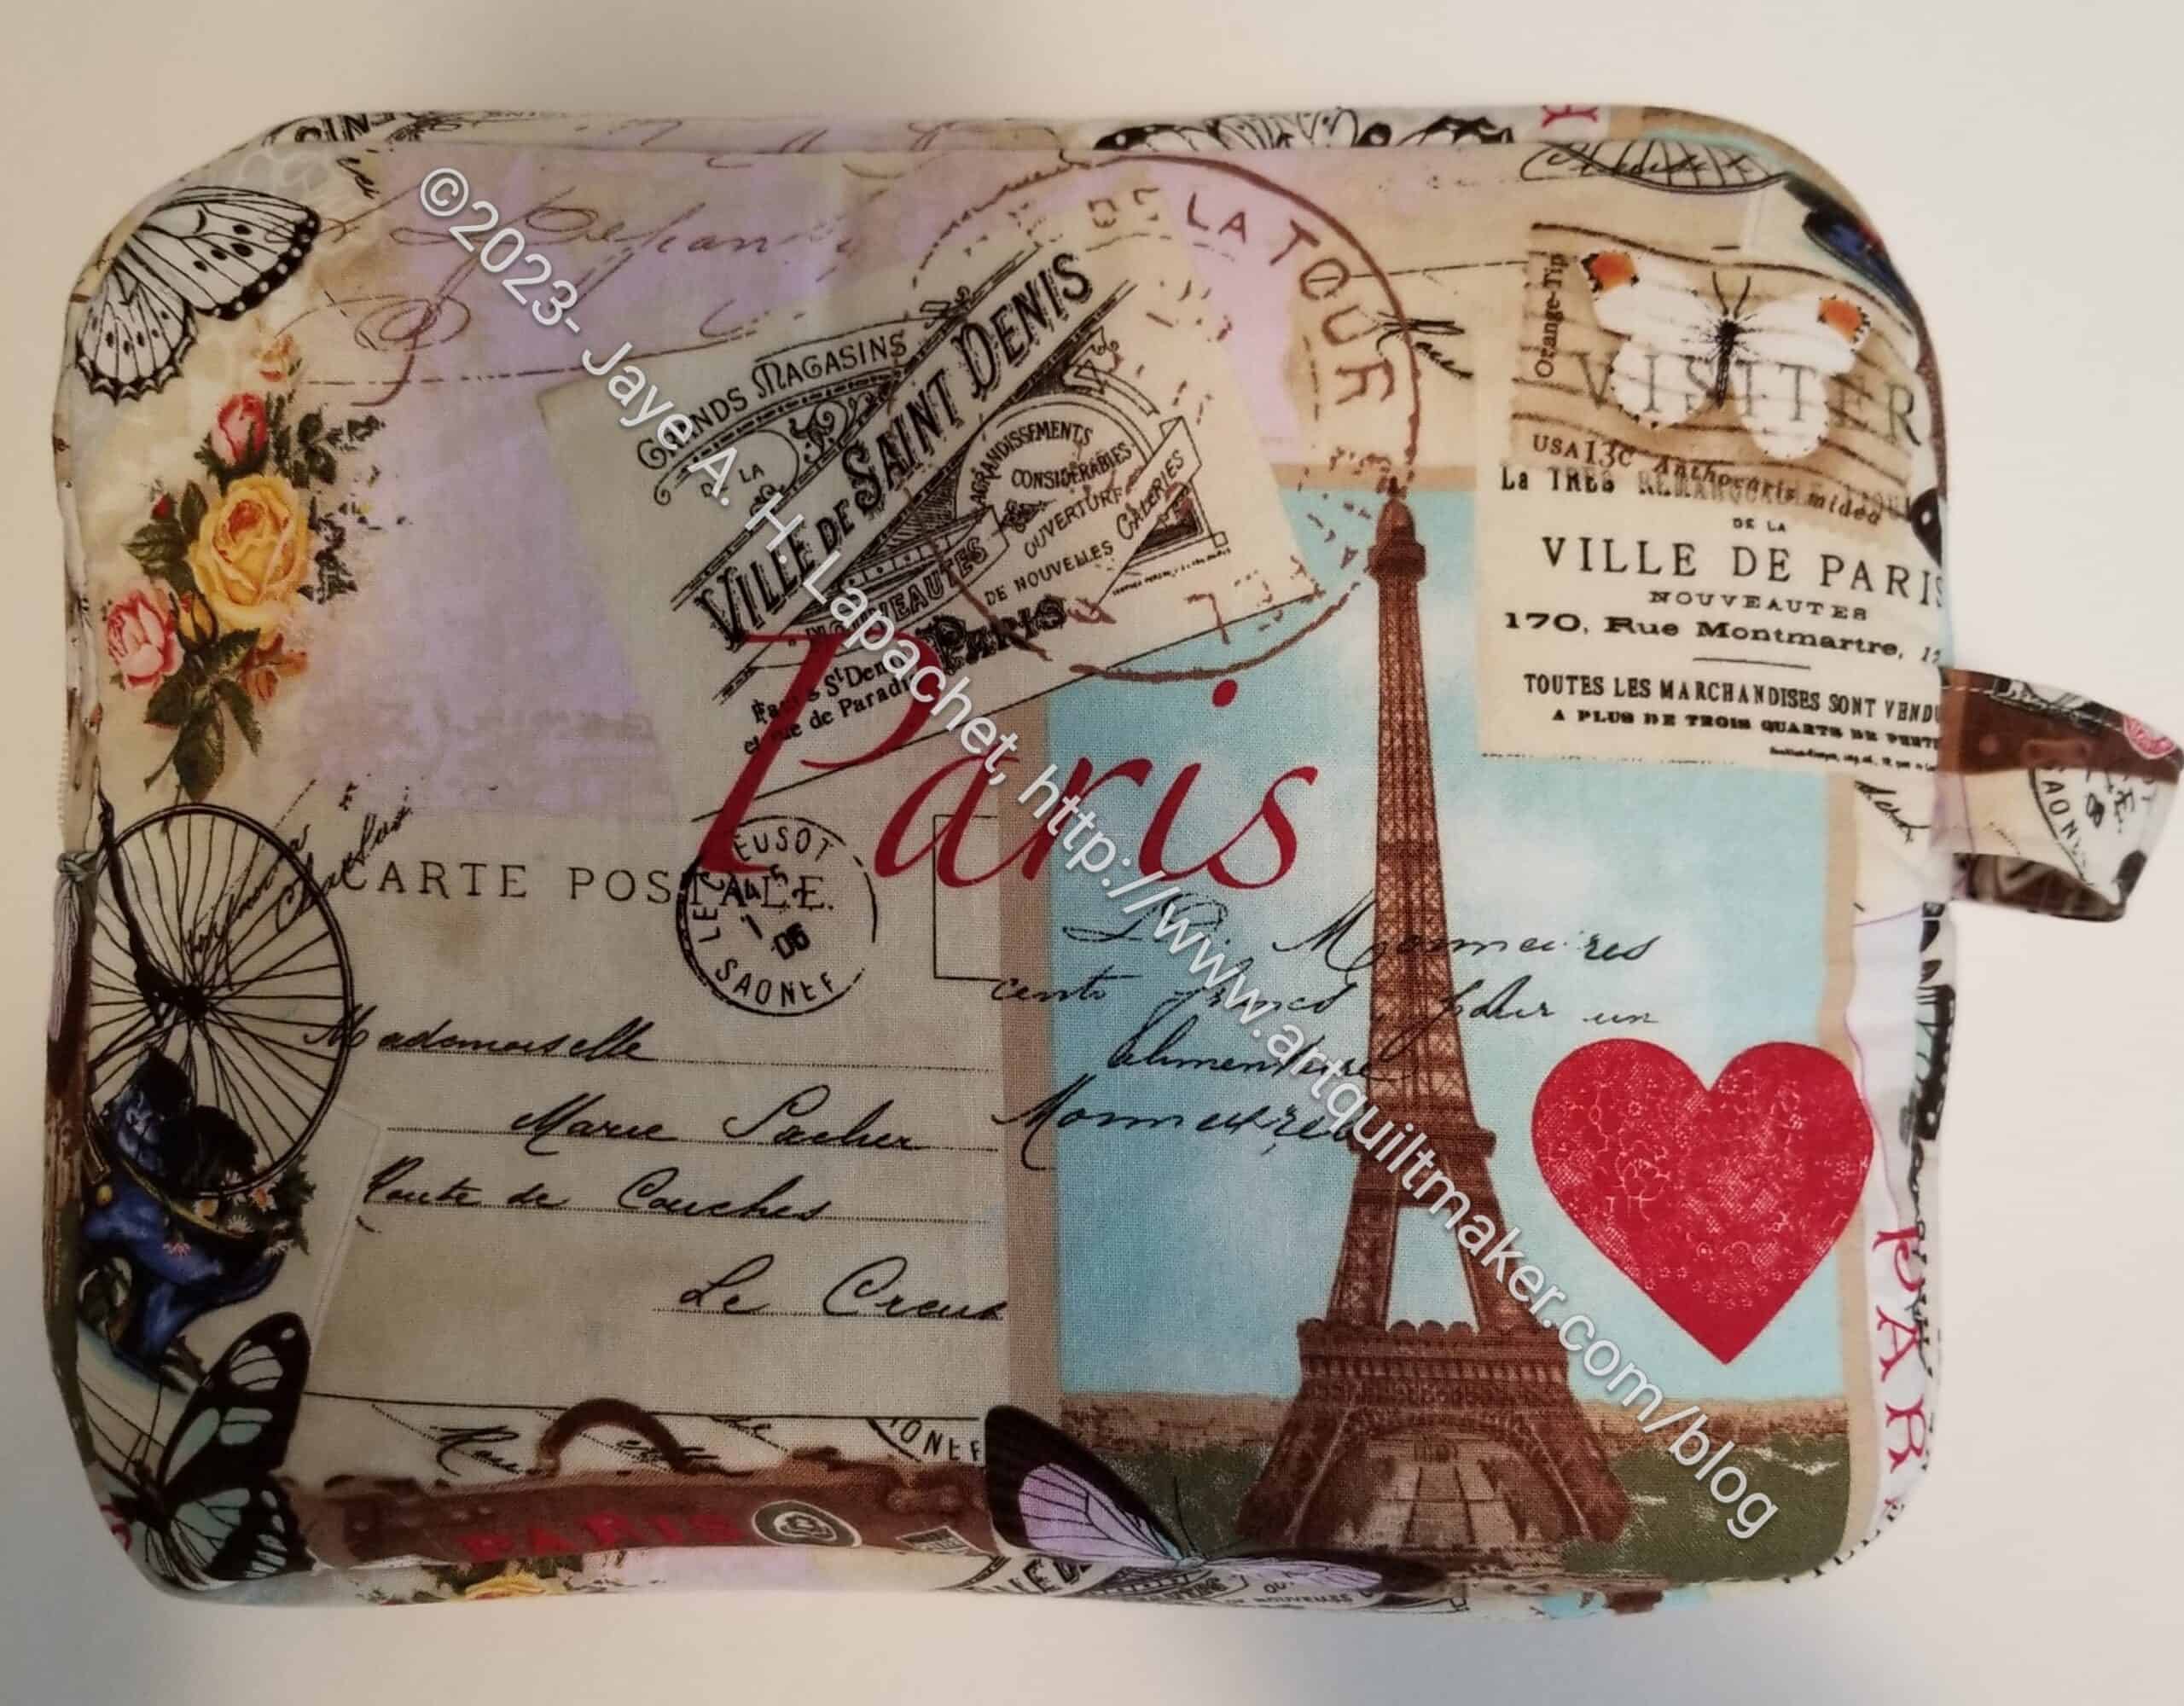
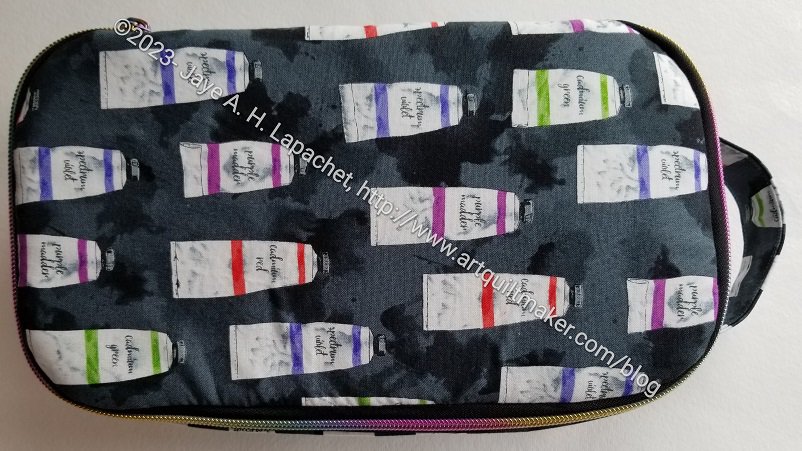
I finally finished the Tula 2-in-1-Case. The binding gave me fits. I am pleased, however, that it came out so well. Choosing a Tula Tiny Stripe for the binding made coordination easy.
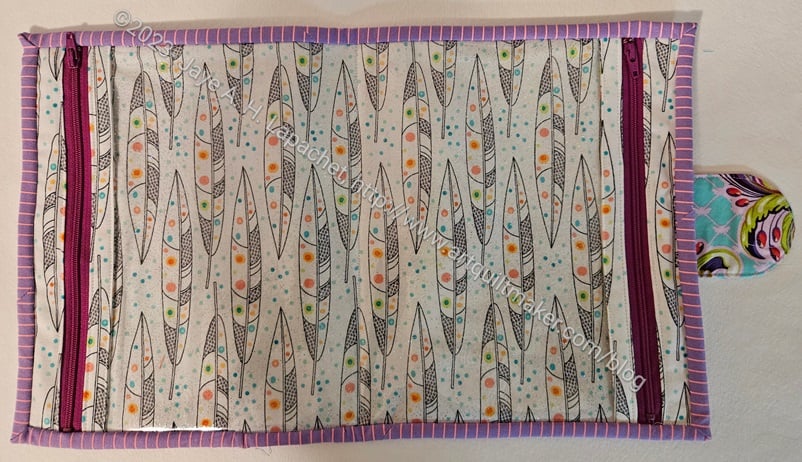
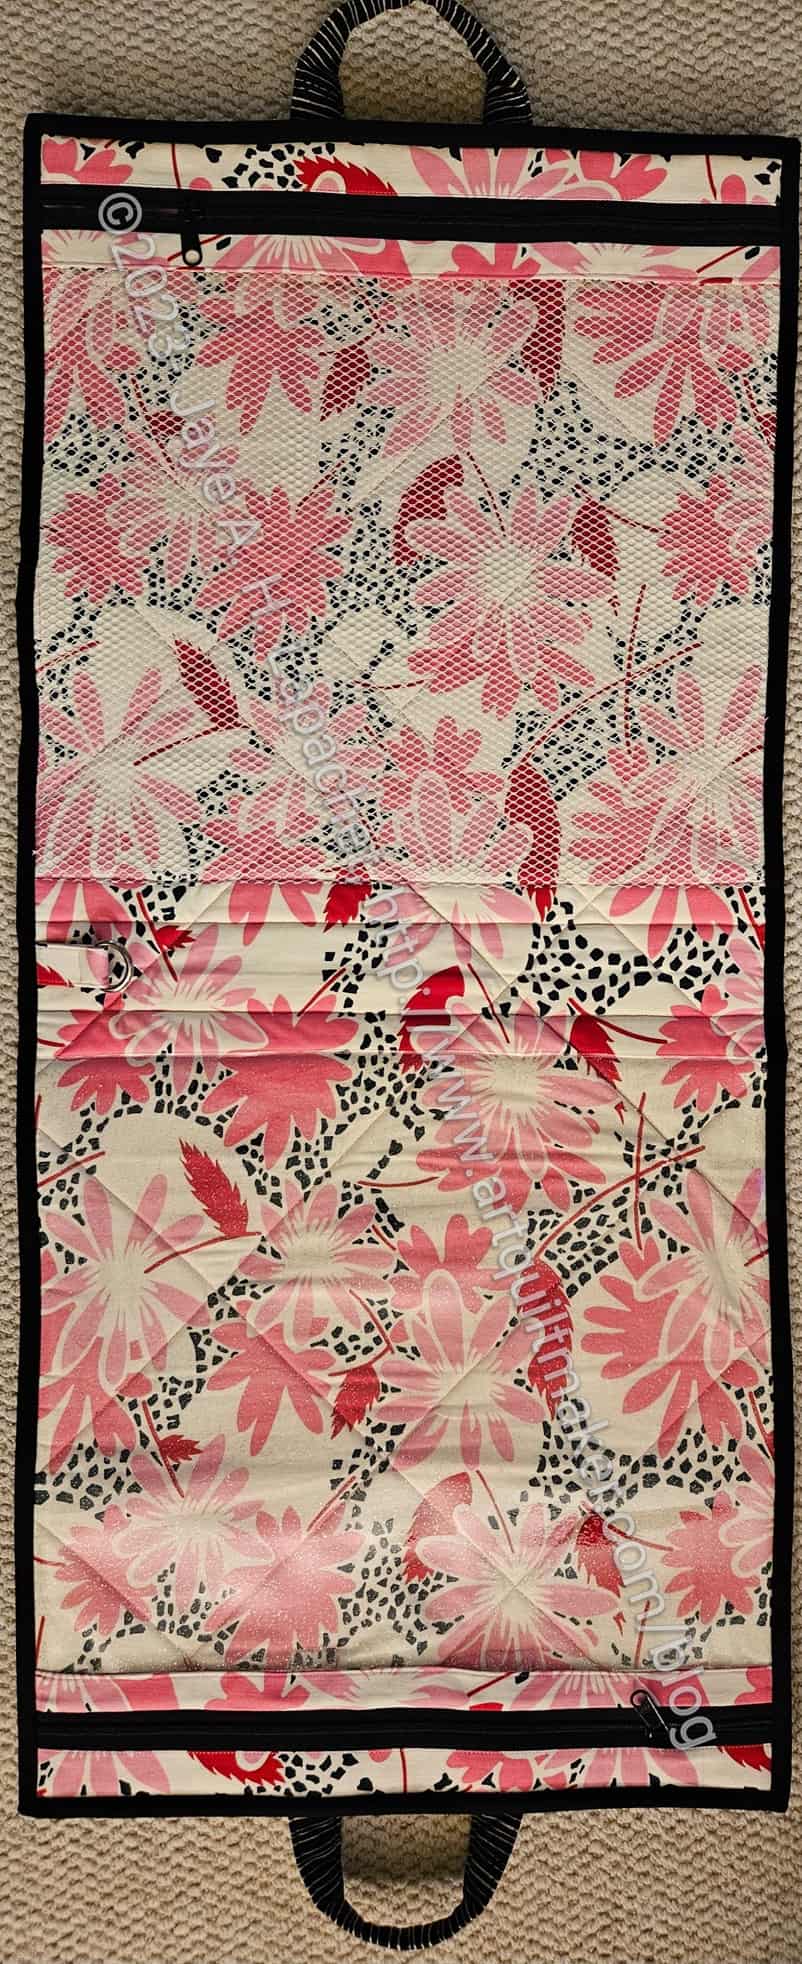
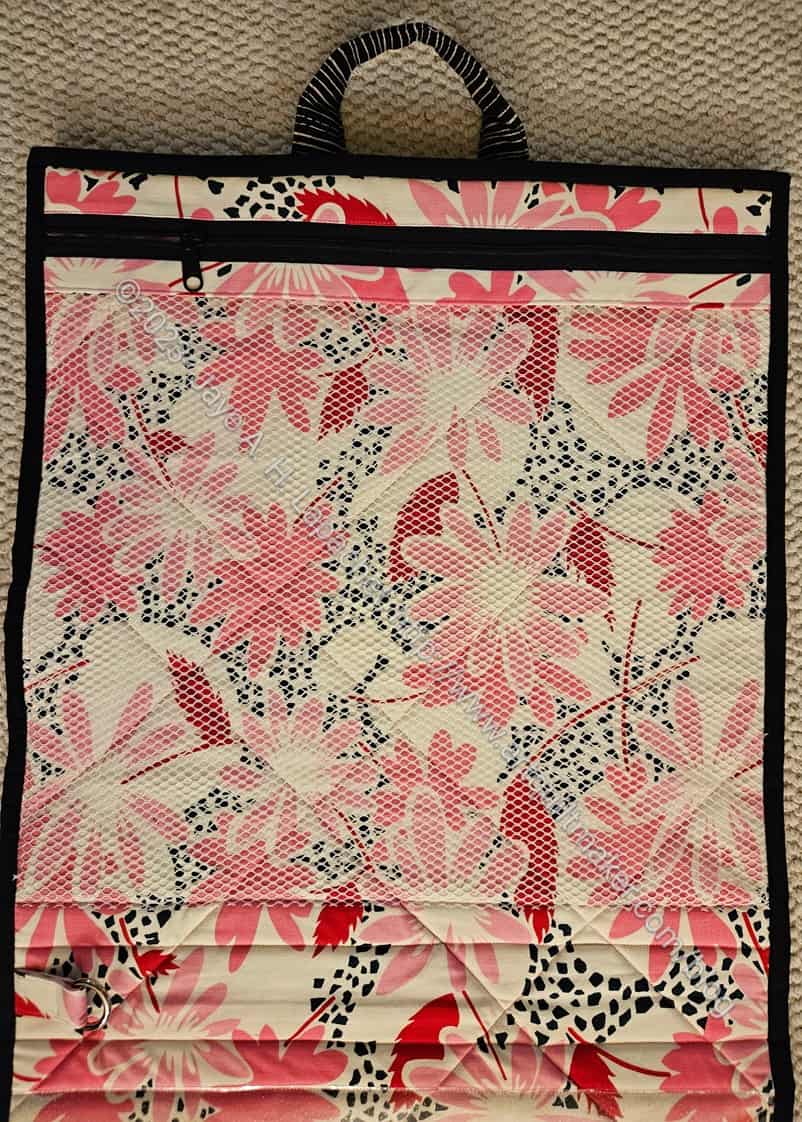
The inside is an old feather print I had. I like it and it is light colored so the recipient will be able to see what’s inside. I suppose, however that is not as important with a bag that opens flat?
Tula 2-in-1 Case – openTula 2-in-1 Case -back
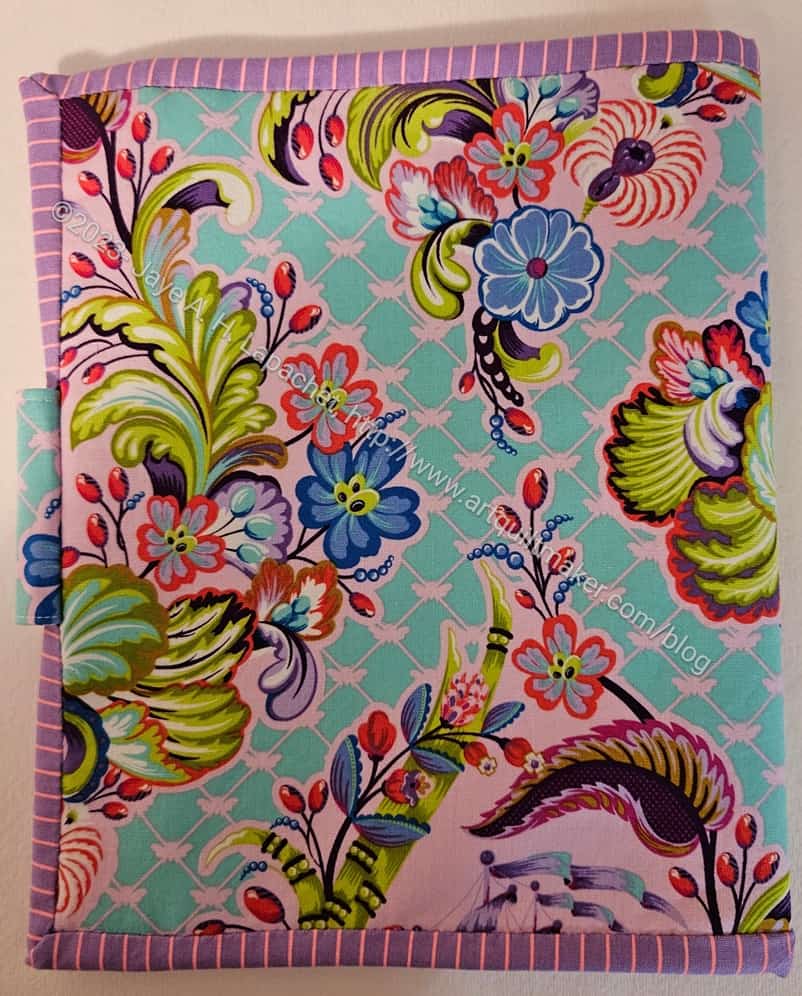
The back is fairly normal. It is just the back of a bag. There is an interesting bit of symmetry because of the way I cut the exterior panel so that the lady would be centered on the front.
I don’t yet know who the recipient will be. Stay tuned!
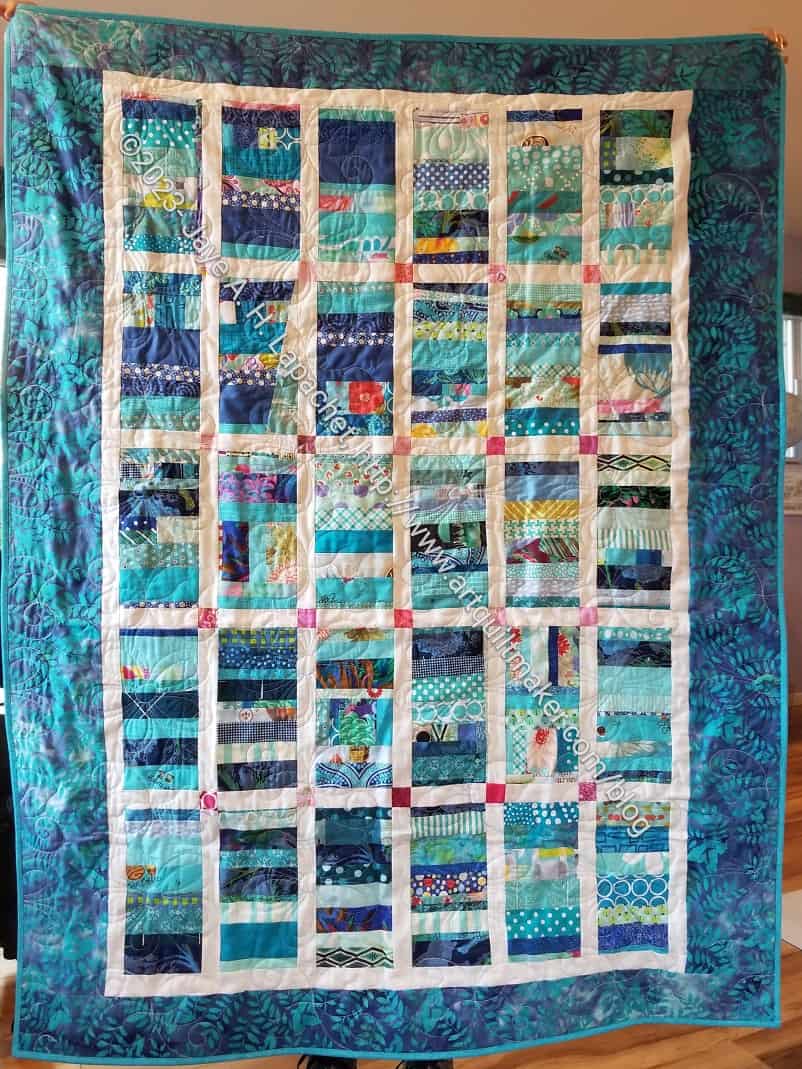
I finished the Ultimate Project Bag! After 5 years, I finished it. I am annoyed, because this was not a difficult project. It may have been more difficult 5 years ago, but my skills have improved tremendously since then. I was also swayed by the other members of the club saying that it was such a difficult project.
I am pretty happy, not only to have it finished, but also with how it came out. I have some ideas for changes, (of course!), if I make this again. I should make it again just to remind myself that it isn’t a very difficult project. It could be very useful for toting around bag projects in process!
This is the exterior and you can see the quilting pretty well. I talked about it a little in the in process post I wrote a few weeks ago.
The exterior is like an Essex Linen, but by Figo. It feels like a very lightweight canvas, though drapey. It looks like the photo above on both sides when closed.
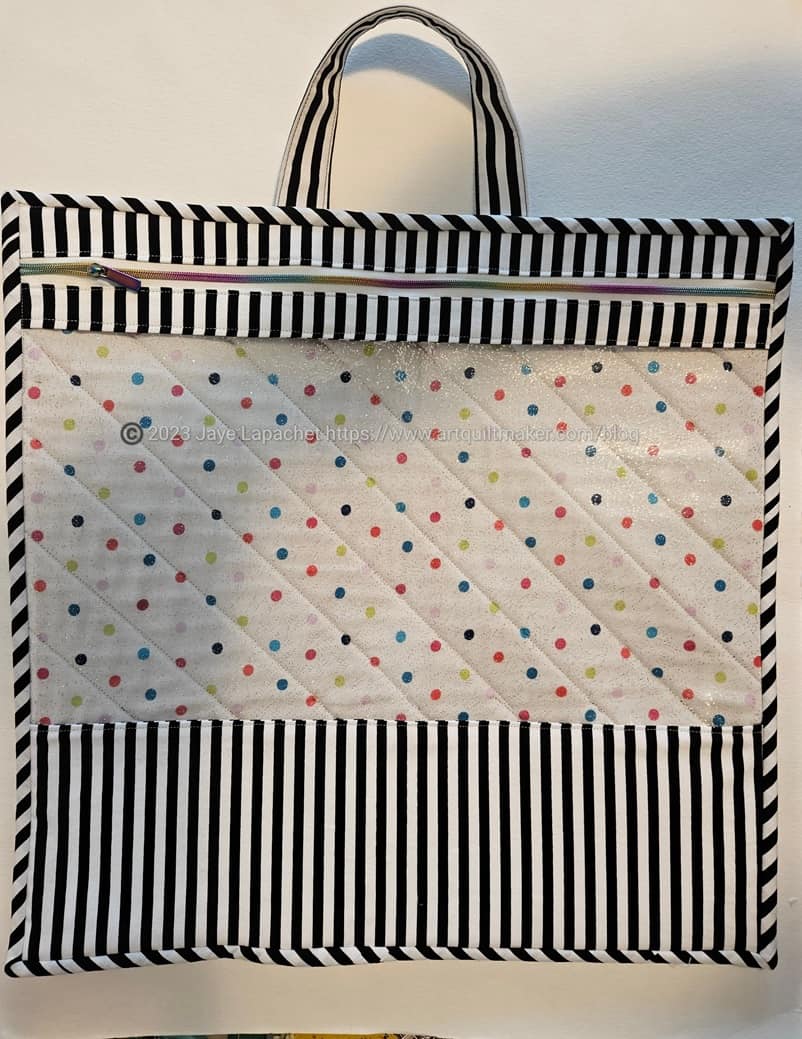
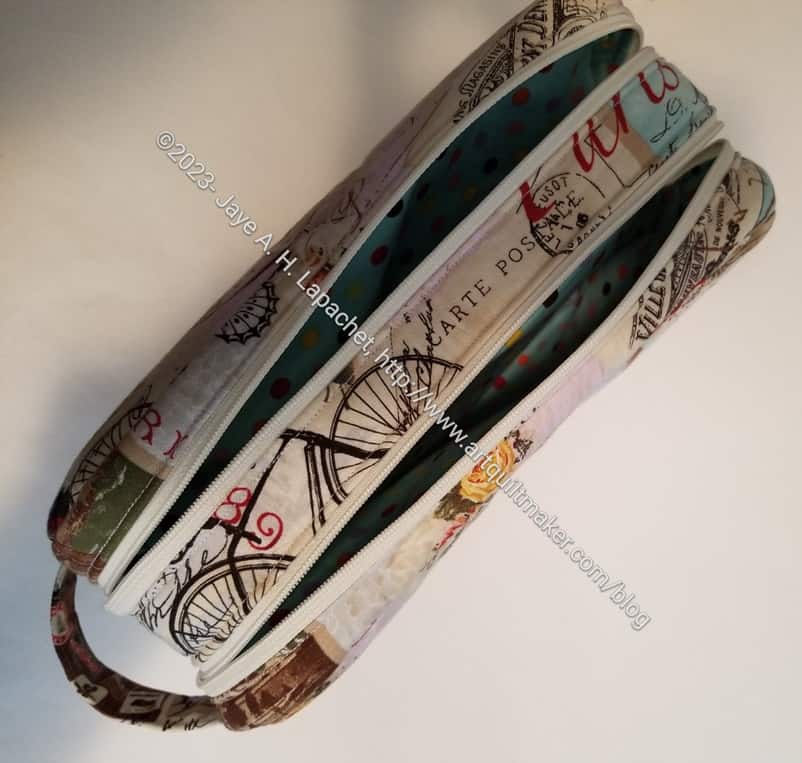
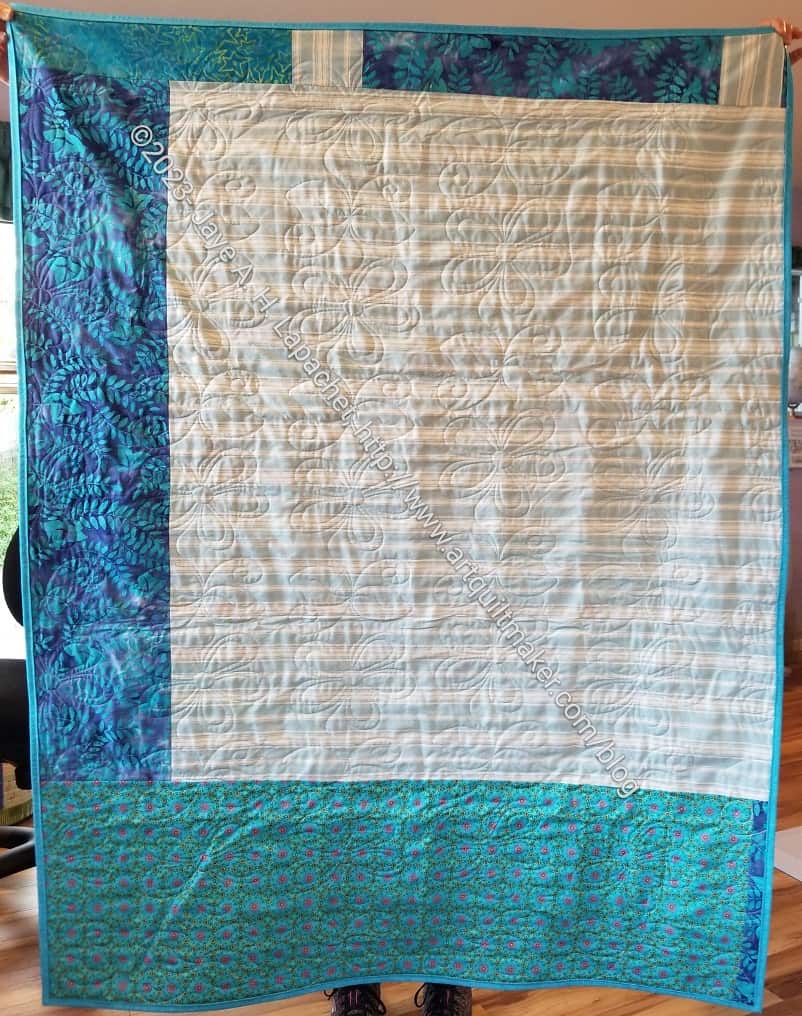
Ultimate Project Bag – interior
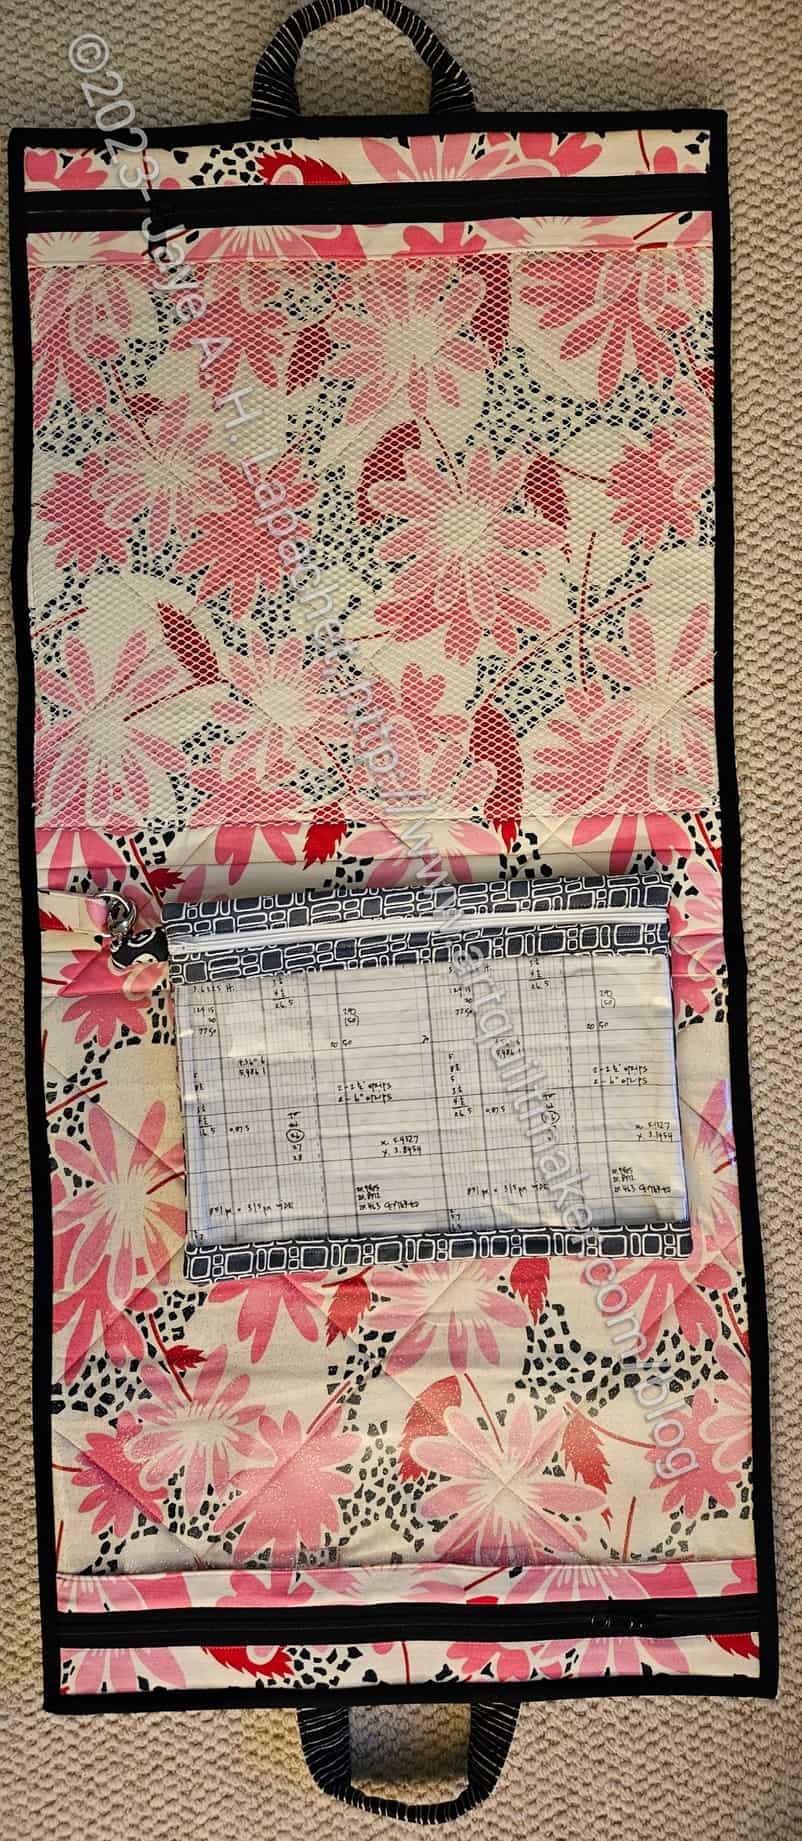
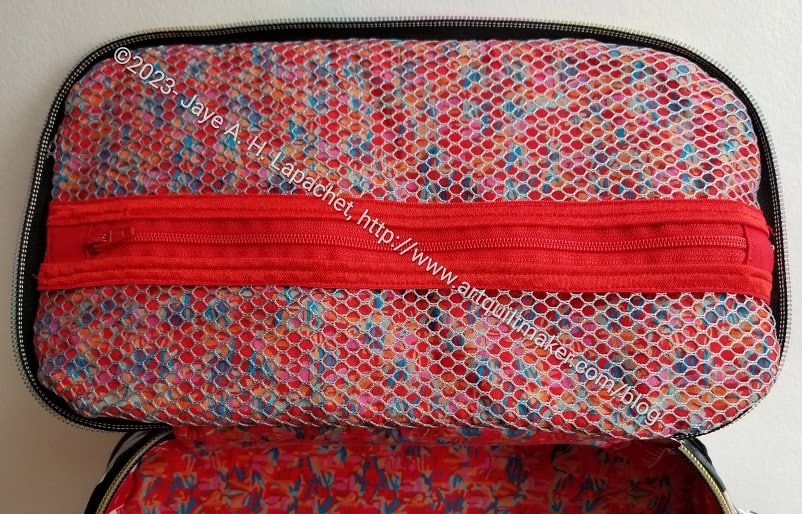
When opened it is about 39 inches long. I don’t know why 39 inches and not 40. ~\/0\/~ On one half of the bag (top in the photo, right) is a zippered mesh pocket.
In the middle is a tab with a D-ring.
On the other half in a vinyl pocket where I used glitter vinyl (because I love it). The vinyl pocket also has a zipper.
The pockets are quite large – around 16×16 inches, which definitely holds blocks.
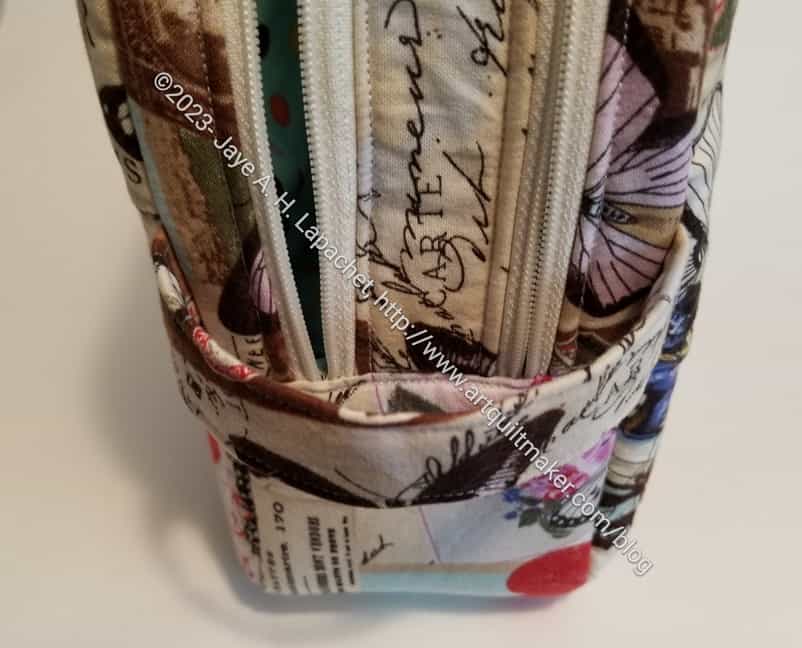
Ultimate Project Bag – interior – with Road Trip bag
As I mentioned, this was part of the Crafty Gemini Organizer Club and one of the first projects we made was the Road Trip bag. The Road Trip bag was designed, from the beginning, to be attached to this Ultimate Project Bag. It is a good idea, because I often need a place to store bag hardware I have collected as I am assembling supplies to make a bag. I put a Lobster Clip on the Road Trip bag and a D-ring in the Ultimate Project Bag, because I prefer to be able to clip the smaller bag to larger bags. Crafty Gemini designed the patterns to have the D-ring on the Road Trip bag and a Lobster Clip on the Ultimate Project Bag. It is really preference. Neither is right or wrong. I try to remember to put a leash/tab and a D-ring on my larger bags just in case I want to clip something to it.
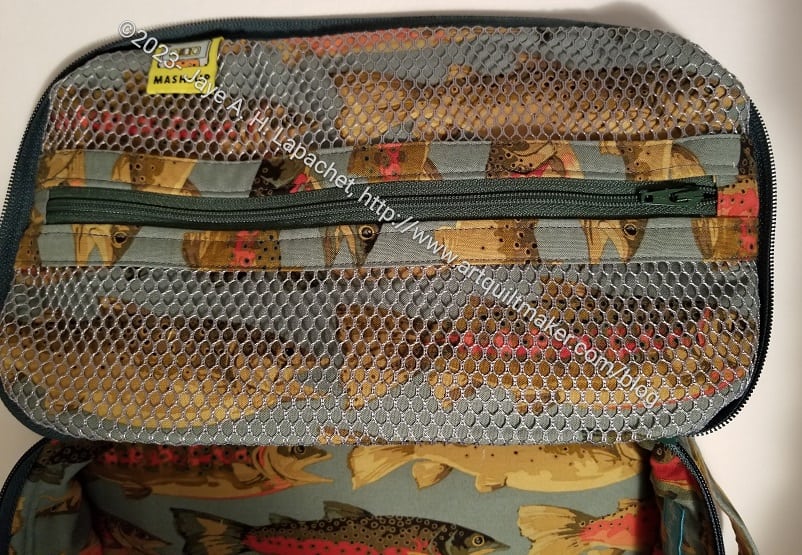
Ultimate Project Bag: detail-mesh pocket
I am not happy with the position of the clip for the Road Trip bag. As I carry the Ultimate Project Bag, the Road Trip Bag falls out and drags on the floor. I am thinking of adding a separate tab and D-ring to the top side, under the zipper, of the mesh pocket. If I do that the Road Trip Bag will still jut out a little bit, but at least it won’t drag on the floor.
Taking the binding off the mesh pocket, will be less destructive than taking it off the vinyl side.
I am sure you can imagine that I was super careful when sewing this project back together. After all the ripping I had to do, I hope I learned my lesson.
It didn’t take me very long to sew the top together, but it would have taken me less time if I had paid better attention the first time.
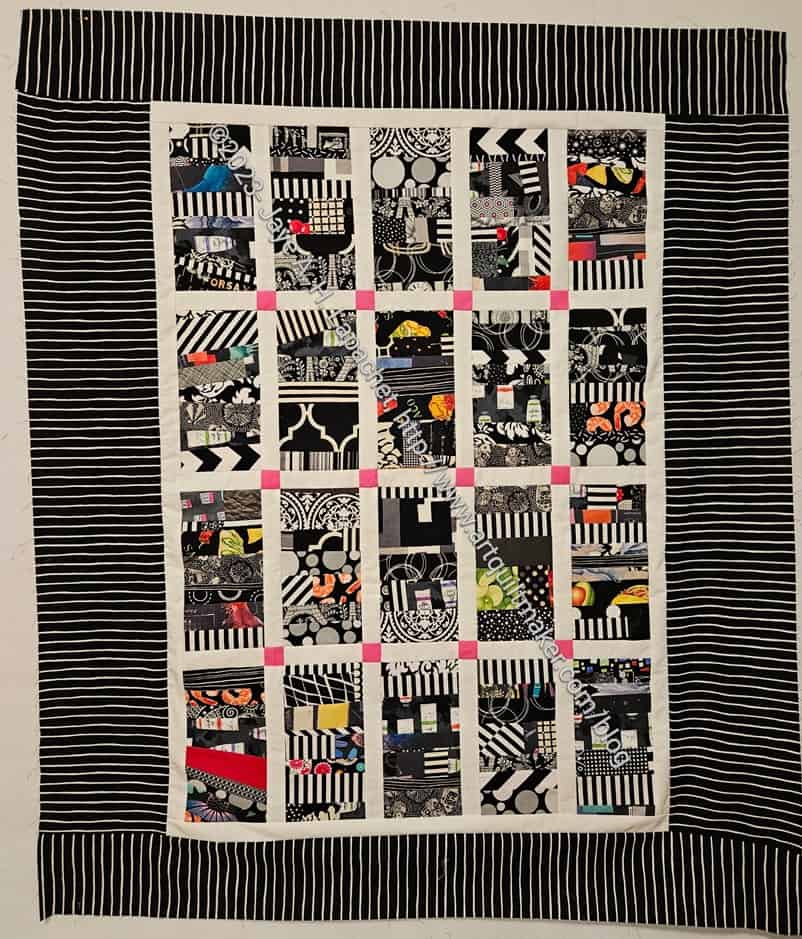
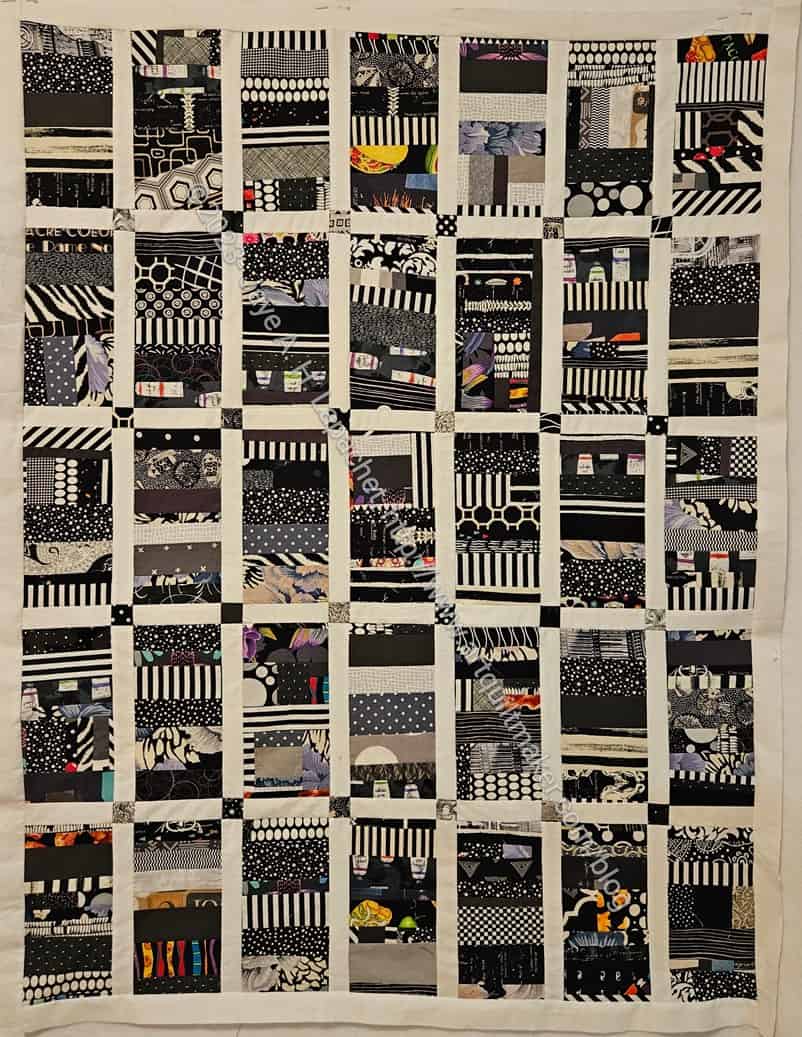
Along with the Orange Improv version from the other day, seeing this quilt finished reminds me of how great this process is. It makes me want to make more
The other color versions that I have made over time are really awesome as well and add to the idea of making more.
Right now my black, grey and brown drawer is overflowing. I have made a few black strip blocks, the first step in my process, but not enough to clear out my drawer. I talked about it with guild members the other day about cheerful quilts. Black is not always a cheerful quilt color like pink or orange. Someone suggested doing a two color version. I don’t think I am ready to branch out from the monochromatic parameters of the project so far.
I was able to finish my Project Bag while I listened to a presentation at work the other day. You might think I was cheating on work, but I find that if I do some handwork, I can pay better attention to the presentation.
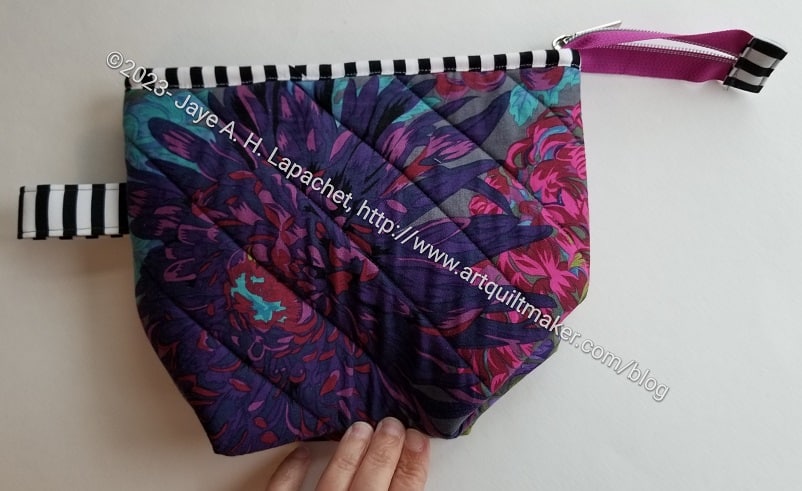
I was going to make Mom another one for Christmas, but decided on something else and made this one for myself with some of the fabric Colleen quilted for me. It is already in use for the EPPic bag pieces I cut out at Sew Day some time ago.
The pouch itself is quite large and with the extra Decor Bond, it is not very squishable. It would fit well into a Chubby Charmer to organize all the things someone needs to take somewhere.
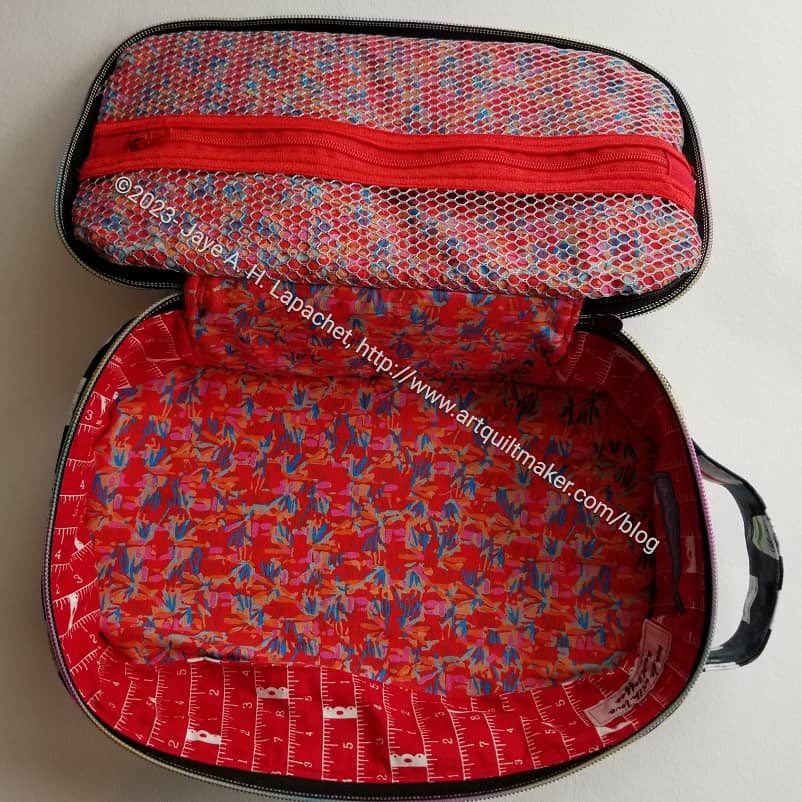
Disco Double Zip Pouch – top
If I were to make this pouch again, I might add some interior zipper pockets. I am not sure how useful they would be, but there is enough space and I think you can never have too many pockets. It would also be good to add some pen holders. As the pattern is written, you just toss things into the pouch. It would fit my Leuchtturm notebook, but then what? I just don’t know how I would use this pouch.
Disco Double Zip Pouch – handle
The handle is very useful, I think. One of the reasons I added a handle to the Hackney was that it made the bag more usable. I am glad the pattern included a handle for this pouch. The weird thing is that the zippers are behind the handle. I might add some zipper pulls.
This pouch is great if you want to fussy cut some special fabric, or use an embroidery design. The large size has a great space for a specific motif. Frankly, I am not sure how I would use this pouch, but I am glad I made it.
Hooray! The Fish Hackney is done. I am going to get a gift card and store it in my box of gifts. I can cross off one holiday gift requirement.
It looks pretty good. I am happy with it and hope my Dad will like it as well.
I think next time I will try a smaller vertical zipper for the mesh pocket. I think it might be useful and there is something about the zipper in the center of the pocket that bugs me a little bit. I’ll have to adjust the size of the zipper binding (called Mesh binding in the pattern) to accommodate a different sized zipper.
Fish Hackney – done – top
I was able to fix the label. I connected the bottom of the label to the mesh by sewing it carefully to bits of the mesh. I should have used yellow thread, but I didn’t.
I’ll have to think about where to put non-artquiltmaker labels in the future. Middle bottom of the top? It would mean they were upside down, but might be an option.
Fish Hackney – done – handle
The handle looks good. I think I need to position them a little higher up in the future.
I know I will make at least one more of these bags, maybe two.
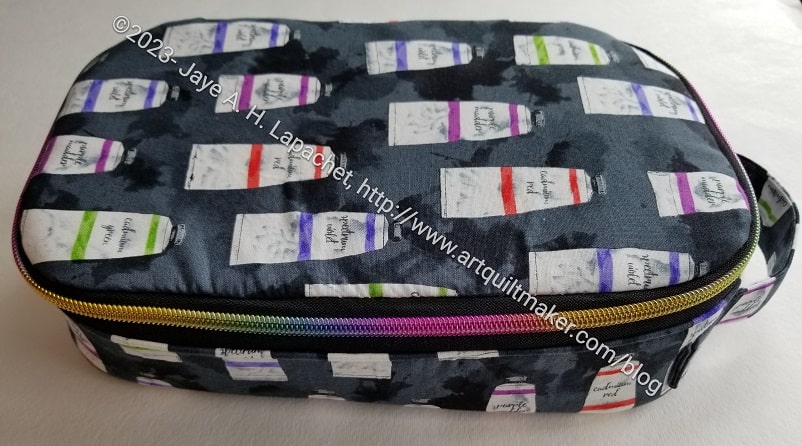
I have made a number of these Hackney bags, but this one is special as it is for my mom for her birthday, which is today!
This one also really came out well. I am super pleased with it.
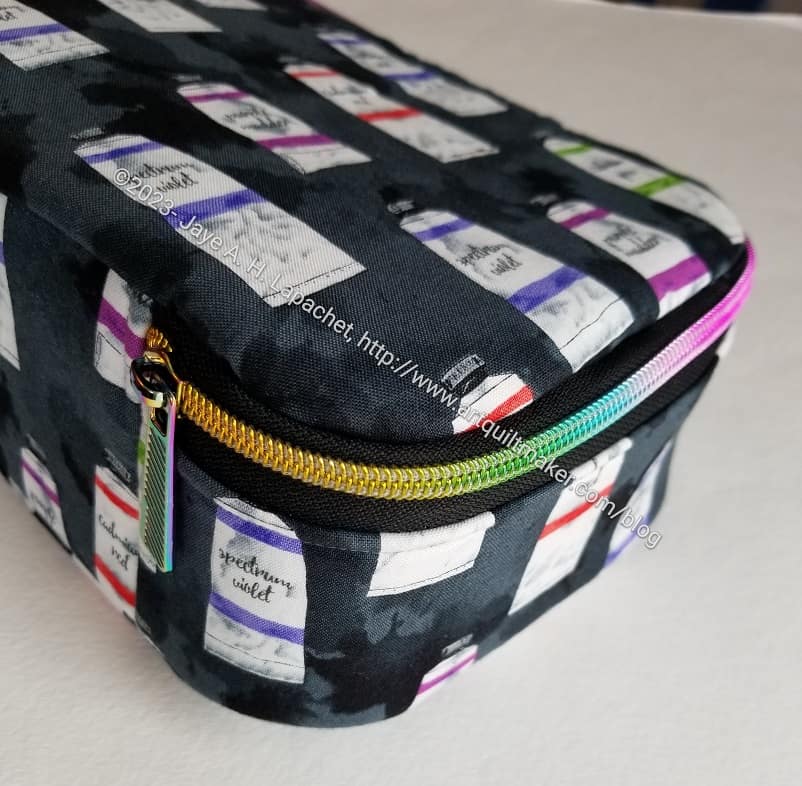
I used some zipper tape I have had for awhile. I bought it from Sew Sweetness in January in both black and white. I am pleased with how the rainbow metallic of the zipper teeth enhance the look of the paint tube fabric. I did forget to add a second zipper head, but the bag will still be able to be closed with a zipper, so no problem.
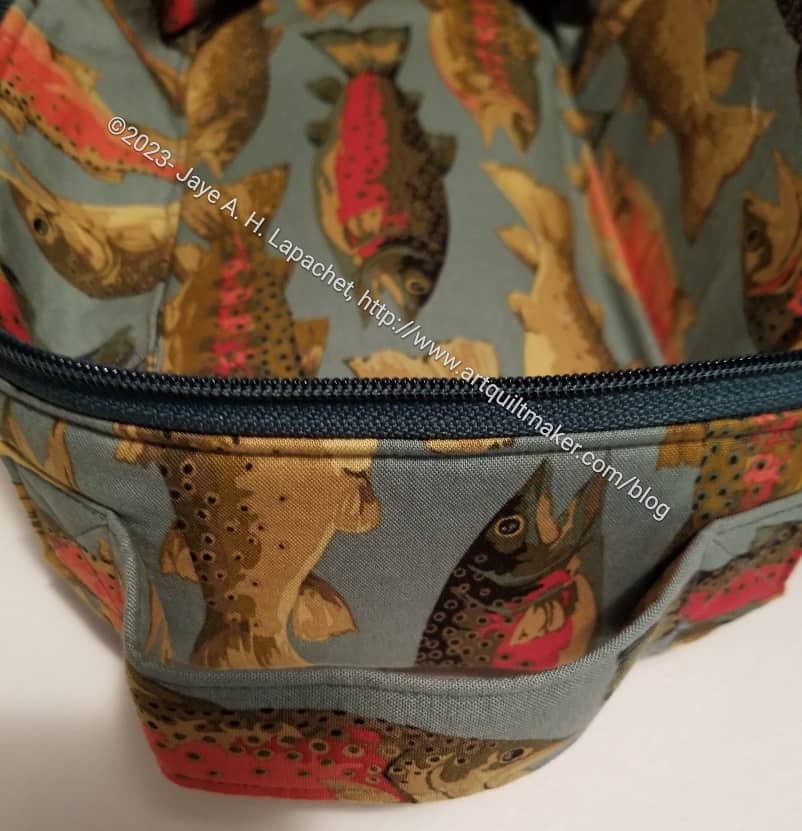
Mom’s Hackney Bag: interior
I used a more Decovil** and DecorBond** than in other Hackneys. Note, I didn’t add an excessive amount, just a bit more. I have to remind myself that I like structured bags and I should add more appropriate interfacing when I need to.
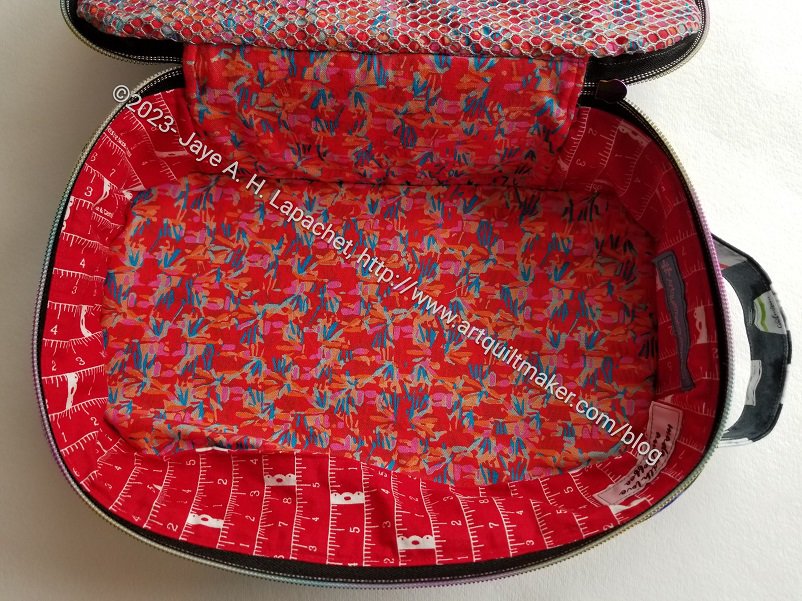
I thought I had a ton of red fabric, but I didn’t have quite enough for the front panel of this bag. I still think it looks nice. It looks very cheerful on the inside.
Mom’s Hackney Bag: interior mesh pocket
Yes, I made the mesh pocket again. As I said before, I think they are useful; I just don’t like making them, but practice makes perfect. I think I would like to try making it a different way. I don’t want to fold the edge of the zipper tape as much as the pattern says. The edge of the zipper tape gets ensconced in the seam allowance, so there really isn’t a reason not to leave it raw. It is easier and tidier not to go through all of those layers of folded zipper tape anyway.
I will say that the fabric I found matches the zipper and the foldover elastic very well.
I think I still need more practice making the inside.
Mom’s Hackney Bag: exterior
The outside looks very good, though.
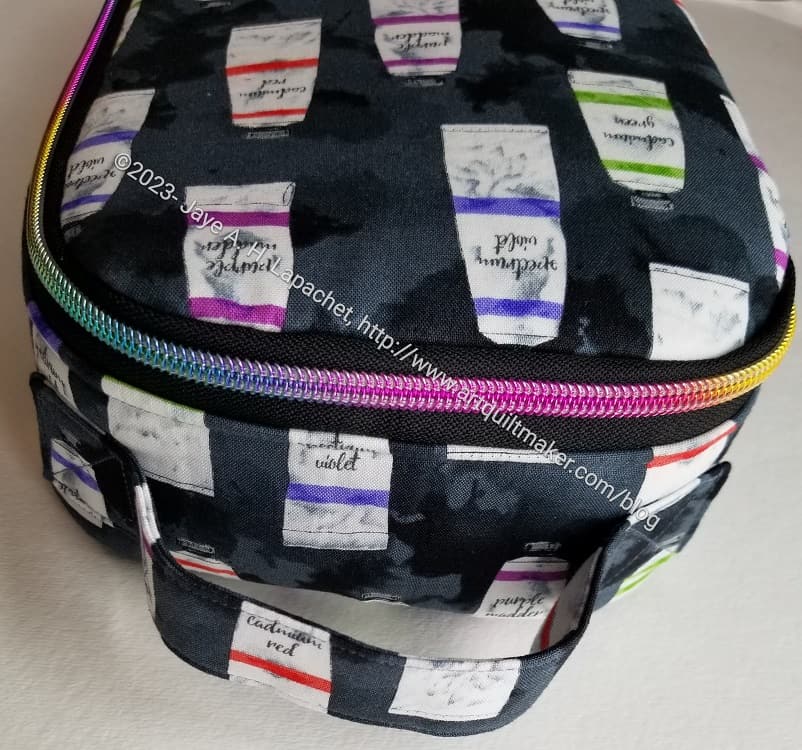
I oriented the directional fabric a little differently this time. I oriented the top exterior piece so the paint tubes are right side up when the bag is being carried. The bottom paint tube are oriented at a 90 degree angle from the top.
Mom’s Hackney Bag: handle
The handle is also in the right place, which makes me really happy.
One thing I haven’t figured out is where to put the handle in terms of the distance between exterior top and exterior bottom. I hope I remembered to measure where this handle is placed before I gave it away. 😉
Mom’s Hackney Bag: interior bottom
I am doing a better job of remembering to sew my labels in. I wrote myself a note on the pattern, so sewing in a label has become another step in the process. You can see the labels in the photo on the right. I try to include one of my Wunderlabels as well as a label from my 2022 Advent Calendar.
Mom’s Hackney Bag: exterior top
So, another Hackney under my belt. I feel like writing another post showing them all. Maybe I should make myself one.
**N. B. : Obviously, you should shop at local quilt shops and small businesses. However, if you are too busy or can’t find what you need there, I use Amazon affiliate links and may be paid for your purchase of an item when you click on an item’s link in my post. There is no additional cost to you for clicking or purchasing items I recommend. I appreciate your clicks and purchases as it helps support this blog.
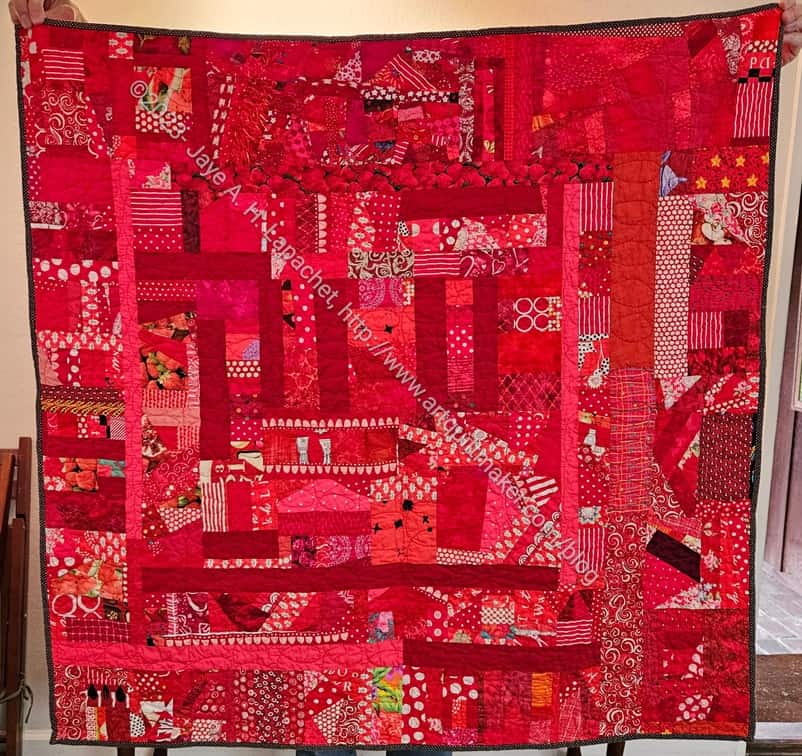
At my sew day with Cyndi, she worked on binding quilts. One of them was my Blue Strip #3. I am so thrilled because I just finished this one in July! I am thrilled that it is already finished.
We discussed colors to use as binding and eventually settled on a turquoise. I thought a purply blue would look better with the batik border, but she didn’t have such a fabric and I didn’t think it mattered that much. The turquoise turned out to be a great choice.
Cyndi did a machine binding that looks really nice. I have to try and learn that skill.
Blue Strip #3 donation quilt back
Laura, a longarmer who has been doing quilting for the guild, did the quilting. It is flowers and you can see it really well from the back.
I finished the Bristol Pouch. I am pleased with how it came out.
I am also pleased with the “fussy cutting”. I have to laugh, because I didn’t really fussy cut the big flower. It just happened: Happy accident!
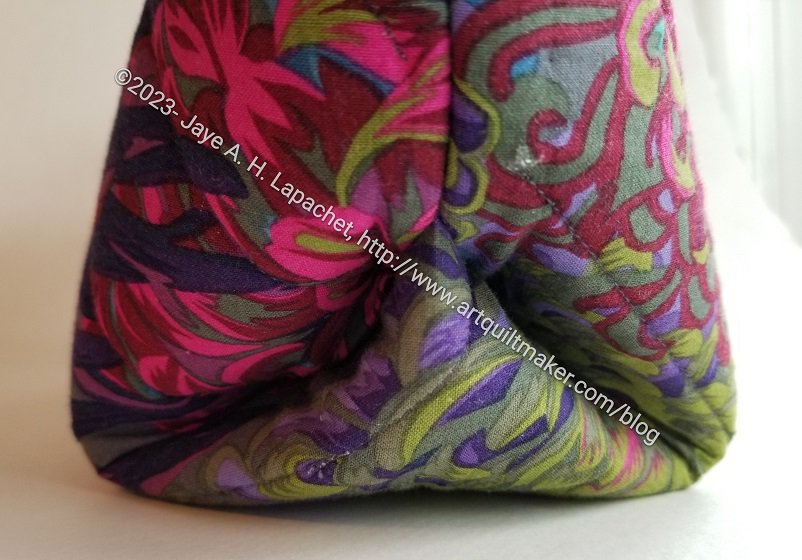
Bottom and side
I think I would construct it a little differently if I made it again. I think the foldy instructions for the bottom are cool, but I don’t like the way it looks on the outside. I also think this technique would be better without the foam. I might try this technique with fusible fleece. The finished piece just feels too thick in the corners. I am pretty sure this is personal preference.
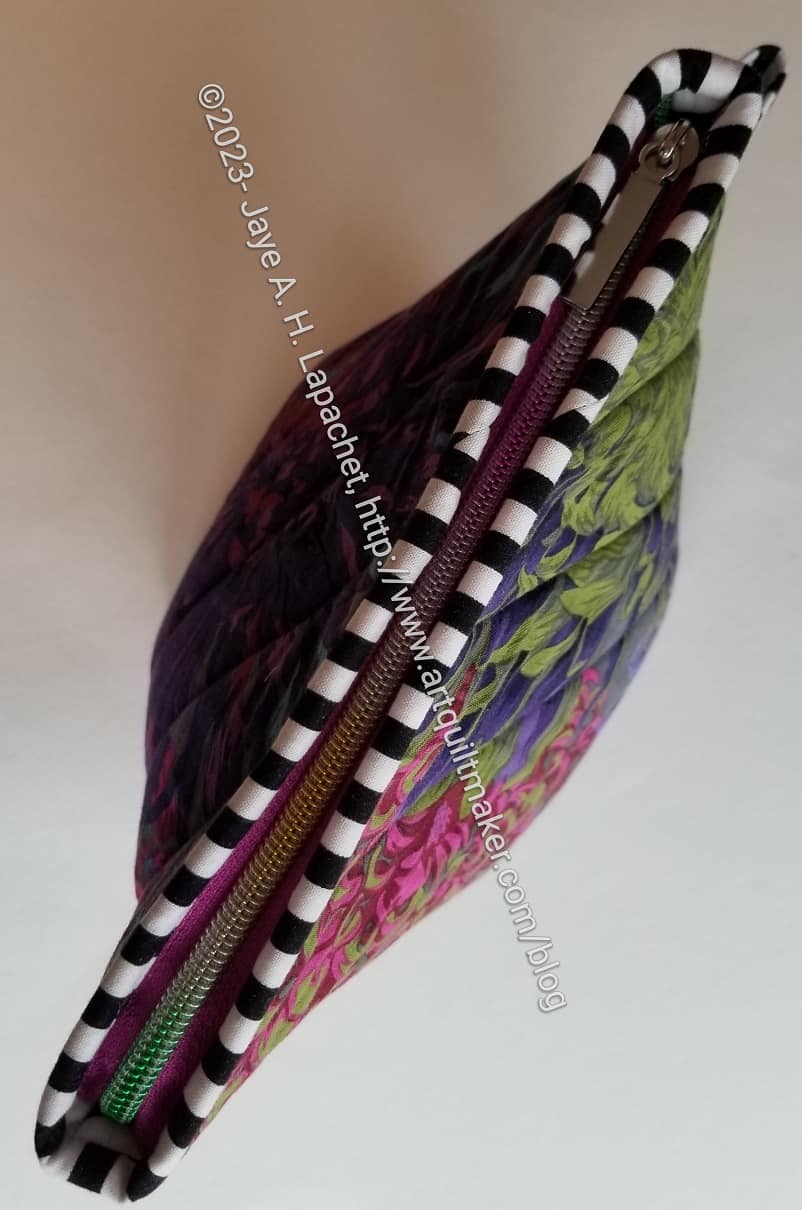
Bristol pouch: top closed
From the top, the pouch looks good. It looks very sleek.
As you can see, I chose a striped binding. I love striped binding and I think the fabric combination looks good.
I am also pleased that my leftover zipper end worked in terms of color with this pouch. I struggled a little to get the zipper to work properly, but once I zipped it a few times, the teeth got themselves organized and there was no problem.
Bristol pouch: top open
I really wanted to make this quickly, so I didn’t spend a lot of time choosing fabrics. I used the quilted combination I had from Colleen, but I probably should have matched the binding on the inside to the lining fabric. Maybe next time.
I am not sure how I will use this pouch, but some need will turn up.
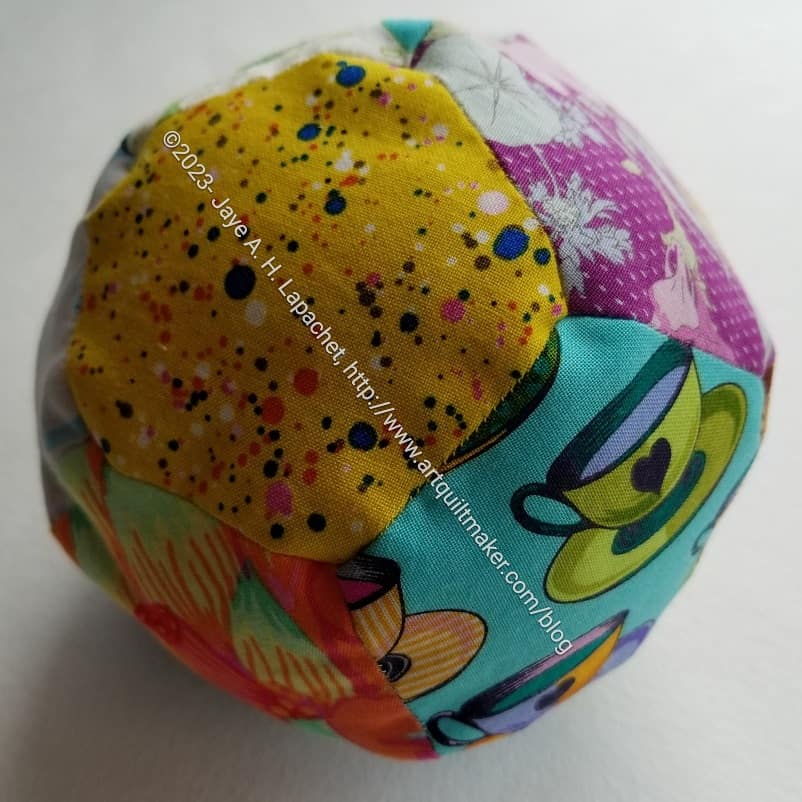
I was able to sew up the gap in the second EPP ball and it is ready to go to its new home. The birthday isn’t until October, so I have a little time.
I really enjoy making these. If I had some space, I might make one for myself. As it is, I will give this one to Dameon or Alita. I haven’t decided yet.
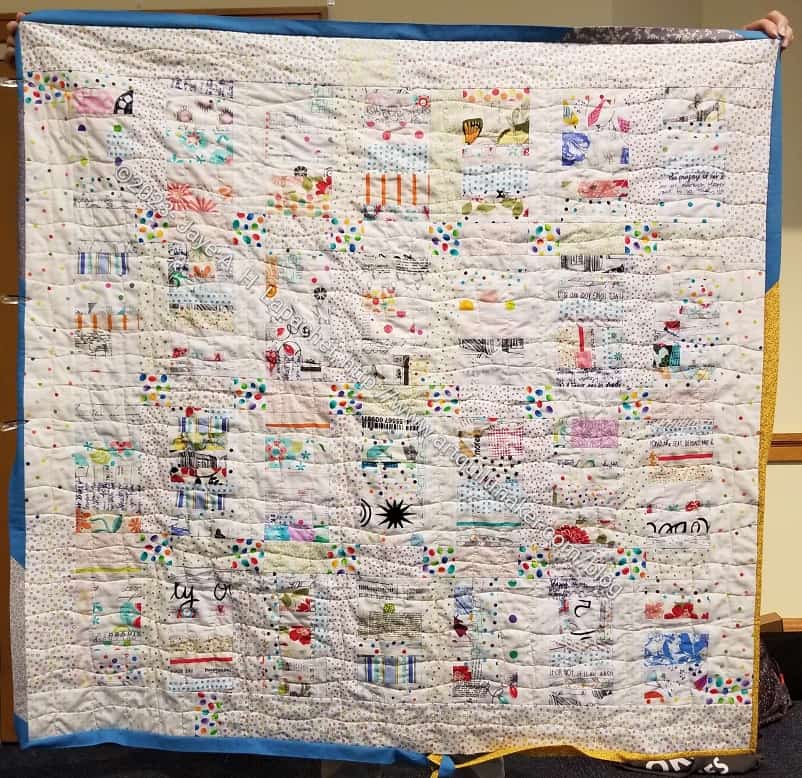
Leann brought the White Strip Donation Quilt to the meeting last weekend. It has been a long while in coming, but she quilted it and was finishing the binding. I am so pleased to see it done.
I finished the top in 2019, so it has been languishing for awhile. Fortunately, fabric doesn’t go bad. There is something about this one that I really like. Soon, I will have enough scraps to make another.