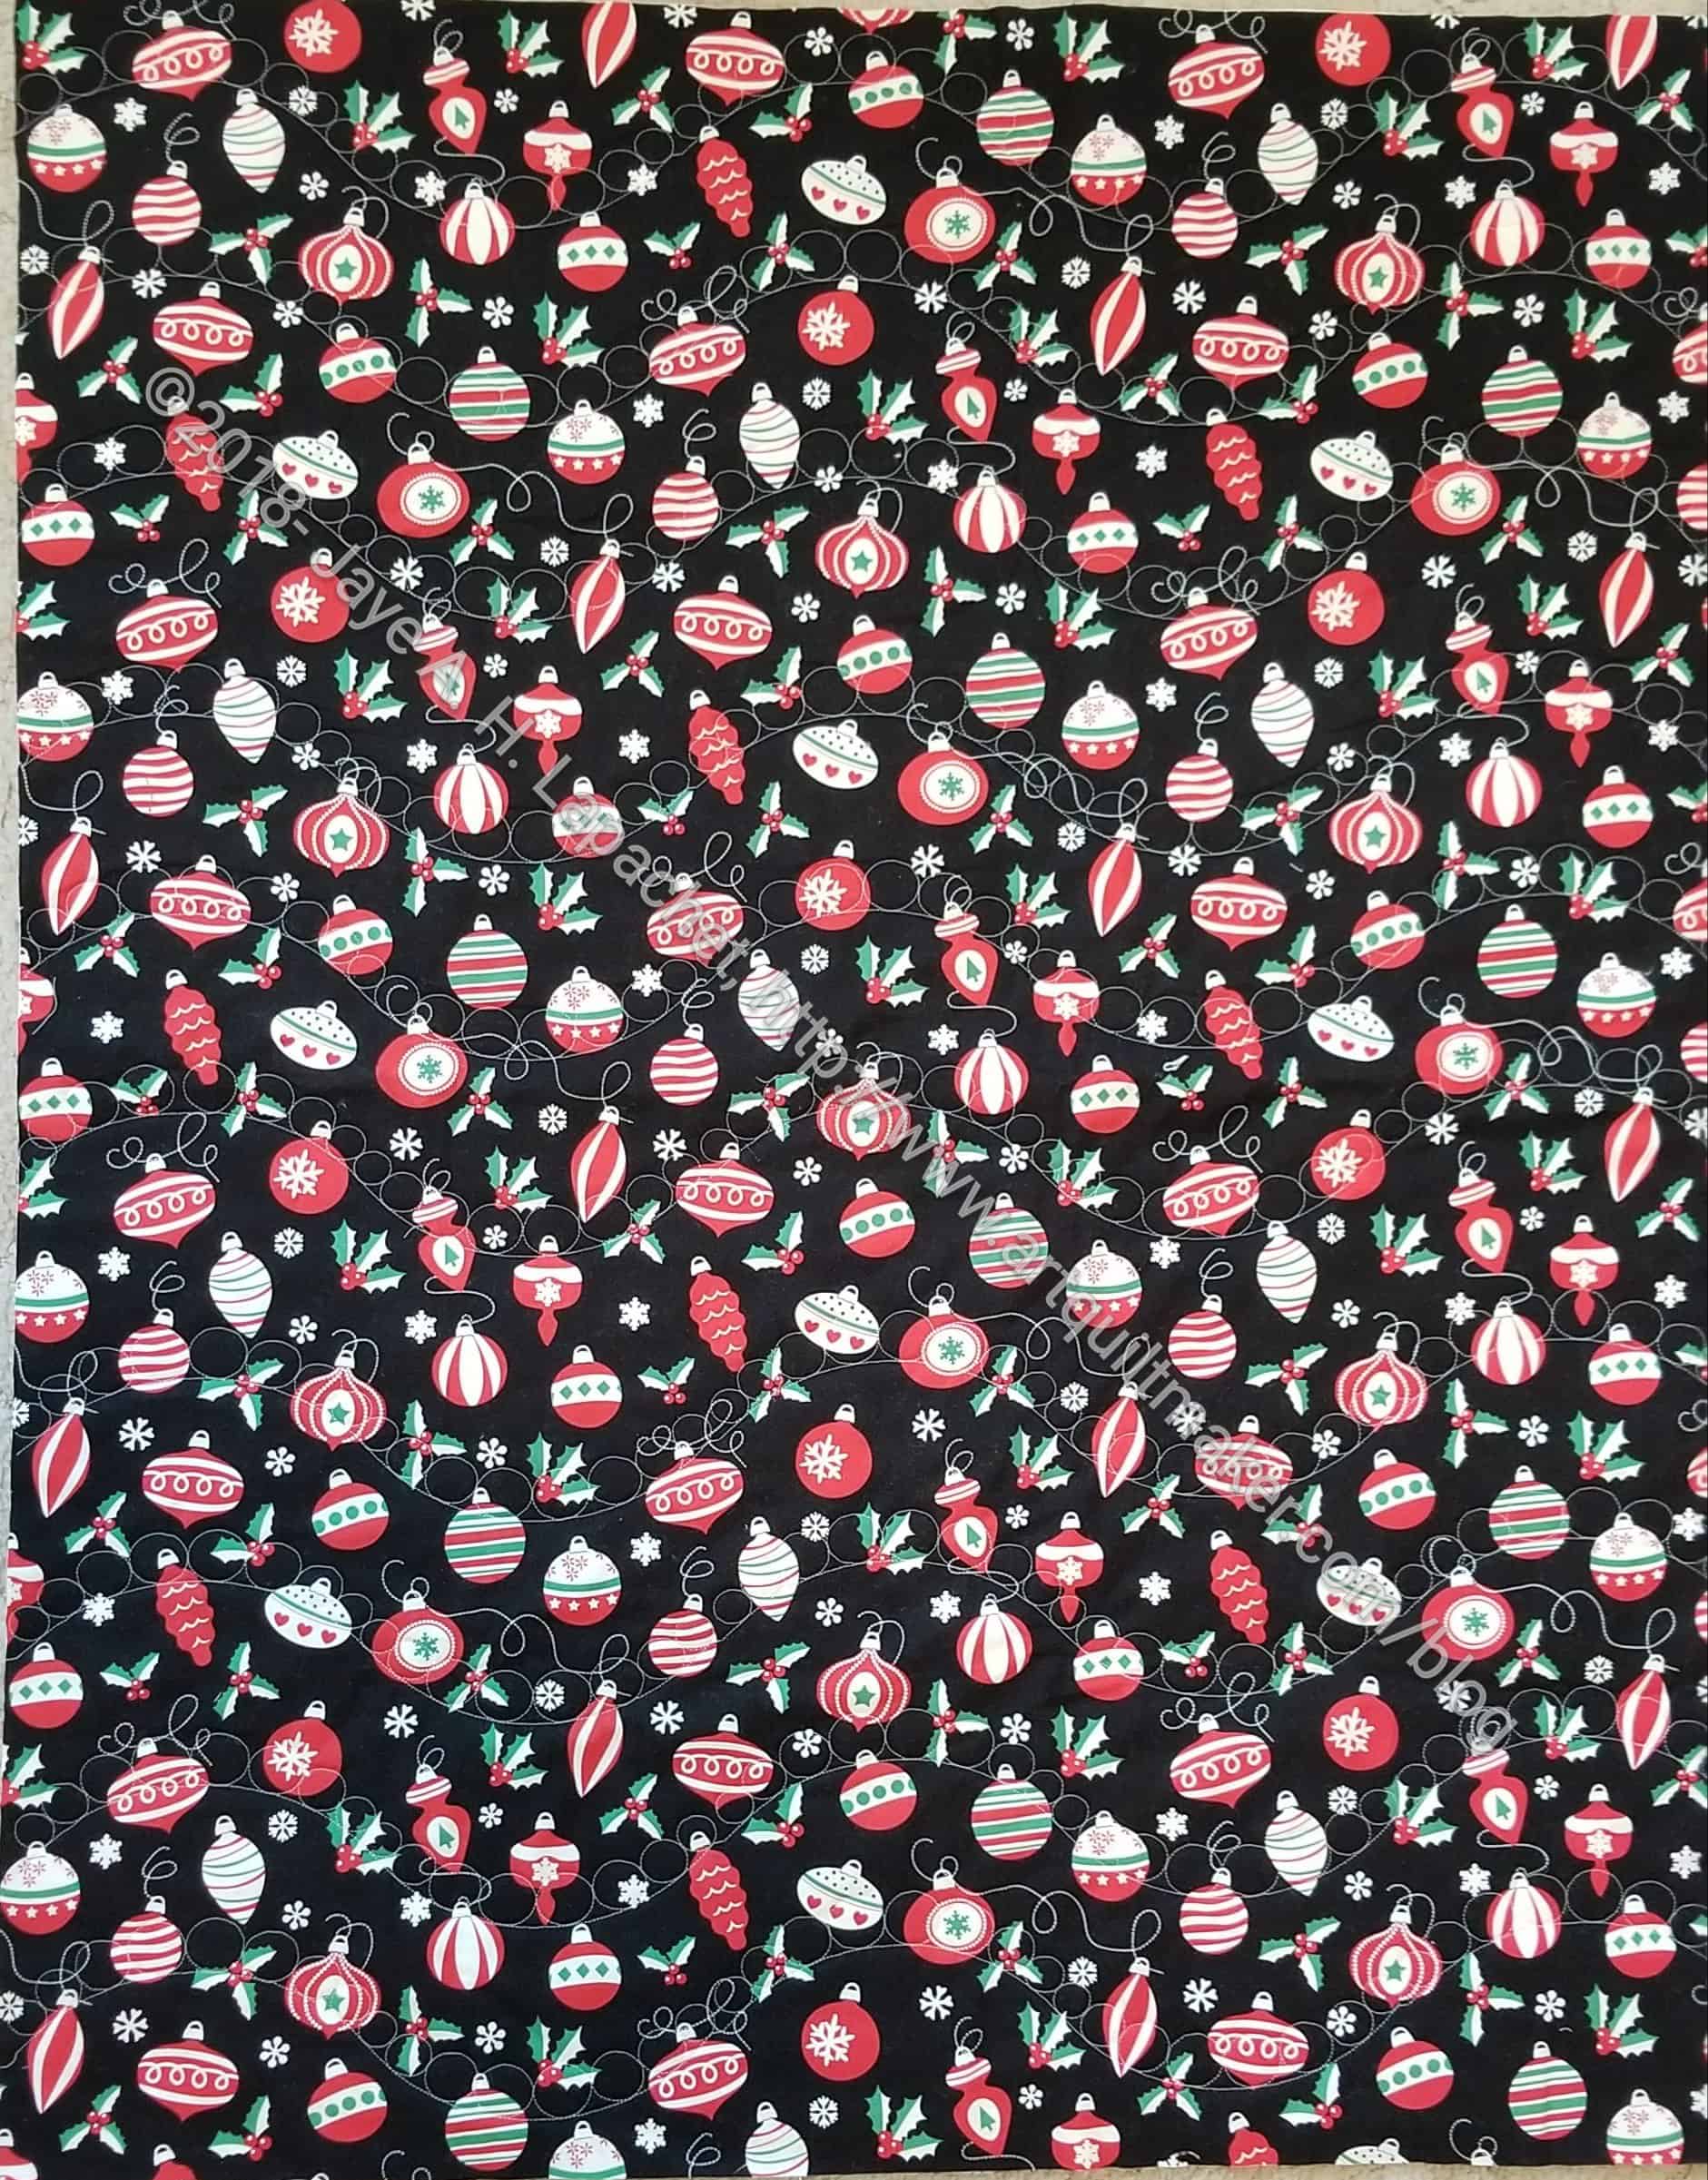
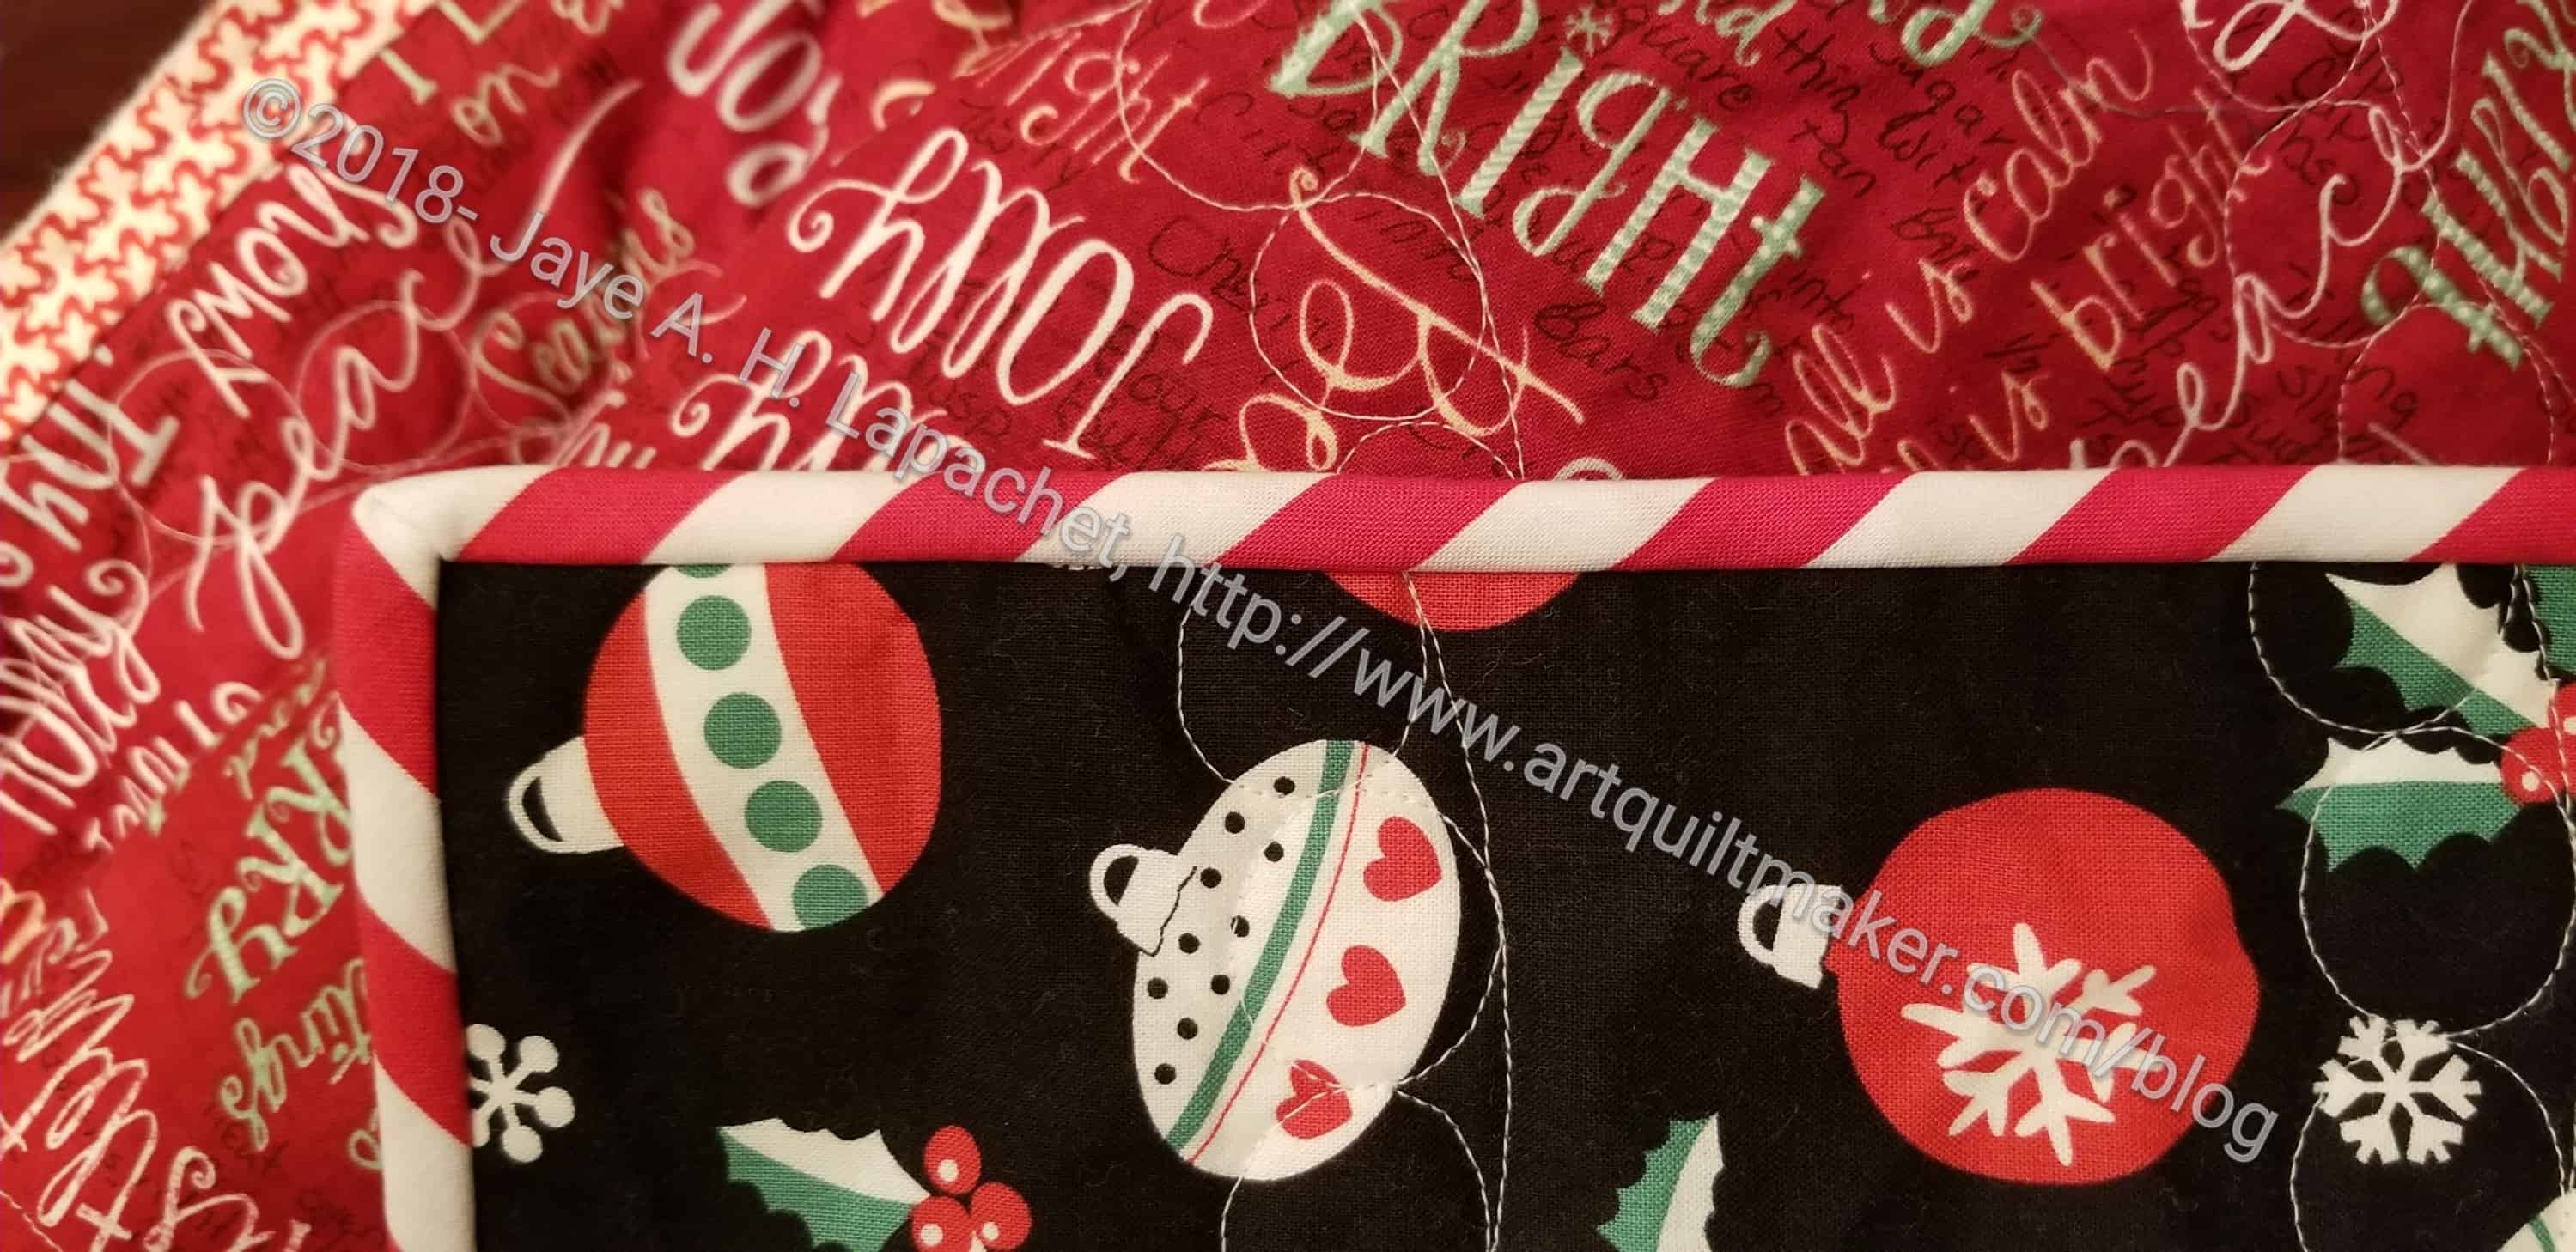
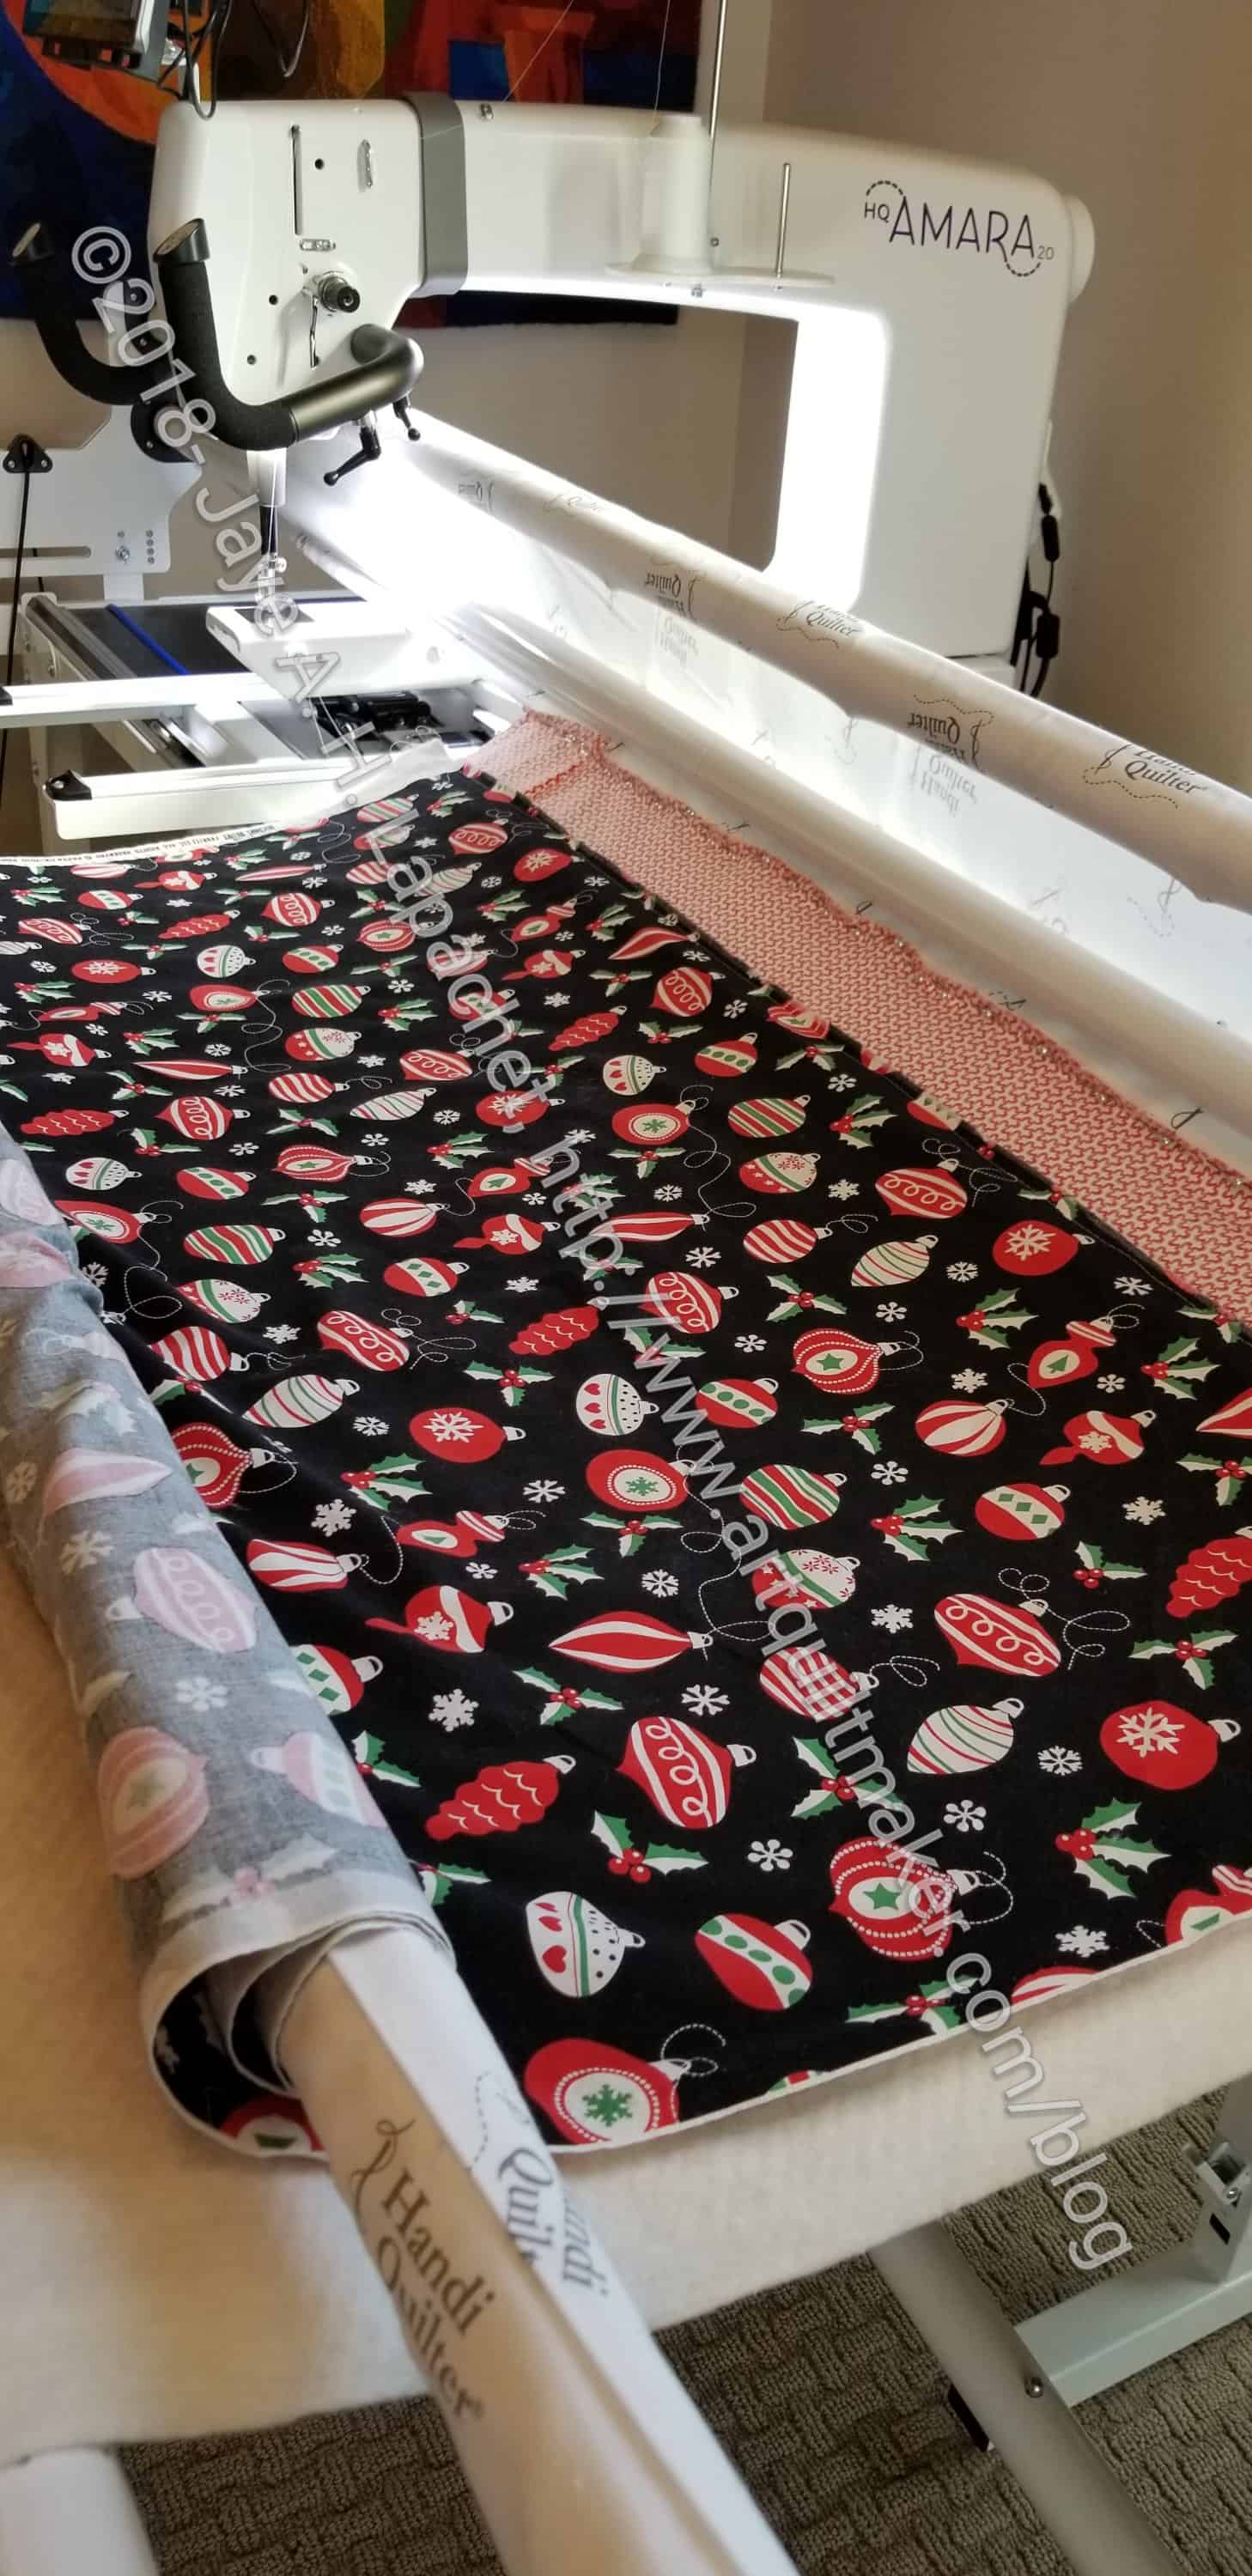
As mentioned the other day, I finished longarming the Christmas Mat.
I am pleased with the design and pleased that all I have to do is bind. Friend Julie thinks that a red binding would work. I agree, which means rummaging around in the my reds to find the right one.
Now I have two things to which I need to make and apply binding.
Last year I bought fabric to make a Christmas mat. The intention is that we will lay this mat on the floor and put our Christmas tree on it.
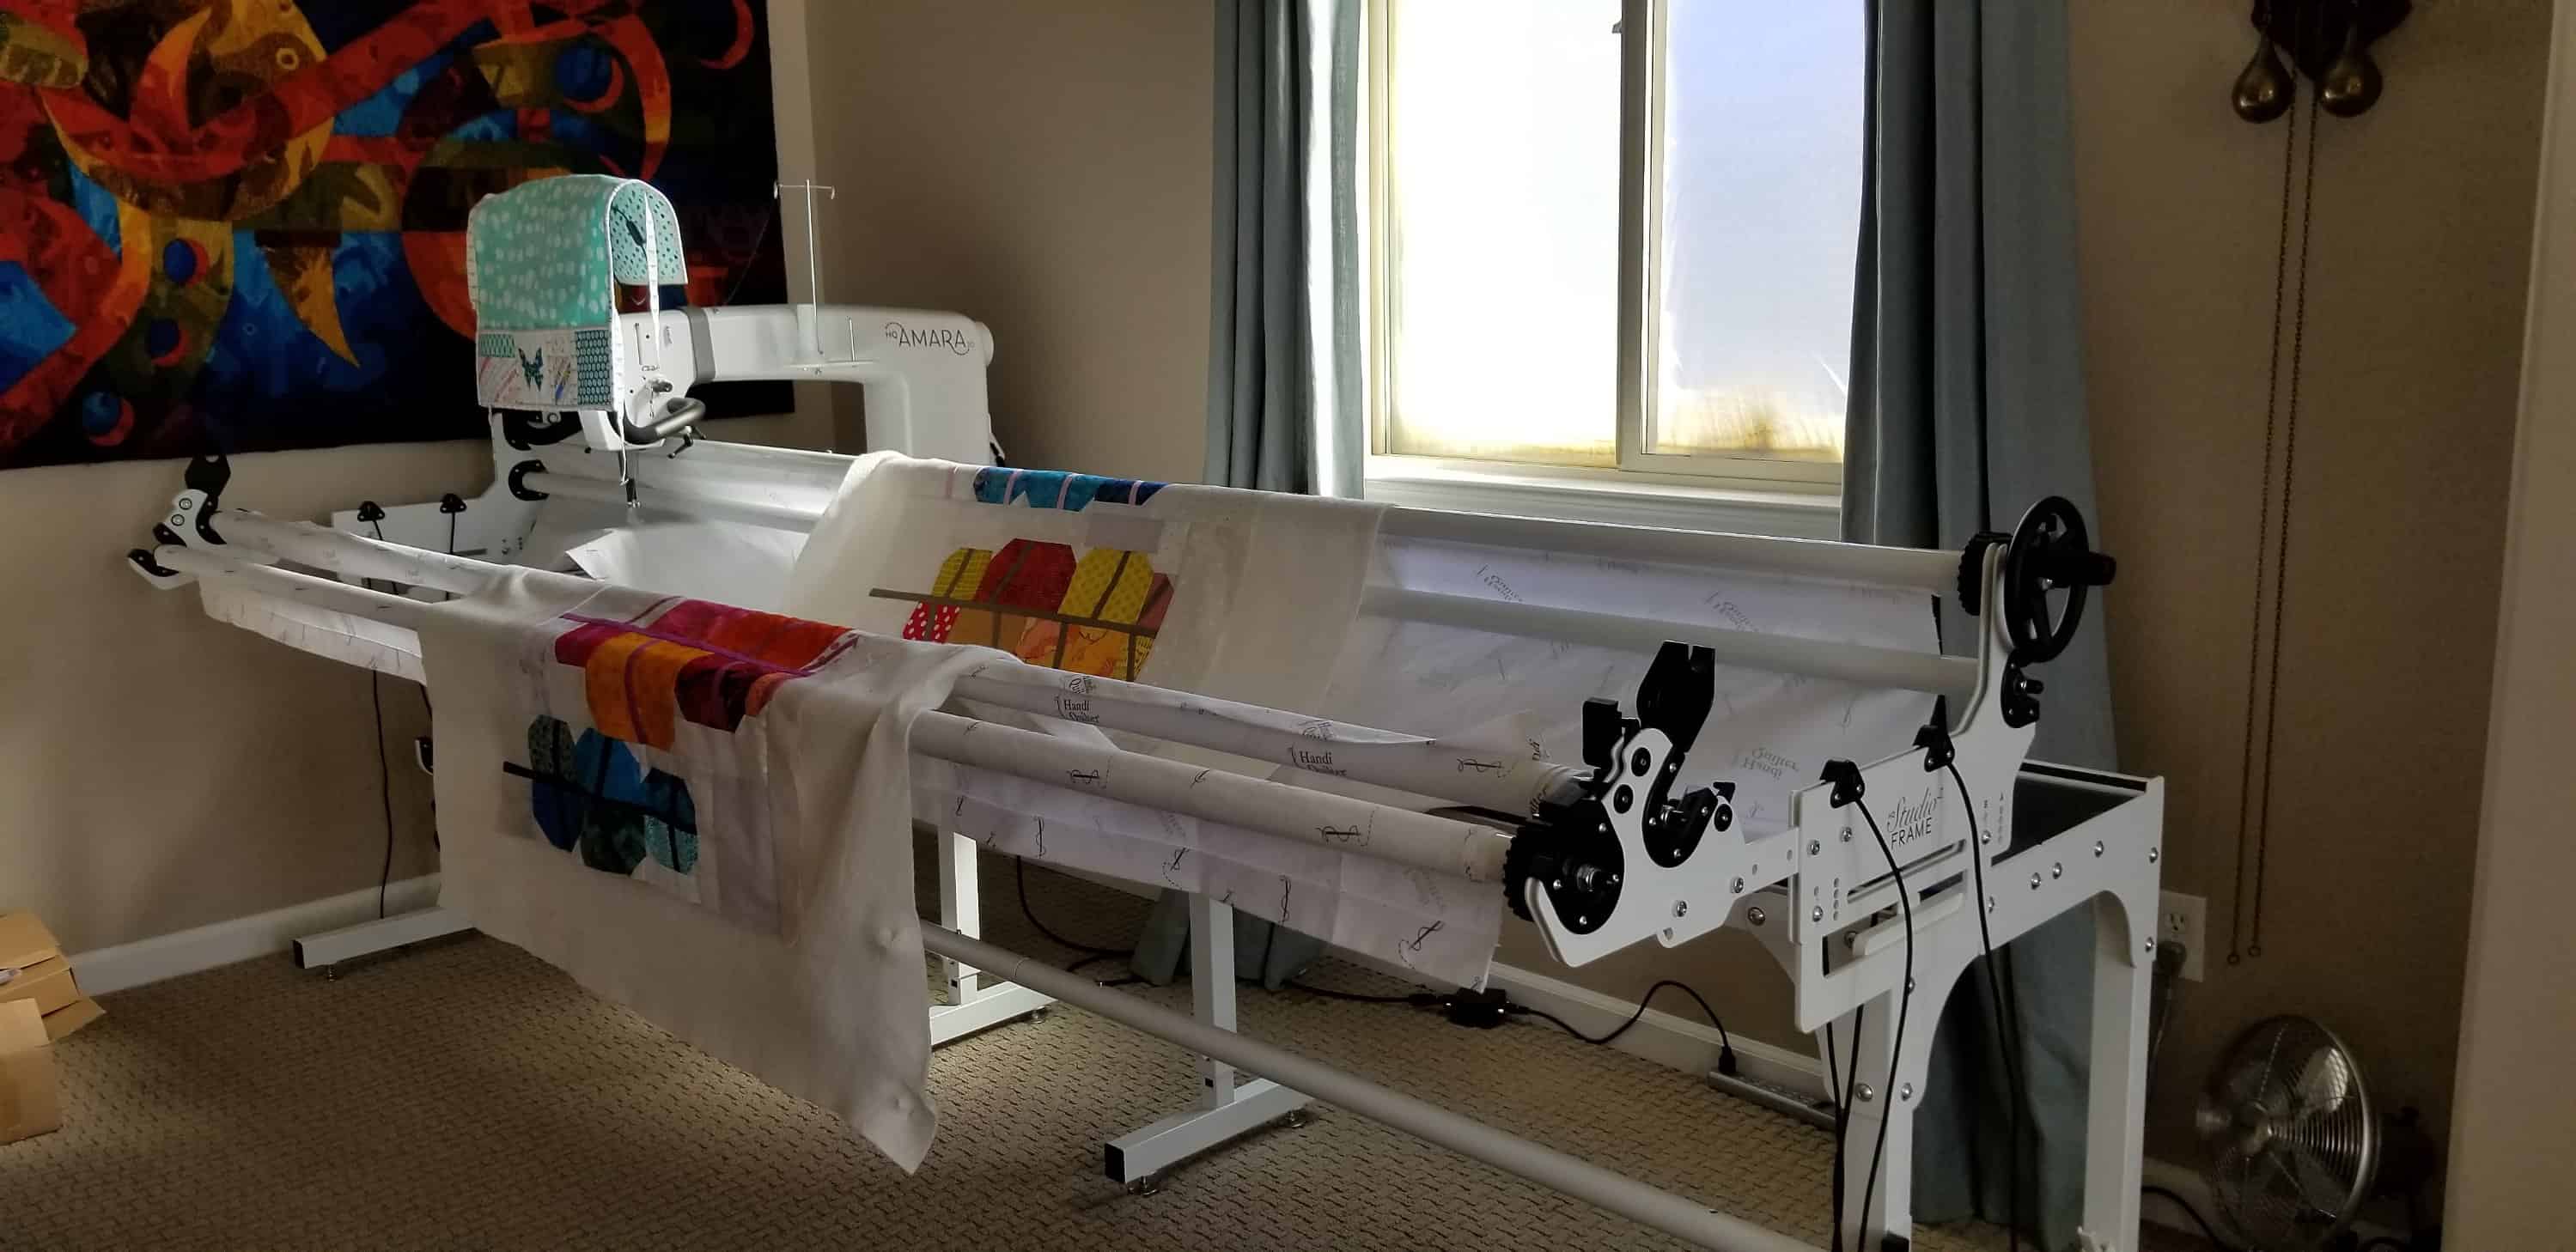
HQ Amara
I was supposed to work on it and finish it last year, but stuff happened and I didn’t do it. I was able to use a friend’s longarm last week and I got the thing quilted. It isn’t finished.
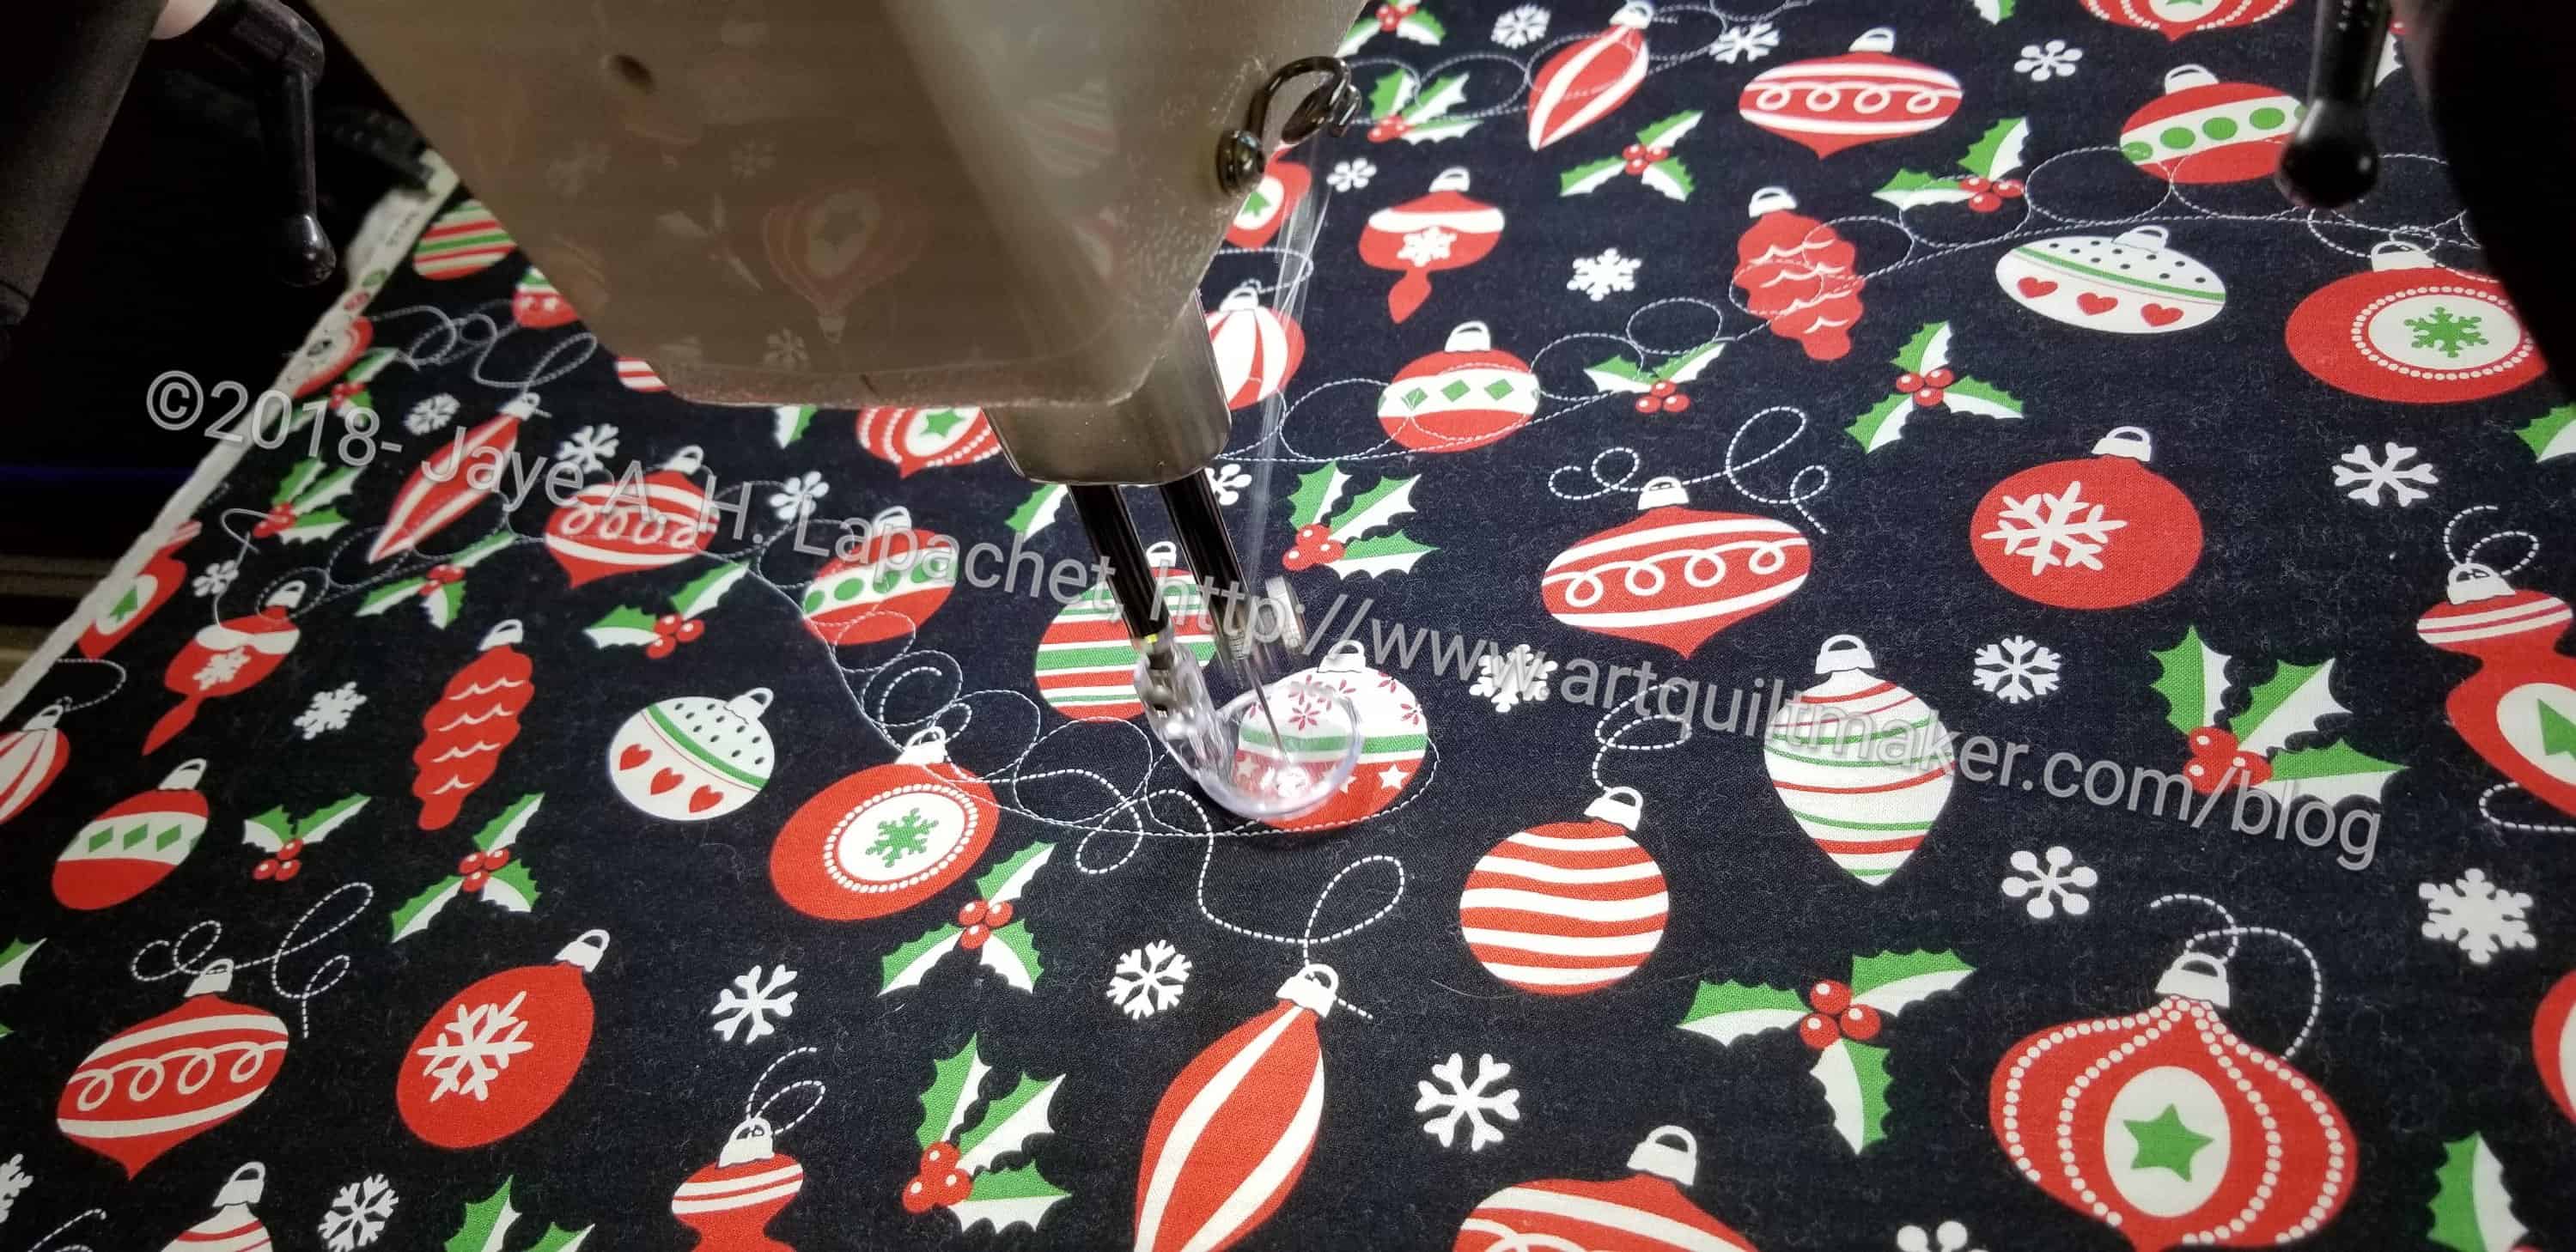
My intention was to free motion, but I ended up decided on a computerized pattern. Since the fabric is just one length of yardage – no piecing it didn’t seem necessary to spend a bunch of time on it. I thought choosing a computerized pattern would make the process go faster. Overall it took us about 2.5 hours to quilt a 41 x 44 inch sandwich. My friend is still learning and the software isn’t as intuitive as I expected it to be*.
Quilting the Christmas Mat
We both worked on it and I was finally getting the hang of moving the quilt from a finished line of quilting back to the right to start the next line (no, it doesn’t do it itself) when we finished. I was glad to finish, because it was exhausting. I am VERY grateful to my friend for helping me quilt the thing and also for just getting another project quilted.
*SIL n.2 and I have discussed how longarm computer software manufacturers don’t have the market to make really great software. If longarm software sold as much as something like Microsoft Word, then there would be more development, but the market just isn’t that large. It is a shame, but business is business.
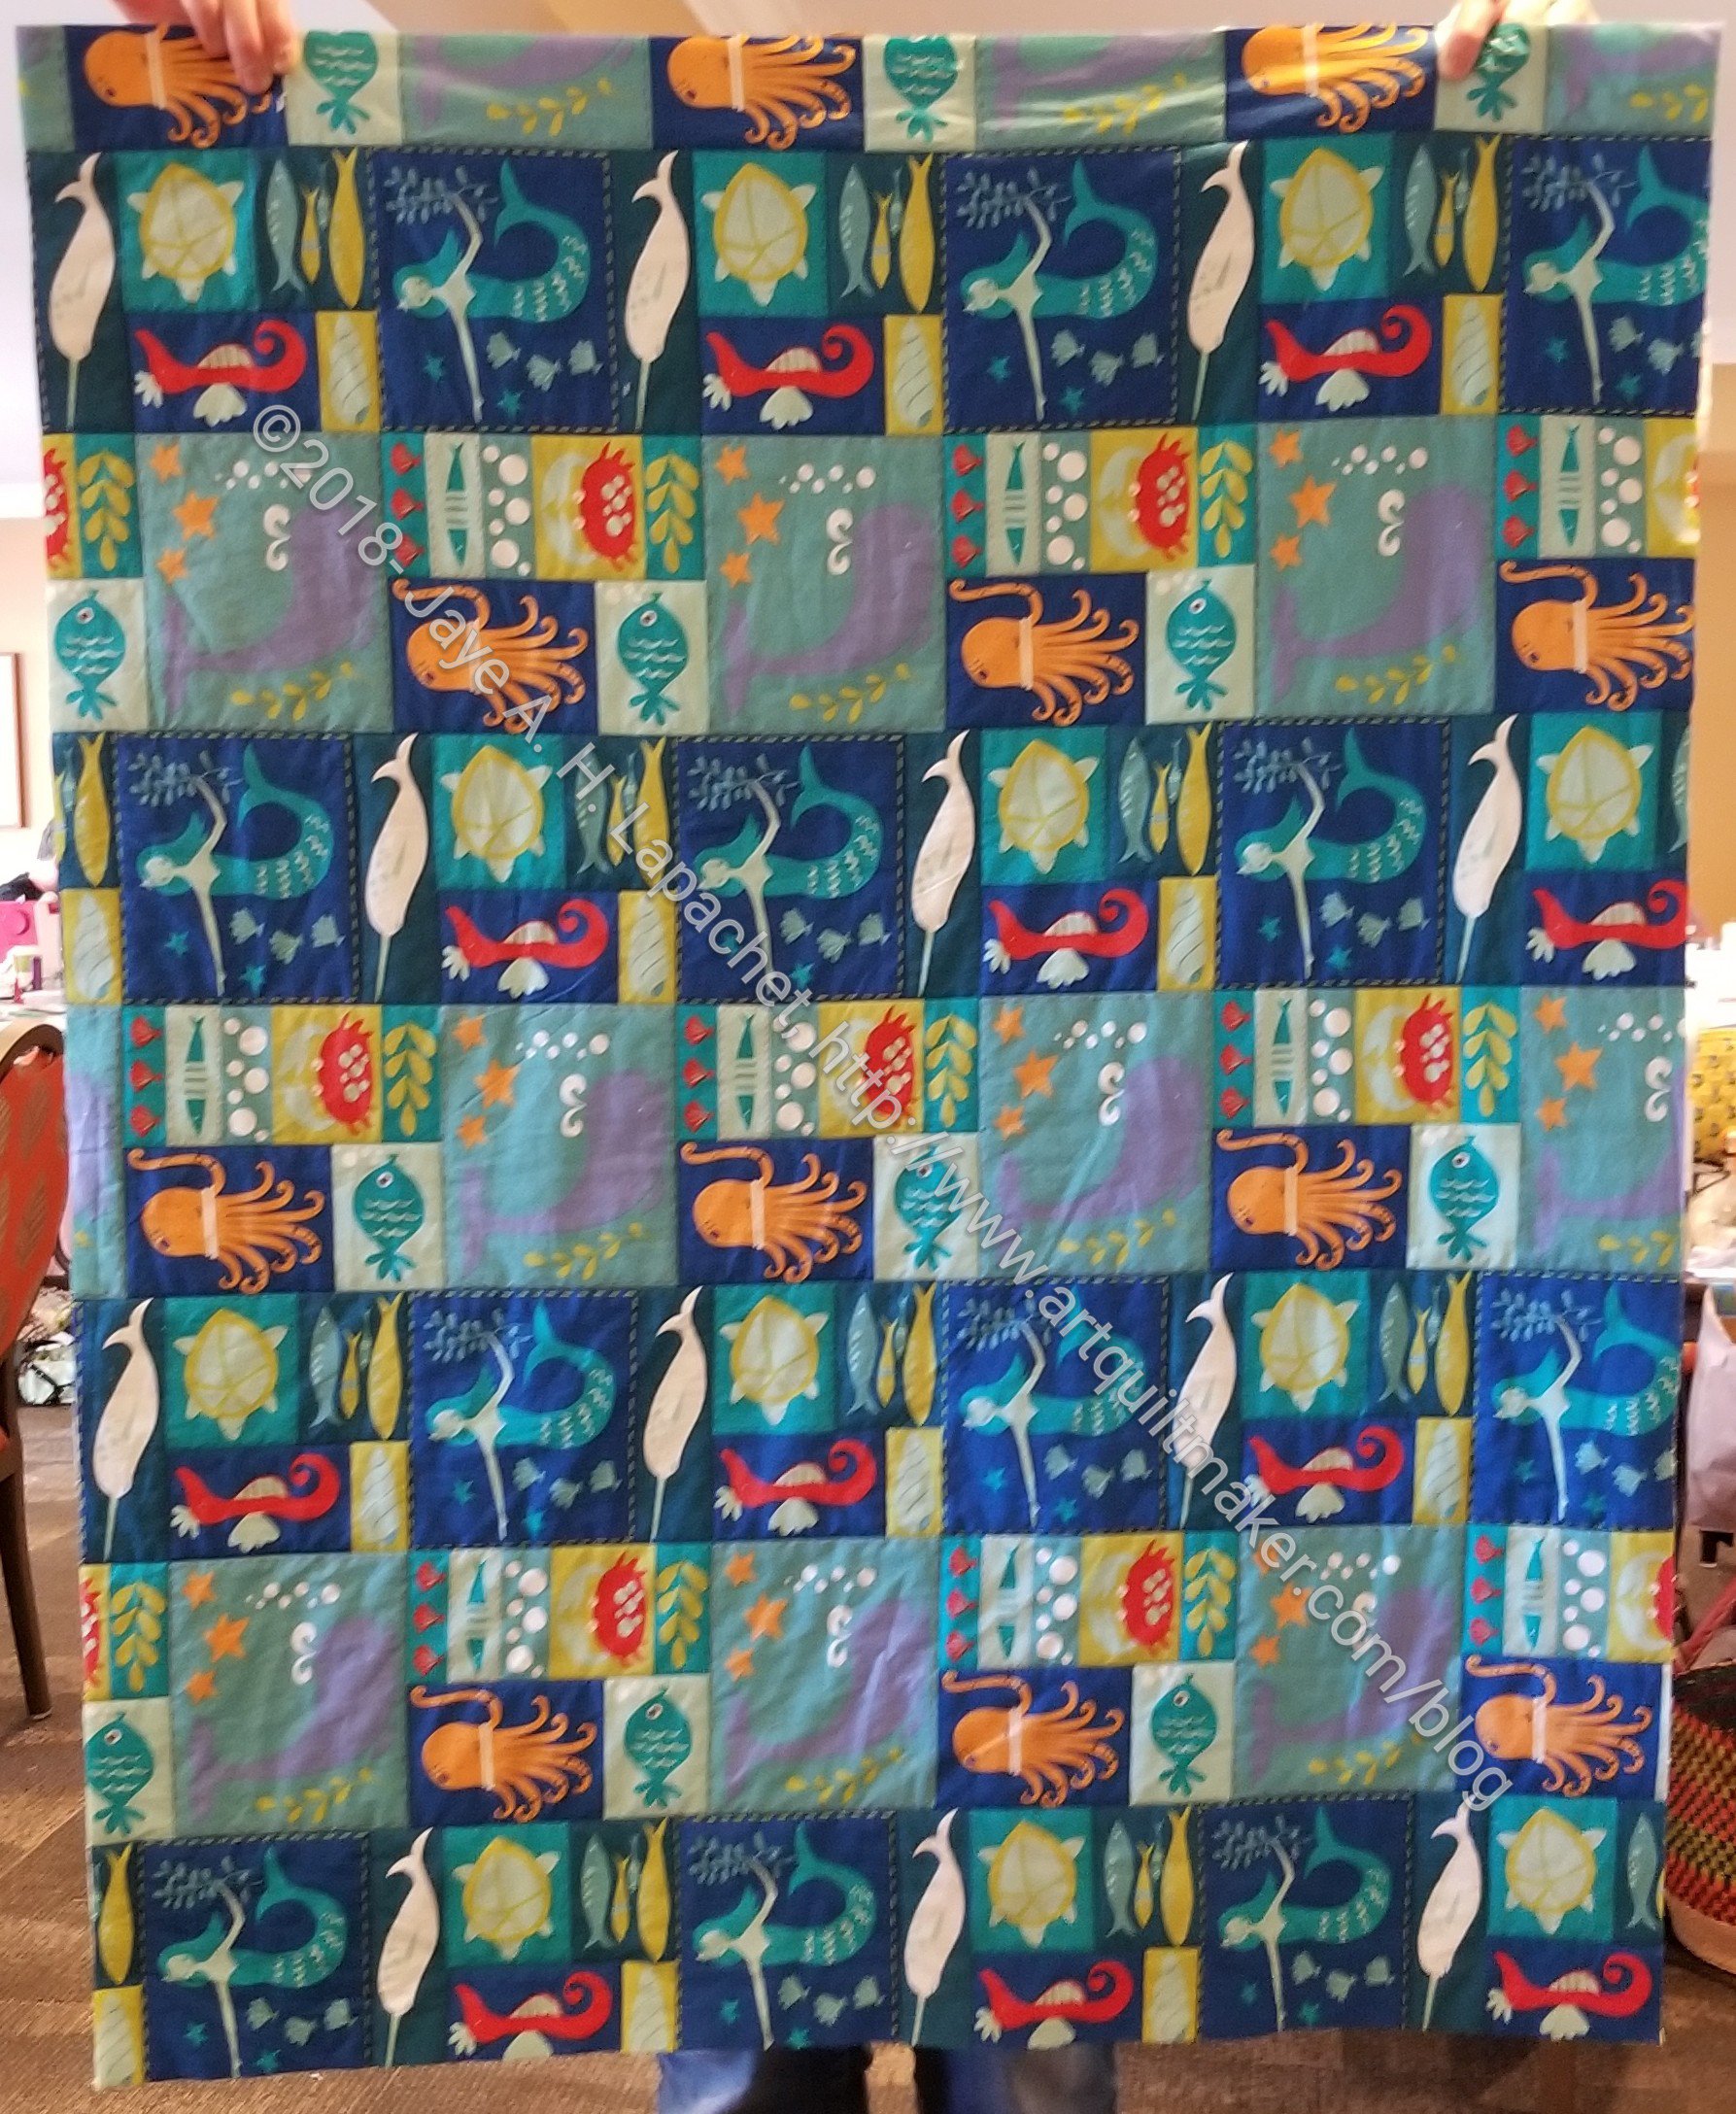
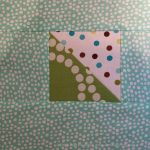
This Sealife quilt-let started as a piece of fabric I bought at PIQF. Perhaps I bought it last year?
I bought this piece of fabric to make a quilt for my friend’s grandchild. Since I was giving his granddaughter the BAMaQG Color Round Robin, I couldn’t very well leave her older brother out. I wasn’t up for a full on boy quilt and this piece of fabric seemed to be a good compromise.
I call this a quilt-let, because there is no piecing. I don’t know if there is another name for this type of work, so quilt-let it is.
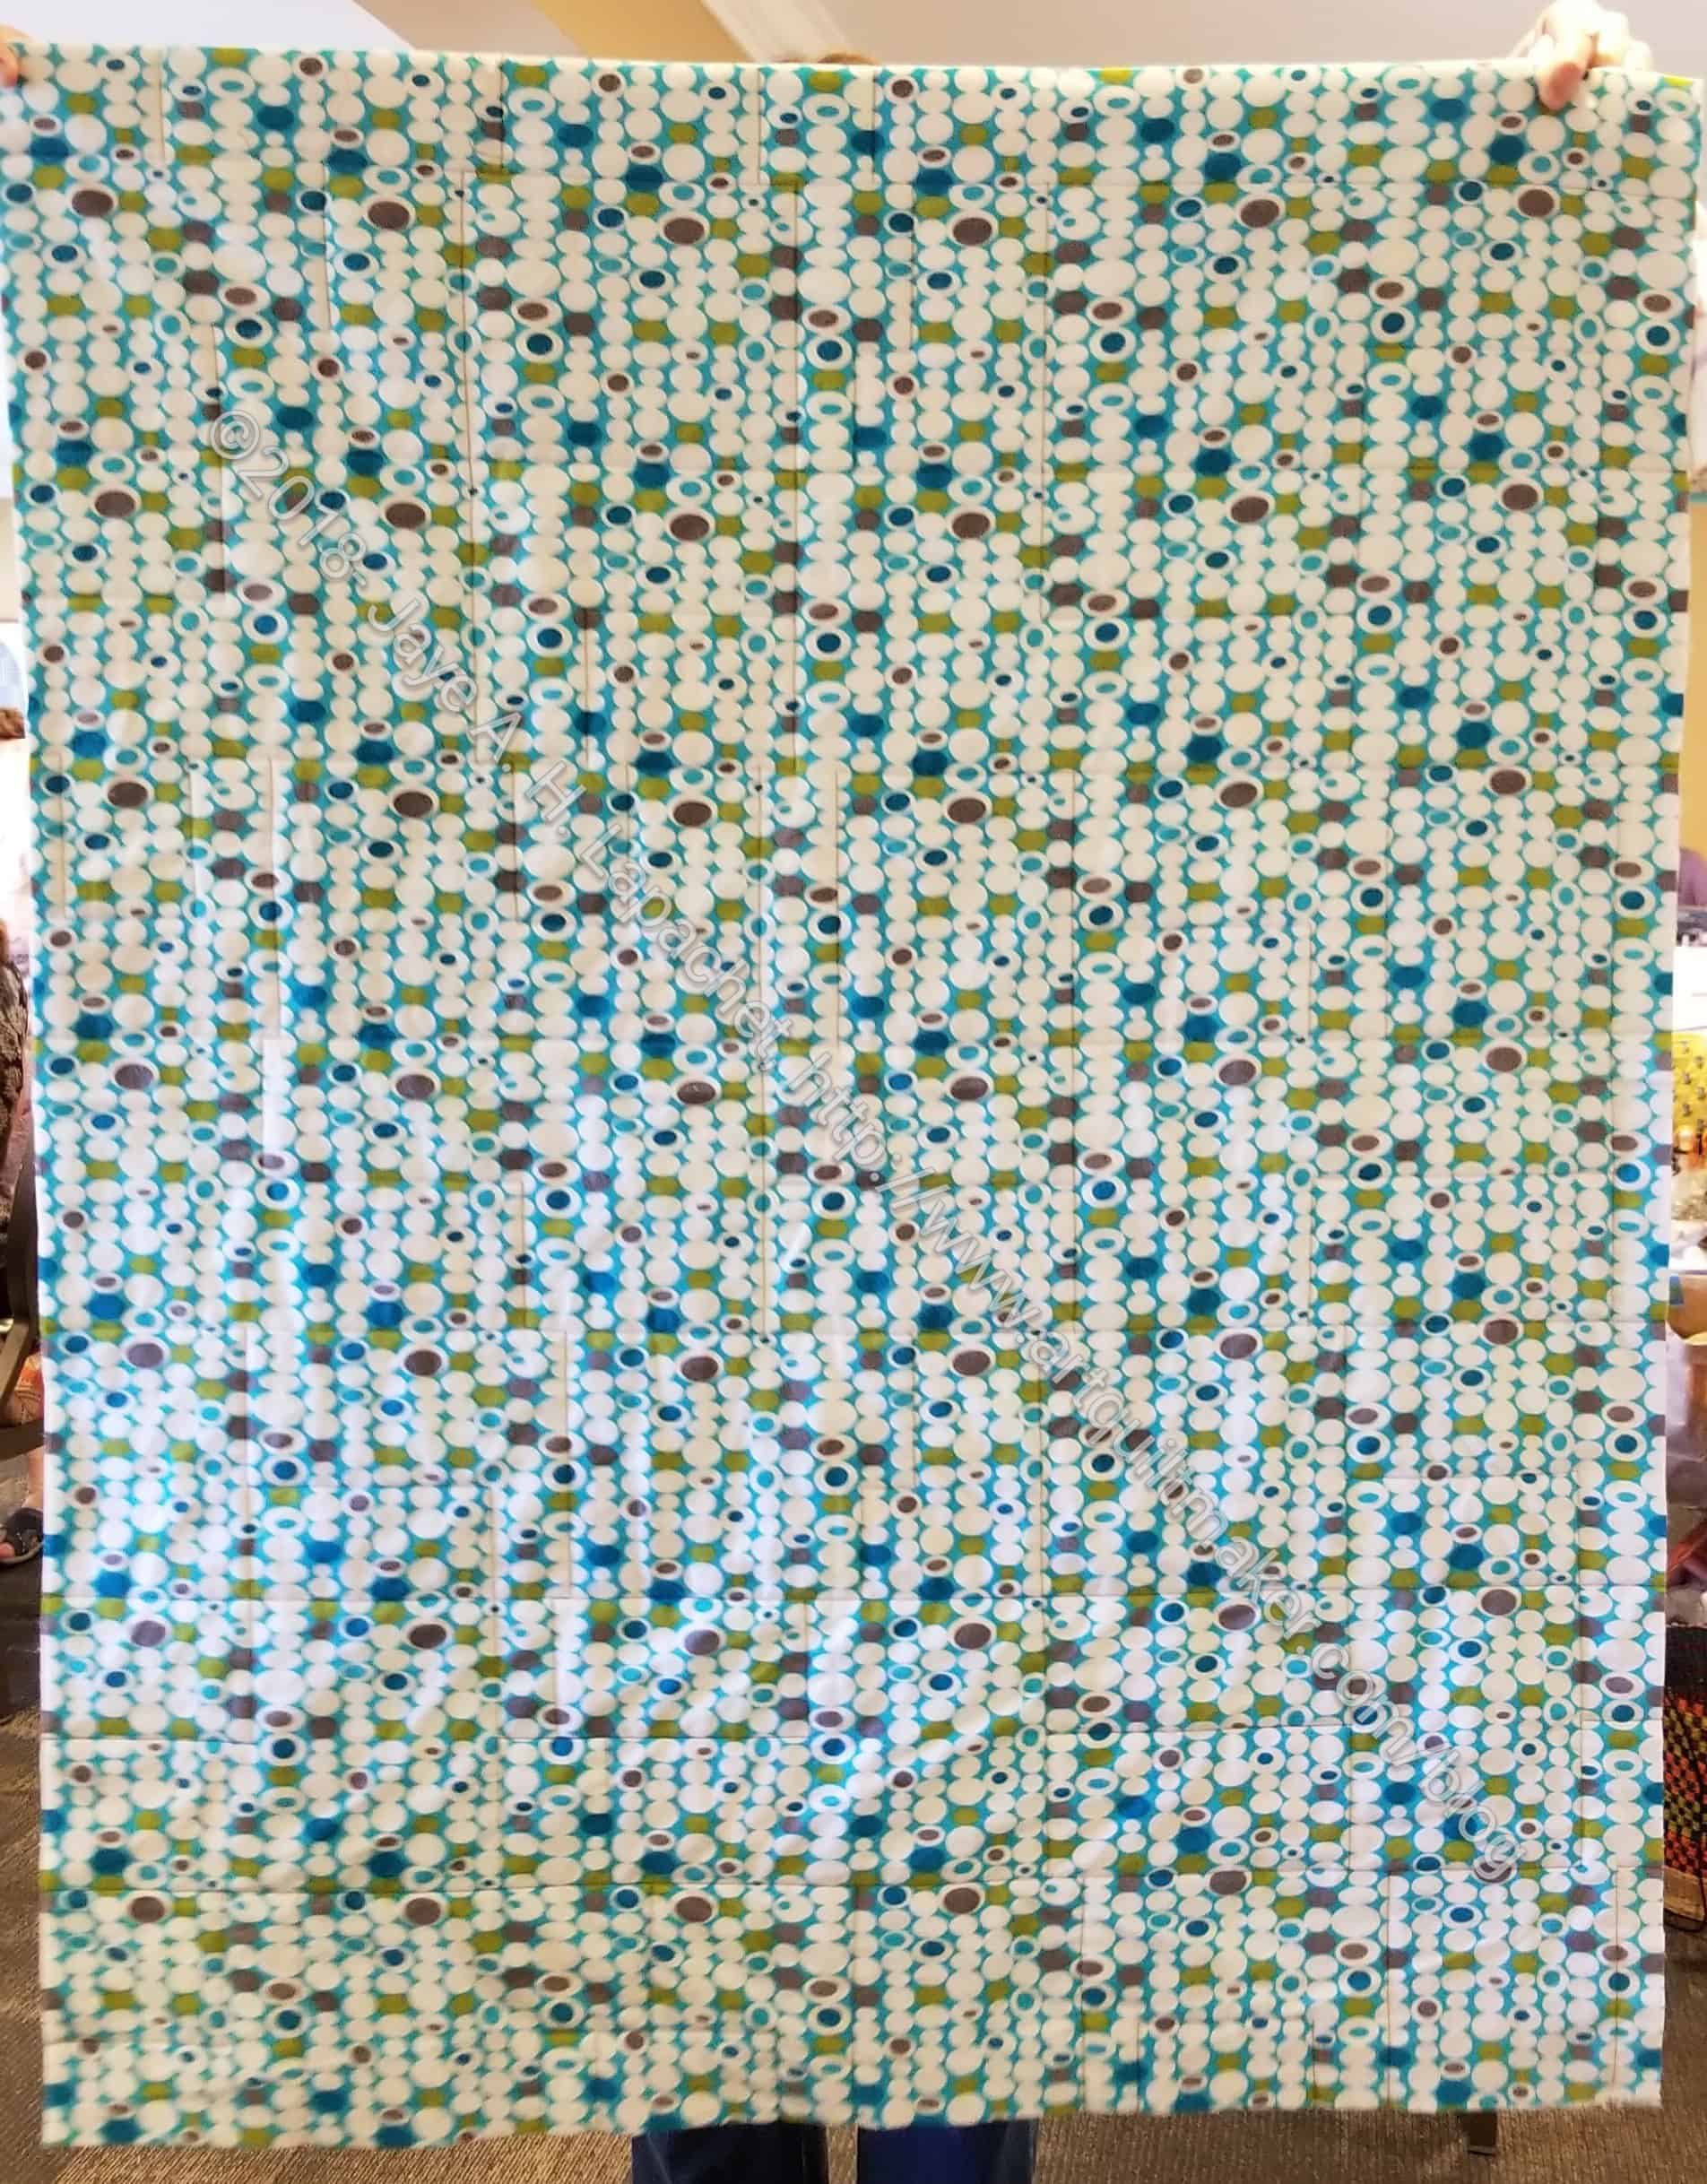
Sealife quilt-let back
After basting it in my hotel room on Friday night, I spent most of Saturday quilting the piece using some flannel for the back. I used the lines on the fabric to guide my quilting.
I have to make a binding and sew that on. I didn’t bring fabric to do that so that is a task for another day.
I am not sure this project was on any of my project lists, which means I can’t cross it off. Still, the fabric has been laying around my workroom and now it will be finished so and off to its new home.
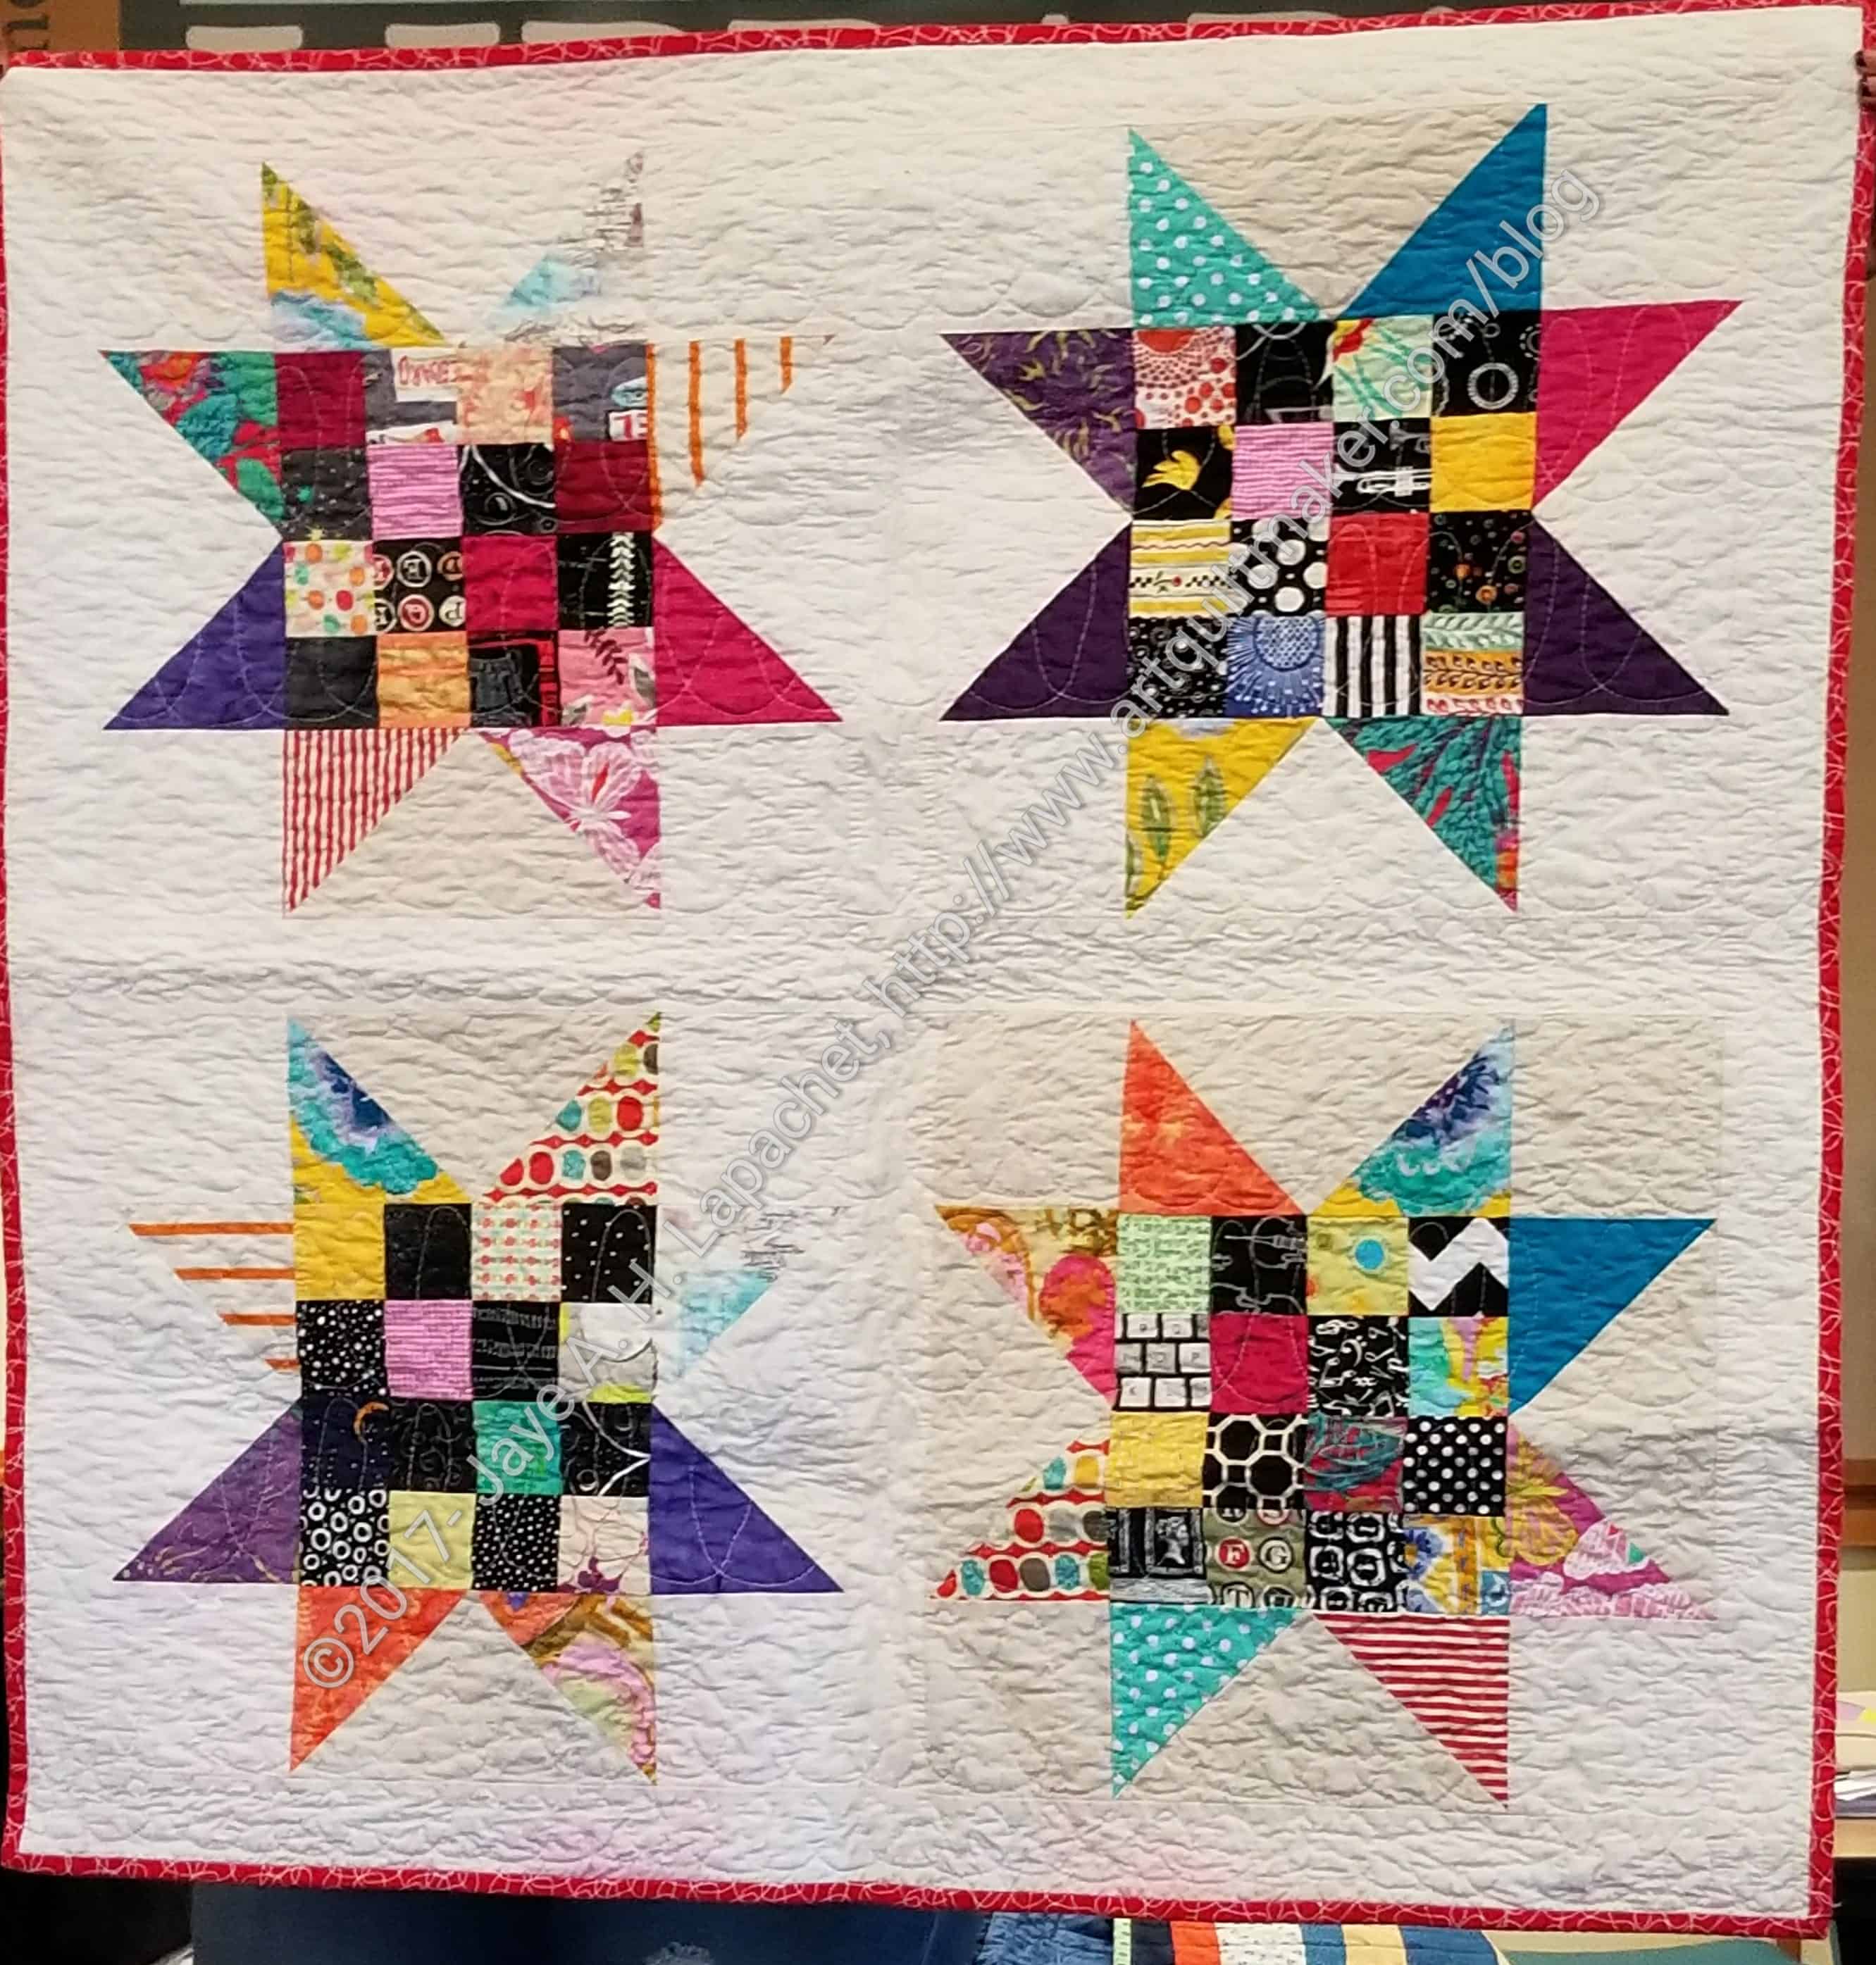
You might remember me talking about the first star donation top. I don’t always get to see the finished product, but last week at the BAM meeting, I got to see it finished.
Star Donation Quilt
Erin quilted it. She doesn’t make a lot of her own quilts, so she quilts a massive number of charity quilts.
The setting looks pretty boring compared to Stars #2 and Stars #3, but I had to make it in order to get to those two. Erin’s quilting makes it look a lot better!
I was thrilled to collaborate with Erin and look forward to seeing what she does next.
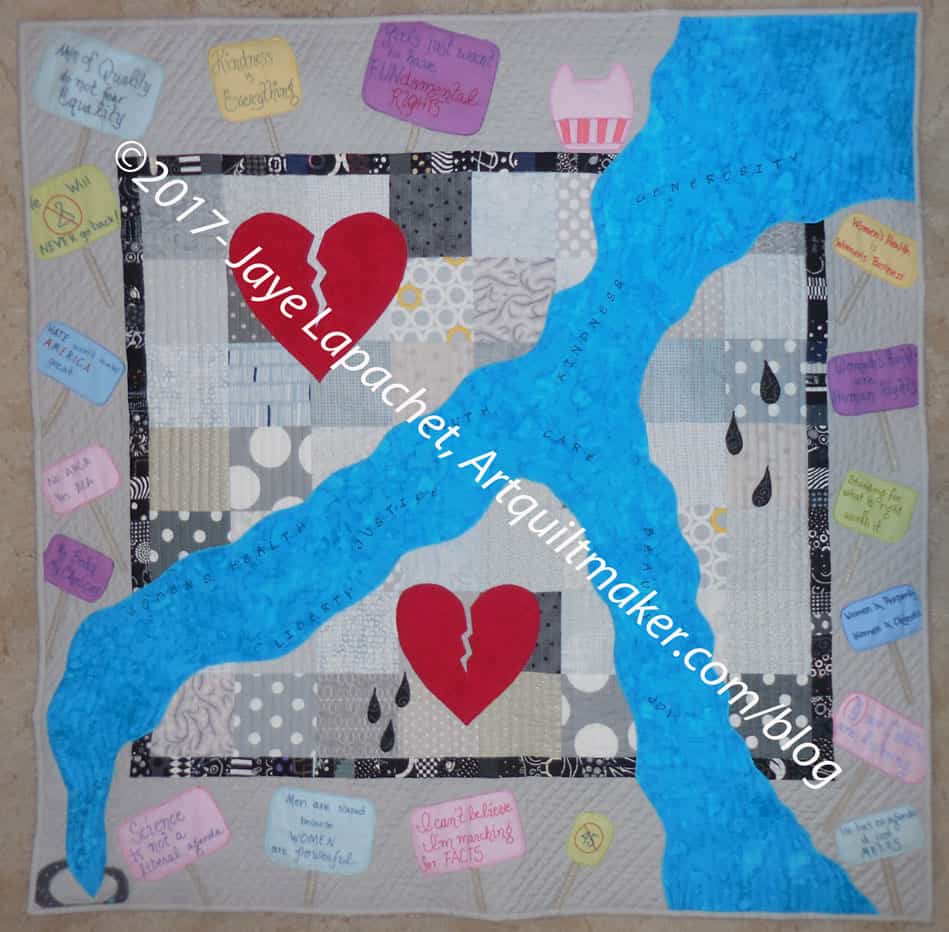
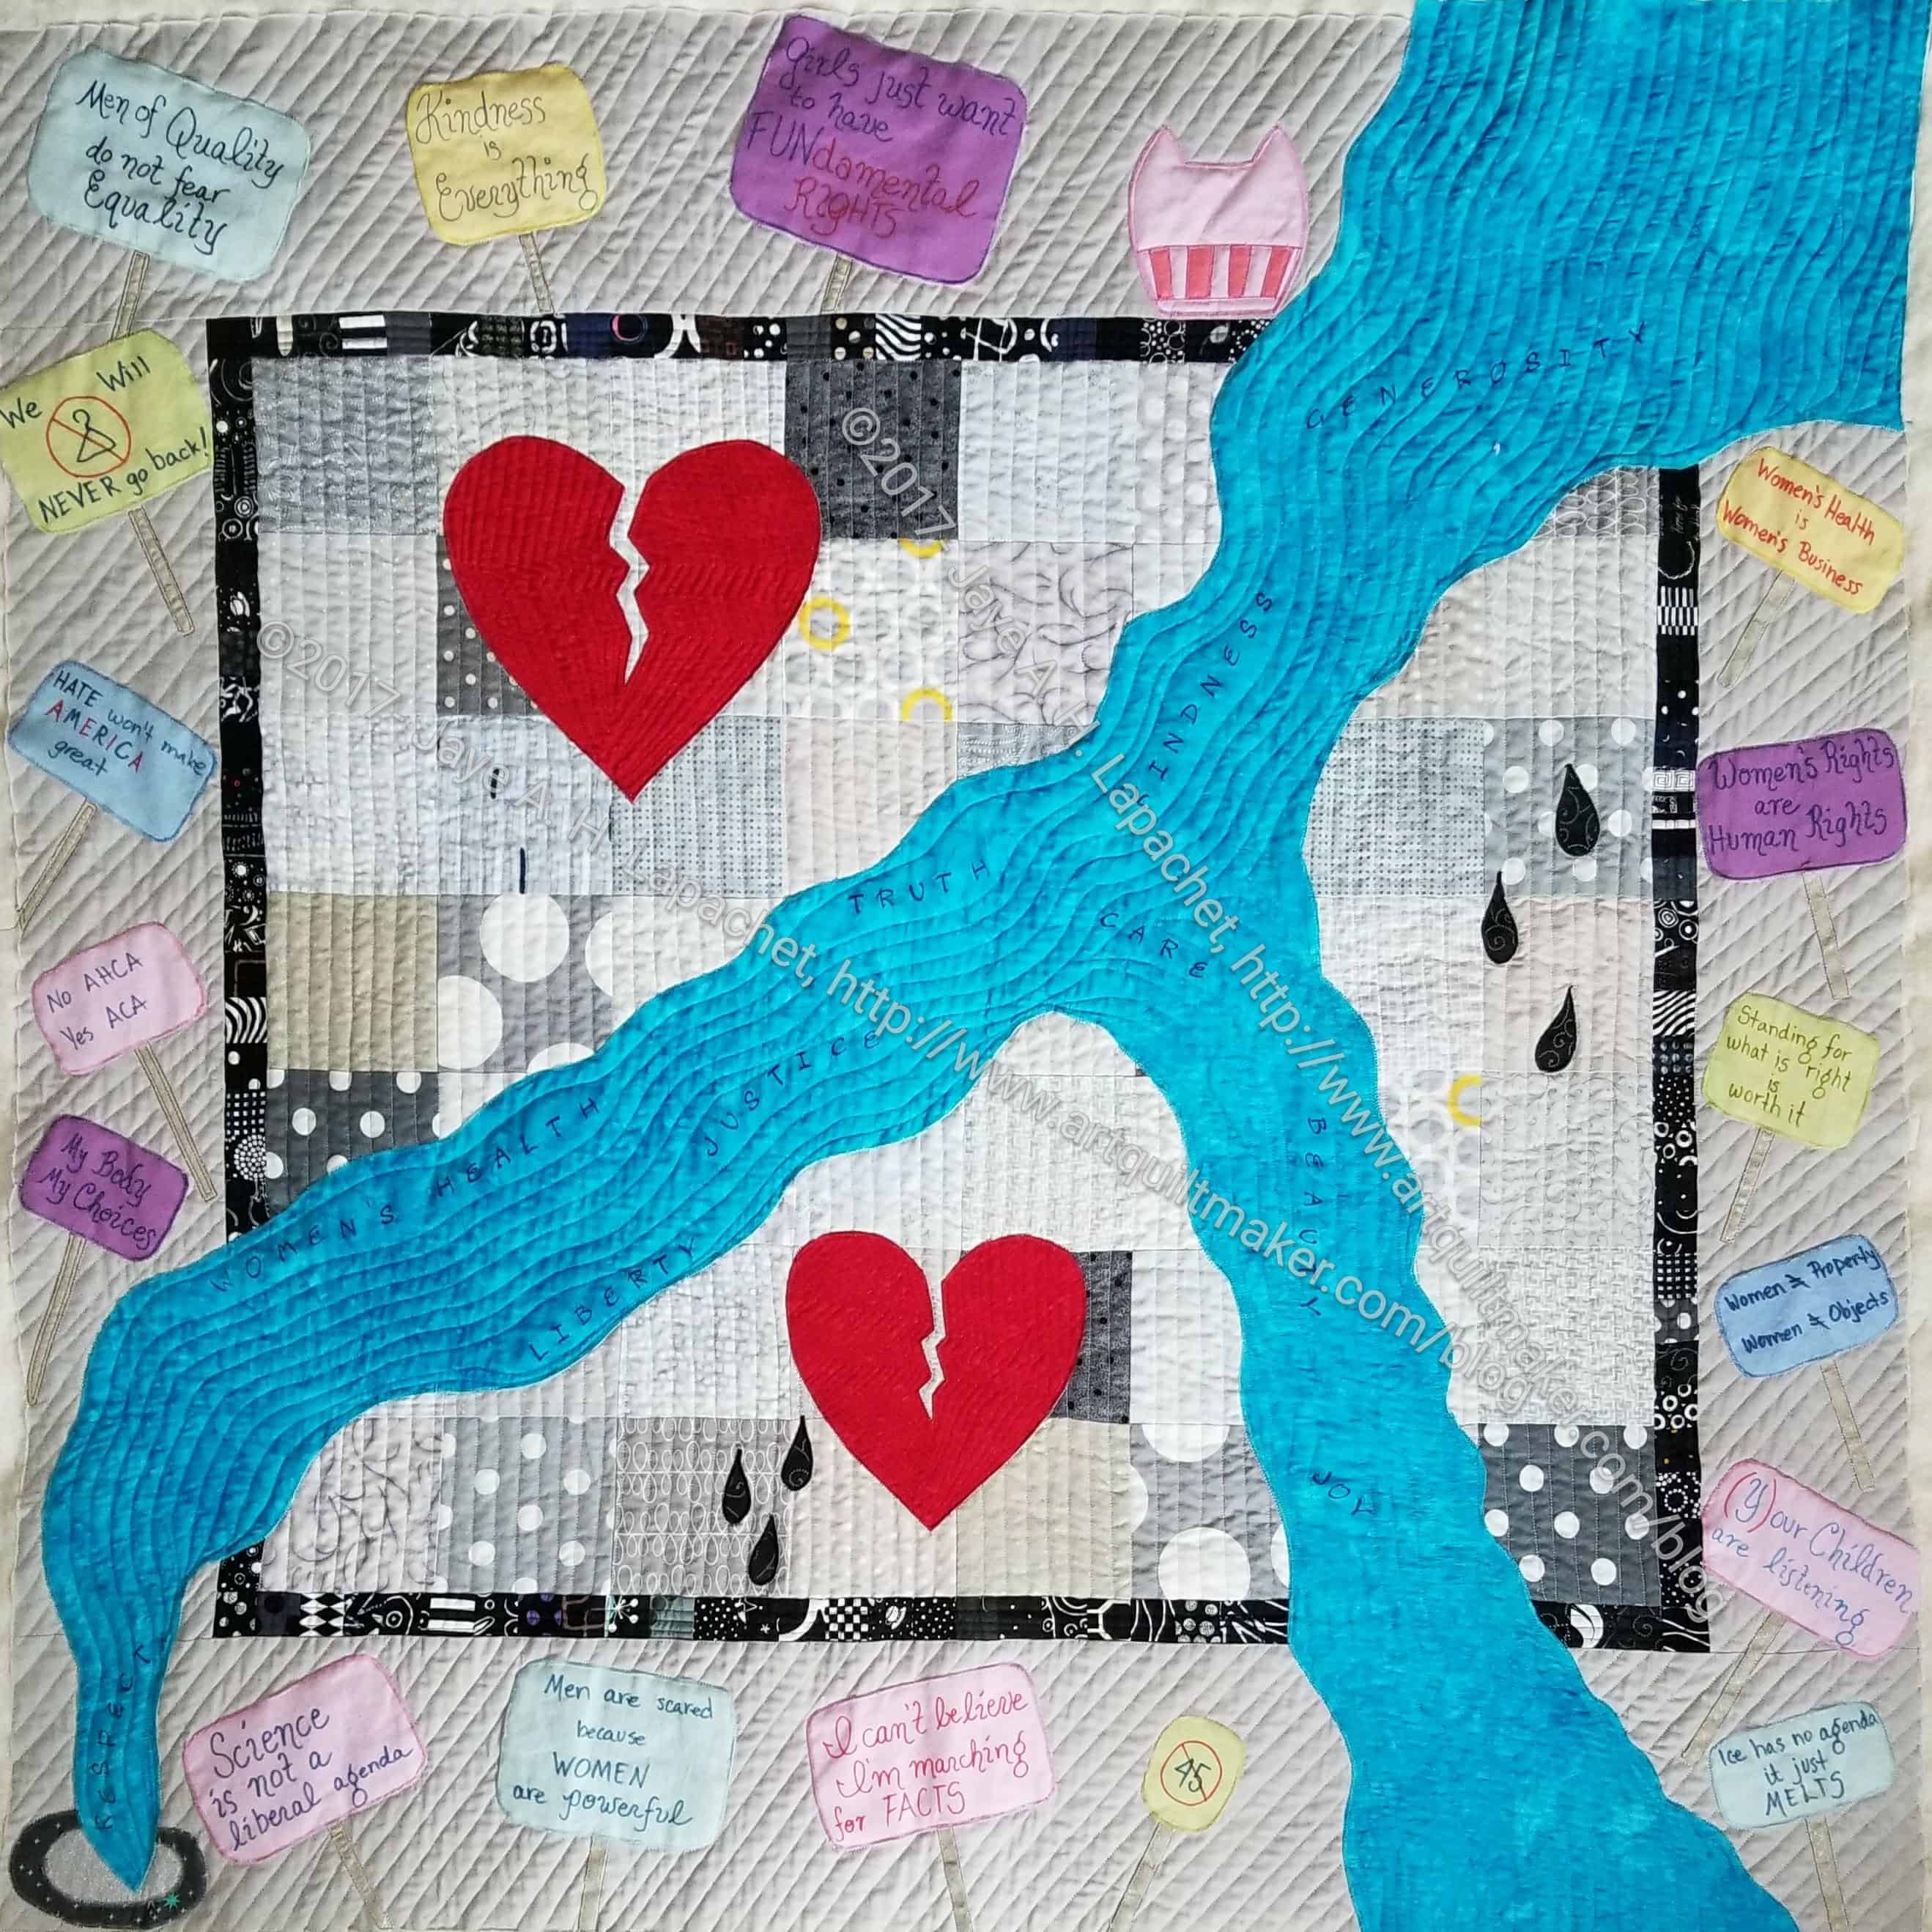
I finally finished Down the Drain on Friday night. Completely finished: quilting done, binding on, sleeve sewn down. Done.
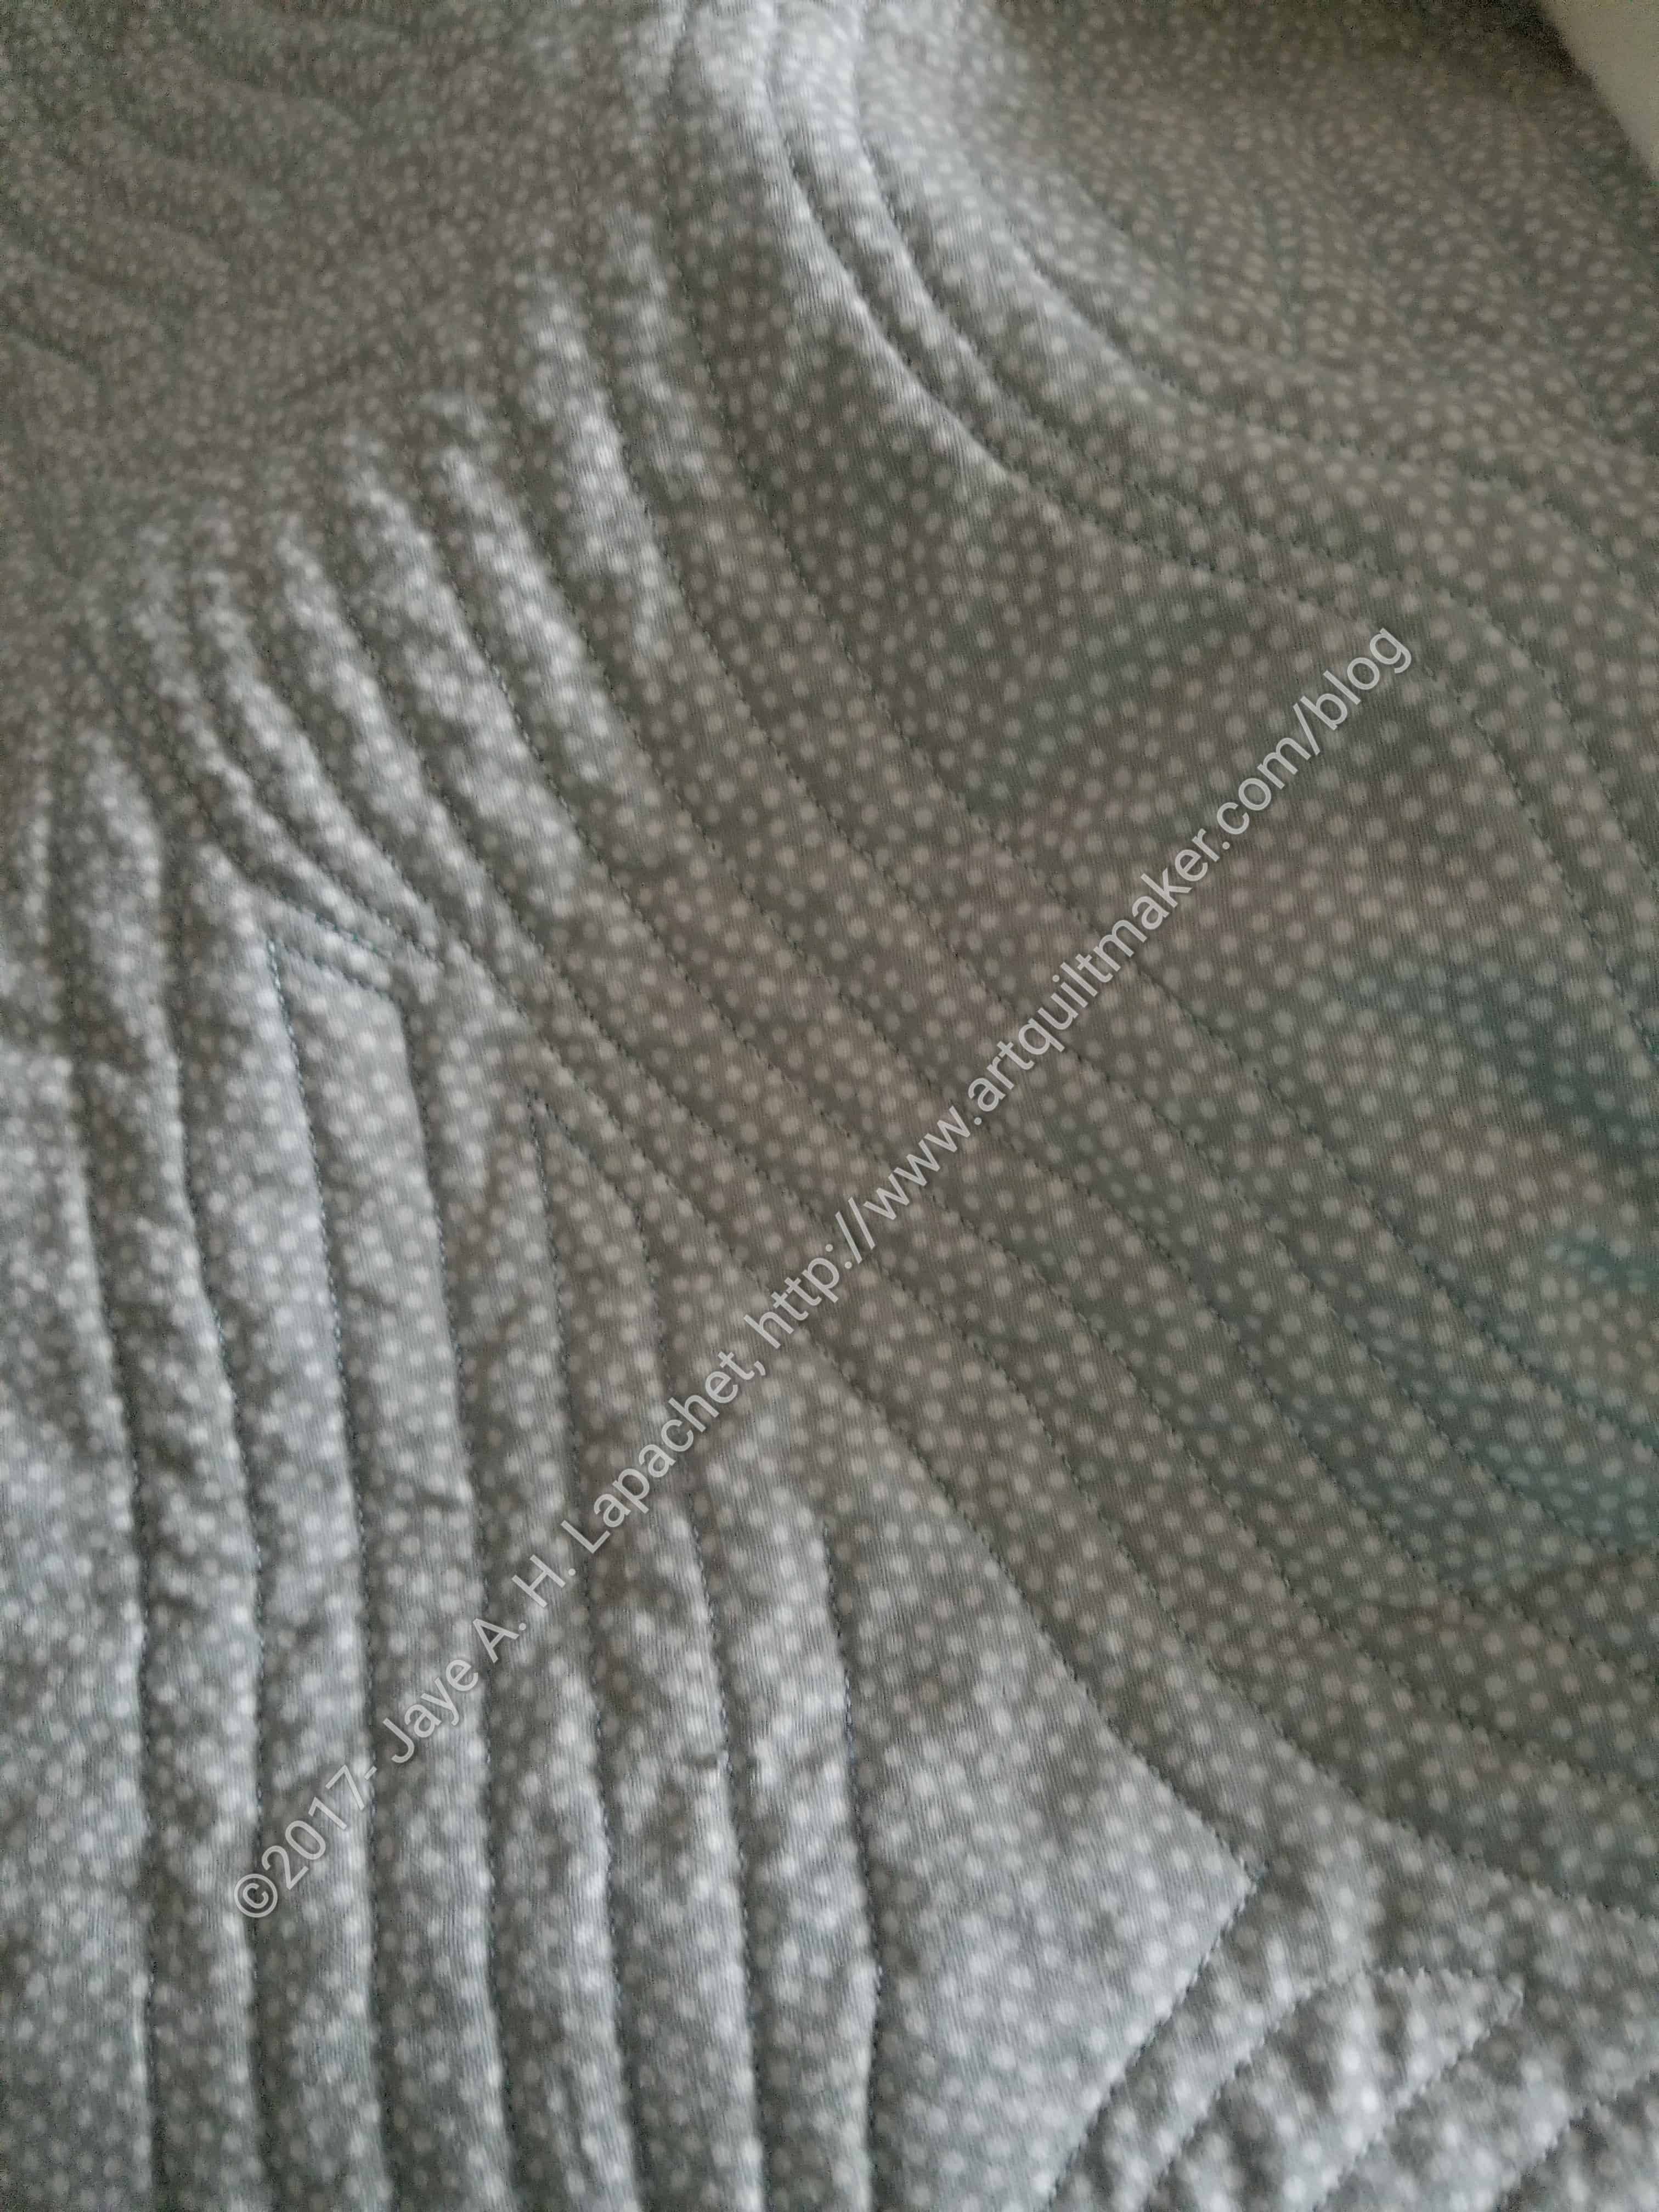
First, as I mentioned, I finished the quilting. Of course I could have stopped any time, but was clearly on a mission. I kept quilting minutely almost every single open space.
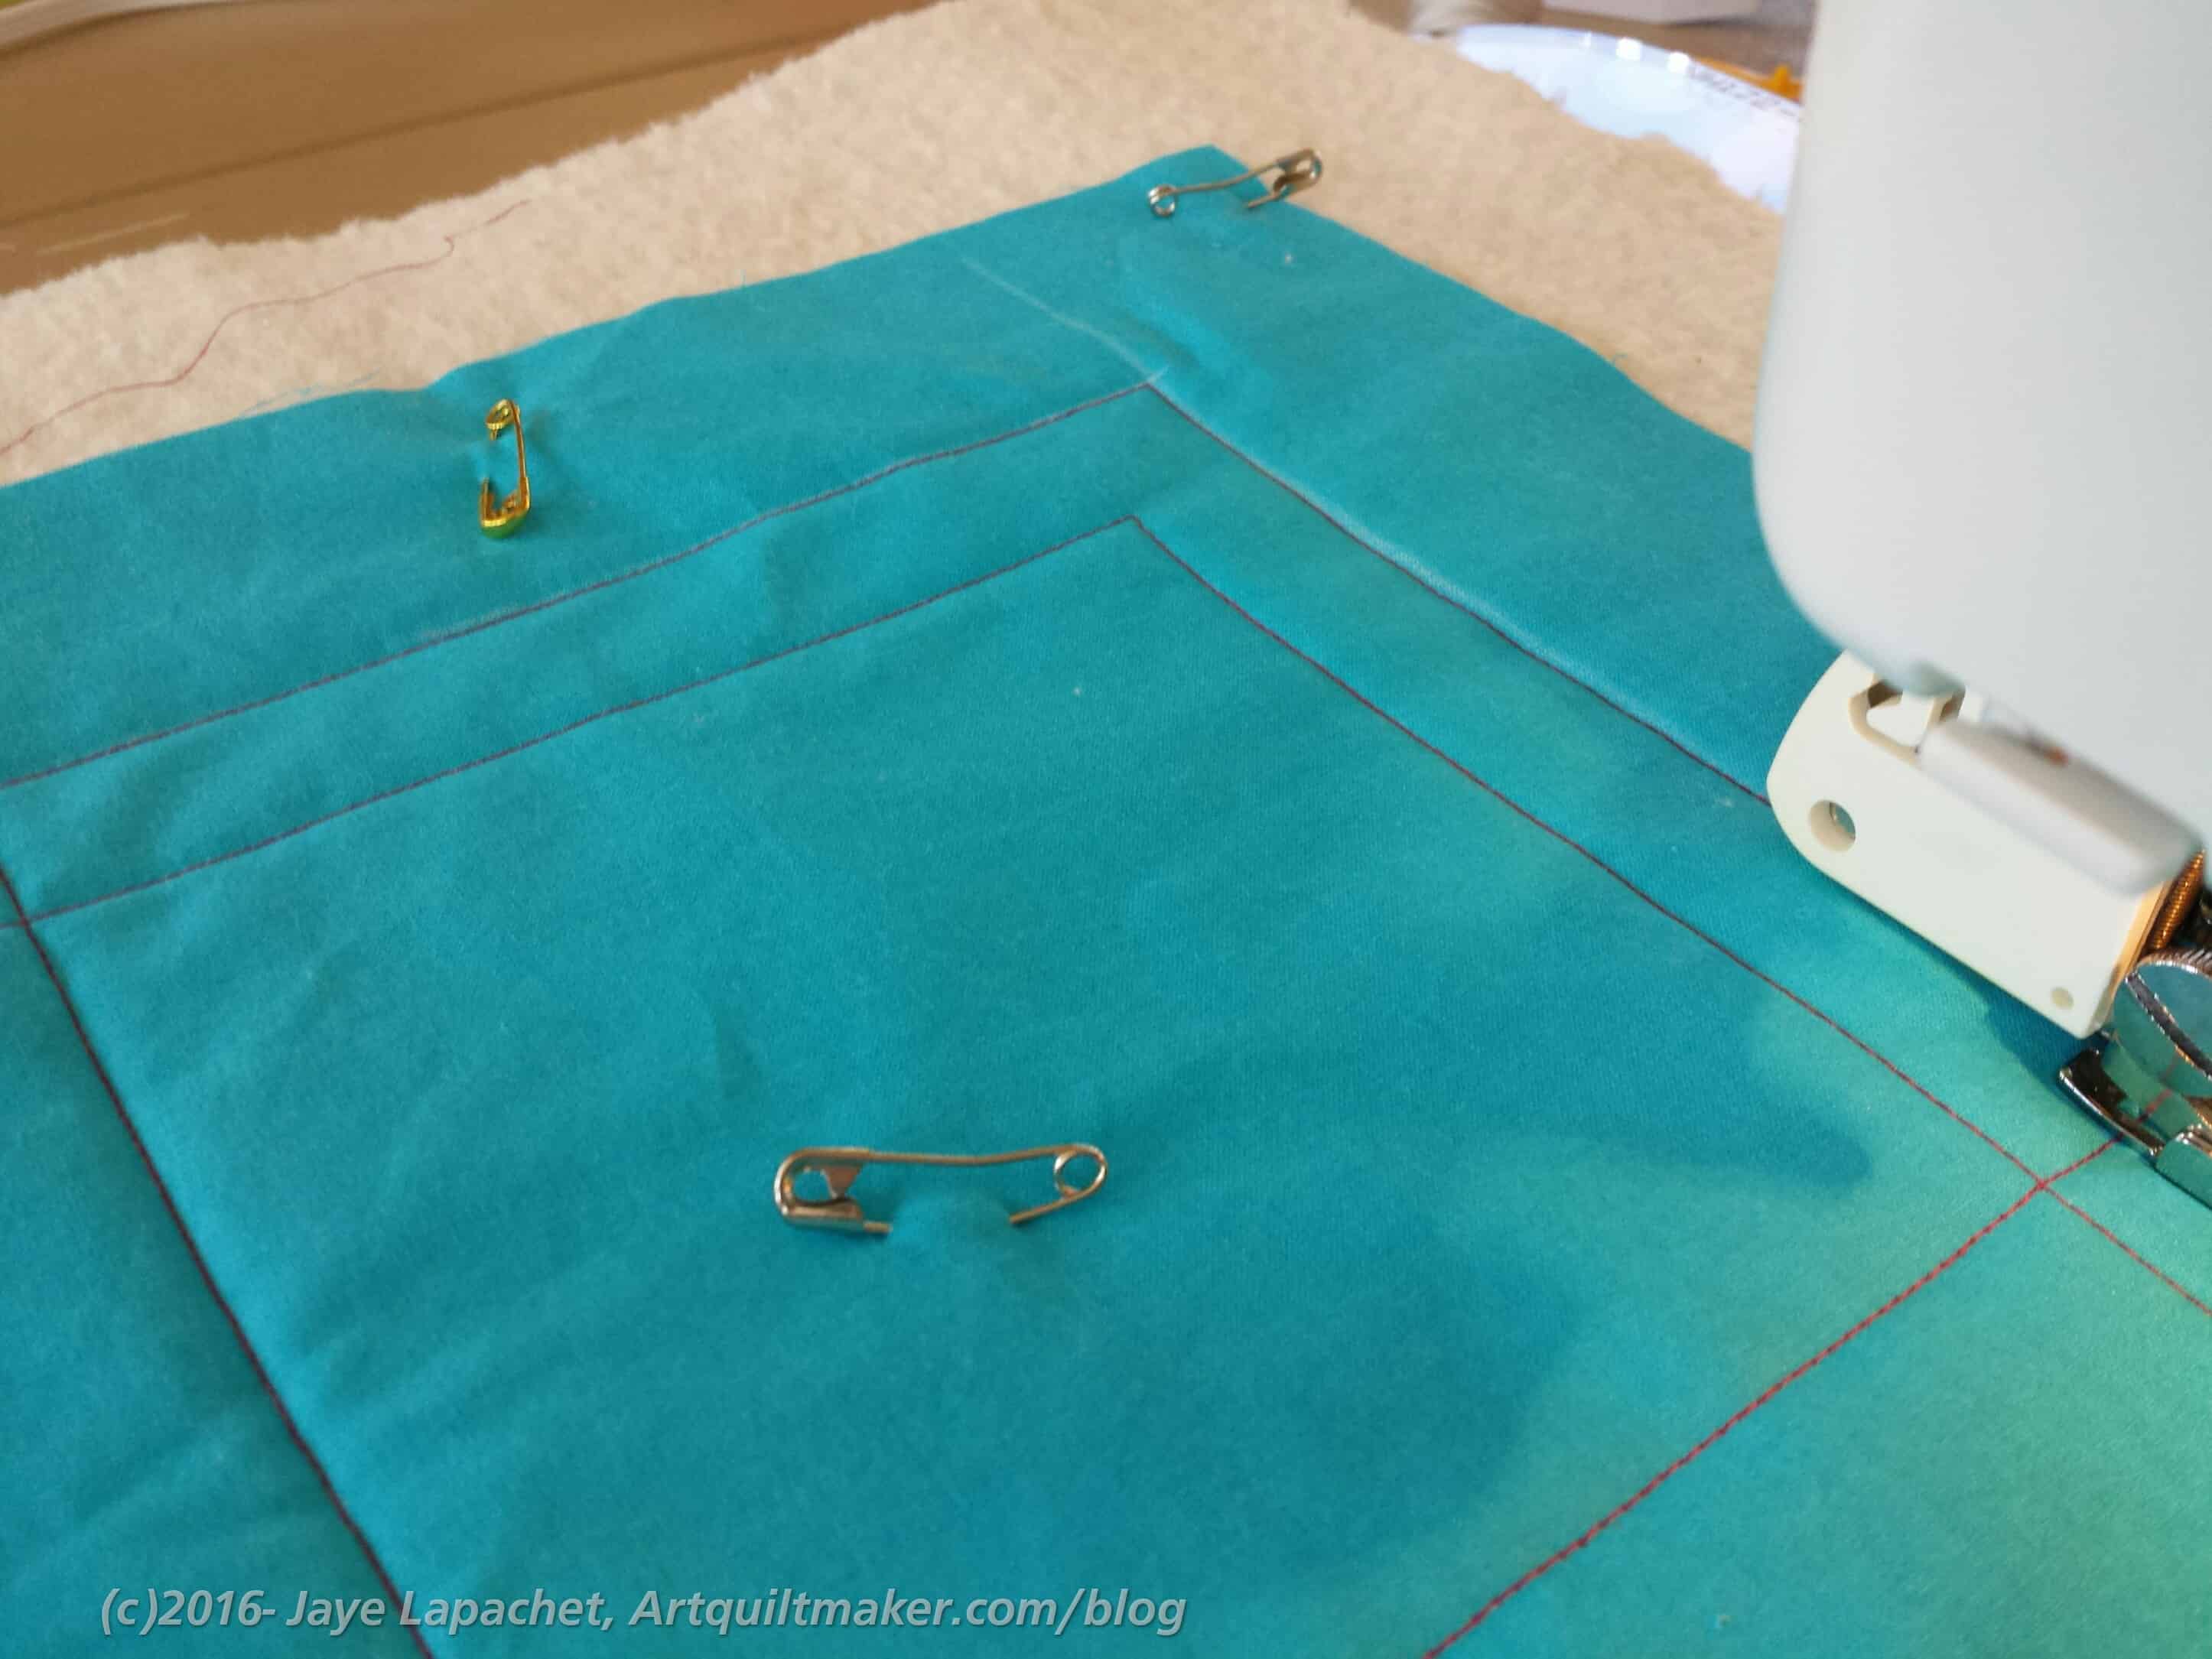
I finished hand sewing the binding on earlier this week. Normally, the combination of tightly woven fabric (an AGF solid) and Aurifil make for slow going, but the combination worked great! My needle went through the fabric with no problem and I sewed the binding in only about 4 hours.
I stitched the sleeve down in only about 2 hours. The whole process of making this quilting was so relatively painless. The experience was not and continues not to be painless. The actual process of making the quilt went so smoothly. I guess it was meant to be.
I finished quilting the art quilt, Down the Drain, a few weeks ago. I don’t know why I didn’t post it. My only explanation is life got in the way.
I am pretty pleased with my quilting. I found that doing the work on the 6600 was relatively painless. The border quilting is not perfect. I couldn’t have done perfect quilting if I had wanted, but I also wanted to express that life isn’t perfect, people aren’t perfect and we have a chance to improve.
I have machine sewed the binding and made the sleeve.
Shockingly, I have been quilting. I have been working, pretty much, on one quilt for a month and I am finishing up the quilting.You’ll see the quilt soon
Quilting a quilt
Yes, **I** am doing the quilting. Don’t expect greatness, because mostly I am doing straight line or straight-ish (as Kelly would say) line quilting.
I am really happy with the 6600. This machine is made for quilting. It has a built-in walking foot that works like a charm. I had very few tension problems even with different weights of Aurifil. While I miss not being able to piece, I am not dreading quilting like I was with my other machines. I think the larger space between the needle and the harp helps, too.
Yes, I have done so in the past, but it has been awhile.
Mel Beach Machine Quilting Sampler
After seeing Mel’s sampler of designs up close and thinking for awhile that I wanted to pull out my walking foot for use more often, I signed up for the class. I love taking BAMQG classes. The people there are really fun, so even if the class it awful (and there hasn’t been an awful one yet), I know we would laugh and have a good time.
I will never be a great quilter like Colleen or Kelly, but I can be adequate and competent. My method of machine quilt is to follow the designs of fabric, as you saw in the Thanksgiving tablerunners. I usually use my applique’ foot and go very slowly. The applique’ foot allows me to see exactly where the needle is going and I can be a bit exacting when I quilt. I used to free motion quilt, but I haven’t done it in a long time and it doesn’t really suit my style of quilts.
The workshop was held at Grace Lutheran on Saturday a week or so ago. The task was to learn to use to the walking foot or become more comfortable in its use. In the process we would create a sampler (or two) of several different quilting patterns. Most of the patterns were straight line, but Mel included some gentle curves as well.
Mel was well organized and had obviously worked hard to develop her handouts. She covered taking breaks and caring for your body, which is skipped over in many classes. We also learned to use tape to mark, tips and tricks for pivoting, decorative stitches and much more. Mel is a calm and well prepared instructor.
The workshop was organized so that the group would get together to learn information then go to the machines to practice. There was a lot of back and forth, which was great because it encouraged everyone to take breaks.
Result of problem with tape
I had a problem sewing on the correct side of the tape at the beginning. This put me behind, because I ended up with a whole bunch of ripping to do. Still I was able to finish one sampler.
I ended up marking an arrow on the tape telling me at a glance on which side to sew. Simple, and possibly unnecessary, but it helped me. I also marked some of the places with my Nonce pencil, a tool I learned to use when I first started quiltmaking. I didn’t have a Sewline with me.
The first thing we did was create squares on the sandwich we had created at home. Like the example above, we were to have a 9 patch layout in which to quilt our designs. I was moving along fine until I sewed on the wrong side of the tape and suddenly my squares were too small. After ripping, I drew the lines on and sewed over those drawn lines rather than using tape. Note that I didn’t make a big deal out of *my* error, as I have seen some people do in other classes. I calmly ripped enough so I could sew the next lesson and then ripped more while I listened to another lecture. Yes, I was frustrated, but this had nothing to do with Mel.
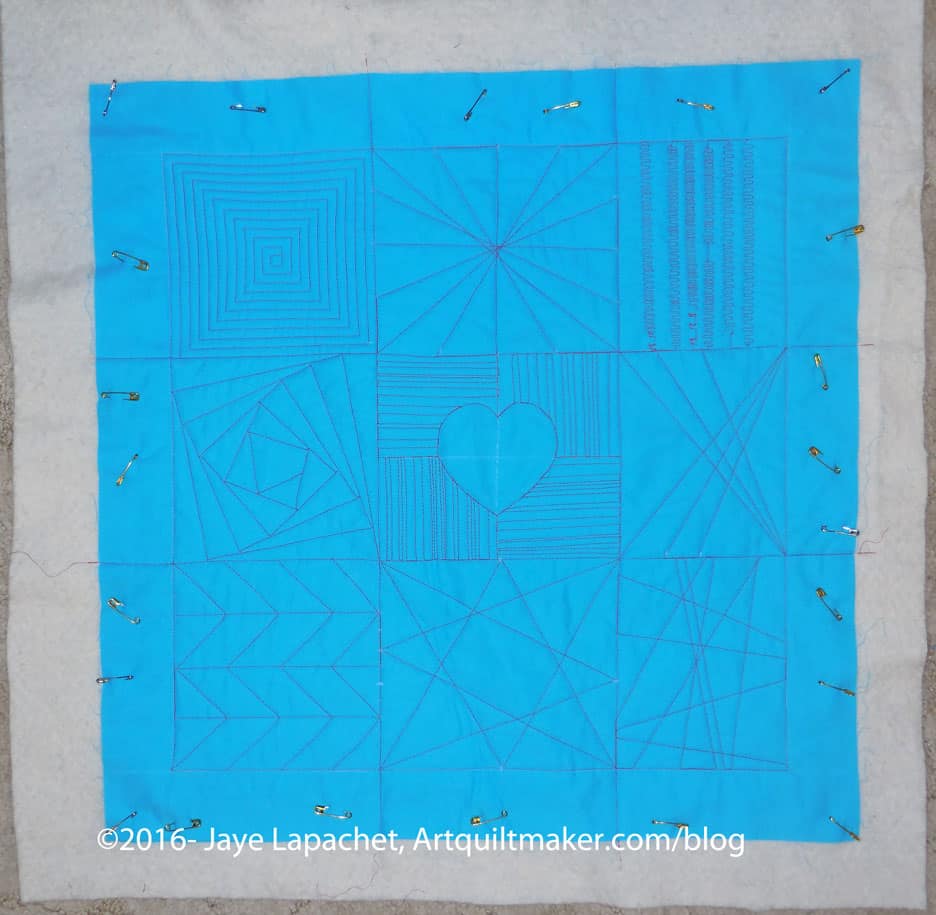
My Machine Quilting Sampler
Eventually, I got back on track and was able to finish all but a quarter of one square.
All of the designs are straight line designs except for the heart in the center, which, as you can see, has only a very slight curve. The straight line designs were mostly done using tape in some way to mark out the lines, though in the spiral (upper left hand corner) I used the side of the walking foot, as instructed.
One of the reasons I took the class was to try and find background designs, that fit my quilting style, to use to finish the Tarts. I am not sure I found what I needed, though I think I can use some of the designs for that purpose
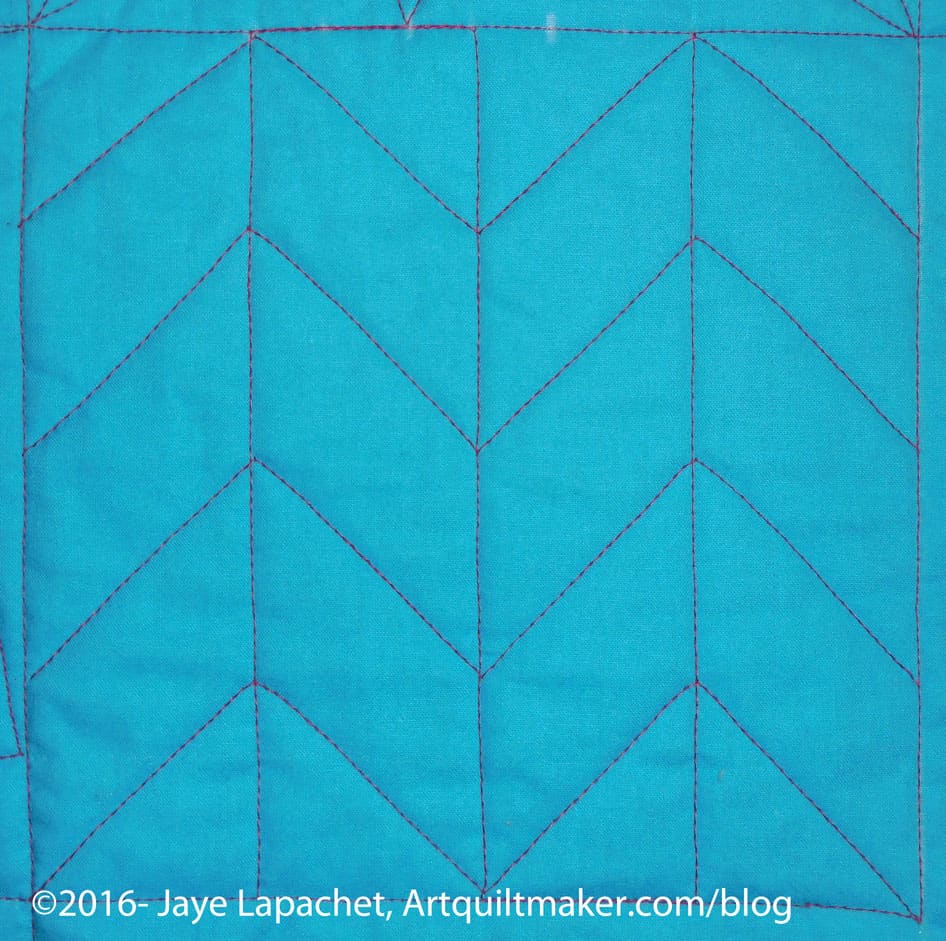
Machine Quilting Sampler: Chevron
My favorite design was probably the Chevron, though I am not sure when I would use it. It isn’t as hard as it looks.
The class was worthwhile and I am glad I took it. I am not sure whether I am more inspired to quilt more in a new way or just have more knowledge. I don’t have a wild desire to machine quilt everything in sight. I suppose time will tell.
I have another sandwich made and continue to try to decide whether I want to start my own sampler, trying out the designs I wasn’t able to try in class. The problem is that if I am quilting, I am not piecing. Also, I can’t switch back and forth as I have to set the machine up for one or the other. For the moment, I will continue to piece.
Walking Foot Students with Projects*
You can read more about Mel’s thoughts on her blog post.
As discussed a couple of days ago, I went on the BAM Retreat. I didn’t just have boatloads of fun and eat until I was sick, I also made some valuable progress.
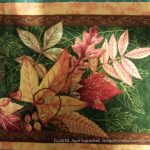
Tablerunner
The Thanksgiving tablerunners have been hanging over my head. Thanksgiving is now 1.5 months away and the hanging became more like the Sword of Damocles than an item on my to do list. I am pleased to say that the two remaining have been quilted. I still need to make and apply the binding, but the quilting part is done. I didn’t get to the tablemat, but I am pleased with my progress.
One thing I did on the pumpkin tablerunner was use Aurifloss (12 wt thread). I used it in the machine with 50 wt Aurifil in the bobbin. There was more breakage than I normally experience with Aurifil. I really like the effect and was pleased that the 50 wt did not show through to the top. I didn’t have to adjust the tension.
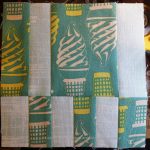
City Sampler / Tale of Two Cities Blocks
City Sampler / Tale of Two Cities Blocks
City Sampler / Tale of Two Cities Blocks
I also made a few blocks for the Tula Pink City Sampler/ Tale of Two Cities project. The blocks were a good break from quilting, which I needed after I completed the quilting on the first tablerunner. Julie joined the #100blocks100days challenge on Instagram and, while I have not joined, it is inspiring me to work on them. Also, she is now ahead of me on making blocks! I need to get myself in gear. Michelle S was a good support for this project at the retreat.
I also FINALLY started the Valori Wells Little Cell Phone Wallet pattern. I really, REALLY need something to carry my phone and hotel key when I am wearing dresses with no pockets. REALLY. Since the project was small, it seemed like a good time to work on it. I had some trouble with the directions, which should be no surprise. I did get a good working sample by the time I left the retreat. It isn’t one that I will use for various reasons. I’ll write more about this pattern in another post.
While my descriptions might not seem like a lot, I was busy and working hard the whole time. I am pleased with my progress and will be really pleased when I can finish these various projects and cross them off my list.
My friend Kathleen is organizing a great event in beautiful Reno: Make it Modern. This is the premier Reno event for modern quiltmakers. It is a great opportunity to work with a couple of QuiltCon 2016’s hottest designers.
What: Fun and fabulous days of creating, led by modern quilters Christina Cameli and Libs Elliott. Additional help, discussions, and general shenanigans each evening at the sewing salon, and a trunk show on Sunday morning.
Where: Peppermill Resort, Reno, Nevada
When: June 9-12, 2016
Who: Christina Cameli and Libs Elliot will be teaching
Why: Because it is fun to meet up with other like minded quiltmakers and have some fun sewing
My friend, Kathleen, is organizing a great event in beautiful Reno: Make it Modern.
What: Fun and fabulous days of creating, led by modern quilters Christina Cameli and Libs Elliott. Additional help, discussions, and general shenanigans each evening at the sewing salon, and a trunk show on Sunday morning.
Where: Peppermill Resort, Reno, Nevada
When: June 9-12, 2016
Who: Christina Cameli and Libs Elliot will be teaching
Why: Because it is fun to meet up with other like minded quiltmakers and have some fun sewing
Quilt Christmas table runner – I thought about calling it done, because I was finished except for the very outer border. I was very much inclined to call it done, but thought the outer border would be flapping around while I tried to bind it, so I started to do a little bit of quilting to hold it down. I have about two more rows left.
Wash fabric AKA The Great Unwashed-I washed a few loads in the past month and actually spent a couple of hours ironing then cutting. Further progress.
Cut out 3 notepad covers for gifts
Finish cutting out Day in the Park backpack variation
Sew 3rd Petrillo Bag
Sew Bon Appetit apron
Cut out Art supplies pincushion
Sew Art supplies pincushion
Sew purple pincushion
Quilt Thanksgiving tablerunner #2
Quilt Thanksgiving tablerunner #3
Quilt Thanksgiving table mat
Bind Thanksgiving tablerunner #1 – I have pulled a couple of fabrics for binding, but I am not sure which to use. Admittedly, I haven’t spent a lot of time thinking about it. I should do, though since that will add to my finish list.
Pull fabrics for QuiltCon class
**Make binding for Flowerburst
Finished since December 2015 post
Quilt Thanksgiving tablerunner #1
Cut out Anna Maria Horner Multi-tasker tote
Cut out Art supplies Sew Together Bag
Finish cutting out 3rd Petrillo bag
Cut out Thanksgiving tablerunner #1
Cut out Thanksgiving tablerunner #2
Cut out Thanksgiving tablerunner #3
Cut out Thanksgiving table mat
ATCs for CQFA December meeting
Finish sewing Anna Maria Horner Multi-tasker tote -this was a gift I intended to give during Holiday 2013- sigh. Missed 2014 Holiday deadline as well. I made it for birthday 2016 and it was a successful gift.
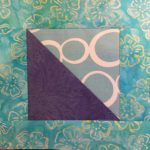
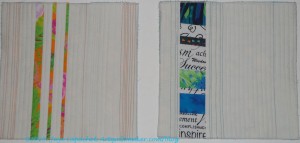
As I mentioned a few times, I made two small quilt-lets to donate to the San Jose Museum of Quilts & Textiles for their Fibershots fundraiser. All the pieces are 10″x 10″ and will be $100. They should have less than 3″ of dimensionality if the piece sticks out from the wall. My piece is basically flat.
I am killing two birds with one stone by making them in the minimalist style for the Mighty Lucky Quilting Club February Challenge. I’ll talk more about that aspect in a later post.
Minimalist Fiber 1 & 2
I wanted to make something that would sell, so I kept the design clean and used popular colors. The piecing was easy – all out of the scrap bins. I got bored by the machine quilting so I added some color to each piece.
I didn’t know I had to put a sleeve, etc on the piece, so I wasn’t able to finish them at the work party after the meeting. I was a little irritated at that, but stayed up on Saturday night (my exciting life!) to finish them so I could start fresh on Sunday morning.
I hope someone buys these. I would really be unhappy if they stayed in the gift shop for the next 3 years.
Friend Julie and I went to Colleen’s last Friday and picked up quilts.
I picked up 2 quilts, which now need to be bound. Julie picked up her giant Christmas quilt. We went to Dharma, Flourcraft and had lunch at the Miracle Mile Cafe.
Colleen is finally getting back into the swing after her family challenges. She is caught up on quilting quilts and is starting to design patterns again. She is working on a group of patterns with a labyrinth theme. They are gorgeous and the construction uses a technique that keeps them very straight. I will share more information with you when she gets to a point where you can buy them.
Julie picked up her giant Christmas quilt, which she showed at the CQFA Meeting. It is a full on scrap quilt and really epitomizes Julie’s exuberant nature.
I picked up the FOTY 2013 and the Russian Rubix. I didn’t remember FOTY 2013 until the morning of when I was in the shower. I am very pleased to have it home and am in the process of hand sewing the binding. After that I will work on the Russian Rubix. I thought I might get RR done in time to enter into the SCVQA Show, but I don’t think so. It is in two weeks and I have done no paperwork, contacted nobody. I’ll enter it into something else later in the year.
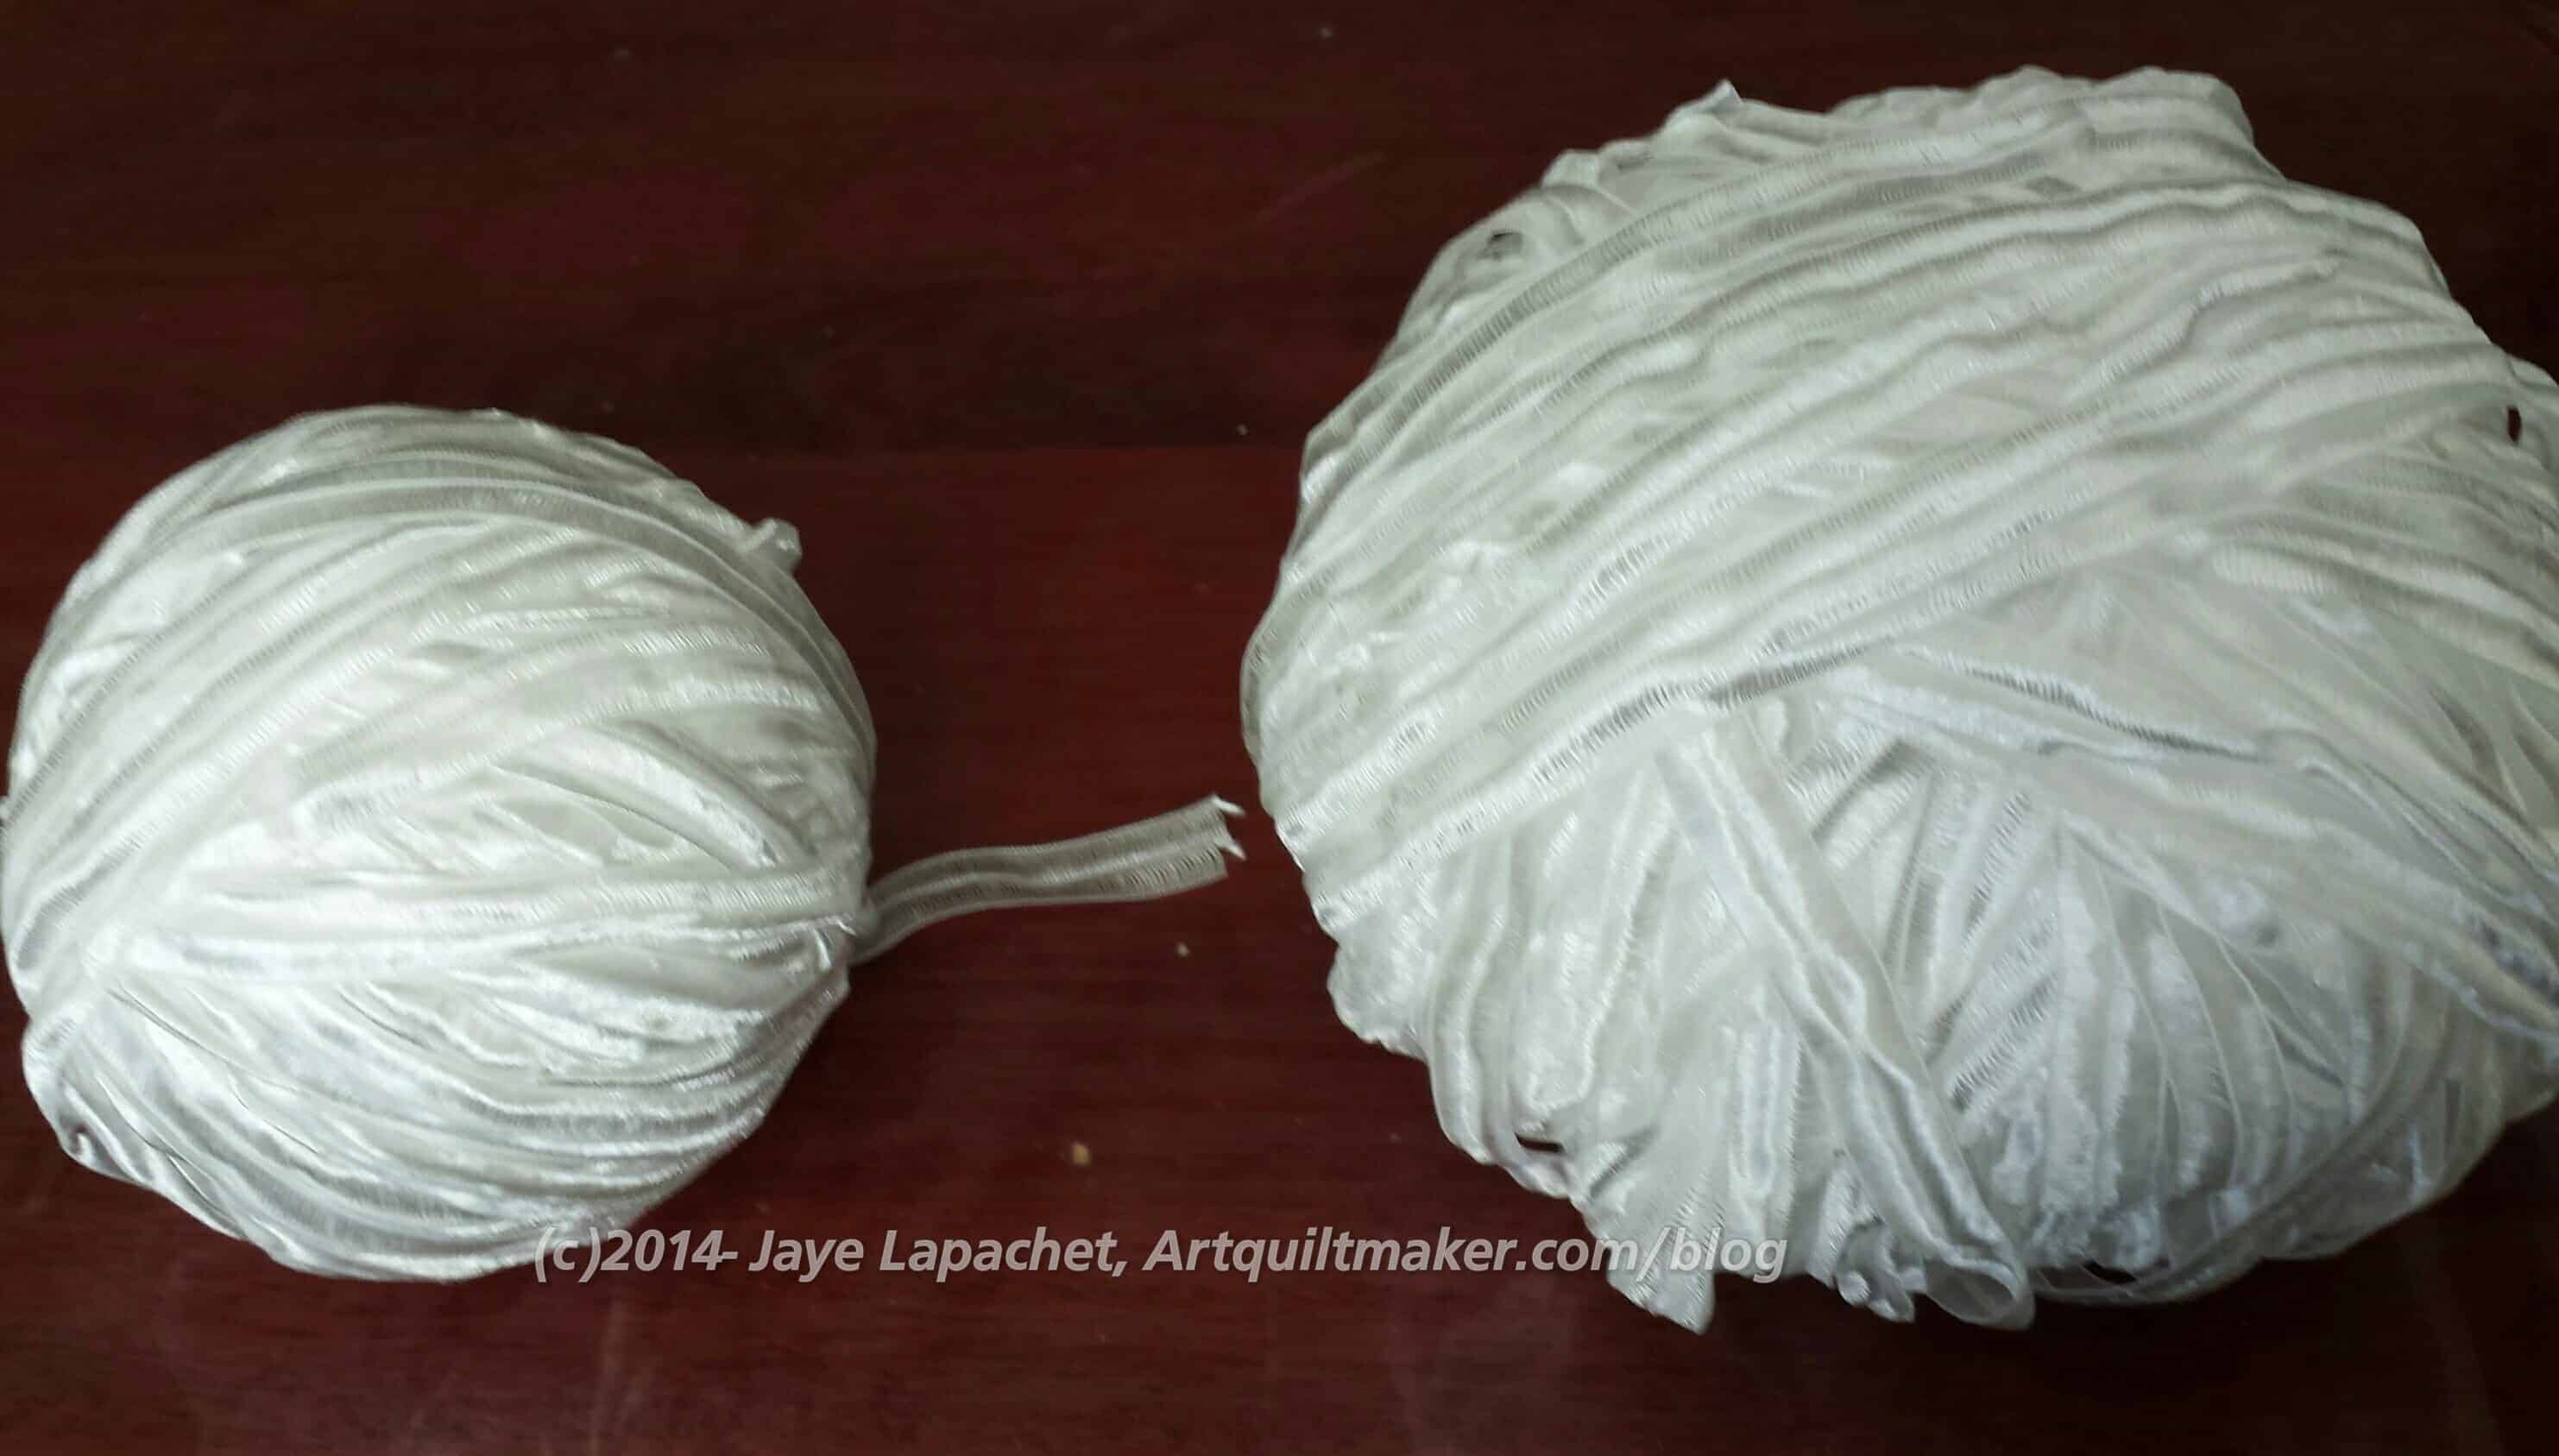
Silk ribbon
Julie needed to stock up on dyes and dyeing supplies, so we went to Dharma. I never feel like there is much there for me there, but I bought a couple of bottles of Retayne and some gifts. I always enjoy looking at the yarns. They are such beautiful colors and feel so soft.
Julie and I shared the purchase of on skein of some PFD silk ribbon. I wasn’t even thinking about until she showed it to me and said that we could lay it on other fabric and color it or paint it. Once she said that I was a goner. I couldn’t get the process out of my head, especially with the Tsukineko Ink experience fresh in my mind. She put it back, but I said I would share it with her.
After Dharma, we went to lunch. There is a cafe, which has a lot of gluten free options. I had GF Eggs Benedict. It is so nice to order straight off the menu and not have to go over ingredients with the server. It makes me feel like a real person. We sat for awhile and then headed over to Flourcraft, which is a gluten free bakery. I was full as a goog, but we sat and had coffee and cake anyway. I stuffed a piece of orange bundt cake into my stomach AND bought two scones for later. Again, I can’t tell you who a treat it is to go into some shop and buy whatever I want without worrying about wheat flour. It was nice to sit there and look out the large windows. The clouds were big and fluffy and gorgeous that day, so the sun was, on and off, peeking through to give a blast-like sunbeam. I definitely did not eat pizza for dinner. I just had a salad while the boys ate pizza.
We stopped at a small toy/craft shop called Doodlebug as well. They have a lot of fun toys, but also craft supplies. They also have pottery to paint. Their button selection is almost as good as Britex, but veering towards kids themed.
It was supposed to be a leisurely day, visiting with each other and doing fun stuff. We did fun stuff and we visited, but we also went and went and went and it felt a little like a marathon. A VERY fun marathon. 😉
I saw a recent article, Turning Practice into Play by Betsey Langford**, in the November 2014 issue of the AQS magazine. The article was about practicing machine quilting. The article proposes a playful, and useful way to practice machine quilting. It made me think about my recent experiences with machine quilting.
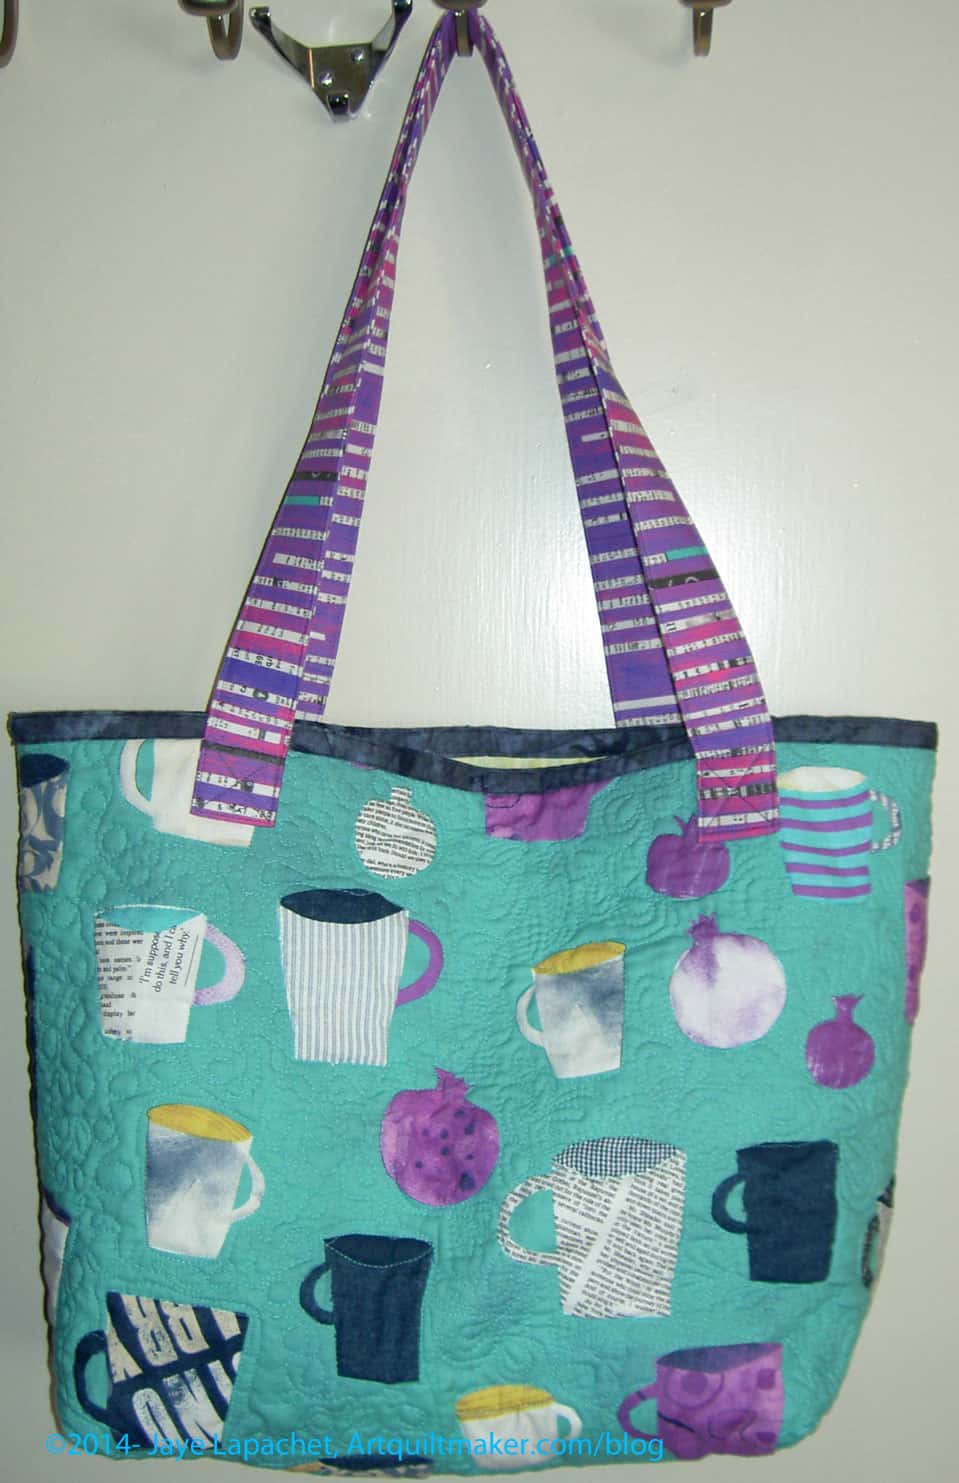
Finished: Kelly Bag
I think that my recent experience with the Kelly Tote is validated by this article. One of the reasons I never really practiced machine quilting outside of classes was because it felt futile. I know the 12″ squares are a good manageable size to get the feel of machine quilting, but then what? What would I do with them? My thought process was ‘nothing’ so I would use ugly fabric and then I wouldn’t be at all motivated to practice. Practicing machine quilting on a half yard of fabric and then making the tote made the process seem less futile. It made it seem like I was practicing AND preparing something that I could use.
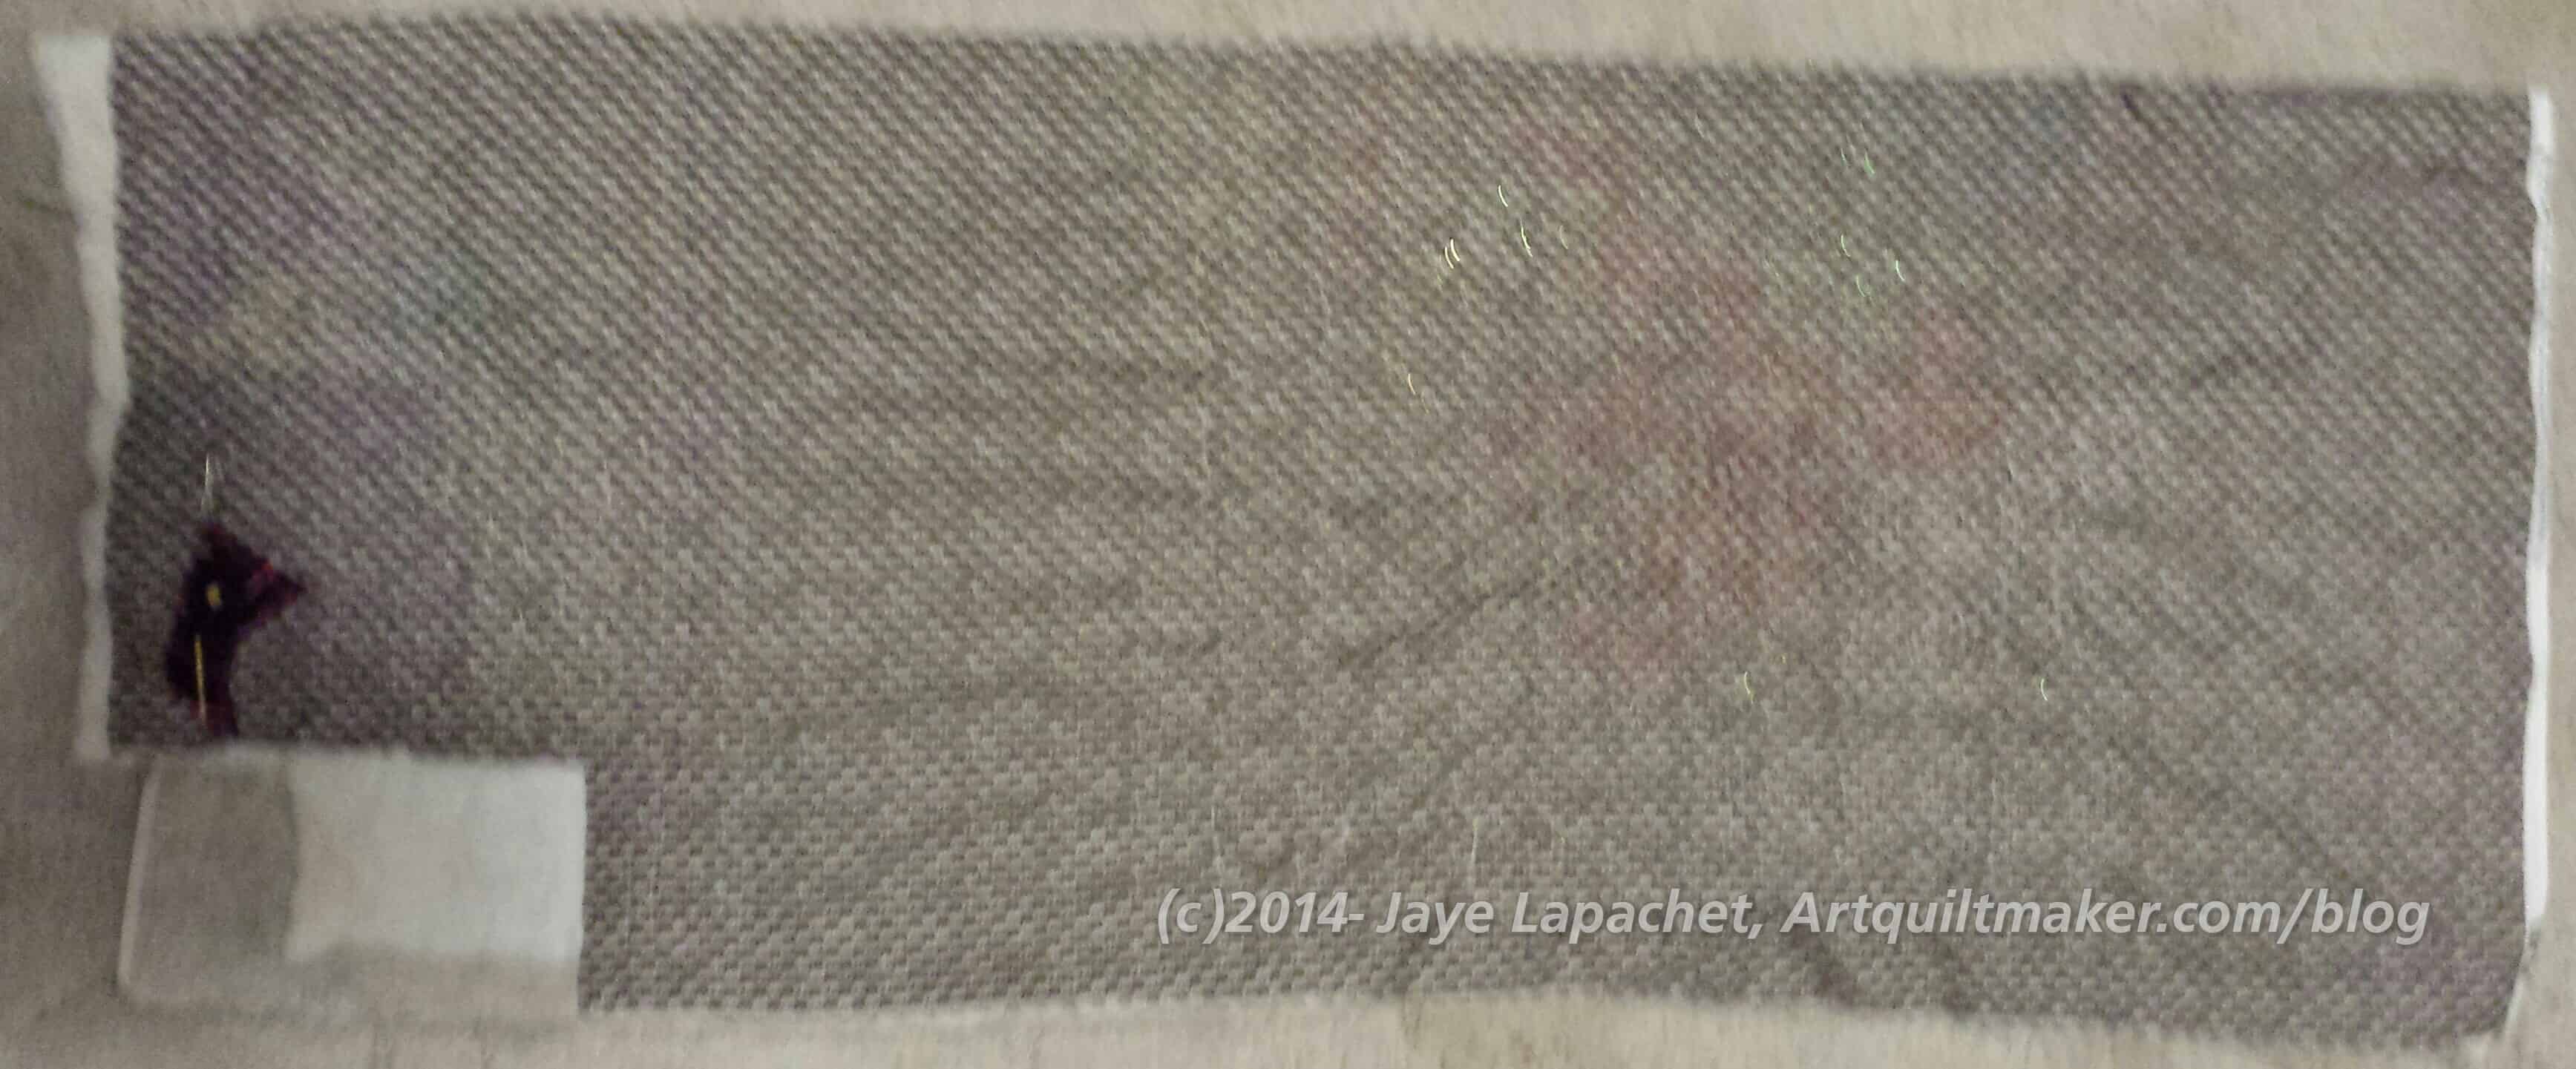
Hideous test piece of FMQ
This article is in the same vein. Langford talks about using various surface design supplies, such as Tsukineko inks, paints, Inktense pencils, etc to make designs and then following those designs to practice FMQ. The surface design piece gives practice on using those tools while providing something interesting to machine quilt. I relied on the motifs on the fabric in the Kelly Tote. Creating your own motifs gives the quiltmaker more freedom of expression.
Betsey Langford also gives ideas for items to make with the product of your machine quilting exercises. The way I feel about the tote bag sums it all up until I want to use one of the author’s ideas. All in all, it gave me some ideas to expand my machine quilting / FMQ practice in a fun way.
**Nota bene: I found references to this article, but could not actually find a link to it. I will add one later if I find one.