Free Motion Quilting

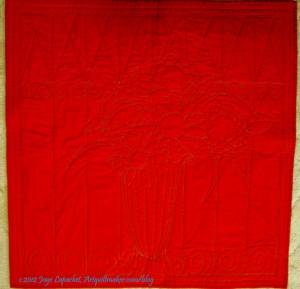
Full Piece Quilted
Full Piece Quilted

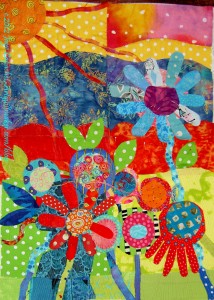
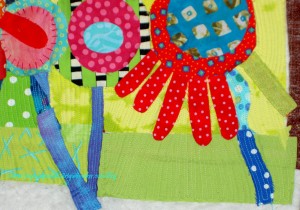
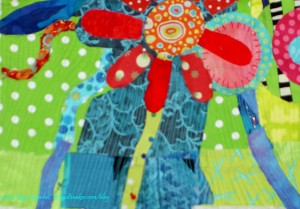
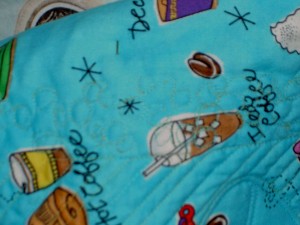
Yes, I did some free motion quilting.

Now that you have all peeled yourselves off the floor and revived yourselves with some smelling salts and a stiff drink, I will repeat that, yes, I did some free motion quilting. Kelly, the BAMQG President is issuing personal challenges and this is the first one I have really been able to do.

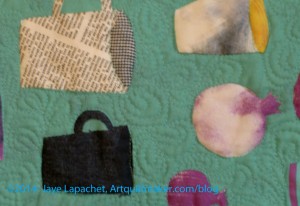
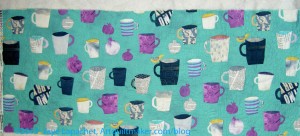
I got this fabric at the EBHQ show and just decided to use it for this exercise.

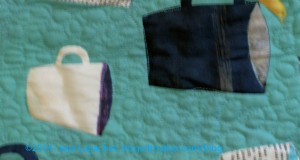
I decided to break up the exercise into 3 patterns, roughly the same size with the piece (1/2 yard x WOF): continuous boxes, flower petals and round swirly things.
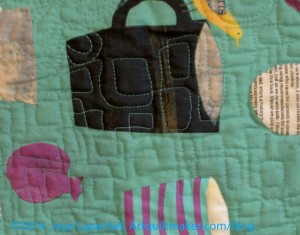
Continuous squares
Continuous squares
Loopy circles
Loopy circles
Flower petals
Flower petals

Some of these are designs I learned in various machine quilting classes I have taken over the years. I did this exercise because of the BAMQG personal challenge, but also to test my skills.

Though I have not done a lot of machine or free motion quilting over the past few years, I am not terrible at it.I still have some skills and was able to get into a nice rhythm. I am not a pro by any stretch of the imagination and I won’t be firing my quilter any time soon, but I think I can do small pieces.
Full Piece Quilted-back

I couldn’t quite get the tension right, but the back doesn’t look horrendous. I will ask about adjusting the tension on the DC5100 when I go for lessons. I decided to concentrate on the look of the front, my speed and the length of the stitches.

I tried two different darning feet as well. Both came with my 9k. One is a hopping foot, which I don’t like that much, but ended up using on the DC5100. The other is a darning foot with no springs or hopping. It fits on to the shaft of the machine, screws in and is ready to sew. I prefer this foot as I can see better where I am headed, but it doesn’t fit on the DC5100 and no similar foot came with that machine. I also used Aurifil 50 wt thread. I used that thread, rather than the 40 wt, because I have a lot of colors and the color I wanted to use was available to me right at the moment I wanted it with no trips to the quilt store. I suspect the 9k didn’t like the speed at which I was quilting with that thin thread. It occurred to me later that I could have adjusted the tension, but I didn’t think of it before I switched machines.
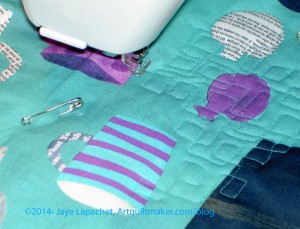
Continuous squares in process

I do free motion quilting at kind of a medium speed. I set the machine to that medium speed and that allows me to have better control over my stitch length.

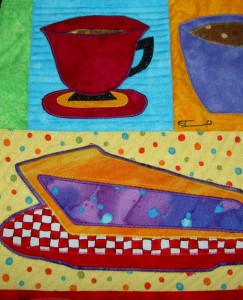
One of the design elements I used was to go around some of the cups and fruits rather than just quilting over all of them. some of them, as you can see, I did quilt over, but many I outlined. I found it to be good practice in following a design.

I never like it when the quilting doesn’t follow the piecing, or fabric design, but getting a little recent experience with machine quilting, I am reminded of the ease of pantographs and all over designs.

Sewing machine[s] setup
My machine was not very cooperative, but it could have been the thread. I switched machines to my back up machine and that worked better, but wasn’t very comfortable. I don’t have an insert yet for the back up machine (traded in my Jem for a Janome DC5100) and quilting with it up out of the cabinet was pretty painful. Also, with the 9K down in the cabinet, I had no good place to put my legs and kept barking my shins.


Quilting the Corner Store

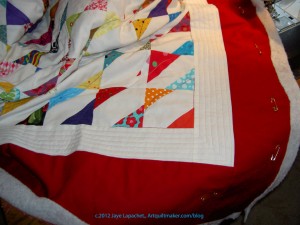
Border & Center Quilted

I spent several hours last week quilting the Corner Store.

Yes, she who does not normally quilt large pieces quilted a large quilt.

I went easy on myself, because my shoulder is acting up again and I didn’t want to be crippled when I had so much to do for the holiday. My pile of quilts to be quilted is getting ridiculous (7 that I can remember), though, and I wanted something to give to my BIL to provide some comfort while he goes through radiation treatment.

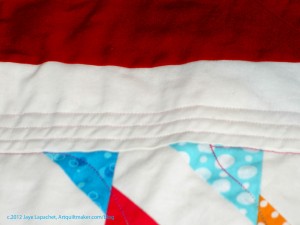
Quilting the 1st Border

I used to be a good quilter (not like Colleen, but I could hold my own). I stopped quilting large pieces when I hurt my neck and am way out of practice. I wanted to go easy on myself and I didn’t want to try anything too ambitious, so I stuck with straight lines and gentle curves. I have to admit that my original idea for the first border (white) was to fill it with a line of large circles. I couldn’t fix the tension enough to make it look good, so I went with the straight lines. It kind of looks like a frame, if you squint.

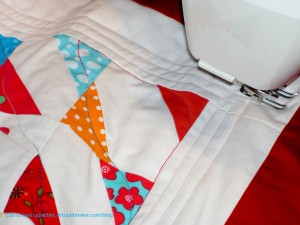
Corner Quilting
Corner Quilting

In the last photo (left), you can see some of the quilting in the center. I used a Valdani variegated thread that I bought in Chicago several years ago. I don’t really like variegated thread, but it works in certain circumstances.

You can also see how I used the walking foot to measure the space between the quilting lines. I kind of like doing that as it seems to be a consistent measurement.

The quilt won’t win any prizes, but if it provides some comfort, I will be happy.

You also might be interested in reading:

  1. Corner Store Again
  2. Corner Store Once More

BAMQG October Meeting

Saturday was the October meeting of the Bay Area Modern Quilt Guild. I know I am late getting this up, but I had to juggle posts around as I was sewing on Sunday instead of writing.

The meeting was fun as usual! The sad part is that I forgot my camera, so I don’t have any of my own photos. I could have taken them with my phone, but just didn’t. Adrianne, the current photographer got the photos up on Flickr pretty quickly, so you may see some.

There are a lot of upcoming events. If you are a member, you can participate in the FQ swap and the pincushion swap. I haven’t decided if I am going to participate in either. I am leaning towards the FQ swap. I want to look at patterns for pincushions as I haven’t made one and I don’t want to commit to something that will come out crappy.

It is also time for new officers. I don’t think anyone signed up, so I am nervous about what will happen. Adrianne will not continue as president. I can’t really blame her. After 2 years, she needs a break and guild needs some new blood. Adrianne has great ideas, but groups, organizations need new leaders to shake things up a bit periodically. I am not really presidential material, so didn’t sign up either. I am still doing the blog (would love to hear your comments over there, BTW!!!), but if you only have time for one comment, comment here at Artquiltmaker. 😉

Someone emailed me and wants to help out with the blog, so I am excited about that! I hope I am not taking candidates away from the leadership of the guild.

A-B-C Challenge

by Jaye

It was the end of the A-B-C Challenge block-making portion of the challenge. We asked people to finish their tops by December and the whole quilt by the beginning of May. Our goal is to enter them into the county fair as a group.

Rhonda was the only other one who showed blocks, the other participants were absent.

Whole Cloth Challenge

Aurifil Wholecloth Challenge

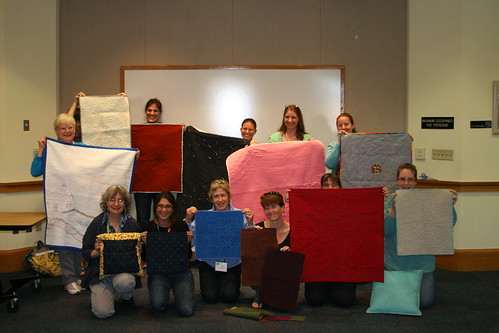
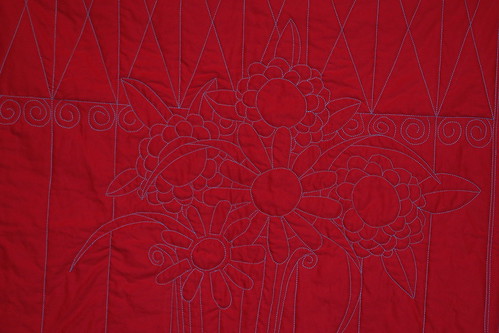
Here is the big reveal of all of the quilts. I wrote about my quilt earlier this week. I do have a detail that Adrianne took with her nice, fancy camera.
by Jaye (detail)

Charity
I was sad not to see the Charity Girls, Jennifer and Deborah at the meeting. They were both off having lives. I turned in the Froggy Cat Bed, but there weren’t any new cat bed kits to take, so I took some of the Patchwork Wheel block kits and am having some fun with them. I only took two kits, which seem to make a total of 4 blocks. The kits have pretty crazy fabric combinations! Perhaps I will move on from the checkerboard blocks I have been churning out and make some more of these blocks?

Checkerboard Charity Quilt

At the last possible moment, I also took a quilt that someone quilted to bind. I put the binding on it on Sunday by machine and am trying to decide if I will test sewing the back to the quilt by machine or if I will hand sew it. It is in the hand sewing area now (down by the couch), but I can always bring it up. I have some Aurifil monofilament to try out and this might be the perfect opportunity to try something new.

Finished: Whole Cloth Quilt!

Whole Cloth Quilt: front

No other name really occurred to me as I was working on this quilt. It is kind of sad, because most of my other quilts have much better names. Still, it is better than “The No Name Quilt” and it is descriptive.

I finished the binding in time to show the quilt at BAMQG. I was excited to see the other pieces in the challenge. I wasn’t the only one who used a colored background, but mine was the only red and aqua quilt. It received a good response.

I will put a sleeve on this quilt, but I want to have the back photographed before I do that, thus it is not in the back photo I am showing today and I don’t know when/if I will show a picture of the sleeve.

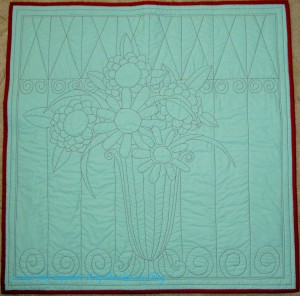
Whole Cloth Quilt: back

I have to say that the binding went on to this quilt really fast.

Did I tell you? I’d like to use this design again for another rendition of this quilt. I wouldn’t do it as a whole cloth quilt again, but perhaps fusible applique’.

Whole Cloth

Whole Cloth with Flowers

I have to say that I find it very frustrating not to be able to show every little detail of the progress of this piece. I couldn’t stand it any longer and wanted to give you a little peek.

I worked on it on and off all weekend last week. I also put in a few hours during the week, especially on Tuesday, when I was off, and in the evenings last week as well. Yes, I was on a mission to finish this piece by the deadline.

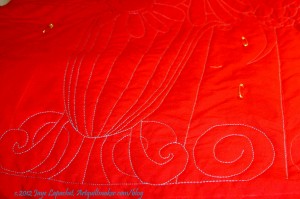
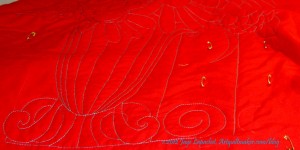
Whole Cloth - Mostly Vase
Whole Cloth – Mostly Vase

That was my plan again this past weekend since it is due next Saturday. When I started stitching on Saturday, I had all of the spirals done,  and had, mostly, straight stitching to finish.

There is a lot of starting and stopping and thread sinking required, but I am enjoying this project for some reason.

I was able to finish the top on Saturday after working on it all day. I spent Sunday trimming it, making the binding, machine stitching the binding. After I folded the laundry, I started to hand stitch the binding down. I was pleased that it going very quickly. In an hour or two, I had more than half of the binding stitched. I was too tired to work on it last night, but, perhaps, tomorrow.

I have a slim hope of making the sleeve this week as well. We will see. I can’t forget to prepare the Renewed Jelly Roll Race for the show. It is due on Friday.

Other Marking Techniques

A few weeks ago I wrote a blog post about Saral Transfer Paper. Frances mentioned it on her podcast (Episode 96), but still seemed unsure, so I thought I would write about the other tools I use for quilting (sewing 3 layers together not making an entire quilt).

I am liking the Saral Transfer Paper as I work on the whole cloth quilt. It does come off easily, so I have to darken the lines a bit as I move through the quilting process, but that is ok with me.

I don’t think it is possible, at least I have not found a way to mark and entire quilt and keep the markings on through the entire quilting process. If I want special designs, I will draw them on one block at a time with one of the 3 methods that work for me. Yes, this can be a bit annoying, but it is good excuse for me to stop, take a rest and stretch.

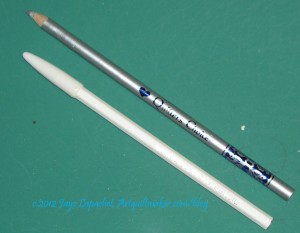
Marking Implements
Marking Implements

I use other tools for marking.

I am not much of a quilter. I send most of my quilts out, but every now and then I get a wild hair (as Pam says) every once in a while and quilt a quilt. The Nonce pencil is a little hard and flaky. It is easier to use on a hard surface (e.g. NOT fabric), but that doesn’t really work for me. I use it with stencils. It works on most colors except for the very light ones.

The Roxanne pencil is much softer and works for a lot of colors from light to dark. I use this for lighter fabrics. Sometimes it doesn’t show up on the mid-range colors.

I have been using the Sewline pencils, primarily, to darken the Saral lines that have faded a bit. I could use this tool for marking a whole quilt as well, but I would need a stencil or a good idea in my mind and confidence. This works for me.

The Chalkoner is also good for darkening up lines right before you quilt them.

I mostly do not wash my quilts, so washing out paper or whatever isn’t an option. It also makes my head hurt to think about the damage to my washer. I have enough handwork and don’t want to use tweezers enough, so I would avoid sewing over paper.

I have always been afraid of the blue washaway pens, so I haven’t tried them. I haven’t tried the Dritz paper and I am allergic to everything so try and minimize chemically smells in my house. I don’t use Pounce either, because I want to avoid particles floating around the air. I am concerned about the Glad Press & Seal method, but I don’t know anything about it, so will have to reserve judgment.

Whole Cloth Quilt

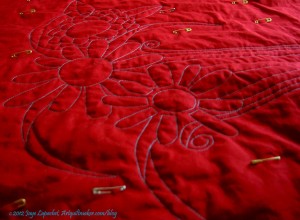
Flowers in Progress
Flowers in Progress

I blame this project on Ruth over at Pippin Sequim.

I didn’t want to do it.

I resisted. Really I did, but the creative urge took over. It caught me at weak point and I gave in.

I also was inspired by the art exhibited at the Art Institute of Chicago and a design popped into my head. It was a good time to give in a engage in the entire process of quiltmaking- from design to binding.

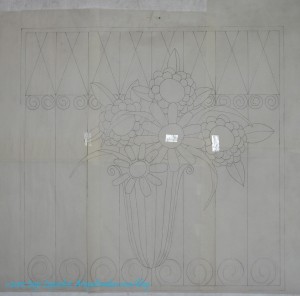
Whole Cloth Quilt Design

Everything with this project has gone very smoothly. Knock wood! The fabric arrived, I had enough tracing paper and the right tools to draw the design. I found Saral Transfer paper and was able to transfer the design with little to no drama.

I am using Aurifil 28wt thread and it is working well and playing nicely with my machine.

Now I am quilting. I can only quilt for about 6 hours at a time and even that is pushing the friendship. I would do better to quilt a couple of hours a day, but the set up and clean up is daunting. I did a whole flower and finished the vase last weekend. I am making progress.

Stay tuned.


Garden Revealed

Garden Back
Garden Back

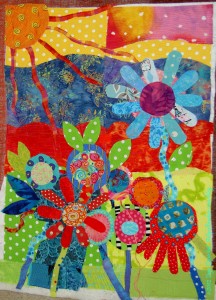
A few weeks ago, I spent a whole weekend, essentially, machine quilting the Garden quilt. I spent so long quilting it, because I am somewhat obsessive and like densely quilted quilts. It takes forever, but it looks great.

I thought I would get this piece framed like the Kissy Fish piece. On Kissy Fish, I didn’t pay much attention to the back, so the back looked fairly terrible: knots all over the place, long stitches joining sections, etc.

However, I took at look at that back after I quilted it and thought it looked really interesting. I quilt with different colors so the stitches blend into the fabric on the front. I don’t really care about the thread color on the back, because I didn’t think anyone would ever see it. I am in the habit of using the same thread color as bobbin color, so as a happy accident the colors of the quilting on the back look very cheerful.

Garden Back detail
Garden Back detail

In looking at the detail, it occurs to me that I now know why people like whole cloth quilts. In a way the back of this piece is like a whole cloth quilt.

BAMQG is having a challenge making a whole cloth quilt and I wasn’t really interested in doing the challenge, but looking at these photos makes me think that I might have an idea for a challenge piece.

Garden Back - Another View
Garden Back – Another View

A lot of the quilting I do, when I actually quilt, uses a regular foot rather than a walking foot. I haven’t felt confident in the last few years of my free motion quilting skills, so I have taken to using the regular foot. It works pretty well.

I did do some free motion quilting on this piece, as I mentioned, just to test my skills. I didn’t do too badly and have to say, again, how pleased I am at how my machine is performing.

Garden Machine Quilting

Garden - Late June
Garden – Late June

I worked, over the weekend, on the Garden quilt. I am machine quilting it. I hadn’t really planned to work on it since I have a back for the Corner Store to finish, a back to make for the Super Secret Project #2 as well as a binding and some other miscellaneous random finishing tasks to accomplish. I also have some bags and smaller projects I could work on to keep my mind off of things. Still, I sat huddled over my machine and machine quilted for hours.

Yes, I am in avoidance mode over the Corner Store, but at least I am accomplishing something while I am avoiding something else. That can’t be all bad, can it?

Free motion quilting

This is the first time I have done any free motion quilting in a long time. Admittedly, I didn’t do much on this piece, but I did some and I am pretty proud that a) I am still able to free motion quilt and b) my machine could handle it.

I am really pleased with the servicing the store down south did. The machine works like a charm and I have stopped having traitorous thoughts about replacing it.

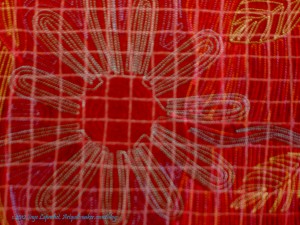
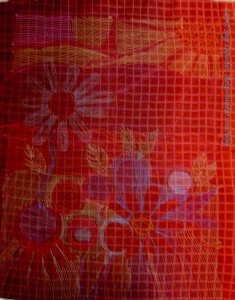
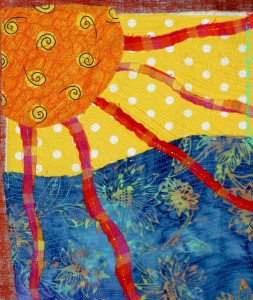
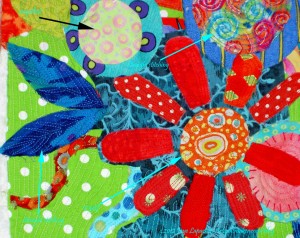
I didn’t free motion quilt (FMQ, FMQing) this entire piece, but I did some FMQing in some key areas. In the photo of the sun, I did some FMQing in the ball of the sun.

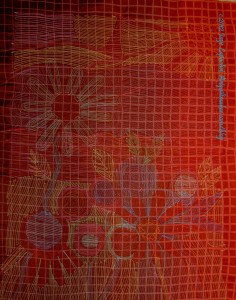
Annotated Garden
Annotated Garden

I have annotated the last photo so I can try and show you the differences in straight line quilting vs. FMQing. You will have to make the photo larger to see what I have written.


Garden Progress

Garden full
Garden full

It is monumental that I am quilting. I hope you appreciate the momentousness of the occasion. 😉

Really, I do quilt small things, but most of my larger pieces are quilted by someone else. Part of the reason is an old injury, which doesn’t allow the pushing and tugging a quilt through the machine required. I also have an older machine (though I bought it when it was a top of the line machine) and the arm is the old normal size, not one of the super sized free arms that look so fantastic. The other part of the reason is that I quilt very densely. I quilt about 1/8th – 1/4 of an inch away from the nearest line of quilting. I don’t know why, but it takes a long time.

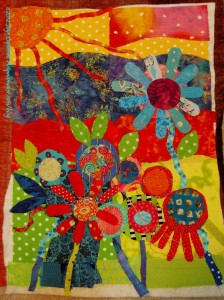
Still this is a small piece, perhaps 18×24″ and I wanted to quilt it myself. I have been working on the background in small increments. I am really nearing the end of that part of the project, which makes me want to jump for joy. There are parts that I would have free motion quilted, but my machine is not up to it, so I just did straight line stitching. I like the quilting to melt into the background so it works for me.

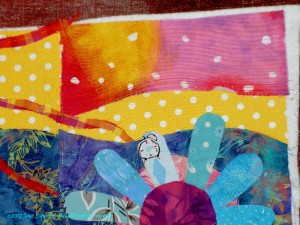
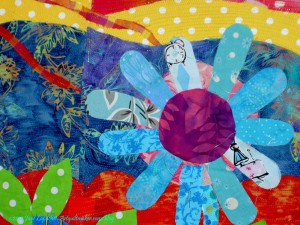
Garden sky detail
Garden sky detail

In order to melt the quilting into the fabric, I needed to quilt the sky in three different sections using different color thread.

Another reason I quilt this way is to reward the ardent viewer. If a viewer comes up and puts his/her nose to my quilt, s/he will get the reward of seeing some additional details. I like to try and layer my pieces in an overt way, above and beyond the textural quality of the quilting.

I don’t really use special thread. I have a number of different colors of Aurifil and I use those to quilt with. I like that the they are thin.

Garden Background detail

I was particularly pleased with the blue background. I used some of Libby Lehman’s Bottom Line purple thread and it just melted into the background. I get good results when I unwind the thread from the spool and lay it on the area where I plan to use it. I find that the color on the spool – when the threads are laying nicely next to each other – is very different than the color of one strand.

I am sure more experienced machine quilters have better tips for you than this, but this post describes what I do and since I am pleased with the results, I thought I would share.

I am pleased that this project, which is on the 26 Projects list is moving forward!

Garden Progress

Garden in process
Garden in process

This piece was started in a Pamela Allen class in 2009. I dreamed about it this week which encouraged me to pull it out of the closet (it usually hangs on the wall of my fabric closet, so I see it frequently) and I spent some time working on it over the weekend.

Garden detail
Garden detail

Basically, what I did was start machine quilting the background. I have a very straightforward style for quilting the piece: I start outside of the piece and go straight up and down until I am done with the section, then I move on to the next section.

I have the perfect green Aurifil for the green grass section, so I worked on that and got quite a bit done.

I also decided to use a variegated King Tut thread that I have had for awhile for the orange hand dyed sections around the turquoise flower. Really nice thread! I know I have used it before, because the wrapper was off the spool and I had a partial bobbin. I can’t remember which project, though. It gave me no problems and I really liked the look.

I want the piece to look like it was built in layers. At the moment, I am trying to figure out whether to also closely quilt the foreground (flowers, stems, leaves, etc) or if I will just use the Perl Cotton to quilt it. I have quilted the stems separately and at a slightly different angle to see if it looks different from the background.

Garden detail
Garden detail

Another layer of the piece is the different fabrics I used. Some of them are part of the same area, so I need to try to minimize the impact of the change of fabrics.

I should have quilted the foreground before I added the flowers, but in the course of a workshop, that sensible method just isn’t possible.

Preparing for Quilting

If you, mostly, do not quilt your quilts yourself, then part of your quiltmaking process should be preparing your quilt for your longarm professional. You can read my longarm rant which implies things to think about when choosing a longarm quilter, but regardless of who you choose, you will still have to prepare your quilt.

To be honest, when I get to the “YAY! I have finished my top” stage, I am done with the quilt. However, I also don’t want a bunch of tops laying around, so I am working on finding the Zen or meditative qualities of finishing my quilts.

For the top, don’t worry much about pattern or block design when thinking about the longarmer. I am more interested in what I want for the top.

Back

However, when I get to the back, I do try to be nice. Part of the process or creating the Zen or meditative space in my head of finishing my quilts deals with the back. I no longer piece tiny squares together to create a coordinated back. I try to use very large pieces of fabric, which not only enables me to finish the back quickly, but also lessens the number of seams on the back for the longarmer.

My personal, fabulous longarmer has never complained about seams, but I also don’t want her to become frustrated with me. I make pieced backs. That is just what I do. I see no good reason to buy additional fabric for the back when I have perfectly good fabric in my fabric closet that is not being used.

Lately, I have started to try to remember to piece the seams open on the back. It doesn’t really matter in terms of construction, IMO, but it lessens the number of layers that the longarm needle has to punch through. My personal, fabulous longarmer has never said one way or the other, but I figure that it can’t hurt.

If I know that the end of the seam will be on the outside of the quilt or NOT crossed by another seam I will also backstitch. I do this on the front also, so that the threads don’t pull apart as the quilt is being stretched on the longarm machine. Of course, I don’t always know, but I do my best.

I try to make the back at least 8″ larger (4″ on each side and 4″ on top and bottom) all the way around than the size of the top. To do this, I lay the top on my design floor and build the back on top of it.

Post-it Notes are your Friend

I measure the top and the back and pin a post-it note to the quilt saying what the sizes are. I use hot pink post-it notes. My quilts are generally square, but usually not perfectly square. They are often off by an 1/8″, but not much more. If I put the post-it note on, the longarmer clearly knows what s/he is dealing with and can’t blame me later for lousy piecing (Well, s/he can, but I can just look at him or her sarcastically and not feel bad).

Top and Bottom

You might think that any idiot could tell which is the top and bottom of your quilt, but that is not always the case. I had a quilt where the back was really large – much larger than the 4″ all around that I normally make it – and my personal, fabulous longarmer put it on sideways, because I didn’t mark the top and the bottom. She is not in my head, though she is in my fantasy life, so now I put a post-it note with the word ‘top’ on both the top and the back. Top on the post-it note means “dude, this is the top of the quilt.”

Pins

I take them out as I piece. There is no later. If my personal, fabulous longarmer runs over a pin I left on the quilt, I pay to have her machine repaired. My fault, my problem.

Embellishments

I embellish with anything 3D AFTER the quilting is done. If there is some reason that I put a button or beads in a section of the quilt, then I pin a very bright post-it note to that area. I also point it out to her when I bring the quilt to her. If my personal, fabulous longarmer runs over an embellishment on the quilt, because I didn’t warn her, I pay to have her machine repaired. My fault, my problem.

Press, Press, Press

As much as I despise pressing the top and the back I do it just before I take the quilt to the longarmer. Then I hang the top and the back on a pants hanger. The pants hangers have to be tough and have really strong clips, because those quilts are heavy. If I don’t press the wrinkles will not ‘quilt’ out.

This is the last step. Once the quilt is on the hanger, it is ready to be taken to the longarmer.

Keep in mind that your personal longarmer might have different requirements for how you prepare your quilts. Make sure that you know what those are before you take your quilt to be quilted.

Open Letter to Longarmers

Dear Longarm Quilter,

Thank you for taking the time to quilt my quilt. I really appreciate your assistance, your artistry and your attention to detail.

I want to support your small business, which is one reason I come to you. I want you to be successful and I want to be able to recommend you to my friends. I was a small business owner in the not-too-distant-past, so I know it is hard work and can be thankless at times.

I have very high standards, which I will warn you about in advance. I have even higher standards for charity quilts. I do my best work on these quilts, so the recipients know I care. I expect the same from you. If you feel anxious about meeting those standards, please send me away with my quilt. I want my quilt done well and I don’t want to increase your anxiety level.  I will respect you for being honest.

Please remember that this is a collaborative effort and what I say to you in our initial meeting is pertinent to how I want my quilt quilted. I have worked hard on the piecing and want your quilting to fit well with my piecing design. Please do not overshadow my piecing with inappropriate quilting. Please do not try to sell me on your designs. Listen to what I want and tell me if you can’t, or don’t want, to do what I want. My quilt is not your playground to show off the quilting that would be much better suited for a whole cloth quilt.

I will tell you that my backs are always pieced and I don’t always press the seams open, that my quilts are almost never square (though not terribly off), and that I use fusible and raw edge applique’. If you can’t, or don’t want to, deal with any of these peculiarities, please tell me upfront. I’d rather know and find someone else.  I will respect you for being honest.

Please act professionally. Do not whine, after the fact, about my unsquare quilts, pieced backs or fusible applique’.  If you whine afterwards, I will suspect you are blaming me for your own poor longarming skills and I am not interested in excuses. If you have, or think you might have, a problem with my quilt, please don’t take it on in the first place.   I will respect you for being honest.

Please be generous about your competitors. Making snide comments about them does not endear me to you or make me loyal.

Please make sure your machine is in good working order. Please make sure you know how to load the back tightly so there are no pleats. Please clean the oil up so it doesn’t stain my quilt. If you do get a pleat or have a problem, I expect you to rip out the quilting and do it over AND not charge me for the time. Your mistake = your problem.

Please have the quilt done when you say it will be done. If it isn’t done, please call me and we can work out a new time to get the quilt. If I arrive and the quilt is not done and you are not working on it, I won’t be happy. Please be realistic about your commitments. Can you really finish my 5 quilts this week? REALLY?

Finally, if someone else picks up my quilts for me, don’t tell them that you screwed up and are glad they picked up the quilts instead of me since you knew I would be angry. If you think I will be mad, fix the problem. I have a phone and can call you. I can be angry over the phone.

Thank you, Love, J

Tarts Return

Tarts quilting Detail

I rearranged my workroom yesterday and quilted on the Tarts. The quilt was calling from where it was neatly hung in the closet and begging to be worked on. Since I had no good excuse NOT to work on it, I pulled it out and quilted some blocks. I did lots of straight line quilting, because the tension on my machine needs to be adjusted. I also didn’t feel like taking the time practice.

I set a goal of doing the yellow section that I had to pick out last Fall. I surpassed that modest goal by quilting that small section, the section next to it, a cup and a piece of pie. I am pleased.

Spending Quality Time with Tarts

I got a bug in my ear a week or so ago to quilt the Tarts. They weren’t hanging in the closet quilting themselves and the label does say 2010. I hauled them out, set up the table and quilted away. I did mostly straight line quilting the background of the 3 cups blocks. I also quilted (mostly) the to go cup. I need a differented colored thread to finish that one.

FMQ Fail
FMQ Fail

Then I got cocky, practiced my free motion skills and did one small strip in free motion circles. Big time fail. I couldn’t get the tension quite right. Yes, I was using the same thread in both the bobbin and the top (different colors, but same thread. Yes, I matched my speed of moving the quilt with the speed of the machine. Fail. The bobbin thread ceased to show through the front, because all of the top thread went through to the back. The yellow you can sort of see in the photo is the top thread. Unsewing is required.

The good part is that I am back in the saddle on this project and there is hope that I will get it done in 2010.